A TACTILE GEOMETRY
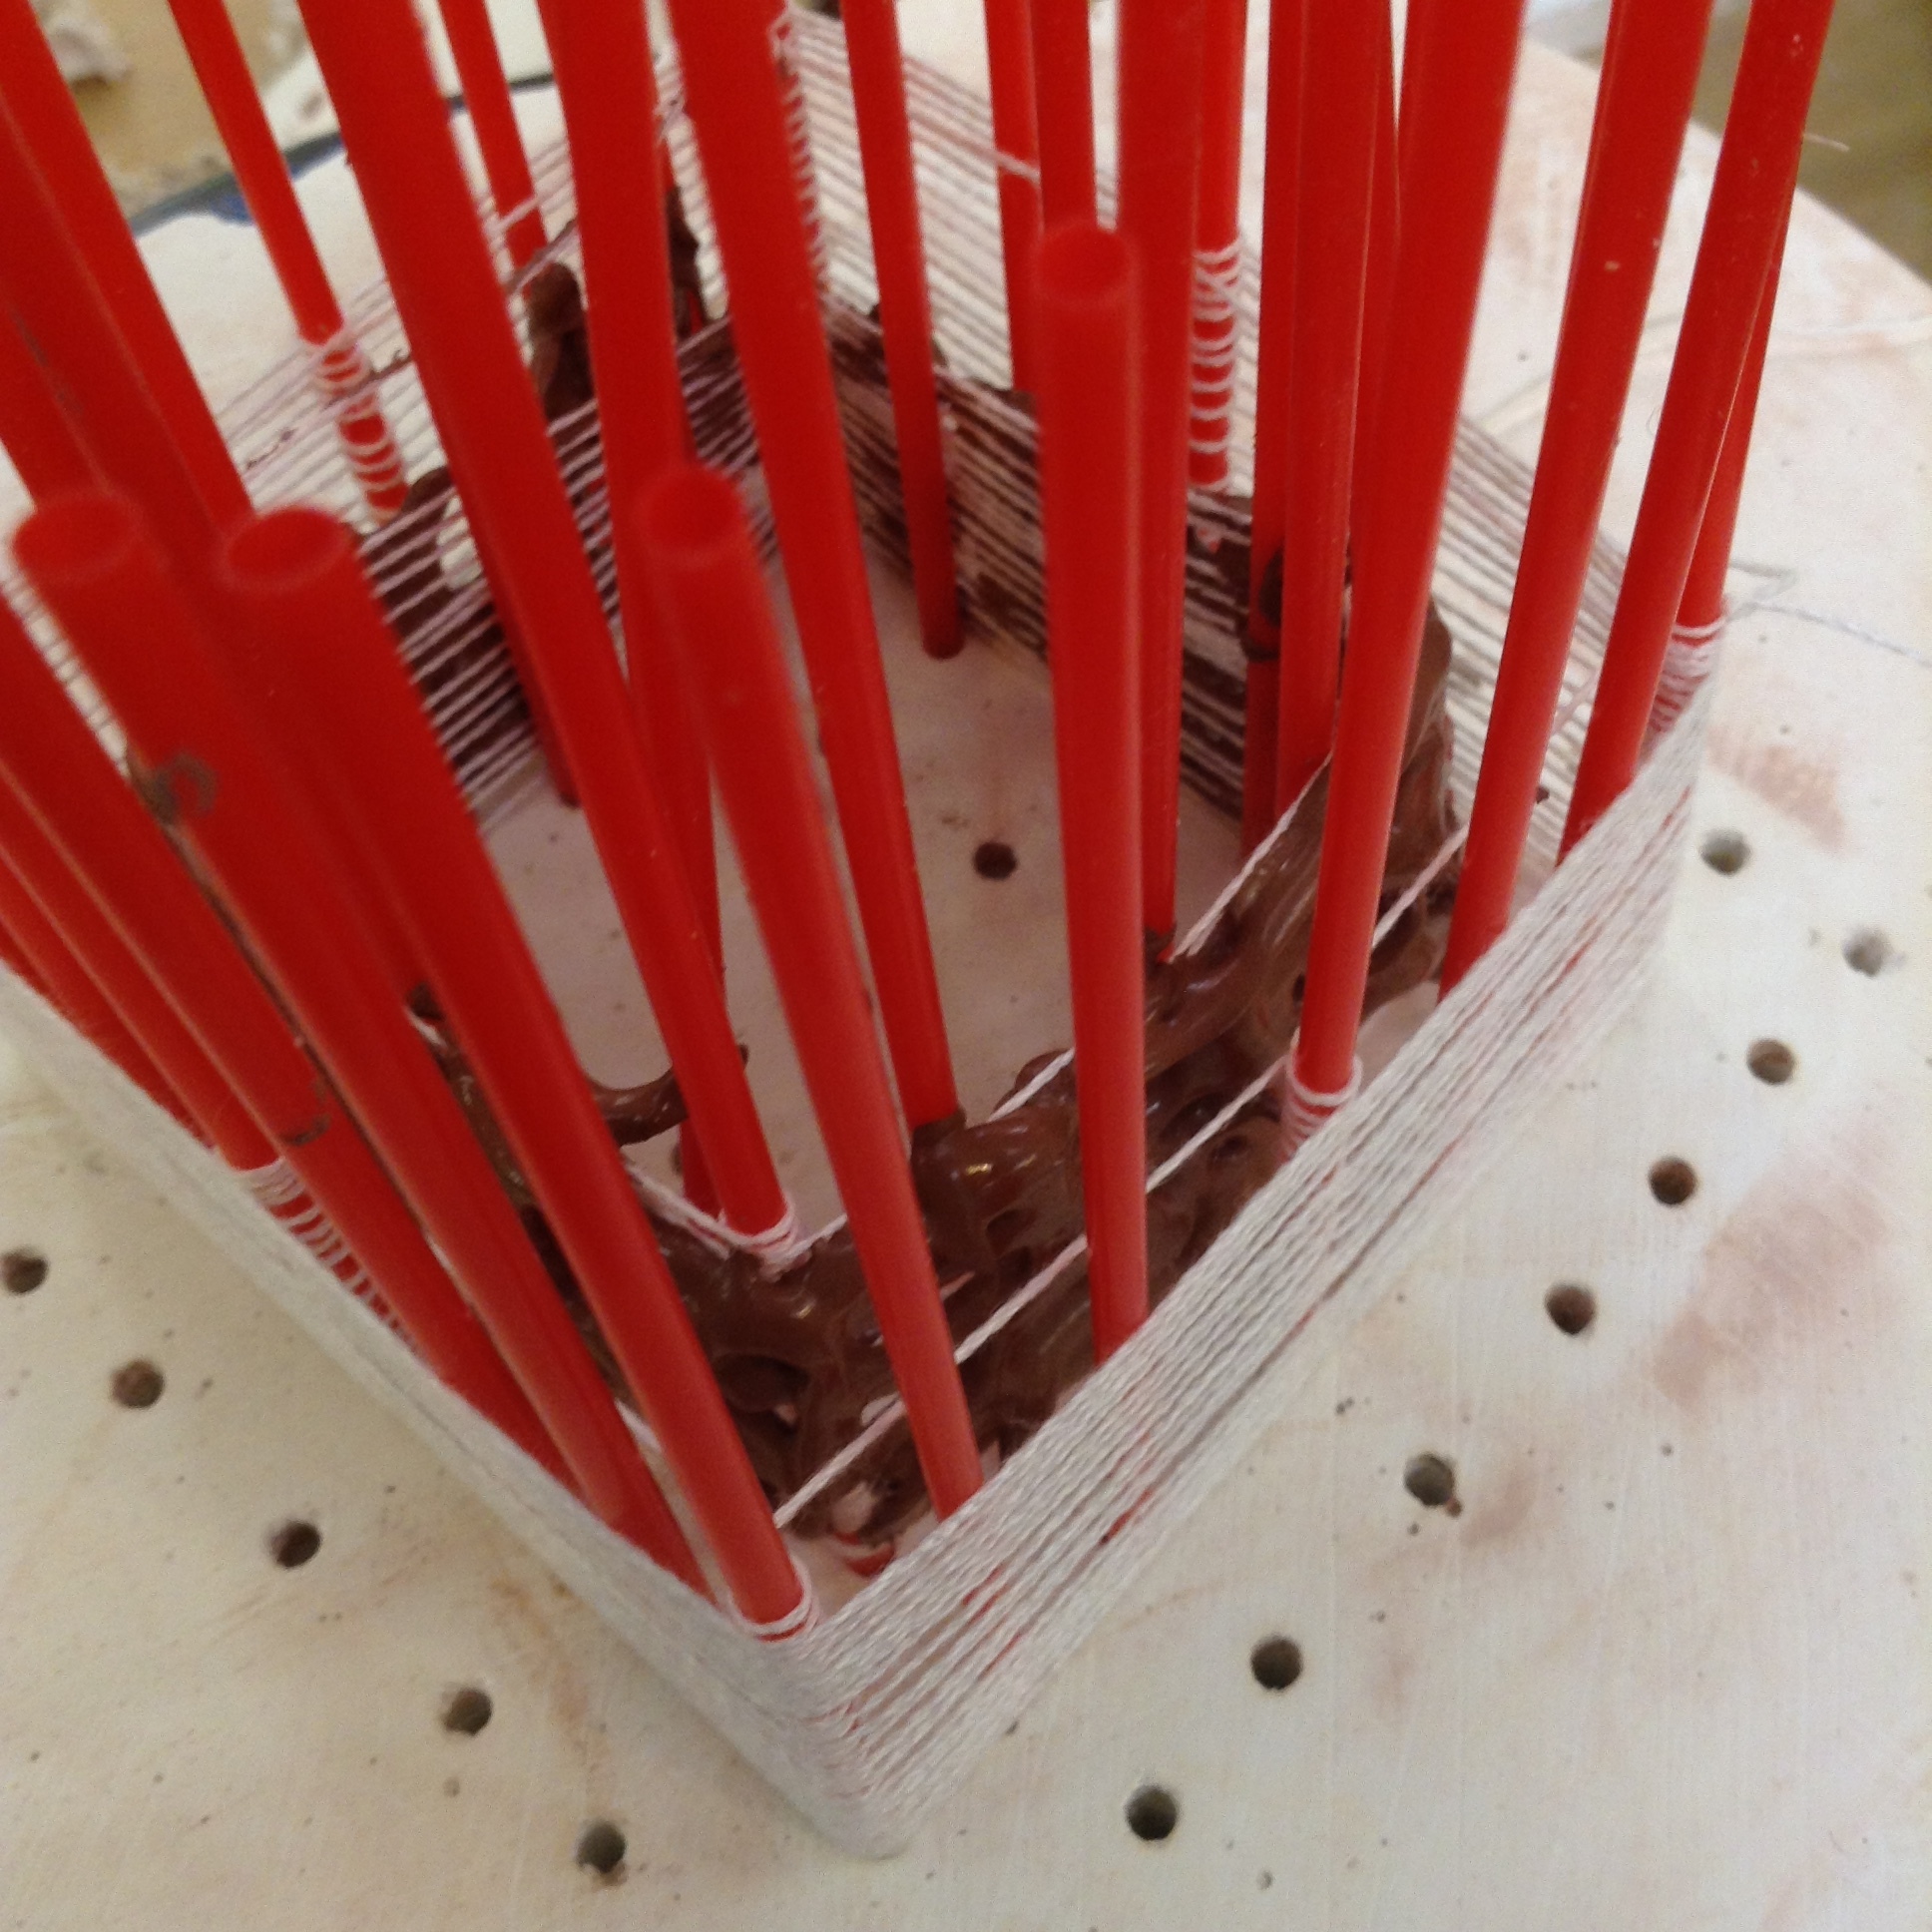
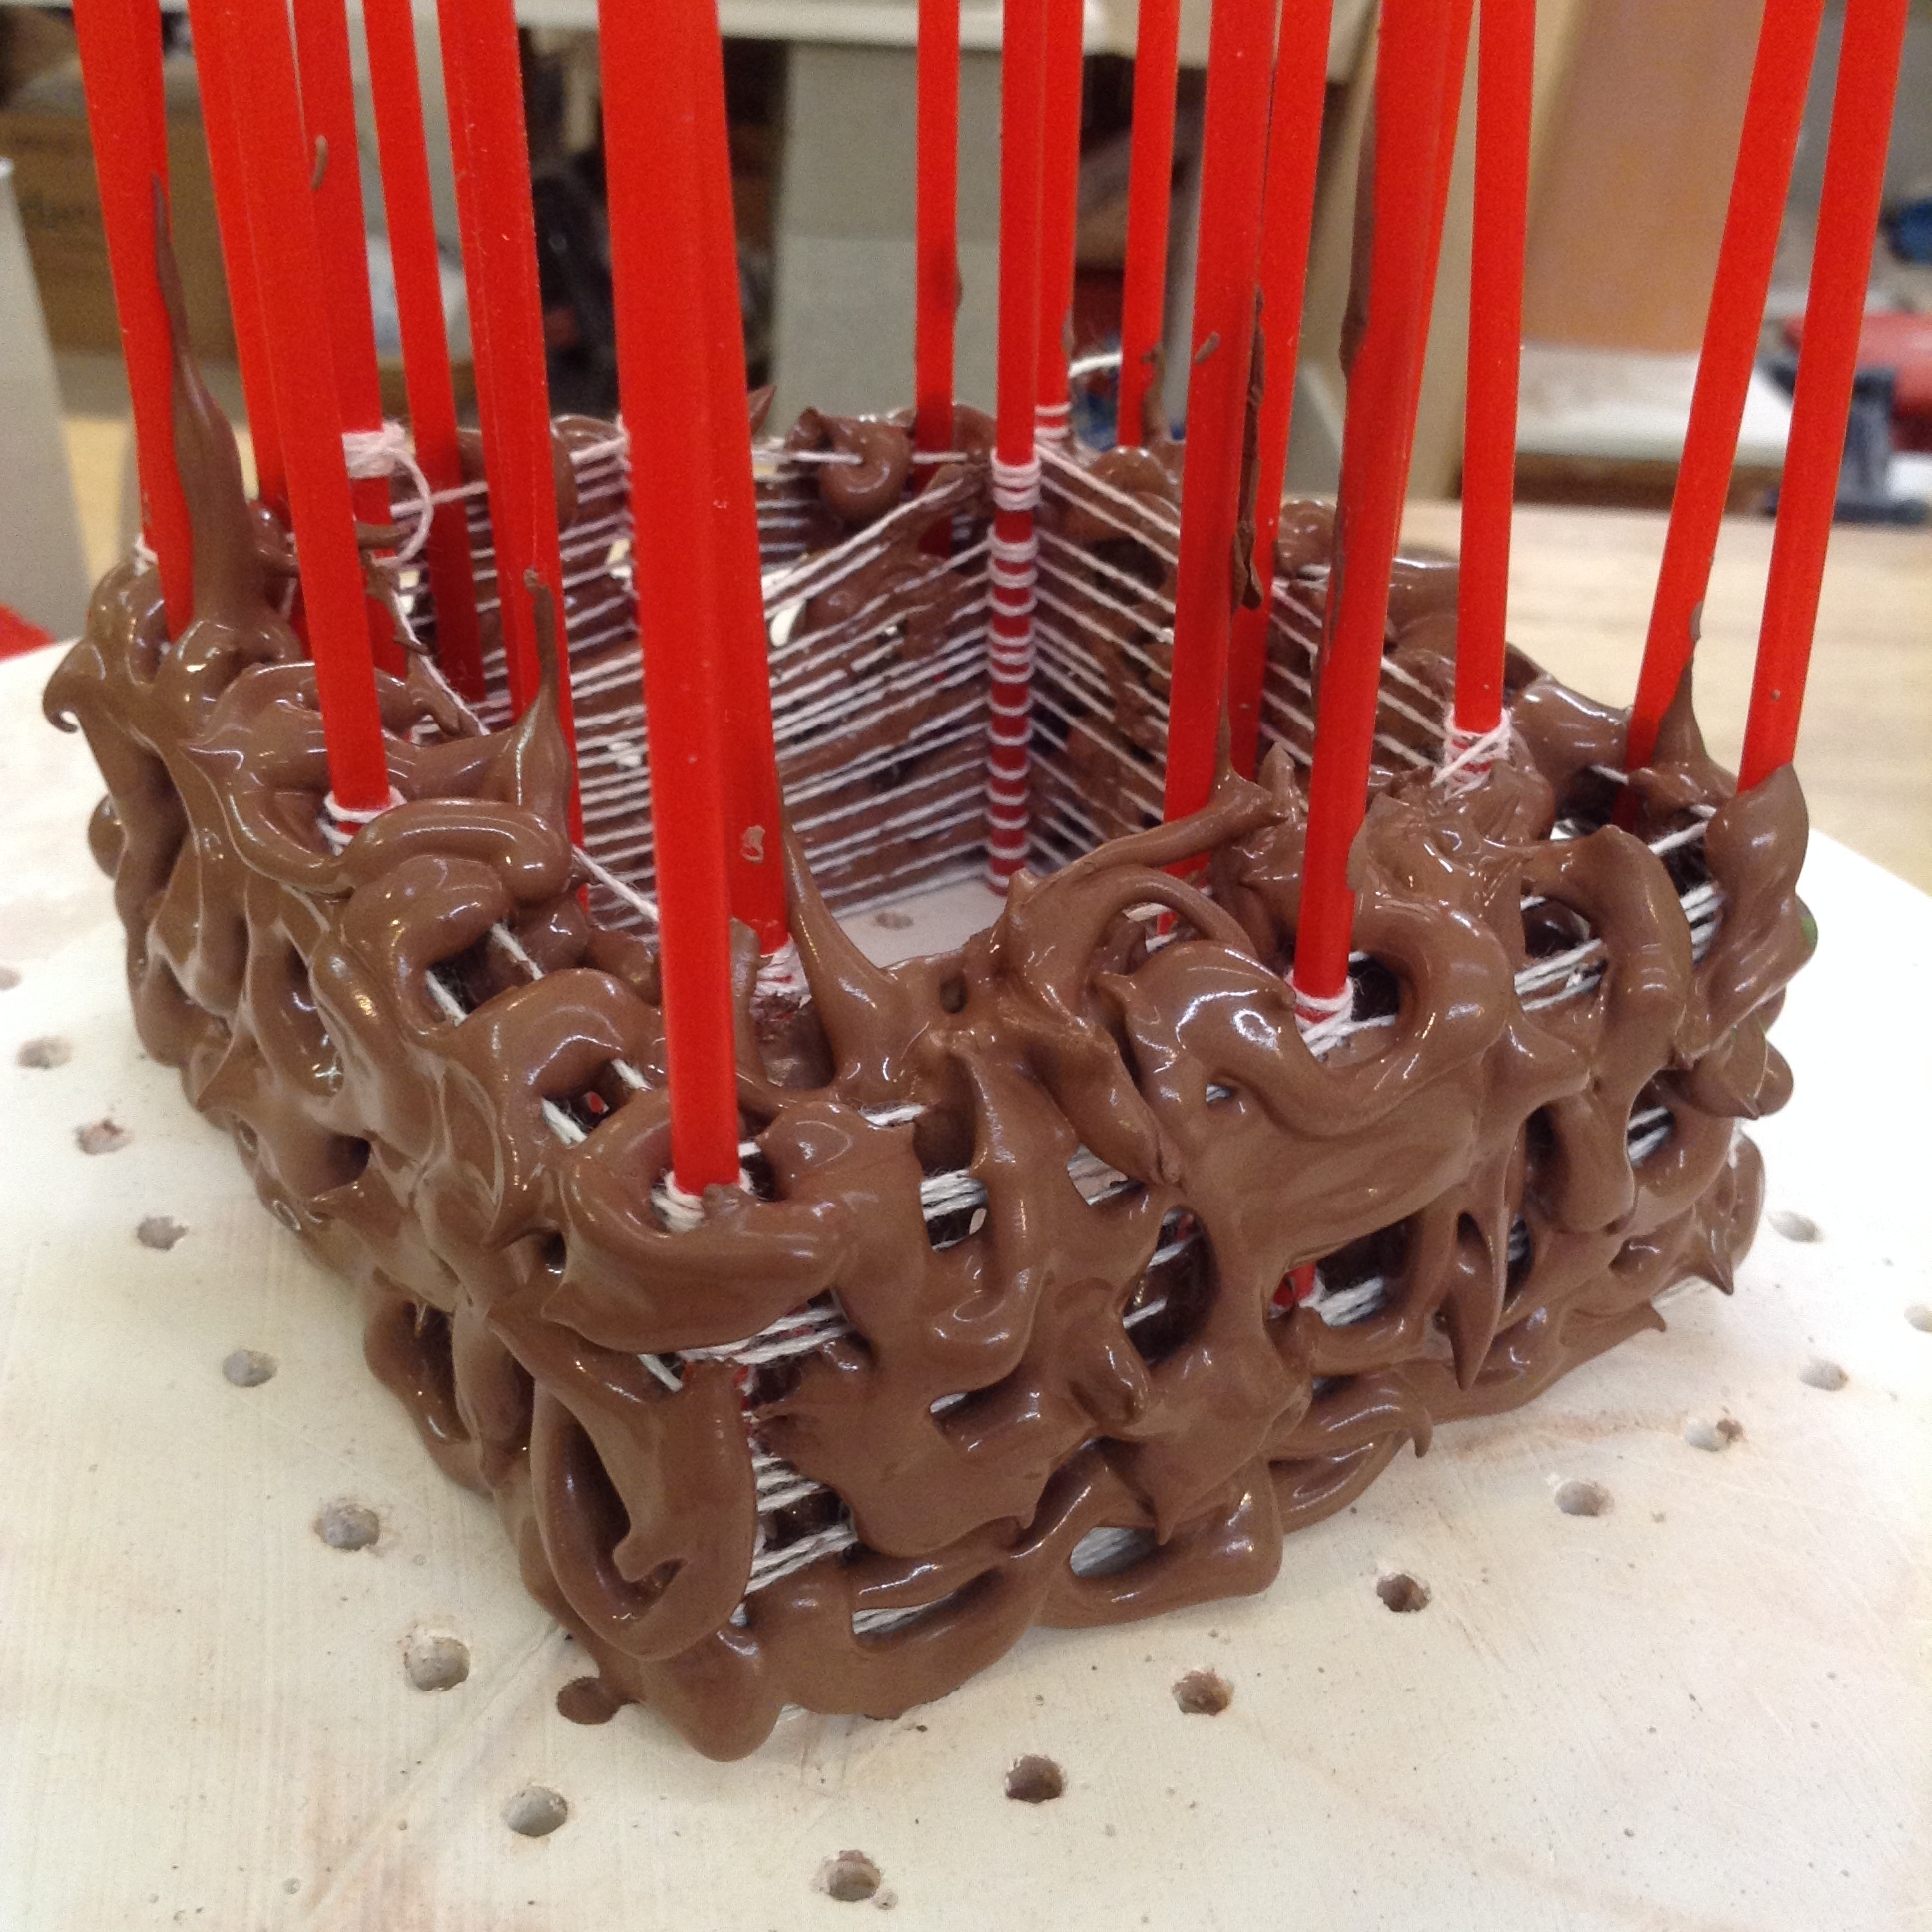
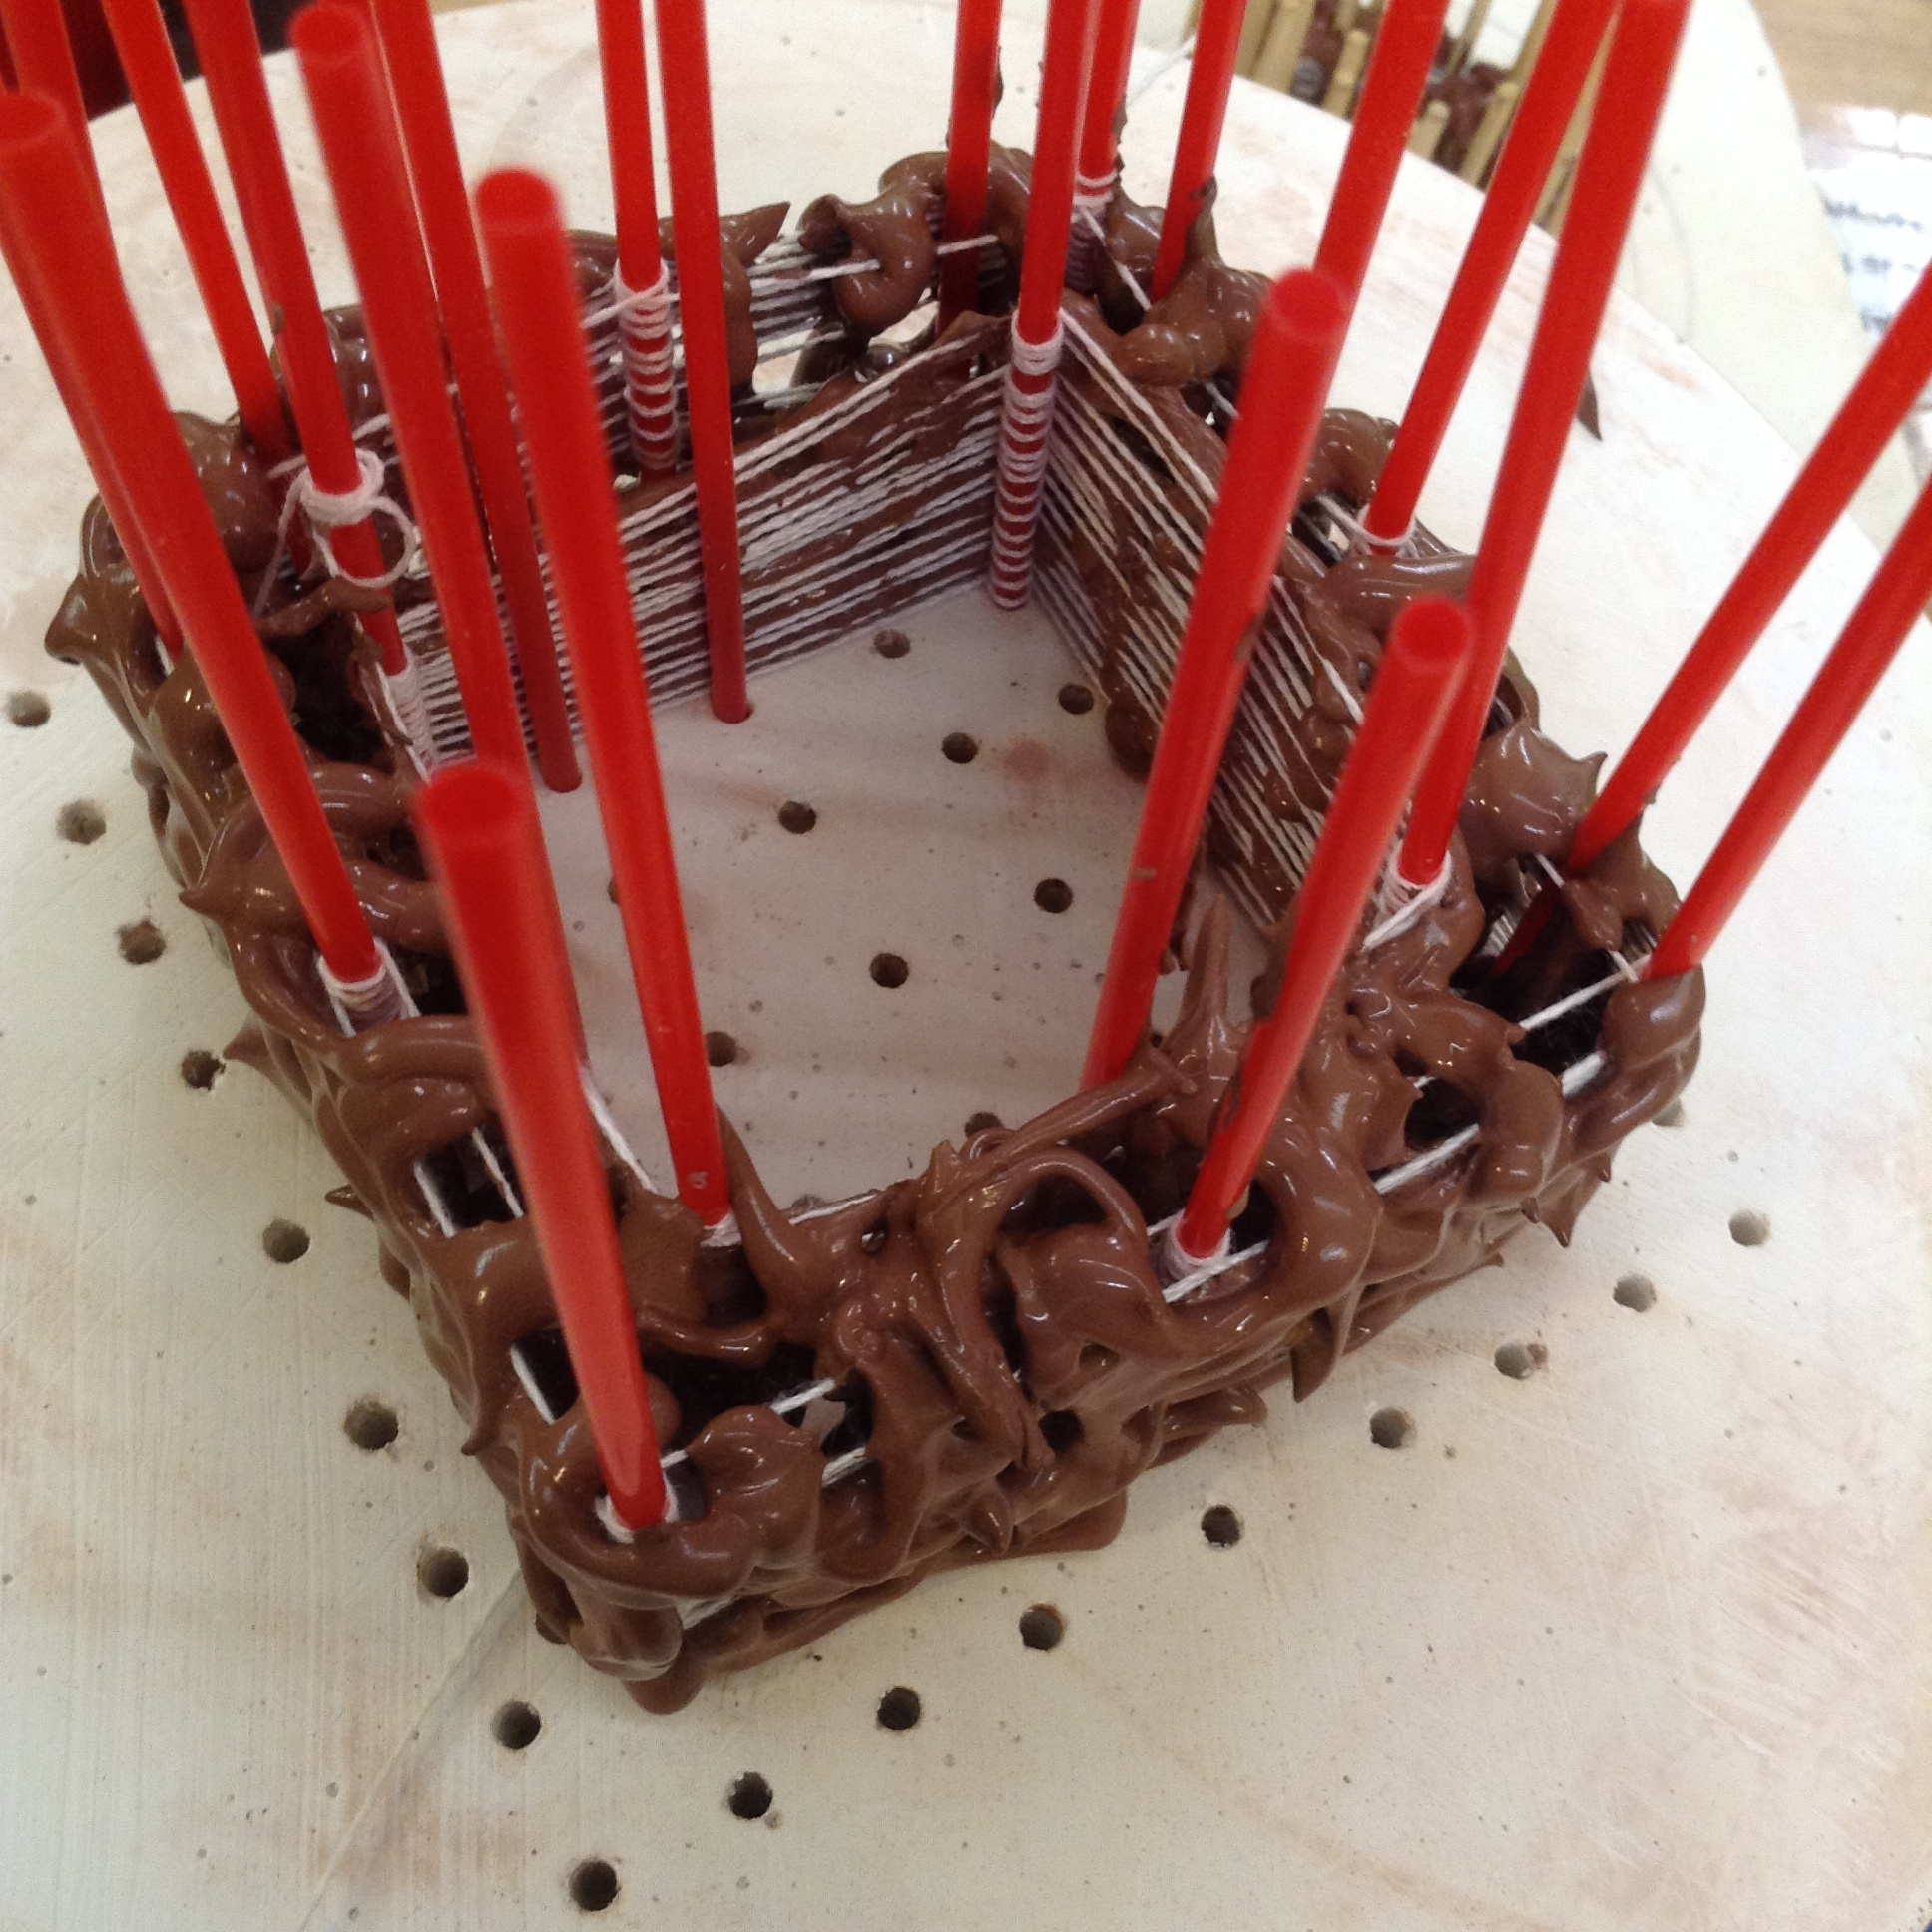
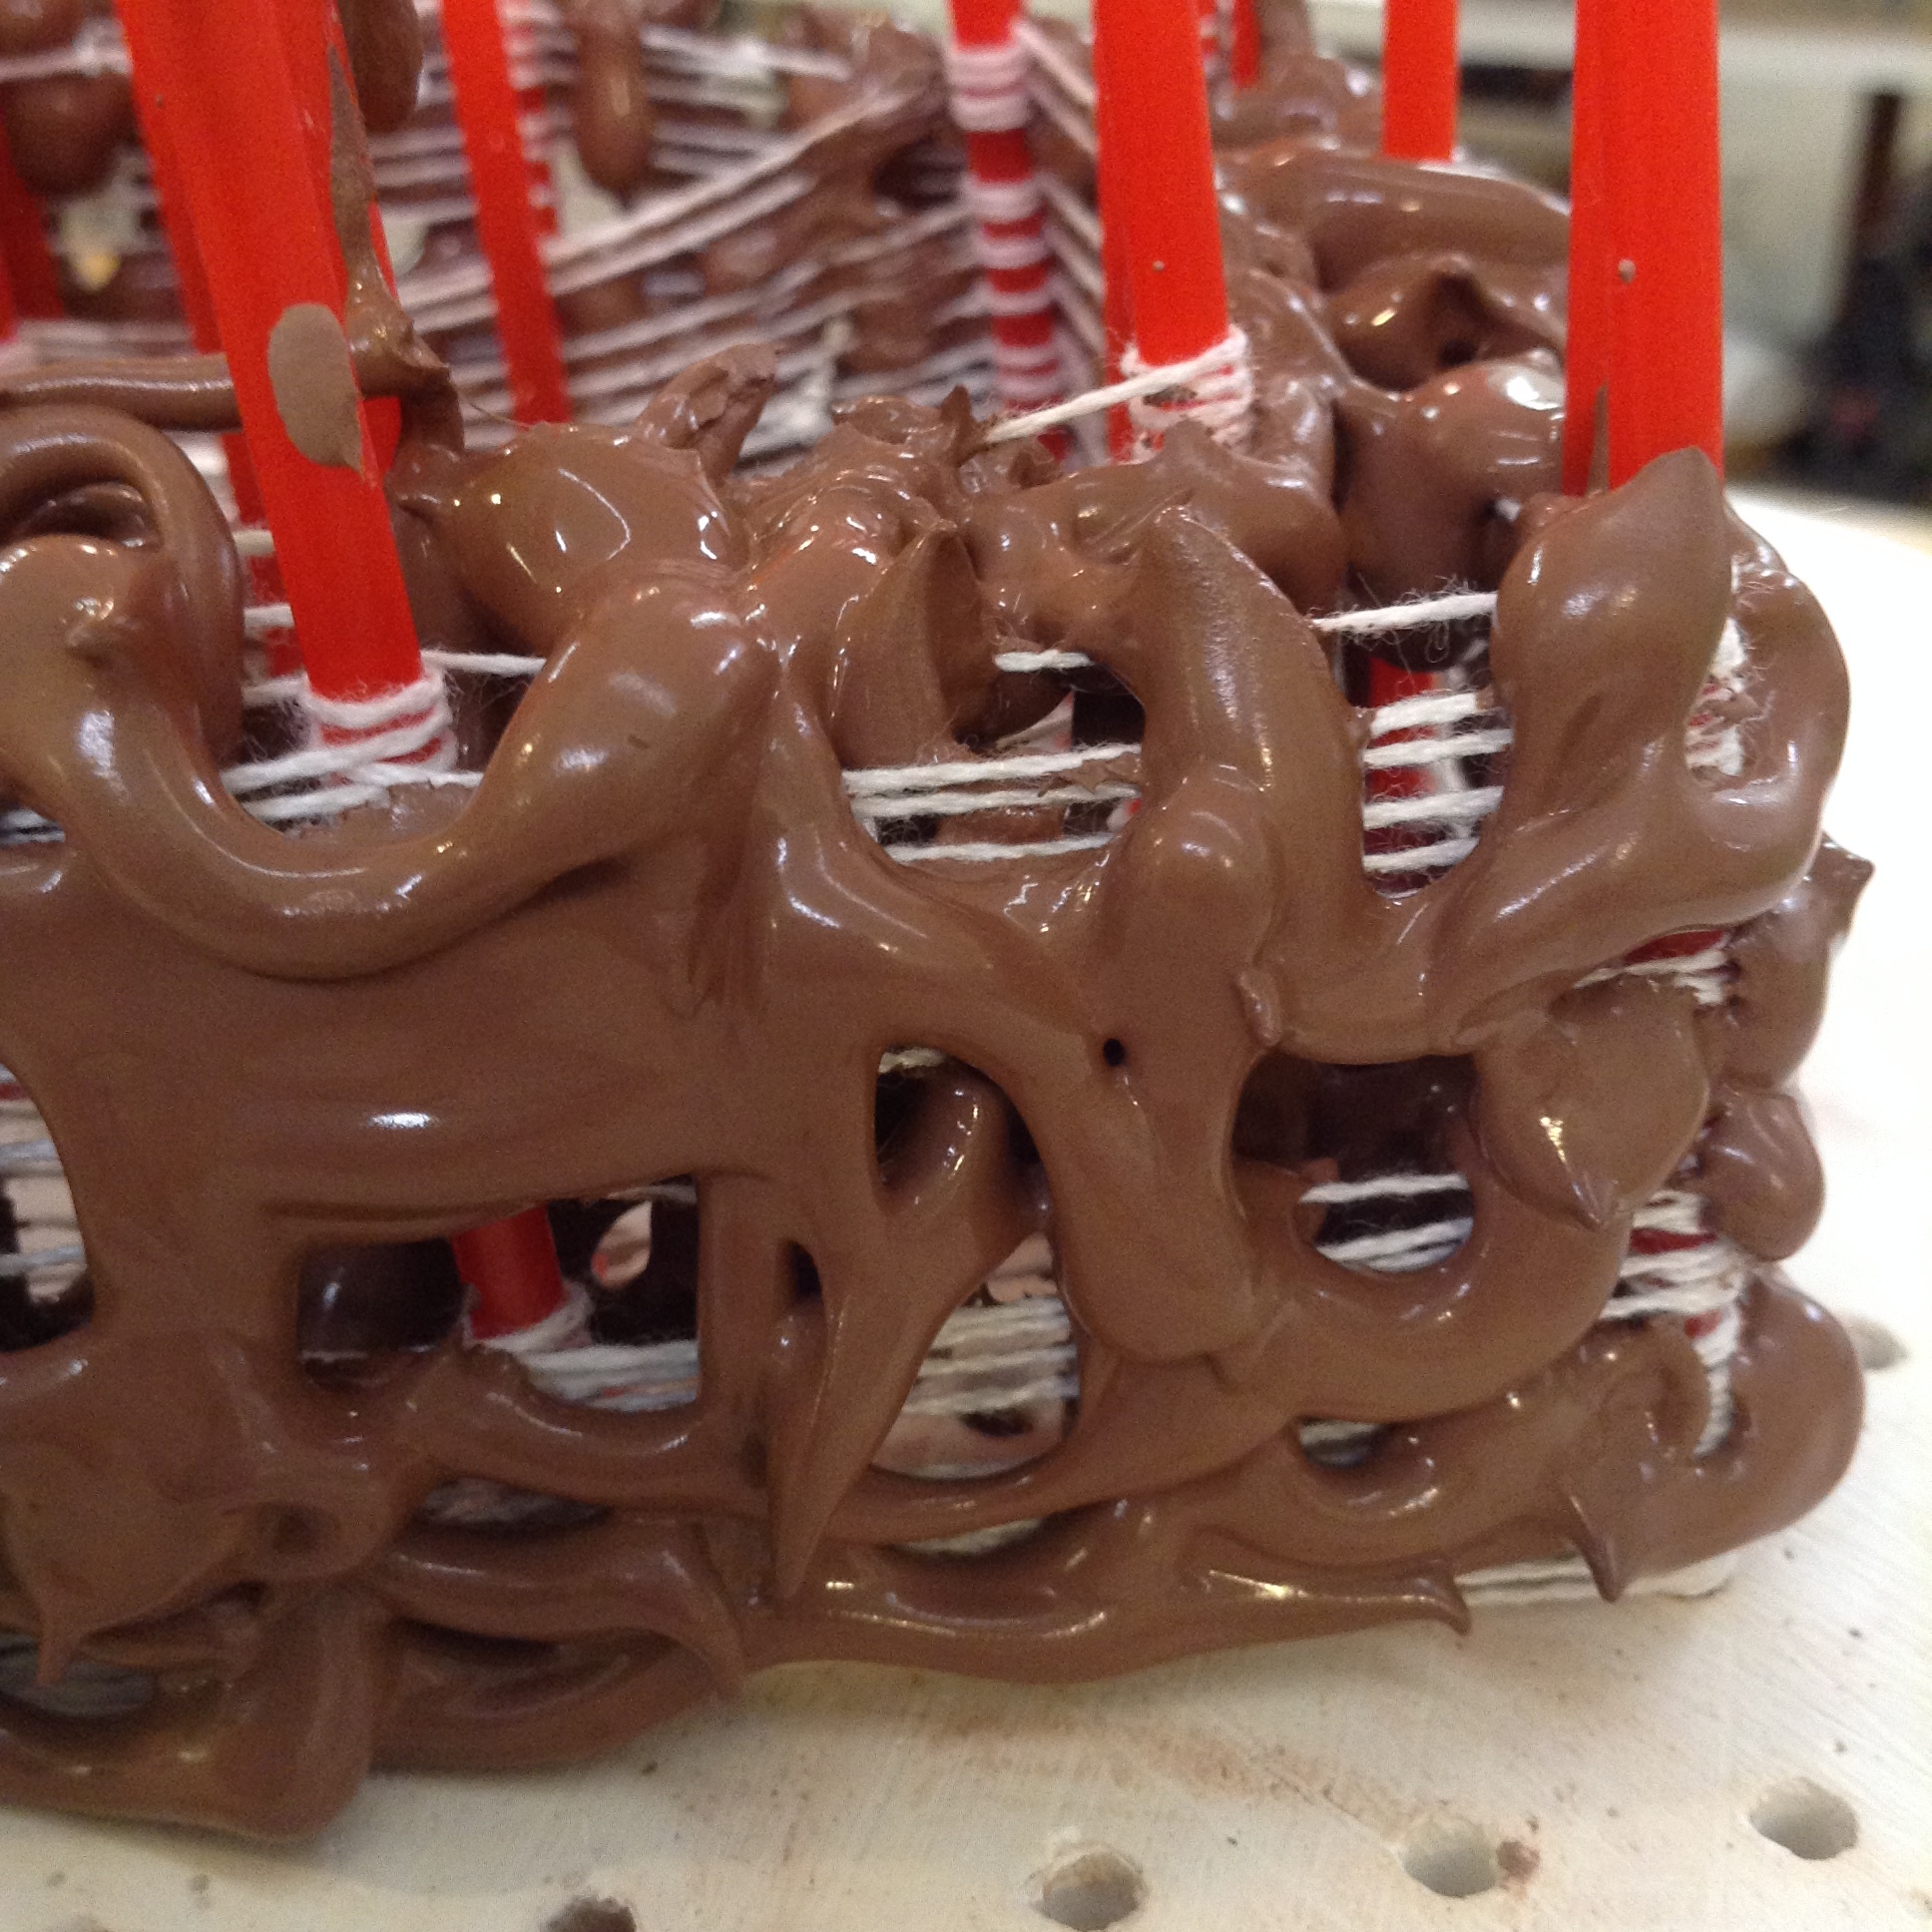
String can be used to form tensile structures when wound around rods, leading to anything from geometric patterns to free-form organic nest-like patterns. I started to ask myself whether those patterns could be captured in clay. Ceramics artists have already been dipping combustible materials in clay slip and firing them, so why not try these rod-supported patterns? Here's the process I've found so far using combustible or removable supports and filaments, plus wet or thickened clay slip. I'm sure this can lead to many flat or dimensional patterns that would otherwise be more difficult or impossible to create.
DIVERSITY OF PATTERN
The structure of the final piece has many contributing factors. As much order as there is in the rods, and method of string winding, there is still much improvisation about where the slip goes, and what happens to the system after it sets up. For me, this is a perfect example of combining intricate predetermined string patterns, yet leads to distorted, organic liquid clay slip forms.
What follows is some recent progress with strings wrapped around metal nails or plastic tubes, which are then dipped in clay slip or used as 3D slip trailing meshes. Some of it is interesting, and some of it...well, to put it kindly, some of it needs more work to become useful.
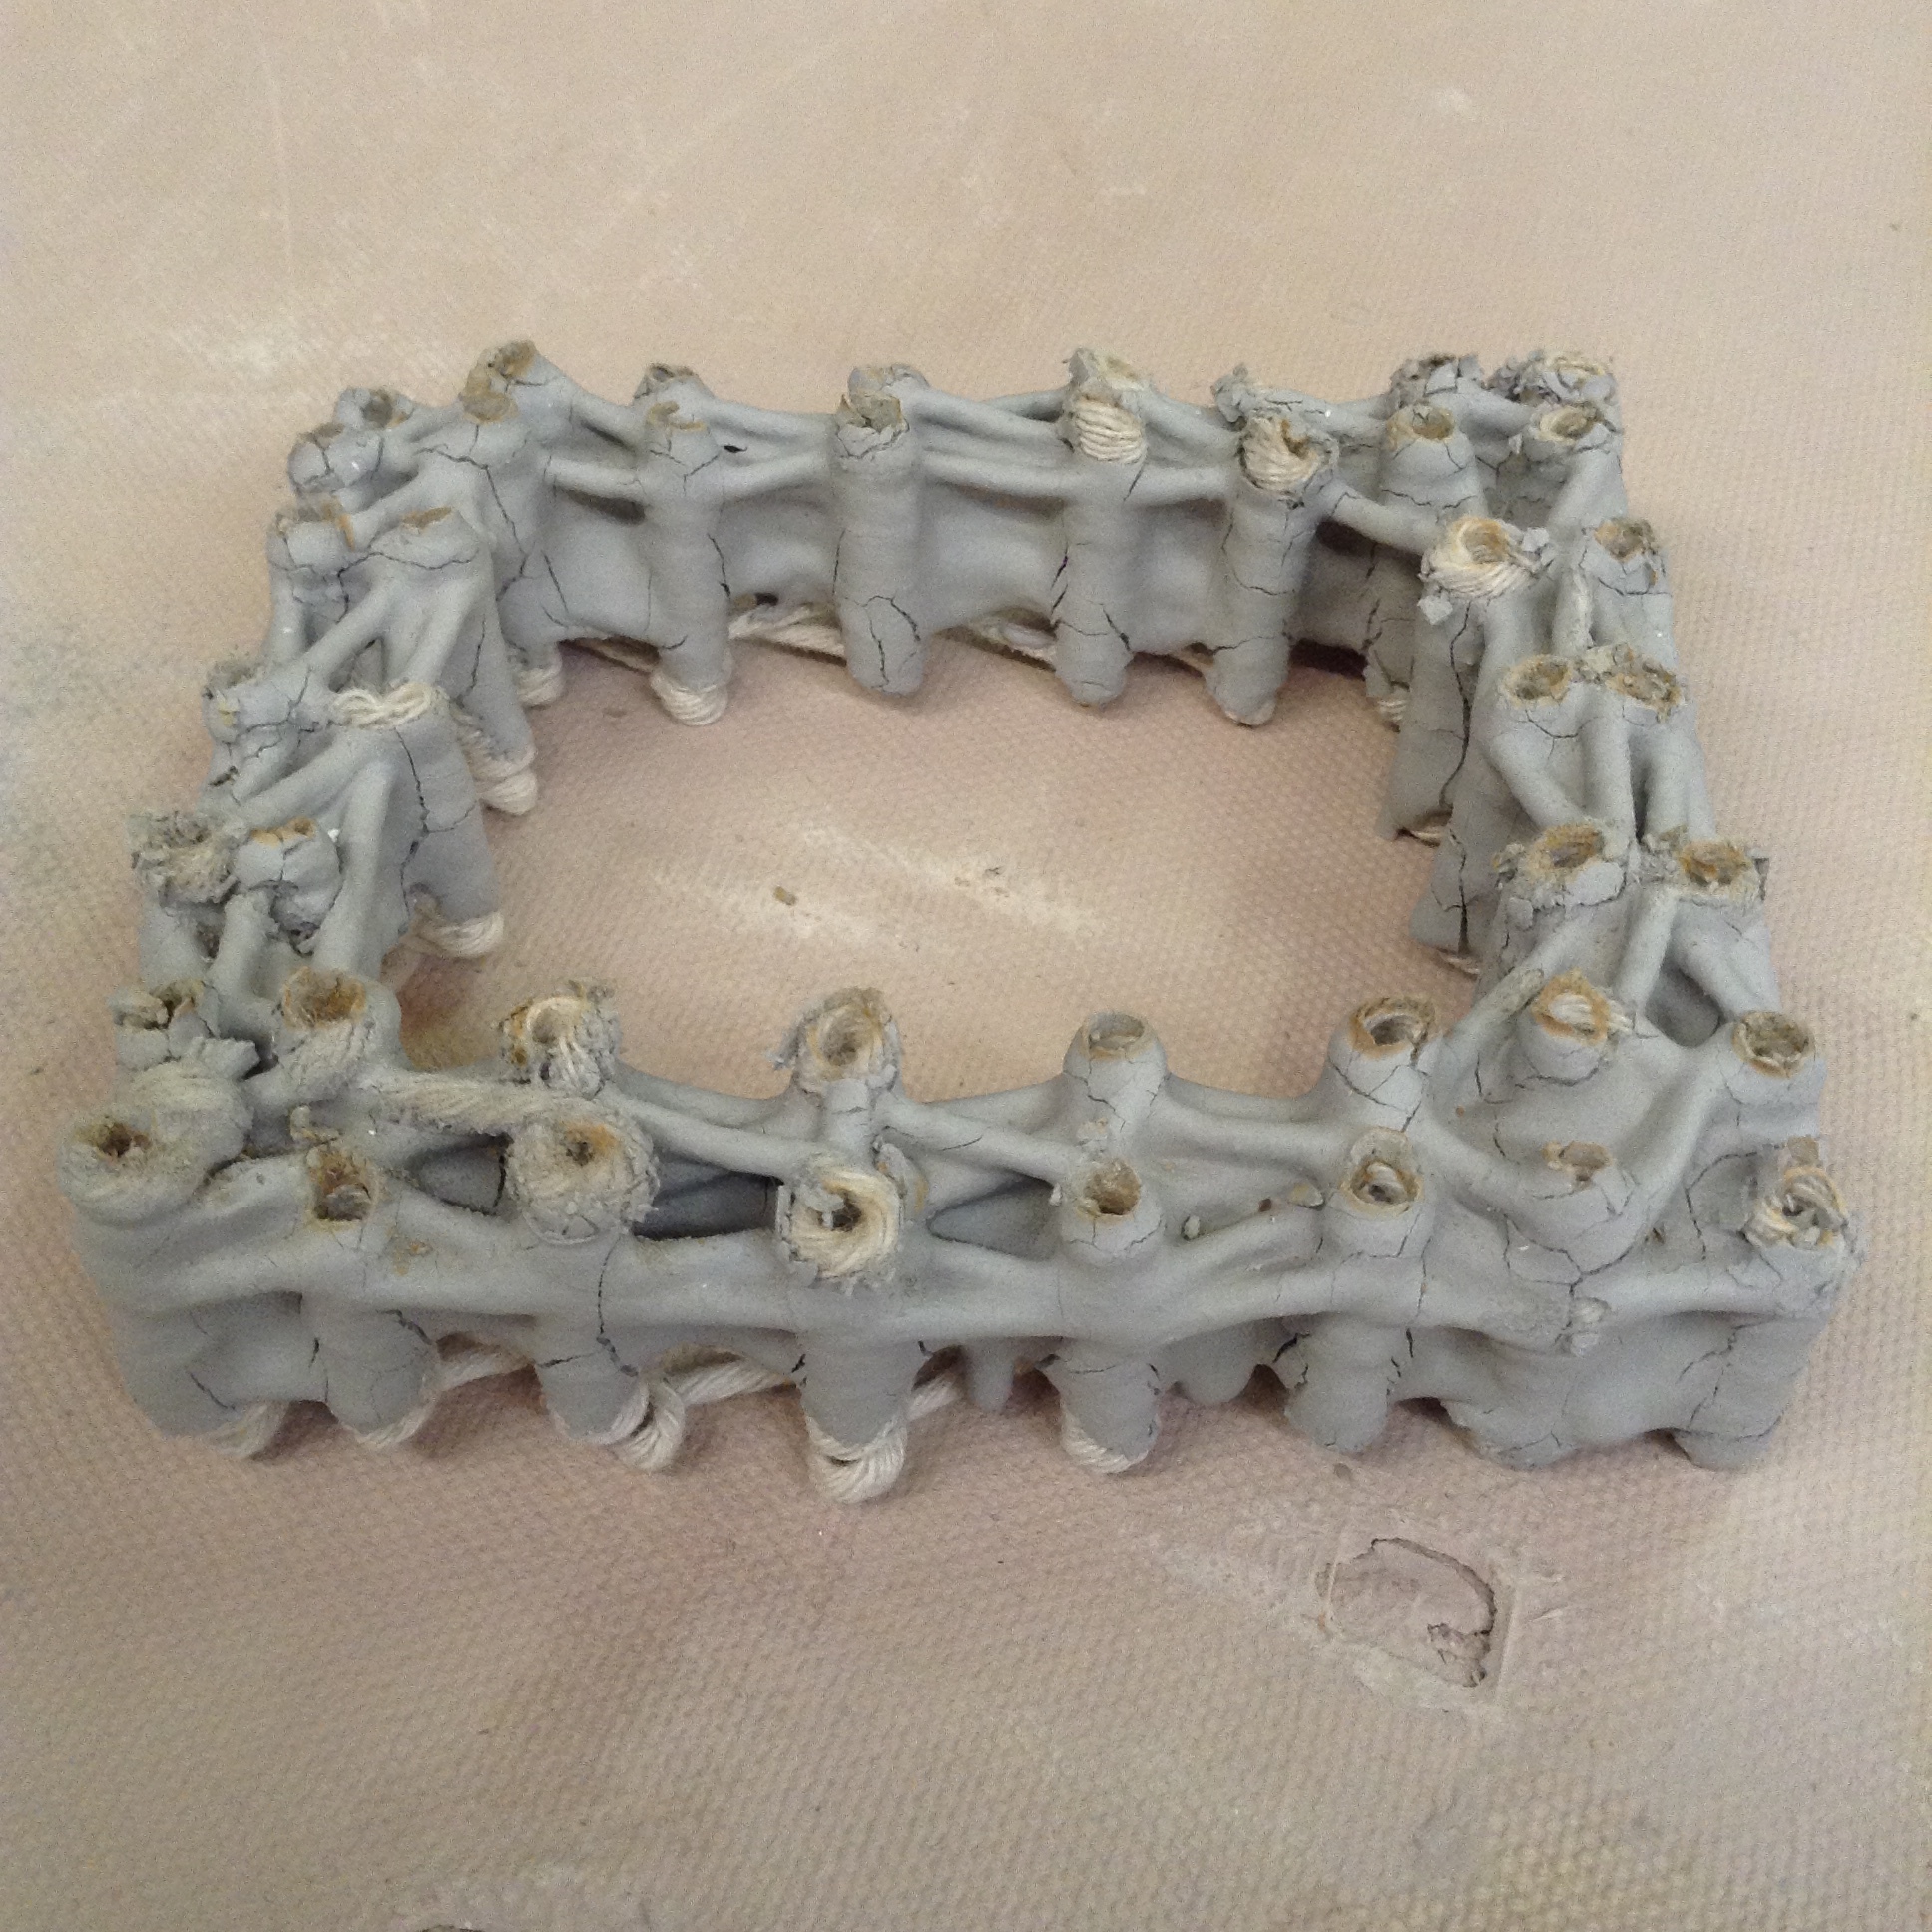
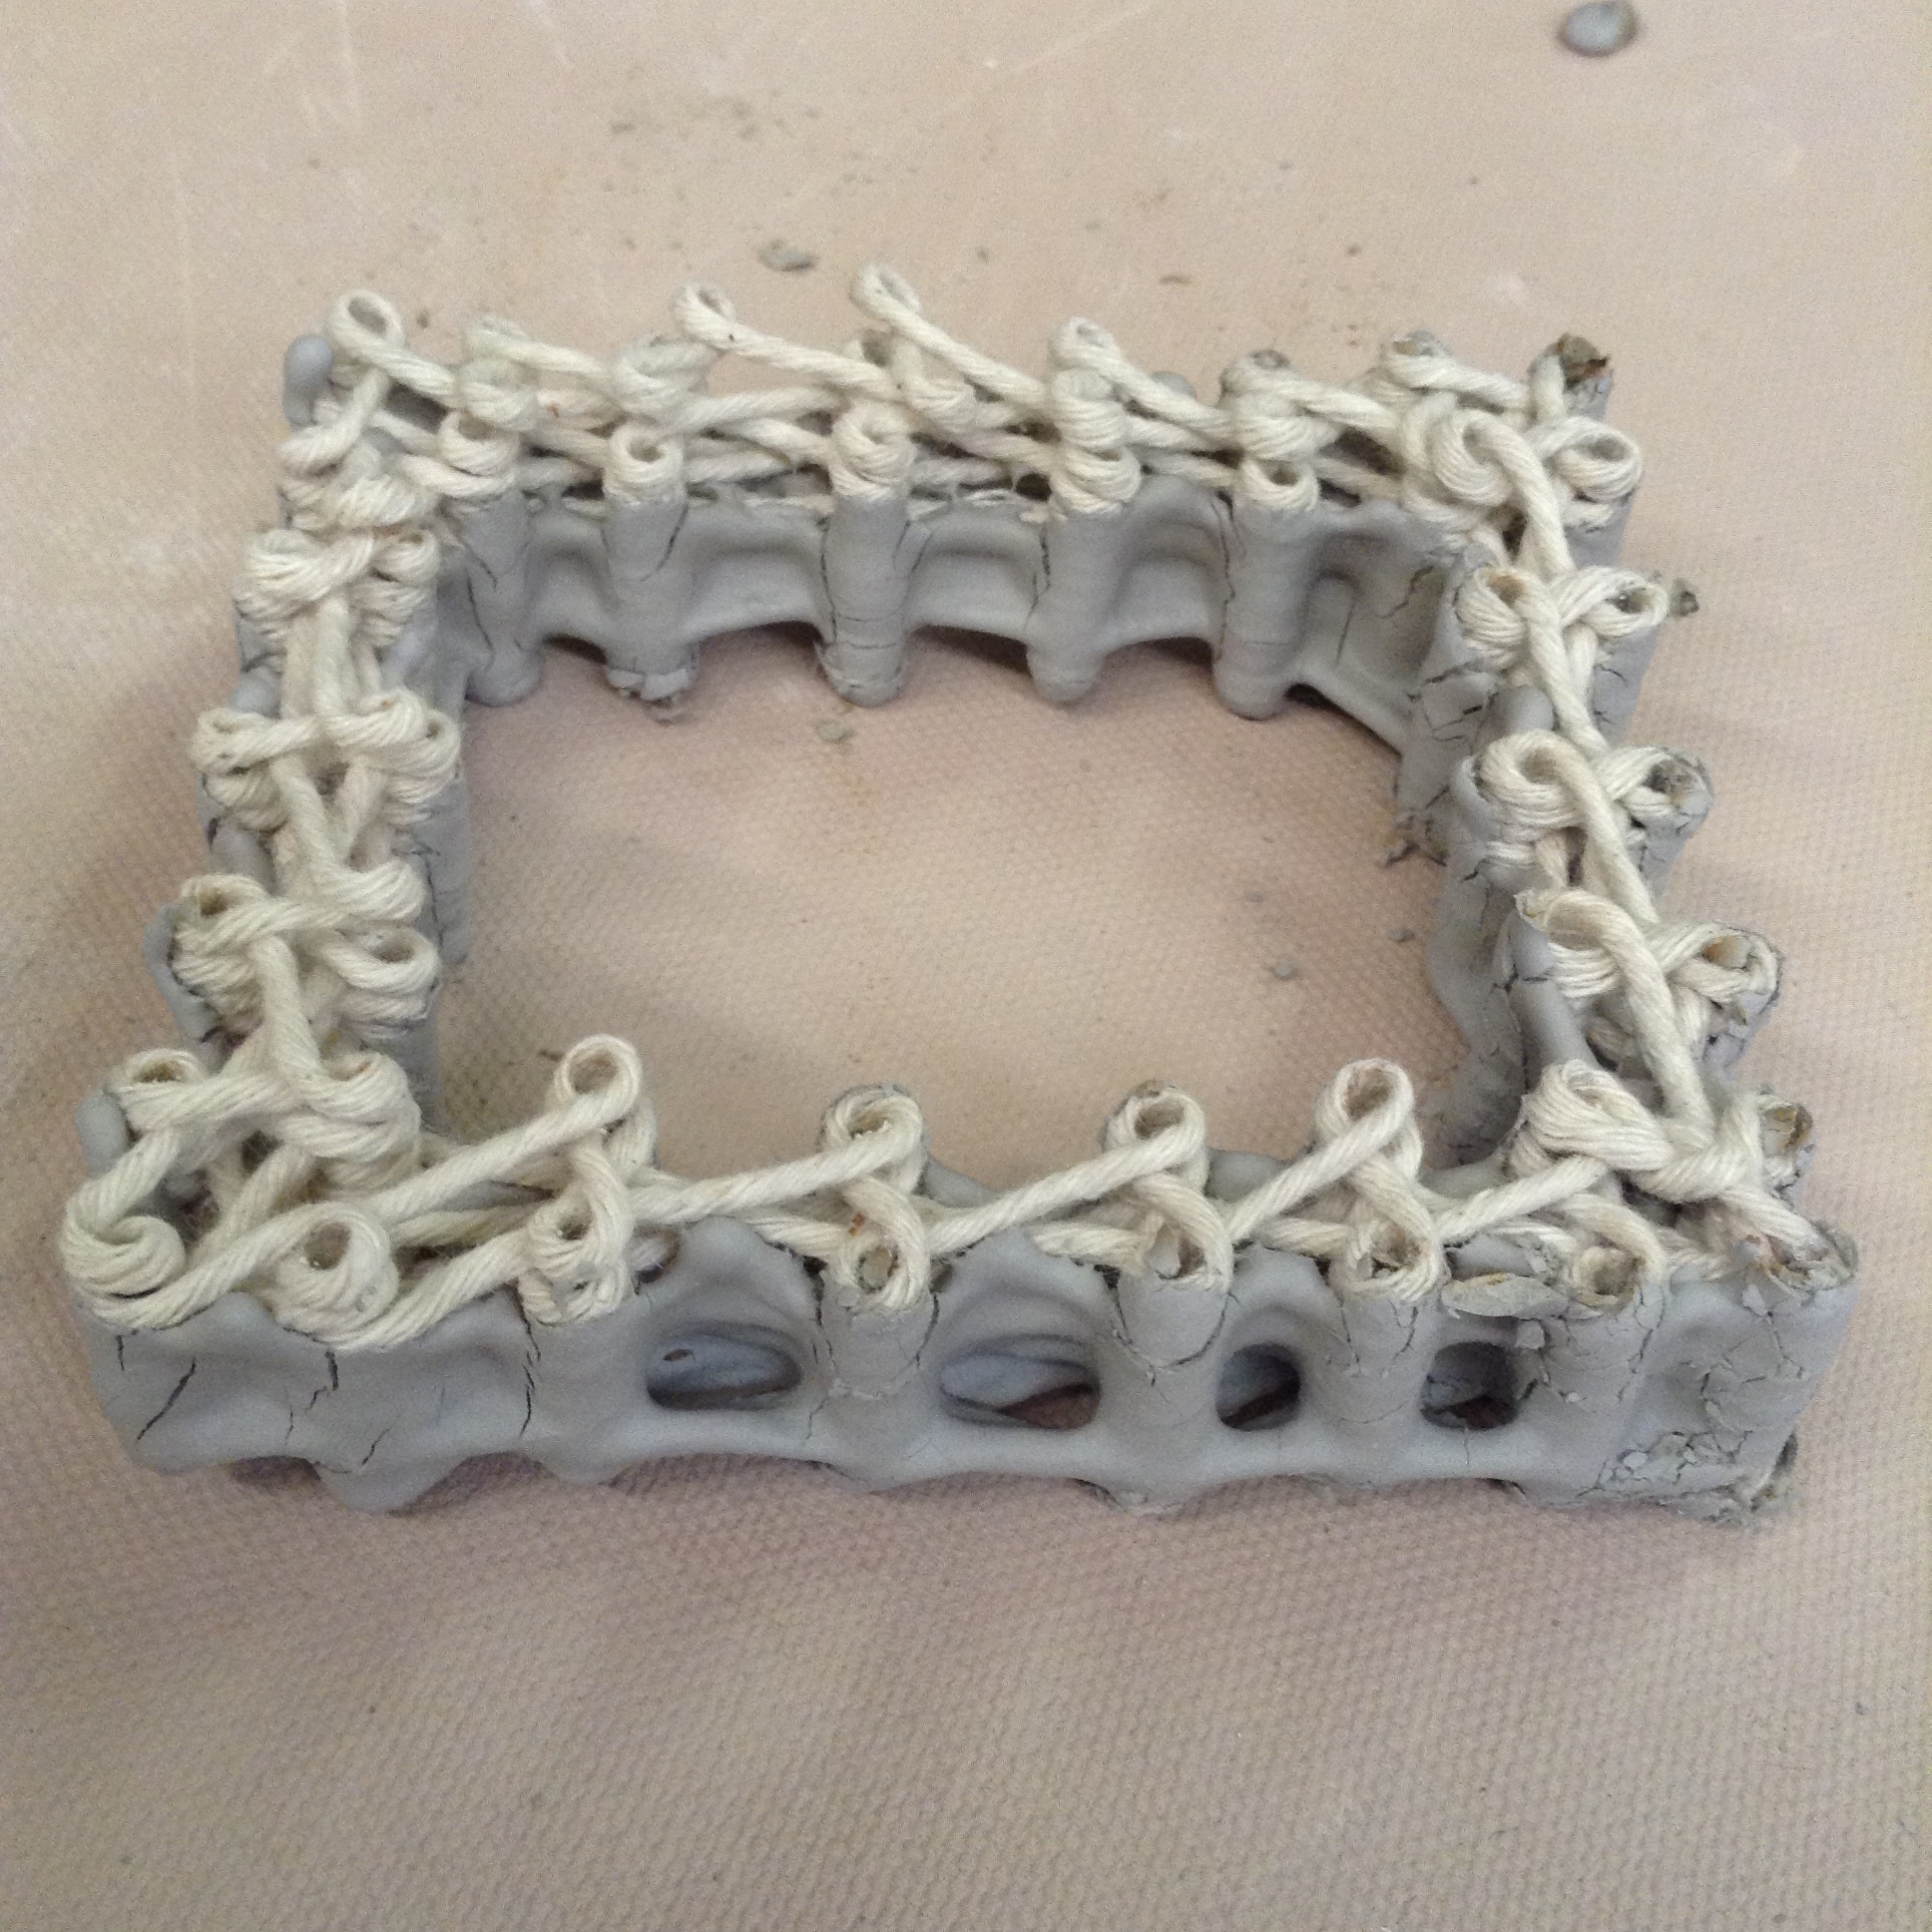
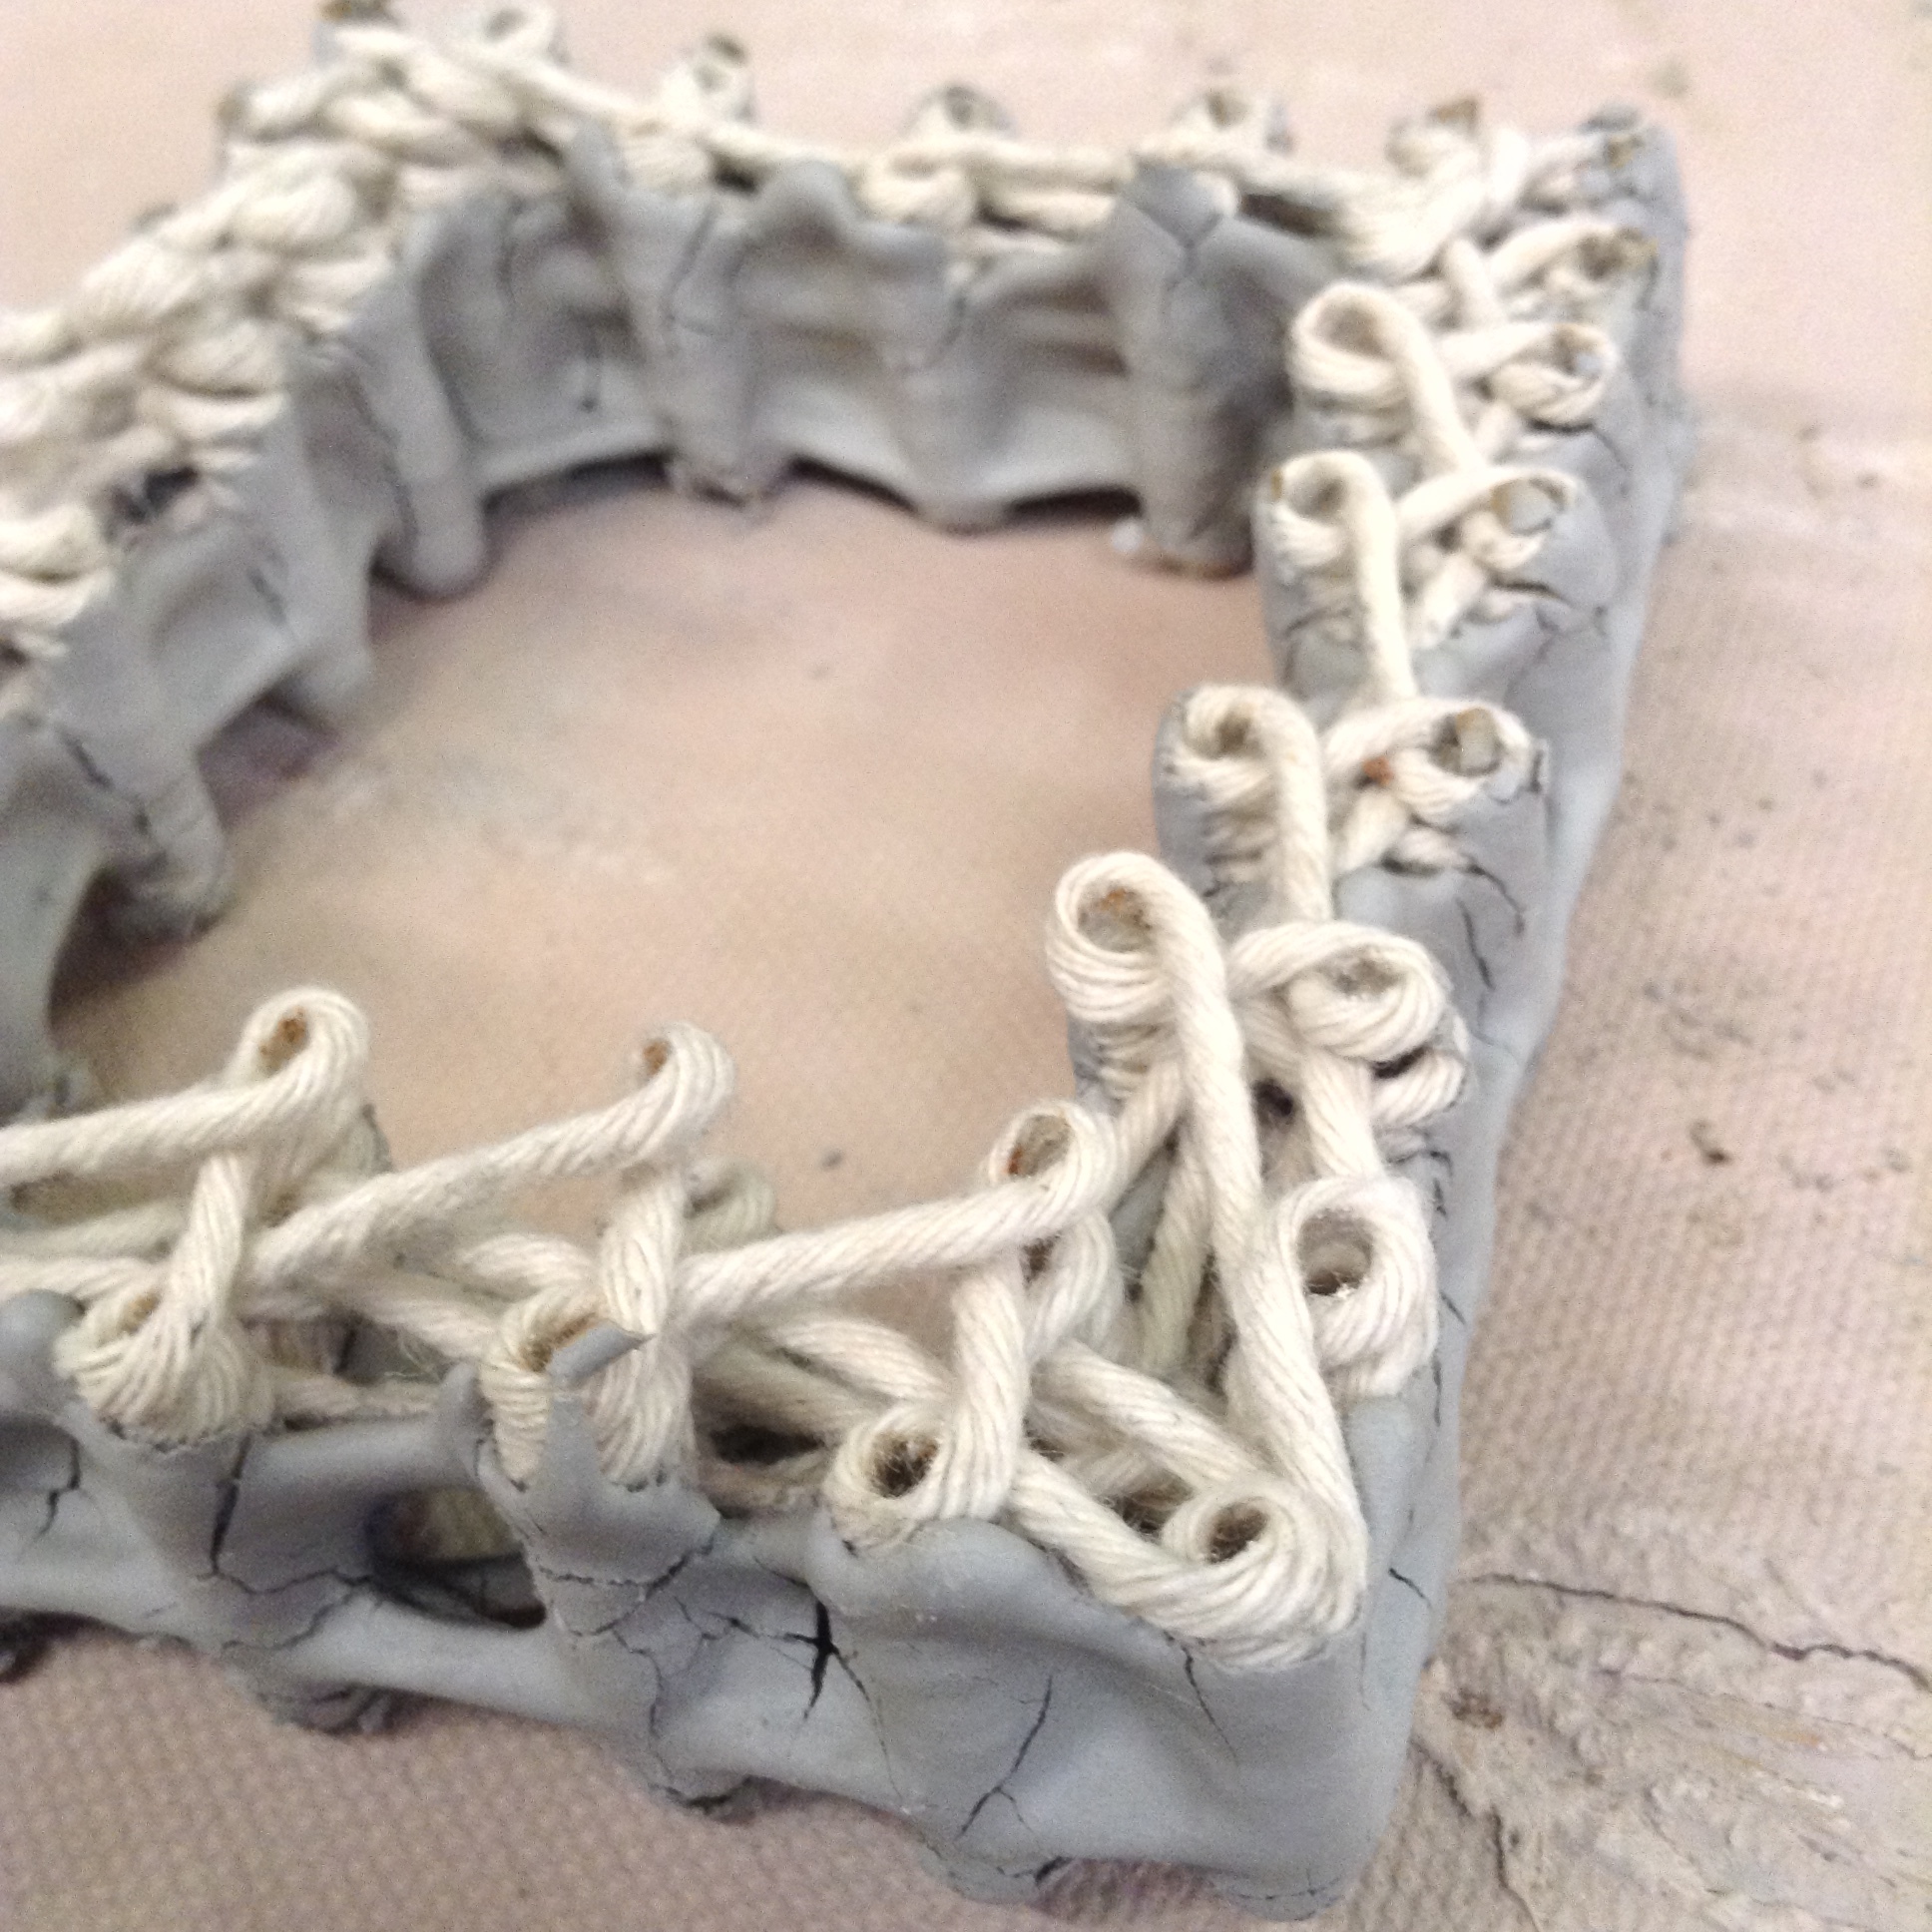
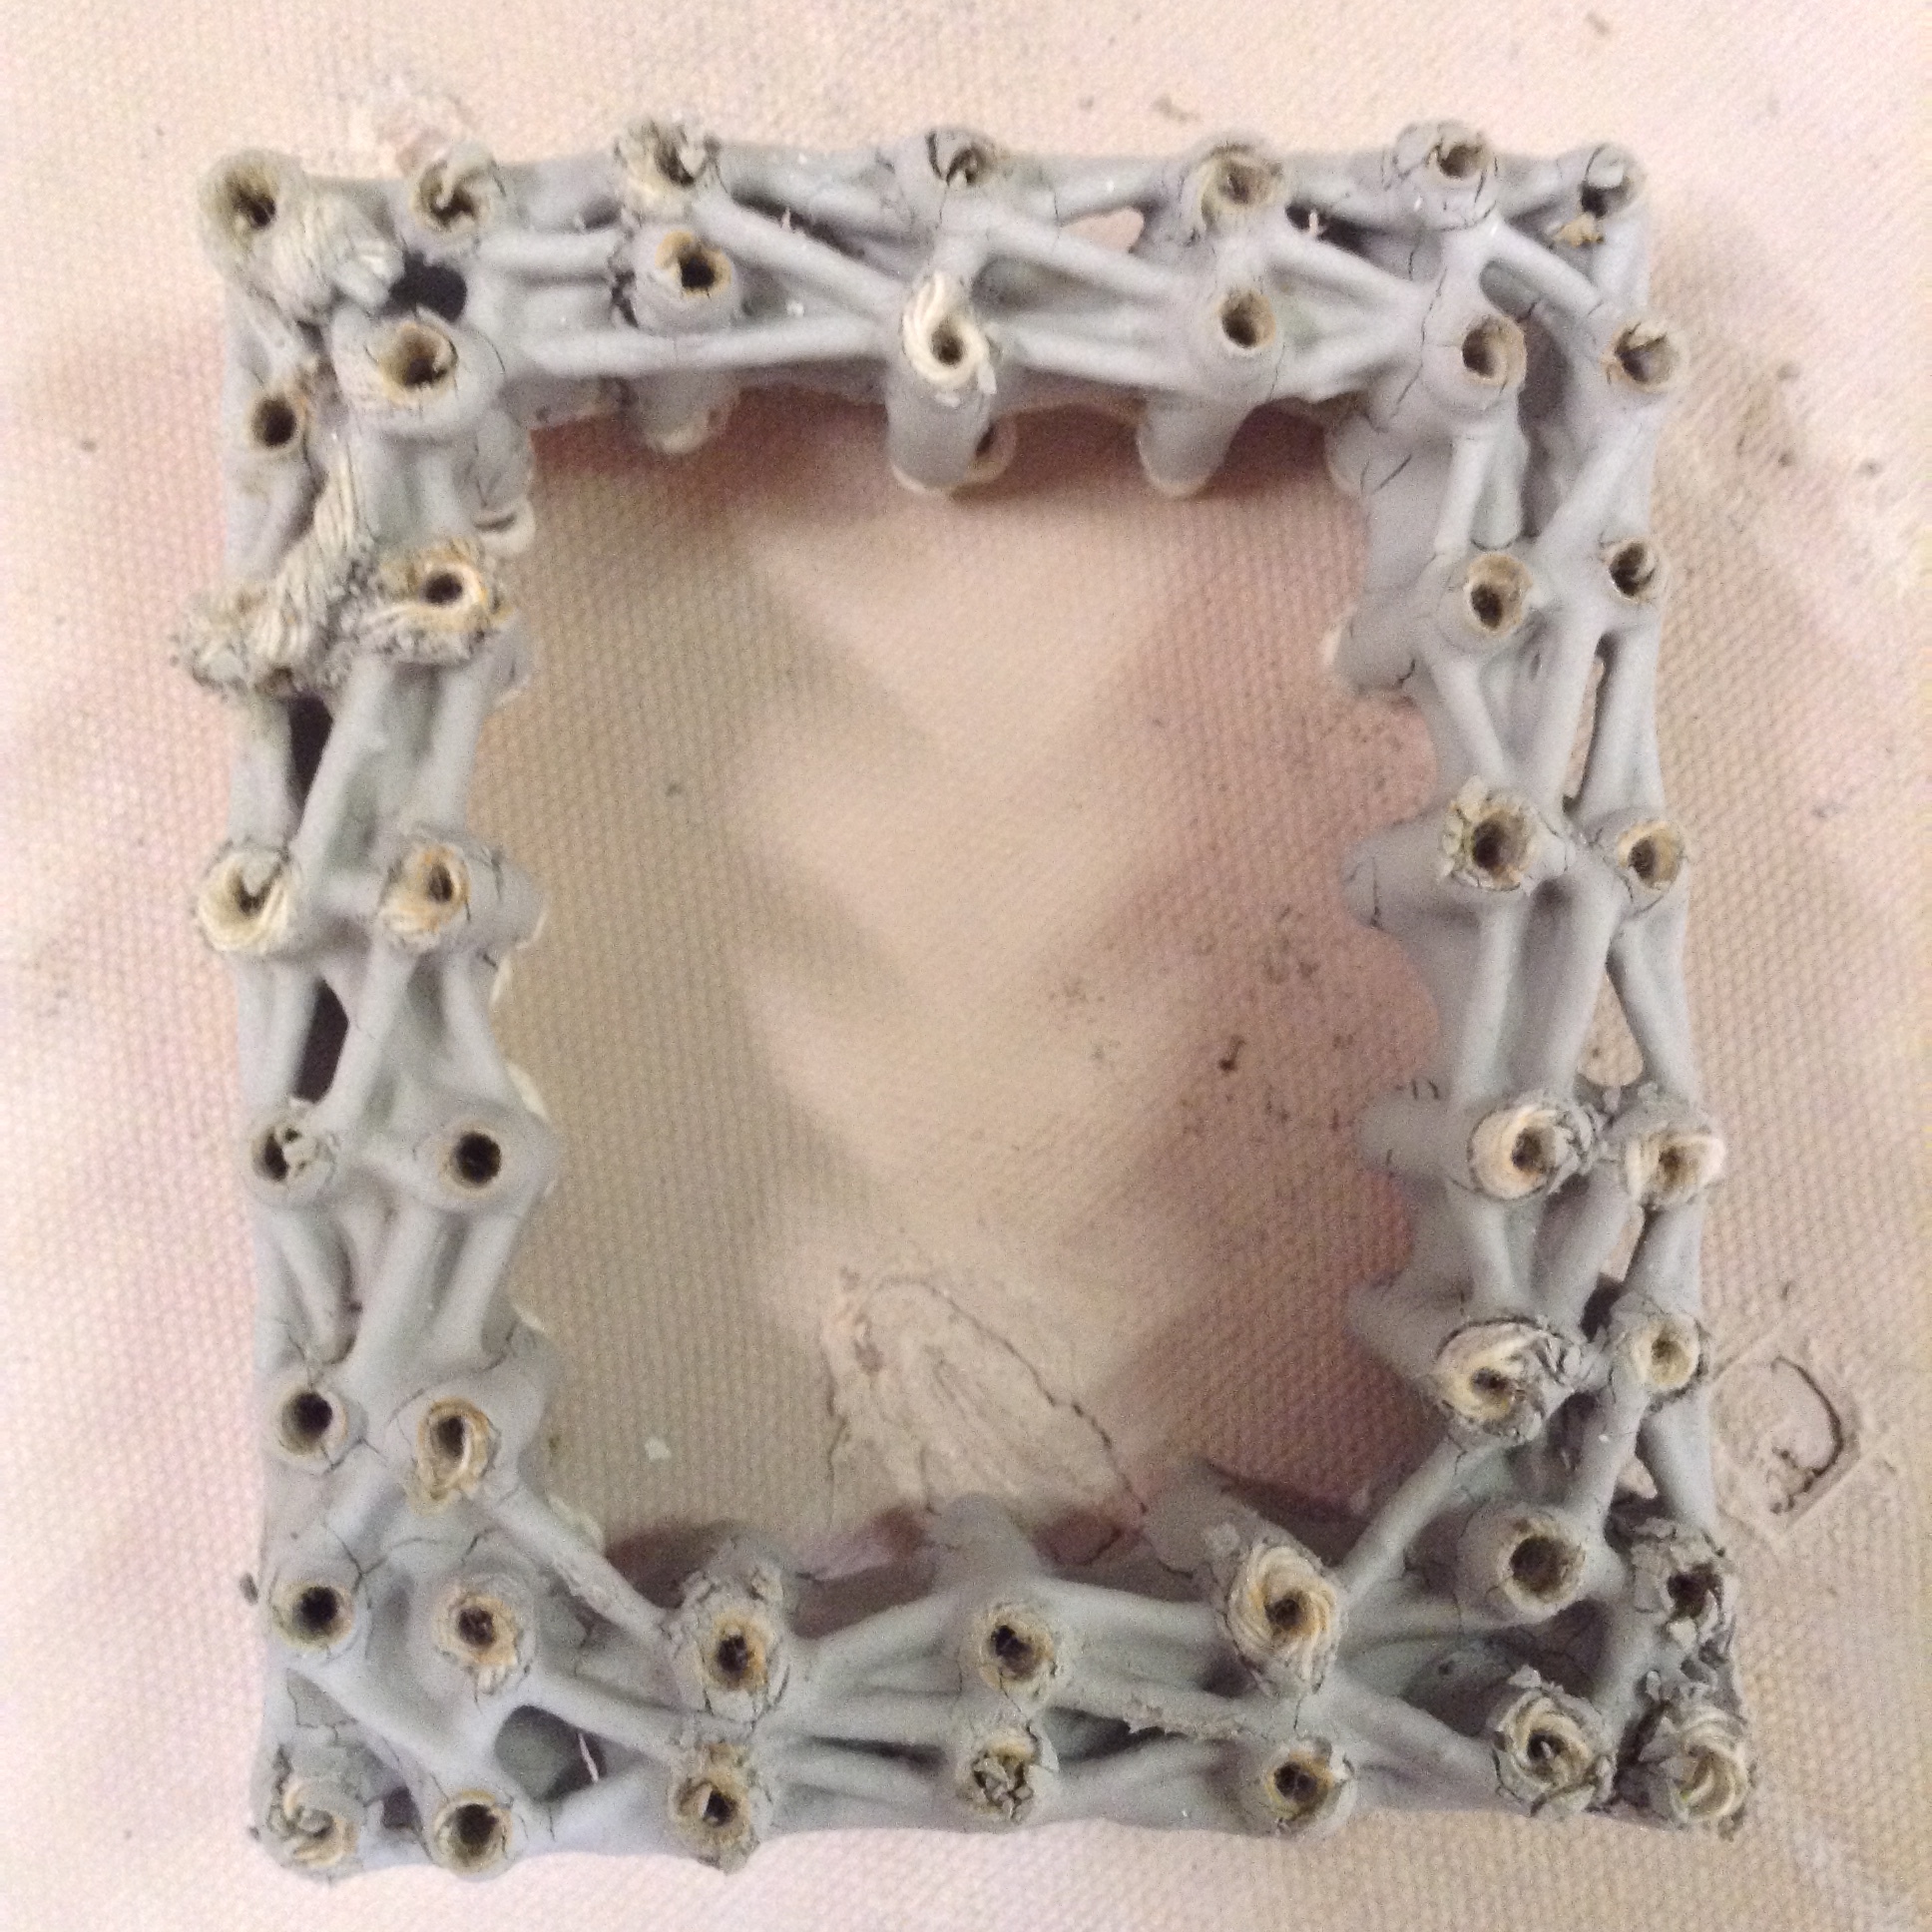
ZOO OF FINISHED RESULTS
A range of ceramic pieces has been made, with varying degrees of success. The scaffolding itself has already gone through a number of iterations. Admittedly, there is more work on the tools than on the finished pieces. But this won't come as a surprise to anyone who knows me. If you see a form you like, you can read below about how it was made.


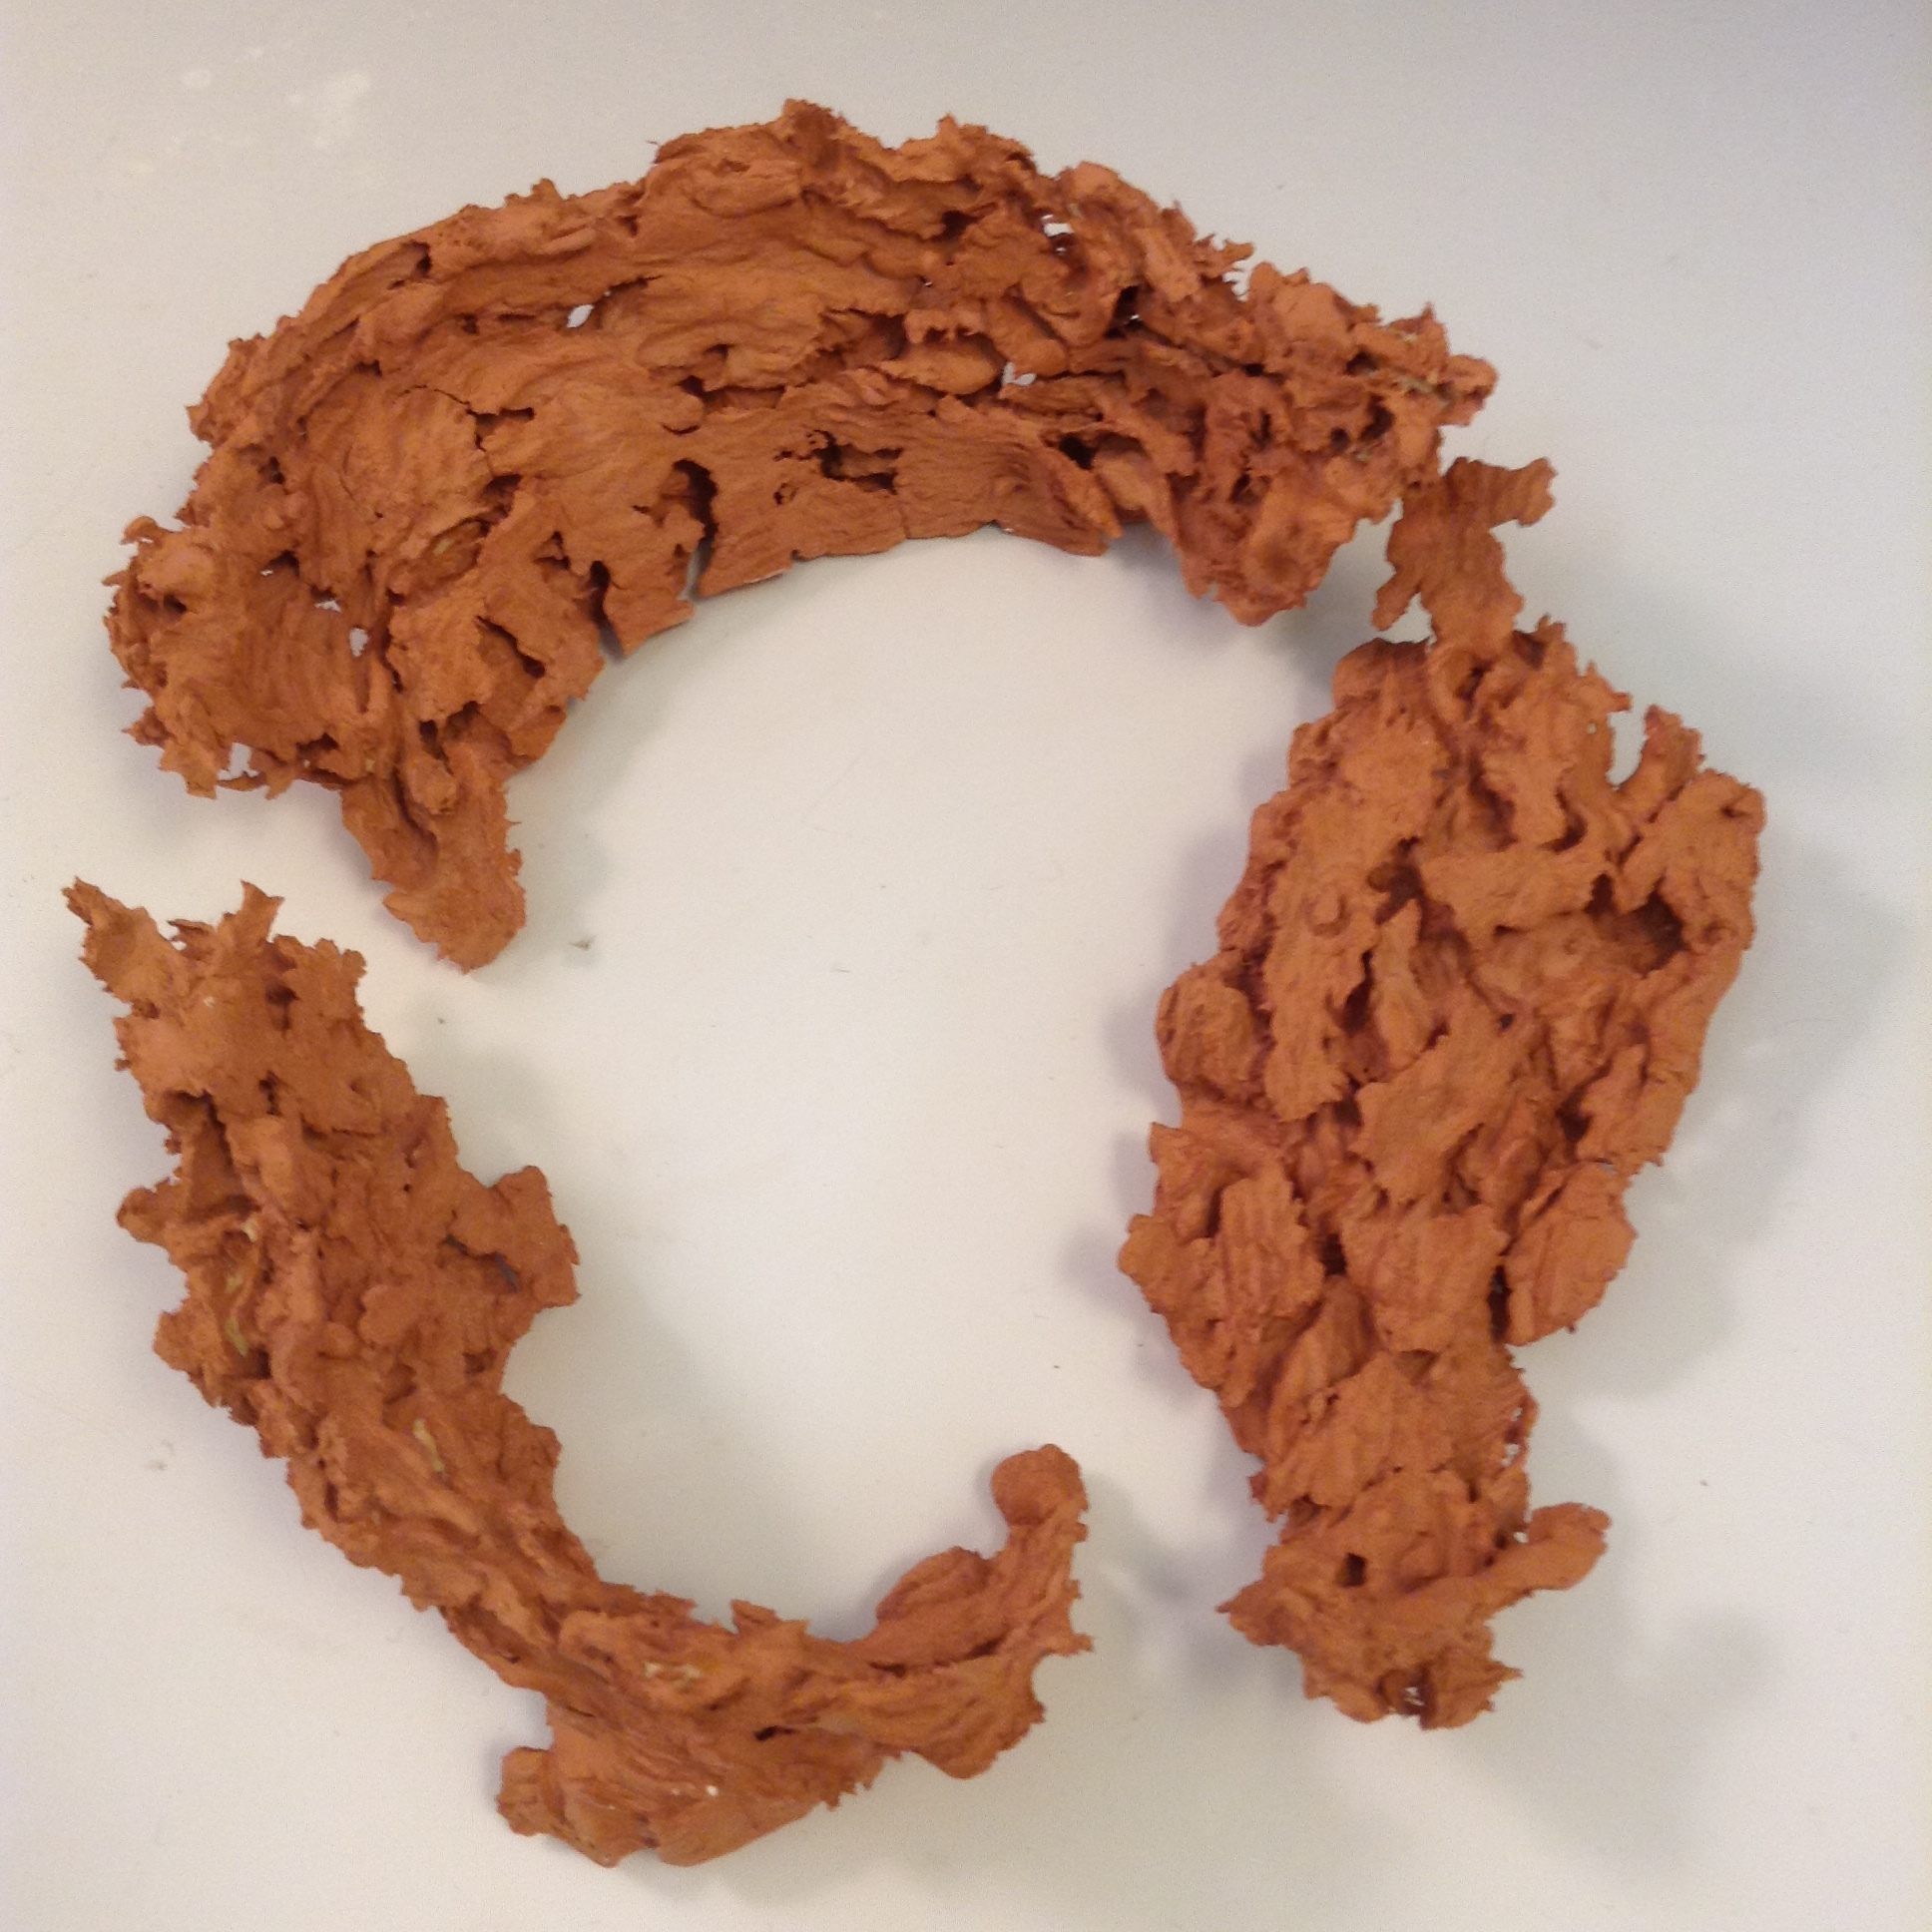
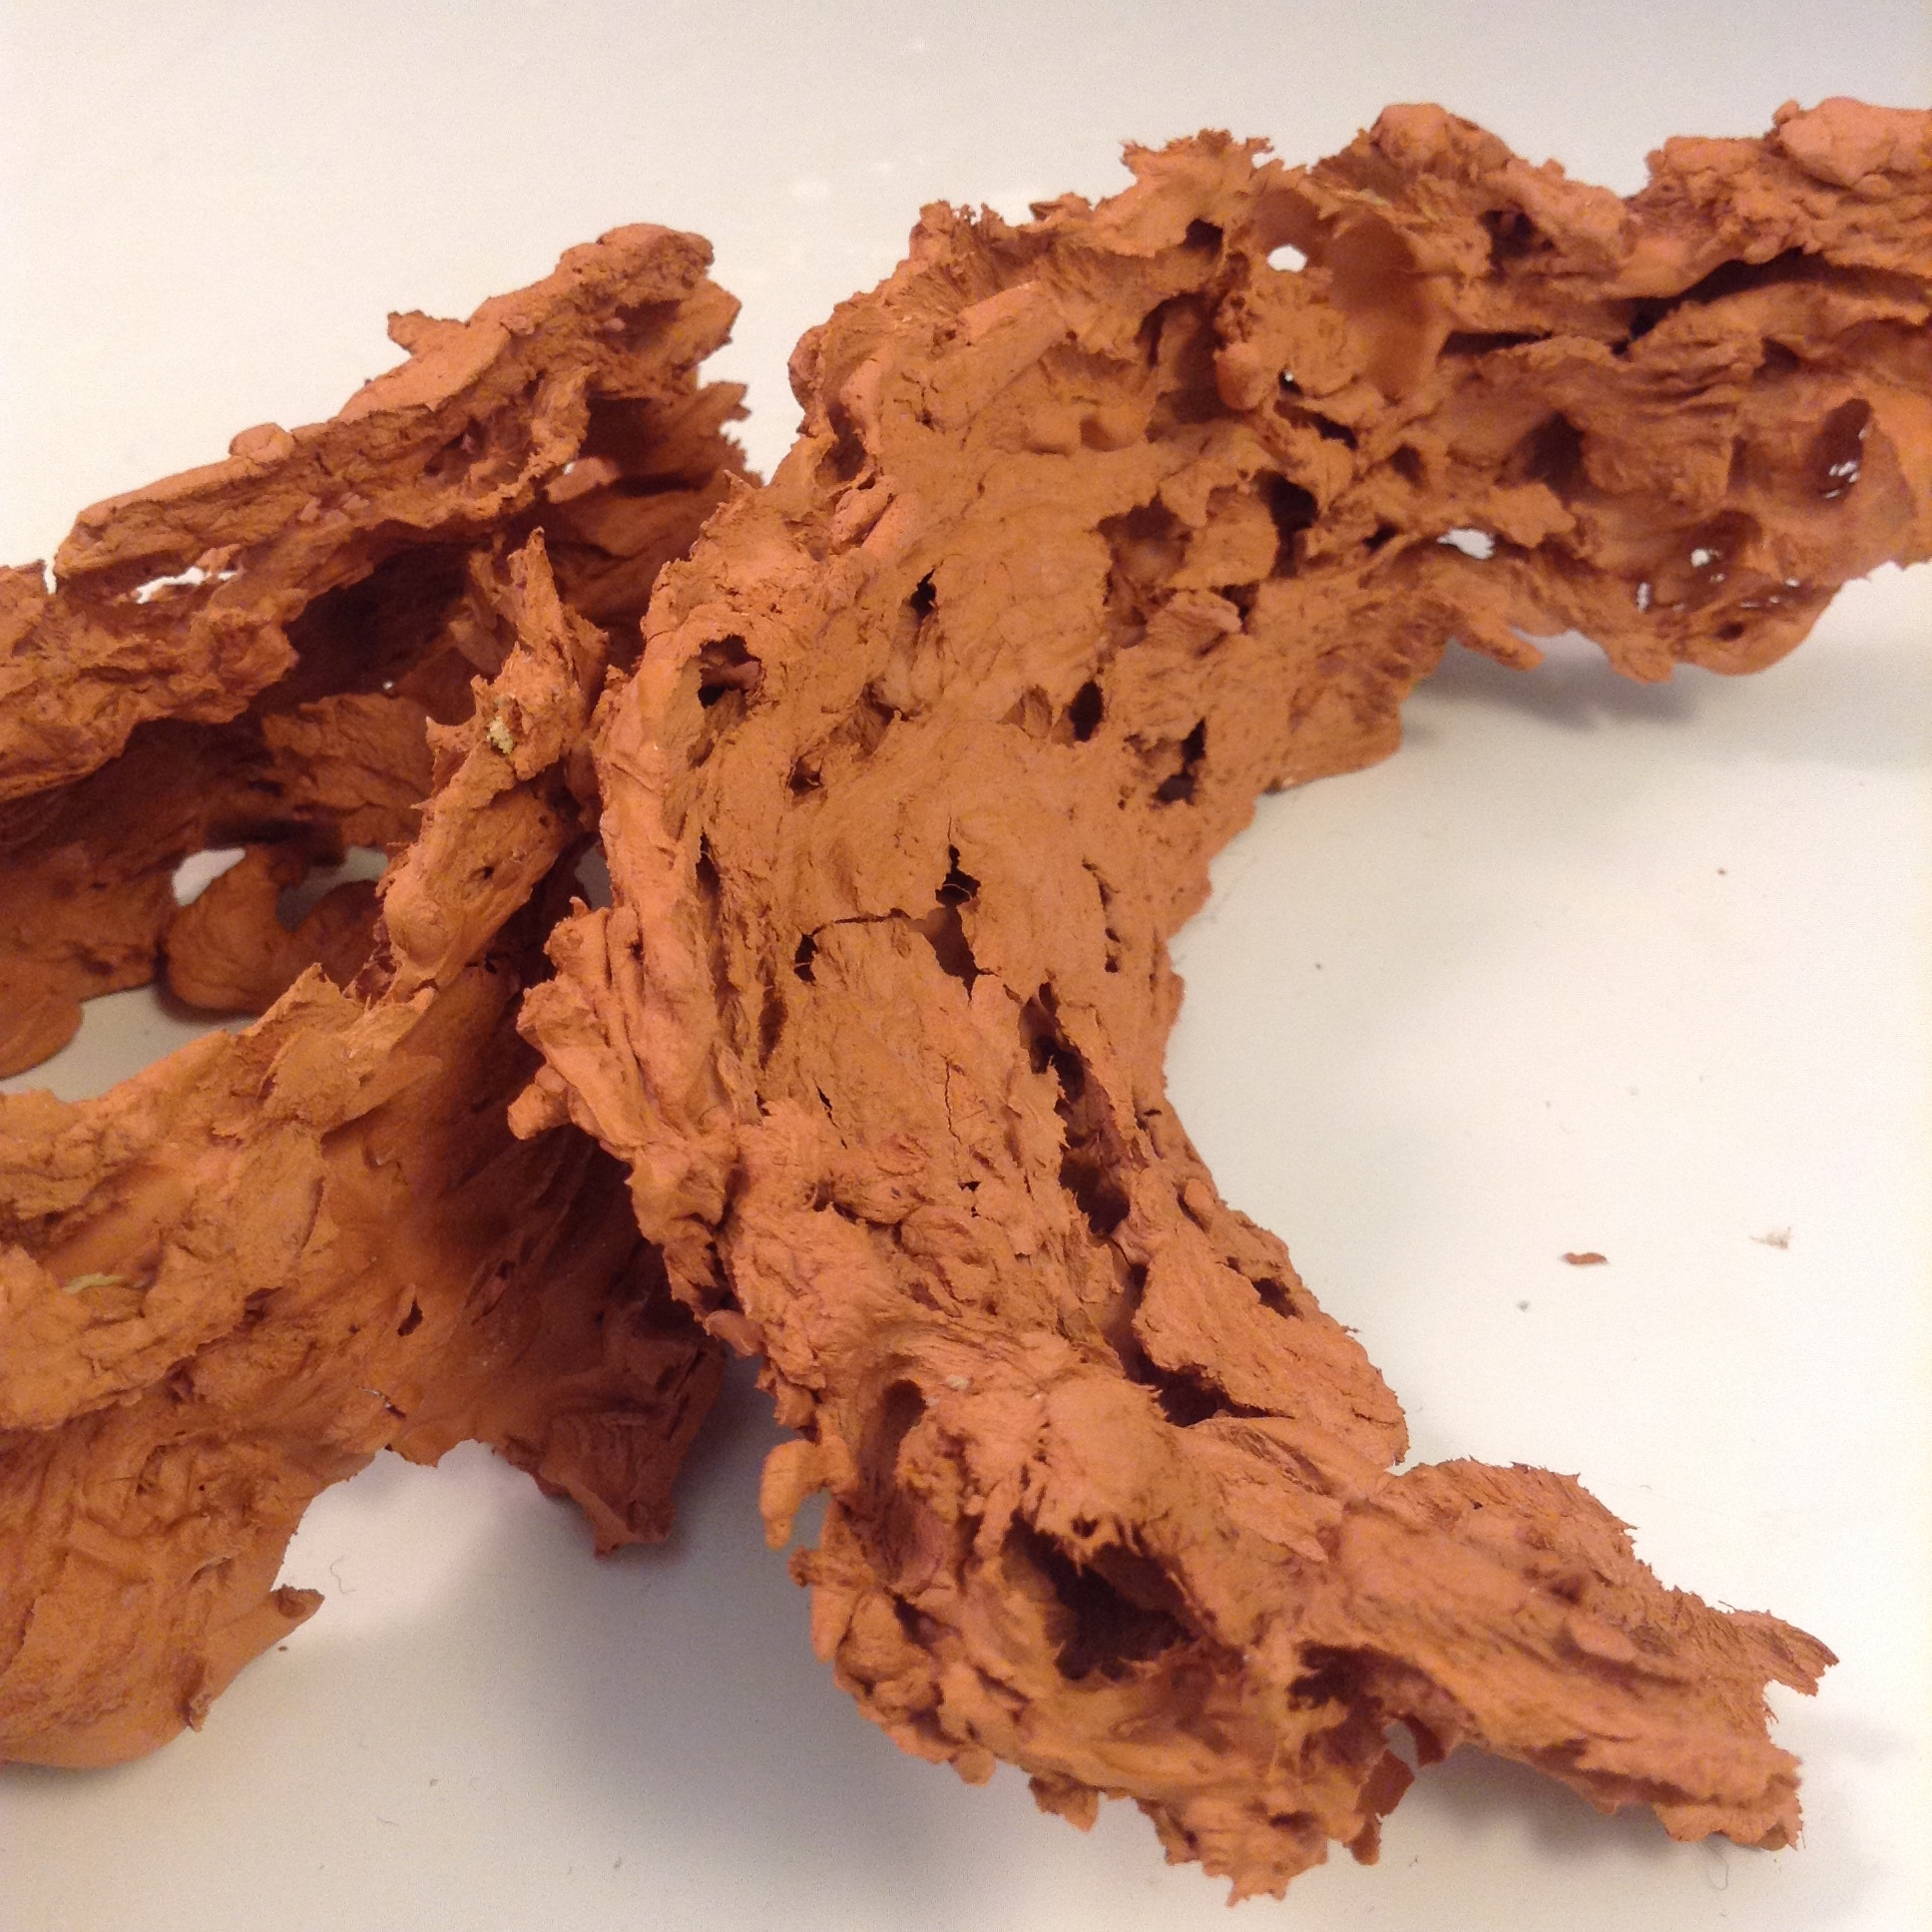
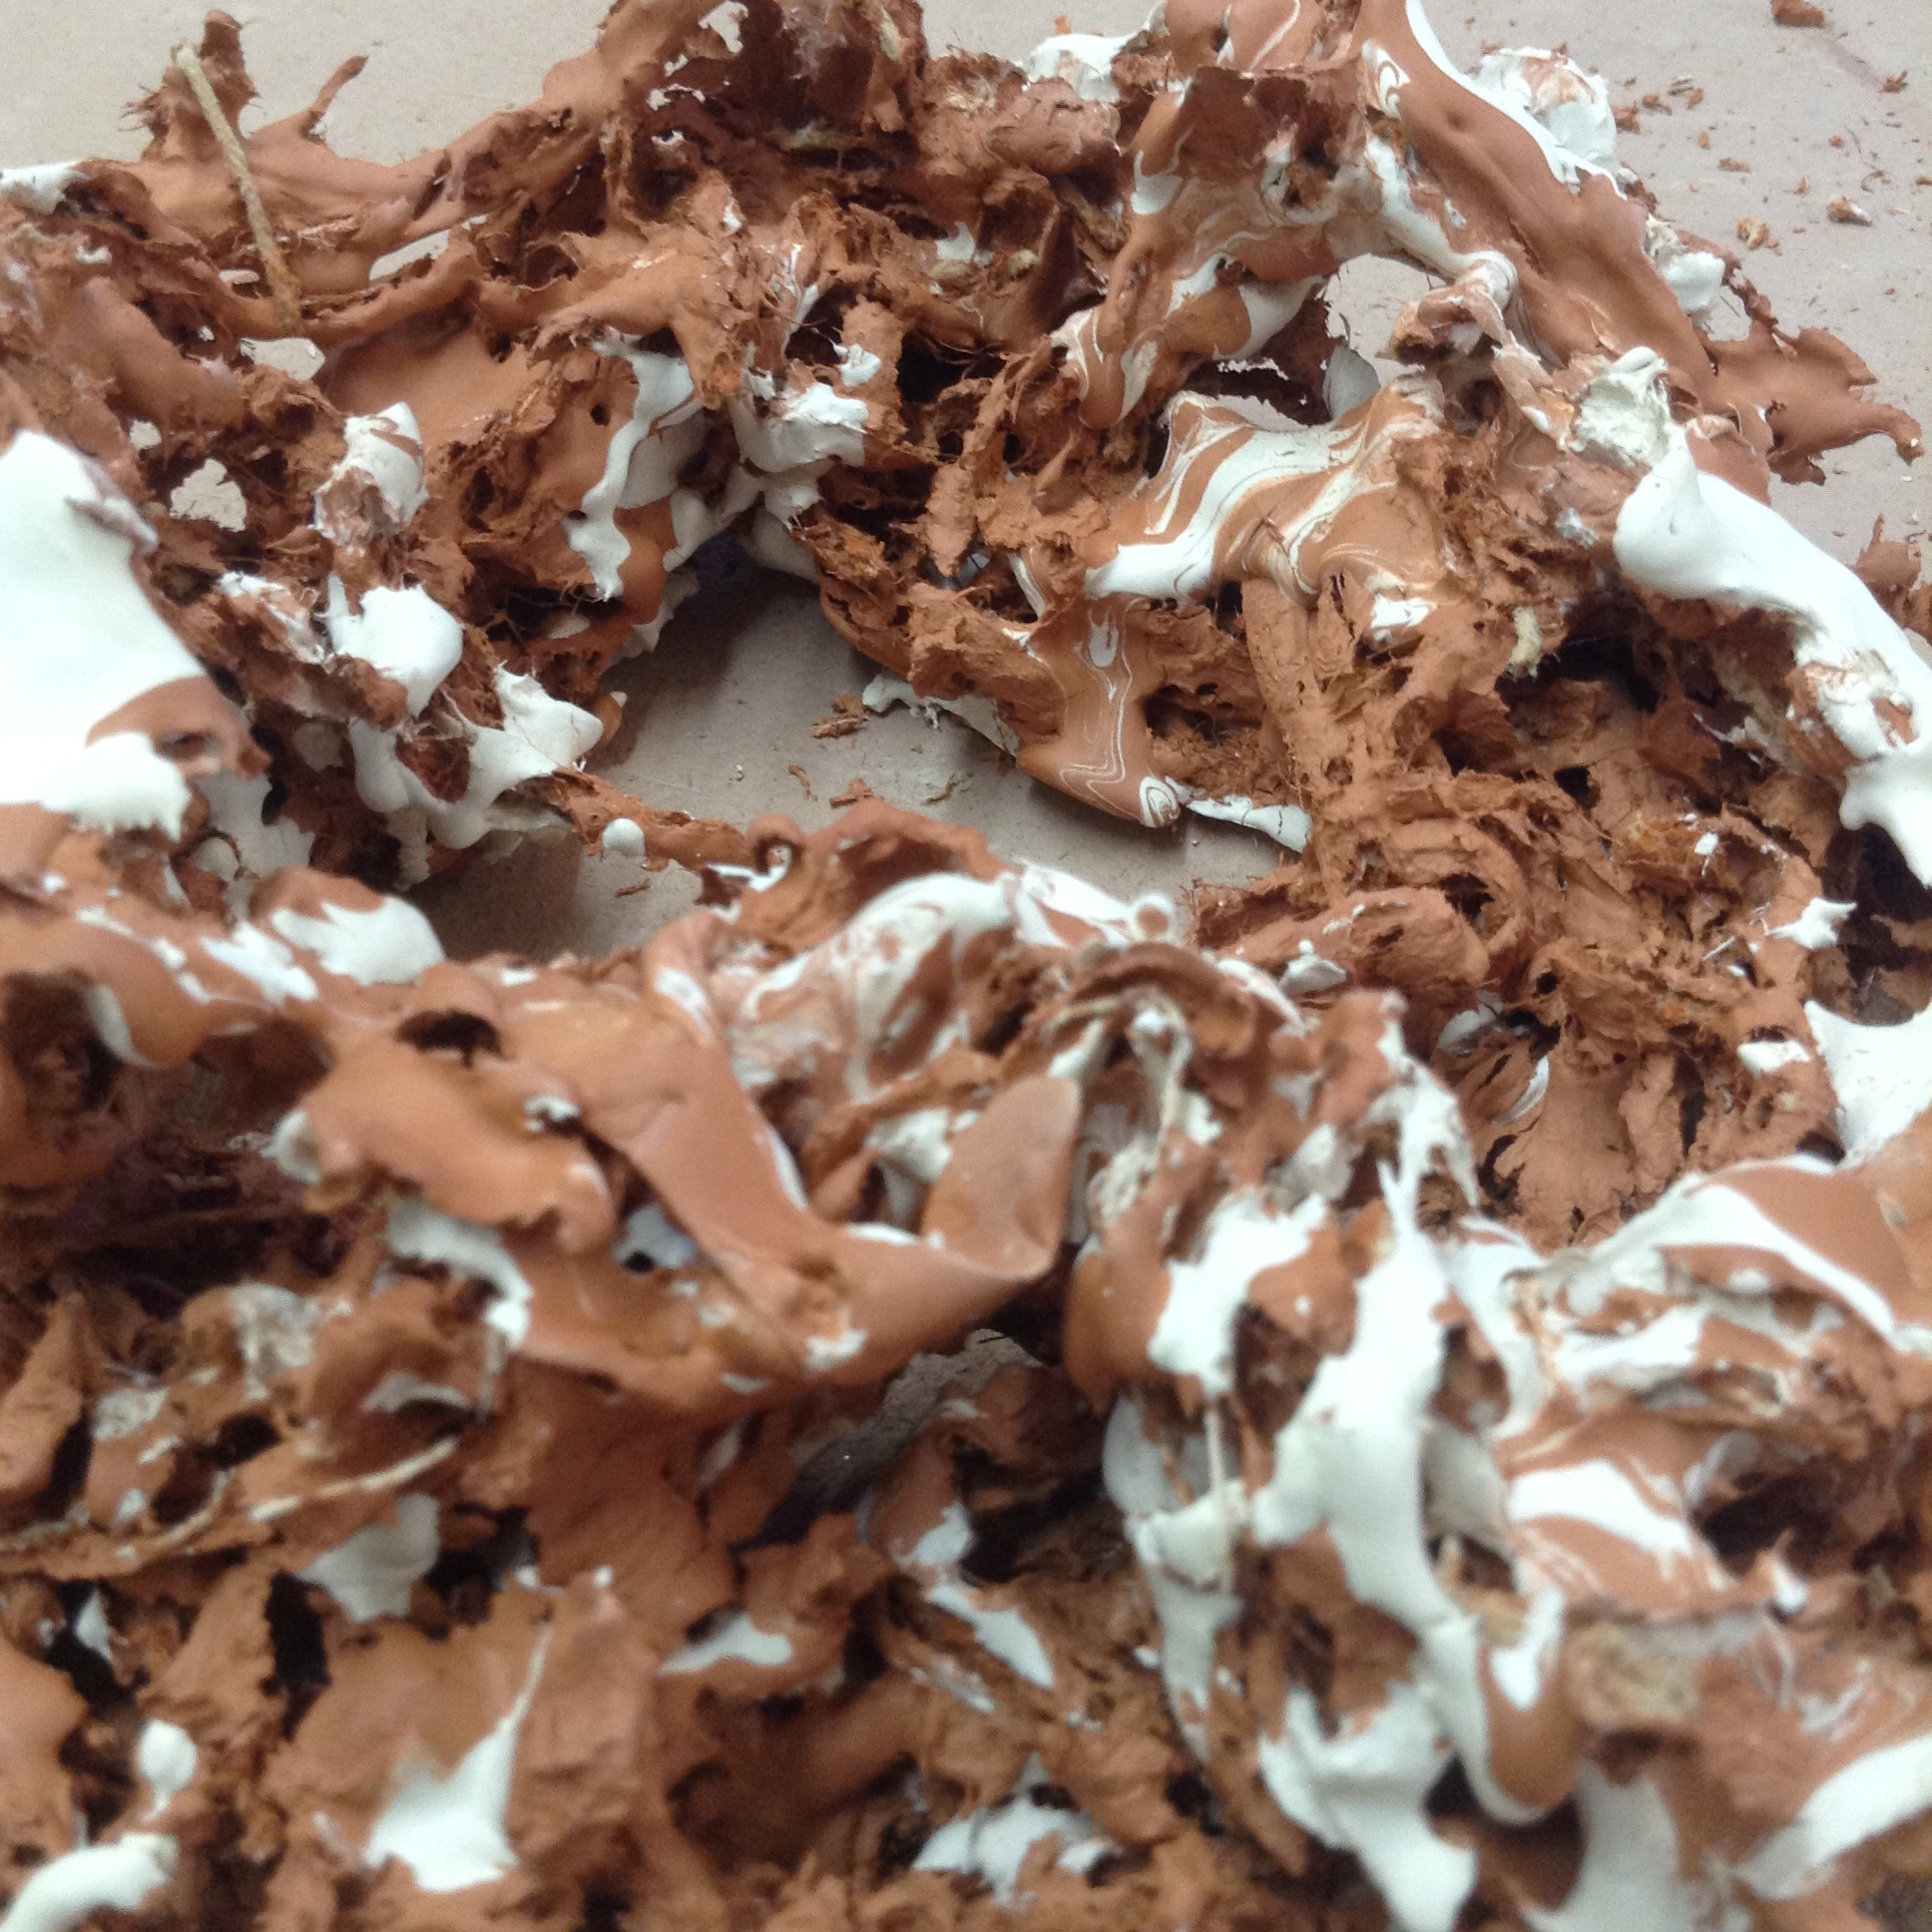
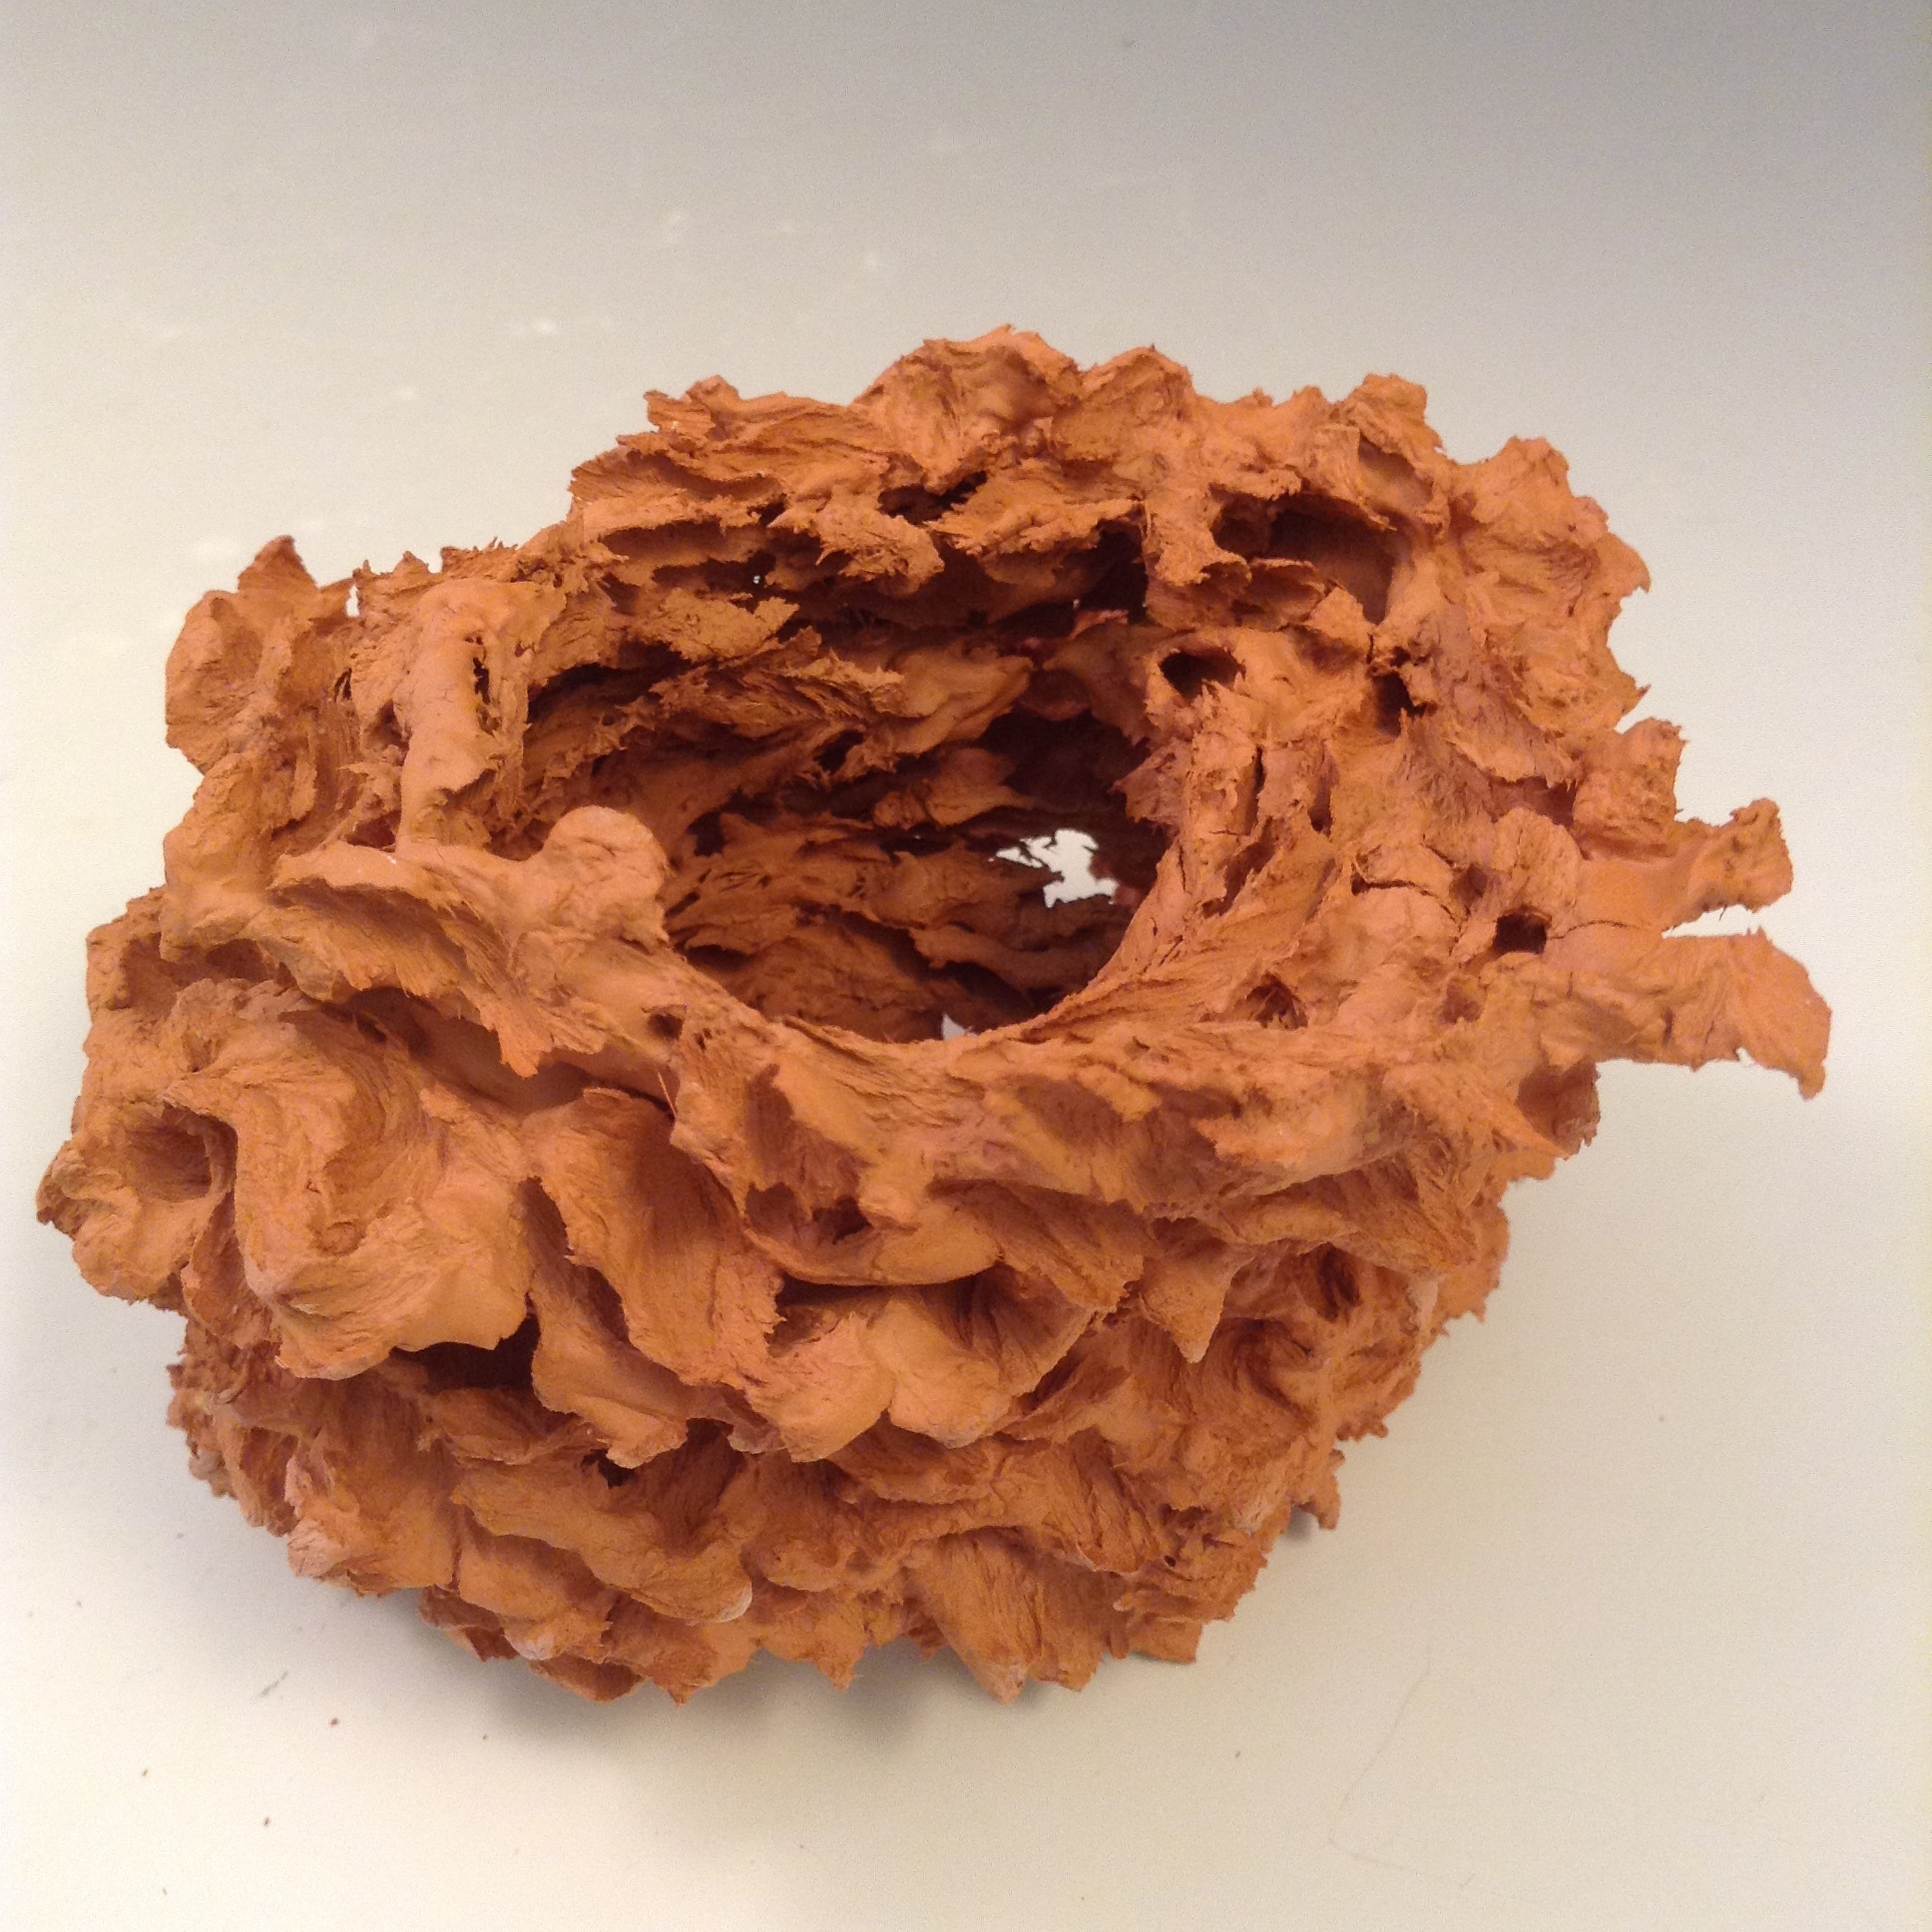

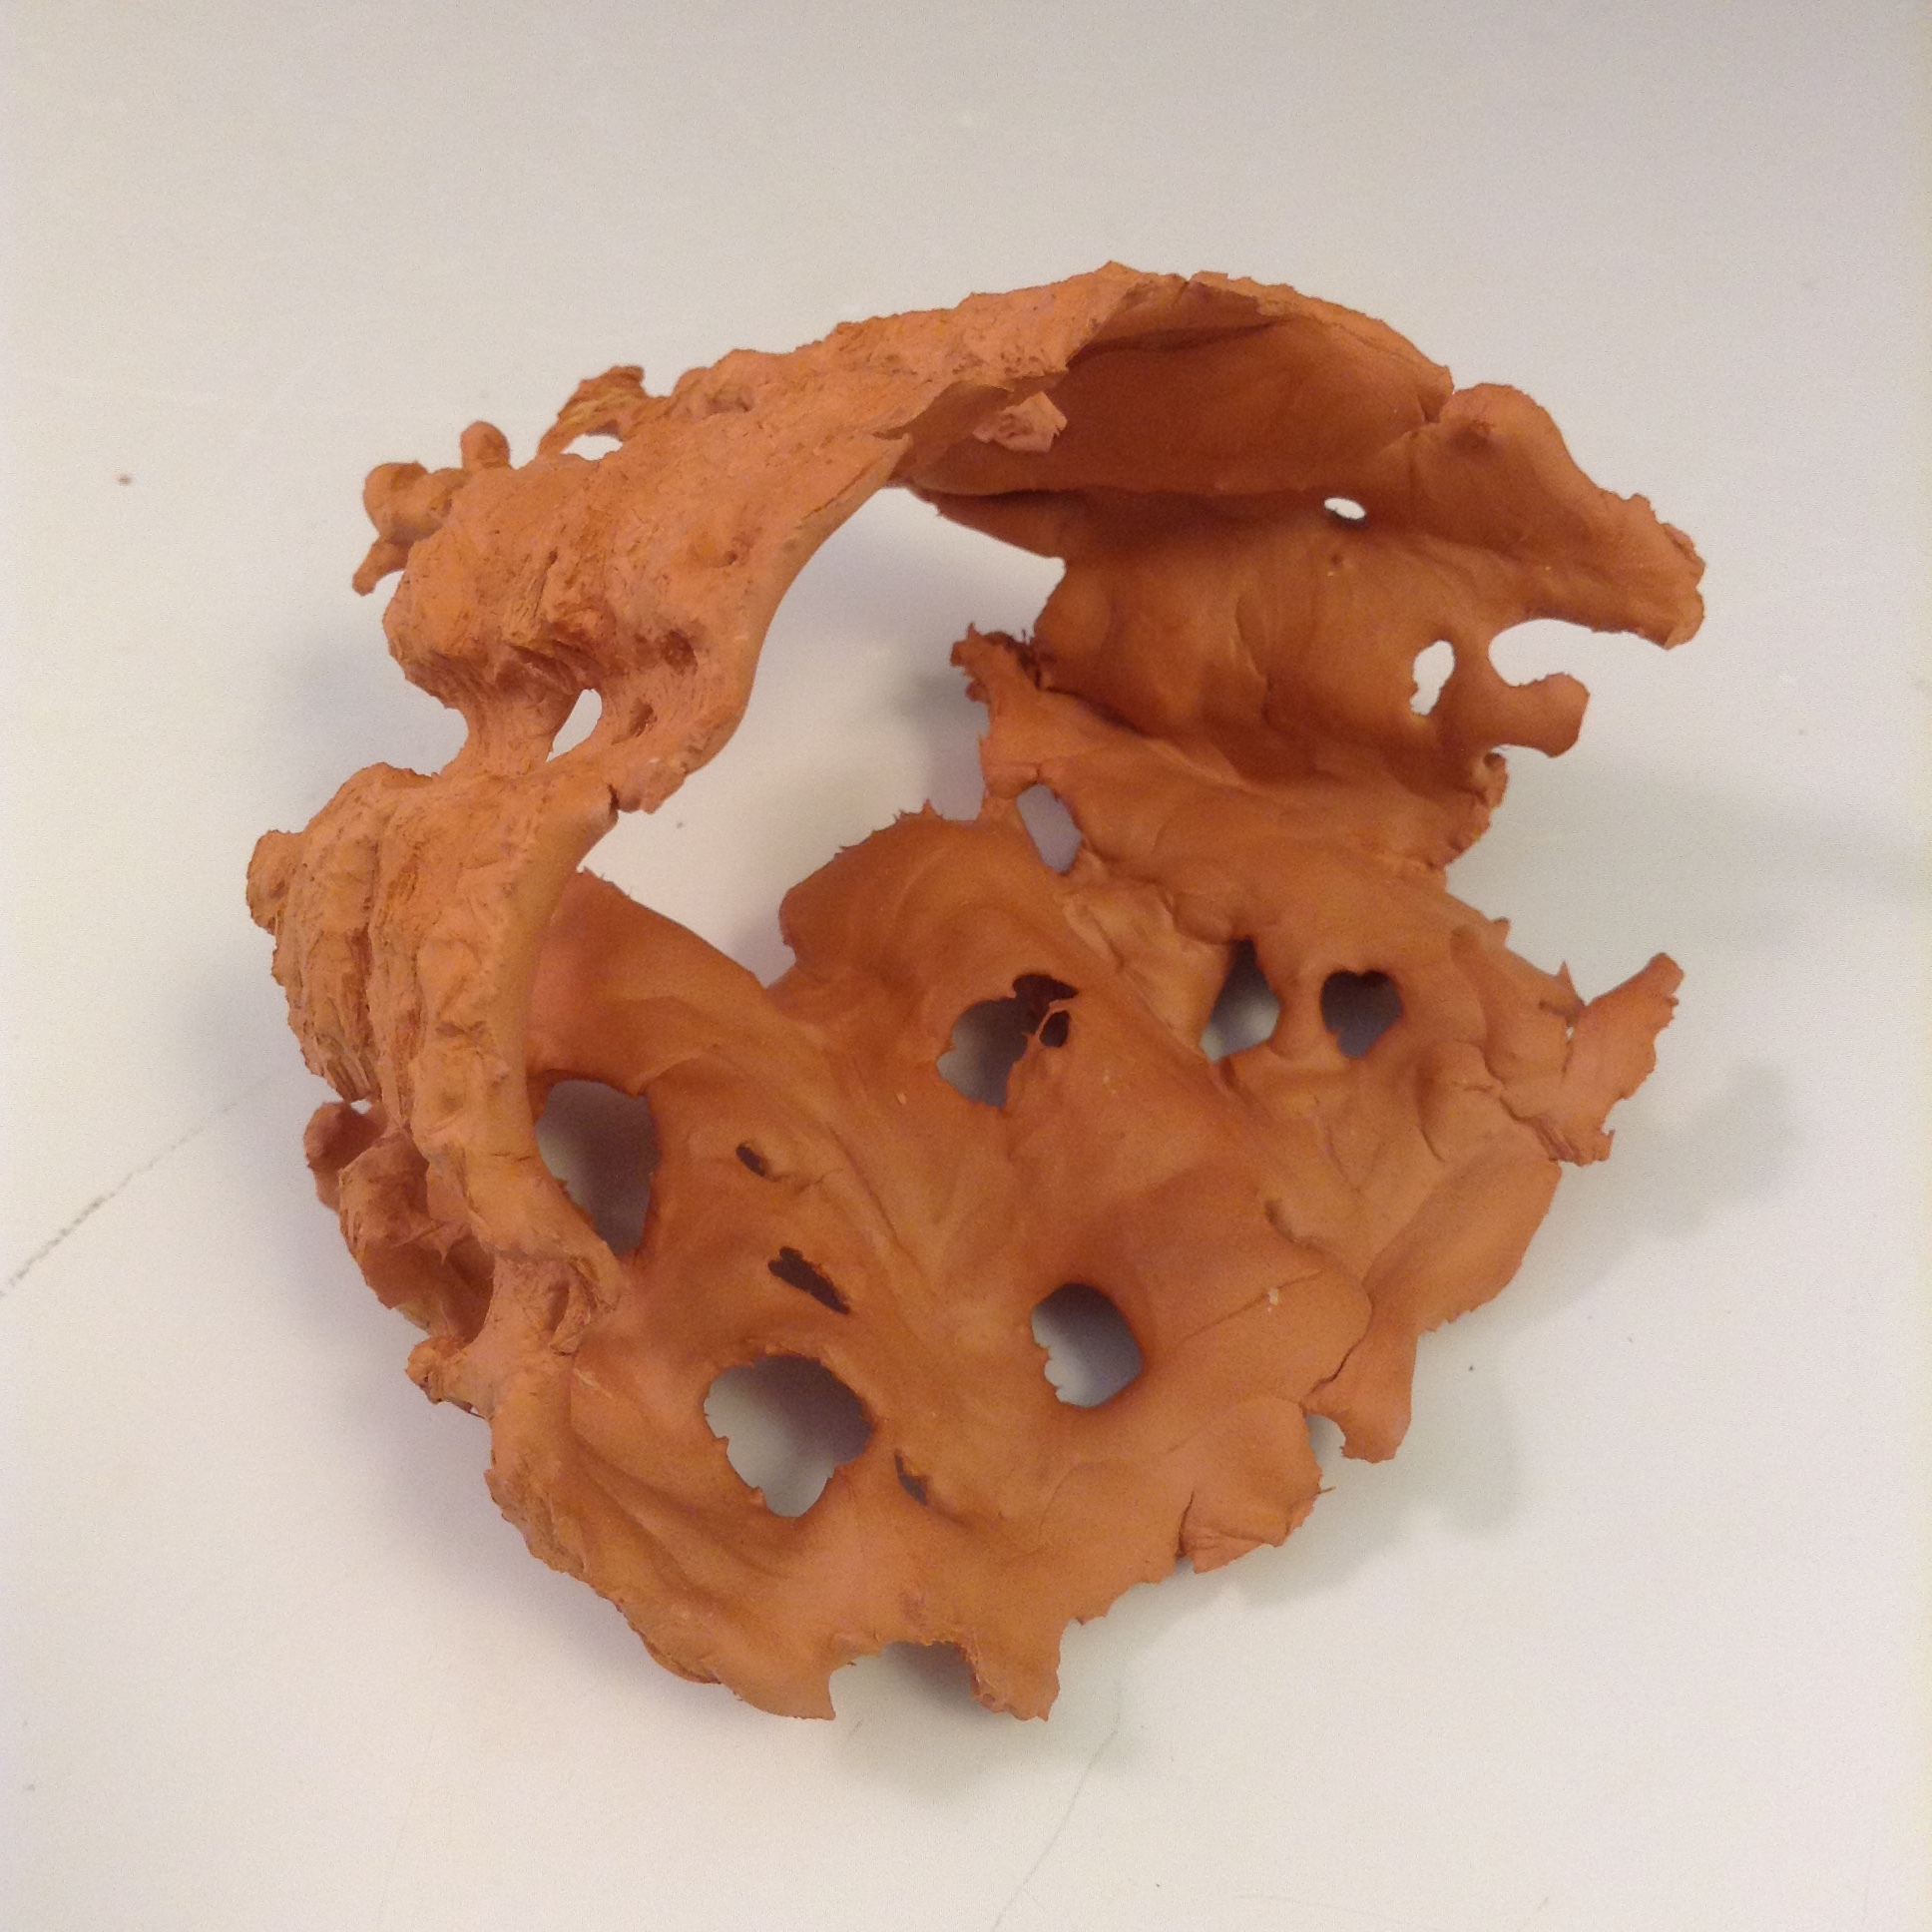
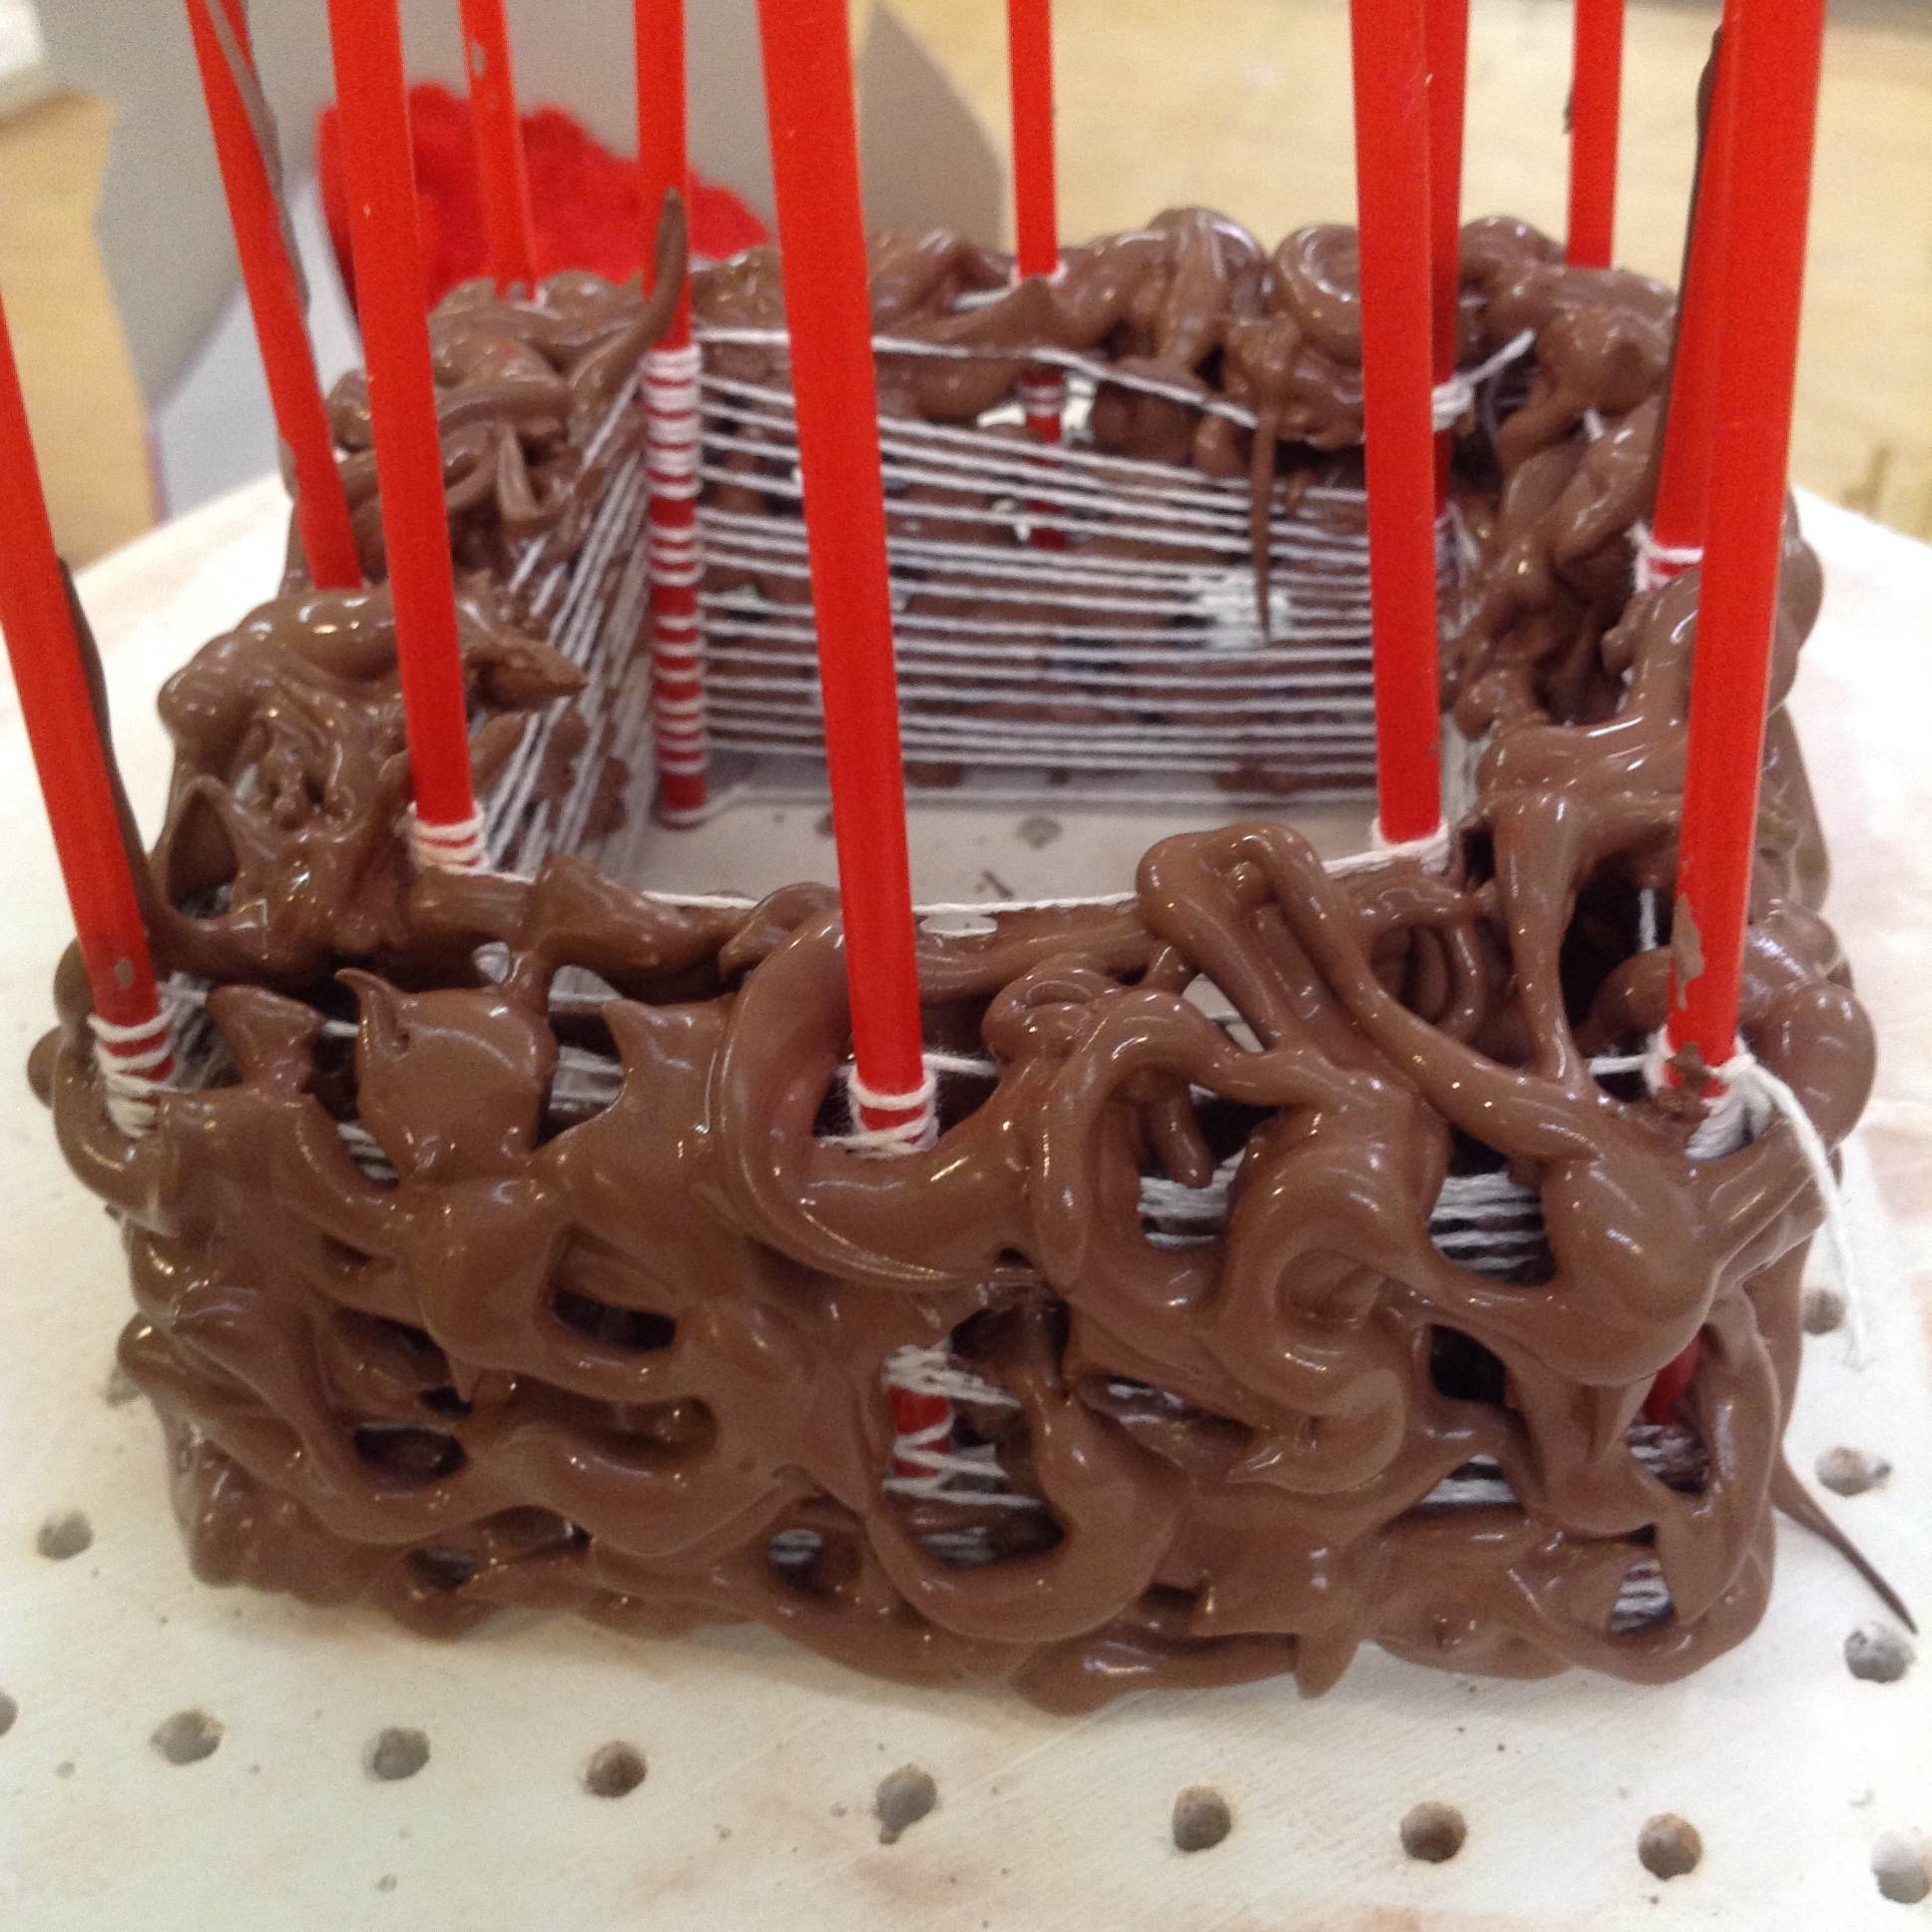
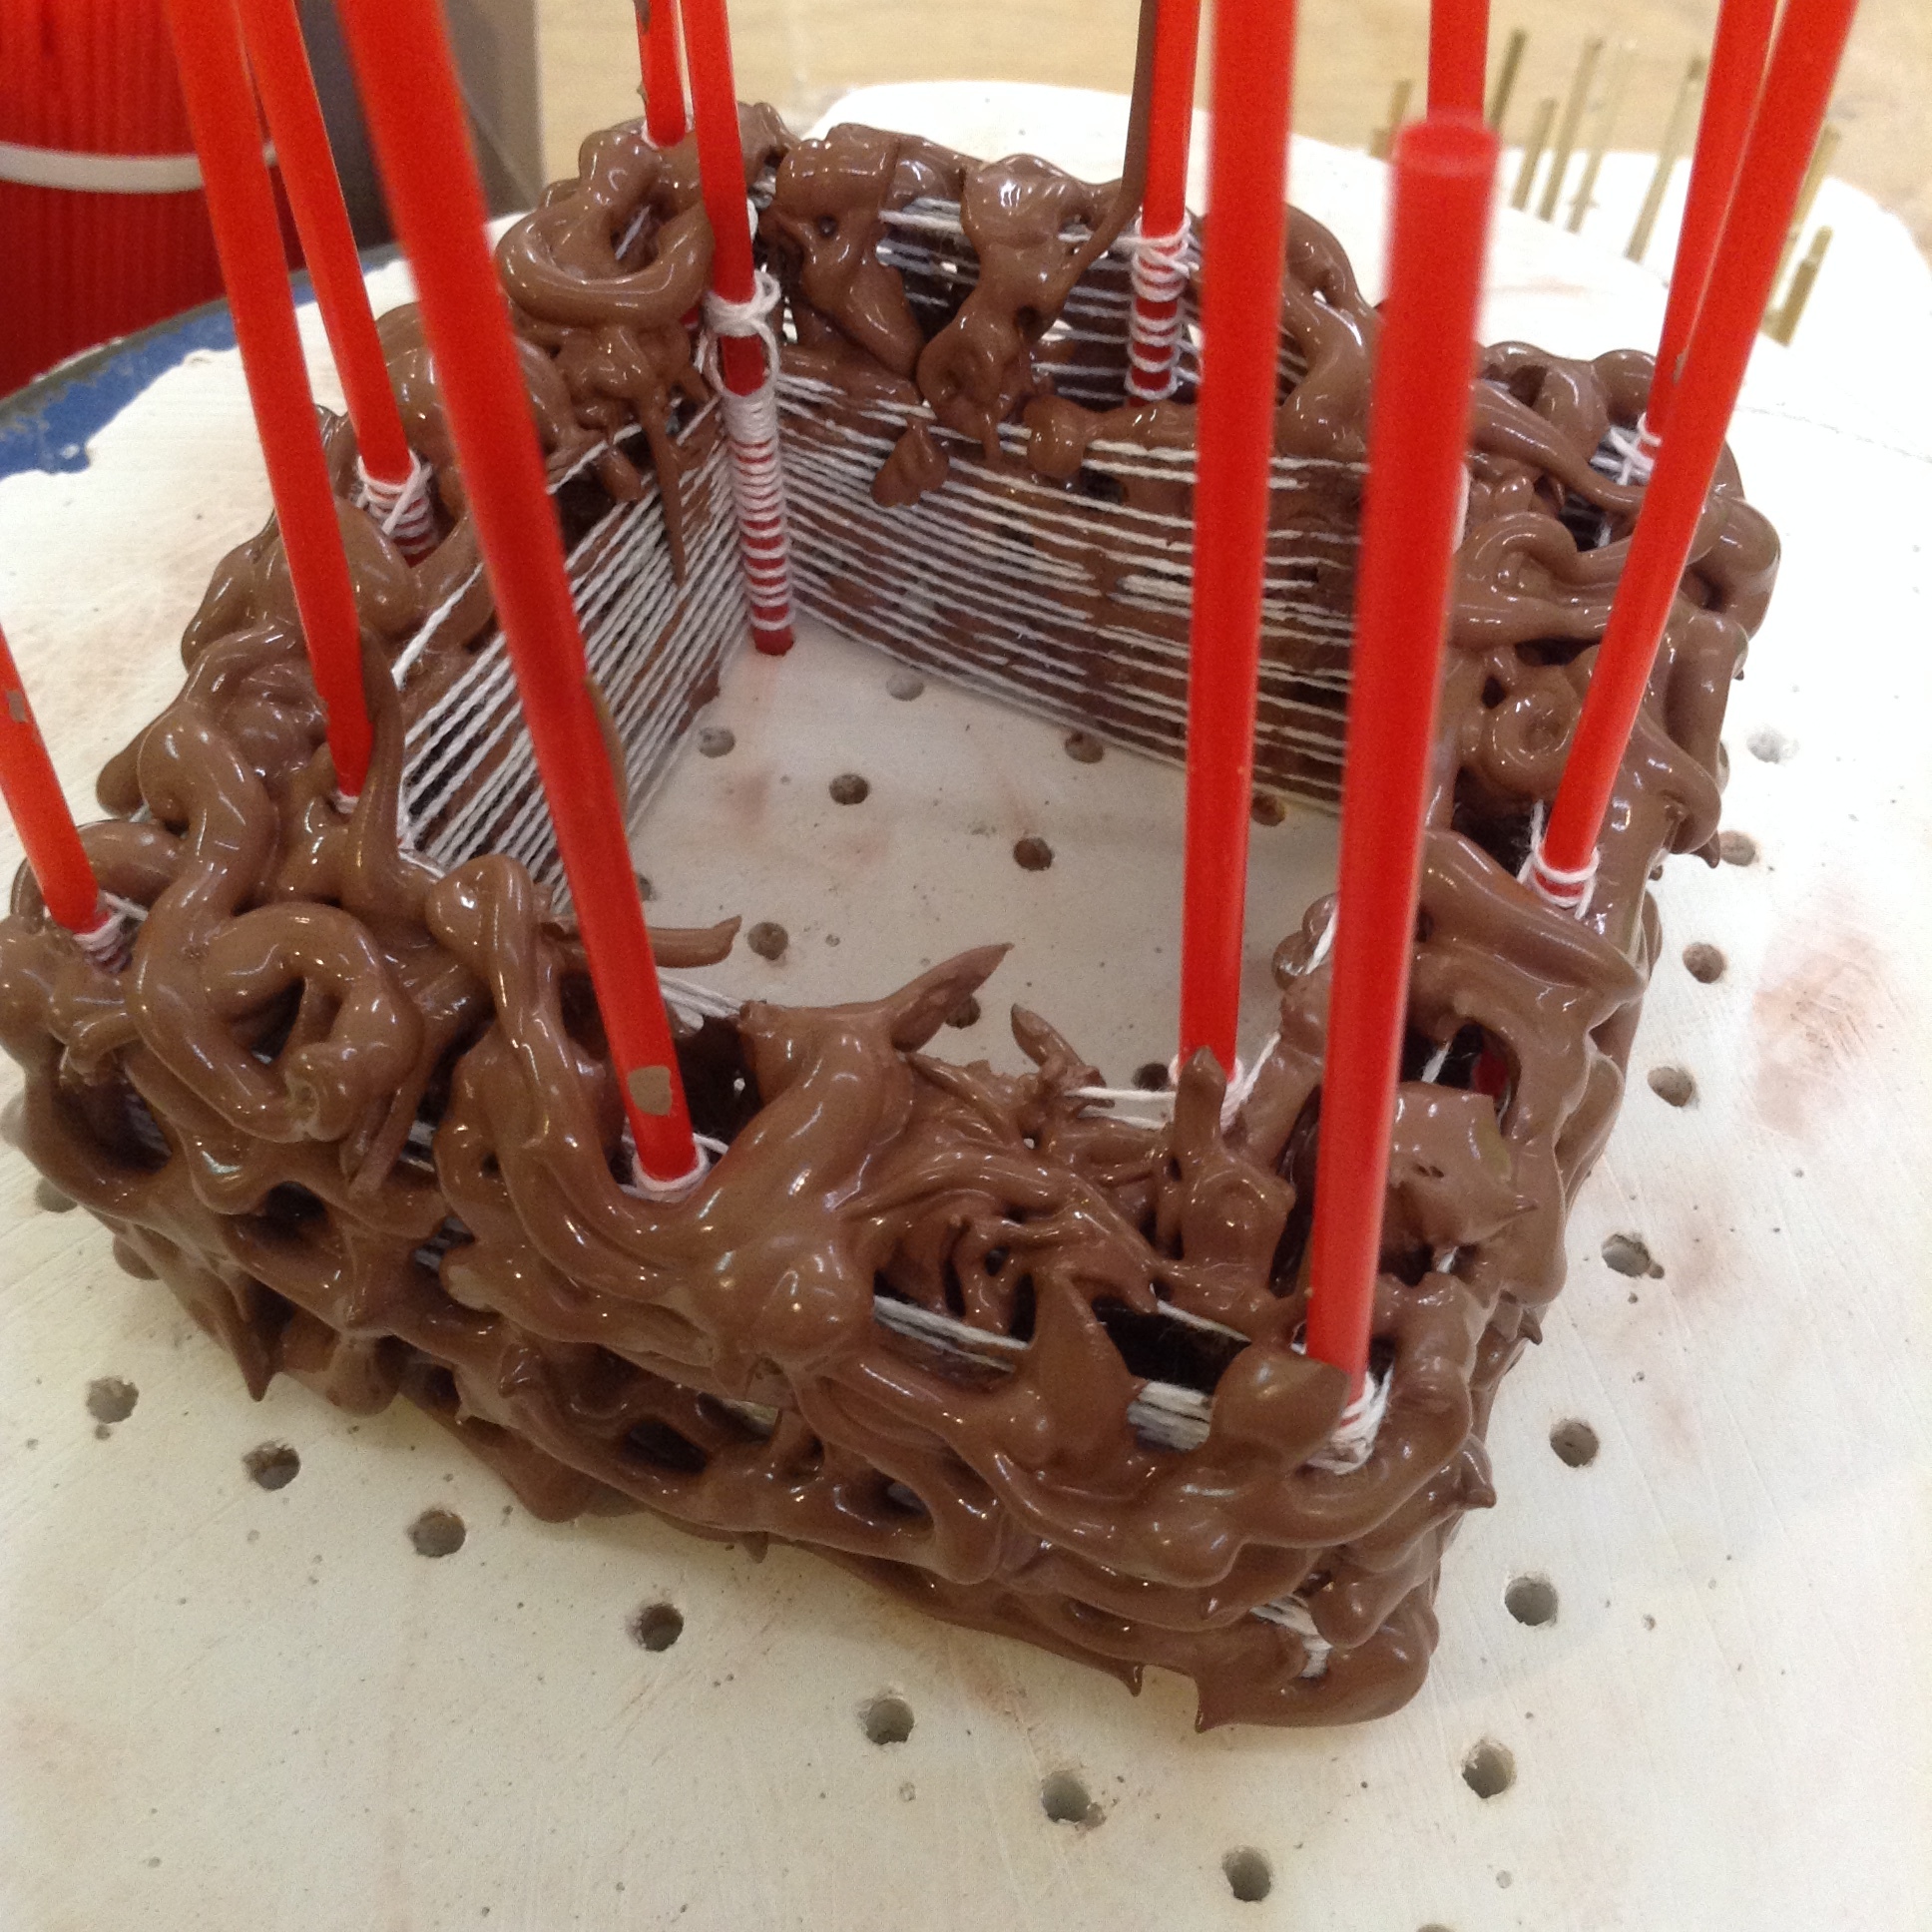
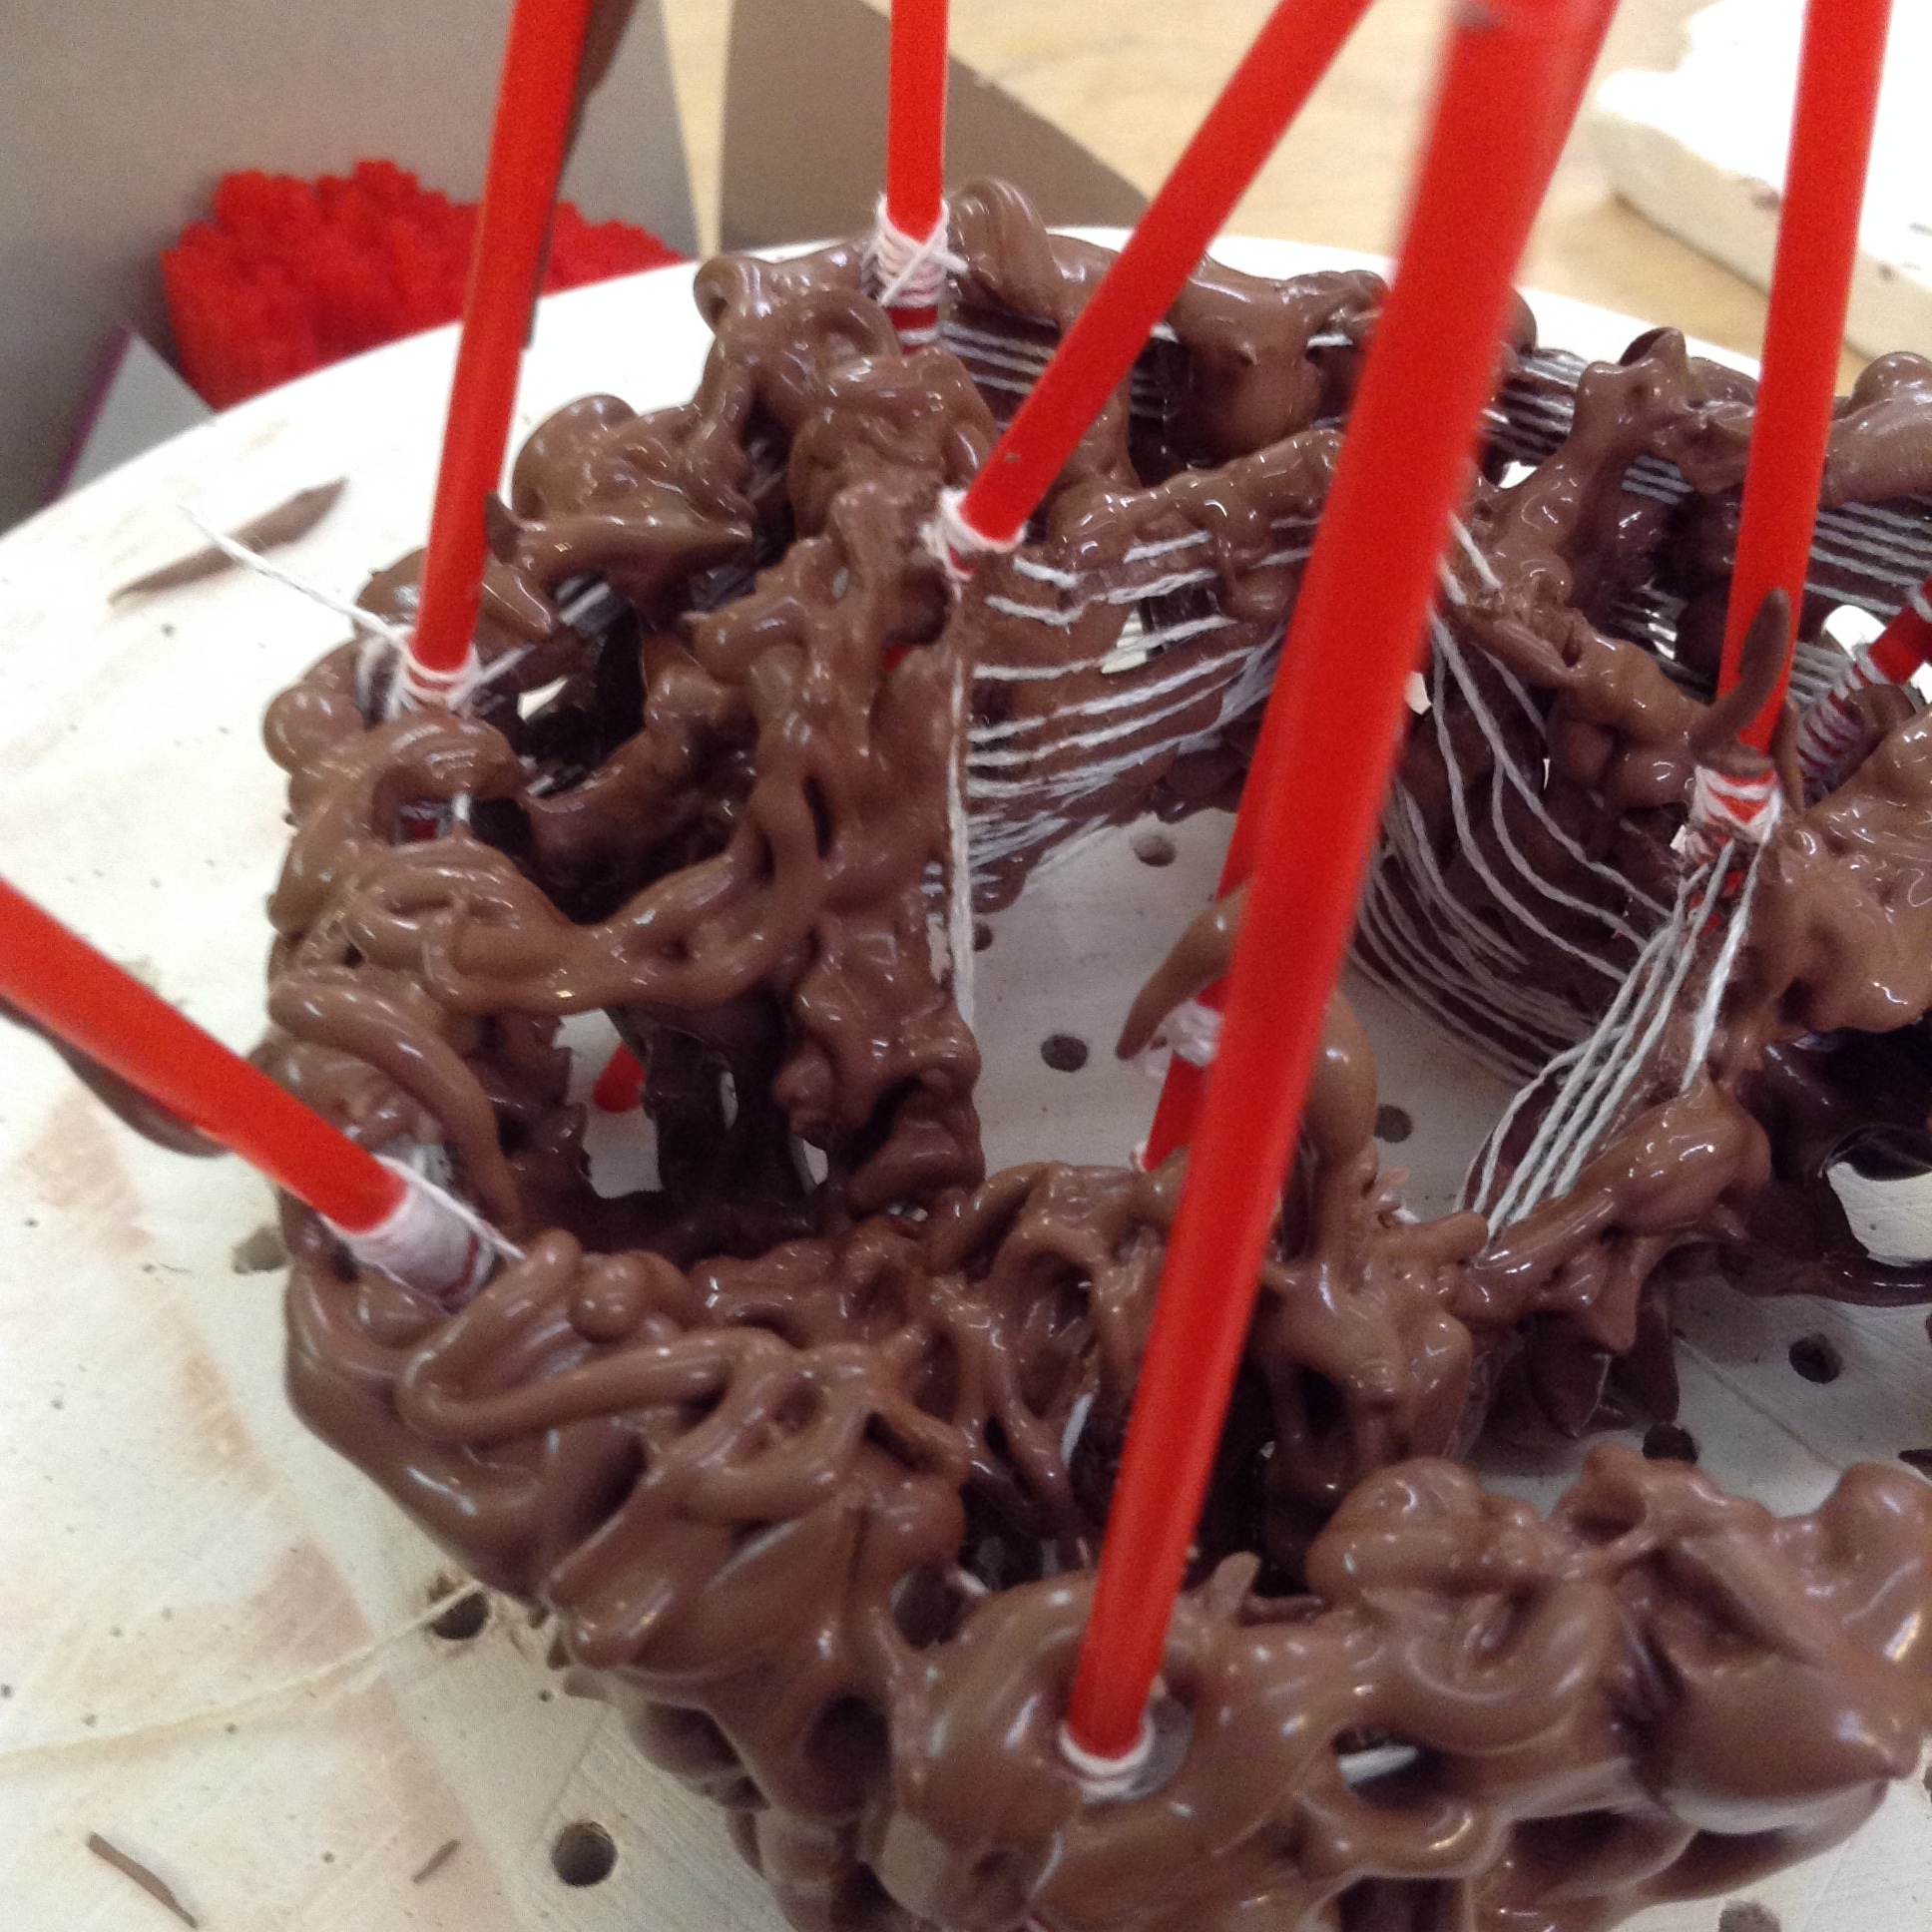
Slideshow of various results from string used as container and manipulator of wet clay slip.
A FEW VIDEOS AND CLIPS
Along the way I make little videos of things I want to remember. Take a look here to see some of the action.
This video shows tool making process for a plaster dome that has many holes in it for securing nails. These nails will be used to hold woven strings, that in turn will be used to shape liquid clay slip as a experimental ceramics technique.
The dome in this video is shown as the large dome with holes.
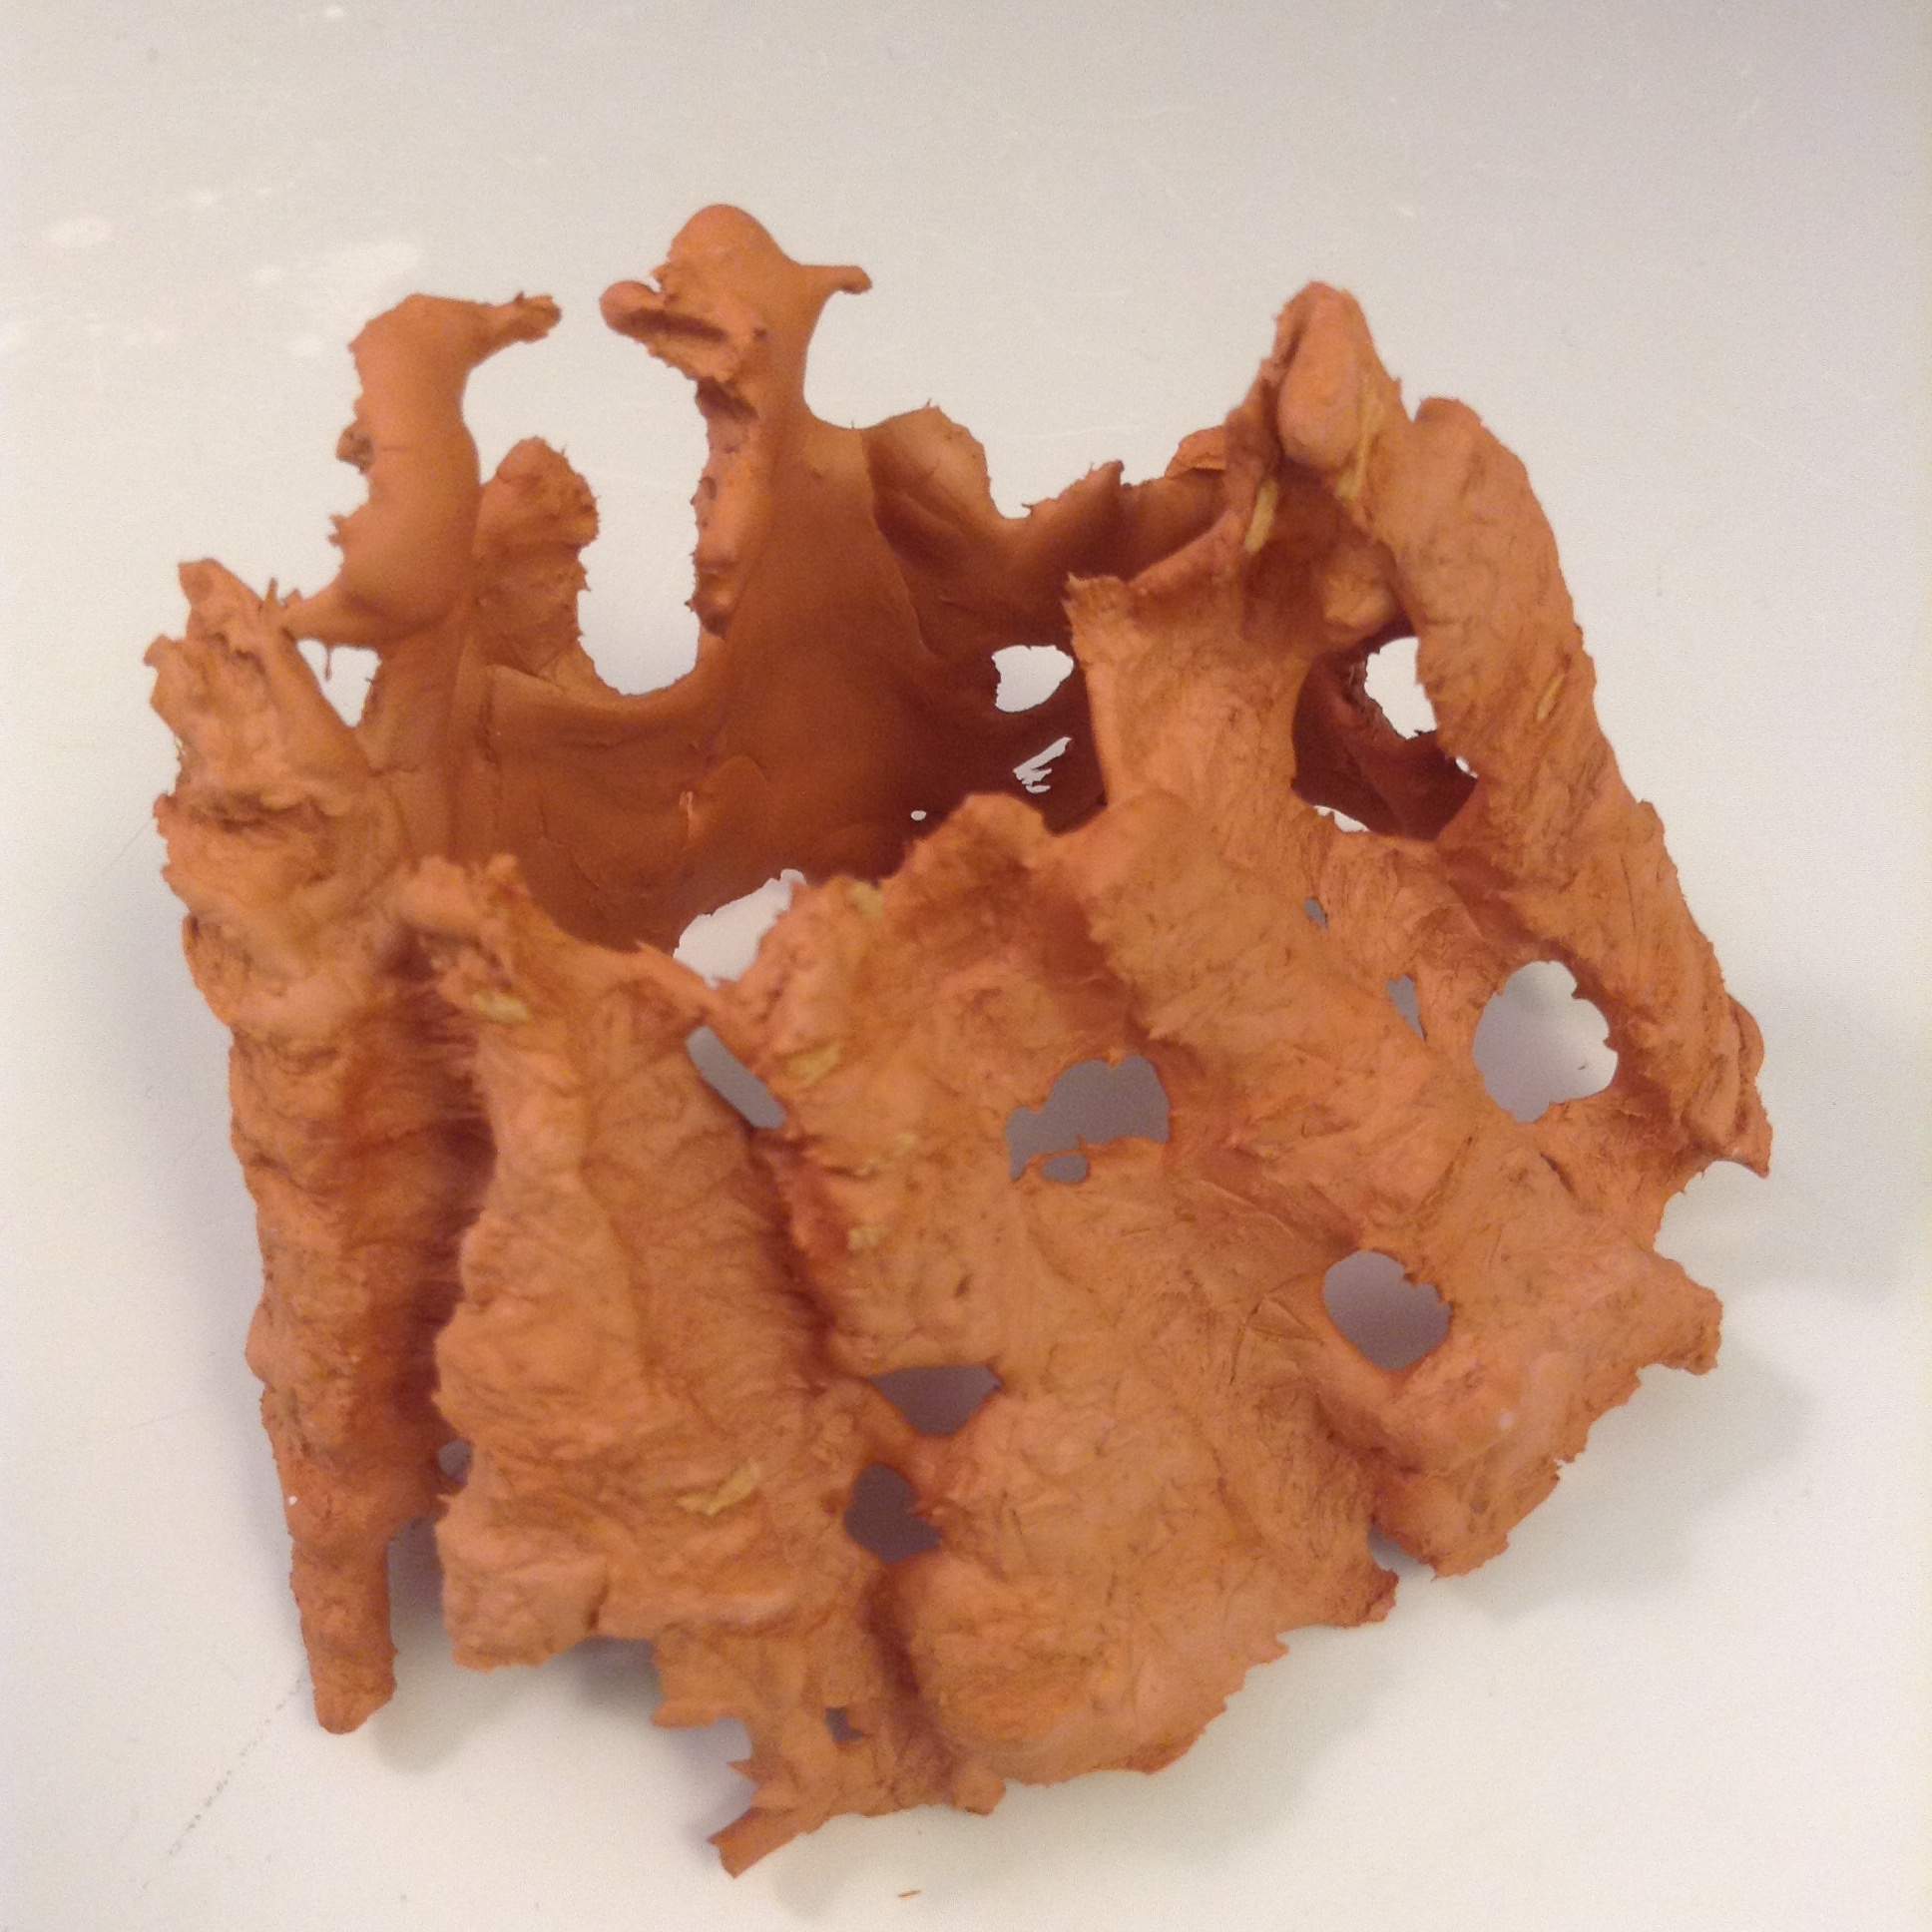
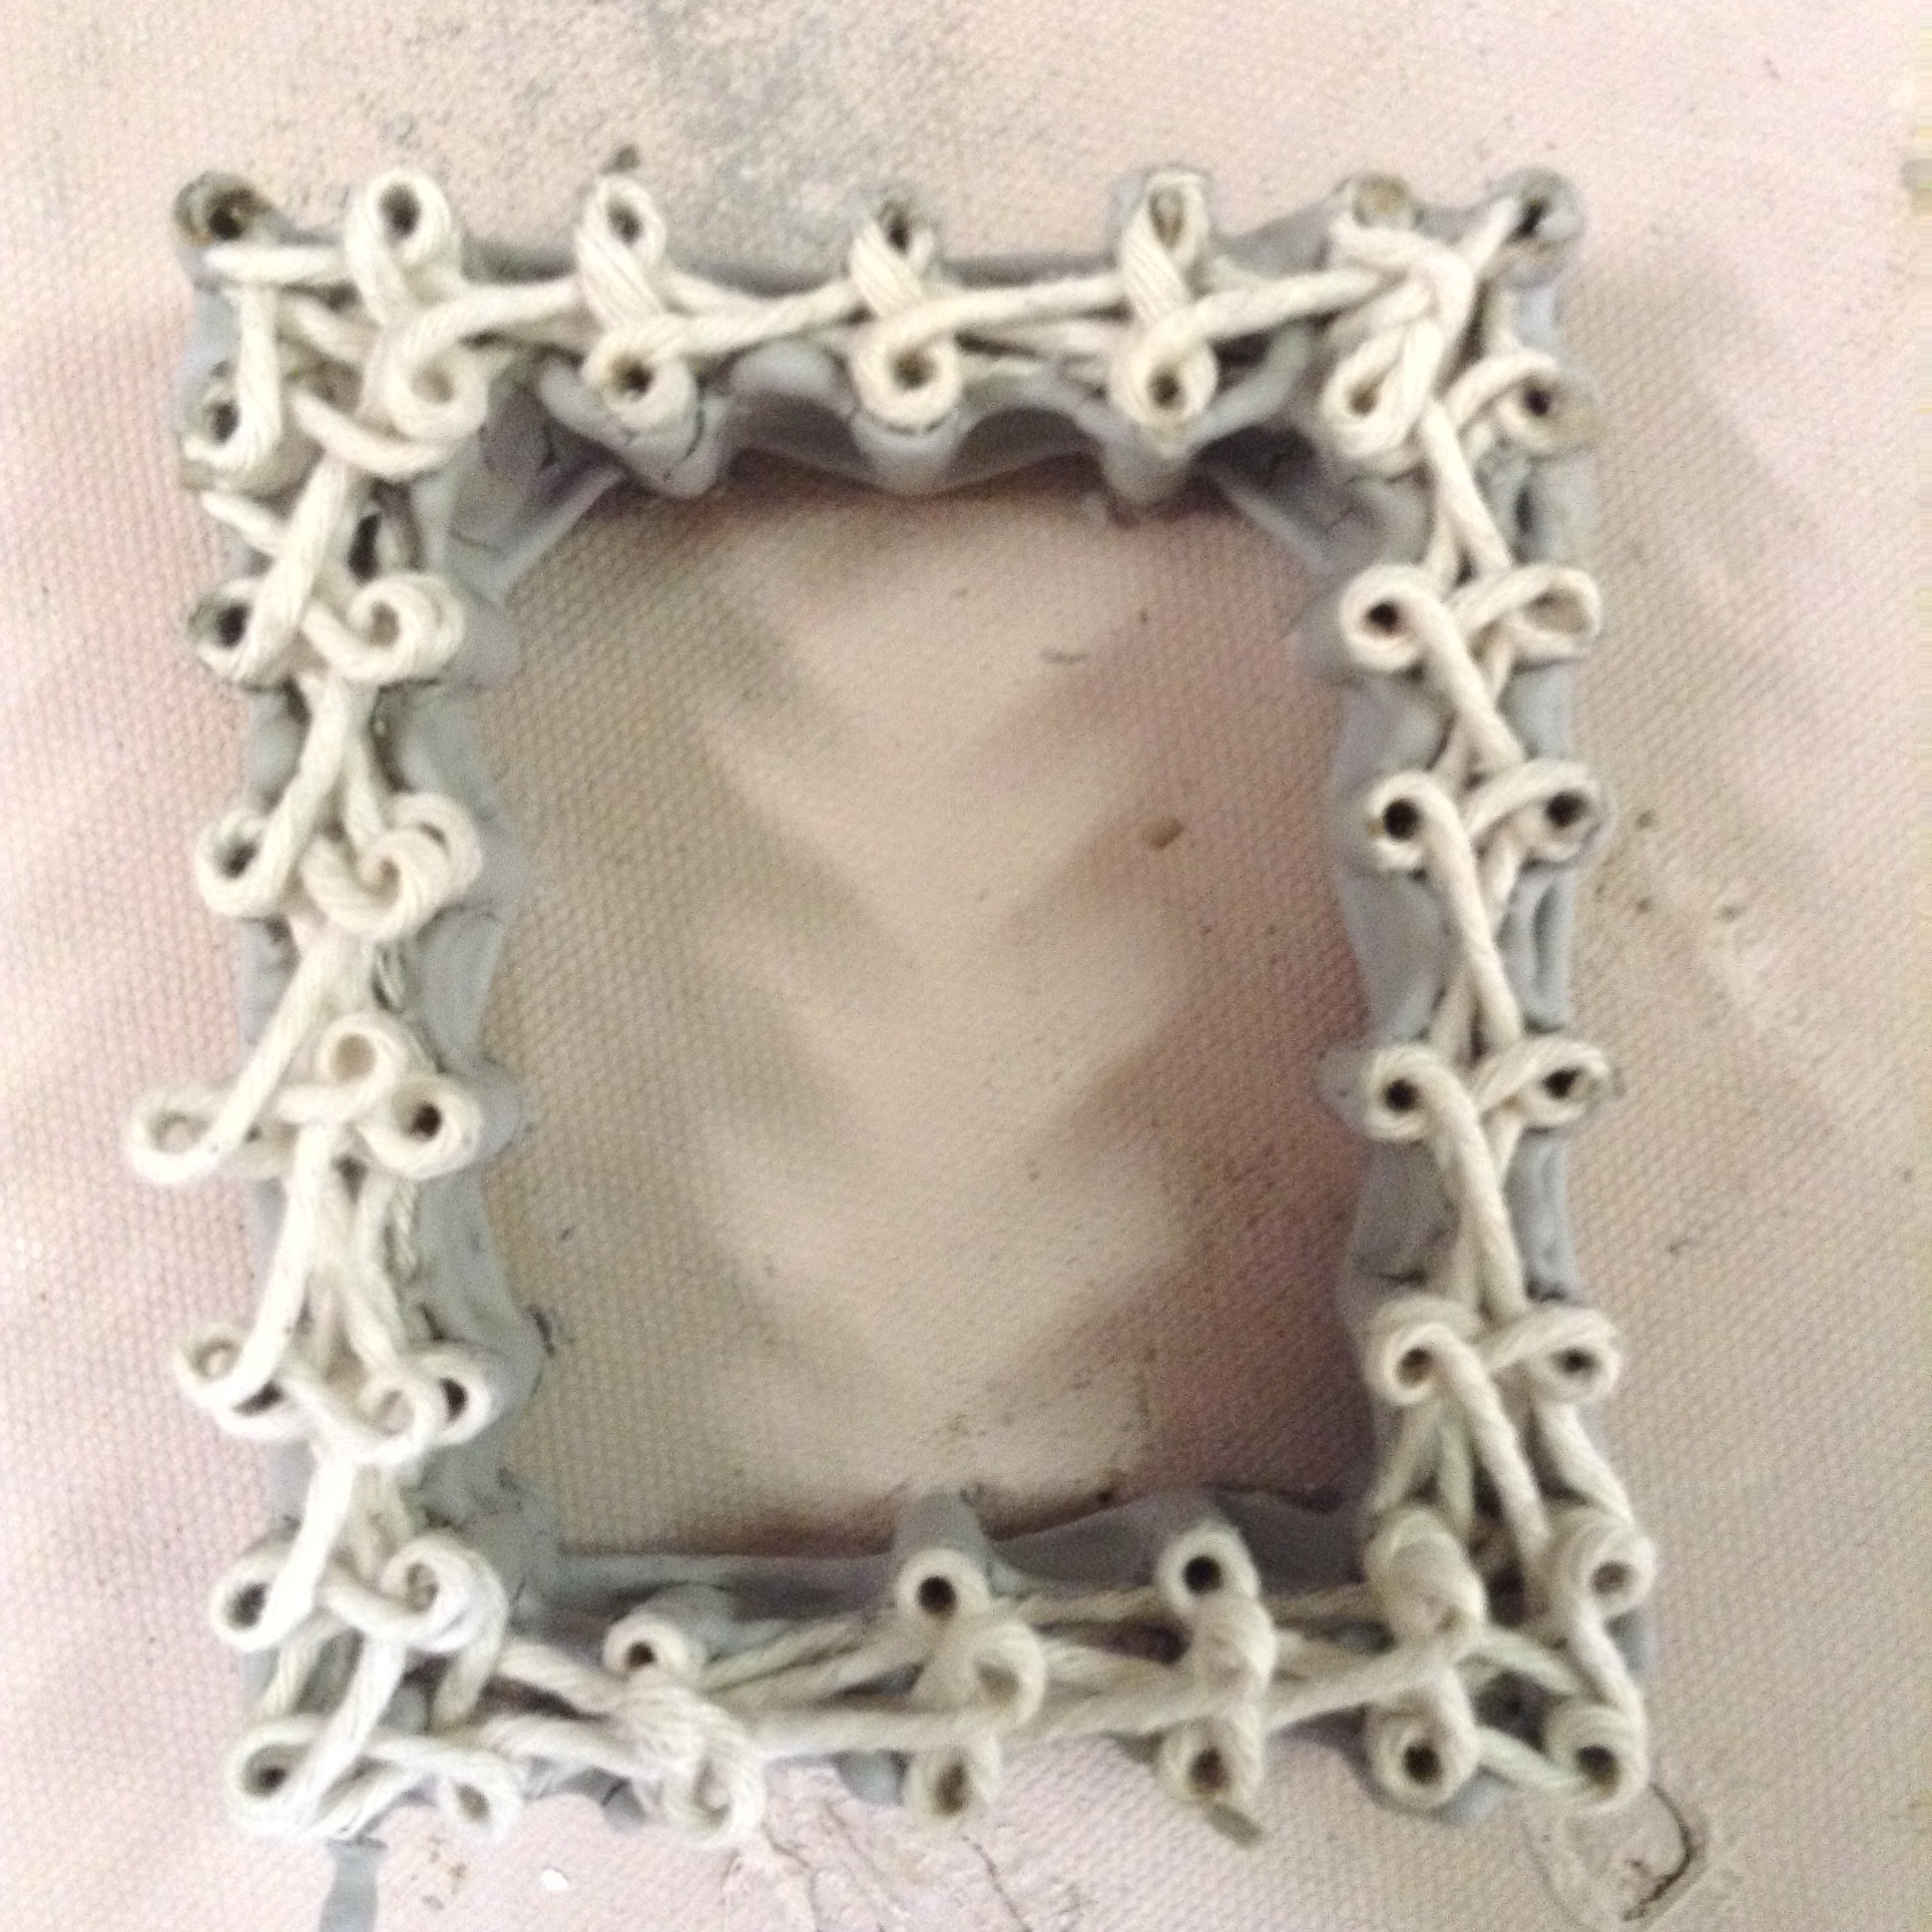
Two circular rings of nails hold two types of string: a heavy twine, and a thinner kitchen string. The nails being pulled are holding all the strings in place while wet clay frosting settles inside. After this video was shot, the string form was distorted, taking the clay with it.
The inner lining was so thin to begin with, that after stretching it was in tatters. But since the layers were close to the stronger outer layer, they held on. Looks like tree bark.
This form is shown as finished in the gallery above.
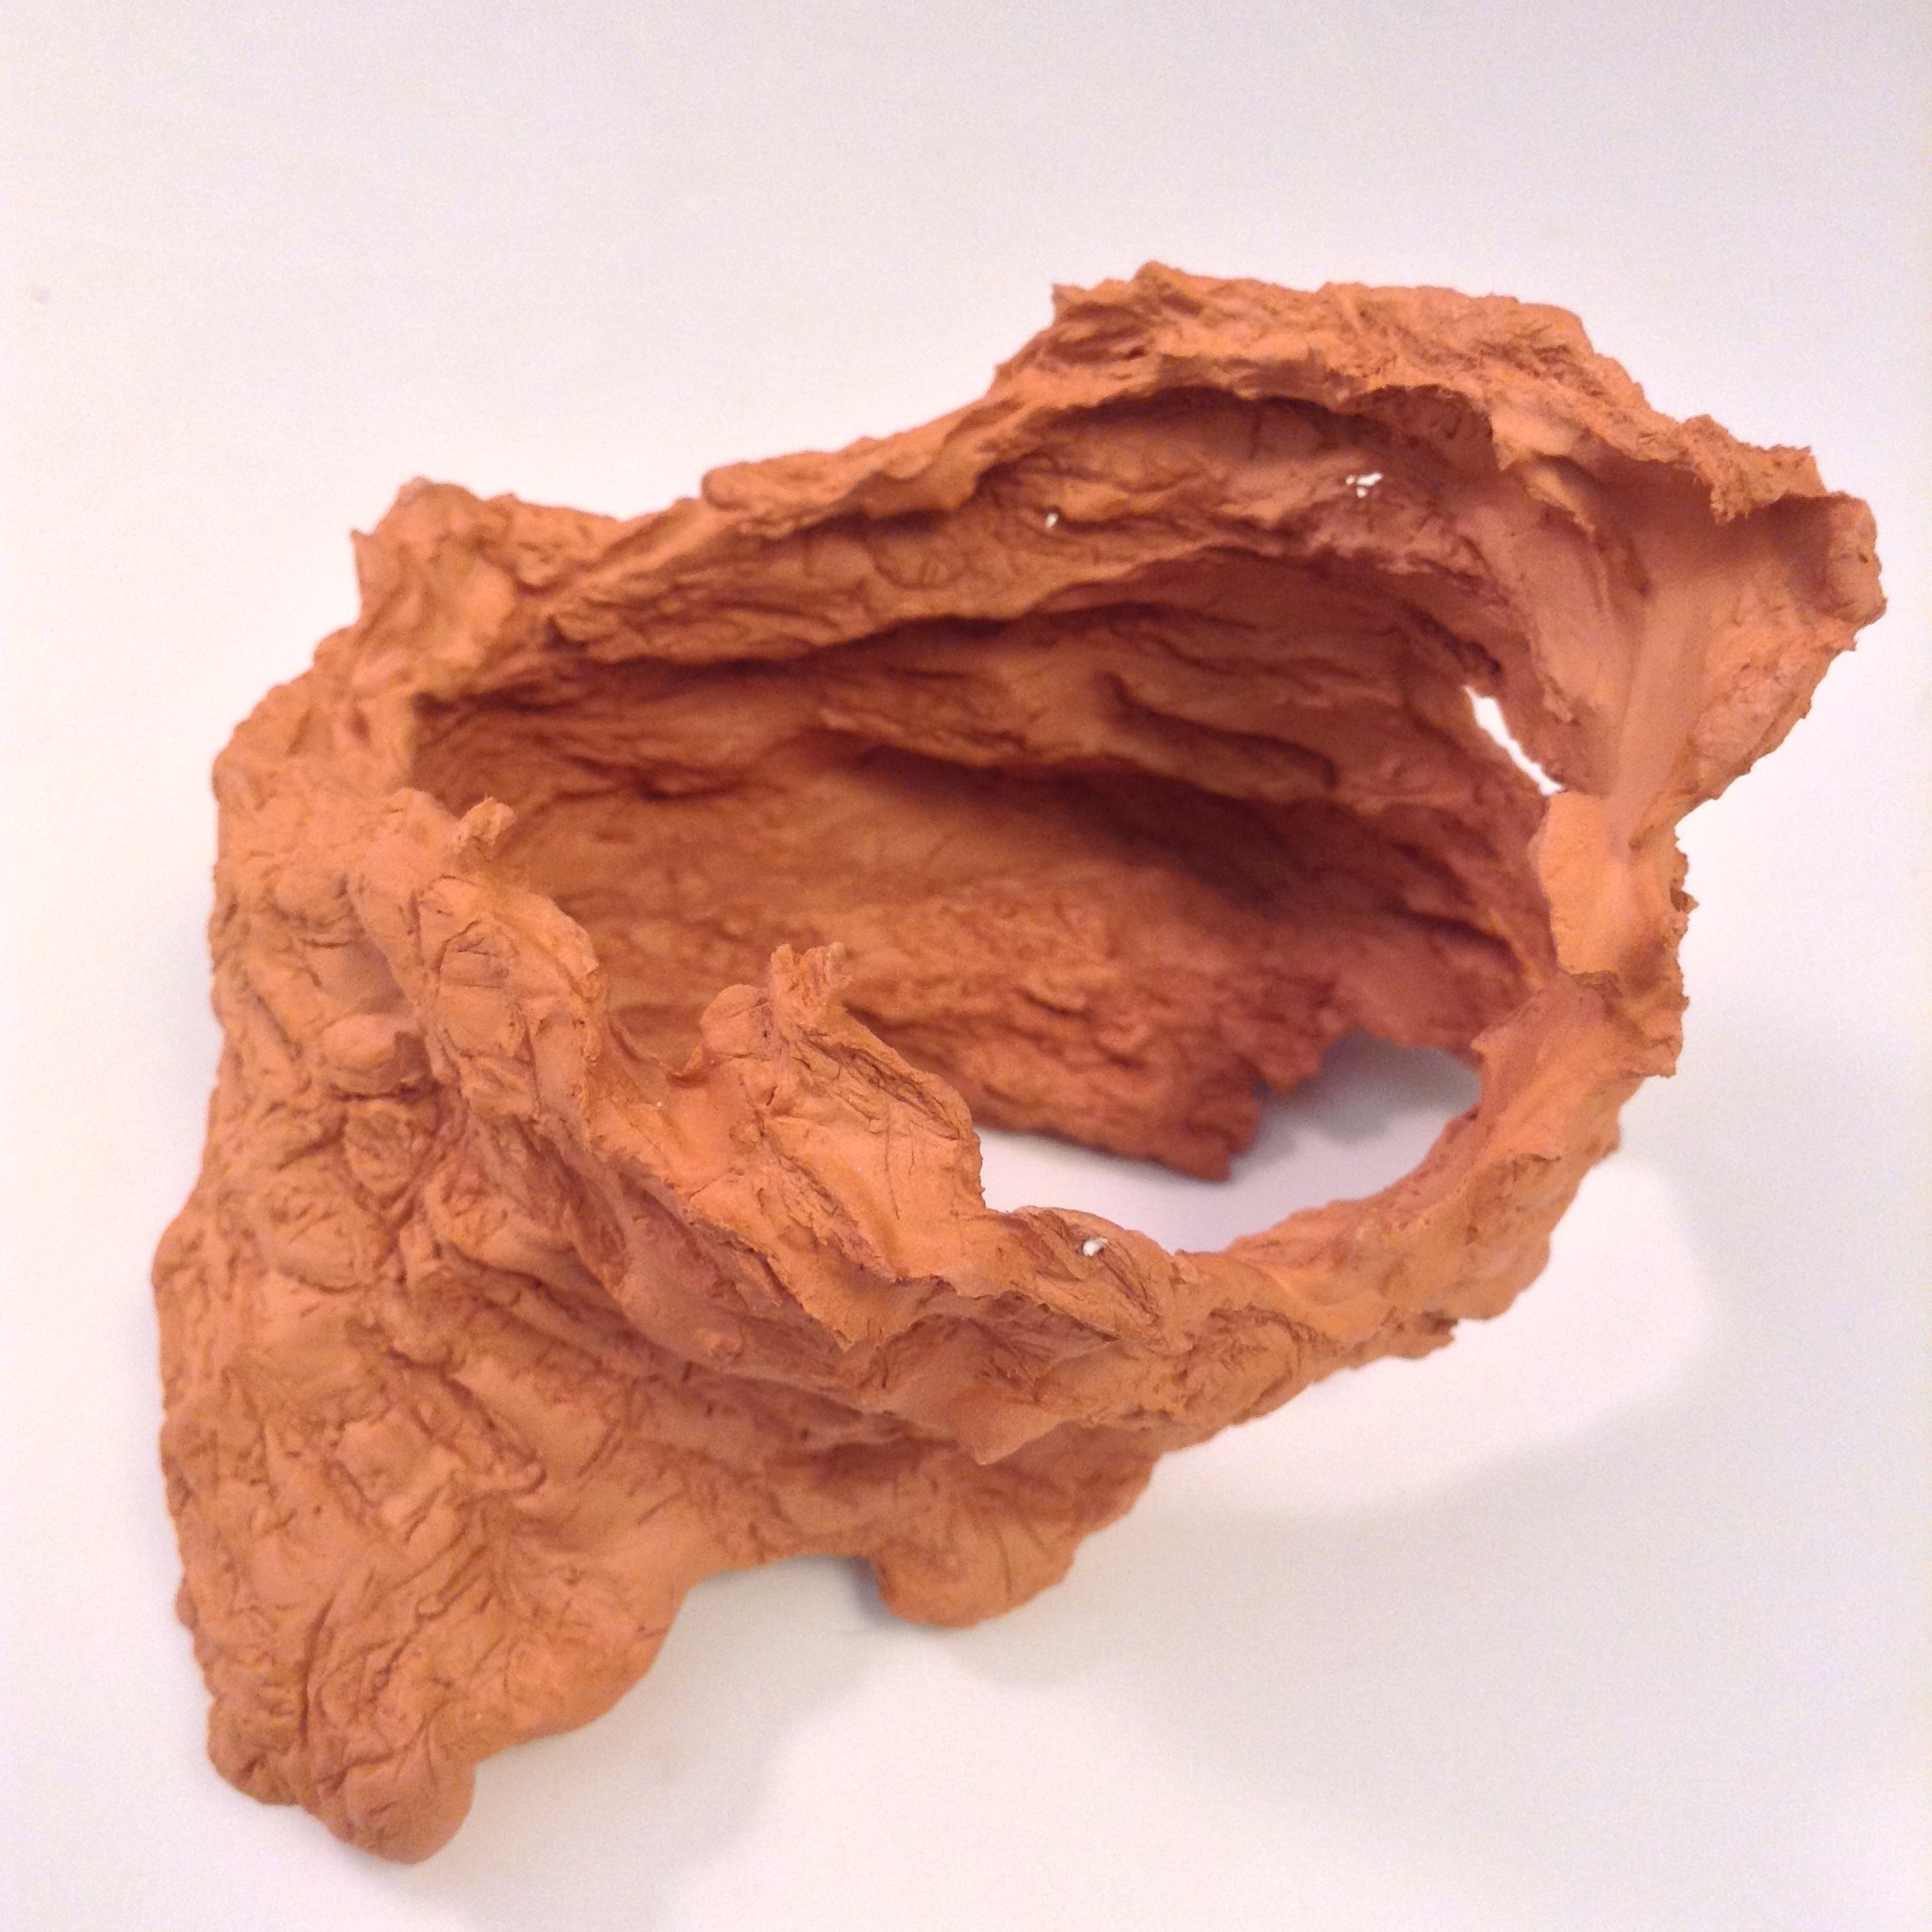
After the last two nails are pulled out, the knotted twine wrapping is distorted by hand, changing the clay slip inside into a wonderful gnarly shape.
The piece resulting from this mesh is in the gallery above.
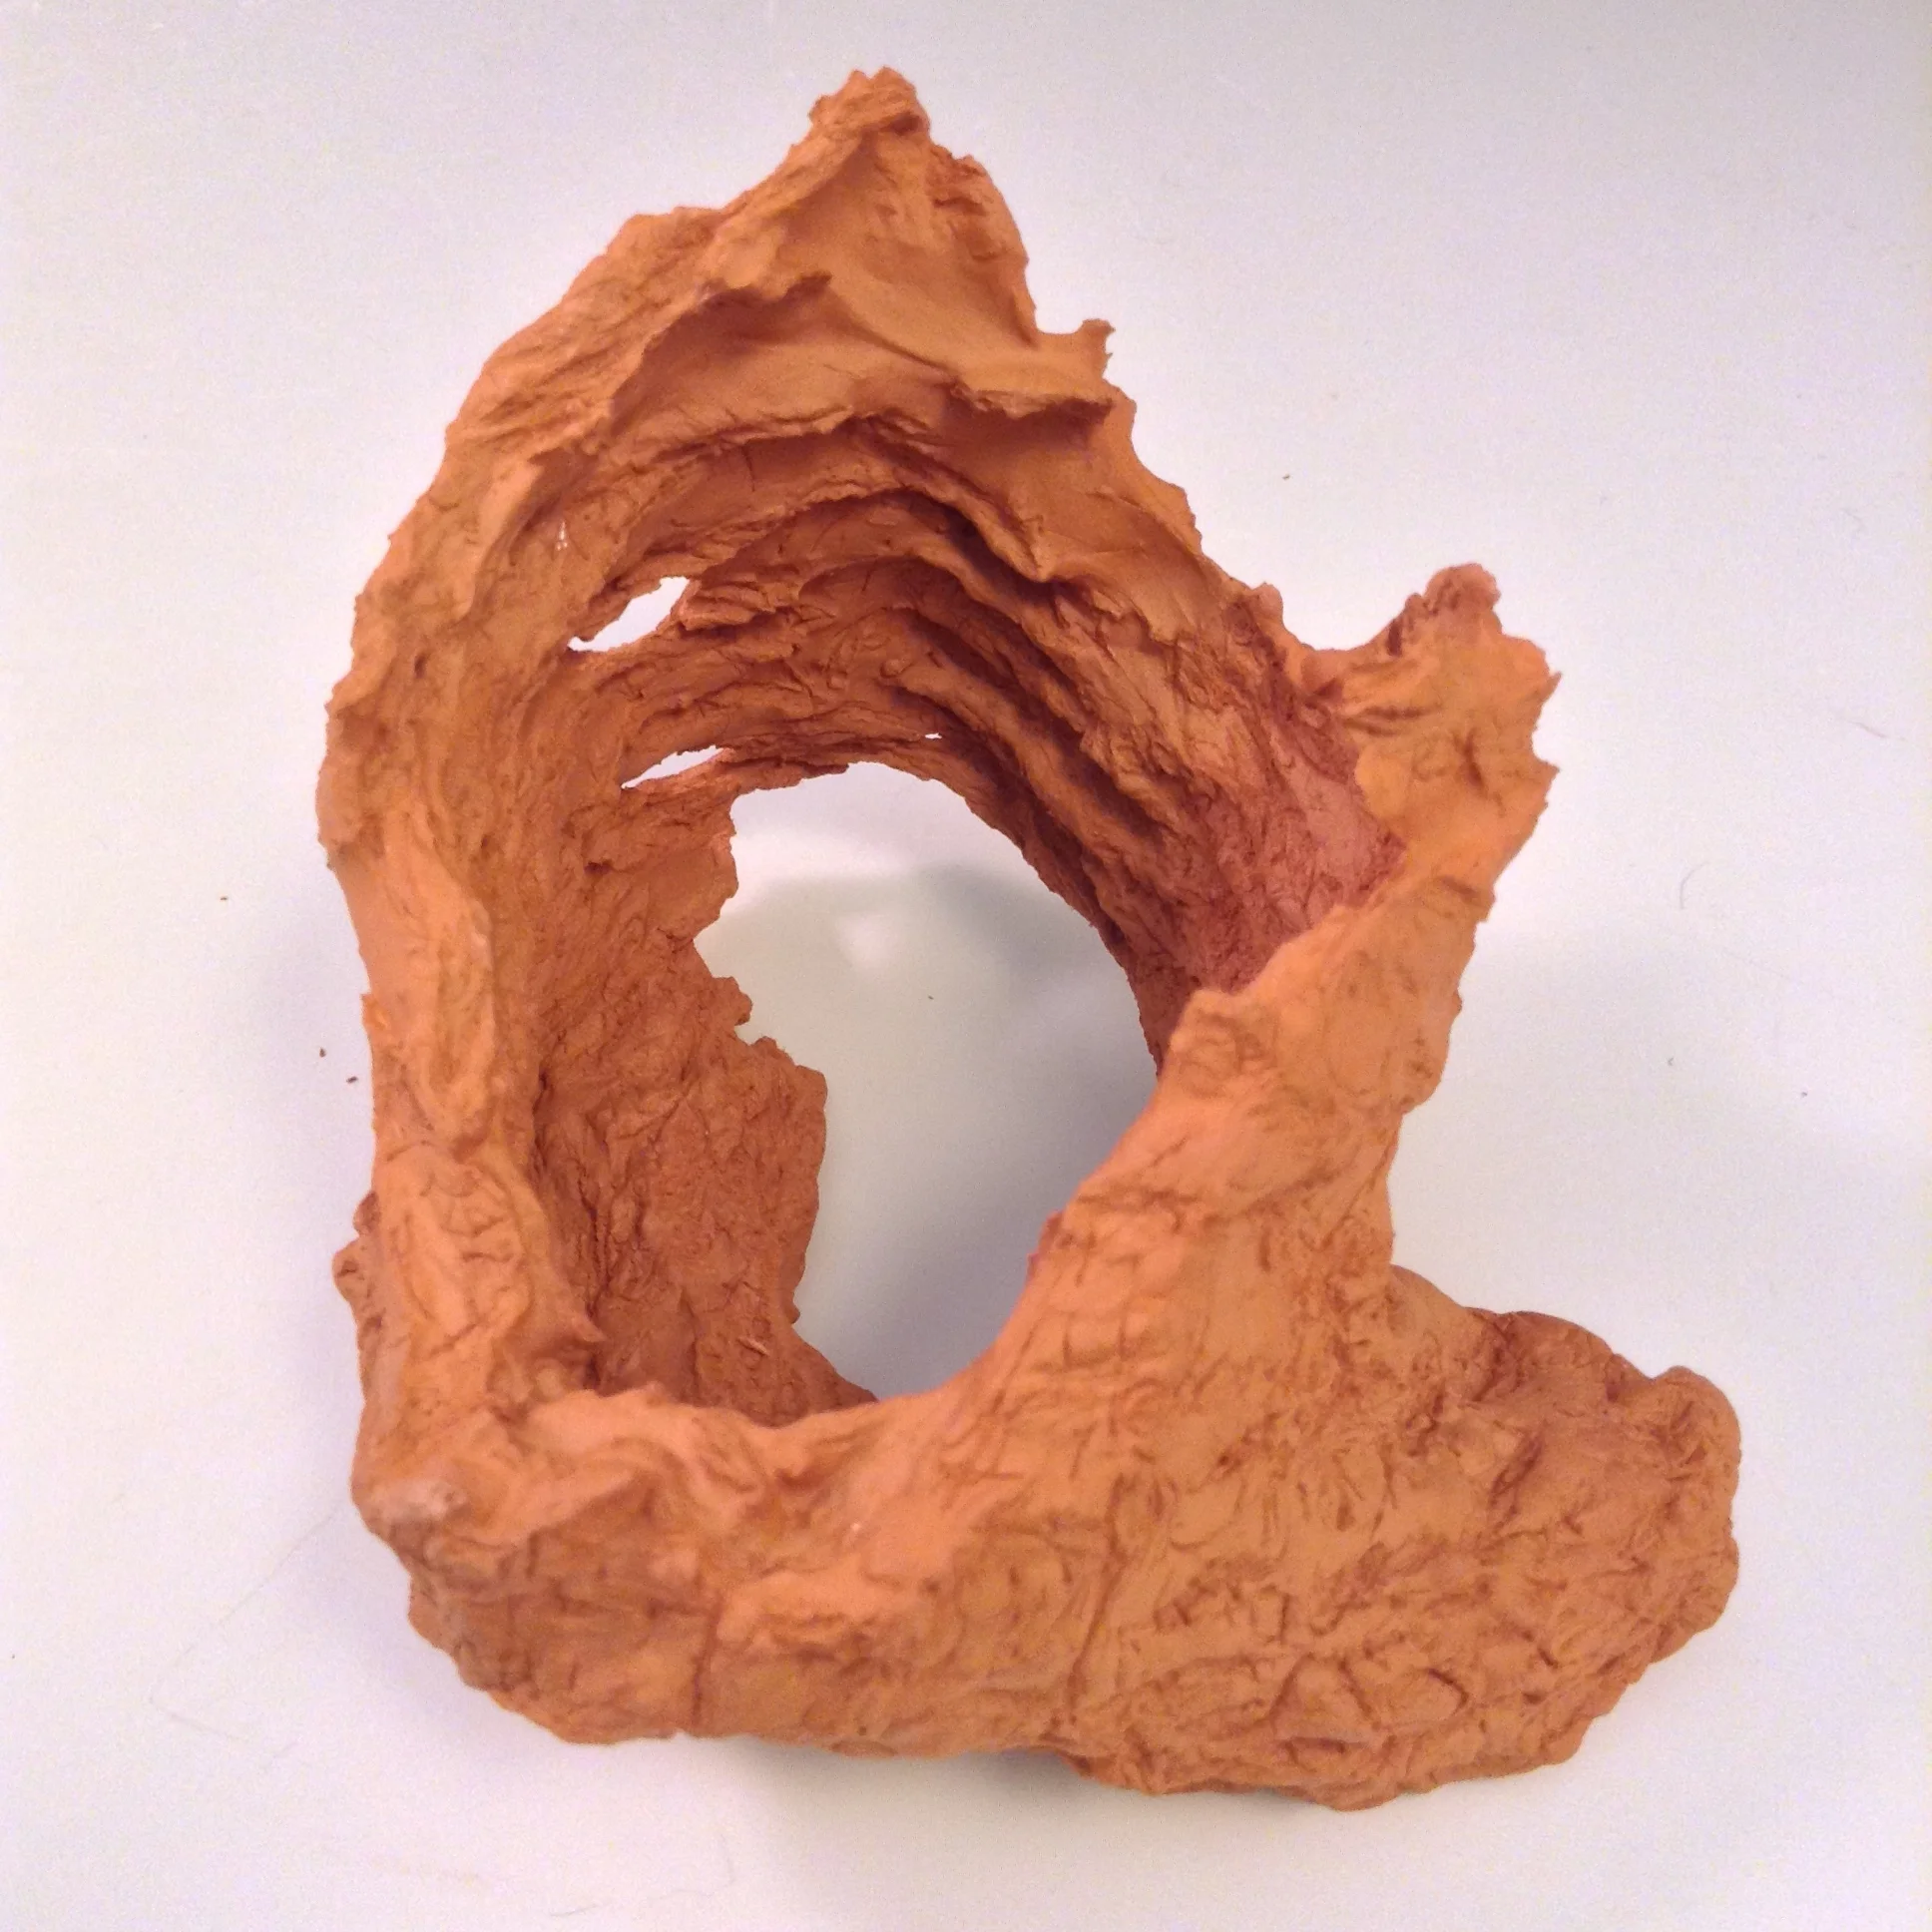
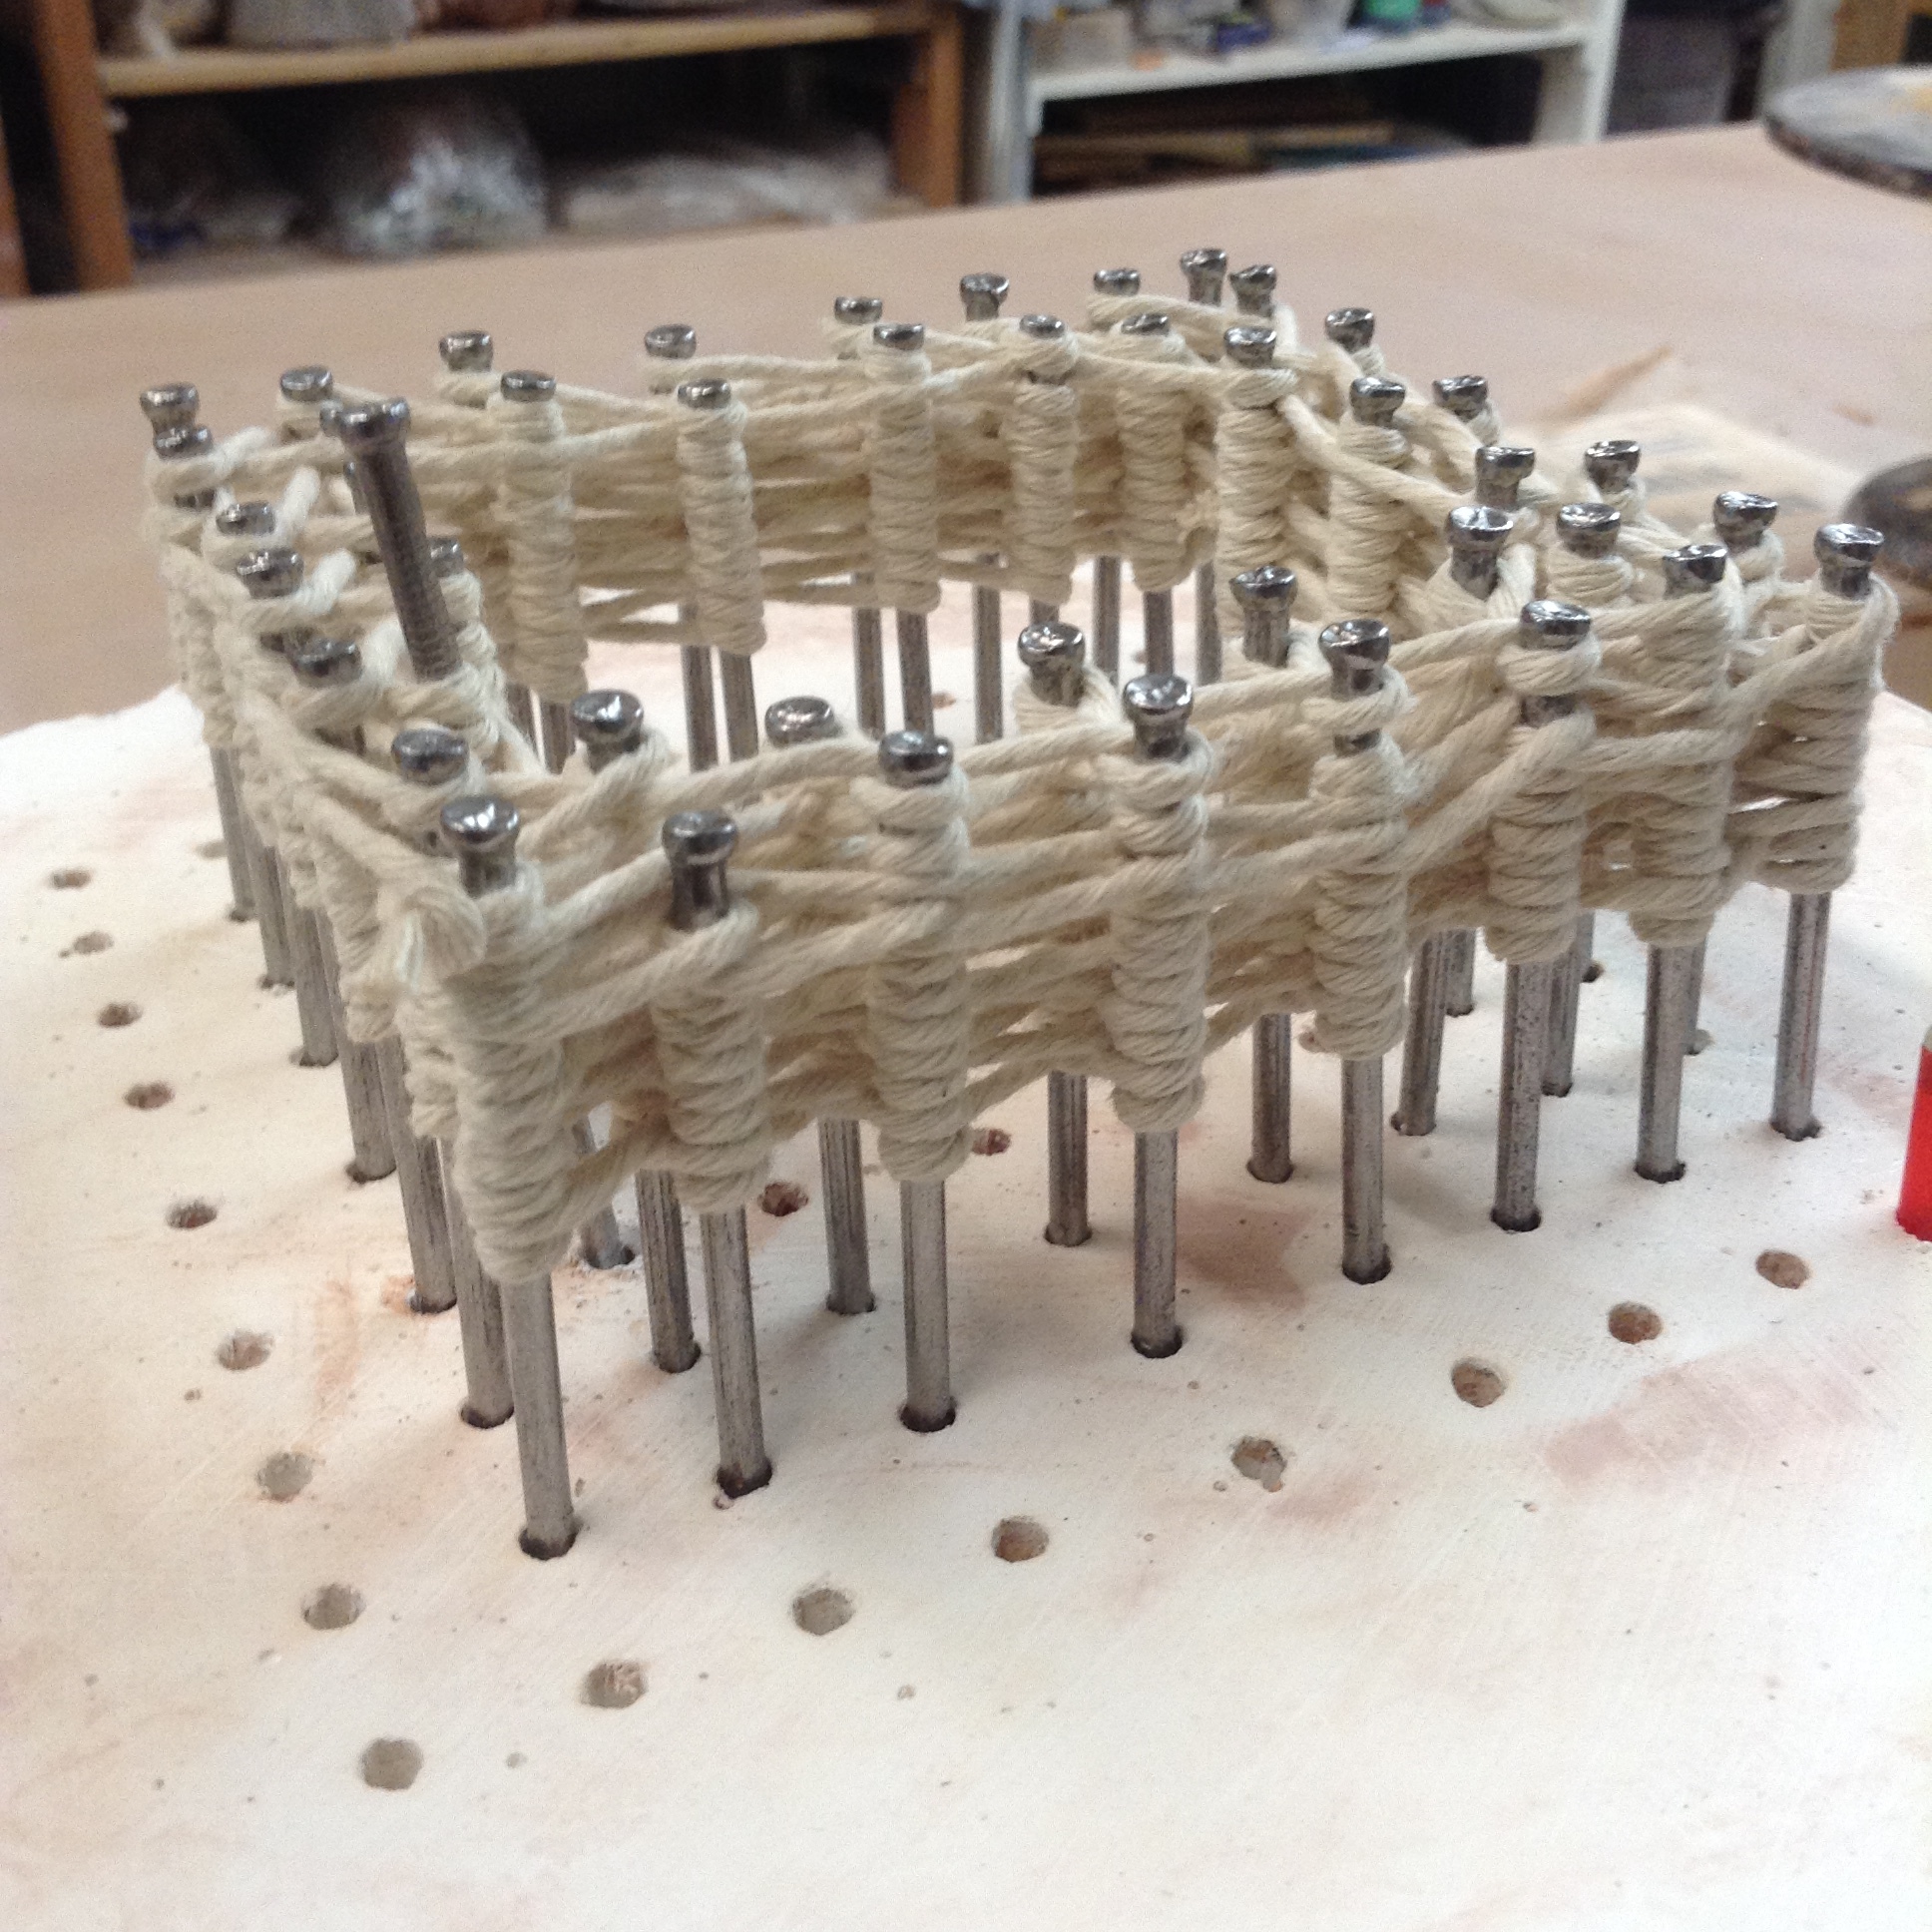
In this low-tech 3D printing technique, I weave coarse twine around wood dowels to form two rings. Then, thick clay paste is dispensed inside. After it dries a few minutes, the wood dowels are removed, making the string weaving floppy. The clay is distorted and changed by the movement, and becomes an interesting finished piece of sculpture.
The resulting piece is shown in the gallery above.
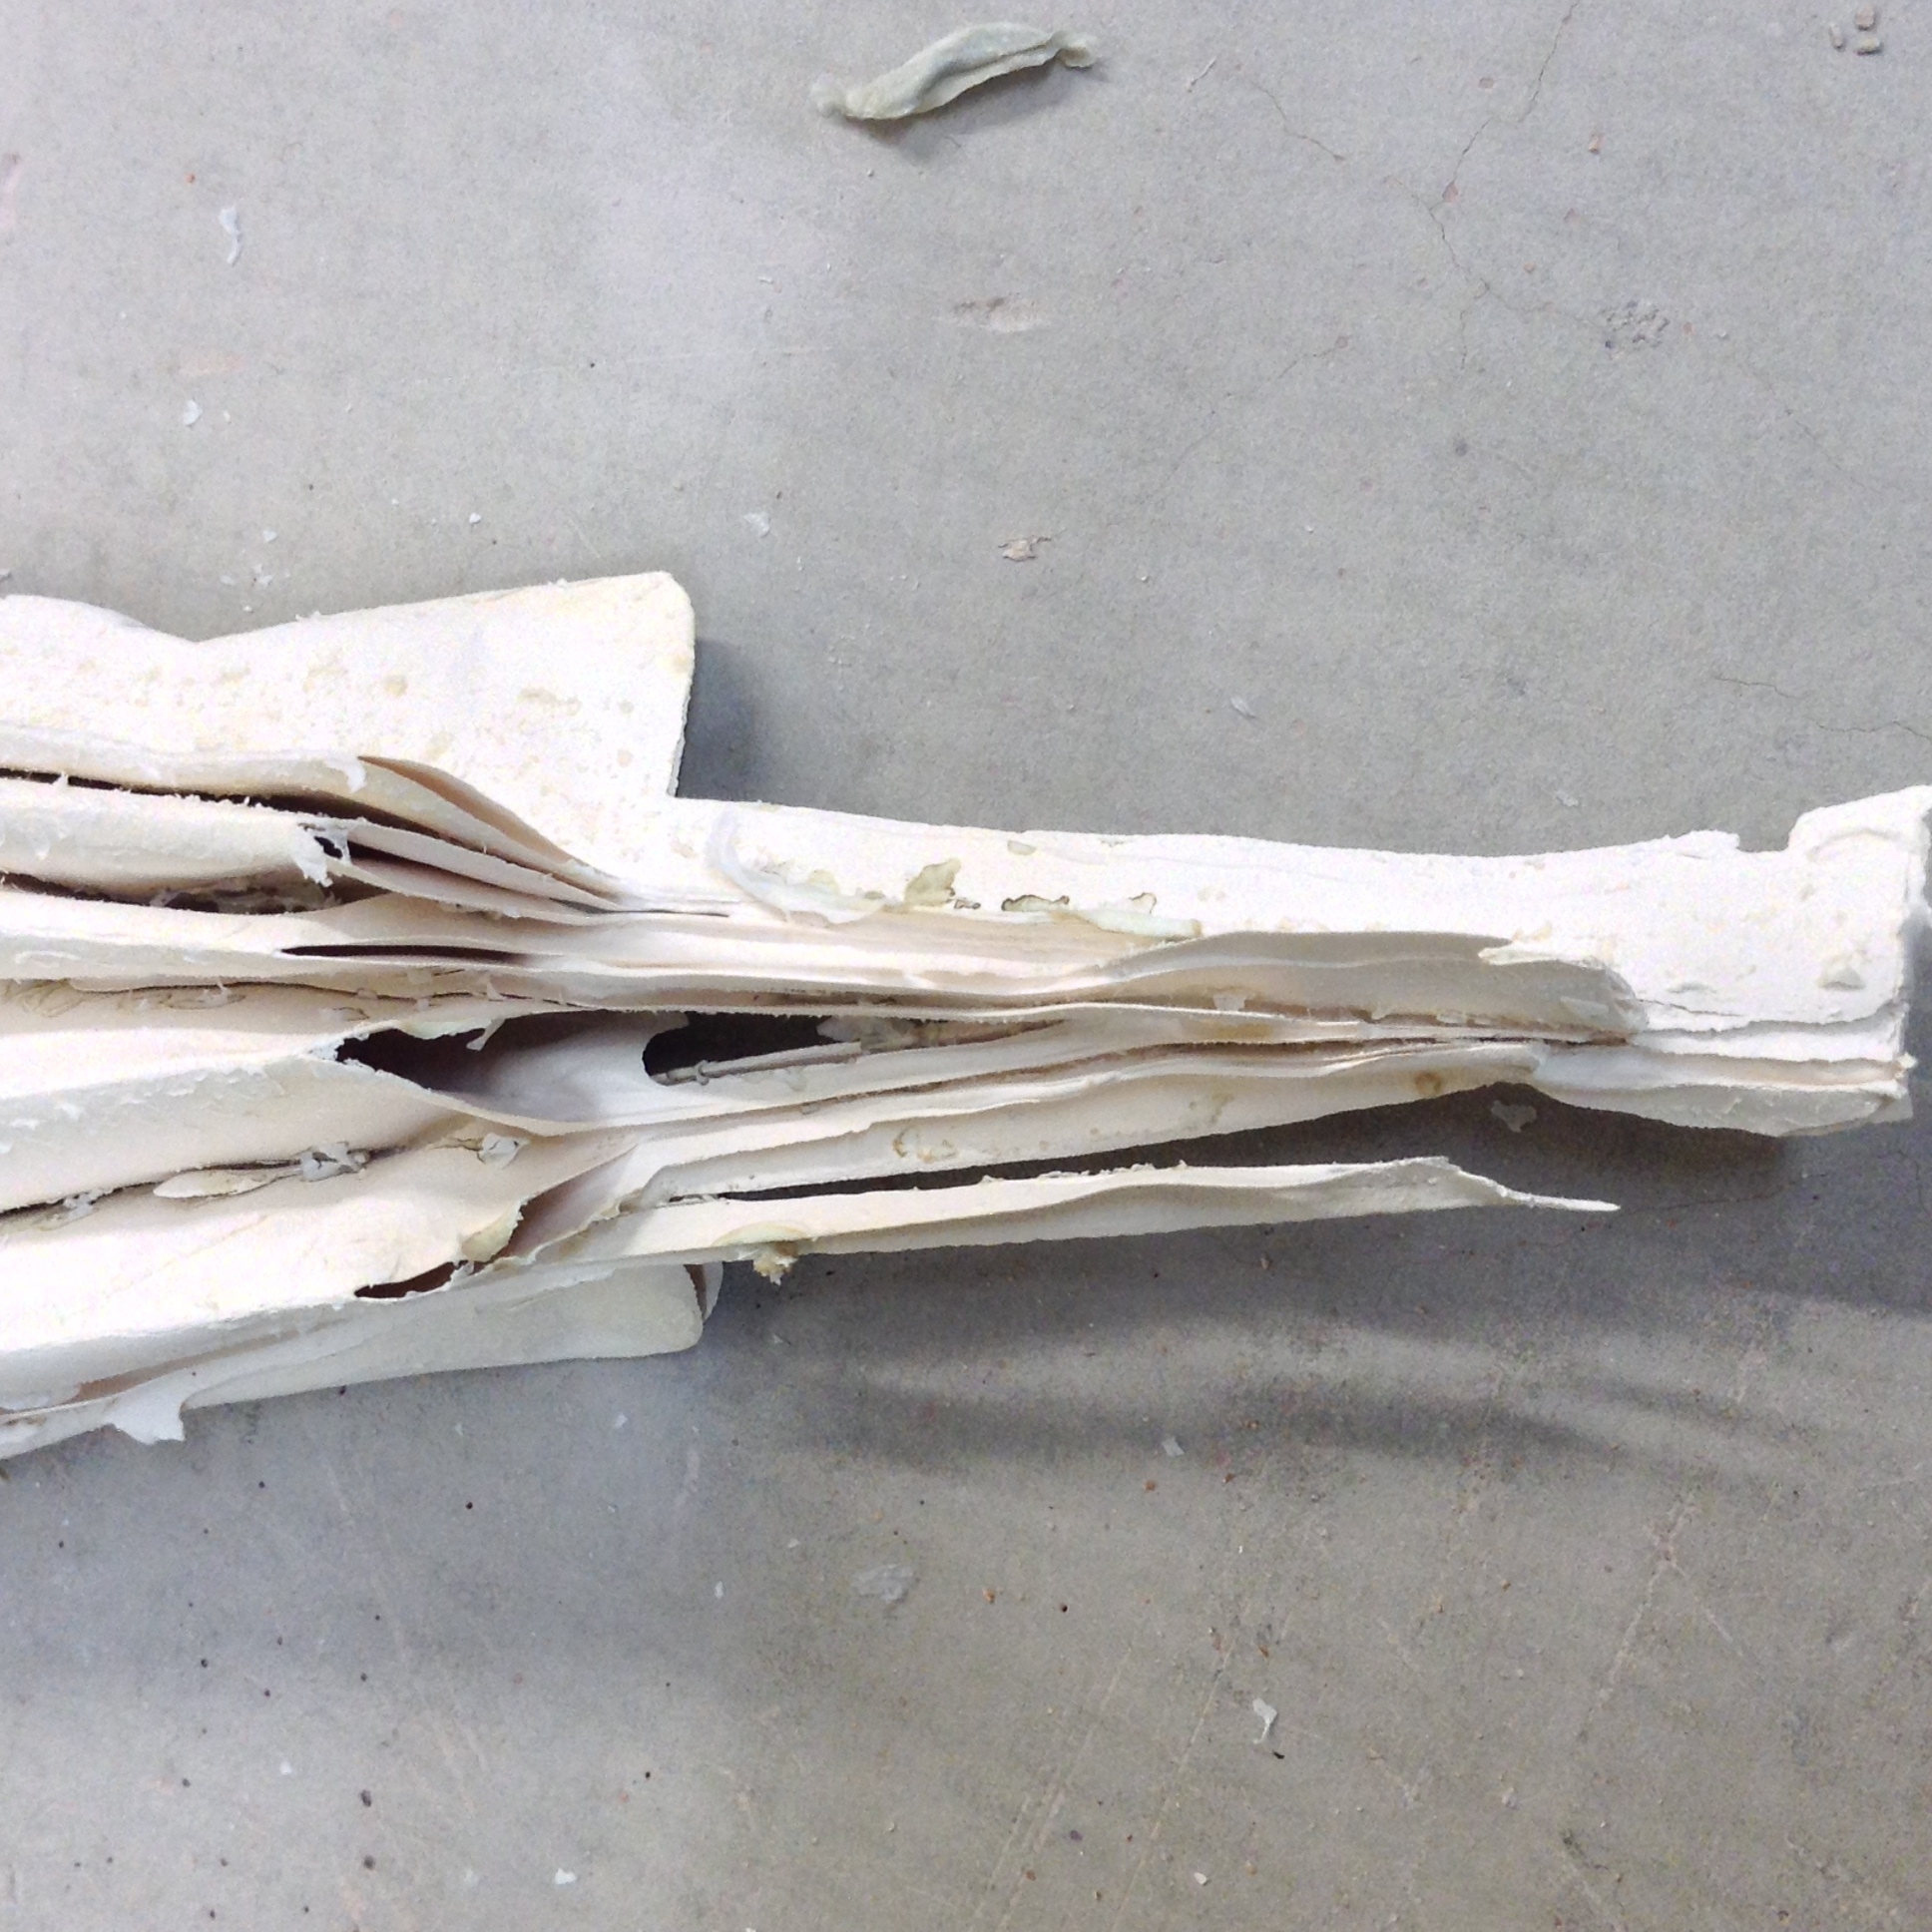
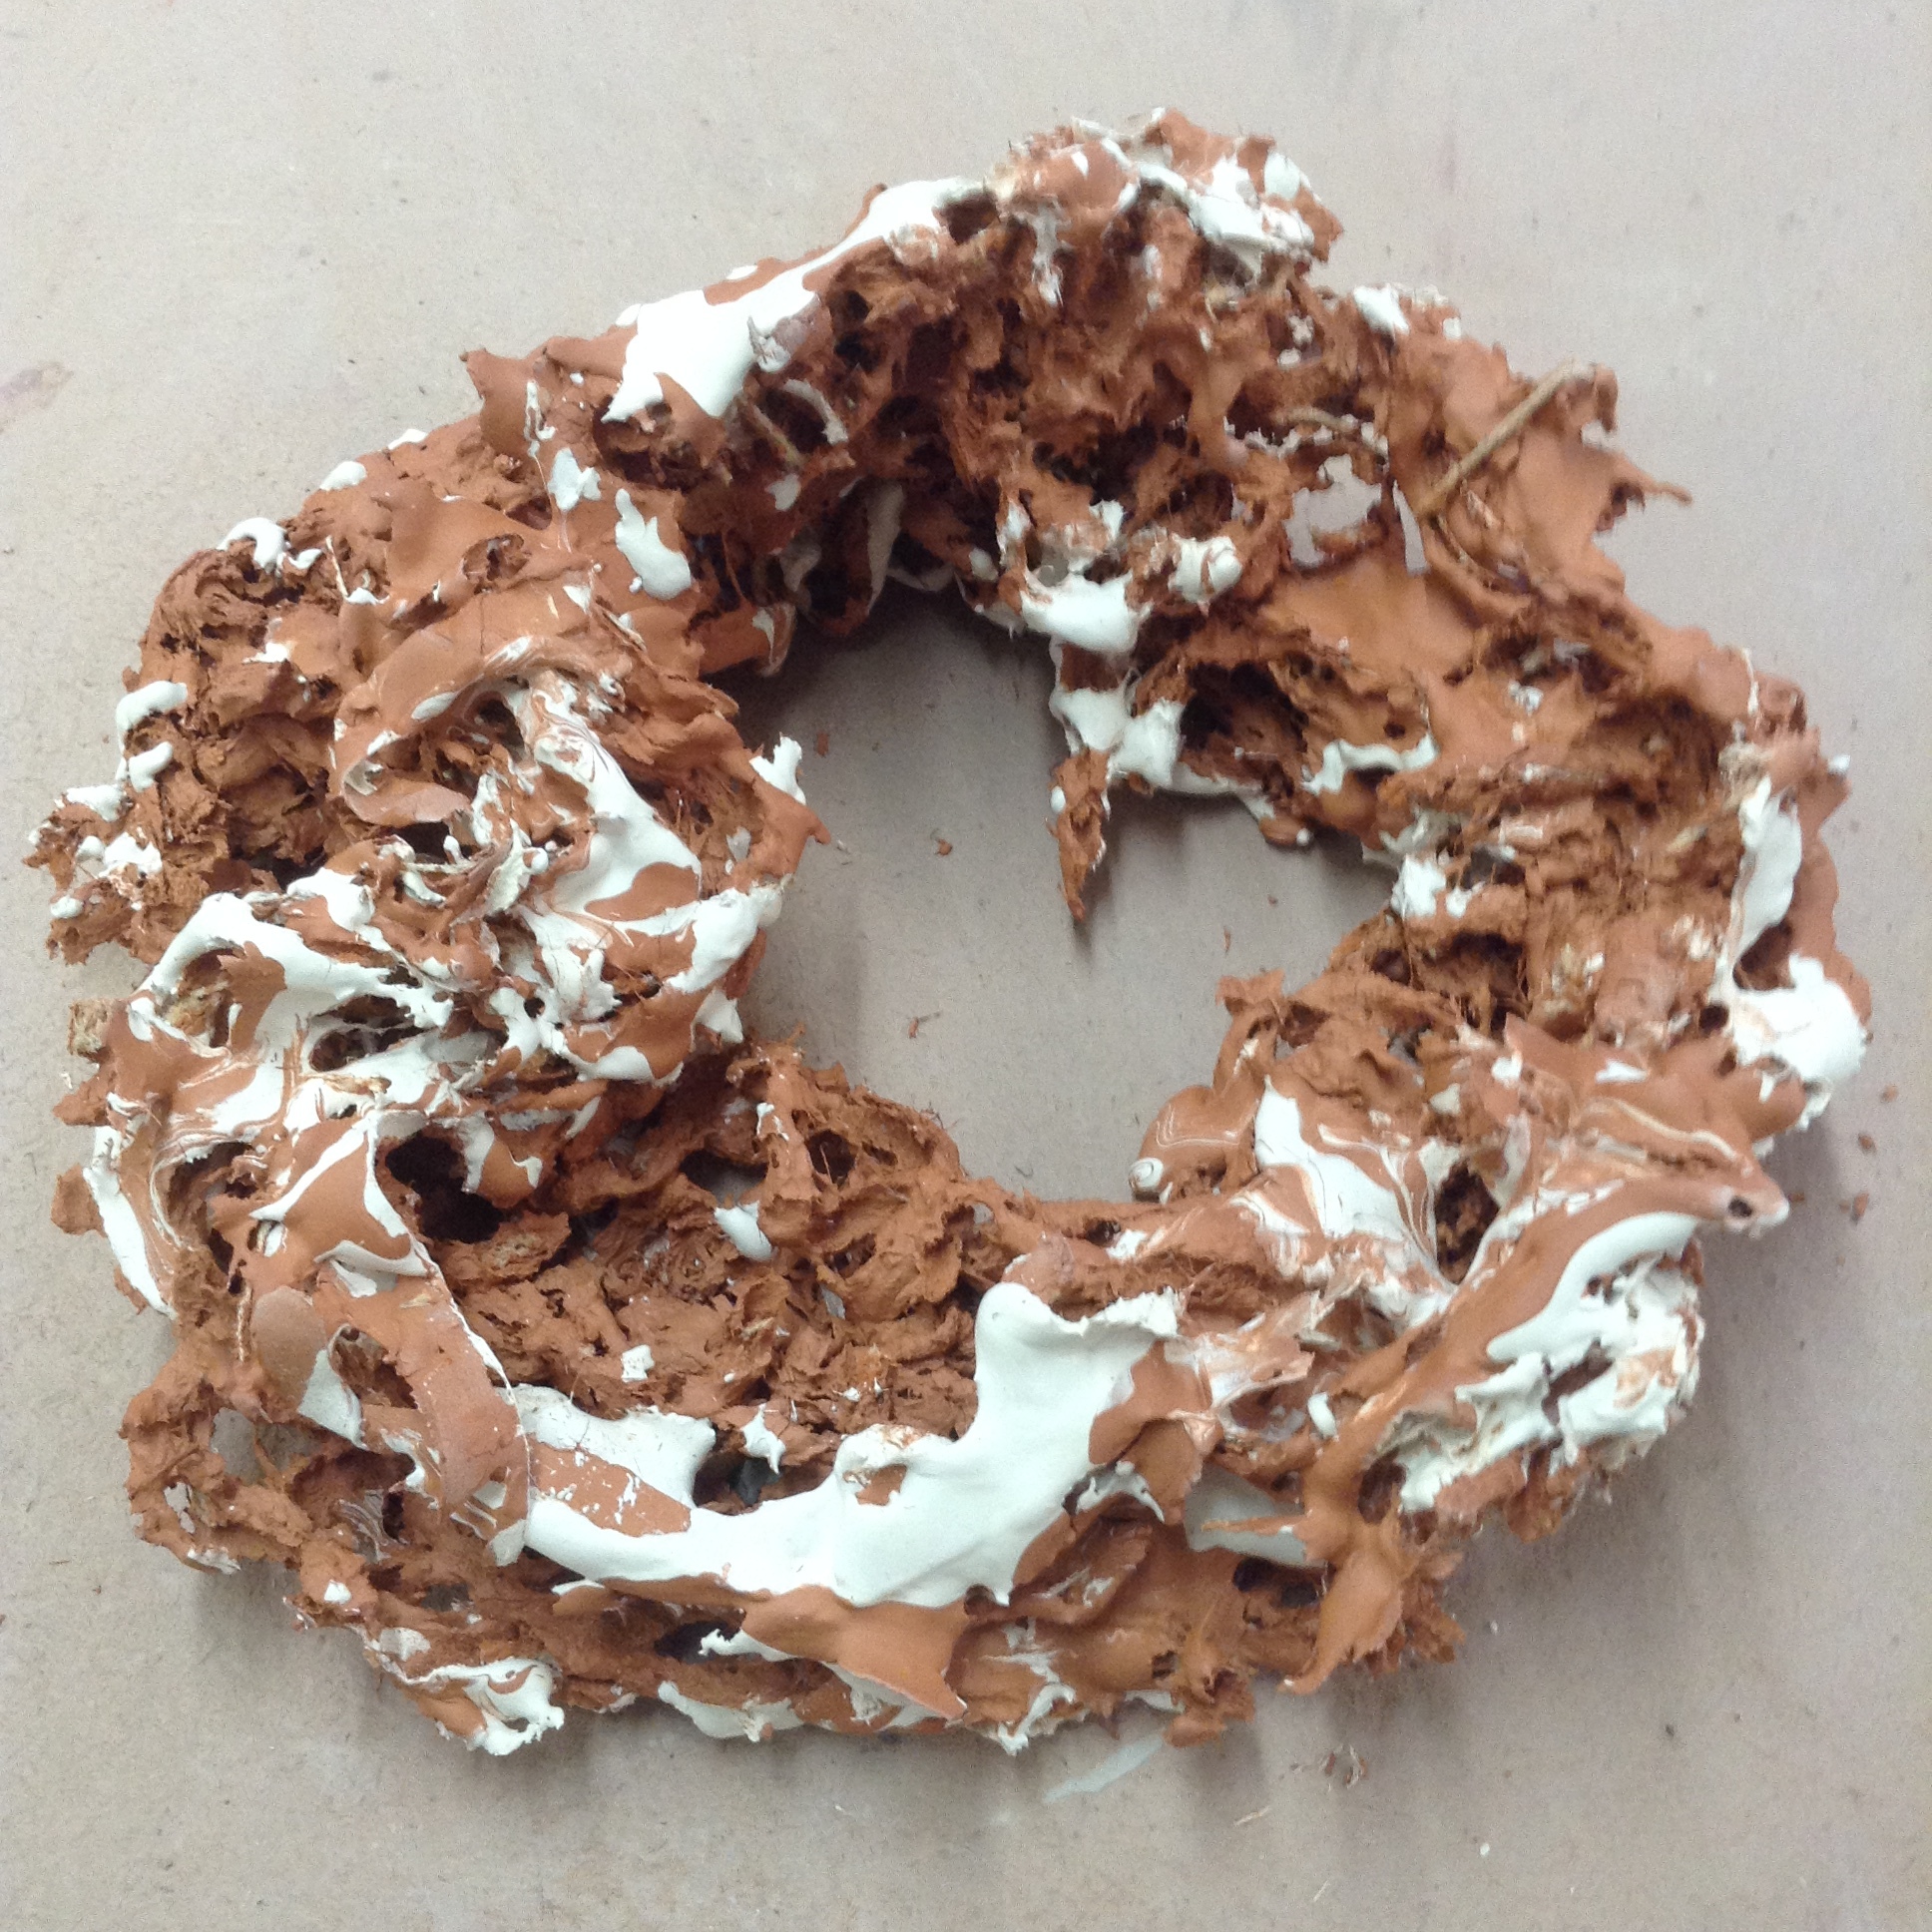
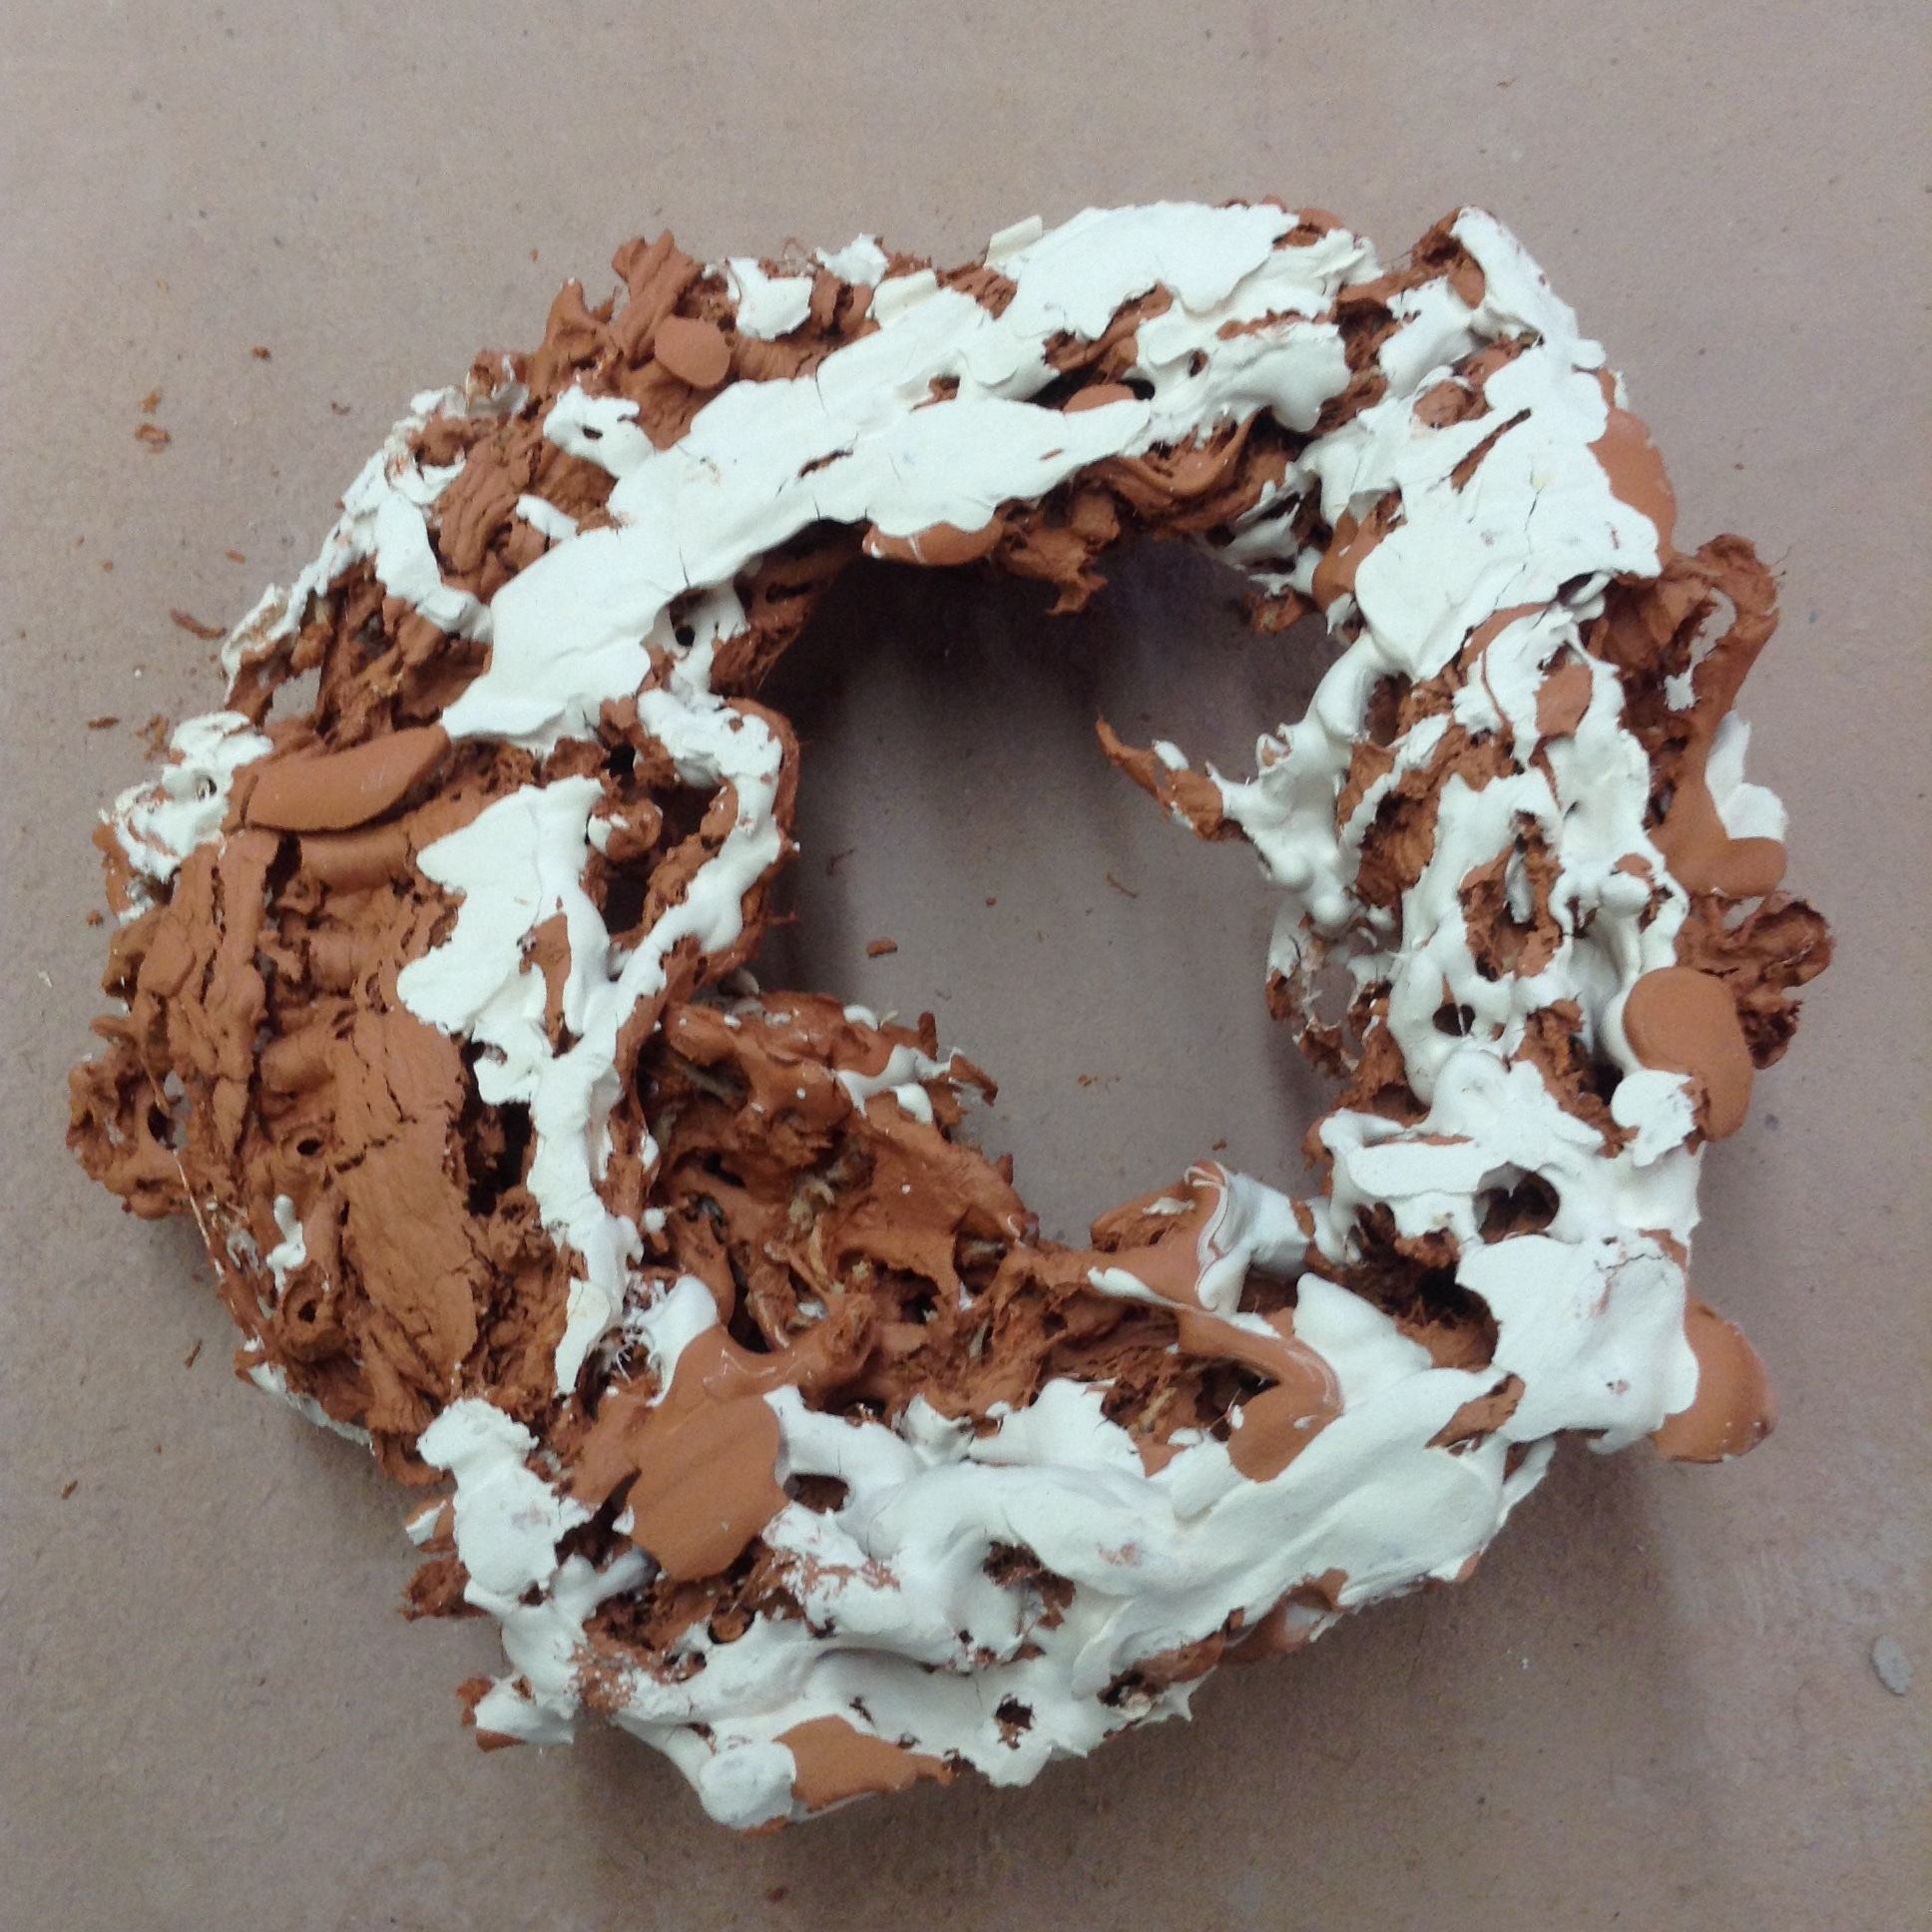
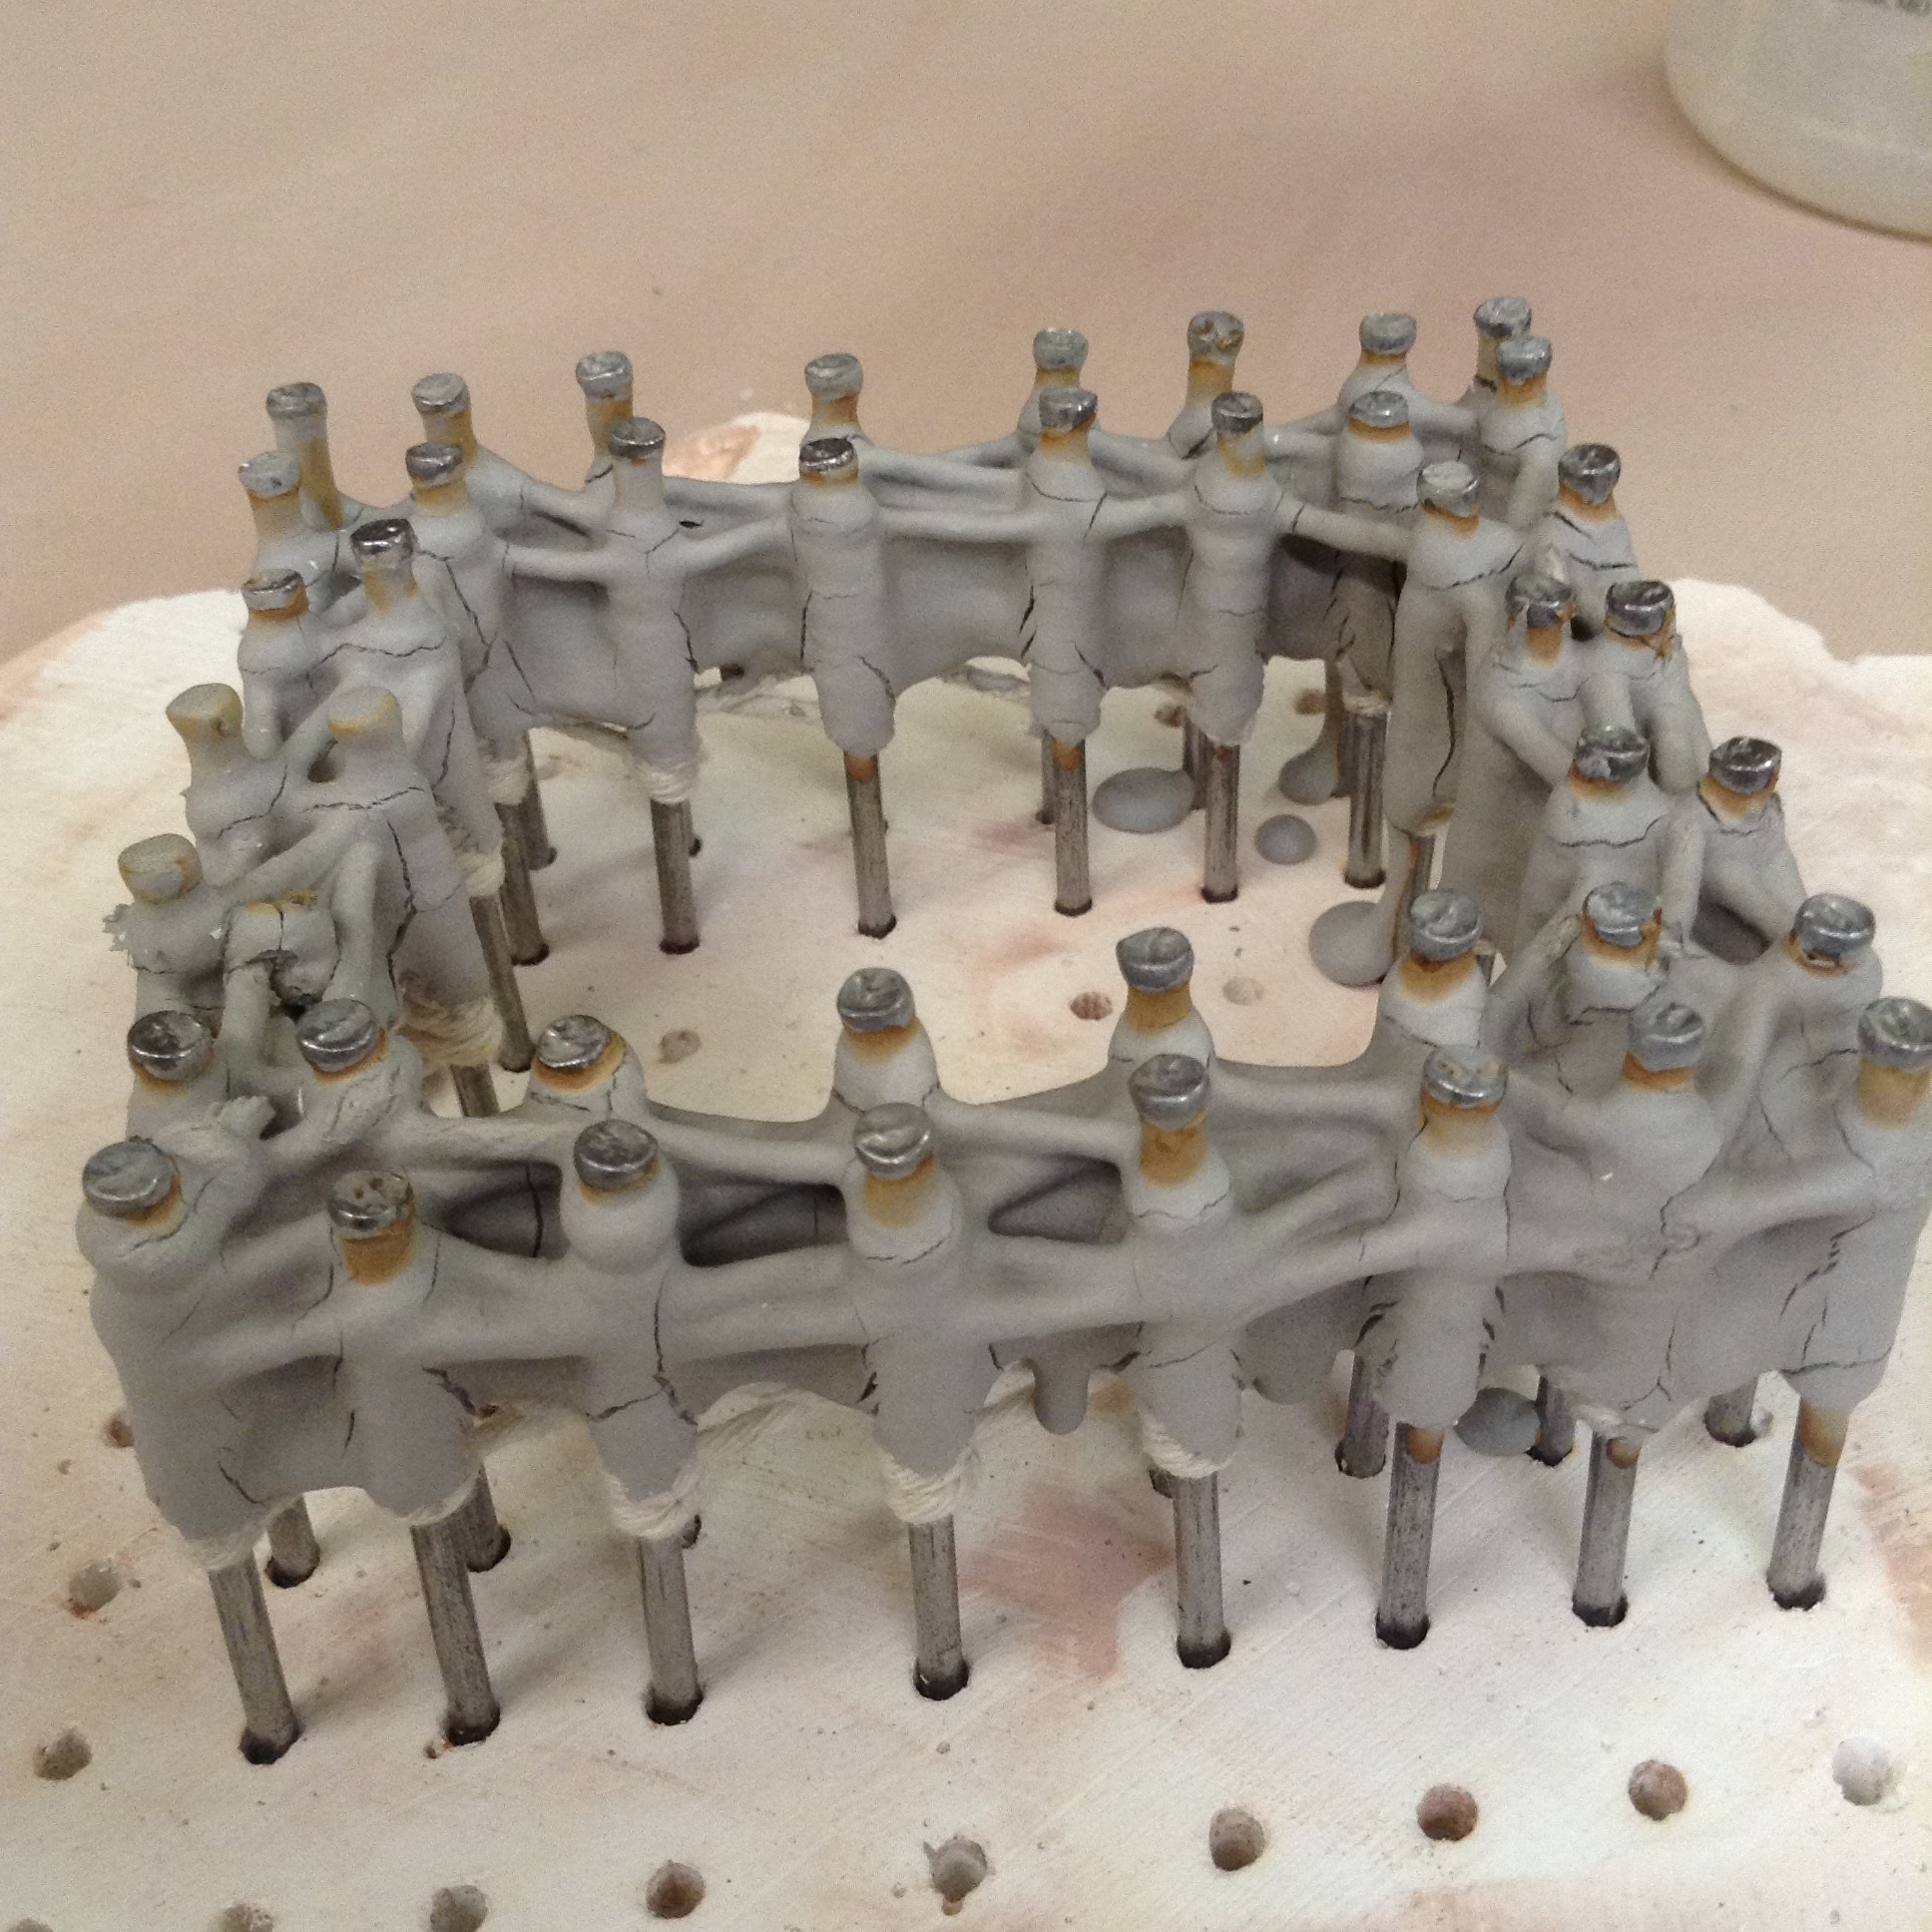
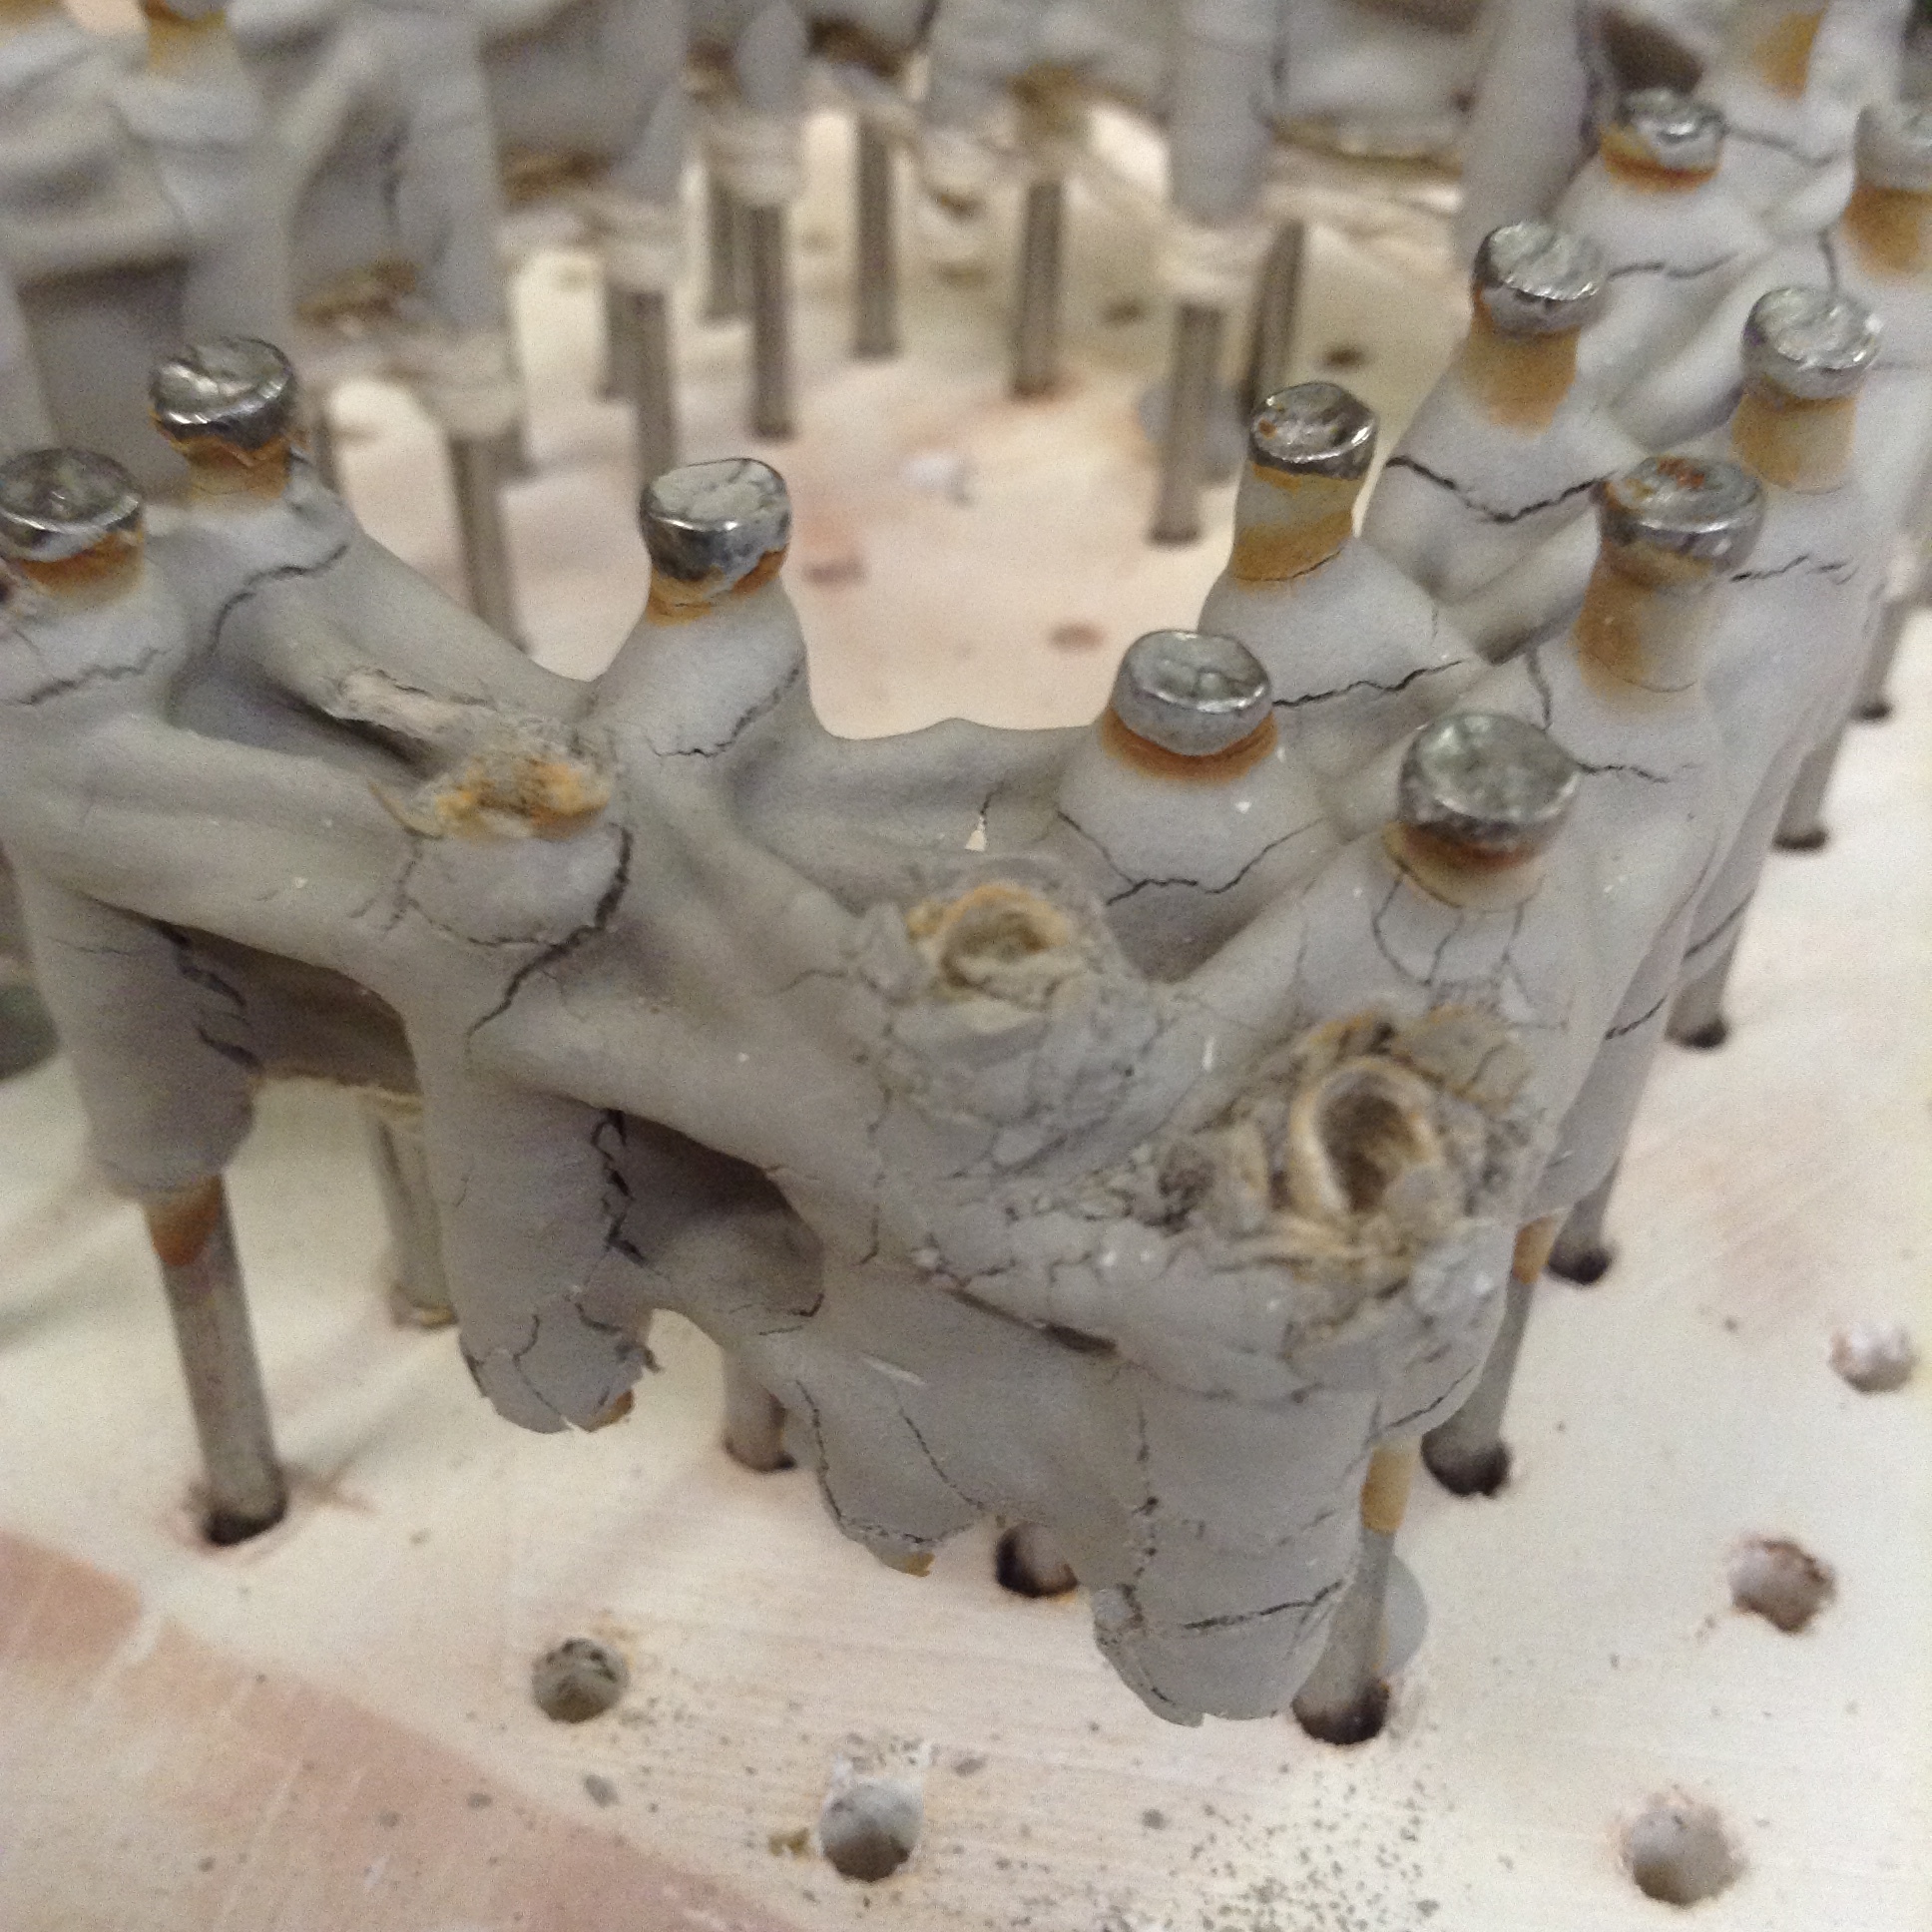
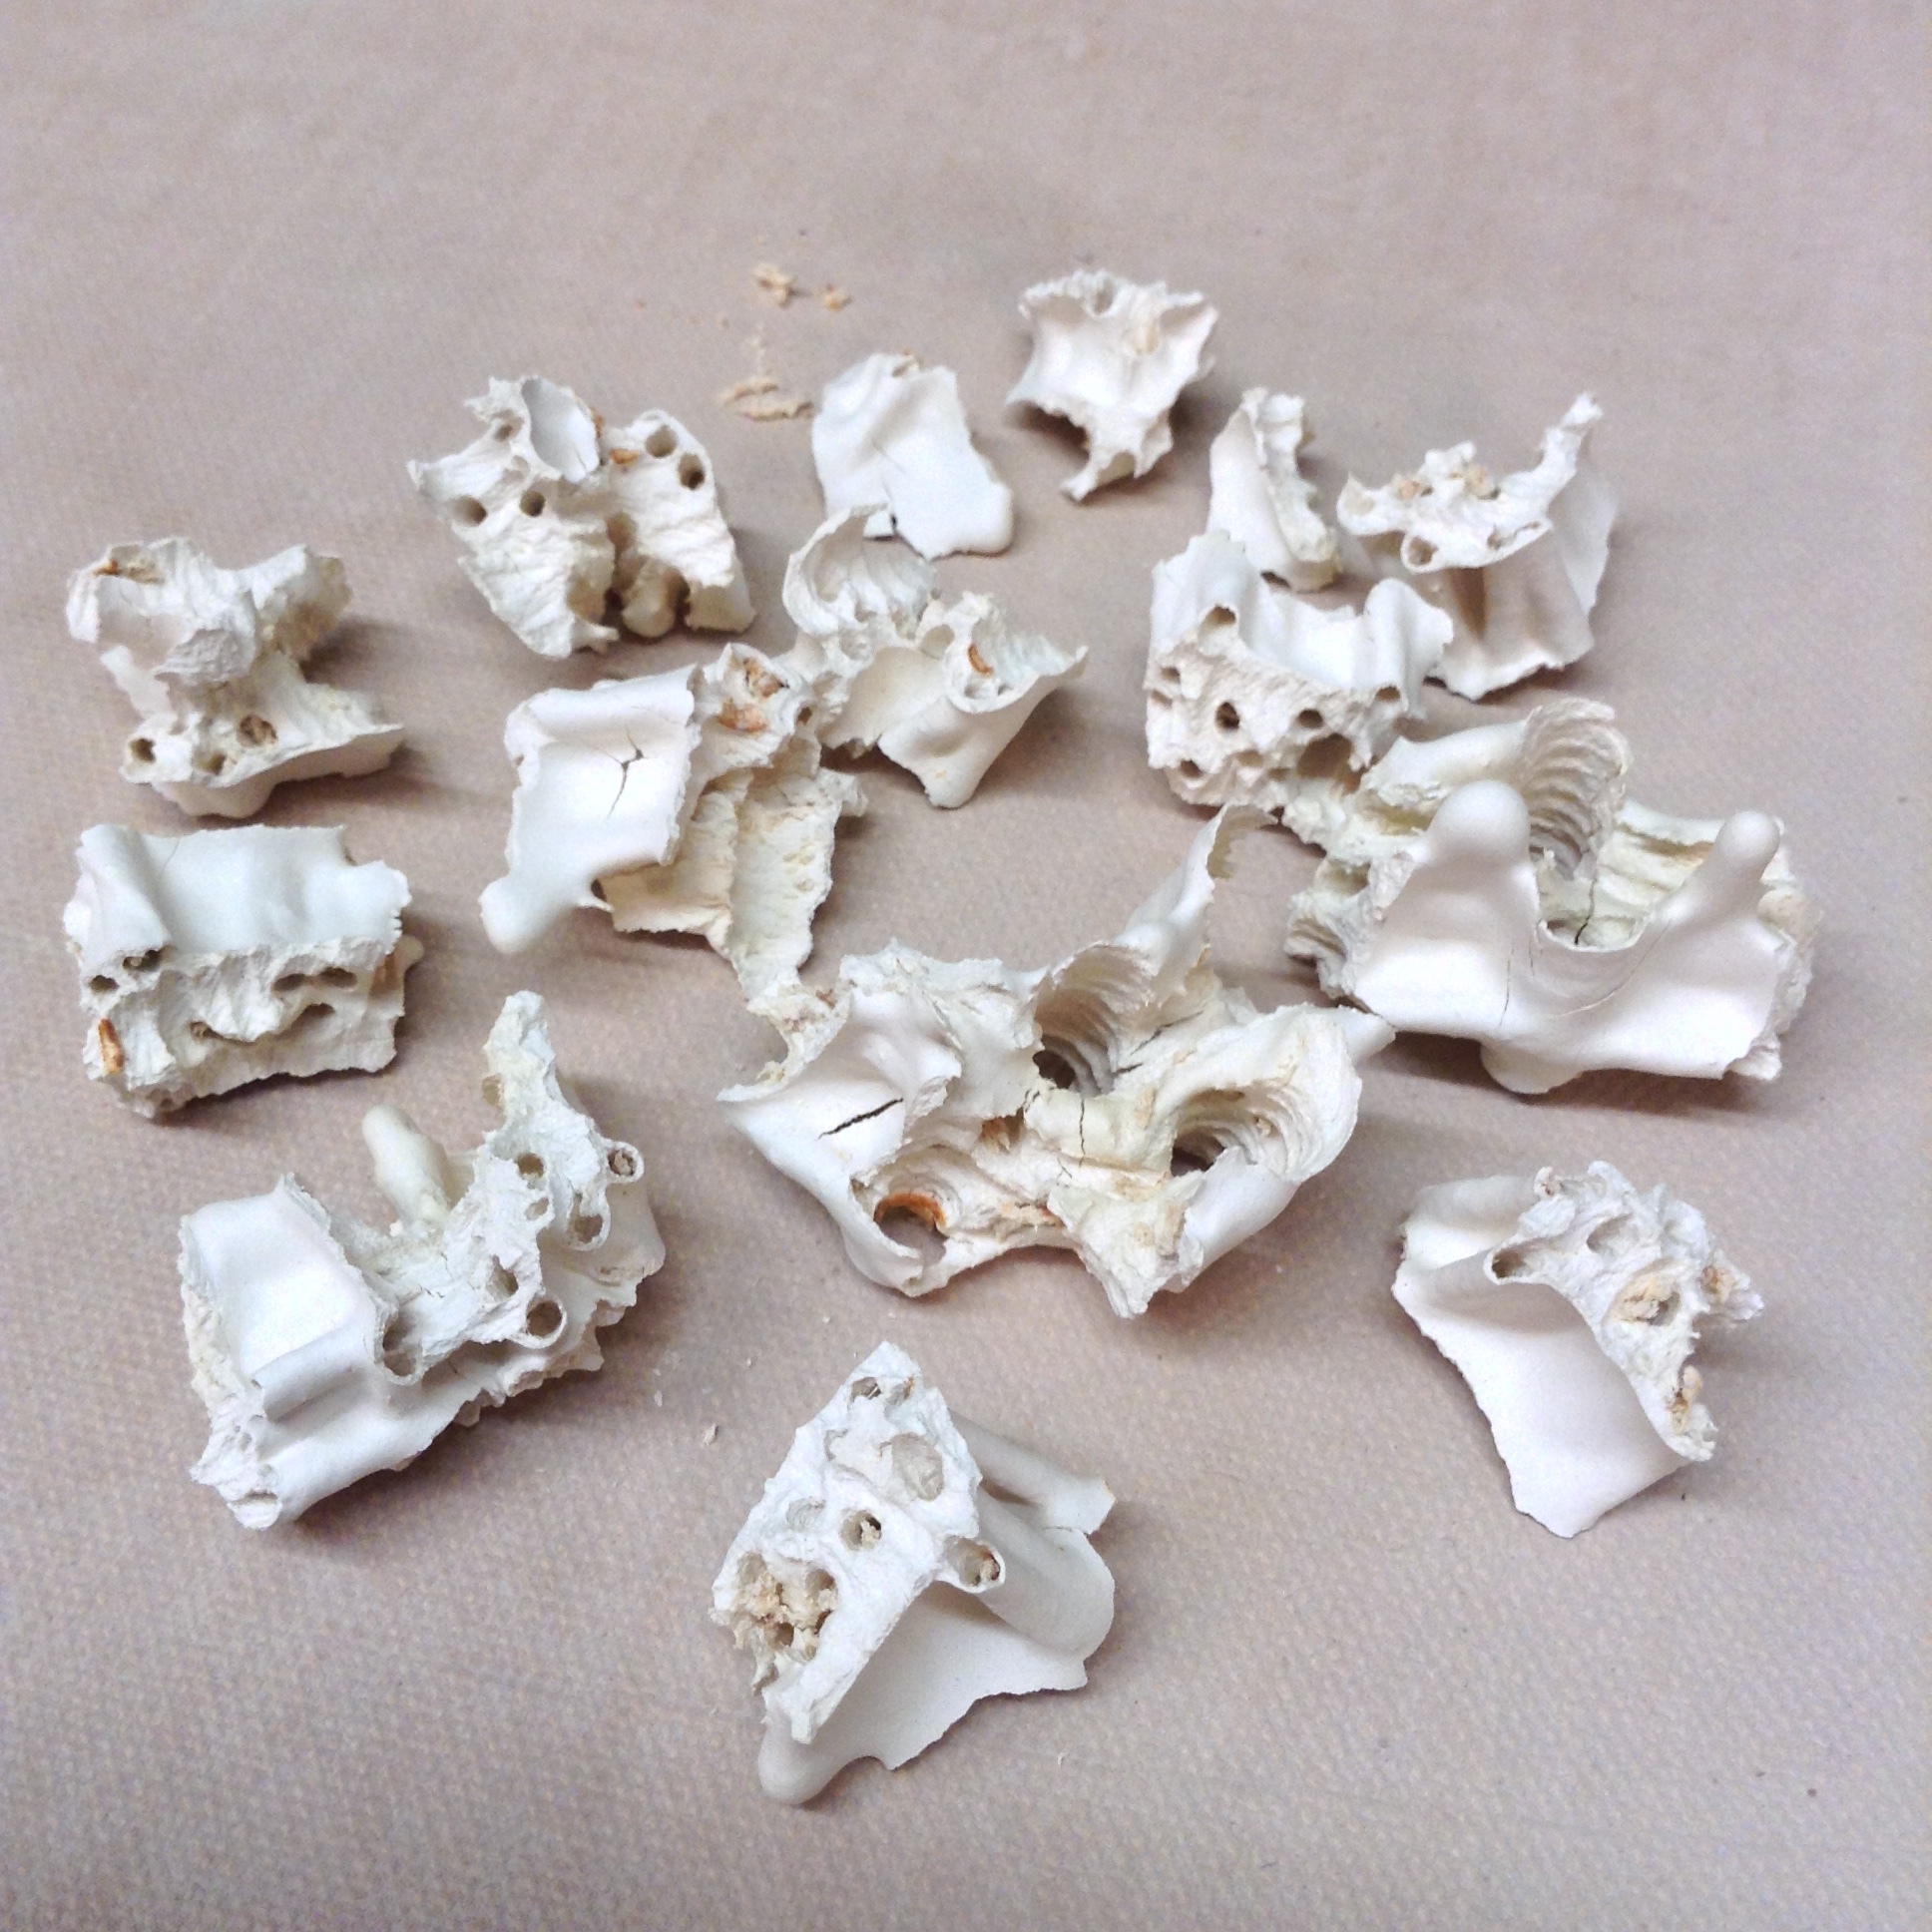
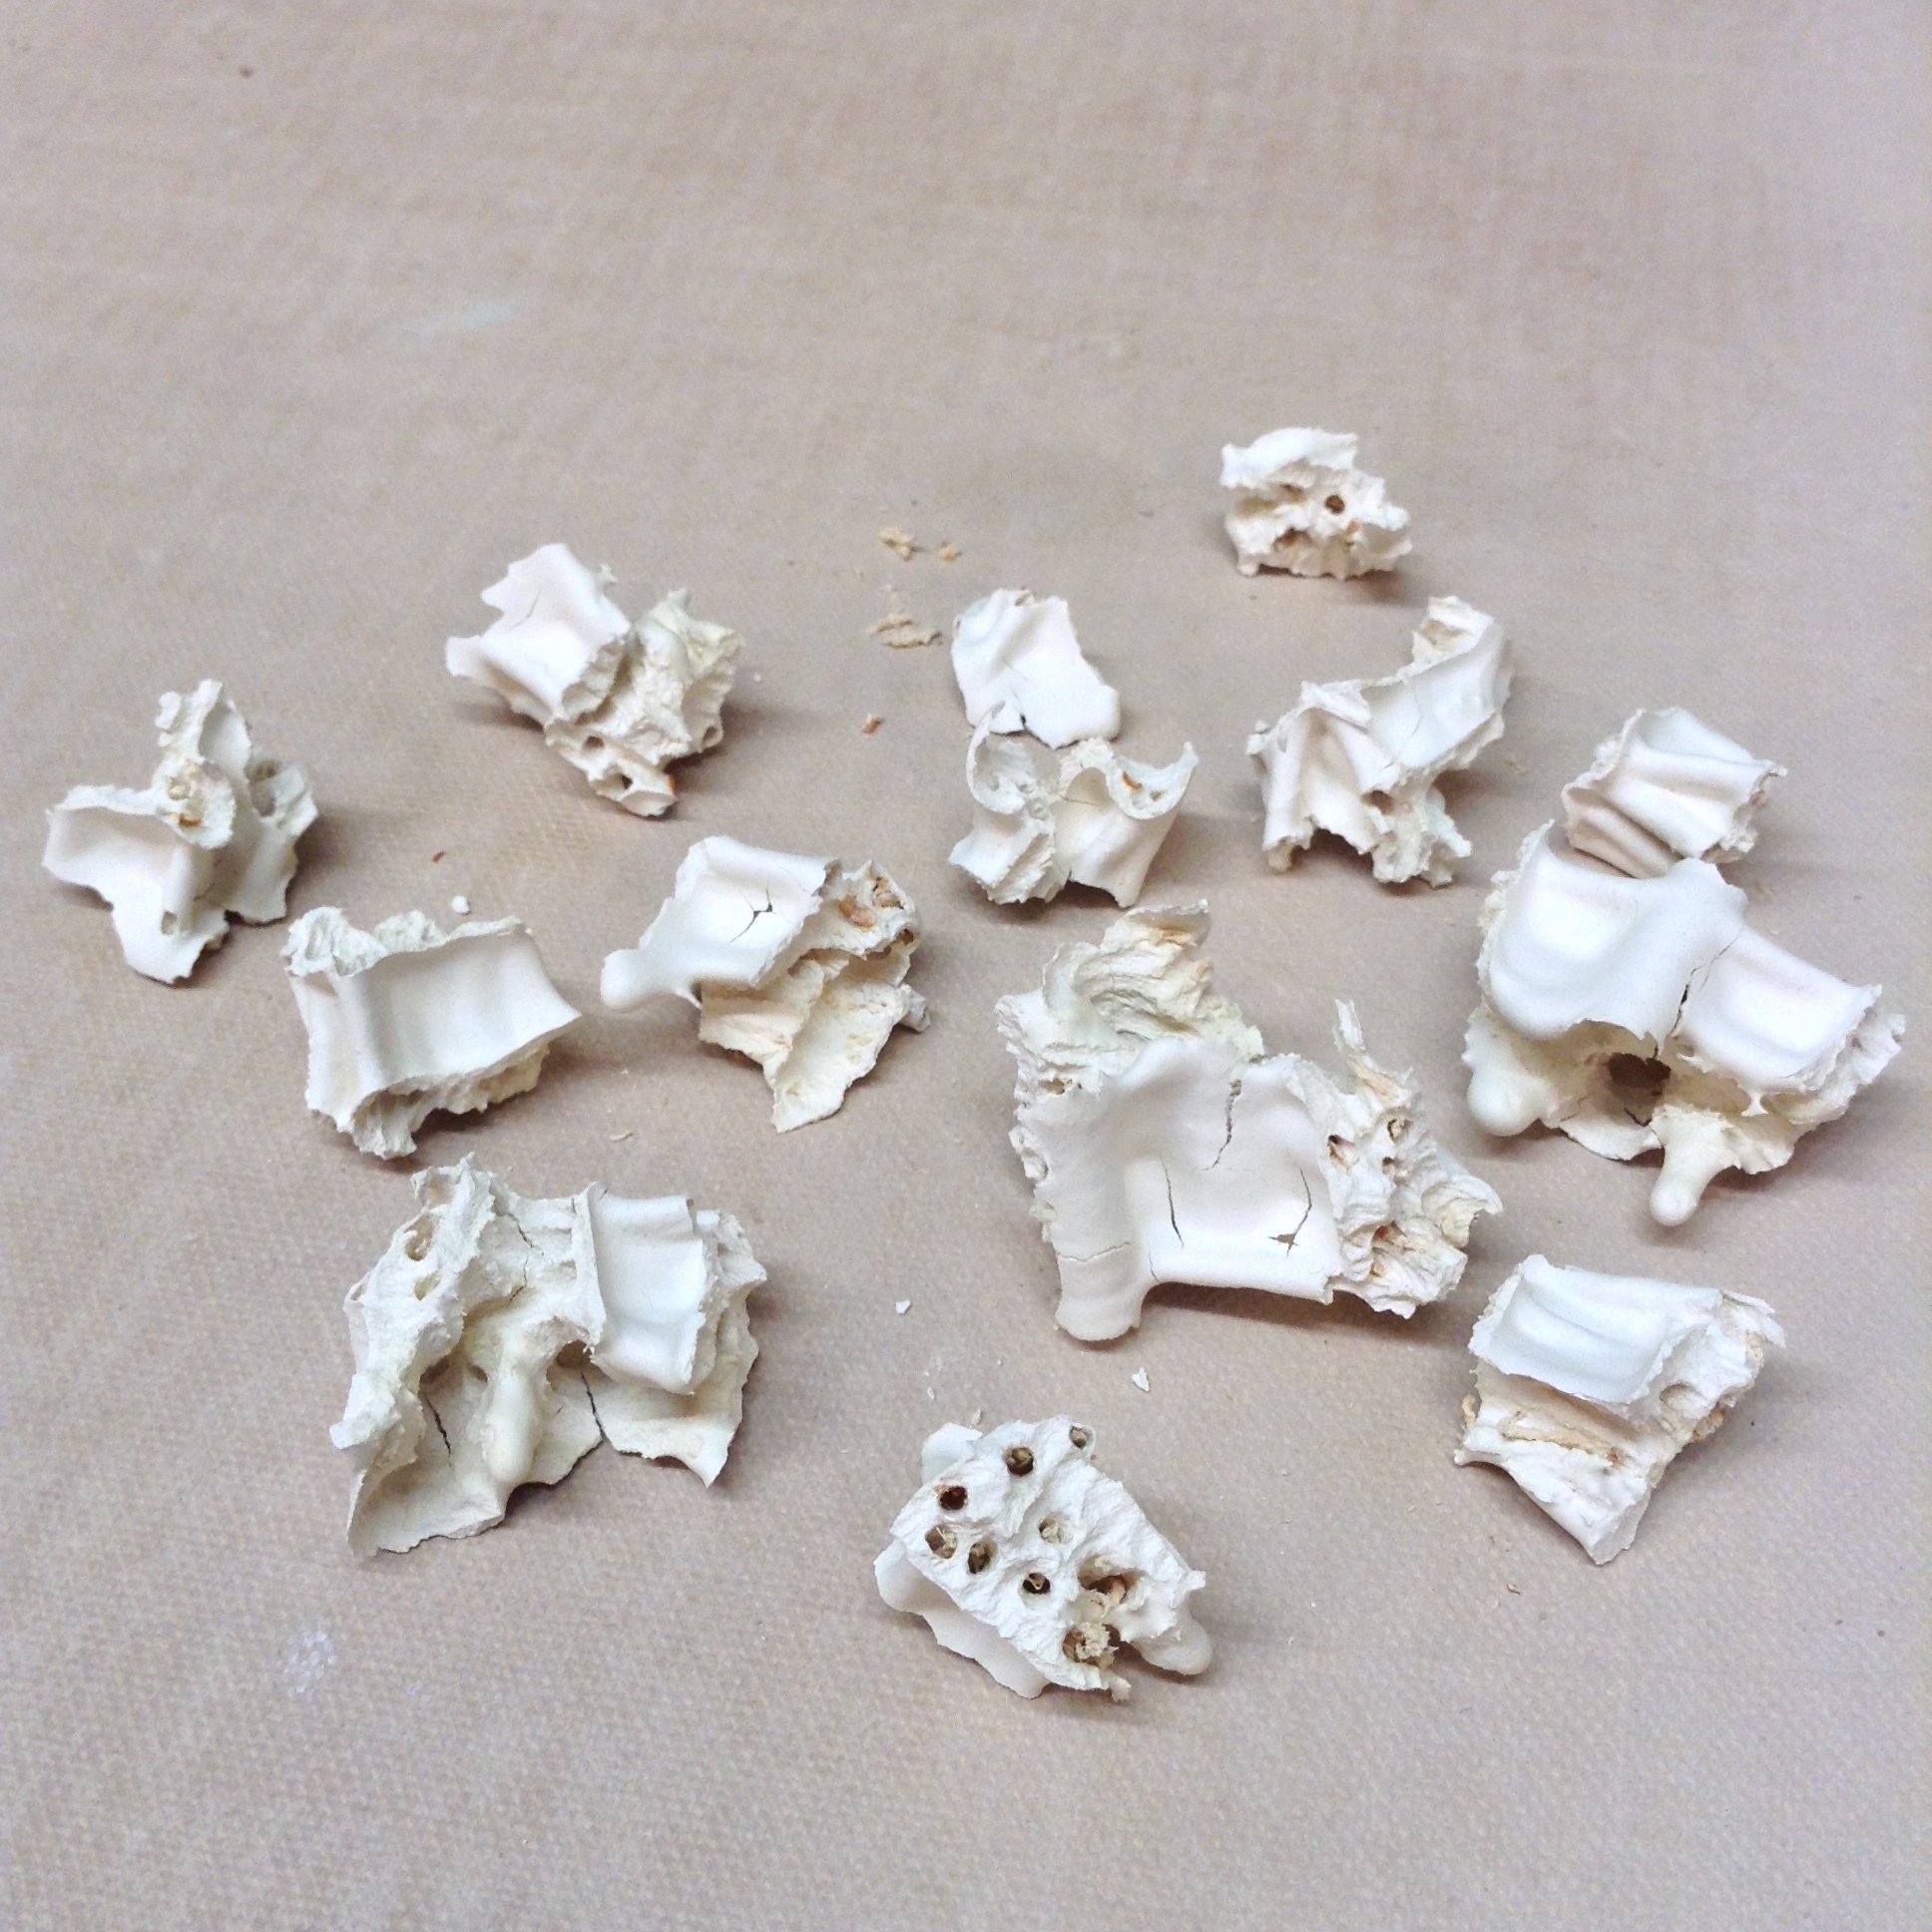
The spirit is willing, but the flesh is weak. Or, really, the clay slip was weak. After the piece dried, and was fired in the kiln, the stresses in the clay matrix were too great and the parts cracked. But the pieces were so very interesting.
The shattered pieces from this form are the white bits with holes and jagged edges.
Since everything is based on spinning, why not use the wheel to make circles on a hand-sculpted bowl while it's upside-down? This form will become a mold for plaster.
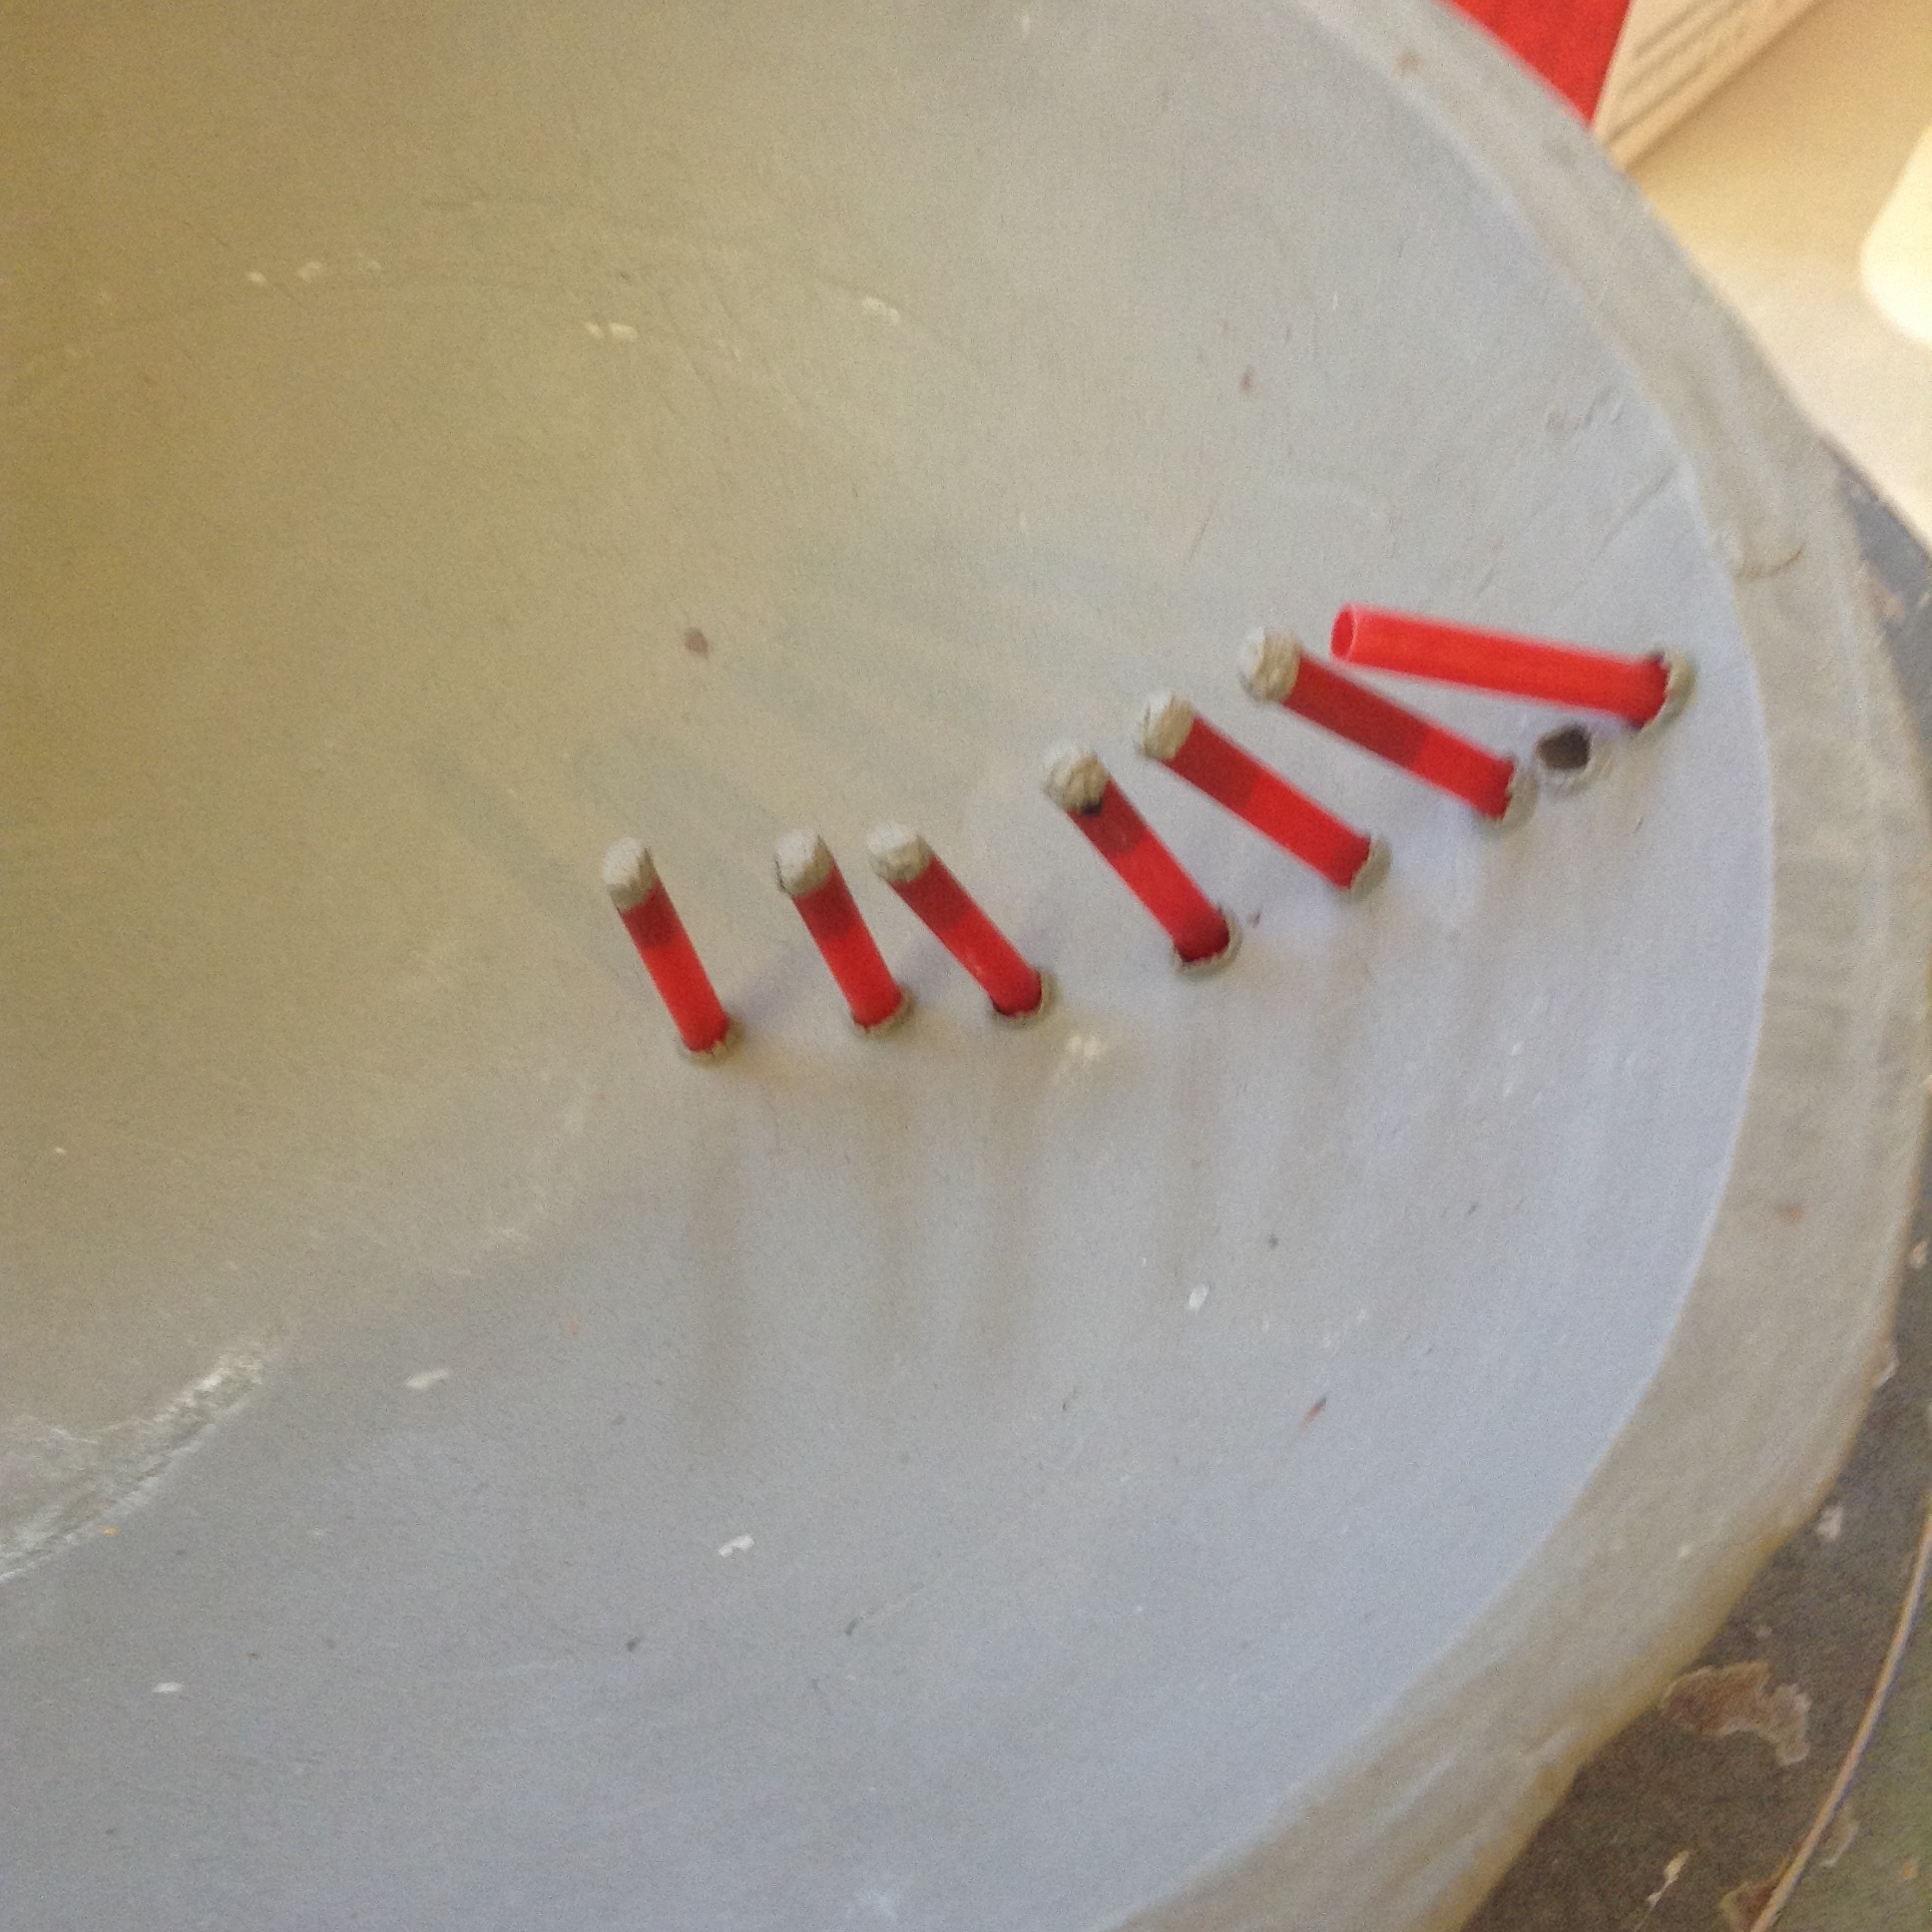
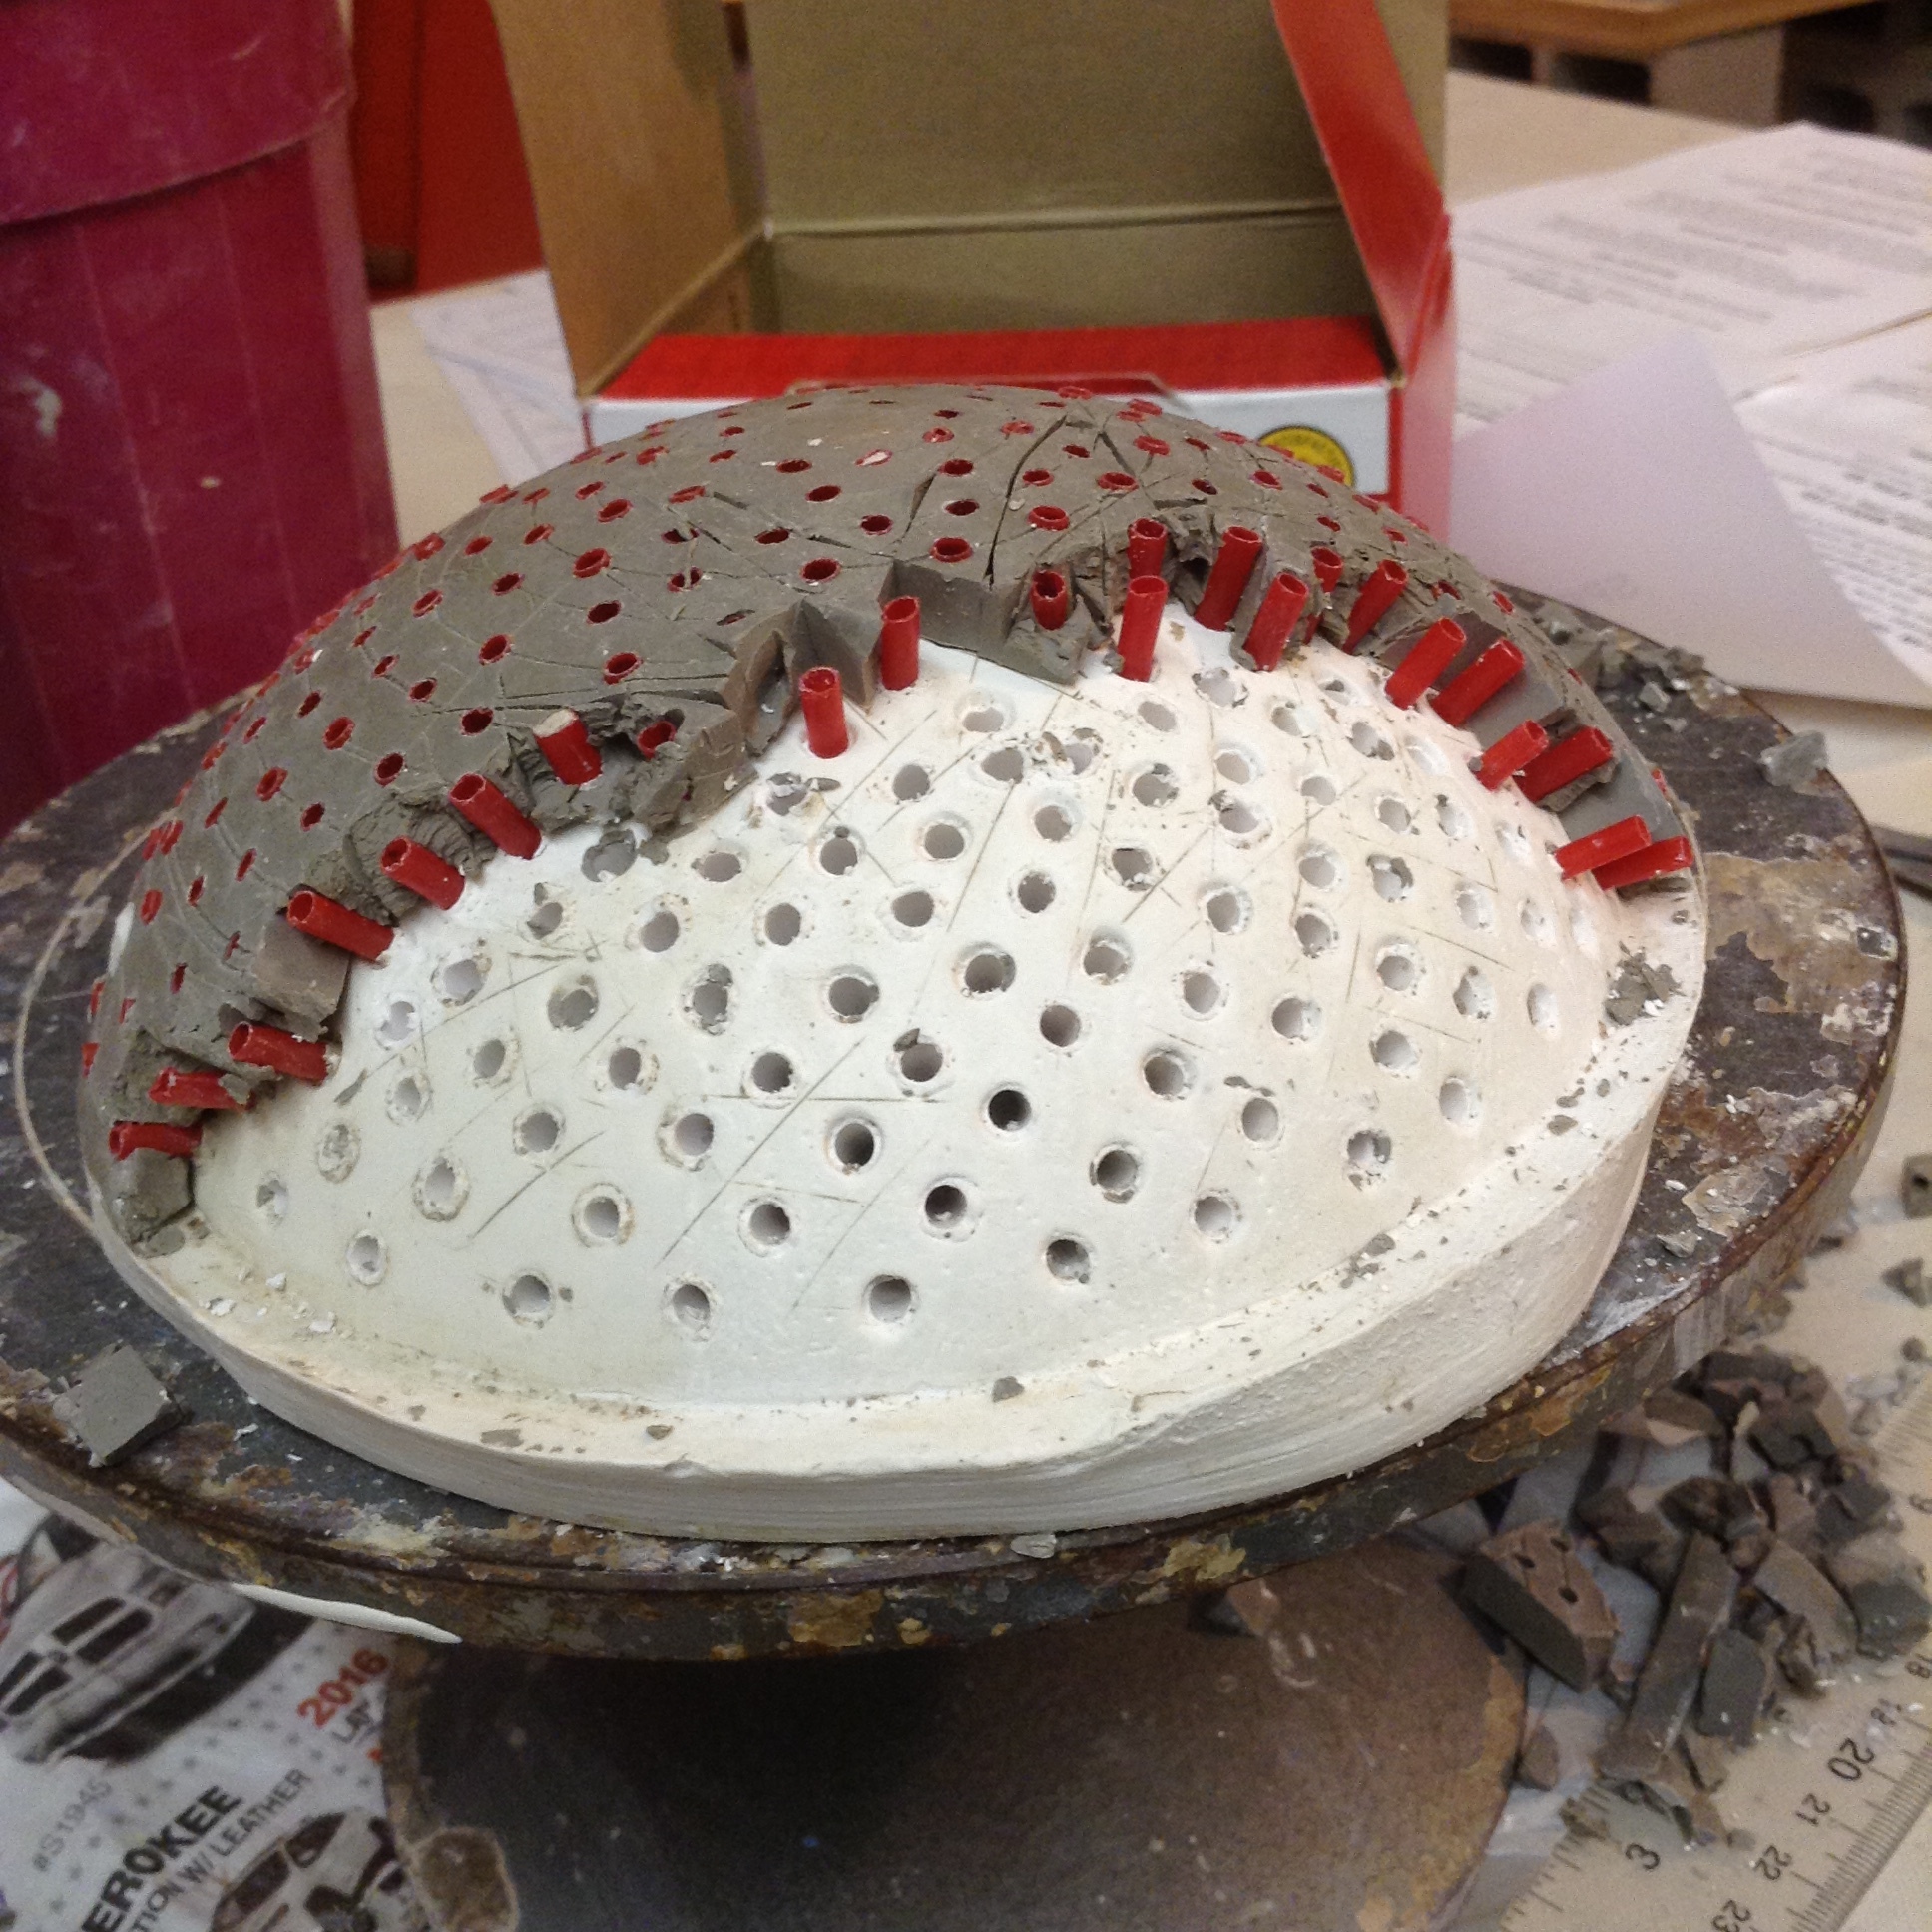
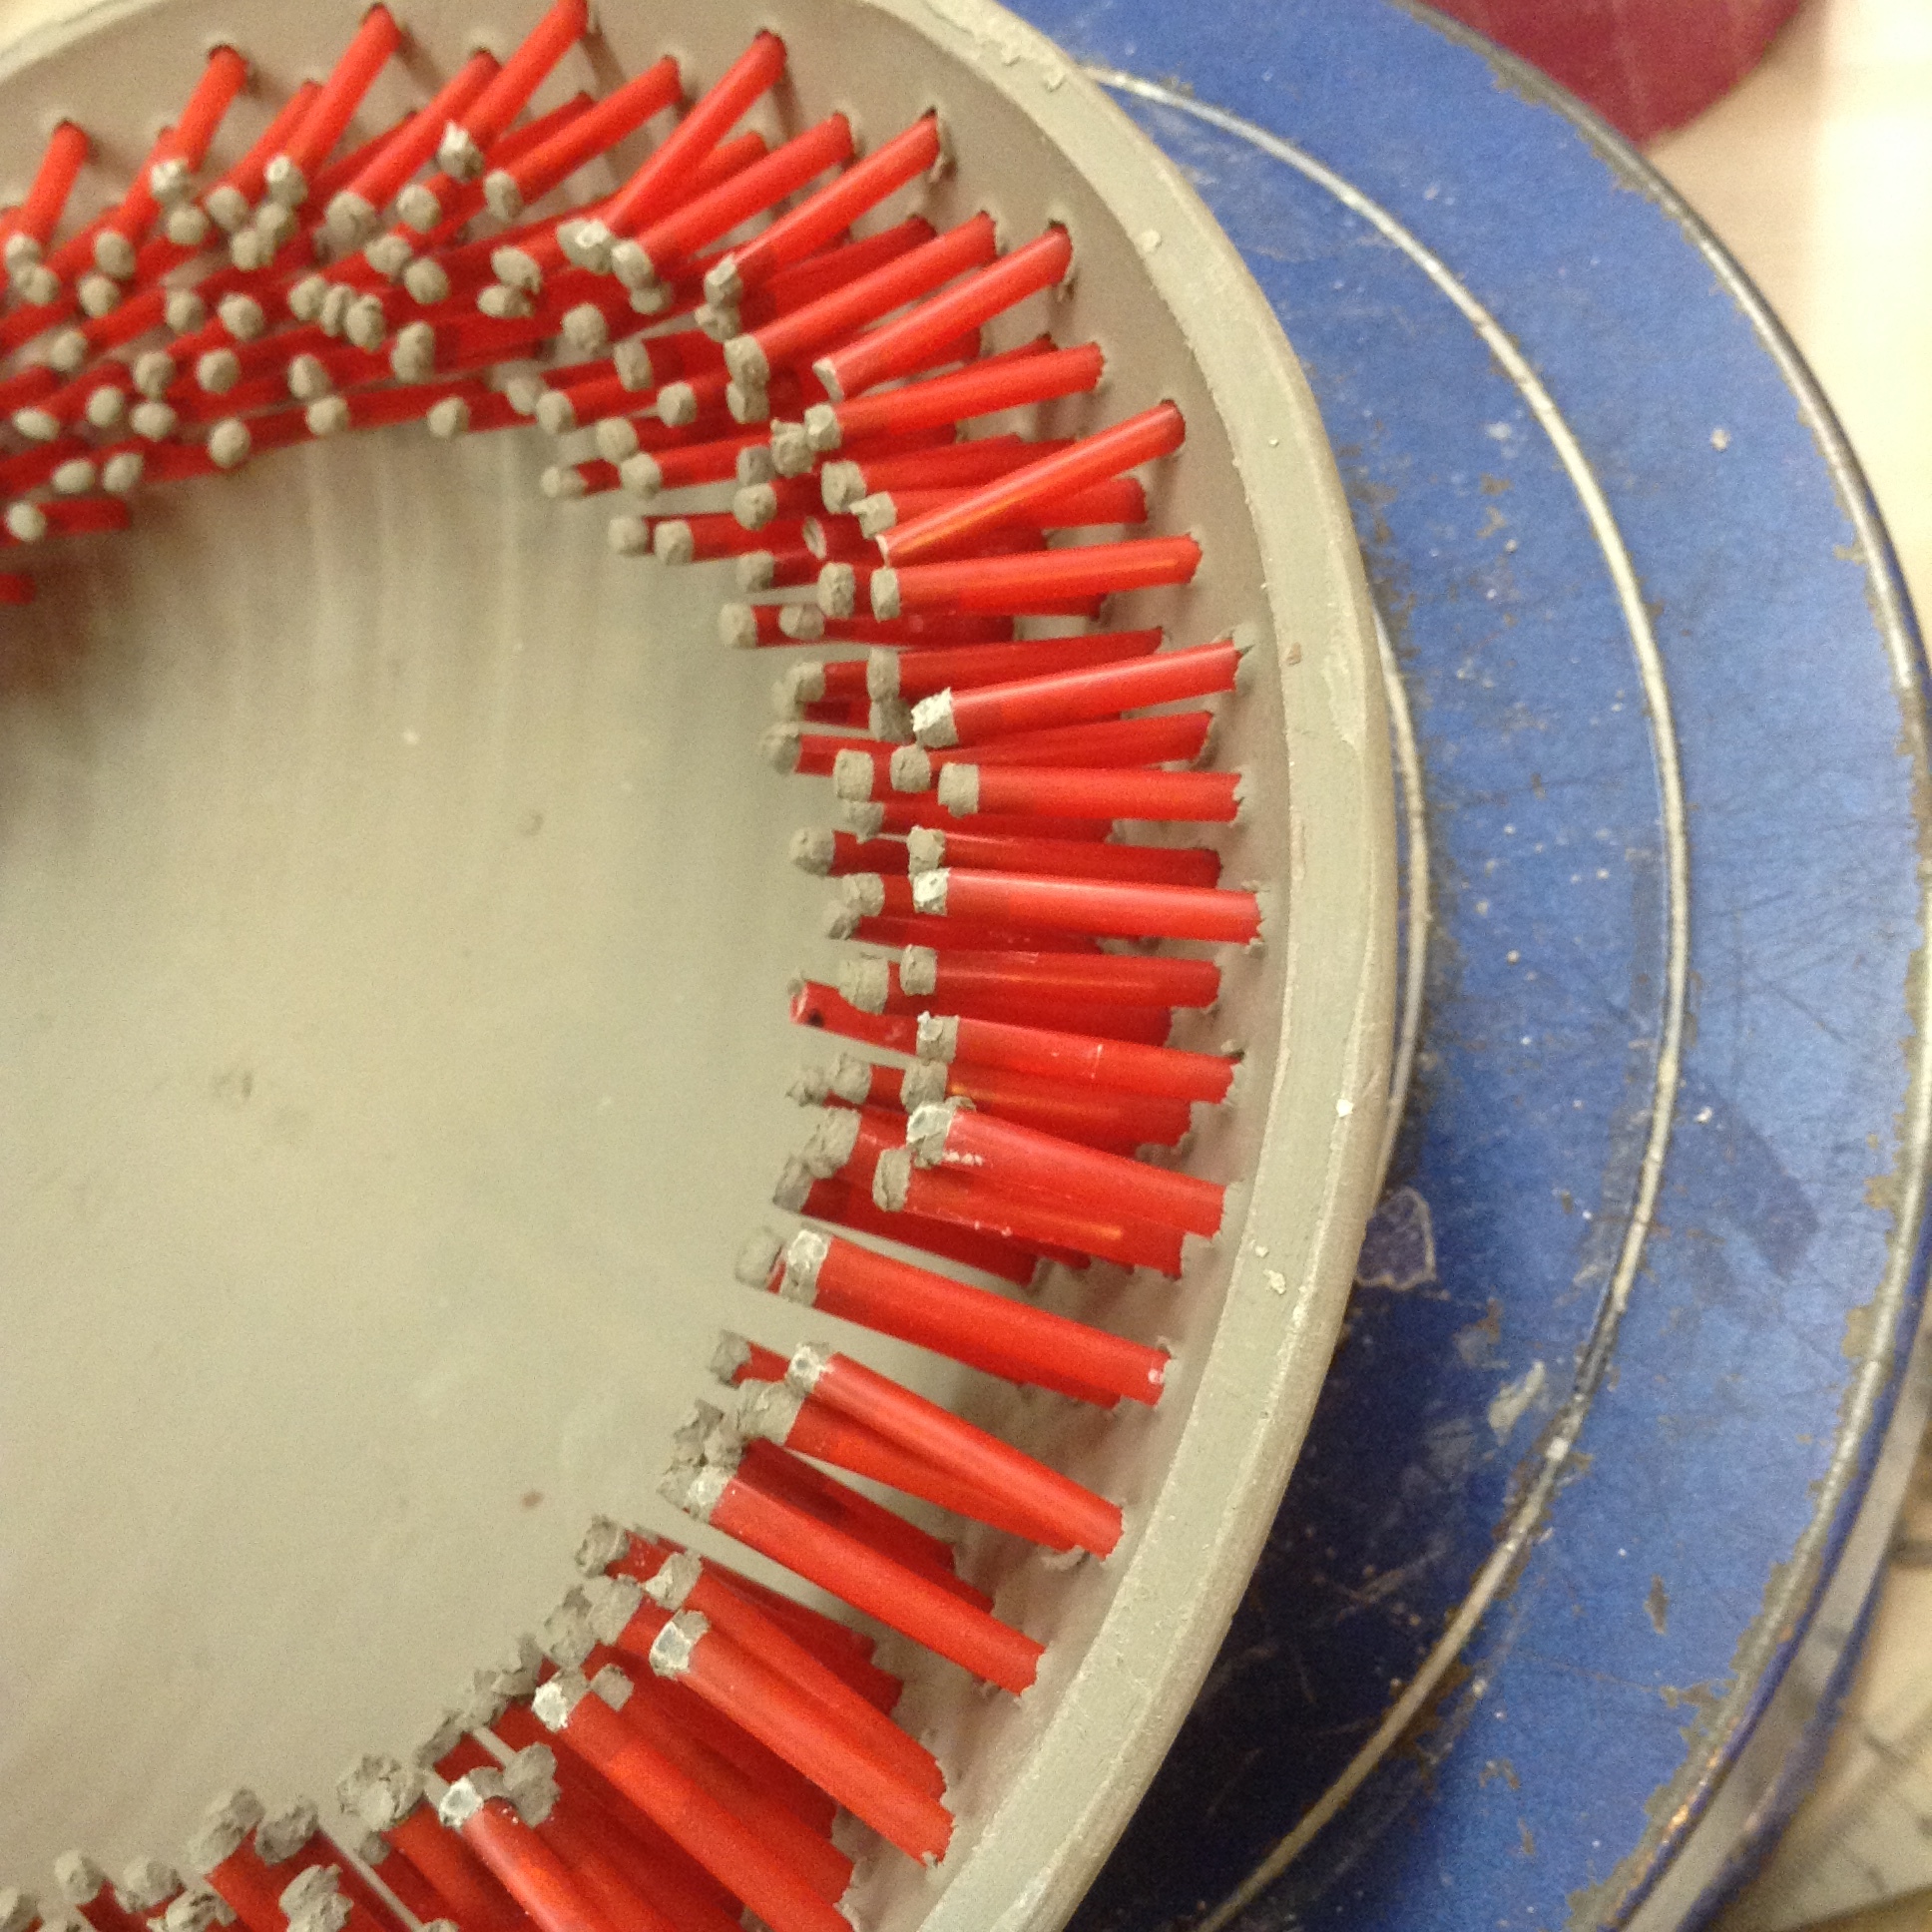
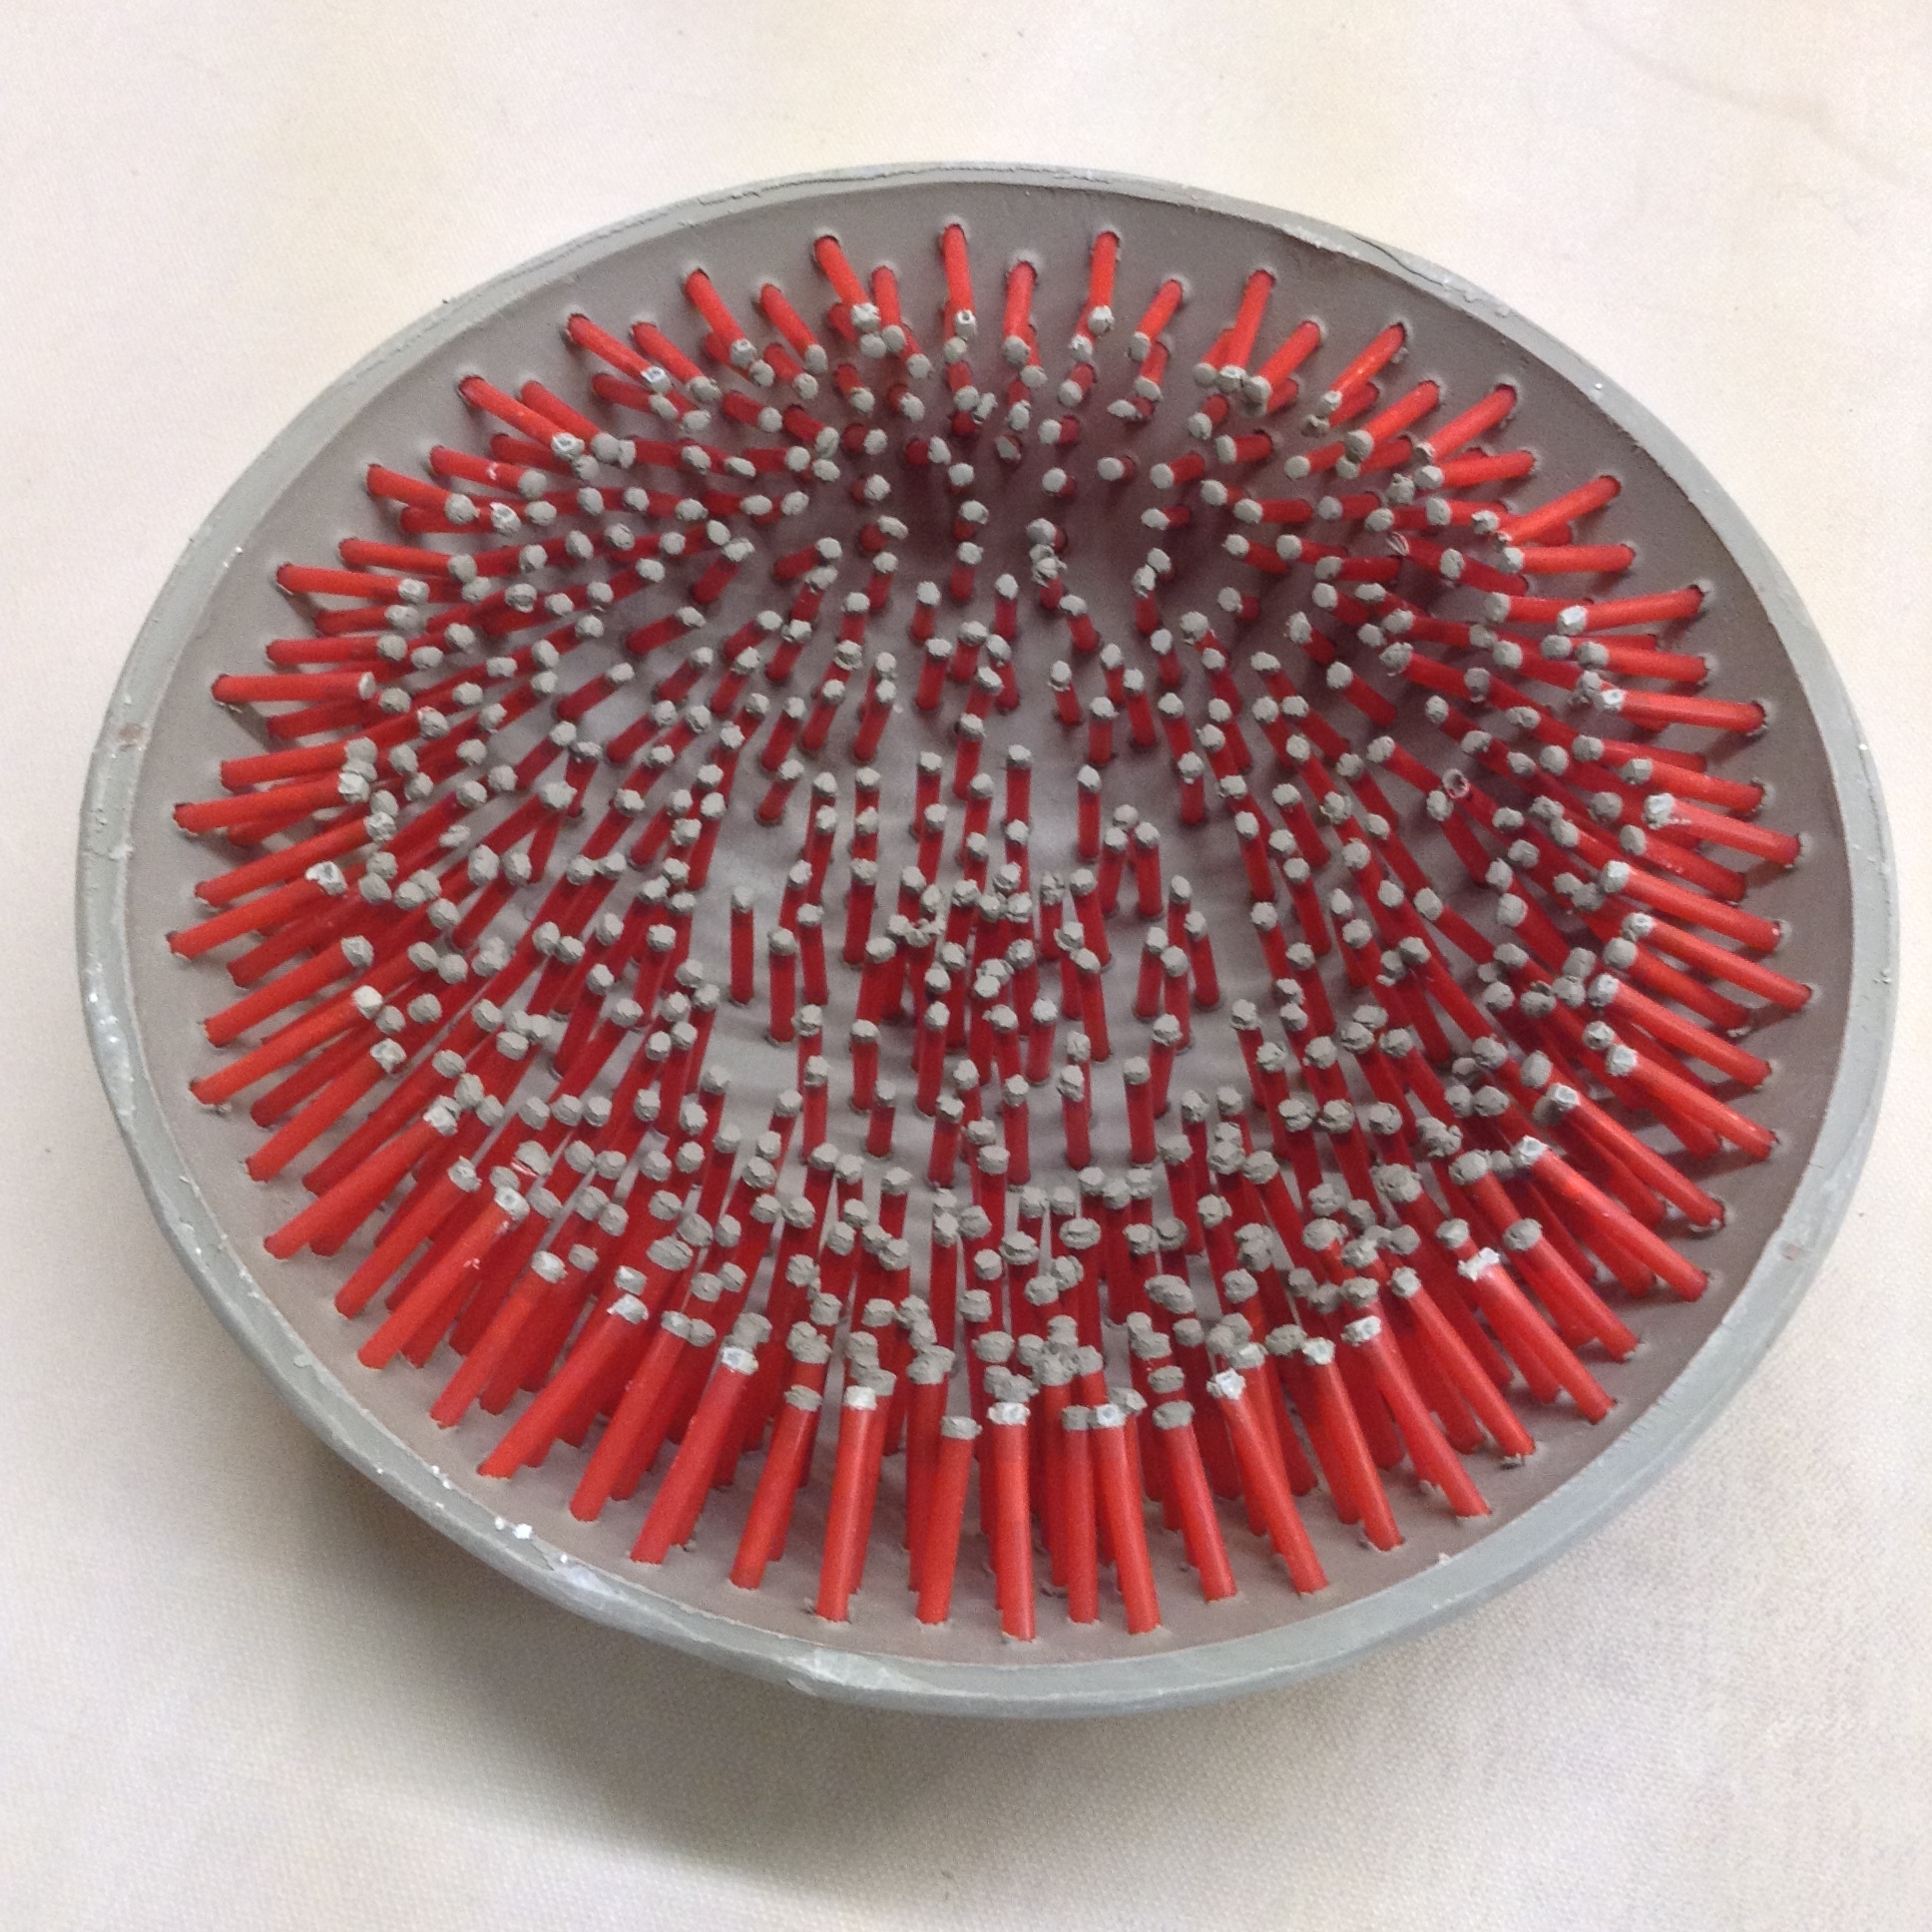
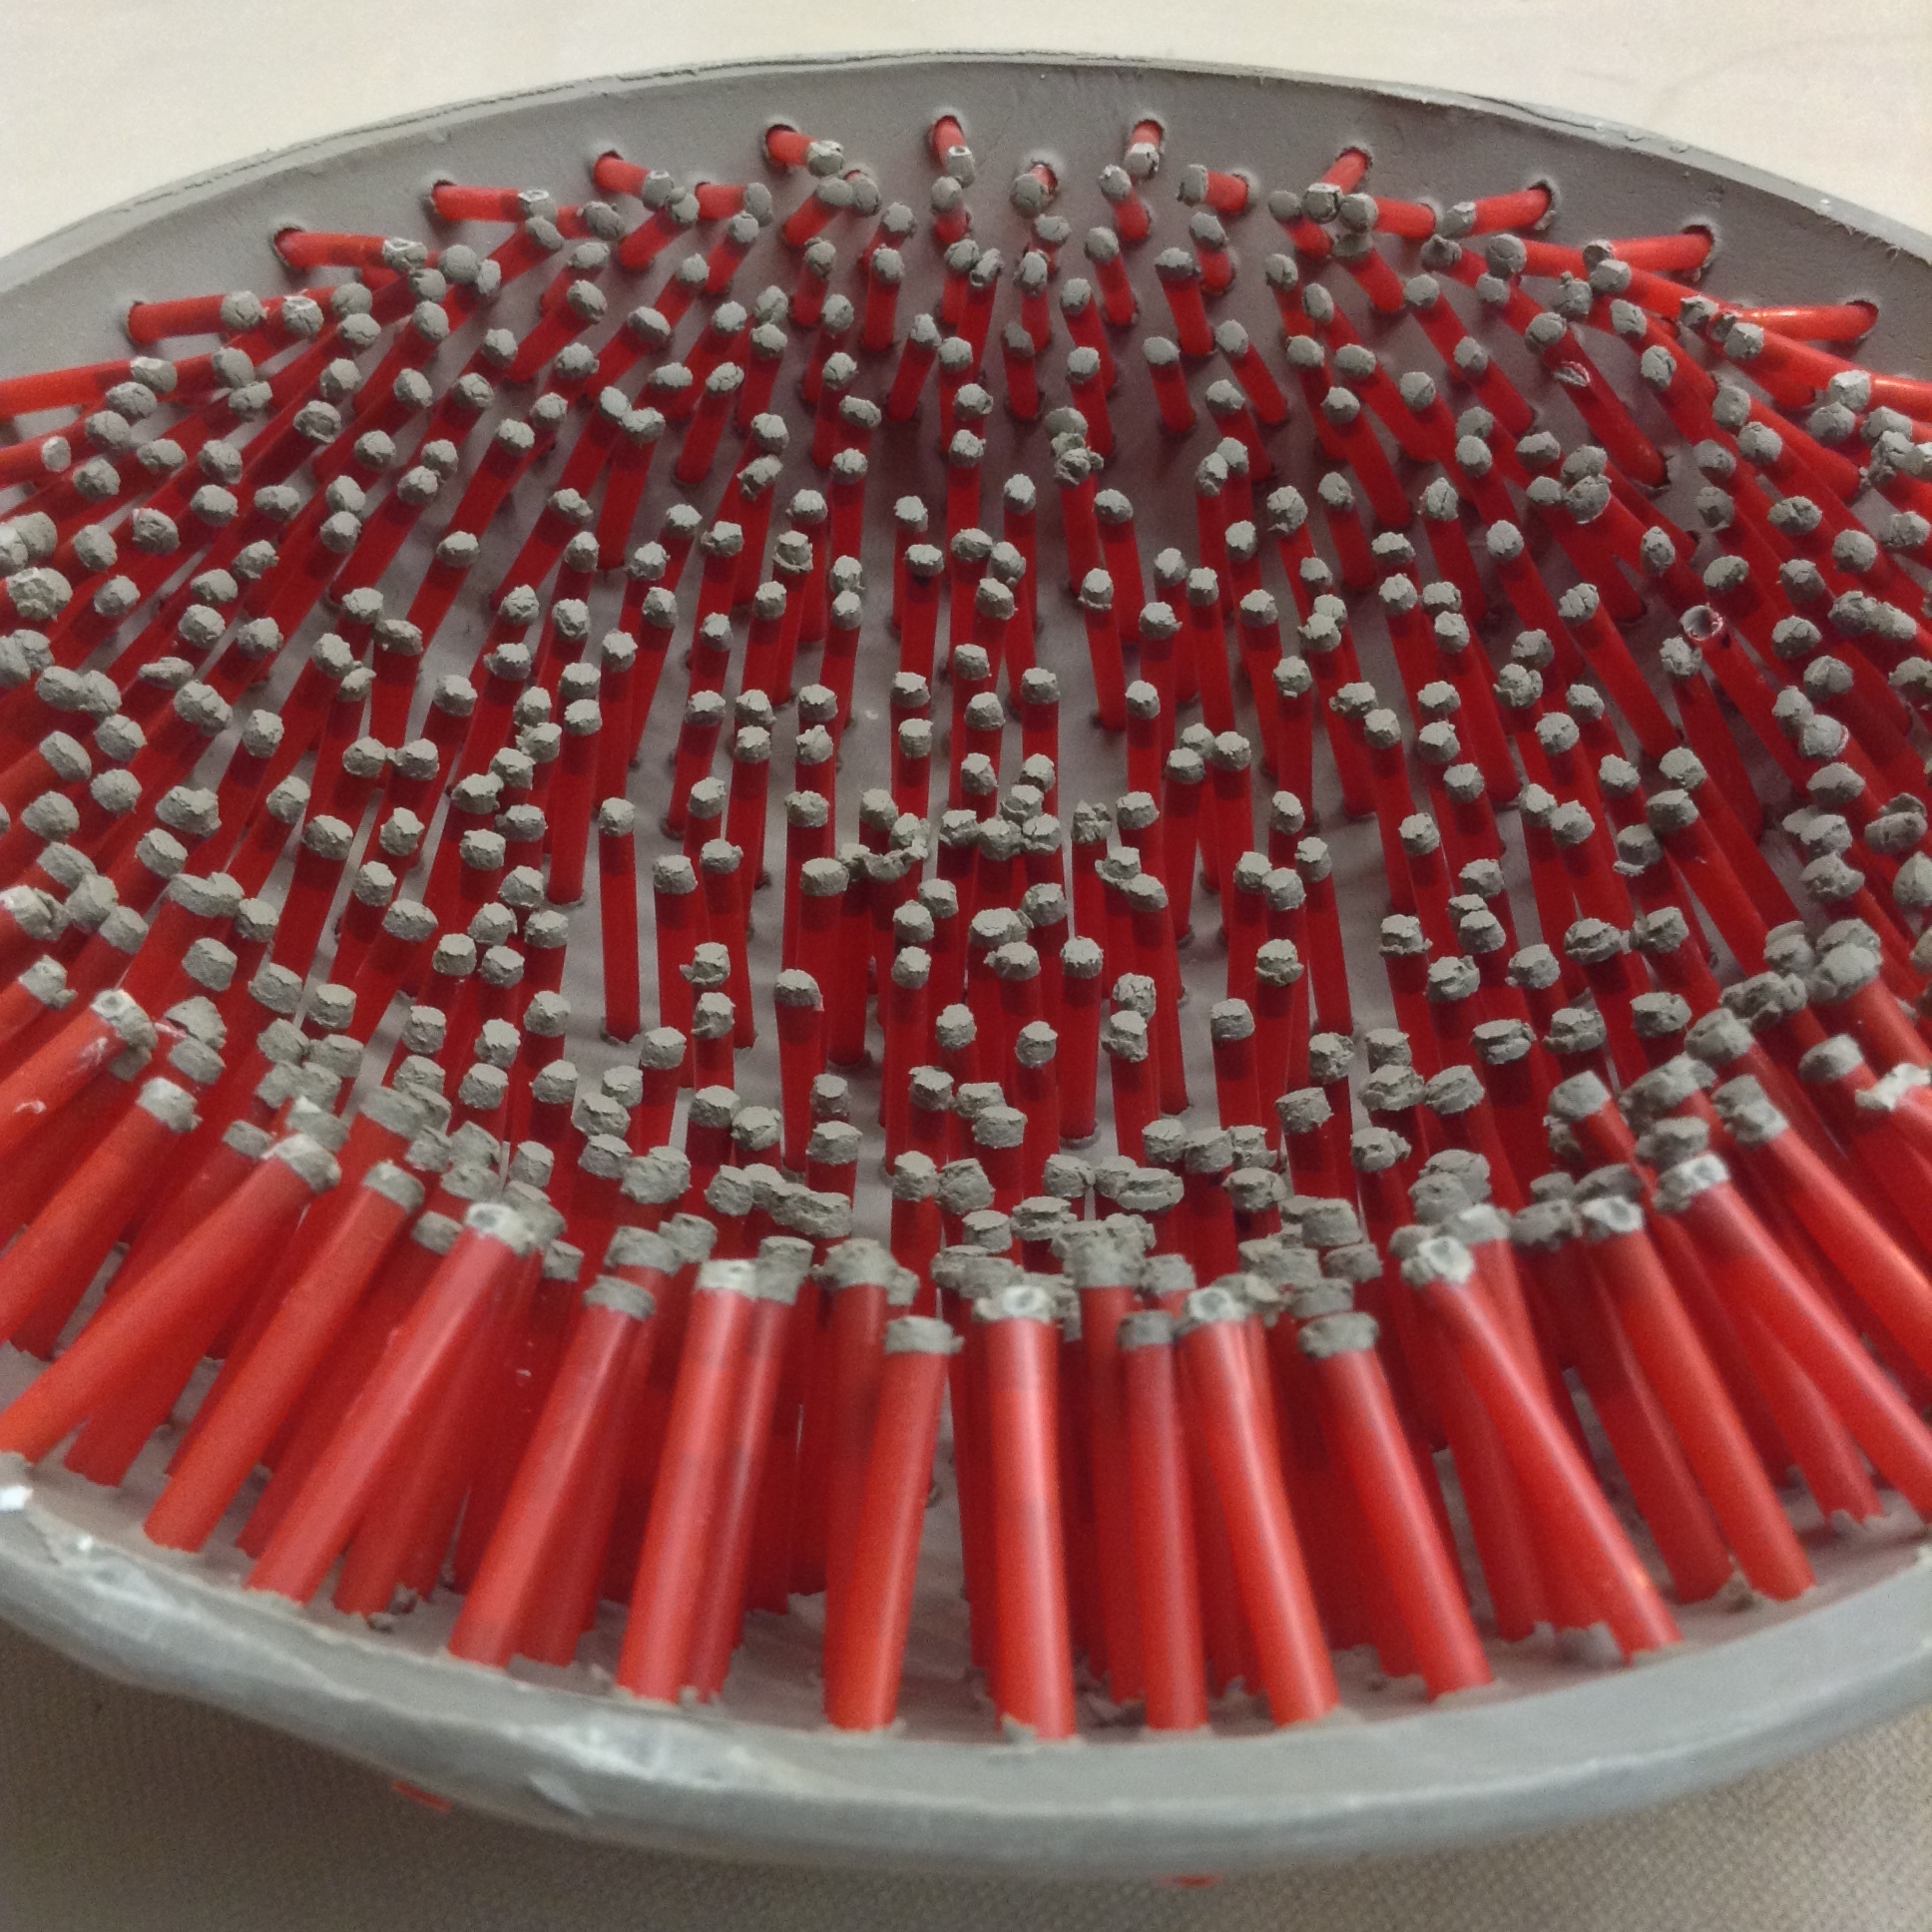
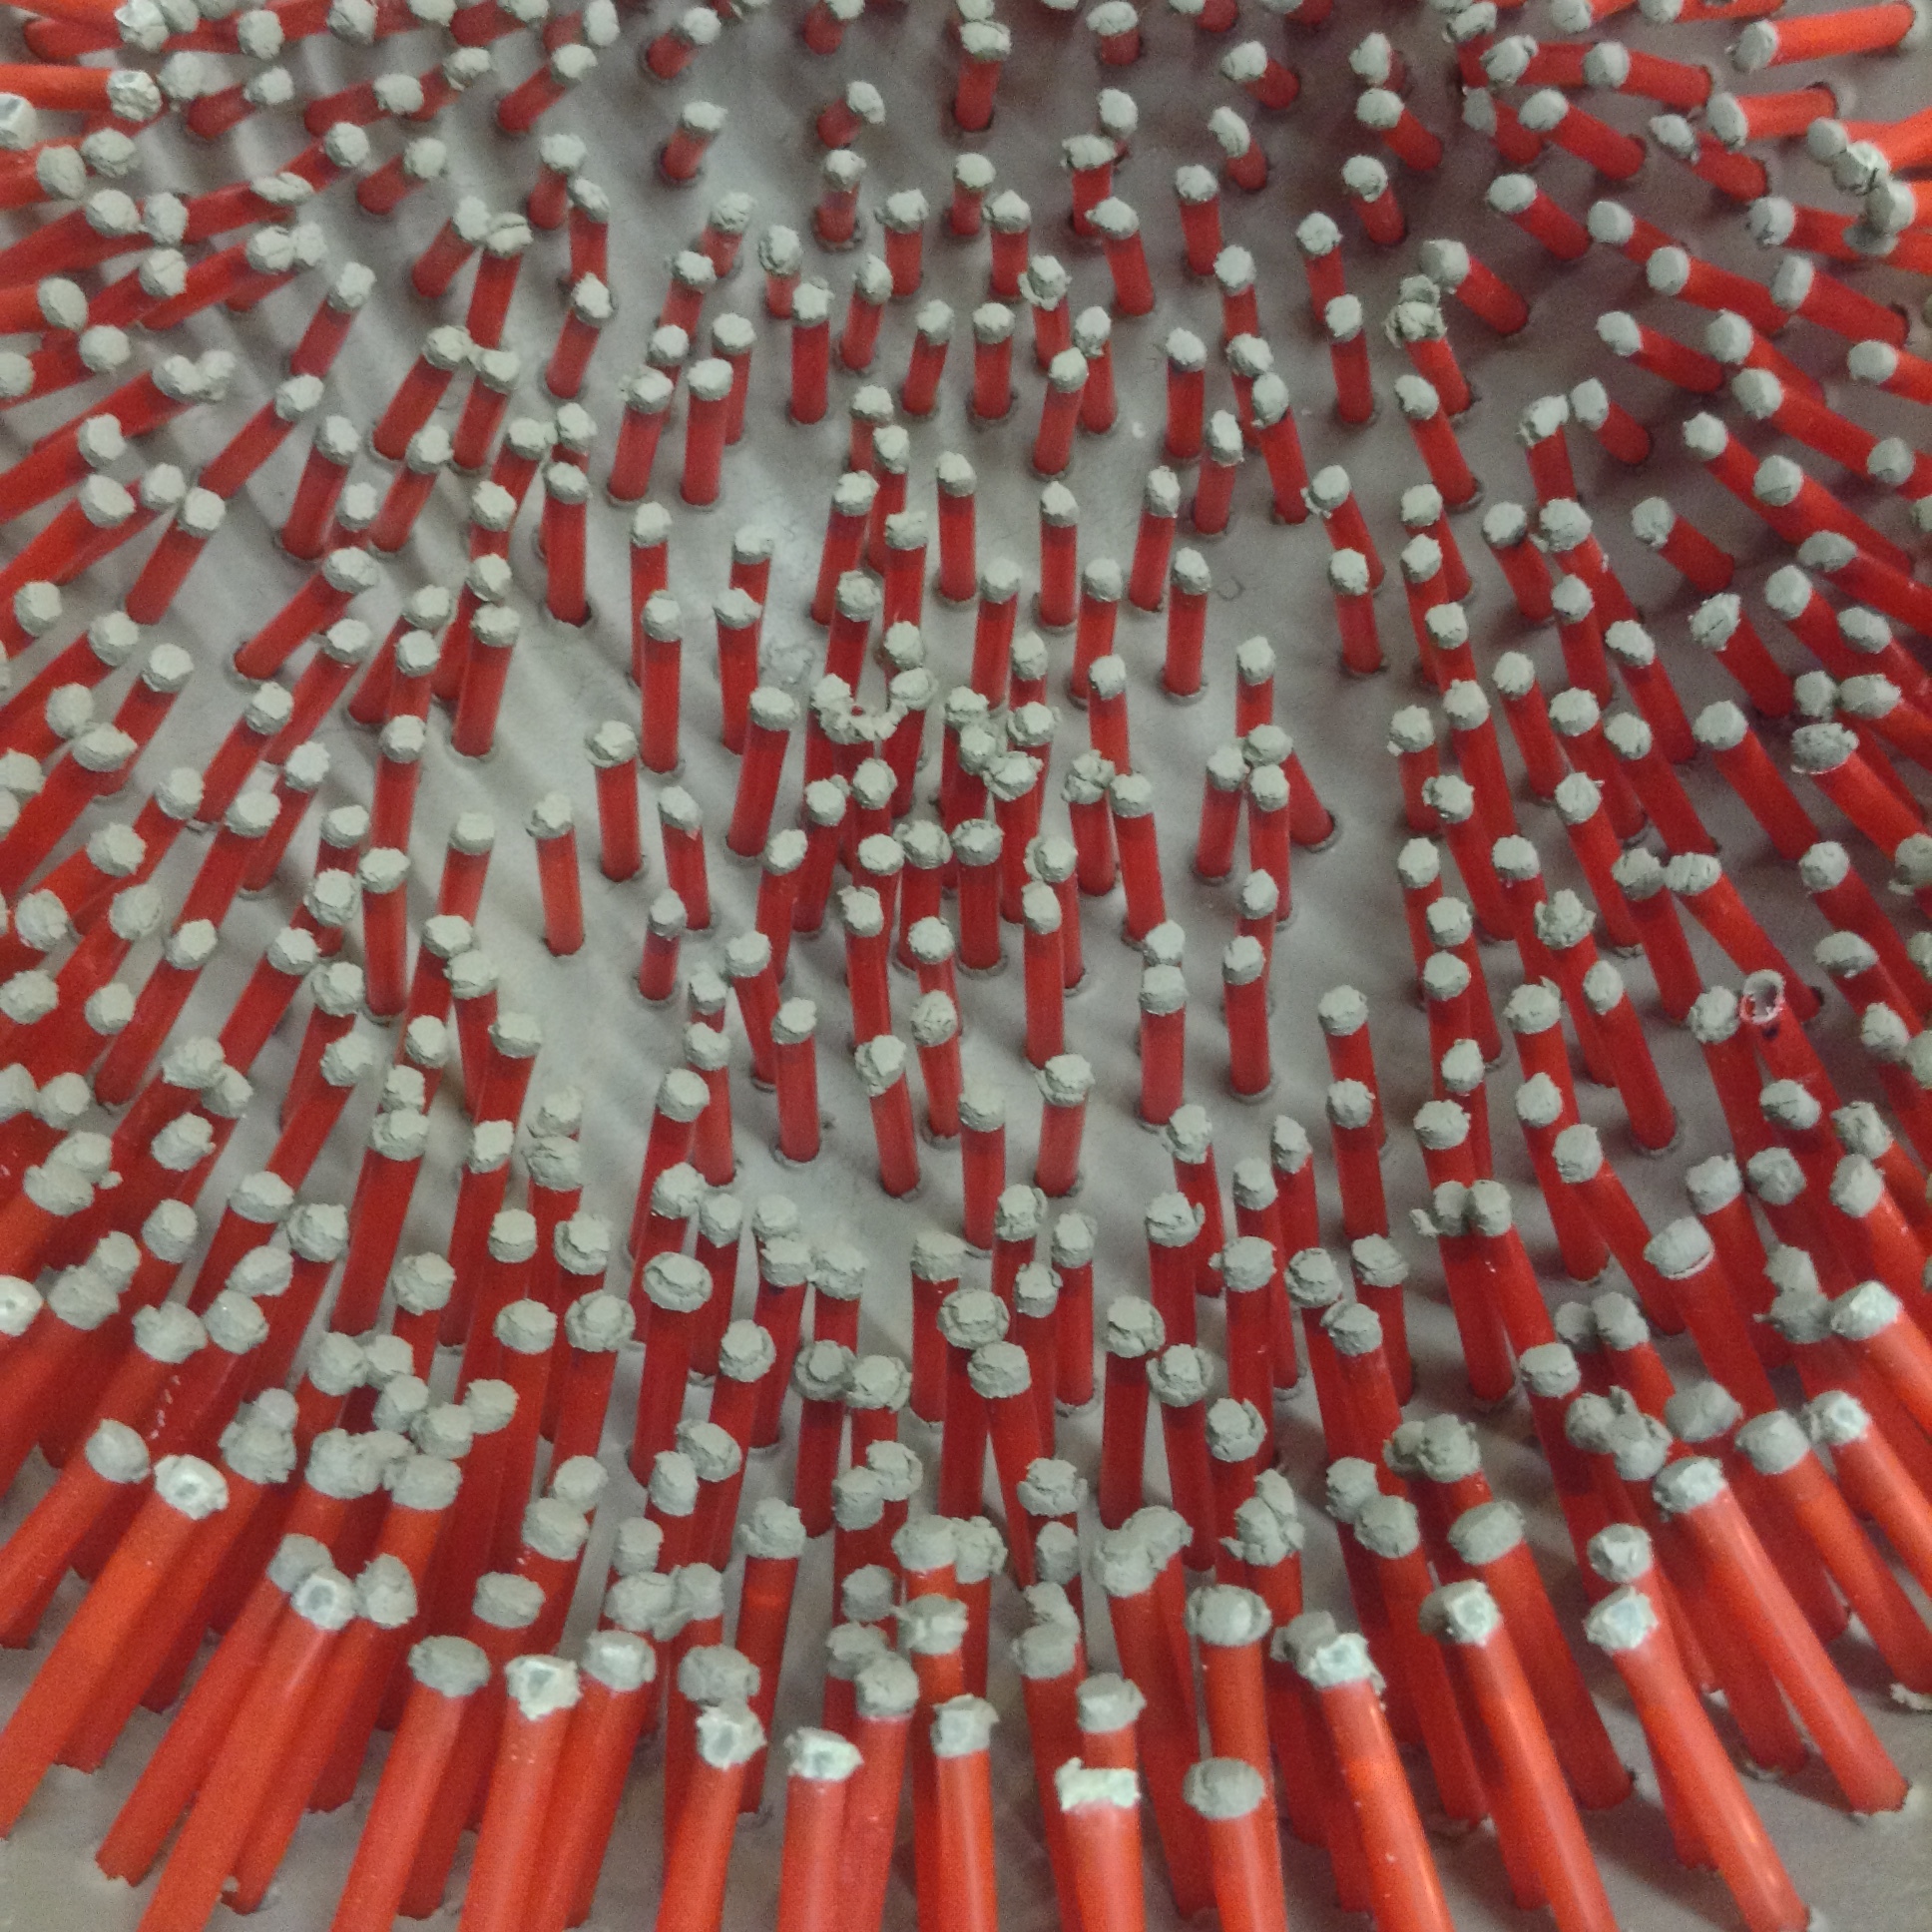
This dome is one of three shown that get stabbed with red straws, then filled from underneath with plaster.
SCAFFOLDING MATERIALS SUMMARY
There are many ways to build an array of holes in a material, but I opted to start my exploration with a hoop-and-tape method, and progressed into plaster. The key feature to these methods that I find useful is that I don't need a drill press, even though i lose out on a little accuracy. As it happens, accuracy of rod angle might not be important.
ARRAY TYPES
Hoop and Tape: Not bad for a hack!
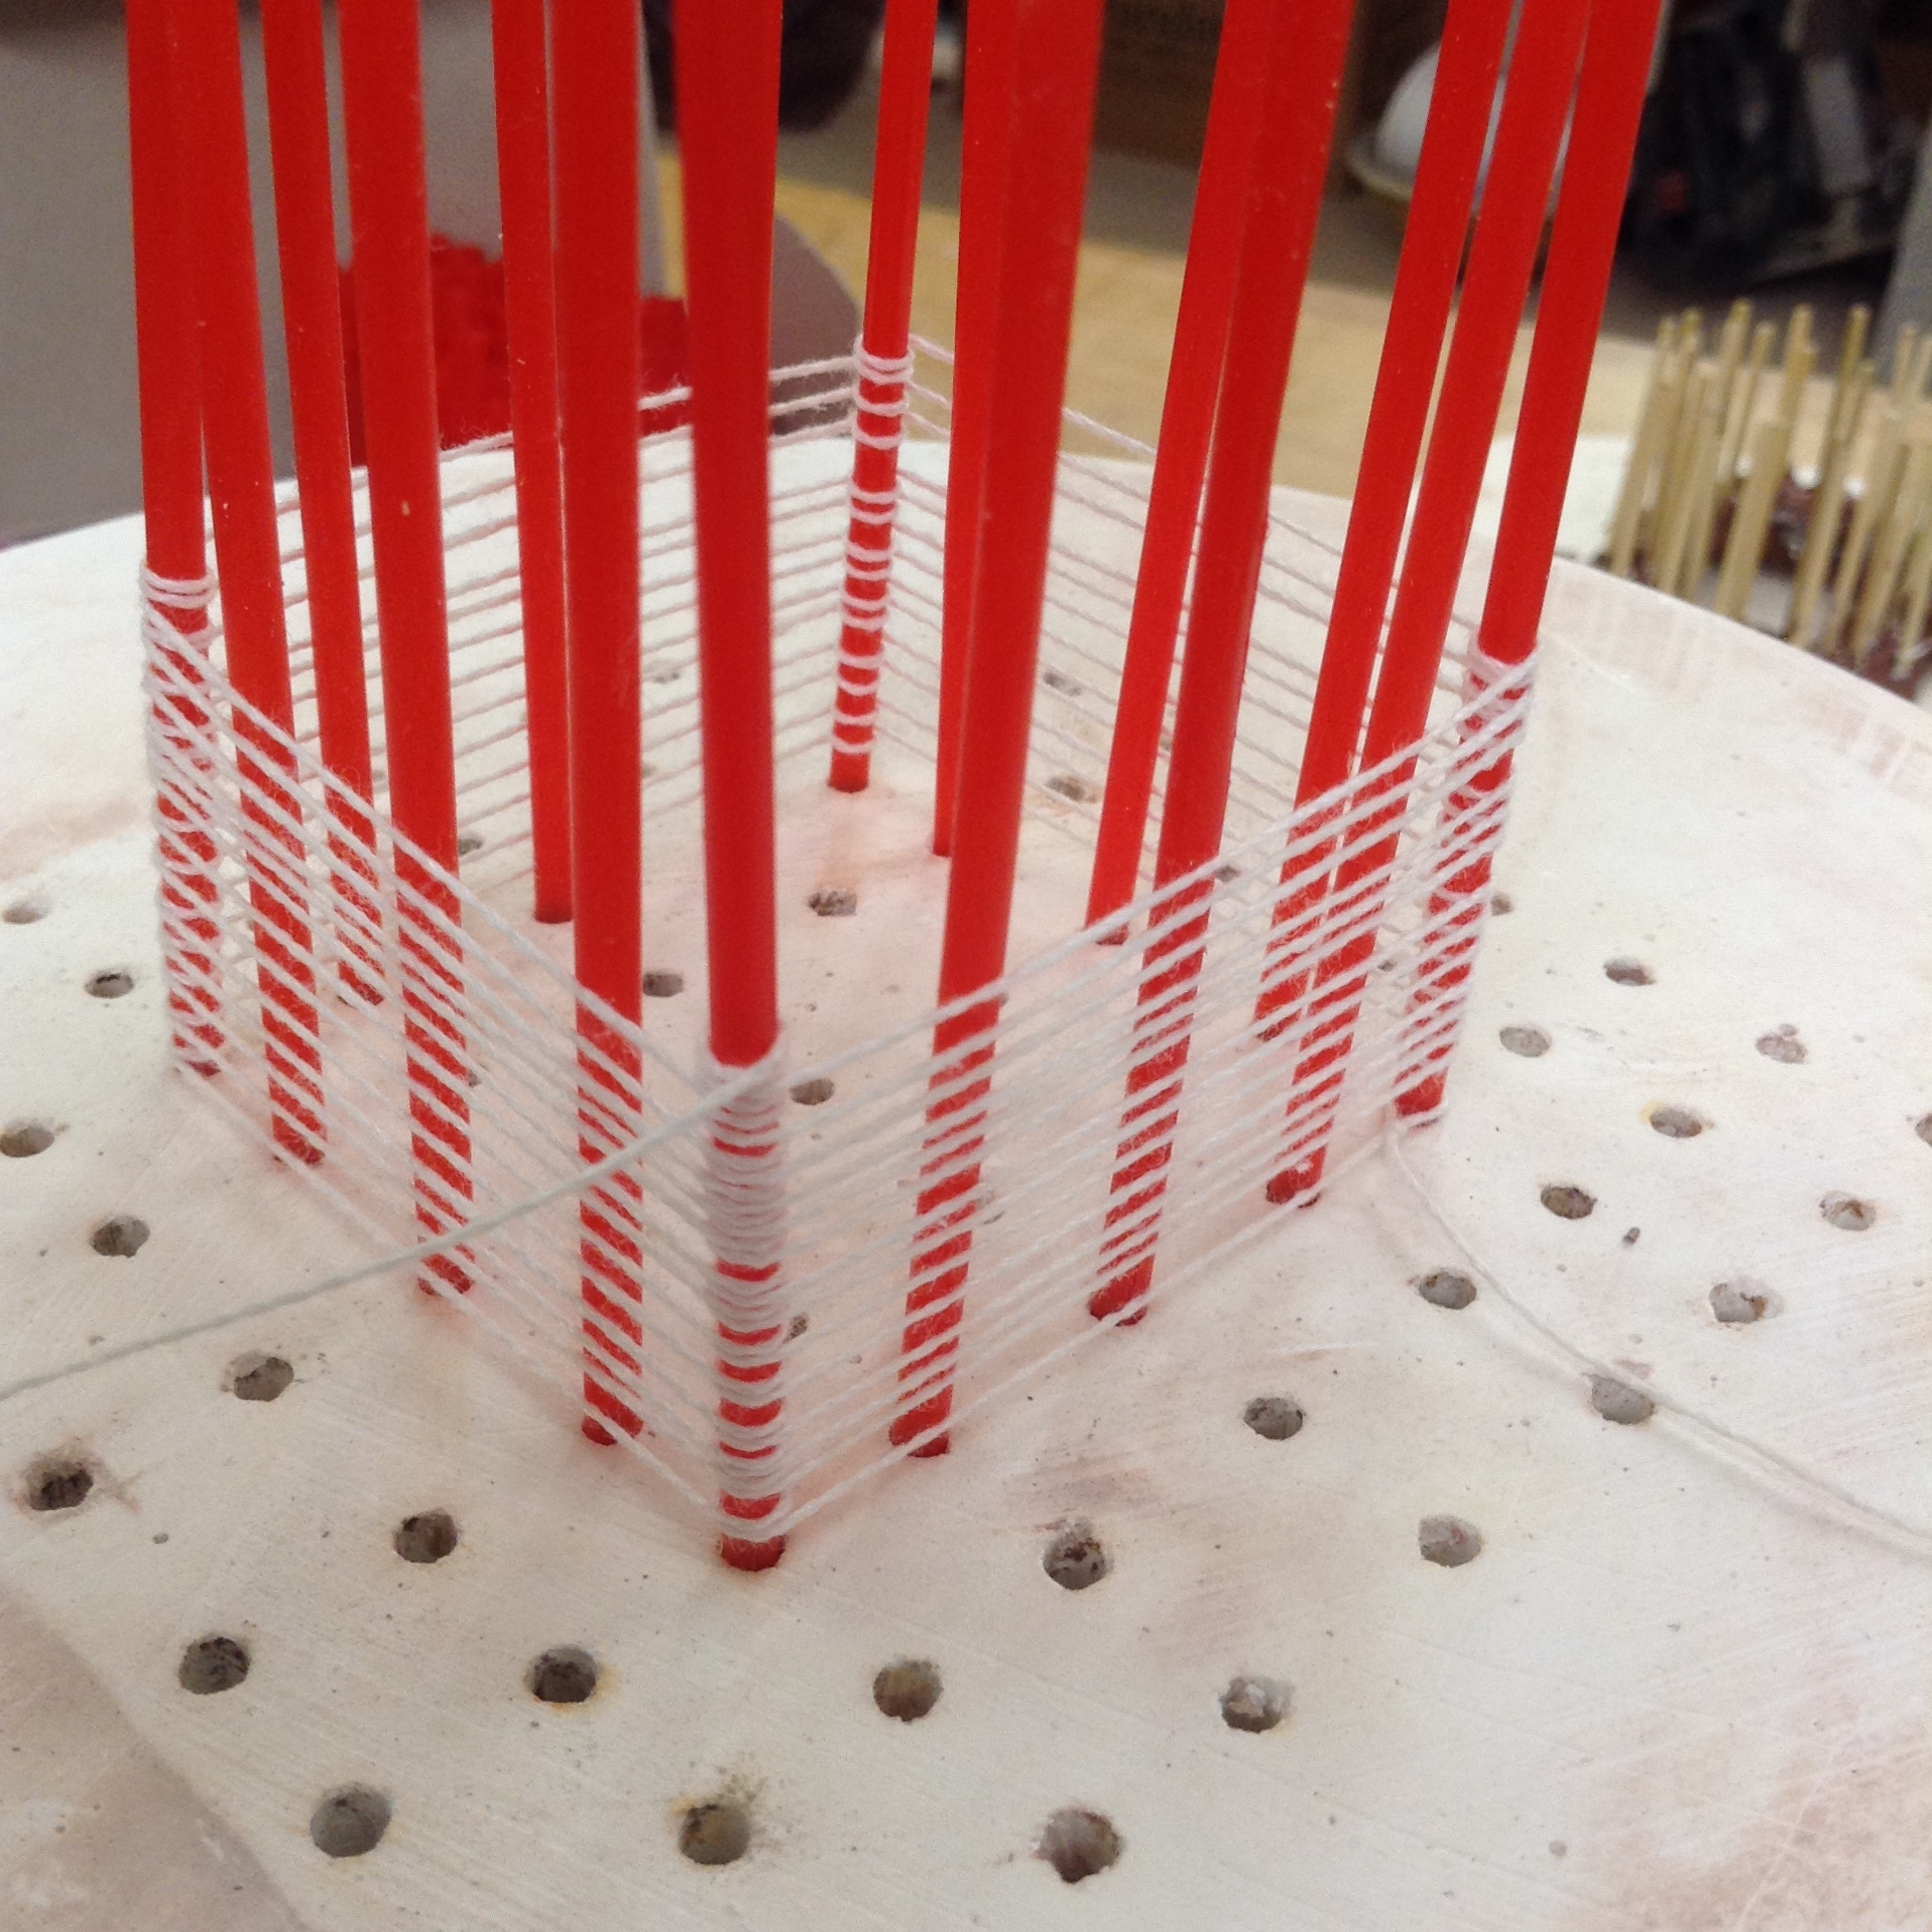
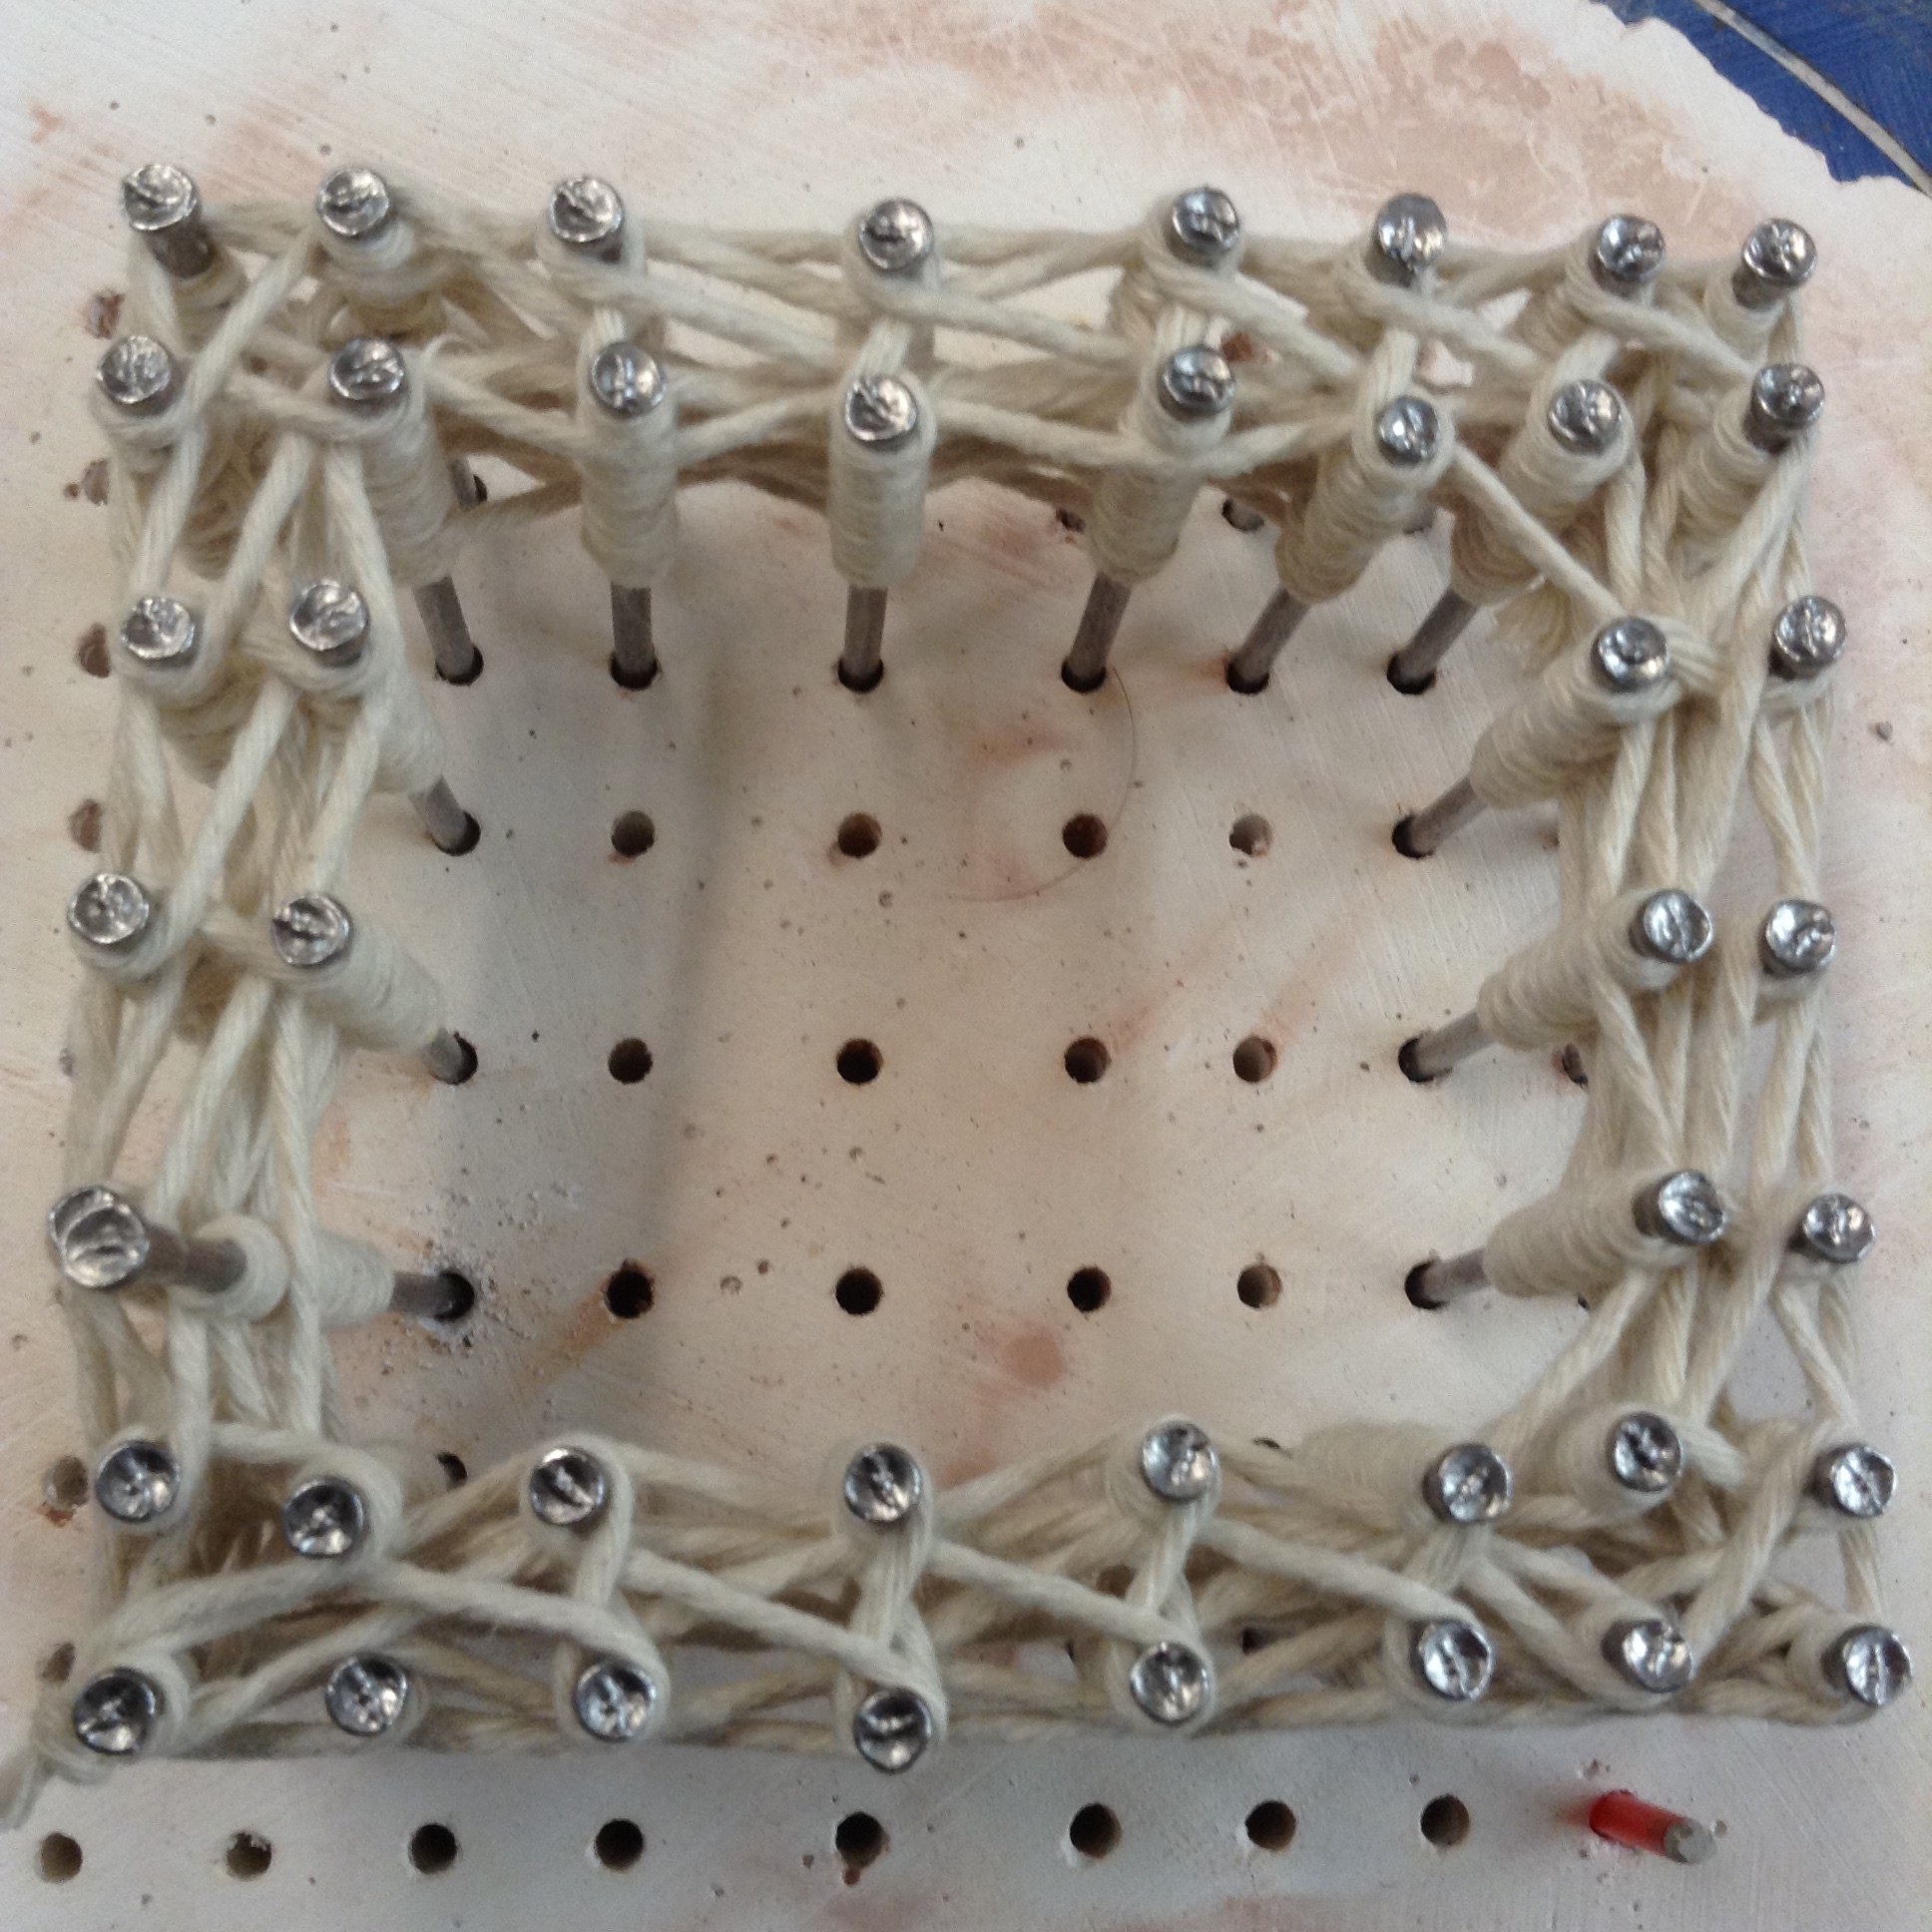
I started by wanting a round array of rods that would eventually lead to container type objects that you could drink from or plant in. This was my first solution. It works pretty well! The tape loosens as the winding gets taller, creating a fish-weir type shape at the top, unless you add some spacing elements. Here are two windings on such a base. Different store-bought hoops are different enough in diameter that using two adjacent sizes leaves enough room in between for a thickness of slip that is strong enough to hold up after lots of distortion.
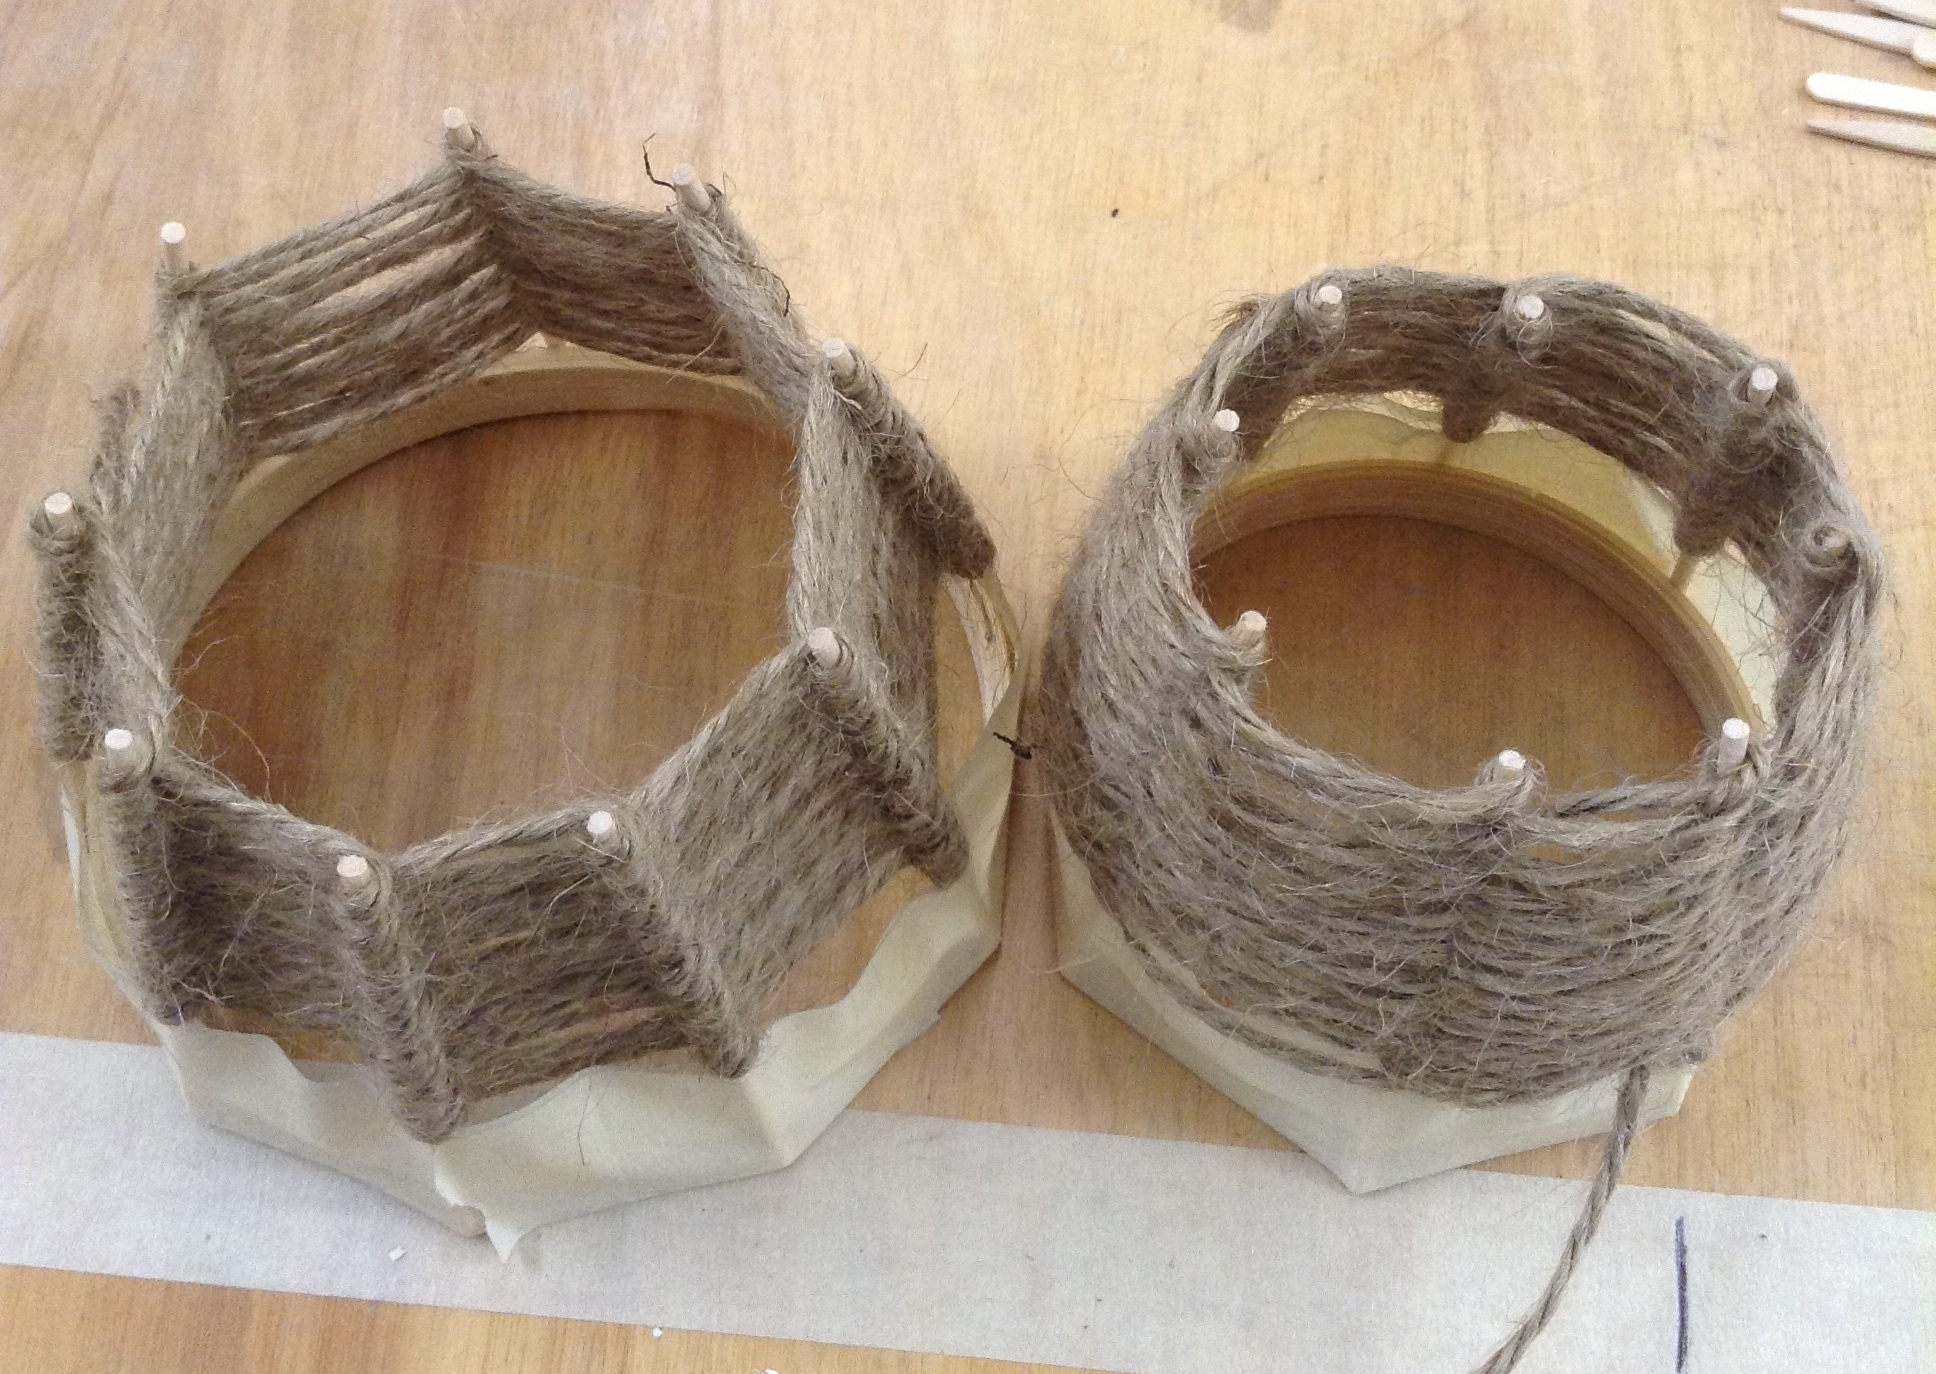
Single round array from embroidery hoops. Rods held with tape.

Hoop and tape form showing a particular winding that makes a smoother string surface on the inside of the rods. The windings develop in many ways with respect to whether the rod bump is involved in the casting or not.
Plaster: A bit fancier!
The plaster bases that hold the rods steady seems like a good development. Here are examples of early stages. The plaster bases themselves are interesting to make!

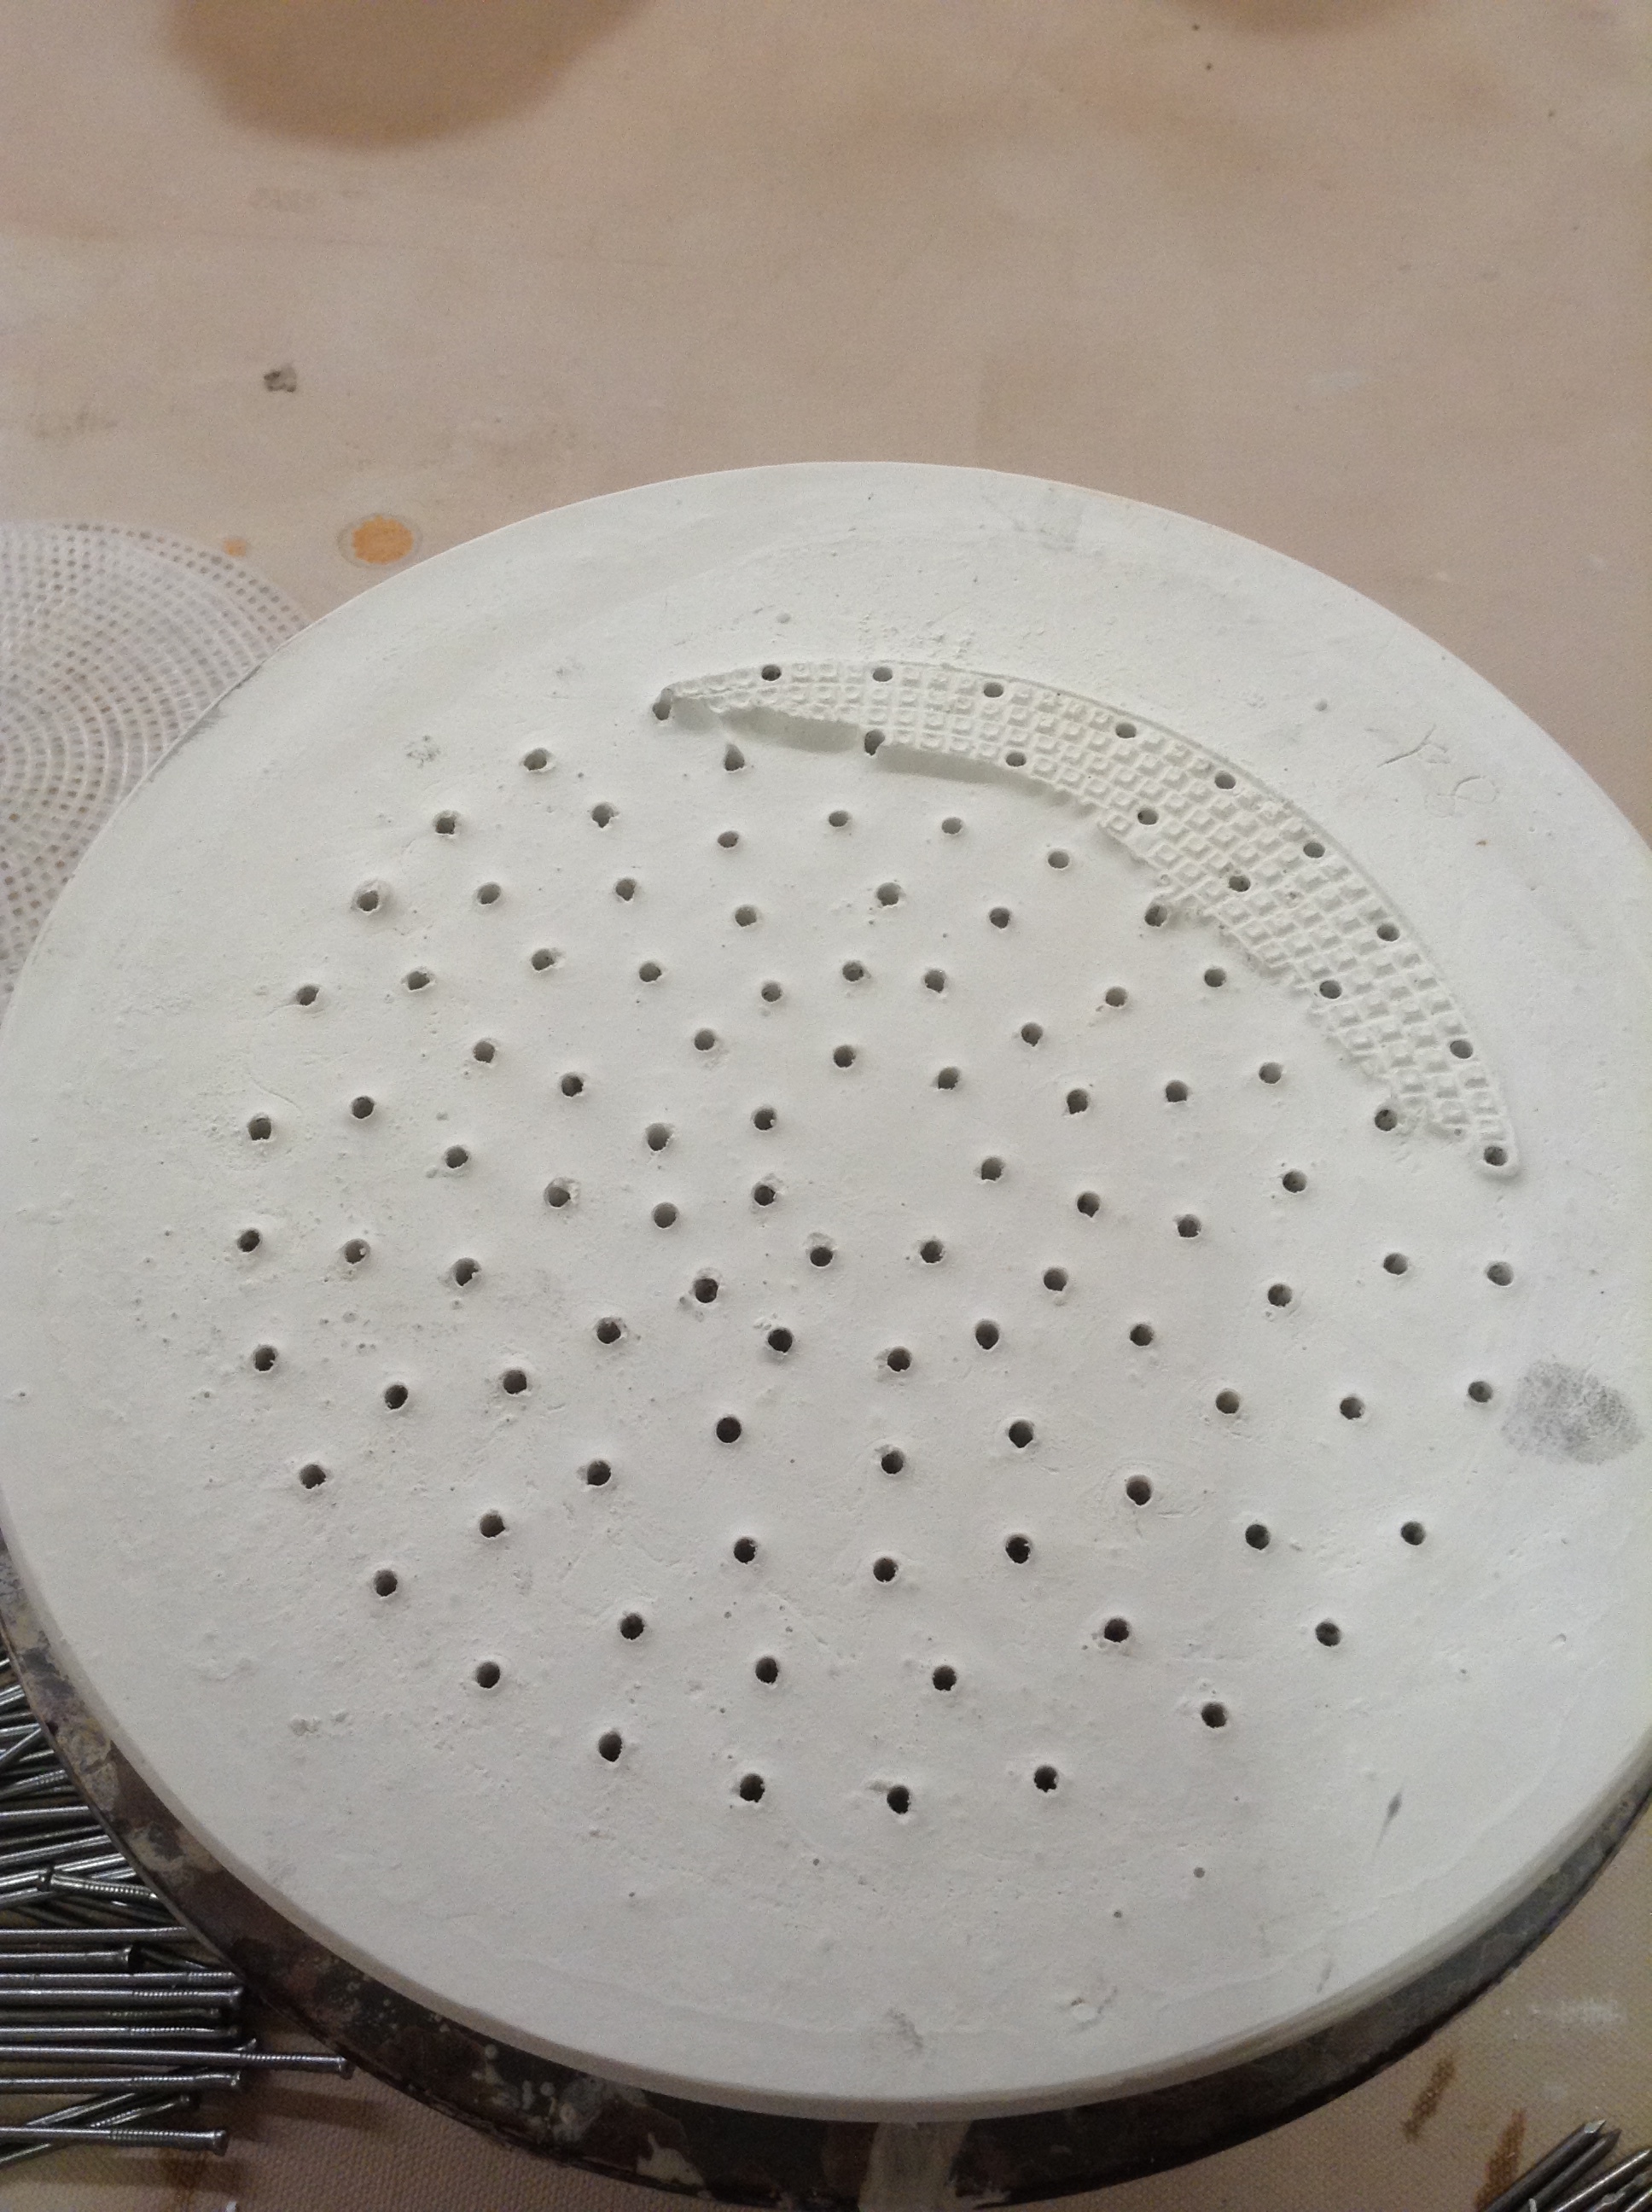
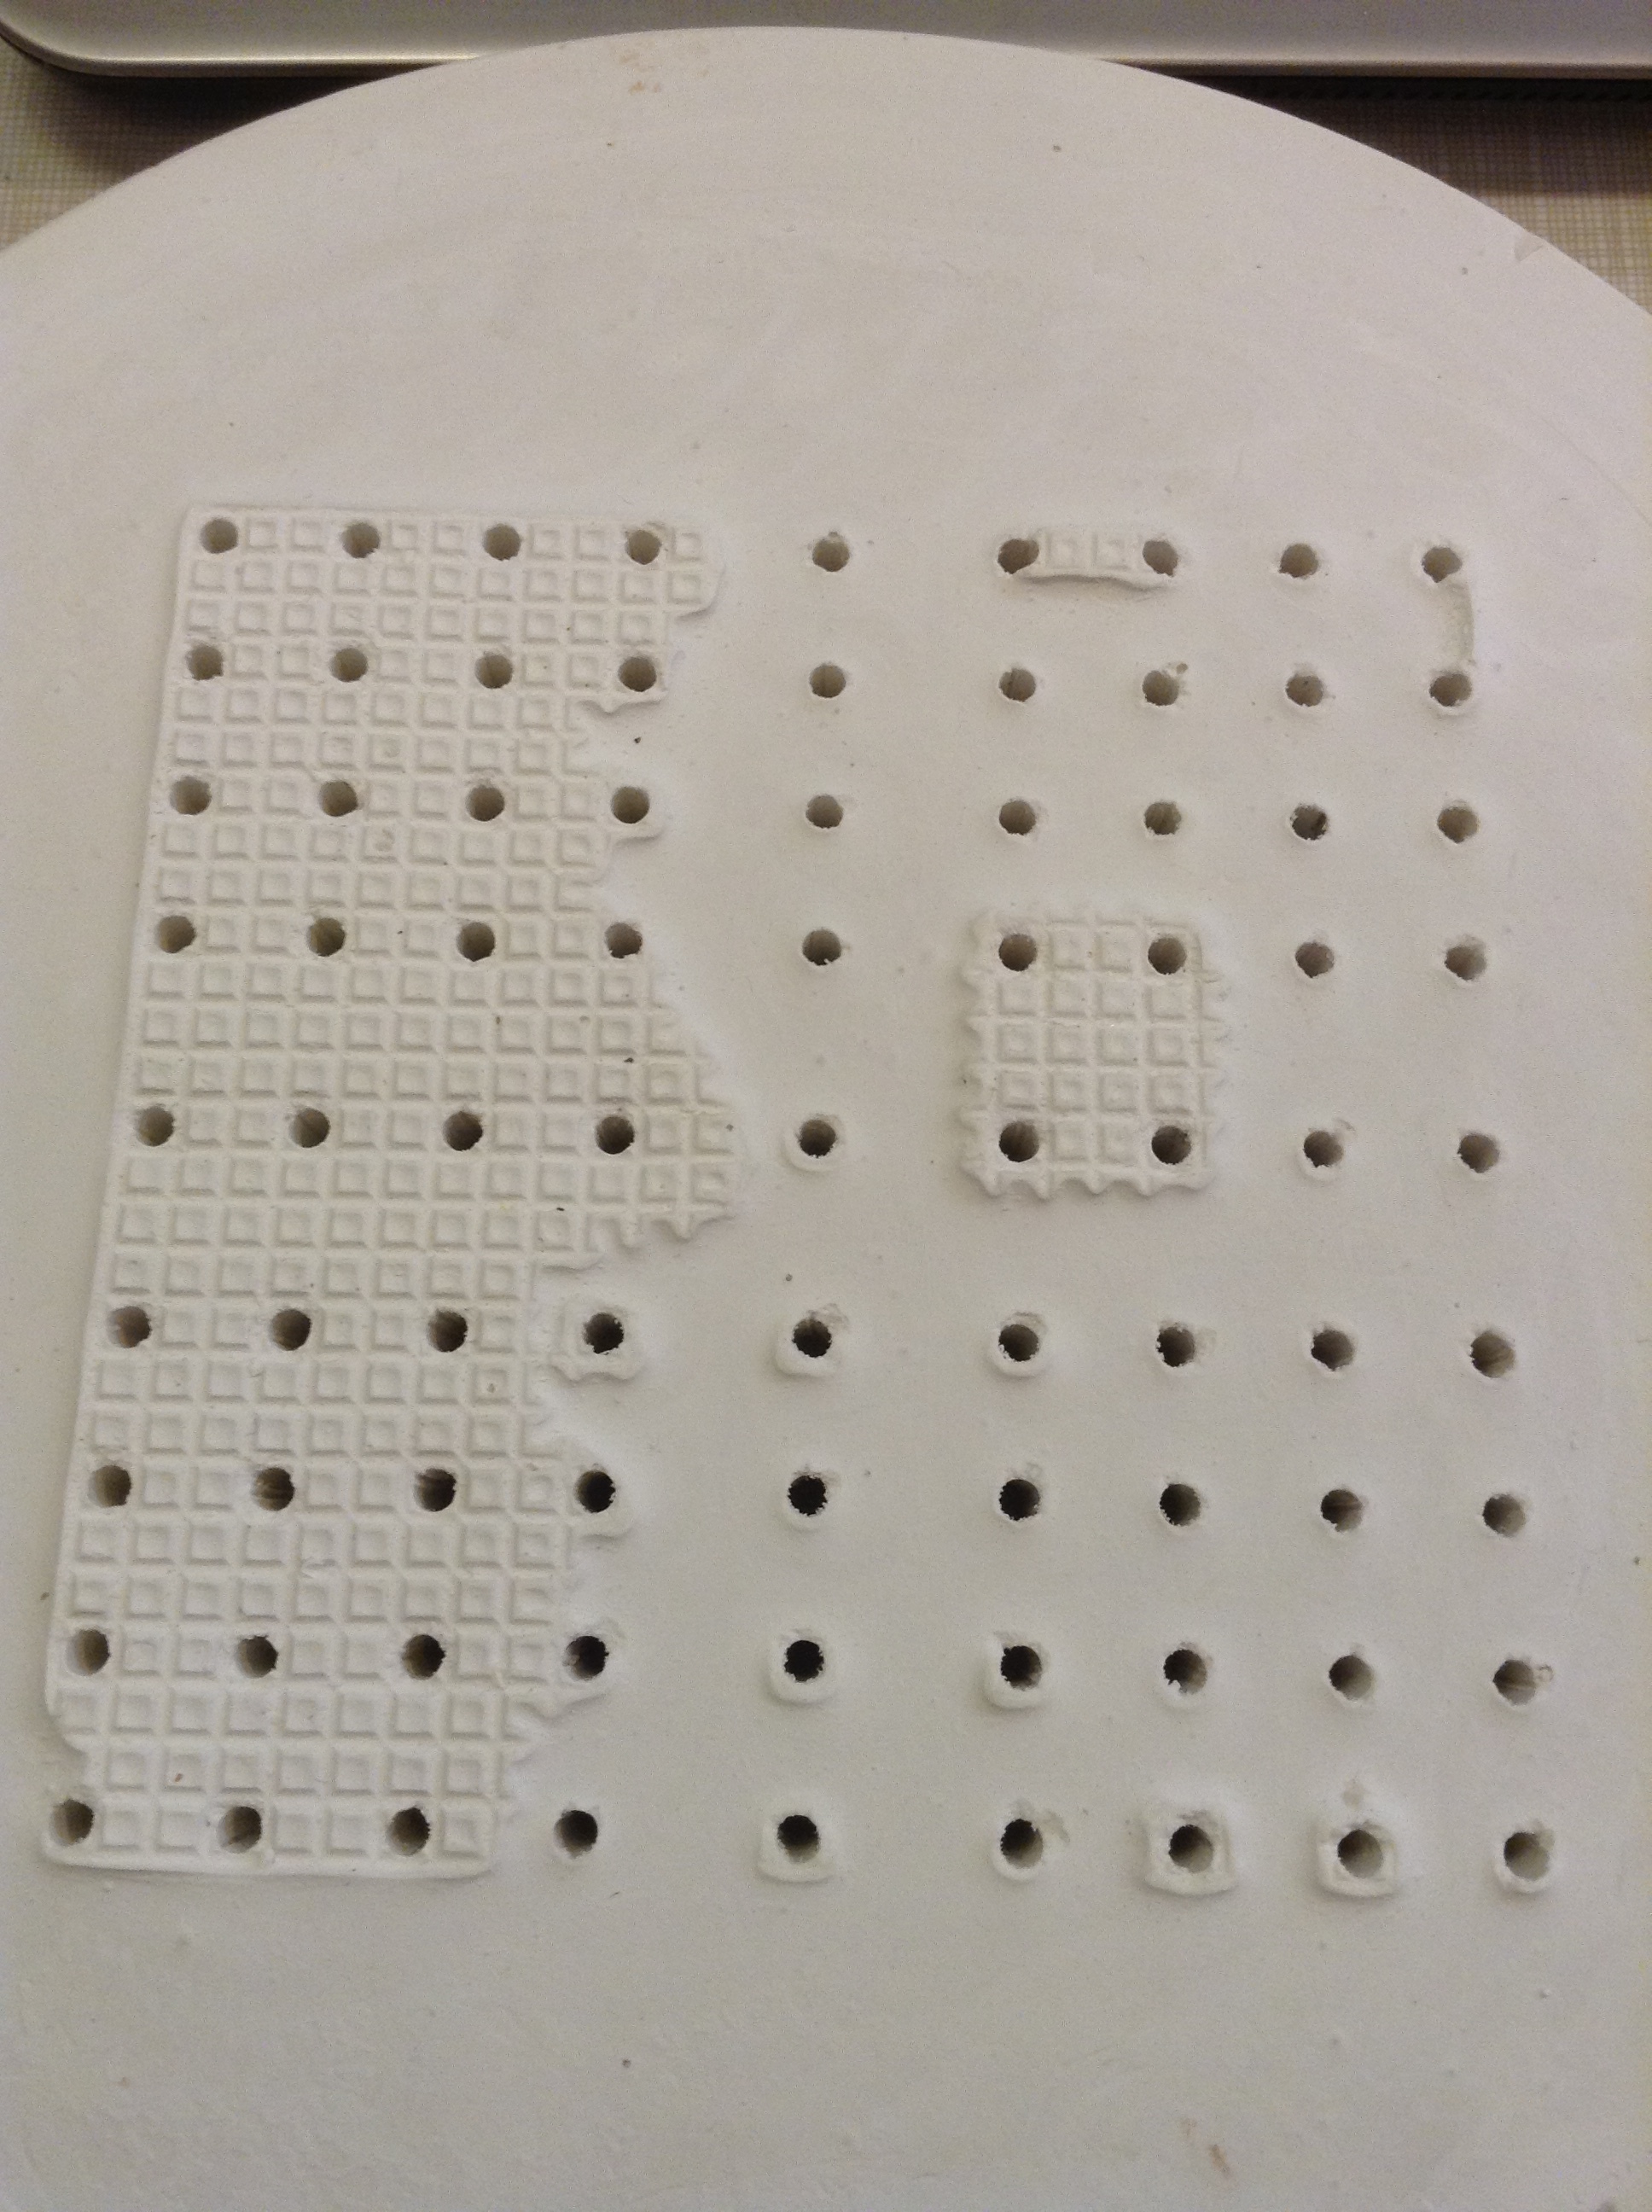
Round array made of plaster. Holes are about 1/2 inch deep to accept rod material.
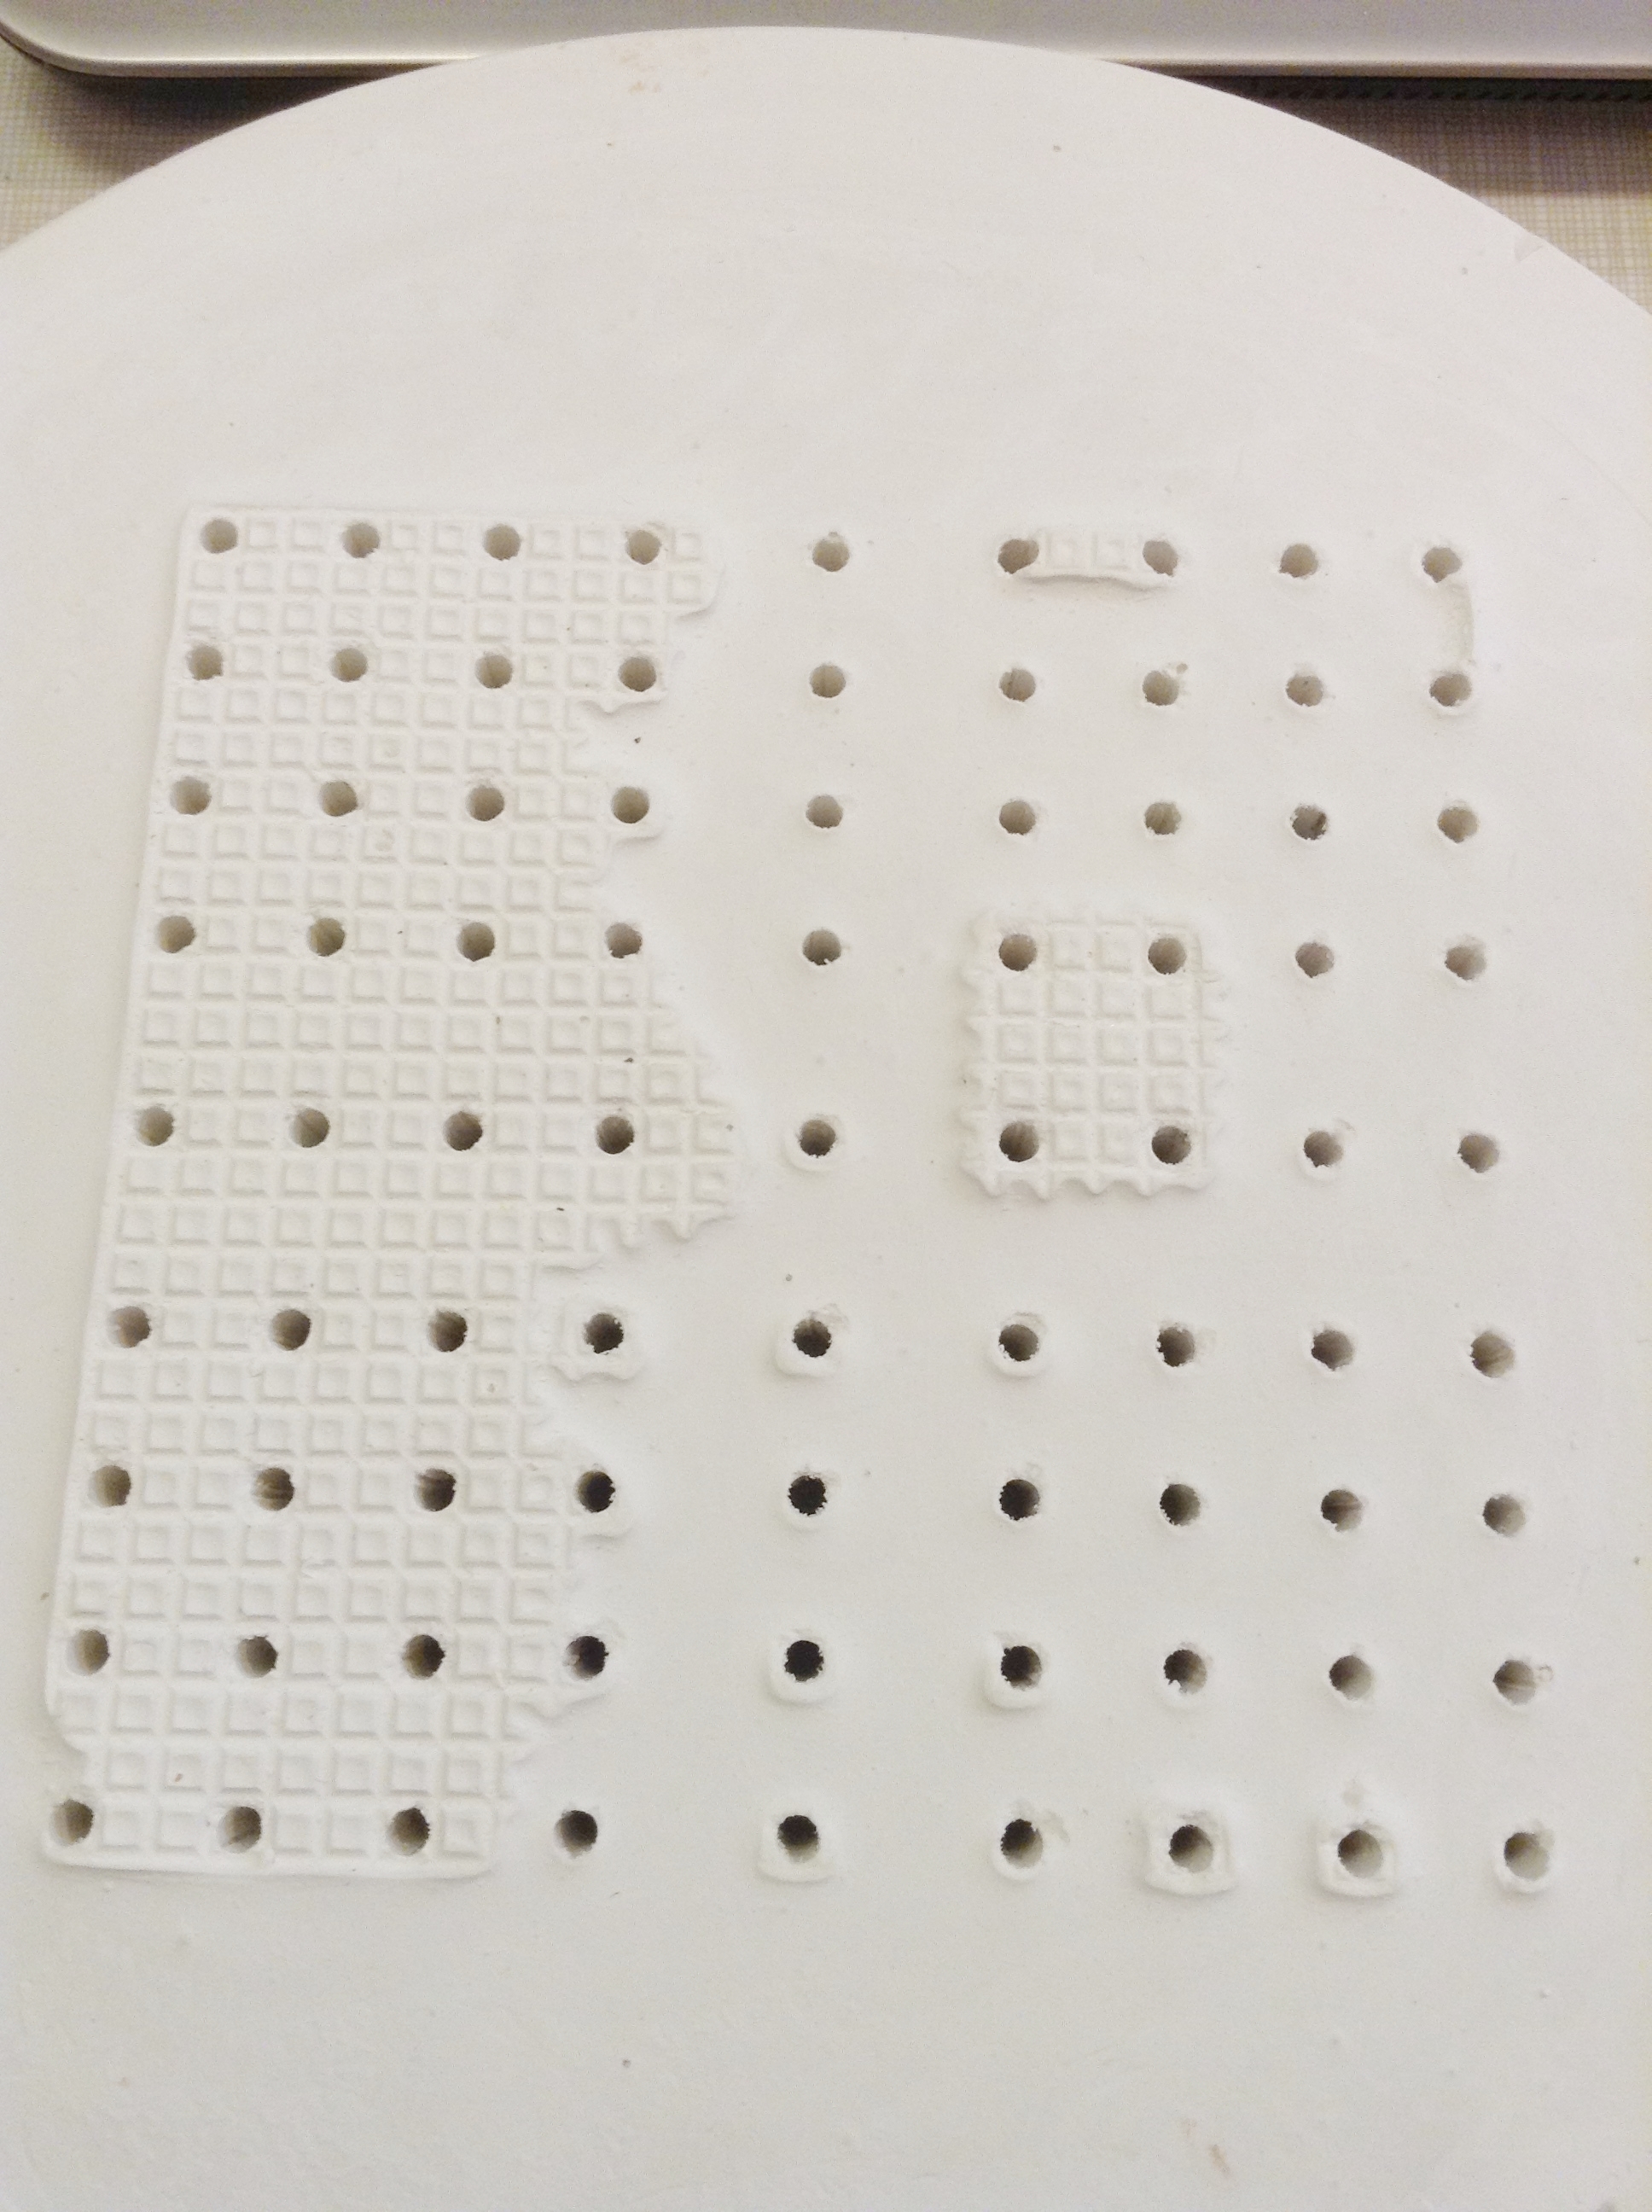
Square array made of plaster. Holes are about 1/2 inch deep to accept rod material.

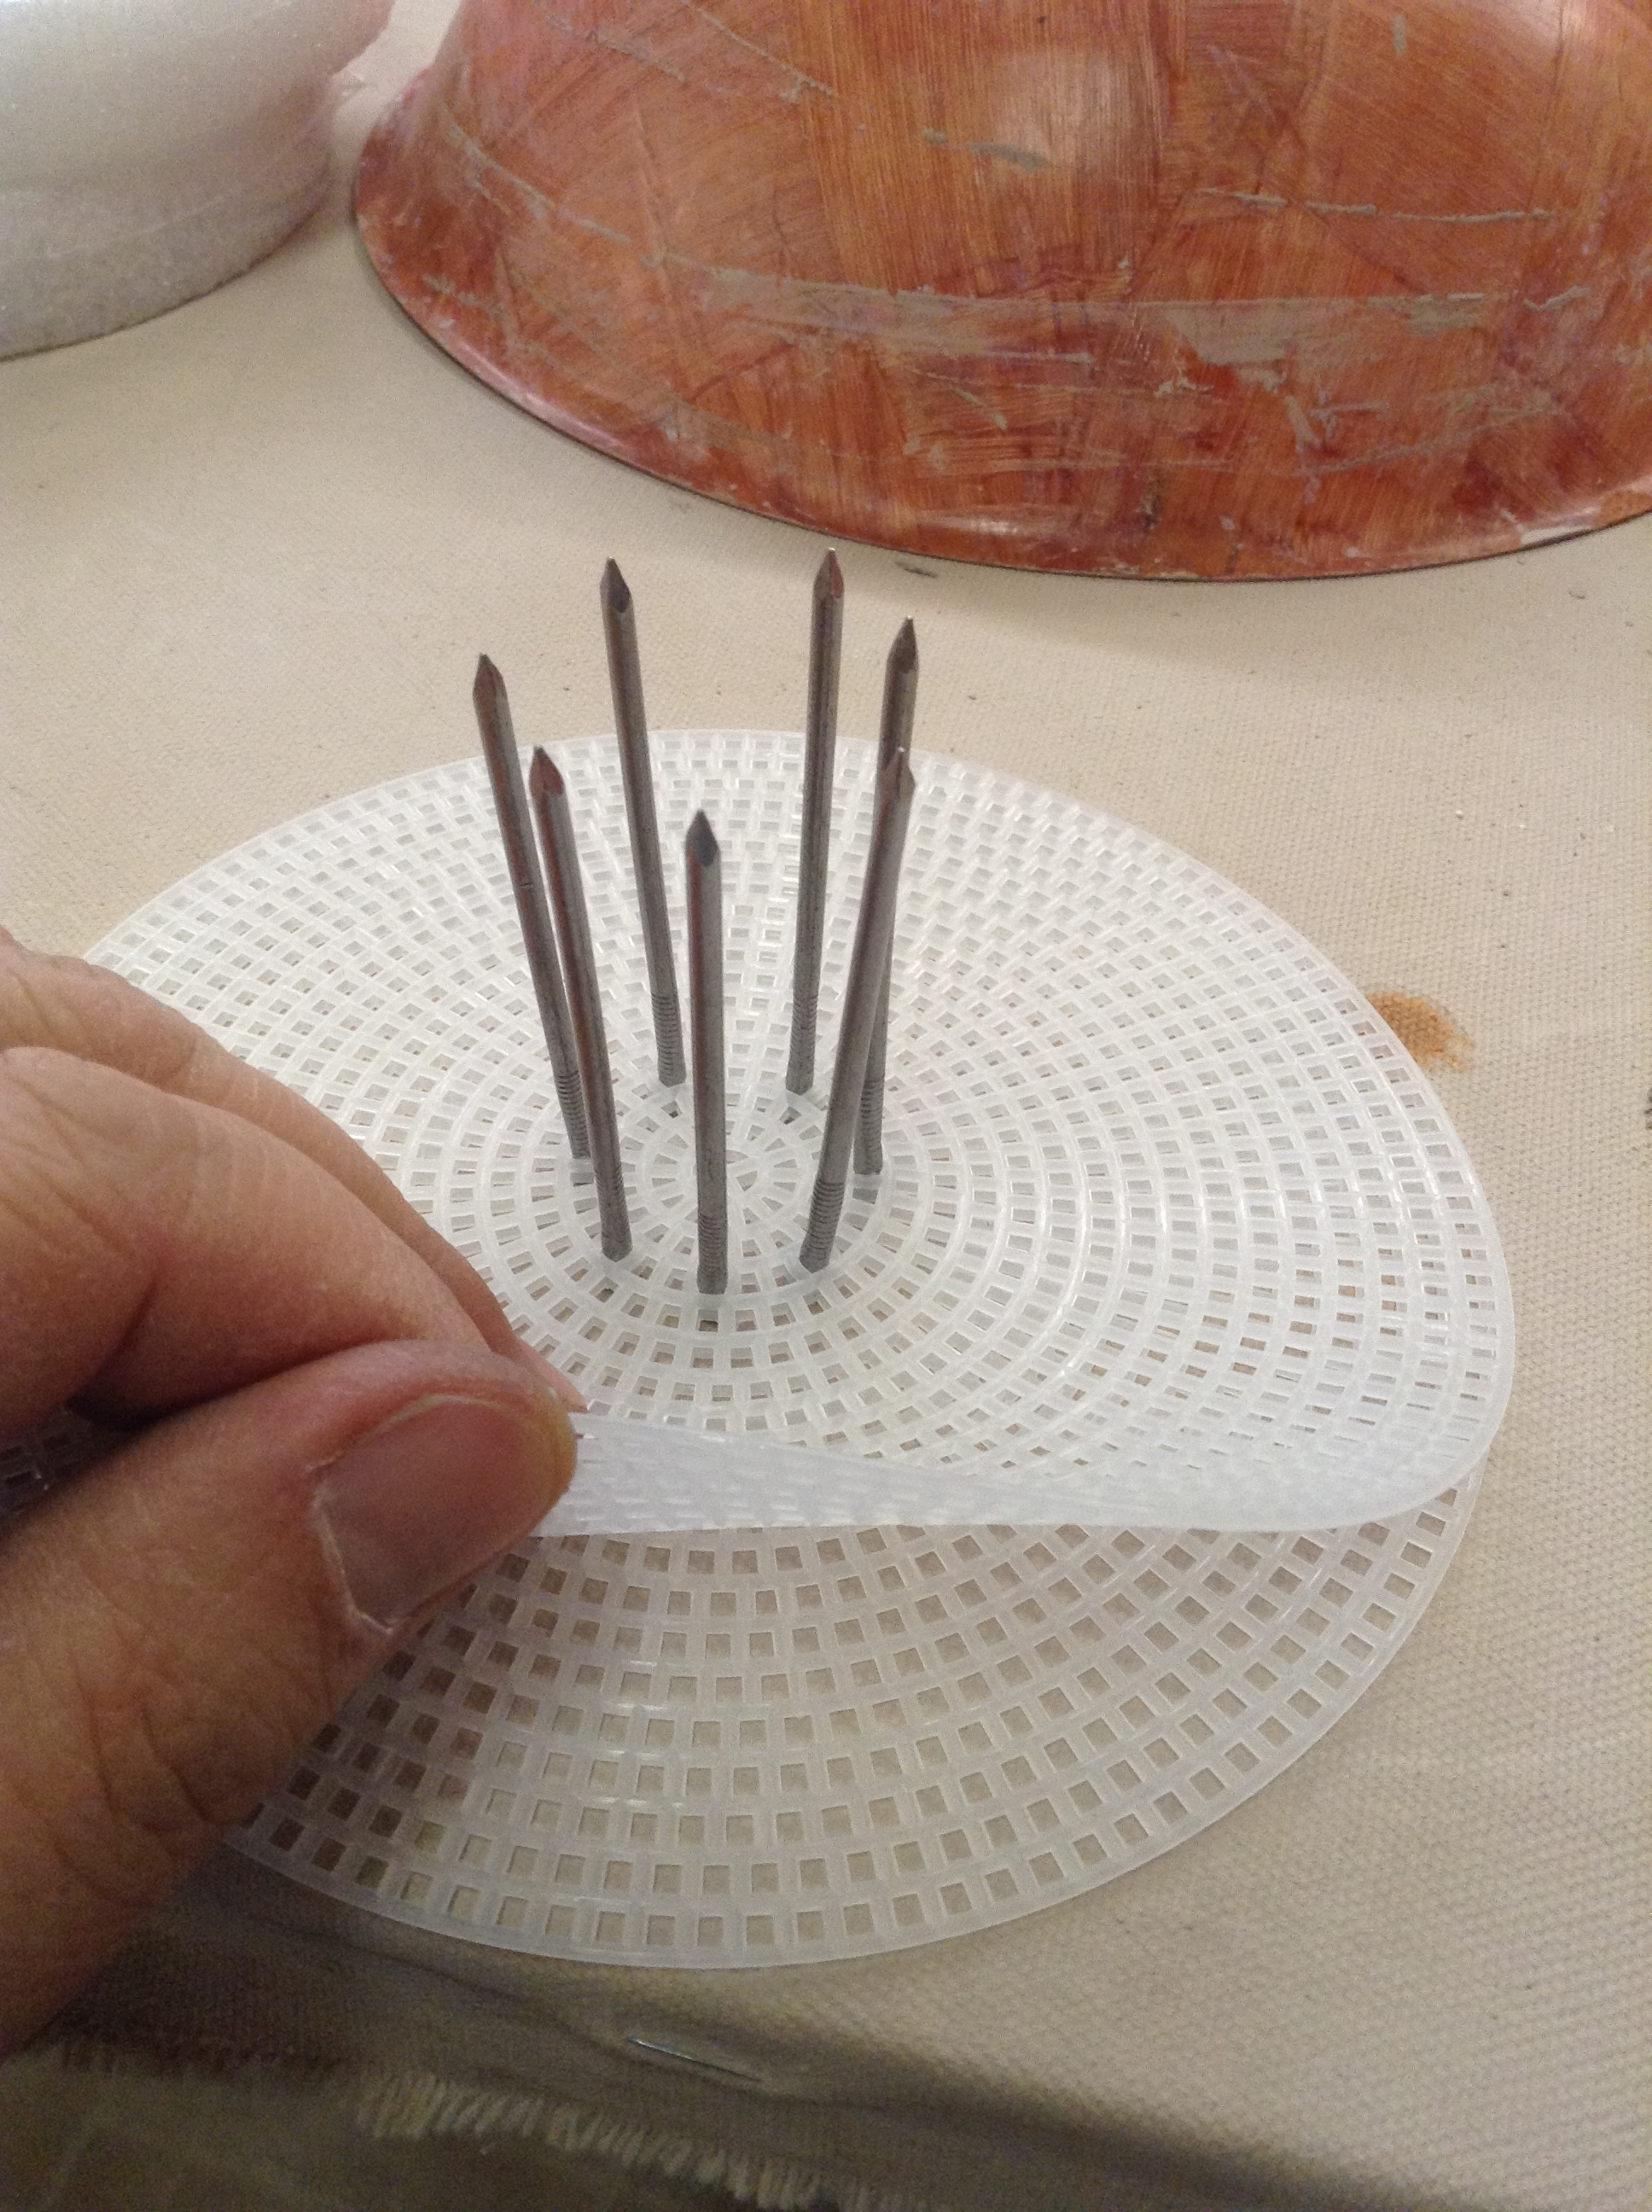
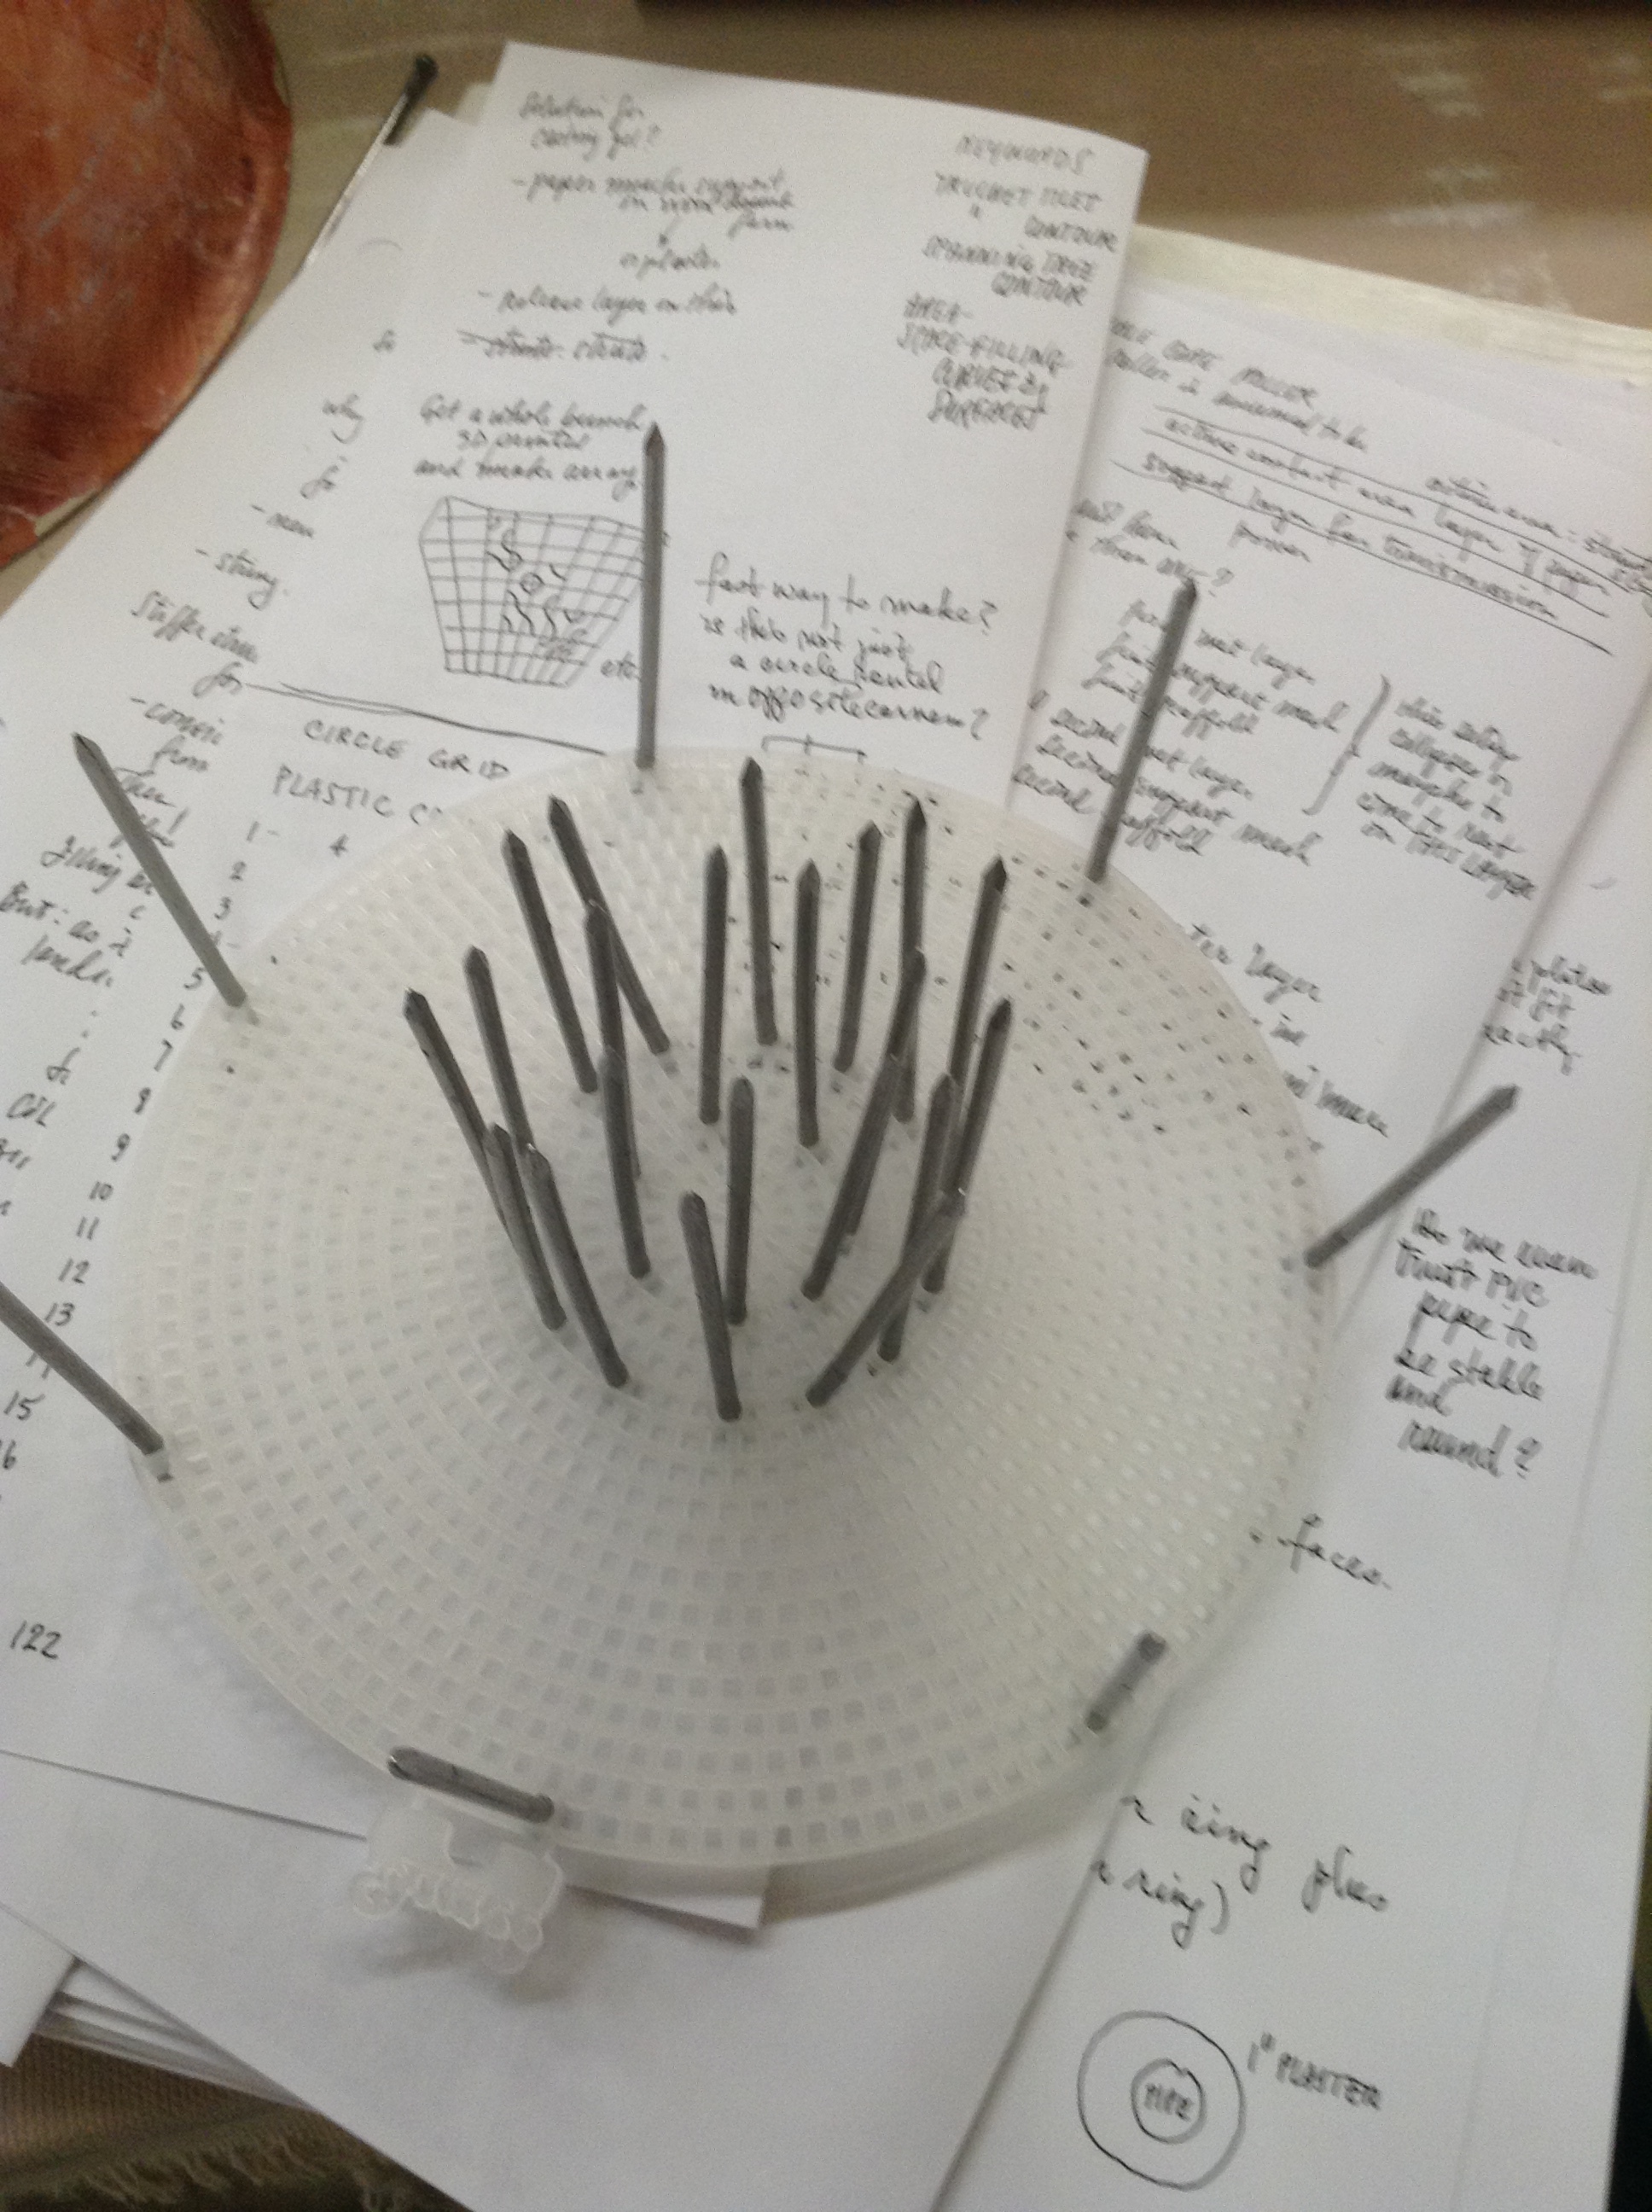
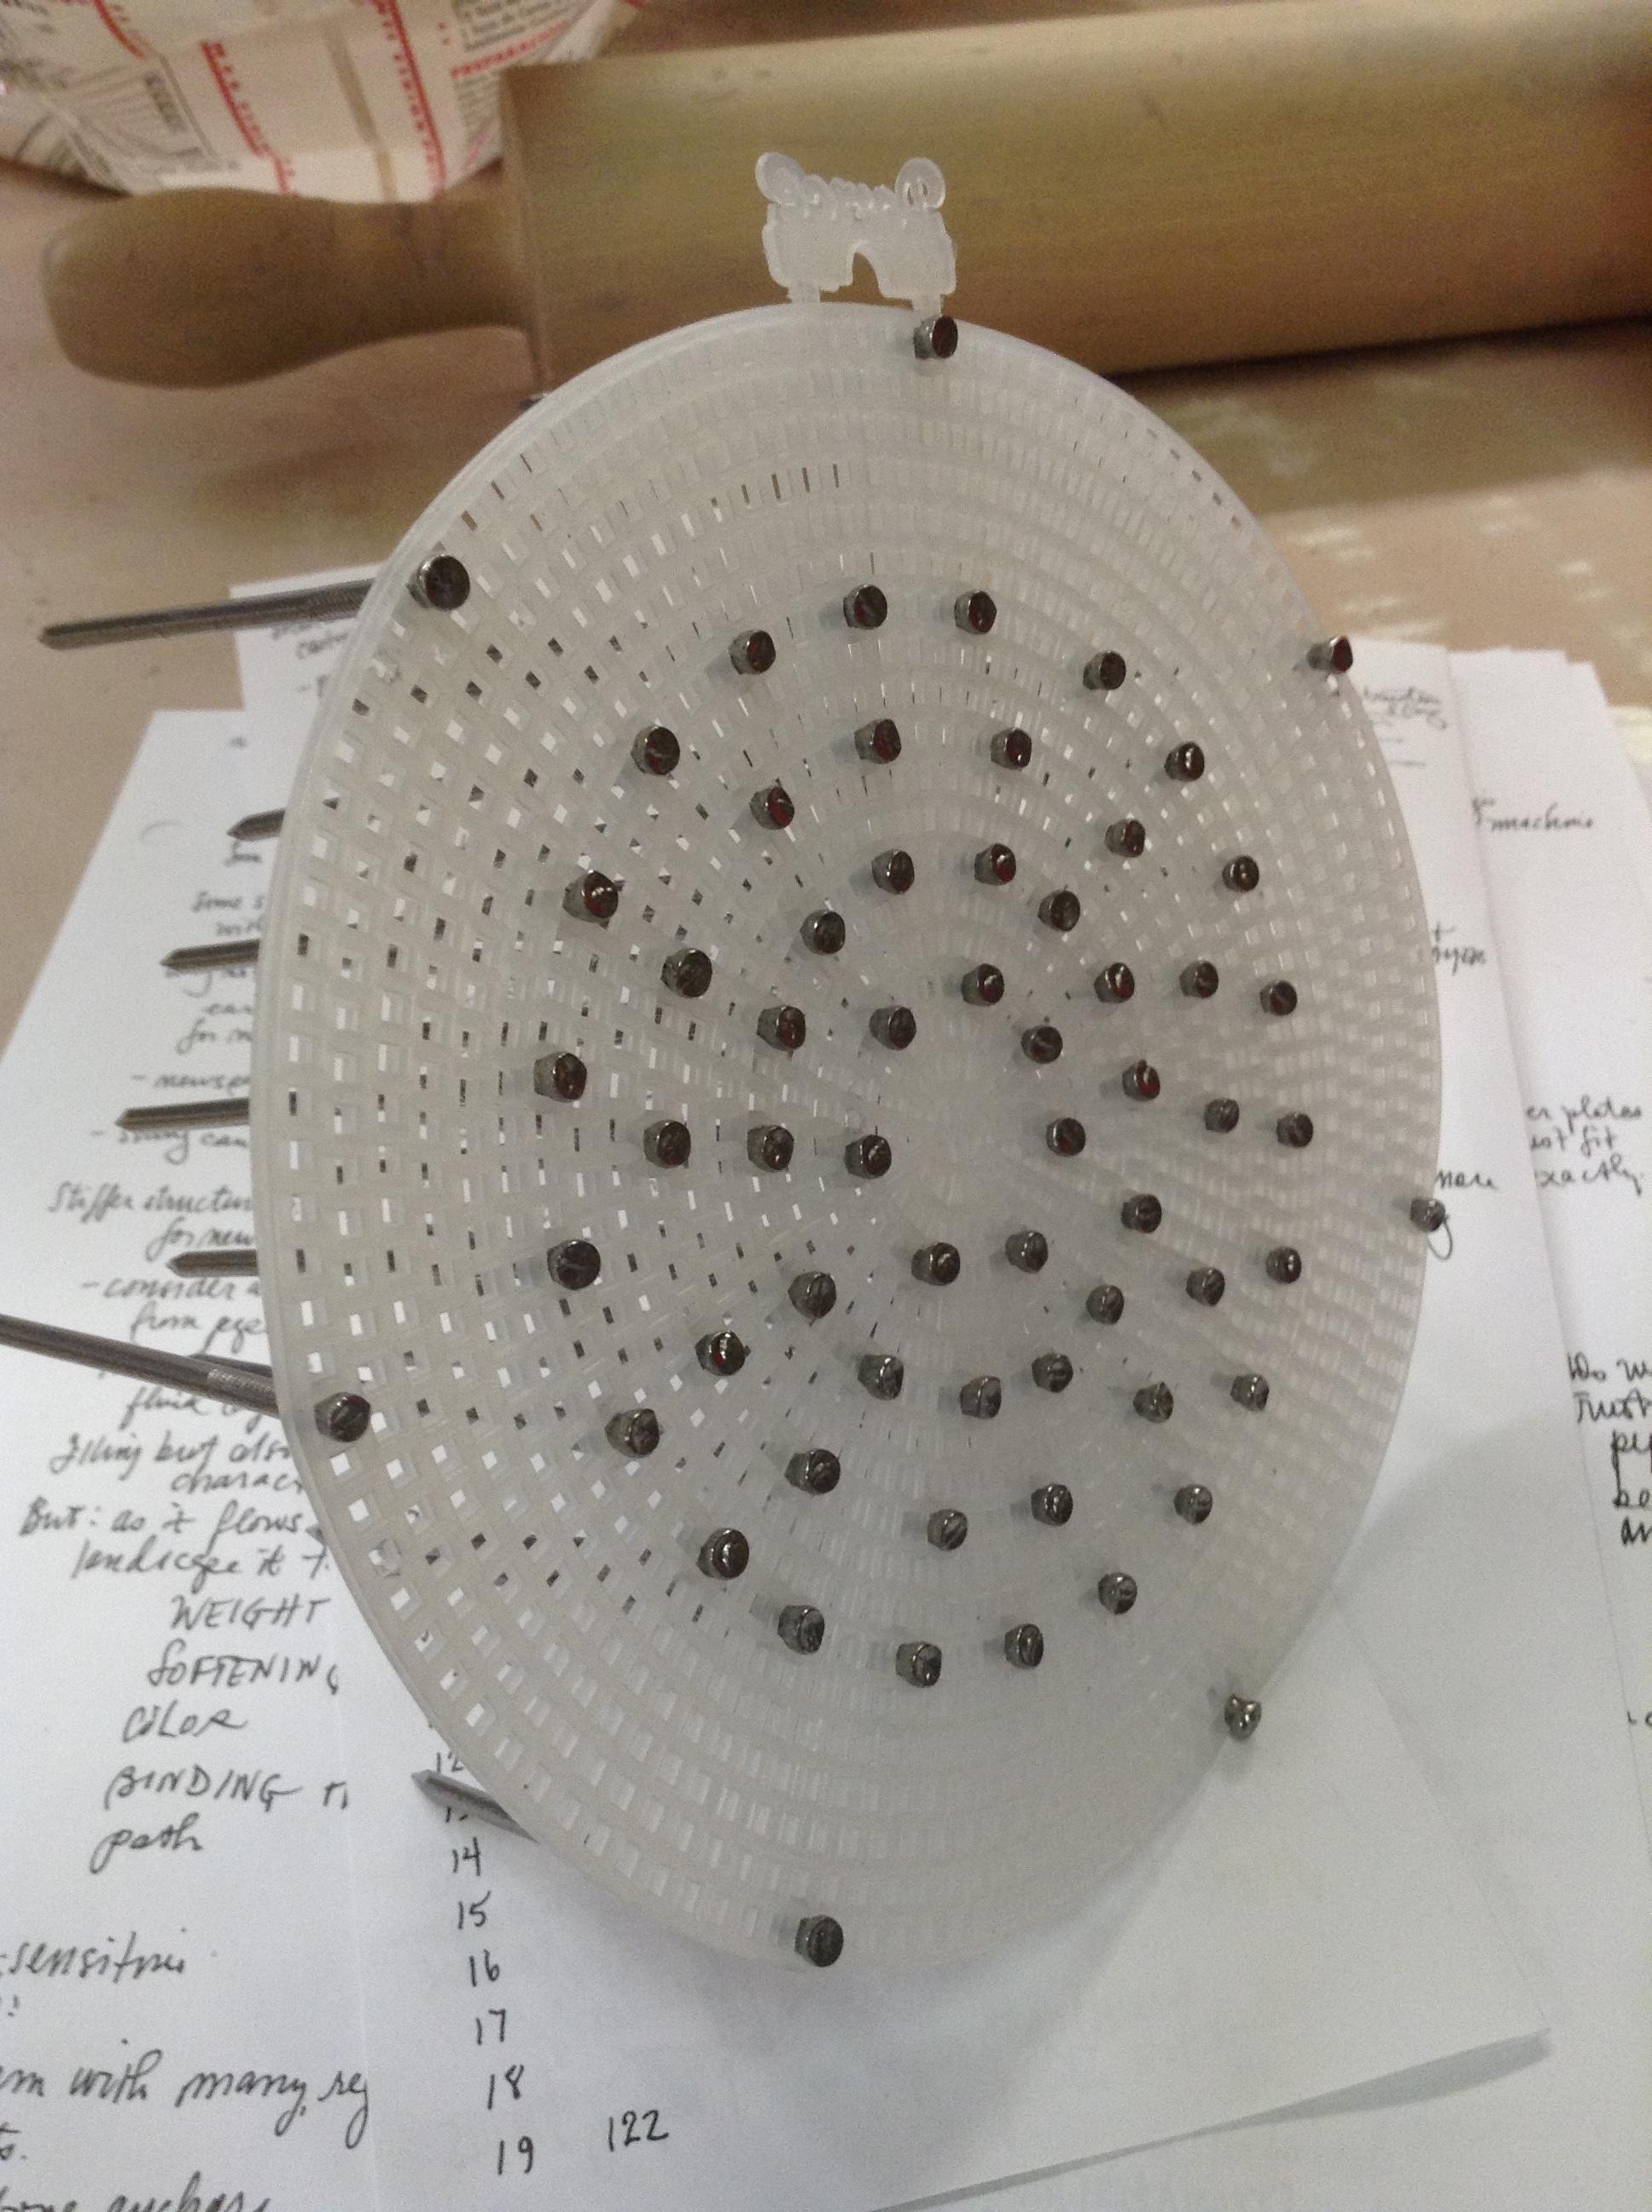
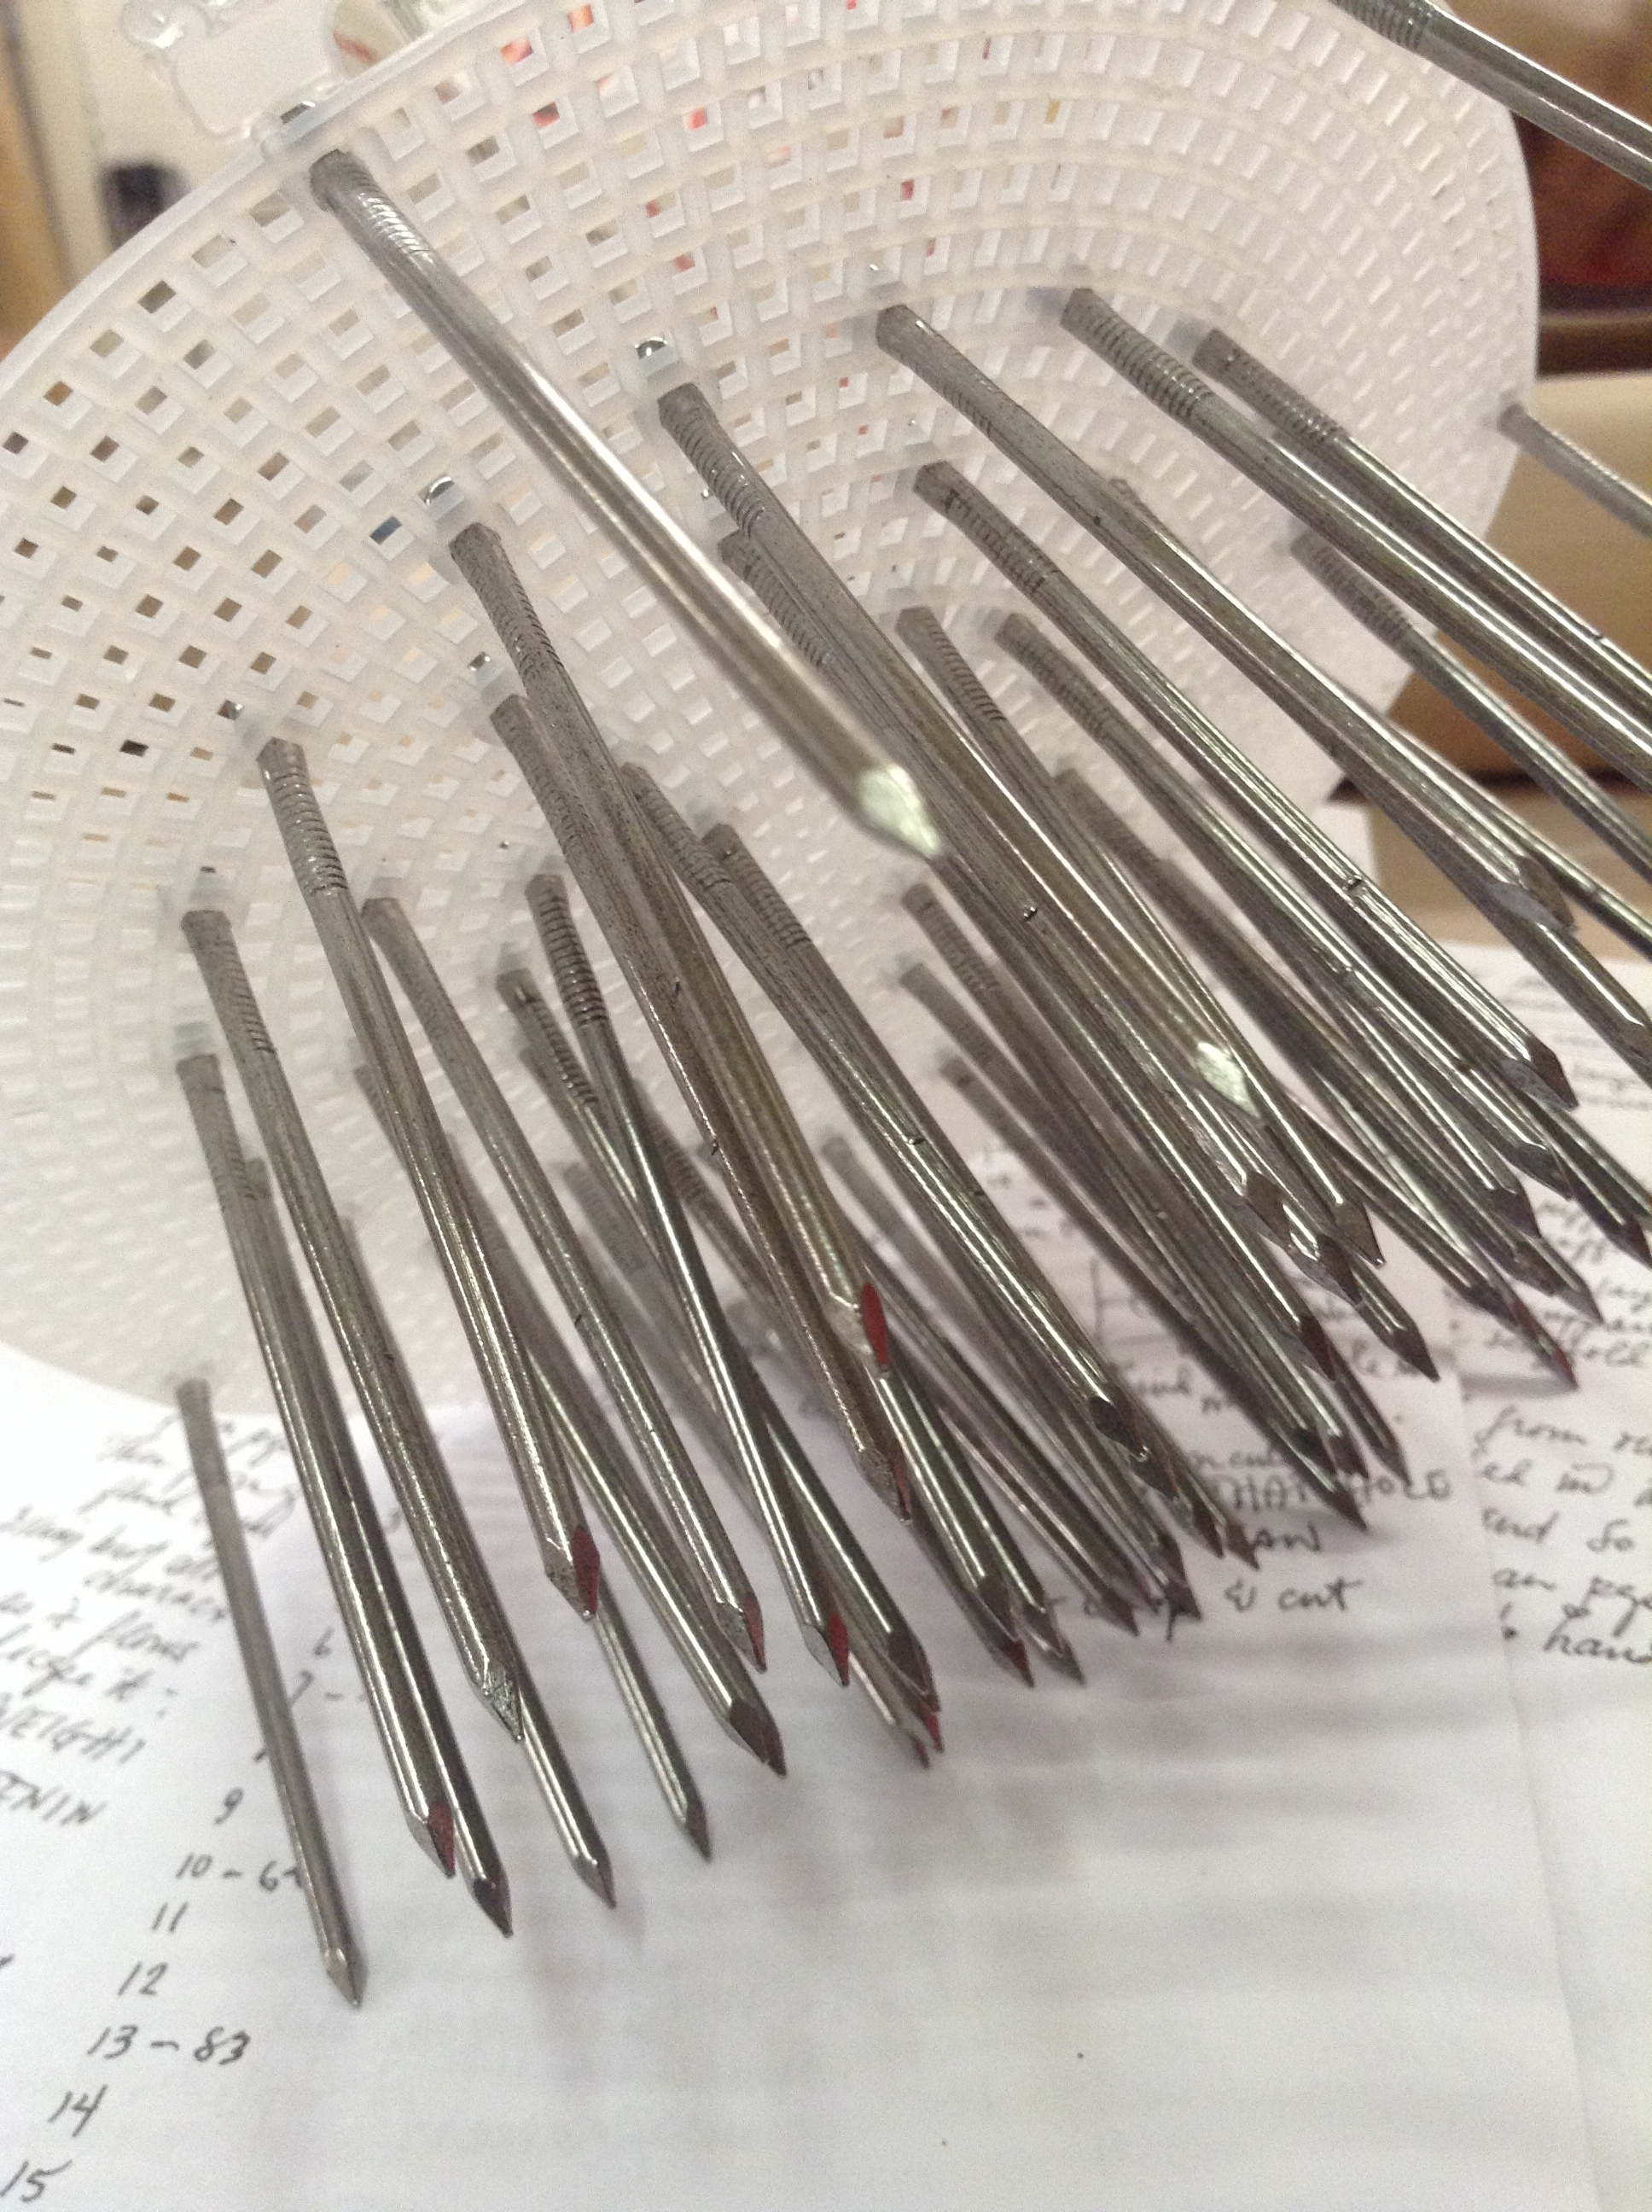
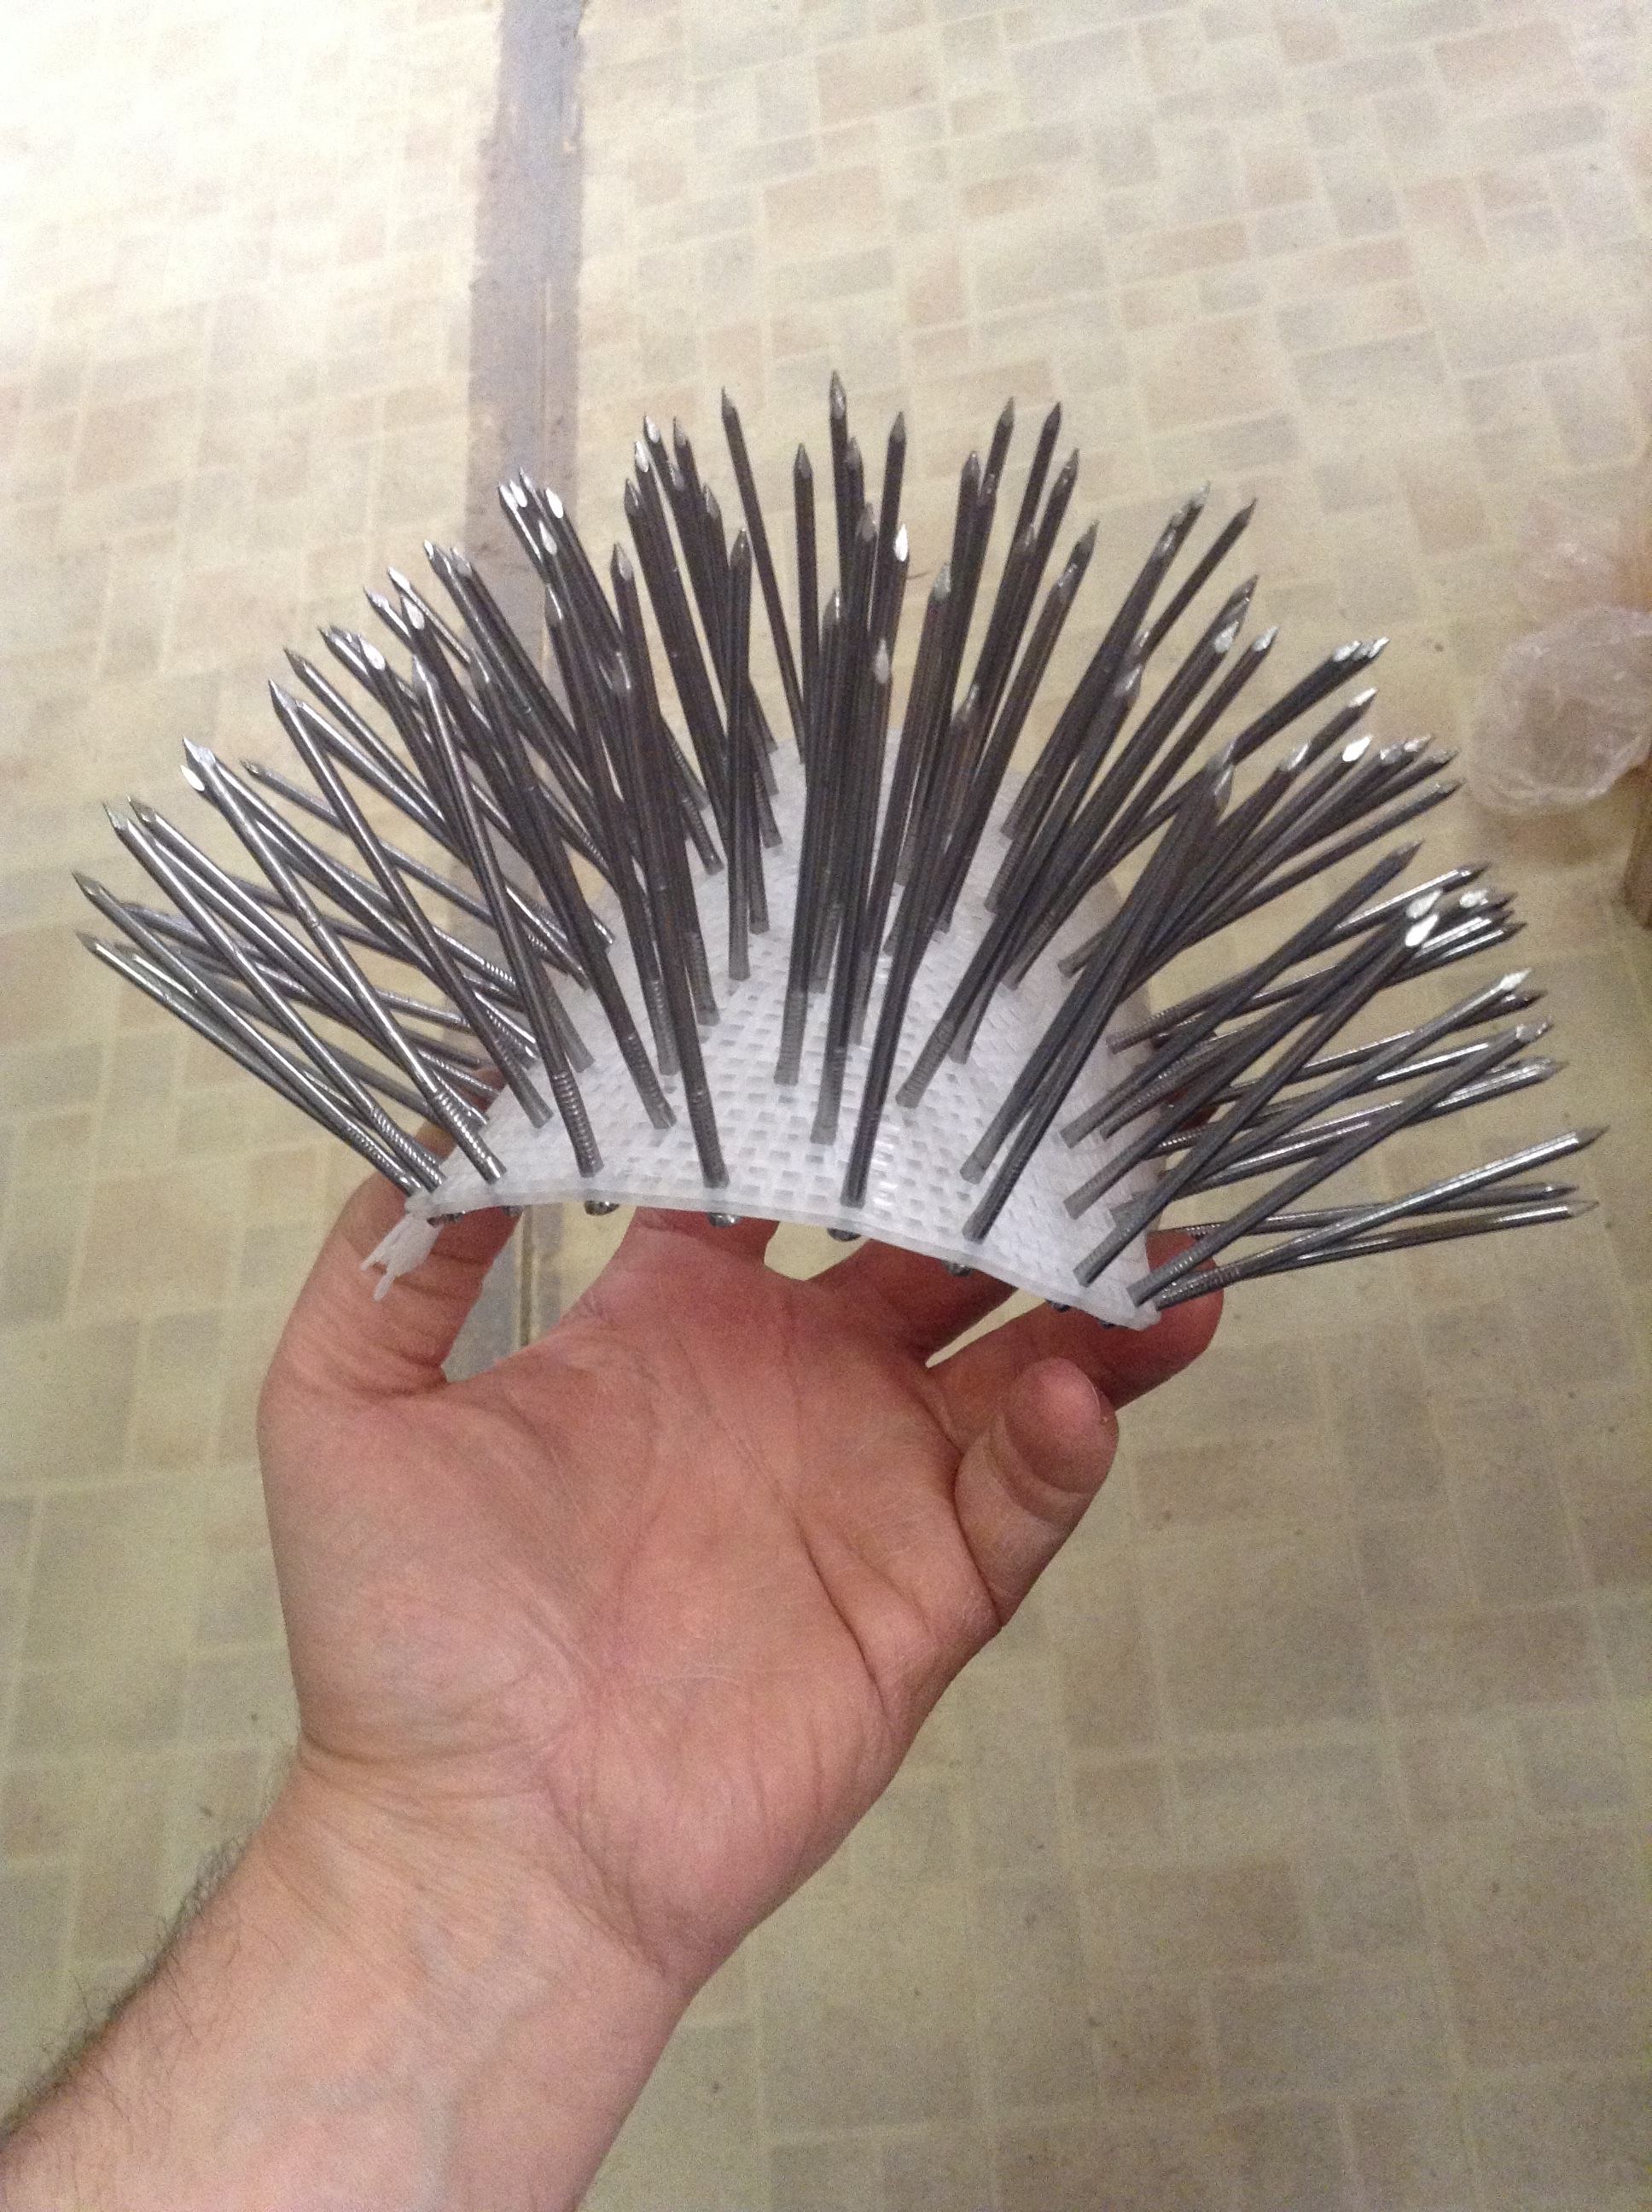
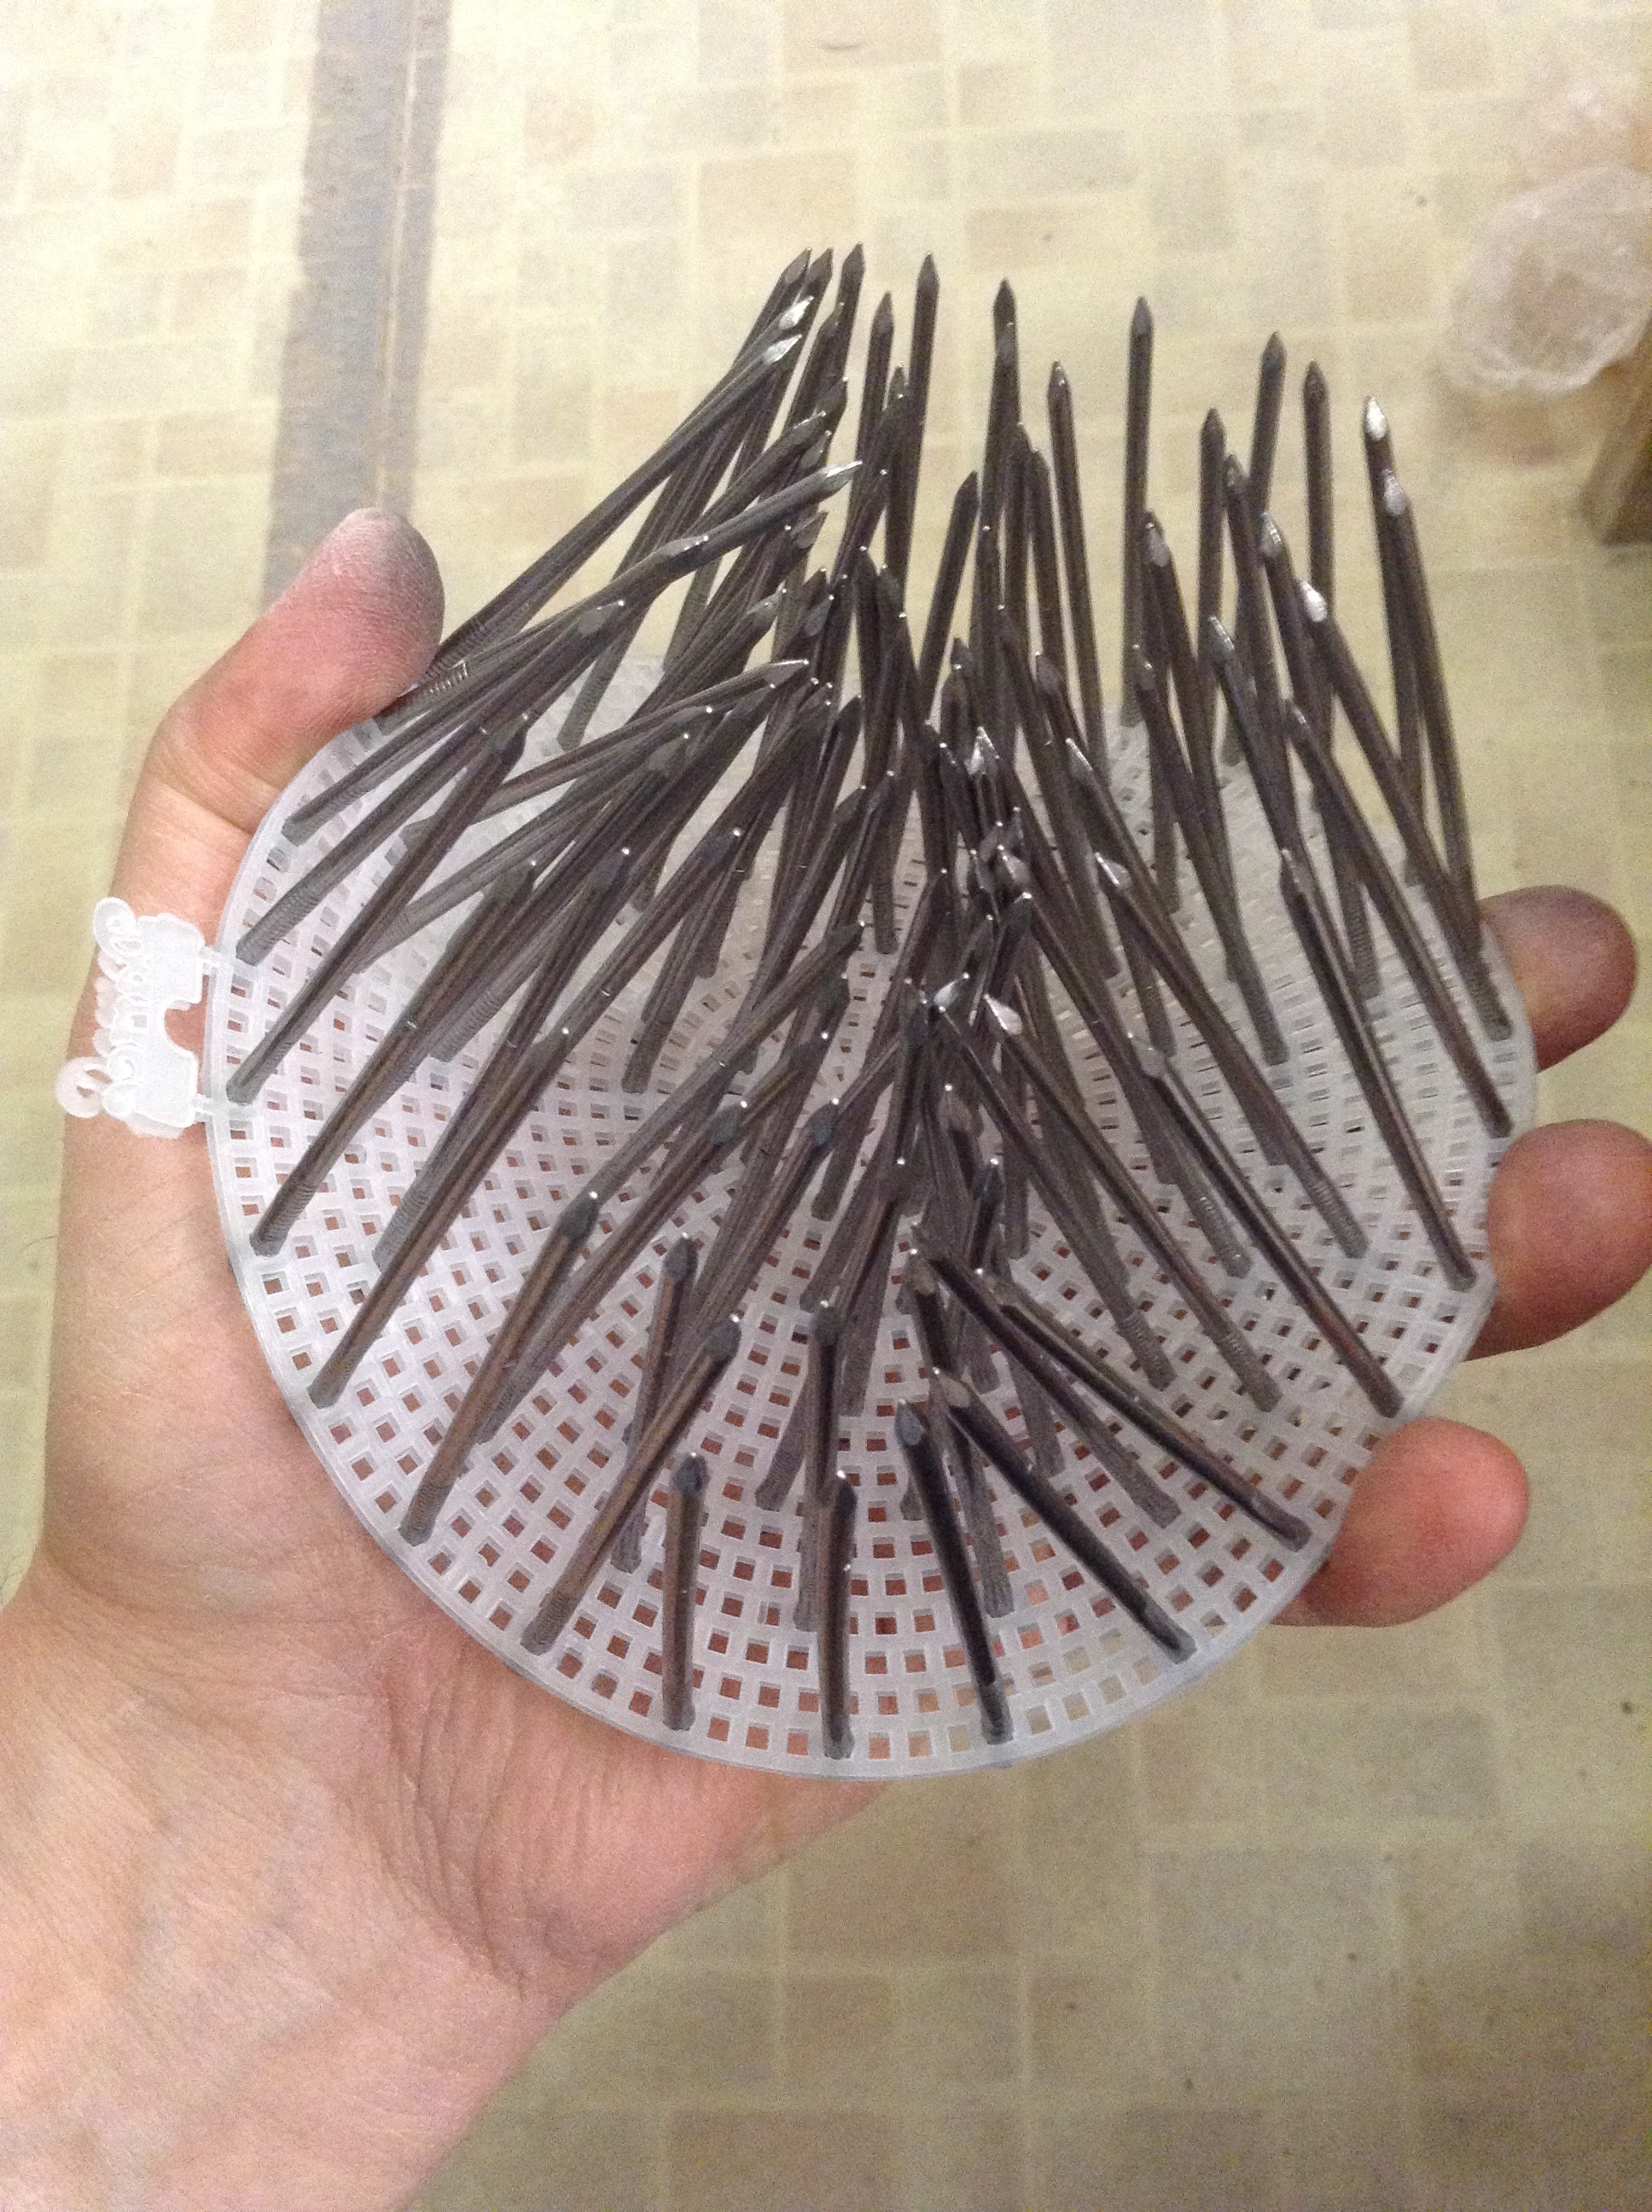
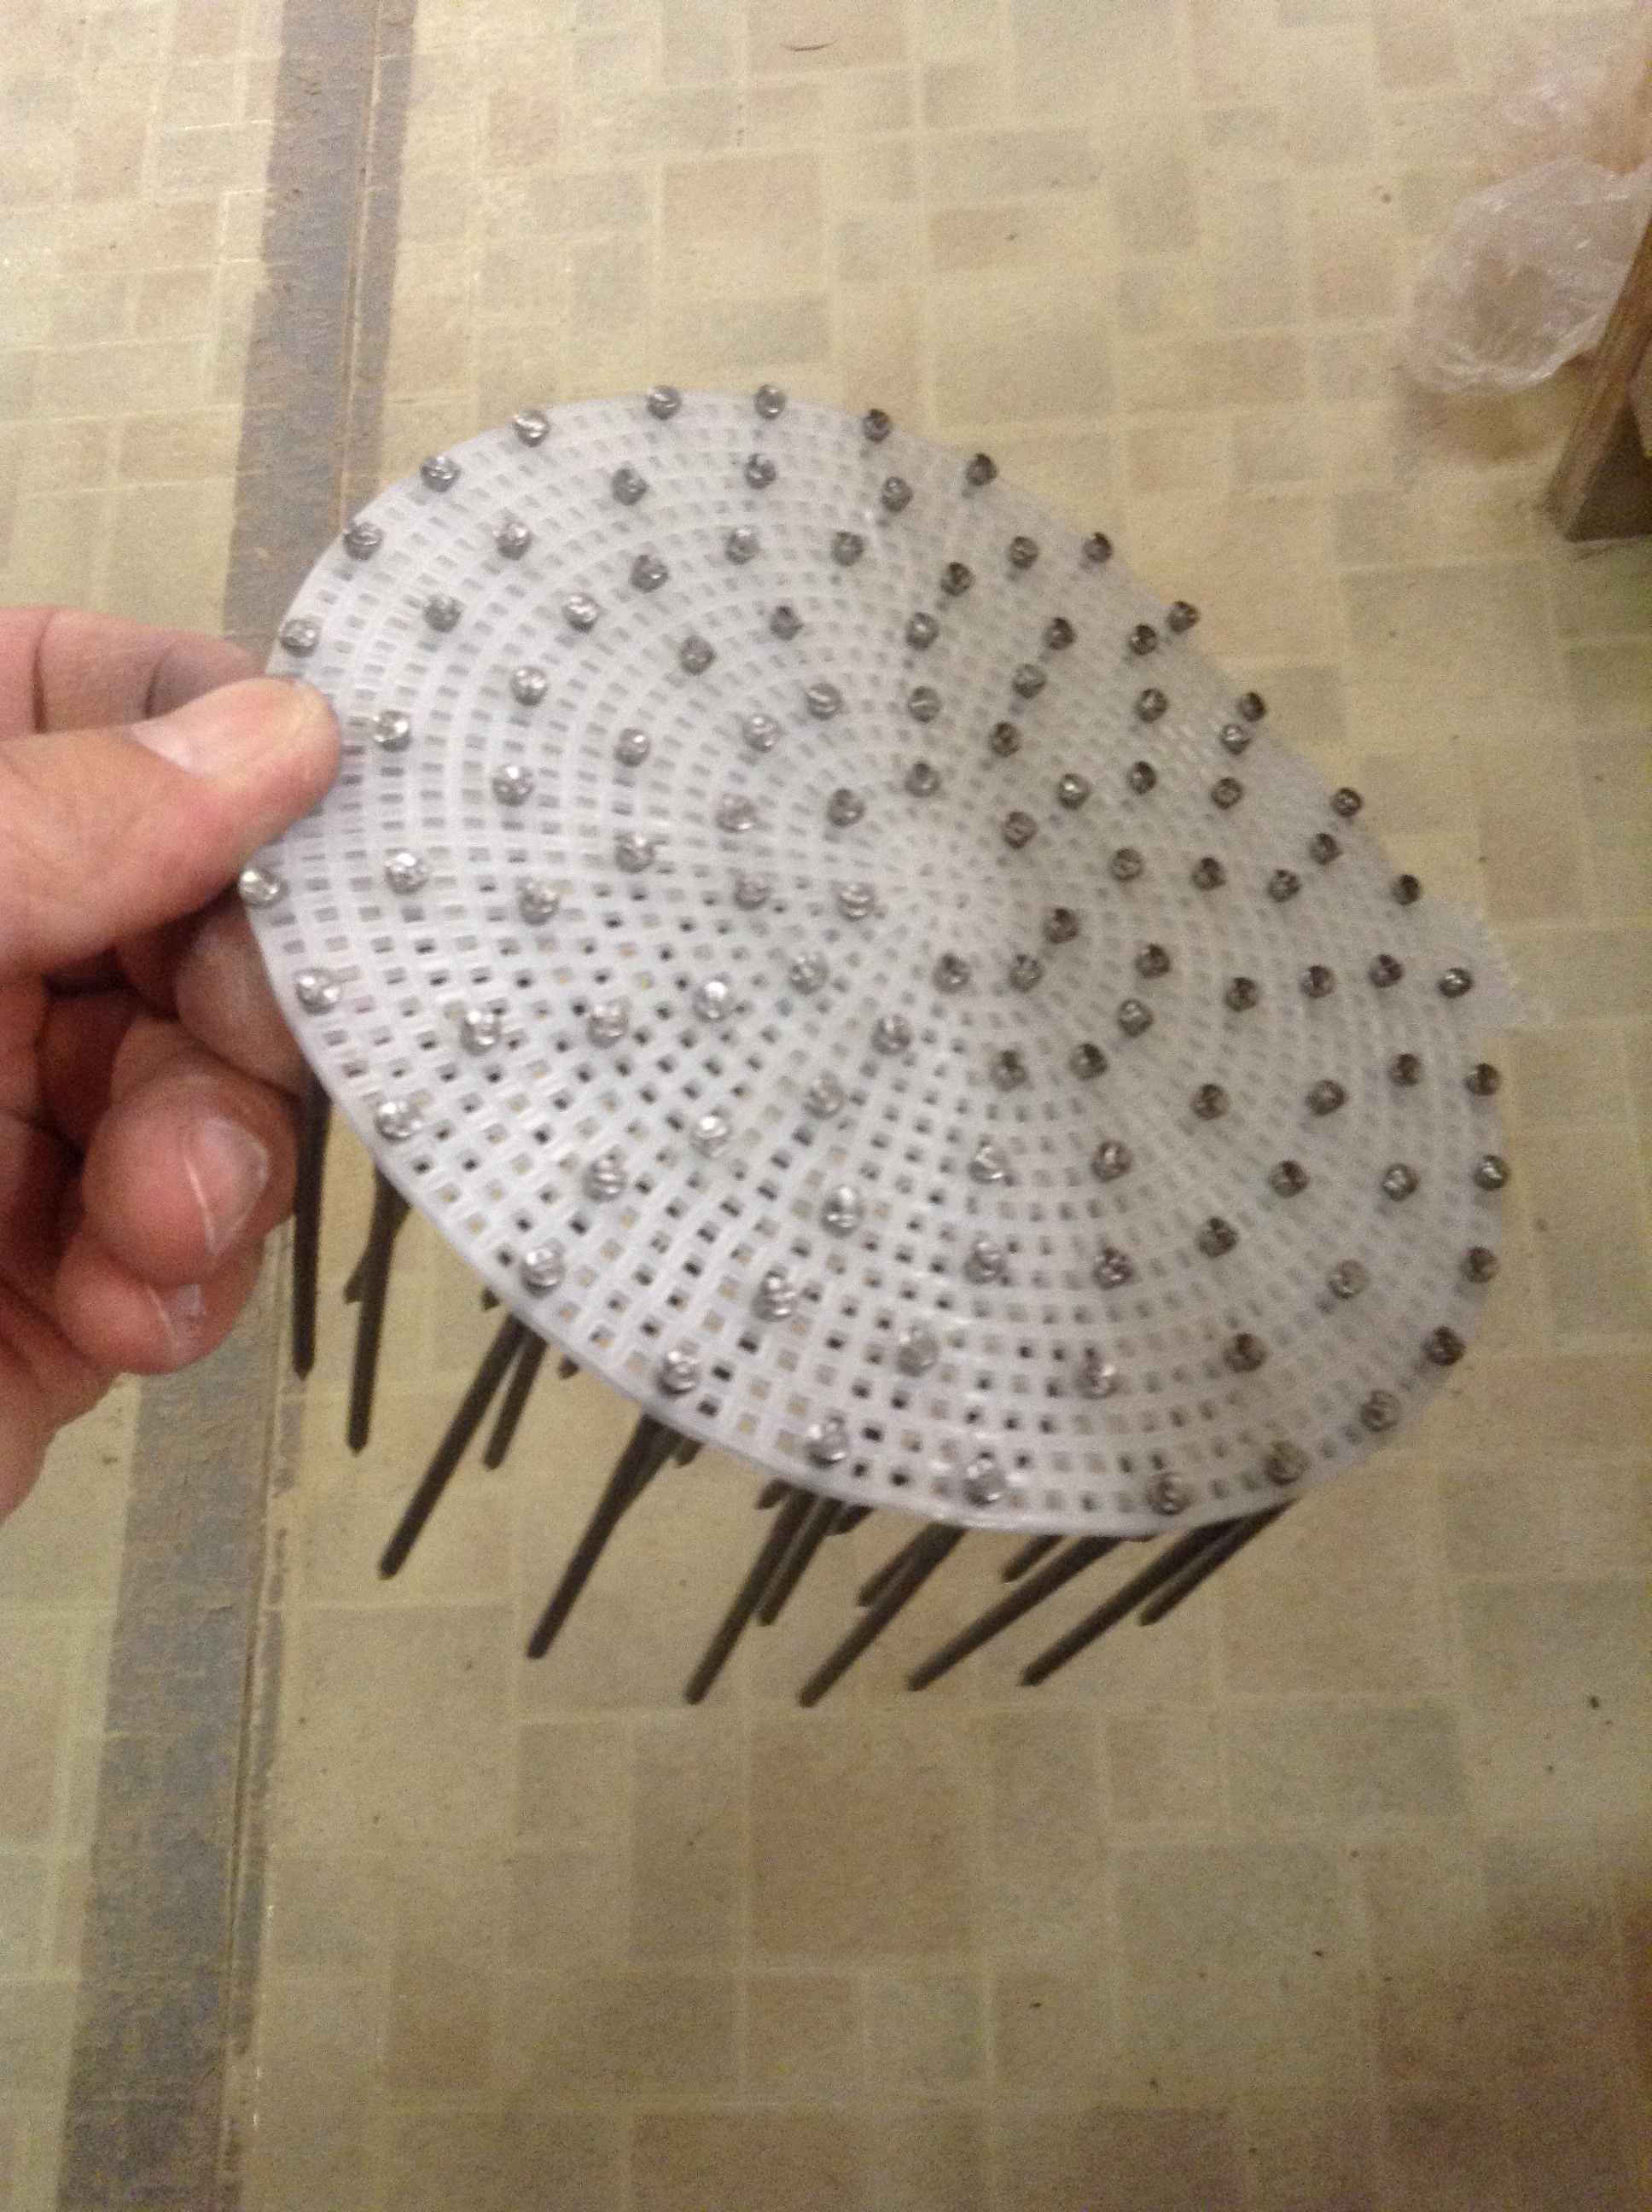
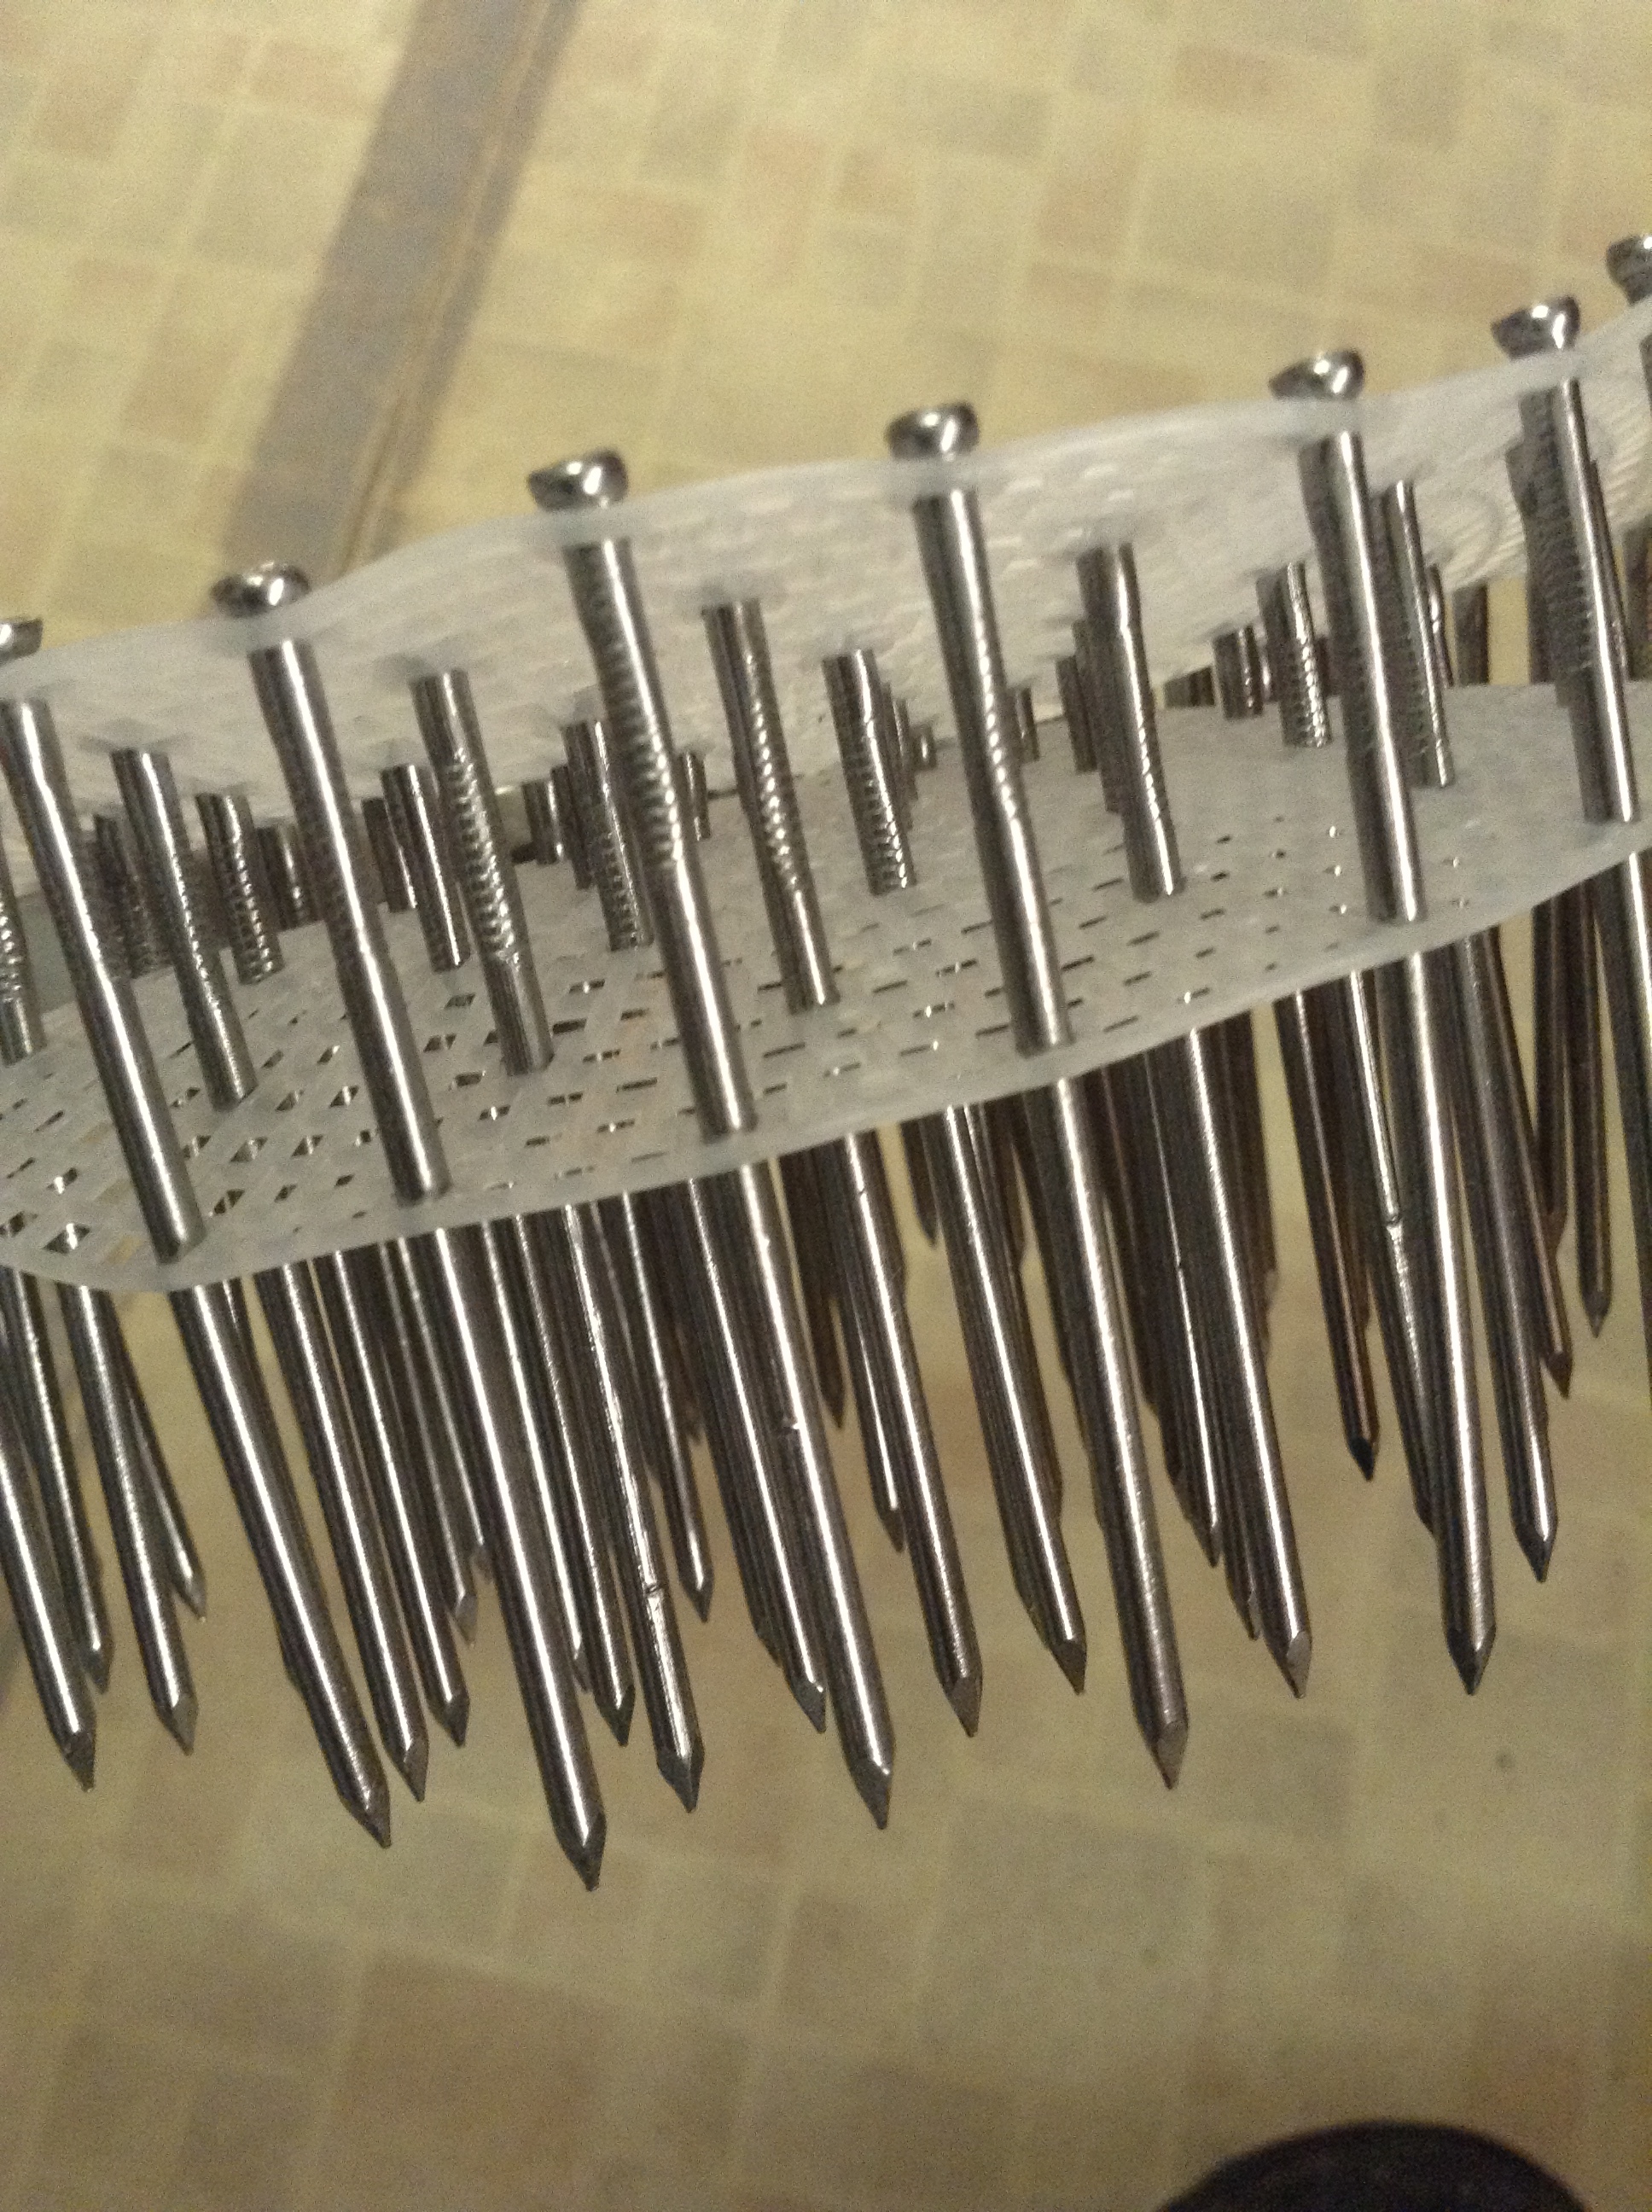
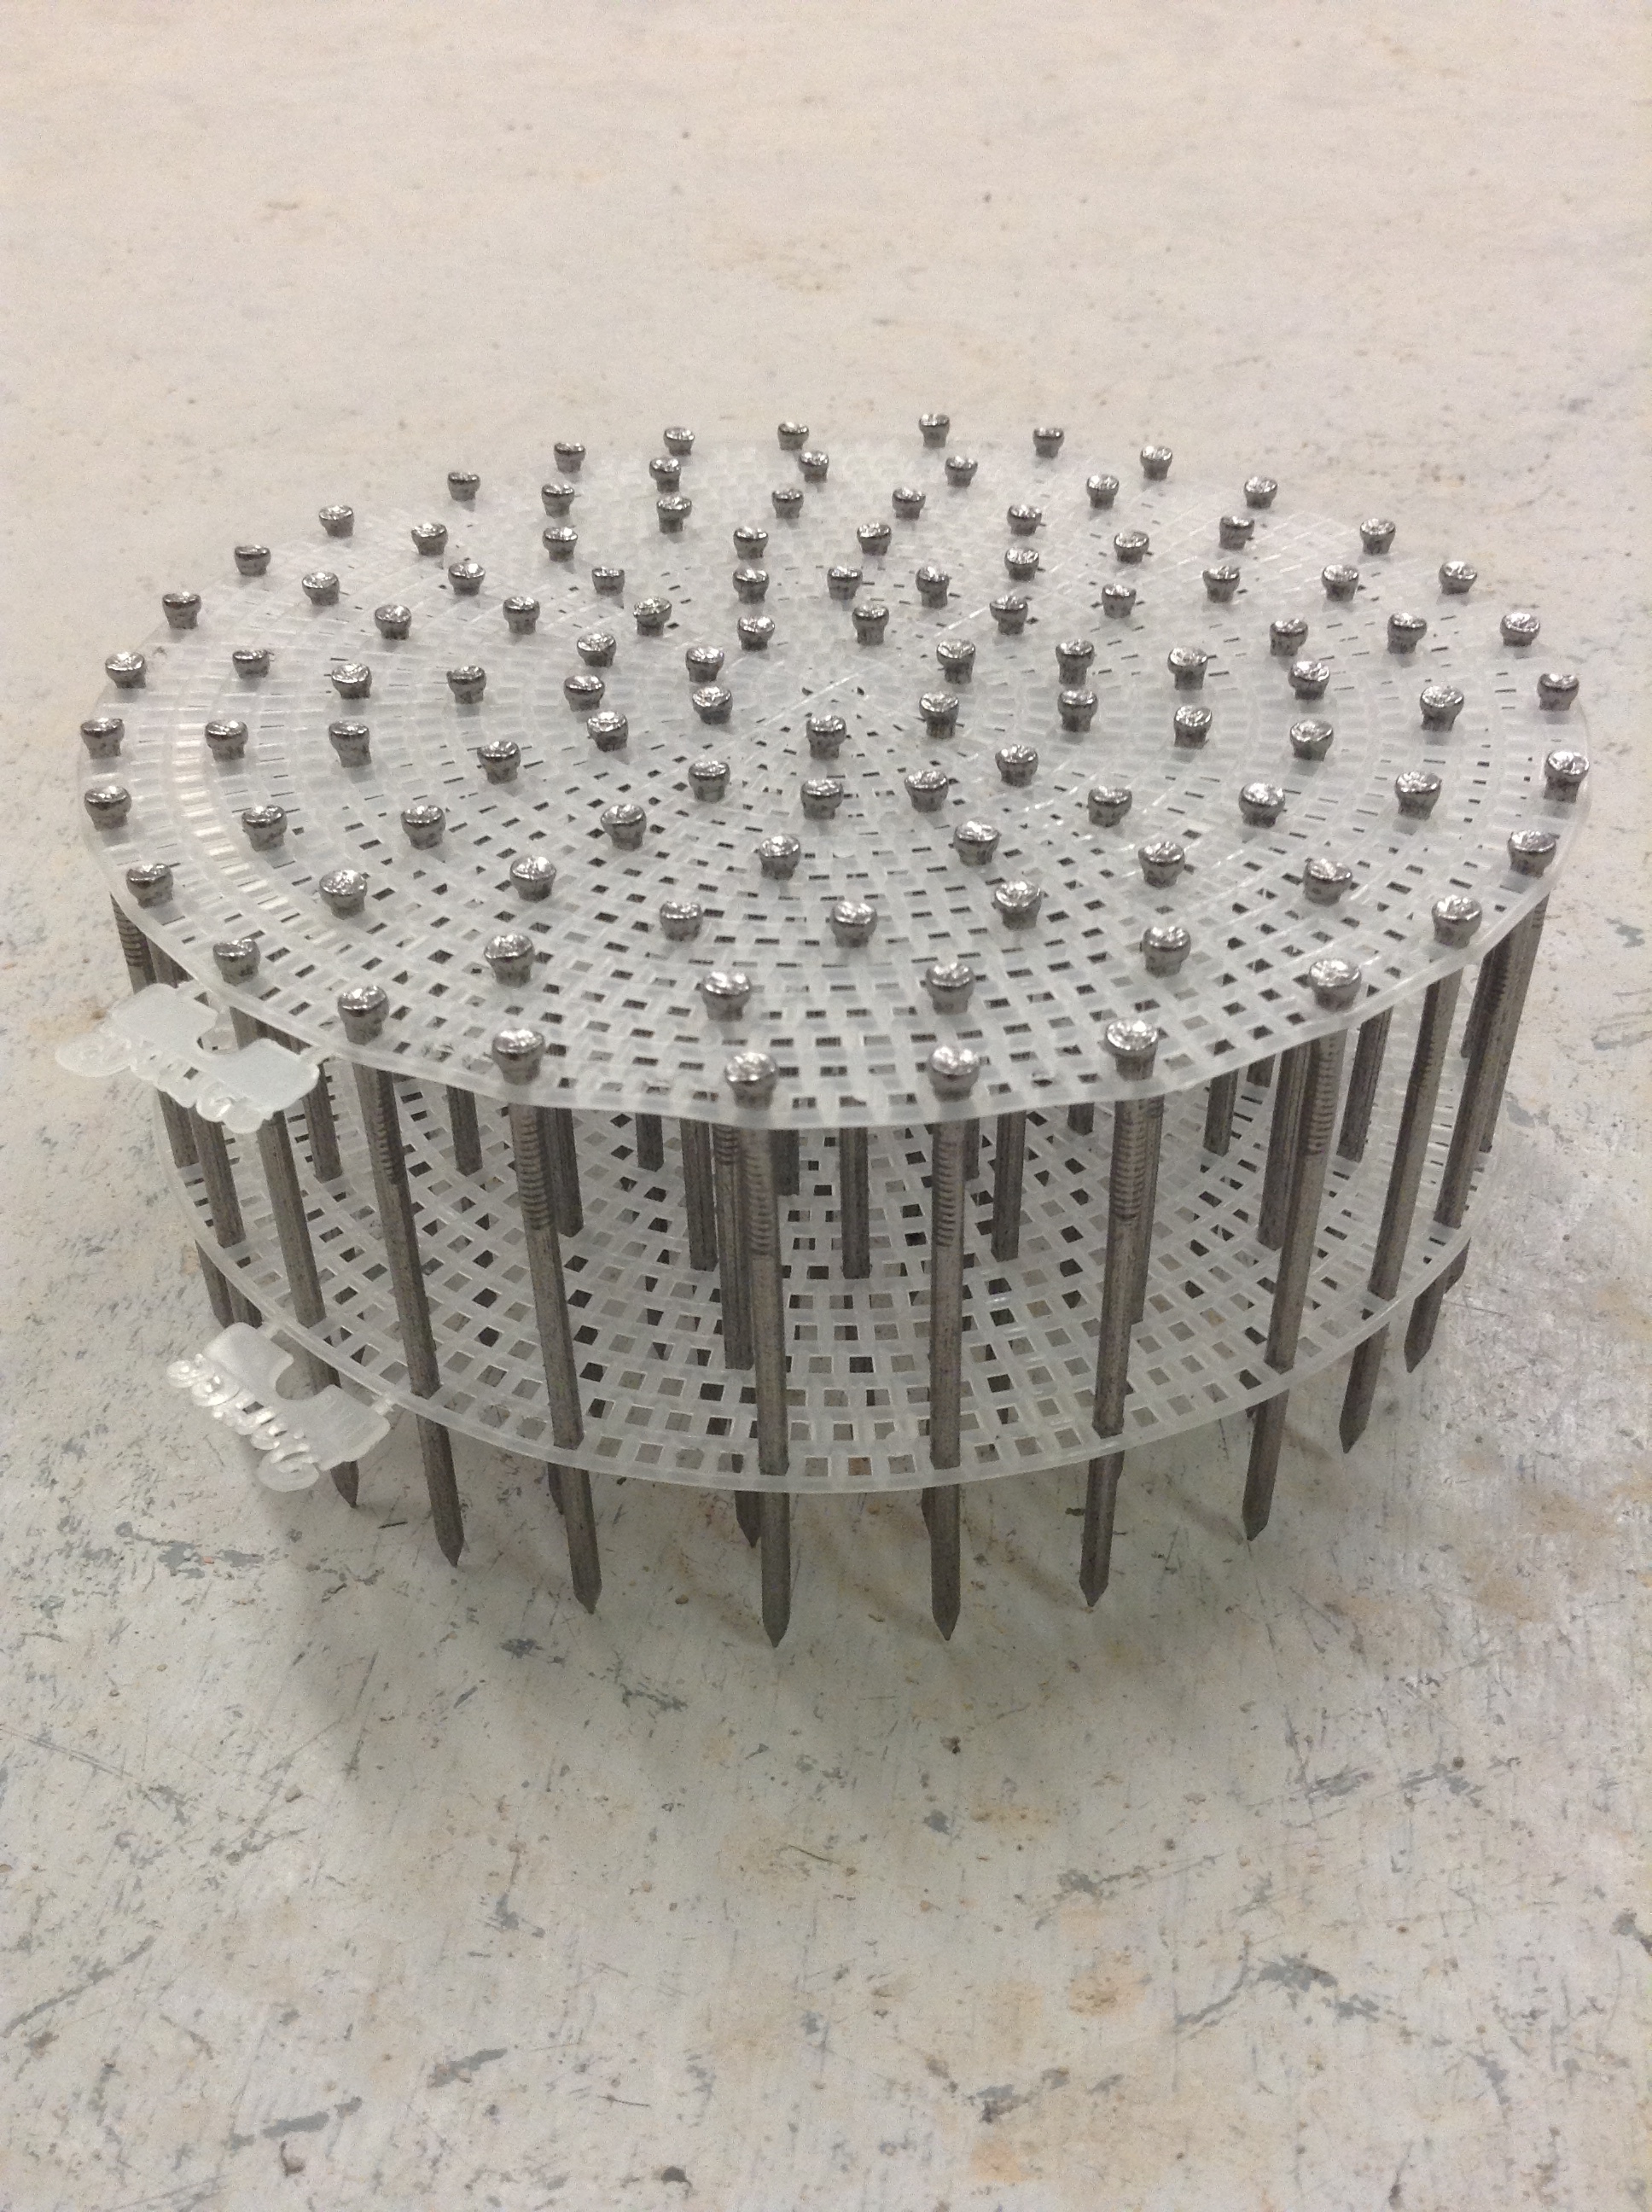
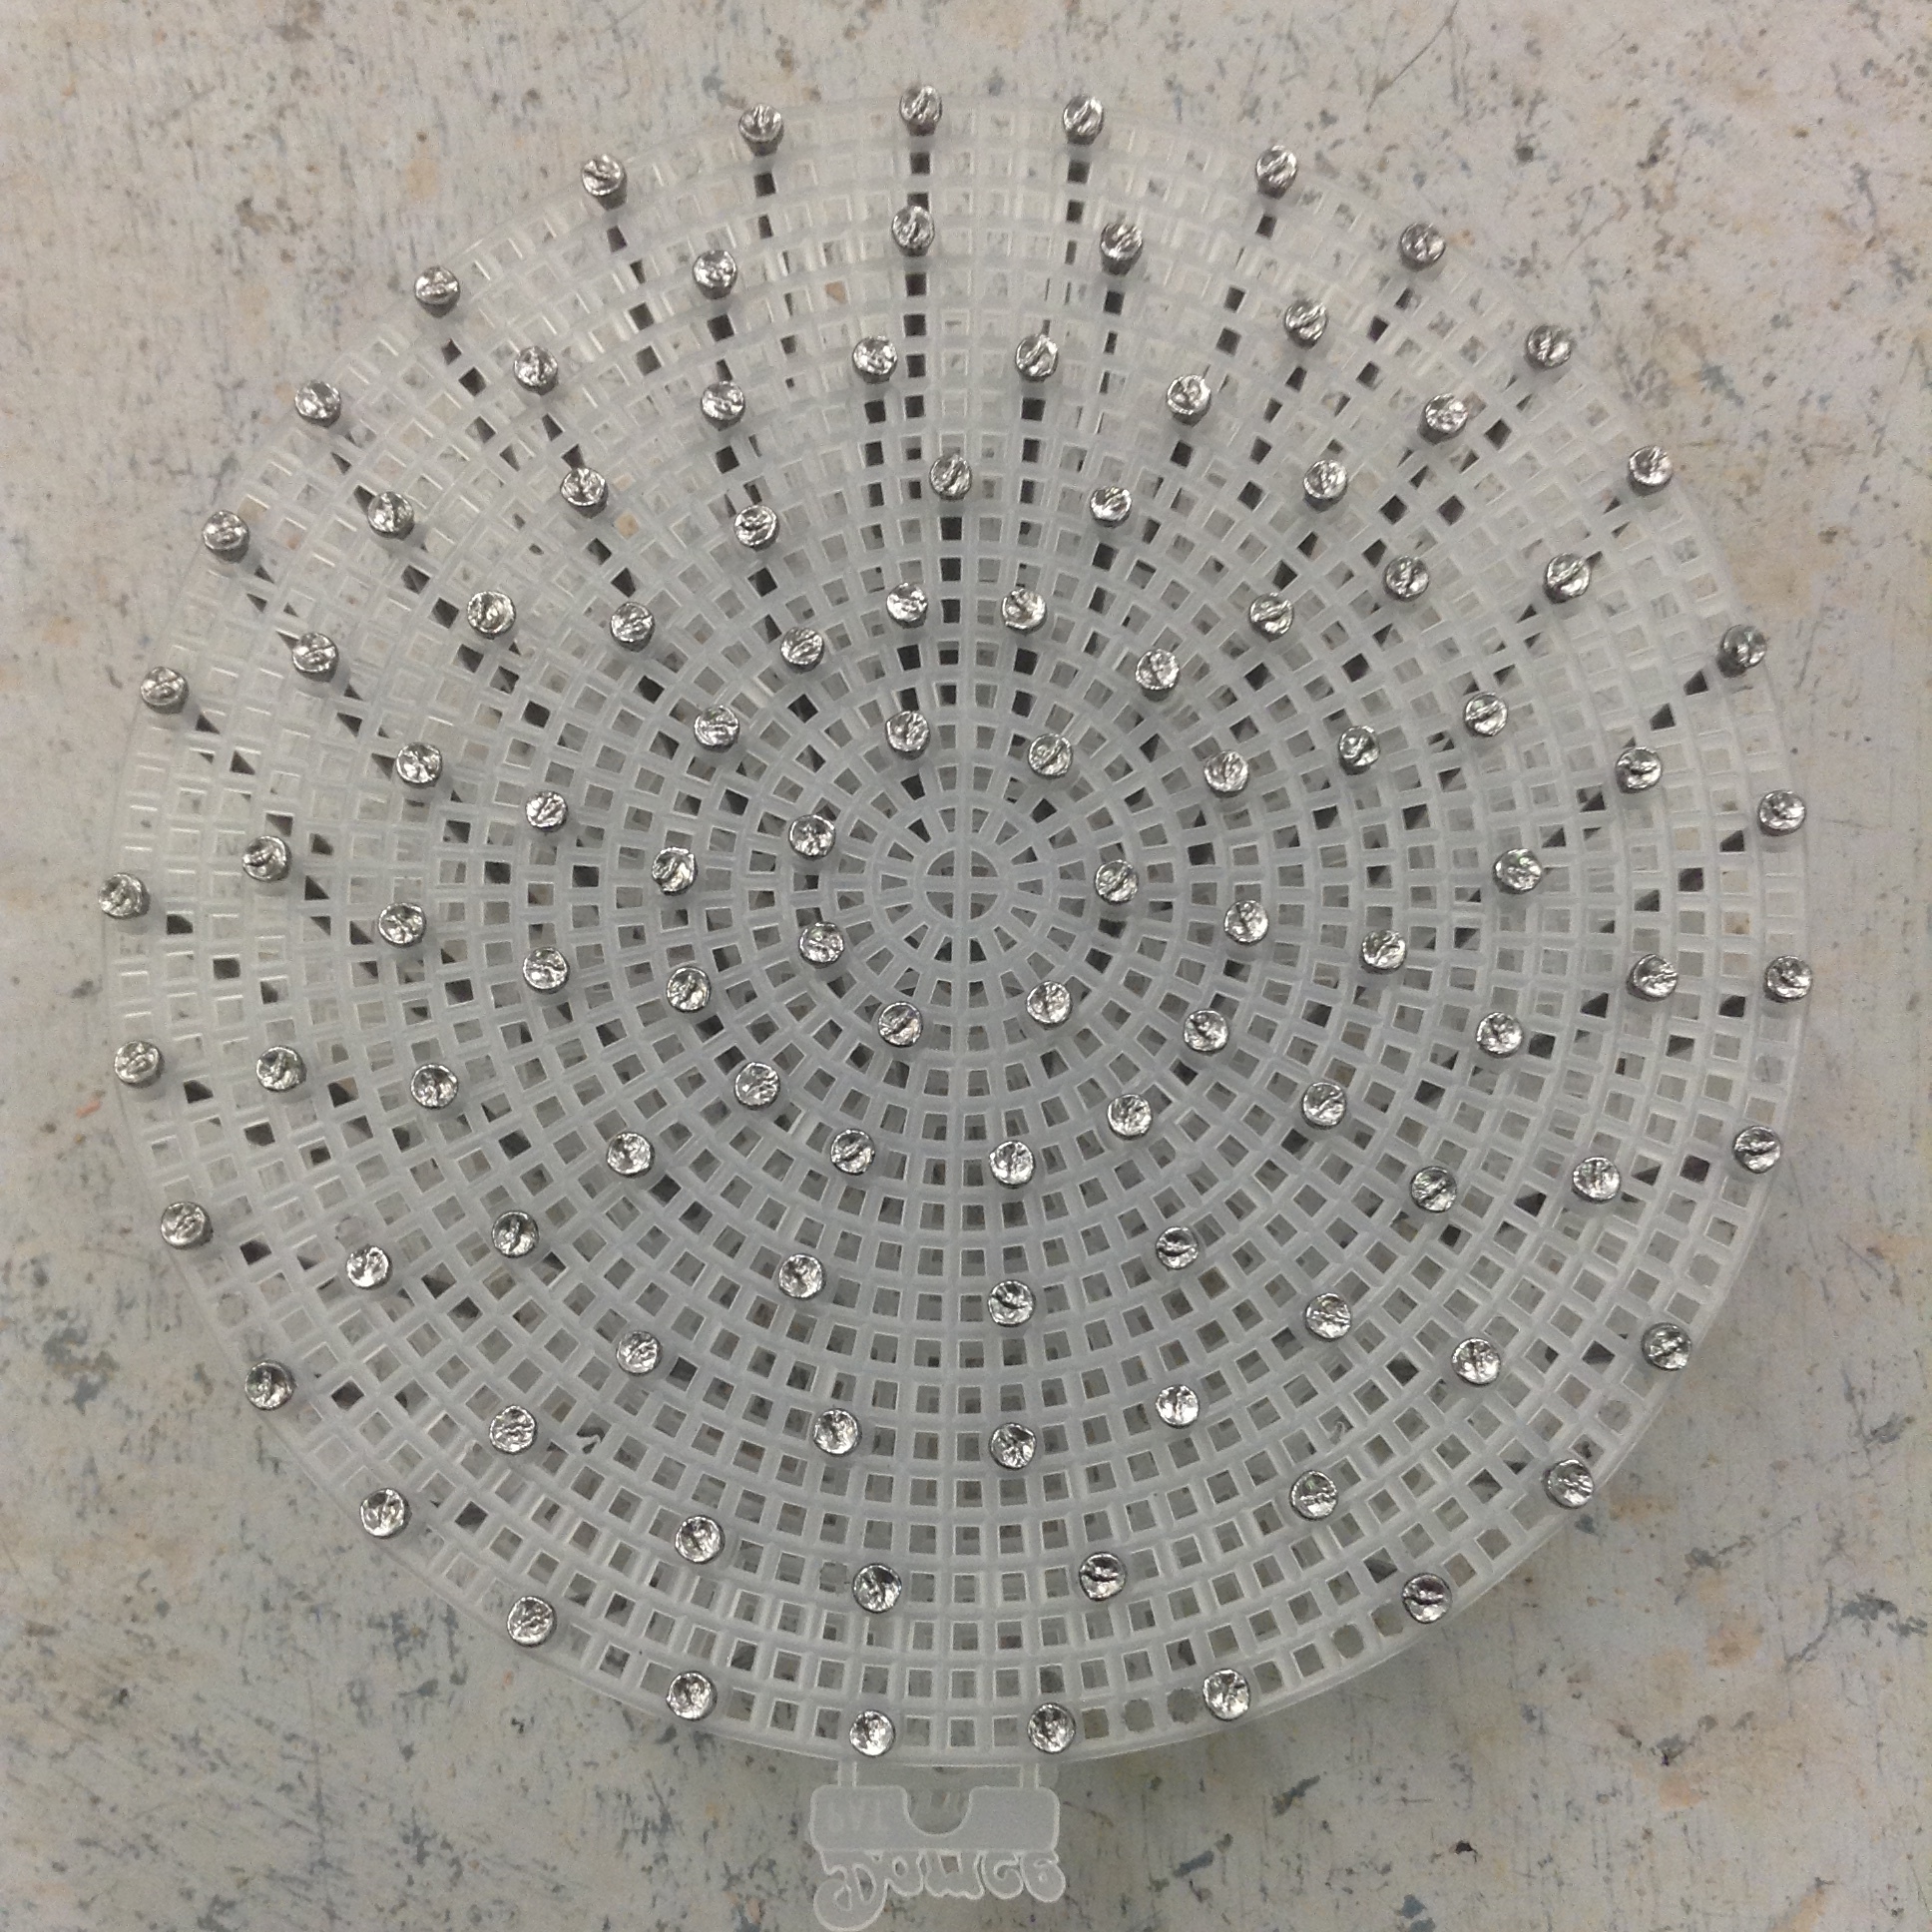
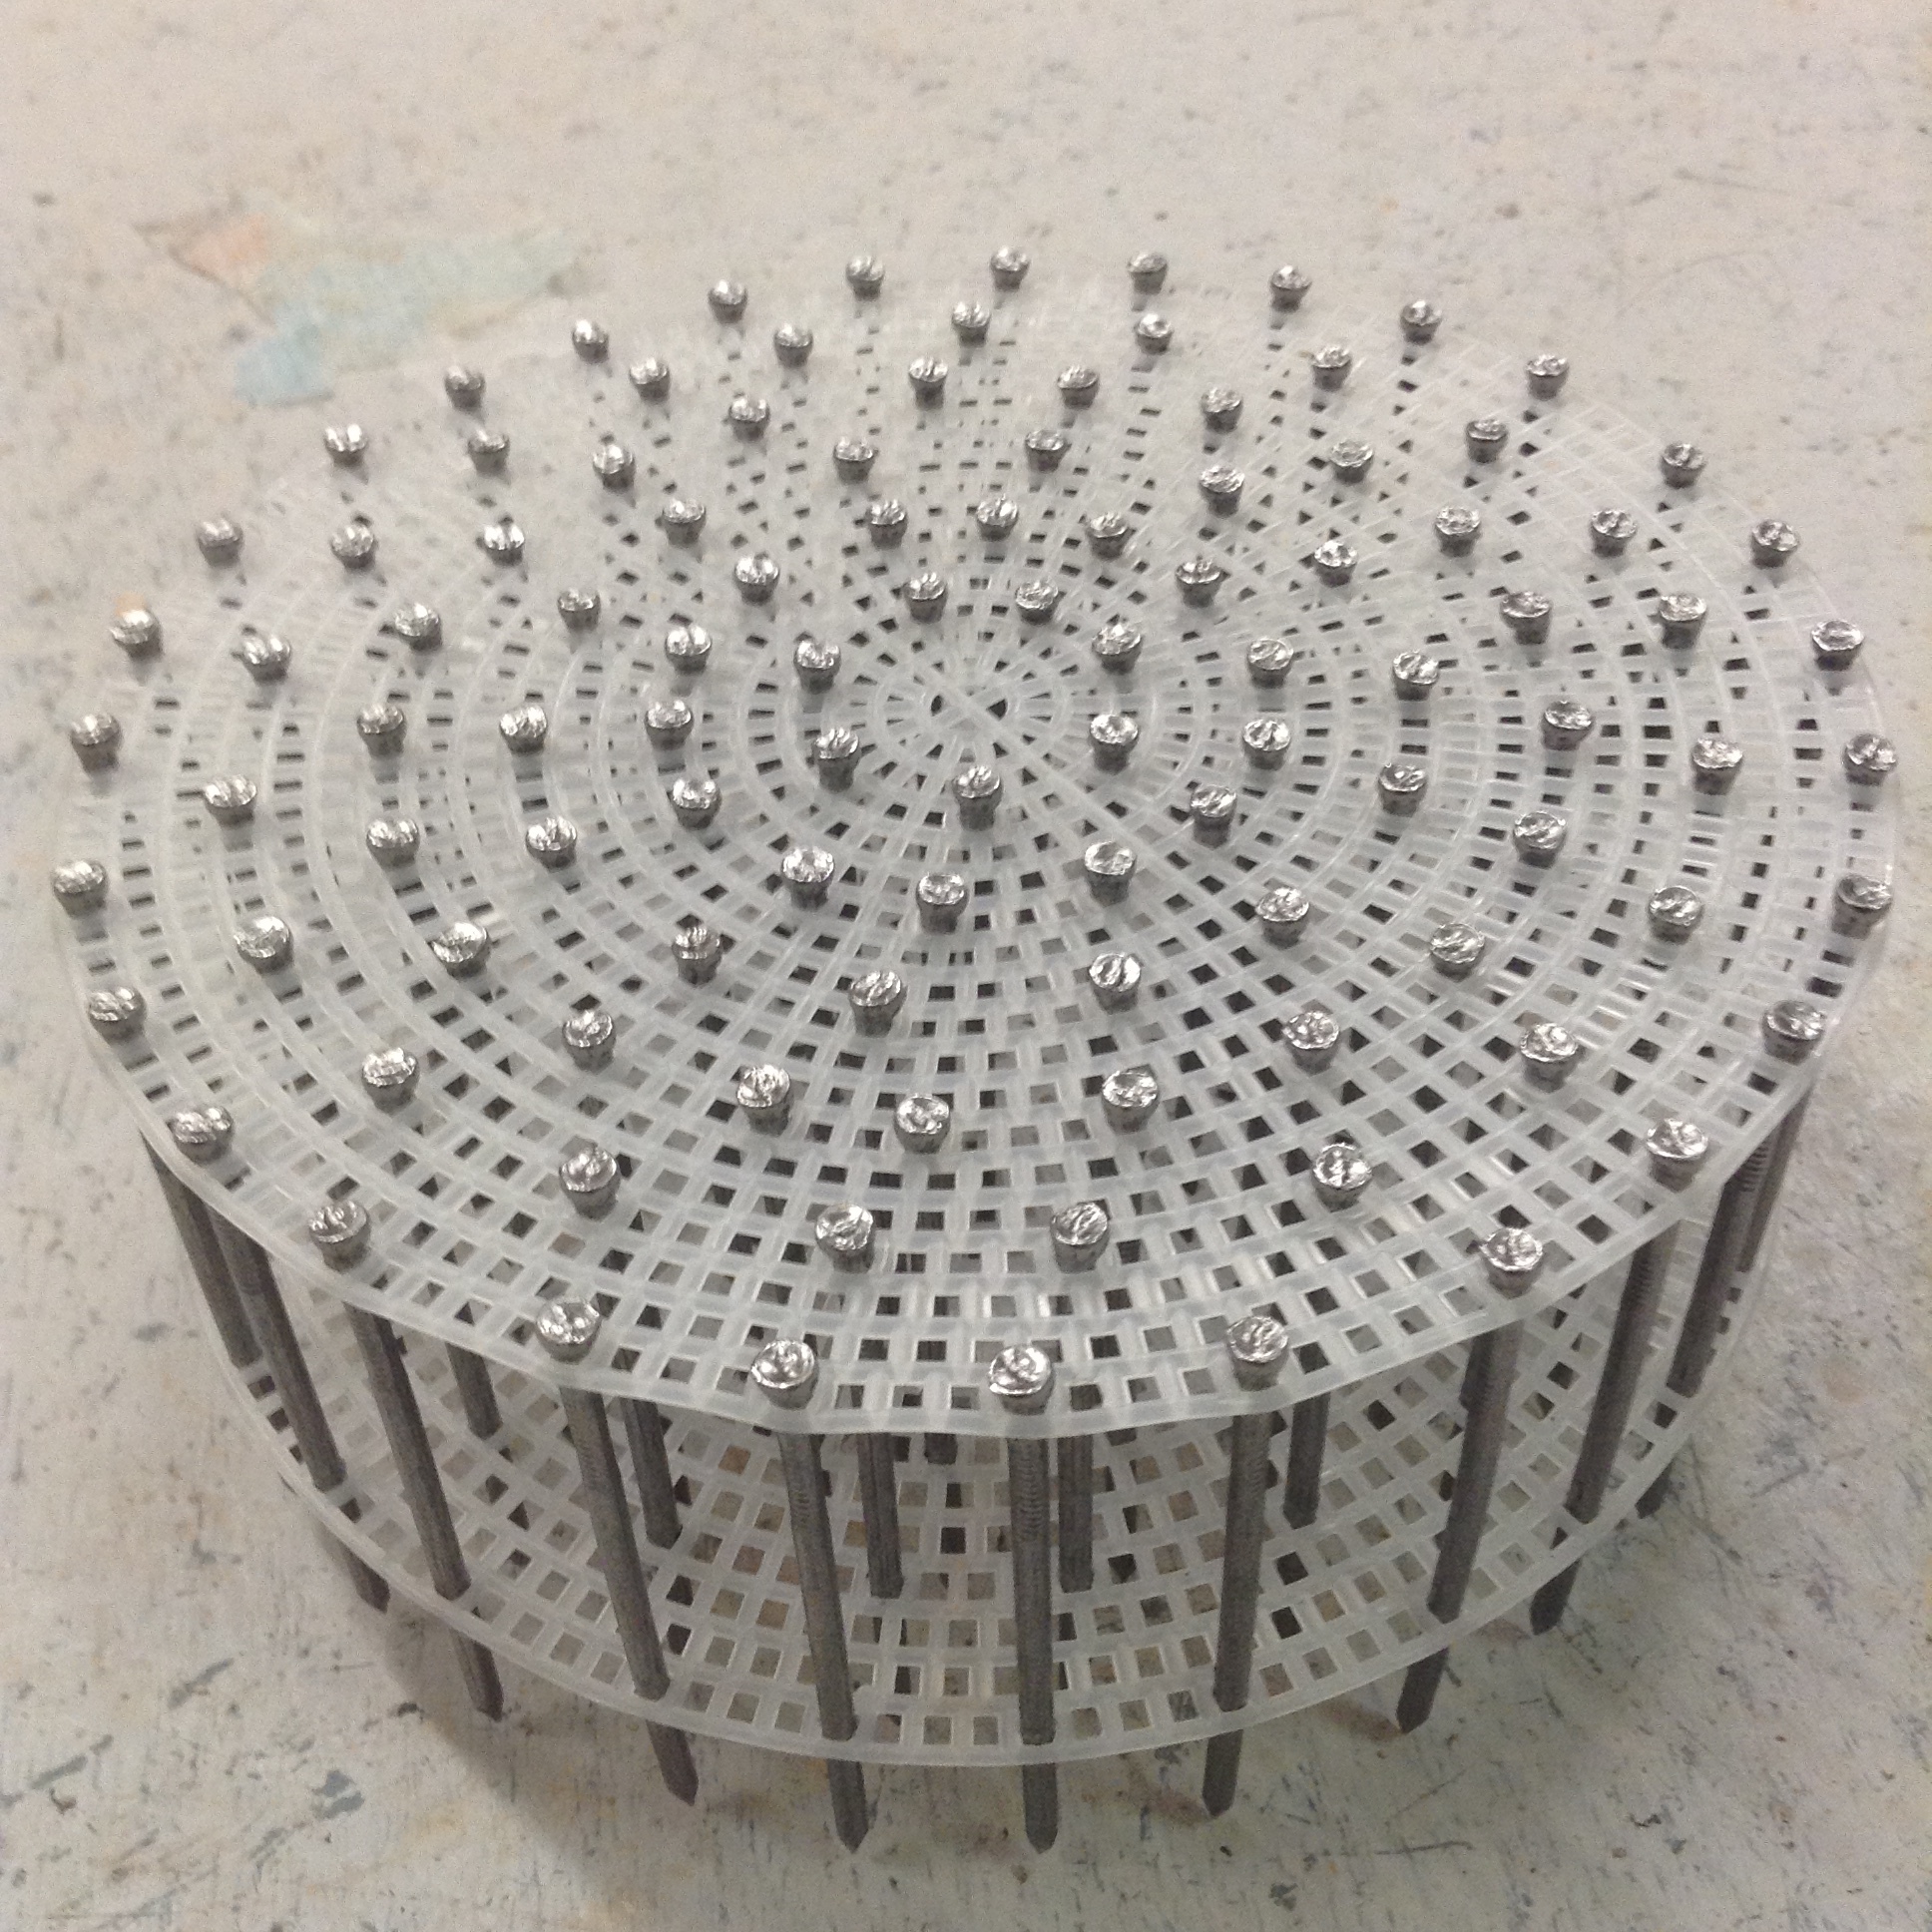
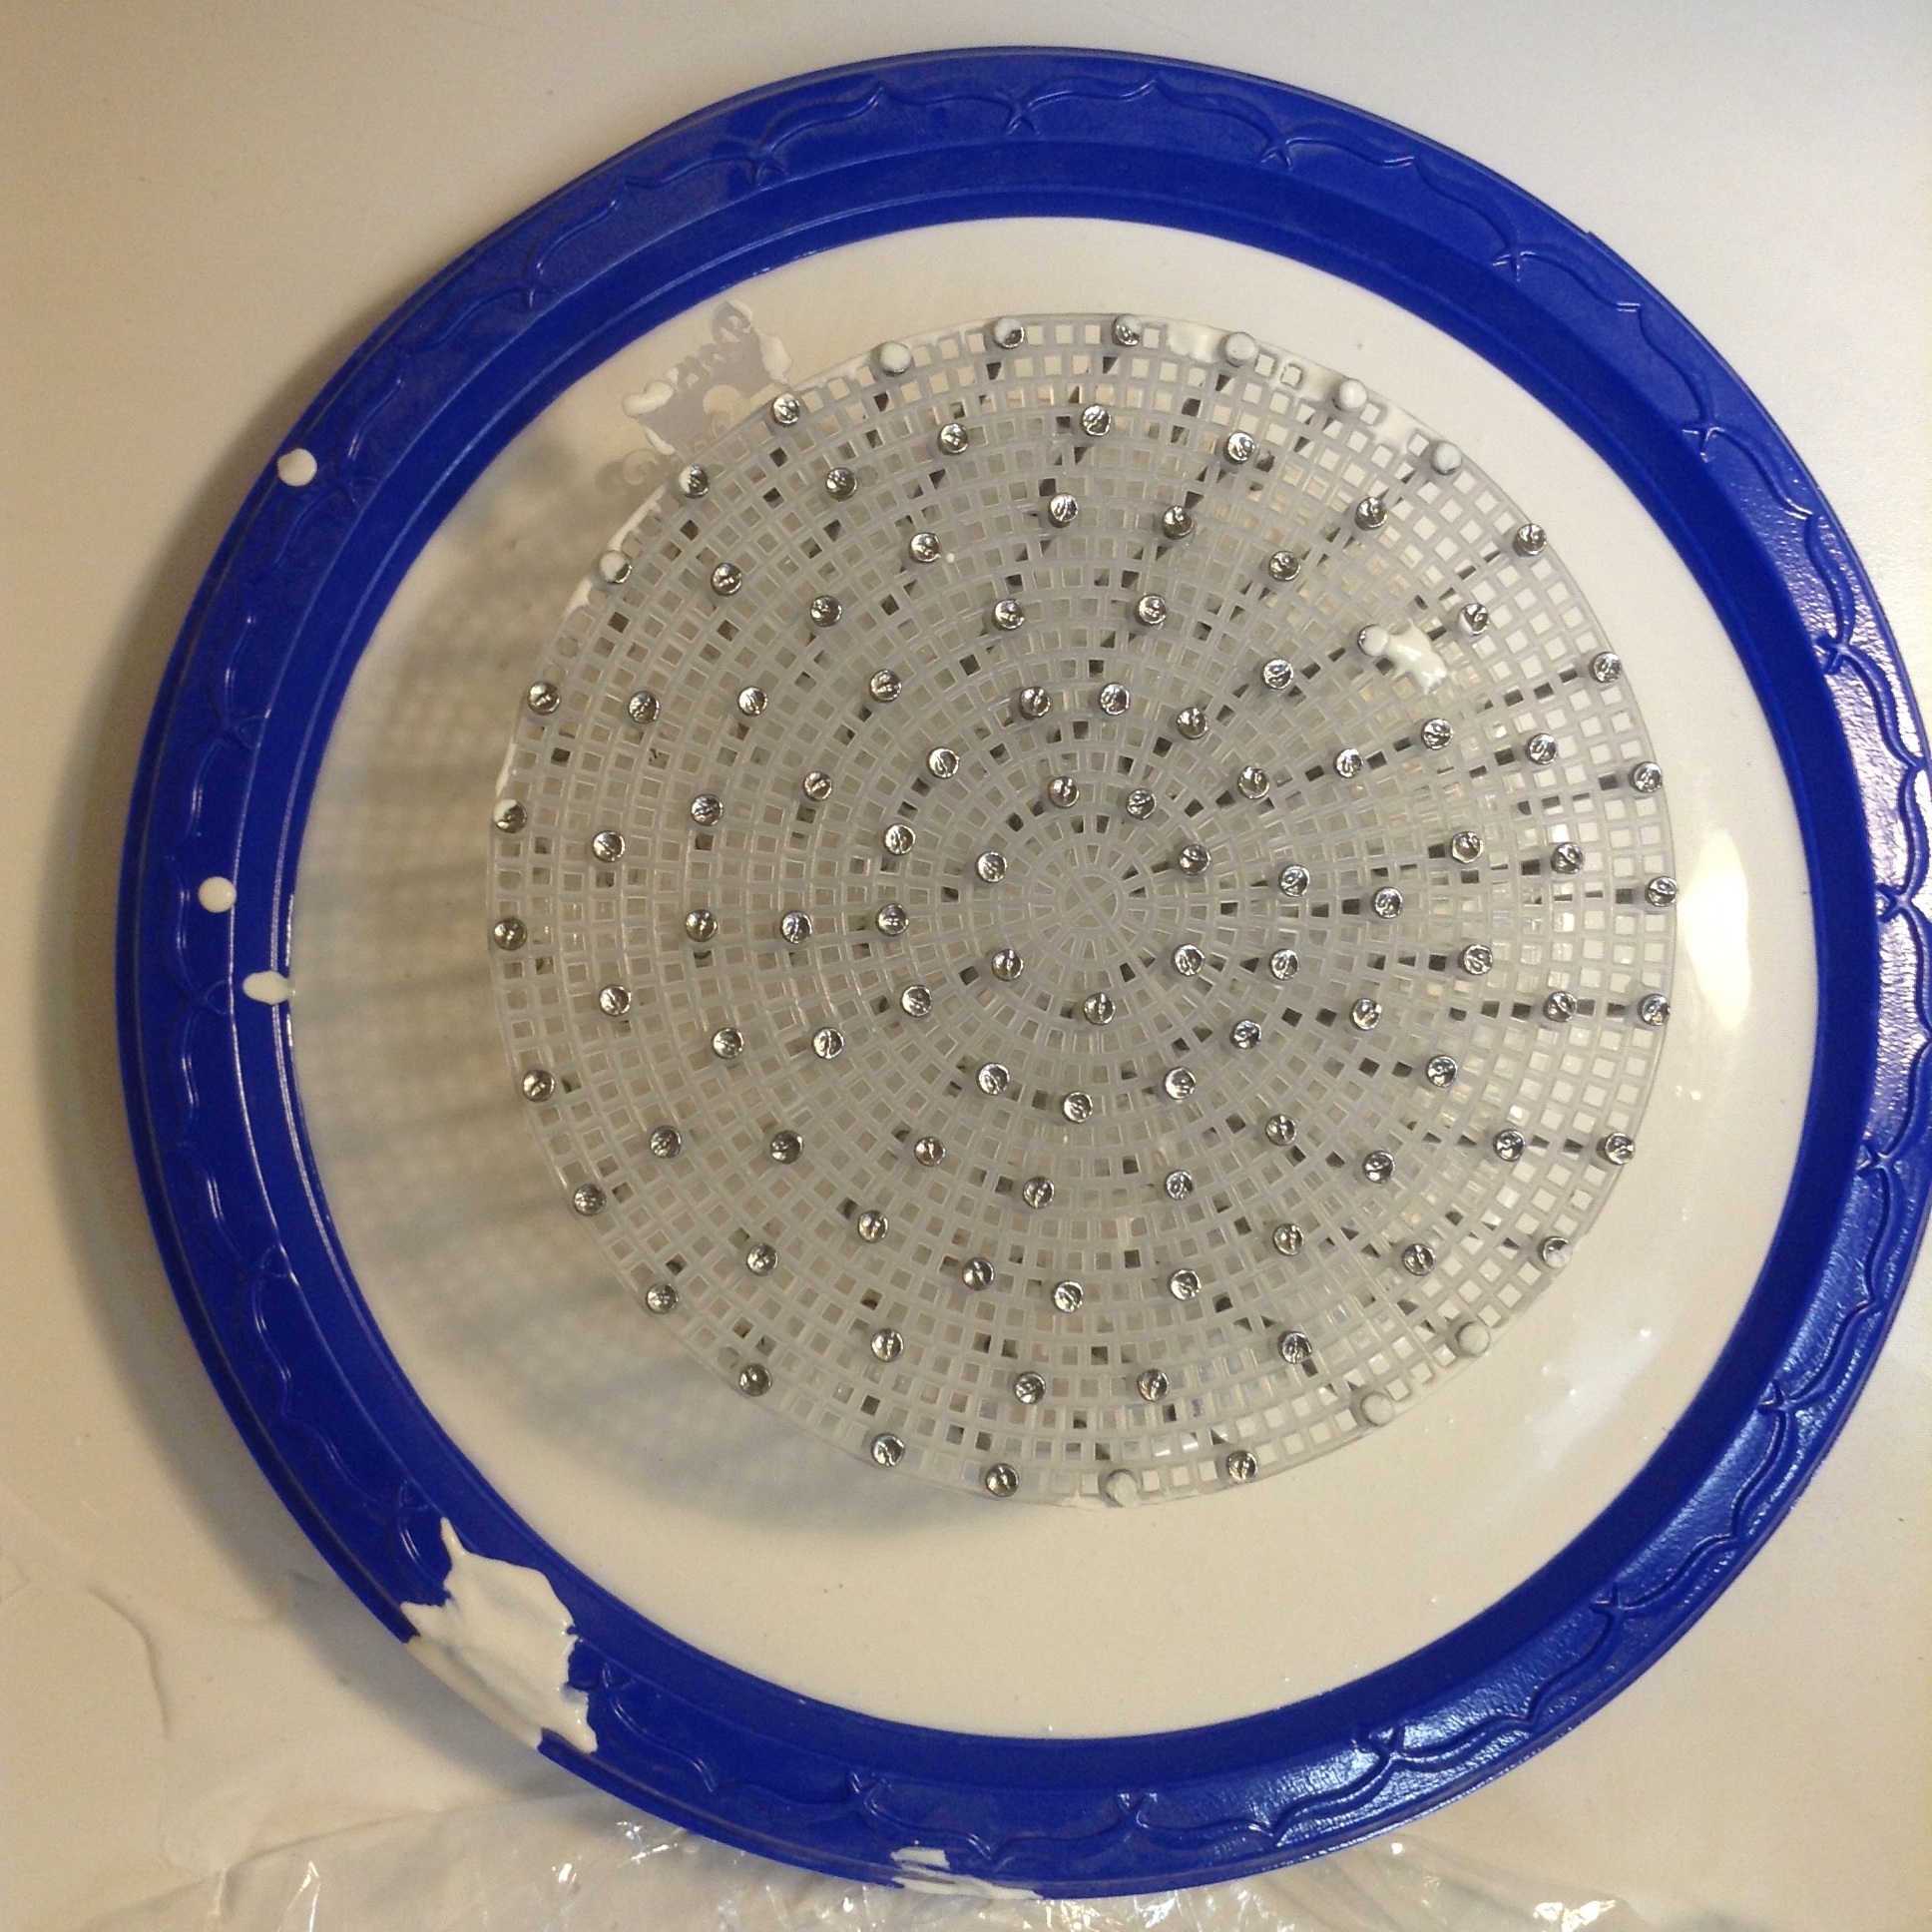
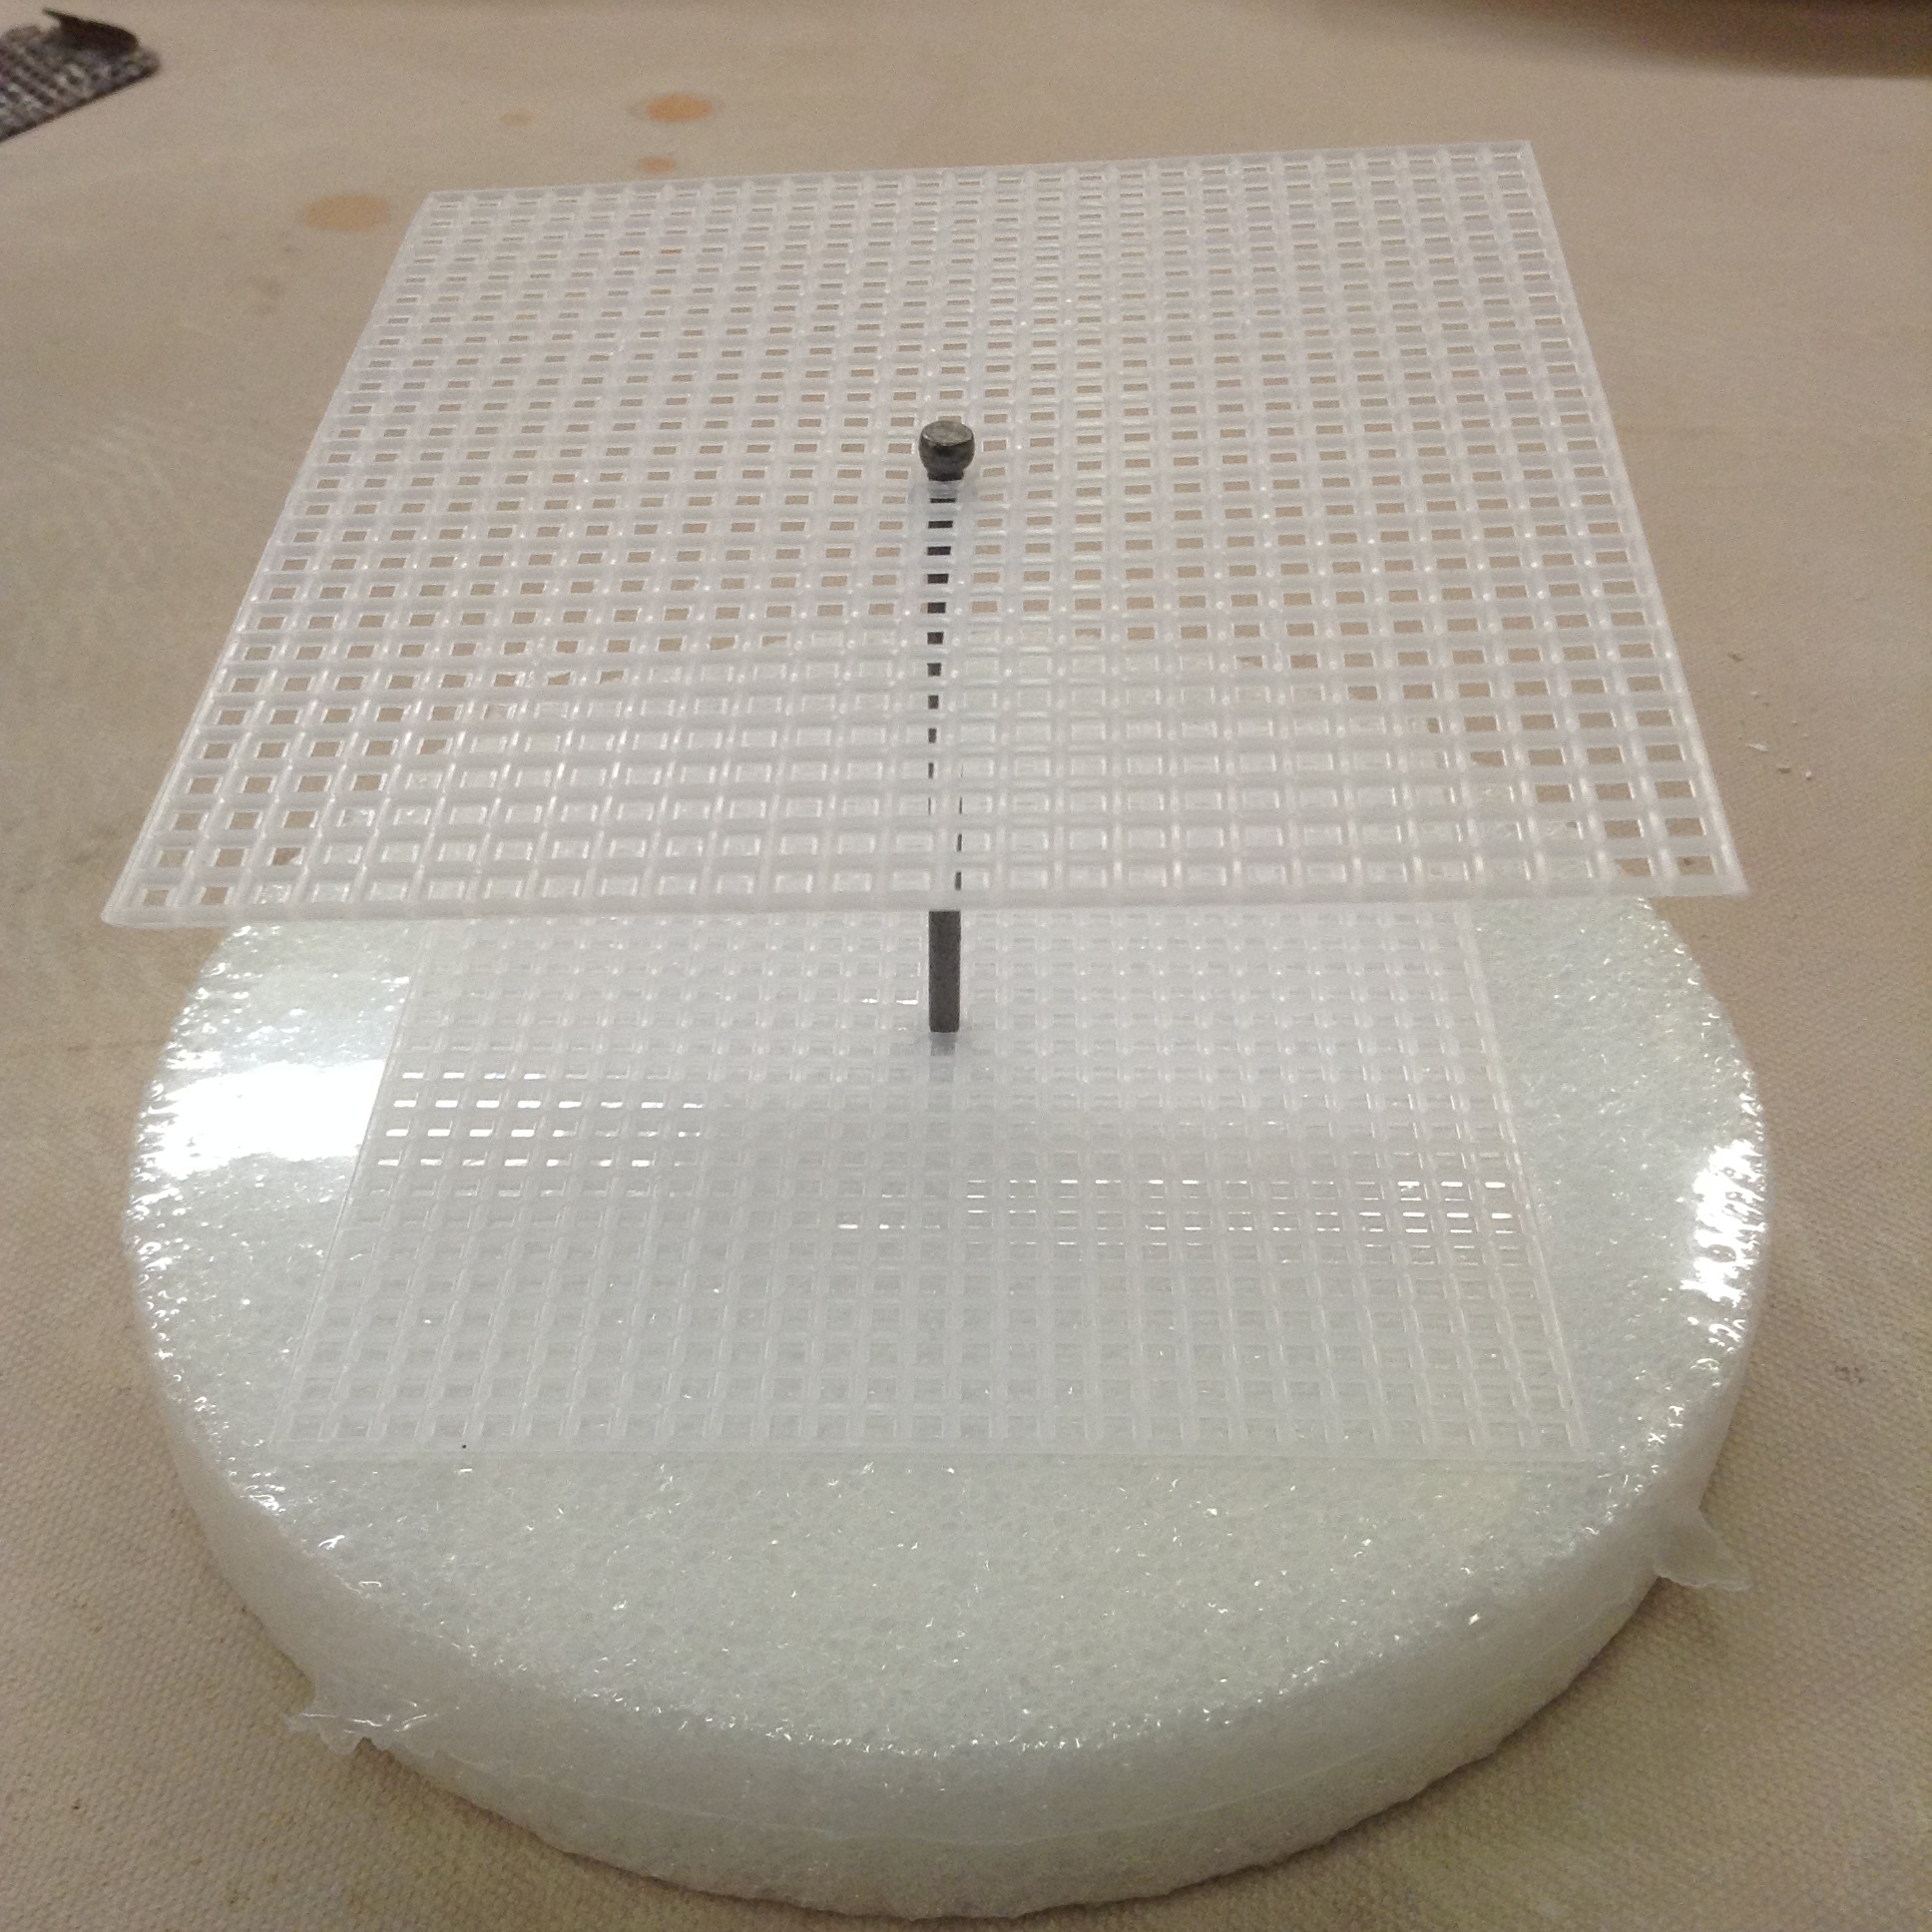
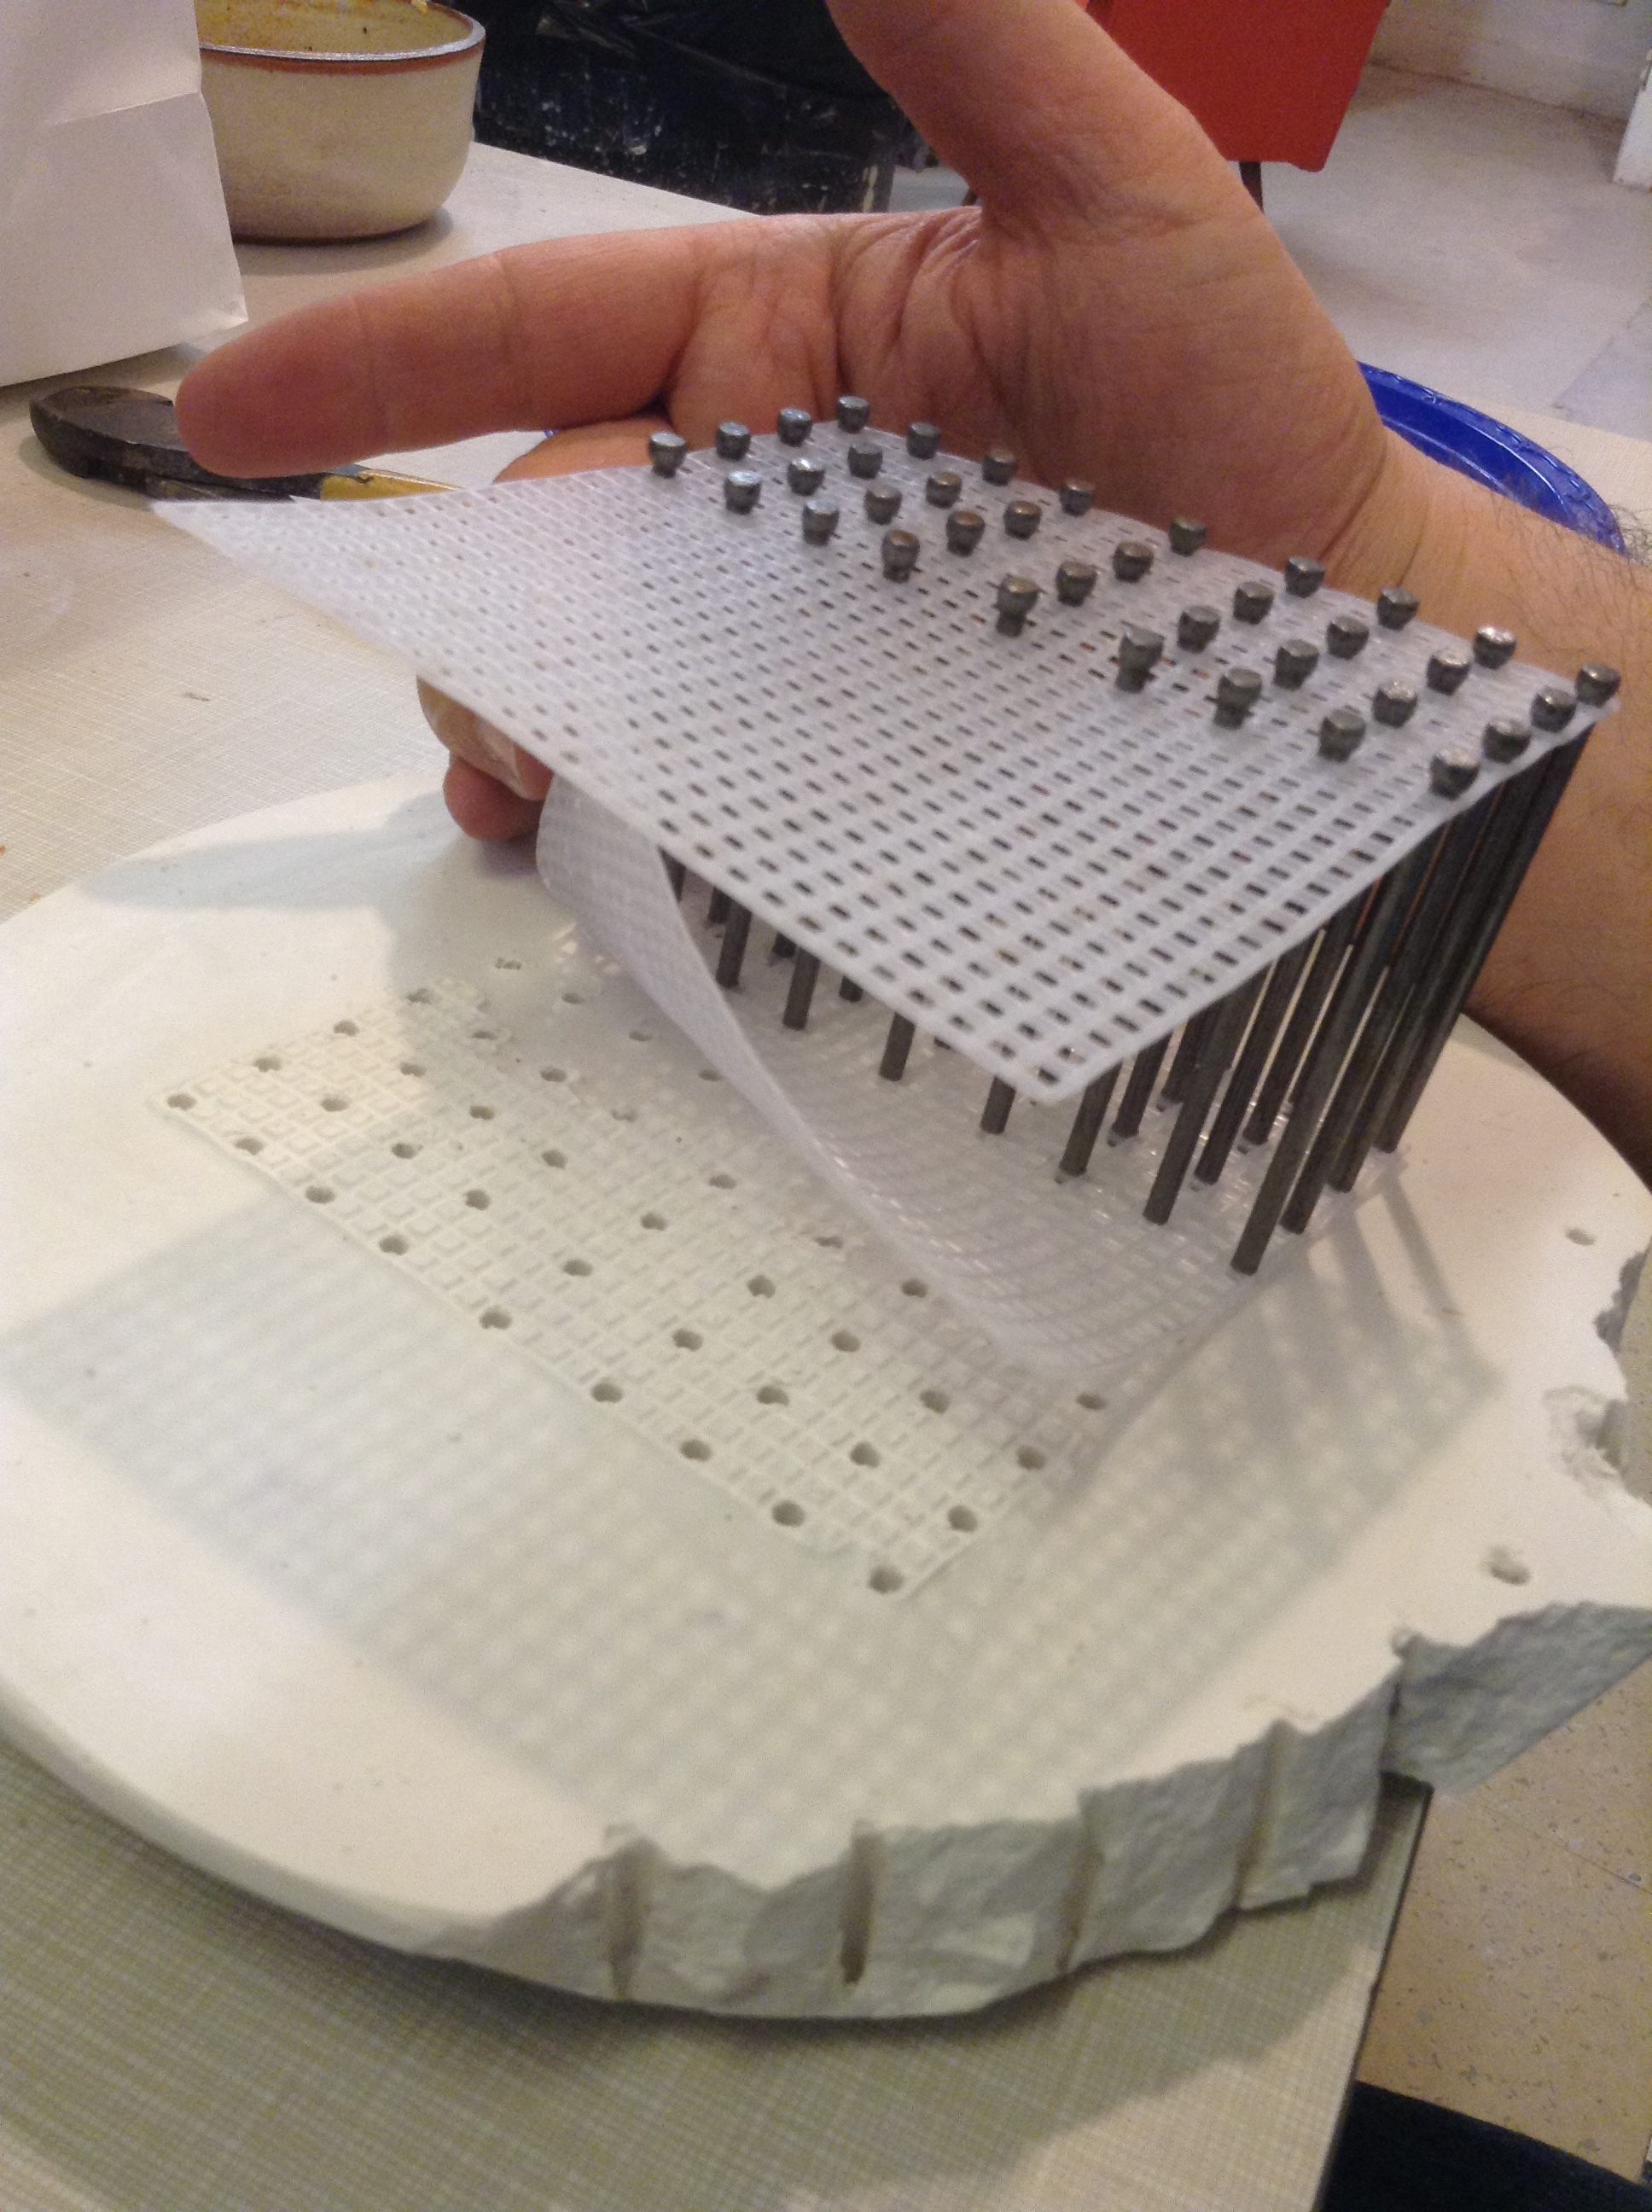
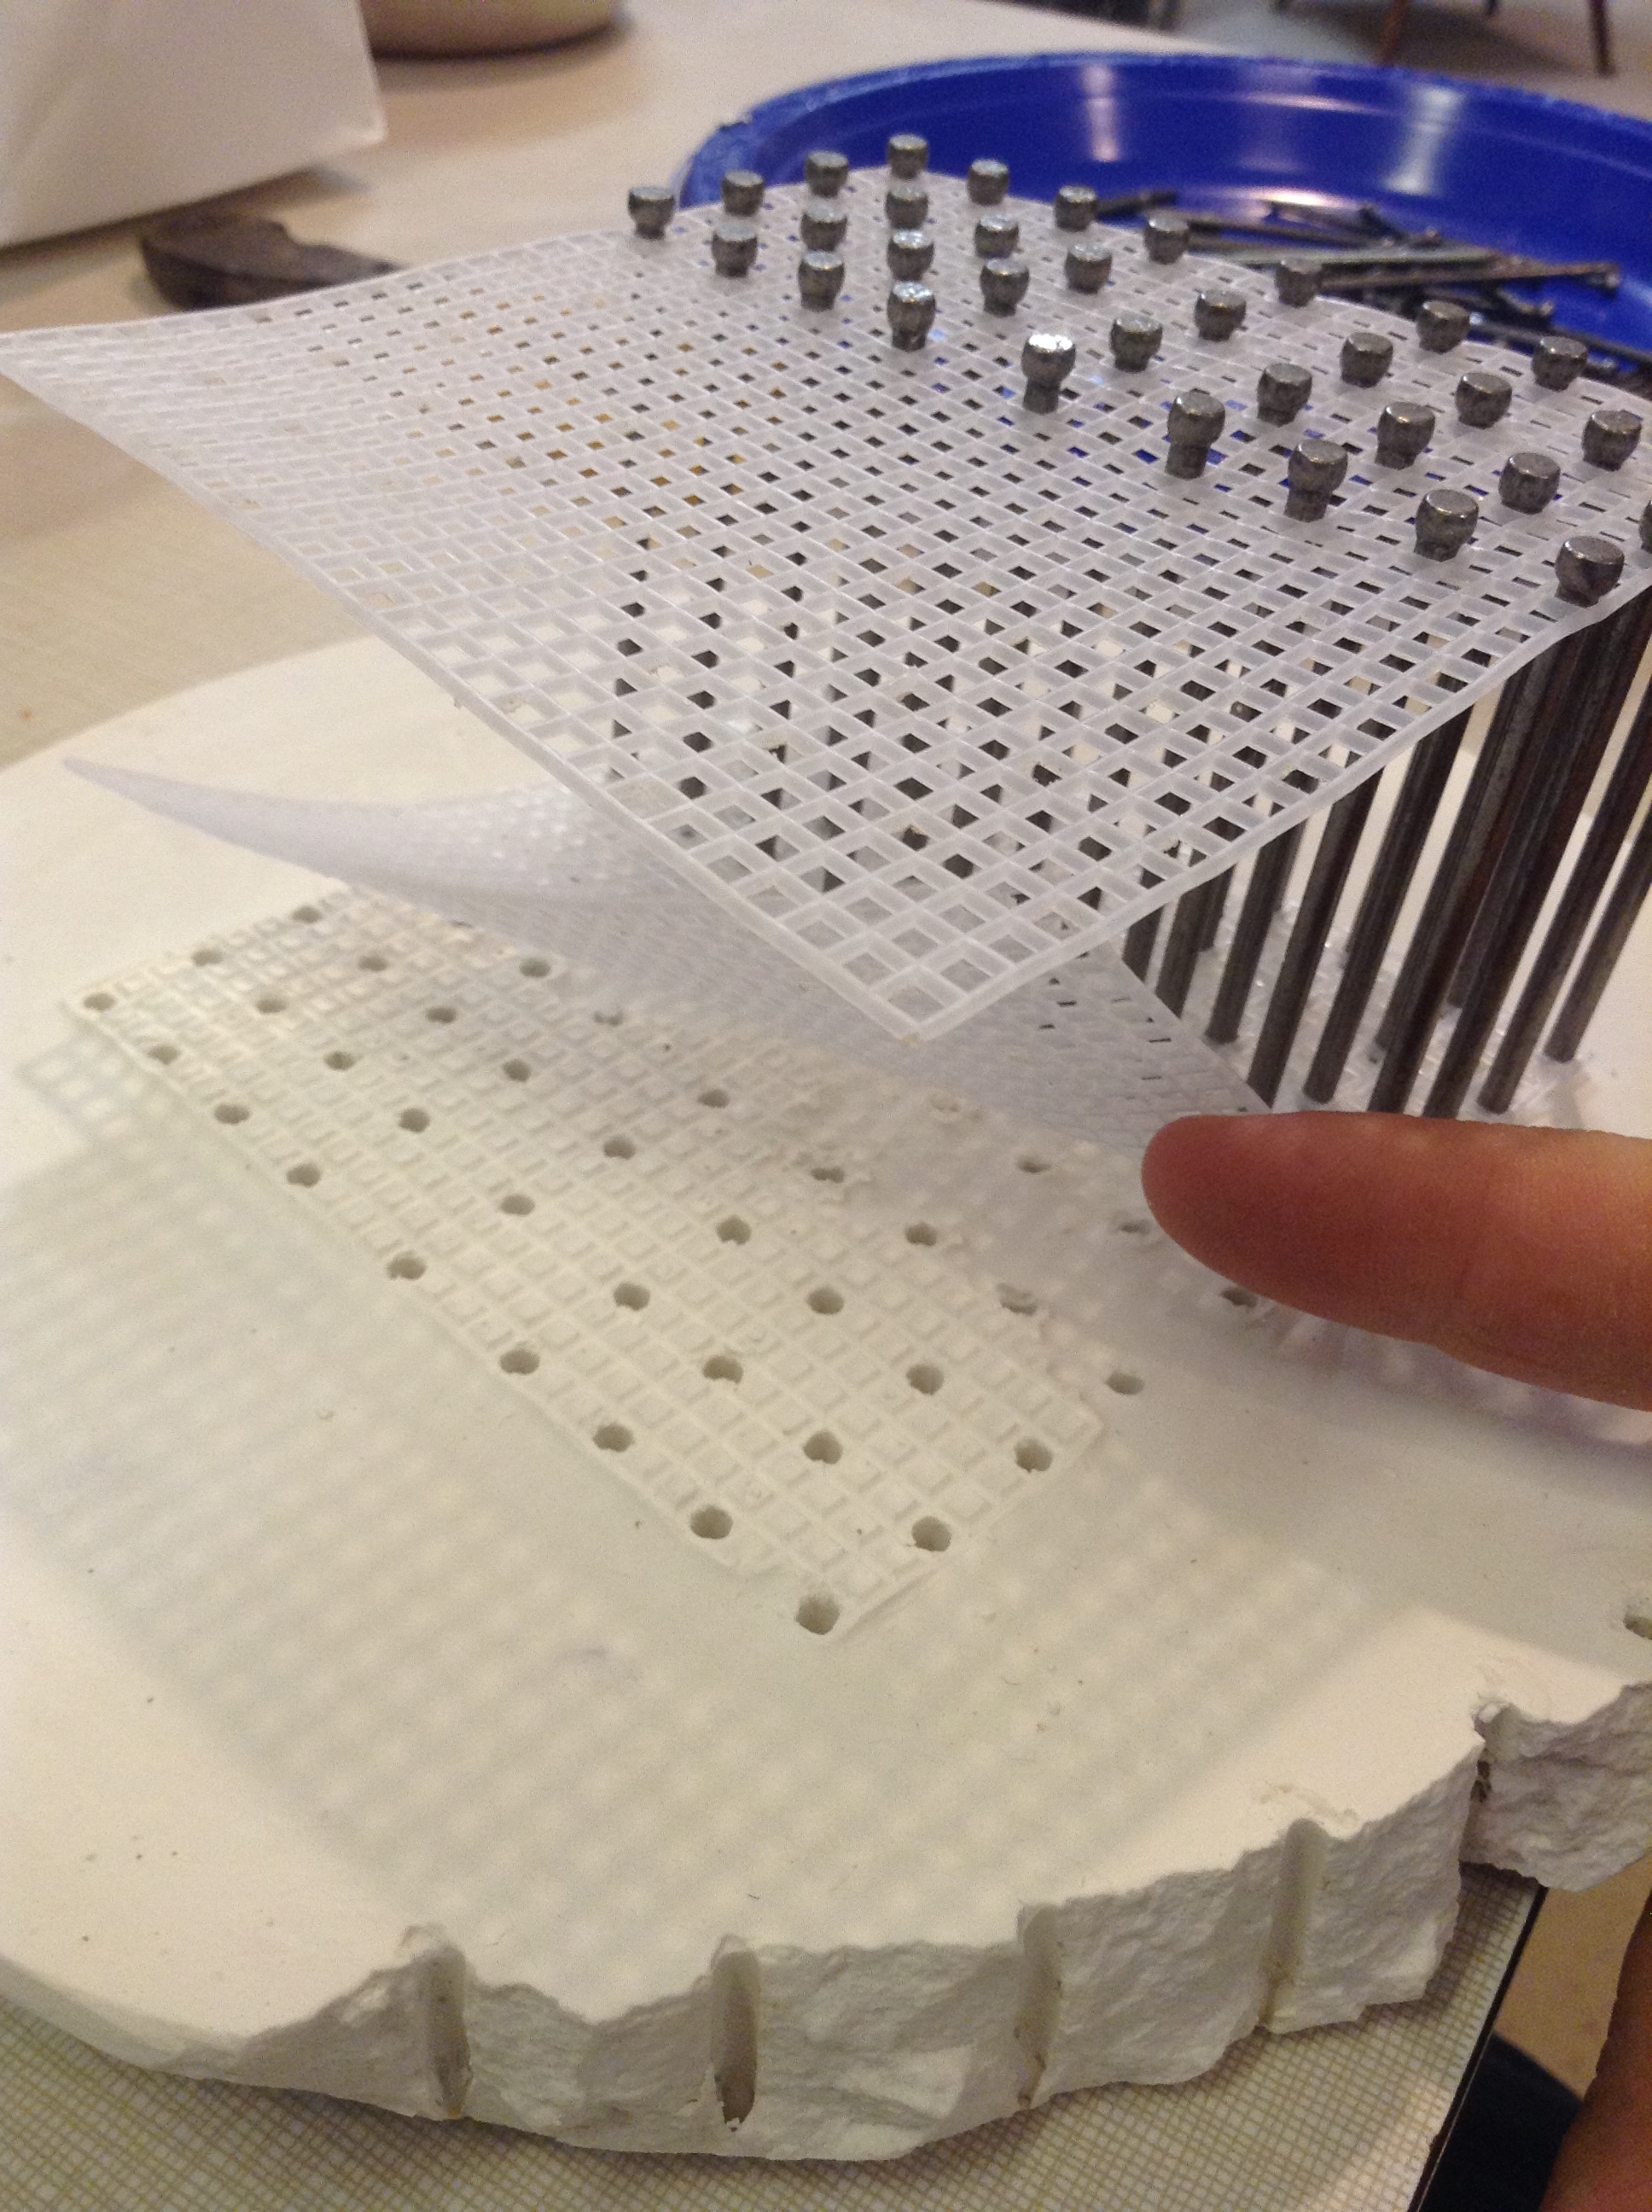
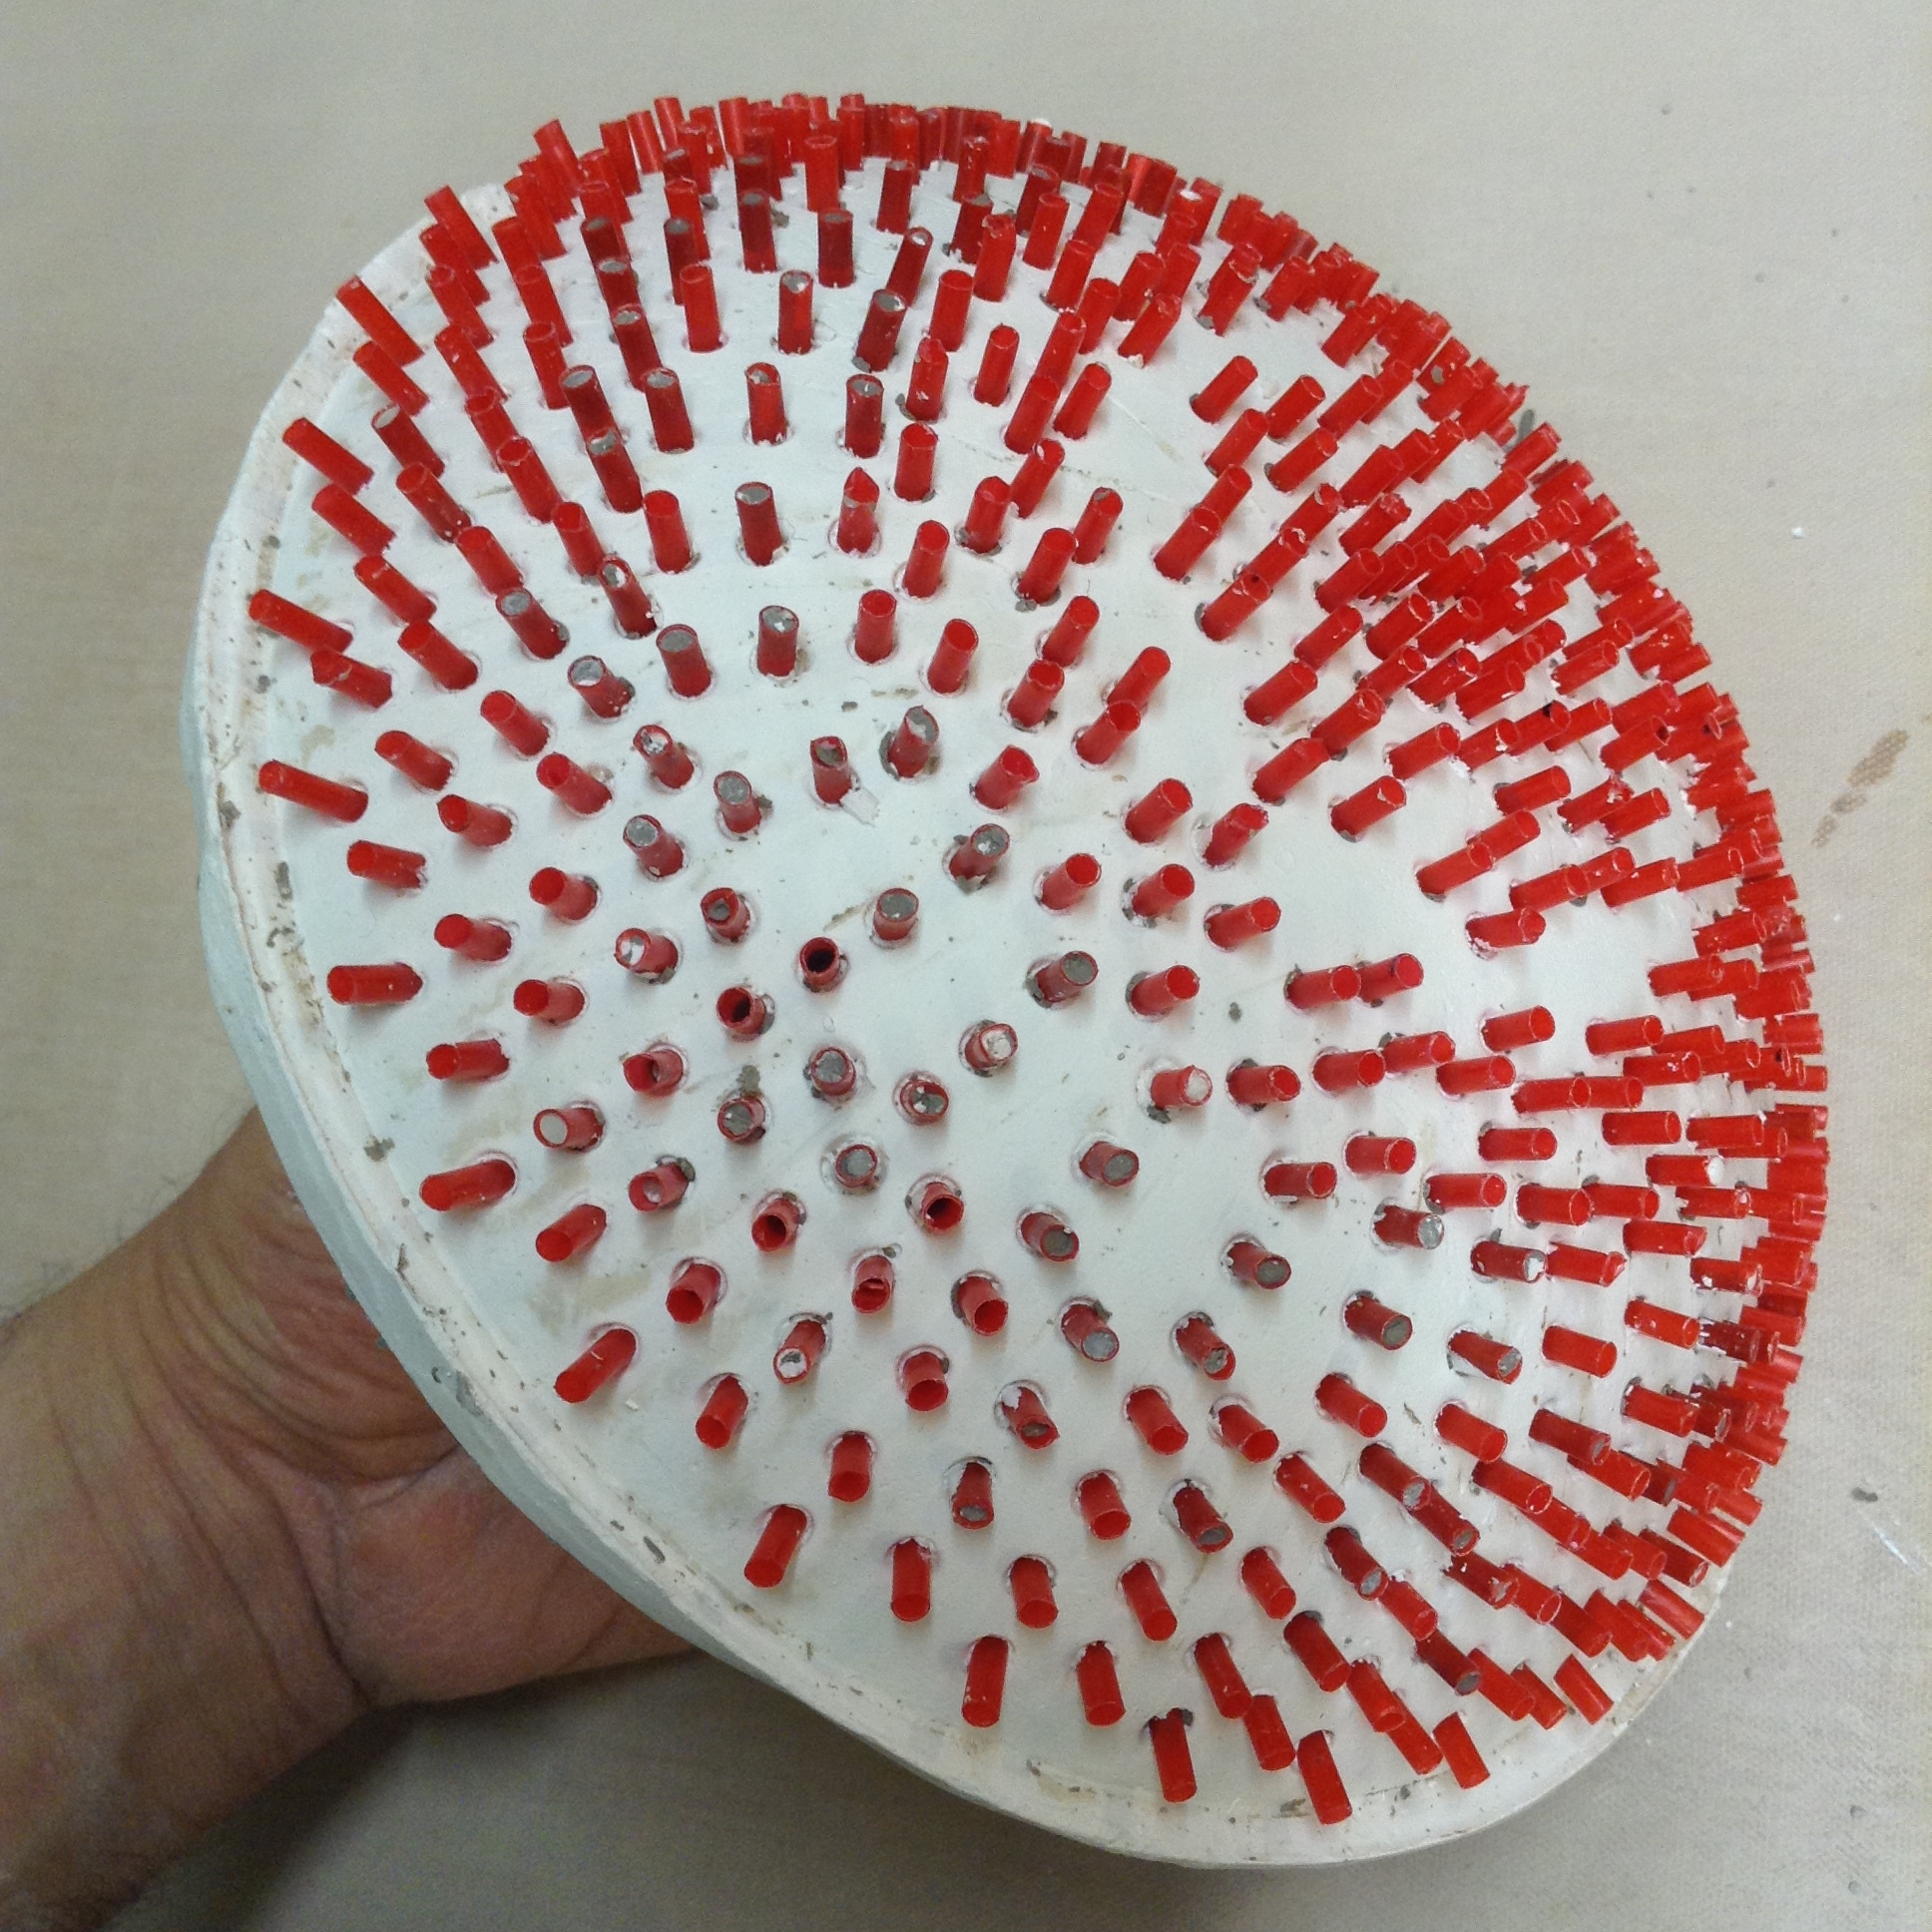
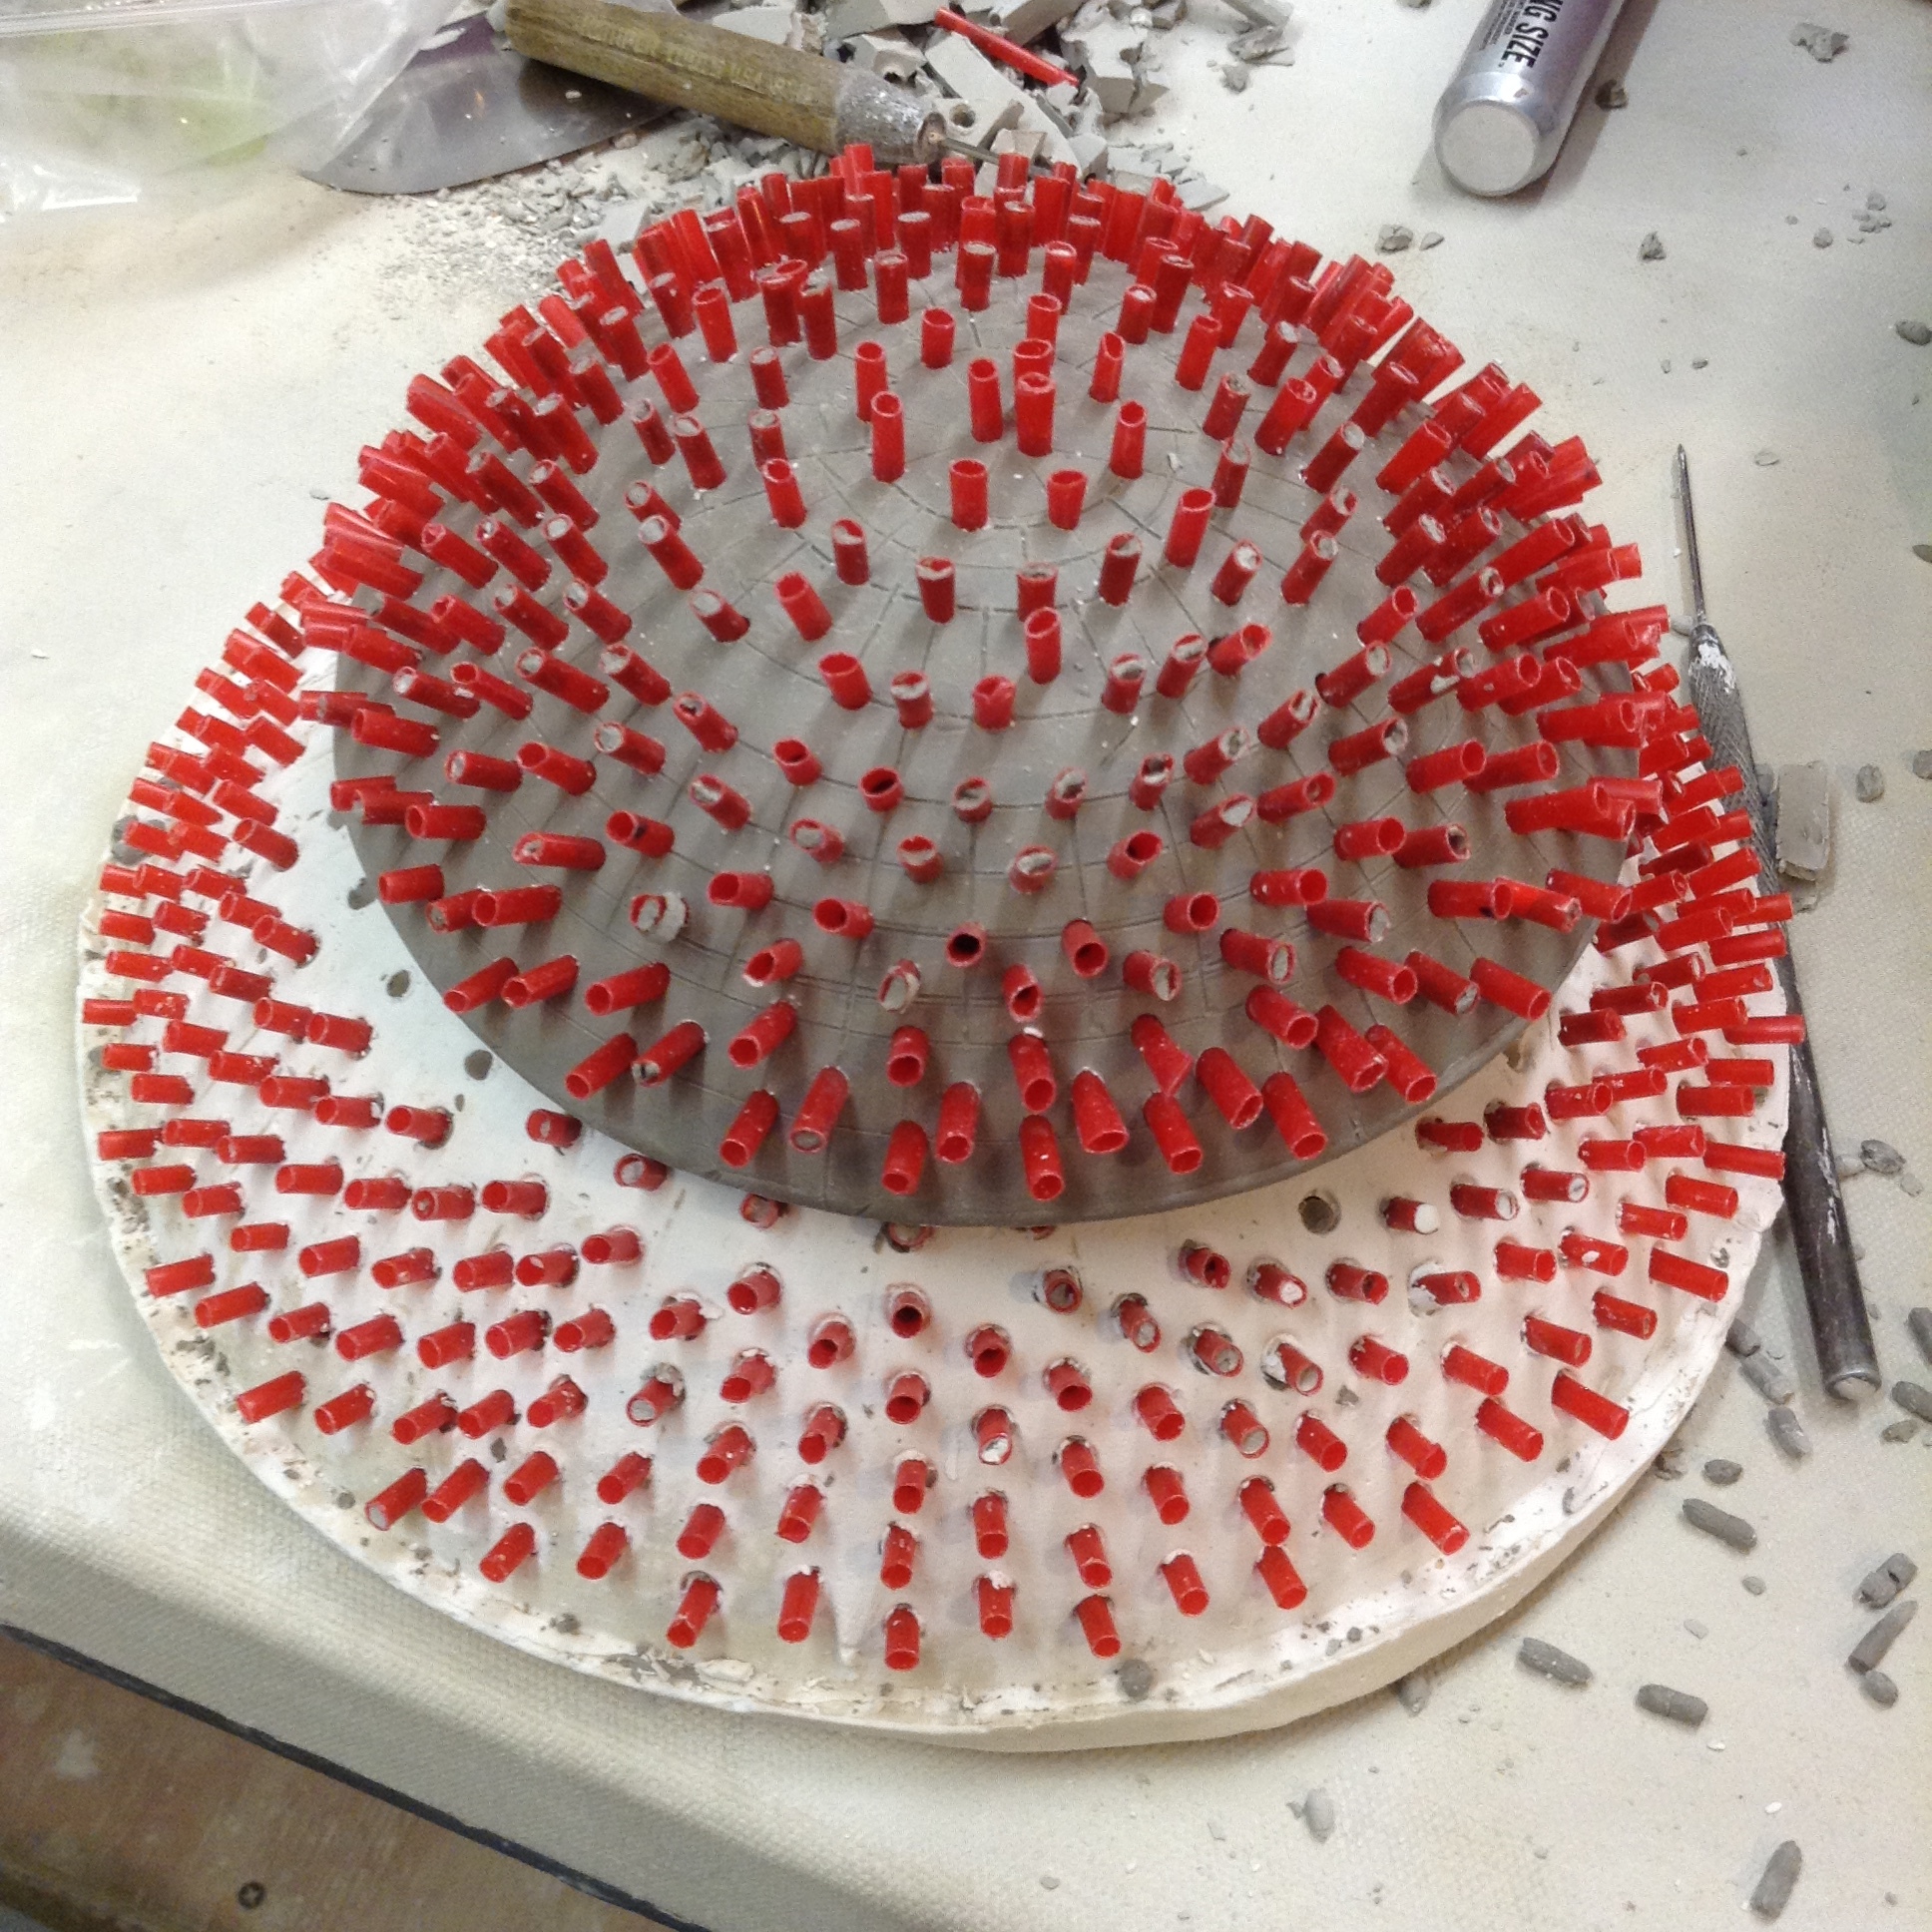
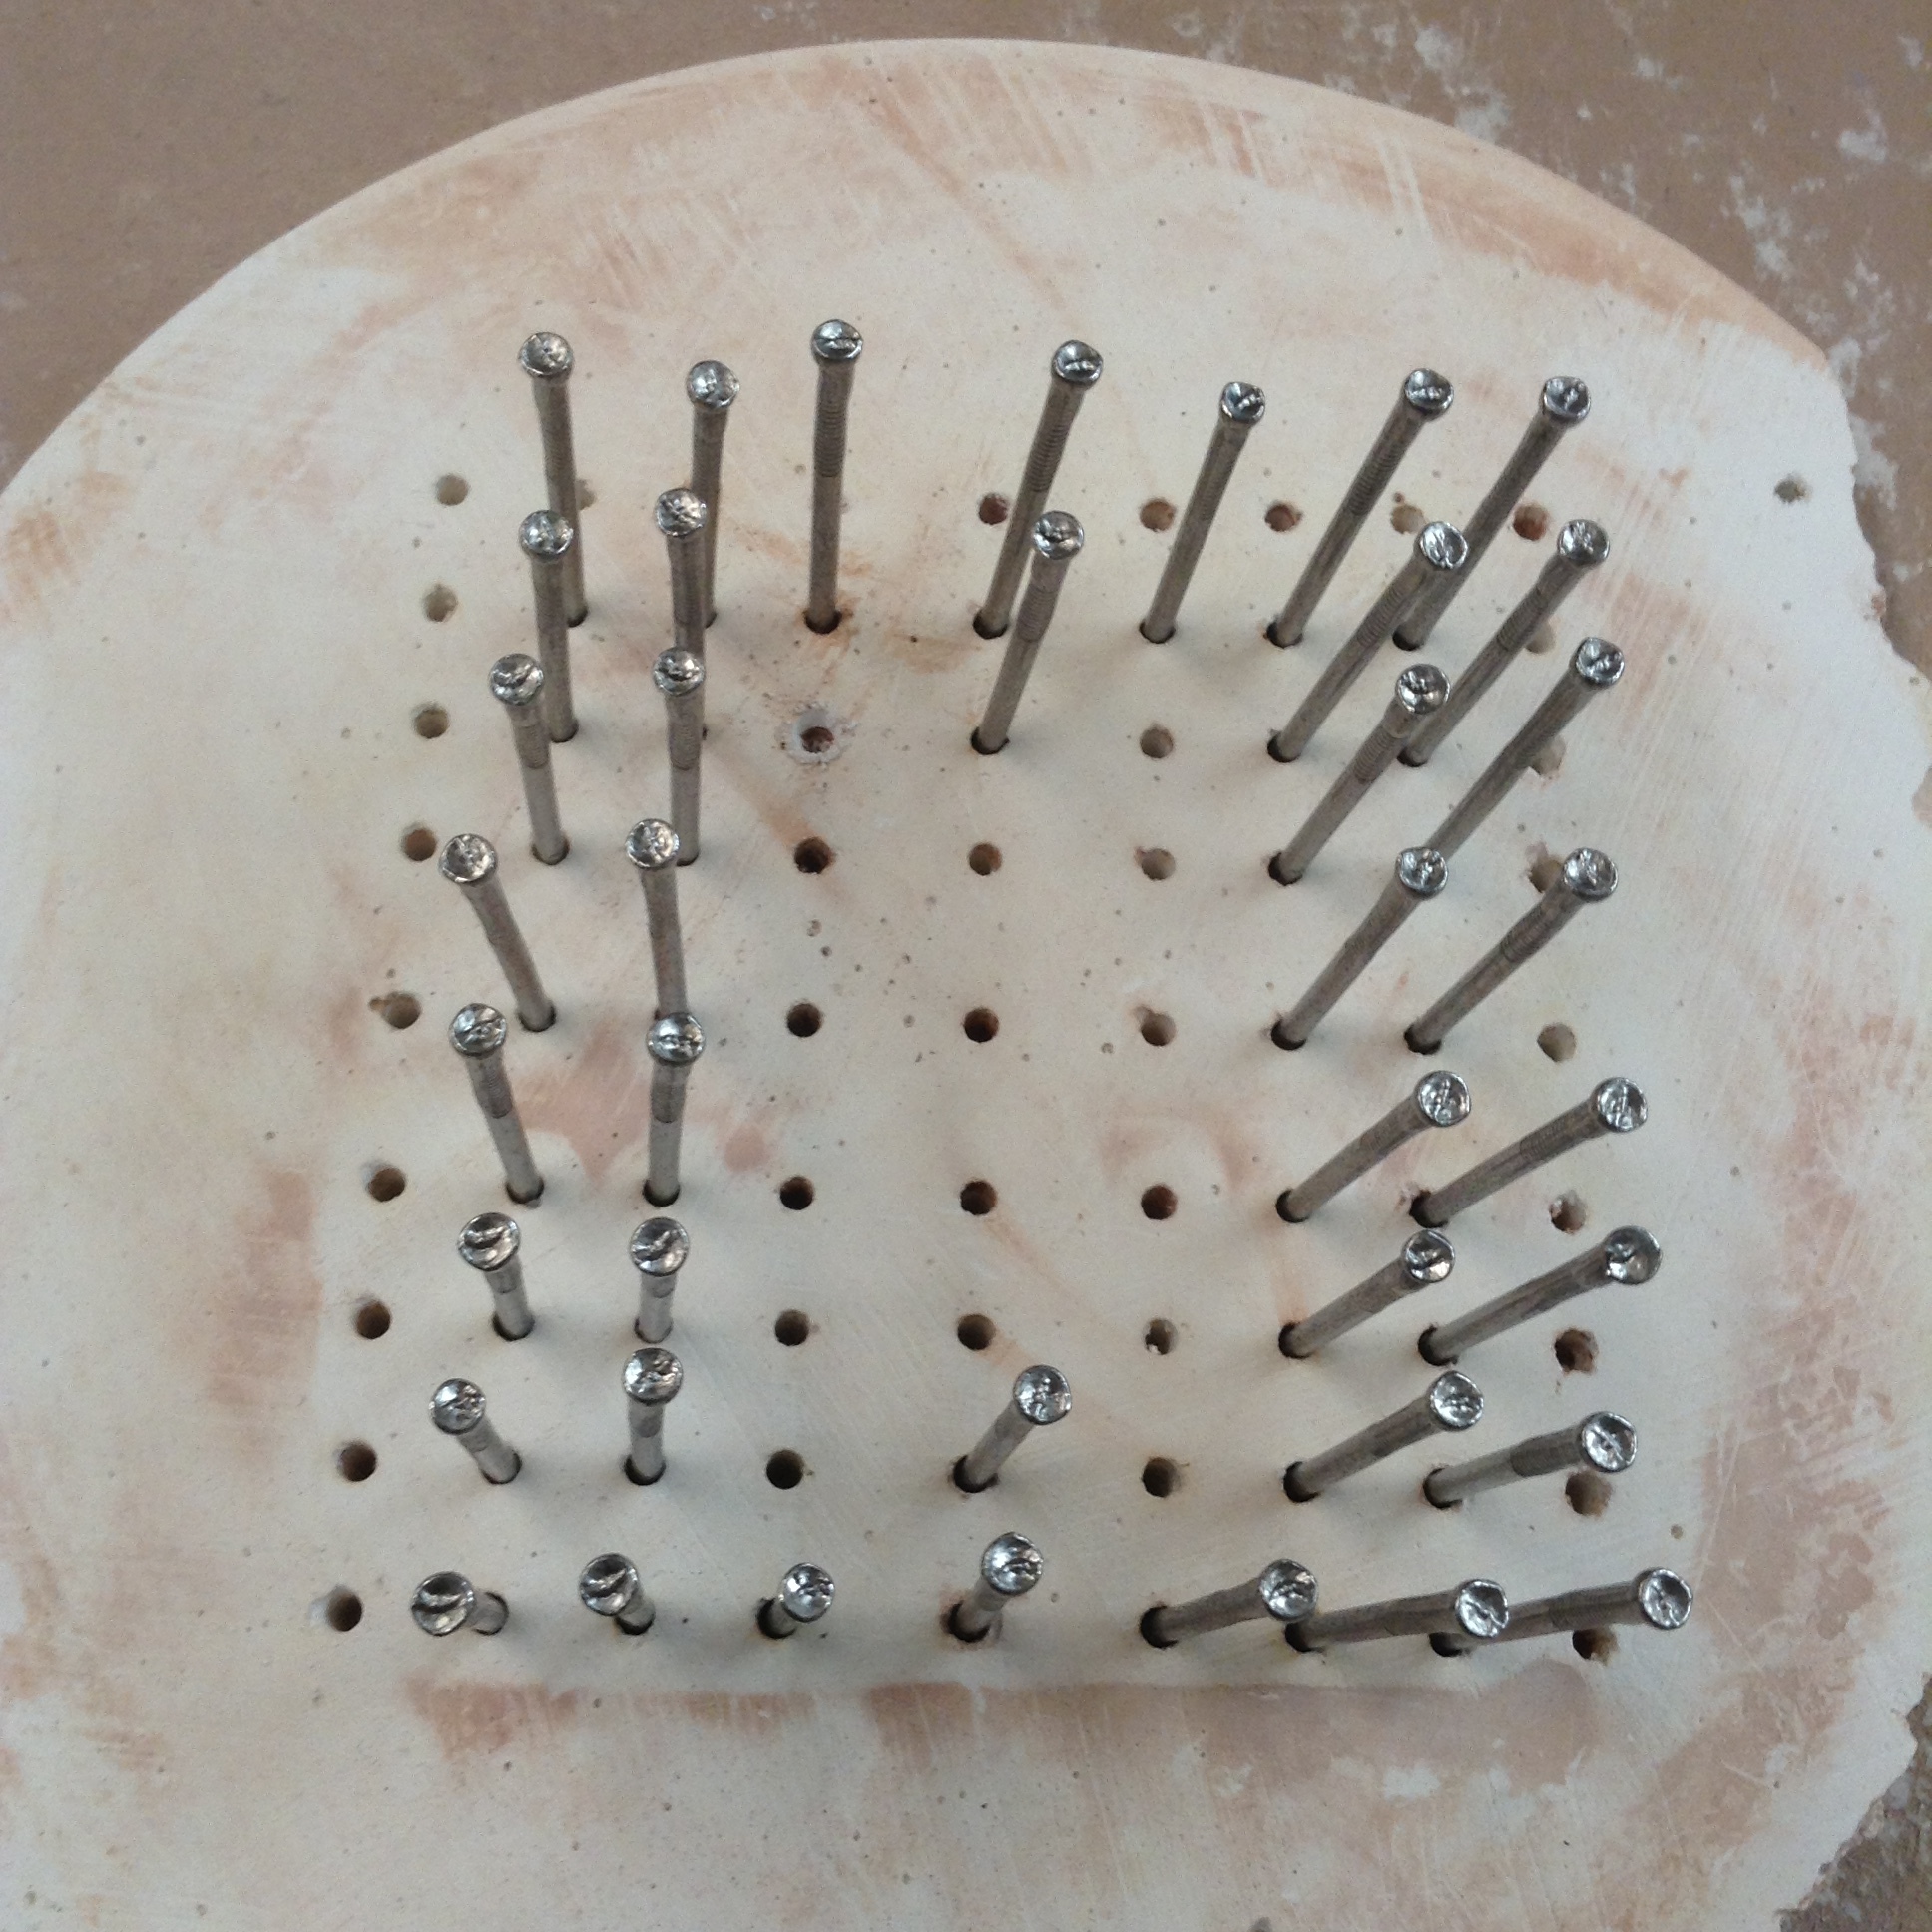
Example of using plastic embroidery mesh to align nails vertically in concentric circles. The space underneath where the points are represents the part buried in plaster. No drilling!

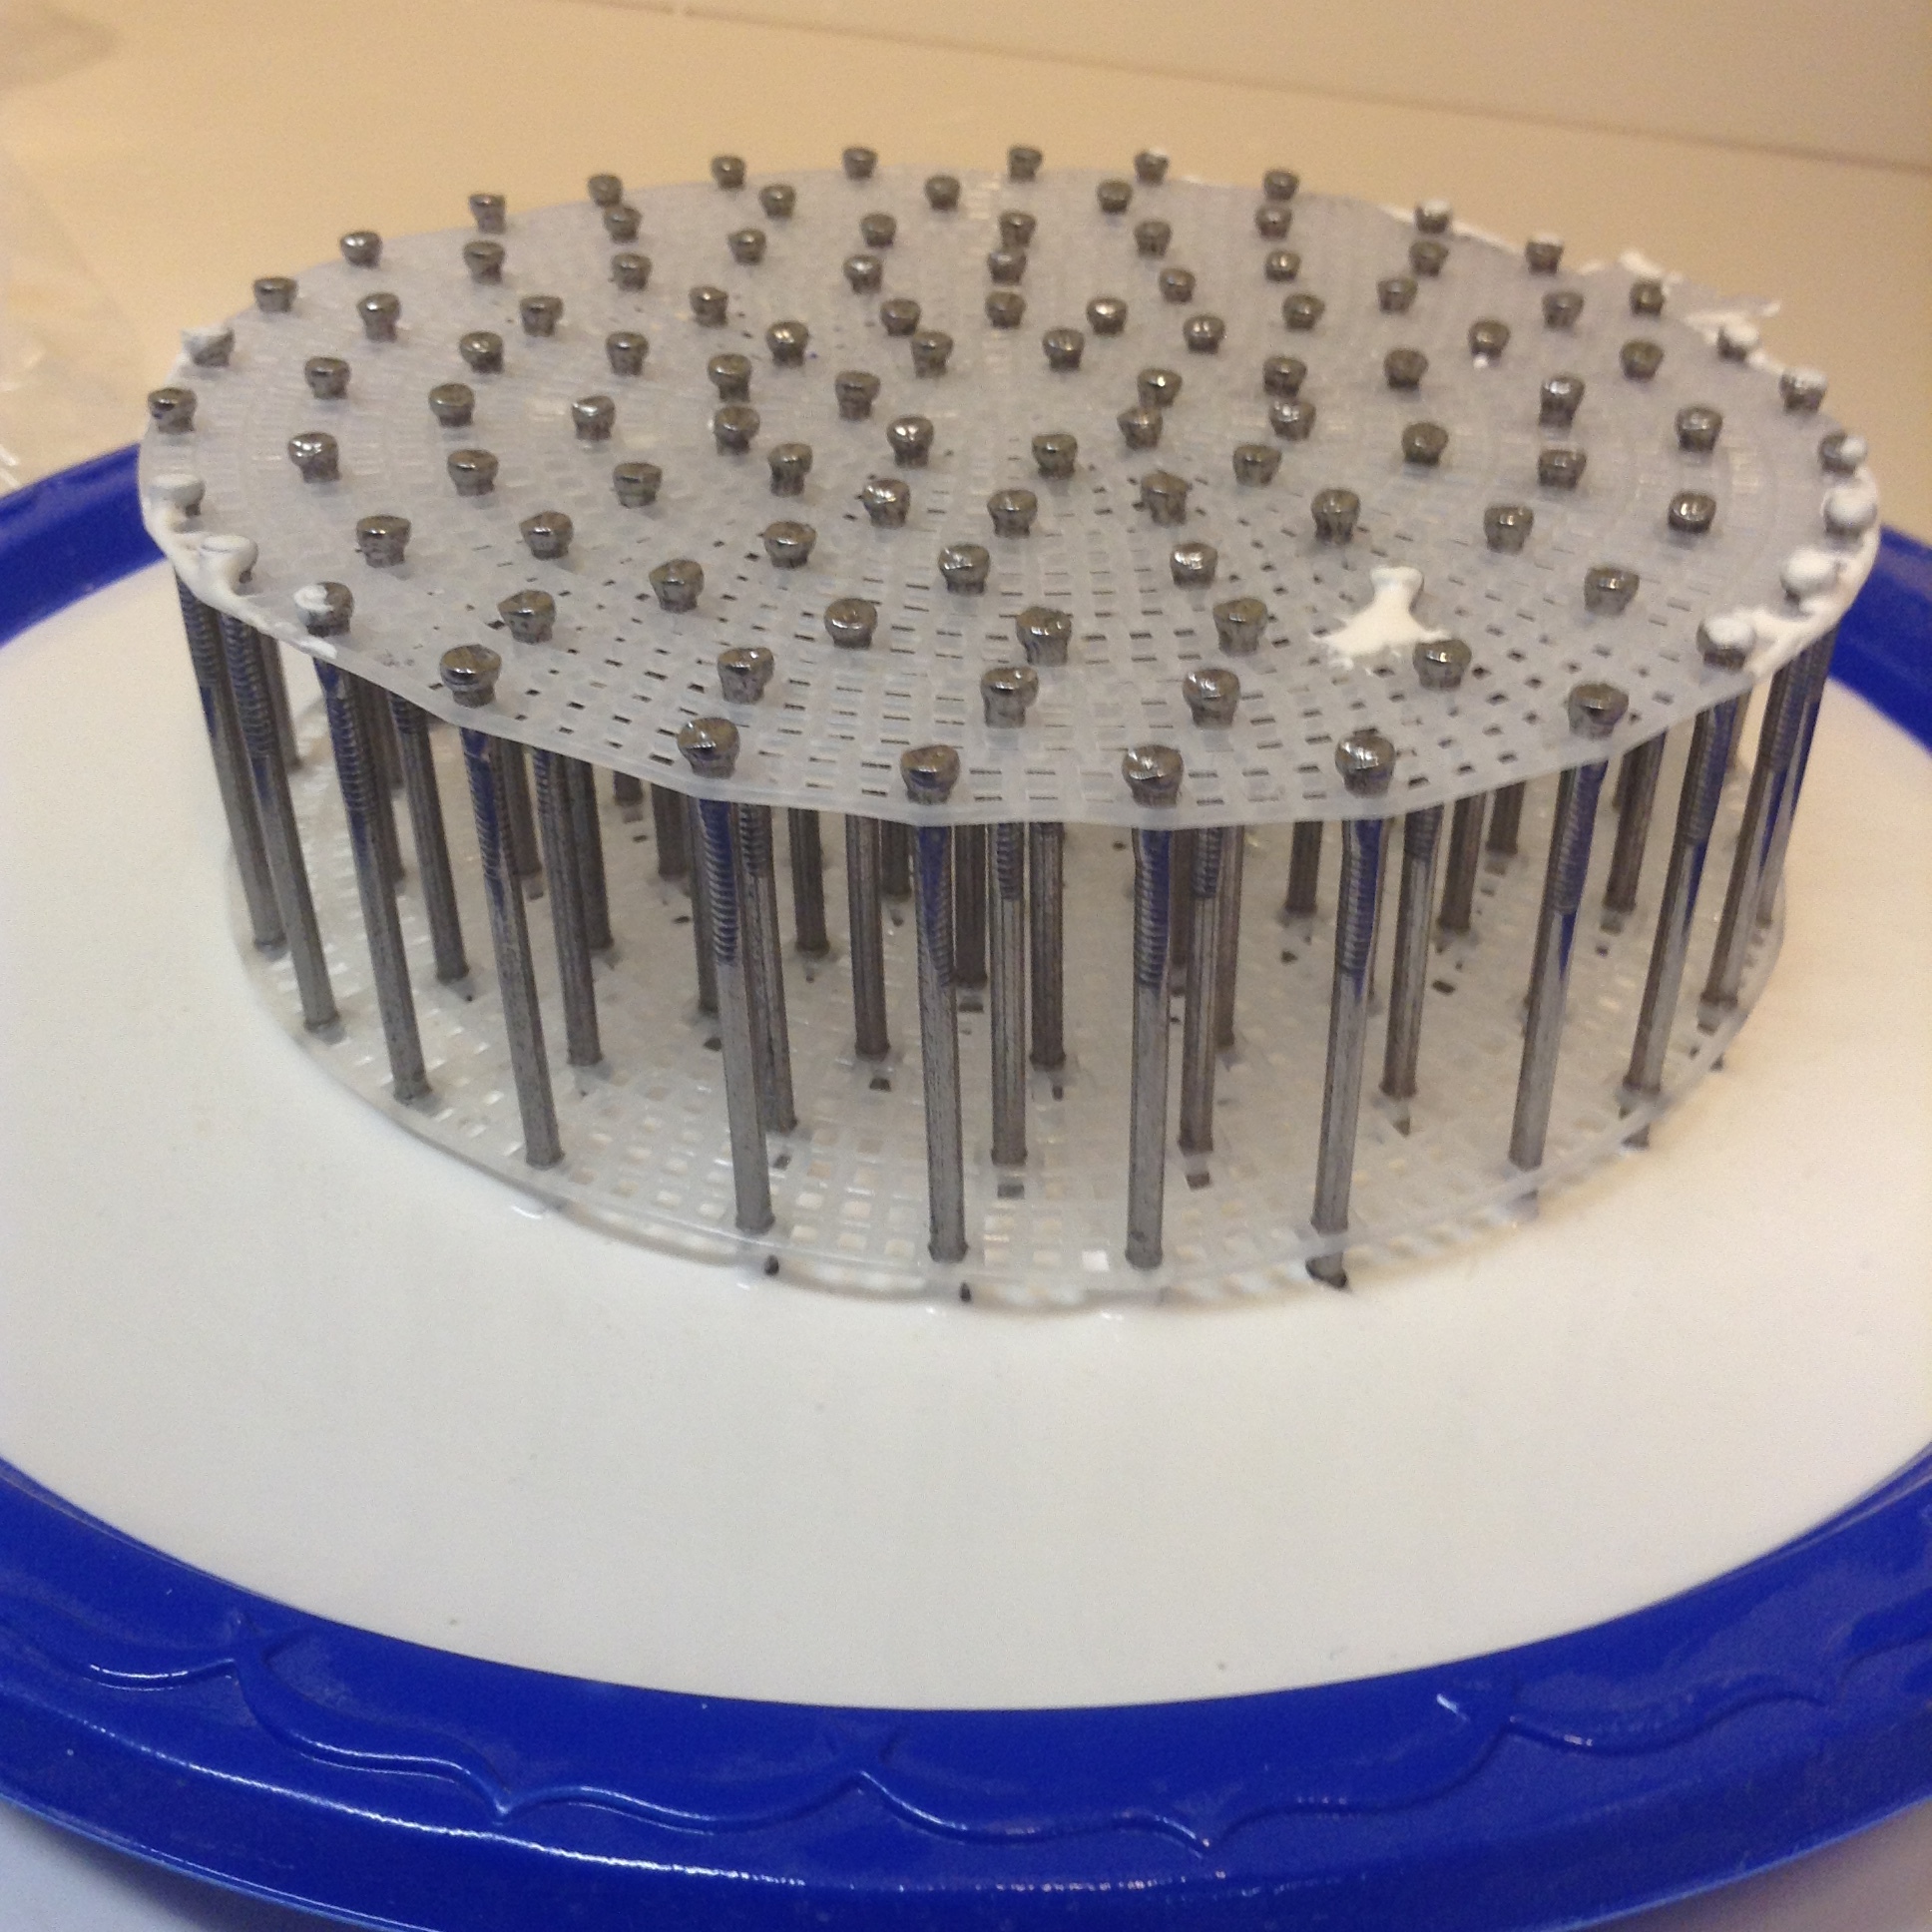
Nail holding apparatus just placed in wet plaster measured to exactly the correct depth.

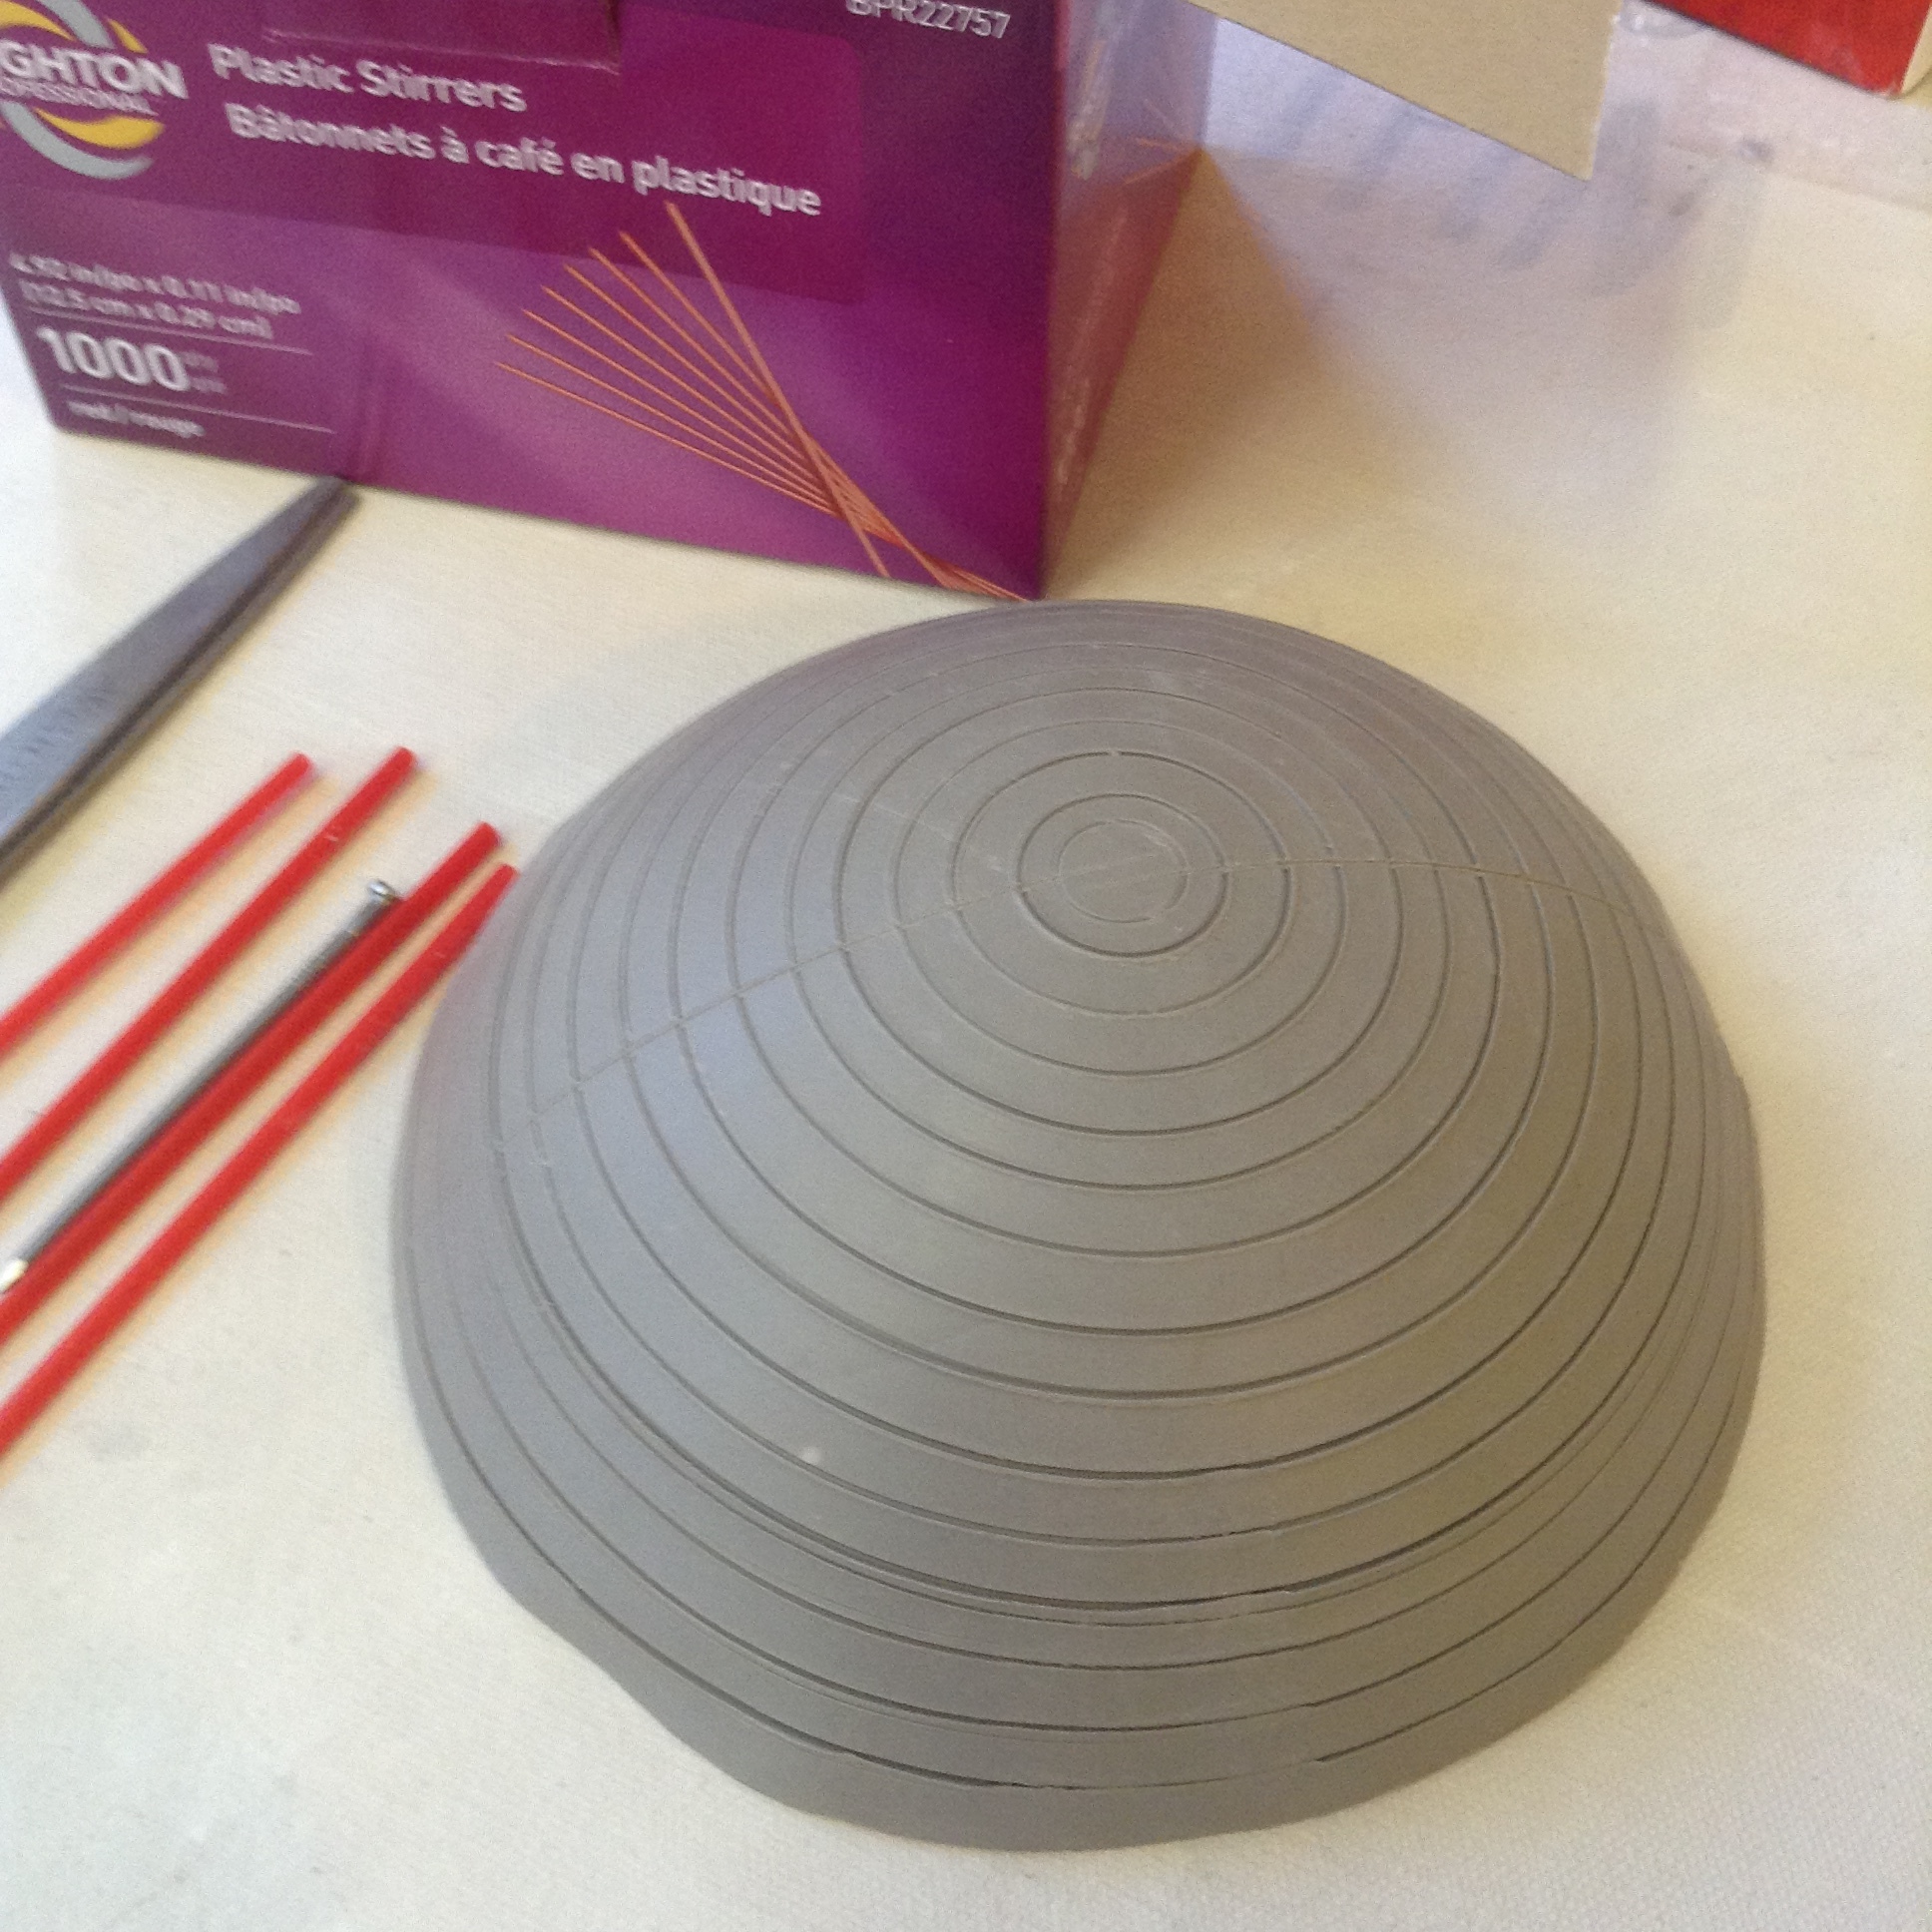
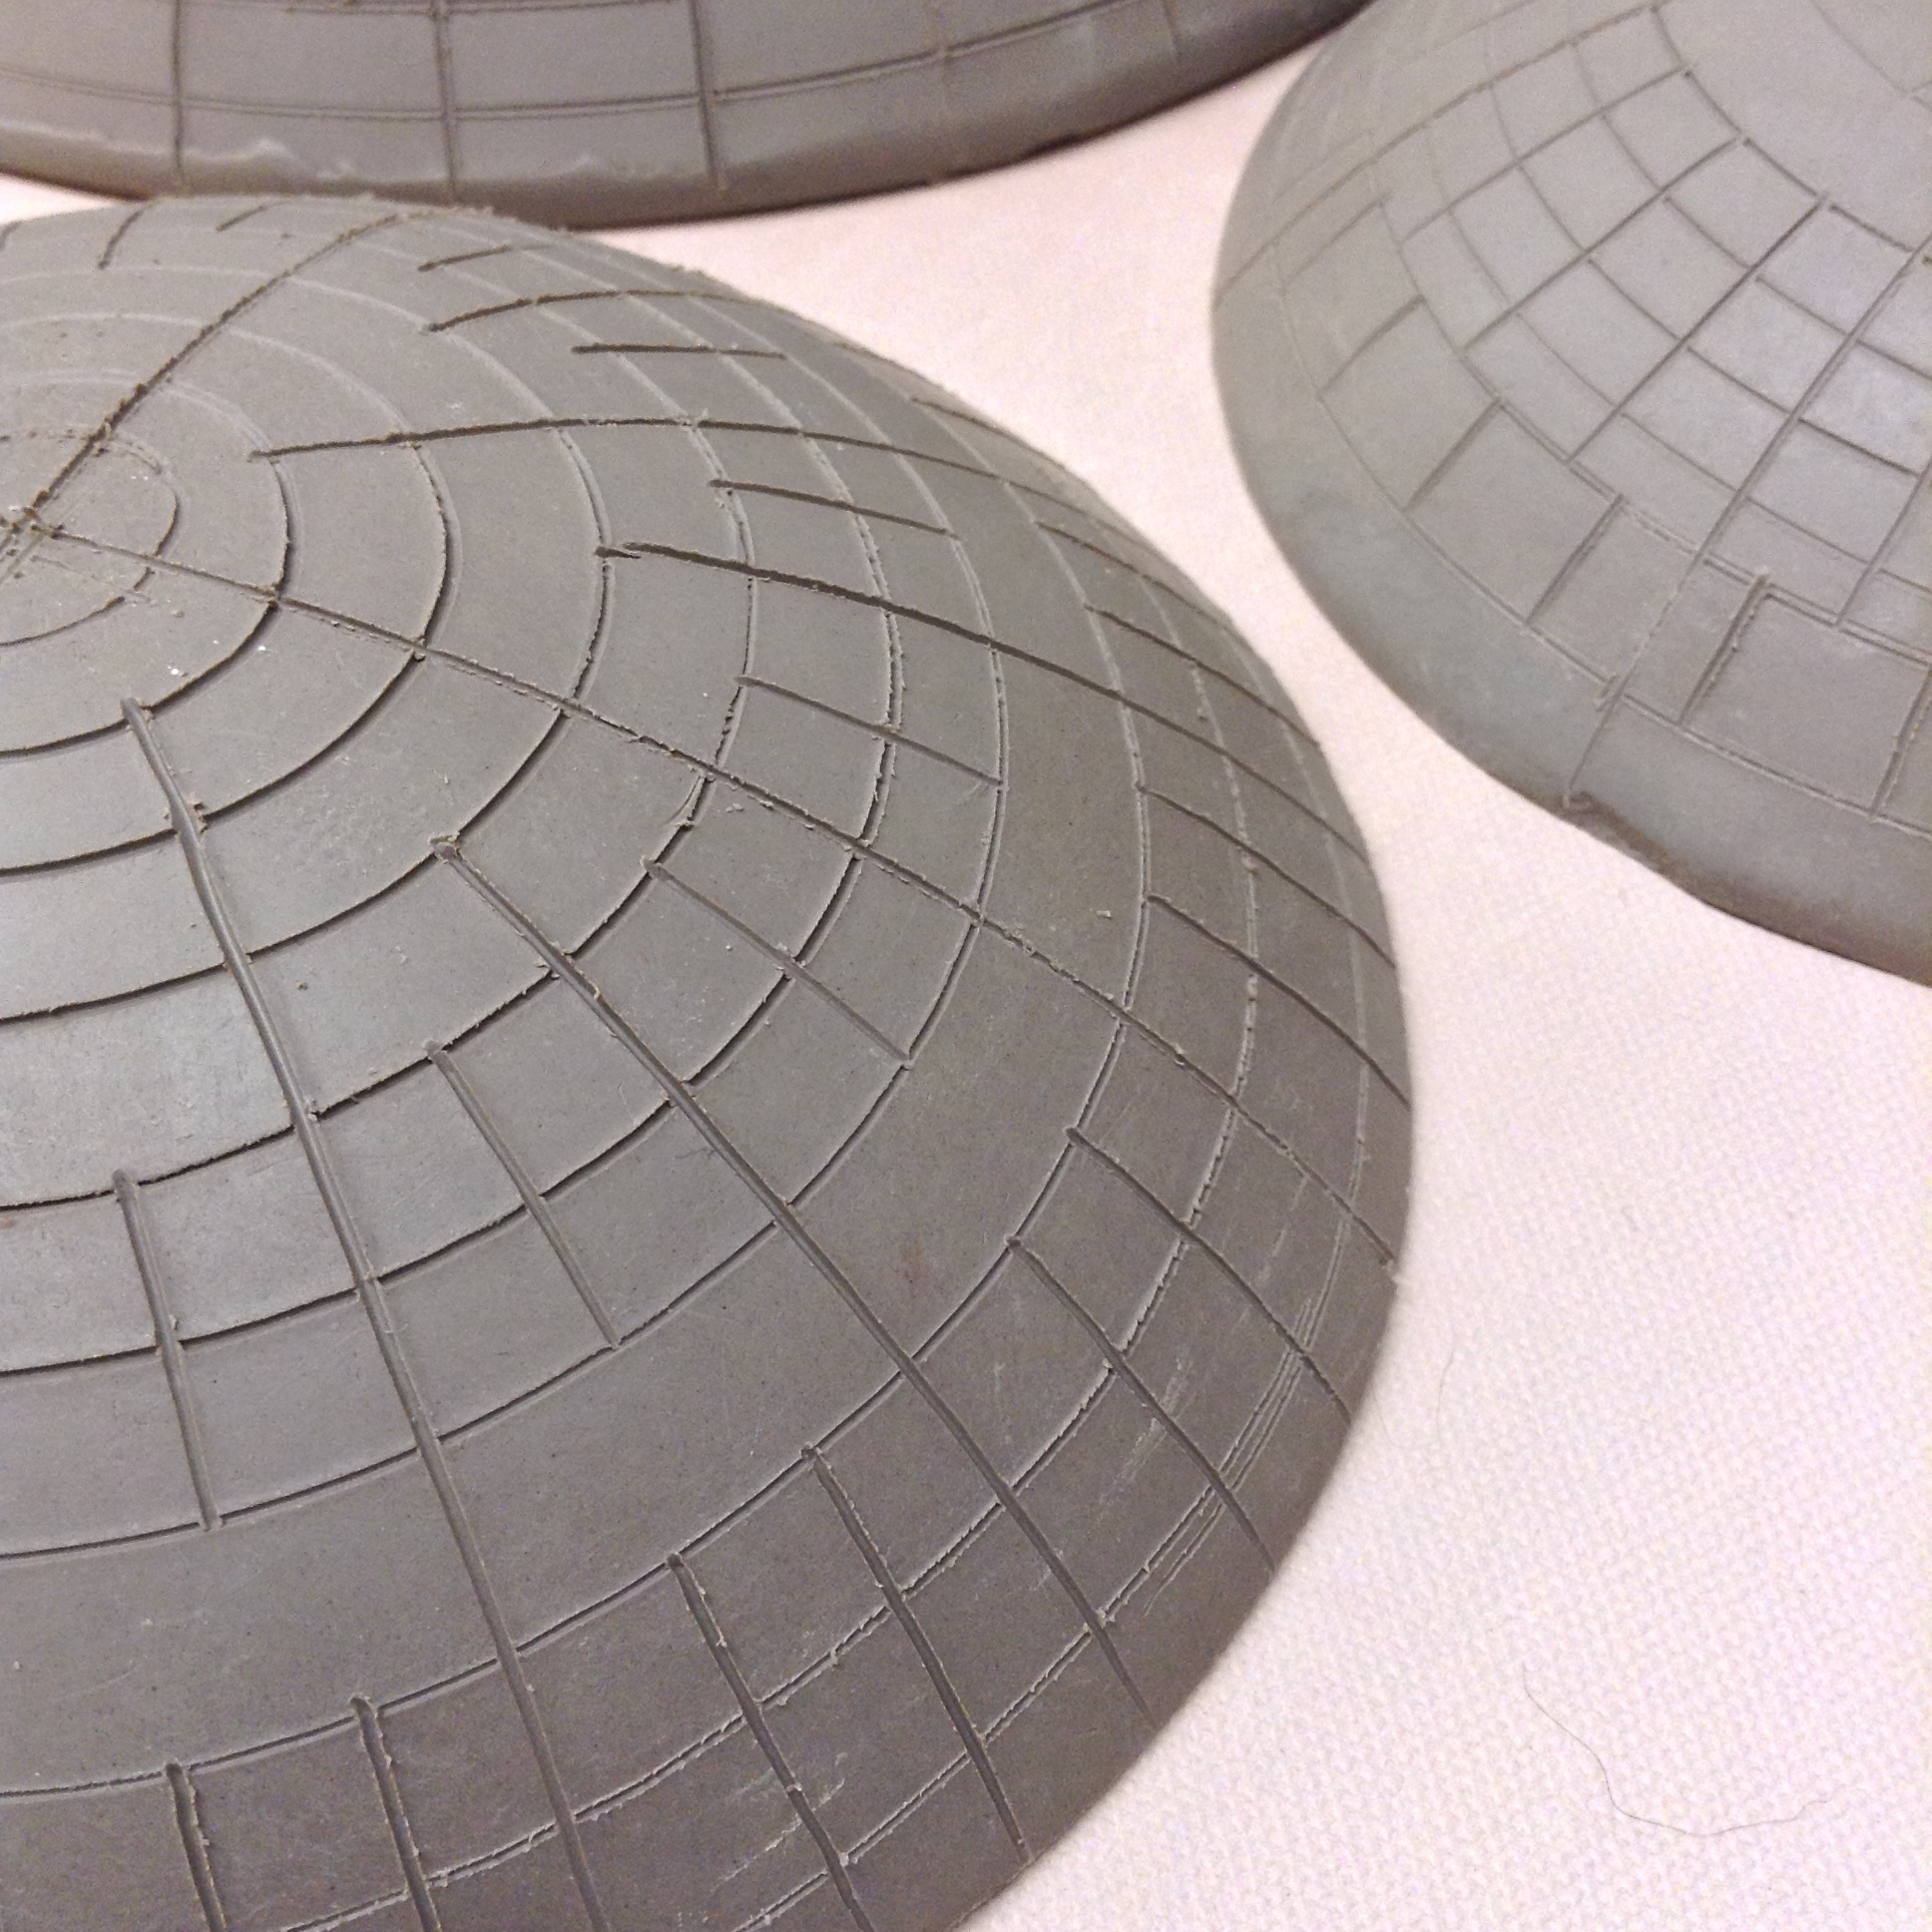
Several clay dome shapes with lines drawn on outside to indicate to me where to drill the holes. Unclear yet whether these subtle changes will matter after all is finished. But I could always make these as just normal ceramic bowls!

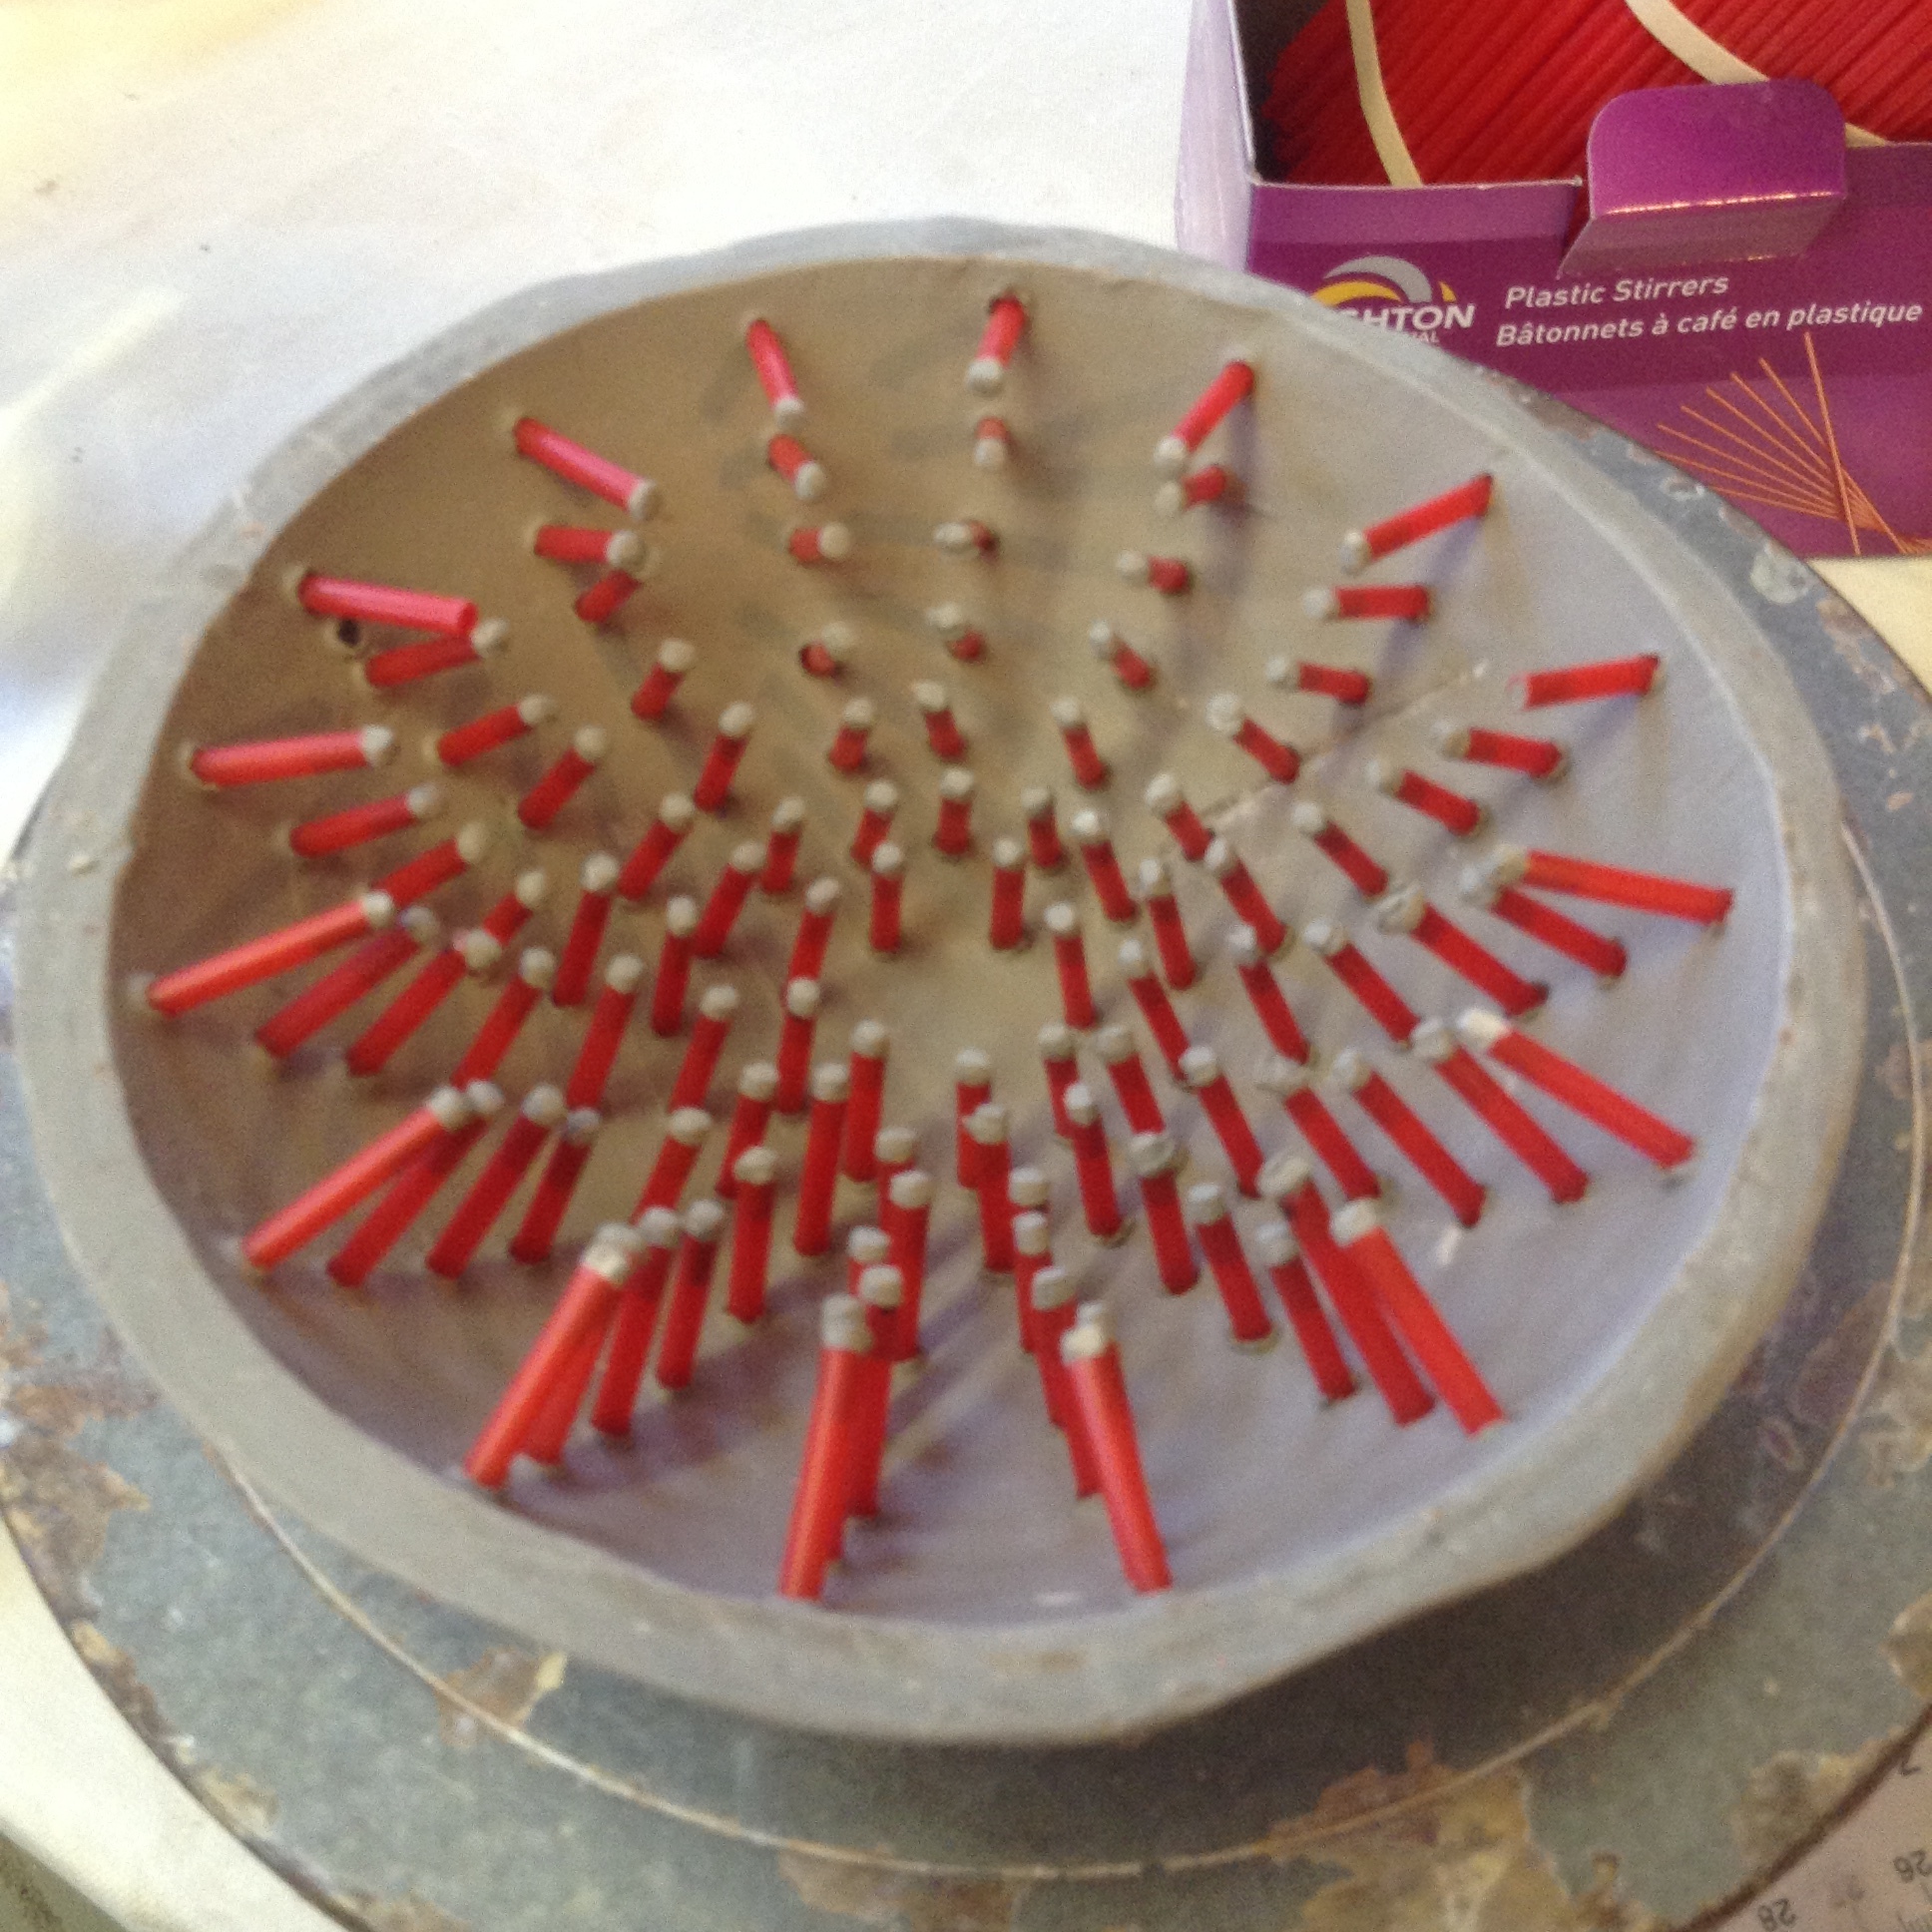
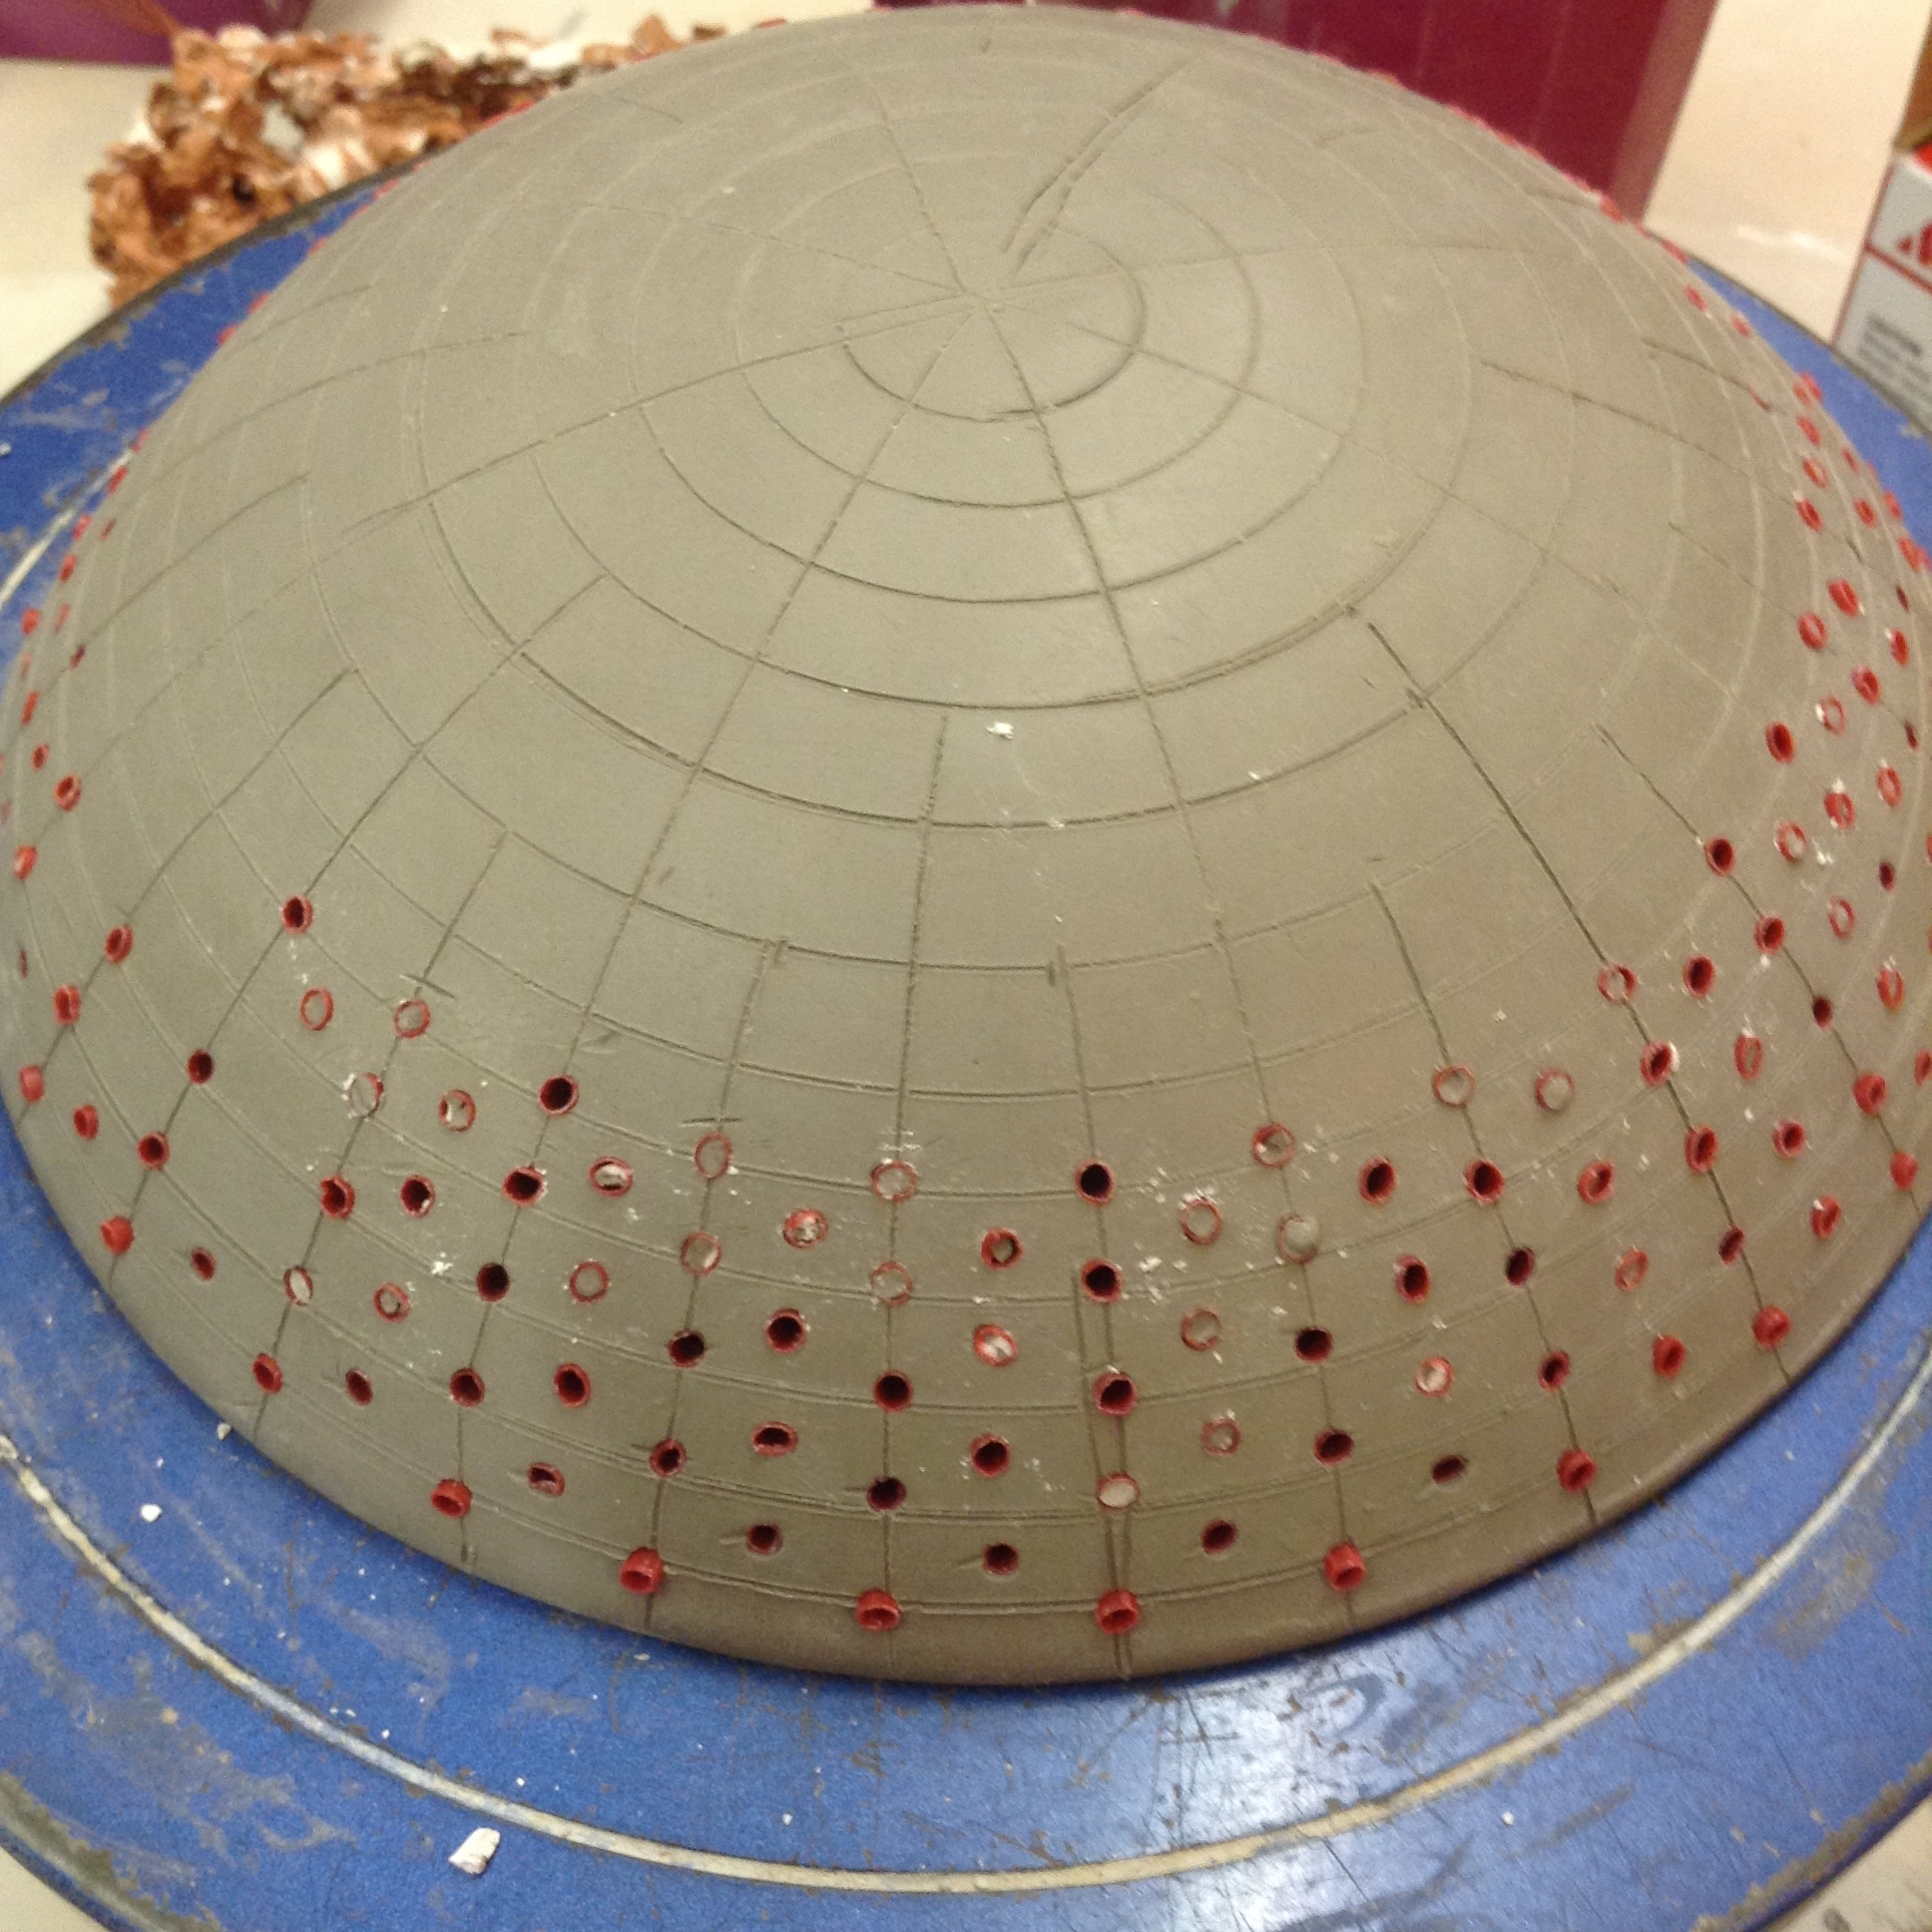
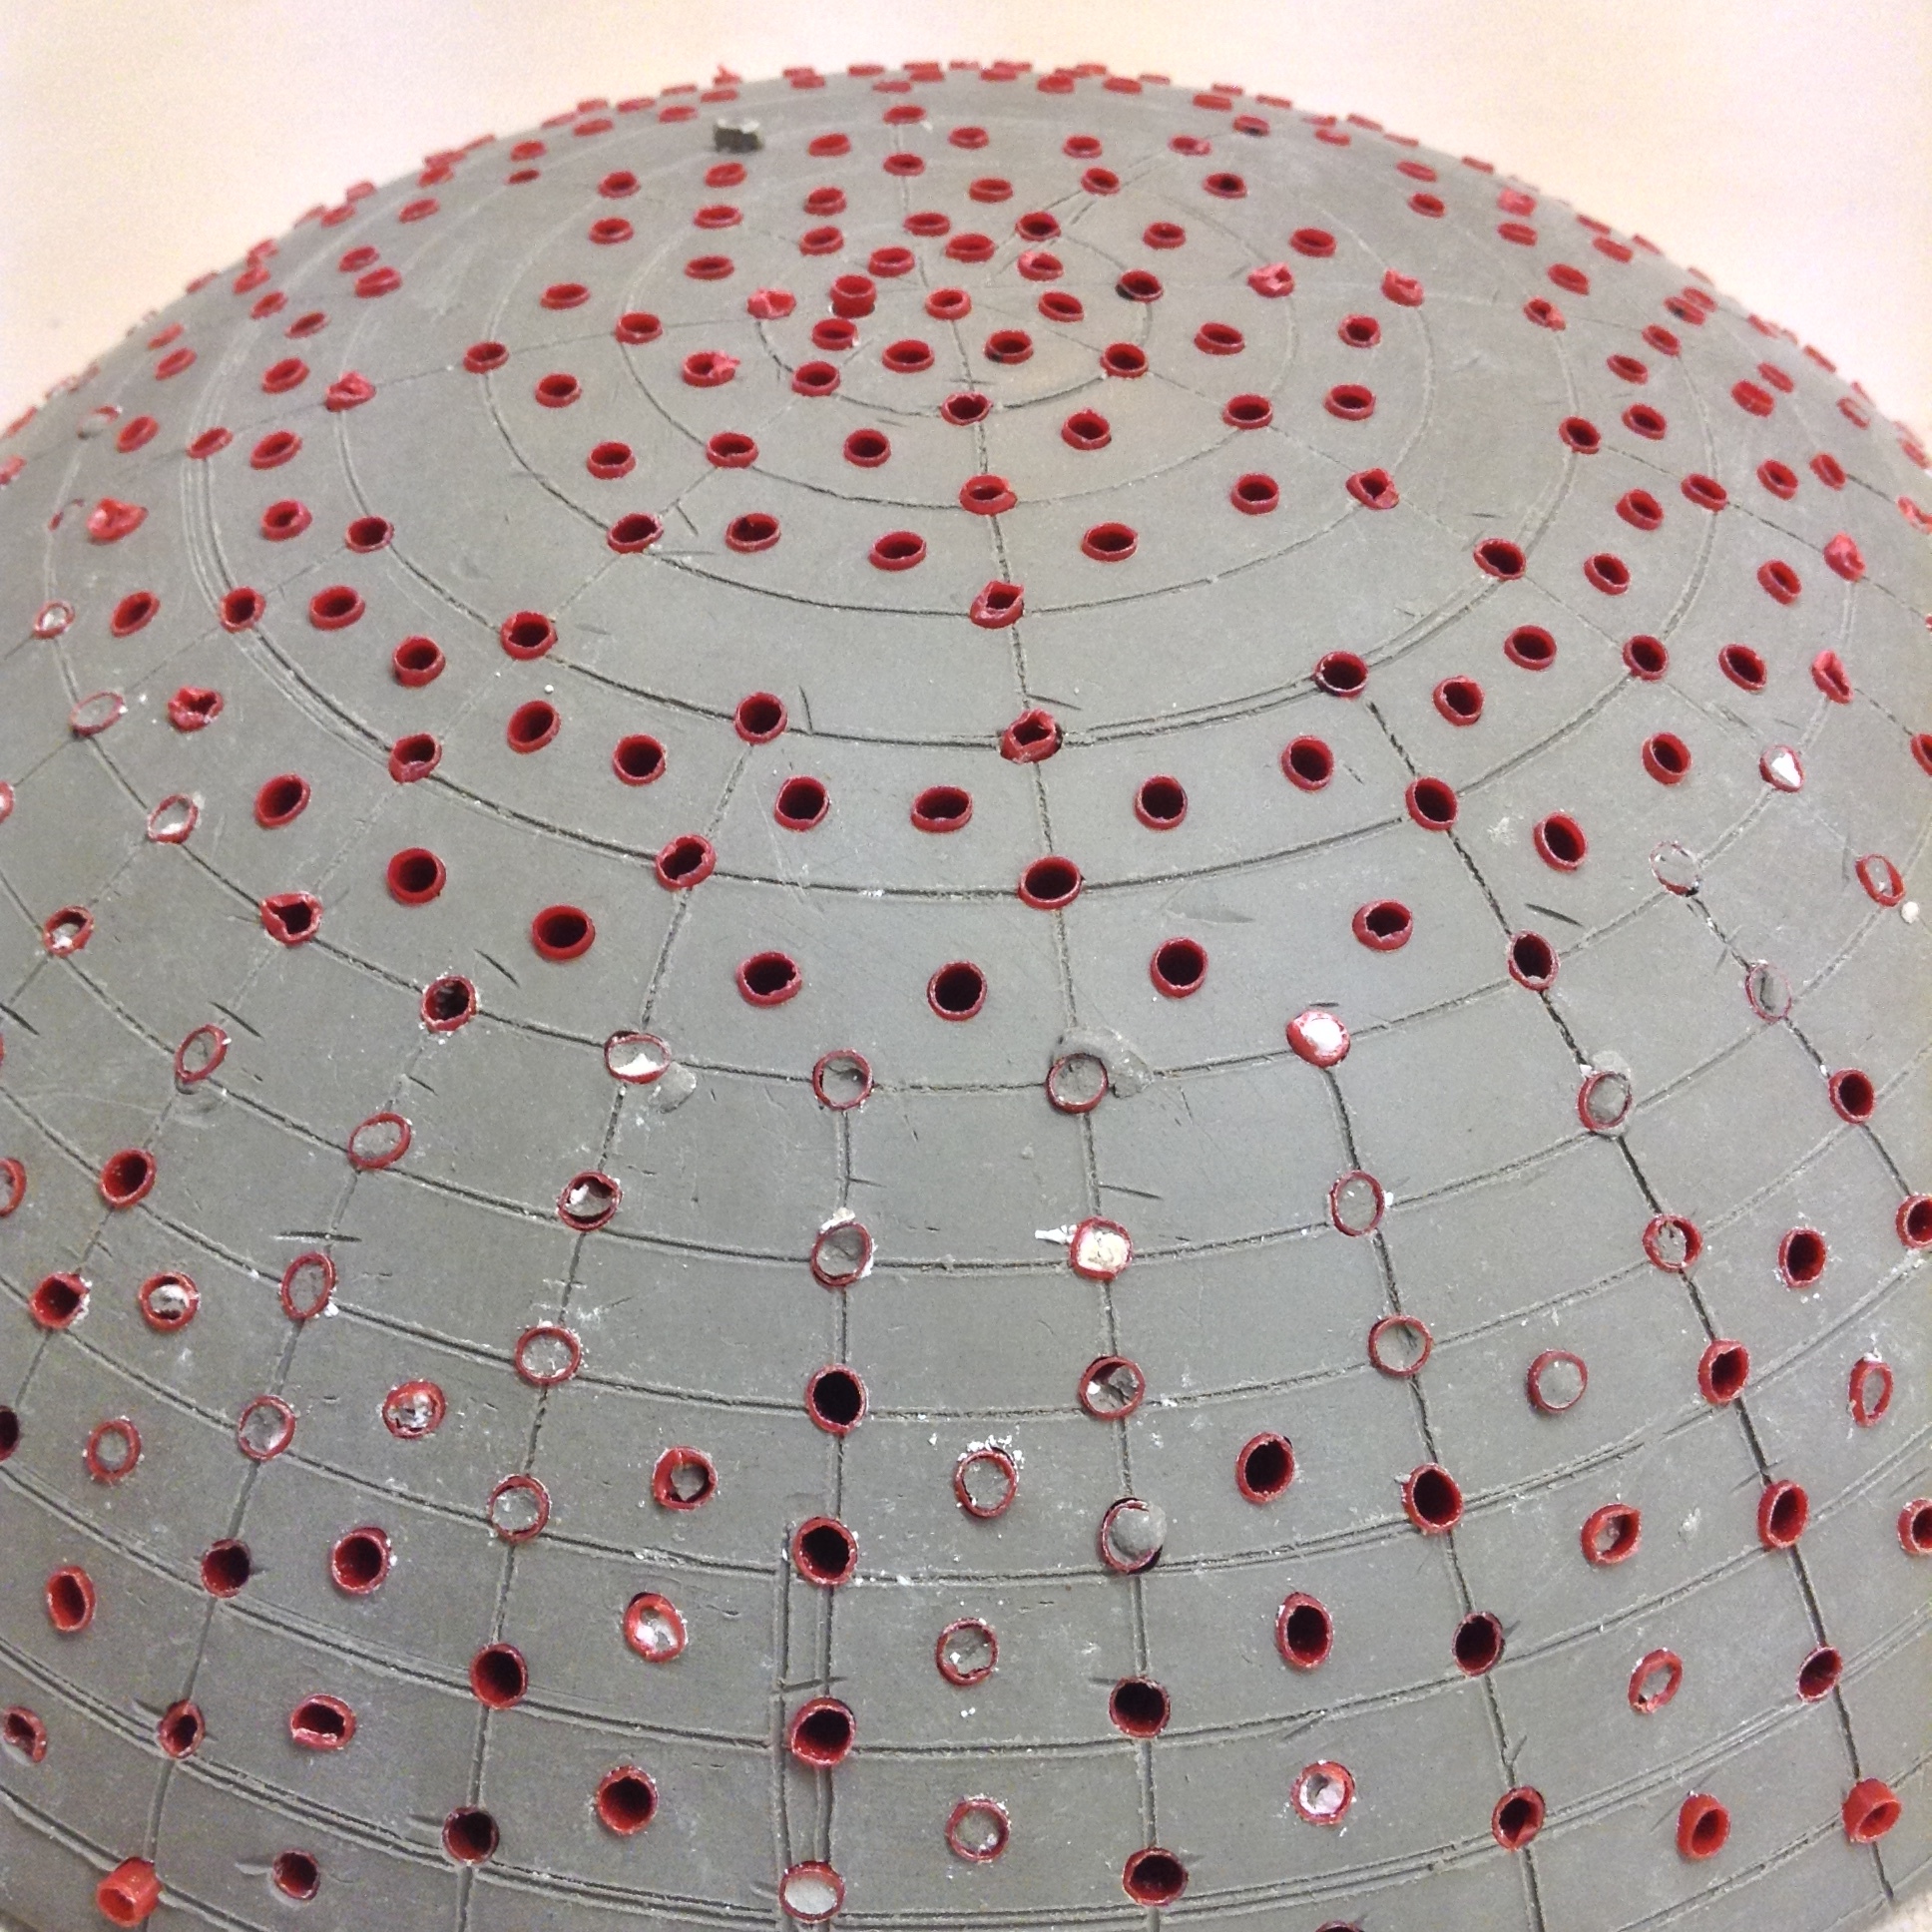
Example of the clay and straw pattern that will eventually become a plaster dome that holds nails for winding the strings that support the clay slip.
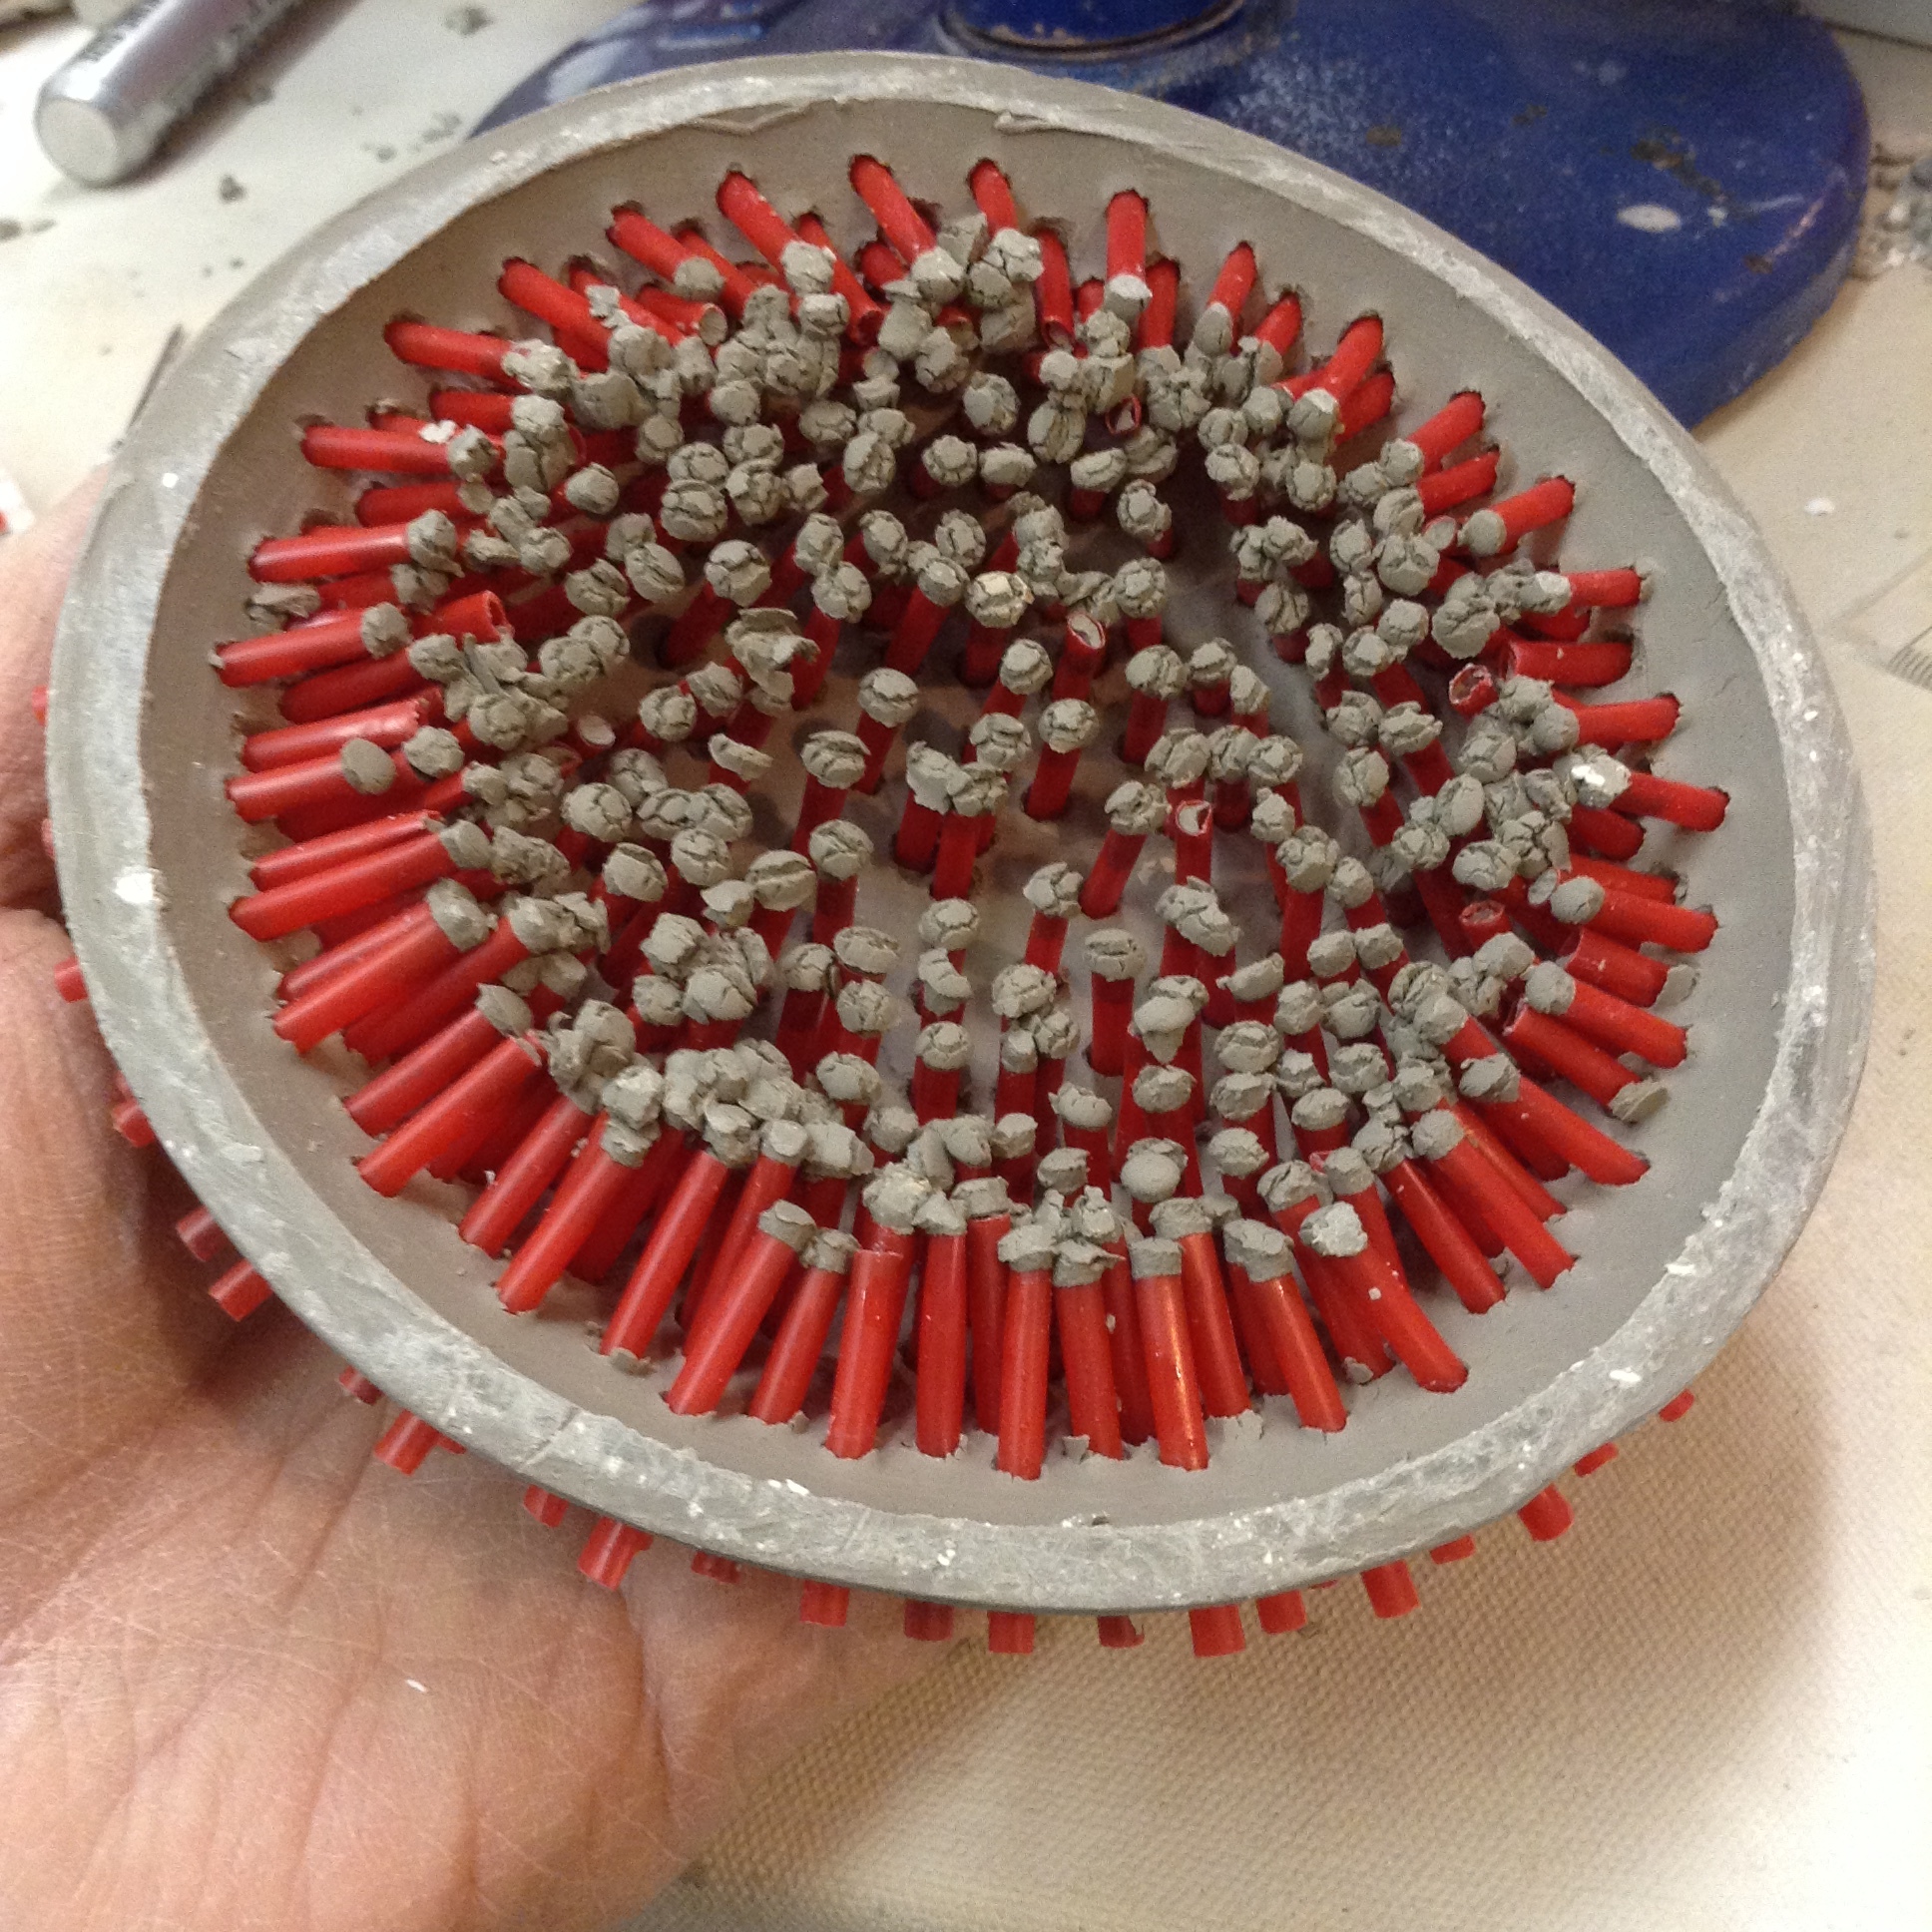
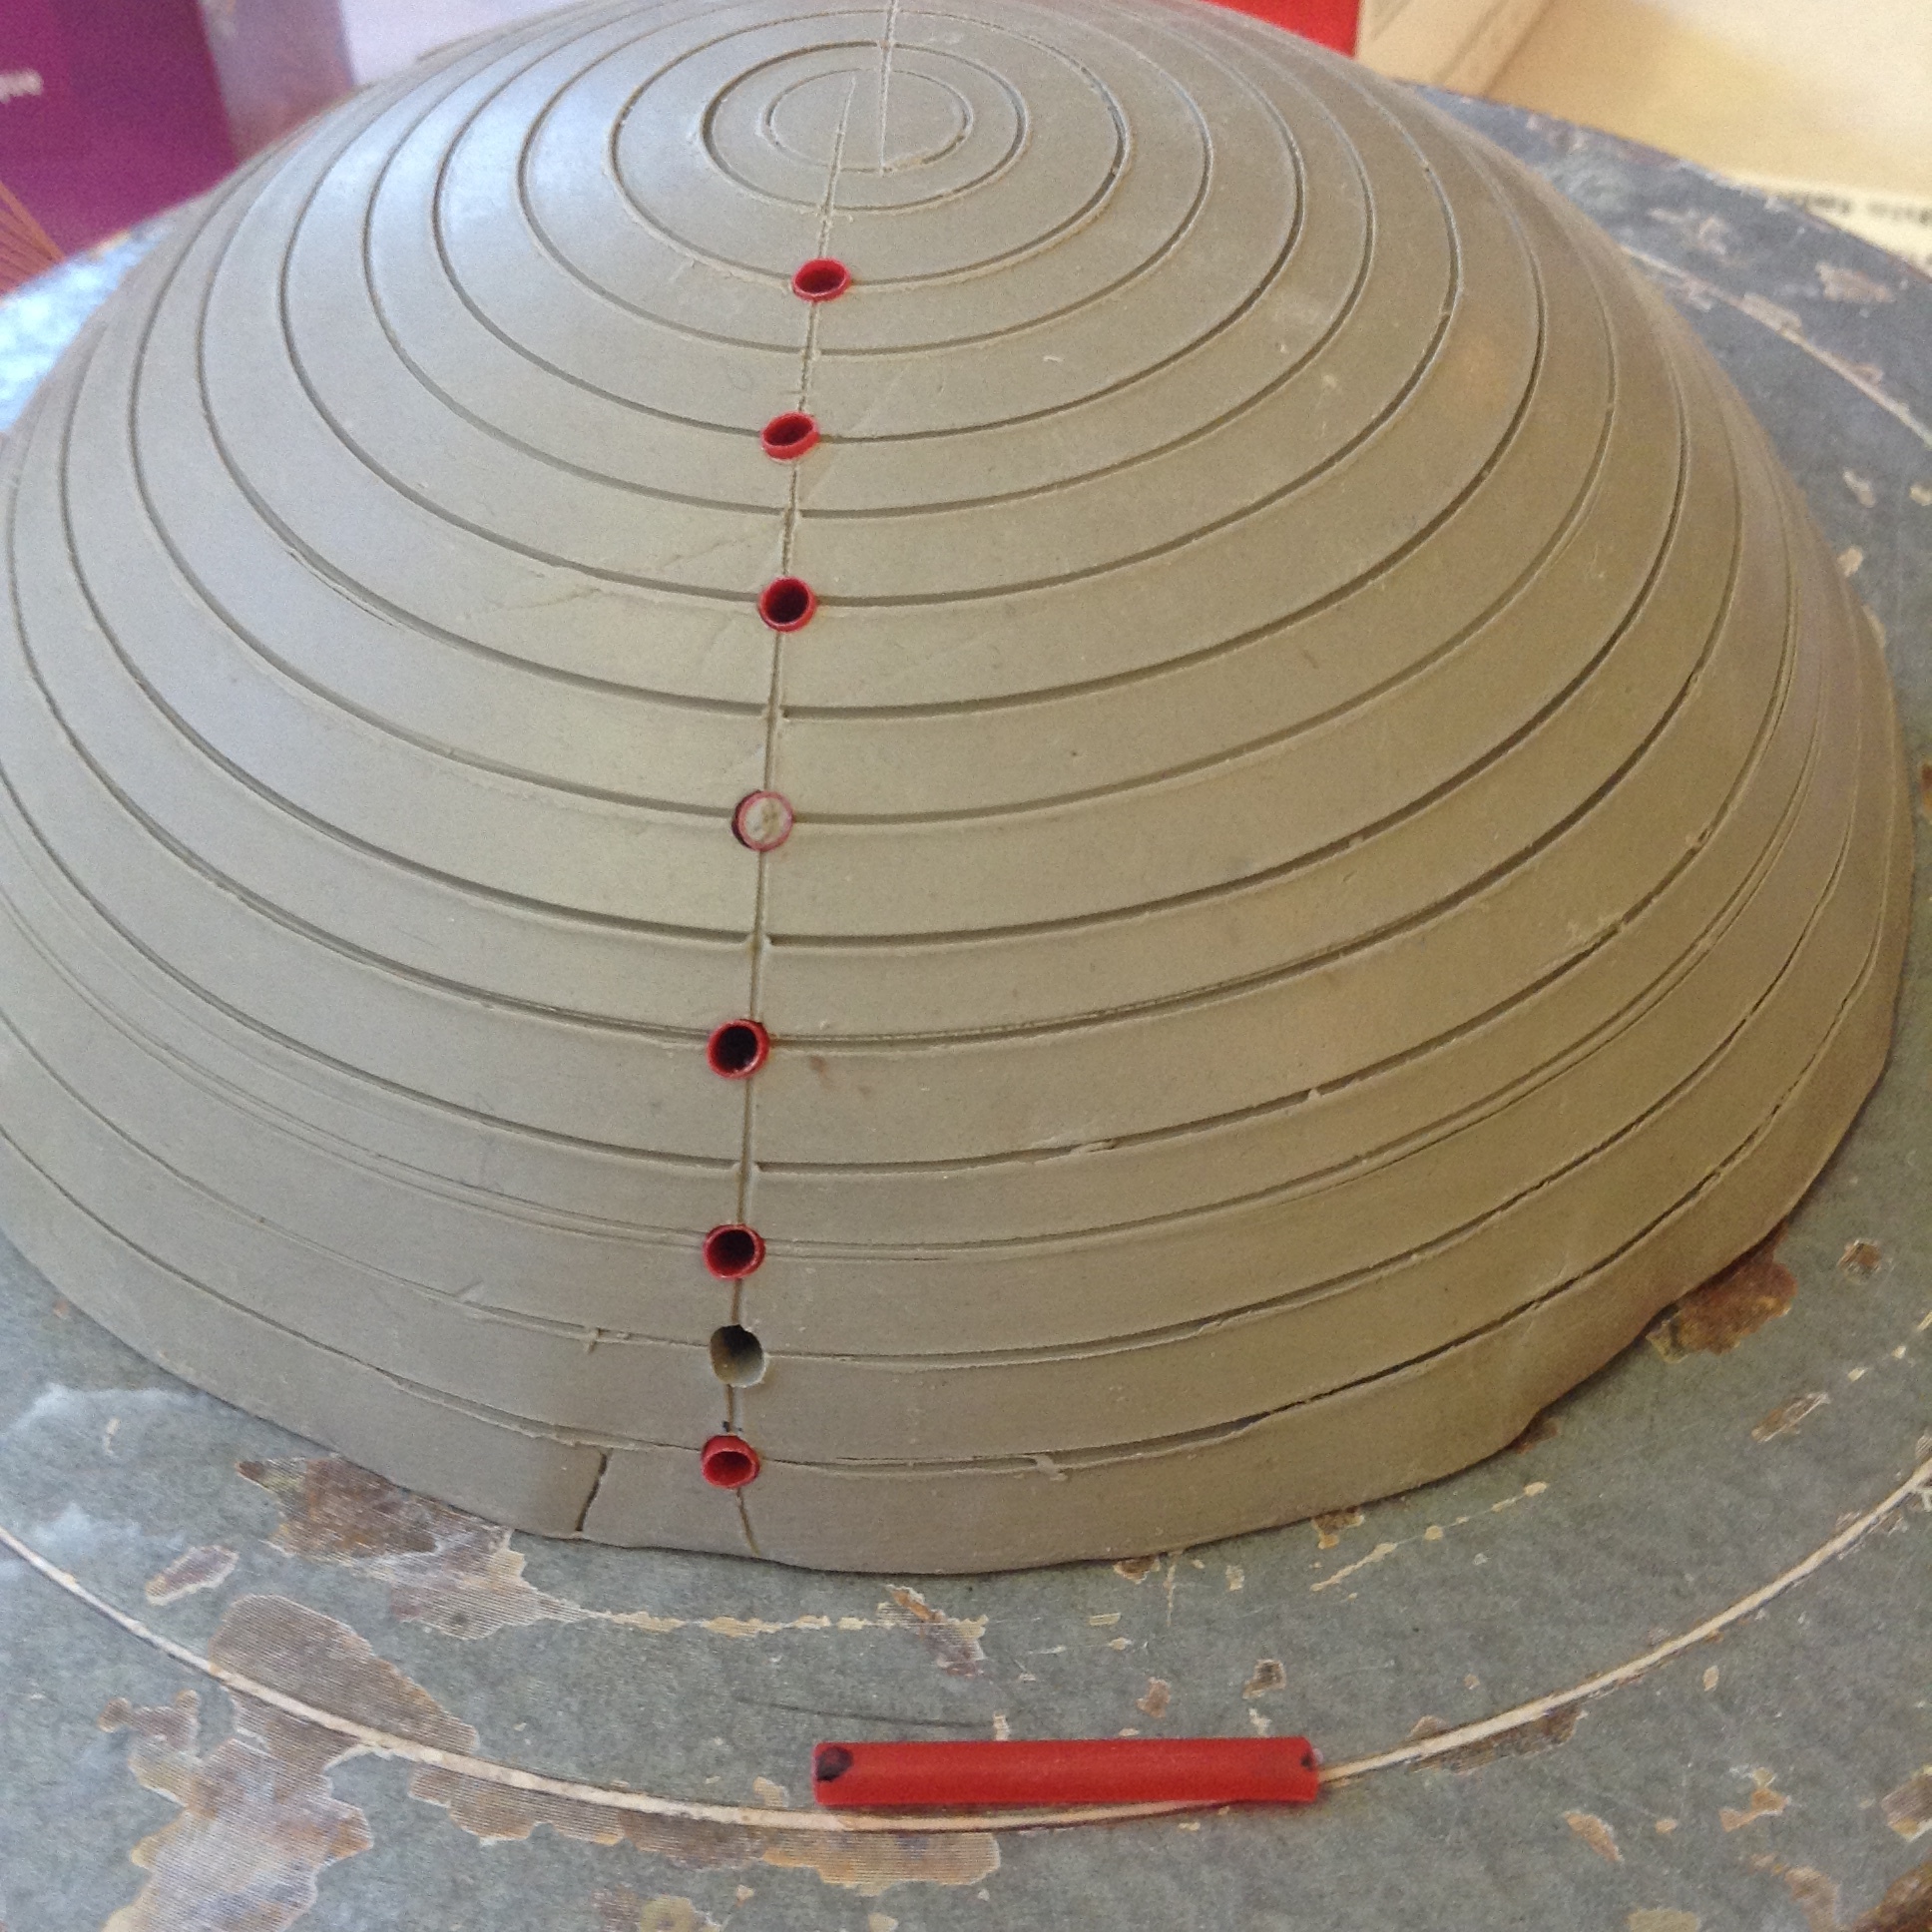
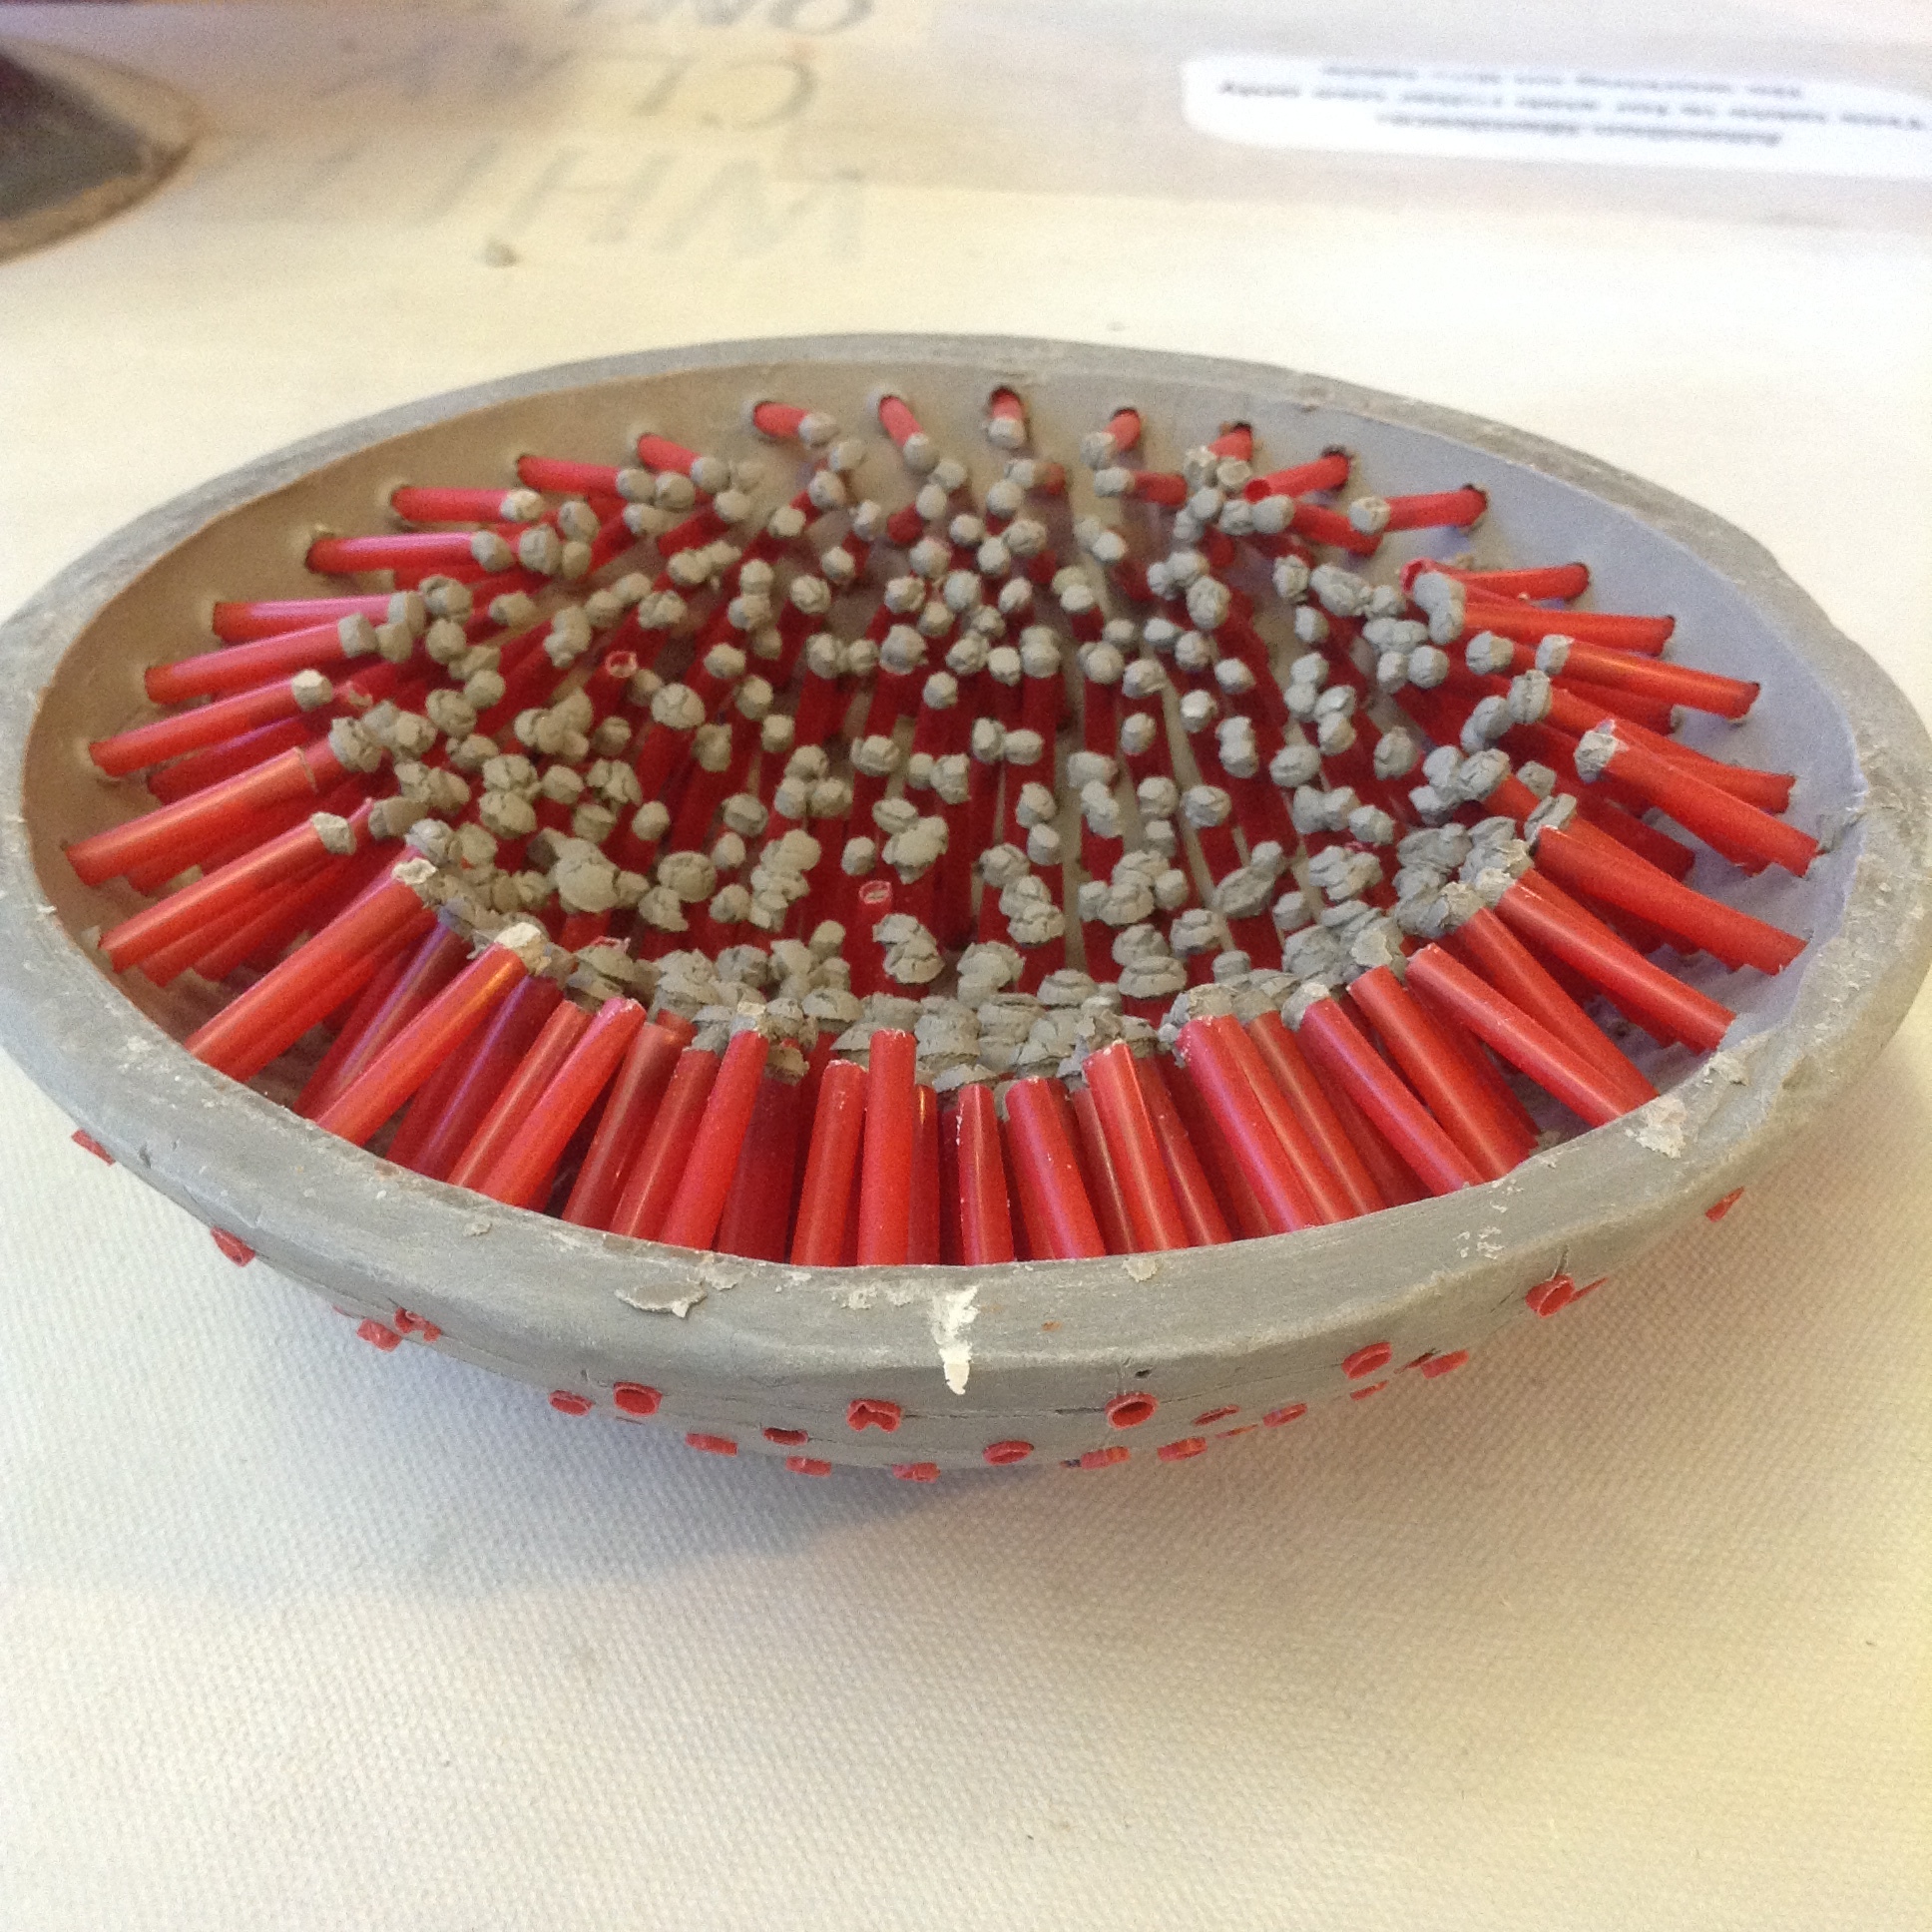
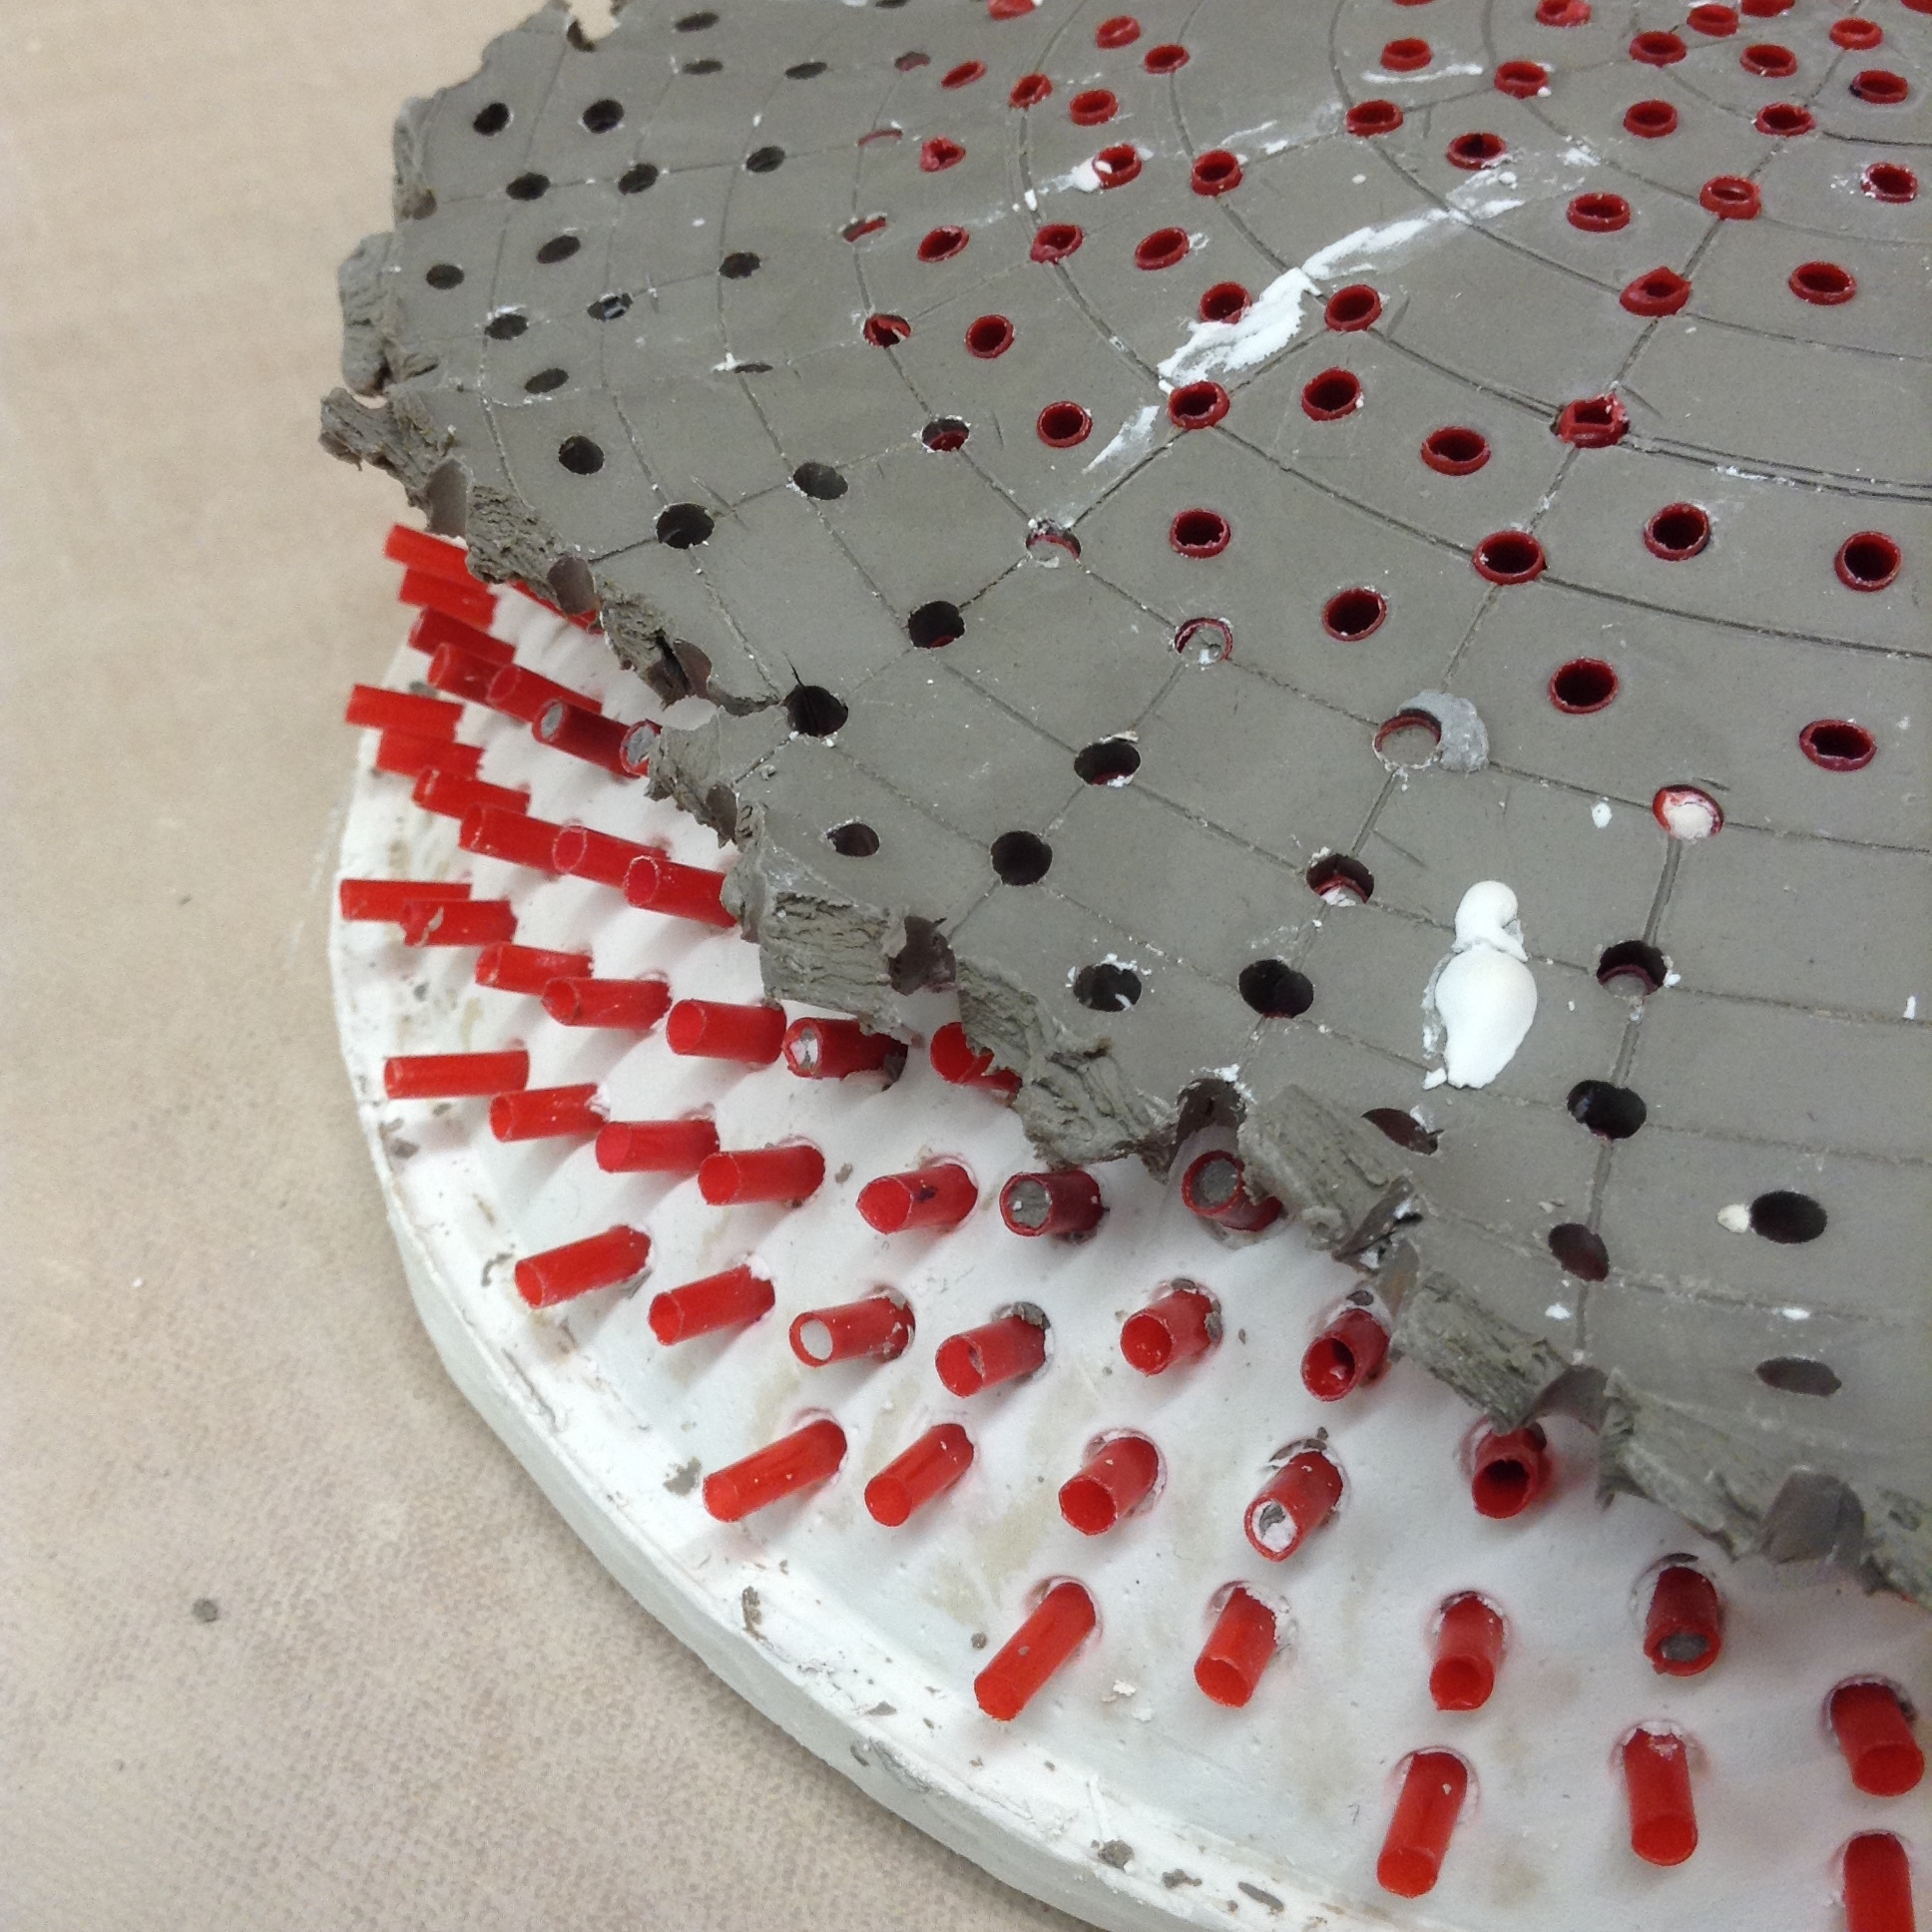
Interior of plaster dome forming bowl. All these ends of coffee stirrers will be completely enclosed in plaster, which eventually is used to hold nails. Conveniently, pushing the straws through the clay wall left a little plug of clay on the ends, which prevents most of the plaster from draining out.

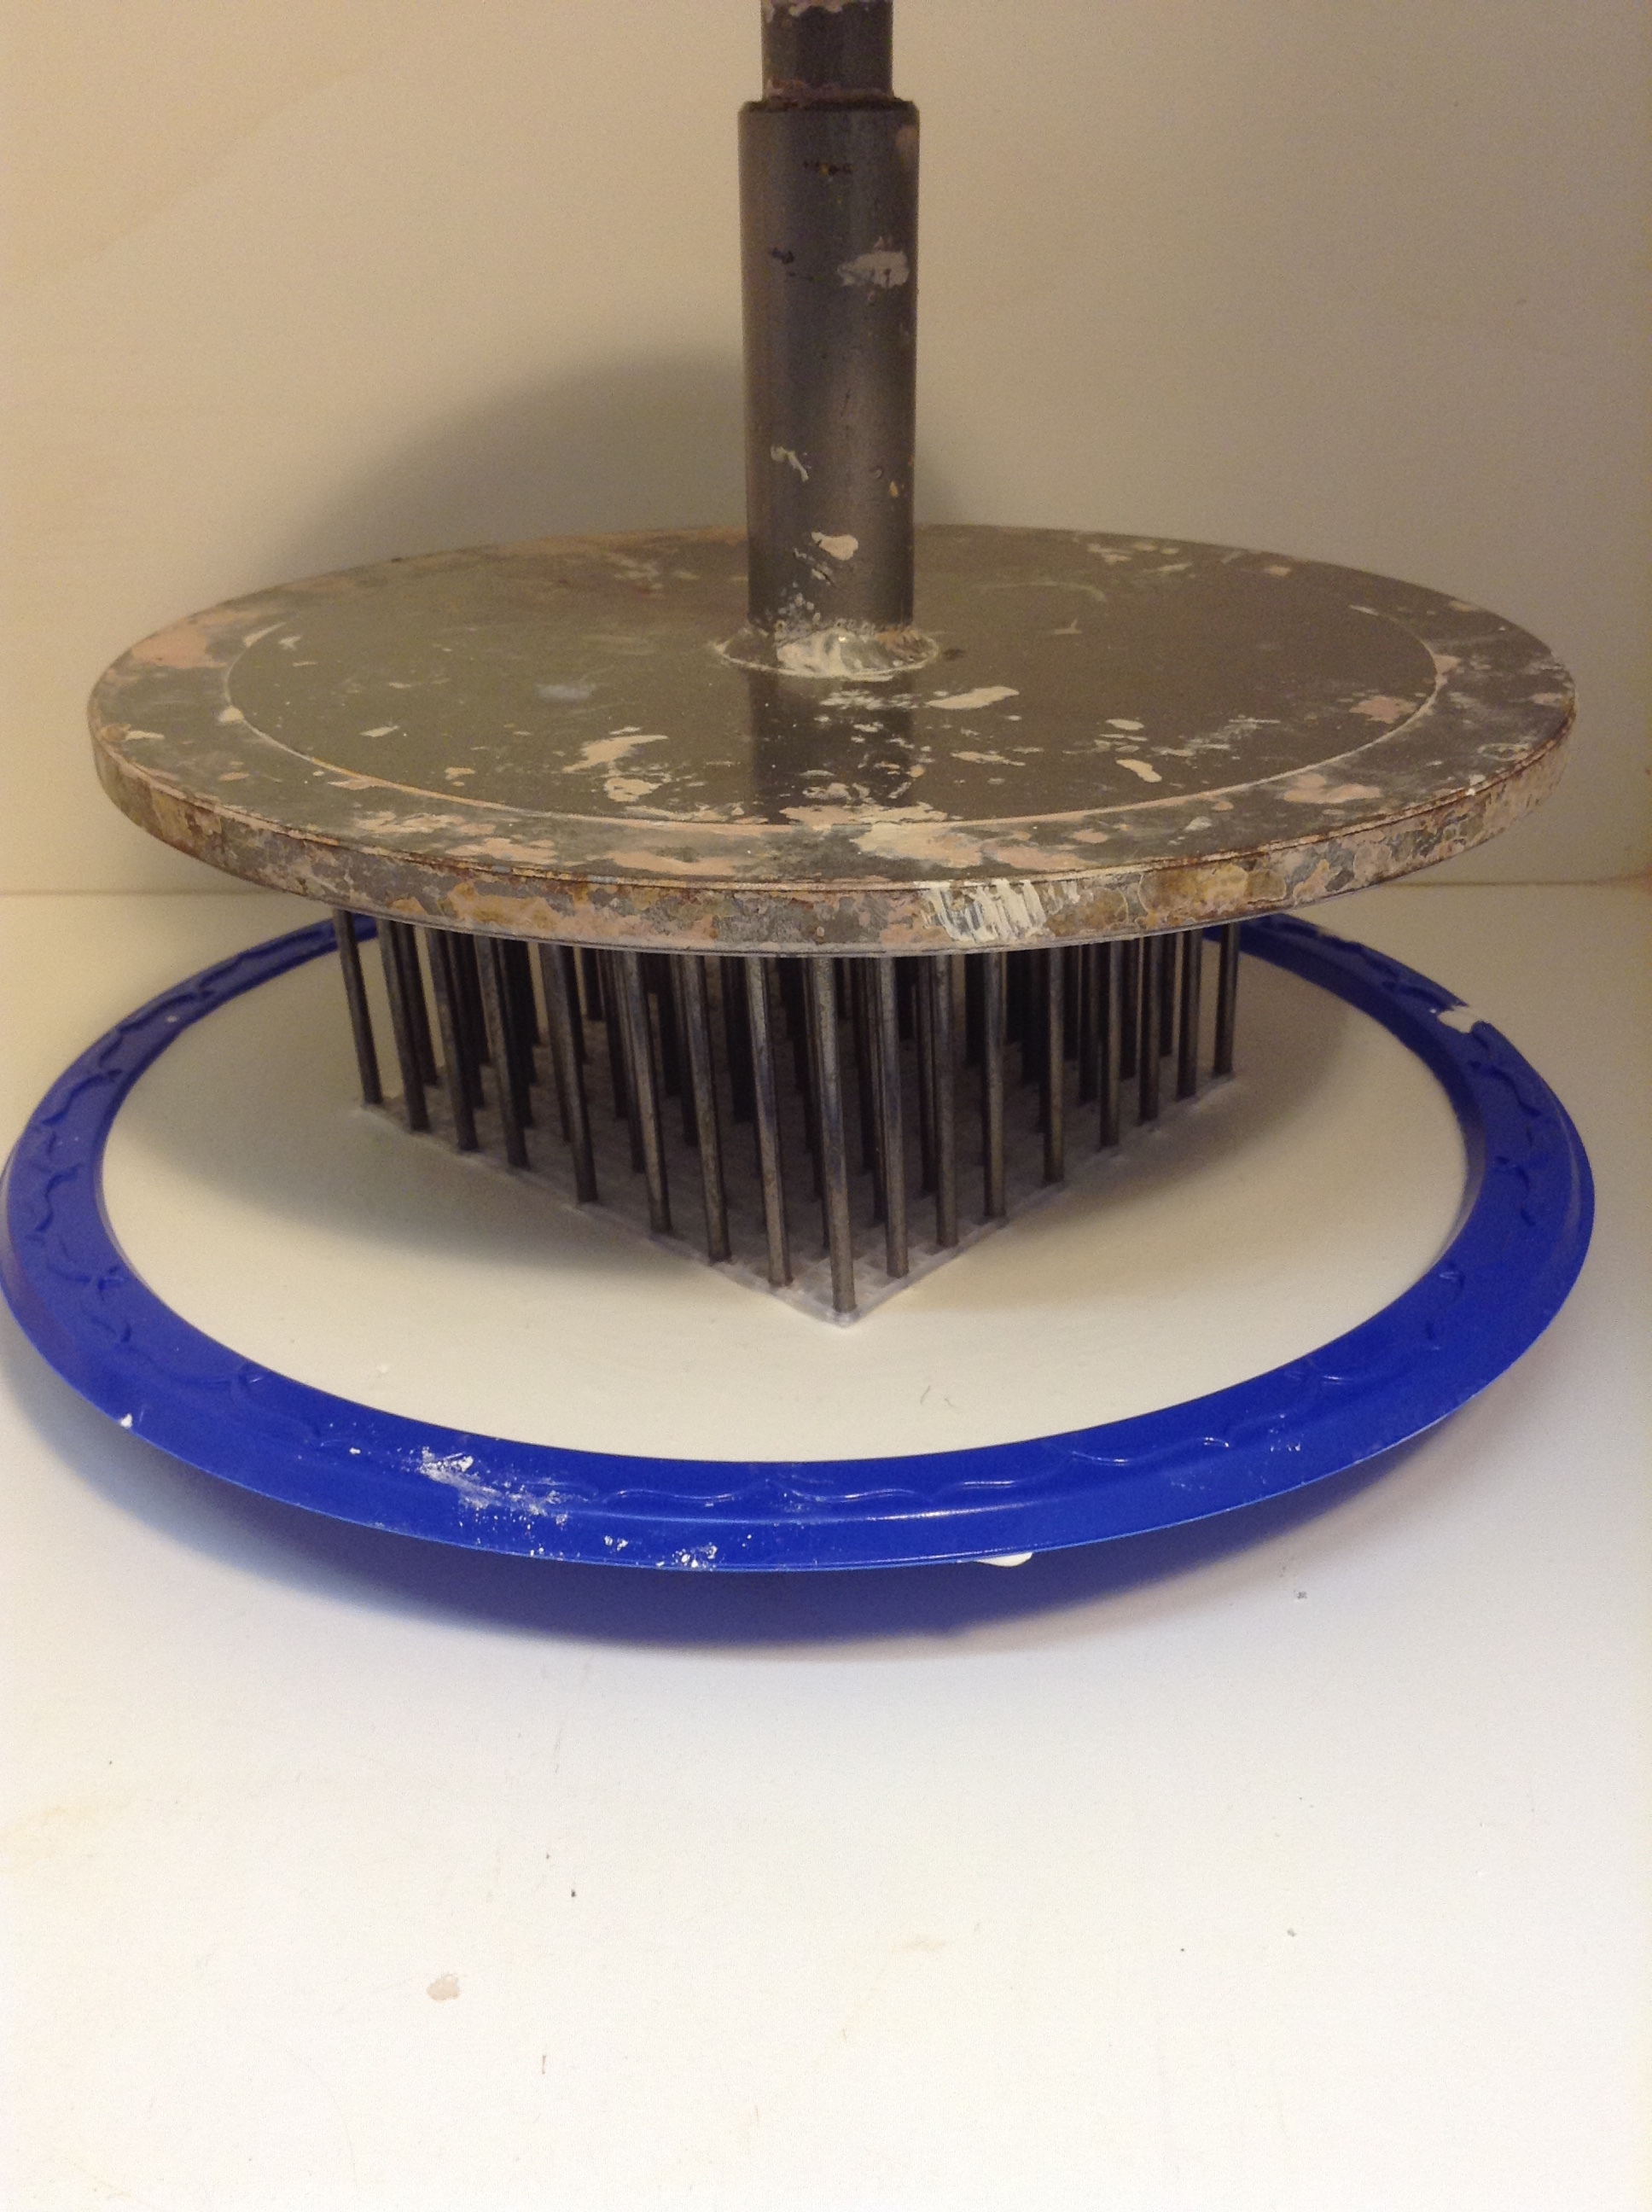
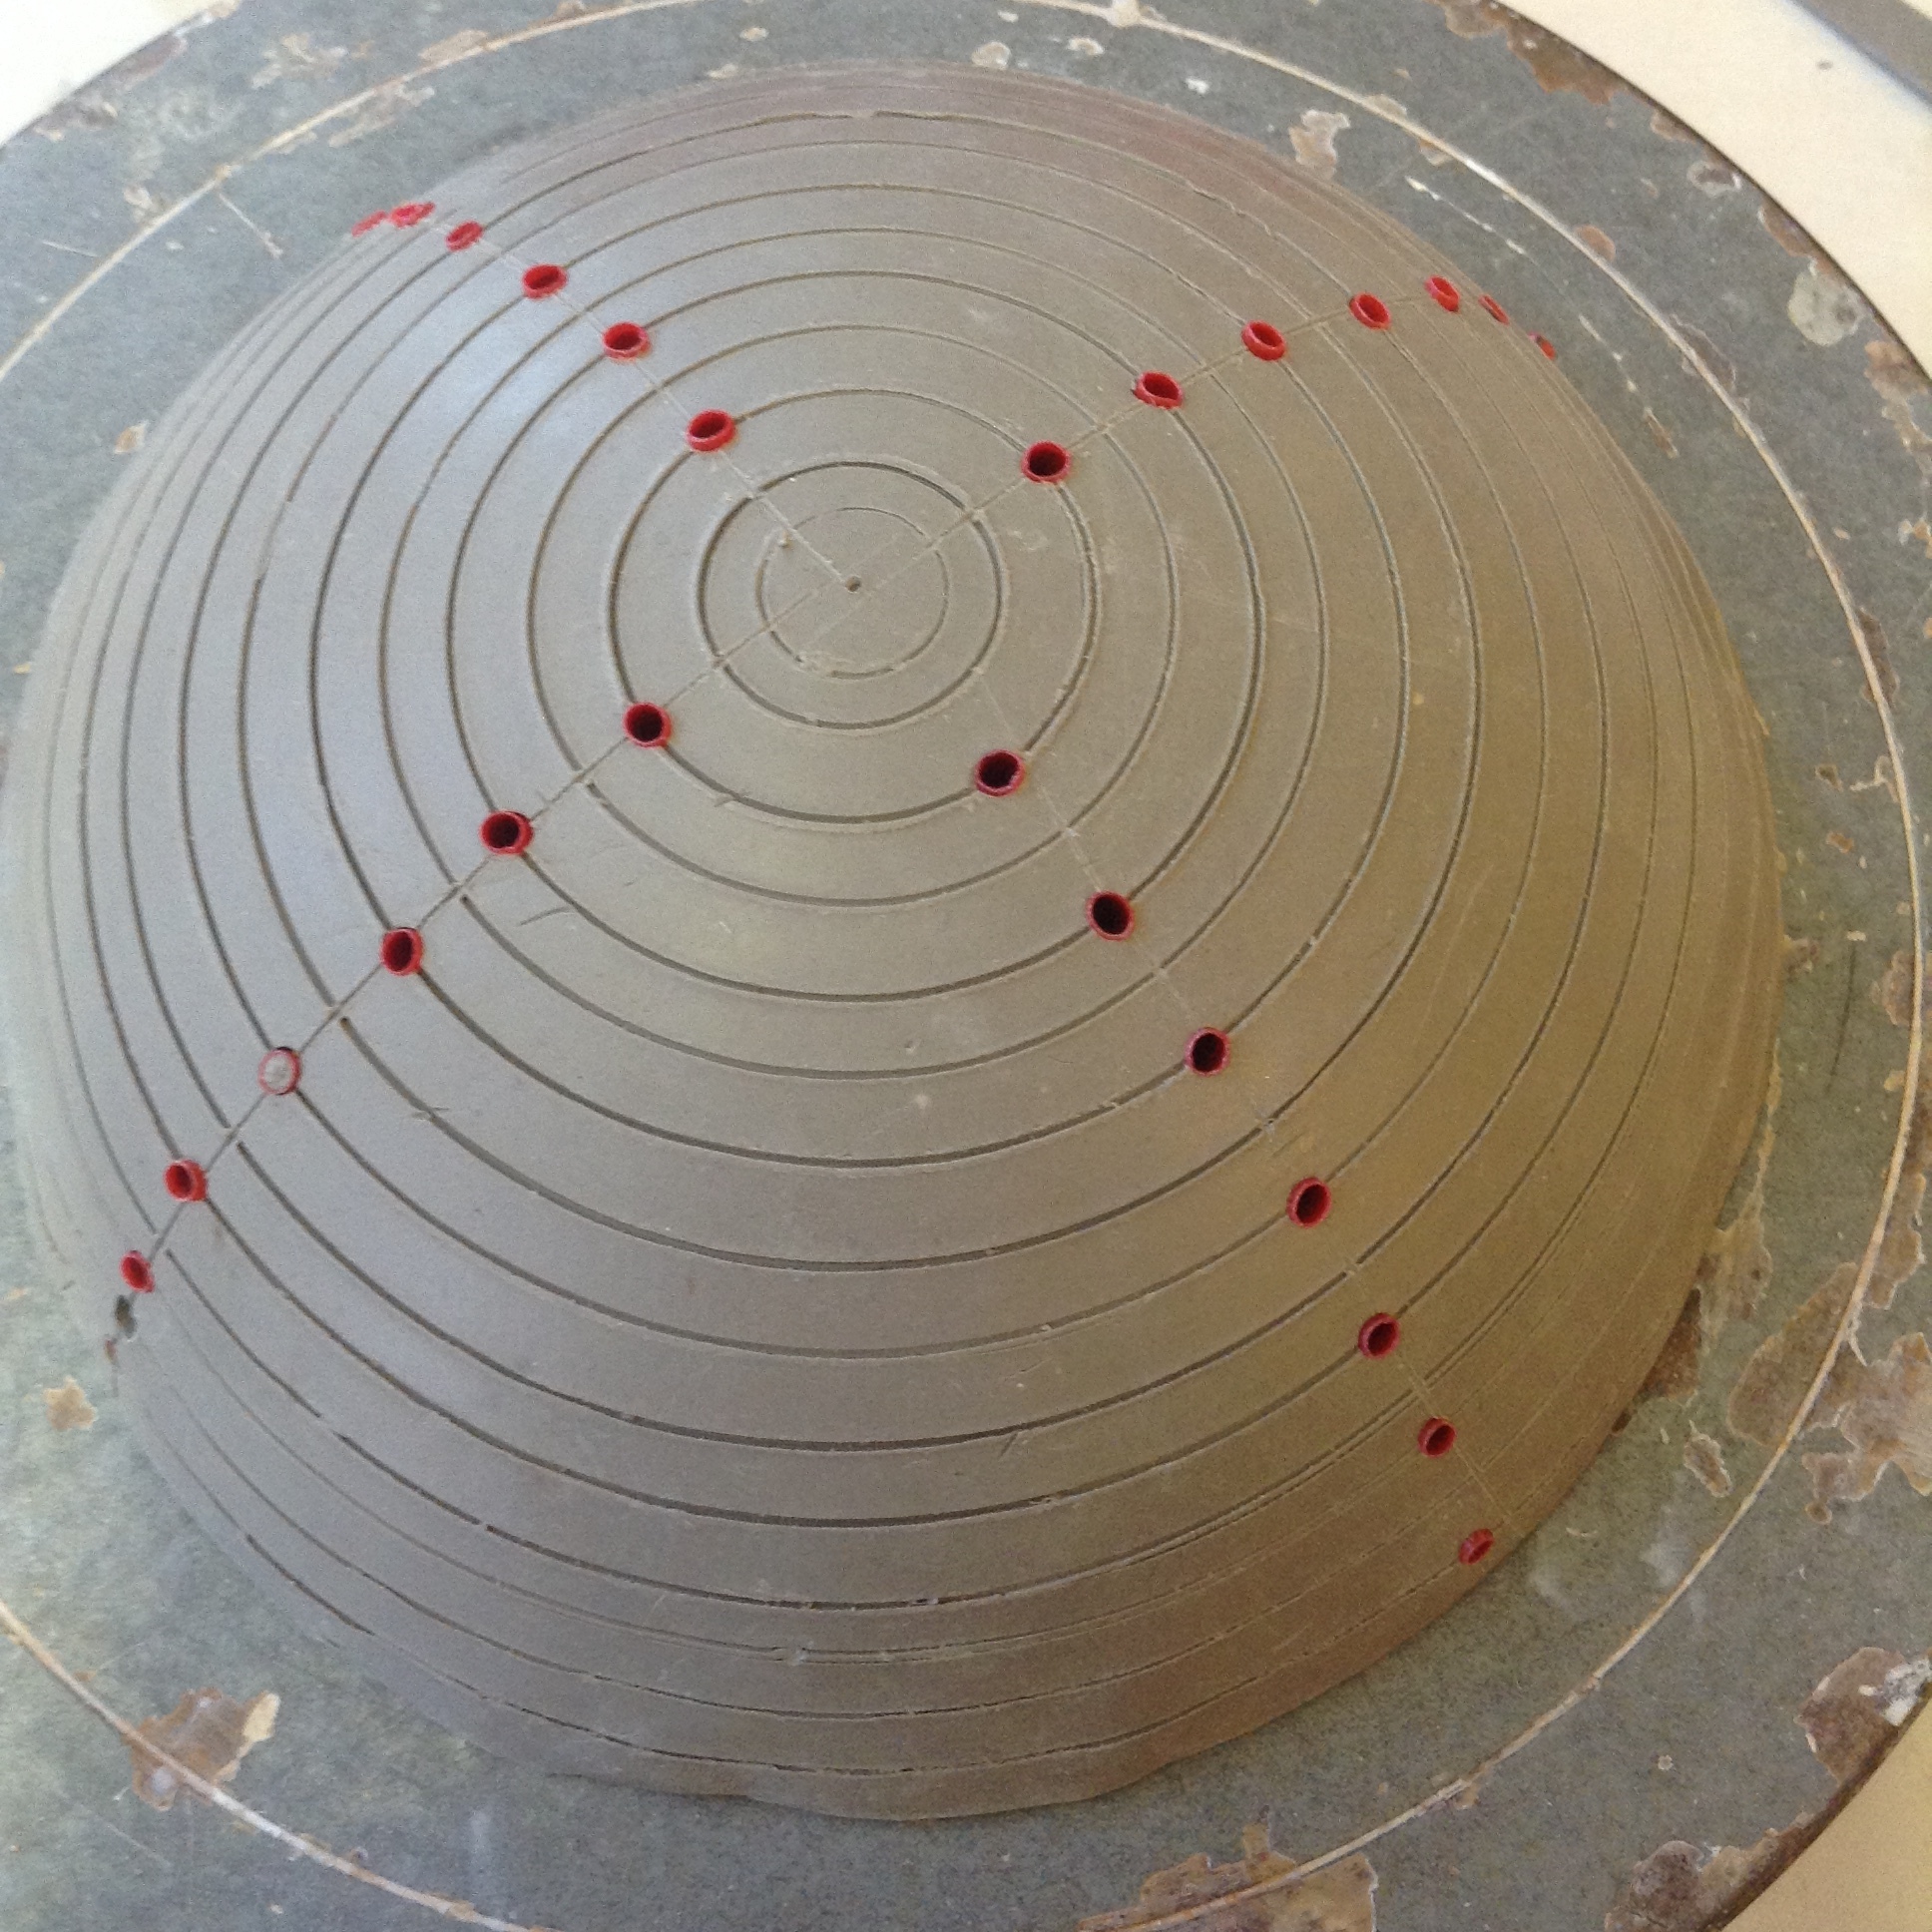
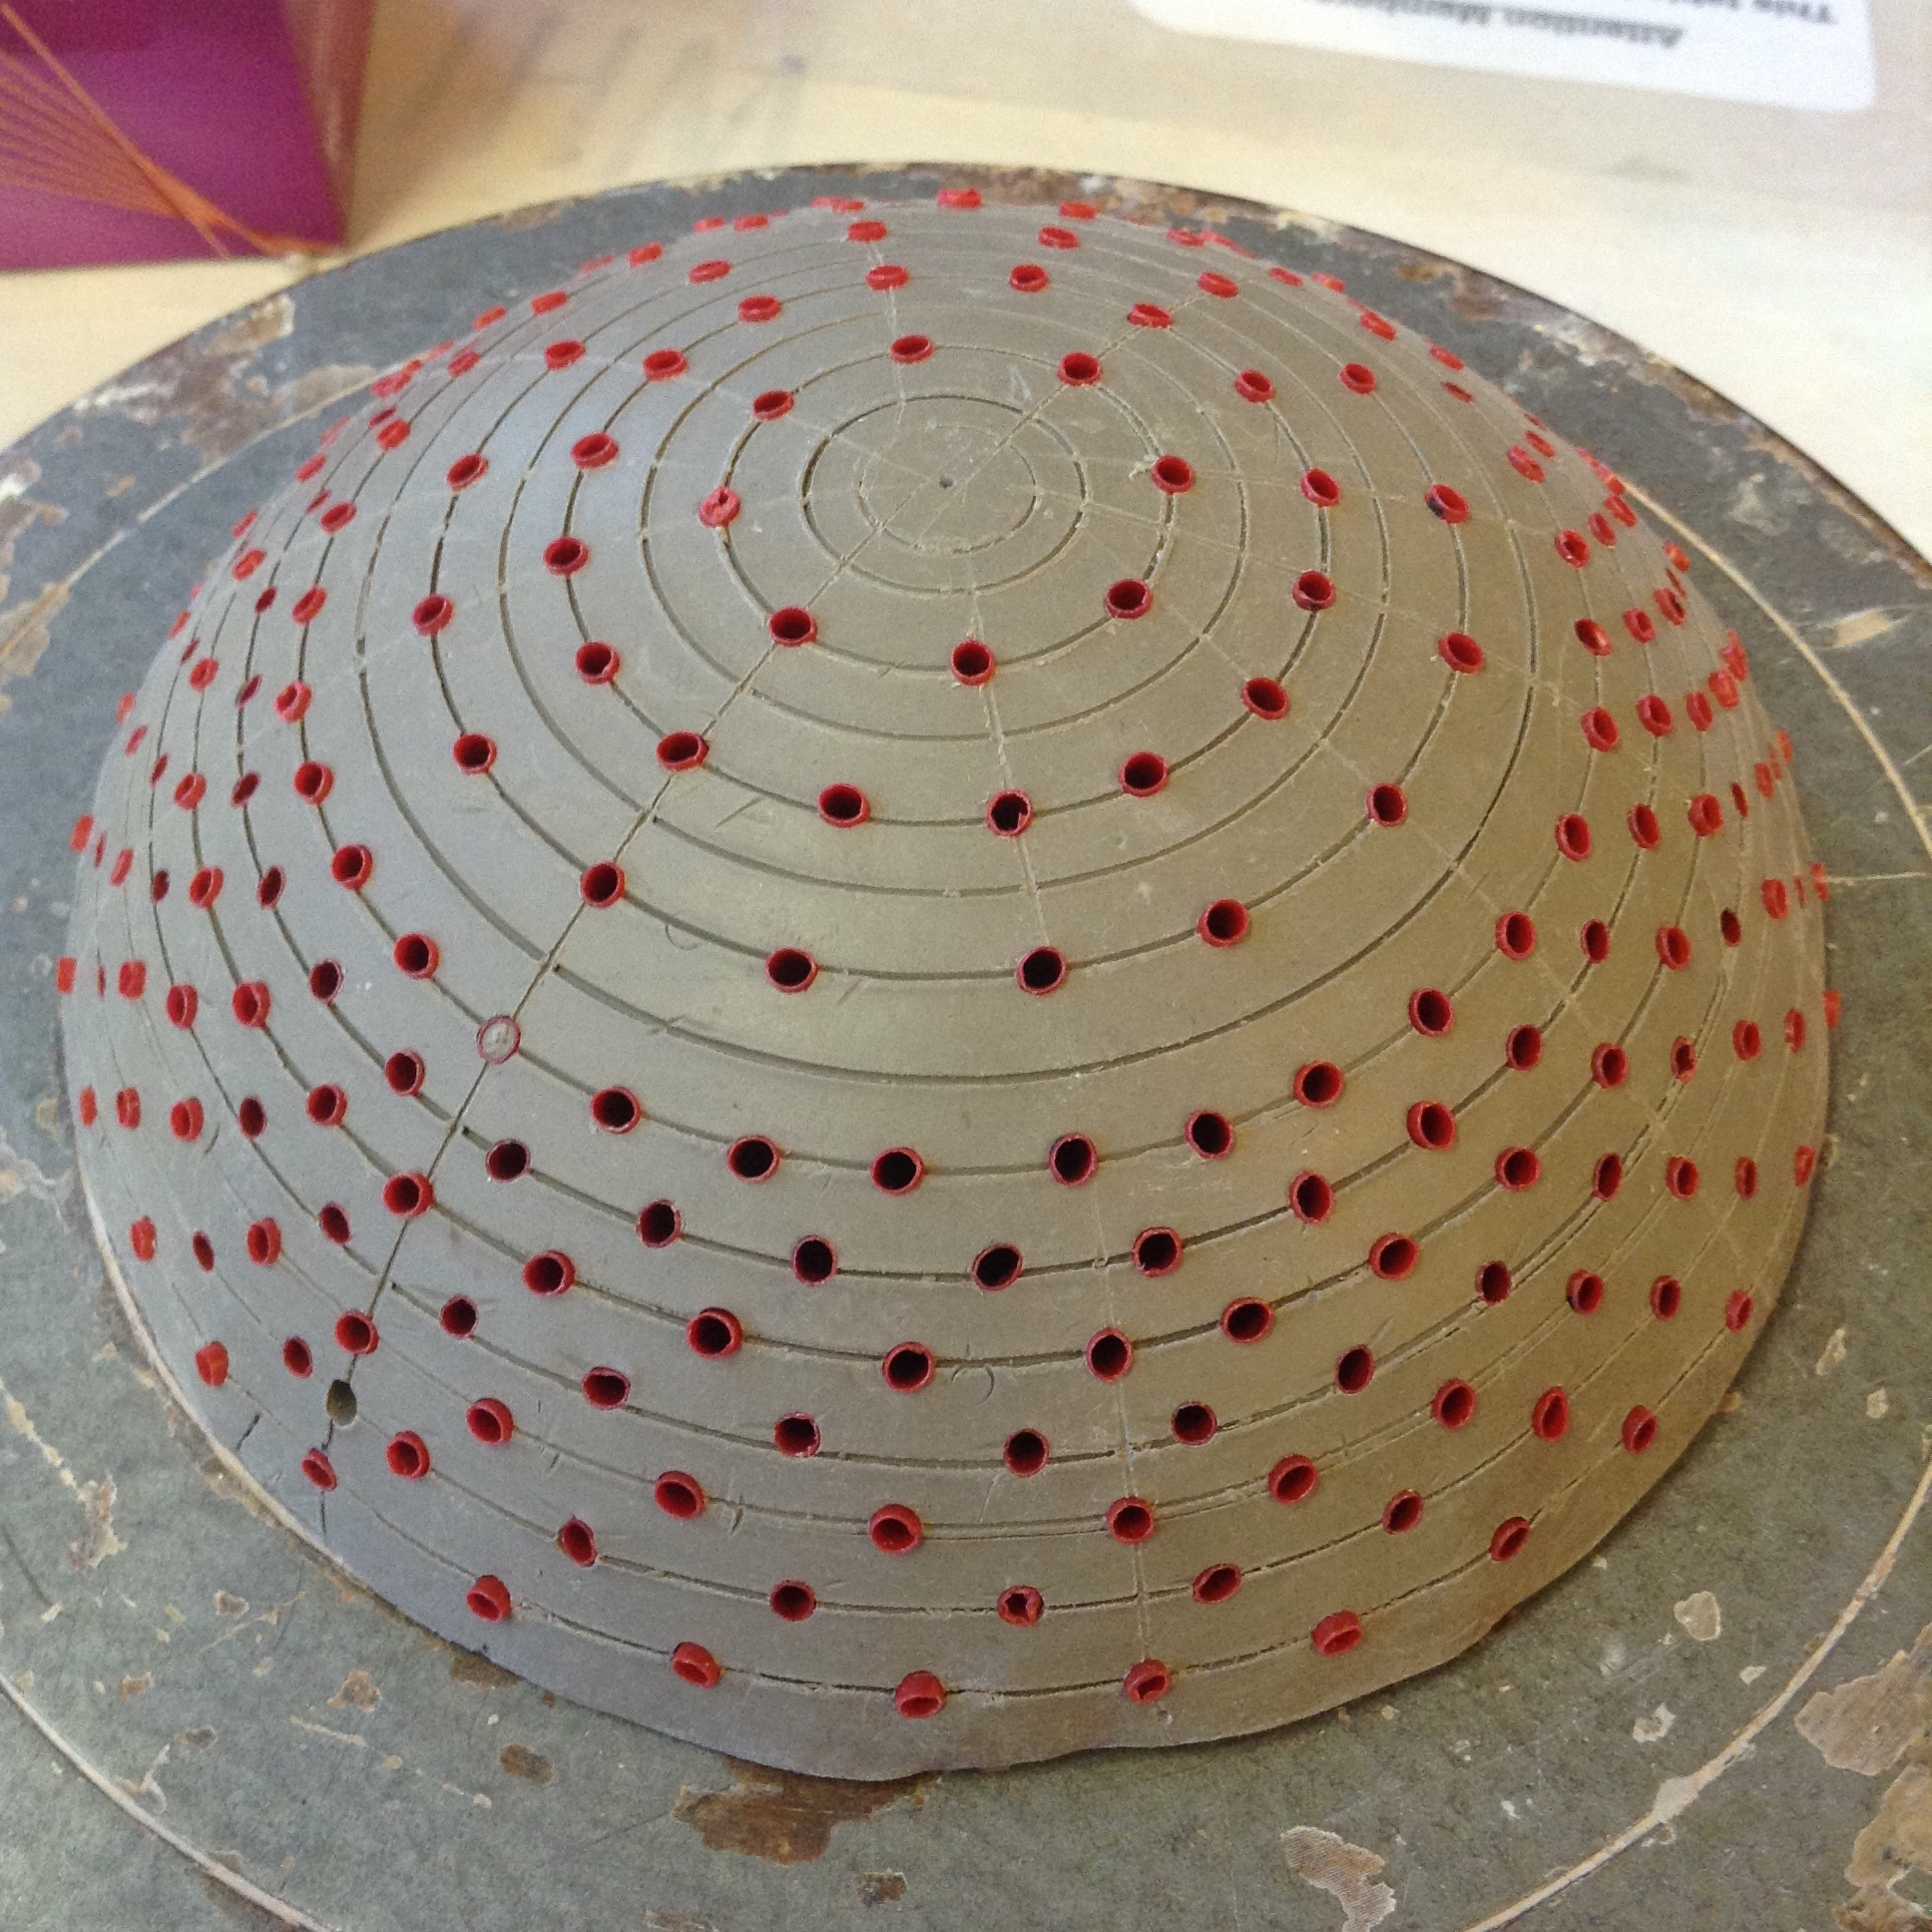
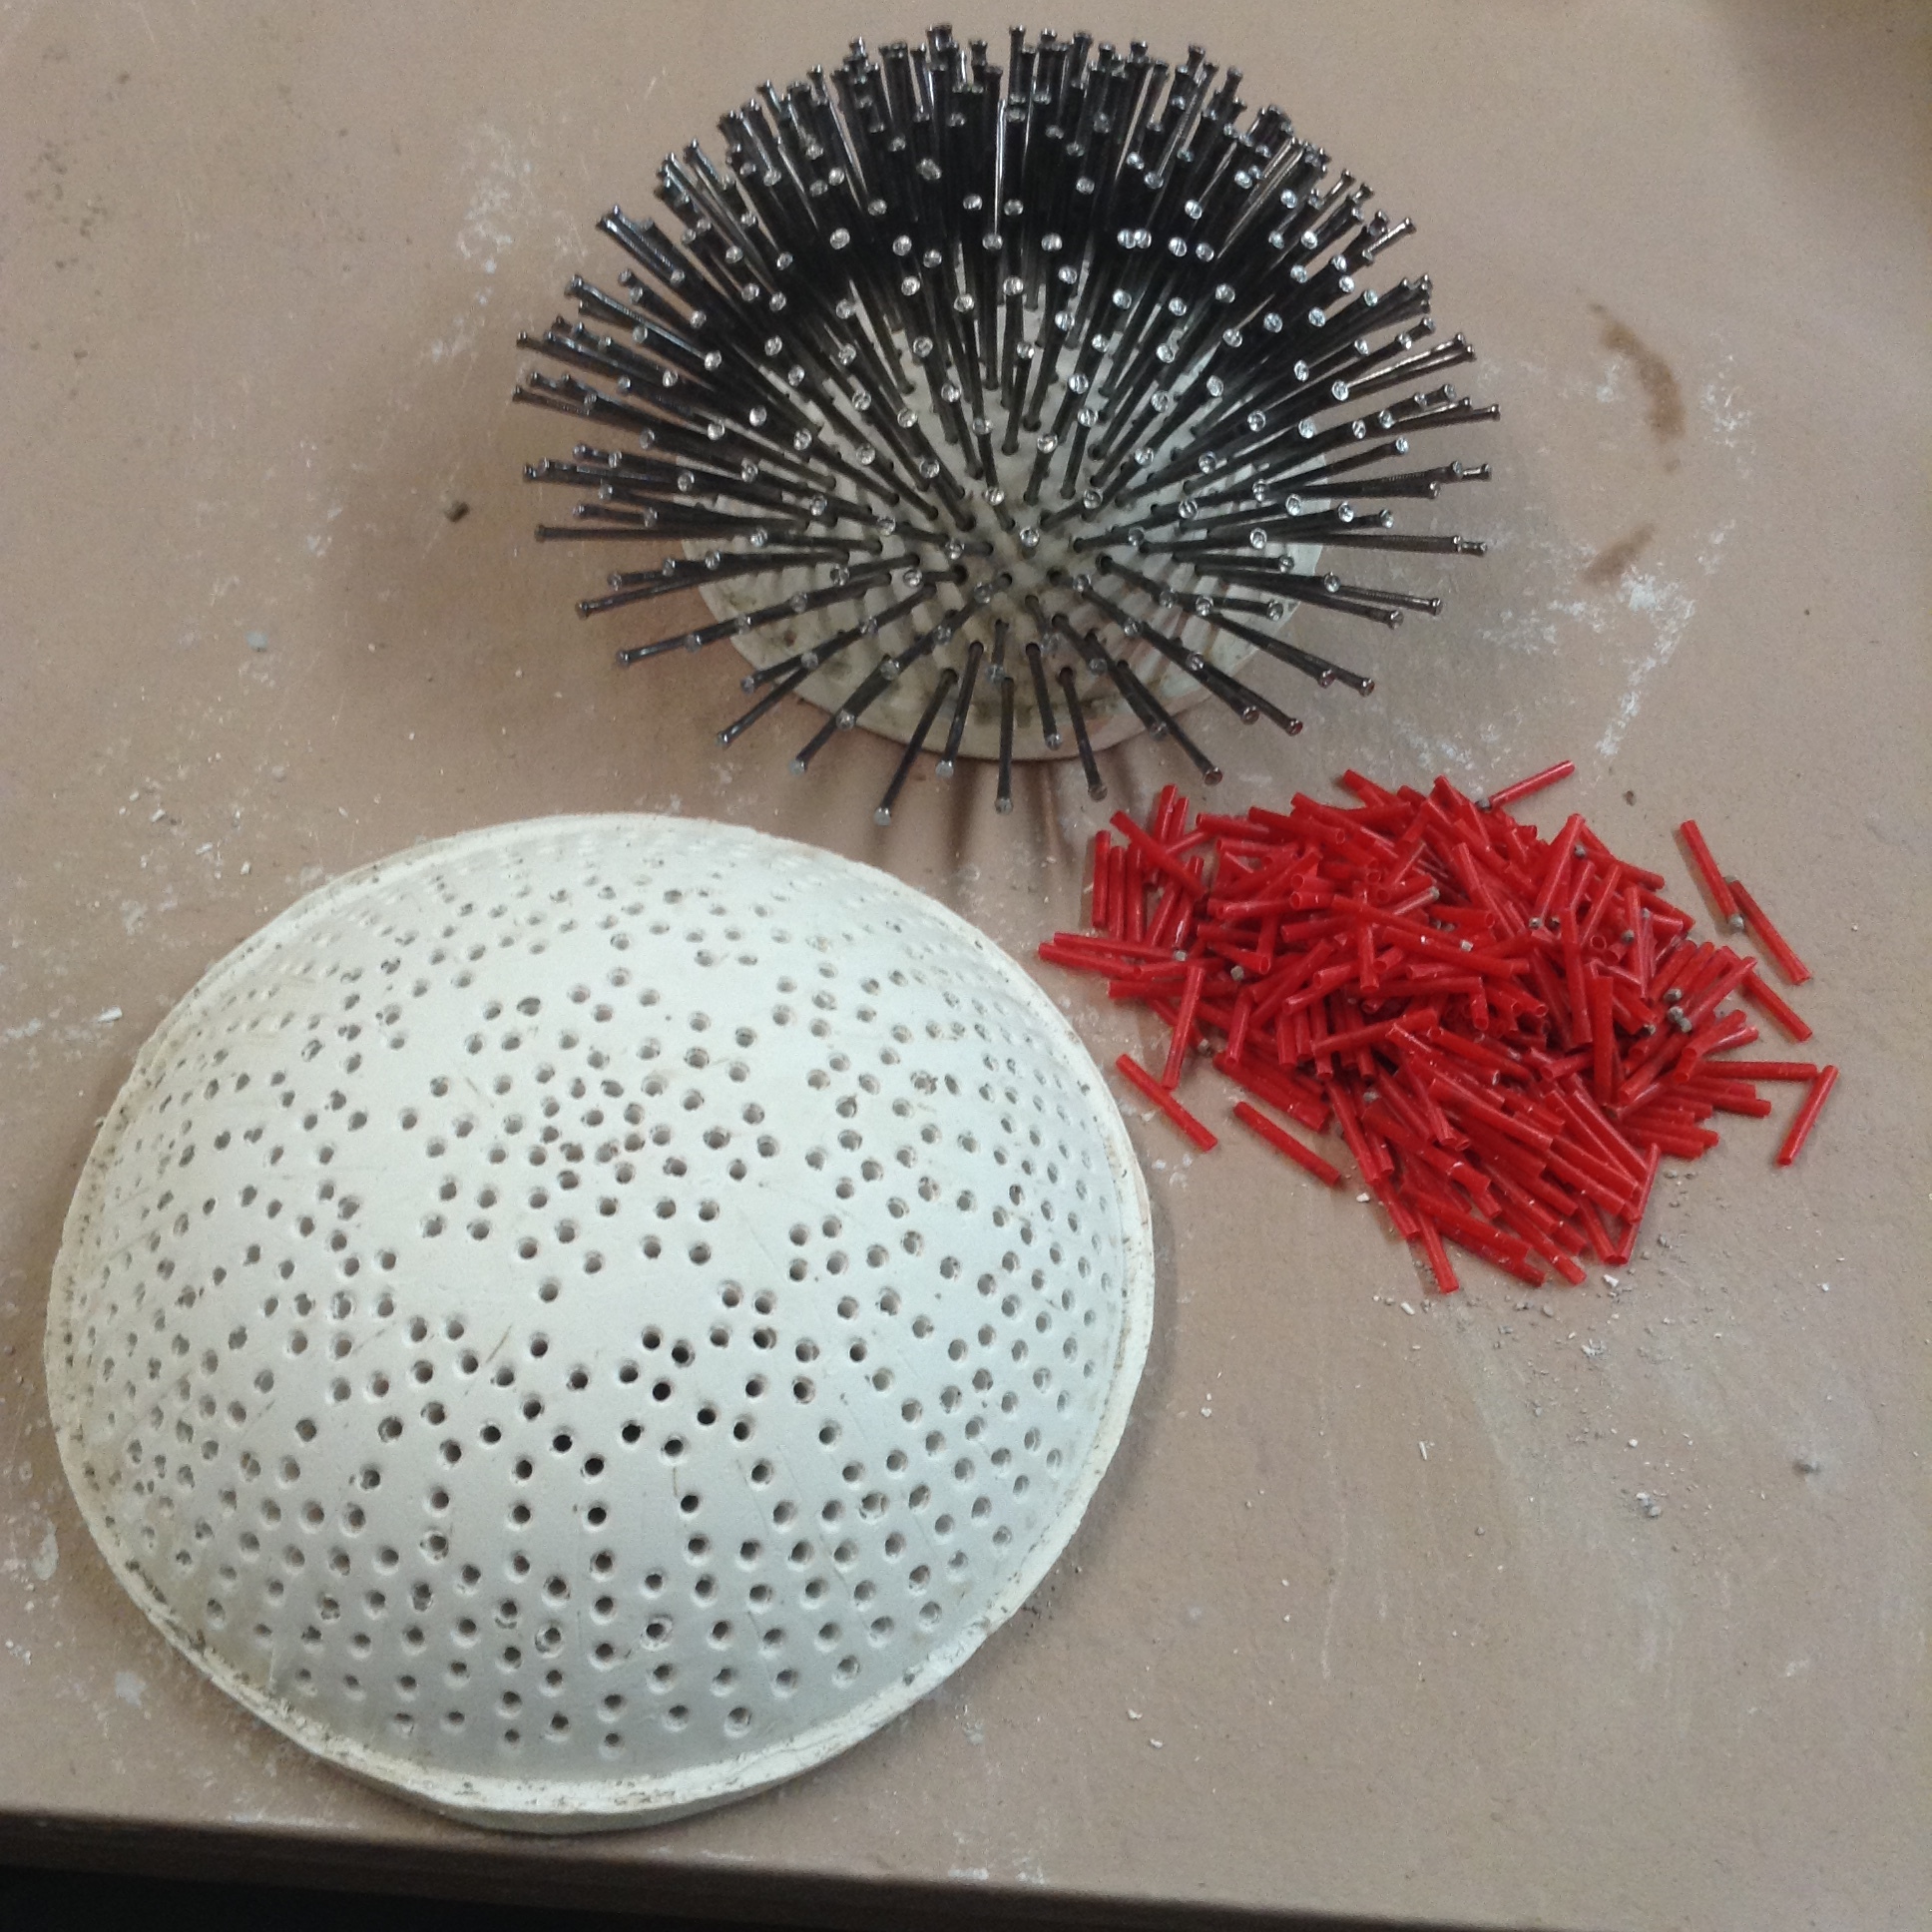
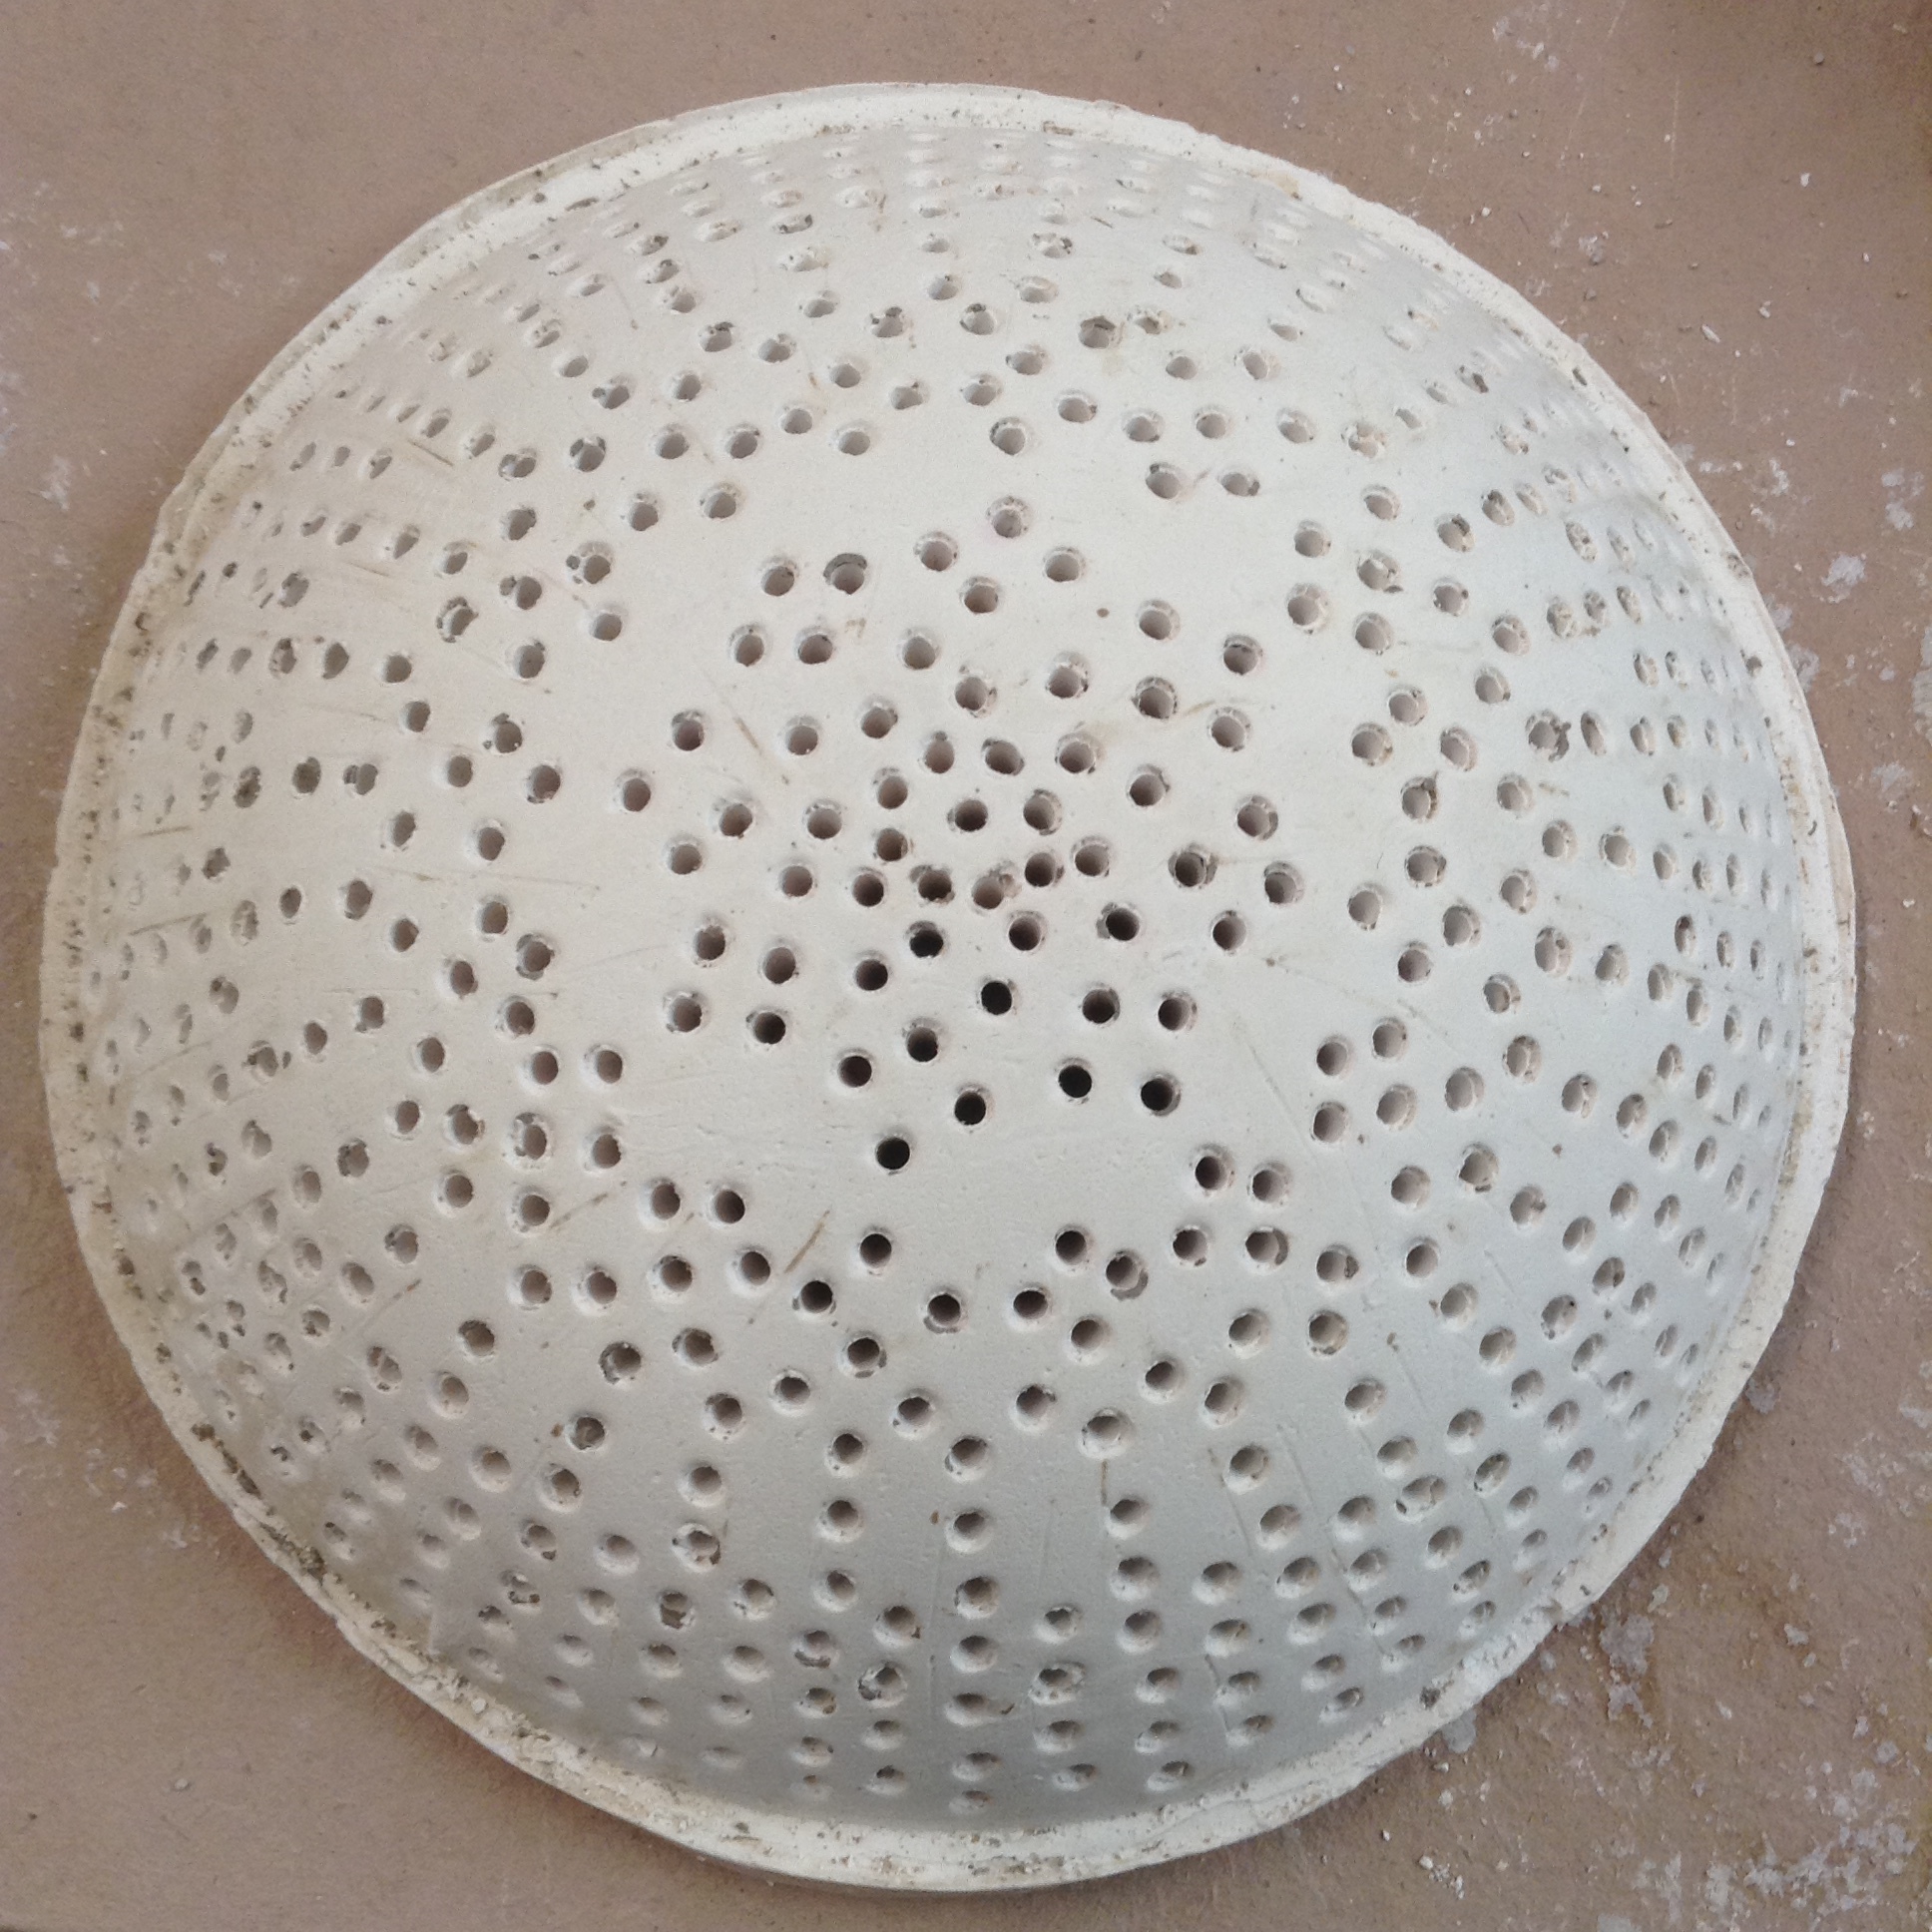
Unmolding process of plaster dome form. Clay form was sculpted for pouring plaster inside. Lines were drawn on outside of clay bowl for locations of red coffee stirrers to push through. These red pieces are encased in plaster, but pull out, solving the problem of my not having a drill press. Here, the wet clay bowl form is being dismantled after the plaster has set. The metal nail is shown here as example of the radiating angle all the holes have.

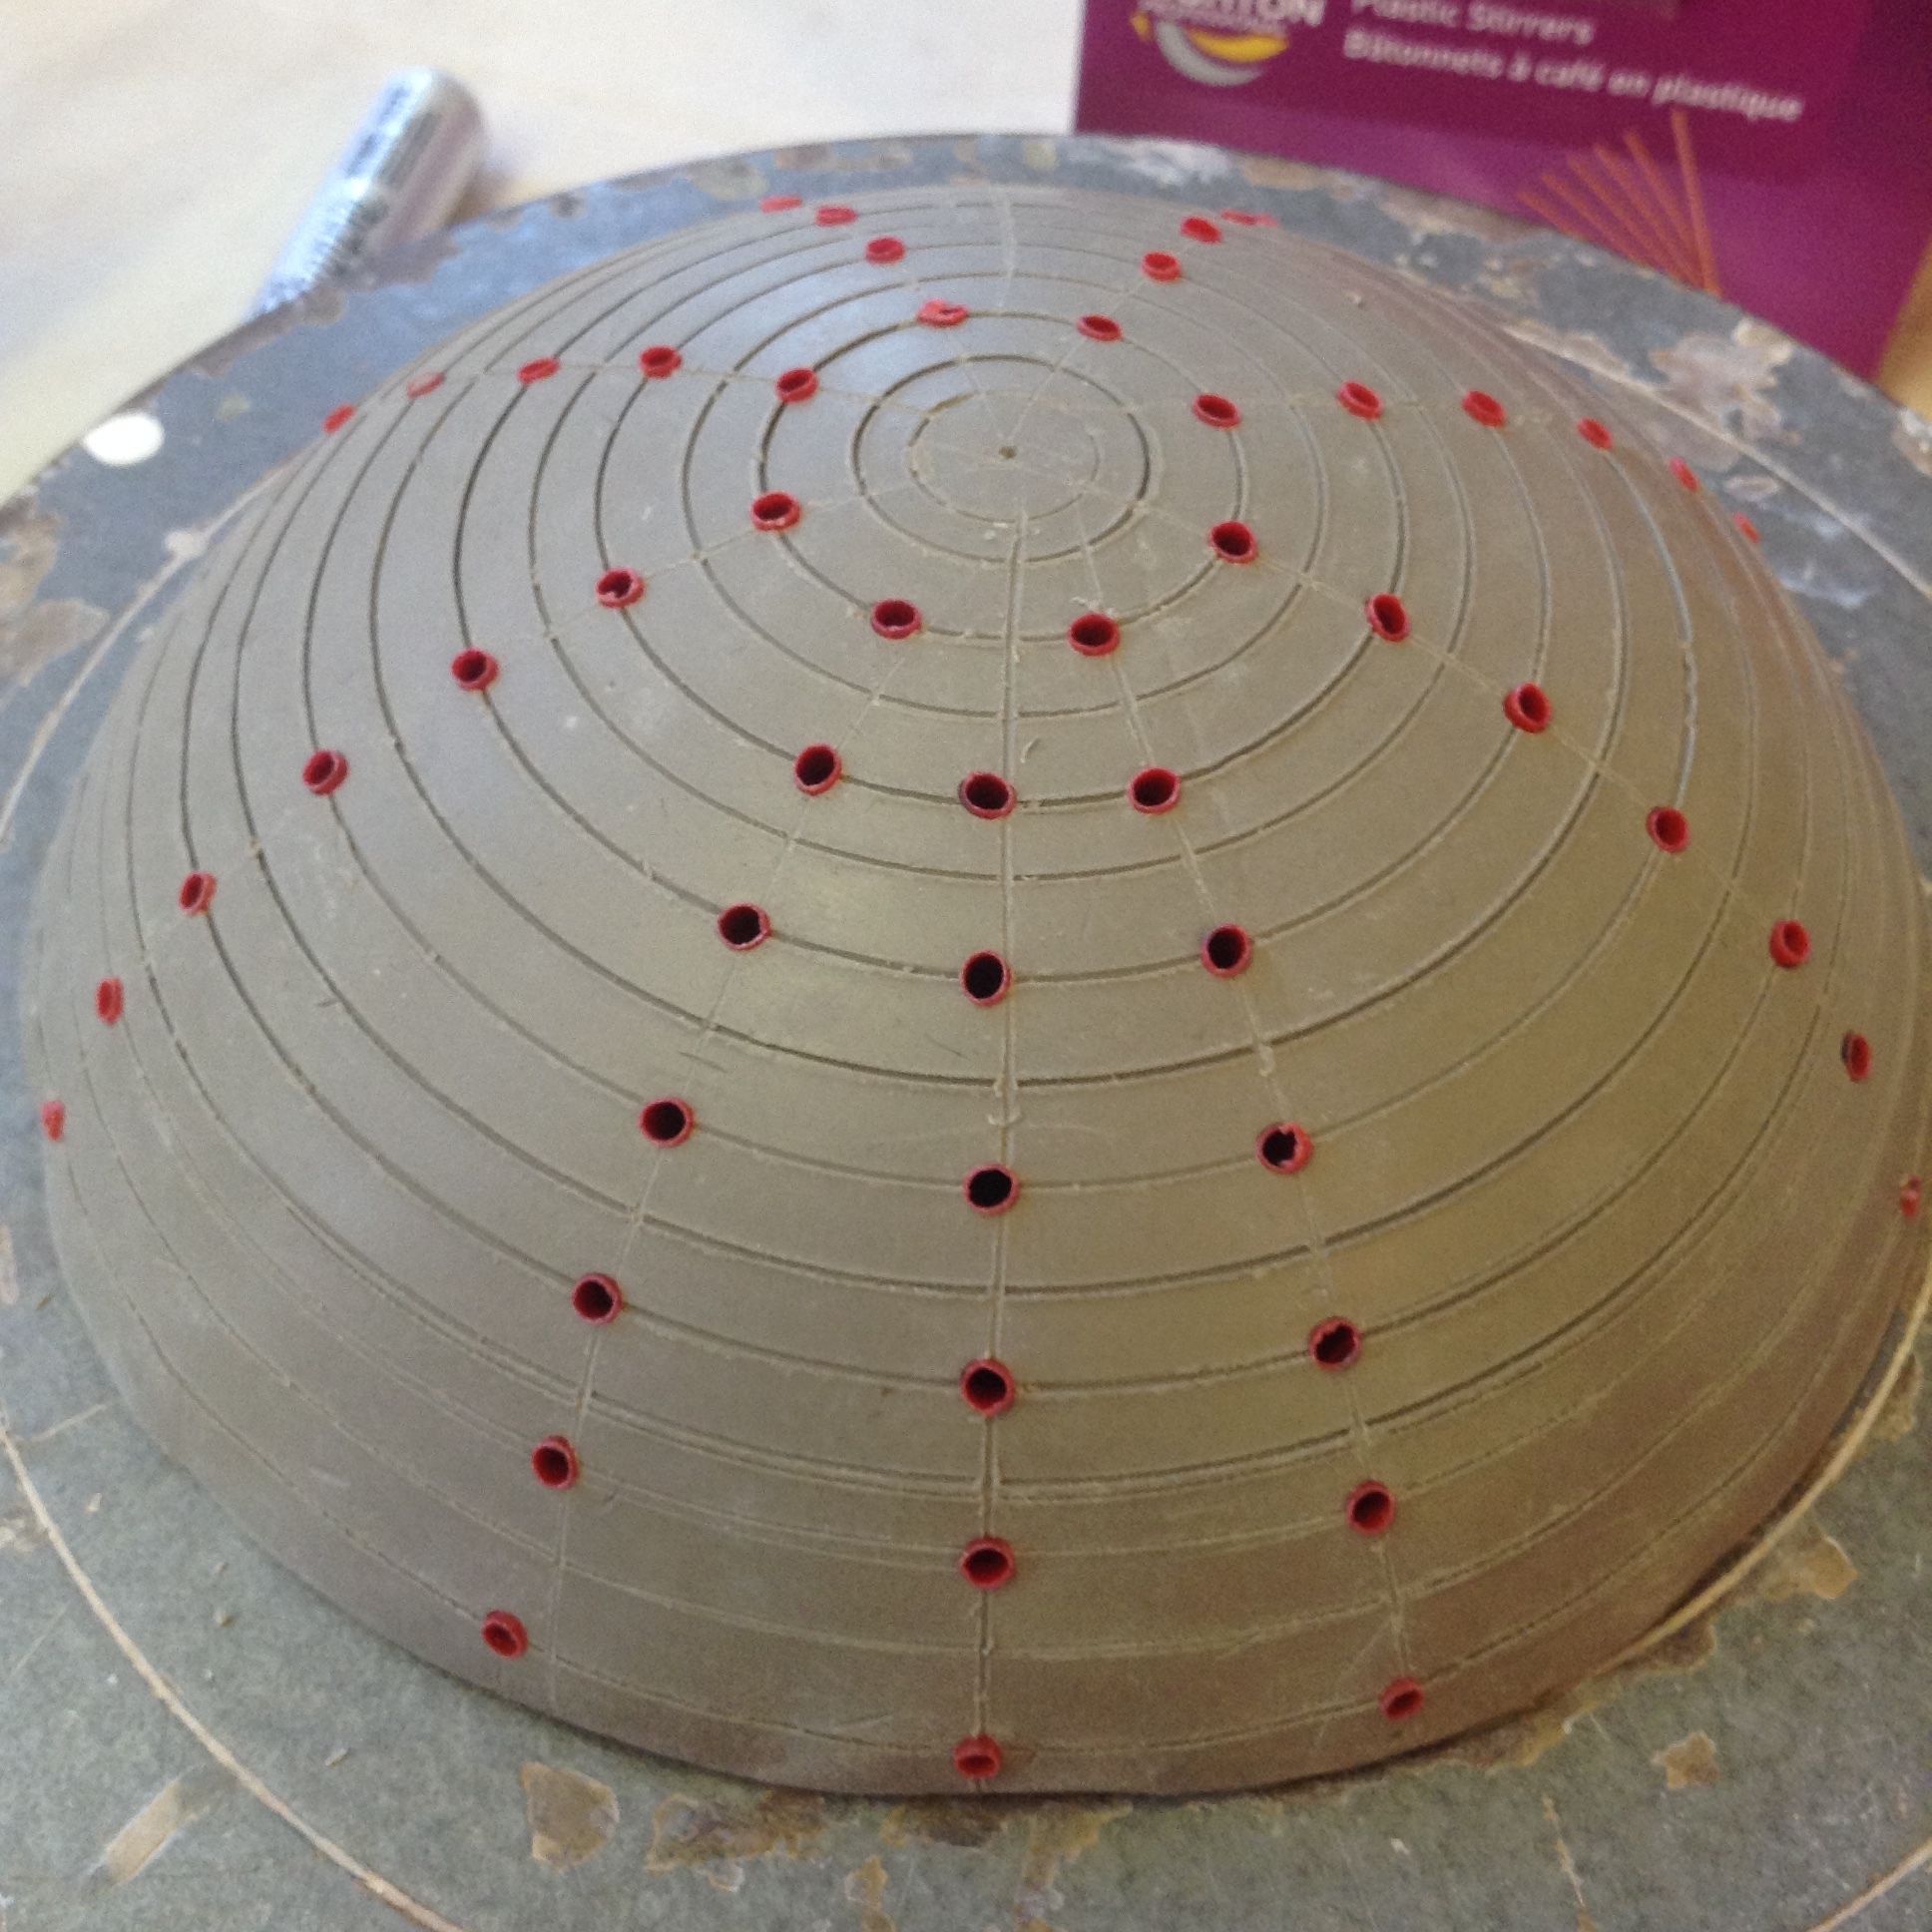
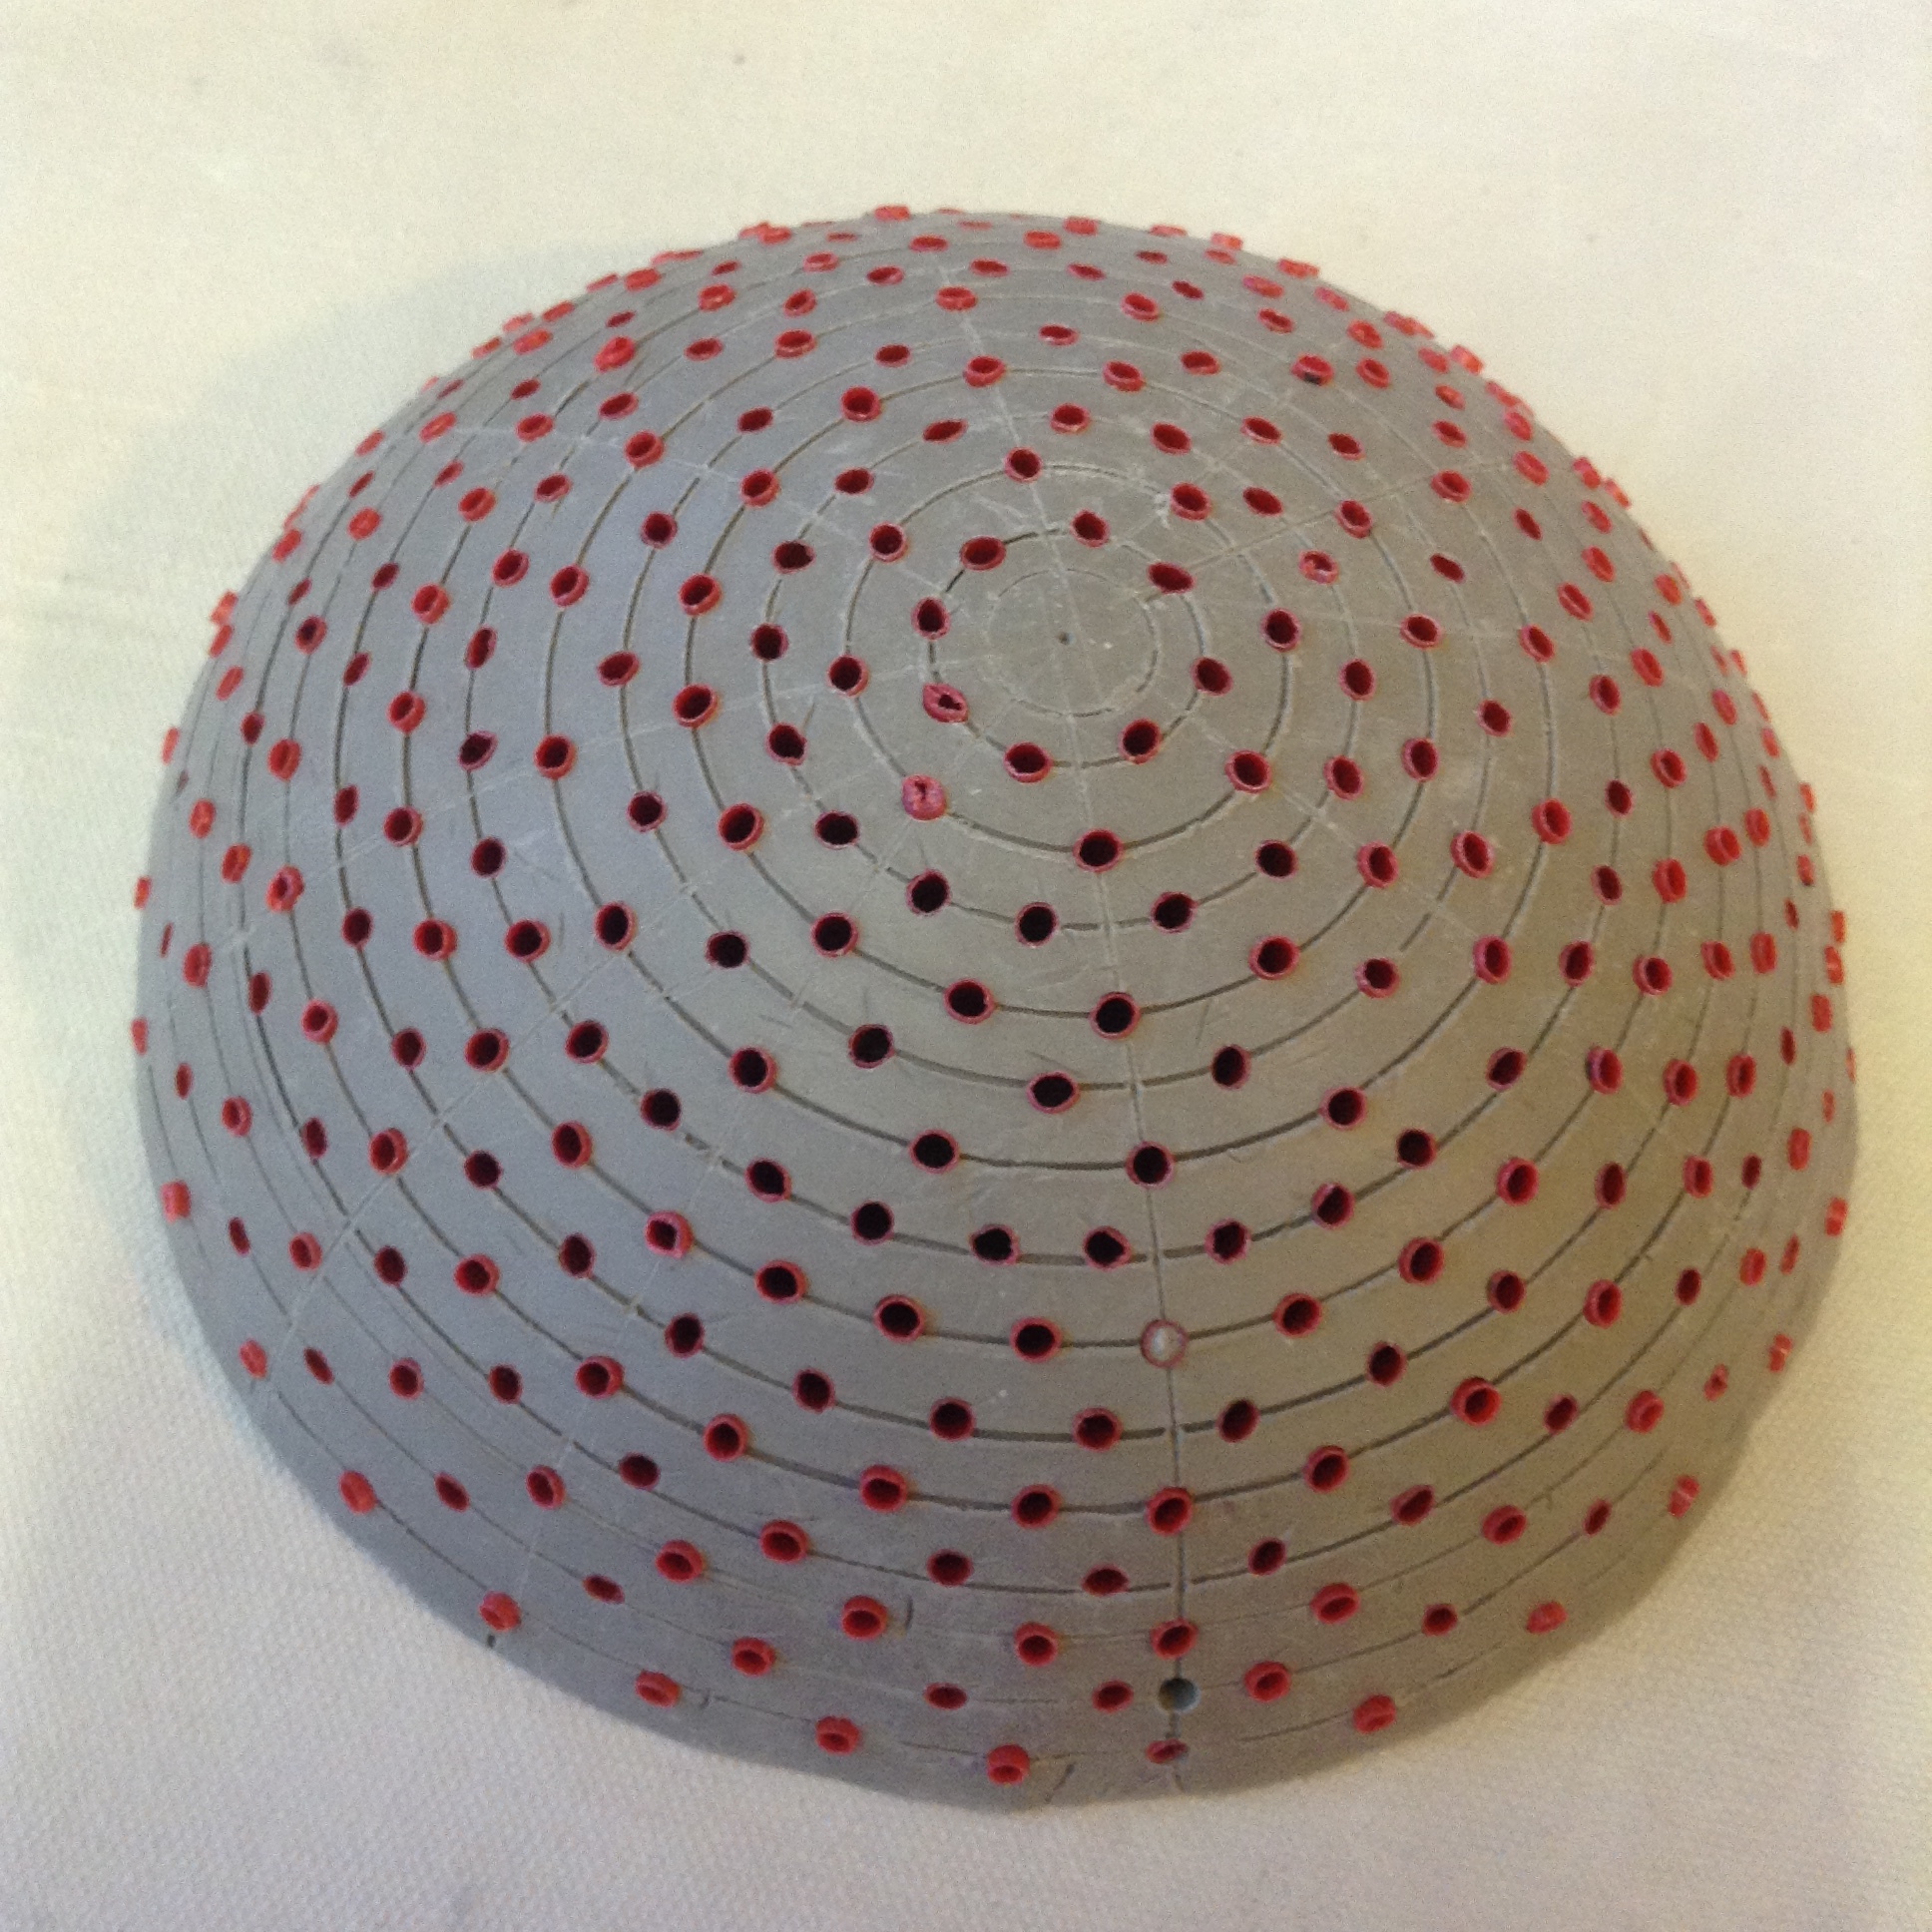
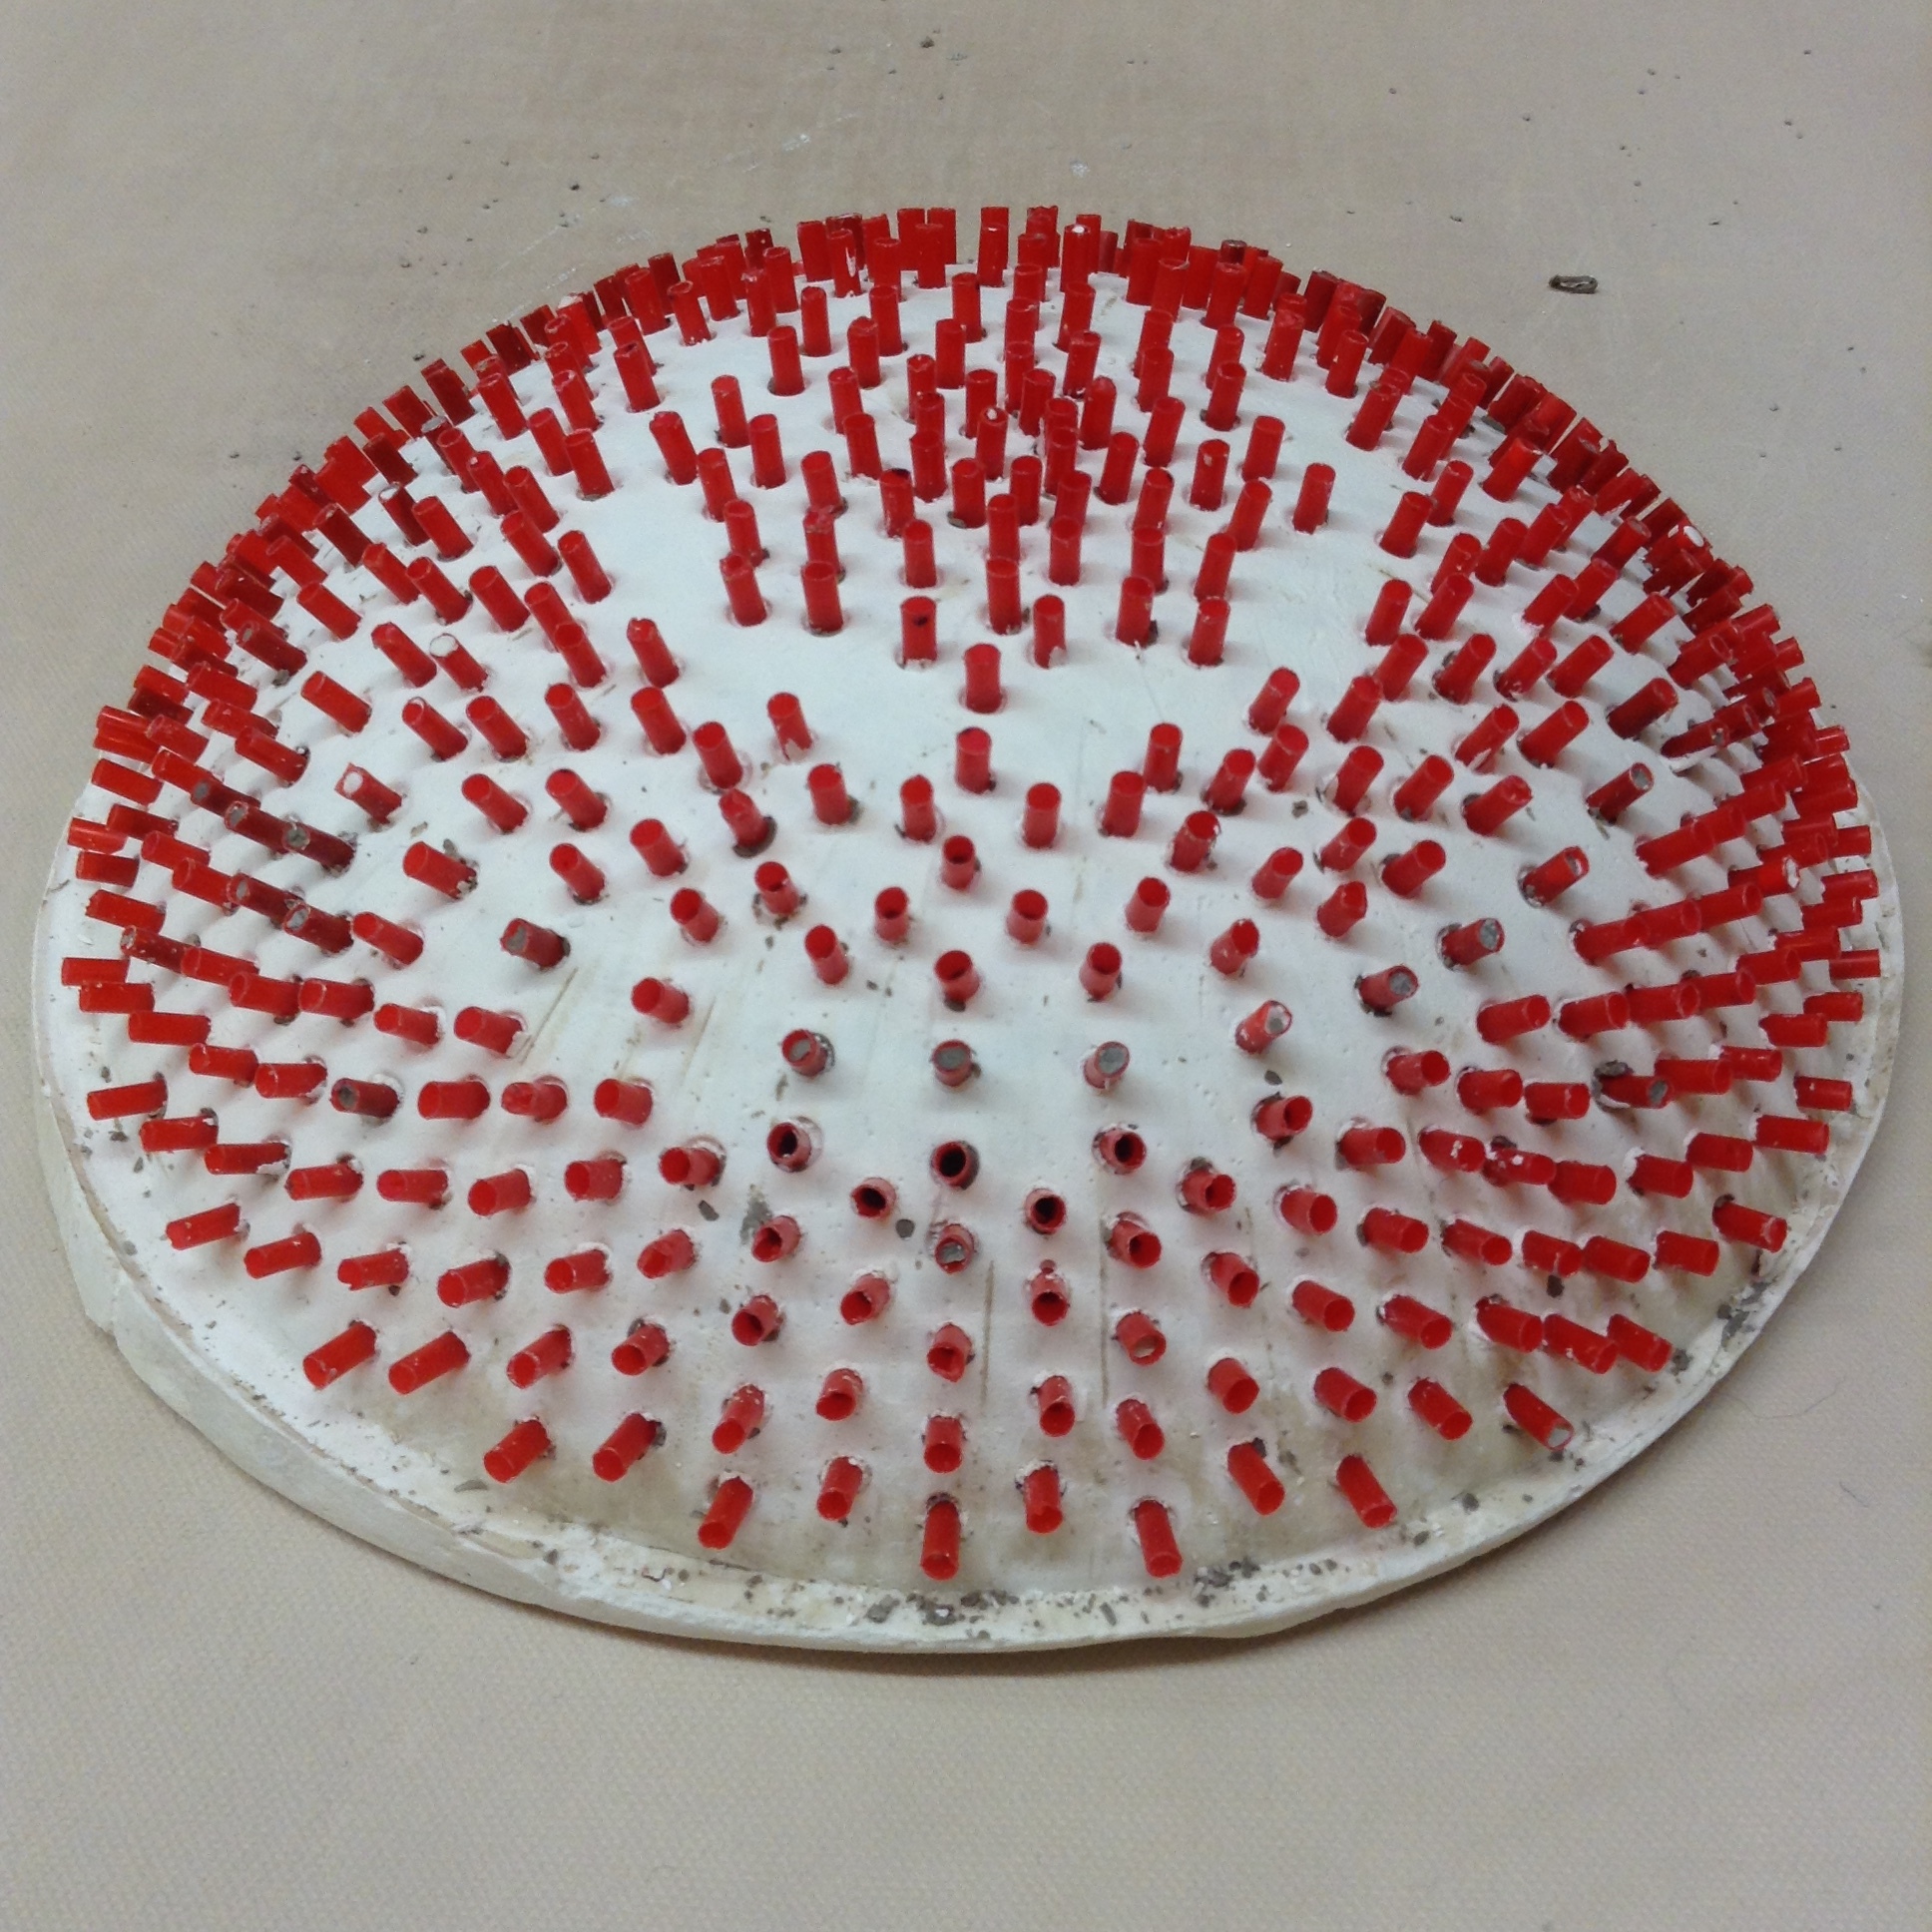
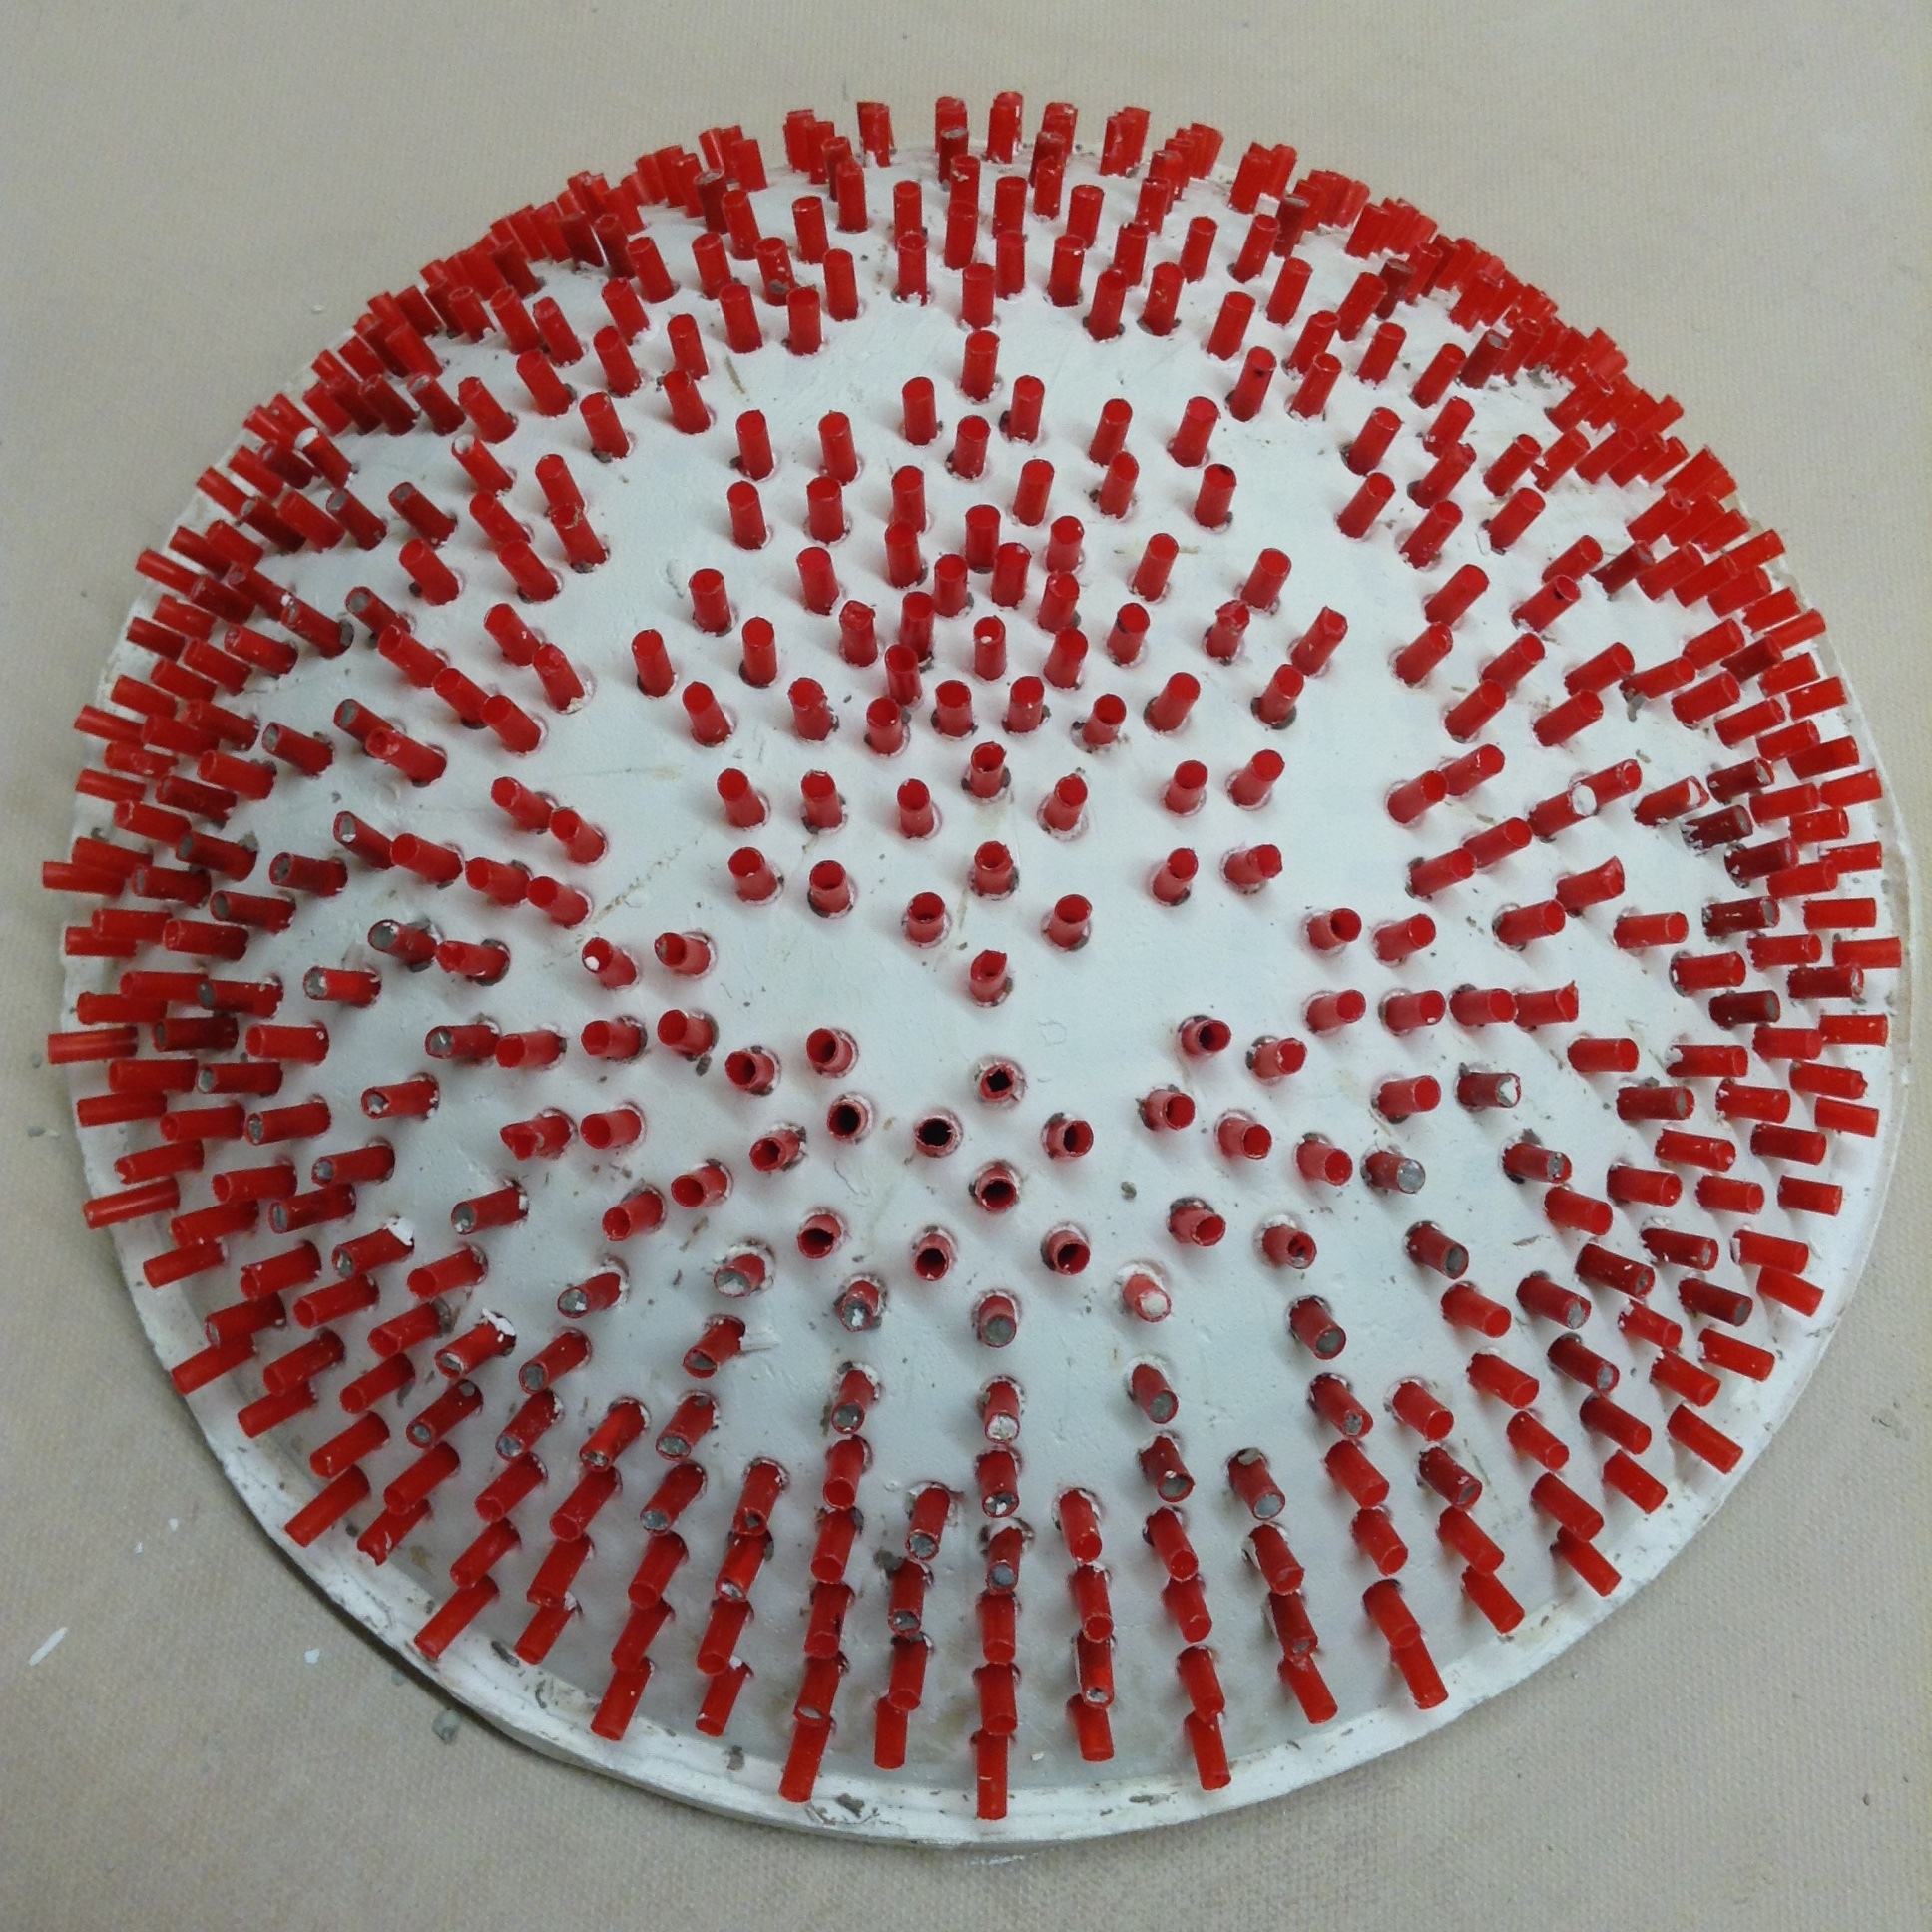
Large plaster dome form with different hole spacing in different areas.

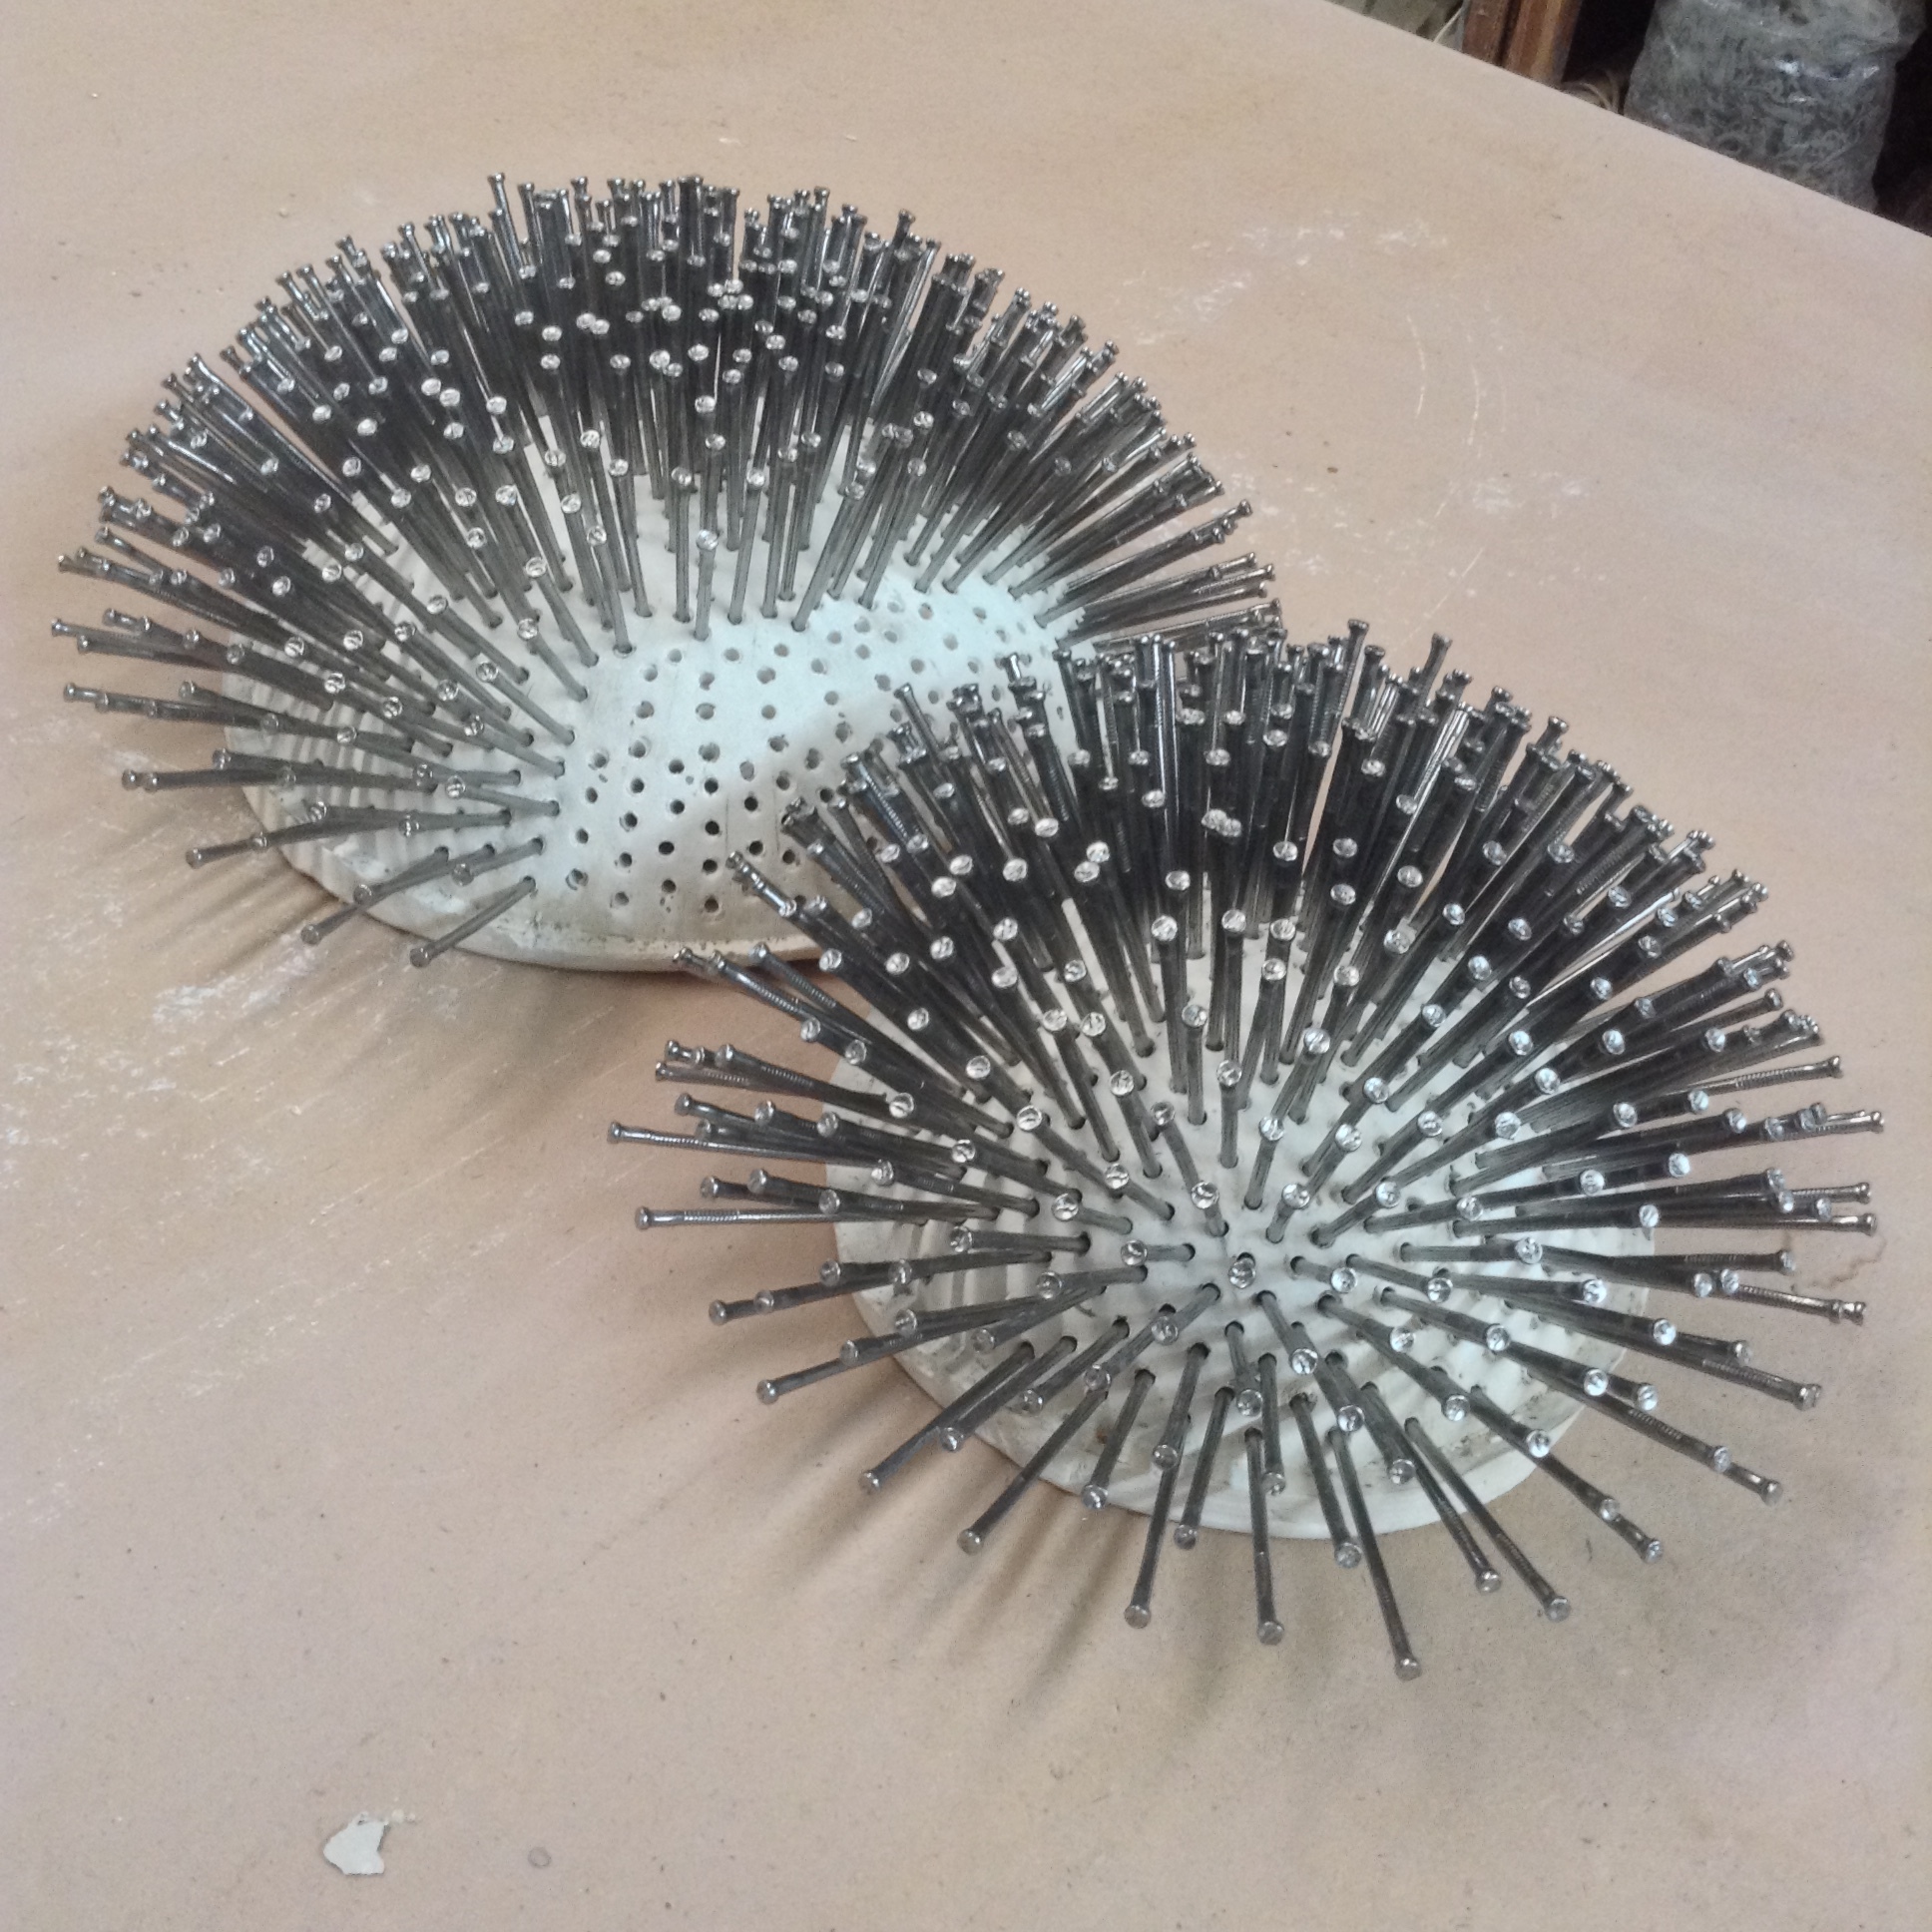
Plaster dome shown here with all its stirrers pulled out. Smaller dome in back, made in similar way, shown with all holes filled with nails. This would make a very complicated winding. Much more likely to use a few nails in a simpler pattern.
TECHNICAL COMMENTARY
- Array material: Plaster instead of wood
- The process of making the supports is almost complex enough to warrant its own blog entry. But the summary will do fine for this explanation: Plaster has many uses in the studio and I felt it was convenient to use as the support material for the rods.
- Wood is plentiful and easily worked, but I wanted not only flat panels but also curved ones. And besides, my clay shaping ability is greater than my wood shaping ability.
- Holes would typically drilled (and be more accurate!), but, instead I arranged the rod materials how I wanted them and poured plaster around them.
- Hard material supports rod materials in a regular pattern or array for weaving the strings. First pattern choices were circles in concentric pattern, and squares or rectangles. Next patterns were more detailed arrangement of points.
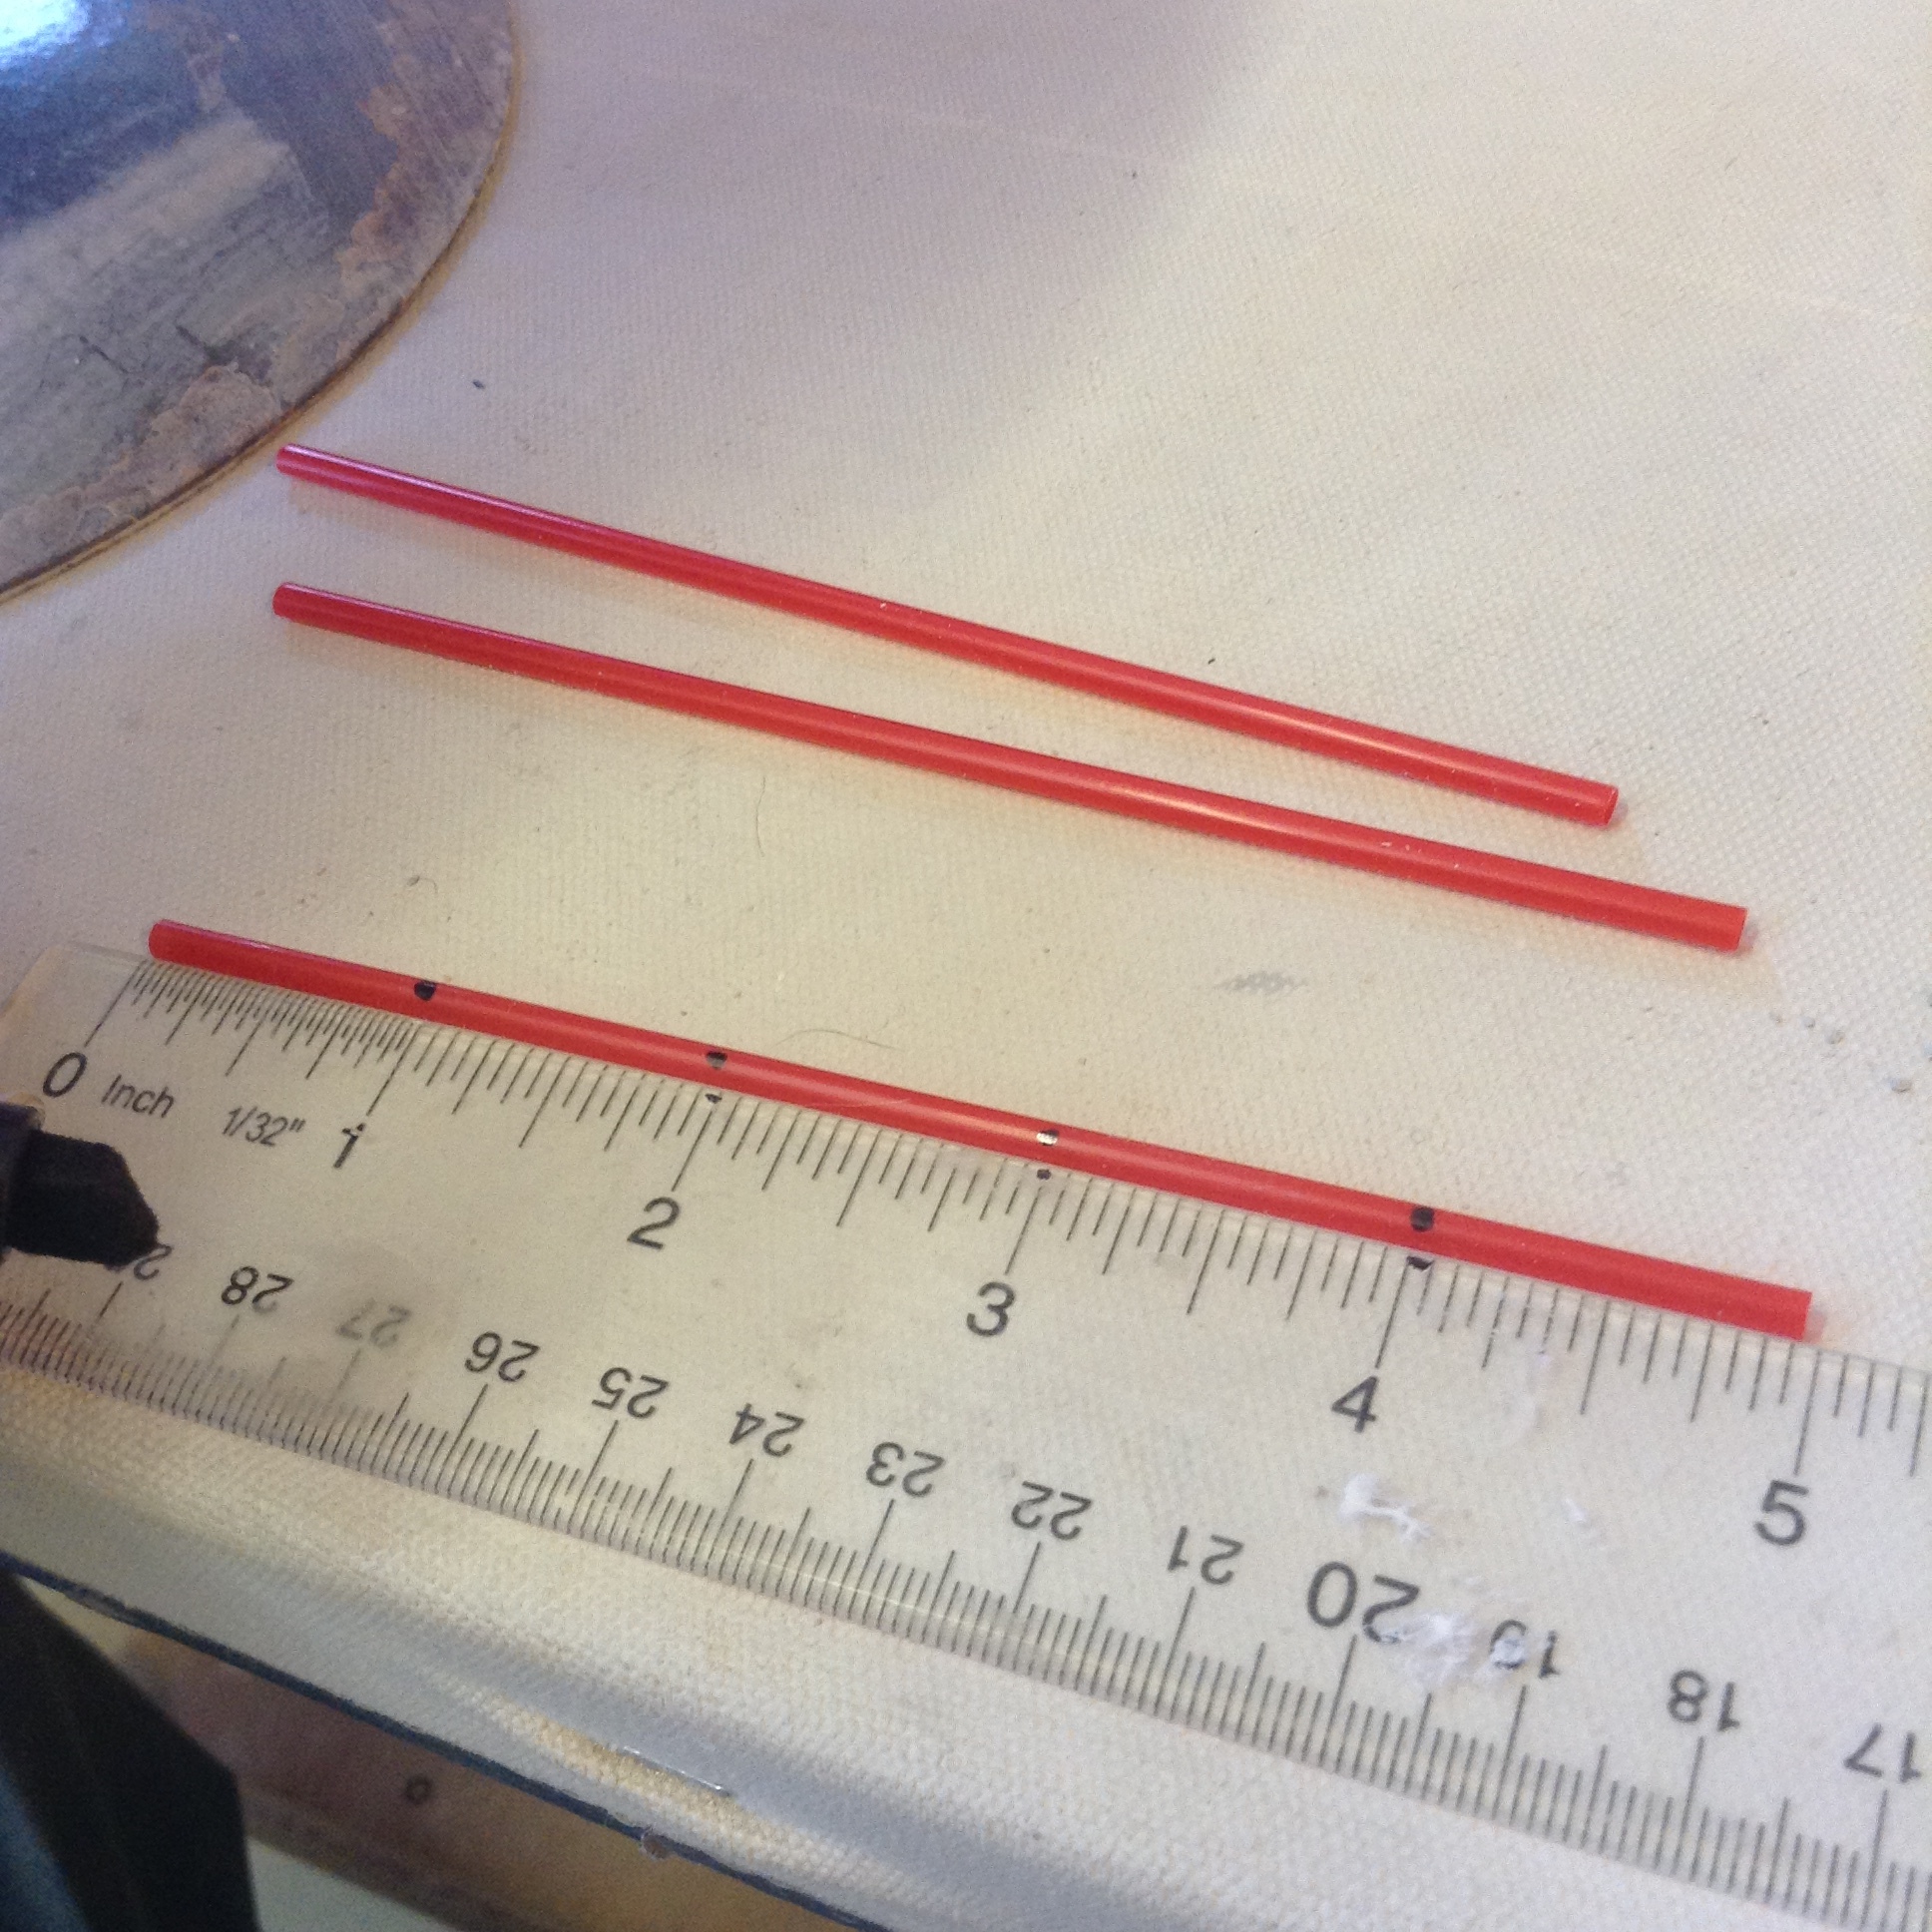
- Rod material: nails, wood skewers, coffee stirrers
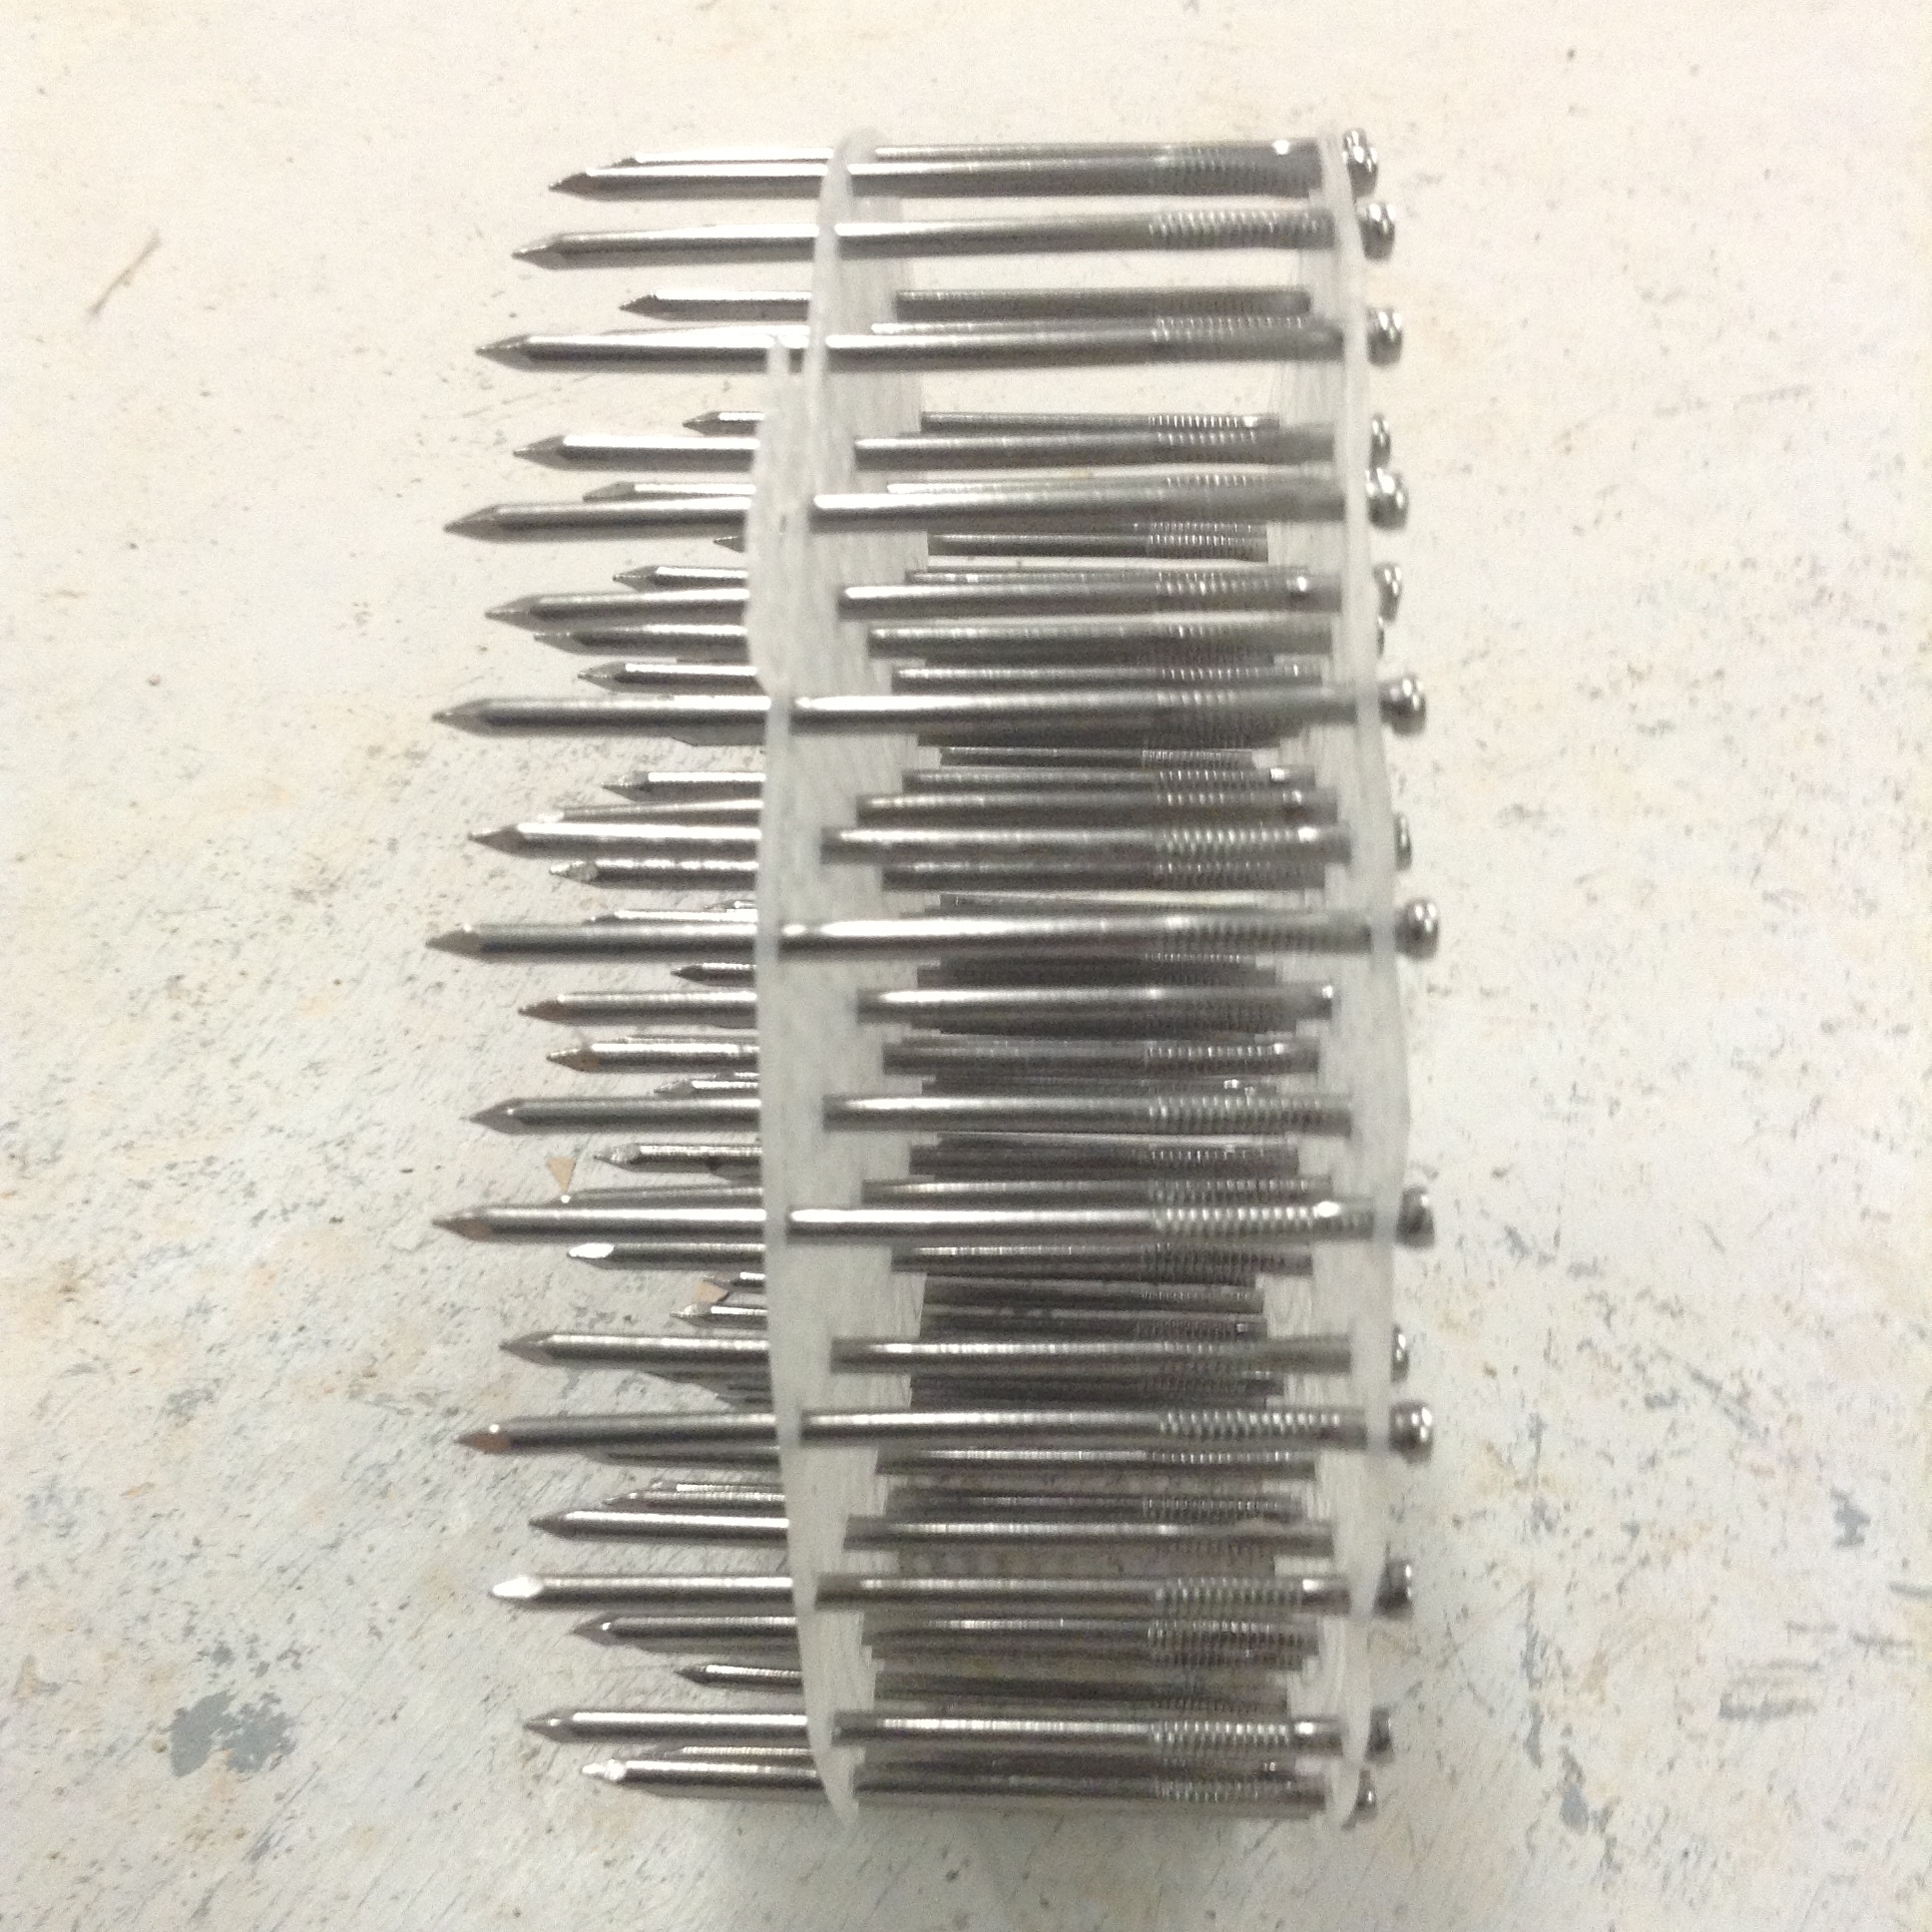
- Metal nails are useful because they're smooth enough to pull out of the looser string windings, and rigid enough to stay straight, if winding needs to be tight. Metal nails rust and give bits of red color to my clay, and can be difficult to remove if the clay dries on them. Nails come in standard and convenient lengths, but I'm not cutting them down at this time.
- Wood skewers are easily cut to different lengths and are somewhat consistent in diameter. They can be burned out in the kiln, but I haven't tried that yet. The bamboo type carry splinters which can make pullout difficult on the thinnner, multistrand strings.
- Coffee stirrers are very easily cut, give no pullout resistance, and don't add mineral color to the strings or to the slip. They are flexible at full length, so the winding might become distorted from its planned shape. They would burn out, technically speaking, but I'd rather not. Fortunately, they're easy to remove or trim off excess. This particular brand fits snugly around the nails, so occasionally I'll need the nail to be protected from the strings. I might use the nails always covered with stirrers.
- FUTURE rod materials include stiffened clay rods, thin kiln-stable wire, pasta.
- Wrapping material: String of various weights from twine (thick) to thread (very thin)
- Thread and string are useful when wrapped in close-spaced parallel lines, for presenting itself as a flat enough surface for slip trailing. Can easily be moved aside to trail slip through the surface rather than onto it. I haven't burned out any of the thinnest thread yet, but I'm guessing it leaves a tiny hole.
- Butcher's or Kitchen String was good as a space-filling strand, but didn't seem to attract the quick connection to the slip. Tiny amounts of slip actually just slid off the string. Future use will involve pre-watering the string to get a better adhesion from the slip. The string was easy to remove, if it did not get too embedded into the slip during distortion.
- Twine was interesting because its furry texture helped hold slip where it was deposited but also gave more texture after firing. That furriness made it a little harder to remove from the stabilized or dry piece, but presented no real problem. Burnout was complete enough with only a little easily removed ash.
- In similar situations on pottery shapes already made, flexible string can be used to lay out patterns around the curved surface of a piece of pottery. In this way, the string is only playing a textural role, since it cannot support itself.
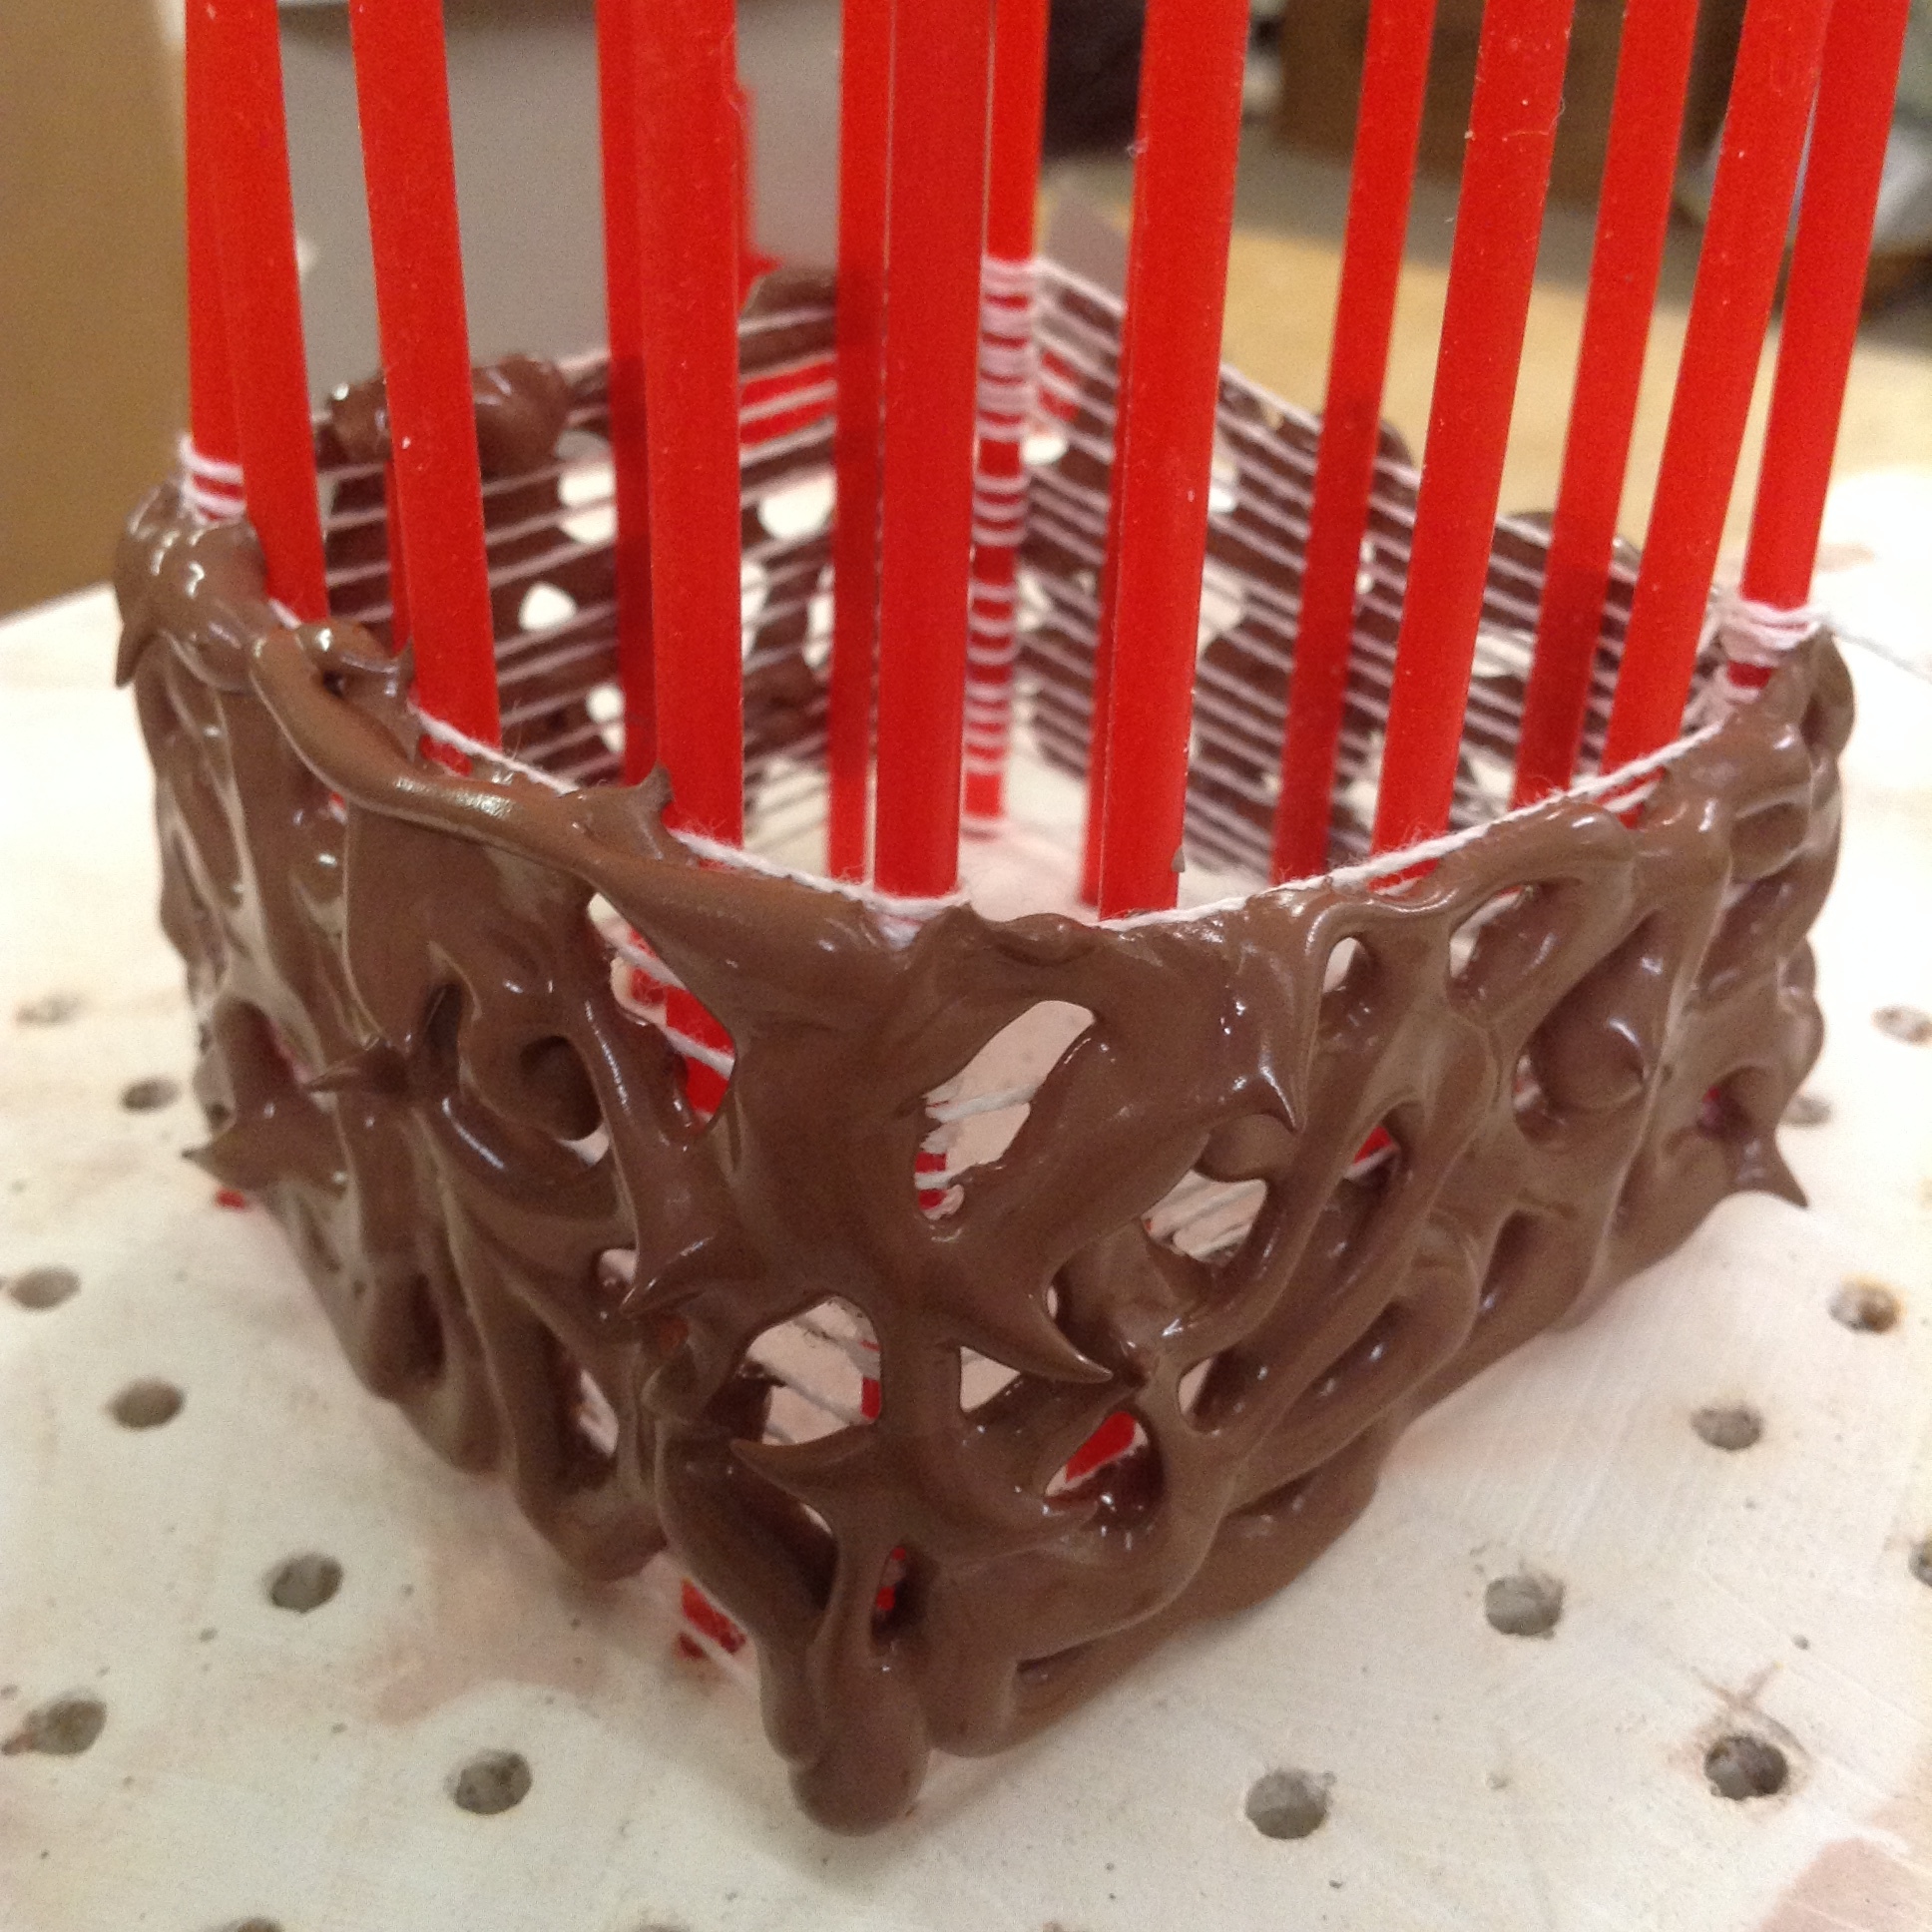
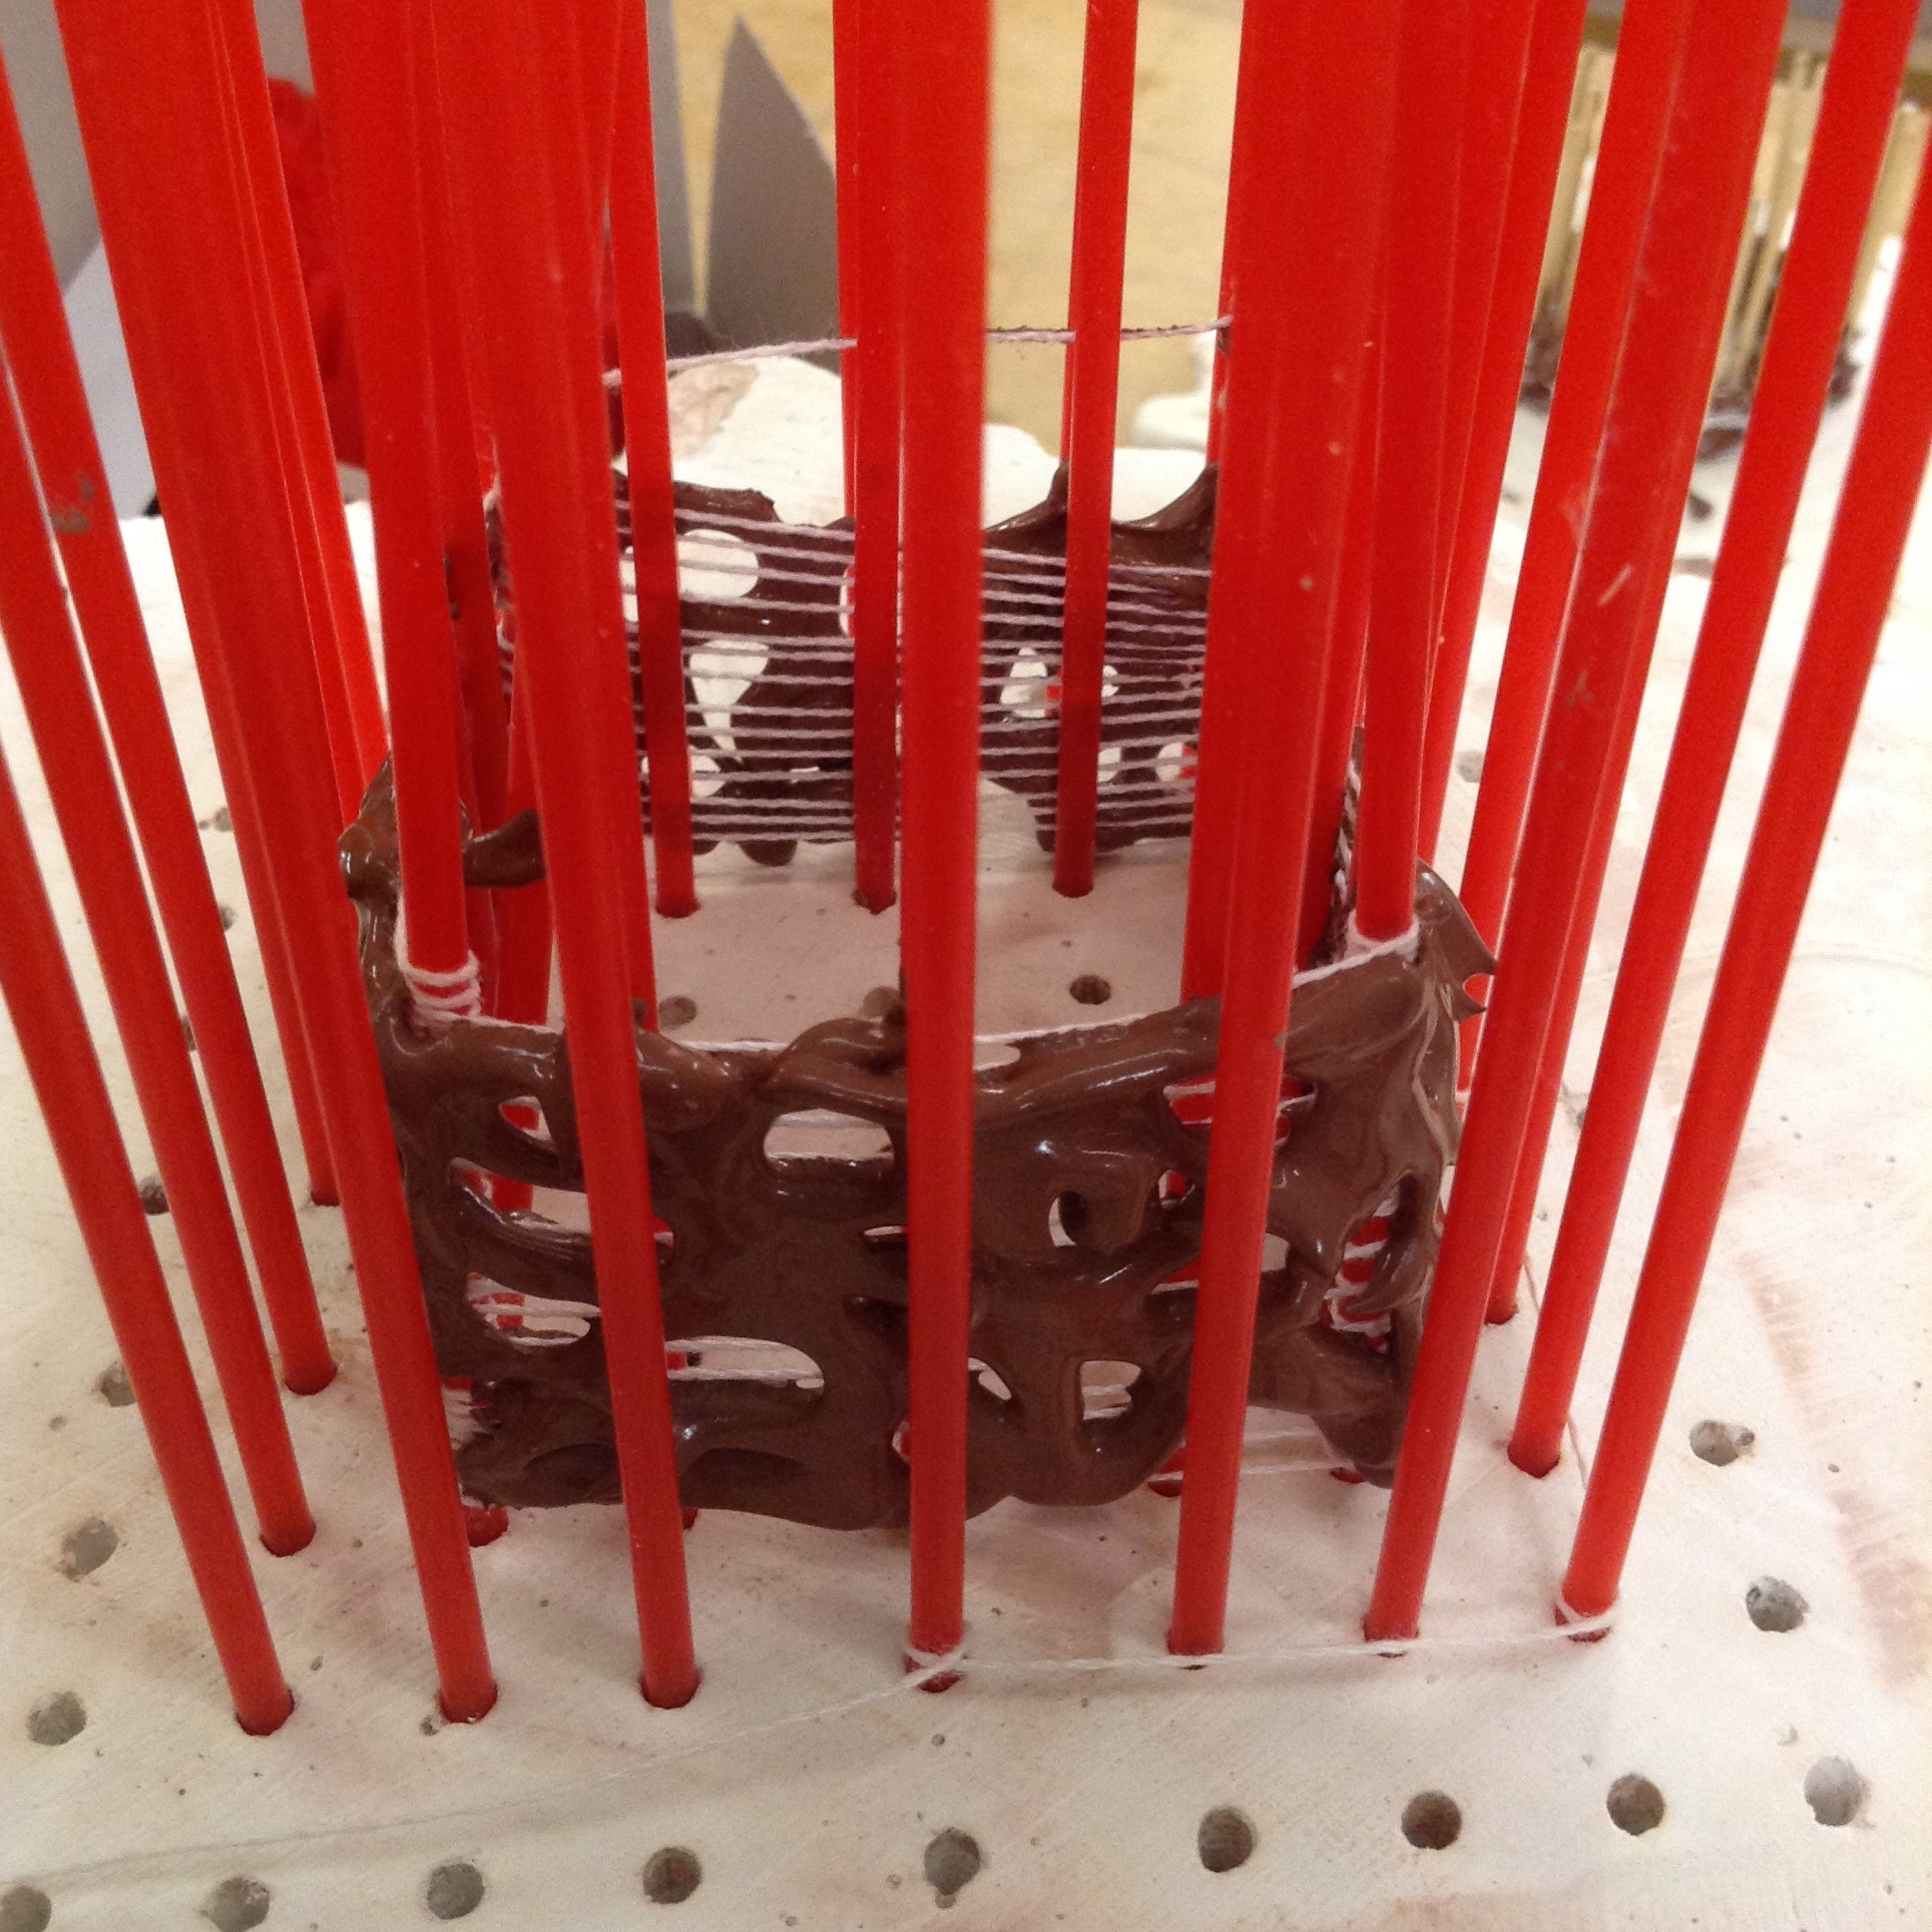
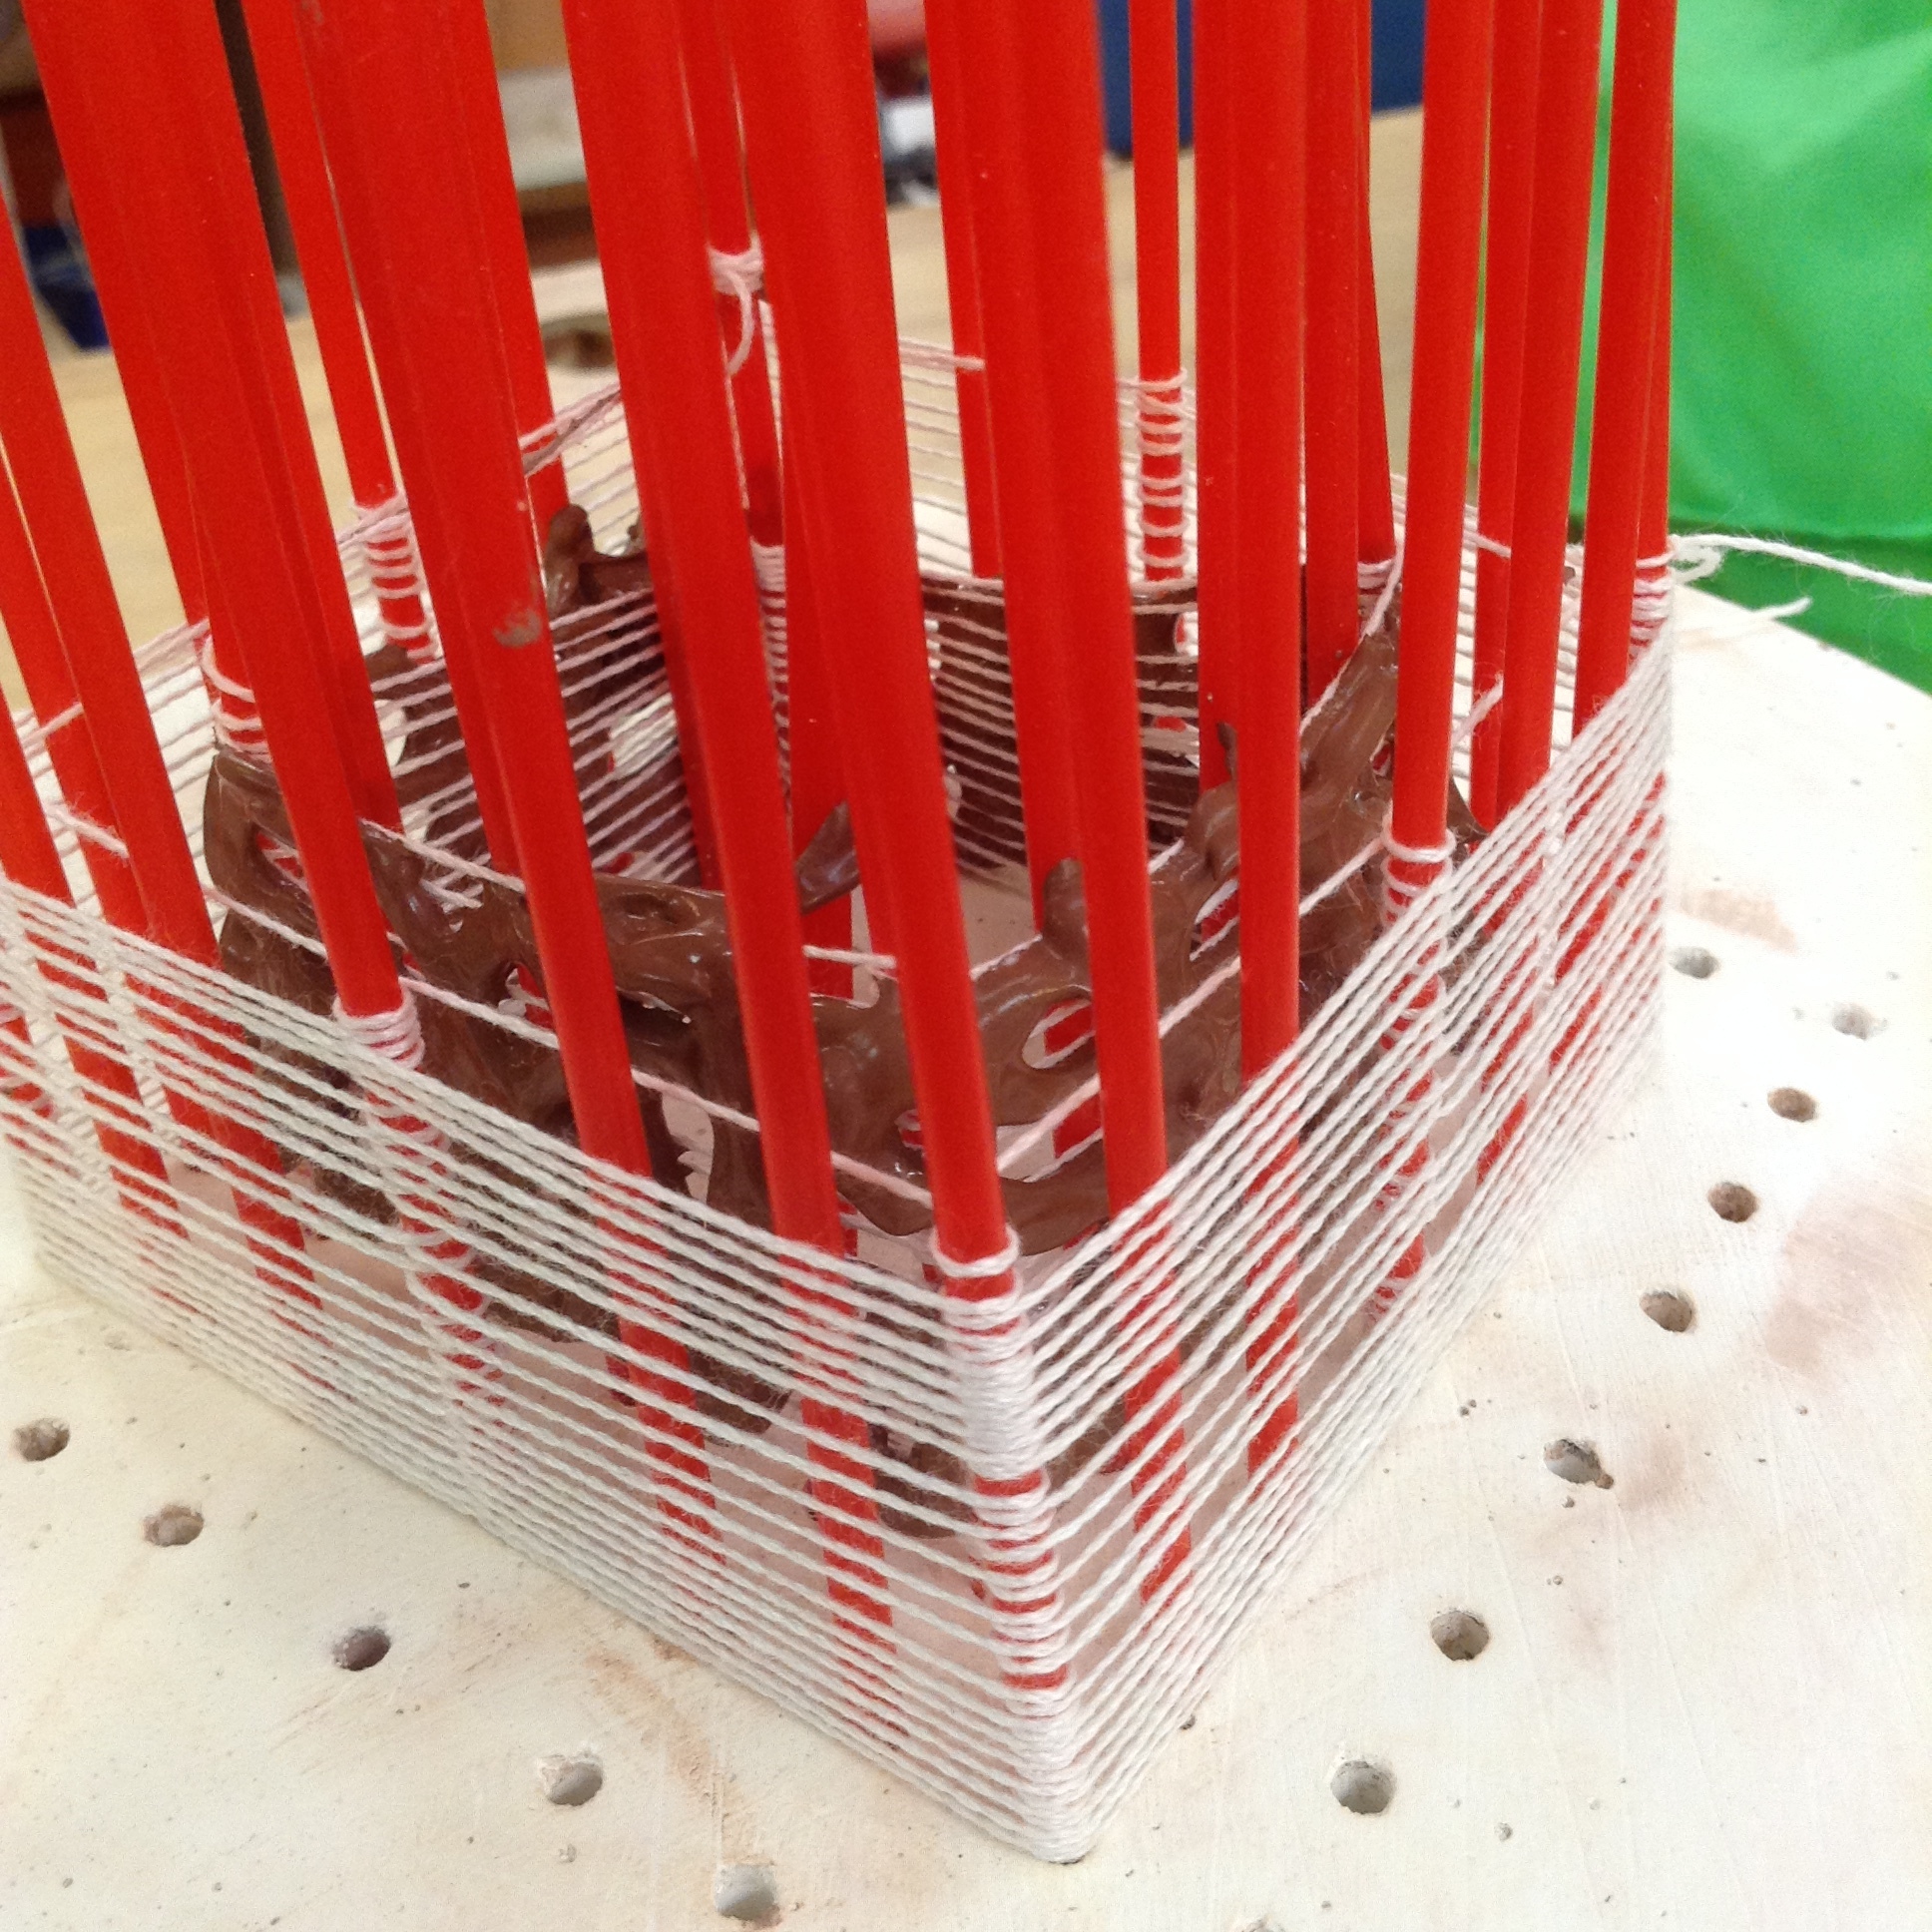
- Being generally absorbent, string woven onto itself or wound around rigid rods is structurally-sound enough to hold up under a quick dip in slip, and thus to absorb enough water to leave a coating of slip on all surfaces of the string. After the slip dries, the whole thing can be put into the kiln to permanently set the ceramic and burn out the string at the same time.
- The resulting pieces have capture the string's texture when woven or wrapped around nails, but show how that detailed original form gets distorted into more organic shapes. The early part can be mostly reproducible, but the later part definitely resists repeatability.
- Clay materials: SLIP
- The clay liquid is called slip and comes as a slippery, flowing liquid. This thin nature can be adjusted to a thicker consistency with a few drops of vinegar. I use thinner and thicker recipes in the sculptures shown here.
- When thin, the slip can flow into absorbent things and, when thicker, create a coating on anything that's dipped into it.
- For these sculptures, a variety of string materials can be used to make unique forms, or a greater number of production forms.
PROCESS SUMMARY
The process for setting up the winding for dipping or trailing isn't too involved, but I admit there are lots of details. But since I enjoy them, I have to make sure I am aware which ones make a difference in the final object and which are simply "recreational" detailing!
- Pick pattern of rods among all the empty holes.
- Choose rod material.
- Unwind strand element and begin winding around rods.
- Choose clay slip color and begin applying slip into or onto the strand mesh.
- Alternate adding more windings, then adding more slip, until form is finished.
- Allow clay to settle from fresh, or even longer to actually dry somewhat.
- Remove any rod materials that must not go into kiln; remove any remaining rod materials that are convenient for distorting.
- Remove any strand elements that must not go into kiln; remove any remaining strand materials as is convenient.
- Allow sculpture to dry and finish the piece by baking it in kiln.
ASSORTED PROCESS PHOTOS
I admitted earlier that I love the problem-solving process so much, I might even like the tool-building more than making the finished pieces. Here are pictures of various aspects of the development so far.
Pictures relating to the round grid plaster form. The plastic mesh is standard embroidery mesh found in craft stores.


PIctures here show the smaller dome form I made first. Lines around the surface guide me to stab with cut up coffee stirrers to make the holes.


PIctures of a larger dome form, with more elaborate holes pattern. The plaster filling was shot as video because it was just too pretty to pass up. The video is in the section above.

Here the coffee stirrers are used as verticals. And since I got tired of wrapping the thread around each and every vertical support, experimented here with wrapping only around key points in the geometry, and simply passing over the rest. Seems to have worked. Note that in the last photos, the slip was still wet when the supports were lifted out of the holes in the base and tilted to distort the mesh. I find this very exciting.

Here are shots of the rigid string mesh that, unfortuntely or fortunately, resulted in lots of little mysterious cracked clay pieces. The solution may be to add even more paper pulp to the slip mix, or to use flexible rather than rigid verticals. Or some other thing entirely. But I'm certain that come combination of factors will allow me to wind a string form and dip it and have it survive the firing.

SO, HOW DOES IT WORK?
SURFACE TENSION A key factor of this process is the fact that close spacing of taut parallel strings functions as a solid flat object with respect to the thickened clay slip. The apparatus that holds and releases the string is comprised of metal or wood rods for winding, and plaster for ordering the array of rods. The apparatus itself is reusable, and is made from a handful of easily-obtainable materials.
This modular system allows the rigid supports, and thus the string, to be used first in a deterministic way while the supporting parts are highly constrained, but allows for secondary structural changes to those same unsupported parts while the clay is still wet. Additionally, the supports can be made from combustible materials, so that removal is not always necessary.
At fairly low amounts of distortion of the string form, the strings contribute surface texture to the clay. Major distortions of the strings drastically change, and support, the overall form of the piece. Strings can also be an embedded, combustible core to dipped forms. For needed support, strings can be woven around other objects such as nails and wooden rods or coffee stirrers. This system of winding allows any non-combustible rigid supports, like nails, to be removed while the clay is at any stage. Nails and metal rods, for example, are useful because they are strong, but cannot typically be burned off in the kiln. The wooden supports, however, present no special problem in terms of firing procedure, and can be burned out, leaving behind clay structure.
Regardless of support type, the strings form clay indirectly as a source of texture, or directly by being coated by slip and burned away in the kiln. The flexible string is wound around any supports, which in turn provide a rigid enough structure for liquid to be contained. As the clay slip thickens and dries, it becomes more and more self-supporting. At different stages after the clay is self-supporting, the external supports of string and non-string elements can be removed. The form is either allowed to dry without changes, or can be further changed by manipulating the laminate created by the alternating, deformable layers of string and slip..
Artistically, the strings can be wound in many patterns that will be transferred to the clay. I've barely begun the search in this particular direction.
THAT'S THE SHOW FOLKS
Now I go back to work. Refining the patterns in the strings and the liquidity of the slip so that larger forms can be made. I can't wait!