I'm building up sculptural ceramic pieces using two recipes for vinegar-thickened slip, trailed or spread between layers of paper. I noticed that these thicker recipes can be supported by paper, distorted pretty significantly, and fired almost immediately.
I'm sure there are interesting characteristic forms that emerge from this process that differ slightly from typical casting of liquid clay, dipping and burnout methods, or moist-clay handbuilding. From the conceptual side of things, there are definite similarities to 3D printing, and enough flexibility to keep the spur-of-the-moment manual techniques making contributions, as well.
I wanted to find out several things:
- How tall can the slip trailed stack get before it collapses? (about 7 inches at least, didn't collapse, ran out of paper, got nervous)
- Can the thicker slip hold its shape even when quite fresh? (yes, with minimal help from paper)
- Can I make windows in the walls? (yes, both for the slip trails and the spread walls)
- What range of slip wetness can I still squeeze through the bottle? (thinnest was fresh unchanged slip that was almost too runny; thickest was a loose pudding consistency)
- Will my white casting slip and red casting slip fuse together when I want them to? (yes)
My ultimate goal is to make forms that can be used functionally. I am happy with these quirky early results that I got. Many of the materials will be familiar to ceramics folk, except perhaps for the techniques of putting them together. The tallest or most interesting results are shown first, then followed by more detailed explanations and process photos of those and other trials.
Thinner slip trailed from a squeeze bottle was built up with napkin tissue paper as separating and stabilizing layers. High-tech , eh? And the cheap kind, at that! Thicker slip was spread between layers of newspaper and manipulated into different shapes. Both methods can be combined in the same piece.
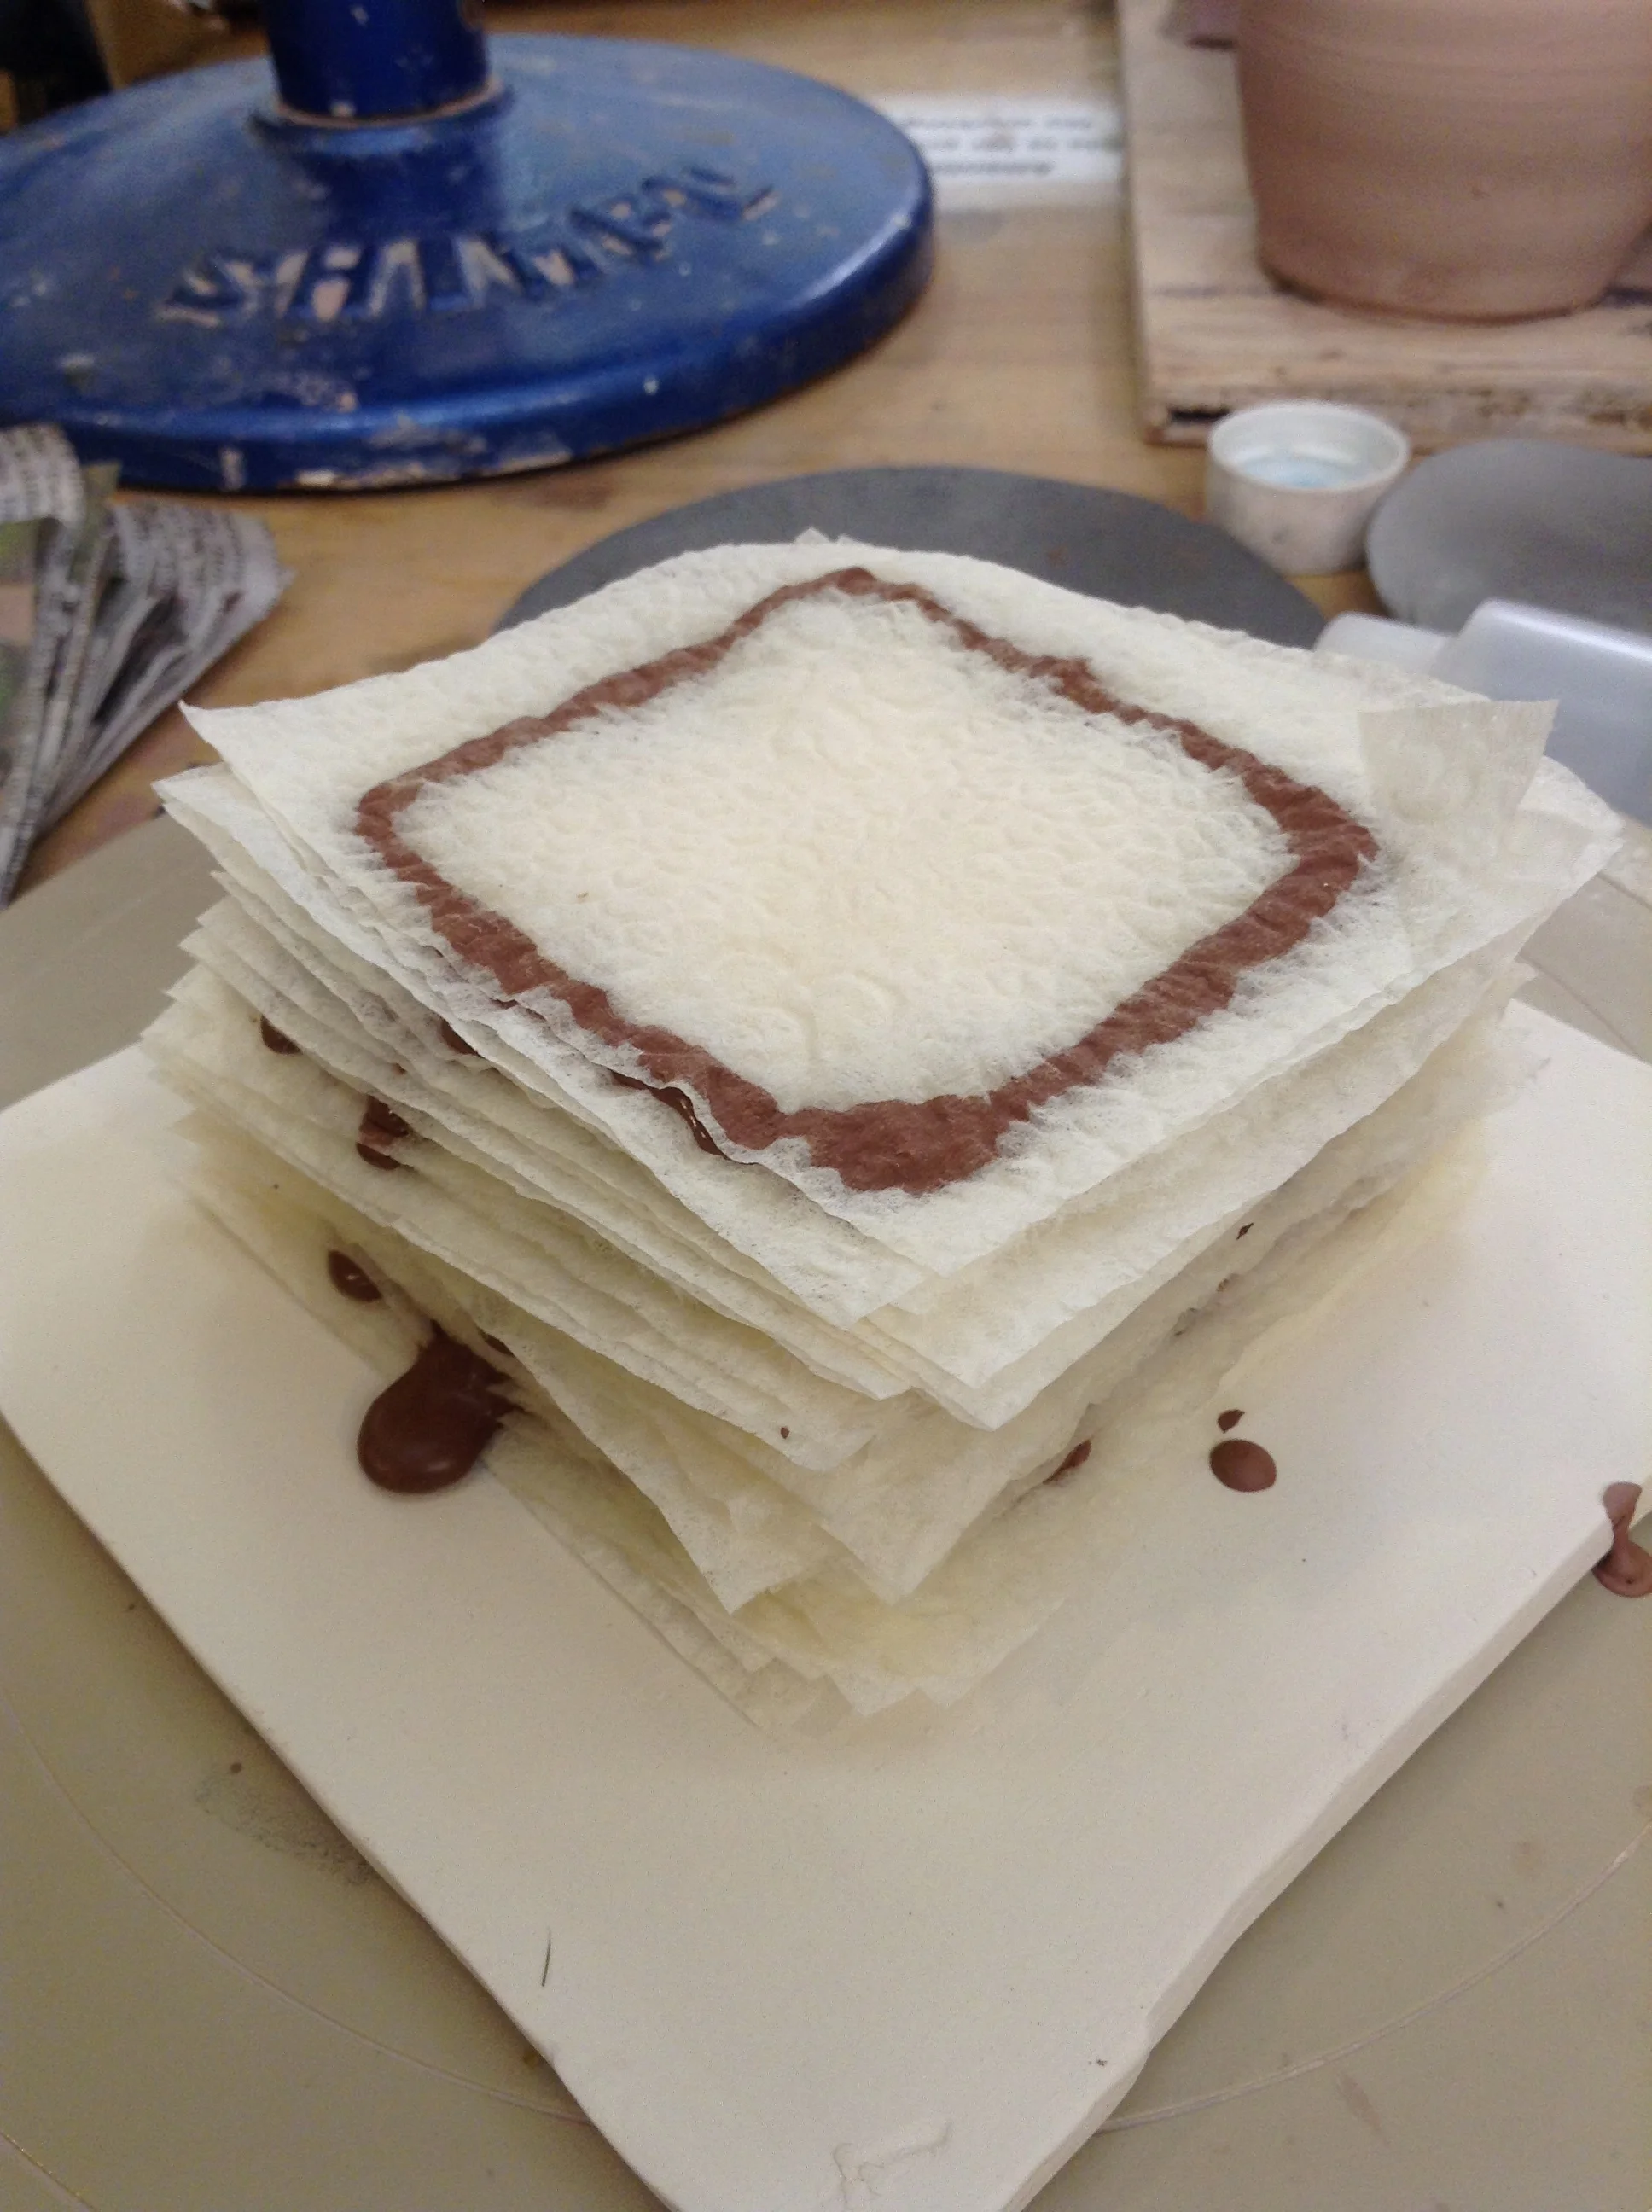
This tallest stack with trailed slip (shown below) is about 7 inches tall (give or take). The open space at the top toward the left was a deliberate break in the layers. I was getting toward the end of my supply of cut up napkin squares, and frankly, wanted some excitement. Instead of making a continuous slip line all the way around the square shape, I stopped drawing in the same inch for several layers. The next full path was supported by the napkin layer, so it formed a "bridge" of clay slip. Happily, it is strong enough even after the paper burns away.
Looking closely at the layers individually from the side, I see that the layers from the bottom to the top have different qualities of line. Some lines are more blobby and flattened, and some are thinner and rounder. This is because my squeeze bottle had to be refilled a few times, but I hadn't worked out exactly how much vinegar to add, or how best to add it. Some mixes were runny, some were too thick, and sometimes the bottle simply wasn't mixed thoroughly. But the sculpture never fell over!
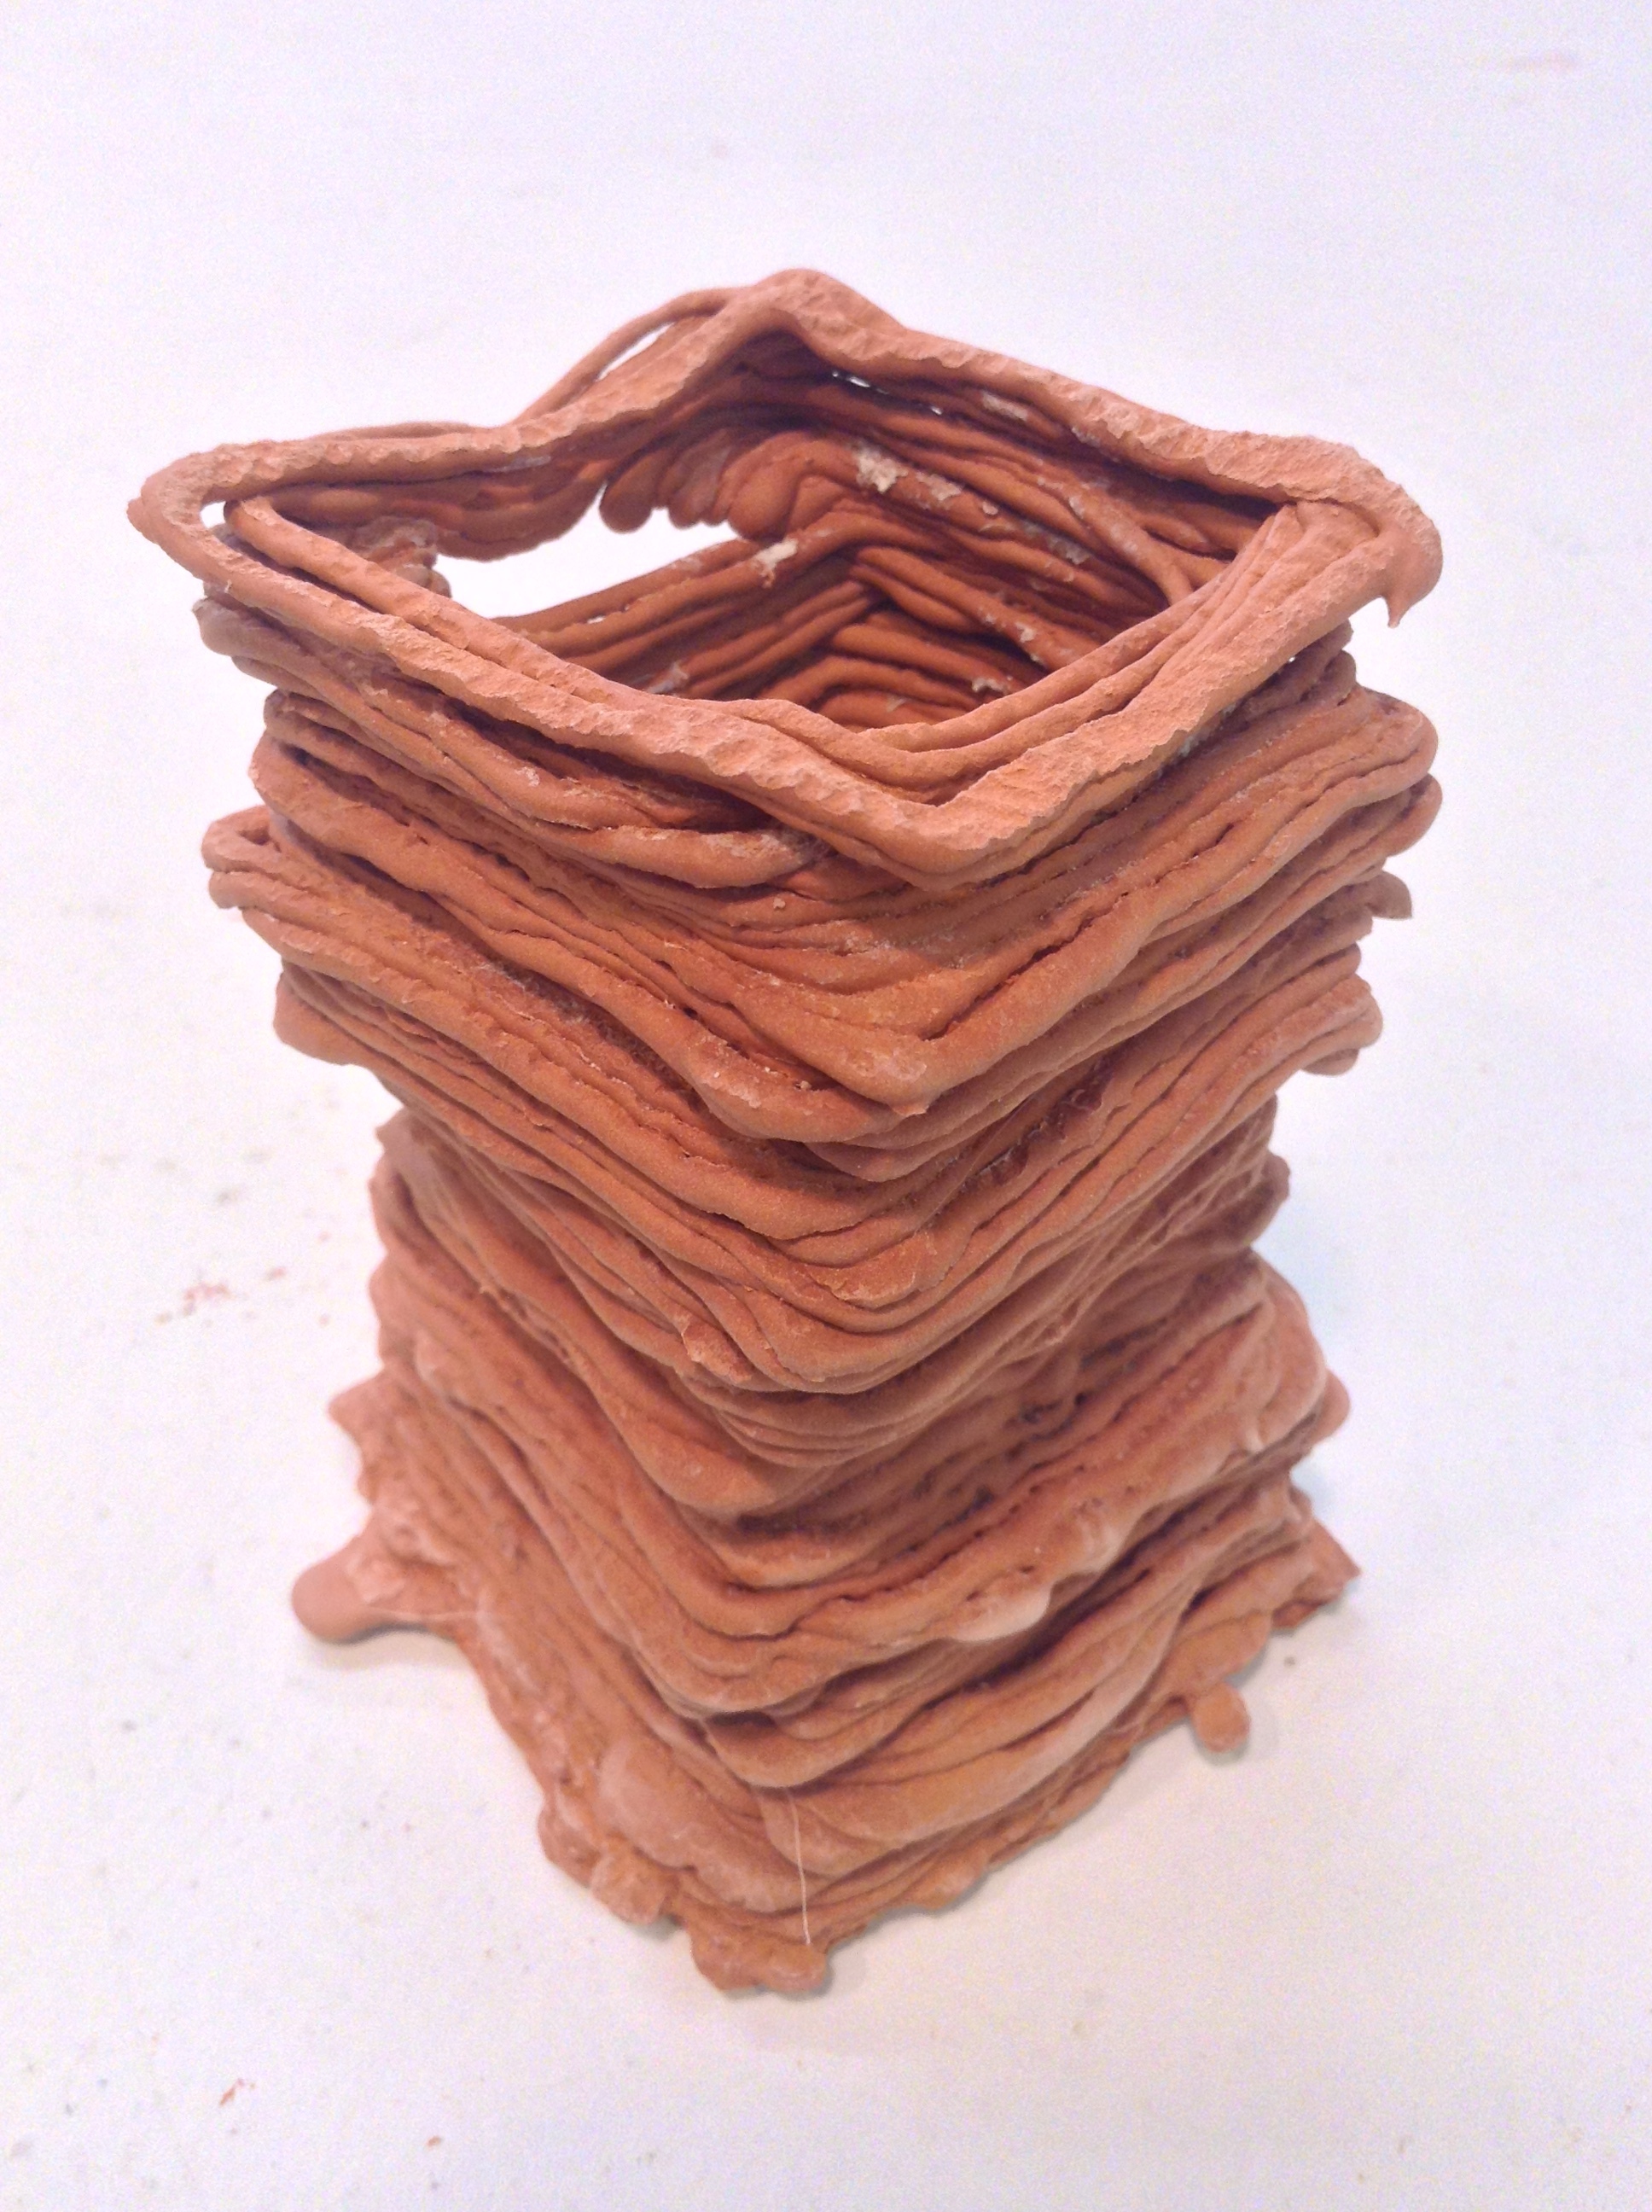
A tall stack of slip-trailed layers. Low-fire clay, cone 05 oxidation, unglazed.

Stacked form just out of the kiln with white ash residue from burned-off paper napkin layers. This was brushed off easily.
Thixotropic clay paste (in white) formed immediately into a simple shape seems promising. Shown here are all the surface details that were captured by the texture and wrinkling of the paper carrier. This texture could easily be removed once the clay is more stable, because there isn't anything new about the clay slip's properties other than the fact that it's more gelatinous when quite wet.
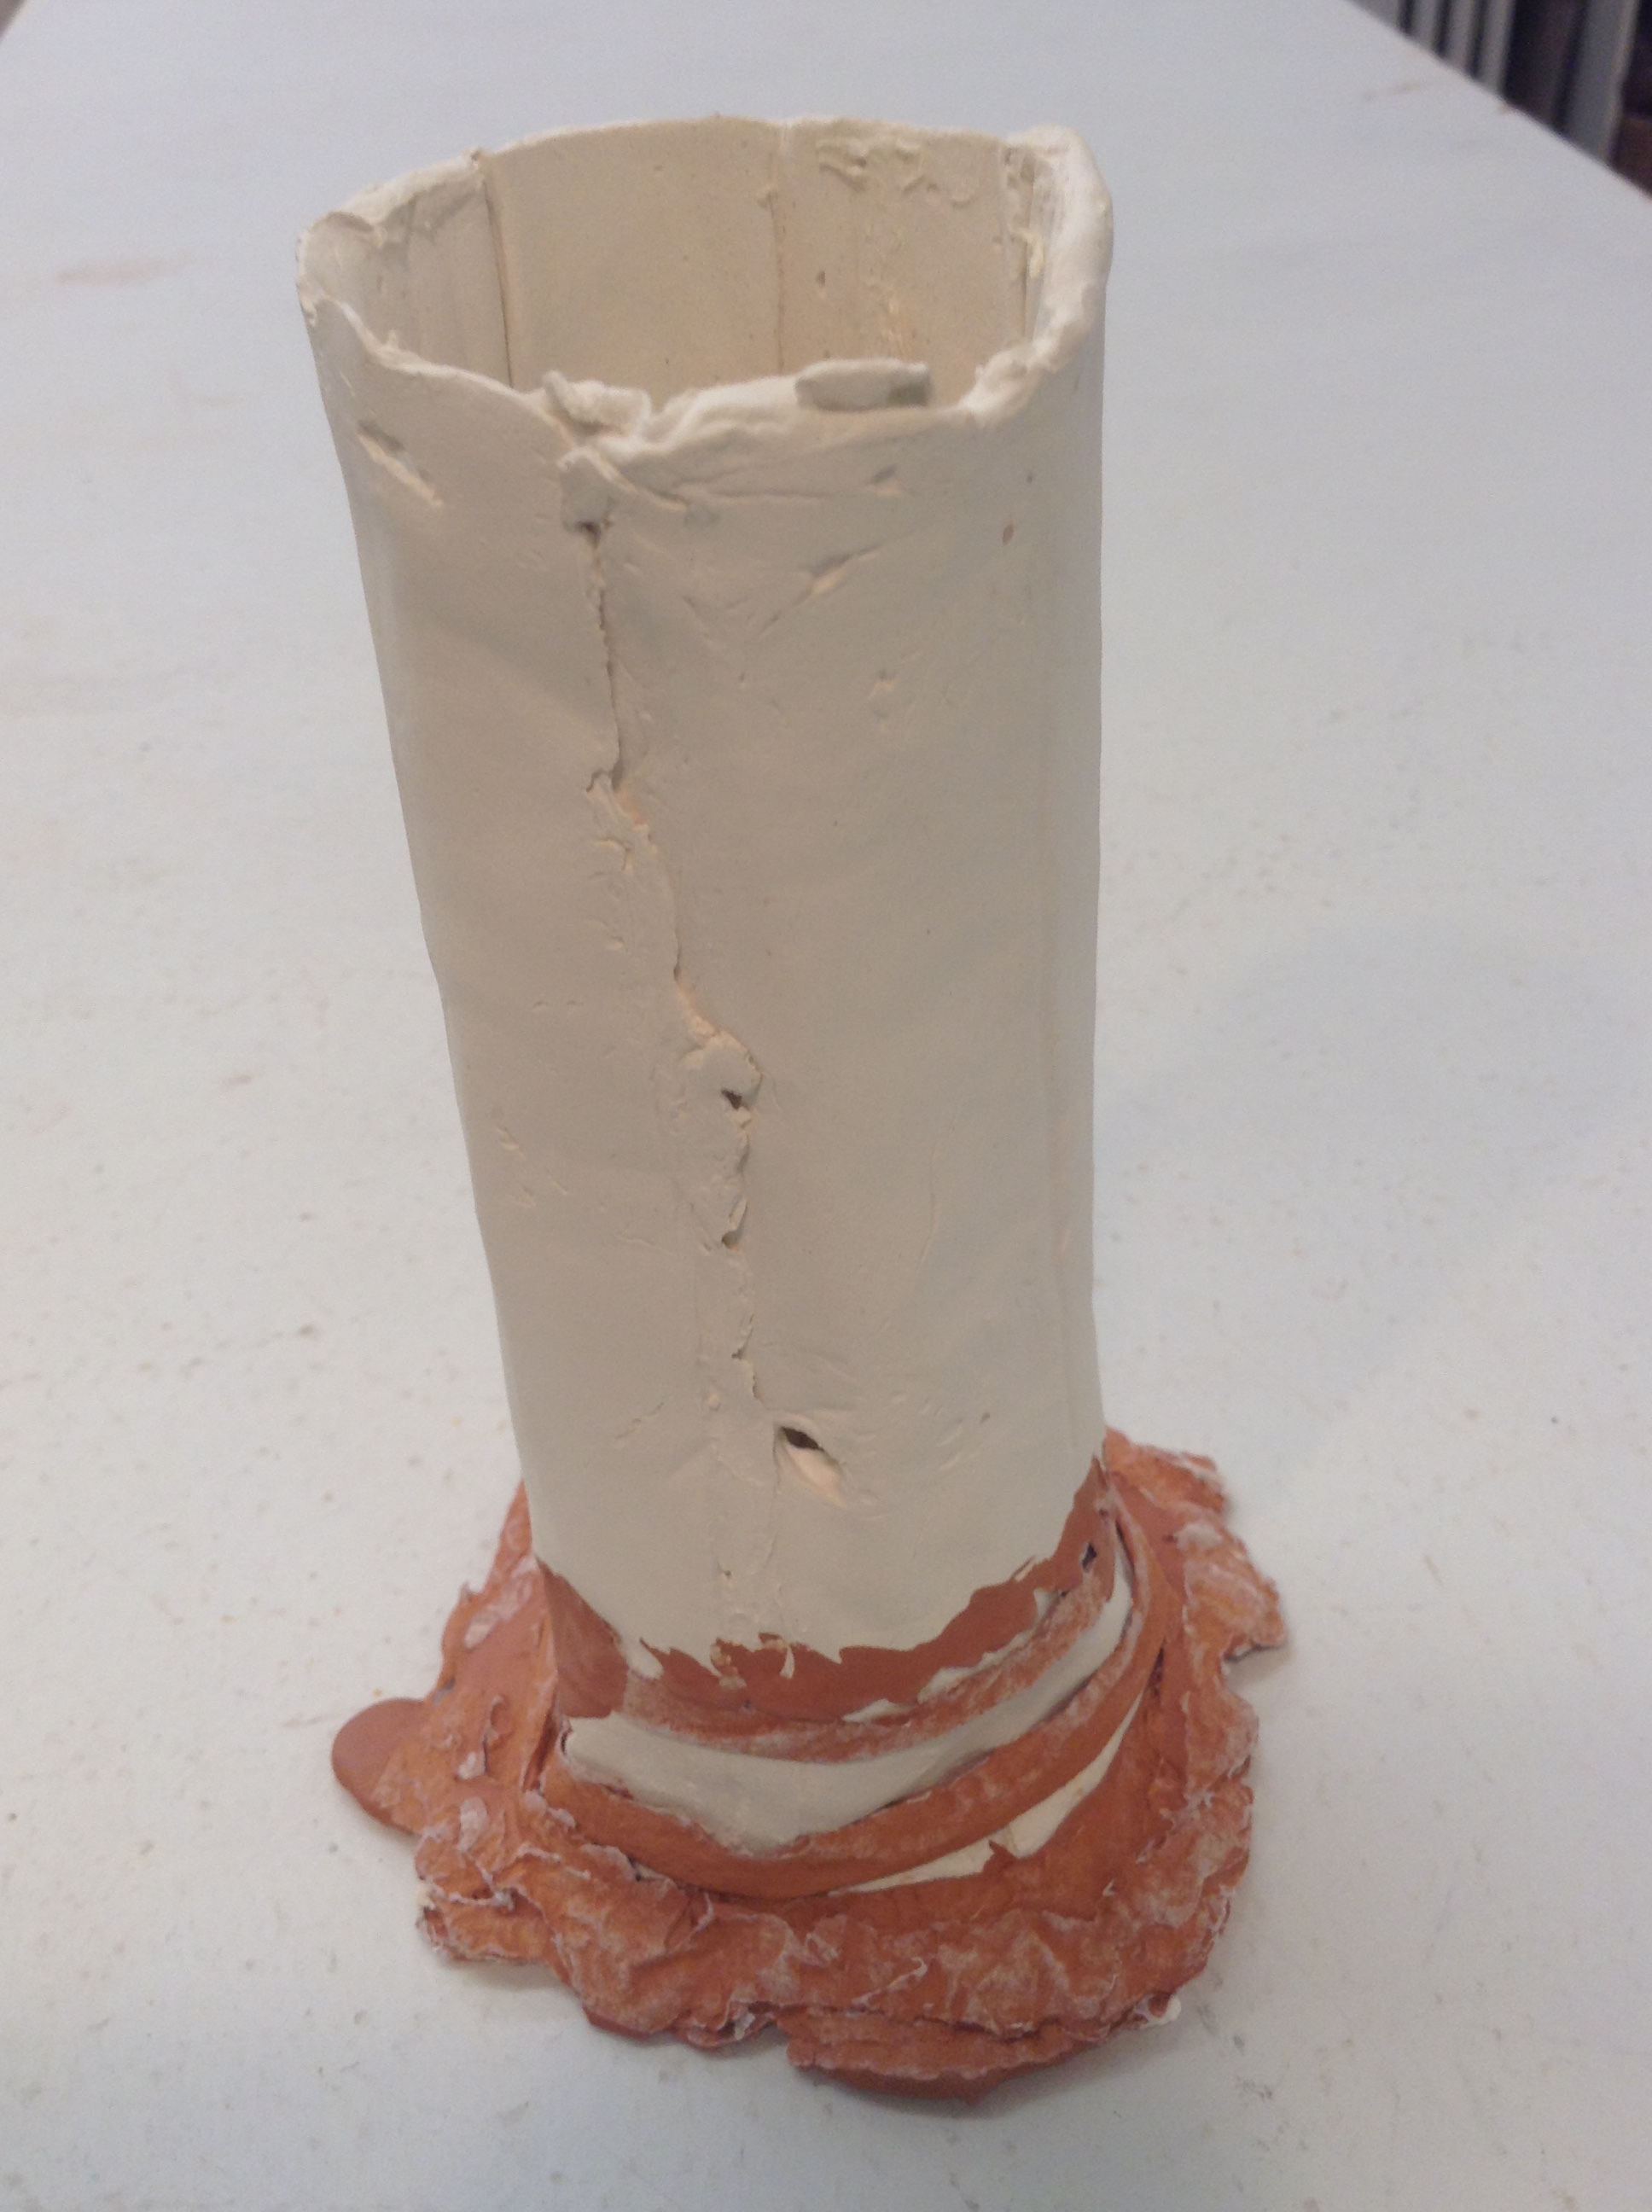
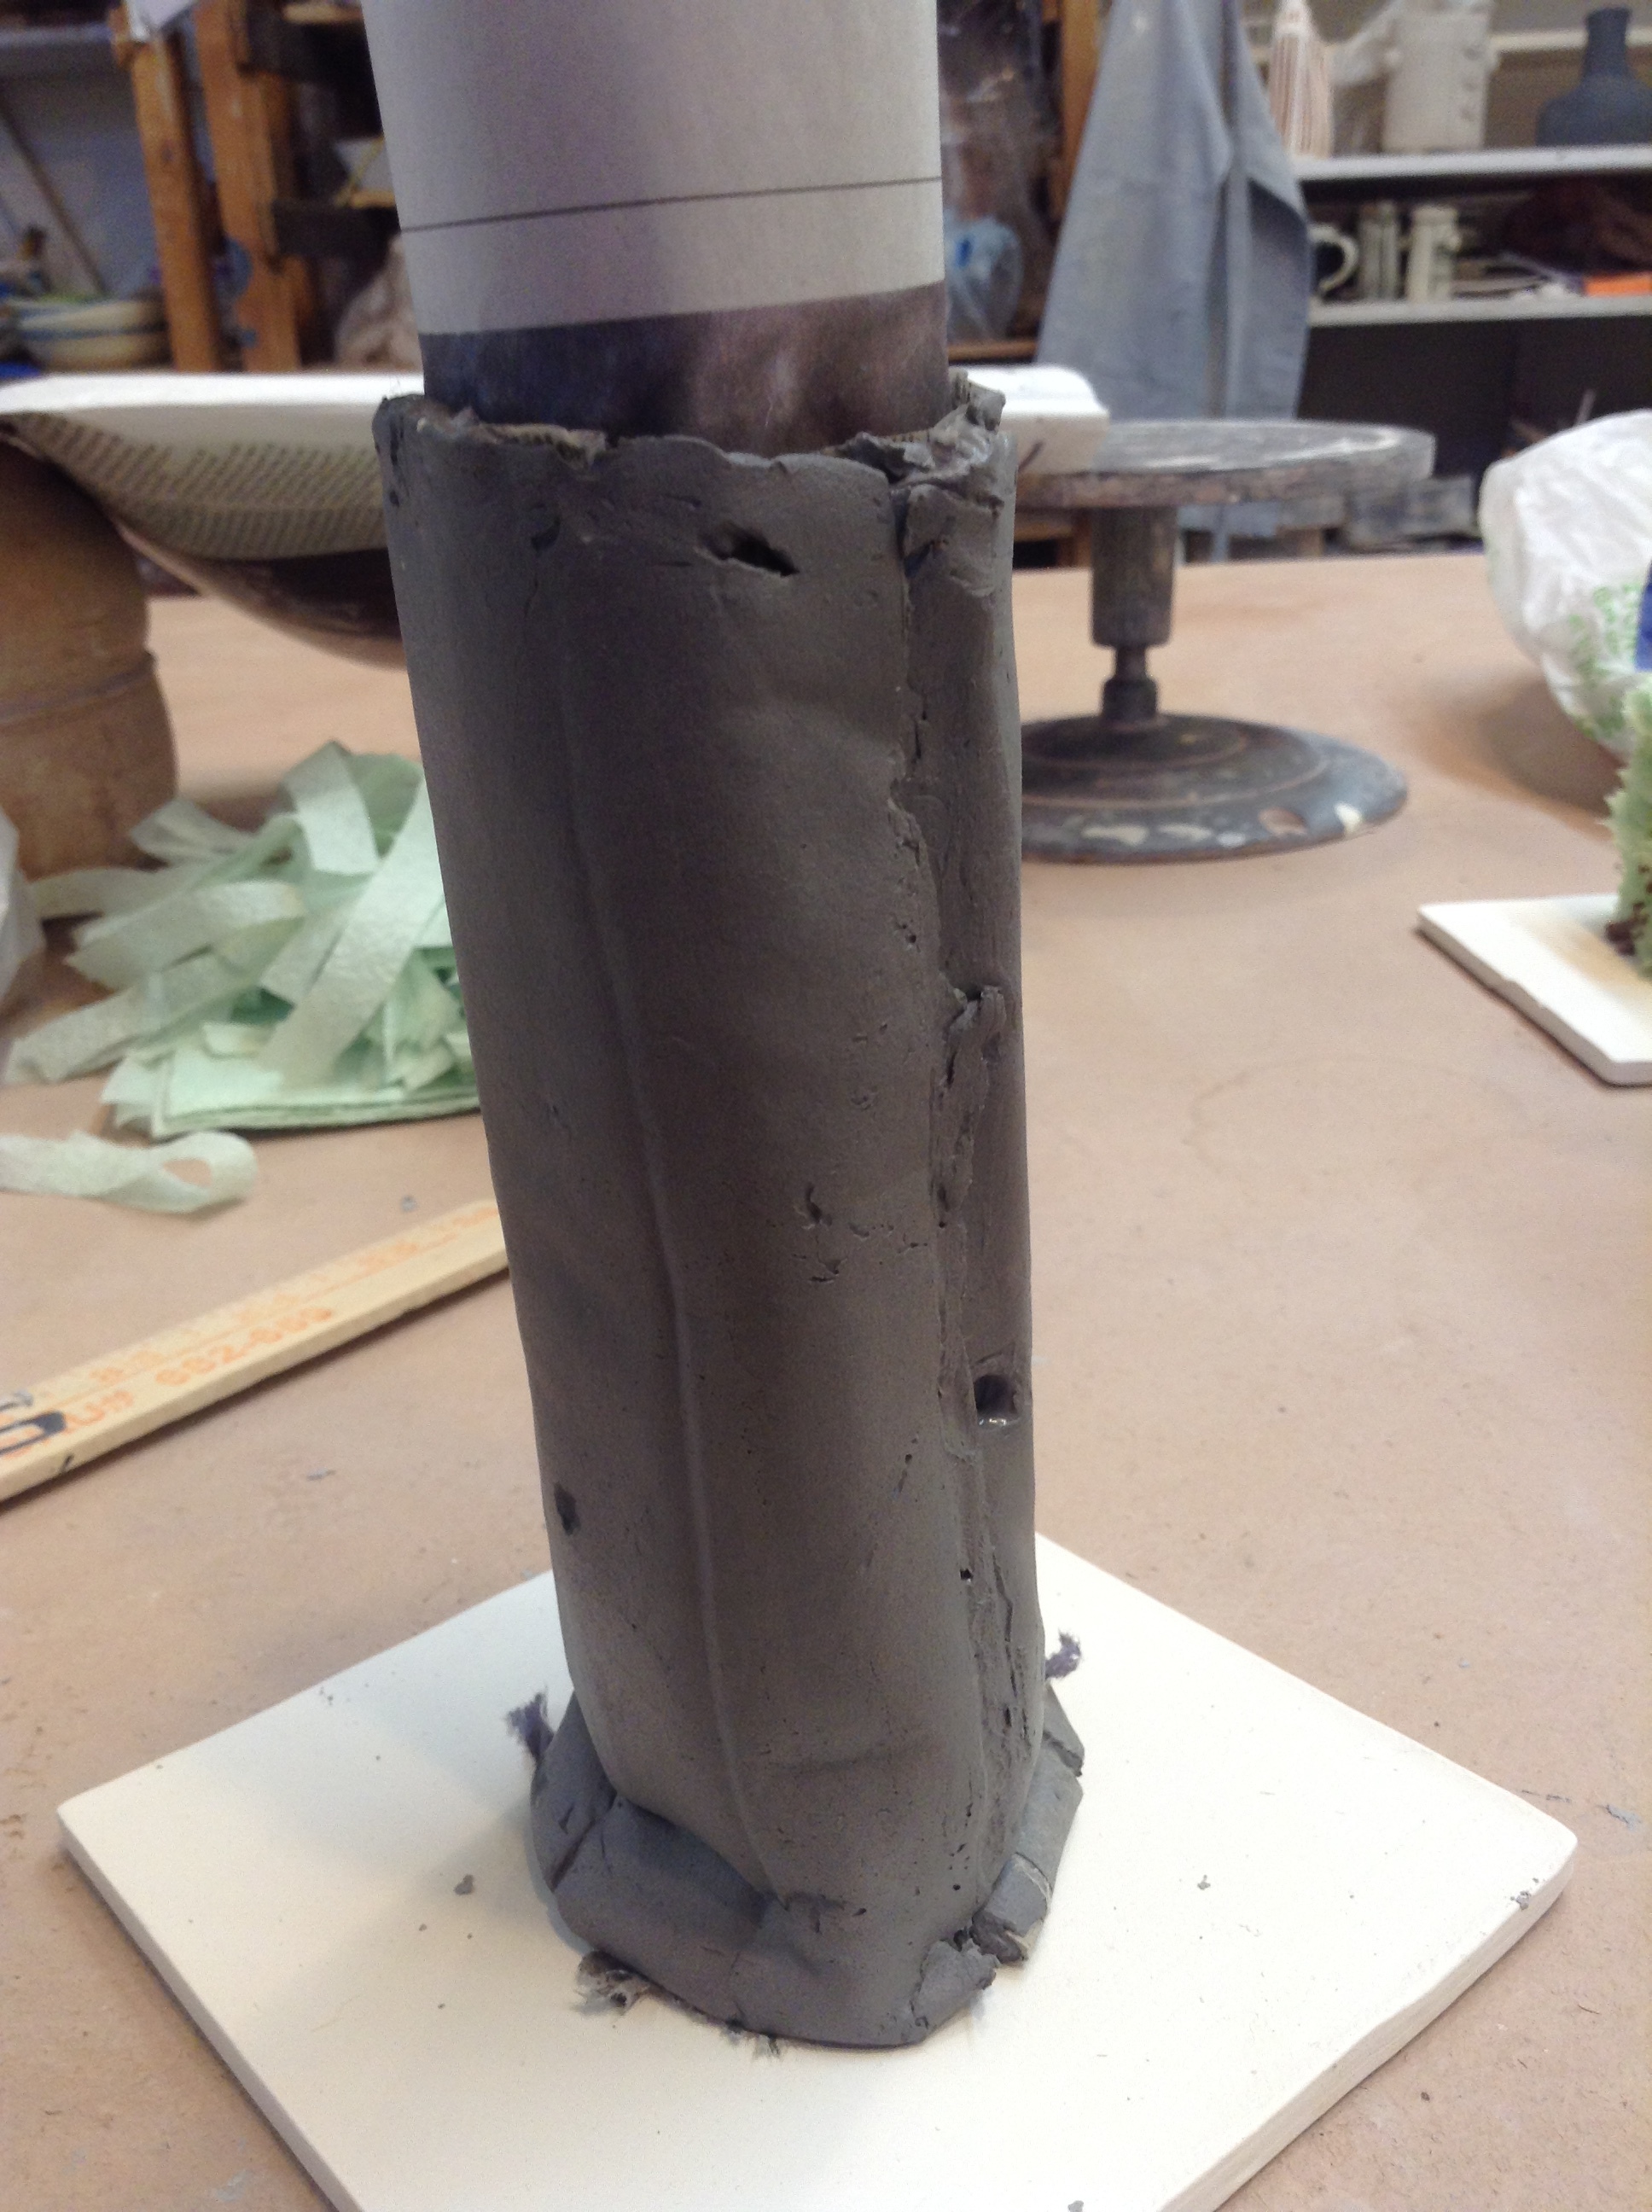
Single tube form made with two commercial casting slips (white and red) that have vinegar added for greater stiffness. The white clay got more vinegar for frosting-like consistency, and the red clay got only a little vinegar, just enough to slightly thicken it from its runny version as is comes as normal casting slip.
Interior of white tube form showing newspaper ash still clinging to walls, and structural seams and wrinkles created when it was a wet newspaper-and-slip sandwich, wrapped while still fresh around a cardboard tube (not shown, removed before firing.)
WHAT'S THE BUILDING PROCESS?
Trailed slip lines (shown here, anywhere in this article where the clay is red) were separated by cut-up napkin paper. The paper is very absorbent, a bit stronger when wet than toilet paper is, and easy to cut in stacks with a paper cutter. The clay paste walls (white clay) is spread between layers of newspaper.
In each case, absorbent paper is used as a support. I chose newspaper and napkin paper because they're both easily obtained and folded, and allows these liquid or soft clay mixtures to be manipulated in ways that would typically require more elaborate molds. Usefully, the paper confers minimal texture while preventing many extraneous marks, shrinks as the clay shrinks during drying, and burns off in the kiln.
I'm using two types of paper for two different functions.
- Newspaper: The newspaper is being used for the core structure and main support layer for the frosting-like (thixotropic!) white clay recipe. The resulting white tube shape in this essay is fairly bland, or at least, not the generic shape I really want. I did prove that the newspaper peels off the clay even when the clay is still quite wet. This enabled me to move the laminate around while completely wet, and yet peel a strip off the white clay square and expose it anywhere I needed to join two surfaces together. The wetness of the slip joins perfectly to itself without the need for the typical scoring and slipping process.
- Napkin tissue: The napkin tissue paper is being used as the stabilizing layers for the more organic-style bottle-squeezed layers. The color slip is a darker brown as a contrasting color to the white clay. While I did not explore my guess that the layers do not have to be all horizontal, I can see by the undulating forms I did get that more extreme curves to the slip trailing would most likely hold together as well as flat layers do.
PROCESS DETAIL: Slip Trailing
Here is a series of photographs with details about the slip trailing process using paper napkins as structure. I was inspired by the idea I was taught by my grandfather as a young shaver: put a bit of toilet paper on a bleeding nick to help stop the flow. I wondered all these years later whether it would help the clay set up faster. I think it does!

Casting the solid bottom of the clay form. Slip amount is perhaps 2mm or 1/16 inch? This is about to be covered by another square of napkin.

A few layers of square shaped pathway stacked on top of the solid base. Here the clay paths are supported by thin napkin strips because I wanted to find out if an open center would be easier to manage or would dry faster. Maybe, but the solid napkin square used as a layer is much faster. I'm particularly fond of the dimpled texture of the bottom layer that happens when the napkin embossing wrinkles up. (I can't prevent it anyway!)
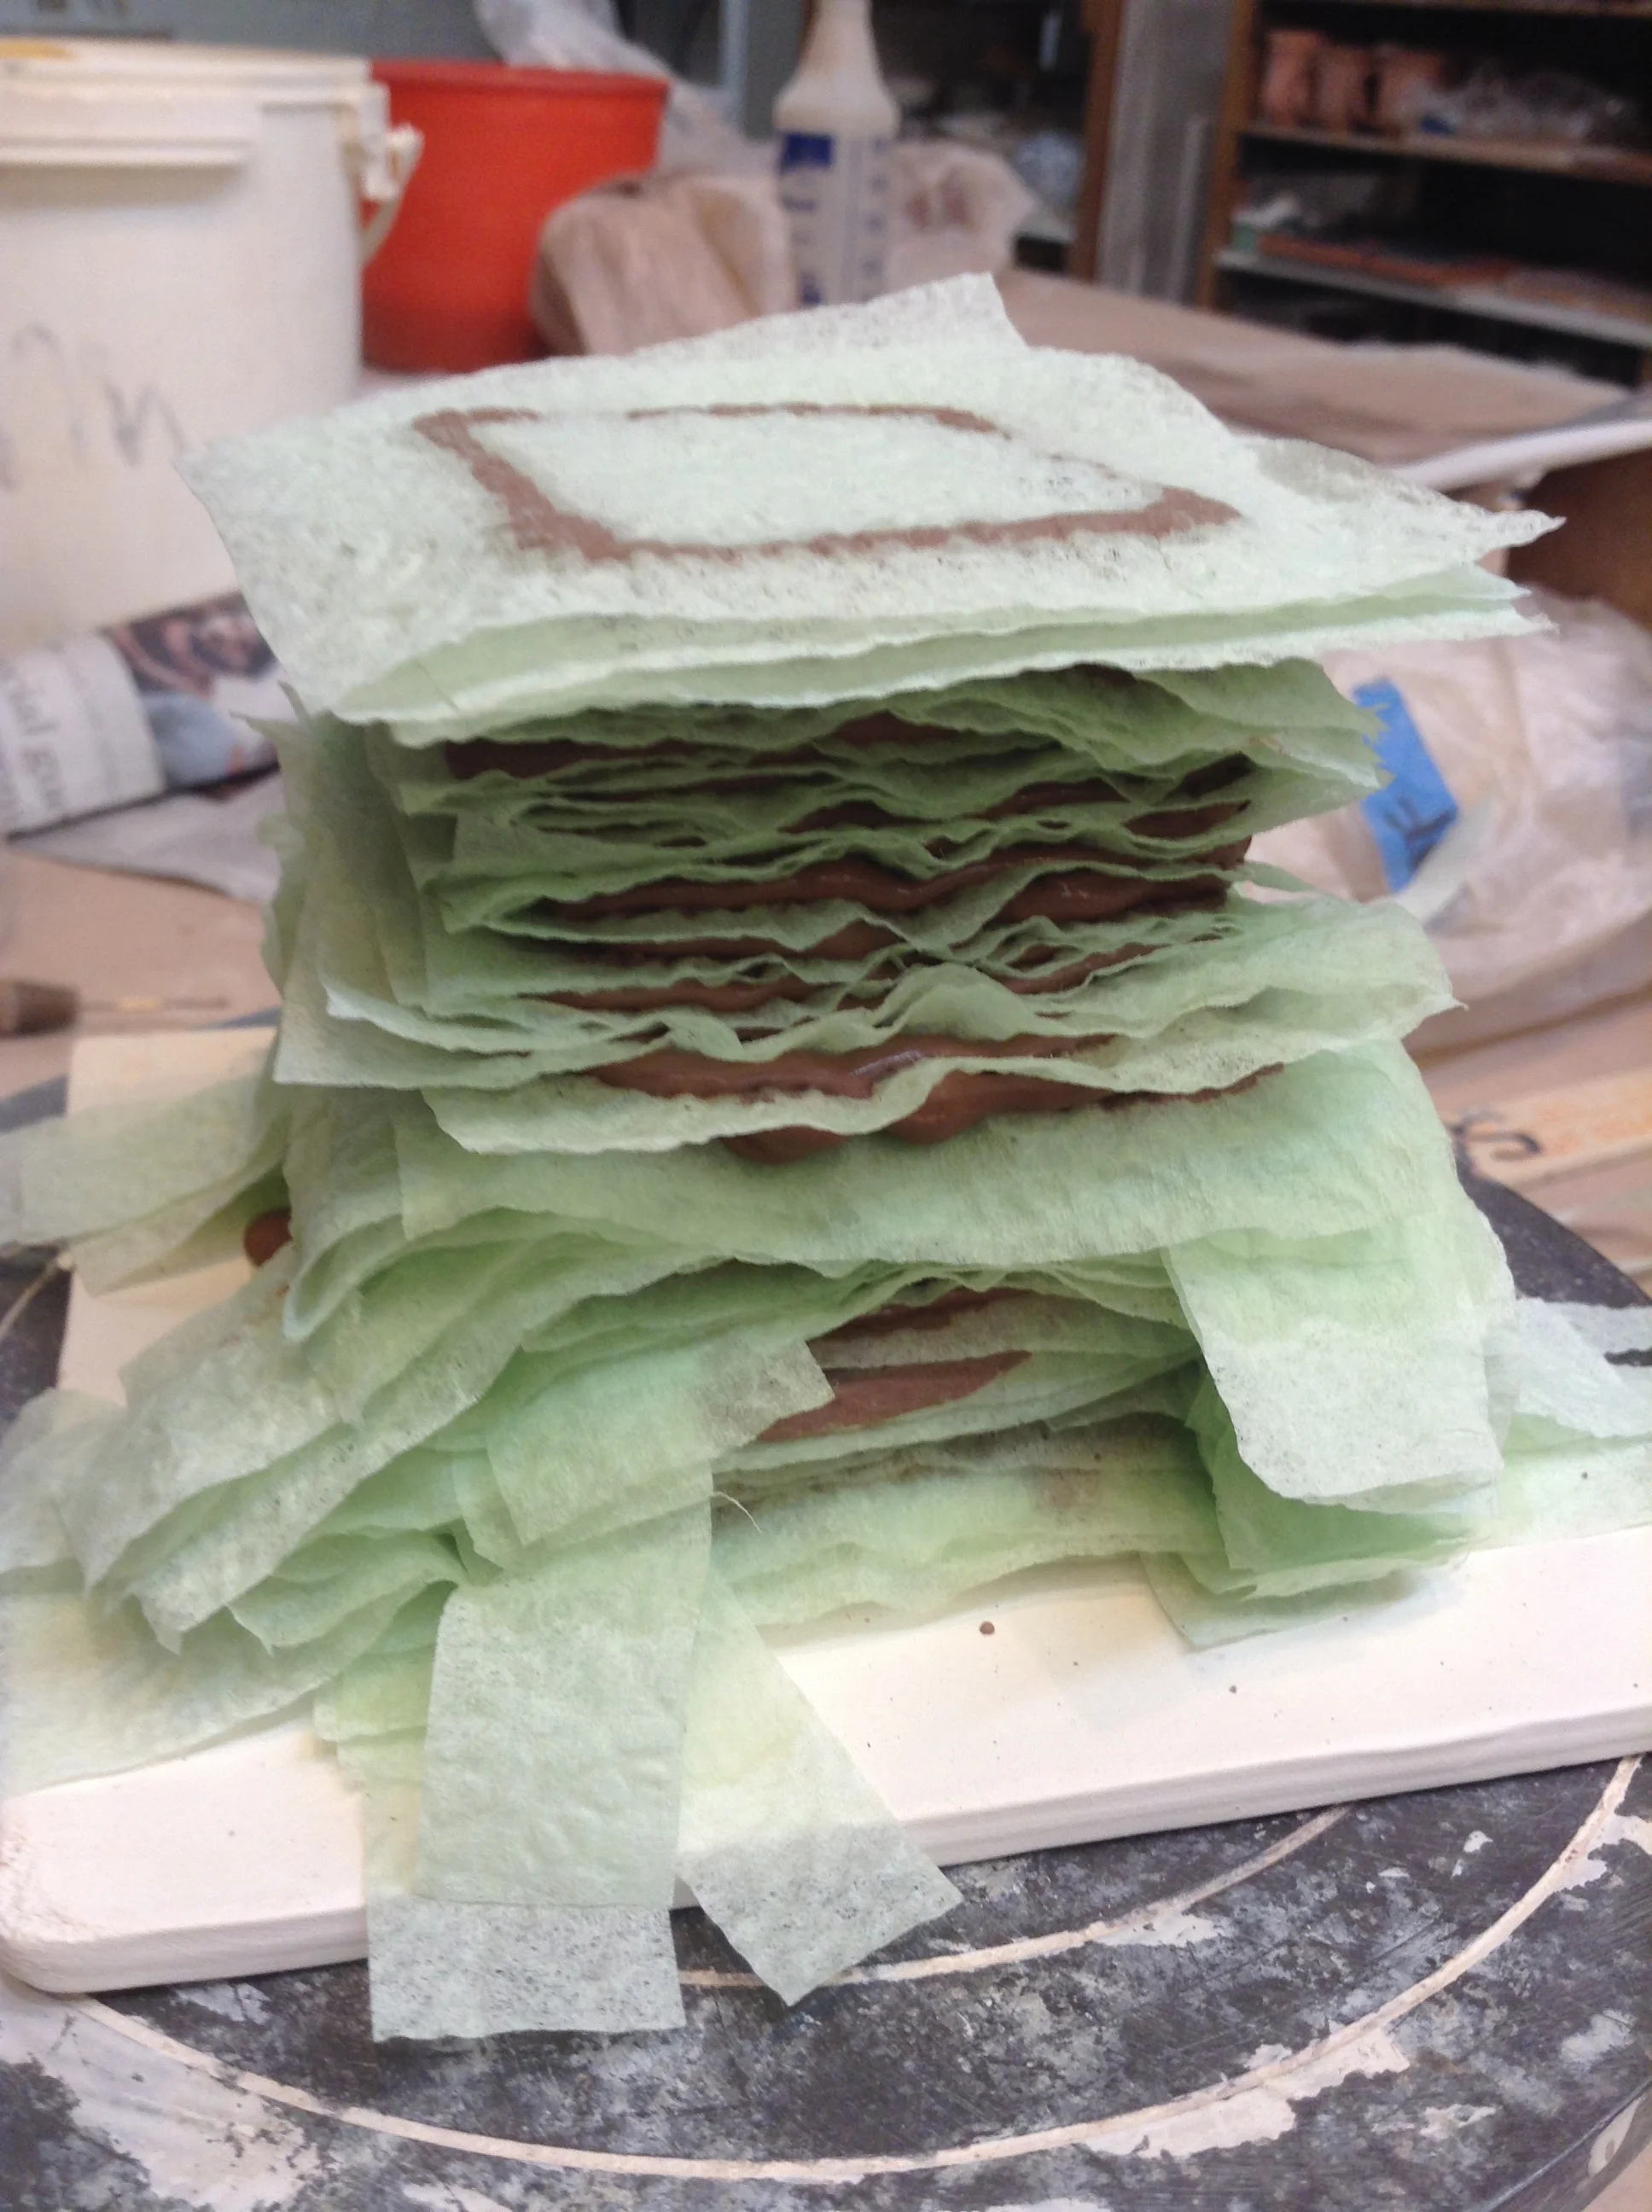
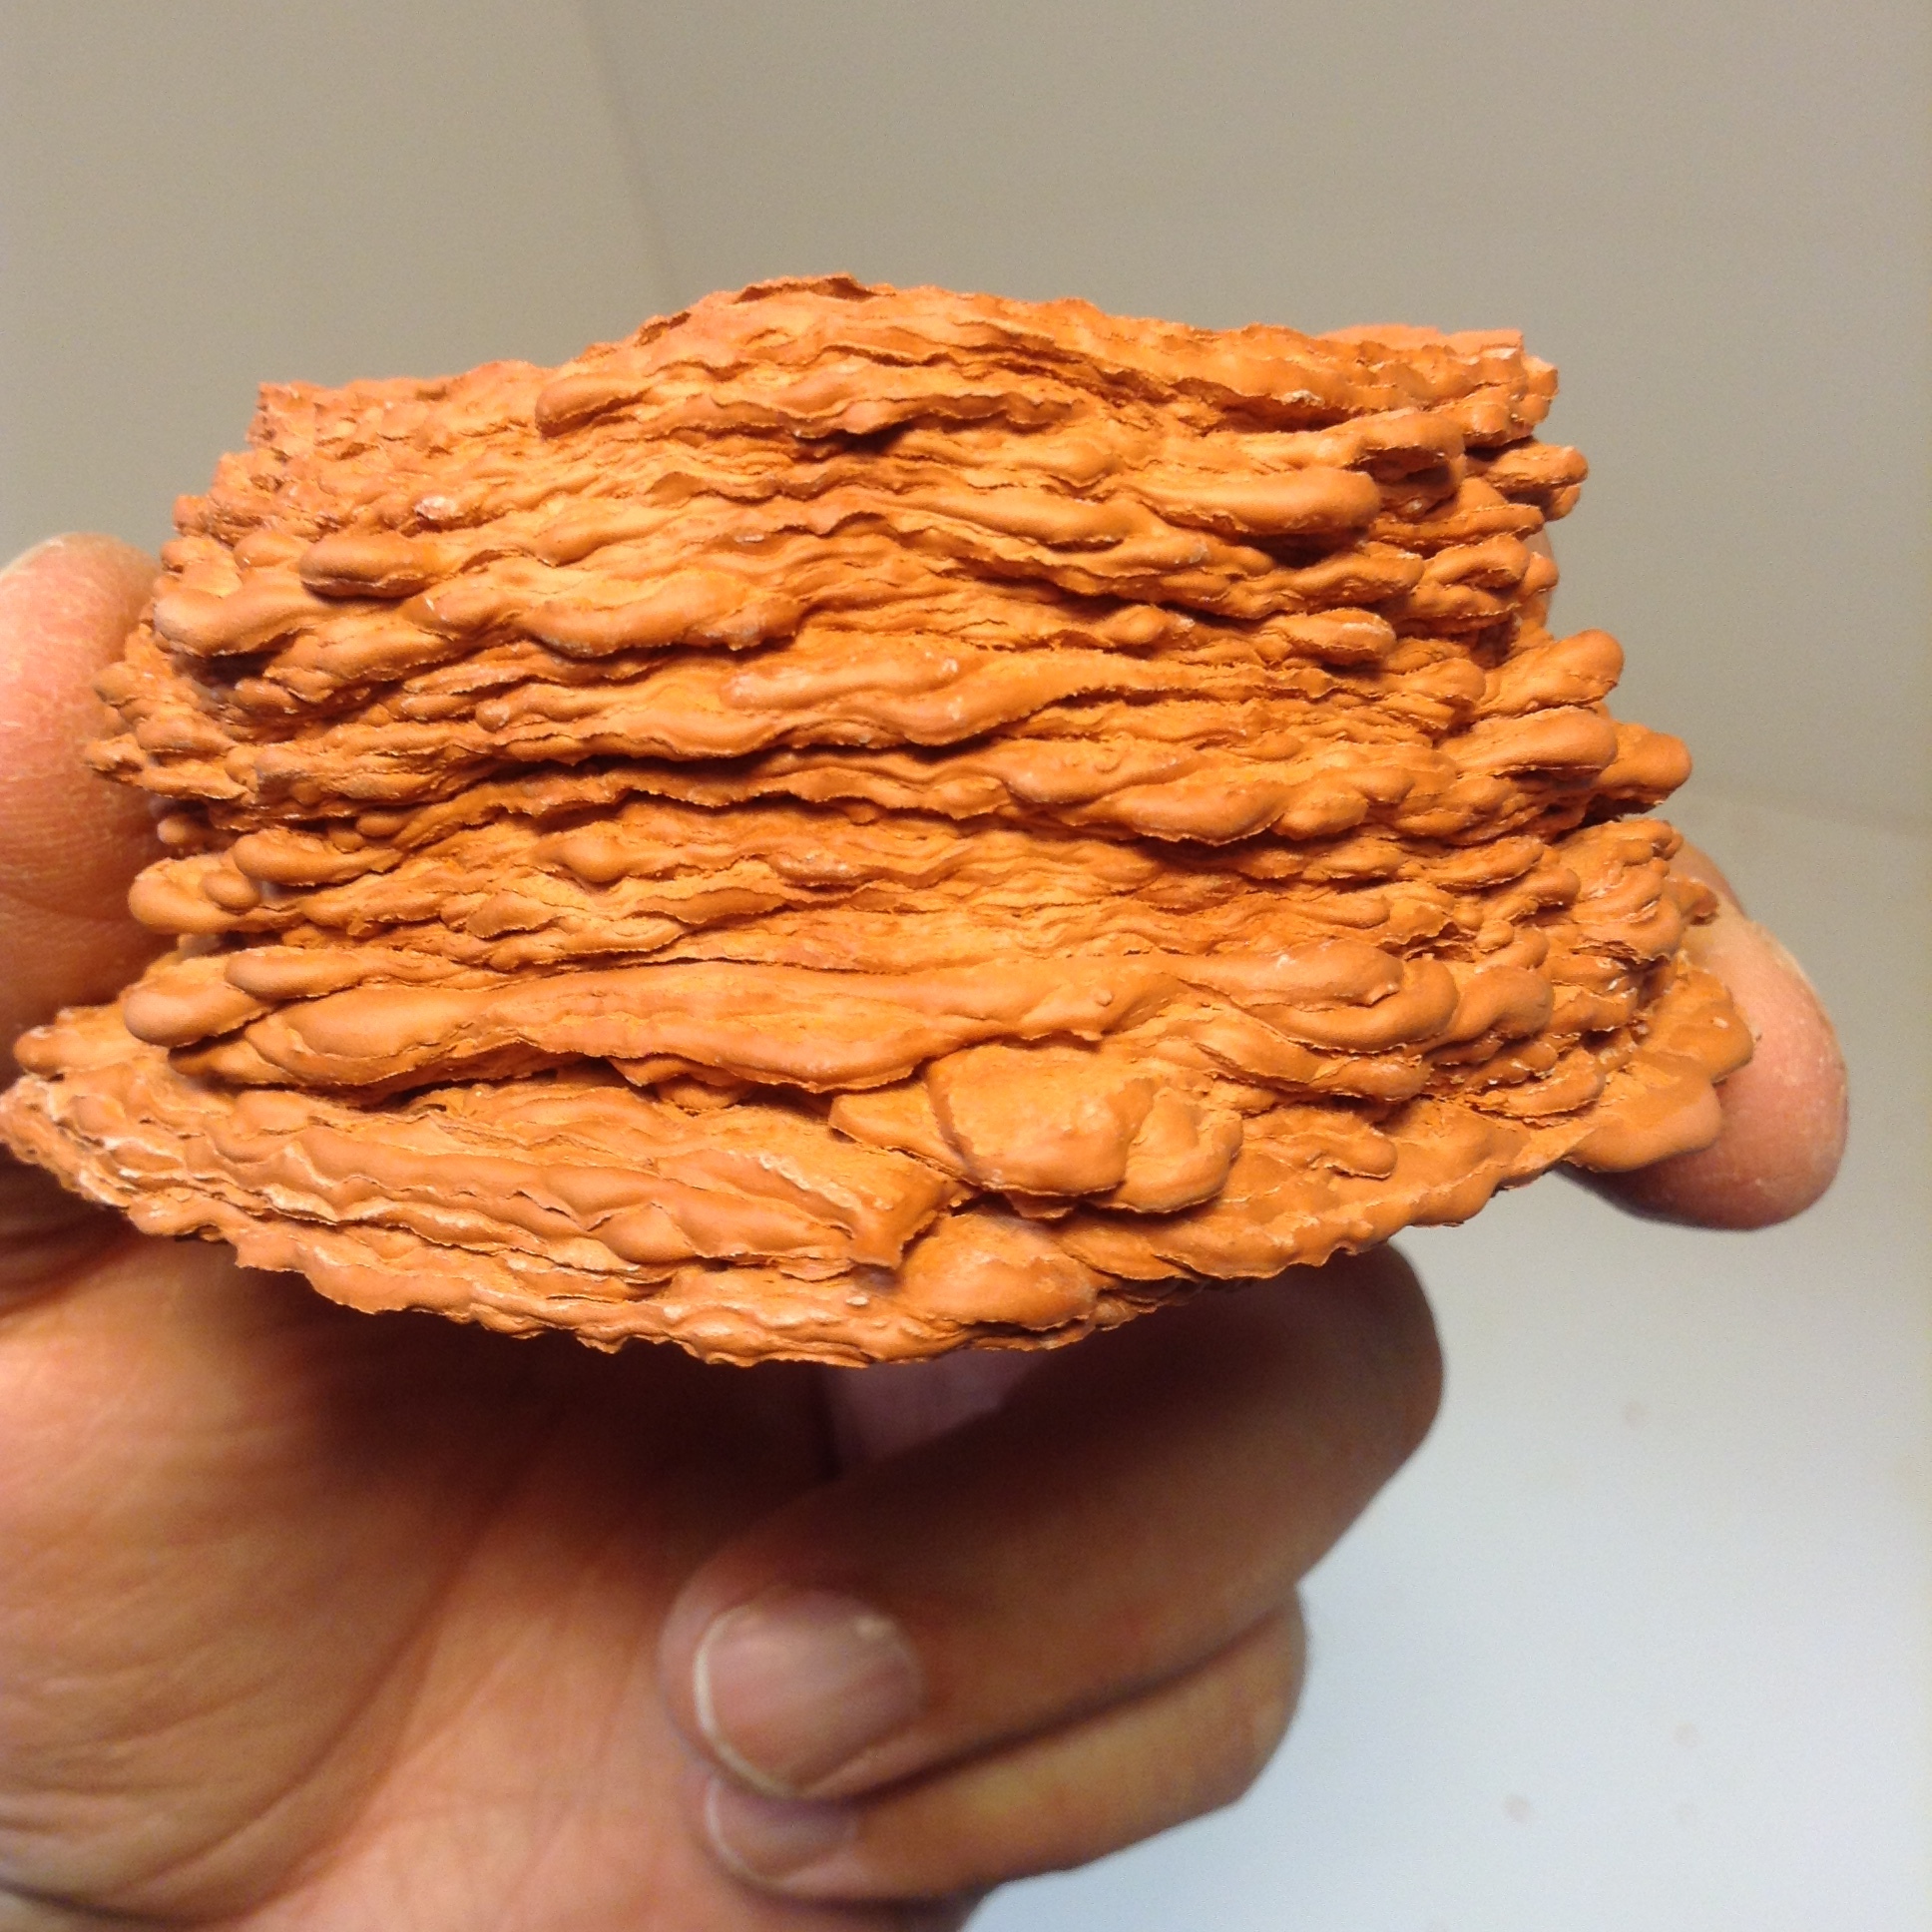
Several inches of the stacked form showing the change from napkin strips to napkin squares. The ultimate choice will be solid squares, unless there is some structure also being formed inside the form.

Several inches viewed from the side. It's fascinating! It's almost a pity the paper has to burn away. Maybe there is yet another sculpture technique that allows this effect to be permanant? Non ceramics, perhaps? Cloth squares glued together with caulking?
NAPKIN PREP, or, AM I REALLY USING A PAPER CUTTER TO MAKE NAPKIN LINGUINI???
I cut up many sheets of napkin paper and have them where I can reach them. The outer dimension of the paper sets a limit on how big an outline of slip I can expect to have enough support while wet. The current flowing nature of the slip seems to stabilize when I draw a line no closer than 1/4 inch from the edge.
These thin papers burn off in the kiln with a minimum of ash and will not harm other pieces. There is often legitimate concern that the products of combustion of this extra organic material might cause kiln elements to burn out more quickly. The napkins involved in these tests weighed less than 20 grams. When you compare this to the vaster quantity of organic matter that is burned off from every single clay piece in the kiln already, the increase in risk is negligible. I'm sure someone will provide us all with useful data in this regard.
PREPARATION FOR KILN
I was concerned on one of the early pieces I made using this method, and dutifully tore off as much of the napkin paper as I could without breaking the form. Poor thing looked like a plucked bird, and I can't imagine it was worth my time. These pictured here went into the kiln fully papered.

Examples of clay slip used in its most runny form, unalterd from the consistency bought for slip casting in plaster molds. Single napkin layers cut into squares stabilize hand-squeezed clay lines. Small textures of paper transferred to clay while liquid. The paper squares do shift a bit, which might be important enough to prevent. Drawing the lines with the squeeze bottle sometimes touches the nozzle to the paper, dragging it a little because the immediately previous layer is still soft. The fix is to not touch the nozzle to the paper. Actually holding the paper steady --say, from a corner-- is actually too subtle because even that little pressure squeezes further the line underneath. Not that it's undesirable.
Same process as for circle path. Shown here is a little overflow drip to left of picture. Happens every so often, and isn't personally horrifying. If I intended to prevent it, I'd try making the slip a little thicker, or drawing the line farther from the edge of the paper. If it doesn't snap off in the future, it's an interesting bit of evidence of the process.

Red earthenware clay after final firing to cone 05. The clay slip used in its most runny form flows freely, is probe to dripping outwards from edges of paper, and squashes flatter with even the slightest pressure from above. Circle form out of the kiln. White shreds is all that's left of napkin paper.

Square form showing interior ridges and ash residue leftover from napkin. These ashes would wash off, or, as I did next, blew them off with the air nozzle of my compressor.

Interior of circle form, showing the highly variable surface that results. Since the paper cutout is completely intact, any extra heavy drawn line toward the inside of the shape simply becomes an extending blob to the interior. On the outside of the shape, near the edge, it leaks downward.

The enclosed bottom of the square form. This was made by pooling the slip everywhere on the bottom layer of paper. The texture of the napkin shows as impressions on the clay, as well as a larger wrinkle that apparently happened while I was moving things around.

Interior detail after all paper ash was removed

Bottom detail shows my attempt at laying out inner and outer lines, and bridging them over for extra support. There is still ash residue the compressed air could not dislodge. I will probably use running water and a soft brush to remove the rest.
Rather gnarly! The larger droplets are the result of squirting out more than usual, and the weight of the slip pulling towards the edge of the paper cutout, In come cases, even leaking downward several layers, or onto the firing tile underneath.
WHITE CLAY AS PASTE, SPREAD THIN AND MANIPULATED
The photos in this set show the setup of the white clay paste. It was originally intended to be dried in a pleated shape, while being held by the metal bending former. It almost worked, but it failed in an uninteresting way, so I scrapped the pleating idea and used the clay panel as a tube instead.
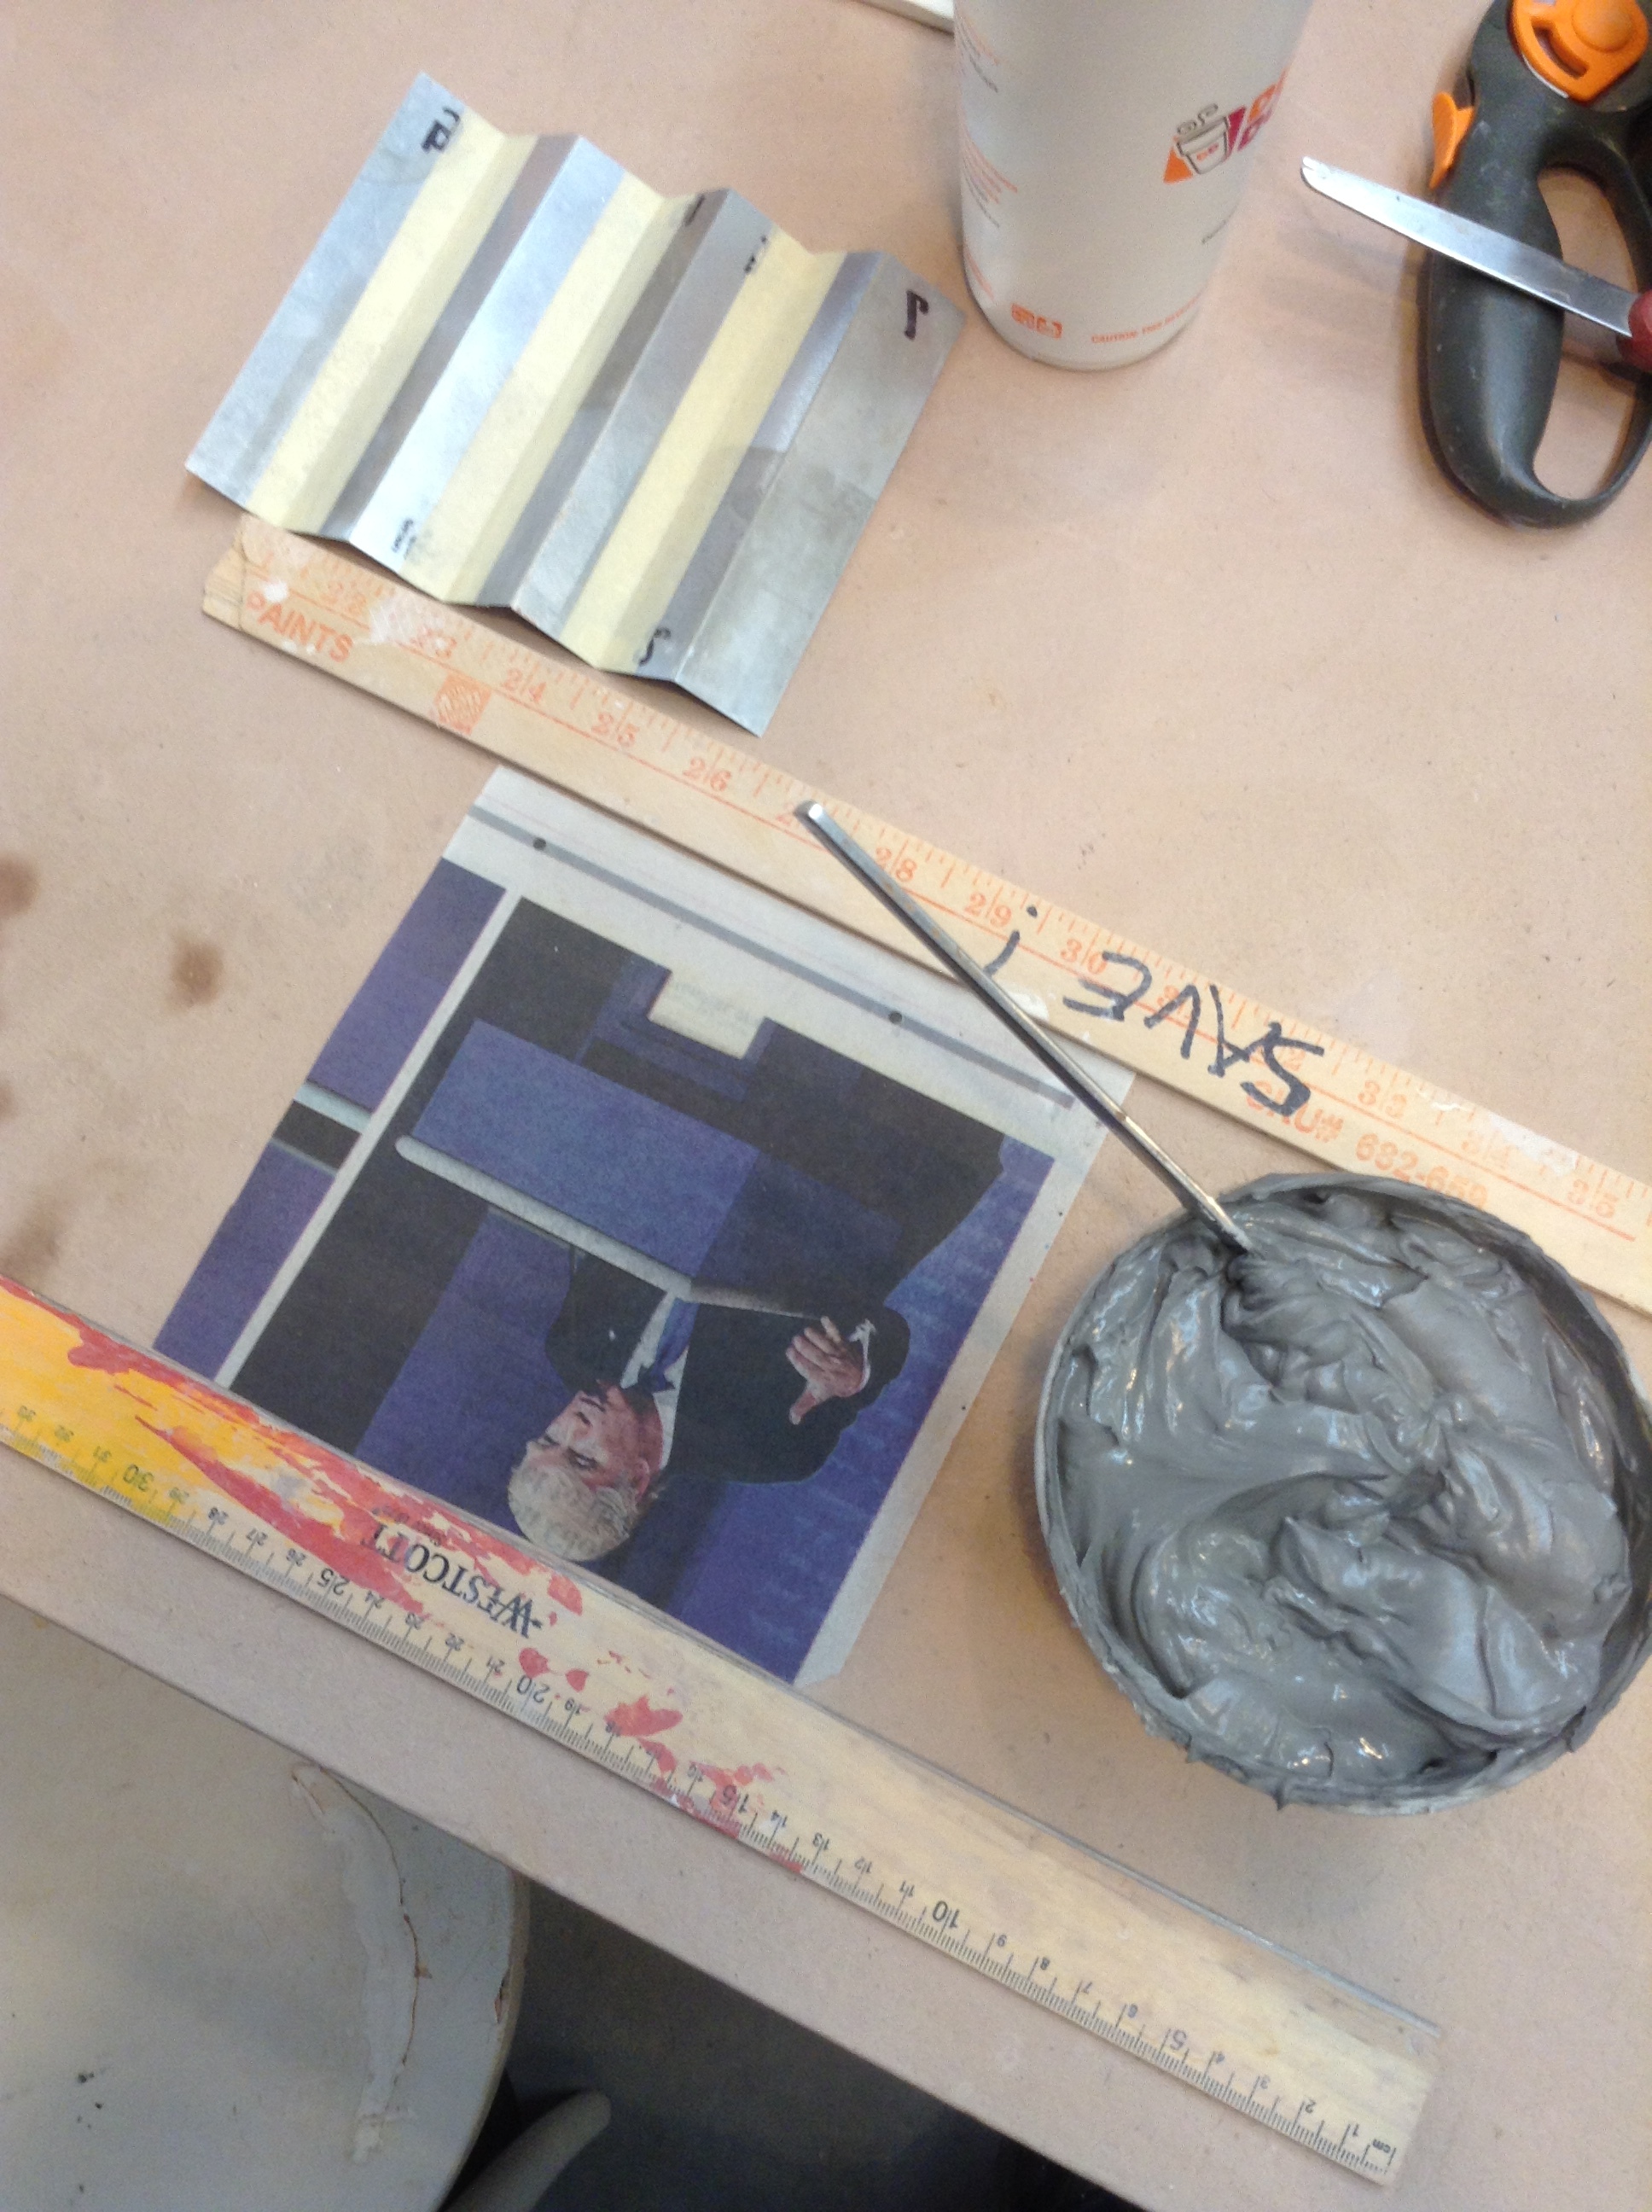
Materials set up to make a paper and clay paste laminate. The newspaper square goes first and a matching one is stuck to the top. FInal goal is to have both squares of newspaper perfectly aligned with a layer of clay paste in between.

Thickened slip with vinegar makes lovely textures. It would probably stay intact if allowed to dry really slowly. Here the goal was simply to make a layer that was too thick so that it could be scraped down to the final thinness.

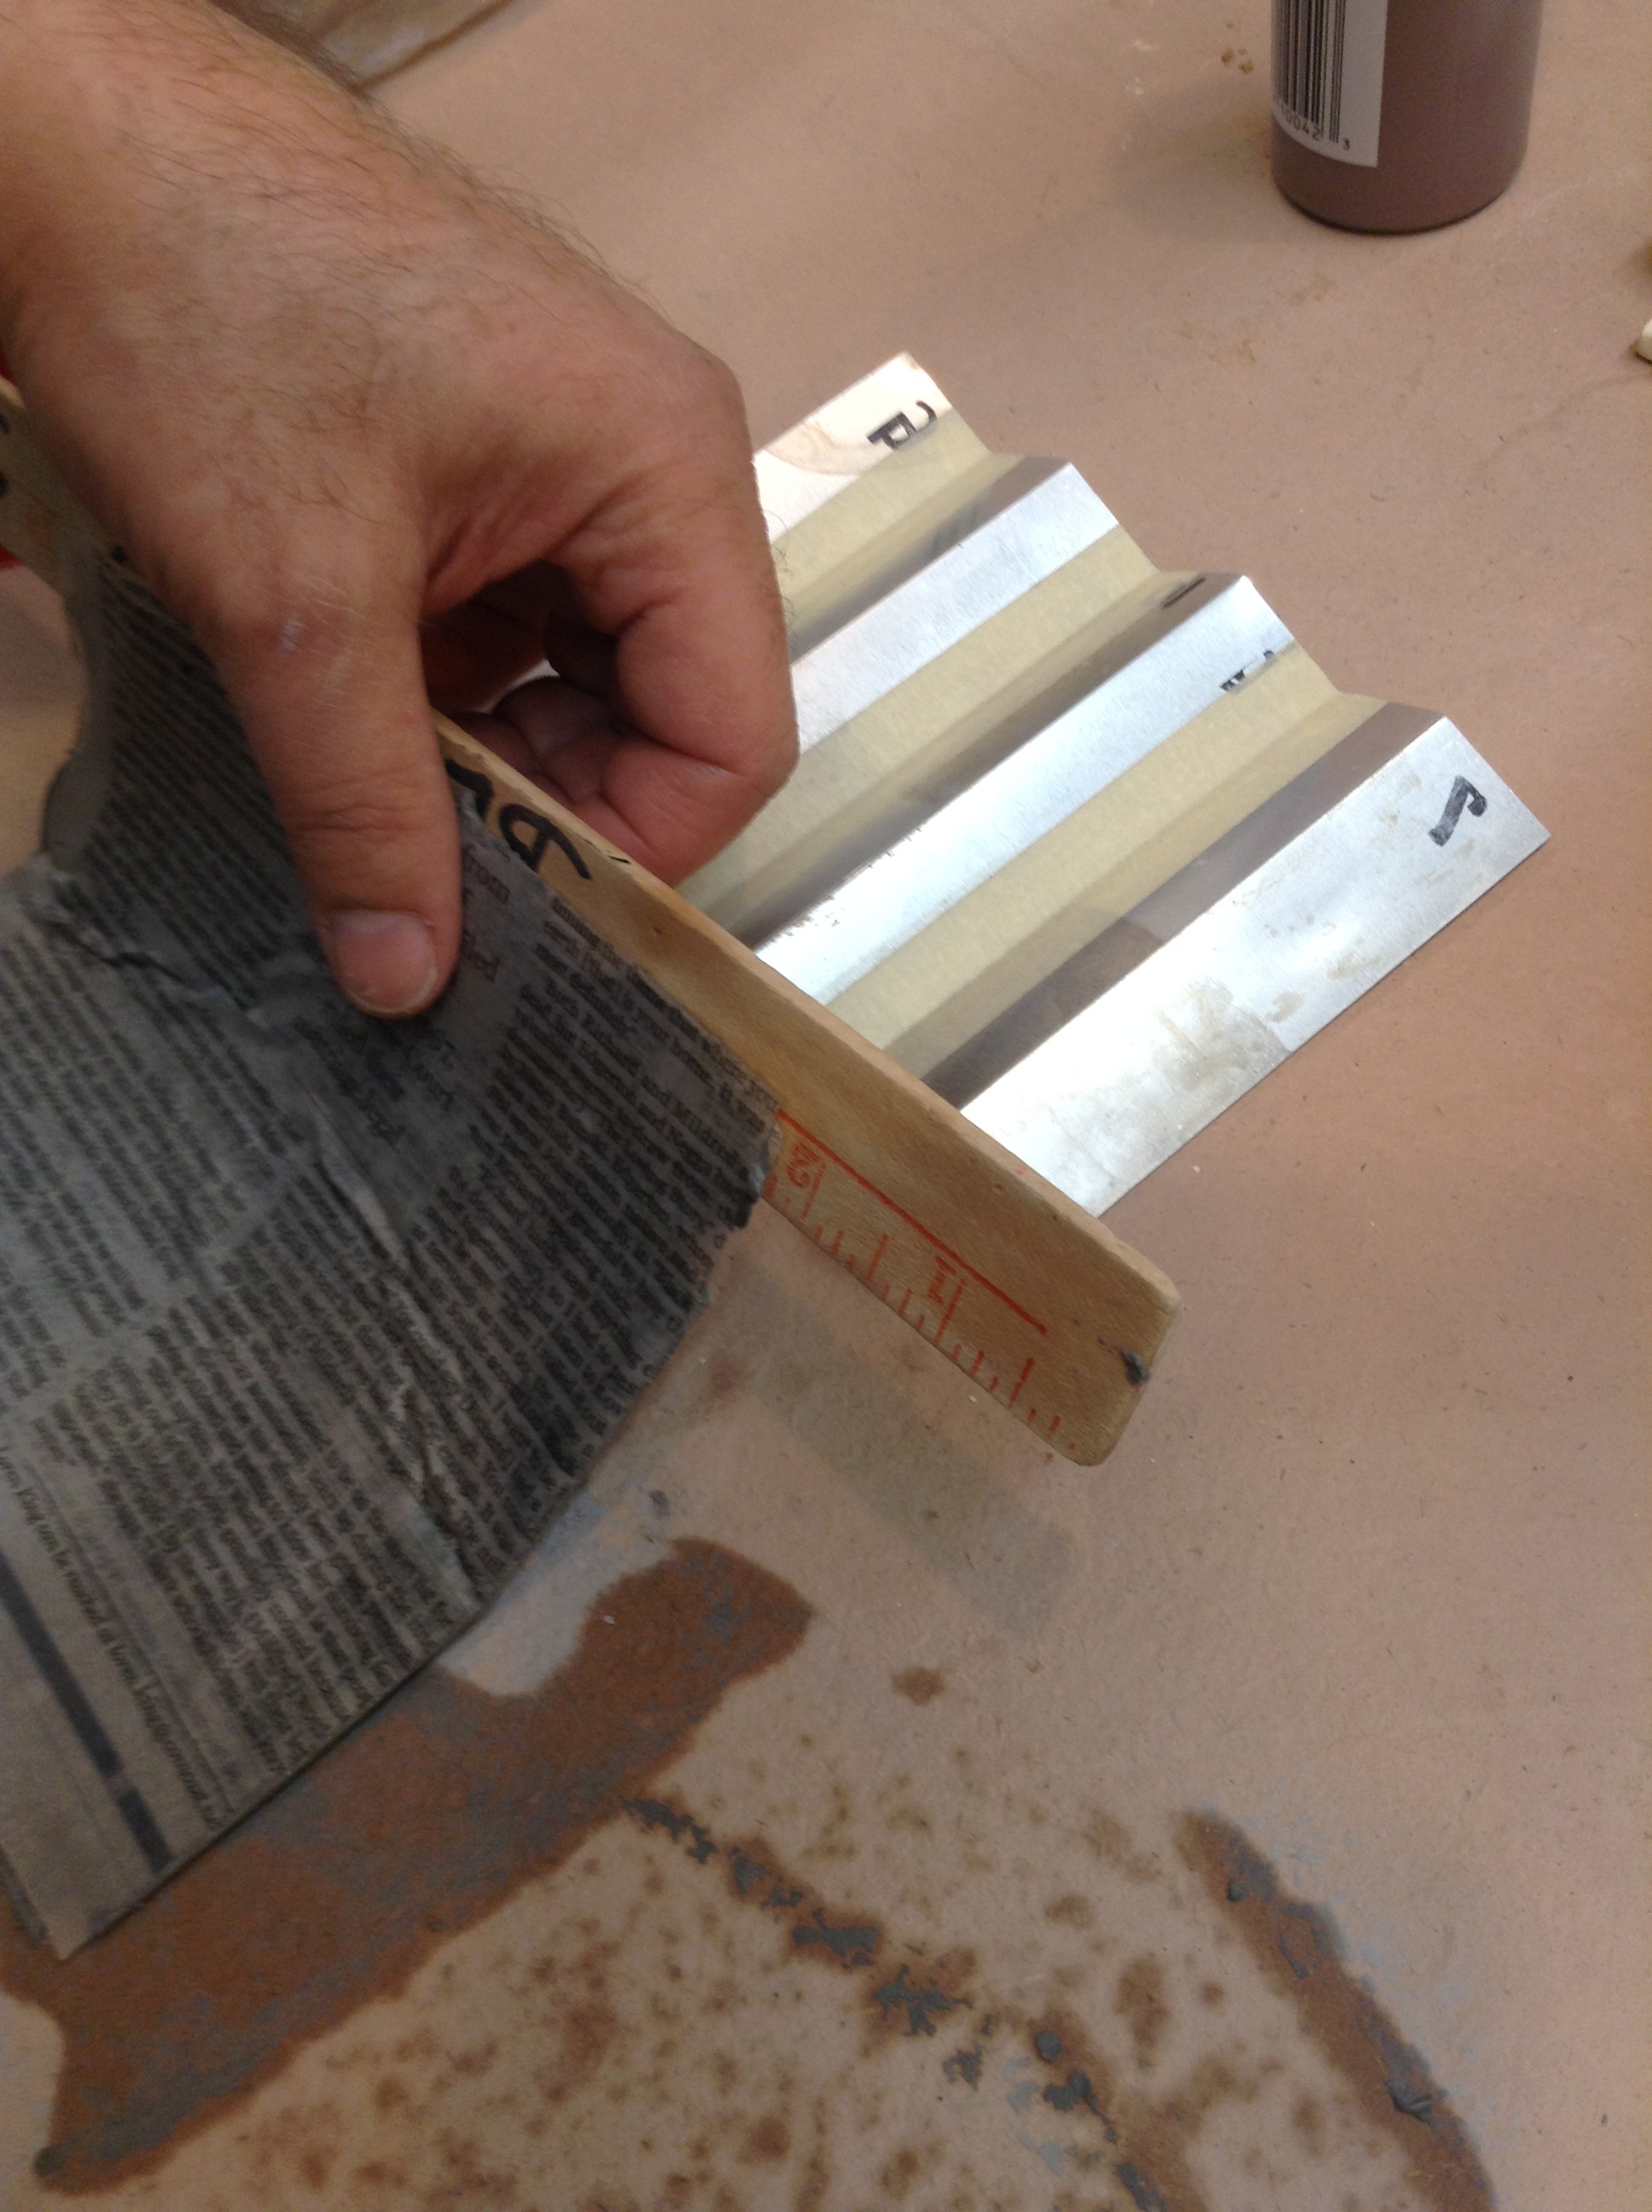
Using flat sticks to scrape the textured slip down to the thinness regulated by the two rulers on either side. Thickness was about 1/4 inch, and could be a little thinner with practice. This scraping isn't perfect, and will probably be replaced with the squashing method used later.

Excess size of thinly spread slip covered on second side with newspaper. Excess slip was scooped away and was perfectly usable for another project.
Carrying the laminate carefully to the former that will distort it.

Paper and clay paste laminate distorted by pleated metal former. Originally the goal of this test, it didn't quite work as planned. The fold is too small angle for the thickness of slip and made bunching paper marks where I didn't want them. But the concept is that the laminate starts flat, becomes distorted in geometric ways, and dries there. I scrapped this design and used the re-flattened panel as a simple tube.

Newspaper peels off after a few minutes of stiffening from water absorption. While not necessary, peeling the paper back allows any area to become exposed for connection to other parts and any stage in the process.
Self-supporting pasty column with lots of texture. Notice that there are air bubble tunnels all the way through the wall. This will probably be used much more deliberately to make walls with much more open spaces.
WHITE CLAY AS PASTE, SQUASH-FORMED: Faster, yes? Better, maybe!
After finding out what happened when I spread the paste manually, I wanted to see if there were a faster way. For smaller amounts of slip, it turns out there is a faster way: simply squash it. This probably has a minimum thinness due to friction and how much pressure can be brought to bear on the simple materials used here. But if scaled up, with smoother and stronger paper, harder and flatter boards, and mechanical assist for pressure, I could make much larger membranes as laminates in a way that might be more convenient than spreading. Might not.
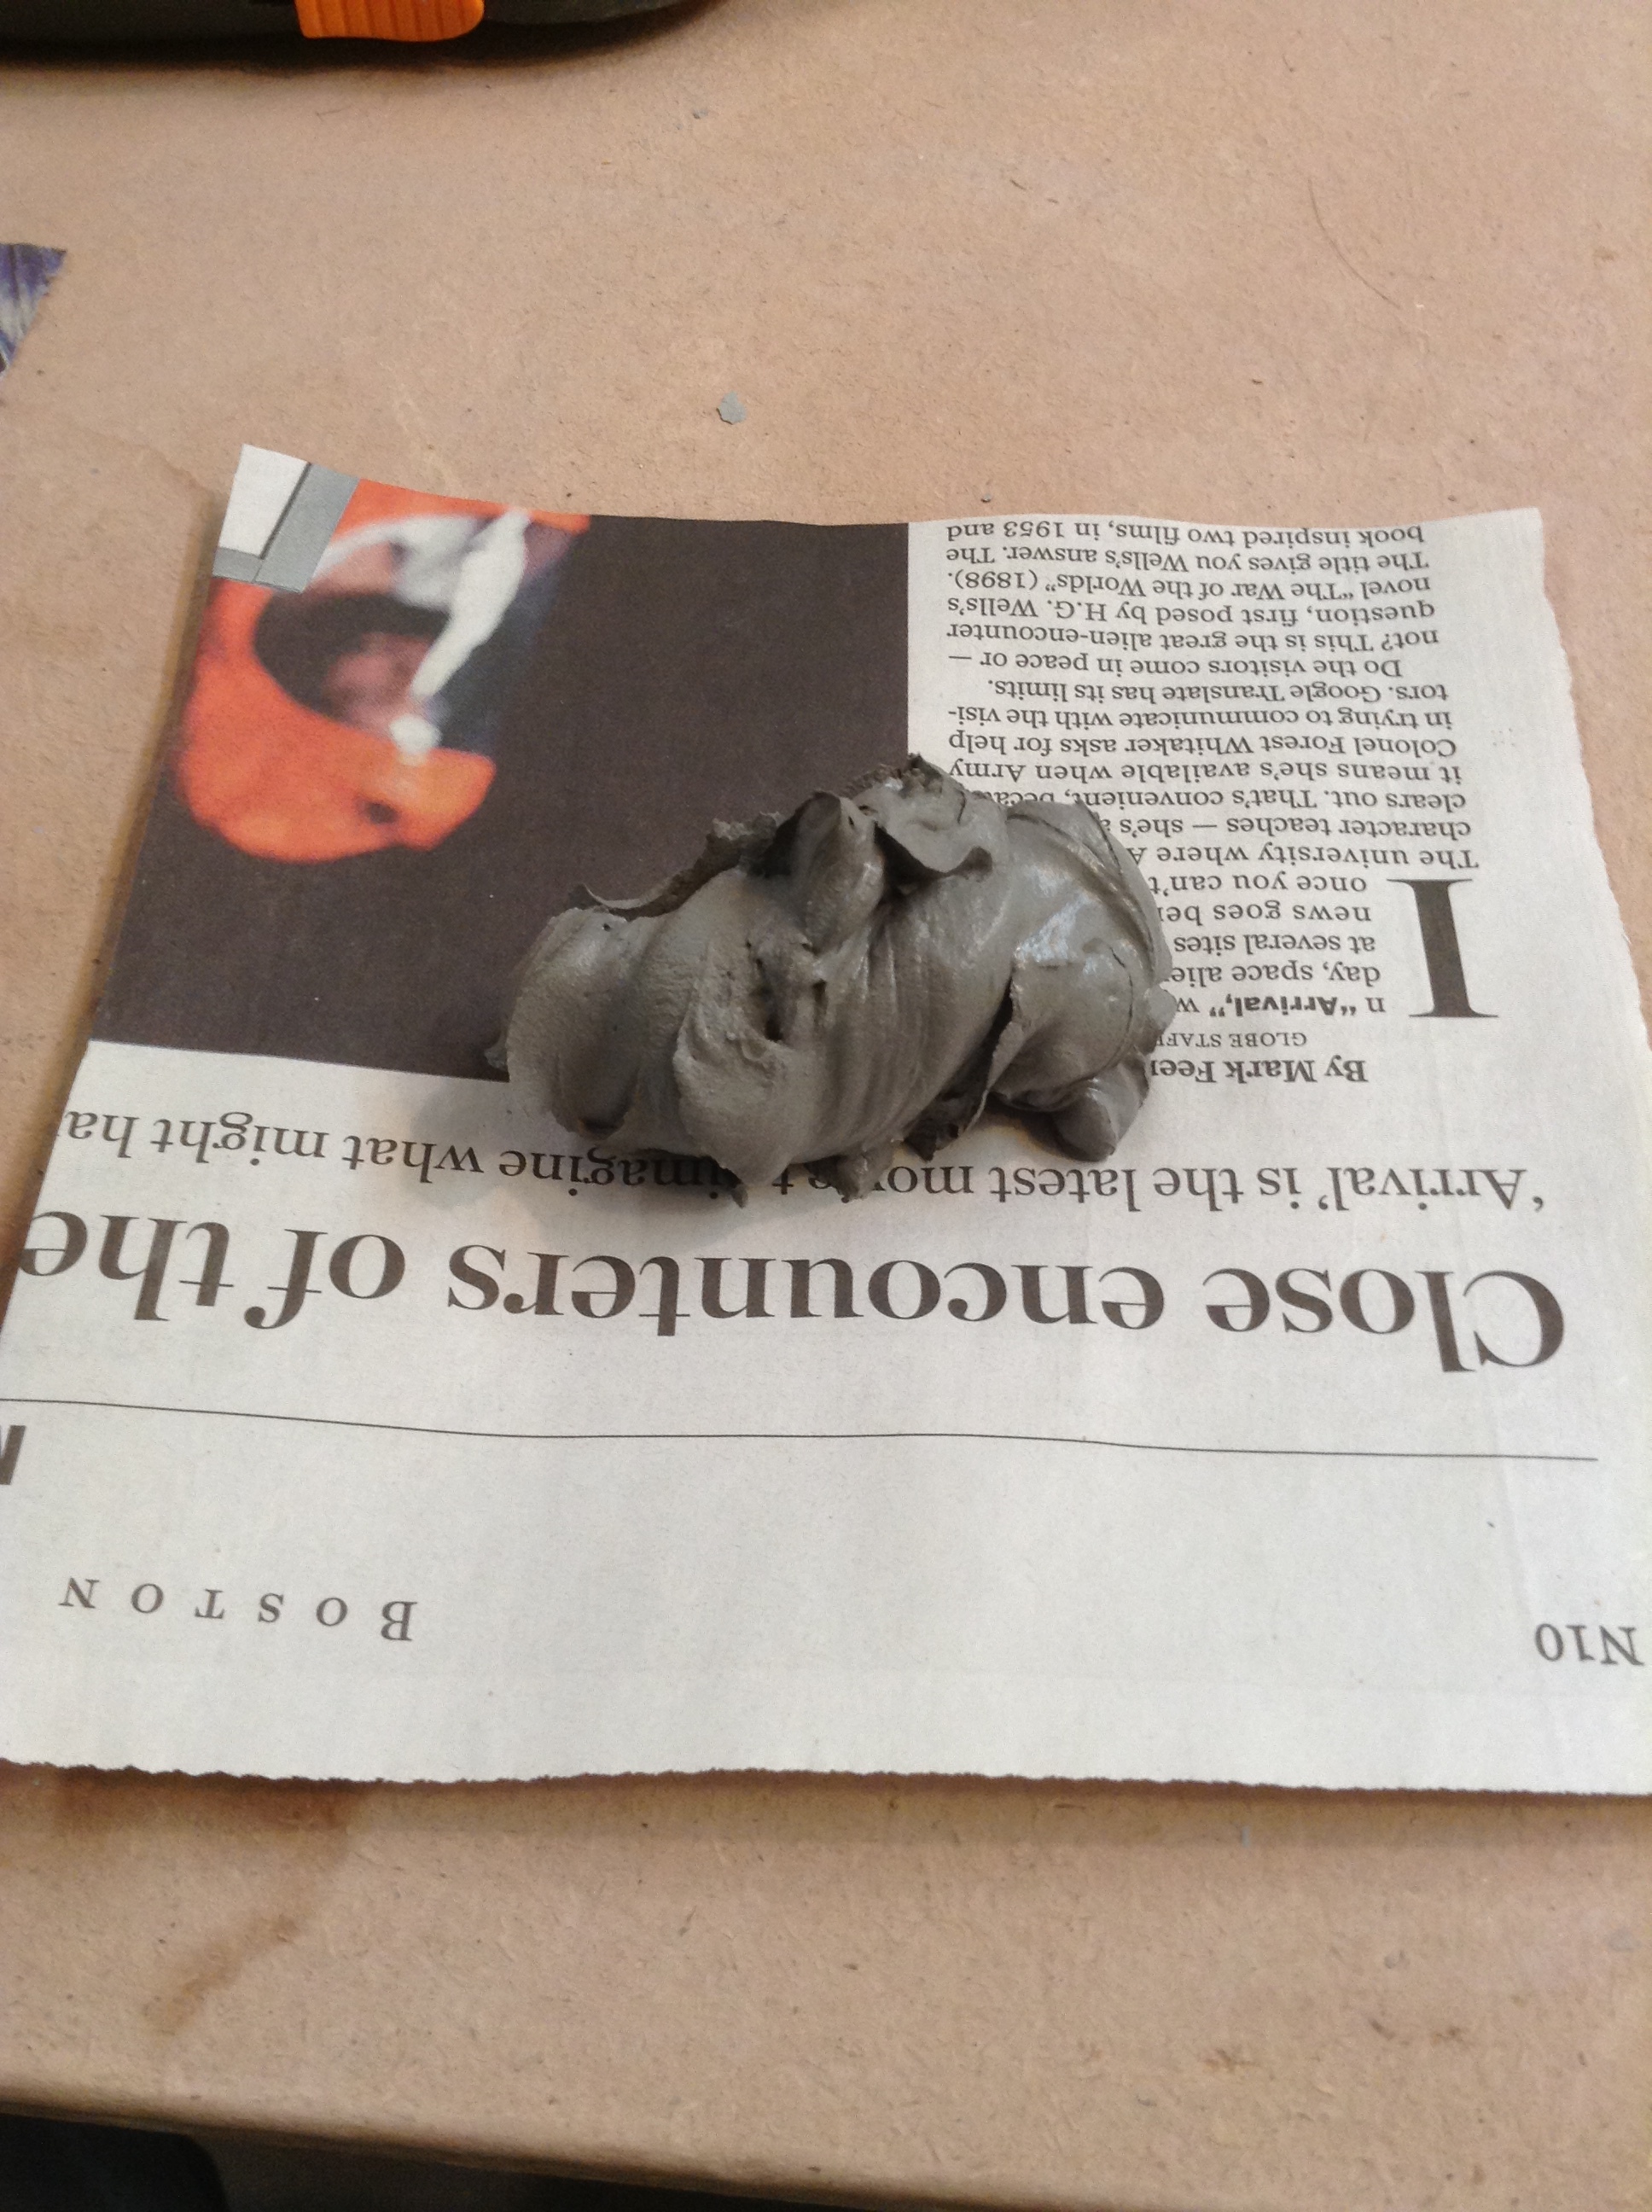
This formless blob of clay slip, thickened with a little vinegar, is thixotropic. Meaning that it holds its shape pretty well, unless subjected to movement or vibration. It has no idea what's about to happen to it.

Who says experimental ceramics processes don't have a "hands on" component? In this case, it was hands on, push really hard, wiggle, check, wiggle some more.

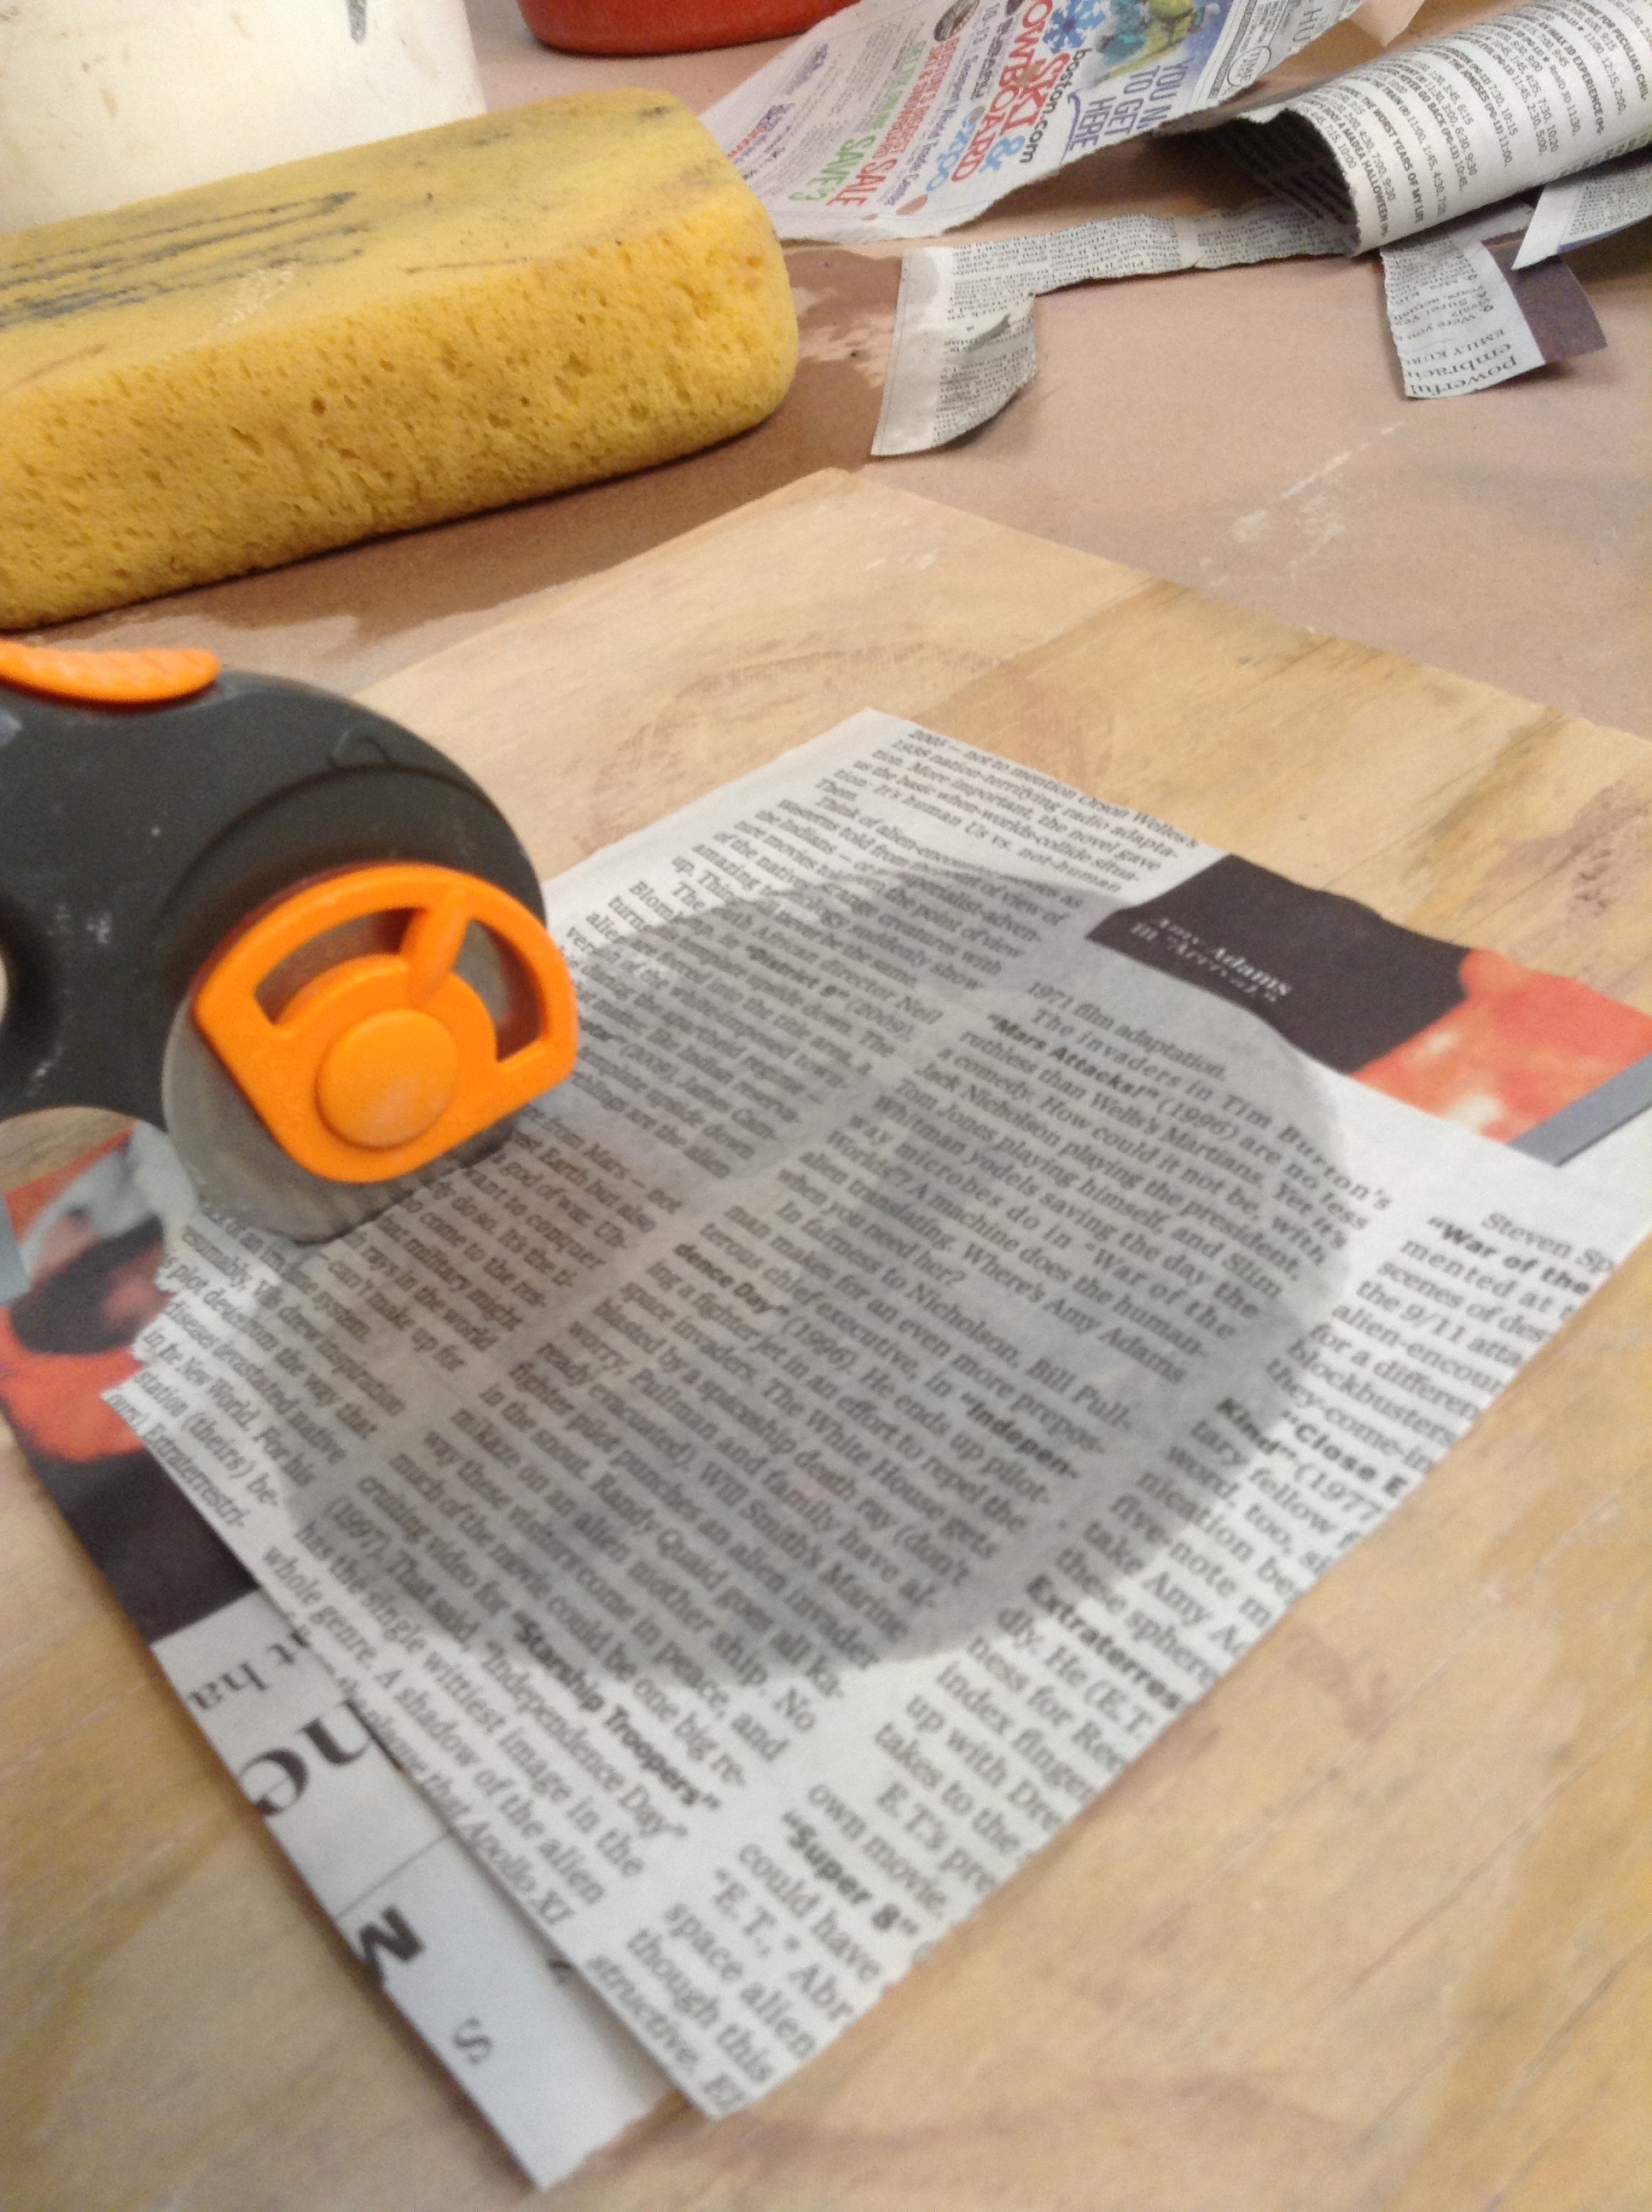
The shapeless blob spread out into a remarkably even circle, with no planning. I didn't expect it! I didn't use the circle as it was, but I can easily see how making circles this way could become habit-forming.
The fabric rotary cutter shown here makes good cuts, but seemed to get dull quickly. This laminate is certainly not official rotary cutting material. Soon afterward I experimented with making cuts with plain scissors and liked it much better.

The prepared square laminate. Cuts at edges are slightly compressed and don't squeeze open too easily. This would leave a distinct edge I can easily accept as a natural part of the process. But I bet they're sharp when finished.
Trimmed scraps from generic squashed shape are immediately unpeeled and added back to original mix. I like the idea of having no wasted scraps.

Four cuts from edges with plain scissors make slits, then one layer of paper is pulled back. These exposed squares will have matching exposed places on other side. These newly-exposed surfaces are almost self-adhesive. Whatever paper remains, helps hold the form stable while connecting happens in a few locations.
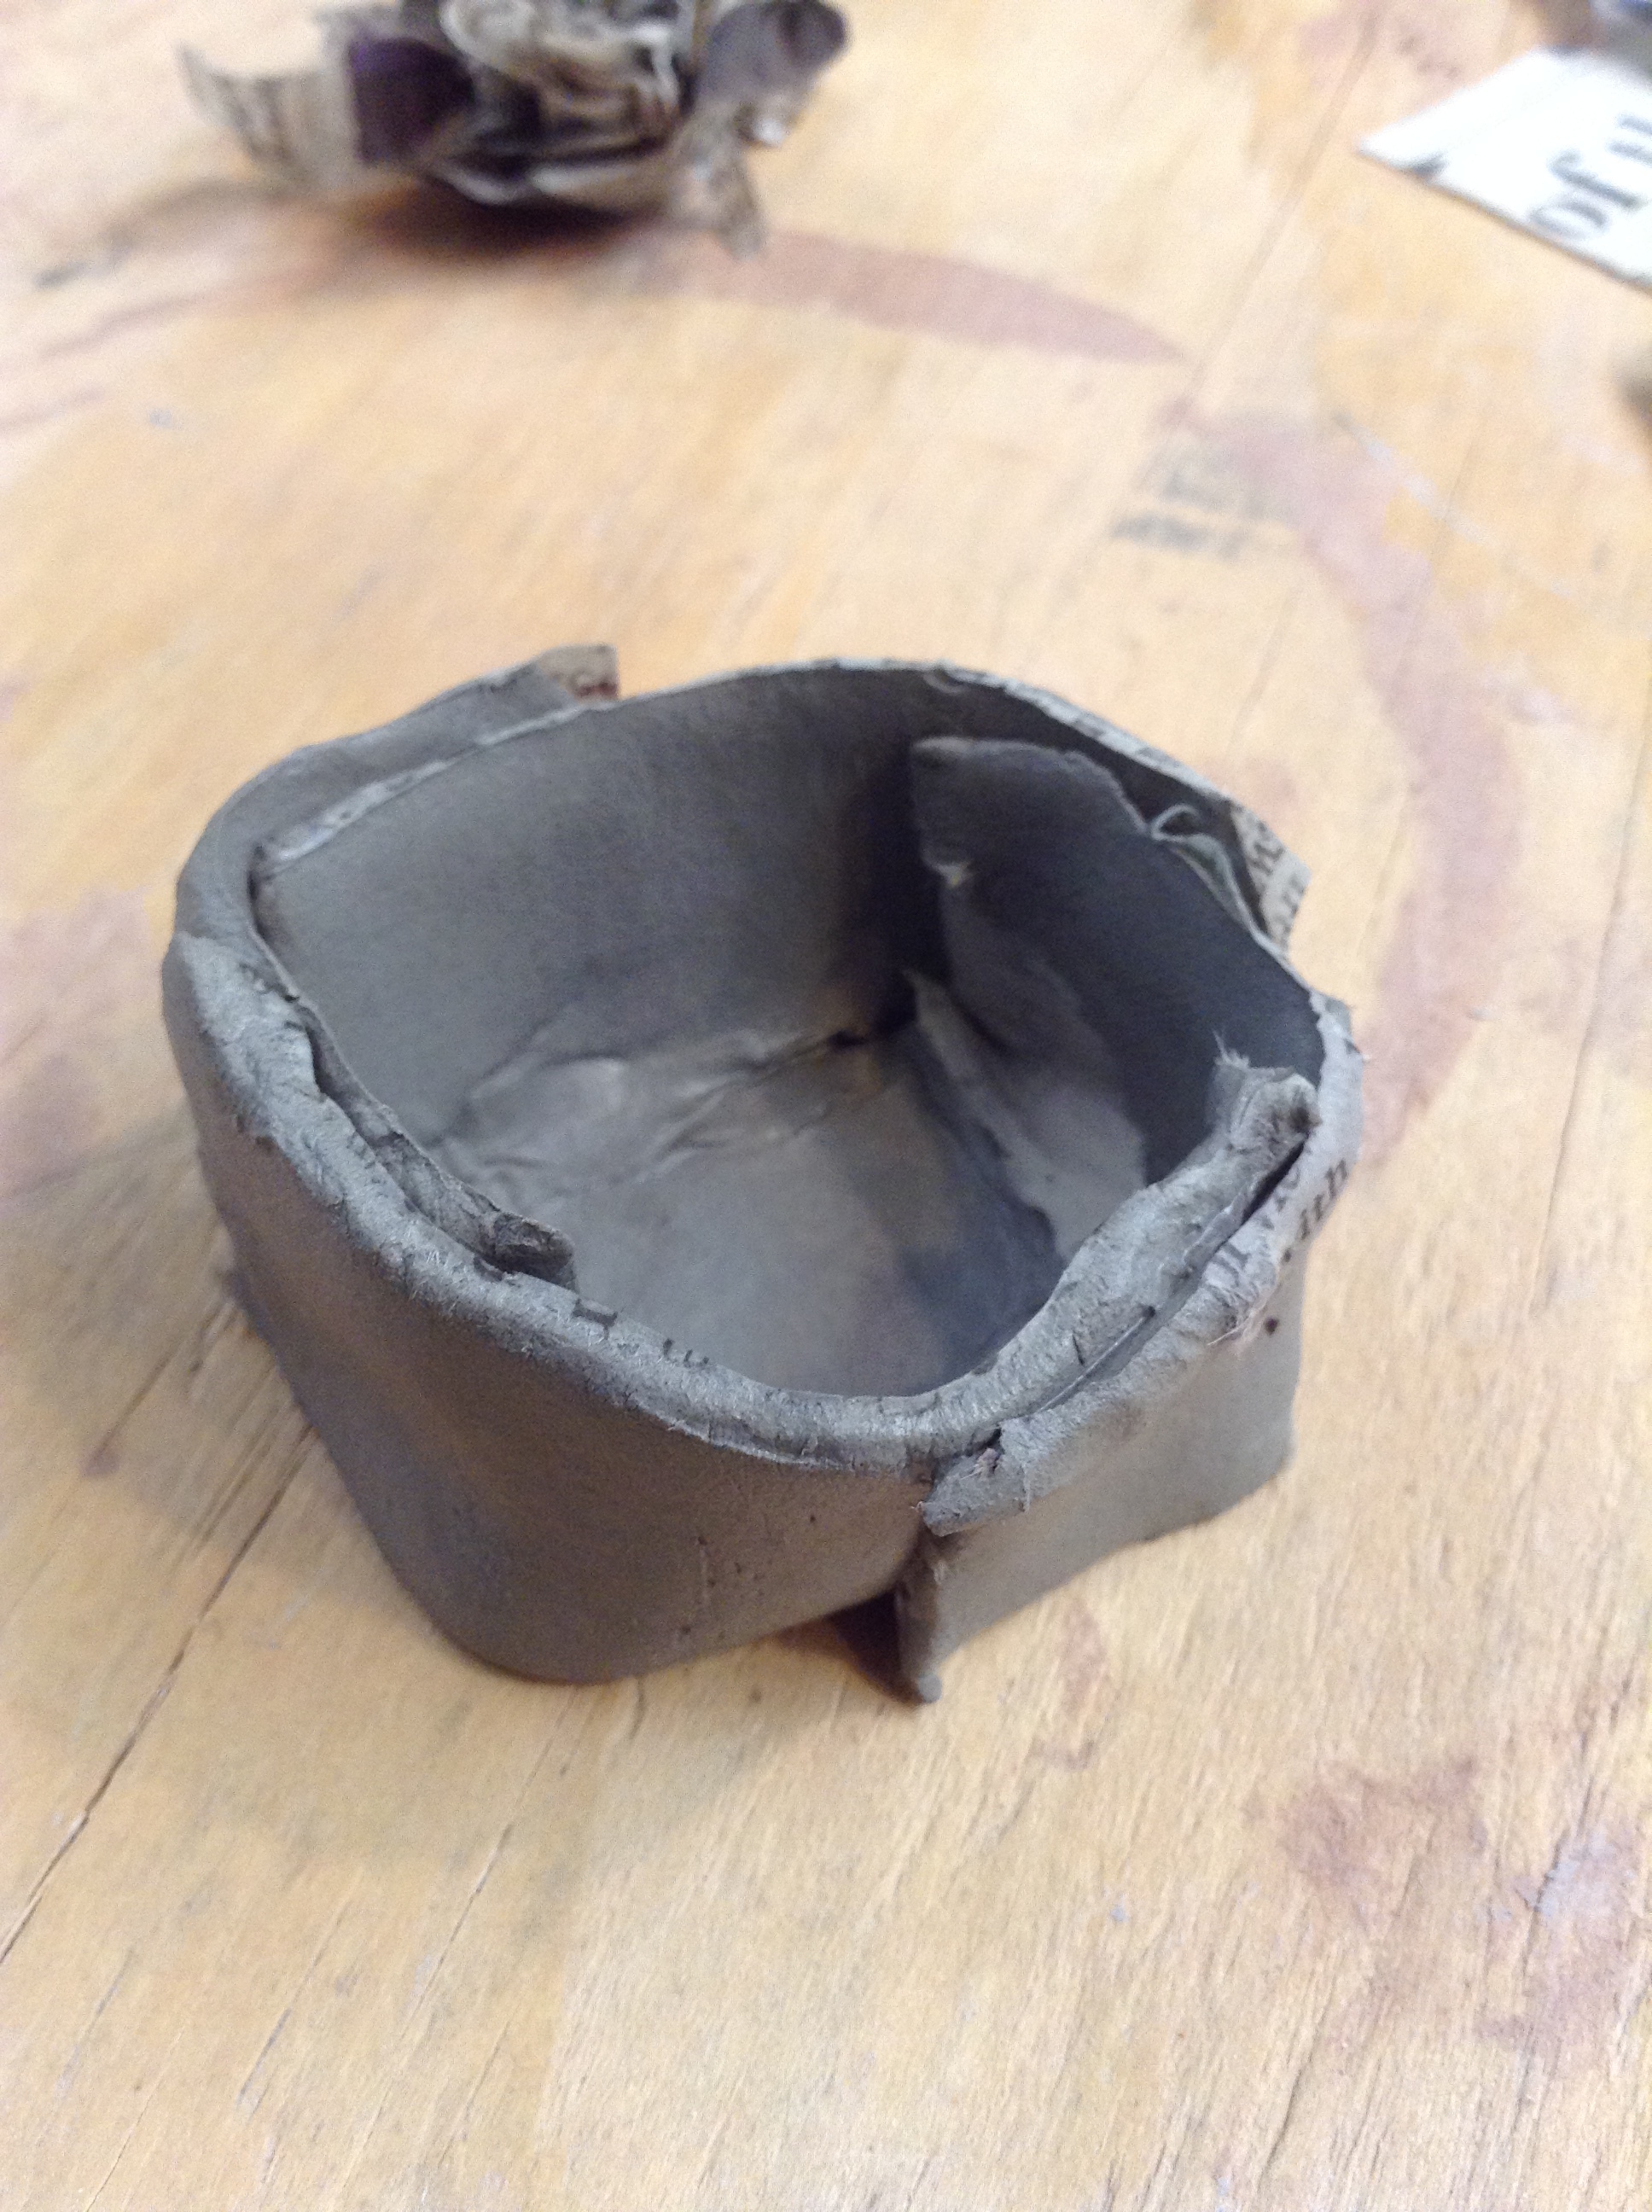
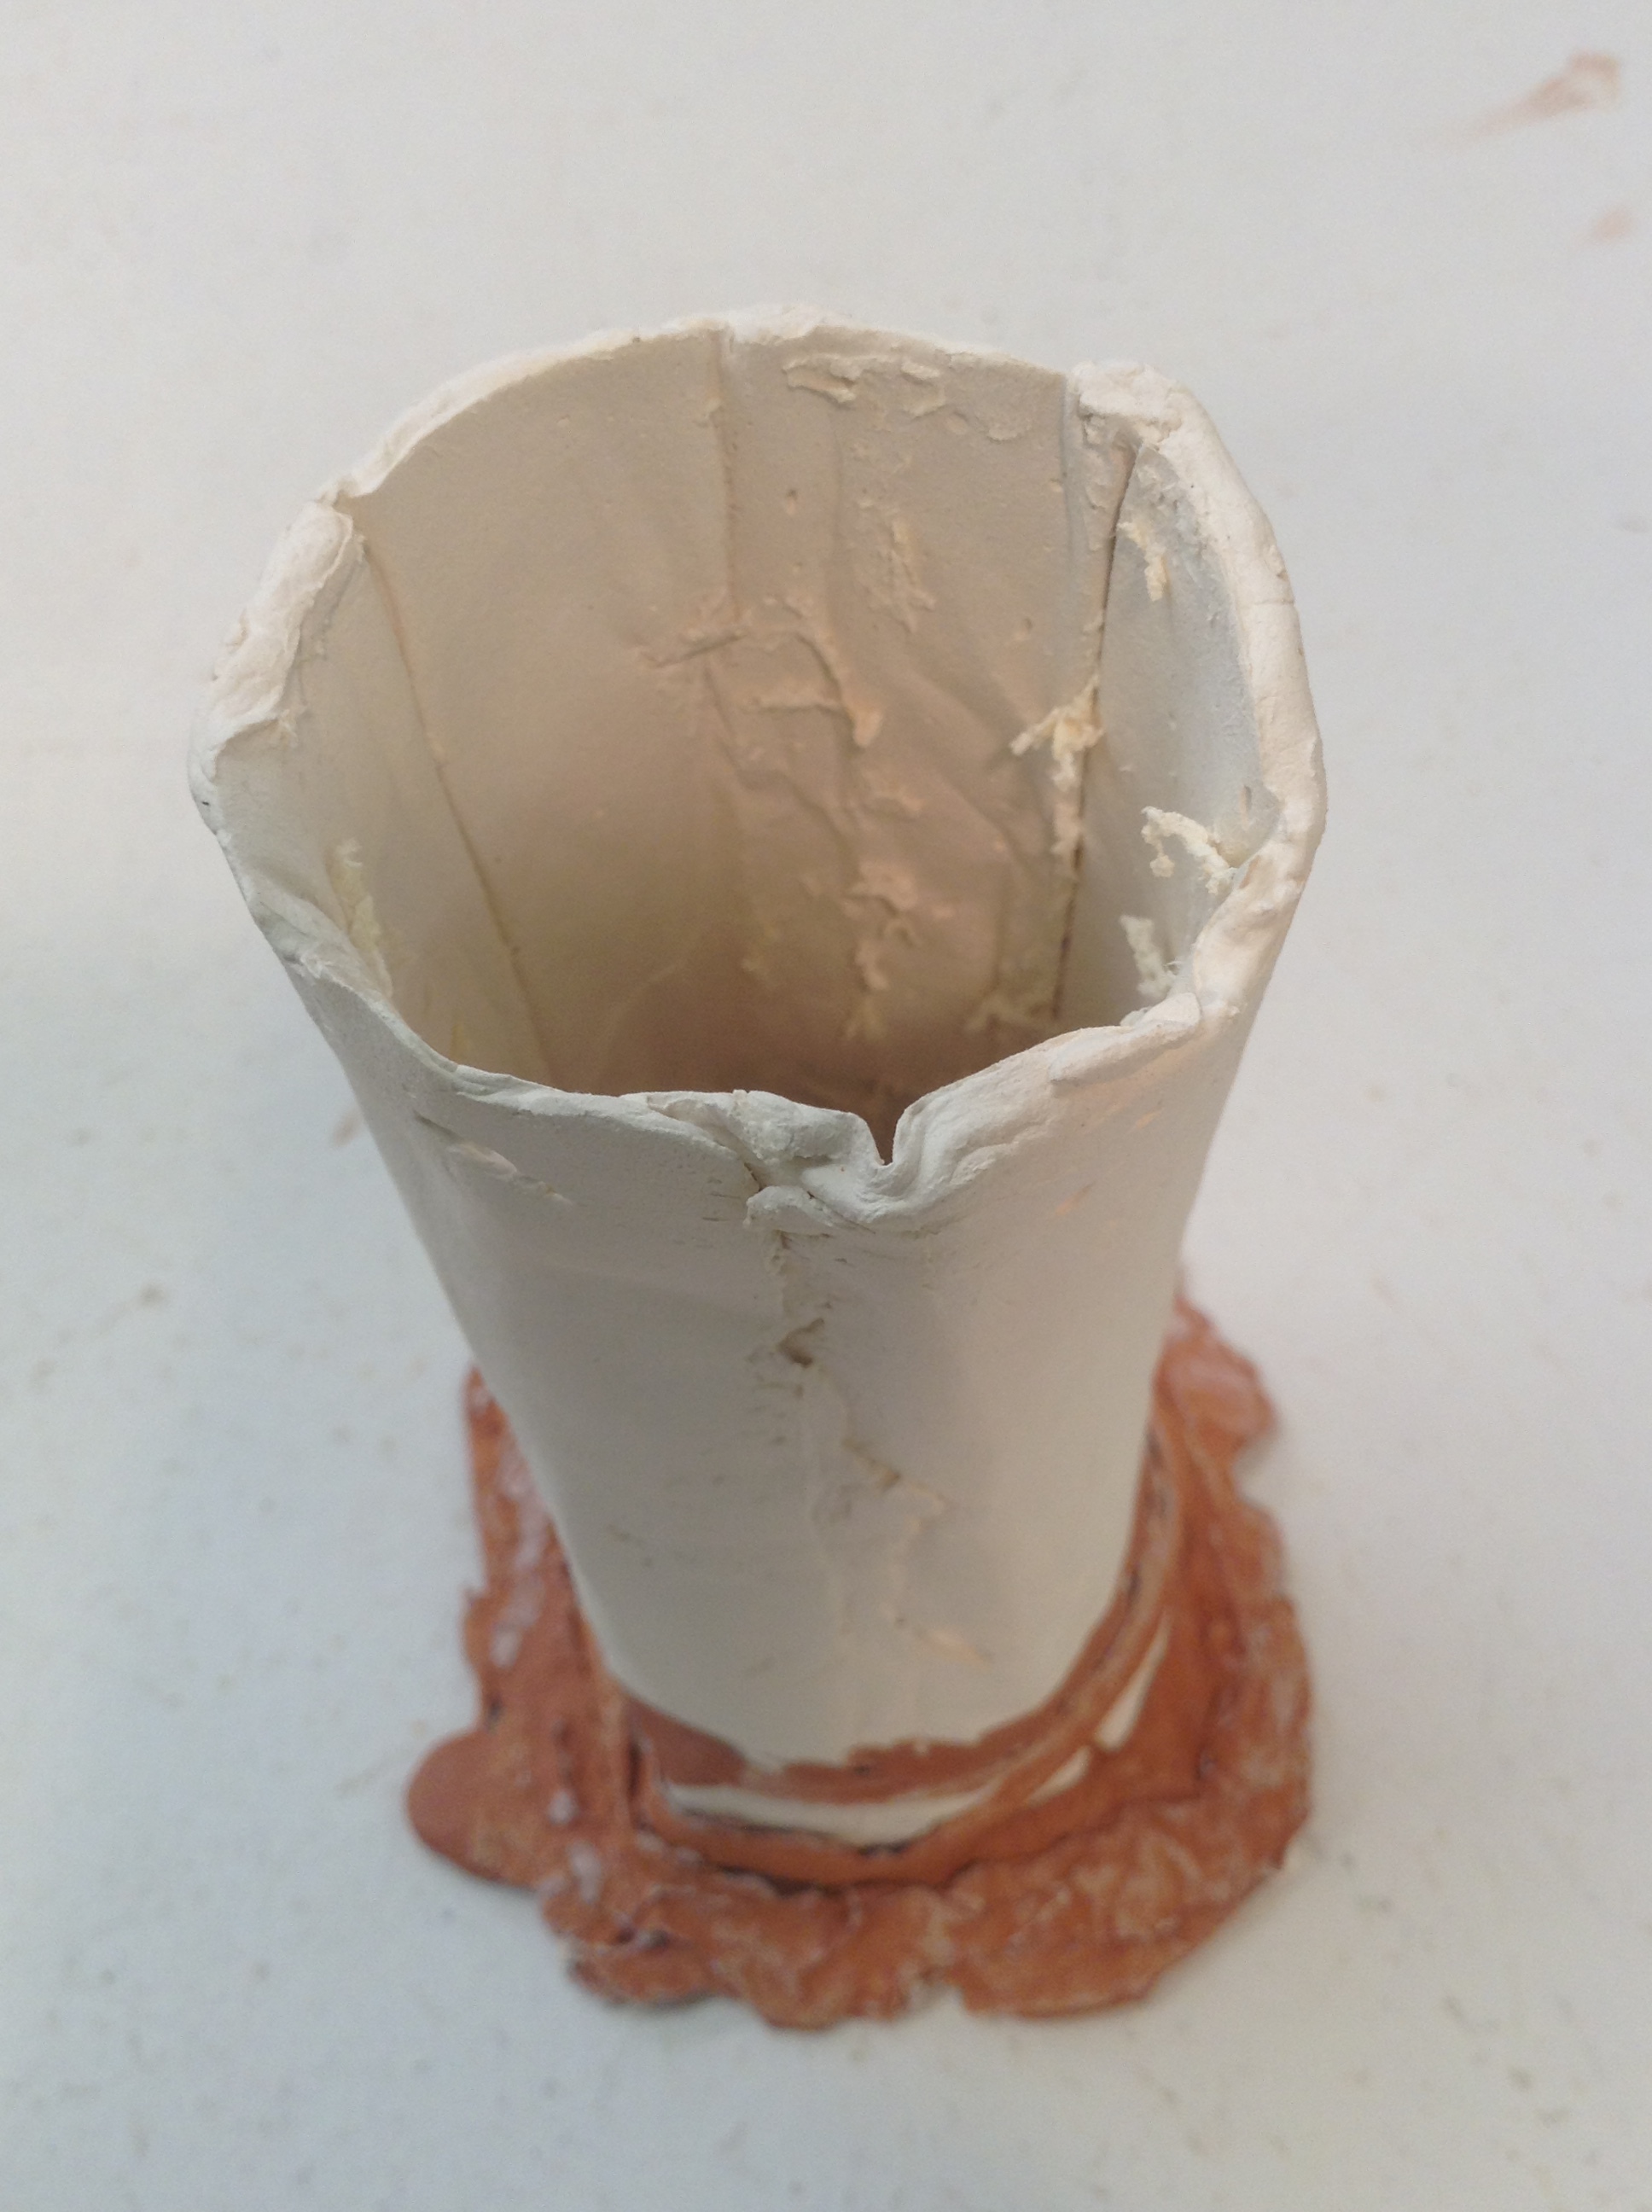
Finished cup sample, clearly rumpled and in need of refinement of technique. But interesting still! If this roughshod laminate were supported by some flexible rigid support, all details would be cleaner, flatter, and faster. Such an improvement is definitely on the to-do list.
COMBINATION OF PASTE AND TRAILED METHODS
An important aspect of these methods is that the trailing recipe and the paste recipe adhere to each other easily. I found that it does. The white column form with the red base was the first attempt and gave good results.

Red earthenware slip pooled into a square shape on napkin tissue. It takes a few minutes for it to set up a little on the bottom, but as pictured, would drip off the top if tilted too far. Conveniently, anything placed on this wet surface would adhere permanently.
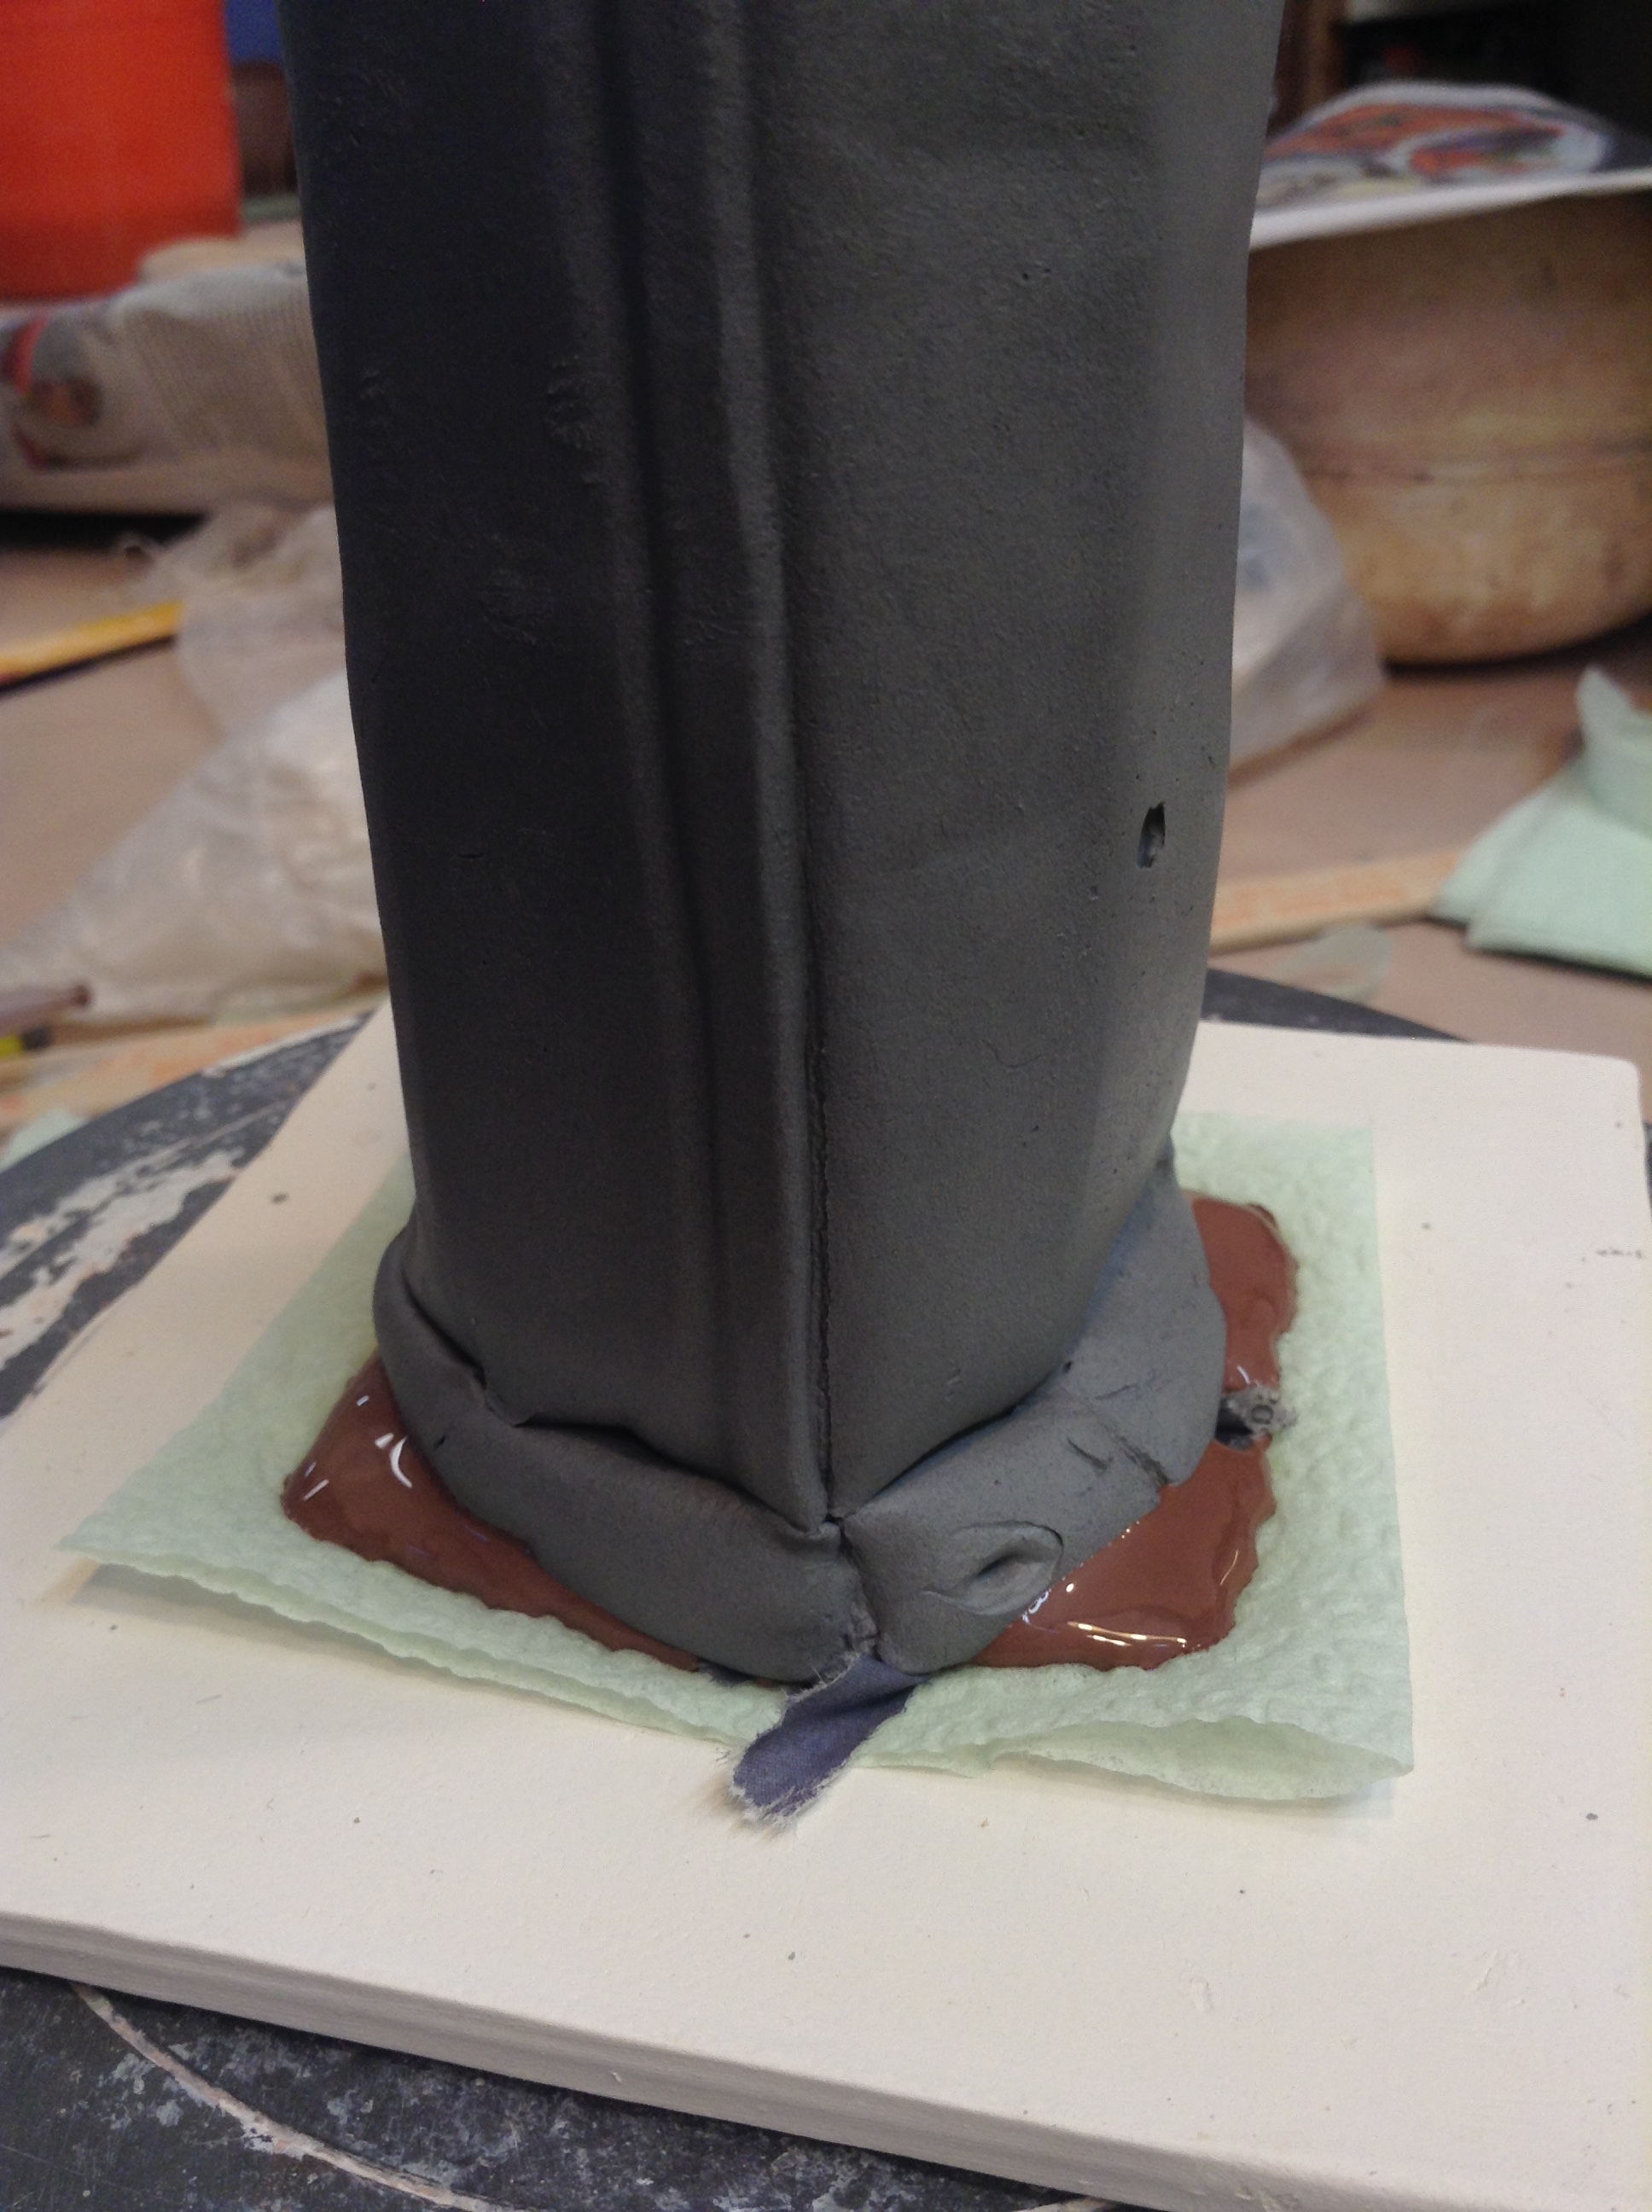
The white paste form has been quite literally squashed down onto the thickened slip base. It connects perfectly, and sets up pretty quickly in case I have to move the sculpture around.

Showing the first trailed layers stacked on top of the pooled, fully-covered floor layer. Here, I was still thinking of a square format wall growing upwards to surround the base of the tube, but that quickly changed!
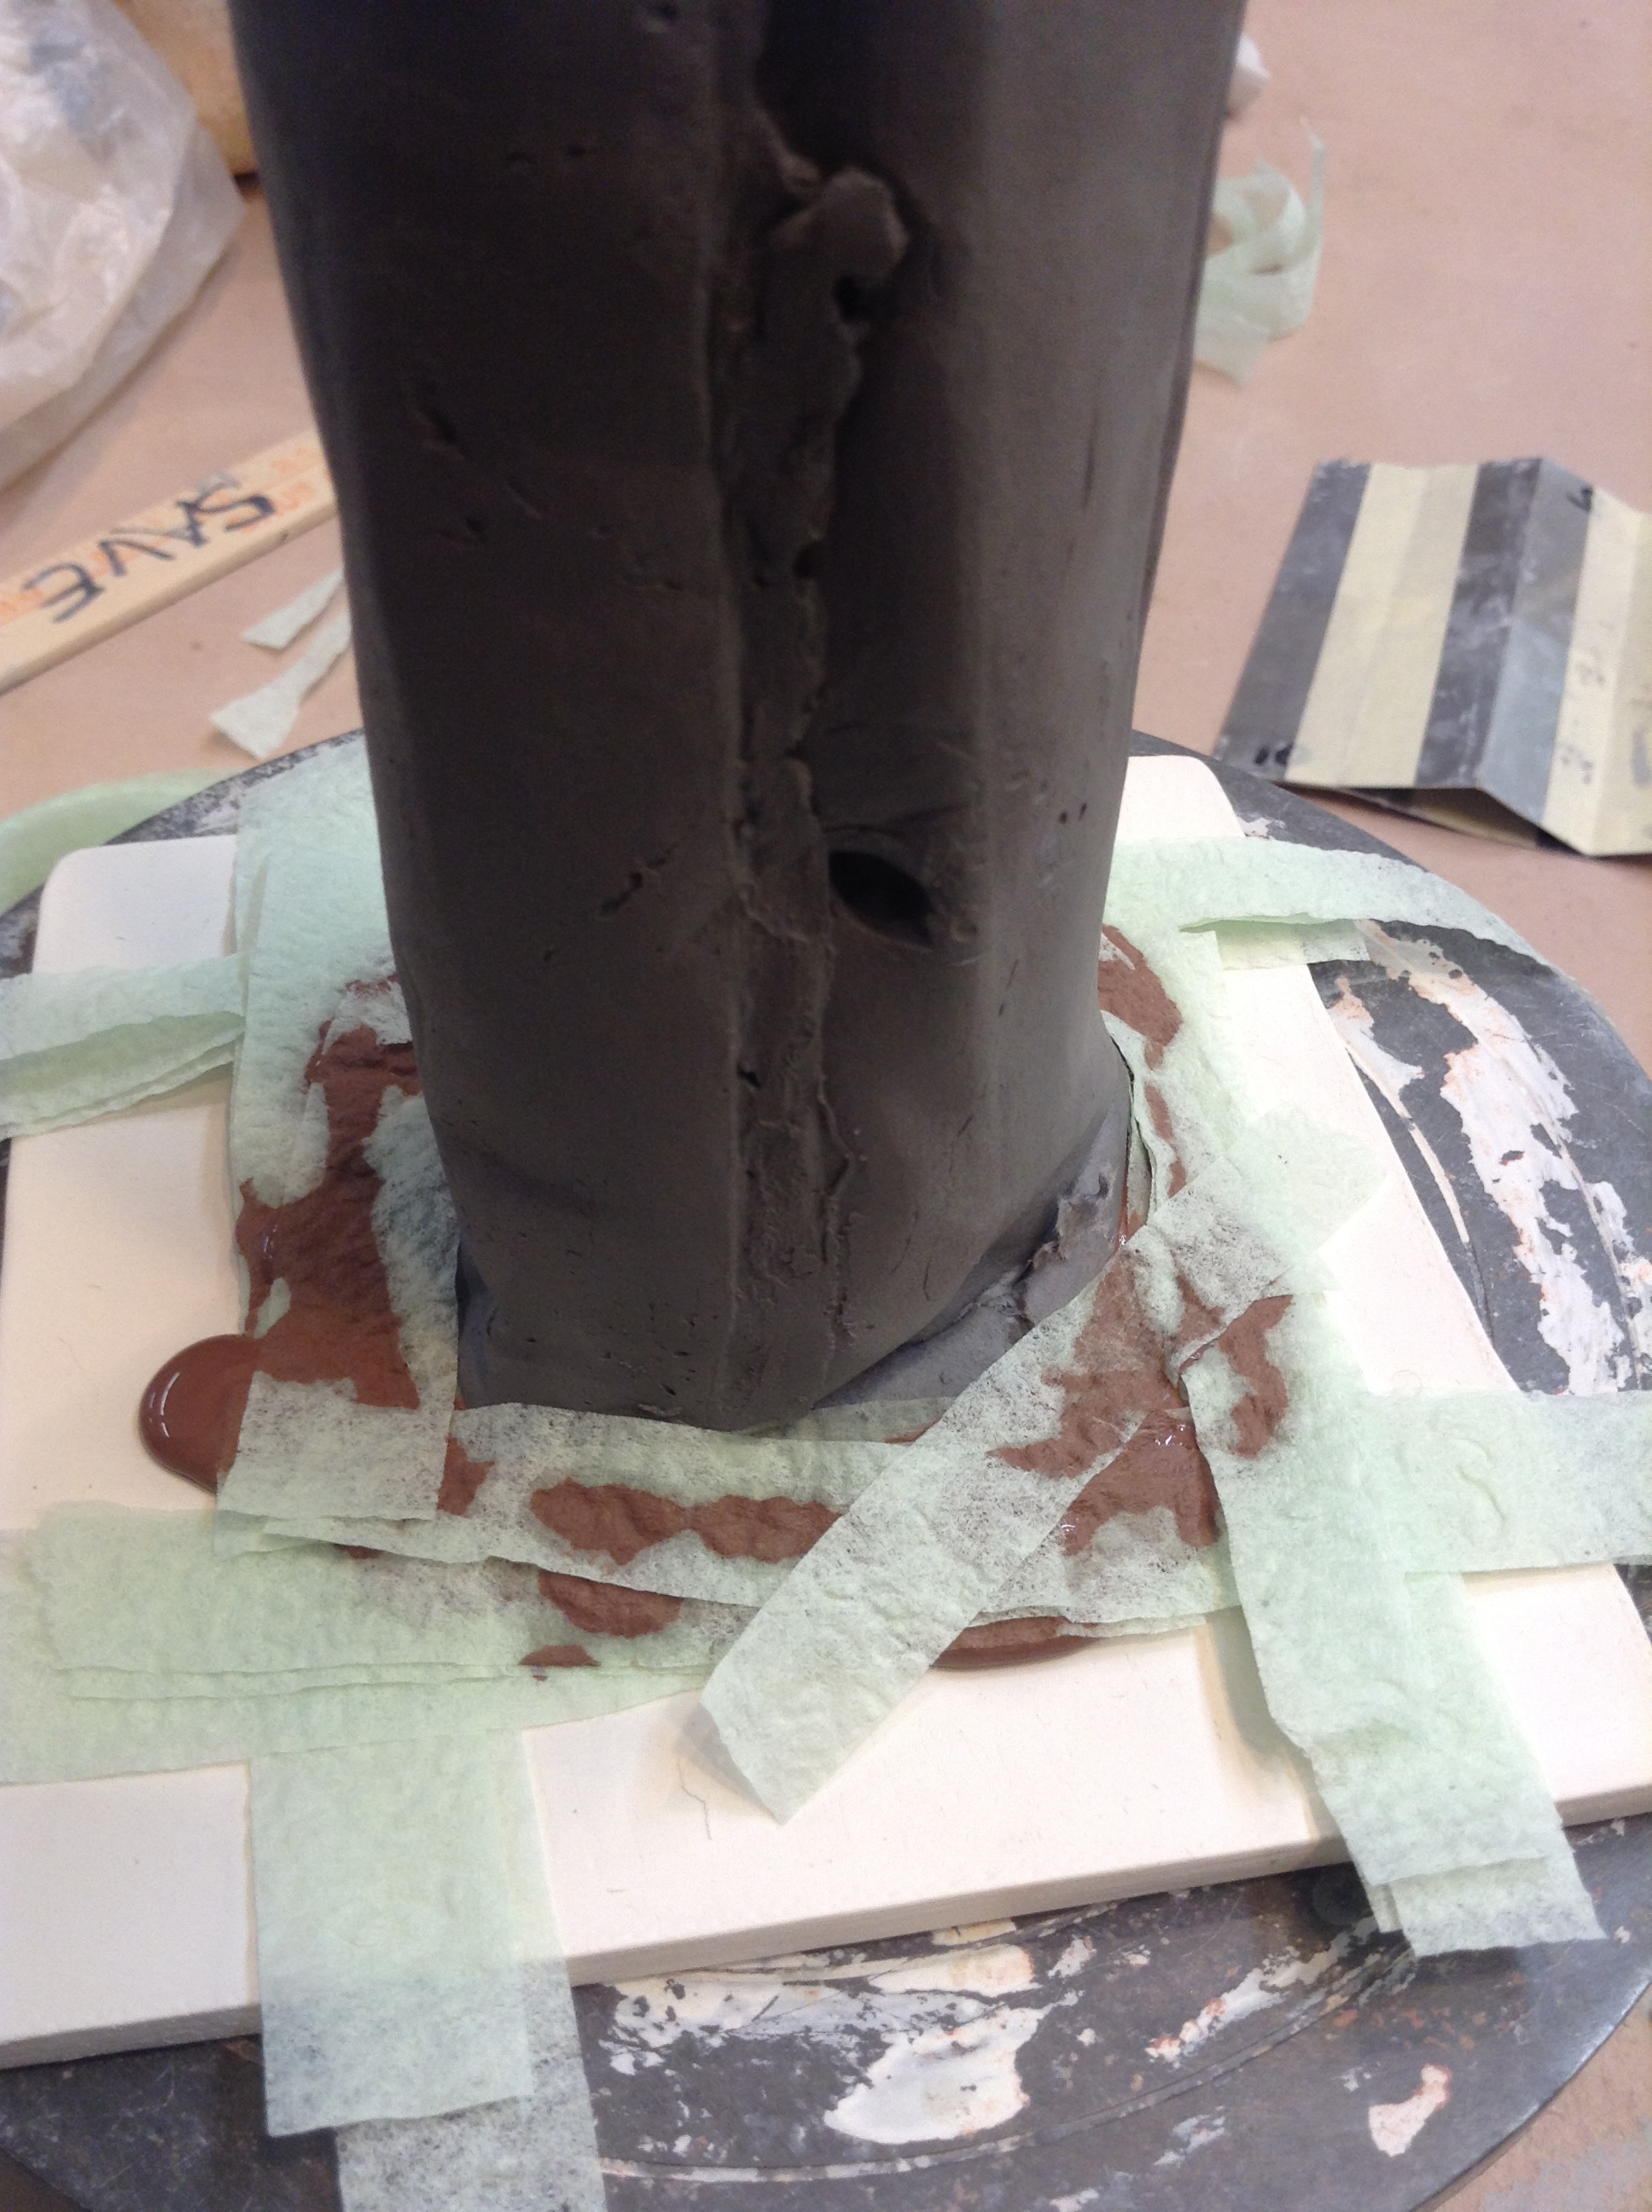
This strips of napkin tissue added at angles closer to tube than a square can get. Not sure using the strips method is worth the effort here. But my future designs need this technique. The center form like the white one here would be decorated or structurally changed by this slip trailed facade.

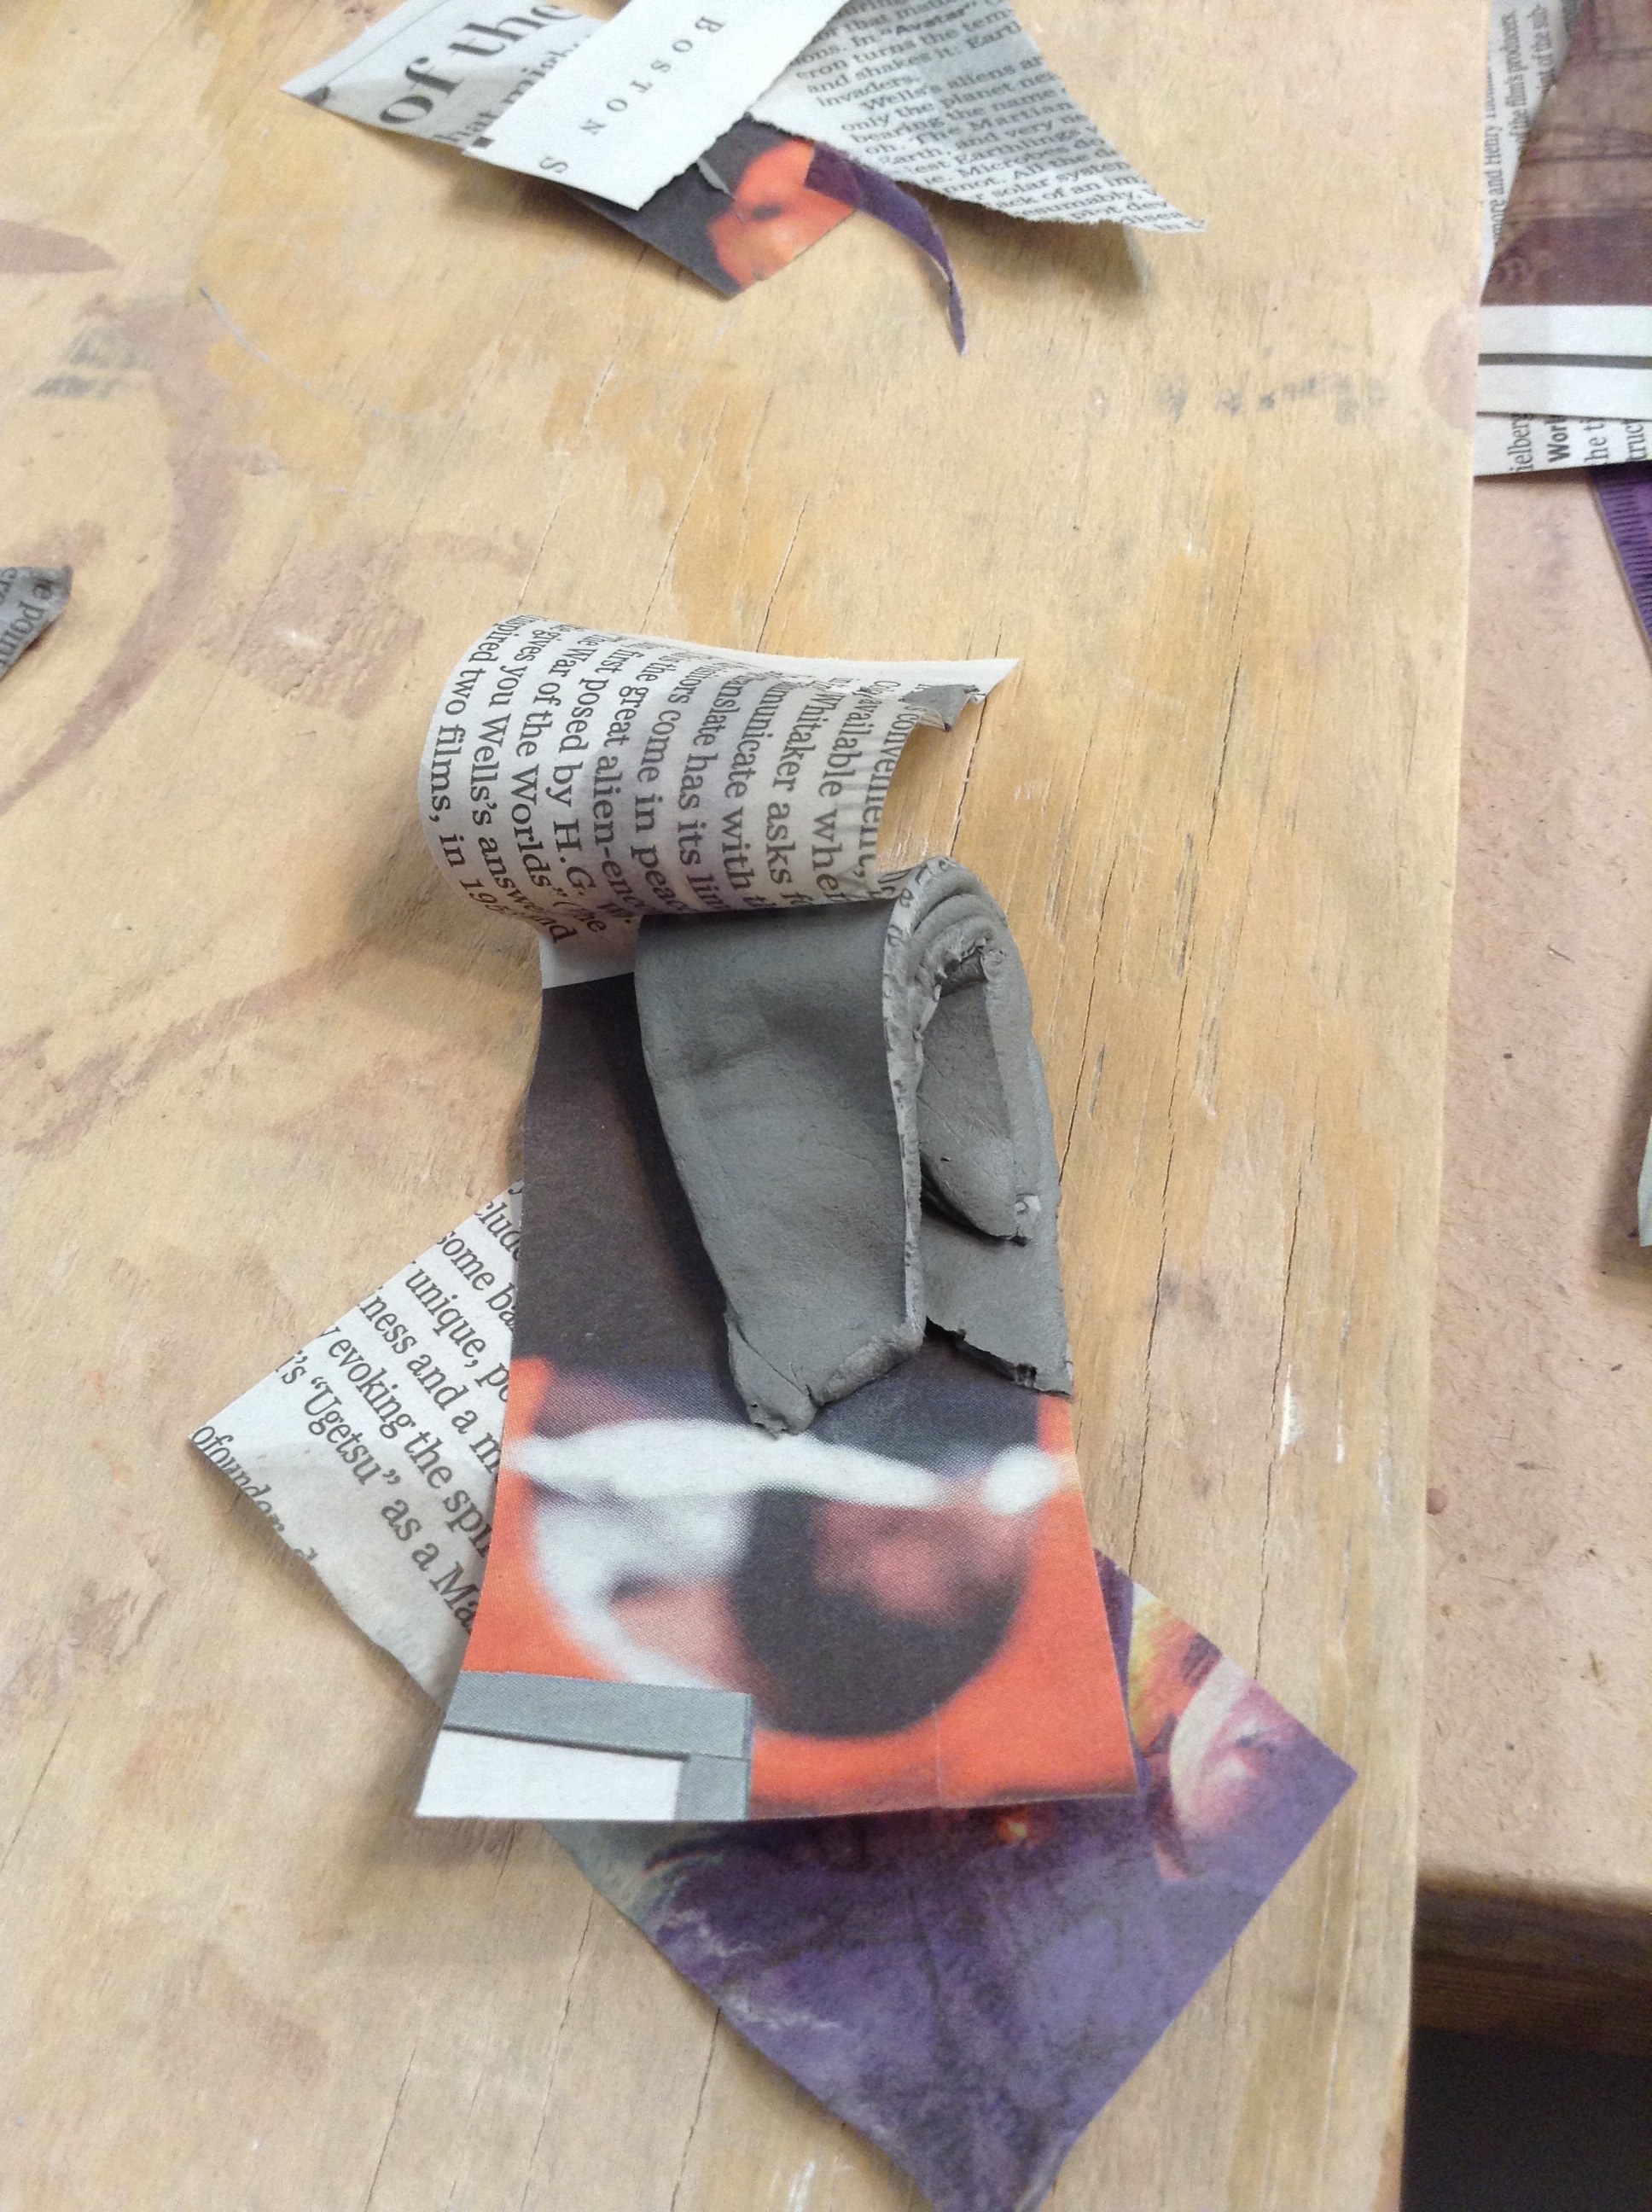
Fired bicolor structure, still with ash residue from paper burnout. The thin coil-like stripes toward highest red areas were actually a surprise. A thin strip of napkin tissue was flat on the table, and I trailed some slip down the center. The paper curled toward the center and I helped it close up like one might roll a cigarette around loose tobacco. This became a portable, completely wet line of slip. Very interesting and probably quite useful later.
RECIPES
- Paste or Frosting-like clay slip: About two tablespoons per cup of slip, stirred really well. Add a little more for thicker paste, add a little water for thinner slip. Adding unaltered clay slip seemed to affect it less than adding plain water did.
- For slip trailing (that will still comfortably pass through a squeeze bottle tip): a few drops of vinegar per cup of slip. Be careful adding vinegar in minute amounts. A consistency you can still squeeze through the bottle gets inconveniently thick very easily.
Should you, or could you, make these slips from your existing moist throwing body? You can, but it's an amount of work people cringe at the thought of doing. If you need the moist clay and slip clay to match, then you must do it. It will be a bit less work if you start from your mushy recycled bucket because it's already fairly wet. The difference is only slight between the recipe for the familiar moist clay from bags, and a clay slip that can be fluid enough to squeeze through nozzles. Many good explainer articles provide varying levels of detail on how to mix up soft clay pastes like these from different starting points.
The stiffest recipes I used started from already-dense casting slip, and could be shaped like cake frosting. The basic components are dry clay powder, water, and chemicals that act as suspension and flow helpers (called deflocculants). For myself, I have used casting slip which is already fluid, and added a little vinegar to it which makes it slightly more syrupy to keep it from sagging when I'm laying out lines.
SQUEEZE BOTTLE PROBLEMS
I realized the awkward way that the slip consistency plays a big role in how controlled the forms appear. For the pieces shown in this essay, I had a fair amount of control over the consistency, but there's clearly room for better protocols. I was impatient and often got globby slip, but at least I know what to do when I want slip that won't squeeze out of the bottle evenly!
Just a bit of helpful advice: Mix your slip first in a wide container with a whisk or heavy flat utensil, before putting it into your squeeze bottle. I made the regrettable choice of adding vinegar to the squeeze bottle directly, thinking "Oh, I'll just shake it up." It mostly works, but not really.
WHY BOTHER WITH ANY OF THIS? WHY USE SMELLY SLIP WHEN HANDBUILDING PROCESSES ALREADY EXIST?
Okay, I'm already being a bit facetious: The clay slip thickened with vinegar doesn't really smell much. I've heard that these mixtures might spoil over time, but mine so far are okay.
From and engineering and artistic perspective, there's already a great deal of work using liquid slip as casting material and thicker slip as a drawing medium. To add to that body of work, I'm using paper as non-typical shaping methods for the thickest versions of the slip recipes. Using this paper-clay-paper laminate, I'm exploring the methods needed to make functional pieces or sculptural objects in ways that could scale up to many dozens of pieces. Plus, it's fun and the resulting forms happen fast. These methods have the incremental-slice methodology of digital 3D printing, but also retain some of the analog hand variations possible with sculpting. Since it's a mix of processes, at the moment I'm calling it "hand-printing."
From a visceral standpoint, I do wonder if something is missing from the process when we don't touch clay directly. Touching the familiar form of clay holds a great satisfaction for so many people. Soft clay seems to invite the most direct approach of the hand, and records all actions upon it. We make our mark on the blended, soft and moldable stuff from store-bought bags. We wrestle and thrash with the hard-won, rocky, grainy, often sticky piles of it found outdoors near bodies of water. Is there anyone who hasn't touched clay at some point?
But, that said, for those of us who are as likely to draw as sculpt, or build instead of sculpt, what can clay do? Maybe something like these things I'm exploring here.
THE SKY'S THE LIMIT.... ALMOST
What's next?
- Larger abstract forms with more than one interior wall
- Changing the orientation of the growing pile so that the layer direction changes
- Getting significantly different diameter nozzles, so that a layer might have one huge strand or several smaller strands, all combining to become the structural wall
- Pleated surfaces that are mounted in frames as wall decoration
- Slip trailing as typically used for decoration printed onto newspaper just prior to spreading the thicker structural slip, so that after distortion, the surface is already patterned
FIN
Thanks for looking at the pictures, and bonus thanks for reading. This is a small beginning. Let me know what made sense and even better, what didn't make sense.