NEW IMPROVED COLOR BLENDING THEORY VIDEO

The pandemic delayed my presentation in March 2020, but it's ON AGAIN in March 2021. The entire NCECA conference is virtual! Yay? Here's the prerecorded presentation that I'm going to zoom into people's heads. March 19 at 5:15pm. There will be a Q&A session.

For any people who might have seen the first version of my presentation, this one is MUCH BETTER even though it covers most of the same topics.

https://youtu.be/XtboRBsArxI

Wheel-formed shapes as plaster molds with pre-drilled holes

Wet pottery shapes make good temporary vessels for casting plaster. To create holes in the plaster without having a drill press, I'm pushing red plastic straws (coffee stirrers) through the clay wall to poke into the interior. When the plaster is poured, it flows around the rods, leaving those holes later when disassembled. These forms allow me to build string meshes more similar in size to the plaster core shape.

NOTES FOR POTTERS

The fact that I'm stabbing these forms with plastic straws might be irrelevant to your needs, but throwing these forms for plaster filling is easily something you might need. Here are some comments that might help:

  1. Think about how much time you have for the project. If you want to throw the forms and pour the plaster within a few hours' time, throw with as stiff a clay as you can manage, so that you don't worry that the weight and water content of the plaster doesn't collapse your form before the plaster sets harder.
  2. For more leisurely timing across a number of days, throw with any clay you can handle, let the forms get to leather hard on their own. Make sure that tall, narrow forms get to the late leather-hard stage for stability.
  3. Use a flexible rib on the interior of the outer form, and on the outside of the inner form, to remove water, slip, throwing lines, and to refine the shape, if that's a priority for you. Freshly thrown clay, especially if wide of design, and made of really floppy clay,  might collapse under the weight of the plaster. For the double wall form, where both forms are connected by their rims to the throwing surface, shape distortion is less of an issue.
  4. Check to see whether the rim of your forms are level. It will be convenient if the rim is parallel to the table surface where you'll be pouring the plaster. Use a cutting tool to trim off any extra height wobble the thrown piece may have. This will allow you to fill the entire for with plaster.
  5. It will be very convenient if the rim of the outer form is flared slightly when made. This flare flattens against the base surface, which can then be flattened and sealed with your fingers.
  6. Don't make the walls thinner than about the thickness of your pinky finger. This shouldn't give you too much trouble throwing, and will still be stable enough to support the weight of the plaster.
  7. Try smaller shapes first, possibly setting up two or three. Then when you mix the plaster, you can fill all the molds at once.


SOLID PLASTER FORMS FROM SIMPLE THROWN SHAPES

Here are videos of the pouring plaster, and of the dismantling of the plaster after it has hardened.

These are solid plaster, with holes. The videos in this section show how they were made.

These are solid plaster, with holes. The videos in this section show how they were made.

Nothing weird about stabbing a clay vase with plastic coffee stirrers. No, not the slightest bit weird. The outside was divided up by lines, and I put straws at the intersections. This really is for filling with plaster since the straws go pretty far in.
Making a plaster shape inside a clay dome! I also wanted to have holes in the plaster shape, but I didn't want to use a drill press. The red straws make the right size holes, and look great while getting sunk in plaster.
Plaster dome sculpture gets its holes from straws. The unfolding process of pulling out the straws and the peeling off the clay form.

COMMENTS ON THE STILL PHOTOS

These photos show how you might approach making a nice plaster form that matches the inside of a clay form. The fairly stiff clay was very stable even when filled with plaster. Even if you don't want to stab the form with holes, this method lets you make plaster forms for using later as molds.

I made the two shapes thinking I wanted one narrower, but that was the only planning I did. Next time I might make the rims of the thrown vessels more equal in diameter so that the resulting plaster forms match when stacked. They do okay, now, though.


DOUBLE-WALLED NESTING WHEEL THROWN FORMS: Small and large

This plaster bowl is an example of using the space between two nesting clay forms.

This plaster bowl is an example of using the space between two nesting clay forms.

These videos show a variation on the methods above where a second, smaller bowl form is made to go inside the larger one. The difference in sizes between the two bowls create an airspace when they're both rim-down on the table. This interior space is where the plaster flows, hardens, and is removed. Here again, you don't have to be using the straws, but you might find a use for a plaster bowl in the studio. It's also good throwing practice to think about the shape that might result.

I needed a plaster shape that was like a bowl that that many holes drilled through it. But plaster is fragile. And besides, I don't have a drill press. So I made two clay forms and planted straws through both layers. Watch how it is unmolded.
A short, silent video showing how two plaster bowl forms relate. Holes made by jamming straws between layers of clay, and pouring plaster in between. After the plaster hardens, tear away clay, and pull out straws.

STILL SHOTS OF DOUBLE WALL FORM

Still shots of the process of making the clay forms, and stabbing the straws through both layers. The large number of straws of each color look very pretty. If you're going through a package of colored straws and NOT trying to put them in some kind of order, there's something wrong with you. The finished unmolded plaster shape is shown last. It is ready for use as form for the string scaffolding.


PLASTER BOWL NUMBER 1

PLASTER BOWL NUMBER 2


WRAPPING IT ALL UP, or at least trying

These bowl forms are intended to be a rigid shape that holds flexible straws, which in turn get wrapped with strings. I've already done it with flat plaster slabs. But it's a bit complicated now. I haven't figured out yet how to best wrap the straws with string or paper. Here are some shots of my attempts. 

The paper loops can hold slip inside them and outside them. The photos show only a few loops created. They would alternate all around the form. I picked a certain pattern of holes that seemed interesting, which is why many of them are unused. The winding of combustible things around the straws will take some more planning. But I like the progress so far.


GOING FORWARD

The next round of plaster forms will have to wait: I'm definitely going to start USING the forms for their intended purpose. I'm having a weird time cheaply sourcing string that I want that I don't mind burning out in the kilns I have access to. But I have enough to use in the short-term.

Thanks for reading! 

Using string and various rods to create dippable, deformable supports ceramic slip trailing

A TACTILE GEOMETRY

String can be used to form tensile structures when wound around rods, leading to anything from geometric patterns to free-form organic nest-like patterns. I started to ask myself whether those patterns could be captured in clay. Ceramics artists have already been dipping combustible materials in clay slip and firing them, so why not try these rod-supported patterns? Here's the process I've found so far using combustible or removable supports and filaments, plus wet or thickened clay slip. I'm sure this can lead to many flat or dimensional patterns that would otherwise be more difficult or impossible to create.


DIVERSITY OF PATTERN

The structure of the final piece has many contributing factors. As much order as there is in the rods, and method of string winding, there is still much improvisation about where the slip goes, and what happens to the system after it sets up. For me, this is a perfect example of combining intricate predetermined string patterns, yet leads to distorted, organic liquid clay slip forms.

What follows is some recent progress with strings wrapped around metal nails or plastic tubes, which are then dipped in clay slip or used as 3D slip trailing meshes. Some of it is interesting, and some of it...well, to put it kindly, some of it needs more work to become useful.


ZOO OF FINISHED RESULTS

A range of ceramic pieces has been made, with varying degrees of success. The scaffolding itself has already gone through a number of iterations. Admittedly, there is more work on the tools than on the finished pieces. But this won't come as a surprise to anyone who knows me. If you see a form you like, you can read below about how it was made.

Slideshow of various results from string used as container and manipulator of wet clay slip.


A FEW VIDEOS AND CLIPS

Along the way I make little videos of things I want to remember. Take a look here to see some of the action.

This video shows tool making process for a plaster dome that has many holes in it for securing nails. These nails will be used to hold woven strings, that in turn will be used to shape liquid clay slip as a experimental ceramics technique.

The dome in this video is shown as the large dome with holes.

Two circular rings of nails hold two types of string: a heavy twine, and a thinner kitchen string. The nails being pulled are holding all the strings in place while wet clay frosting settles inside. After this video was shot, the string form was distorted, taking the clay with it.

The inner lining was so thin to begin with, that after stretching it was in tatters. But since the layers were close to the stronger outer layer, they held on. Looks like tree bark.

This form is shown as finished in the gallery above.

After the last two nails are pulled out, the knotted twine wrapping is distorted by hand, changing the clay slip inside into a wonderful gnarly shape.

The piece resulting from this mesh is in the gallery above.

In this low-tech 3D printing technique, I weave coarse twine around wood dowels to form two rings. Then, thick clay paste is dispensed inside. After it dries a few minutes, the wood dowels are removed, making the string weaving floppy. The clay is distorted and changed by the movement, and becomes an interesting finished piece of sculpture.

The resulting piece is shown in the gallery above.

The spirit is willing, but the flesh is weak. Or, really, the clay slip was weak. After the piece dried, and was fired in the kiln, the stresses in the clay matrix were too great and the parts cracked. But the pieces were so very interesting.

The shattered pieces from this form are the white bits with holes and jagged edges.

Since everything is based on spinning, why not use the wheel to make circles on a hand-sculpted bowl while it's upside-down? This form will become a mold for plaster.

This dome is one of three shown that get stabbed with red straws, then filled from underneath with plaster.


SCAFFOLDING MATERIALS SUMMARY

There are many ways to build an array of holes in a material, but I opted to start my exploration with a hoop-and-tape method, and progressed into plaster. The key feature to these methods that I find useful is that I don't need a drill press, even though i lose out on a little accuracy. As it happens, accuracy of rod angle might not be important.


ARRAY TYPES

Hoop and Tape: Not bad for a hack!

I started by wanting a round array of rods that would eventually lead to container type objects that you could drink from or plant in. This was my first solution. It works pretty well! The tape loosens as the winding gets taller, creating a fish-weir type shape at the top, unless you add some spacing elements. Here are two windings on such a base. Different store-bought hoops are different enough in diameter that using two adjacent sizes leaves enough room in between for a thickness of slip that is strong enough to hold up after lots of distortion.

Single round array from embroidery hoops. Rods held with tape.

Single round array from embroidery hoops. Rods held with tape.

Hoop and tape form showing a particular winding that makes a smoother string surface on the inside of the rods. The windings develop in many ways with respect to whether the rod bump is involved in the casting or not.

Hoop and tape form showing a particular winding that makes a smoother string surface on the inside of the rods. The windings develop in many ways with respect to whether the rod bump is involved in the casting or not.

Plaster: A bit fancier!

The plaster bases that hold the rods steady seems like a good development. Here are examples of early stages. The plaster bases themselves are interesting to make!

Round array made of plaster. Holes are about 1/2 inch deep to accept rod material.

Round array made of plaster. Holes are about 1/2 inch deep to accept rod material.

Square array made of plaster. Holes are about 1/2 inch deep to accept rod material.

Square array made of plaster. Holes are about 1/2 inch deep to accept rod material.

Example of using plastic embroidery mesh to align nails vertically in concentric circles. The space underneath where the points are represents the part buried in plaster. No drilling!

Example of using plastic embroidery mesh to align nails vertically in concentric circles. The space underneath where the points are represents the part buried in plaster. No drilling!

Nail holding apparatus just placed in wet plaster measured to exactly the correct depth.

Nail holding apparatus just placed in wet plaster measured to exactly the correct depth.

Several clay dome shapes with lines drawn on outside to indicate to me where to drill the holes. Unclear yet whether these subtle changes will matter after all is finished. But I could always make these as just normal ceramic bowls!

Several clay dome shapes with lines drawn on outside to indicate to me where to drill the holes. Unclear yet whether these subtle changes will matter after all is finished. But I could always make these as just normal ceramic bowls!

Example of the clay and straw pattern that will eventually become a plaster dome that holds nails for winding the strings that support the clay slip.

Example of the clay and straw pattern that will eventually become a plaster dome that holds nails for winding the strings that support the clay slip.

Interior of plaster dome forming bowl. All these ends of coffee stirrers will be completely enclosed in plaster, which eventually is used to hold nails. Conveniently, pushing the straws through the clay wall left a little plug of clay on the ends, w…

Interior of plaster dome forming bowl. All these ends of coffee stirrers will be completely enclosed in plaster, which eventually is used to hold nails. Conveniently, pushing the straws through the clay wall left a little plug of clay on the ends, which prevents most of the plaster from draining out.

Unmolding process of plaster dome form. Clay form was sculpted for pouring plaster inside. Lines were drawn on outside of clay bowl for locations of red coffee stirrers to push through. These red pieces are encased in plaster, but pull out, solving …

Unmolding process of plaster dome form. Clay form was sculpted for pouring plaster inside. Lines were drawn on outside of clay bowl for locations of red coffee stirrers to push through. These red pieces are encased in plaster, but pull out, solving the problem of my not having a drill press. Here, the wet clay bowl form is being dismantled after the plaster has set. The metal nail is shown here as example of the radiating angle all the holes have.

Large plaster dome form with different hole spacing in different areas.

Large plaster dome form with different hole spacing in different areas.

Plaster dome shown here with all its stirrers pulled out. Smaller dome in back, made in similar way, shown with all holes filled with nails. This would make a very complicated winding. Much more likely to use a few nails in a simpler pattern.

Plaster dome shown here with all its stirrers pulled out. Smaller dome in back, made in similar way, shown with all holes filled with nails. This would make a very complicated winding. Much more likely to use a few nails in a simpler pattern.

TECHNICAL COMMENTARY

  • Array material: Plaster instead of wood
    • The process of making the supports is almost complex enough to warrant its own blog entry. But the summary will do fine for this explanation: Plaster has many uses in the studio and I felt it was convenient to use as the support material for the rods. 
    • Wood is plentiful and easily worked, but I wanted not only flat panels but also curved ones. And besides, my clay shaping ability is greater than my wood shaping ability.
    • Holes would typically drilled (and be more accurate!), but, instead I arranged the rod materials how I wanted them and poured plaster around them.
    • Hard material supports rod materials in a regular pattern or array for weaving the strings. First pattern choices were circles in concentric pattern, and squares or rectangles. Next patterns were more detailed arrangement of points.
  • Rod material: nails, wood skewers, coffee stirrers
    • Metal nails are useful because they're smooth enough to pull out of the looser string windings, and rigid enough to stay straight, if winding needs to be tight. Metal nails rust and give bits of red color to my clay, and can be difficult to remove if the clay dries on them. Nails come in standard and convenient lengths, but I'm not cutting them down at this time.
    • Wood skewers are easily cut to different lengths and are somewhat consistent in diameter. They can be burned out in the kiln, but I haven't tried that yet. The bamboo type carry splinters which can make pullout difficult on the thinnner, multistrand strings.
    • Coffee stirrers are very easily cut, give no pullout resistance, and don't add mineral color to the strings or to the slip. They are flexible at full length, so the winding might become distorted from its planned shape. They would burn out, technically speaking, but I'd rather not. Fortunately, they're easy to remove or trim off excess. This particular brand fits snugly around the nails, so occasionally I'll need the nail to be protected from the strings. I might use the nails always covered with stirrers.
    • FUTURE rod materials include stiffened clay rods, thin kiln-stable wire, pasta.


  • Wrapping material: String of various weights from twine (thick) to thread (very thin)
    • Thread and string are useful when wrapped in close-spaced parallel lines, for presenting itself as a flat enough surface for slip trailing. Can easily be moved aside to trail slip through the surface rather than onto it. I haven't burned out any of the thinnest thread yet, but I'm guessing it leaves a tiny hole.
    • Butcher's or Kitchen String was good as a space-filling strand, but didn't seem to attract the quick connection to the slip. Tiny amounts of slip actually just slid off the string. Future use will involve pre-watering the string to get a better adhesion from the slip. The string was easy to remove, if it did not get too embedded into the slip during distortion.
    • Twine was interesting because its furry texture helped hold slip where it was deposited but also gave more texture after firing. That furriness made it a little harder to remove from the stabilized or dry piece, but presented no real problem. Burnout was complete enough with only a little easily removed ash.
    • In similar situations on pottery shapes already made,  flexible string can be used to lay out patterns around the curved surface of a piece of pottery. In this way, the string is only playing a textural role, since it cannot support itself.
    • Being generally absorbent, string woven onto itself or wound around rigid rods is structurally-sound enough to hold up under a quick dip in slip, and thus to absorb enough water to leave a coating of slip on all surfaces of the string. After the slip dries, the whole thing can be put into the kiln to permanently set the ceramic and burn out the string at the same time.
    • The resulting pieces have capture the string's texture when woven or wrapped around nails, but show how that detailed original form gets distorted into more organic shapes. The early part can be mostly reproducible, but the later part definitely resists repeatability.


  • Clay materials: SLIP
    • The clay liquid is called slip and comes as a slippery, flowing liquid. This thin nature can be adjusted to a thicker consistency with a few drops of vinegar. I use thinner and thicker recipes in the sculptures shown here.
    • When thin, the slip can flow into absorbent things and, when thicker, create a coating on anything that's dipped into it.
    • For these sculptures, a variety of string materials can be used to make unique forms, or a greater number of production forms.


PROCESS SUMMARY

The process for setting up the winding for dipping or trailing isn't too involved, but I admit there are lots of details. But since I enjoy them, I have to make sure I am aware which ones make a difference in the final object and which are simply "recreational" detailing!

  • Pick pattern of rods among all the empty holes.
  • Choose rod material.
  • Unwind strand element and begin winding around rods.
  • Choose clay slip color and begin applying slip into or onto the strand mesh.
  • Alternate adding more windings, then adding more slip, until form is finished.
  • Allow clay to settle from fresh, or even longer to actually dry somewhat.
  • Remove any rod materials that must not go into kiln; remove any remaining rod materials that are convenient for distorting.
  • Remove any strand elements that must not go into kiln; remove any remaining strand materials as is convenient.
  • Allow sculpture to dry and finish the piece by baking it in kiln.


ASSORTED PROCESS PHOTOS

I admitted earlier that I love the problem-solving process so much, I might even like the tool-building more than making the finished pieces. Here are pictures of various aspects of the development so far.

Pictures relating to the round grid plaster form. The plastic mesh is standard embroidery mesh found in craft stores.


PIctures here show the smaller dome form I made first. Lines around the surface guide me to stab with cut up coffee stirrers to make the holes.


PIctures of a larger dome form, with more elaborate holes pattern. The plaster filling was shot as video because it was just too pretty to pass up. The video is in the section above.


Here the coffee stirrers are used as verticals. And since I got tired of wrapping the thread around each and every vertical support, experimented here with wrapping only around key points in the geometry, and simply passing over the rest. Seems to have worked. Note that in the last photos, the slip was still wet when the supports were lifted out of the holes in the base and tilted to distort the mesh. I find this very exciting.


Here are shots of the rigid string mesh that, unfortuntely or fortunately, resulted in lots of little mysterious cracked clay pieces. The solution may be to add even more paper pulp to the slip mix, or to use flexible rather than rigid verticals. Or some other thing entirely. But I'm certain that come combination of factors will allow me to wind a string form and dip it and have it survive the firing.


SO, HOW DOES IT WORK?

SURFACE TENSION  A key factor of this process is the fact that close spacing of taut parallel strings functions as a solid flat object with respect to the thickened clay slip. The apparatus that holds and releases the string is comprised of metal or wood rods for winding, and plaster for ordering the array of rods. The apparatus itself is reusable, and is made from a handful of easily-obtainable materials.

This modular system allows the rigid supports, and thus the string, to be used first in a deterministic way while the supporting parts are highly constrained, but allows for secondary structural changes to those same unsupported parts while the clay is still wet. Additionally, the supports can be made from combustible materials, so that removal is not always necessary.

At fairly low amounts of distortion of the string form, the strings contribute surface texture to the clay. Major distortions of the strings drastically change, and support, the overall form of the piece. Strings can also be an embedded, combustible core to dipped forms. For needed support, strings can be woven around other objects such as nails and wooden rods or coffee stirrers. This system of winding allows any non-combustible rigid supports, like nails, to be removed while the clay is at any stage. Nails and metal rods, for example, are useful because they are strong, but cannot typically be burned off in the kiln. The wooden supports, however, present no special problem in terms of firing procedure, and can be burned out, leaving behind clay structure.

Regardless of support type, the strings form clay indirectly as a source of texture, or directly by being coated by slip and burned away in the kiln. The flexible string is wound around any supports, which in turn provide a rigid enough structure for liquid to be contained. As the clay slip thickens and dries, it becomes more and more self-supporting. At different stages after the clay is self-supporting, the external supports of string and non-string elements can be removed. The form is either allowed to dry without changes, or can be further changed by manipulating the laminate created by the alternating, deformable layers of string and slip..

Artistically, the strings can be wound in many patterns that will be transferred to the clay. I've barely begun the search in this particular direction. 


THAT'S THE SHOW FOLKS

Now I go back to work. Refining the patterns in the strings and the liquidity of the slip so that larger forms can be made. I can't wait!


Hand-printed, thickened clay slip becomes dimensional with paper supports

I'm building up sculptural ceramic pieces using two recipes for vinegar-thickened slip, trailed or spread between layers of paper. I noticed that these thicker recipes can be supported by paper, distorted pretty significantly, and fired almost immediately.

I'm sure there are interesting characteristic forms that emerge from this process that differ slightly from typical casting of liquid clay, dipping and burnout methods, or moist-clay handbuilding. From the conceptual side of things, there are definite similarities to 3D printing, and enough flexibility to keep the spur-of-the-moment manual techniques making contributions, as well.

I wanted to find out several things:

  • How tall can the slip trailed stack get before it collapses? (about 7 inches at least, didn't collapse, ran out of paper, got nervous)
  • Can the thicker slip hold its shape even when quite fresh? (yes, with minimal help from paper)
  • Can I make windows in the walls? (yes, both for the slip trails and the spread walls)
  • What range of slip wetness can I still squeeze through the bottle? (thinnest was fresh unchanged slip that was almost too runny; thickest was a loose pudding consistency)
  • Will my white casting slip and red casting slip fuse together when I want them to? (yes)

My ultimate goal is to make forms that can be used functionally. I am happy with these quirky early results that I got. Many of the materials will be familiar to ceramics folk, except perhaps for the techniques of putting them together. The tallest or most interesting results are shown first, then followed by more detailed explanations and process photos of those and other trials. 

Thinner slip trailed from a squeeze bottle was built up with napkin tissue paper as separating and stabilizing layers. High-tech , eh? And the cheap kind, at that! Thicker slip was spread between layers of newspaper and manipulated into different shapes. Both methods can be combined in the same piece.

    This tallest stack with trailed slip (shown below) is about 7 inches tall (give or take). The open space at the top toward the left was a deliberate break in the layers. I was getting toward the end of my supply of cut up napkin squares, and frankly, wanted some excitement. Instead of making a continuous slip line all the way around the square shape, I stopped drawing in the same inch for several layers. The next full path was supported by the napkin layer, so it formed a "bridge" of clay slip. Happily, it is strong enough even after the paper burns away.

    Looking closely at the layers individually from the side, I see that the layers from the bottom to the top have different qualities of line. Some lines are more blobby and flattened, and some are thinner and rounder. This is because my squeeze bottle had to be refilled a few times, but I hadn't worked out exactly how much vinegar to add, or how best to add it. Some mixes were runny, some were too thick, and sometimes the bottle simply wasn't mixed thoroughly. But the sculpture never fell over!

    A tall stack of slip-trailed layers. Low-fire clay, cone 05 oxidation, unglazed.

    A tall stack of slip-trailed layers. Low-fire clay, cone 05 oxidation, unglazed.

    Stacked form just out of the kiln with white ash residue from burned-off paper napkin layers. This was brushed off easily.

    Stacked form just out of the kiln with white ash residue from burned-off paper napkin layers. This was brushed off easily.

    Thixotropic clay paste (in white) formed immediately into a simple shape seems promising. Shown here are all the surface details that were captured by the texture and wrinkling of the paper carrier. This texture could easily be removed once the clay is more stable, because there isn't anything new about the clay slip's properties other than the fact that it's more gelatinous when quite wet.

    Single tube form made with two commercial casting slips (white and red) that have vinegar added for greater stiffness. The white clay got more vinegar for frosting-like consistency, and the red clay got only a little vinegar, just enough to slightly…

    Single tube form made with two commercial casting slips (white and red) that have vinegar added for greater stiffness. The white clay got more vinegar for frosting-like consistency, and the red clay got only a little vinegar, just enough to slightly thicken it from its runny version as is comes as normal casting slip.

    Interior of white tube form showing newspaper ash still clinging to walls, and structural seams and wrinkles created when it was a wet newspaper-and-slip sandwich, wrapped while still fresh around a cardboard tube (not shown, removed before fir…

    Interior of white tube form showing newspaper ash still clinging to walls, and structural seams and wrinkles created when it was a wet newspaper-and-slip sandwich, wrapped while still fresh around a cardboard tube (not shown, removed before firing.)


    WHAT'S THE BUILDING PROCESS?

    Trailed slip lines (shown here, anywhere in this article where the clay is red) were separated by cut-up napkin paper. The paper is very absorbent, a bit stronger when wet than toilet paper is, and easy to cut in stacks with a paper cutter. The clay paste walls (white clay) is spread between layers of newspaper. 

    In each case, absorbent paper is used as a support.  I chose newspaper and napkin paper because they're both easily obtained and folded, and allows these liquid or soft clay mixtures to be manipulated in ways that would typically require more elaborate molds. Usefully, the paper confers minimal texture while preventing many extraneous marks, shrinks as the clay shrinks during drying, and burns off in the kiln.

    I'm using two types of paper for two different functions.

    • Newspaper: The newspaper is being used for the core structure and main support layer for the frosting-like (thixotropic!) white clay recipe. The resulting white tube shape in this essay is fairly bland, or at least, not the generic shape I really want. I did prove that the newspaper peels off the clay even when the clay is still quite wet. This enabled me to move the laminate around while completely wet, and yet peel a strip off the white clay square and expose it anywhere I needed to join two surfaces together. The wetness of the slip joins perfectly to itself without the need for the typical scoring and slipping process.
    • Napkin tissue: The napkin tissue paper is being used as the stabilizing layers for the more organic-style bottle-squeezed layers. The color slip is a darker brown as a contrasting color to the white clay. While I did not explore my guess that the layers do not have to be all horizontal, I can see by the undulating forms I did get that more extreme curves to the slip trailing would most likely hold together as well as flat layers do.

    PROCESS DETAIL: Slip Trailing

    Here is a series of photographs with details about the slip trailing process using paper napkins as structure. I was inspired by the idea I was taught by my grandfather as a young shaver: put a bit of toilet paper on a bleeding nick to help stop the flow. I wondered all these years later whether it would help the clay set up faster. I think it does!

    Casting the solid bottom of the clay form. Slip amount is perhaps 2mm or 1/16 inch? This is about to be covered by another square of napkin.

    Casting the solid bottom of the clay form. Slip amount is perhaps 2mm or 1/16 inch? This is about to be covered by another square of napkin.

    A few layers of square shaped pathway stacked on top of the solid base. Here the clay paths are supported by thin napkin strips because I wanted to find out if an open center would be easier to manage or would dry faster. Maybe, but the solid napkin…

    A few layers of square shaped pathway stacked on top of the solid base. Here the clay paths are supported by thin napkin strips because I wanted to find out if an open center would be easier to manage or would dry faster. Maybe, but the solid napkin square used as a layer is much faster. I'm particularly fond of the dimpled texture of the bottom layer that happens when the napkin embossing wrinkles up. (I can't prevent it anyway!)

    Several inches of the stacked form showing the change from napkin strips to napkin squares. The ultimate choice will be solid squares, unless there is some structure also being formed inside the form.

    Several inches of the stacked form showing the change from napkin strips to napkin squares. The ultimate choice will be solid squares, unless there is some structure also being formed inside the form.

    Several inches viewed from the side. It's fascinating! It's almost a pity the paper has to burn away. Maybe there is yet another sculpture technique that allows this effect to be permanant? Non ceramics, perhaps? Cloth squares glued together with ca…

    Several inches viewed from the side. It's fascinating! It's almost a pity the paper has to burn away. Maybe there is yet another sculpture technique that allows this effect to be permanant? Non ceramics, perhaps? Cloth squares glued together with caulking?

    NAPKIN PREP, or, AM I REALLY USING A PAPER CUTTER TO MAKE NAPKIN LINGUINI???

    I cut up many sheets of napkin paper and have them where I can reach them. The outer dimension of the paper sets a limit on how big an outline of slip I can expect to have enough support while wet. The current flowing nature of the slip seems to stabilize when I draw a line no closer than 1/4 inch from the edge.

    These thin papers burn off in the kiln with a minimum of ash and will not harm other pieces. There is often legitimate concern that the products of combustion of this extra organic material might cause kiln elements to burn out more quickly. The napkins involved in these tests weighed less than 20 grams. When you compare this to the vaster quantity of organic matter that is burned off from every single clay piece in the kiln already, the increase in risk is negligible. I'm sure someone will provide us all with useful data in this regard.


    PREPARATION FOR KILN

    I was concerned on one of the early pieces I made using this method, and dutifully tore off as much of the napkin paper as I could without breaking the form. Poor thing looked like a plucked bird, and I can't imagine it was worth my time. These pictured here went into the kiln fully papered.

    Examples of clay slip used in its most runny form, unalterd from the consistency bought for slip casting in plaster molds. Single napkin layers cut into squares stabilize hand-squeezed clay lines. Small textures of paper transferred to clay while li…

    Examples of clay slip used in its most runny form, unalterd from the consistency bought for slip casting in plaster molds. Single napkin layers cut into squares stabilize hand-squeezed clay lines. Small textures of paper transferred to clay while liquid. The paper squares do shift a bit, which might be important enough to prevent. Drawing the lines with the squeeze bottle sometimes touches the nozzle to the paper, dragging it a little because the immediately previous layer is still soft. The fix is to not touch the nozzle to the paper. Actually holding the paper steady --say, from a corner-- is actually too subtle because even that little pressure squeezes further the line underneath. Not that it's undesirable.

    Same process as for circle path. Shown here is a little overflow drip to left of picture. Happens every so often, and isn't personally horrifying. If I intended to prevent it, I'd try making the slip a little thicker, or drawing the line farther fro…

    Same process as for circle path. Shown here is a little overflow drip to left of picture. Happens every so often, and isn't personally horrifying. If I intended to prevent it, I'd try making the slip a little thicker, or drawing the line farther from the edge of the paper. If it doesn't snap off in the future, it's an interesting bit of evidence of the process.

    Red earthenware clay after final firing to cone 05. The clay slip used in its most runny form flows freely, is probe to dripping outwards from edges of paper, and squashes flatter with even the slightest pressure from above. Circle form out of the k…

    Red earthenware clay after final firing to cone 05. The clay slip used in its most runny form flows freely, is probe to dripping outwards from edges of paper, and squashes flatter with even the slightest pressure from above. Circle form out of the kiln. White shreds is all that's left of napkin paper.

    Square form showing interior ridges and ash residue leftover from napkin. These ashes would wash off, or, as I did next, blew them off with the air nozzle of my compressor.

    Square form showing interior ridges and ash residue leftover from napkin. These ashes would wash off, or, as I did next, blew them off with the air nozzle of my compressor.

    Interior of circle form, showing the highly variable surface that results. Since the paper cutout is completely intact, any extra heavy drawn line toward the inside of the shape simply becomes an extending blob to the interior. On the outside of the…

    Interior of circle form, showing the highly variable surface that results. Since the paper cutout is completely intact, any extra heavy drawn line toward the inside of the shape simply becomes an extending blob to the interior. On the outside of the shape, near the edge, it leaks downward.

    The enclosed bottom of the square form. This was made by pooling the slip everywhere on the bottom layer of paper. The texture of the napkin shows as impressions on the clay, as well as a larger wrinkle that apparently happened while I was moving th…

    The enclosed bottom of the square form. This was made by pooling the slip everywhere on the bottom layer of paper. The texture of the napkin shows as impressions on the clay, as well as a larger wrinkle that apparently happened while I was moving things around.

    Interior detail after all paper ash was removed

    Interior detail after all paper ash was removed

    Bottom detail shows my attempt at laying out inner and outer lines, and bridging them over for extra support. There is still ash residue the compressed air could not dislodge. I will probably use running water and a soft brush to remove the rest.

    Bottom detail shows my attempt at laying out inner and outer lines, and bridging them over for extra support. There is still ash residue the compressed air could not dislodge. I will probably use running water and a soft brush to remove the rest.

    Rather gnarly! The larger droplets are the result of squirting out more than usual, and the weight of the slip pulling towards the edge of the paper cutout, In come cases, even leaking downward several layers, or onto the firing tile underneath.

    Rather gnarly! The larger droplets are the result of squirting out more than usual, and the weight of the slip pulling towards the edge of the paper cutout, In come cases, even leaking downward several layers, or onto the firing tile underneath.

    WHITE CLAY AS PASTE, SPREAD THIN AND MANIPULATED

    The photos in this set show the setup of the white clay paste. It was originally intended to be dried in a pleated shape, while being held by the metal bending former. It almost worked, but it failed in an uninteresting way, so I scrapped the pleating idea and used the clay panel as a tube instead.

    Materials set up to make a paper and clay paste laminate. The newspaper square goes first and a matching one is stuck to the top. FInal goal is to have both squares of newspaper perfectly aligned with a layer of clay paste in between.

    Materials set up to make a paper and clay paste laminate. The newspaper square goes first and a matching one is stuck to the top. FInal goal is to have both squares of newspaper perfectly aligned with a layer of clay paste in between.

    Thickened slip with vinegar makes lovely textures. It would probably stay intact if allowed to dry really slowly. Here the goal was simply to make a layer that was too thick so that it could be scraped down to the final thinness.

    Thickened slip with vinegar makes lovely textures. It would probably stay intact if allowed to dry really slowly. Here the goal was simply to make a layer that was too thick so that it could be scraped down to the final thinness.

    Using flat sticks to scrape the textured slip down to the thinness regulated by the two rulers on either side. Thickness was about 1/4 inch, and could be a little thinner with practice. This scraping isn't perfect, and will probably be replaced with…

    Using flat sticks to scrape the textured slip down to the thinness regulated by the two rulers on either side. Thickness was about 1/4 inch, and could be a little thinner with practice. This scraping isn't perfect, and will probably be replaced with the squashing method used later.

    Excess size of thinly spread slip covered on second side with newspaper. Excess slip was scooped away and was perfectly usable for another project.

    Excess size of thinly spread slip covered on second side with newspaper. Excess slip was scooped away and was perfectly usable for another project.

    Carrying the laminate carefully to the former that will distort it.

    Carrying the laminate carefully to the former that will distort it.

    Paper and clay paste laminate distorted by pleated metal former. Originally the goal of this test, it didn't quite work as planned. The fold is too small angle for the thickness of slip and made bunching paper marks where I didn't want them. But the…

    Paper and clay paste laminate distorted by pleated metal former. Originally the goal of this test, it didn't quite work as planned. The fold is too small angle for the thickness of slip and made bunching paper marks where I didn't want them. But the concept is that the laminate starts flat, becomes distorted in geometric ways, and dries there. I scrapped this design and used the re-flattened panel as a simple tube.

    Newspaper peels off after a few minutes of stiffening from water absorption. While not necessary, peeling the paper back allows any area to become exposed for connection to other parts and any stage in the process.

    Newspaper peels off after a few minutes of stiffening from water absorption. While not necessary, peeling the paper back allows any area to become exposed for connection to other parts and any stage in the process.

    Self-supporting pasty column with lots of texture. Notice that there are air bubble tunnels all the way through the wall. This will probably be used much more deliberately to make walls with much more open spaces.

    Self-supporting pasty column with lots of texture. Notice that there are air bubble tunnels all the way through the wall. This will probably be used much more deliberately to make walls with much more open spaces.


    WHITE CLAY AS PASTE, SQUASH-FORMED: Faster, yes? Better, maybe!

    After finding out what happened when I spread the paste manually, I wanted to see if there were a faster way. For smaller amounts of slip, it turns out there is a faster way: simply squash it. This probably has a minimum thinness due to friction and how much pressure can be brought to bear on the simple materials used here. But if scaled up, with smoother and stronger paper, harder and flatter boards, and mechanical assist for pressure, I could make much larger membranes as laminates in a way that might be more convenient than spreading. Might not.

    This formless blob of clay slip, thickened with a little vinegar, is thixotropic. Meaning that it holds its shape pretty well, unless subjected to movement or vibration. It has no idea what's about to happen to it.

    This formless blob of clay slip, thickened with a little vinegar, is thixotropic. Meaning that it holds its shape pretty well, unless subjected to movement or vibration. It has no idea what's about to happen to it.

    Who says experimental ceramics processes don't have a "hands on" component? In this case, it was hands on, push really hard, wiggle, check, wiggle some more.

    Who says experimental ceramics processes don't have a "hands on" component? In this case, it was hands on, push really hard, wiggle, check, wiggle some more.

    The shapeless blob spread out into a remarkably even circle, with no planning. I didn't expect it! I didn't use the circle as it was, but I can easily see how making circles this way could  become habit-forming.

    The shapeless blob spread out into a remarkably even circle, with no planning. I didn't expect it! I didn't use the circle as it was, but I can easily see how making circles this way could  become habit-forming.

    The fabric rotary cutter shown here makes good cuts, but seemed to get dull quickly. This laminate is certainly not official rotary cutting material. Soon afterward I experimented with making cuts with plain scissors and liked it much better.

    The fabric rotary cutter shown here makes good cuts, but seemed to get dull quickly. This laminate is certainly not official rotary cutting material. Soon afterward I experimented with making cuts with plain scissors and liked it much better.

    The prepared square laminate. Cuts at edges are slightly compressed and don't squeeze open too easily. This would leave a distinct edge I can easily accept as a natural part of the process. But I bet they're sharp when finished.

    The prepared square laminate. Cuts at edges are slightly compressed and don't squeeze open too easily. This would leave a distinct edge I can easily accept as a natural part of the process. But I bet they're sharp when finished.

    Trimmed scraps from generic squashed shape are immediately unpeeled and added back to original mix. I like the idea of having no wasted scraps.

    Trimmed scraps from generic squashed shape are immediately unpeeled and added back to original mix. I like the idea of having no wasted scraps.

    Four cuts from edges with plain scissors make slits, then one layer of paper is pulled back. These exposed squares will have matching exposed places on other side. These newly-exposed surfaces are almost self-adhesive. Whatever paper remains, helps …

    Four cuts from edges with plain scissors make slits, then one layer of paper is pulled back. These exposed squares will have matching exposed places on other side. These newly-exposed surfaces are almost self-adhesive. Whatever paper remains, helps hold the form stable while connecting happens in a few locations.

    Finished cup sample, clearly rumpled and in need of refinement of technique. But interesting still! If this roughshod laminate were supported by some flexible rigid support, all details would be cleaner, flatter, and faster. Such an improvement is d…

    Finished cup sample, clearly rumpled and in need of refinement of technique. But interesting still! If this roughshod laminate were supported by some flexible rigid support, all details would be cleaner, flatter, and faster. Such an improvement is definitely on the to-do list.

    COMBINATION OF PASTE AND TRAILED METHODS

    An important aspect of these methods is that the trailing recipe and the paste recipe adhere to each other easily. I found that it does. The white column form with the red base was the first attempt and gave good results.

    Red earthenware slip pooled into a square shape on napkin tissue. It takes a few minutes for it to set up a little on the bottom, but as pictured, would drip off the top if tilted too far. Conveniently, anything placed on this wet surface would adhe…

    Red earthenware slip pooled into a square shape on napkin tissue. It takes a few minutes for it to set up a little on the bottom, but as pictured, would drip off the top if tilted too far. Conveniently, anything placed on this wet surface would adhere permanently.

    The white paste form has been quite literally squashed down onto the thickened slip base. It connects perfectly, and sets up pretty quickly in case I have to move the sculpture around.

    The white paste form has been quite literally squashed down onto the thickened slip base. It connects perfectly, and sets up pretty quickly in case I have to move the sculpture around.

    Showing the first trailed layers stacked on top of the pooled, fully-covered floor layer. Here, I was still thinking of a square format wall growing upwards to surround the base of the tube, but that quickly changed!

    Showing the first trailed layers stacked on top of the pooled, fully-covered floor layer. Here, I was still thinking of a square format wall growing upwards to surround the base of the tube, but that quickly changed!

    This strips of napkin tissue added at angles closer to tube than a square can get. Not sure using the strips method is worth the effort here. But my future designs need this technique. The center form like the white one here would be decorated or st…

    This strips of napkin tissue added at angles closer to tube than a square can get. Not sure using the strips method is worth the effort here. But my future designs need this technique. The center form like the white one here would be decorated or structurally changed by this slip trailed facade. 

    Fired bicolor structure, still with ash residue from paper burnout. The thin coil-like stripes toward highest red areas were actually a surprise. A thin strip of napkin tissue was flat on the table, and I trailed some slip down the center. The paper…

    Fired bicolor structure, still with ash residue from paper burnout. The thin coil-like stripes toward highest red areas were actually a surprise. A thin strip of napkin tissue was flat on the table, and I trailed some slip down the center. The paper curled toward the center and I helped it close up like one might roll a cigarette around loose tobacco. This became a portable, completely wet line of slip. Very interesting and probably quite useful later.

    RECIPES

    • Paste or Frosting-like clay slip: About two tablespoons per cup of slip, stirred really well. Add a little more for thicker paste, add a little water for thinner slip. Adding unaltered clay slip seemed to affect it less than adding plain water did. 
    • For slip trailing (that will still comfortably pass through a squeeze bottle tip): a few drops of vinegar per cup of slip. Be careful adding vinegar in minute amounts. A consistency you can still squeeze through the bottle gets inconveniently thick very easily.

    Should you, or could you, make these slips from your existing moist throwing body? You can, but it's an amount of work people cringe at the thought of doing. If you need the moist clay and slip clay to match, then you must do it. It will be a bit less work if you start from your mushy recycled bucket because it's already fairly wet. The difference is only slight between the recipe for the familiar moist clay from bags, and a clay slip that can be fluid enough to squeeze through nozzles. Many good explainer articles provide varying levels of detail on how to mix up soft clay pastes like these from different starting points.

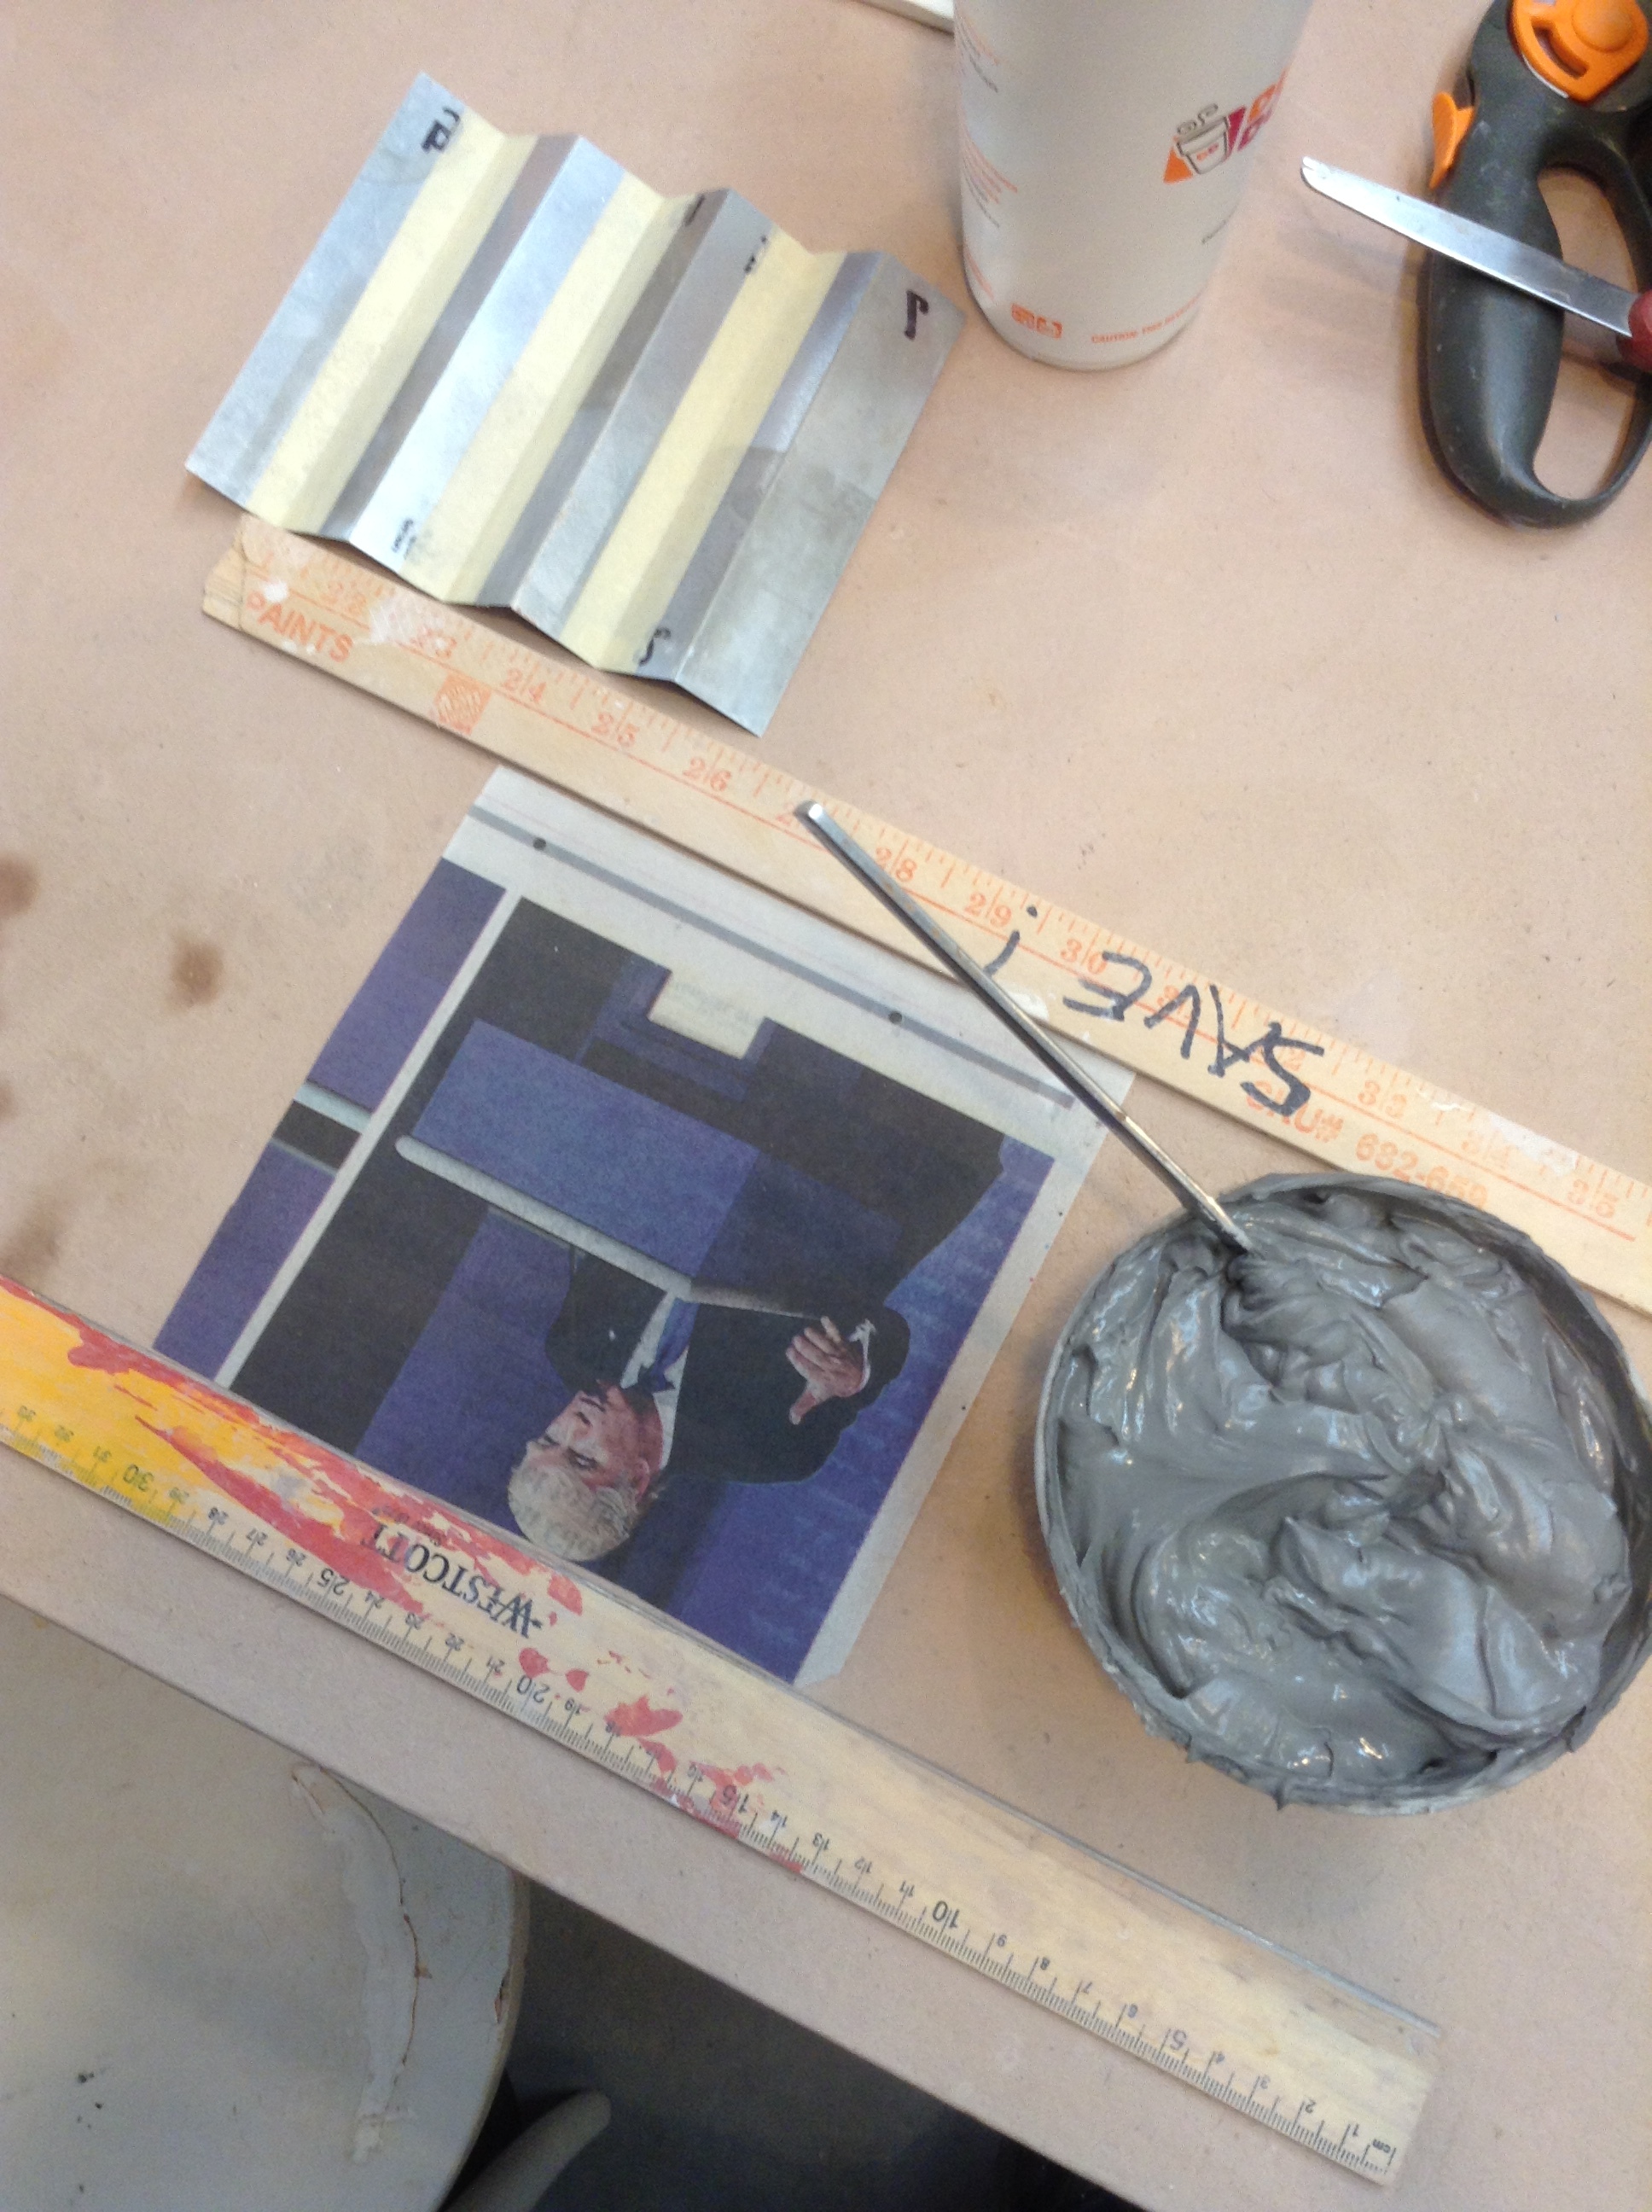
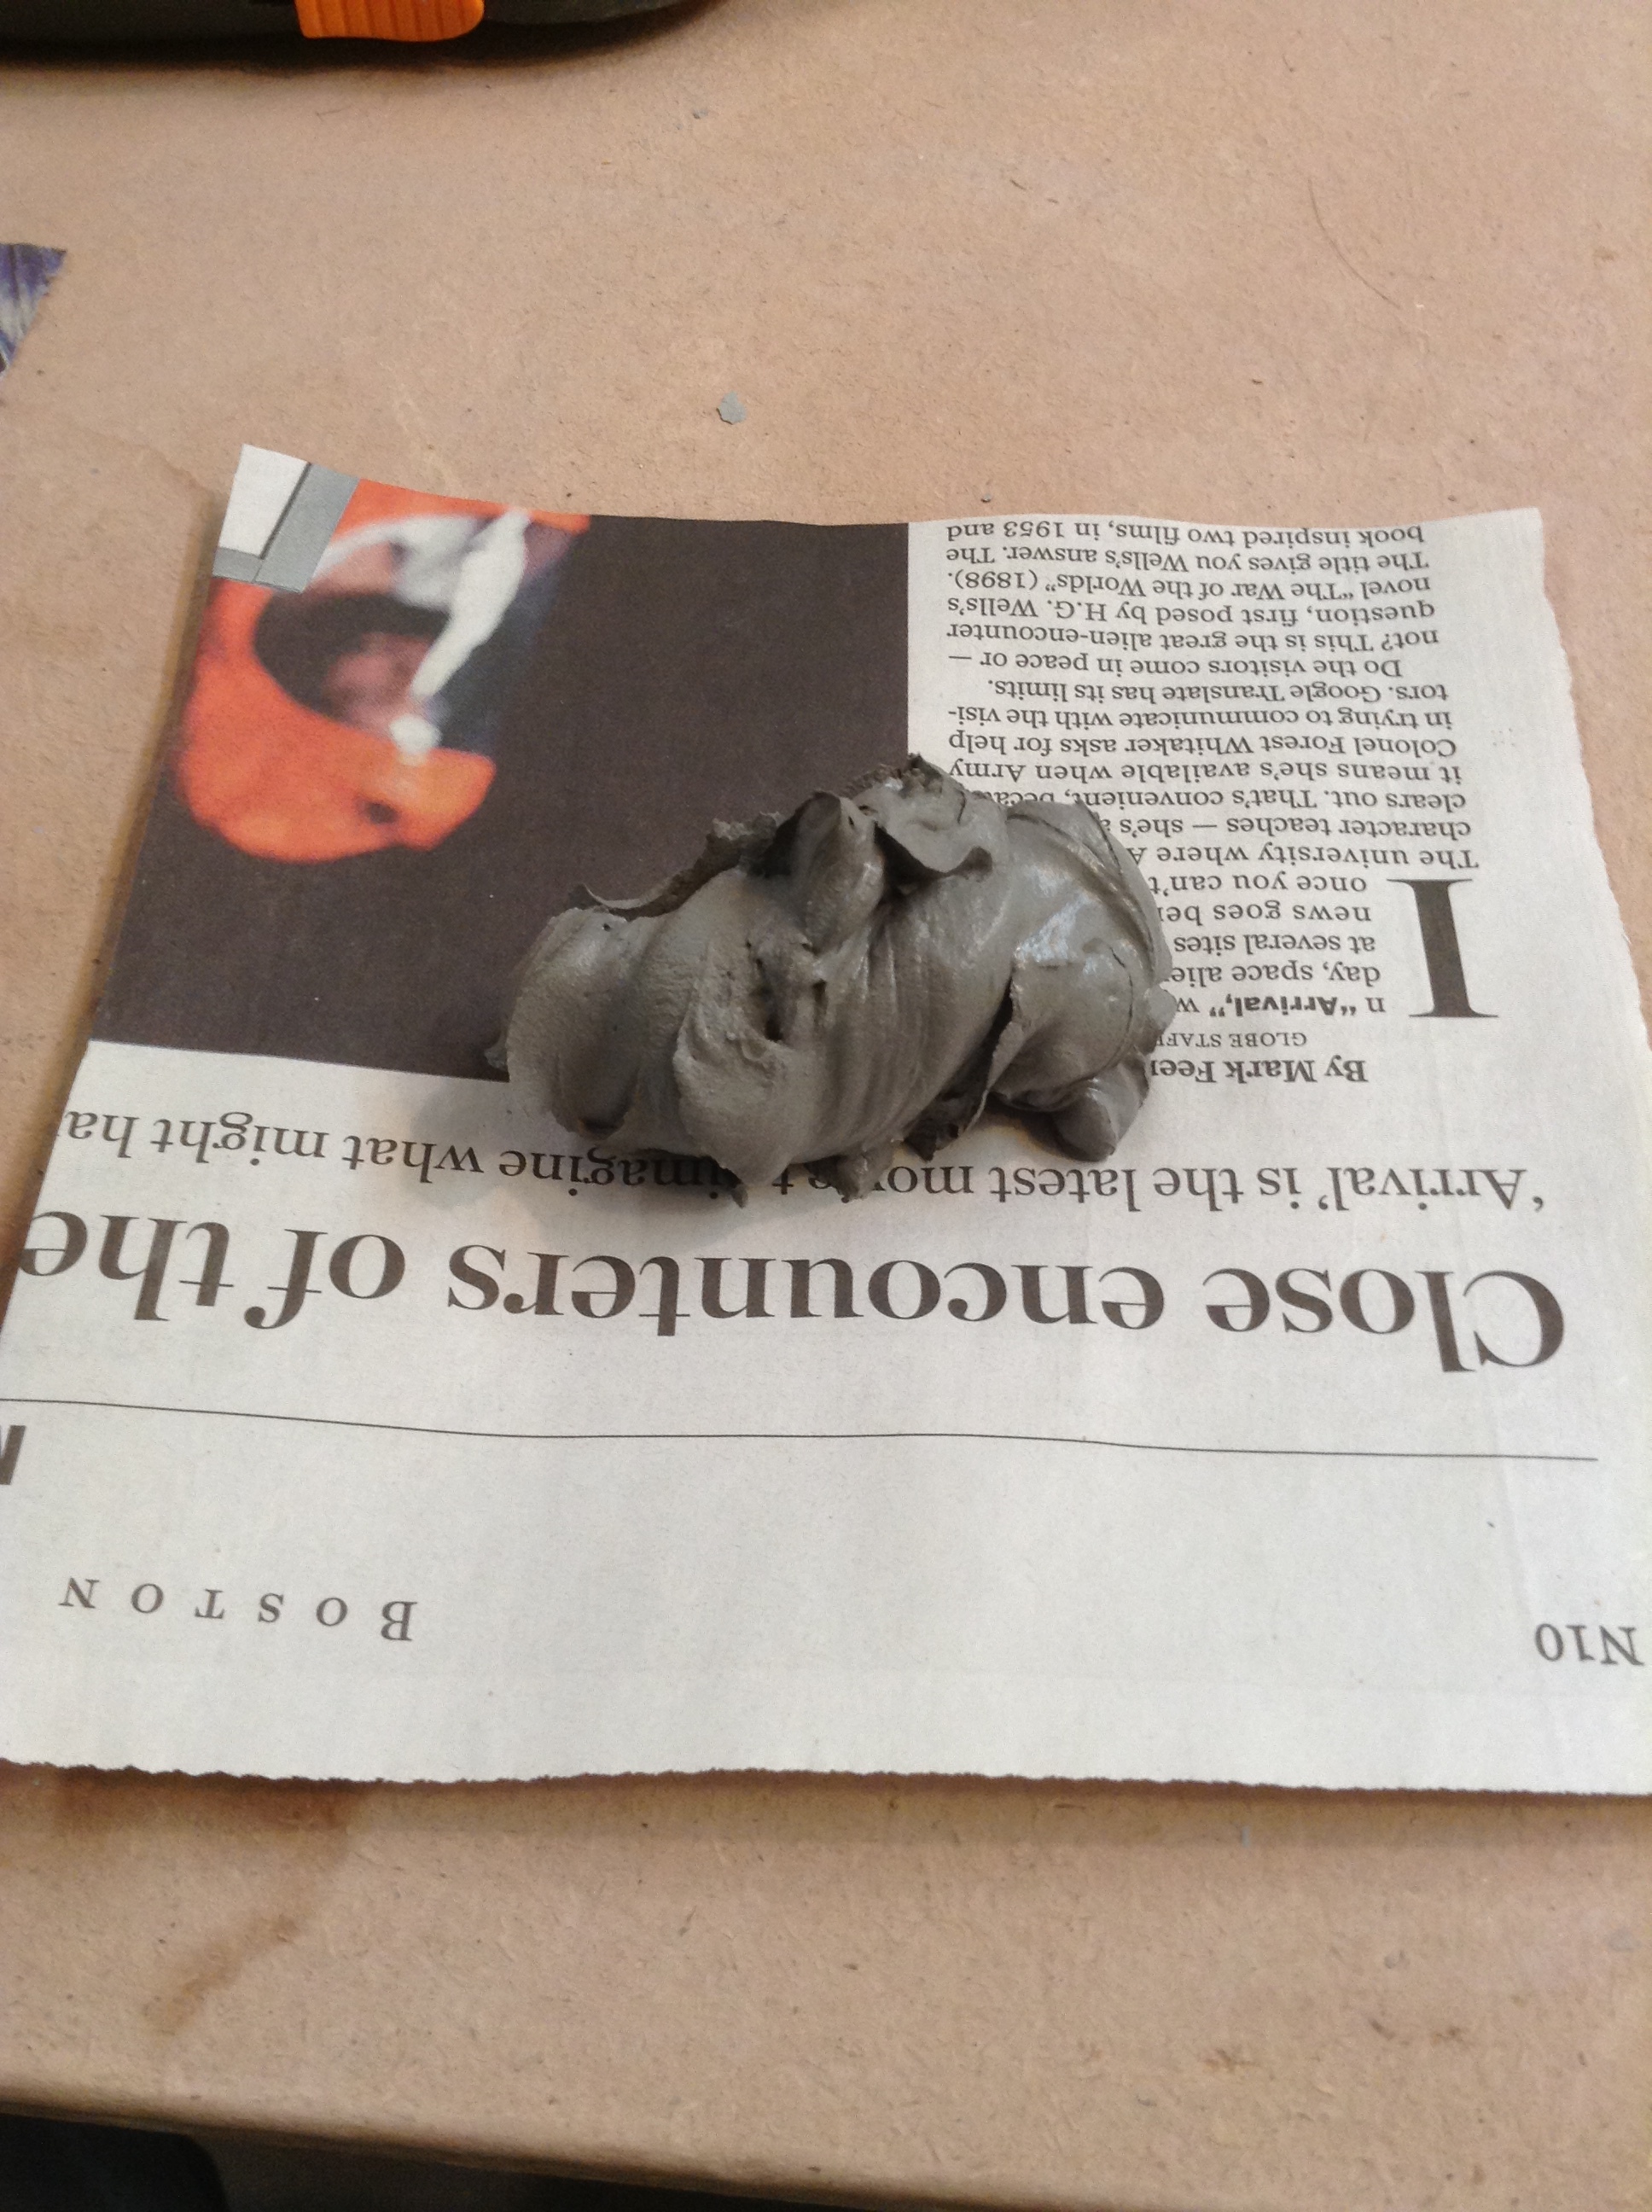
    The stiffest recipes I used started from already-dense casting slip, and could be shaped like cake frosting. The basic components are dry clay powder, water, and chemicals that act as suspension and flow helpers (called deflocculants). For myself, I have used casting slip  which is already fluid, and added a little vinegar to it which makes it slightly more syrupy to keep it from sagging when I'm laying out lines.


    SQUEEZE BOTTLE PROBLEMS

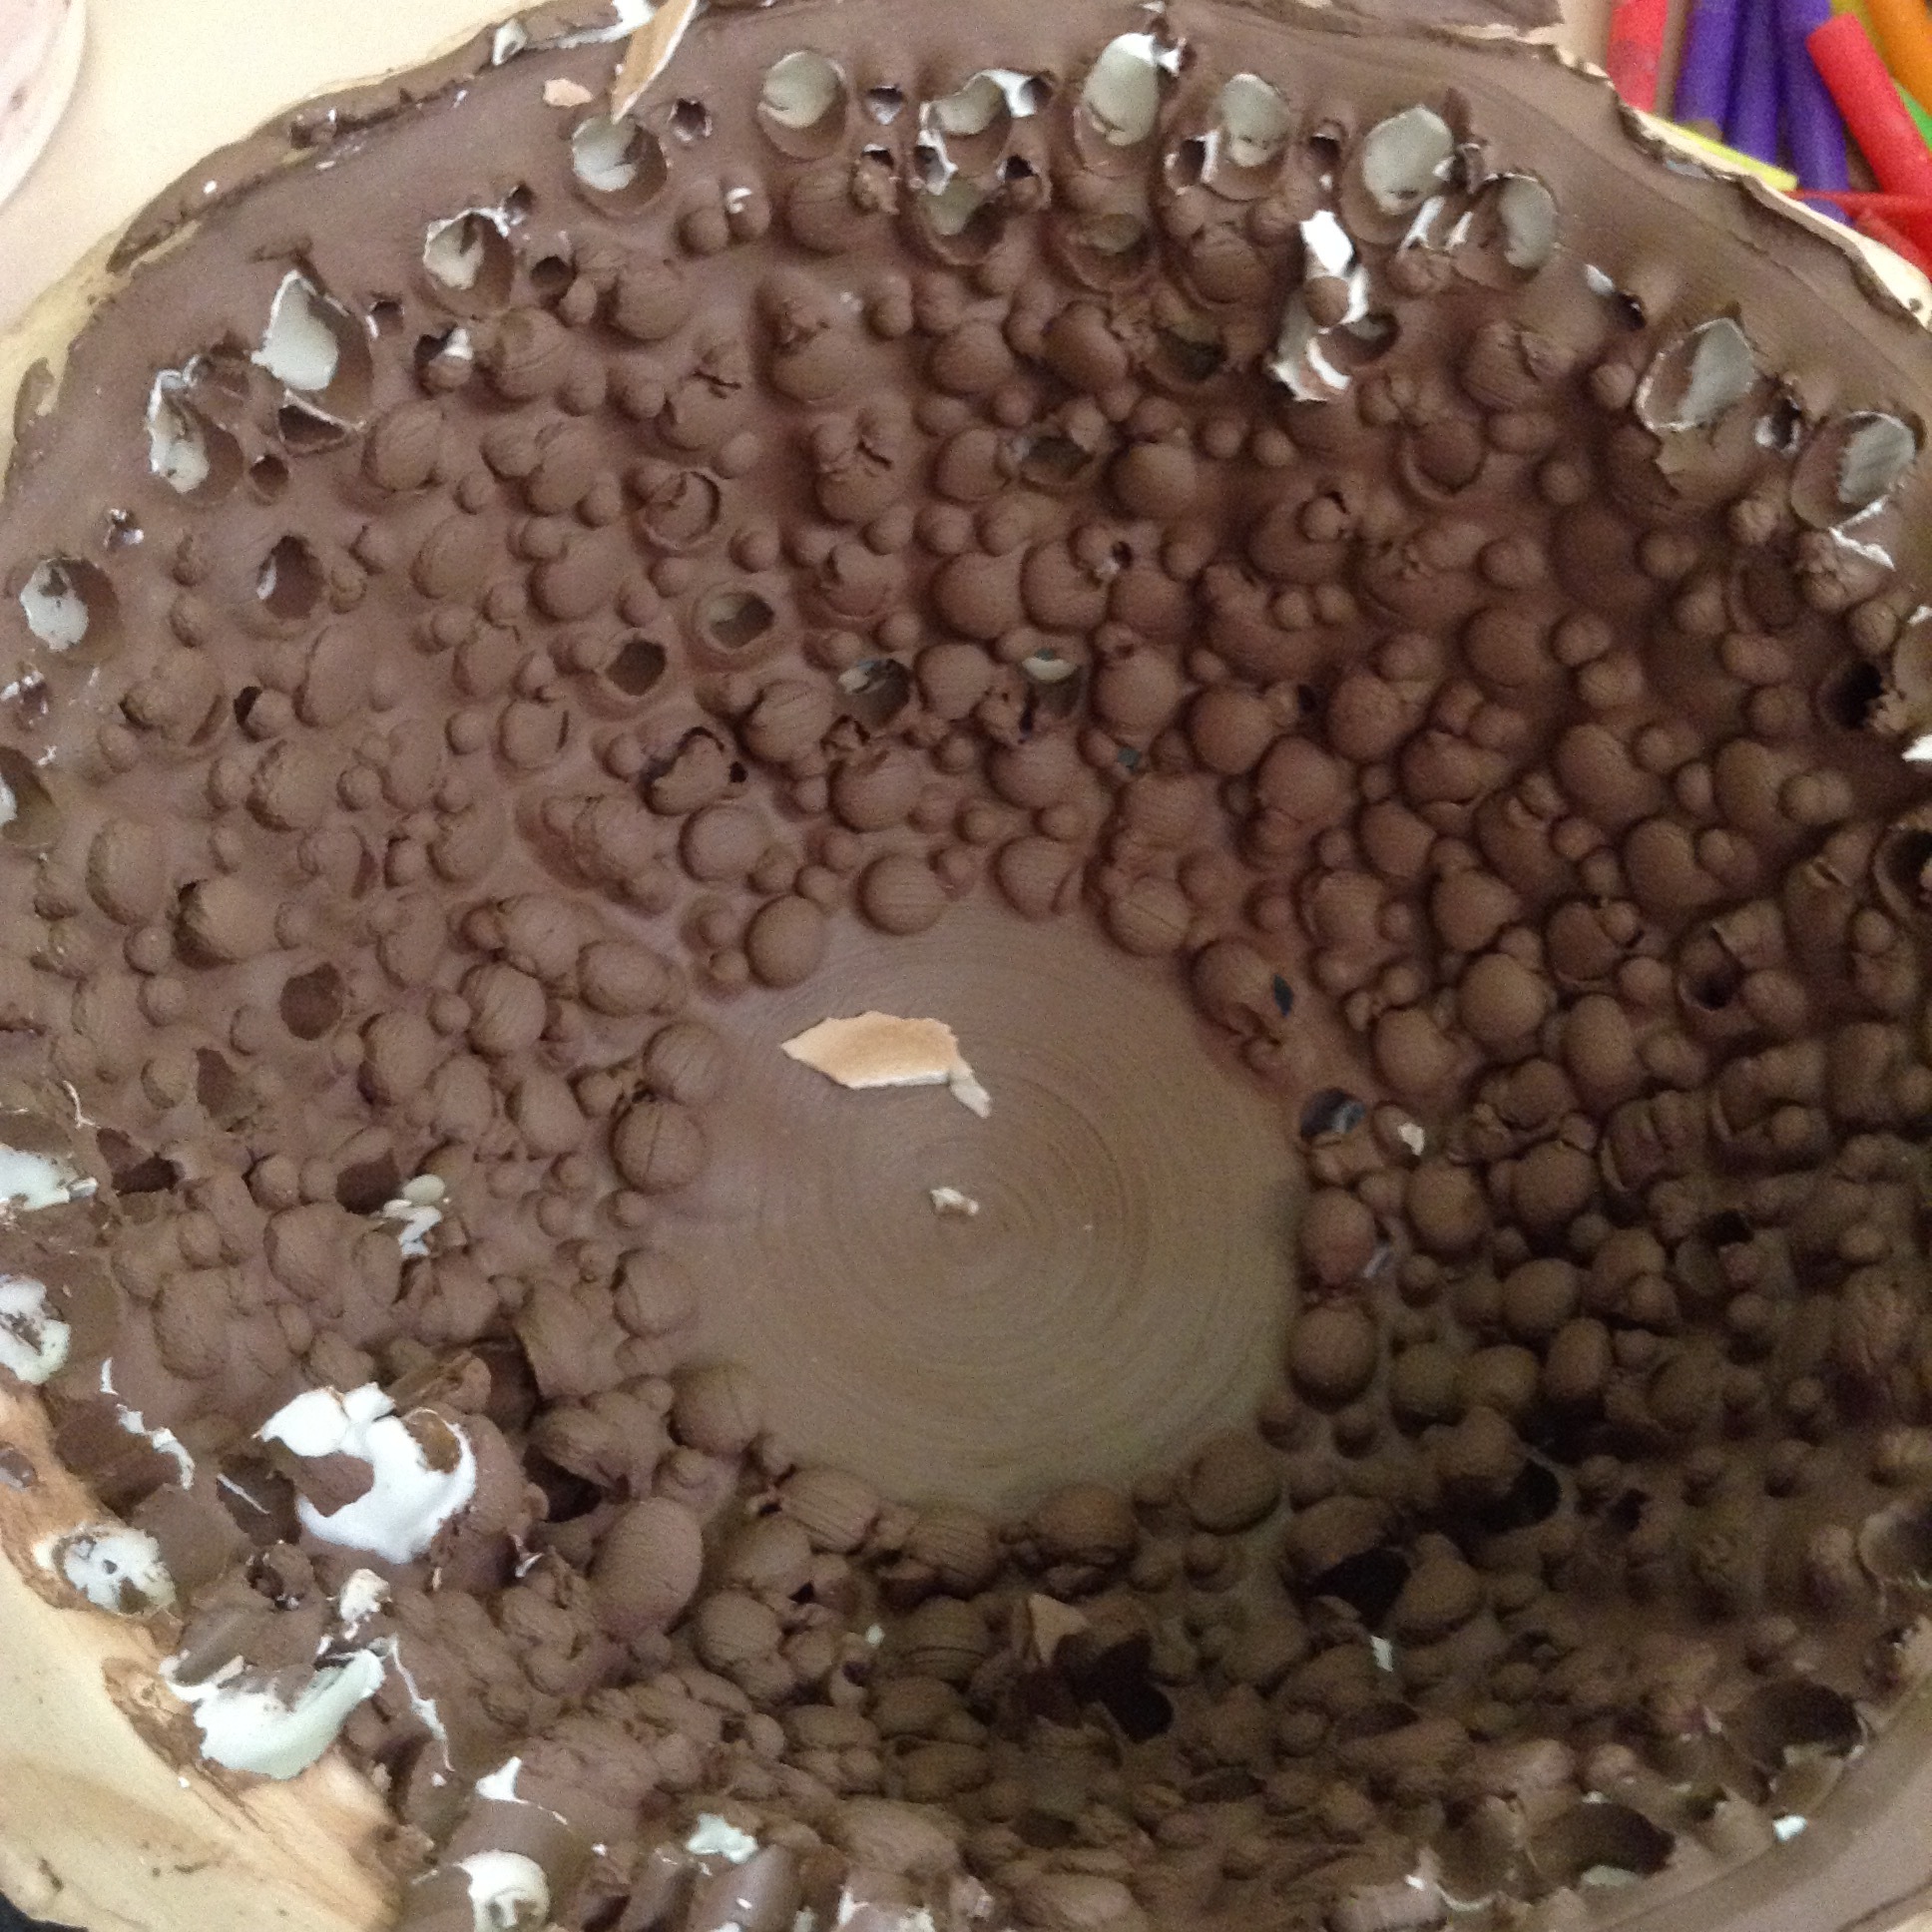
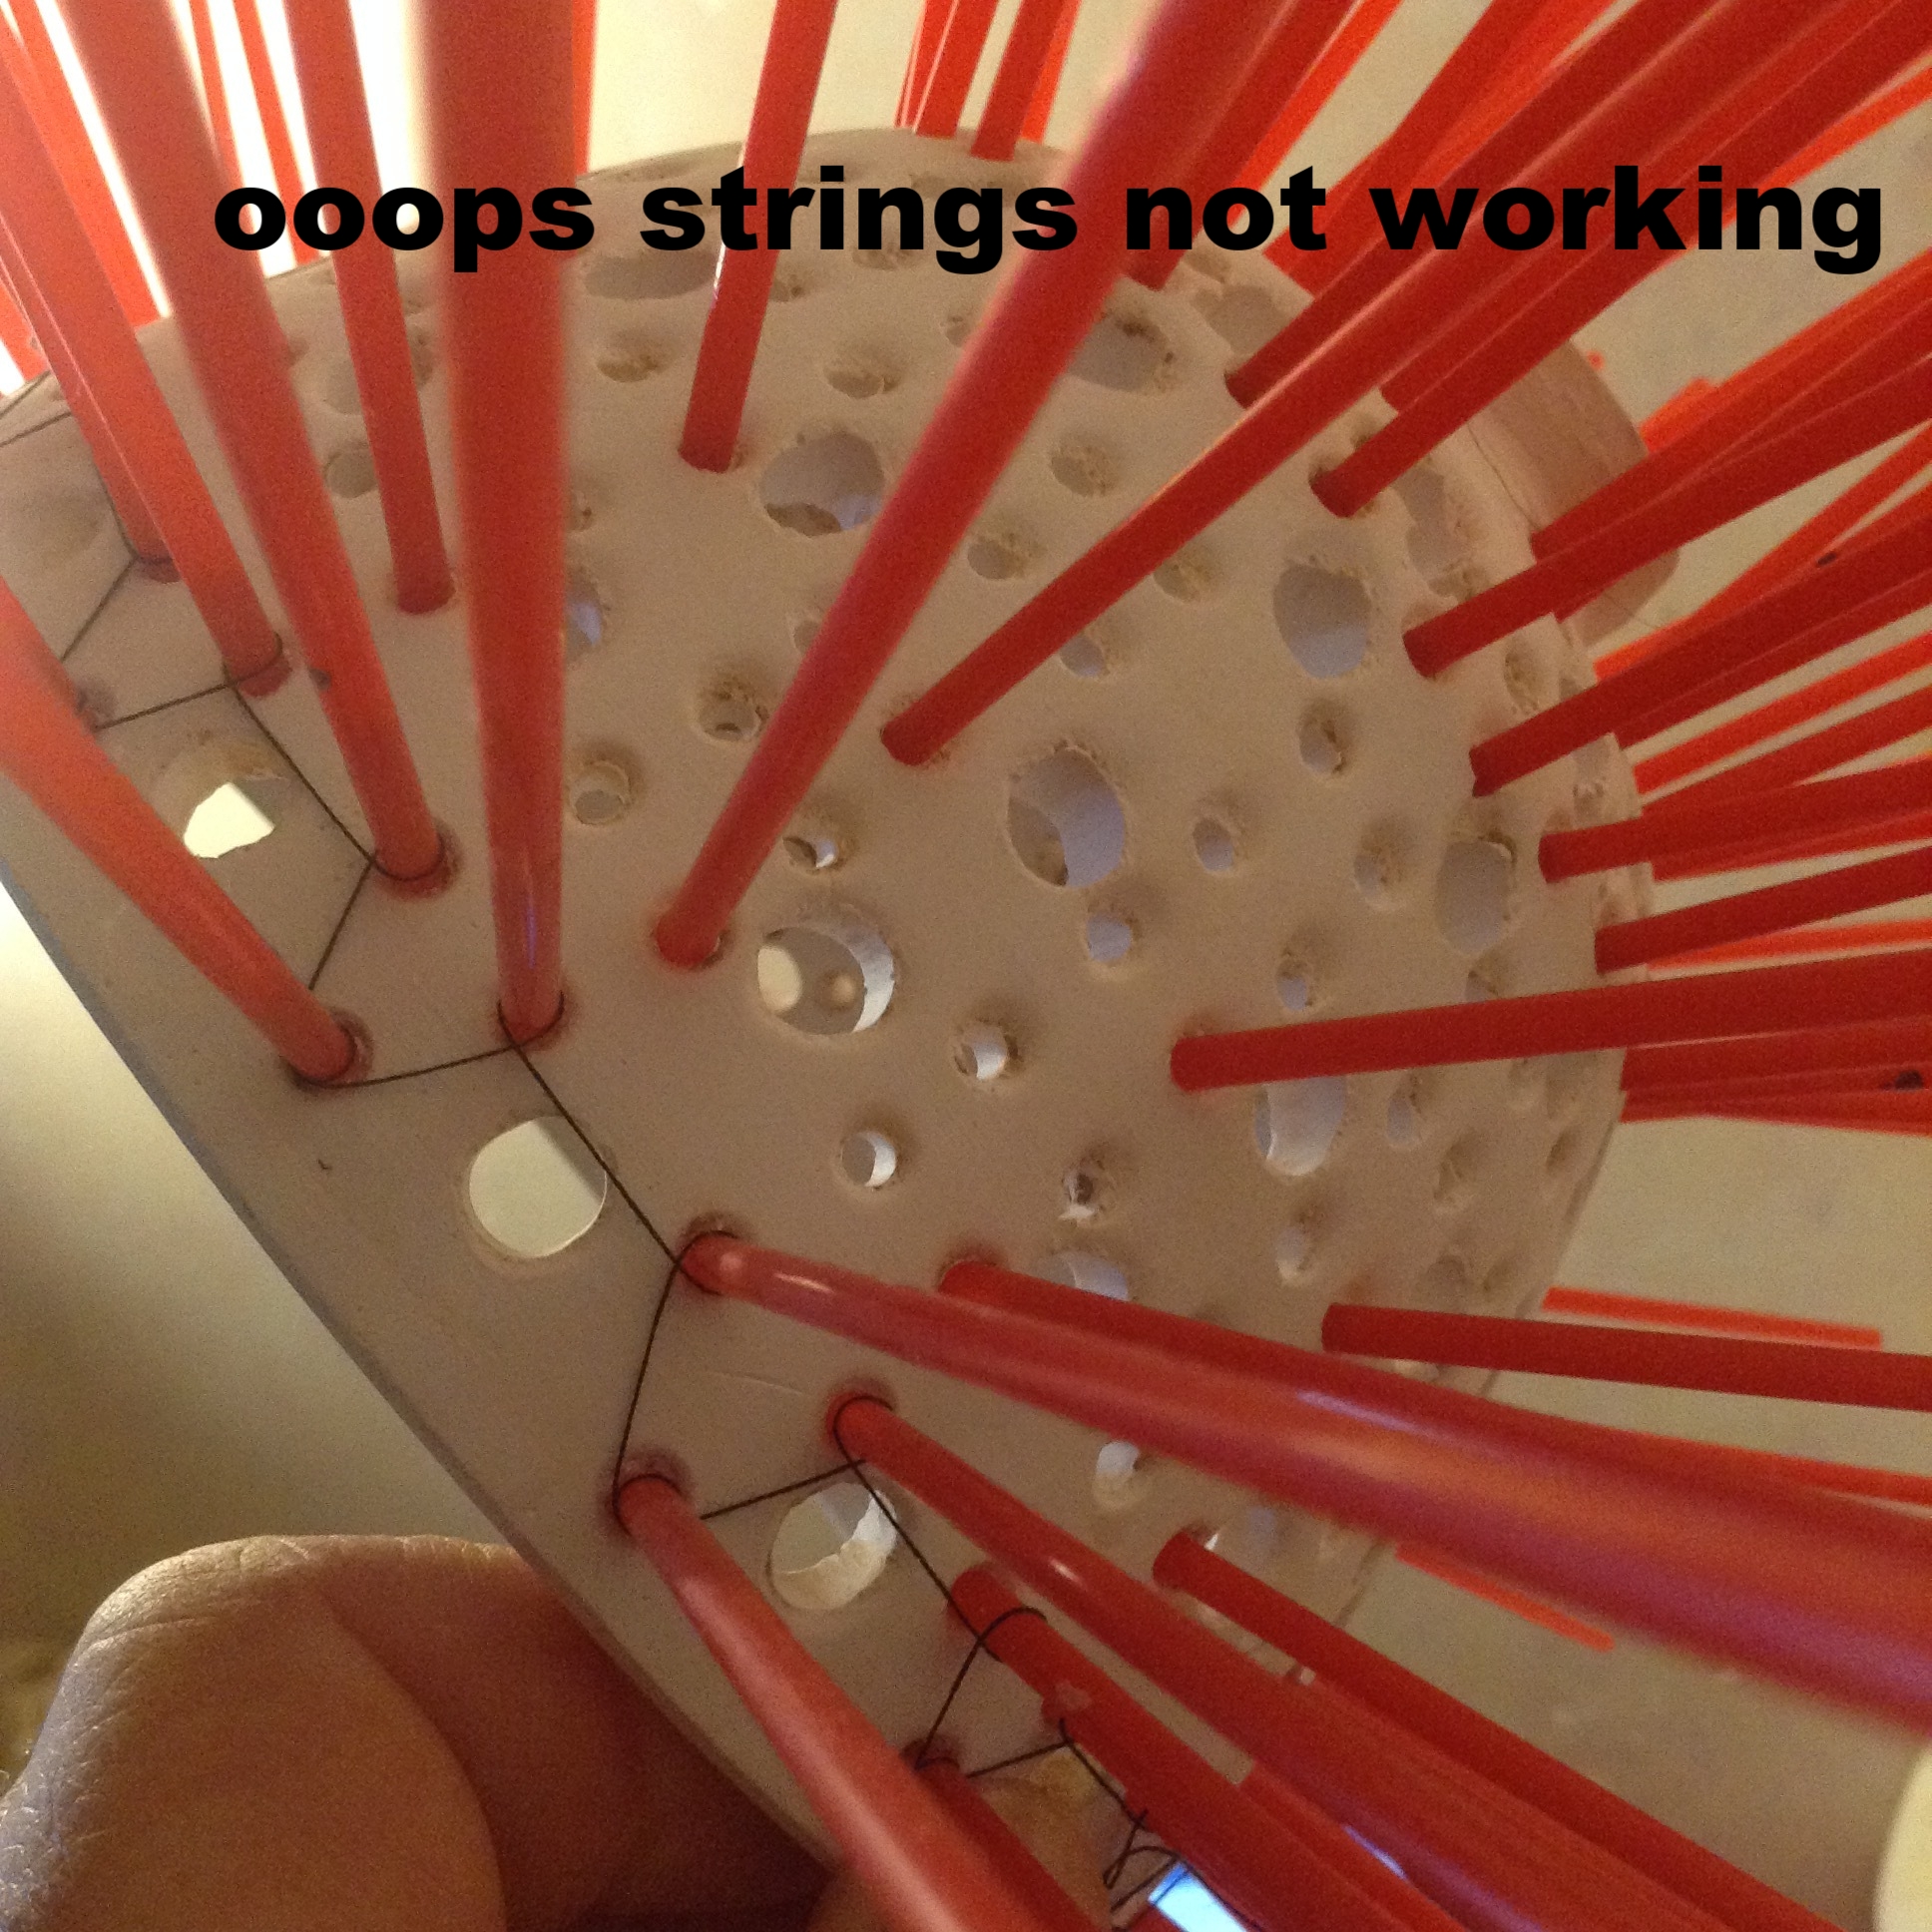
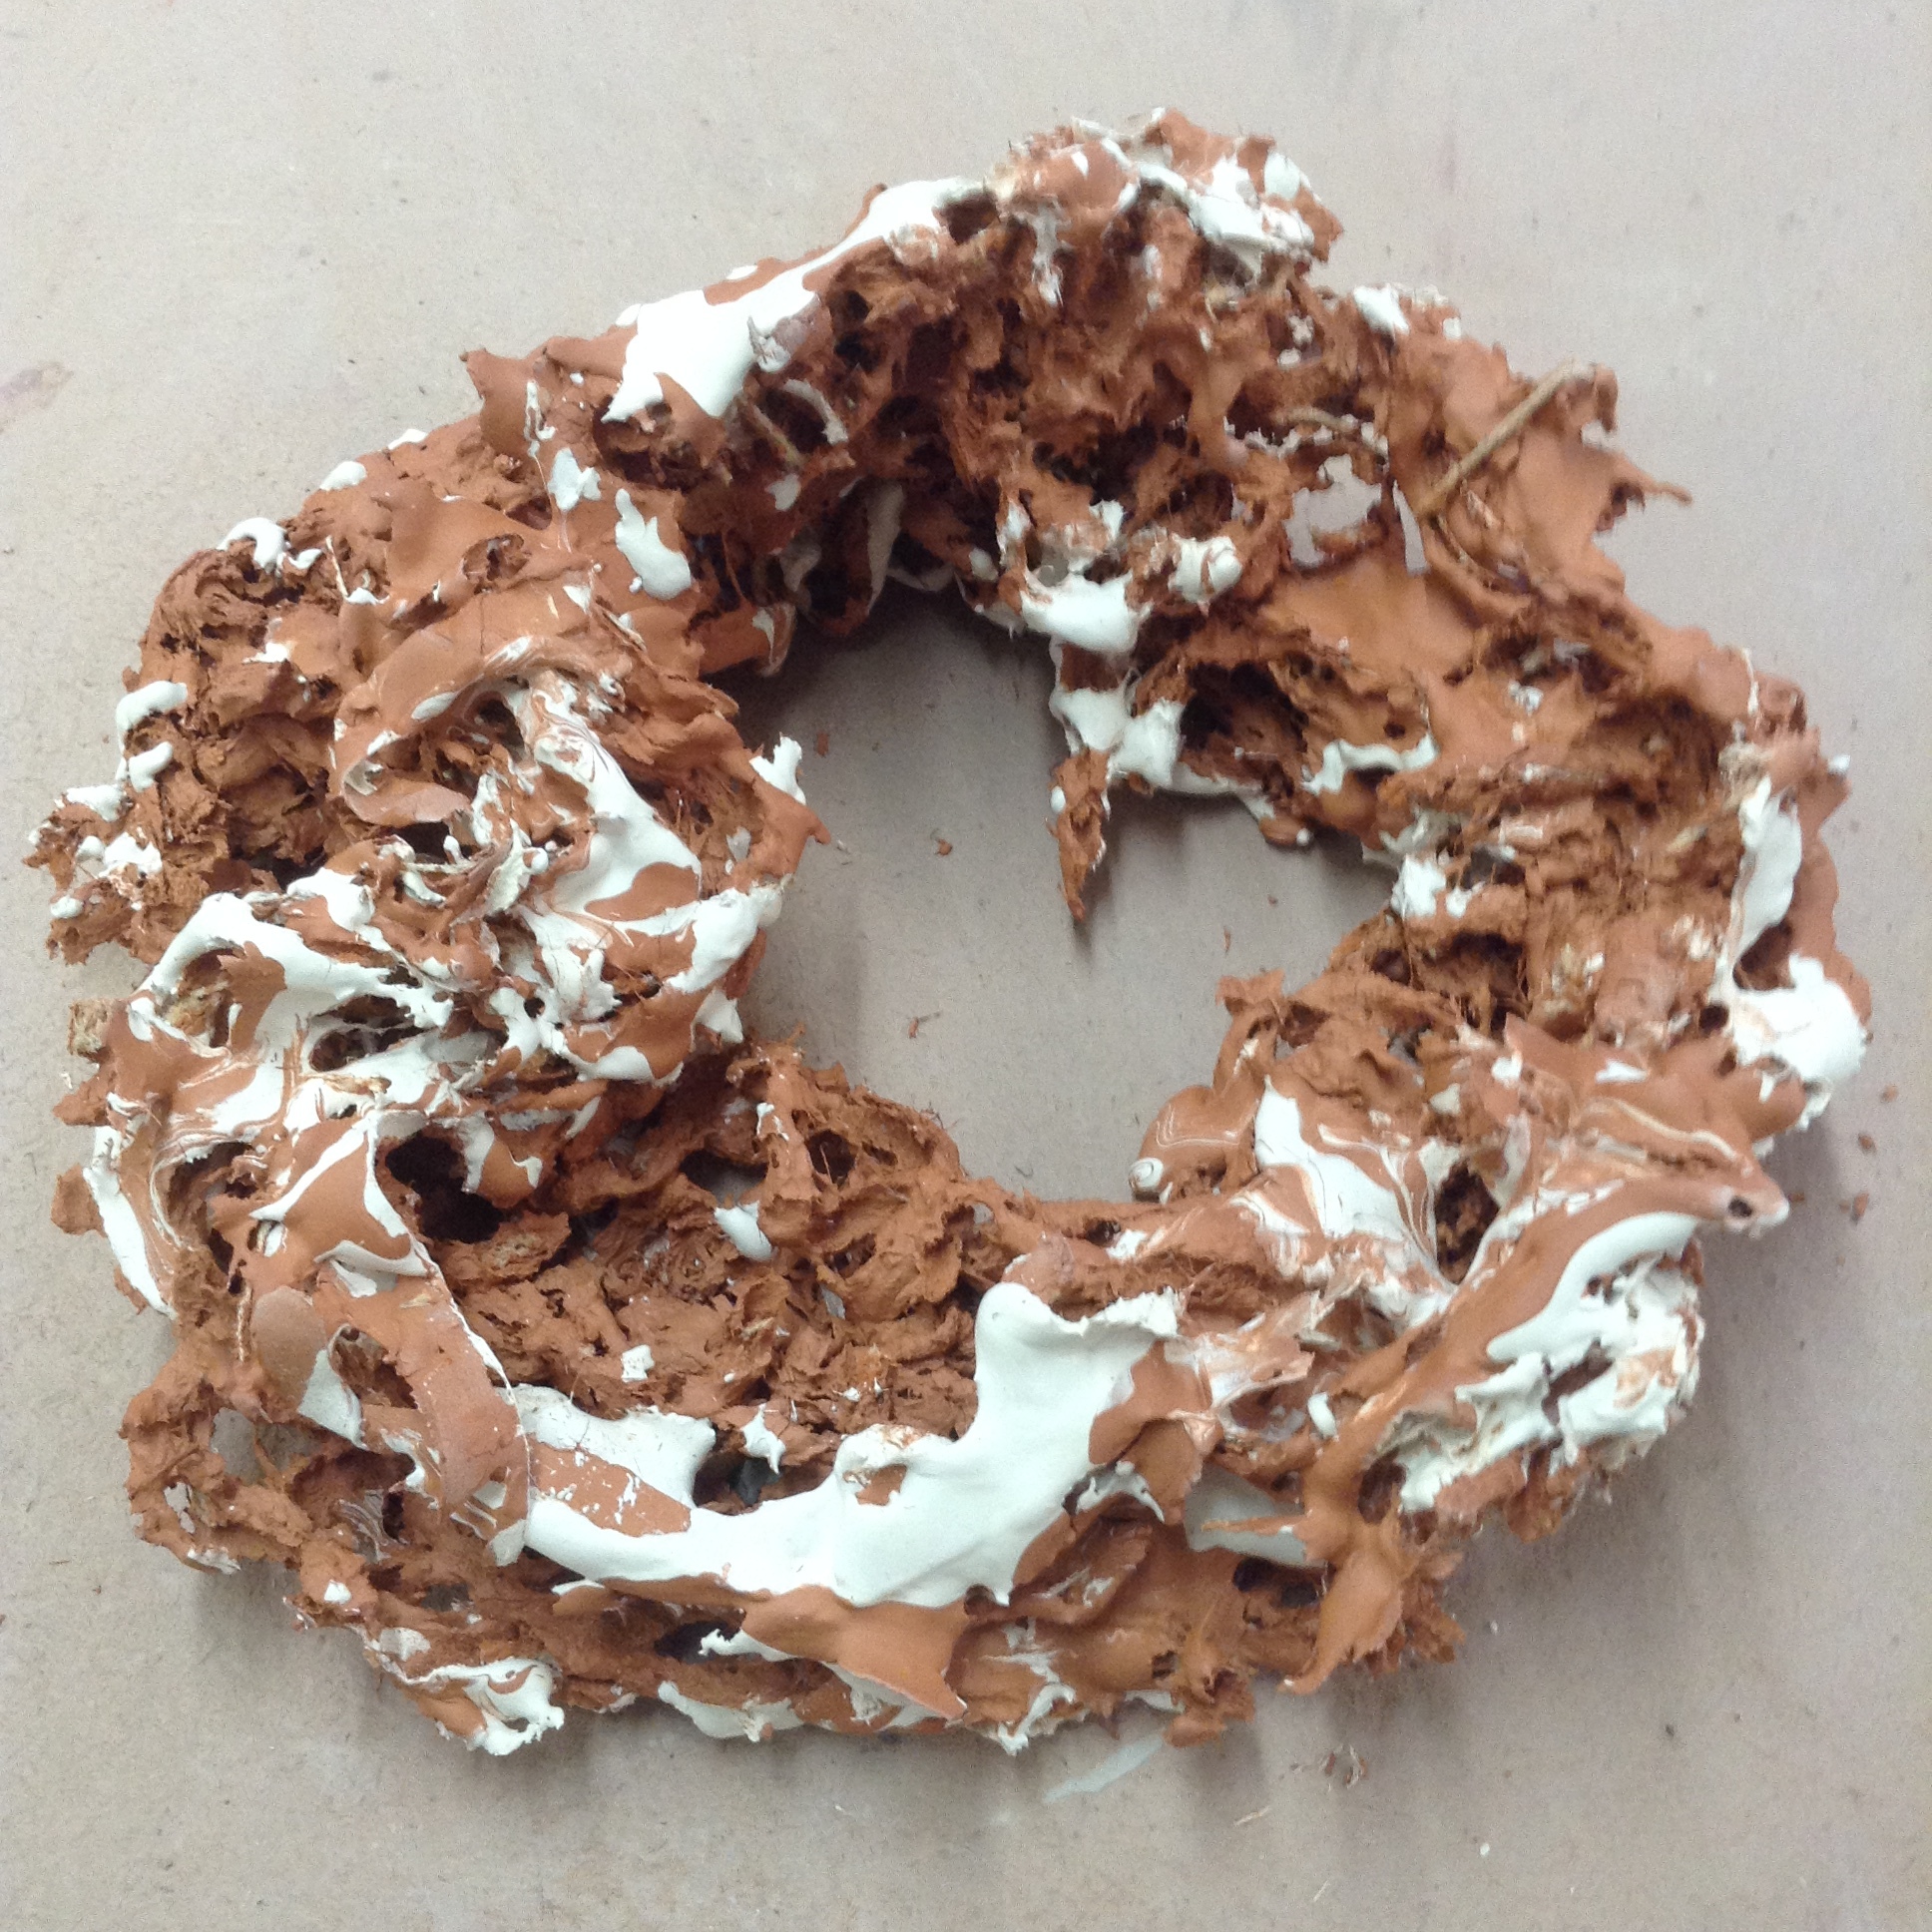
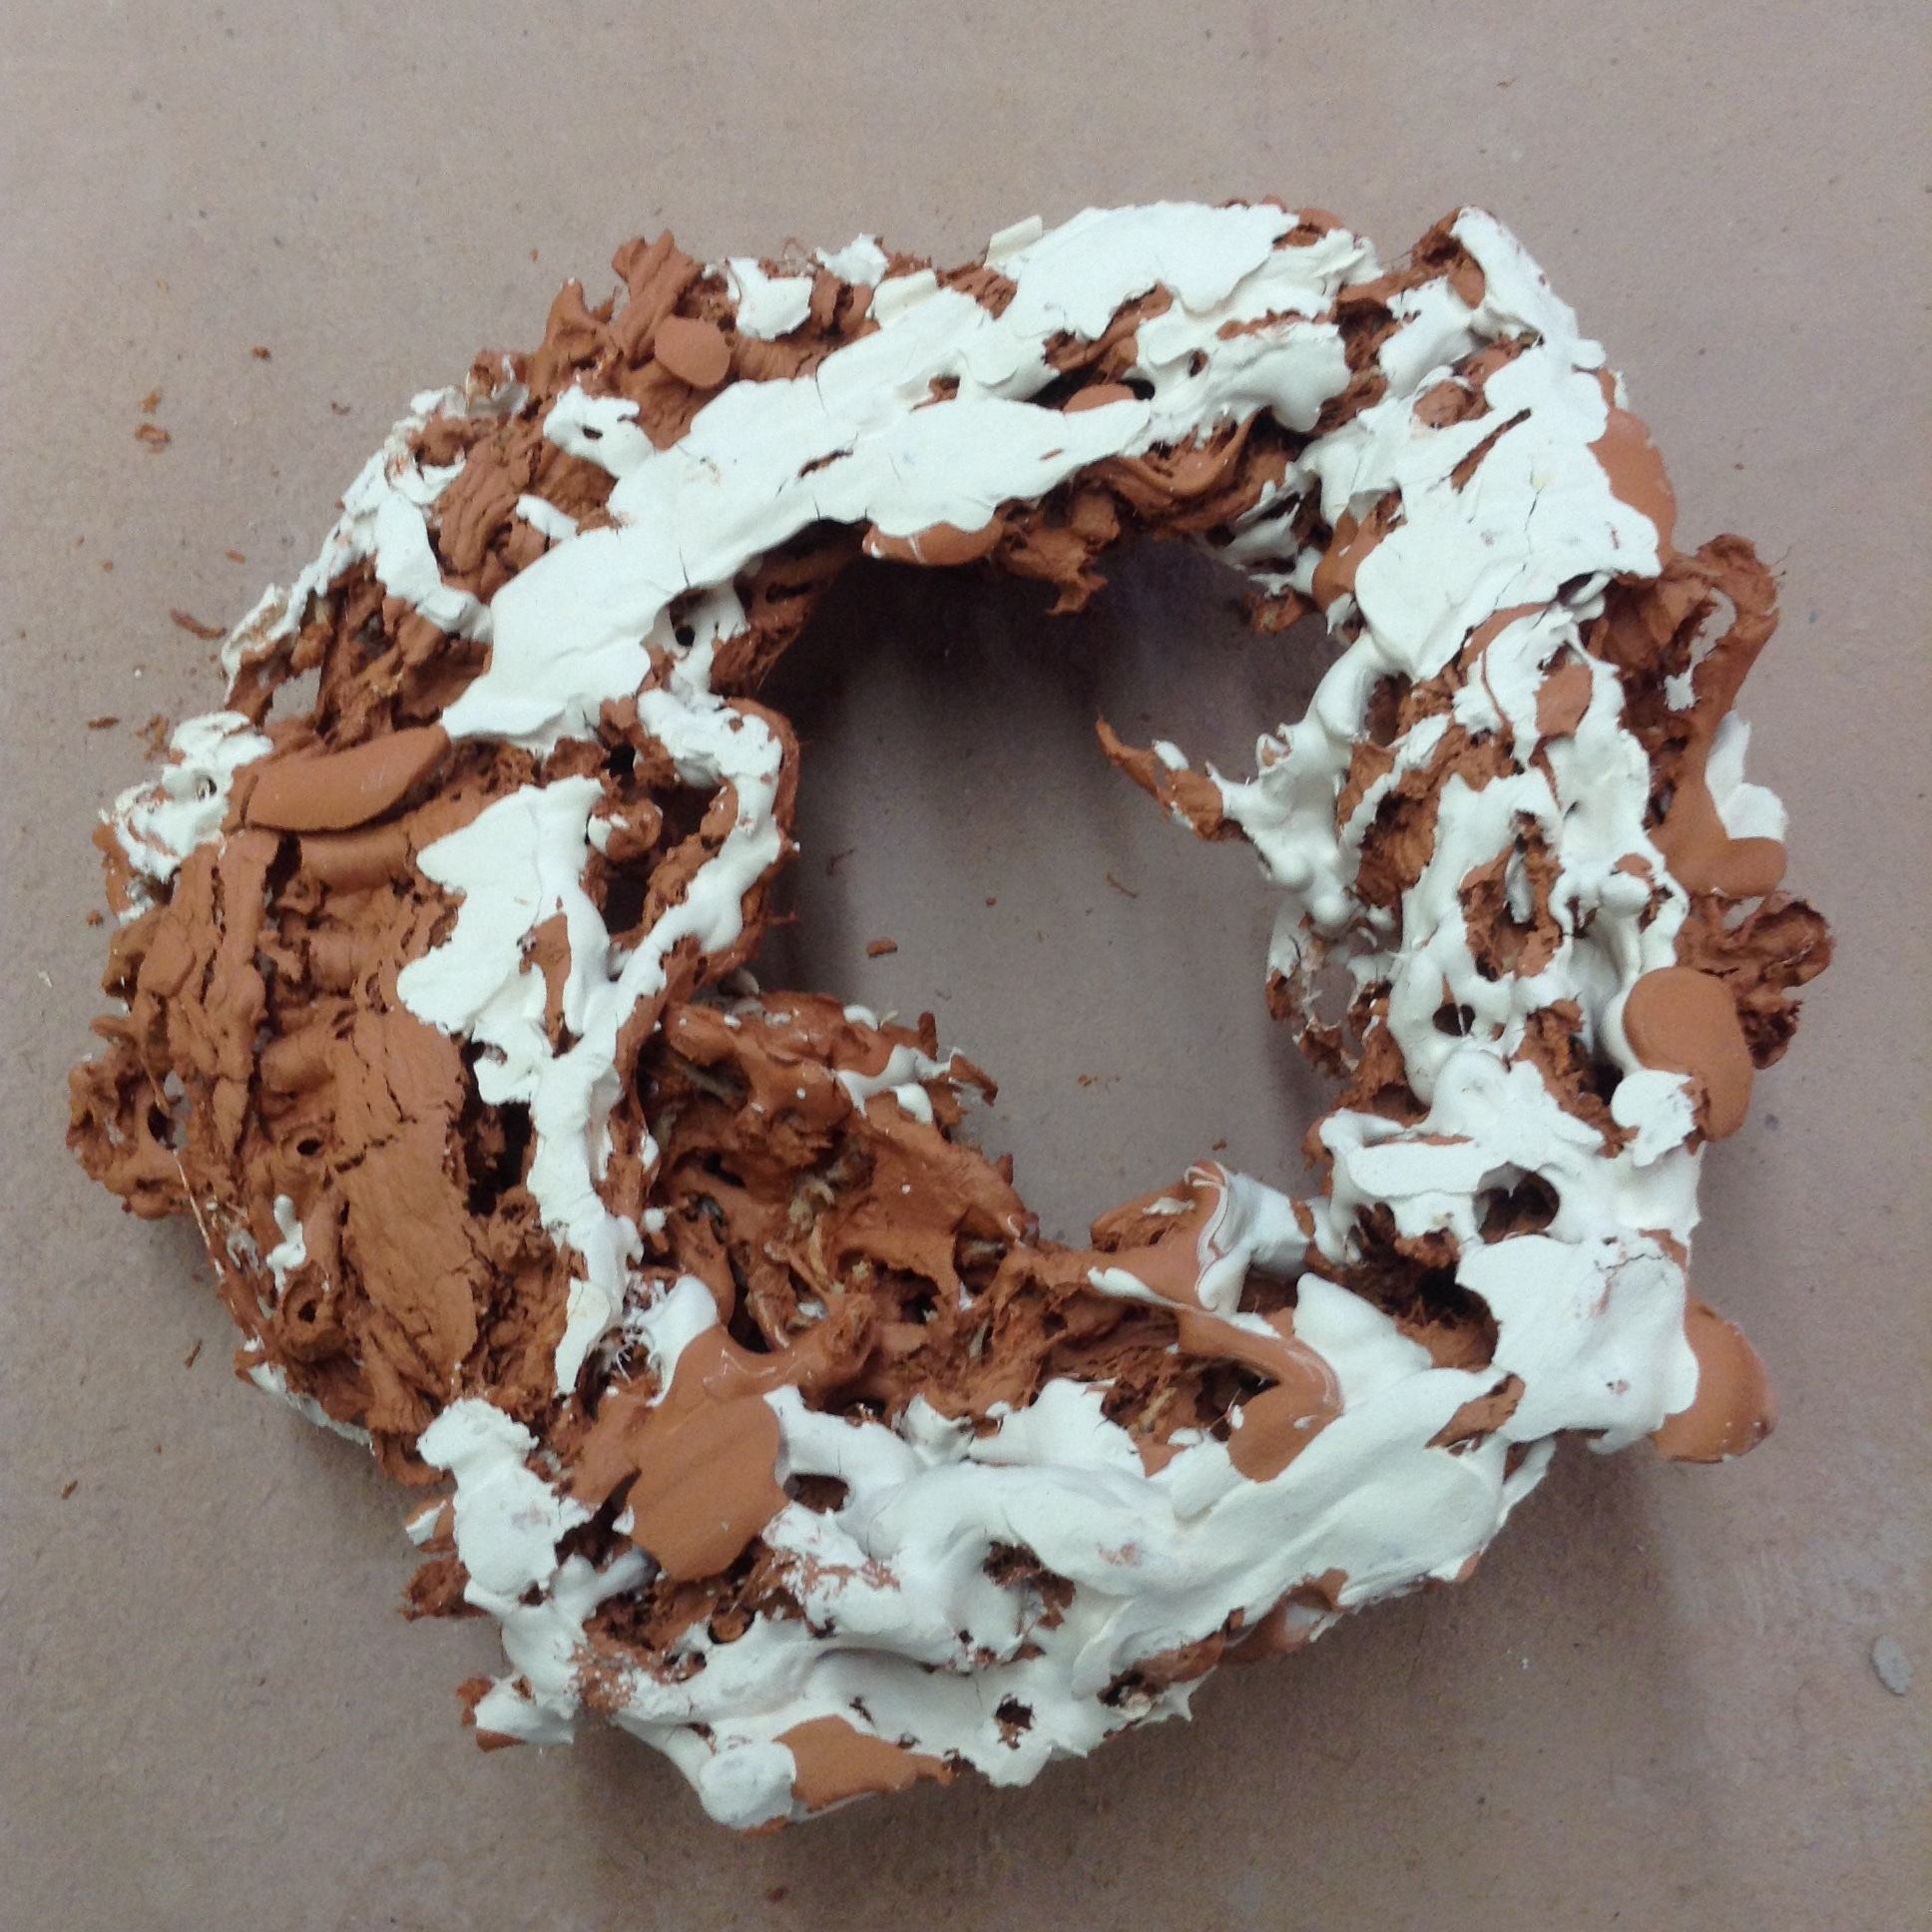
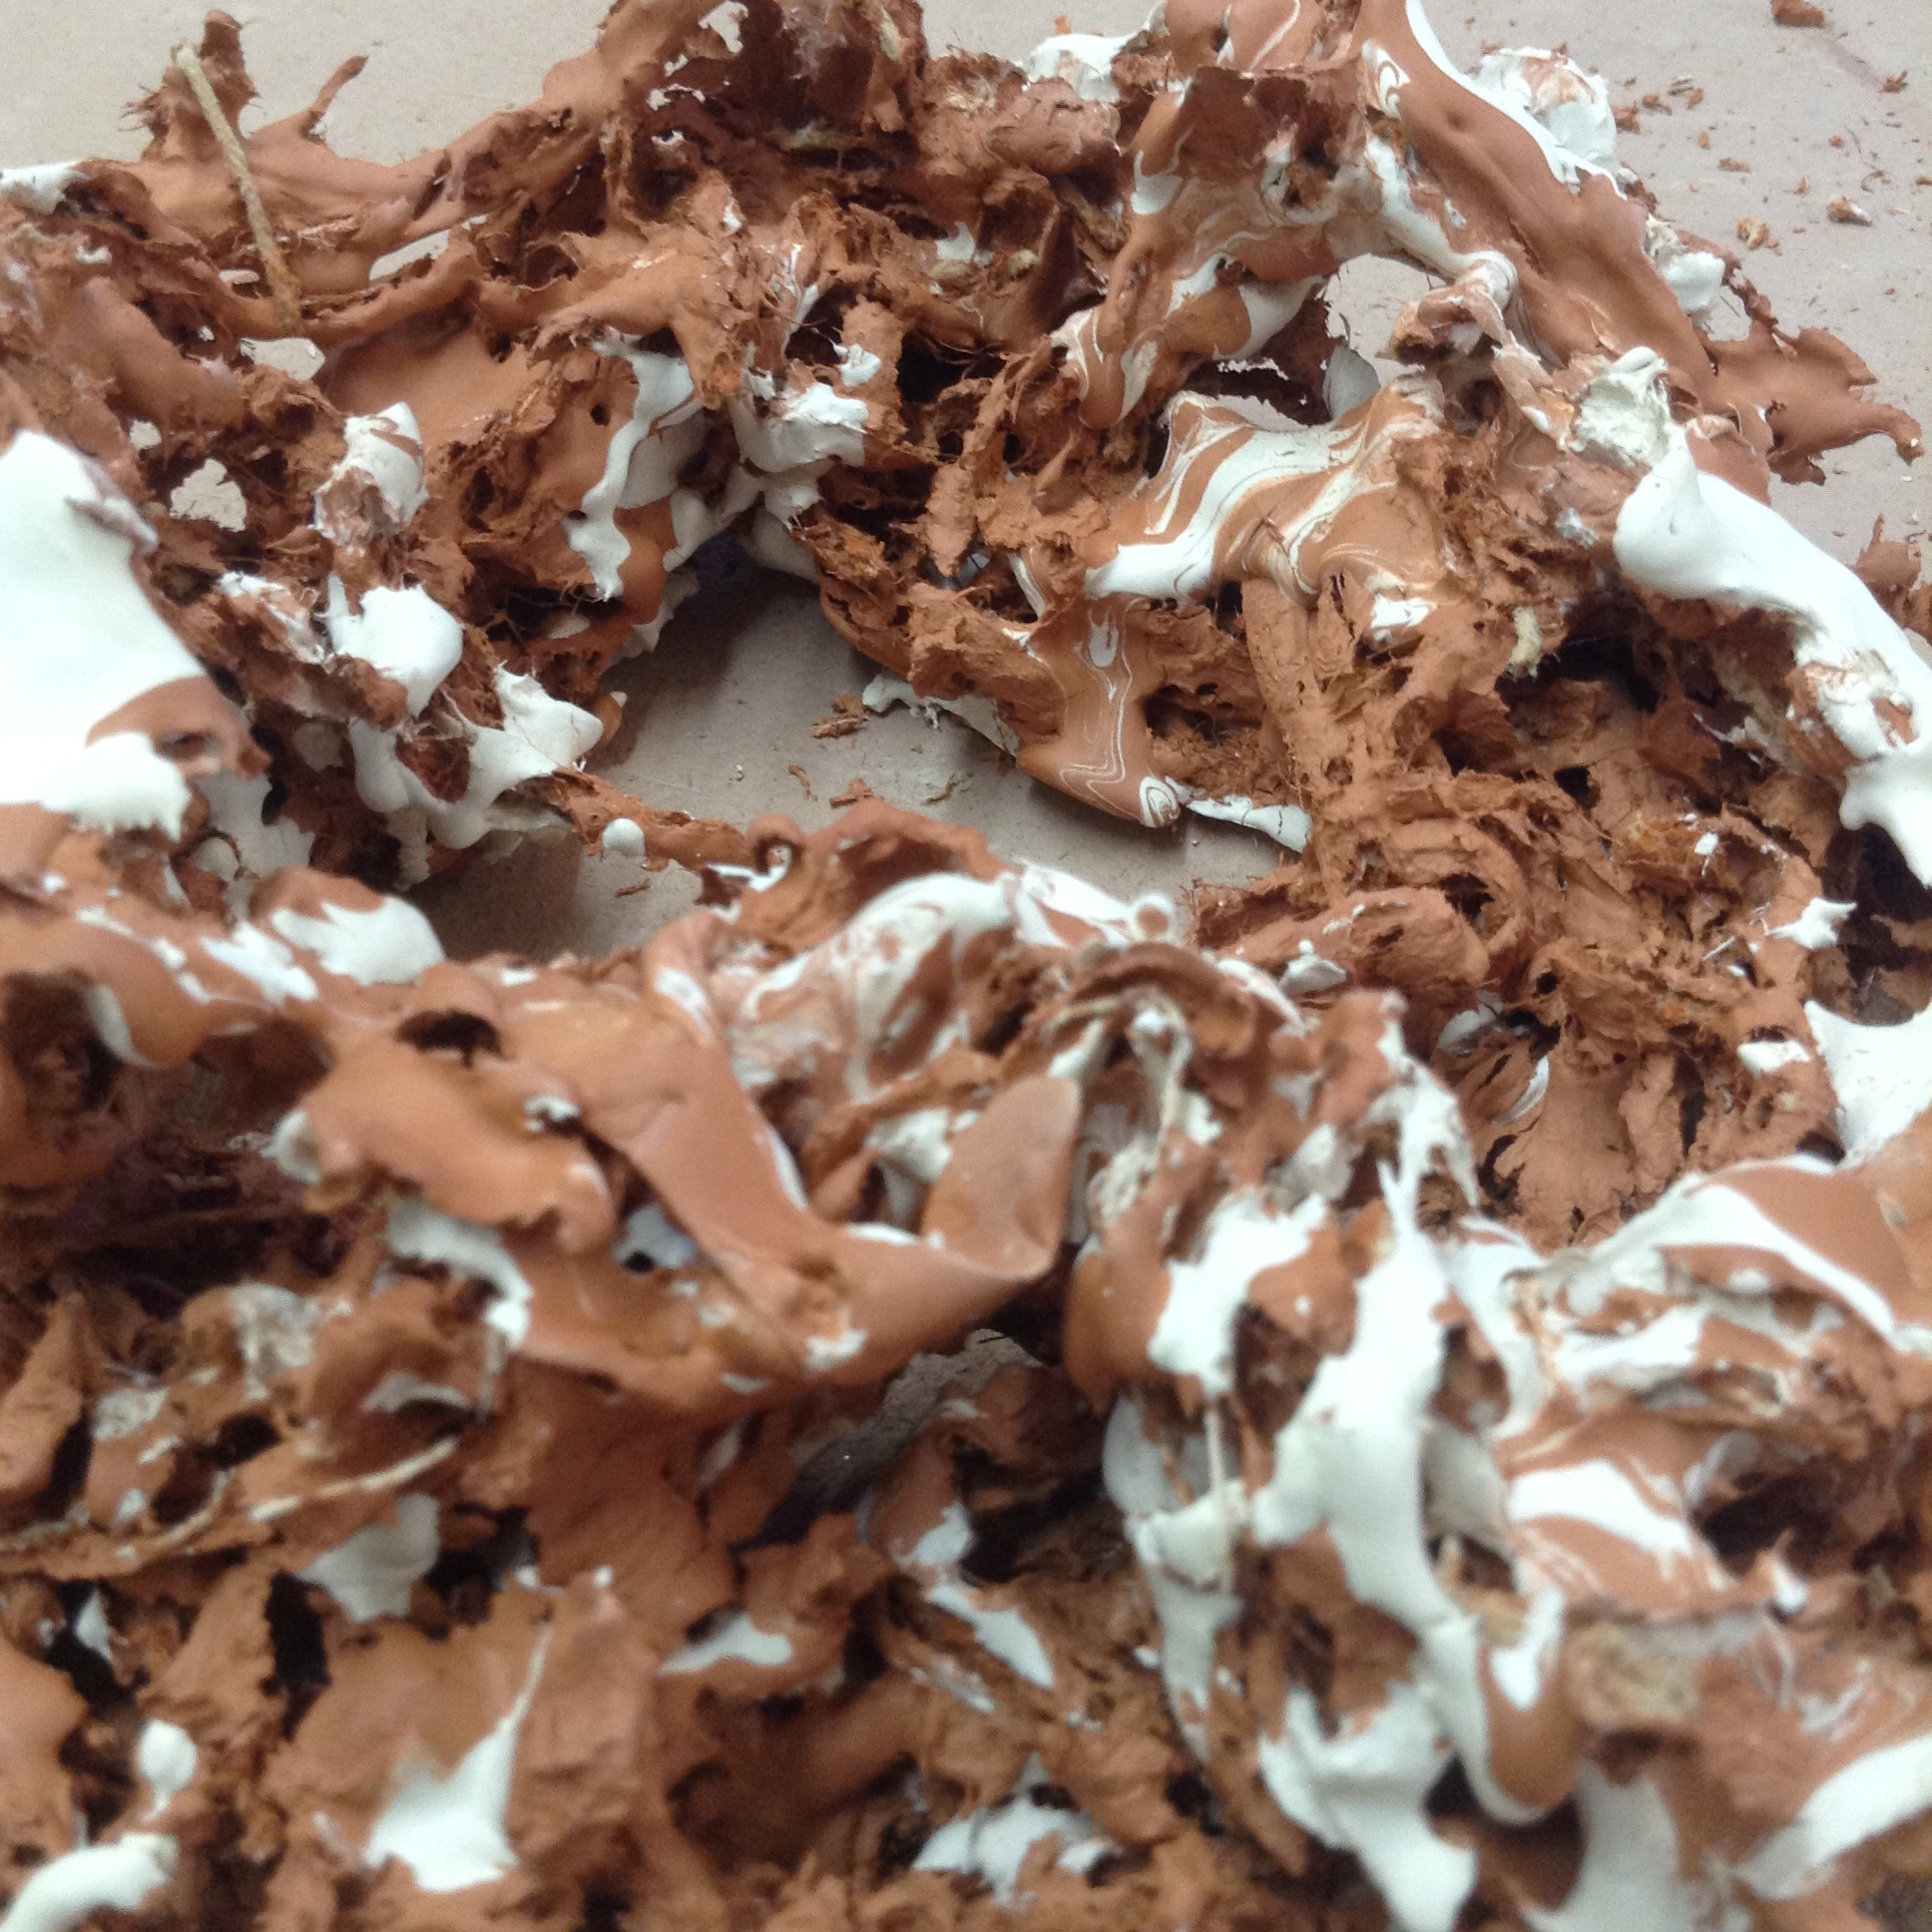
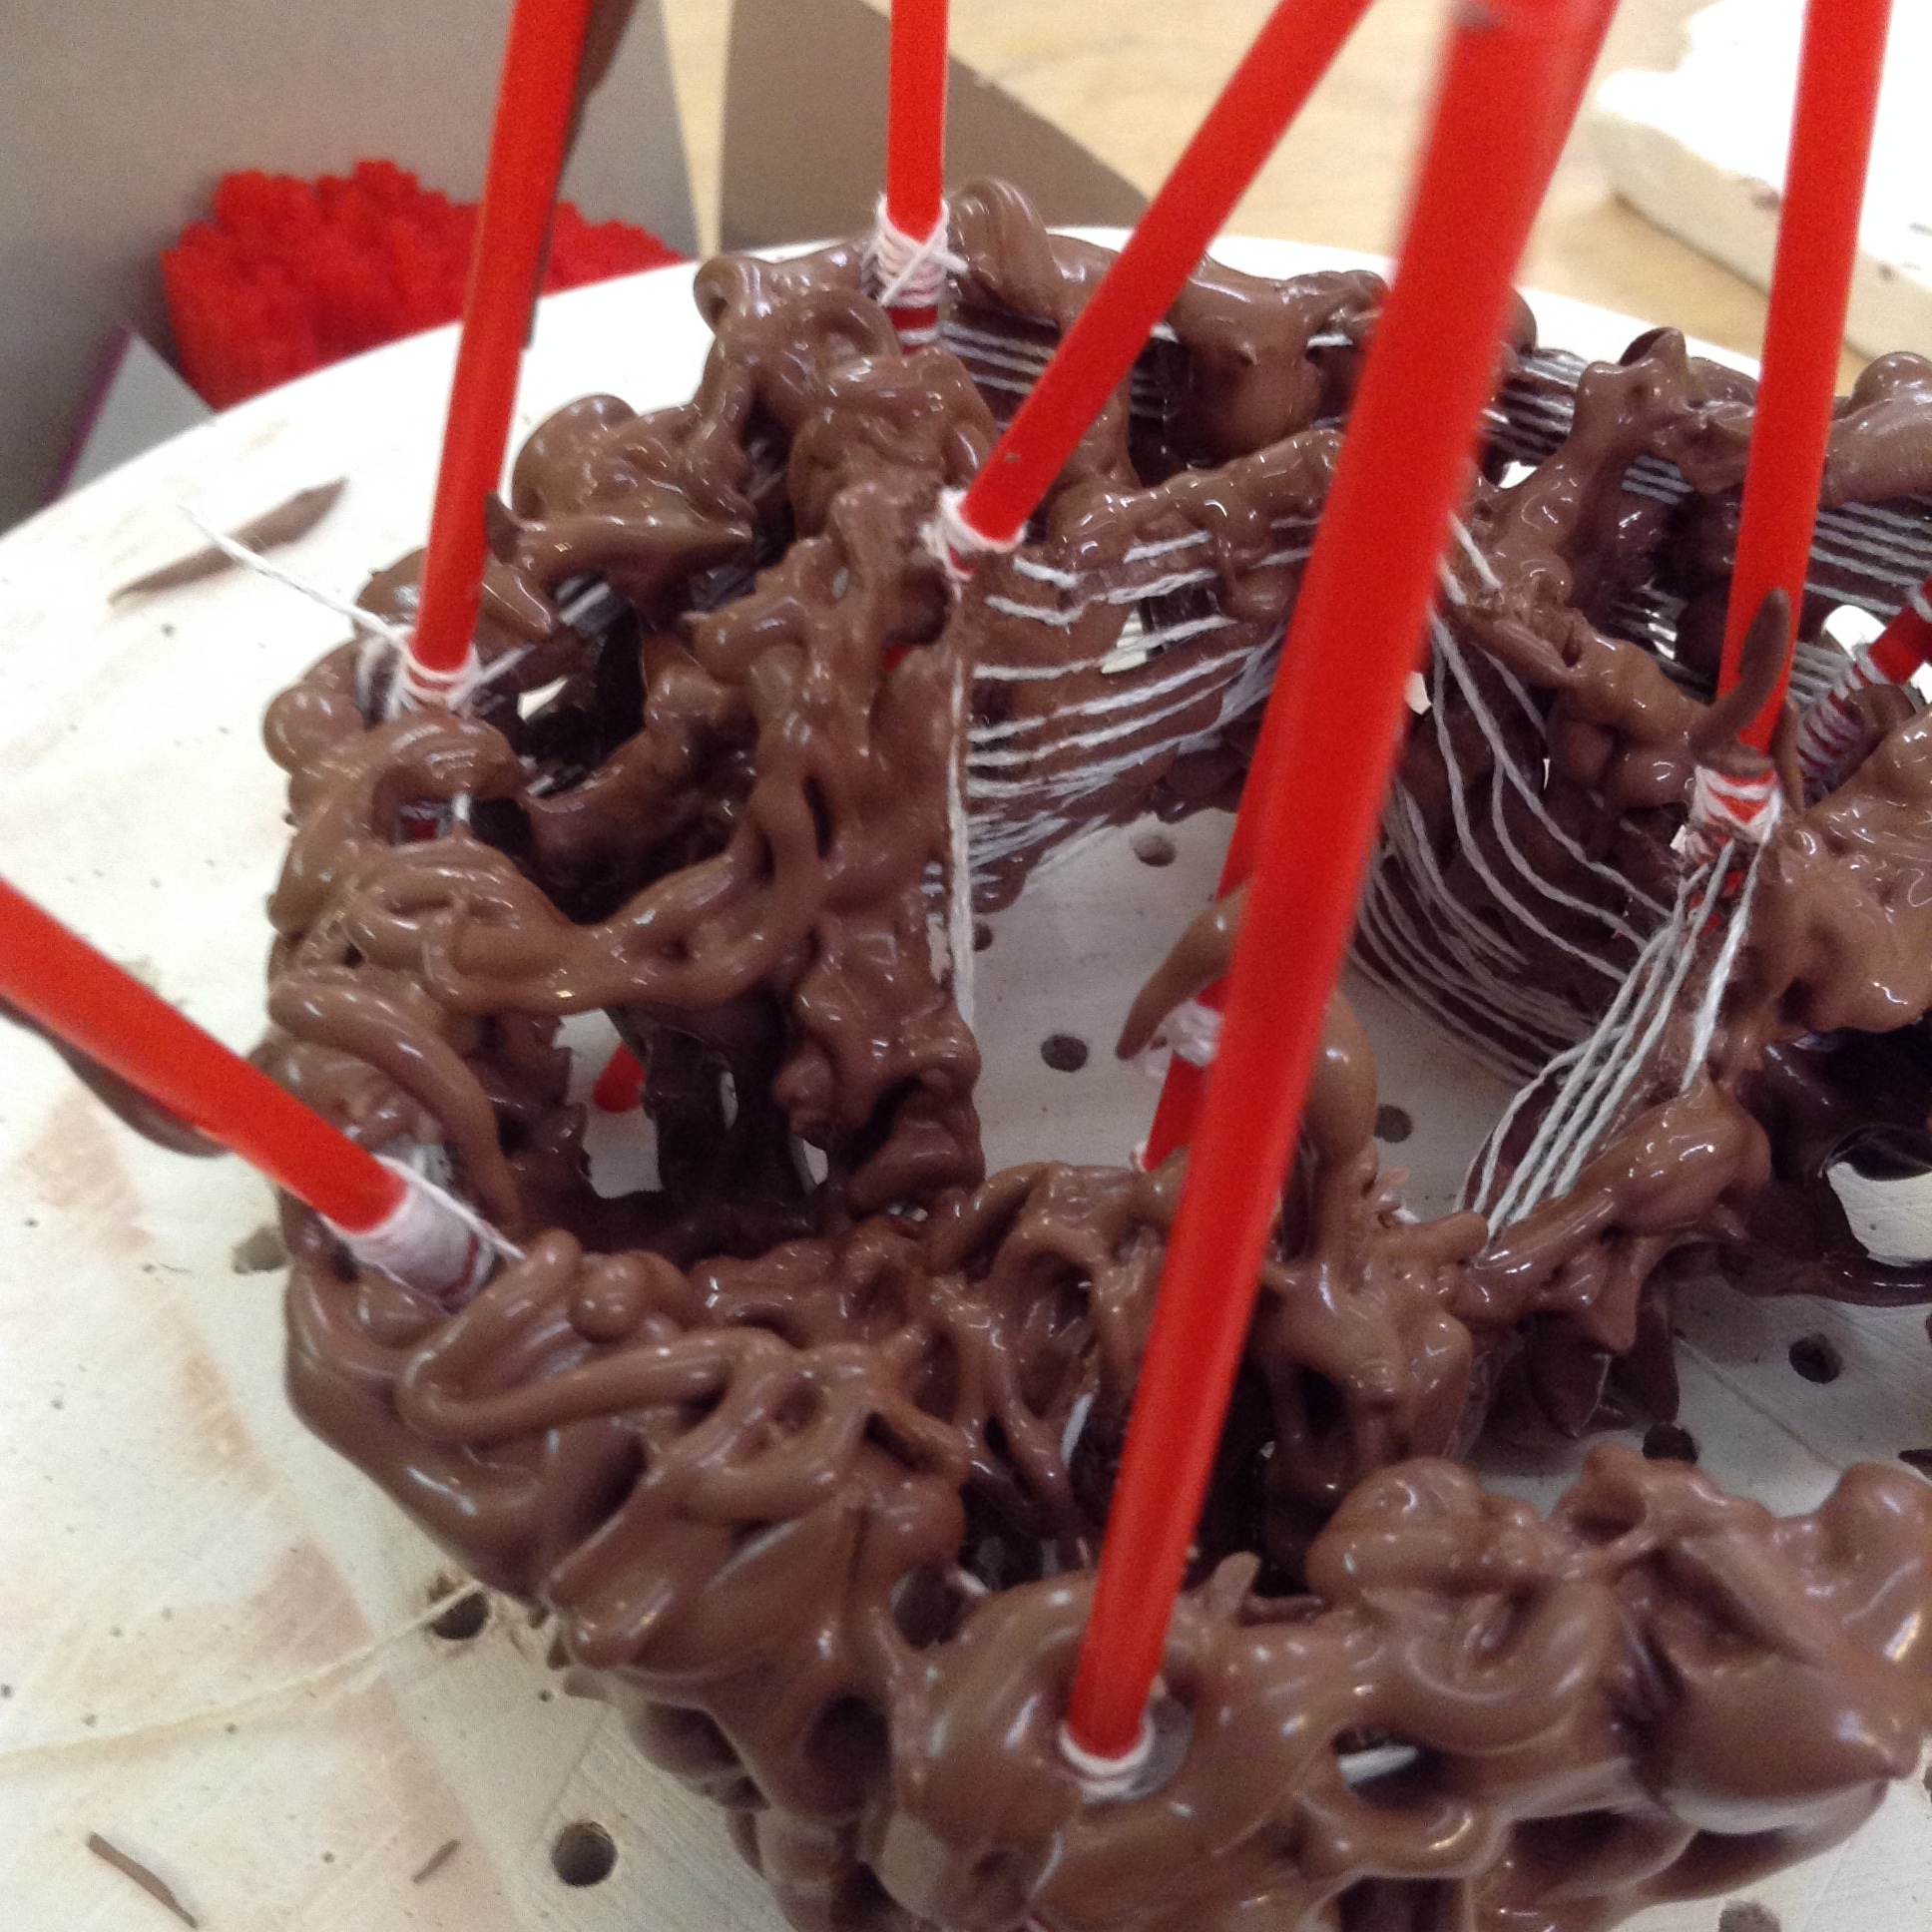
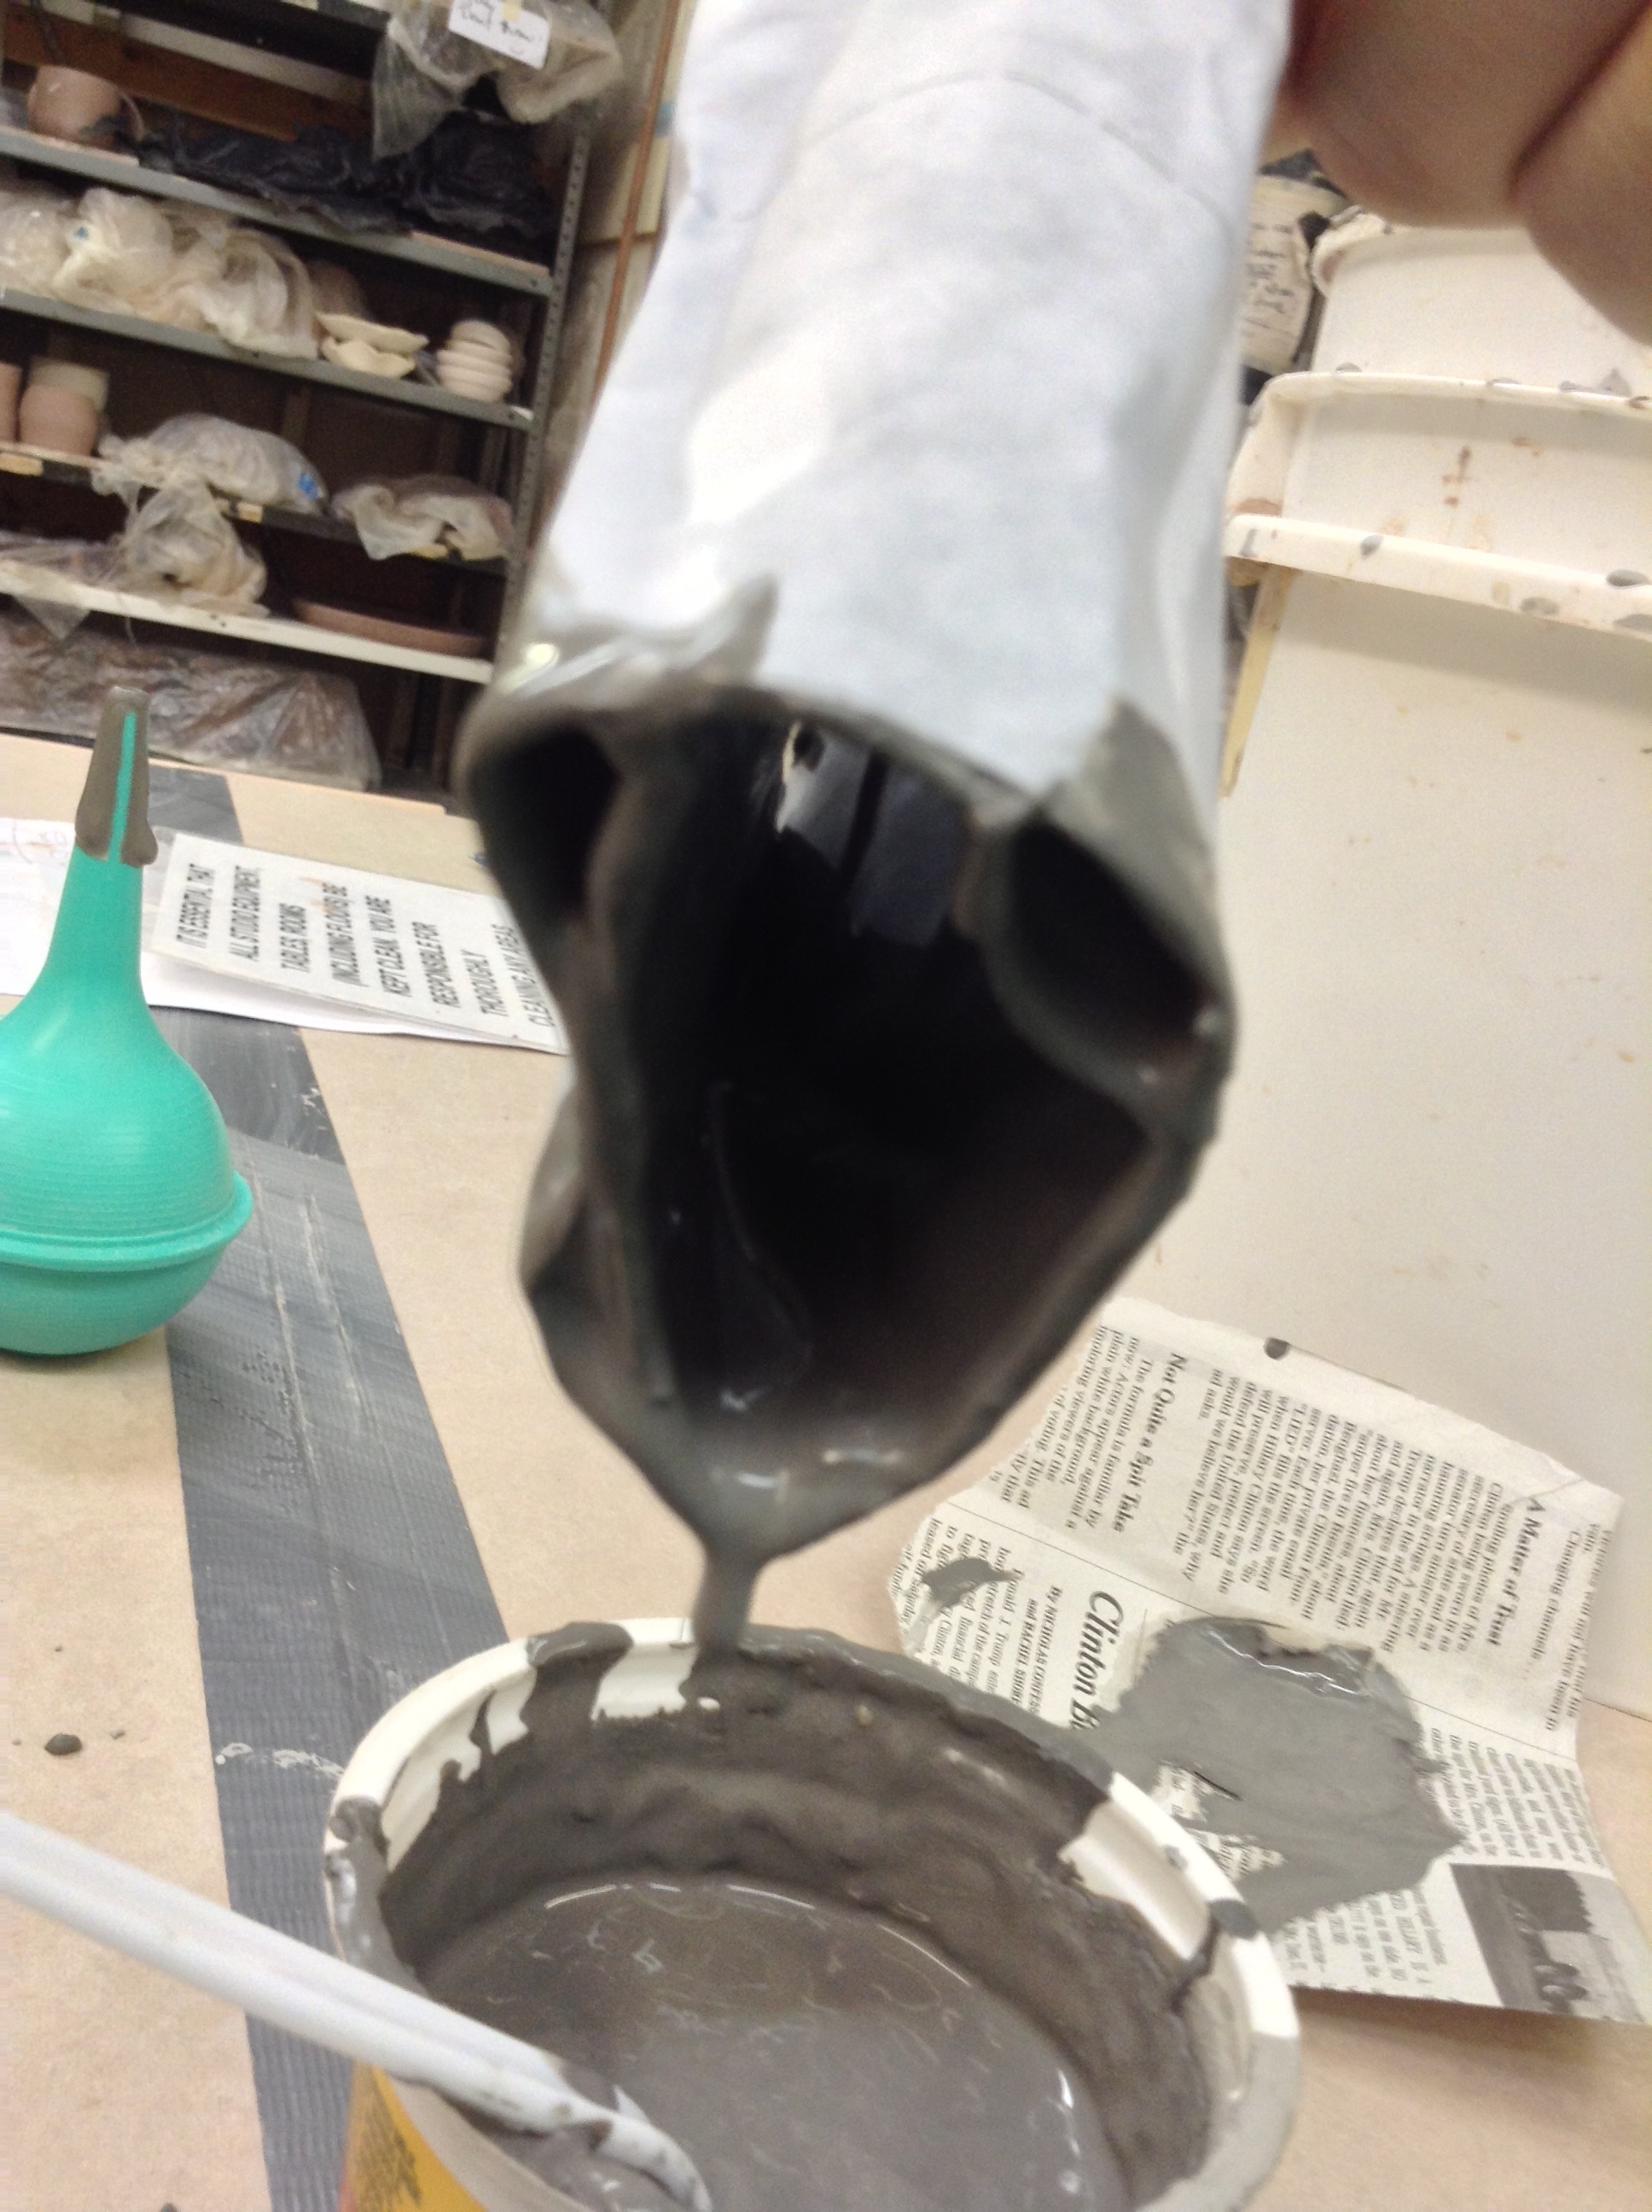
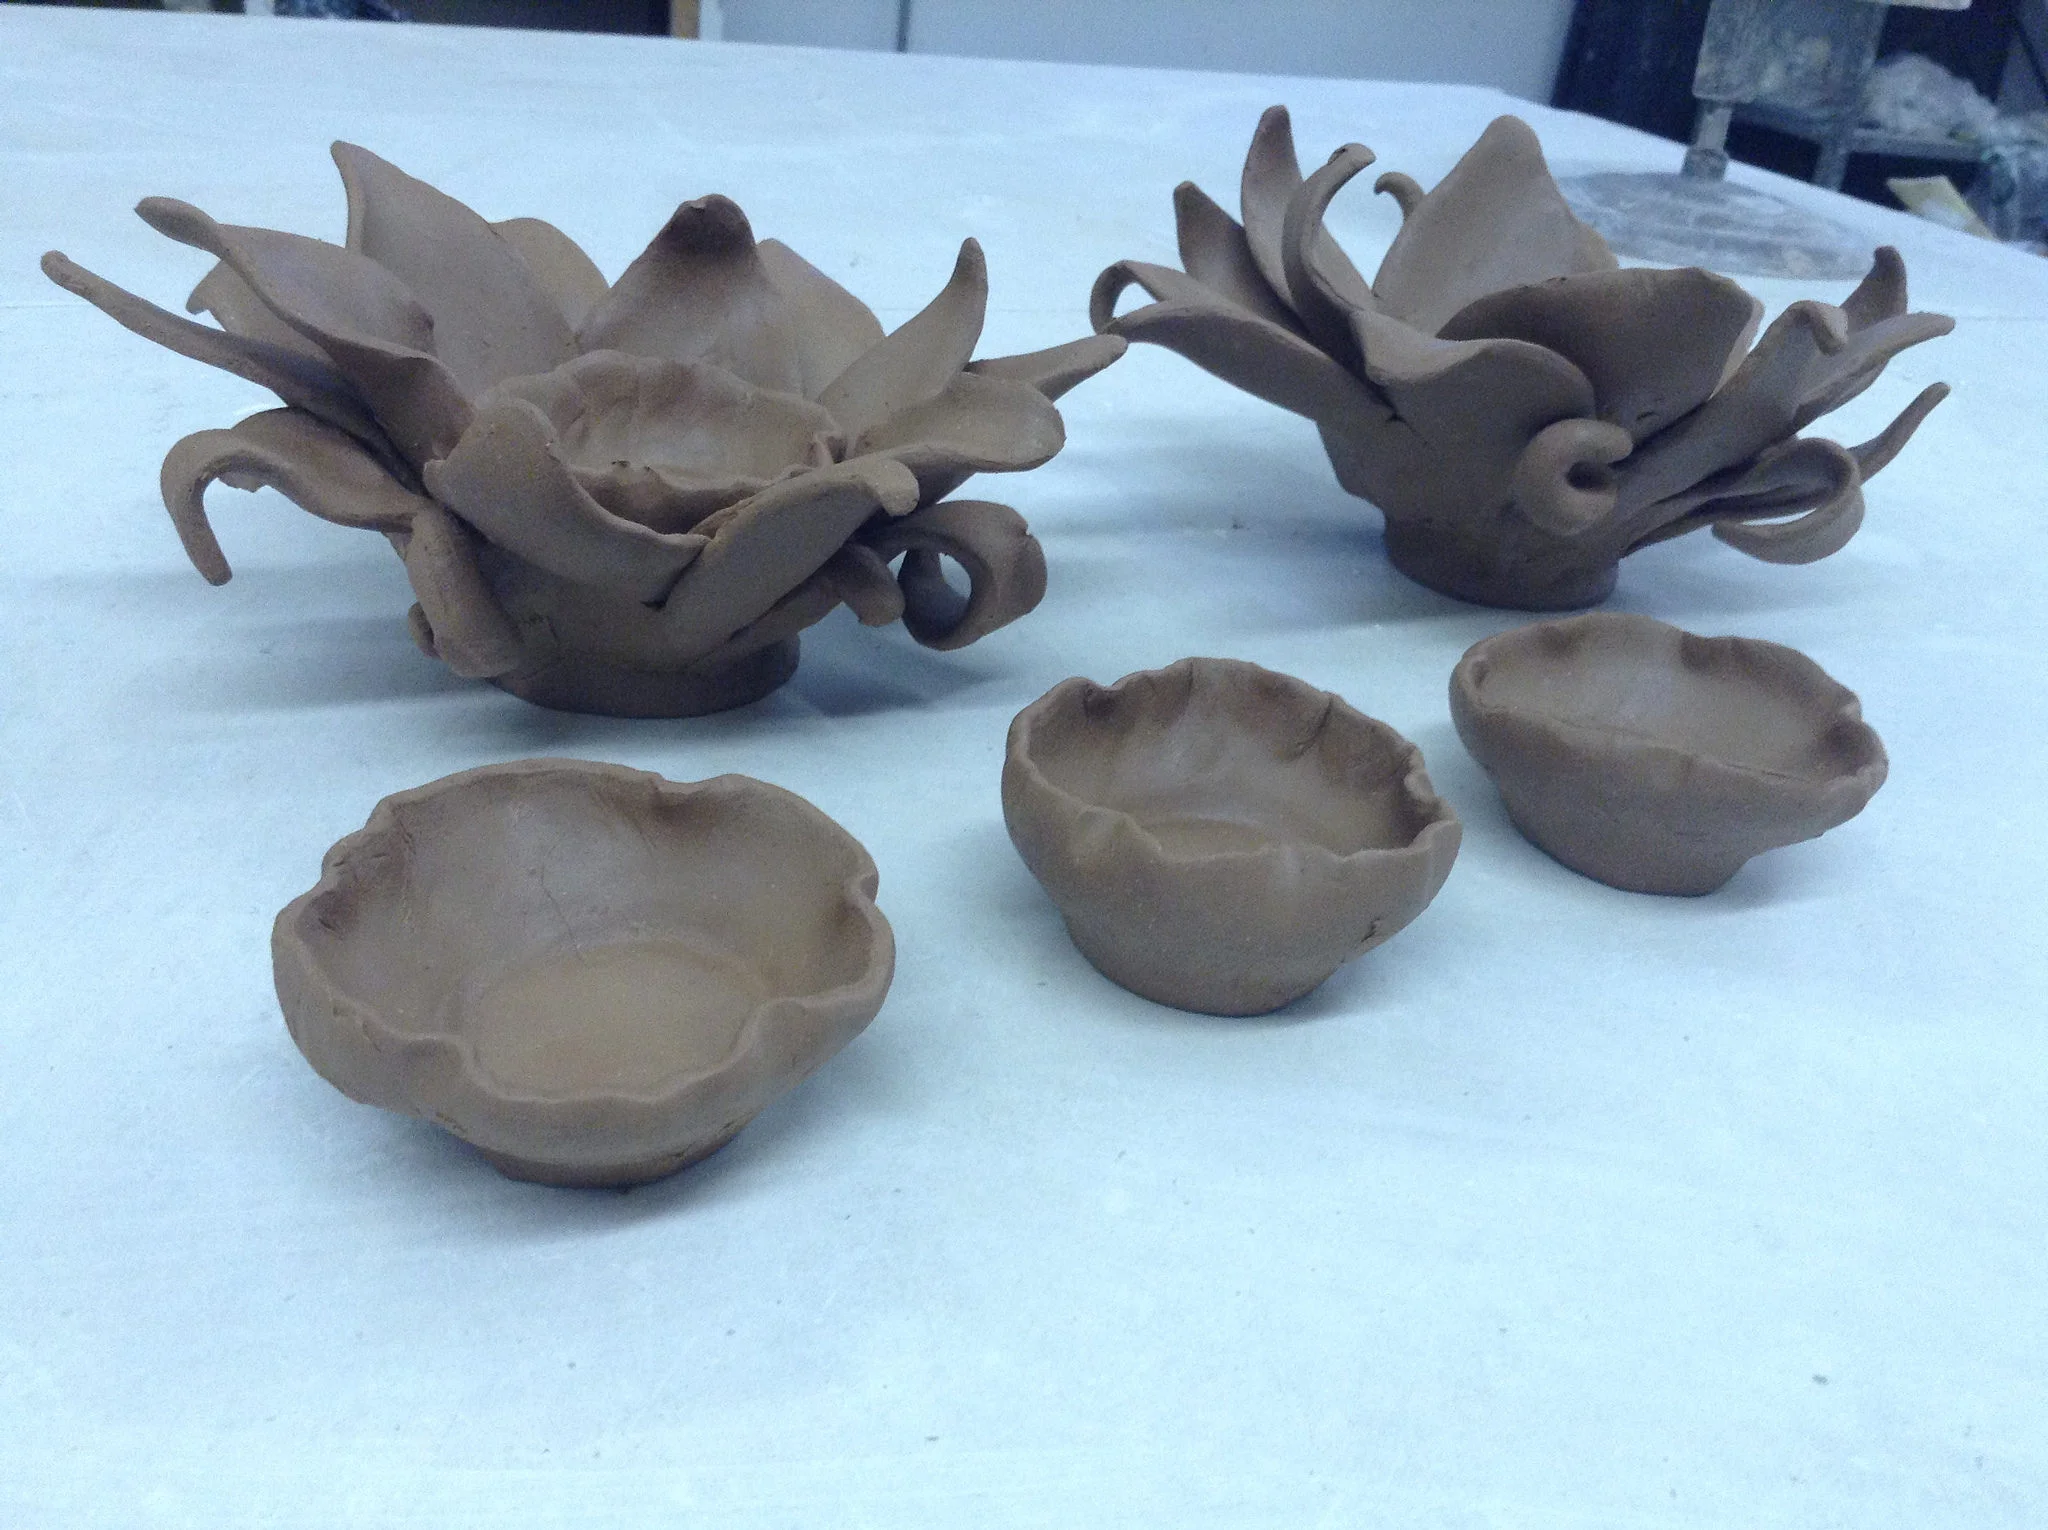
    I realized the awkward way that the slip consistency plays a big role in how controlled the forms appear. For the pieces shown in this essay, I had a fair amount of control over the consistency, but there's clearly room for better protocols. I was impatient and often got globby slip, but at least I know what to do when I want slip that won't squeeze out of the bottle evenly!

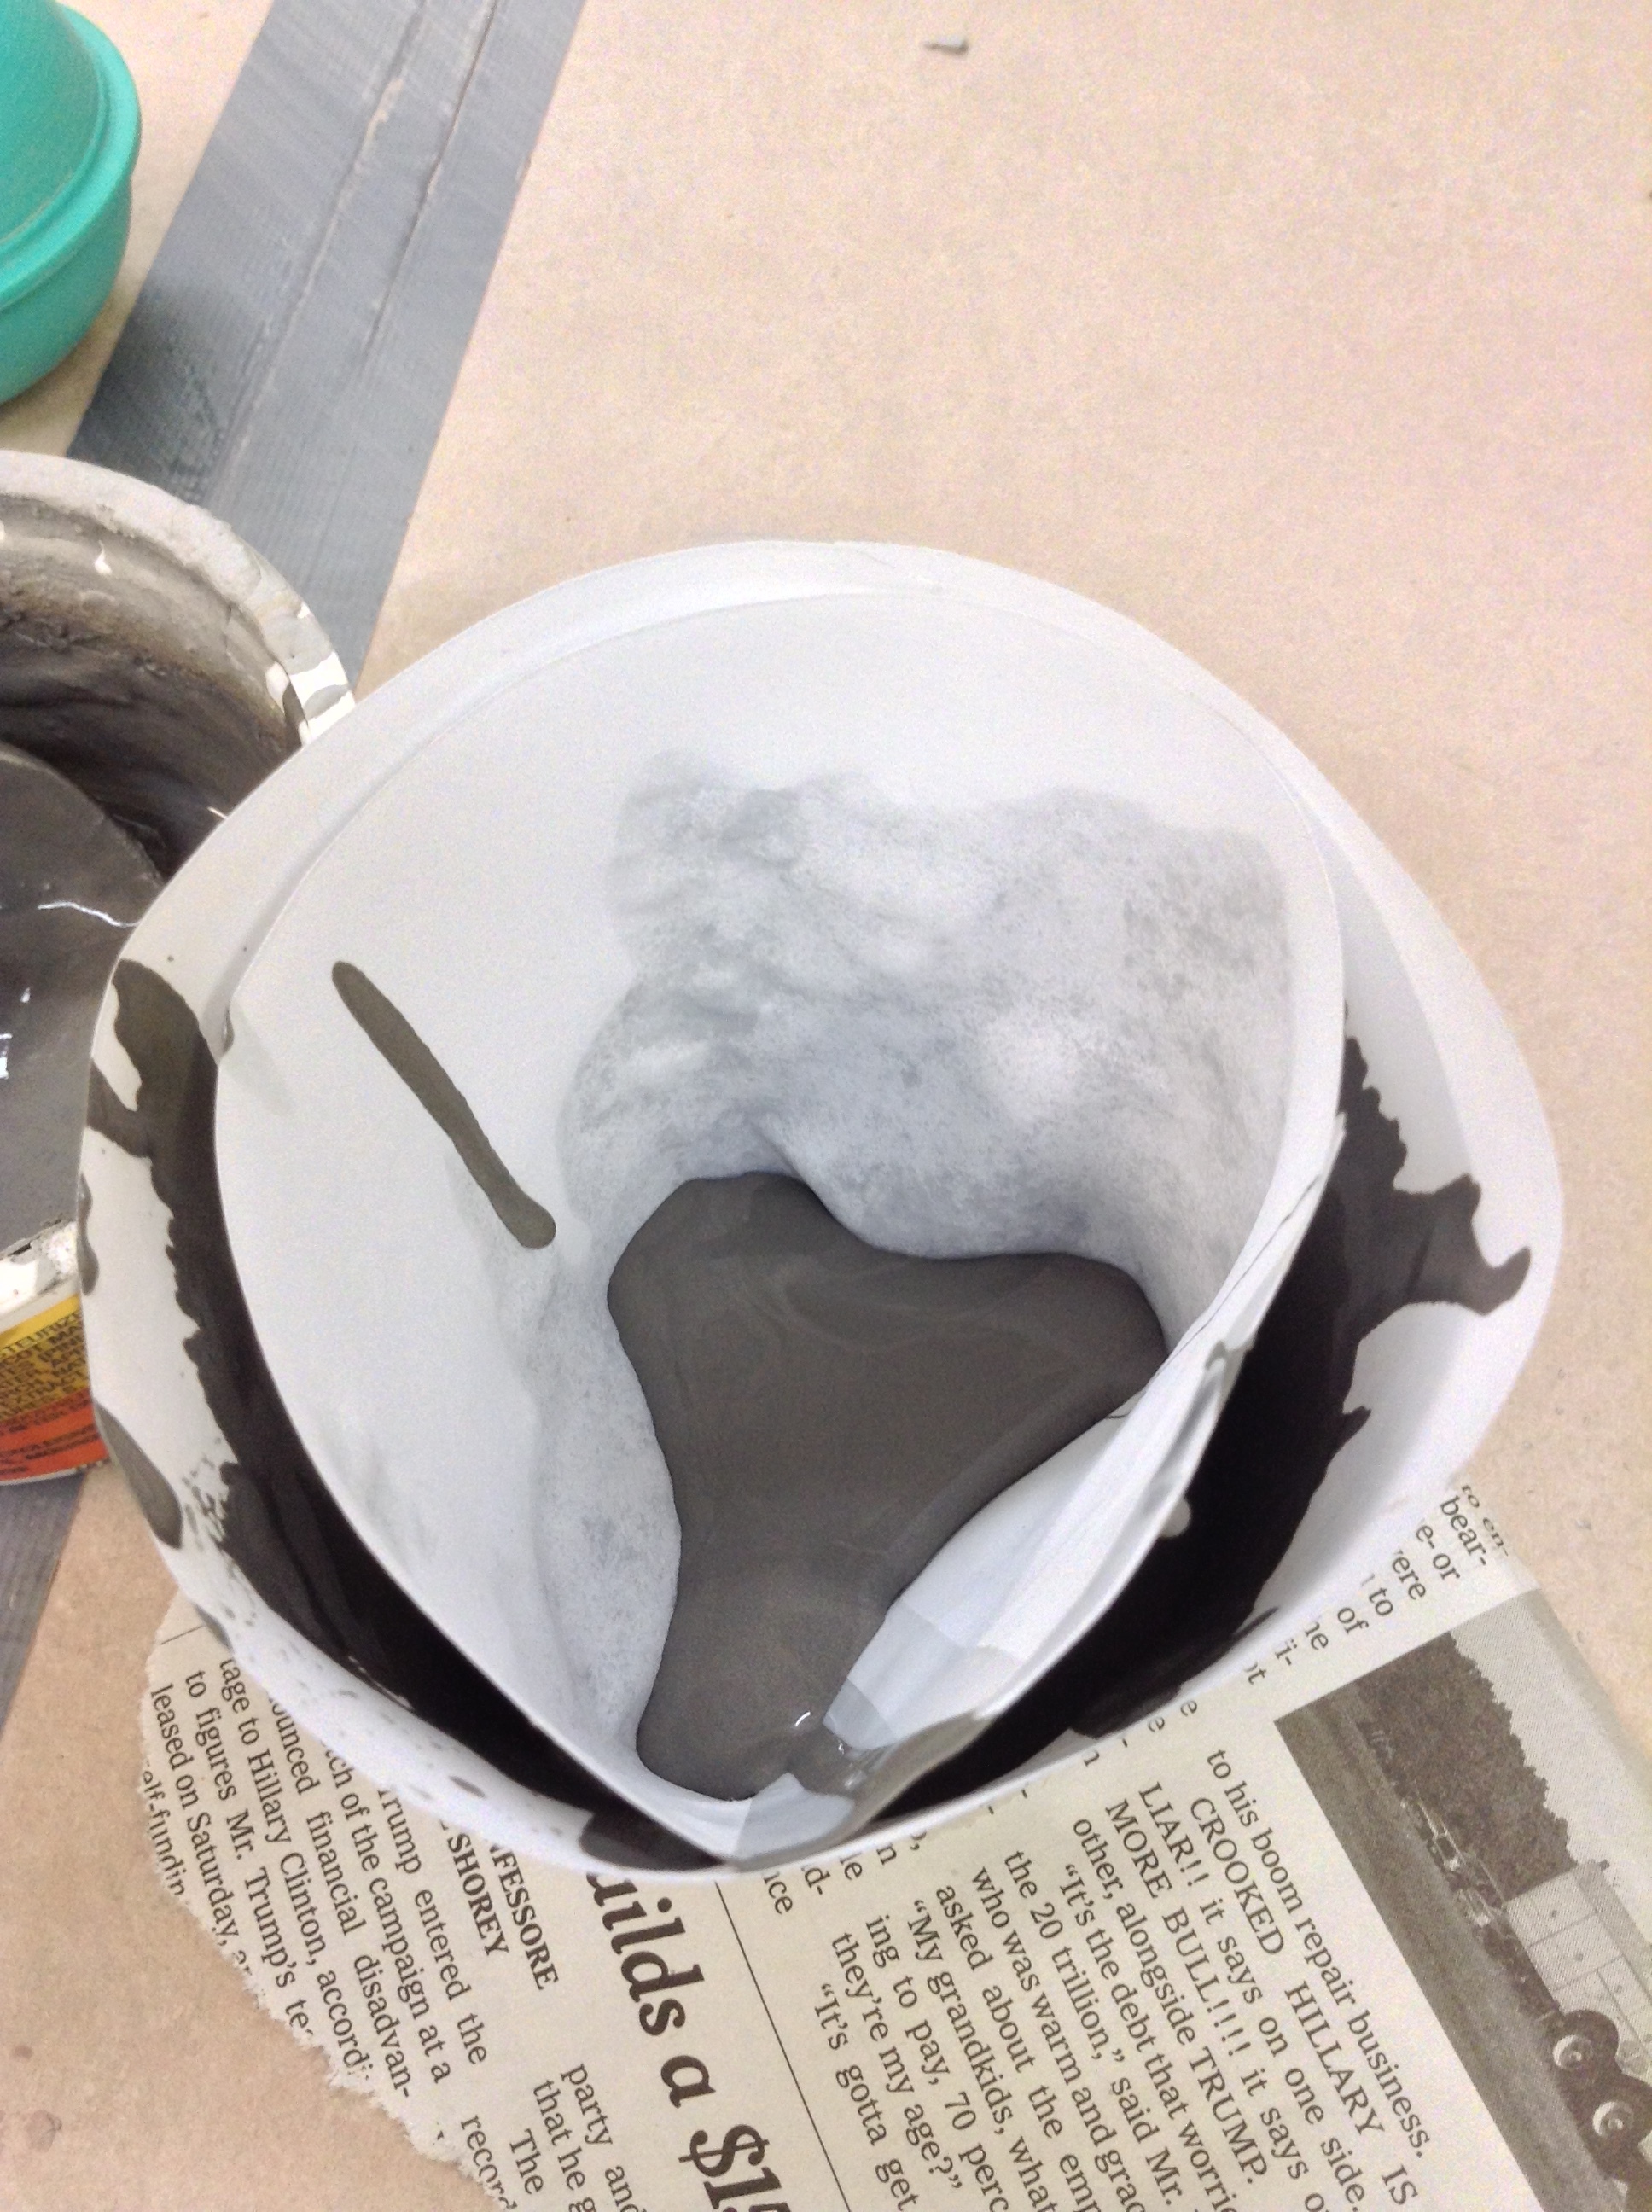
    Just a bit of helpful advice: Mix your slip first in a wide container with a whisk or heavy flat utensil, before putting it into your squeeze bottle. I made the regrettable choice of adding vinegar to the squeeze bottle directly, thinking "Oh, I'll just shake it up." It mostly works, but not really.


    WHY BOTHER WITH ANY OF THIS? WHY USE SMELLY SLIP WHEN HANDBUILDING PROCESSES ALREADY EXIST?

    Okay, I'm already being a bit facetious: The clay slip thickened with vinegar doesn't really smell much. I've heard that these mixtures might spoil over time, but mine so far are okay.

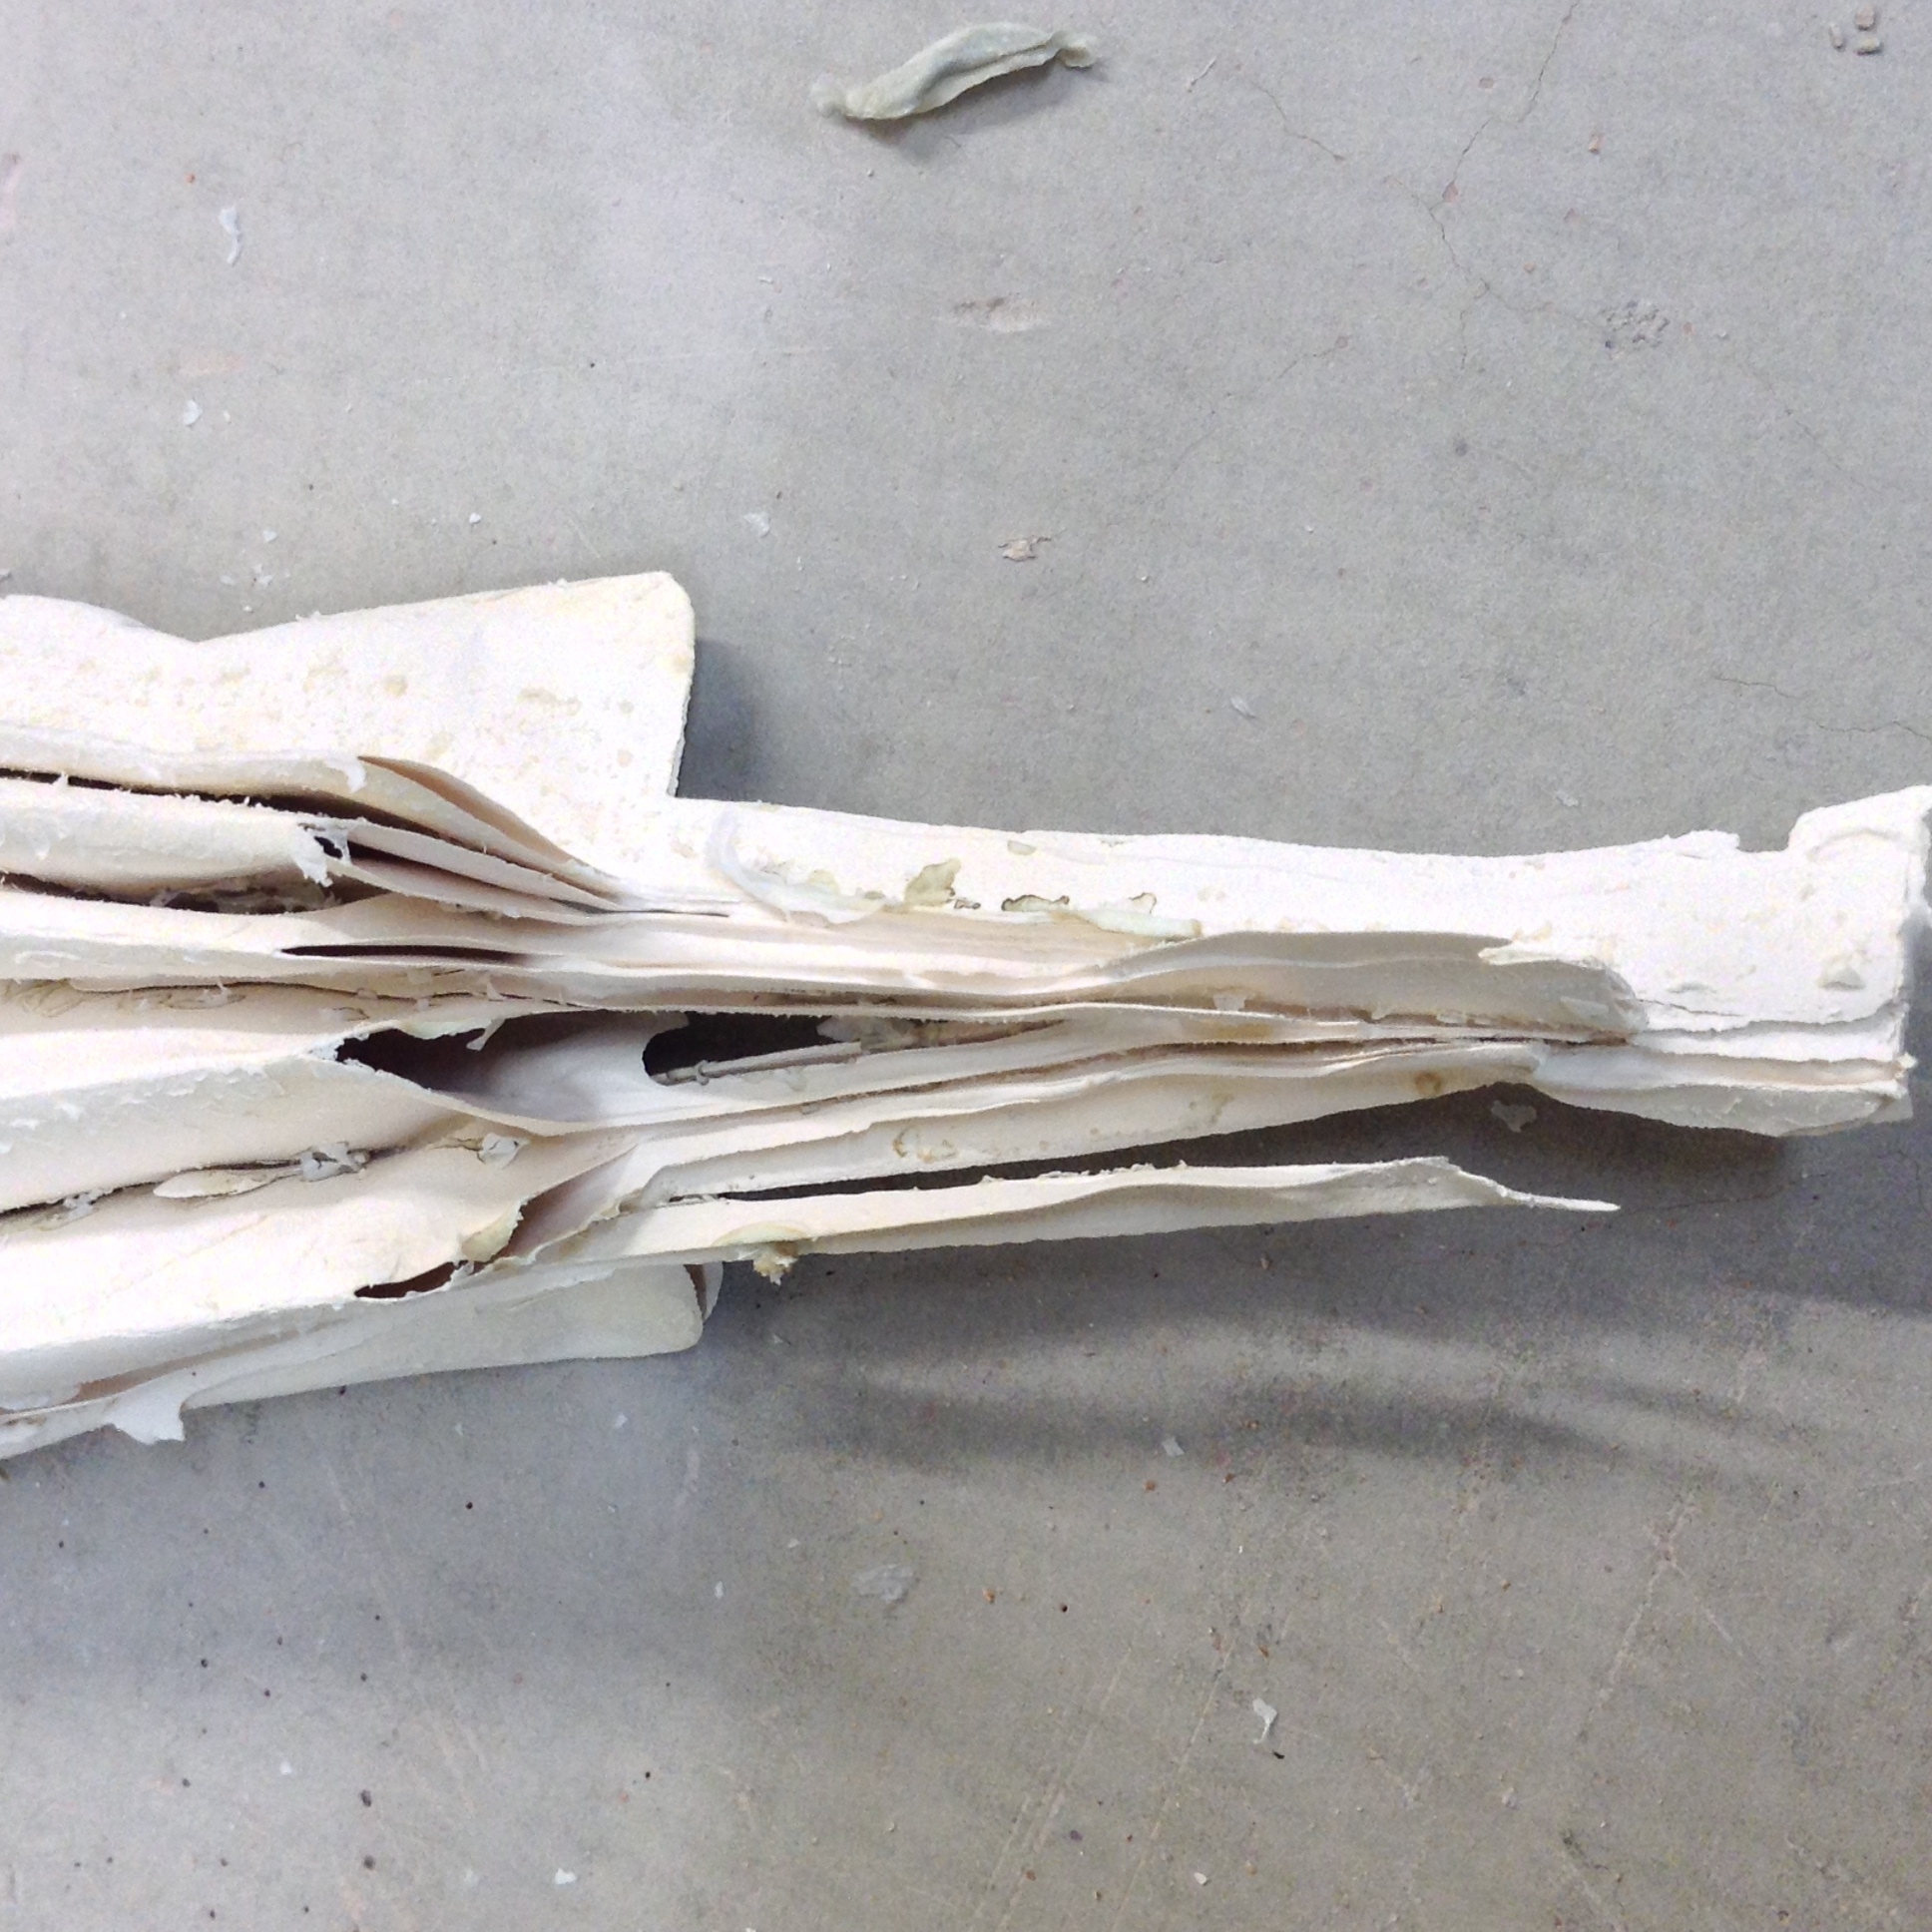
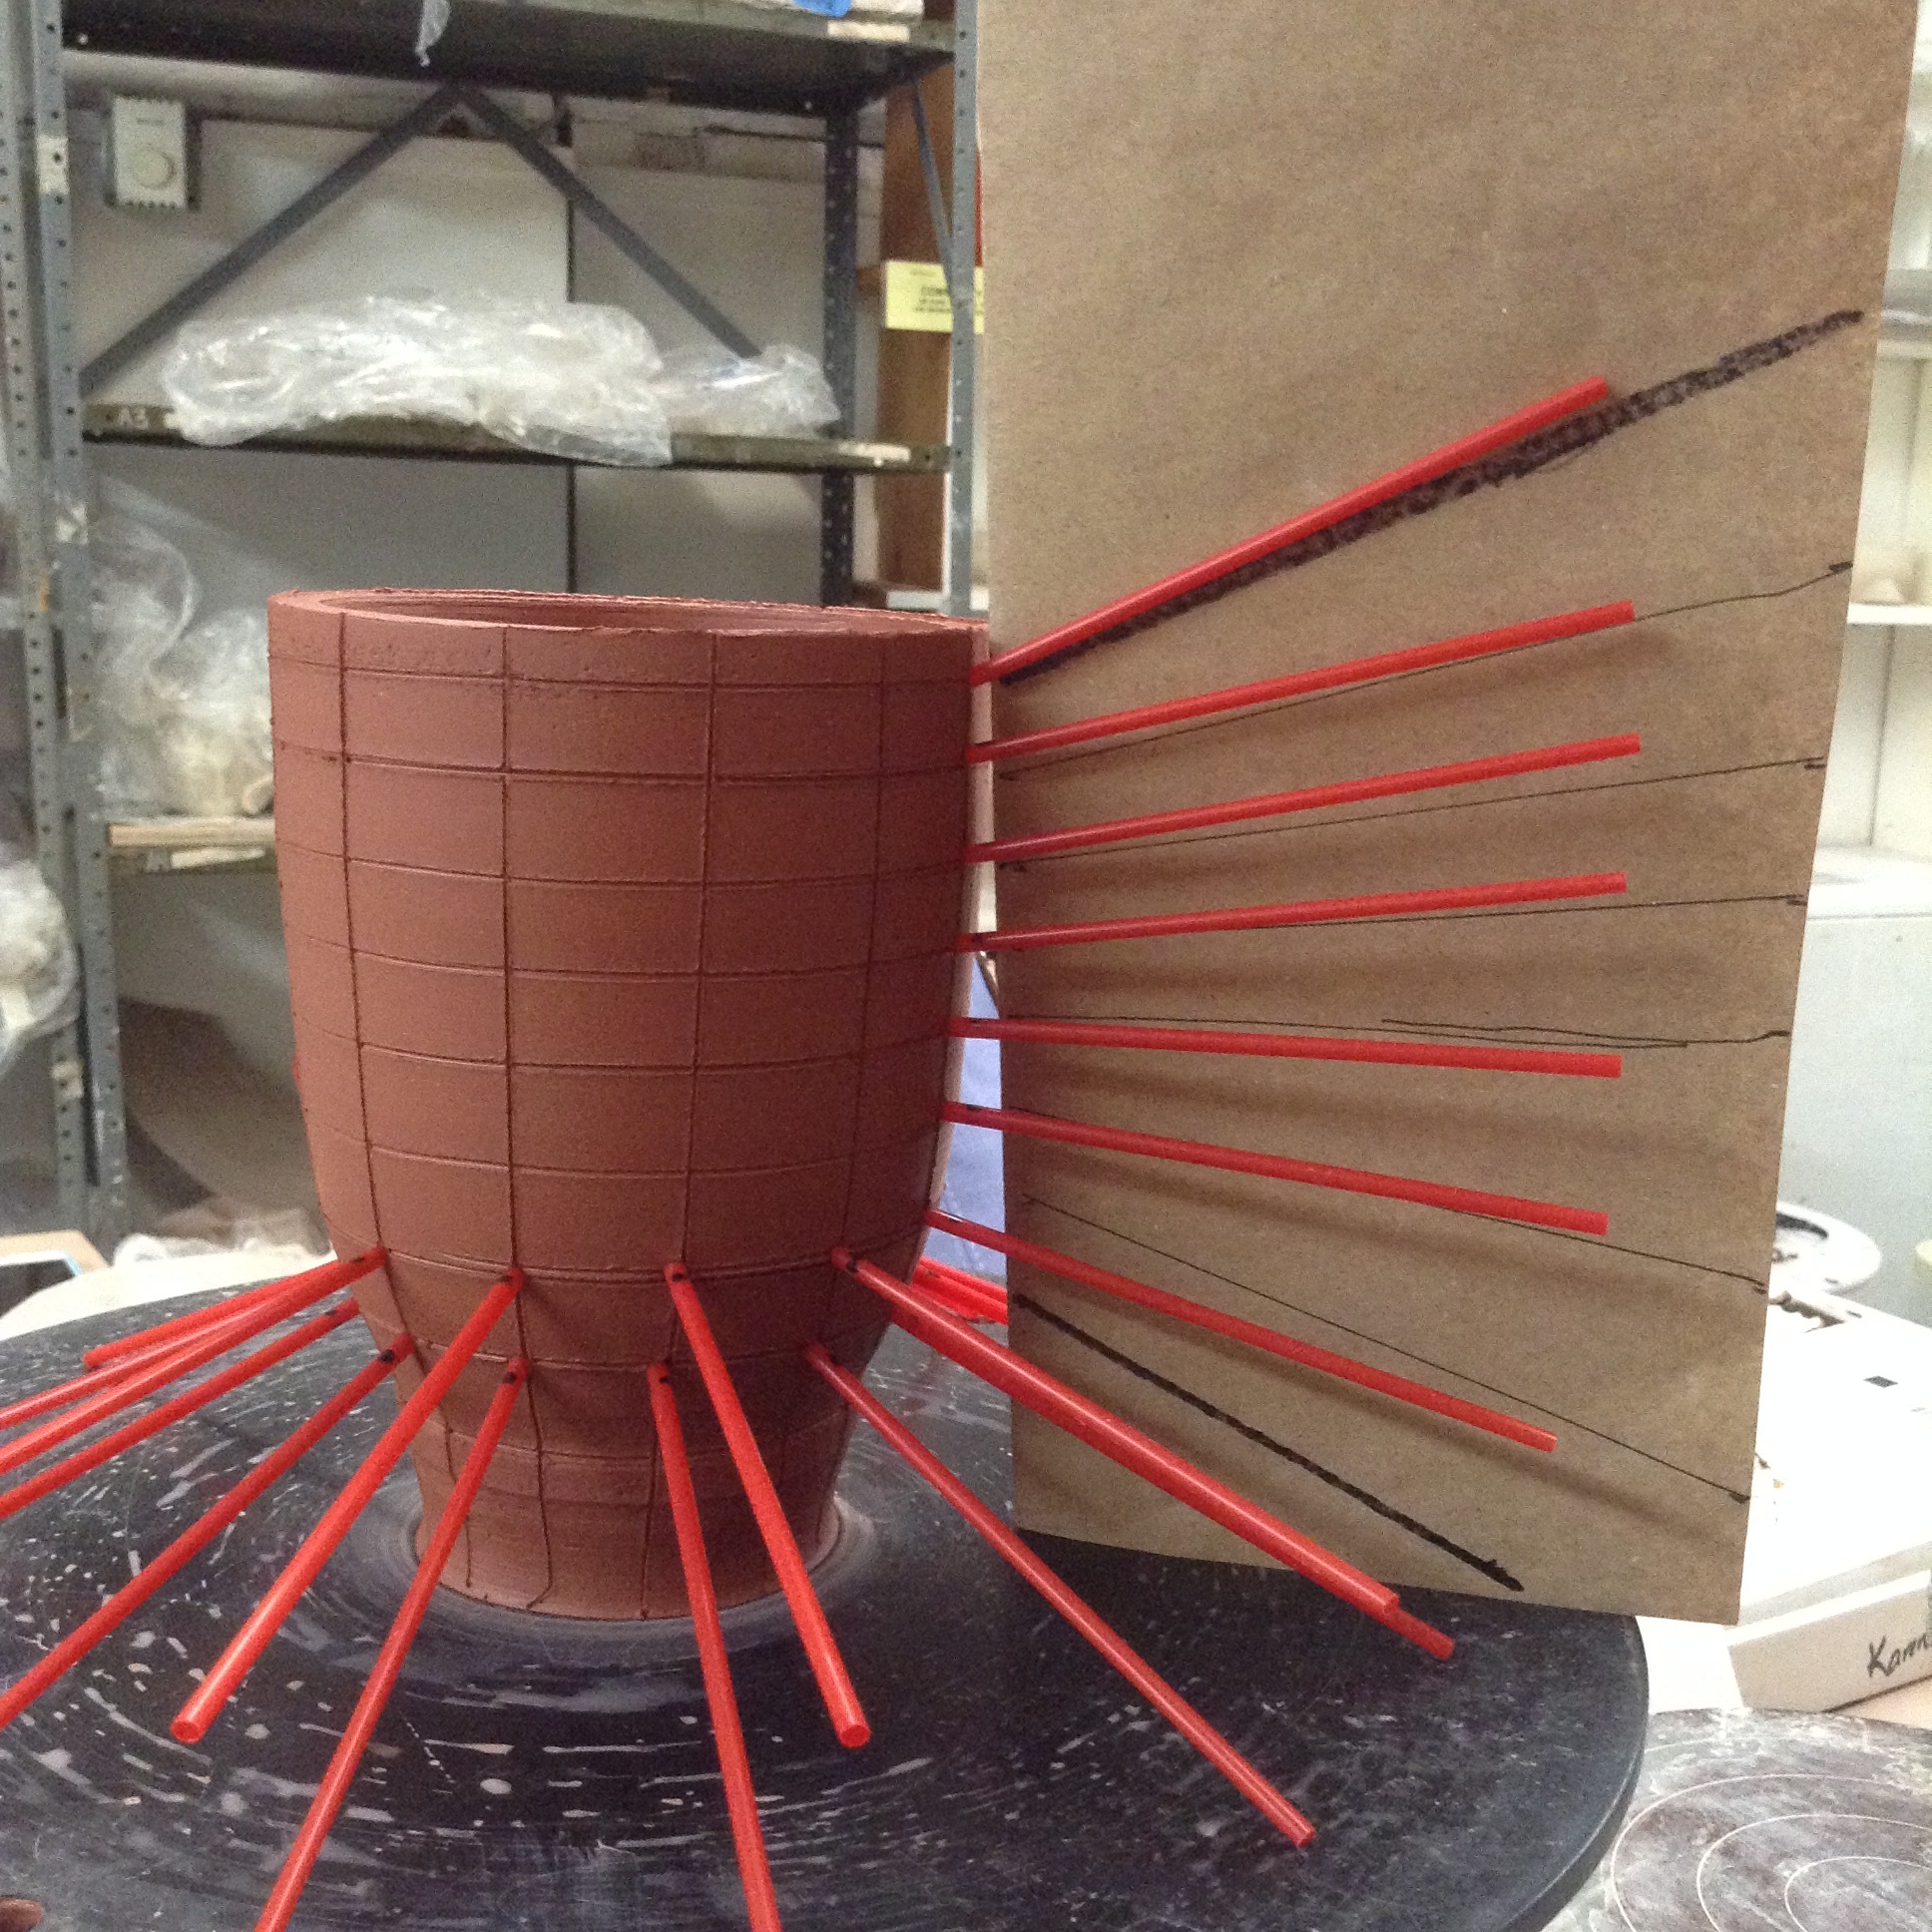
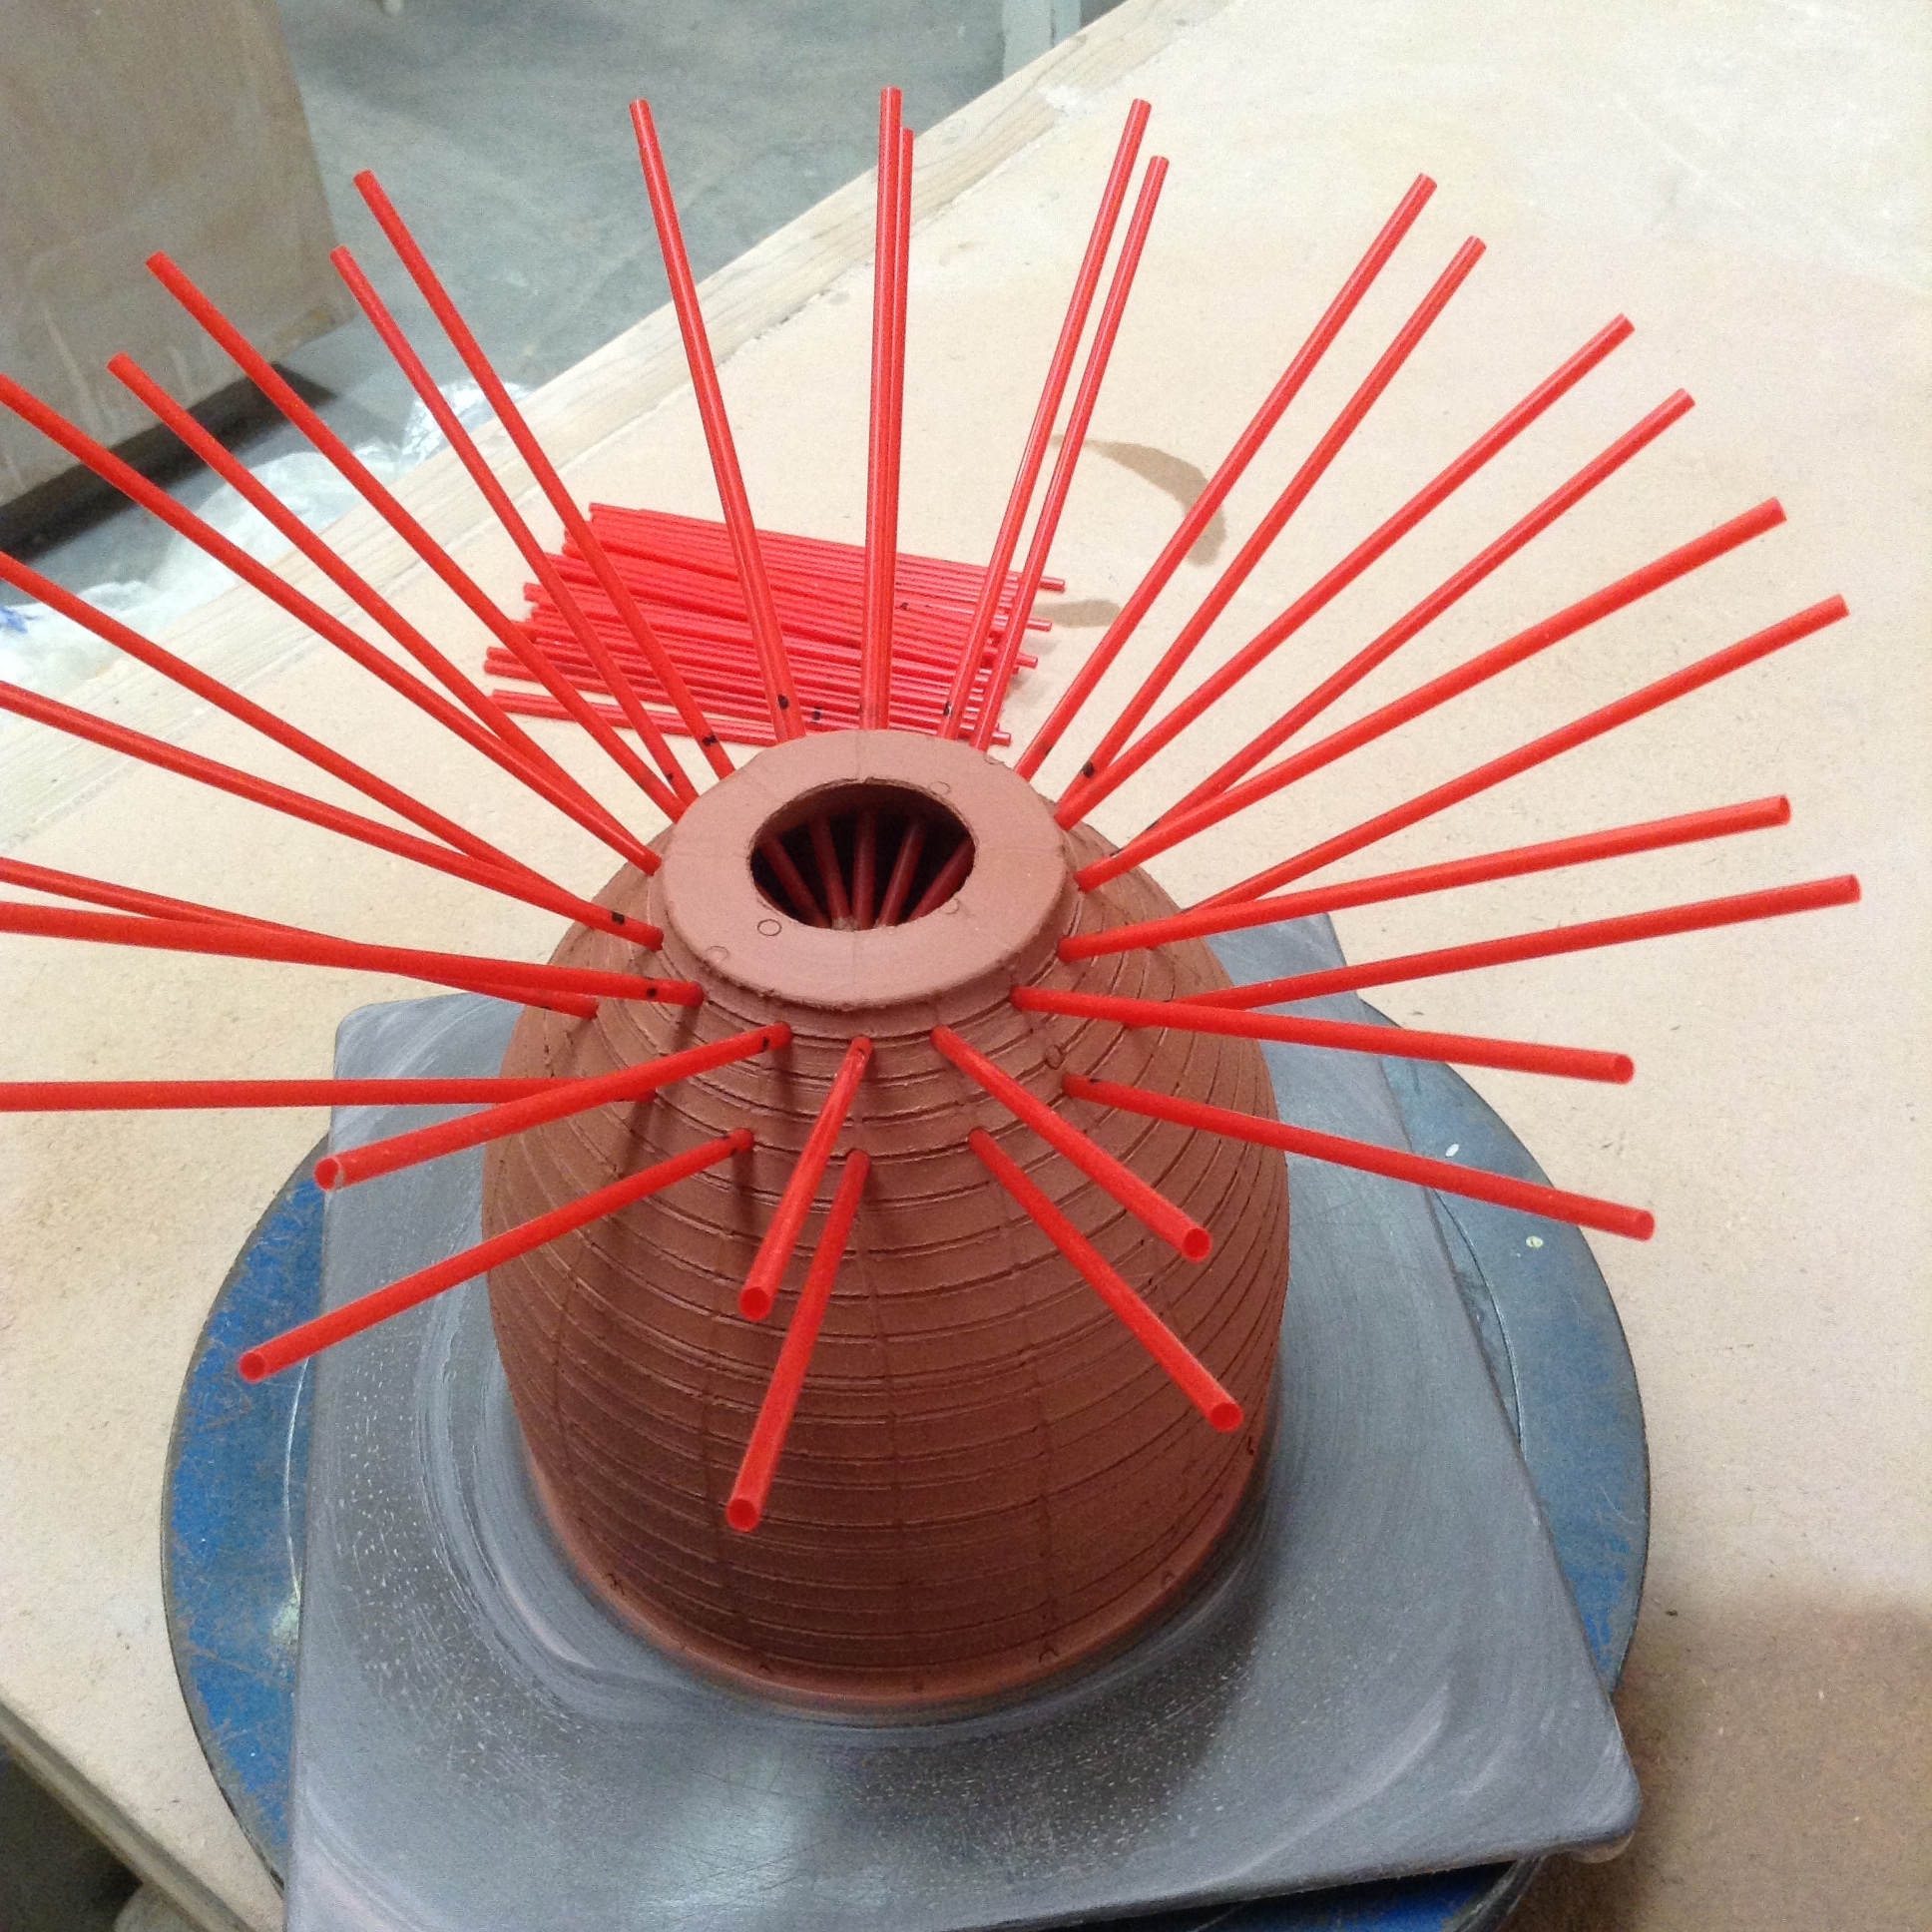
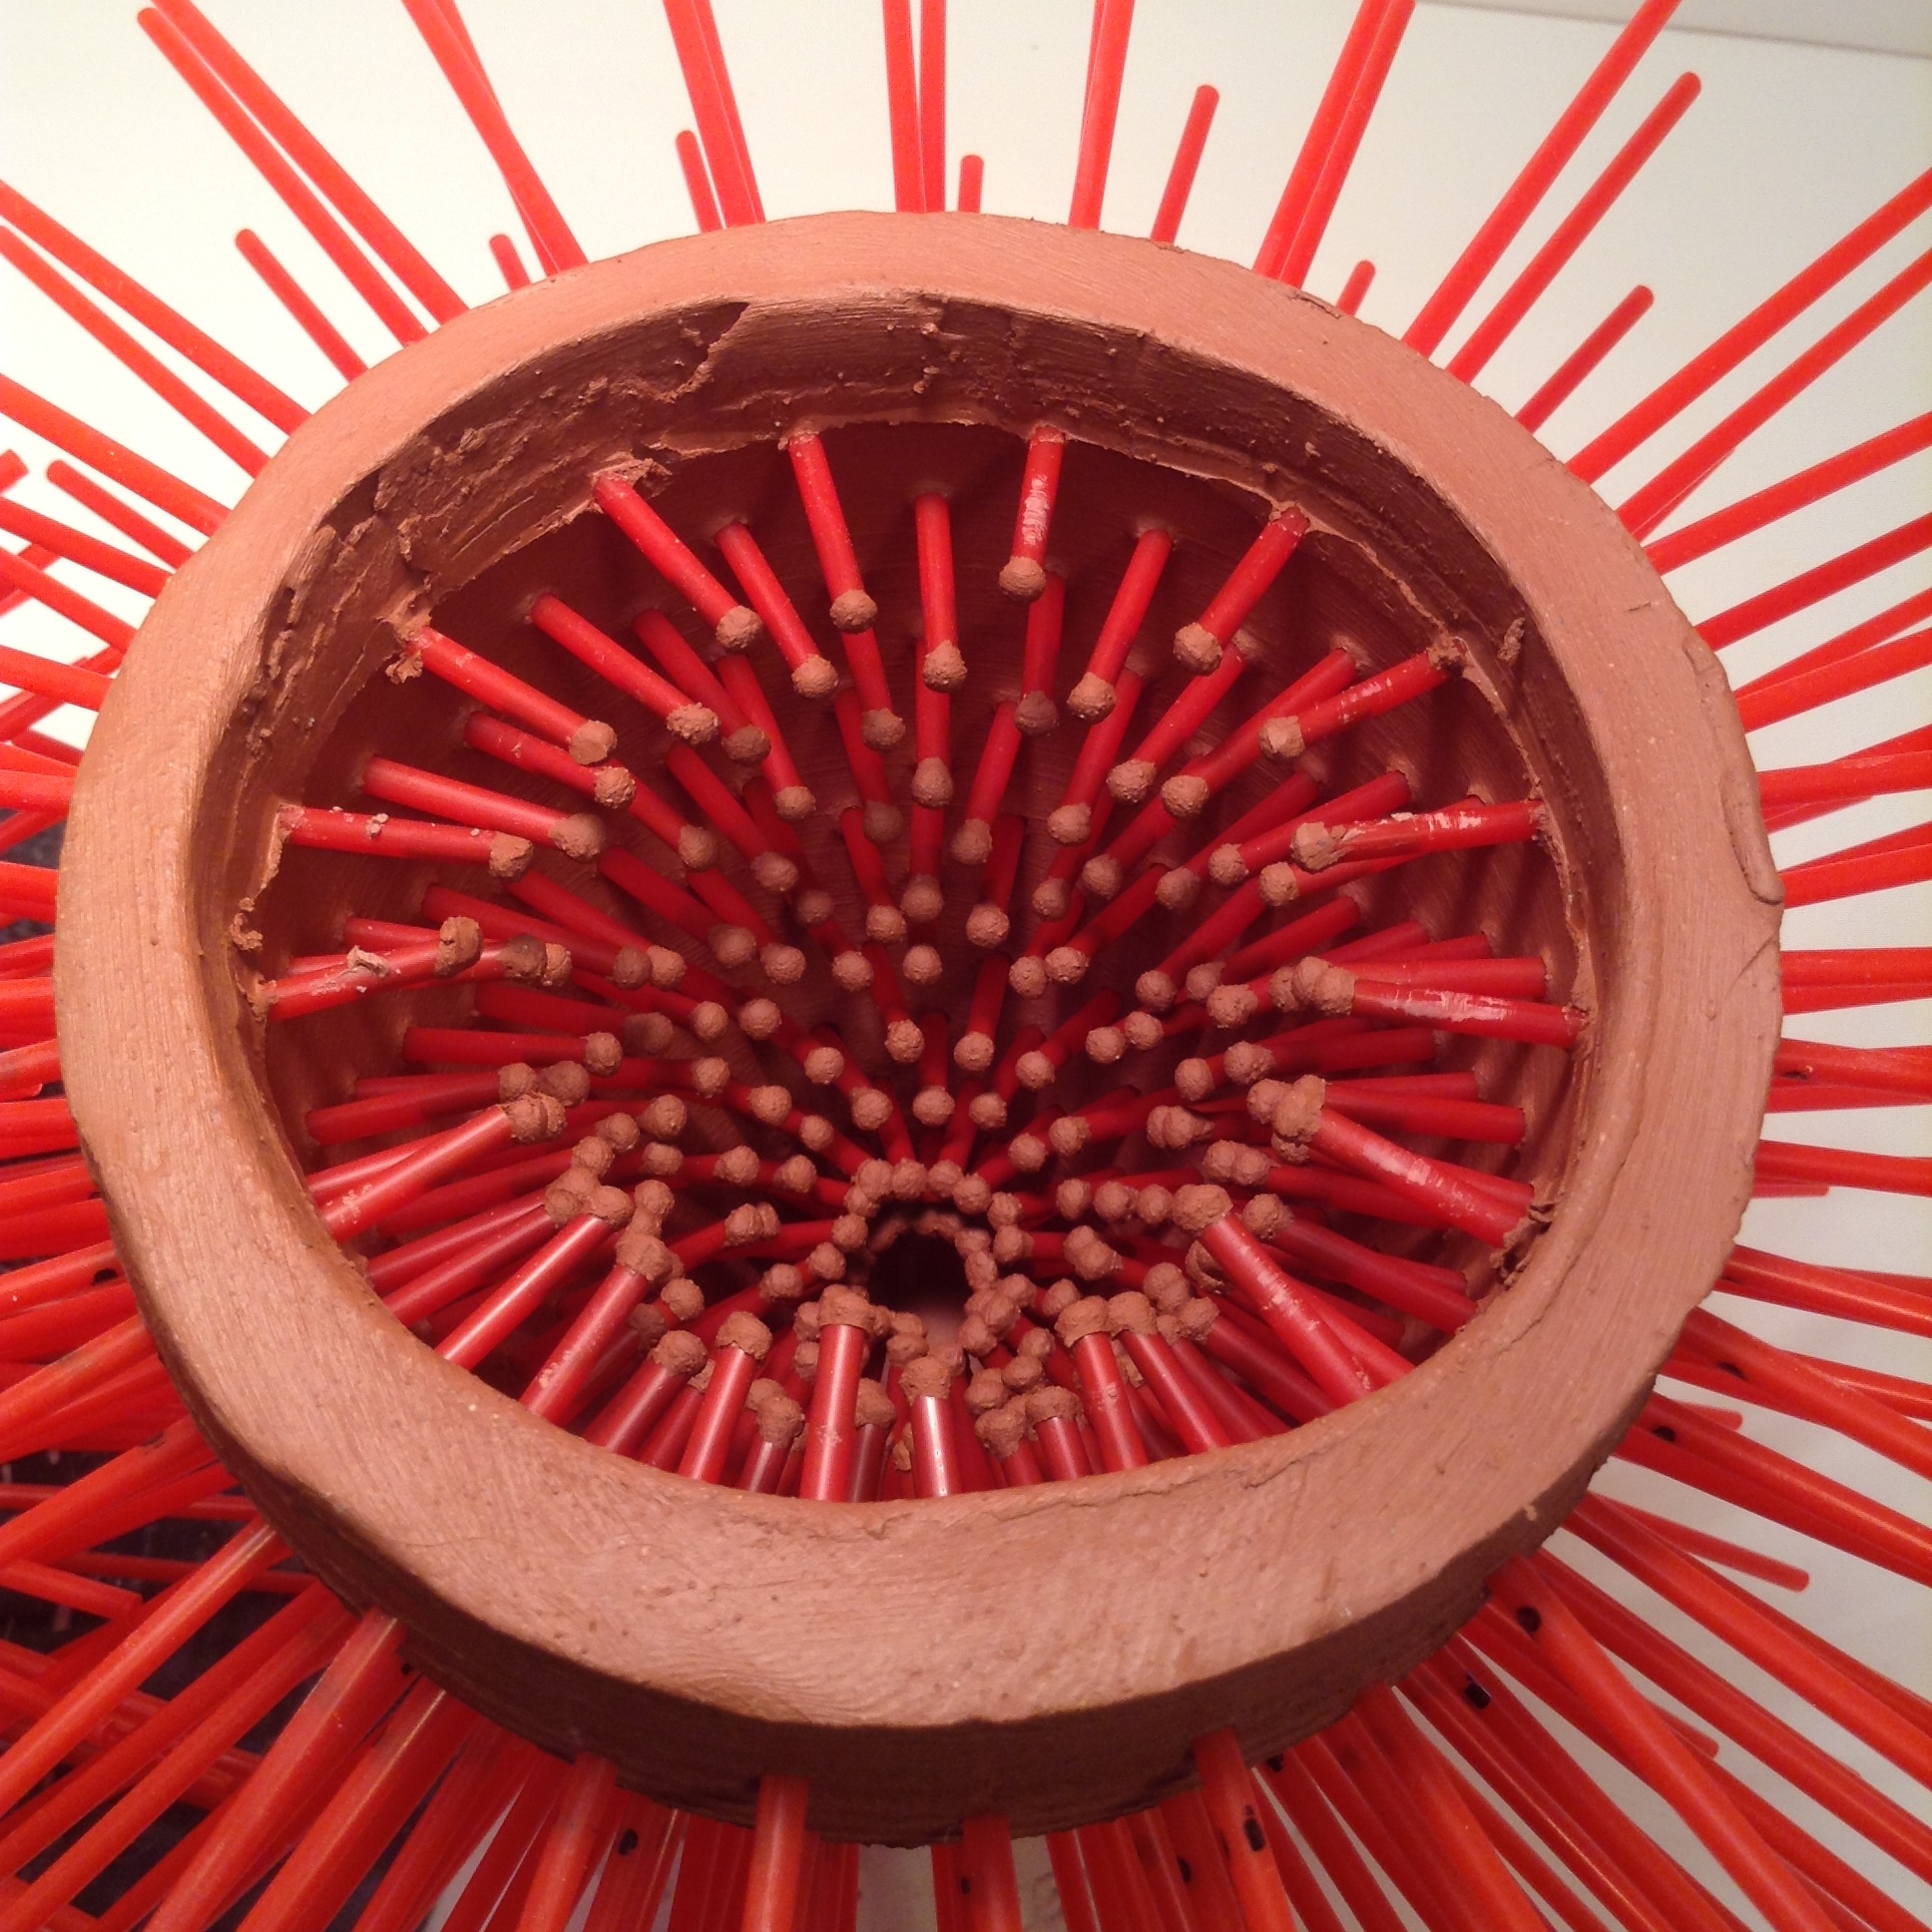
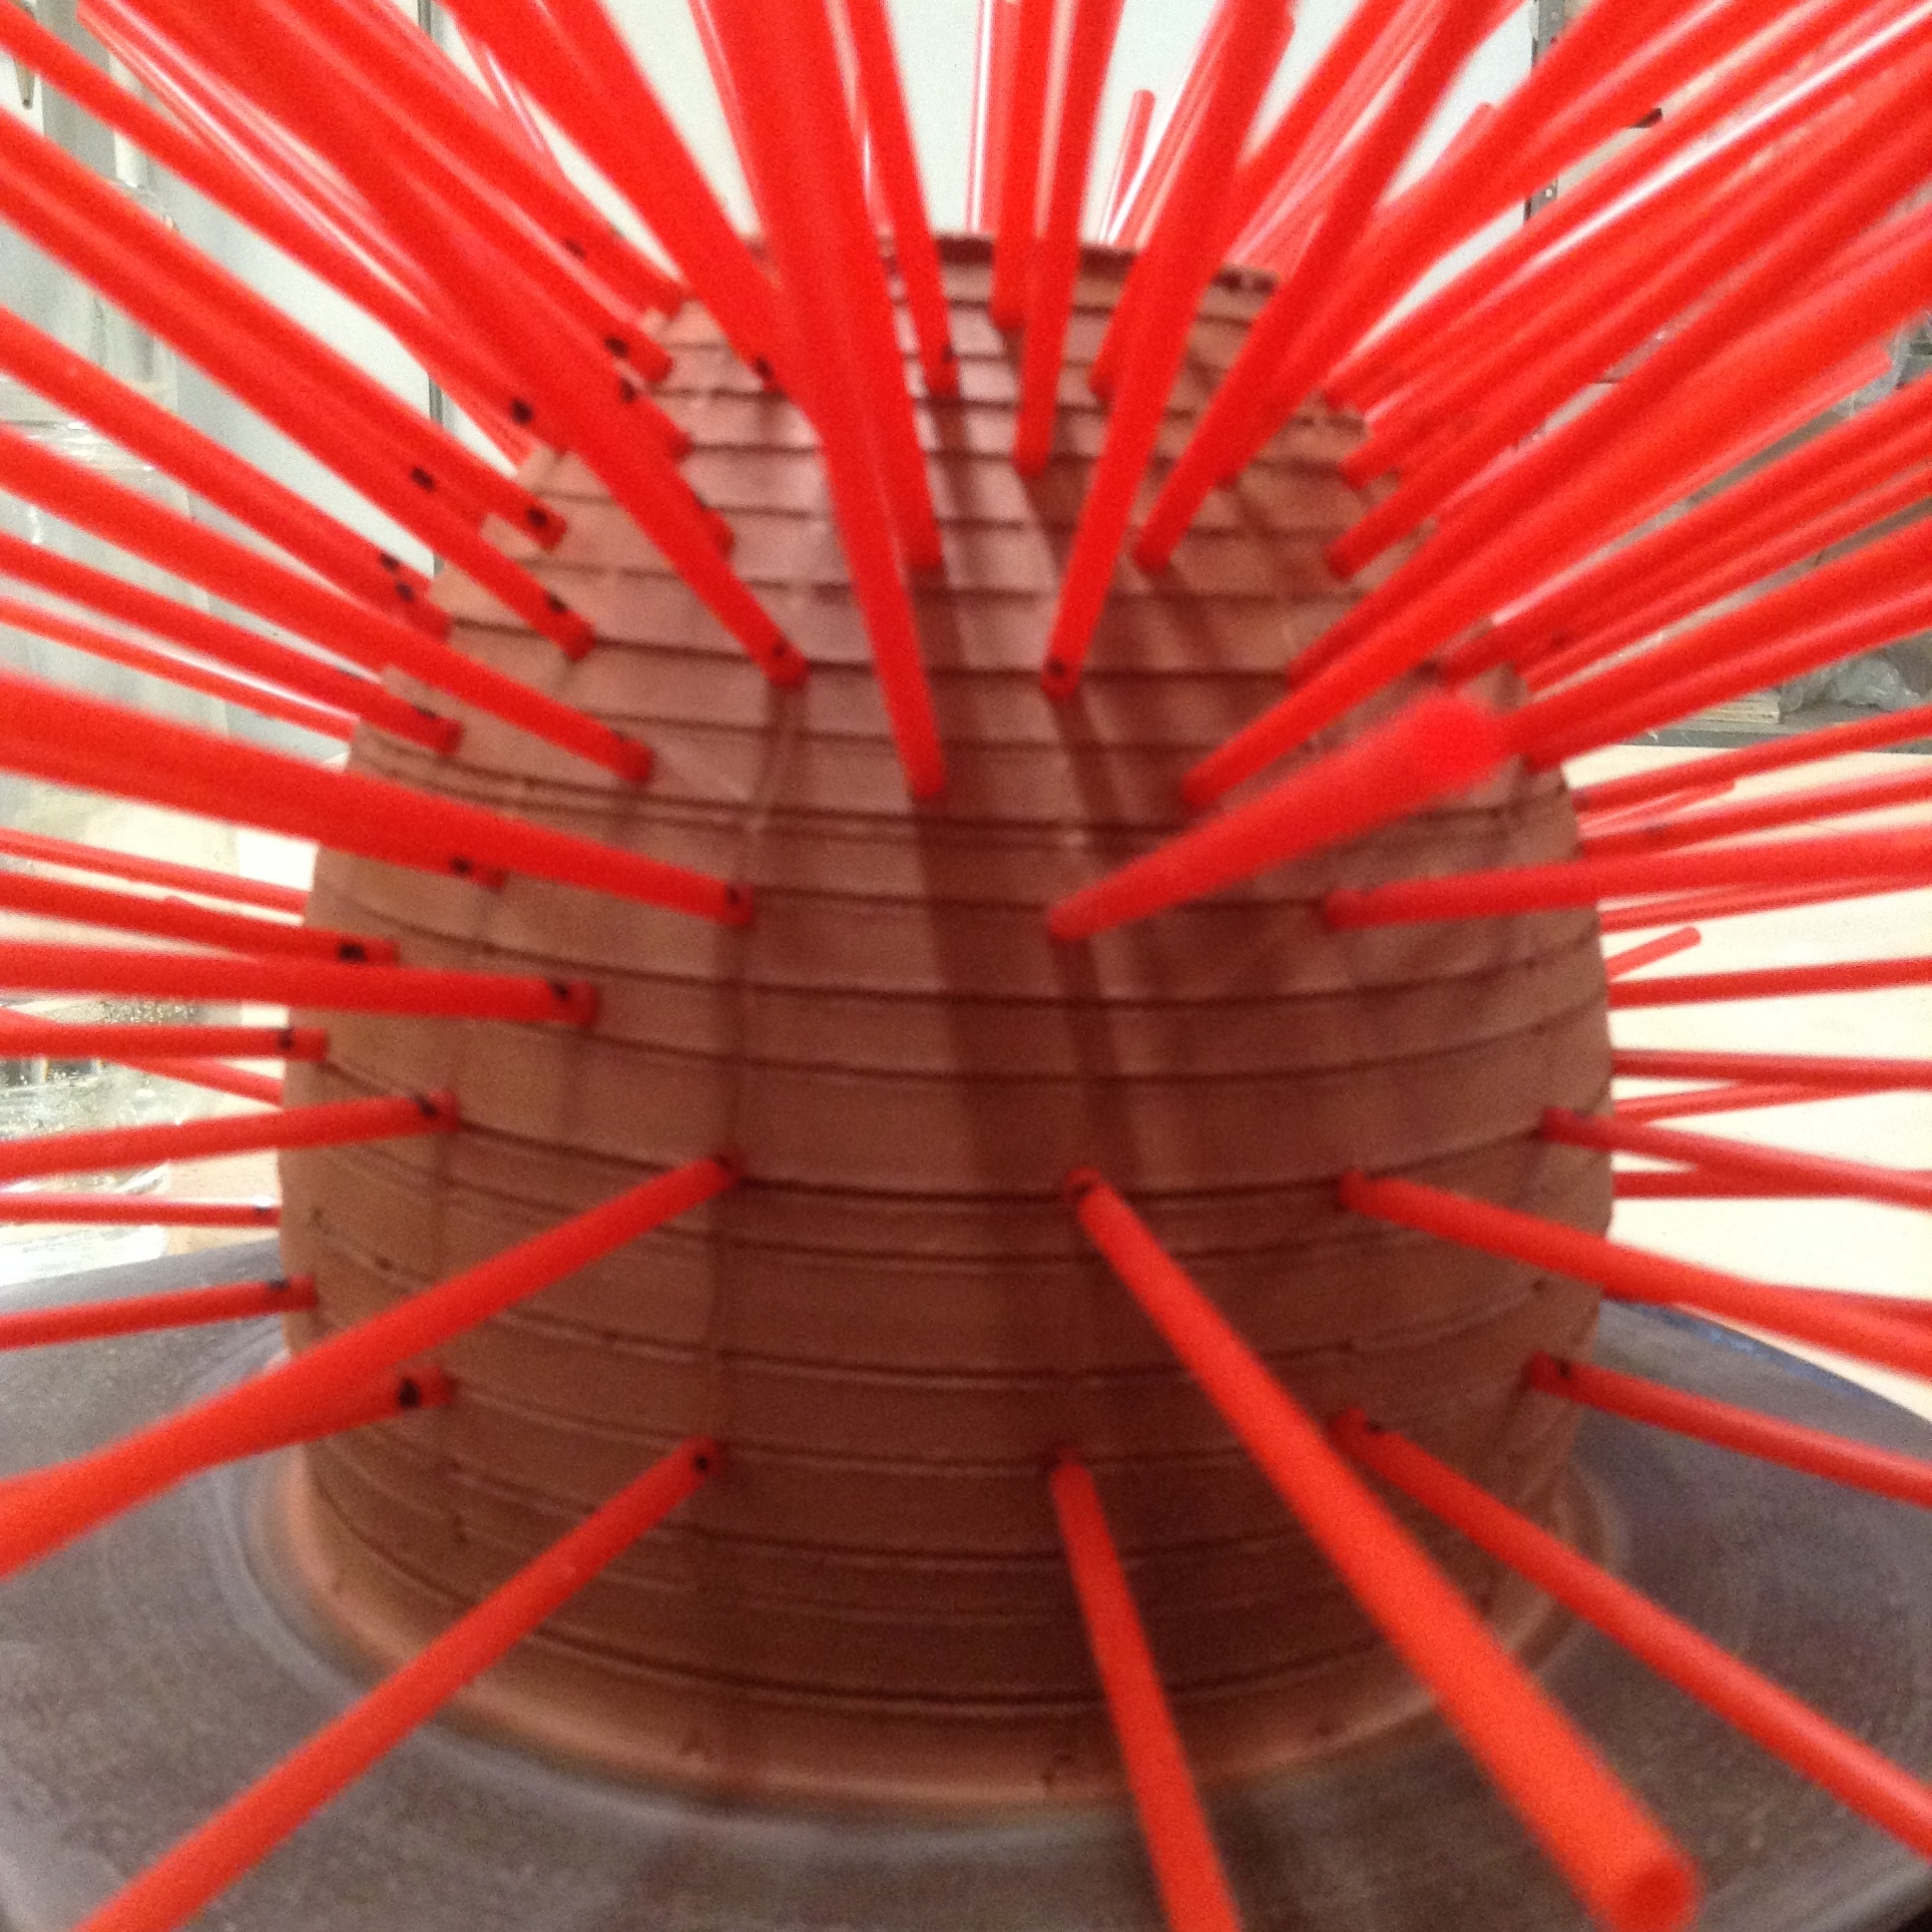
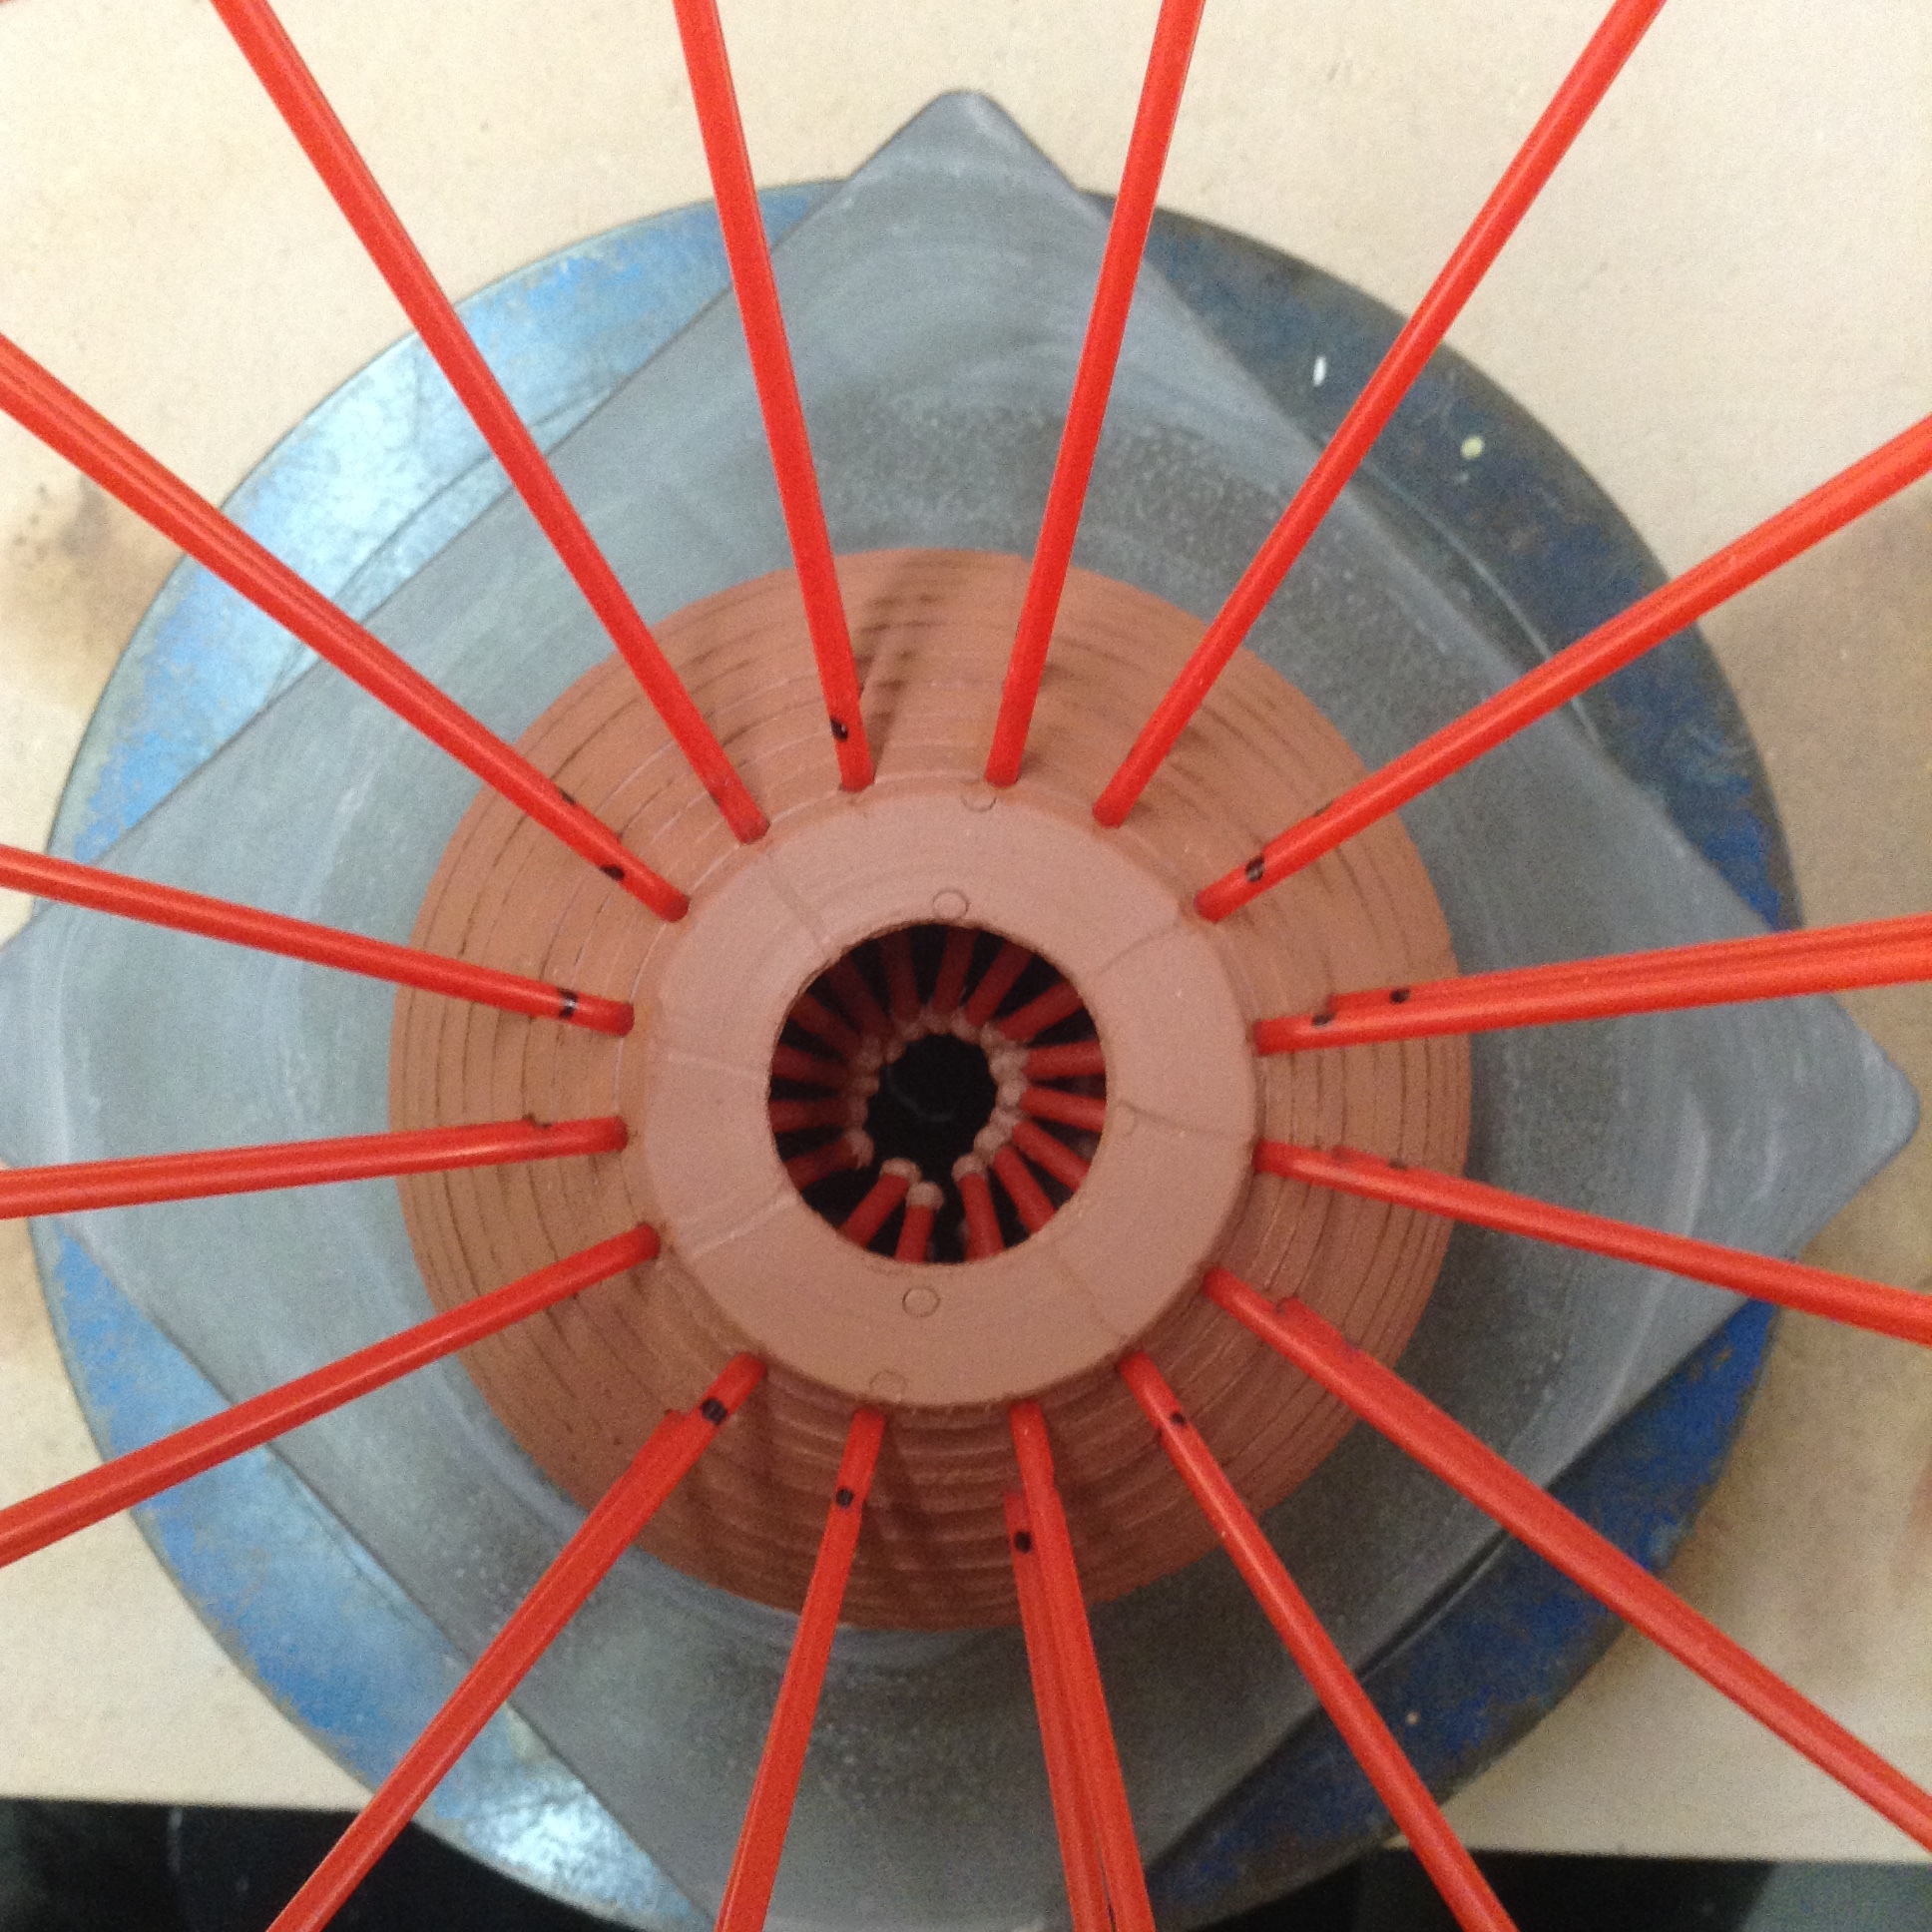
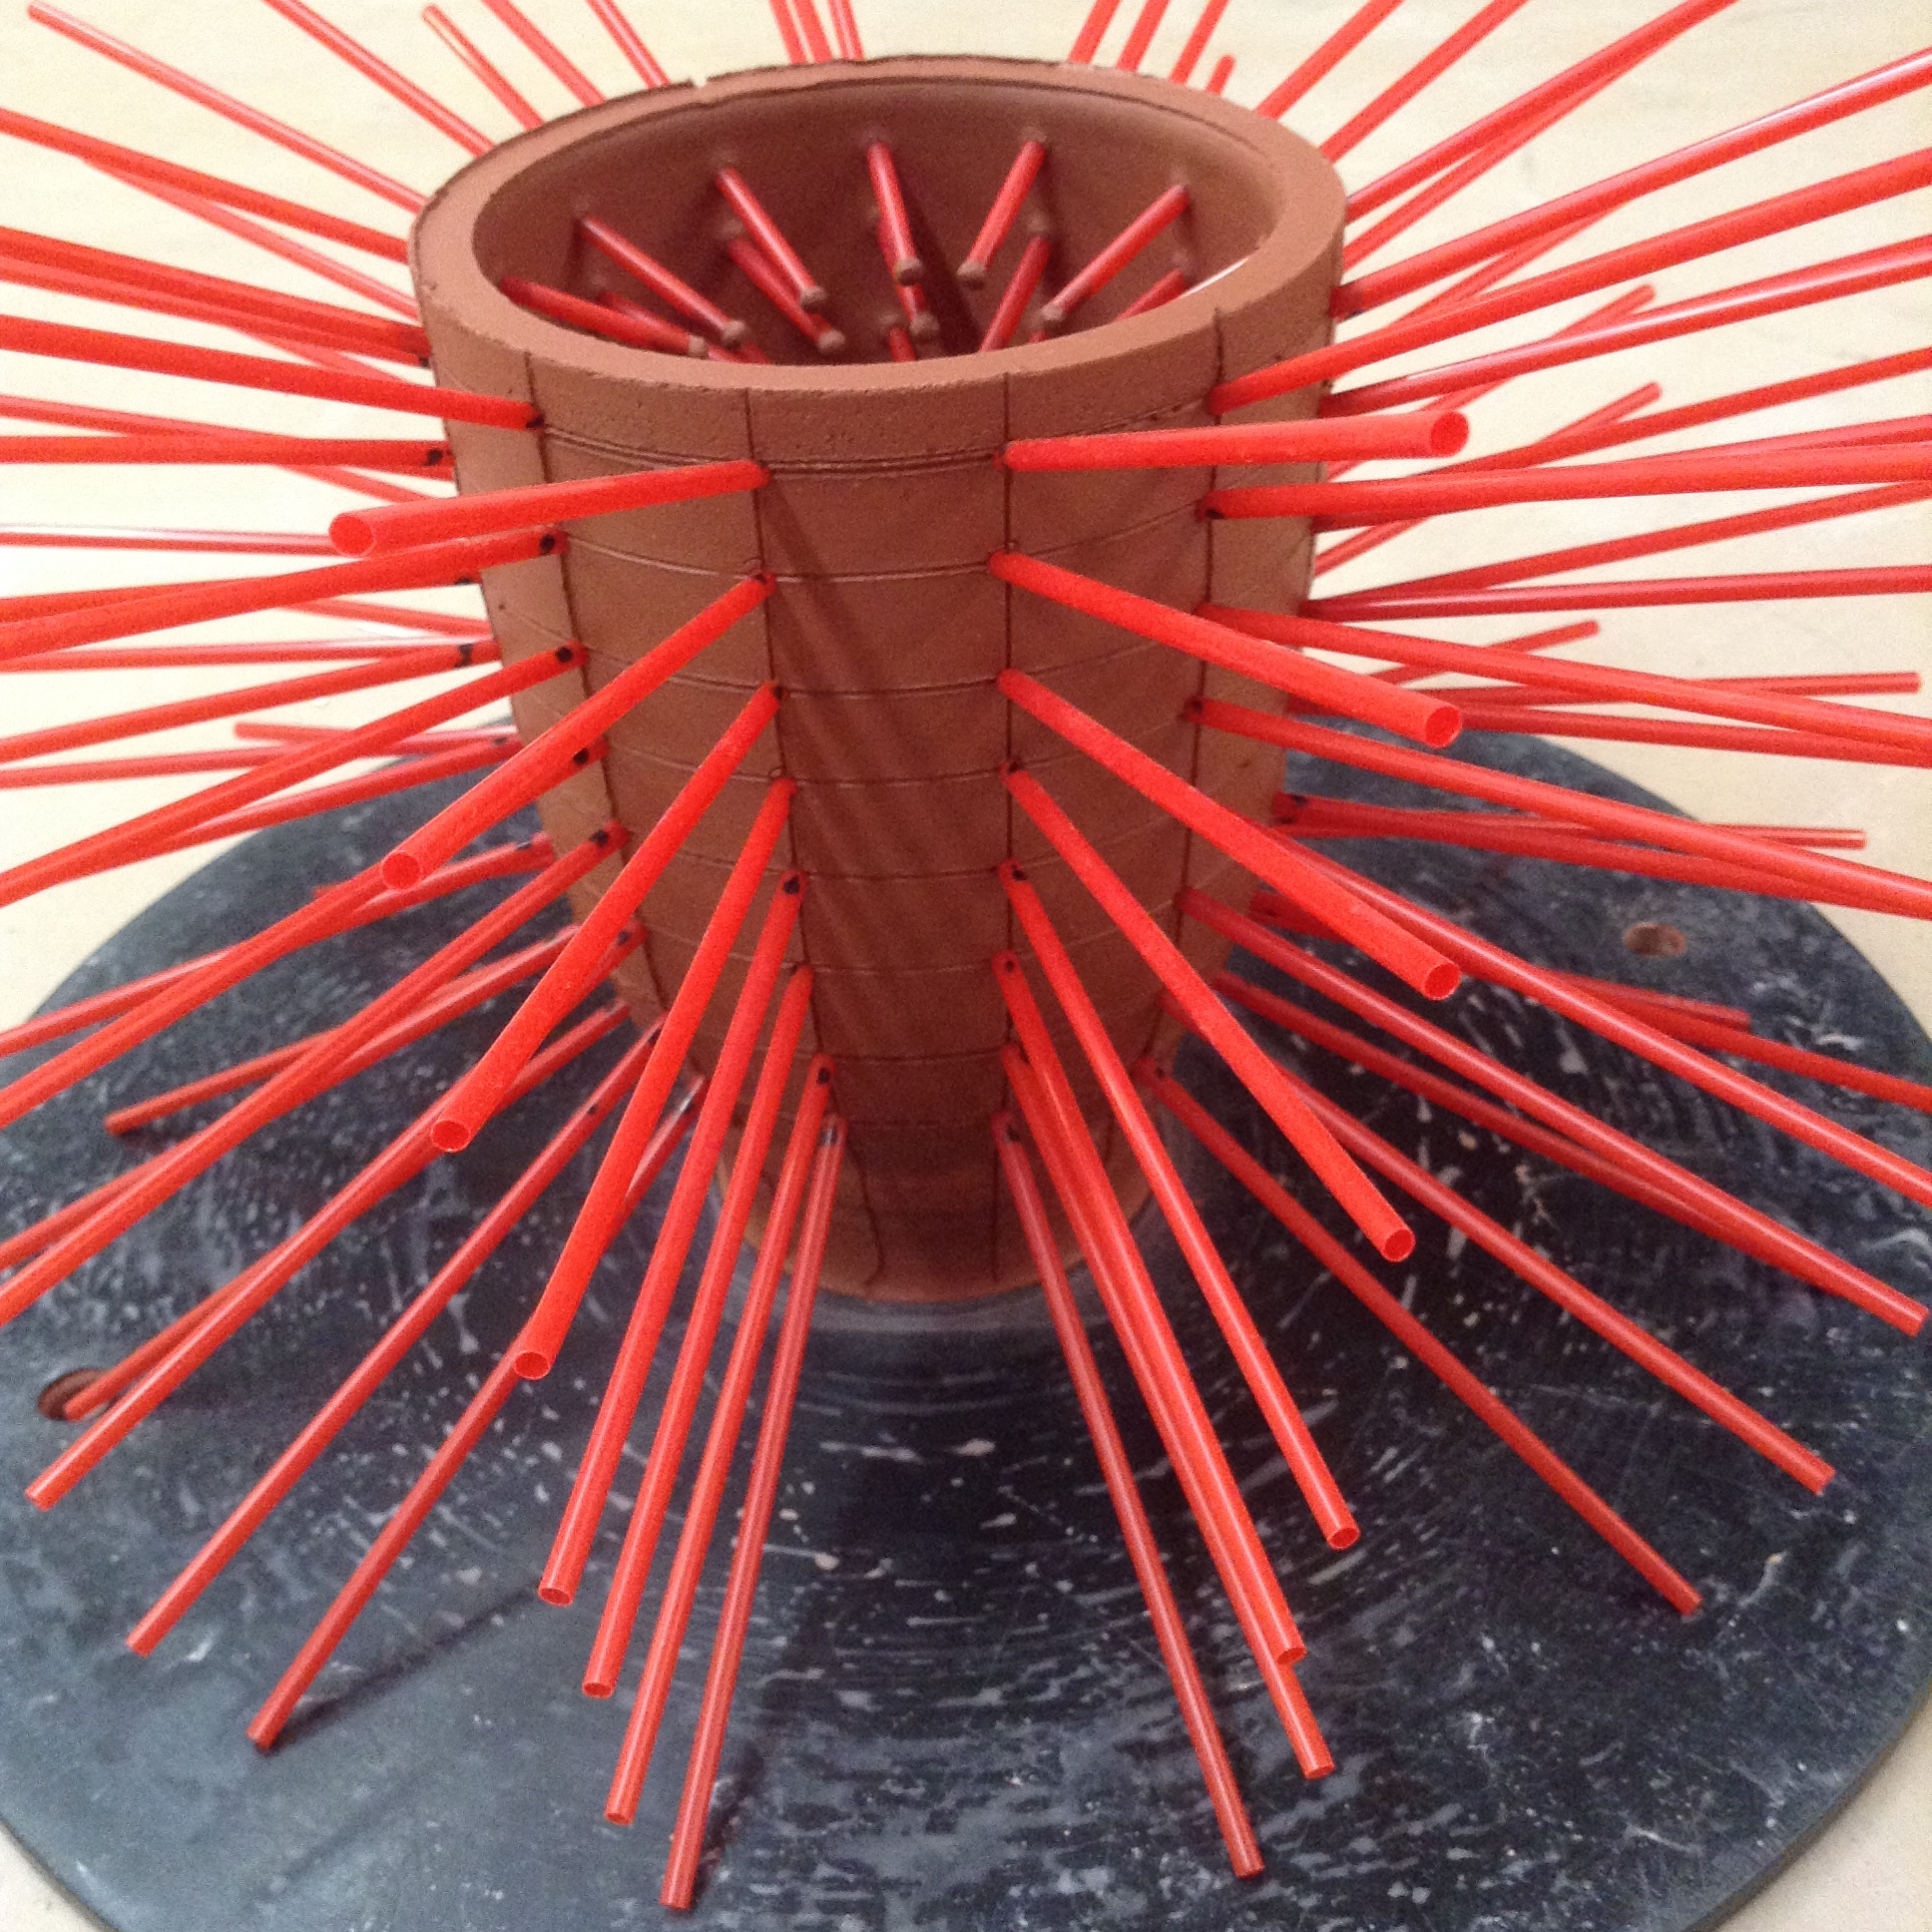
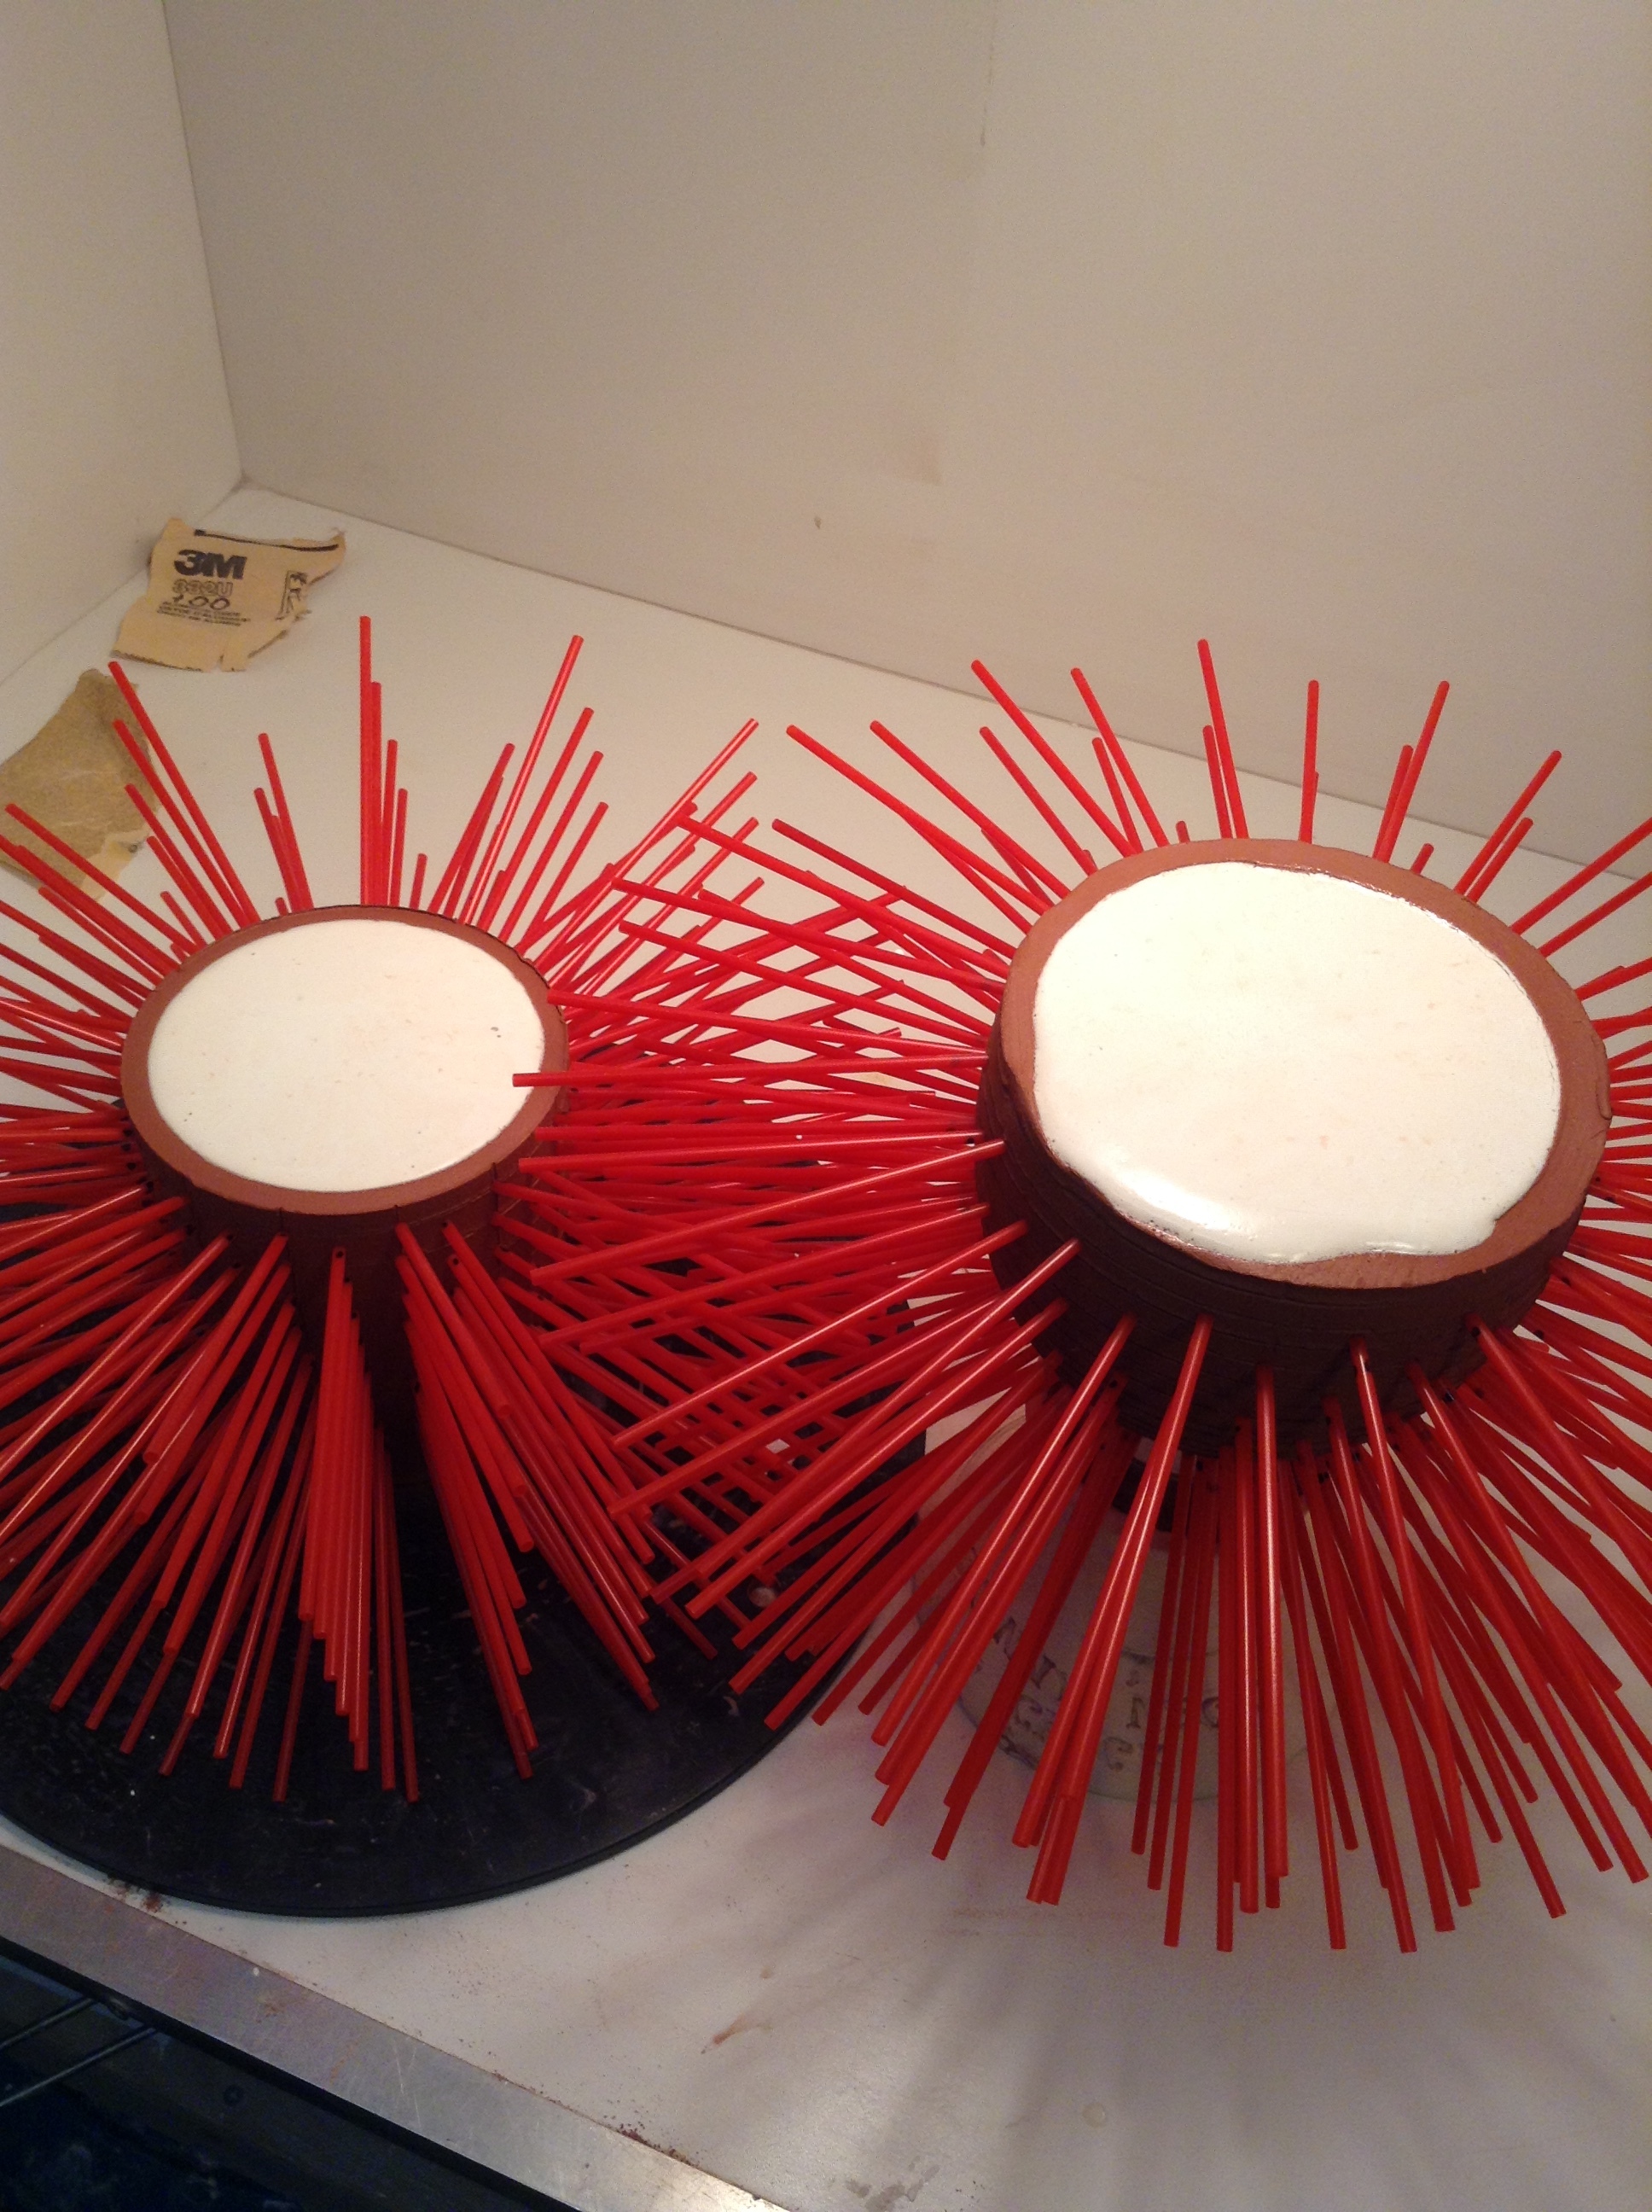
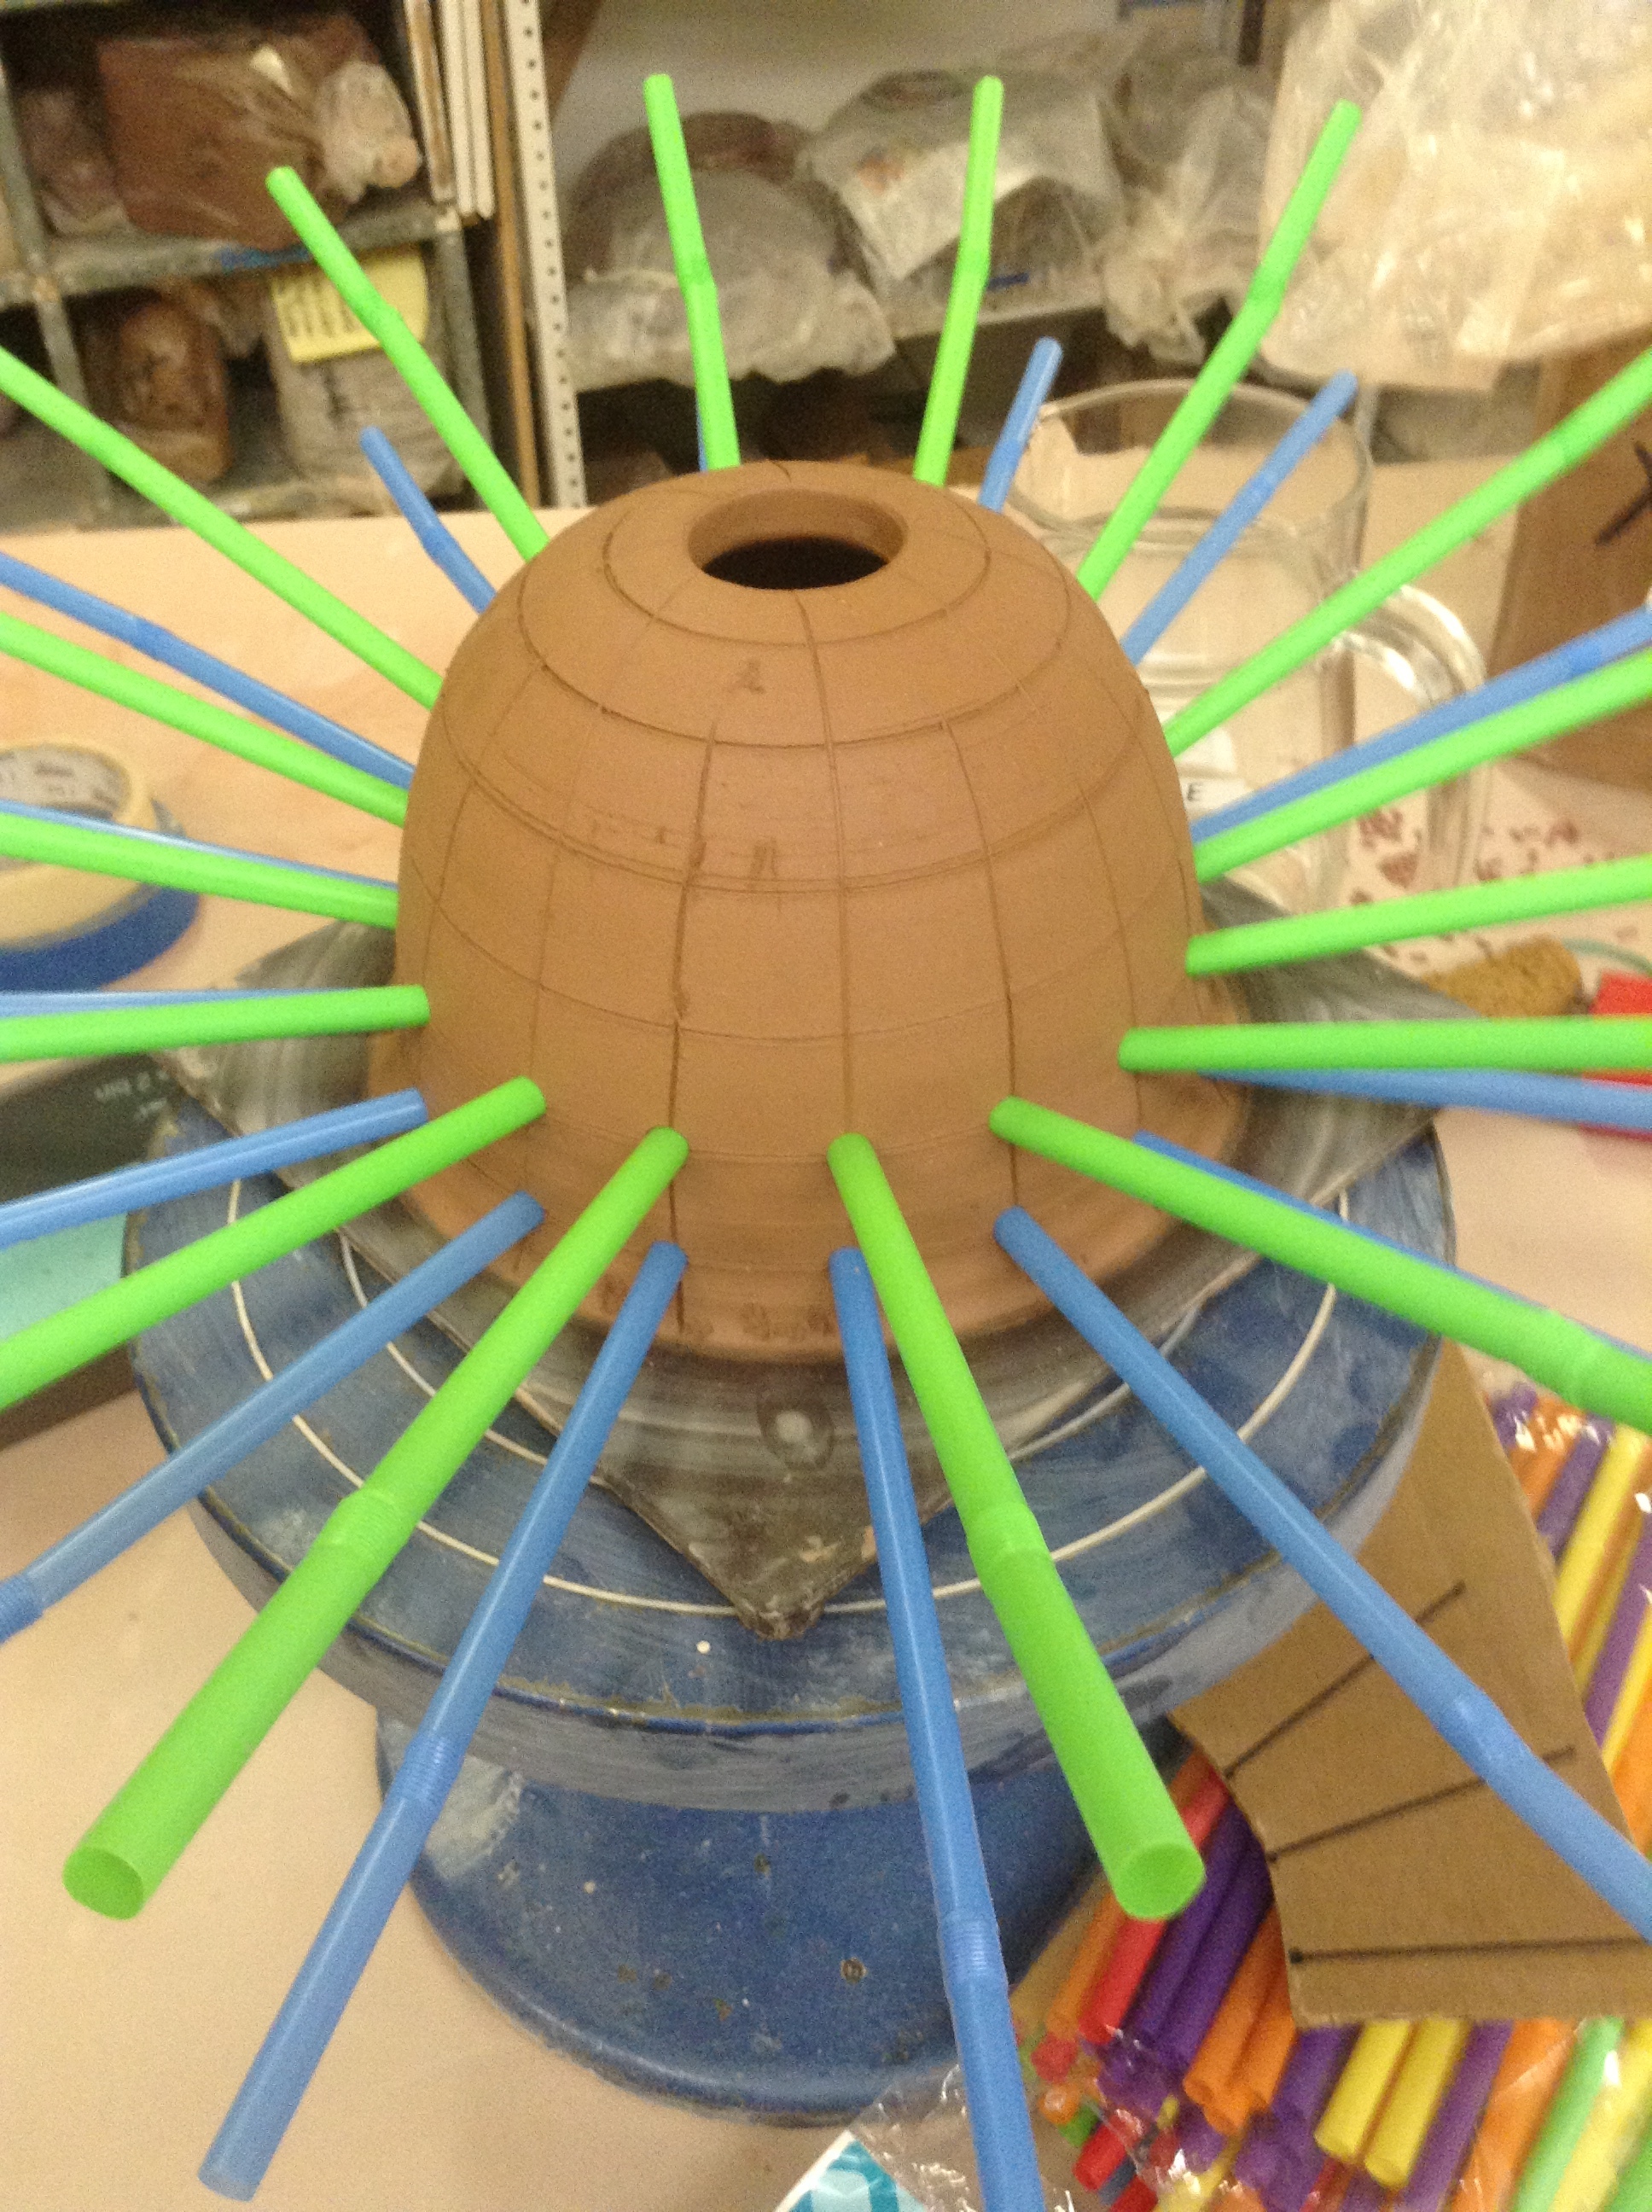
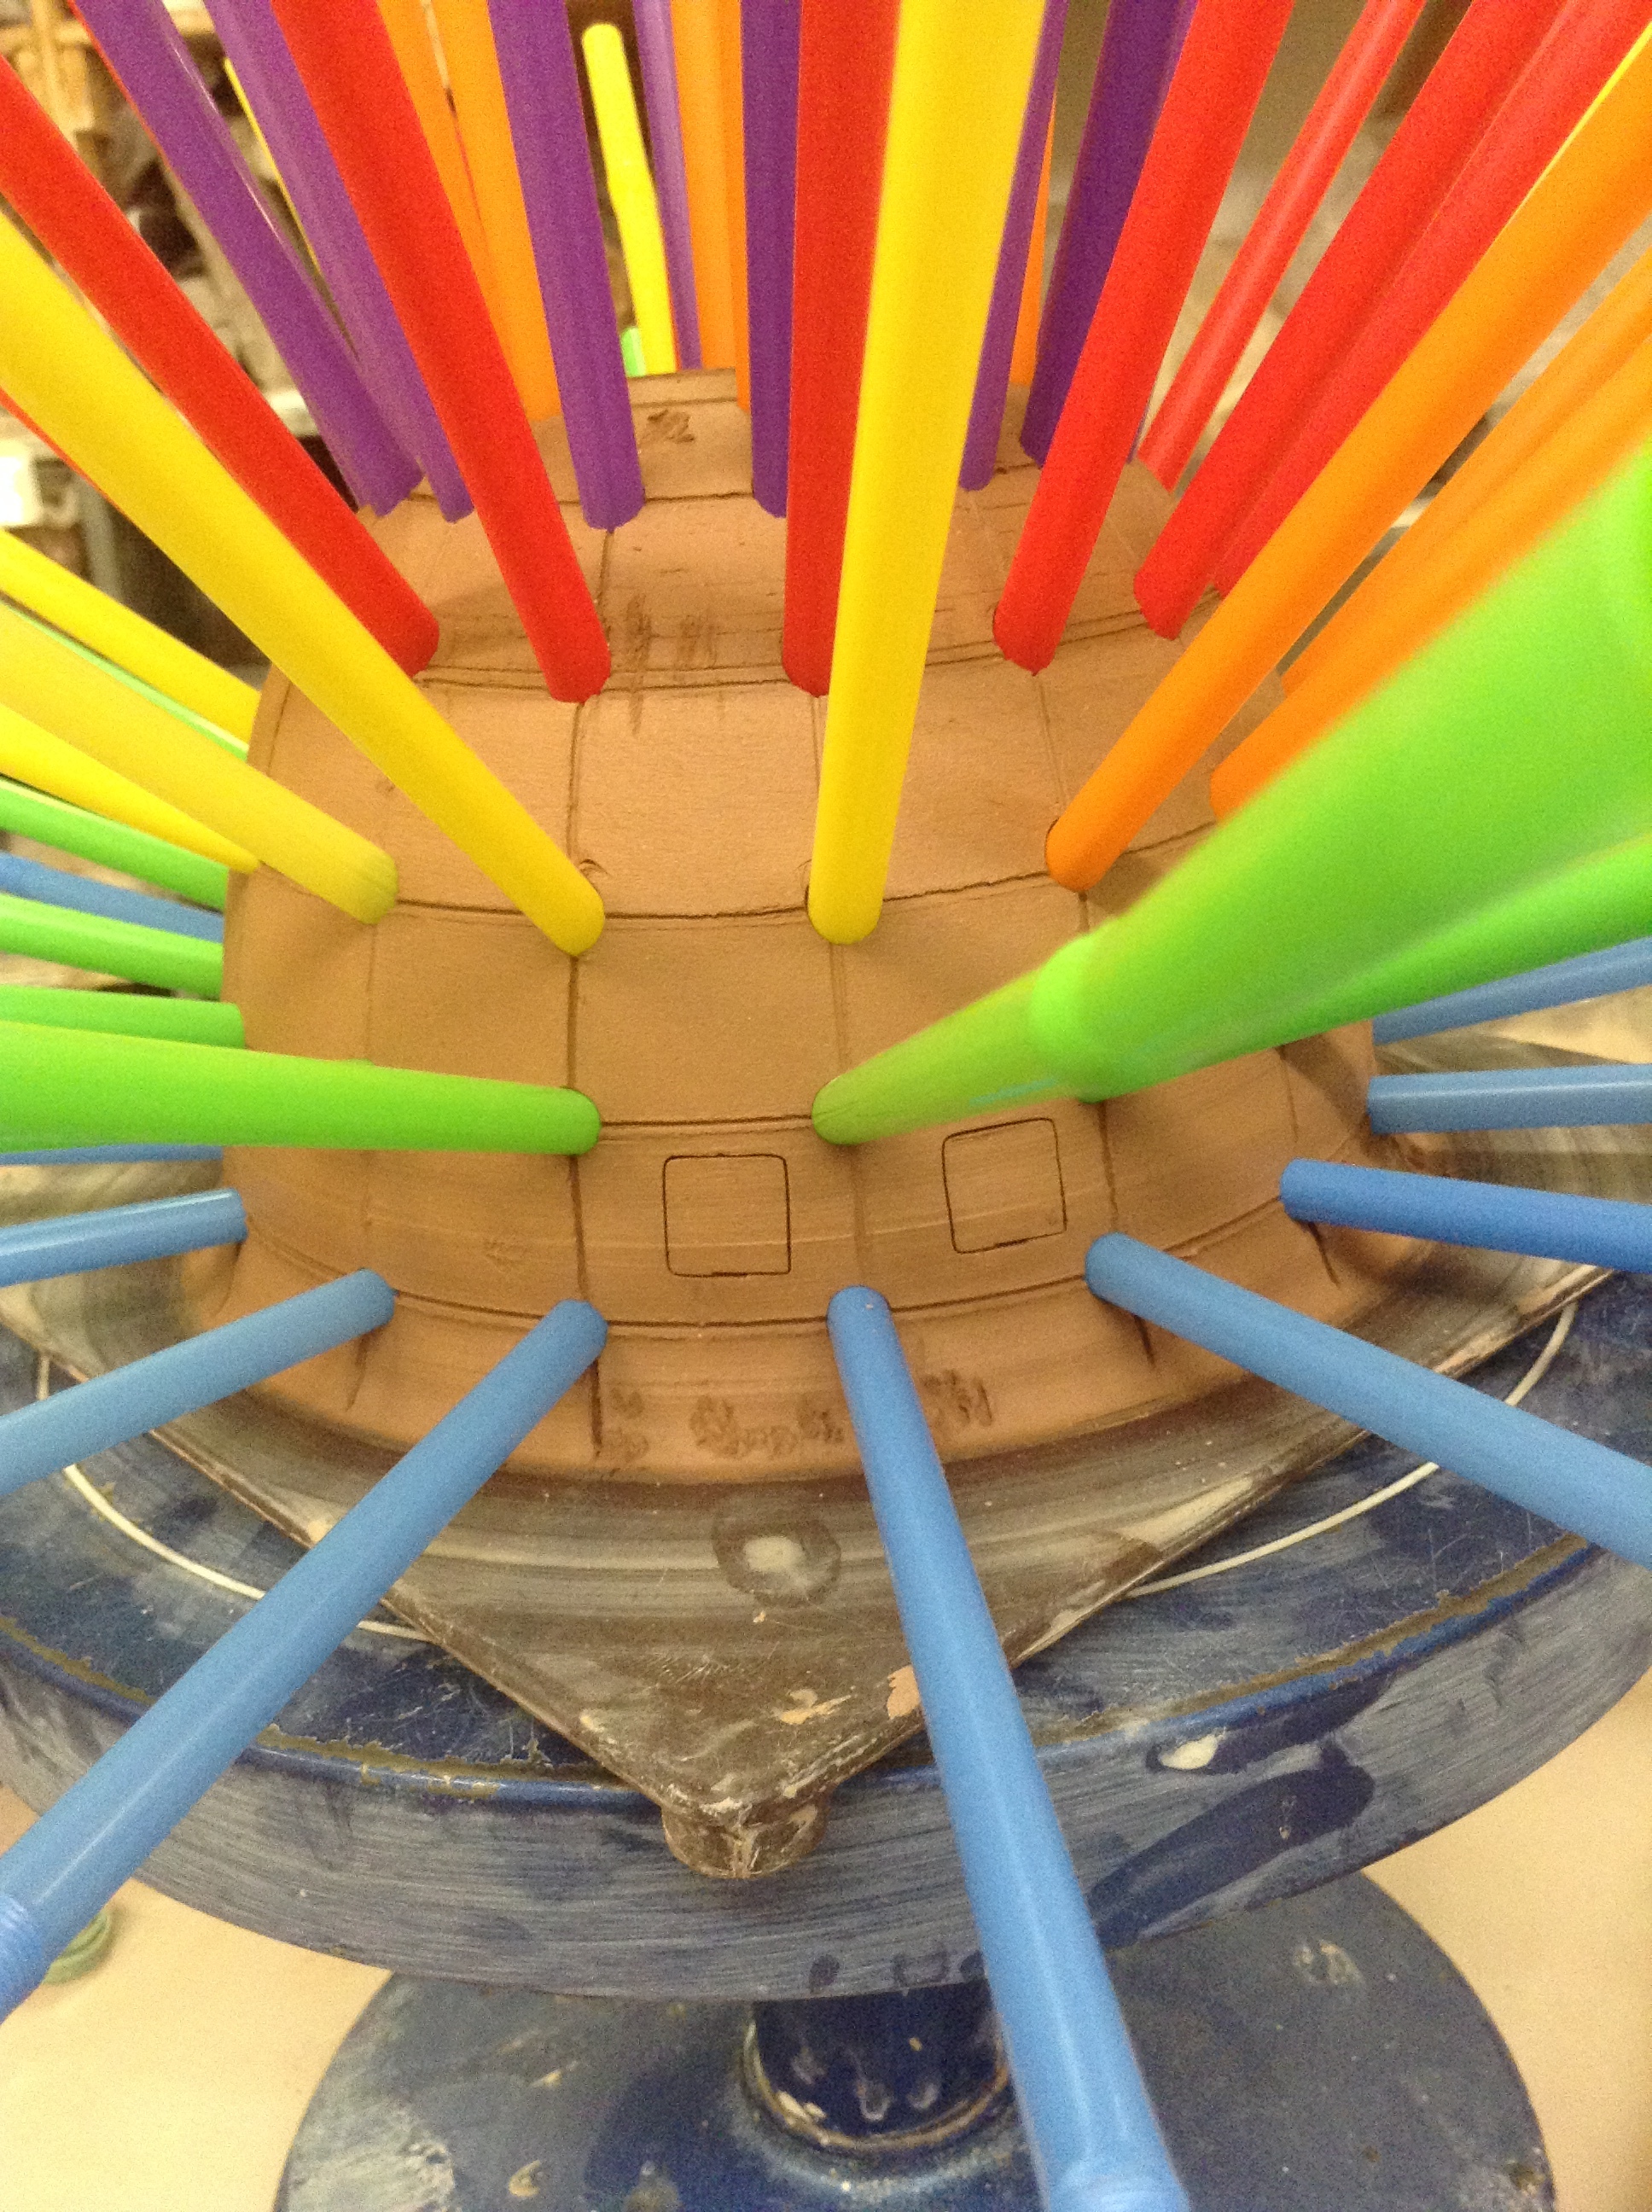
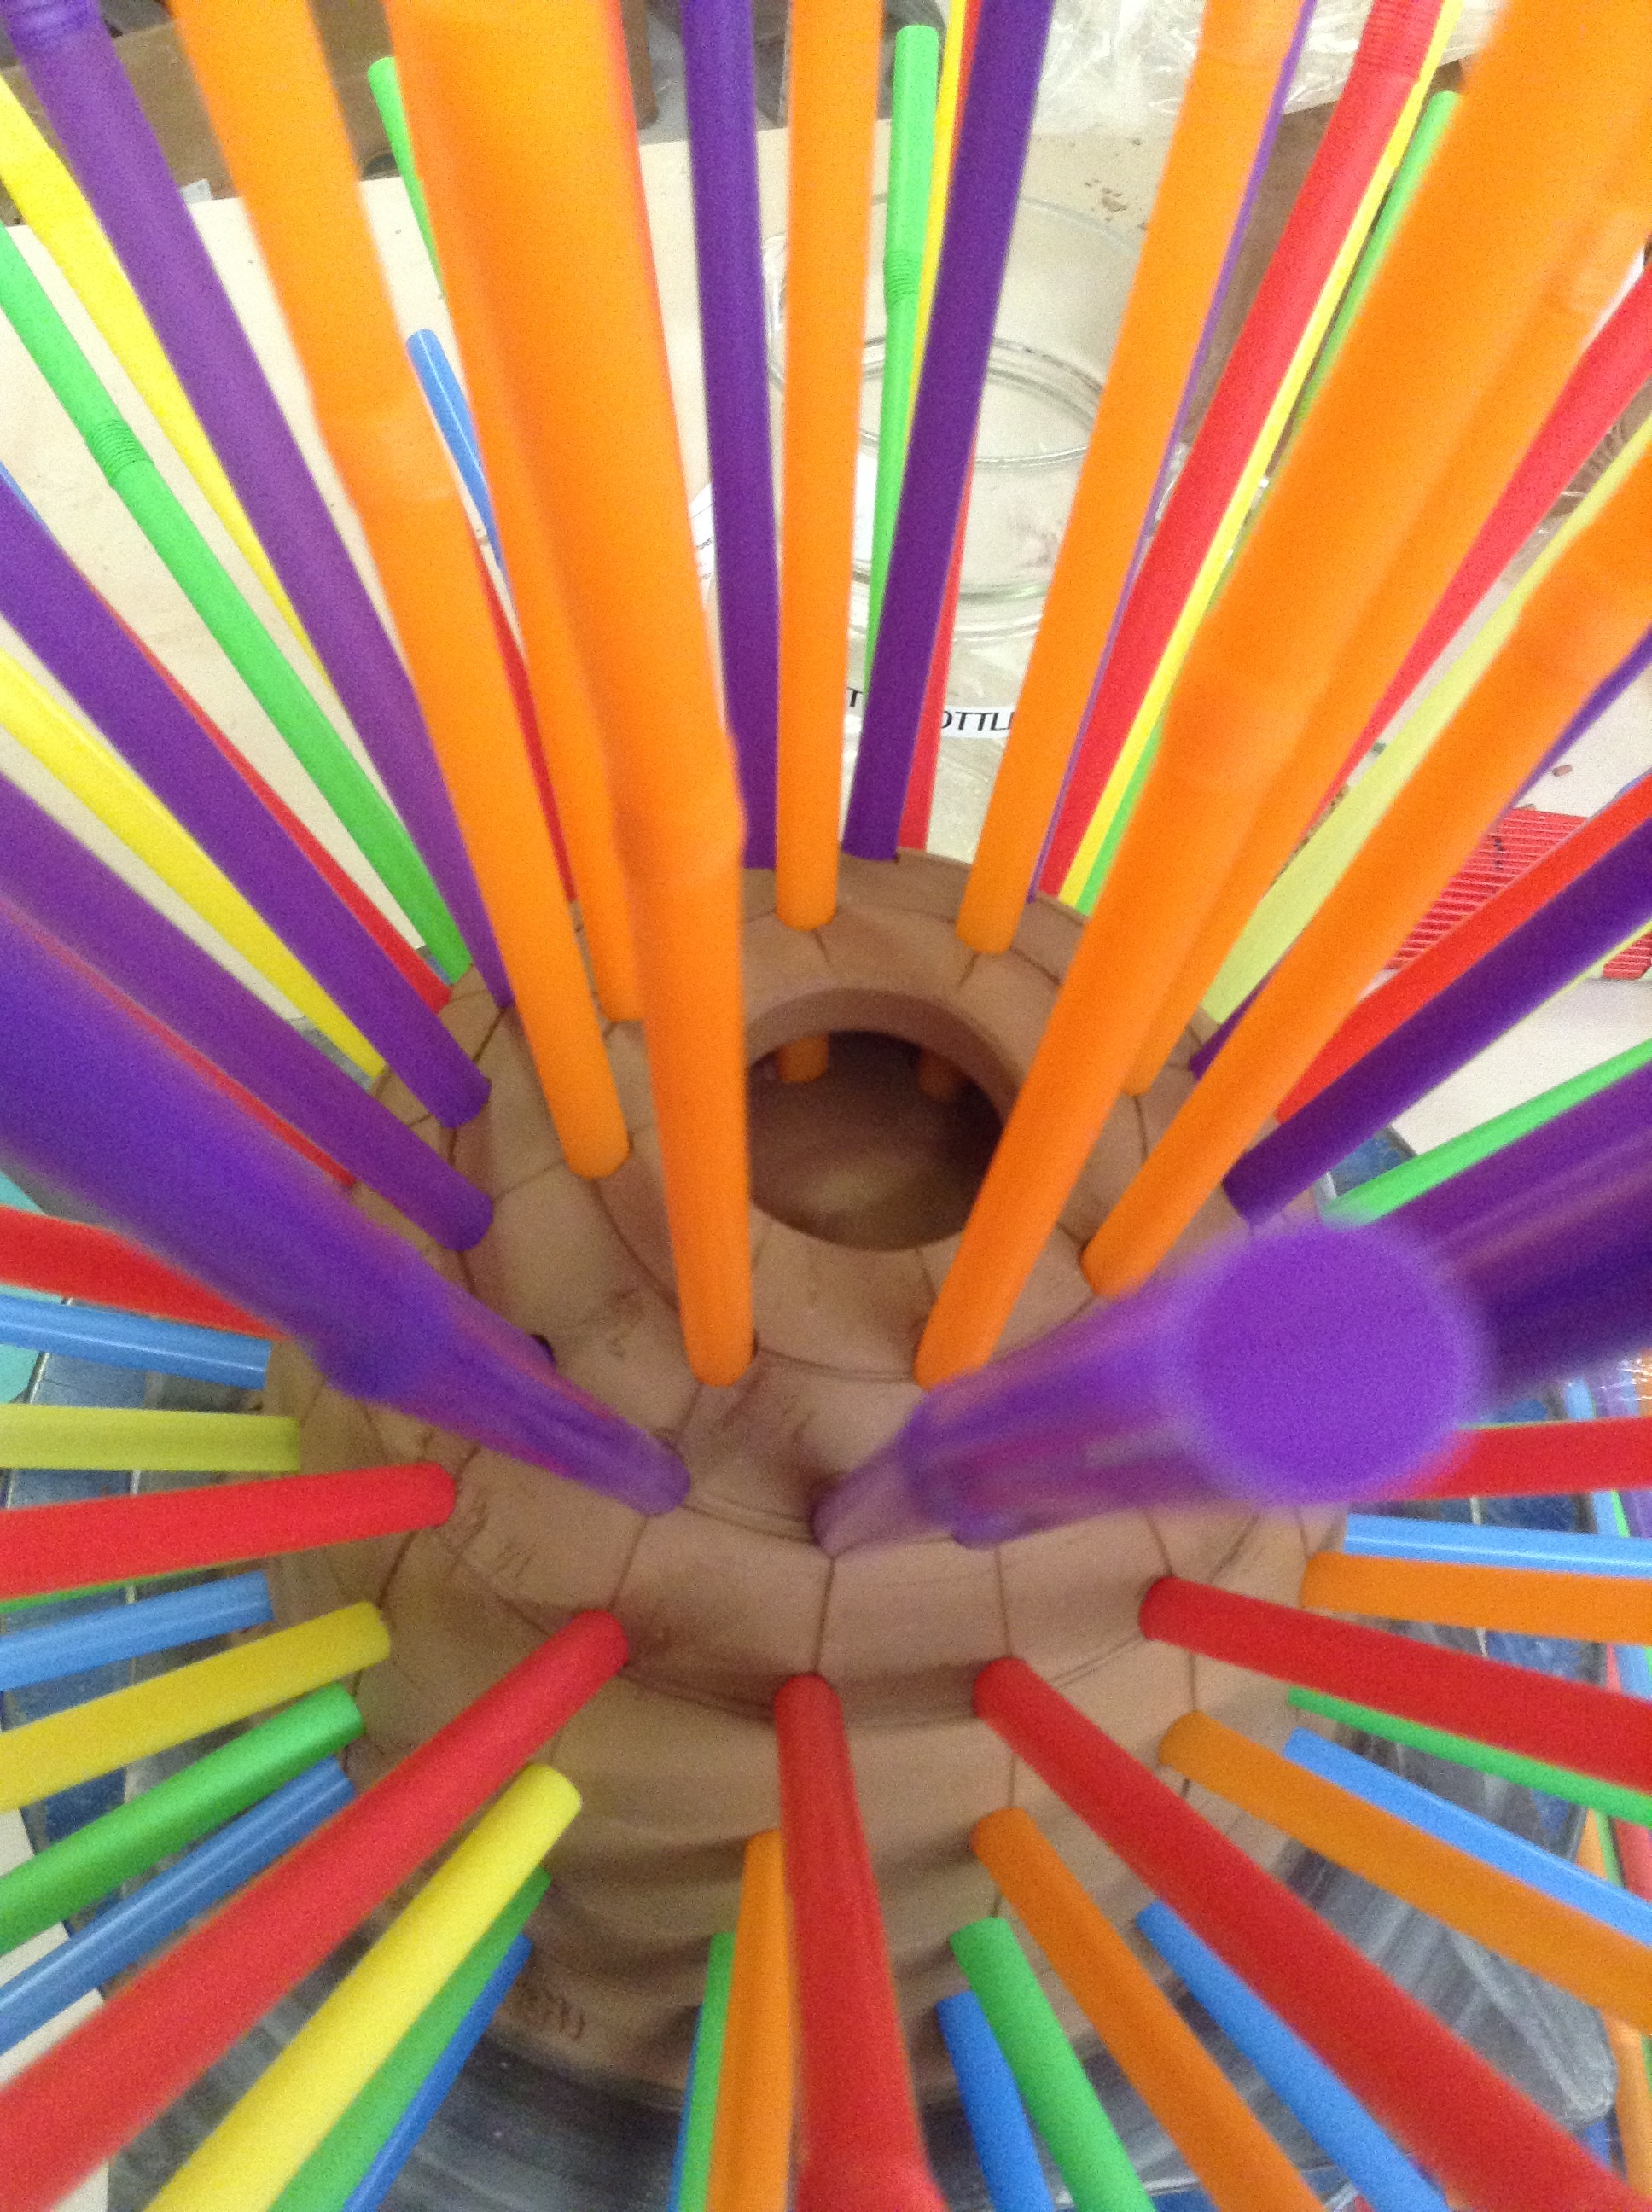
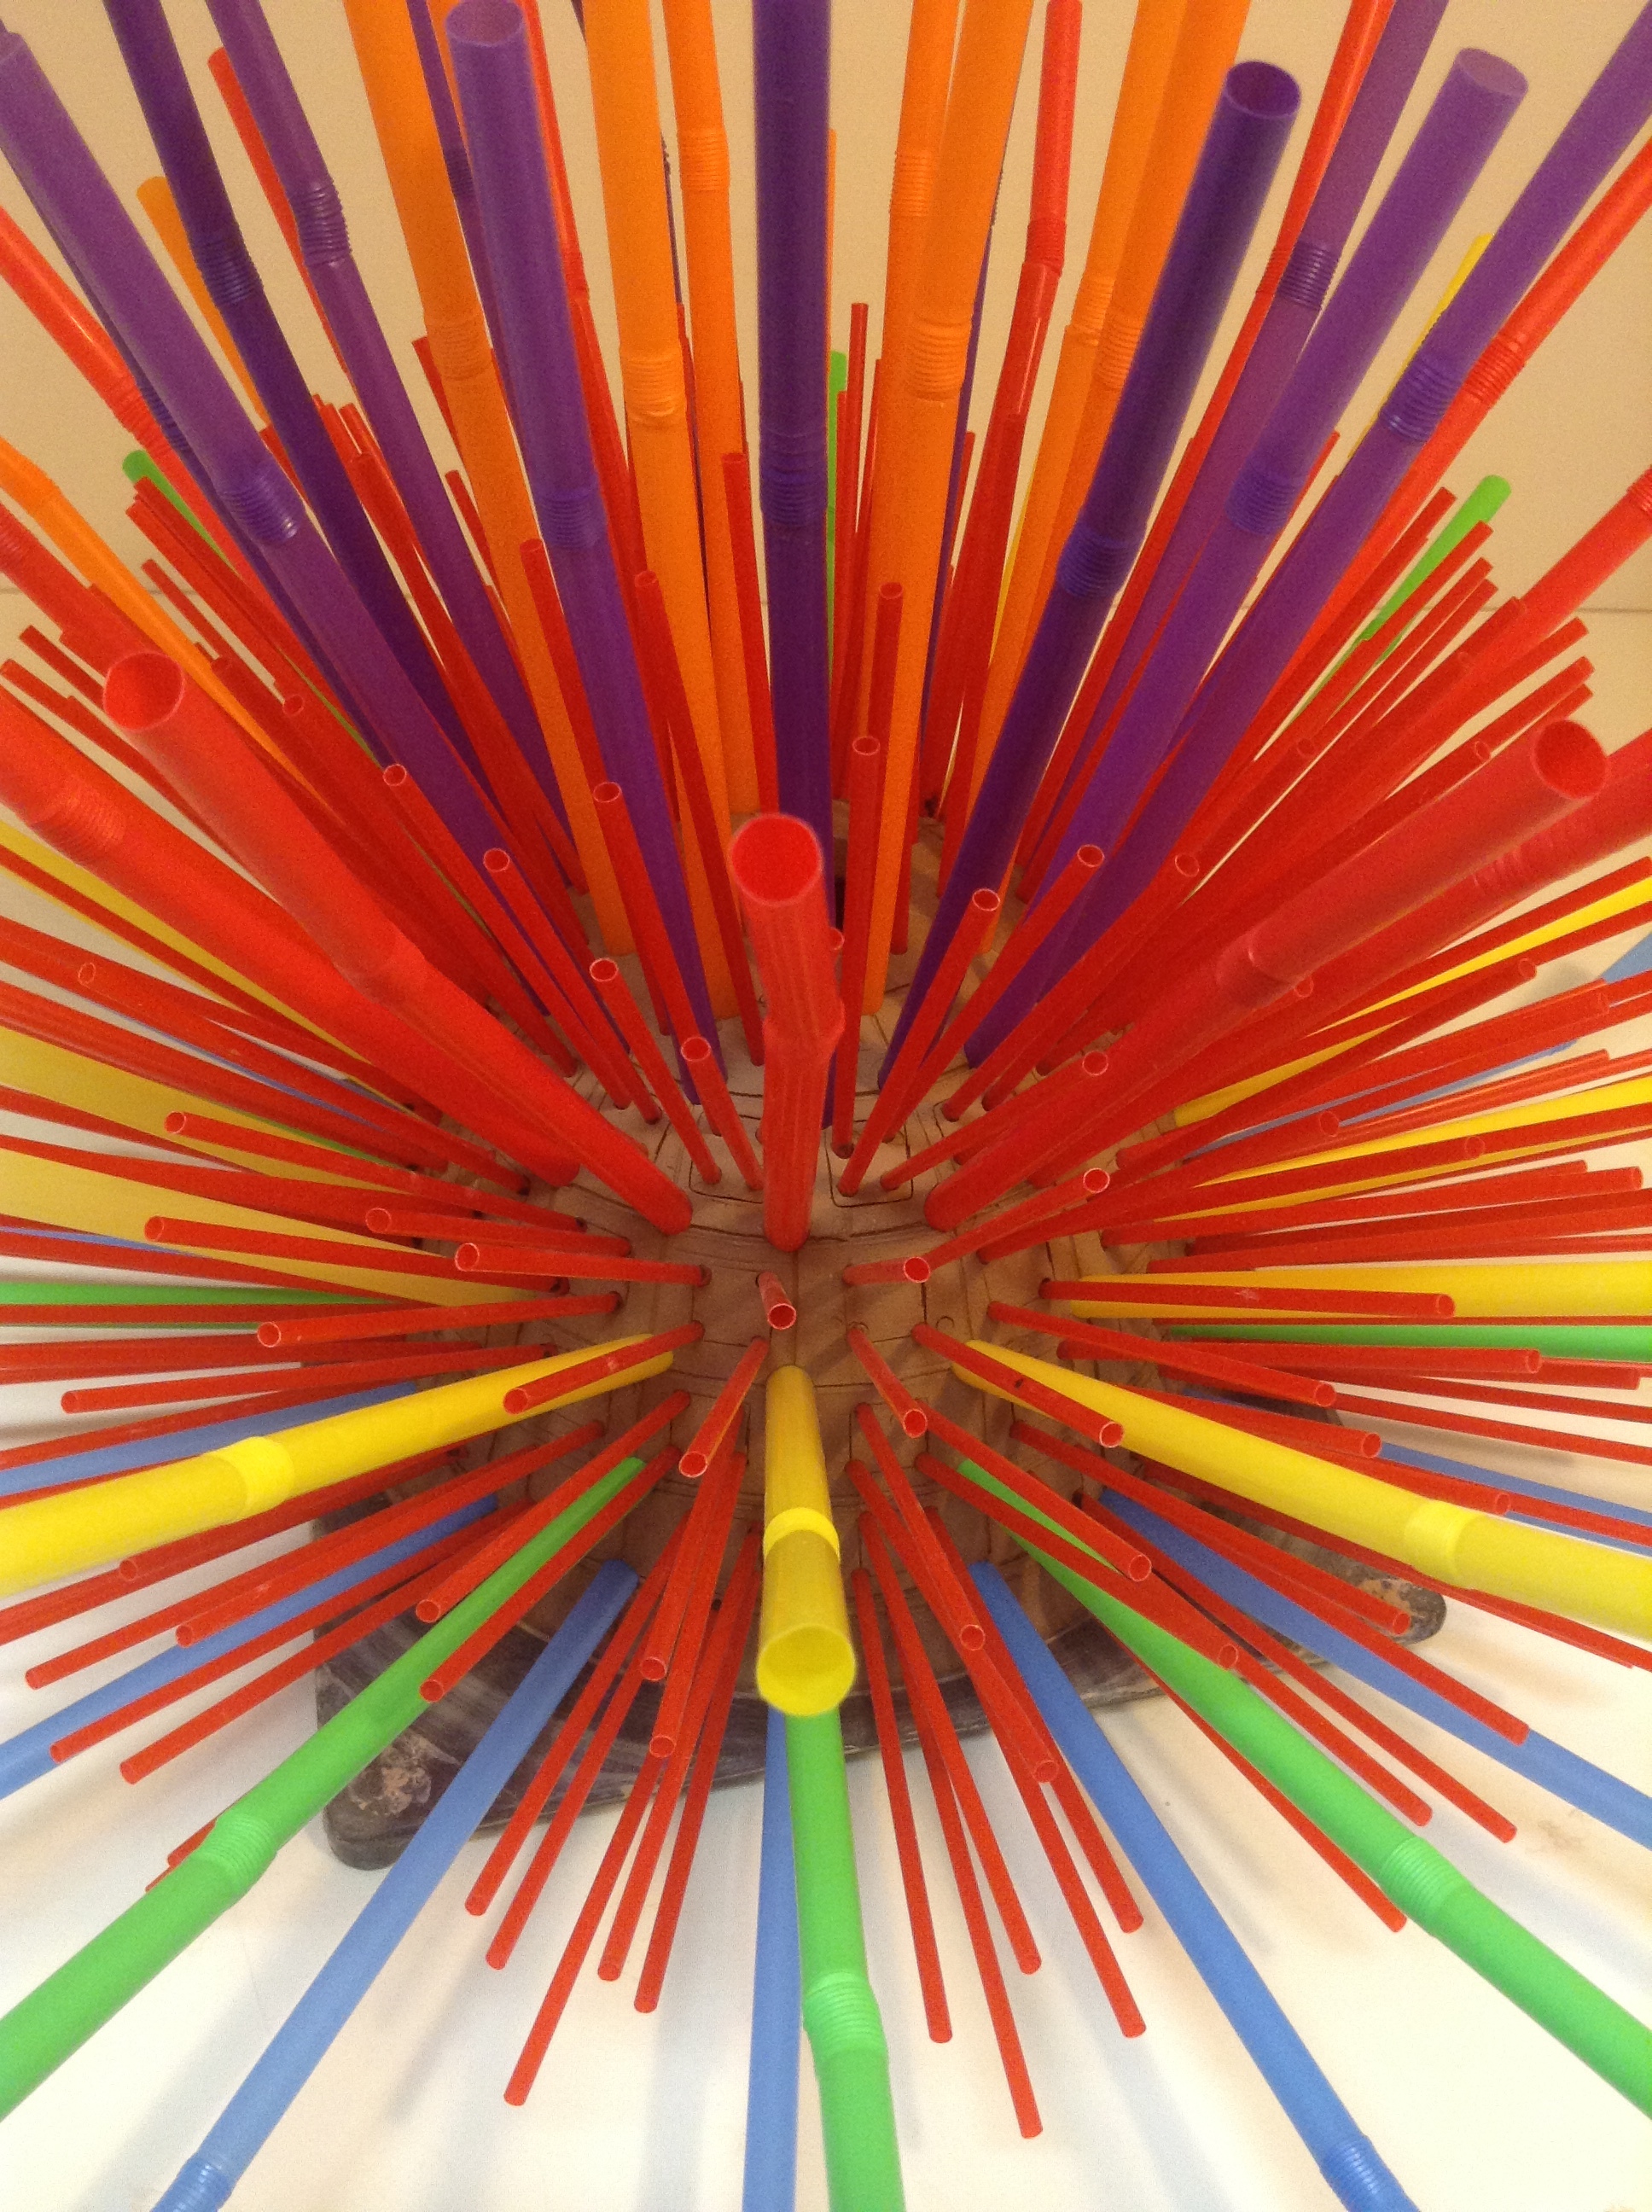
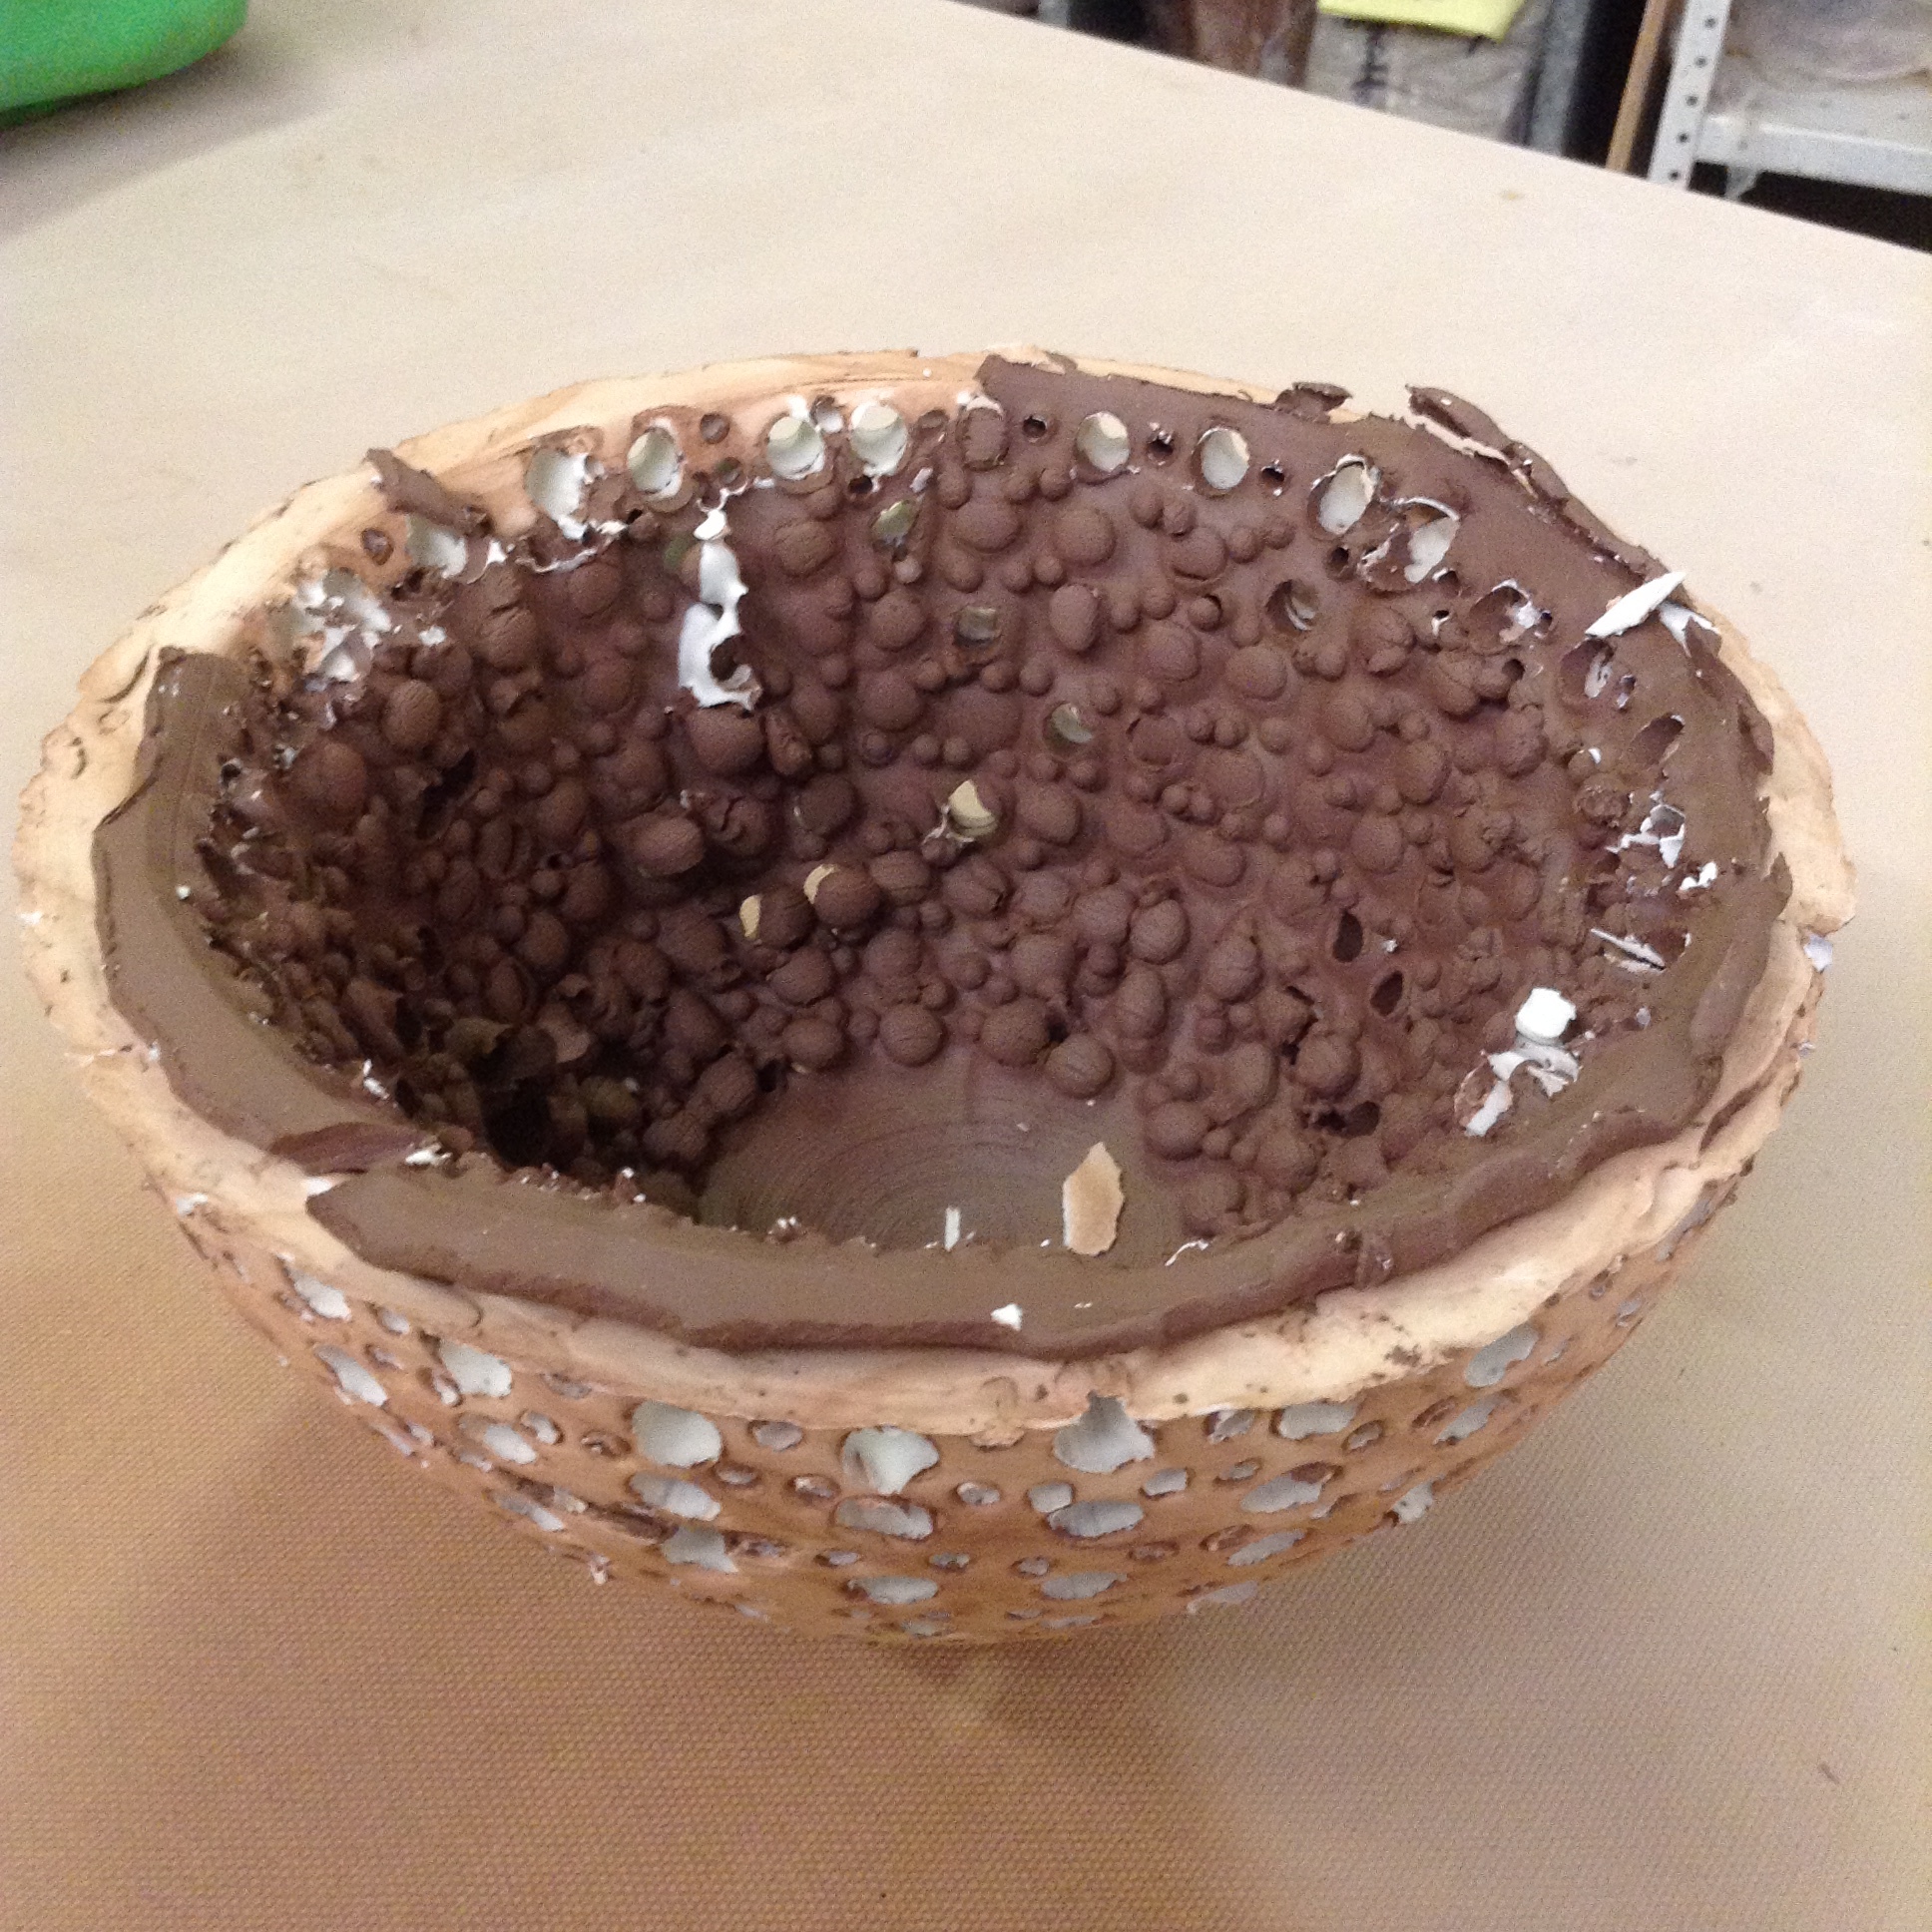
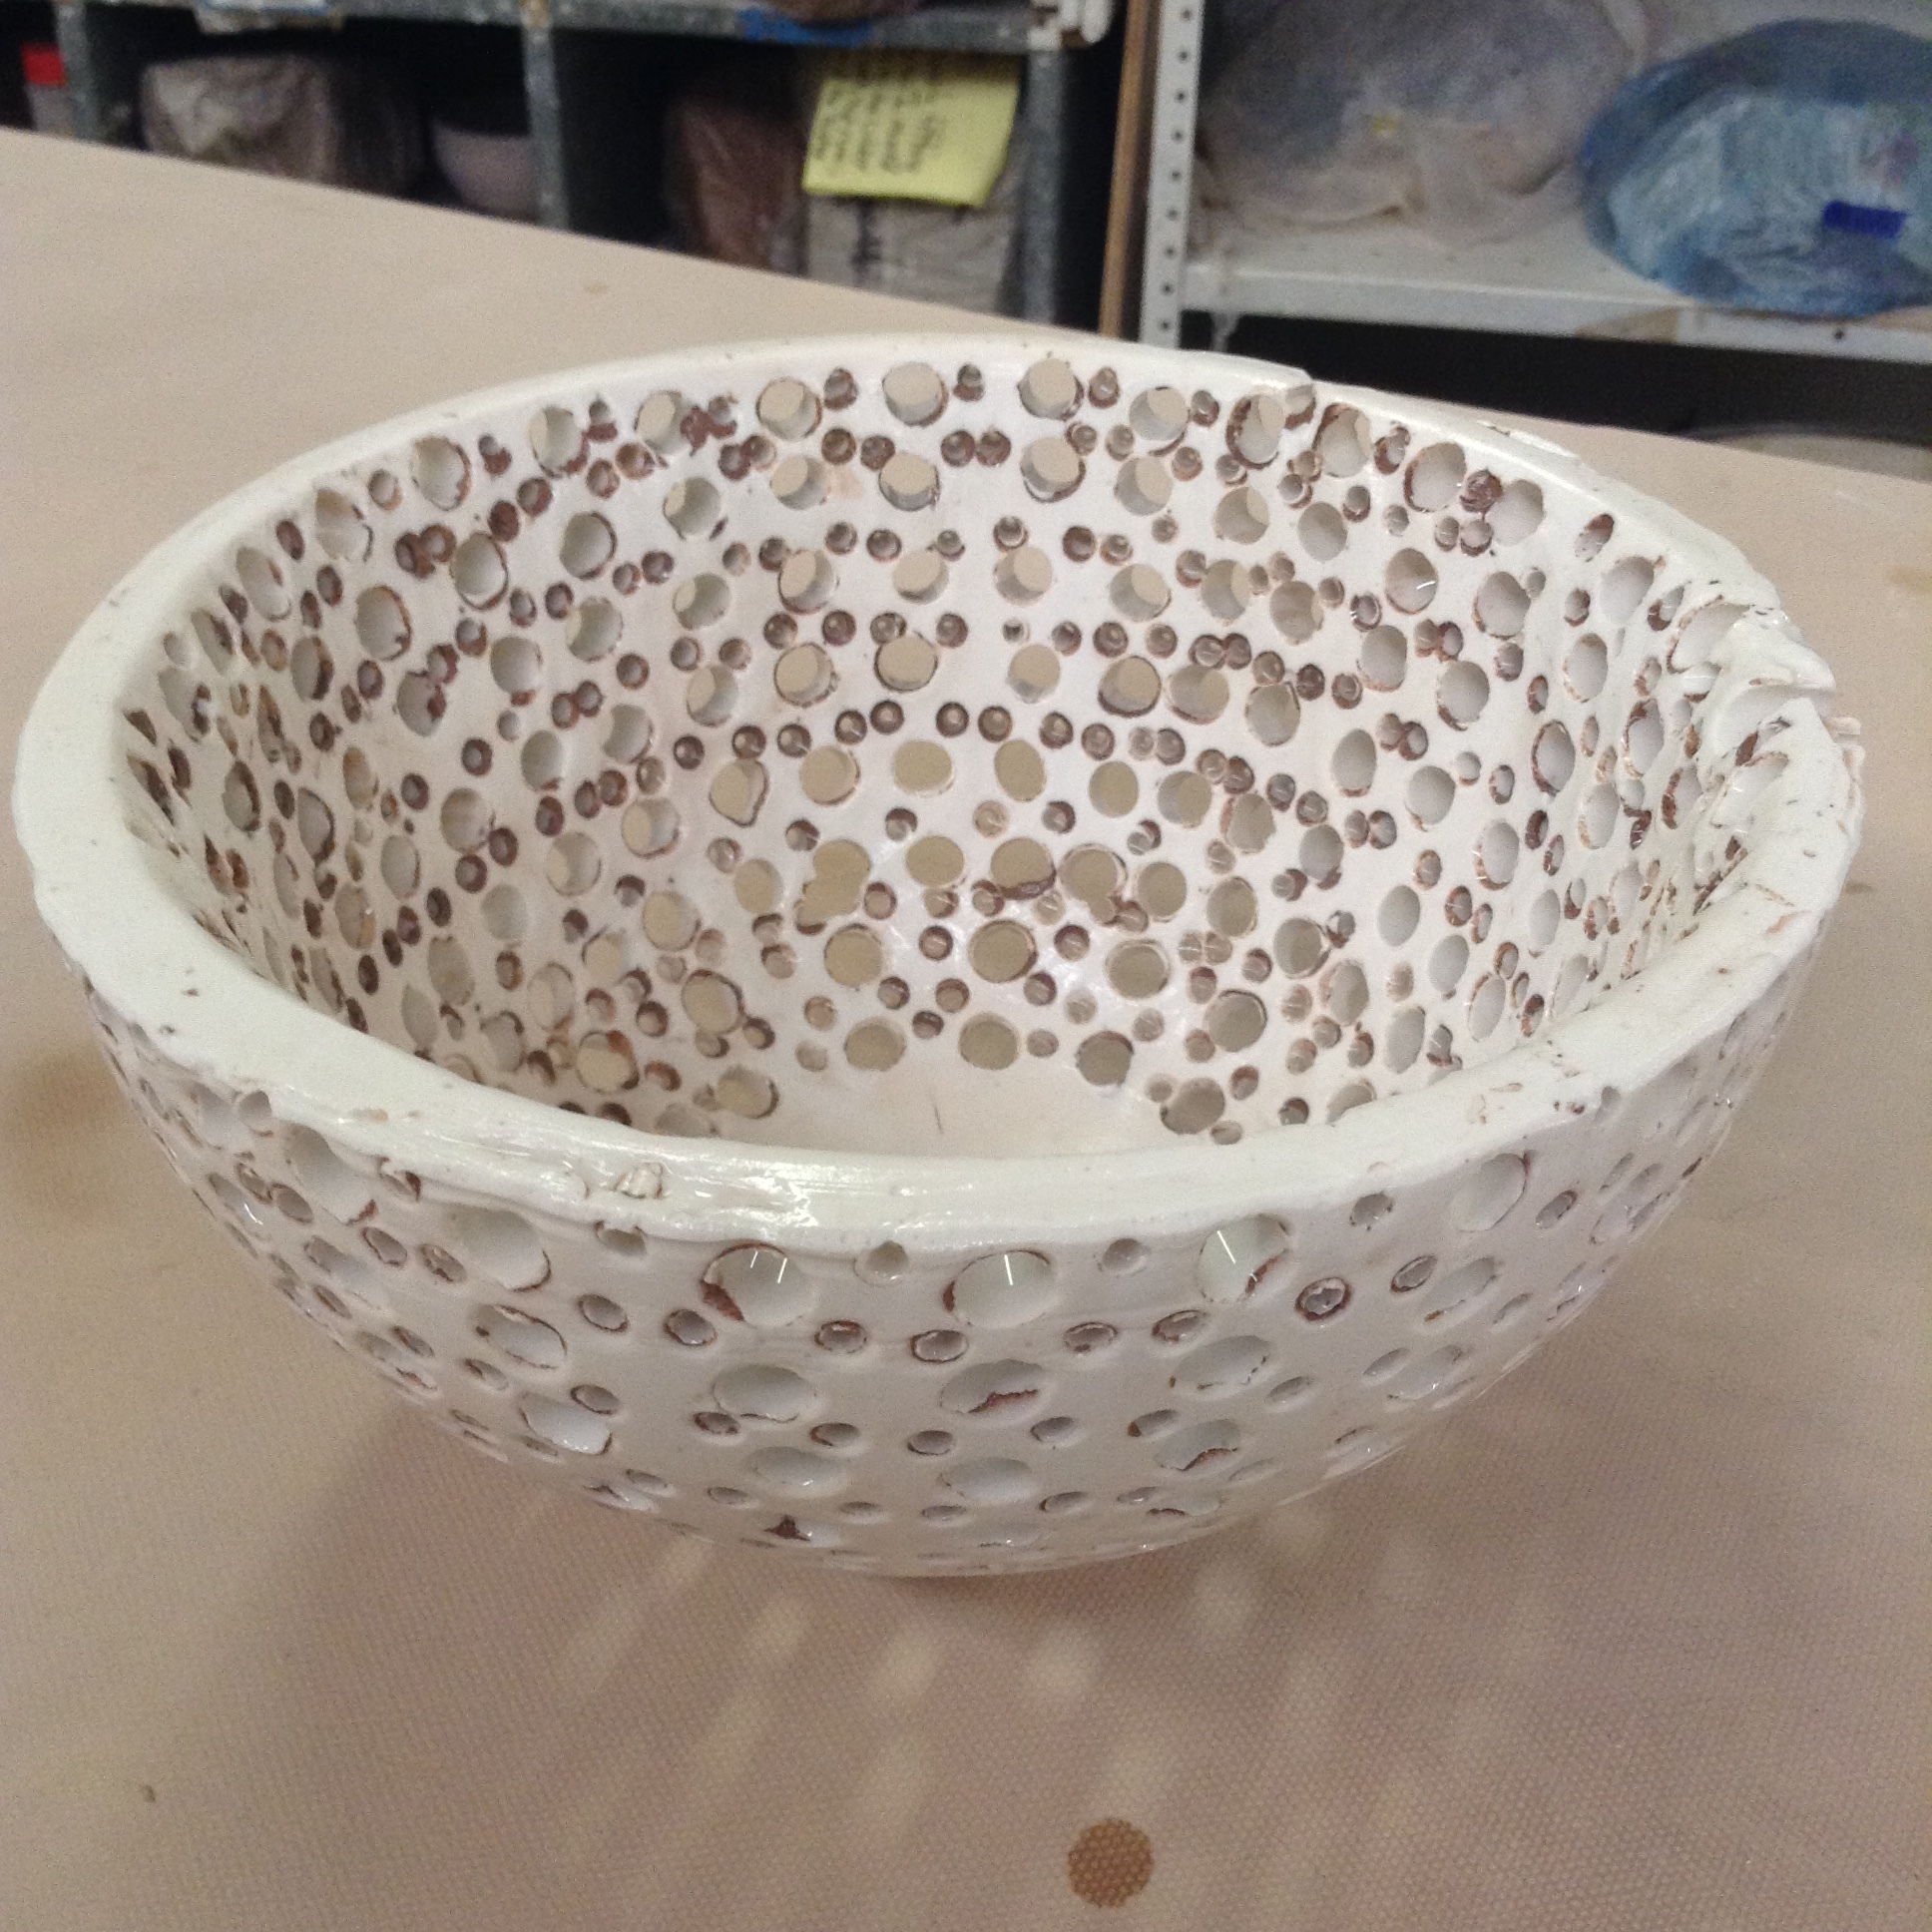
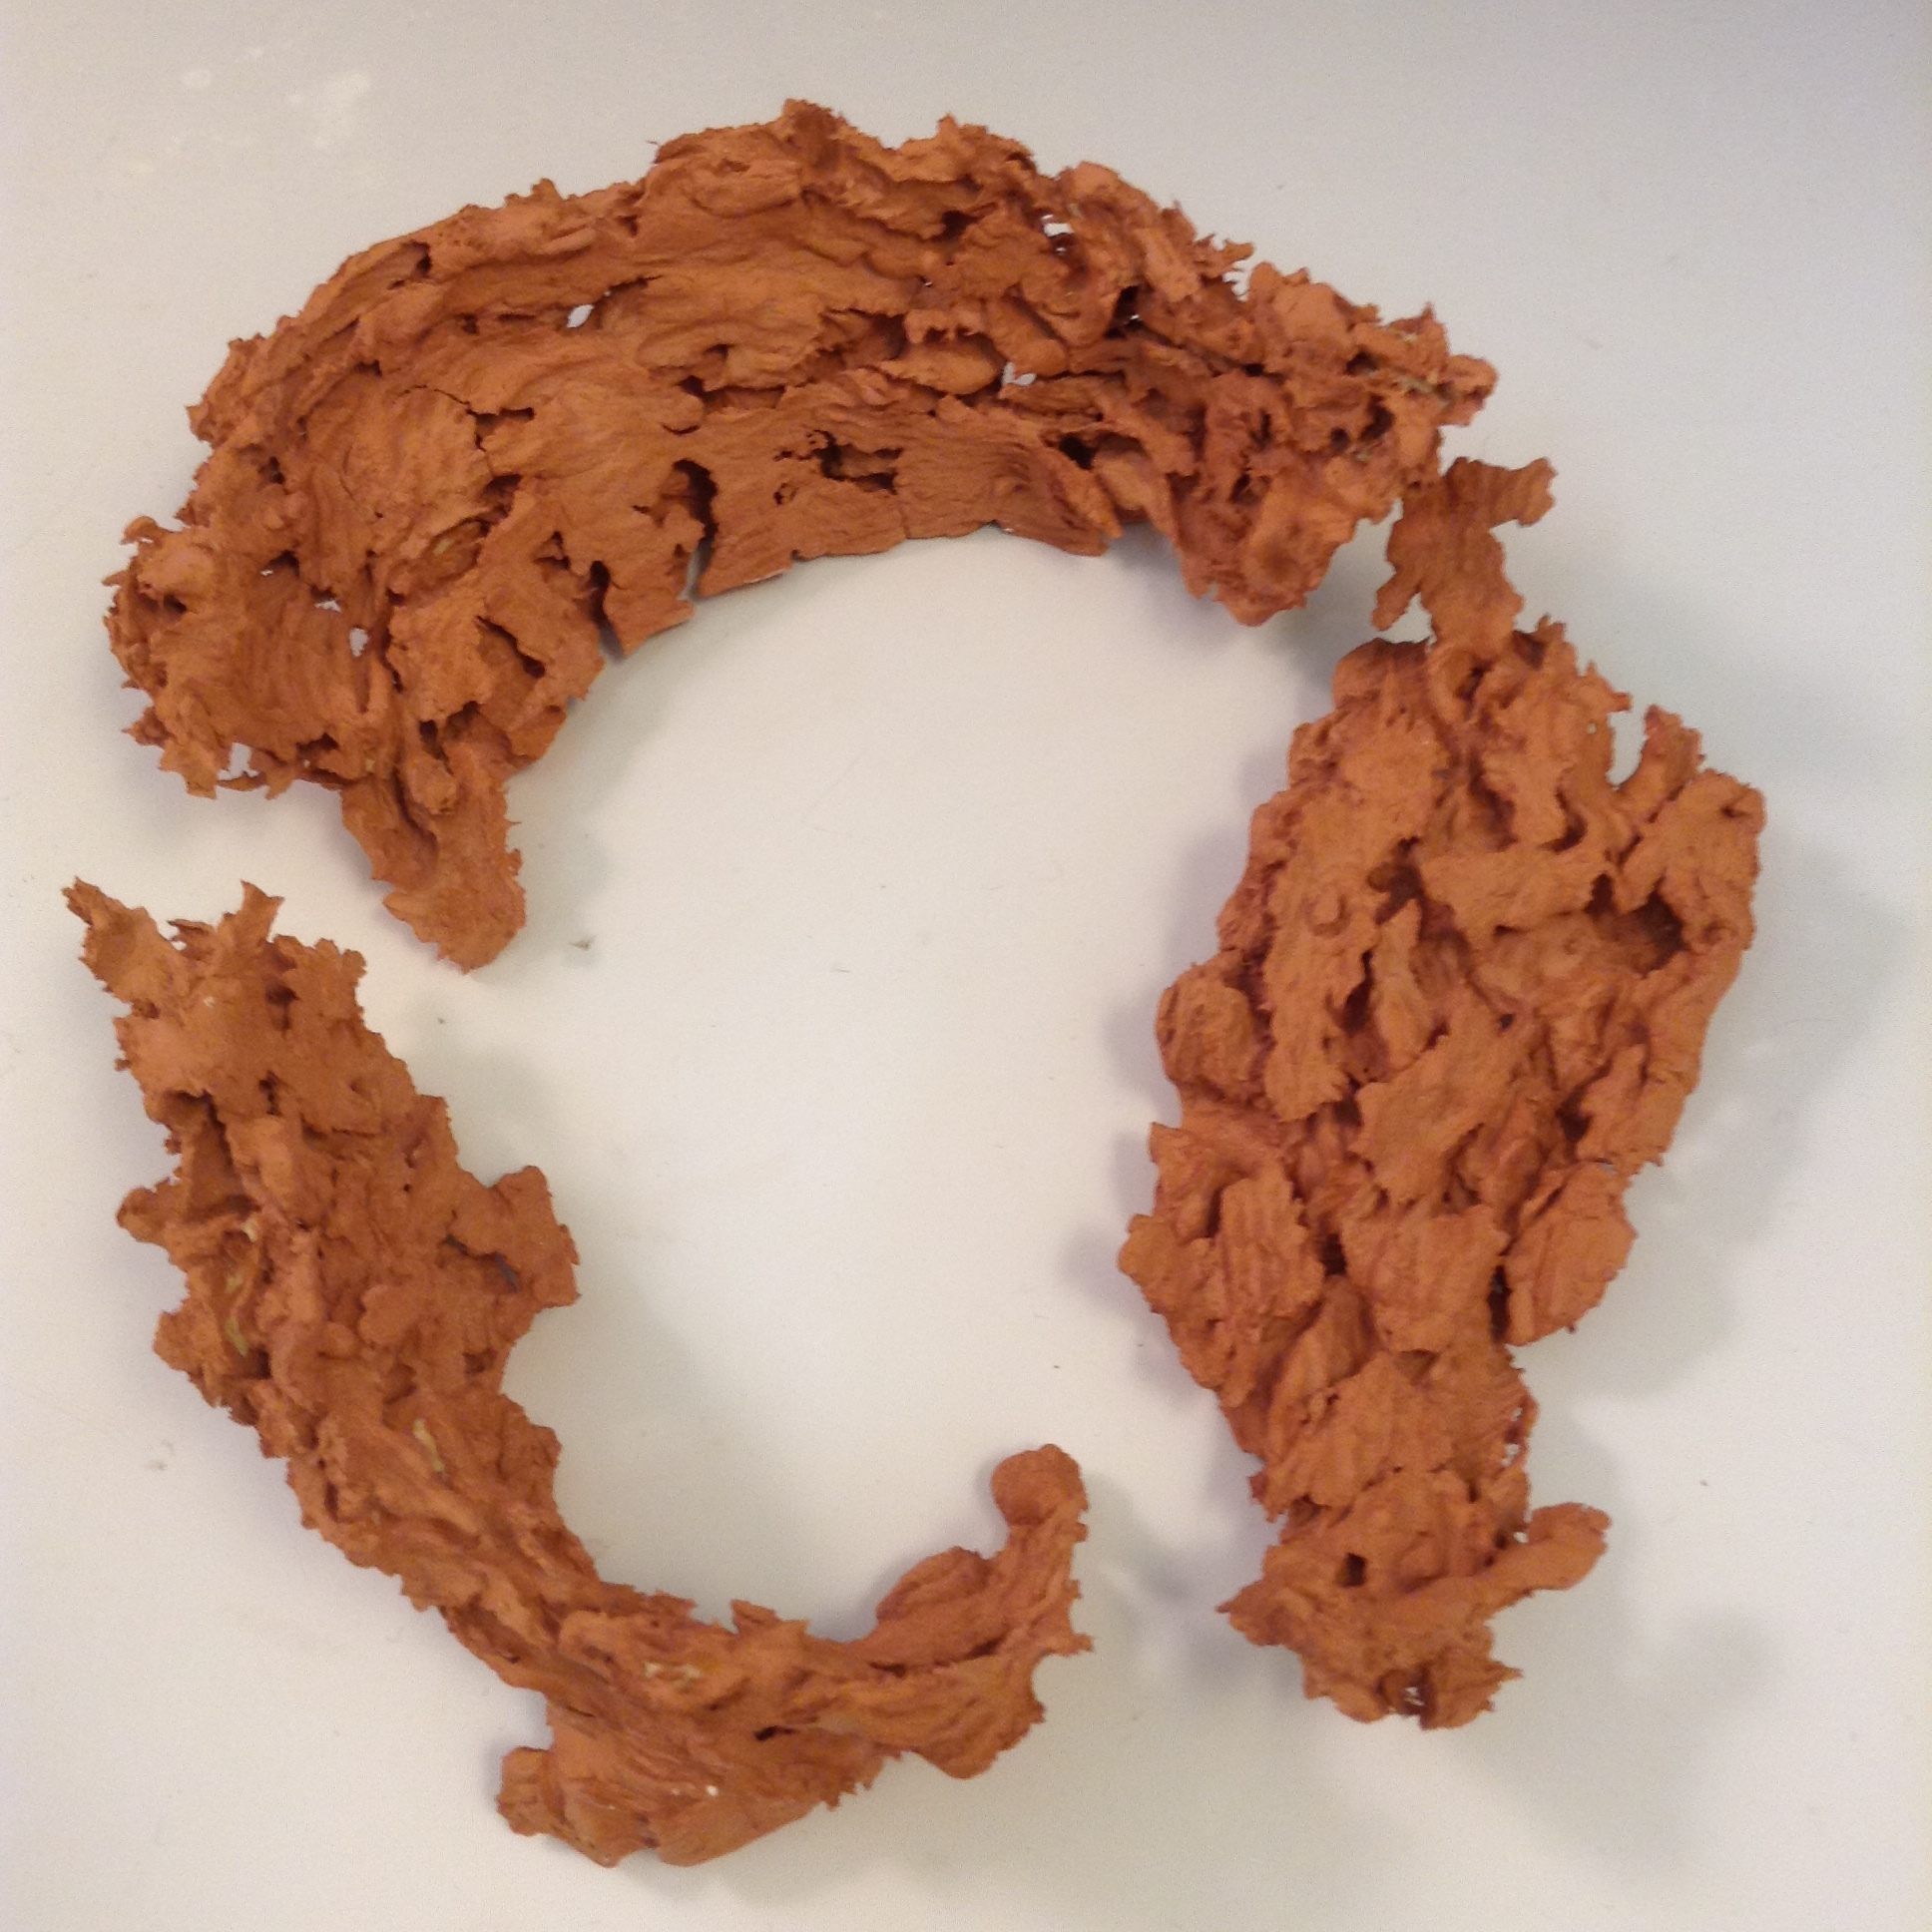
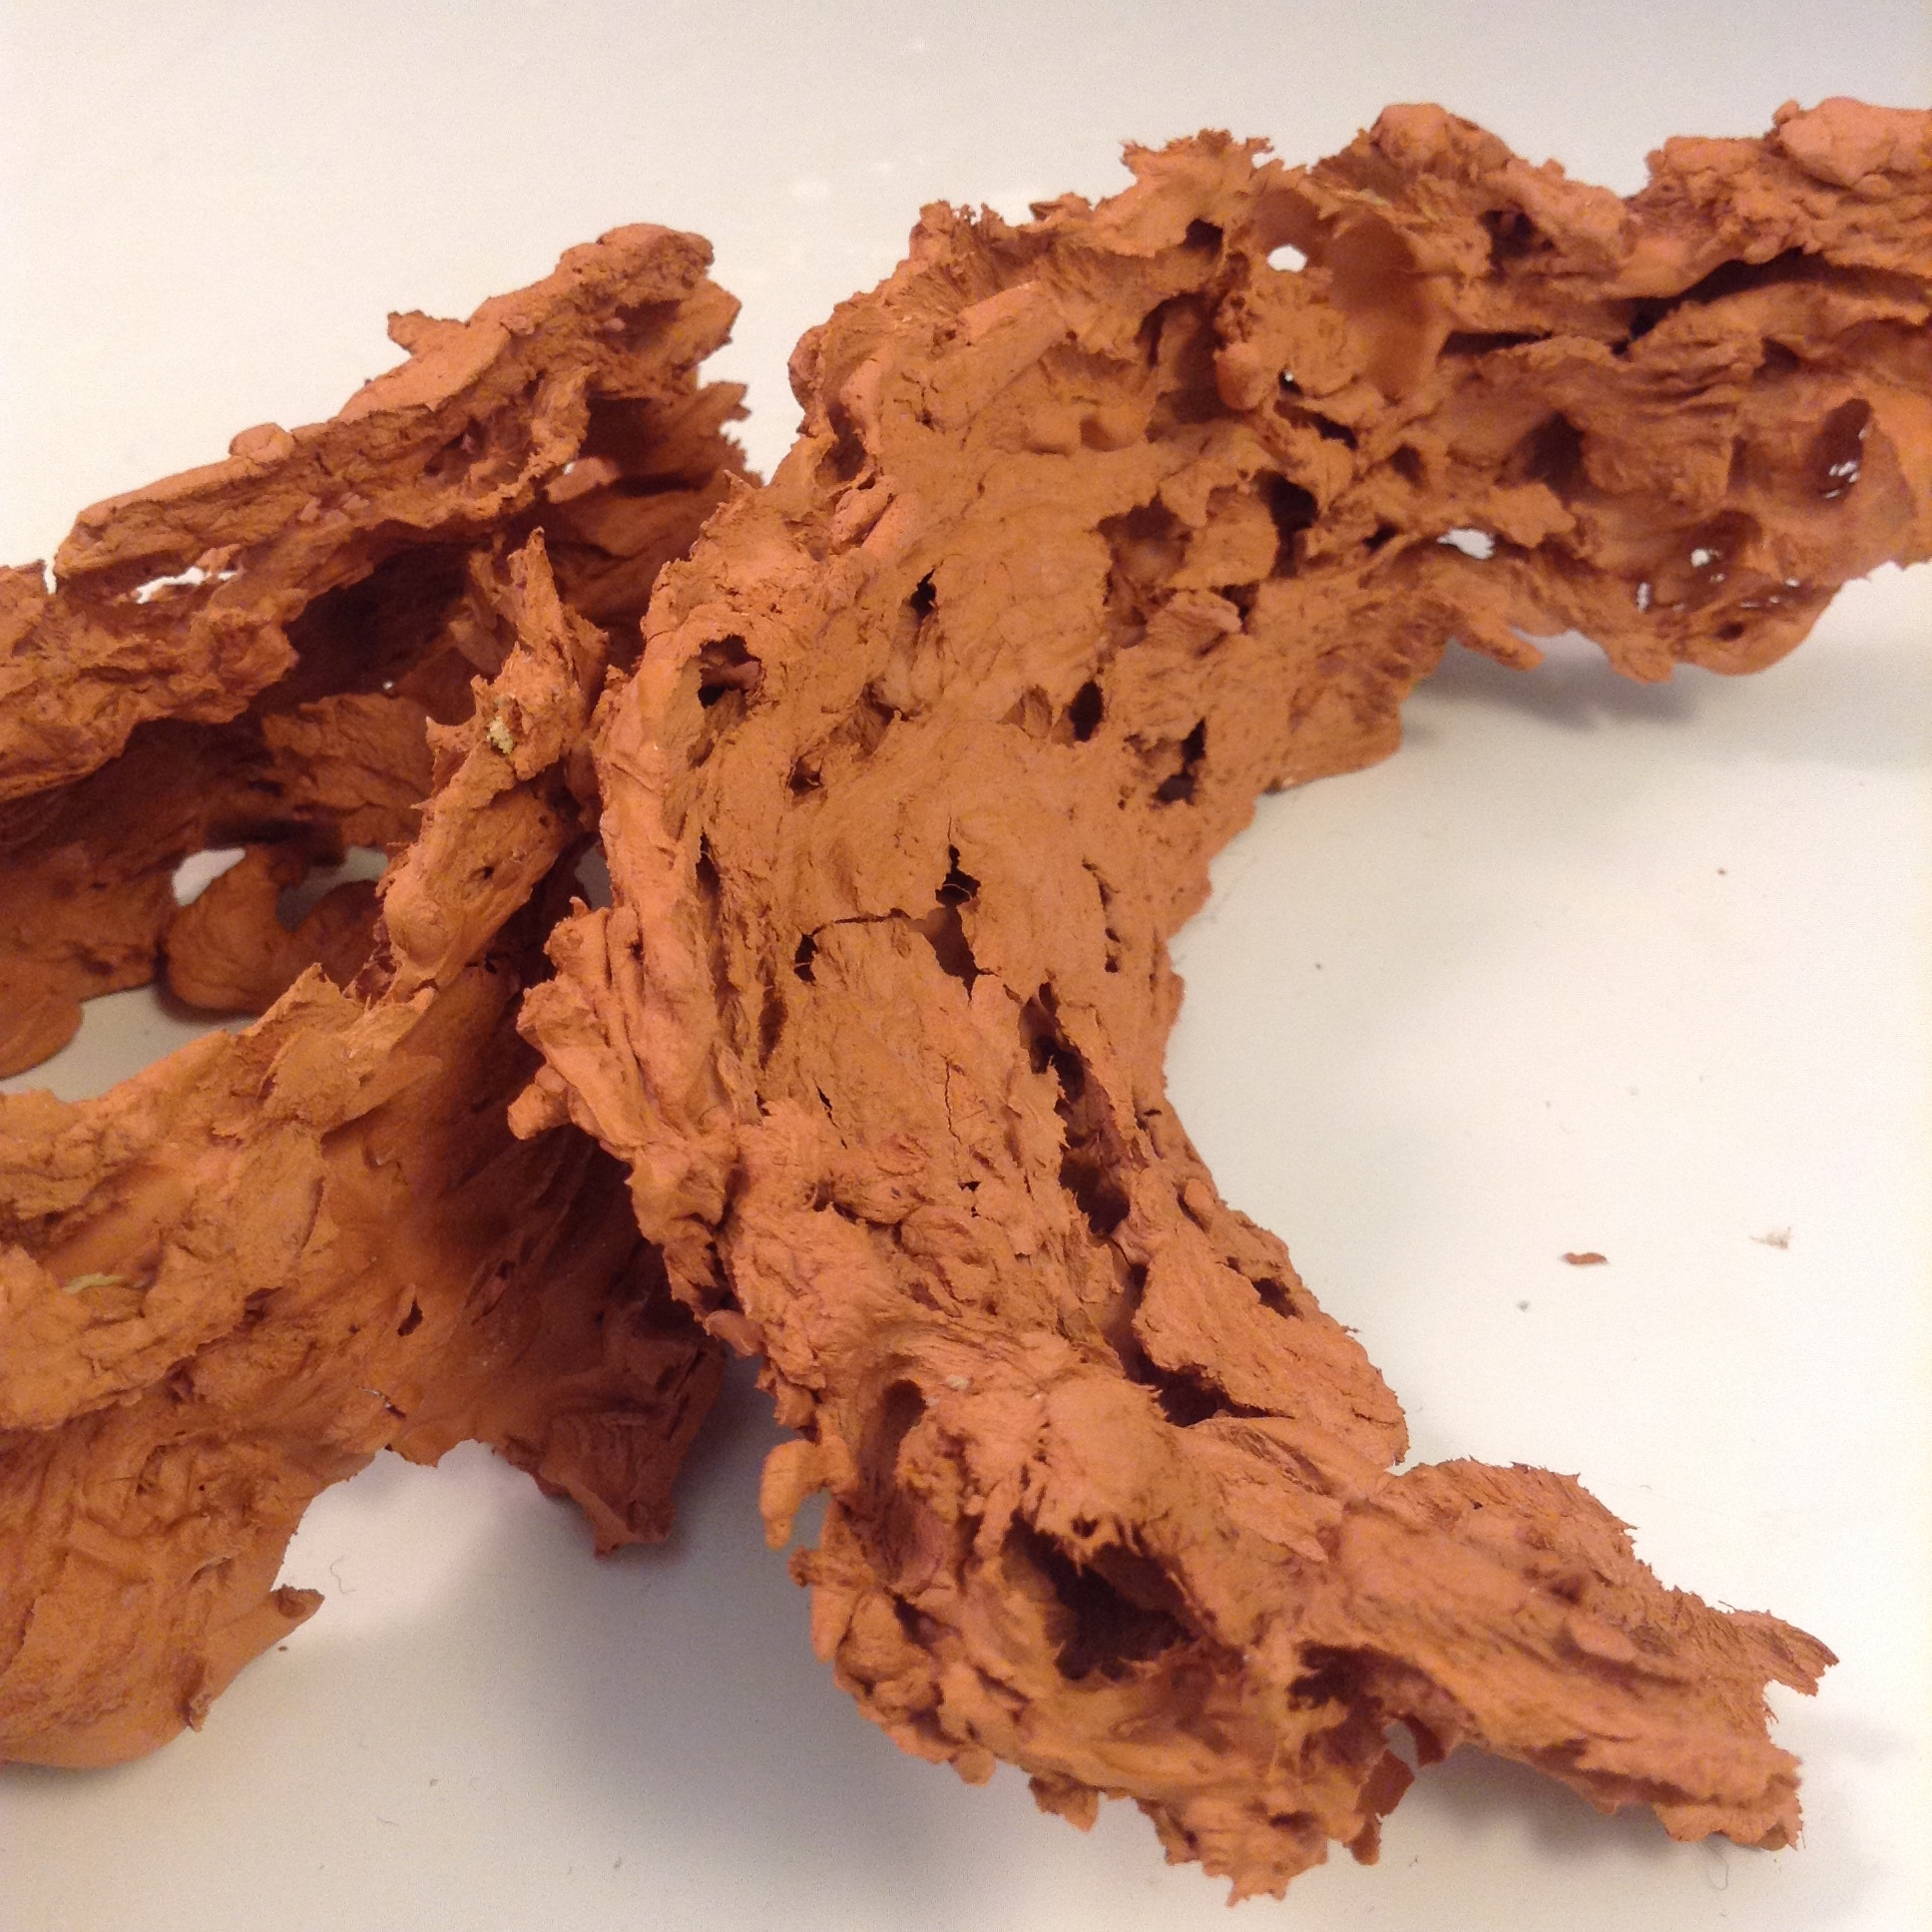
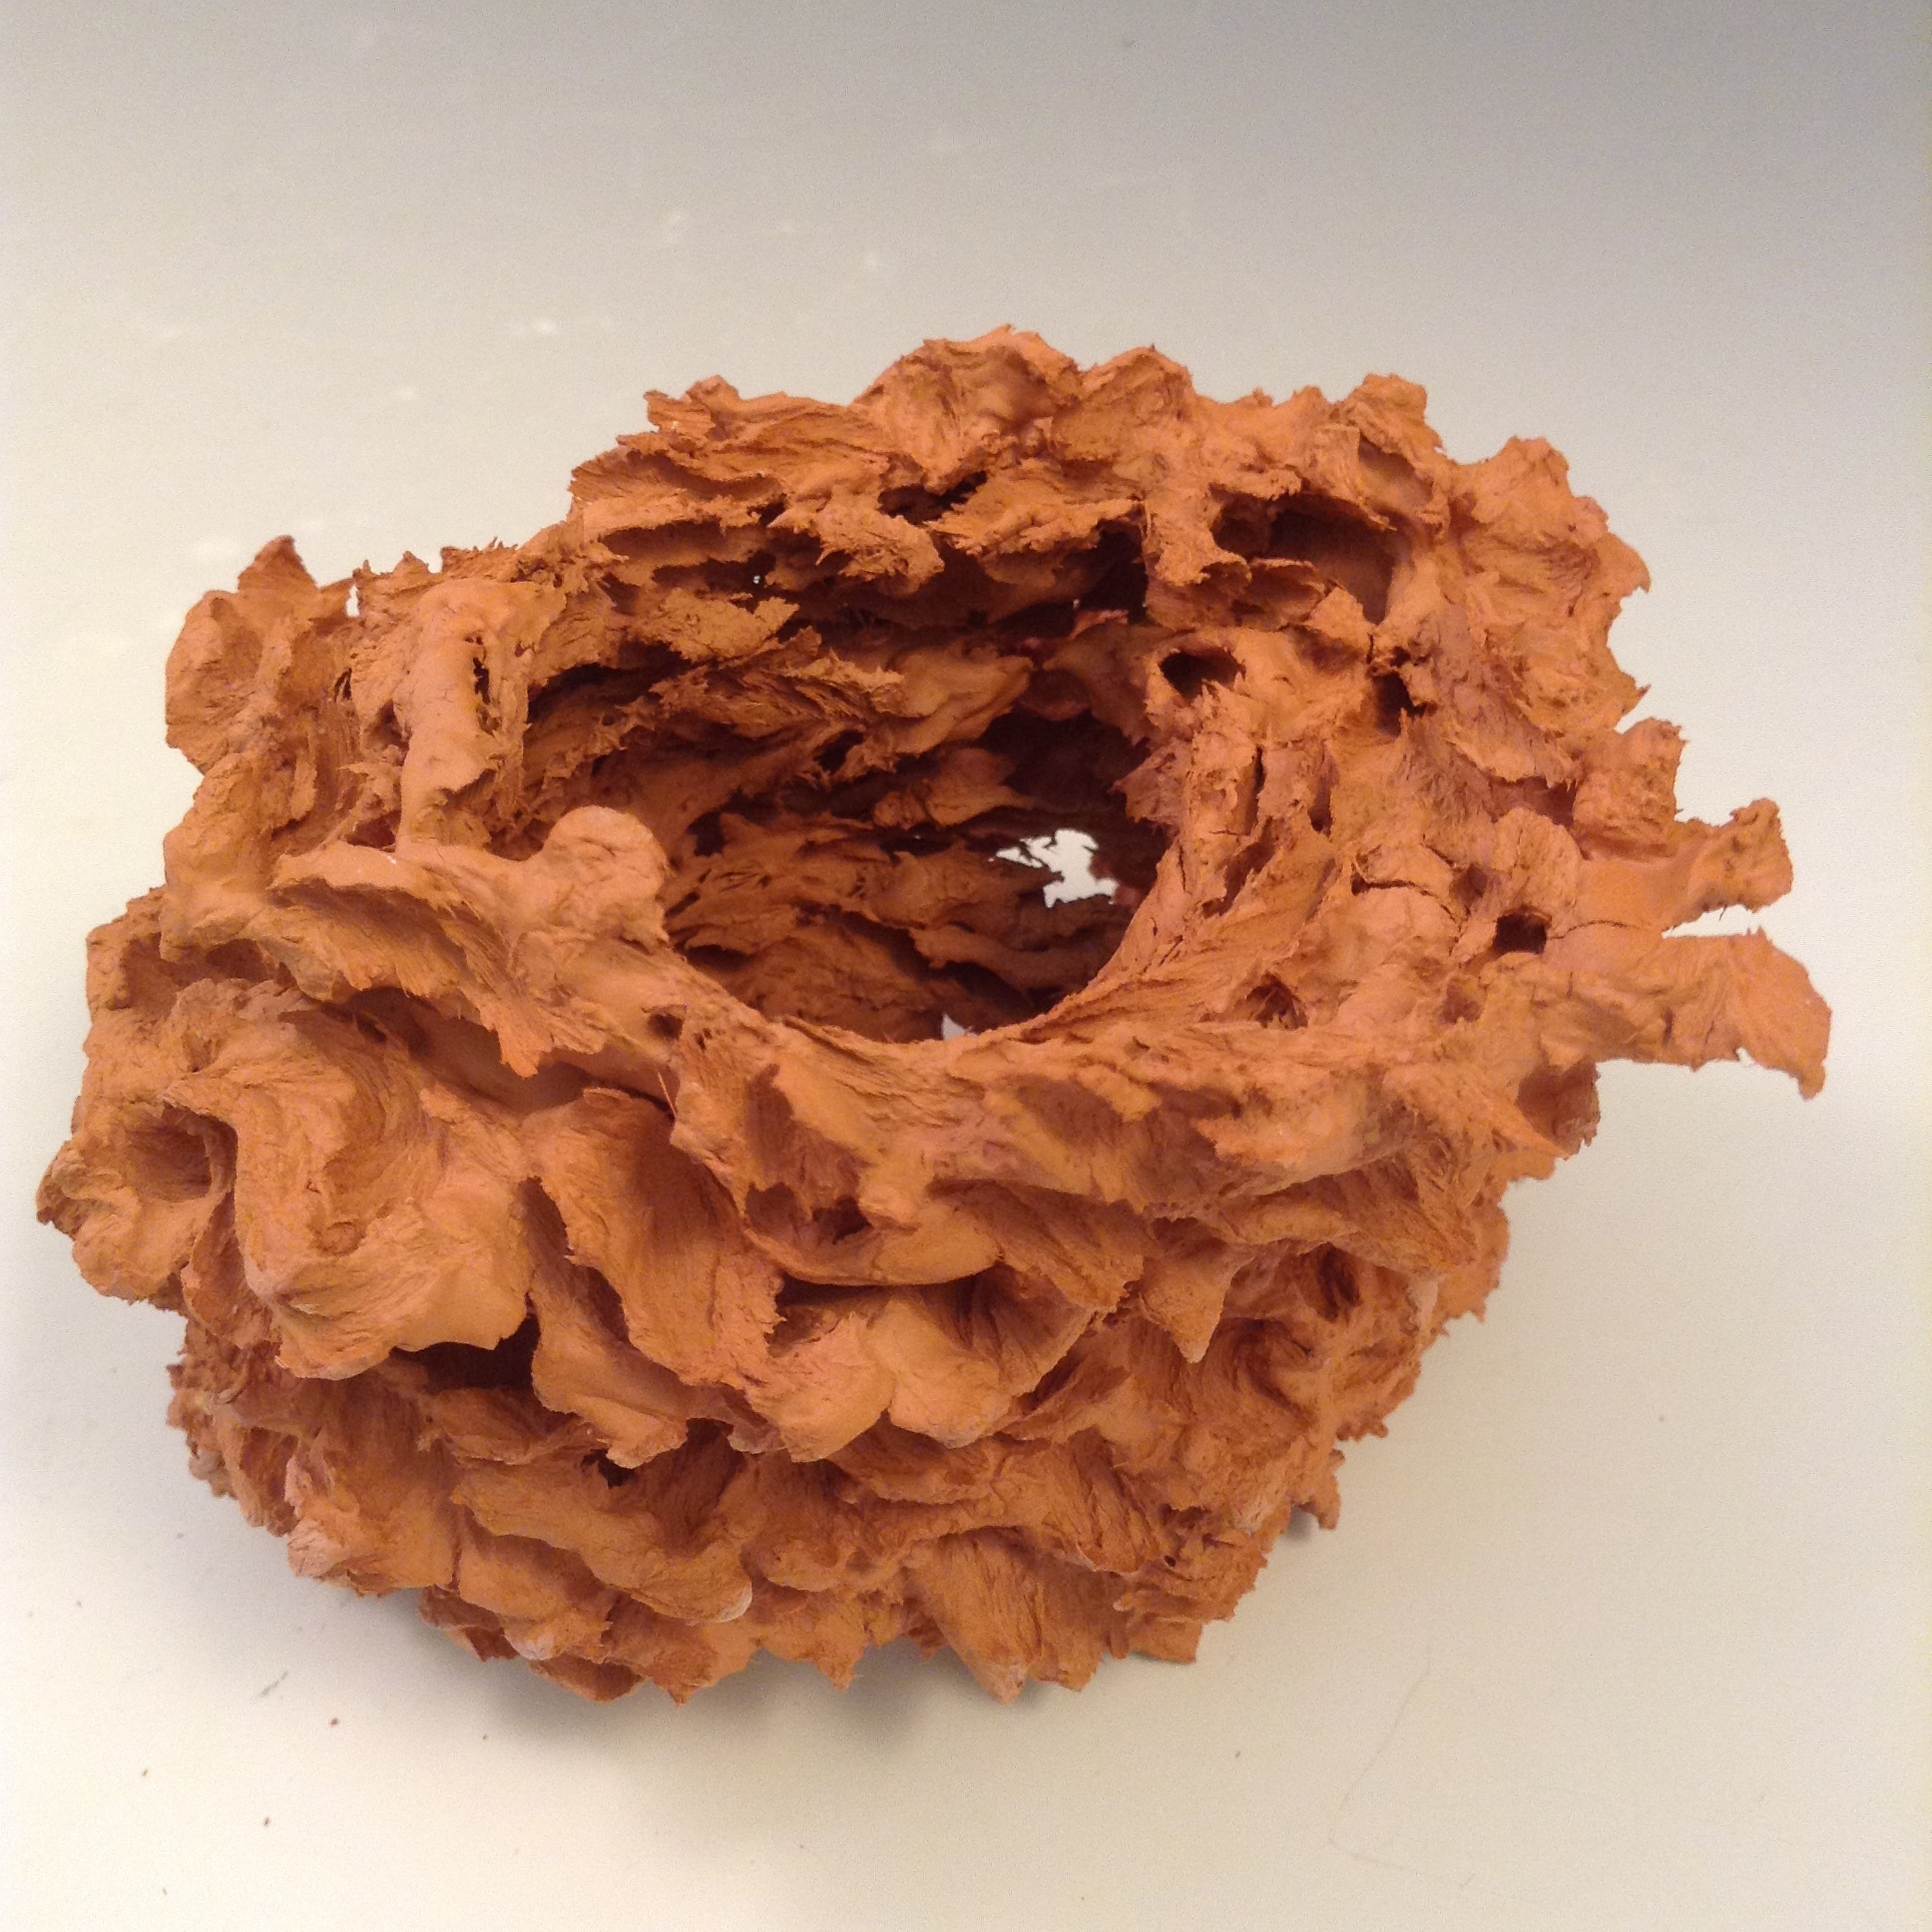
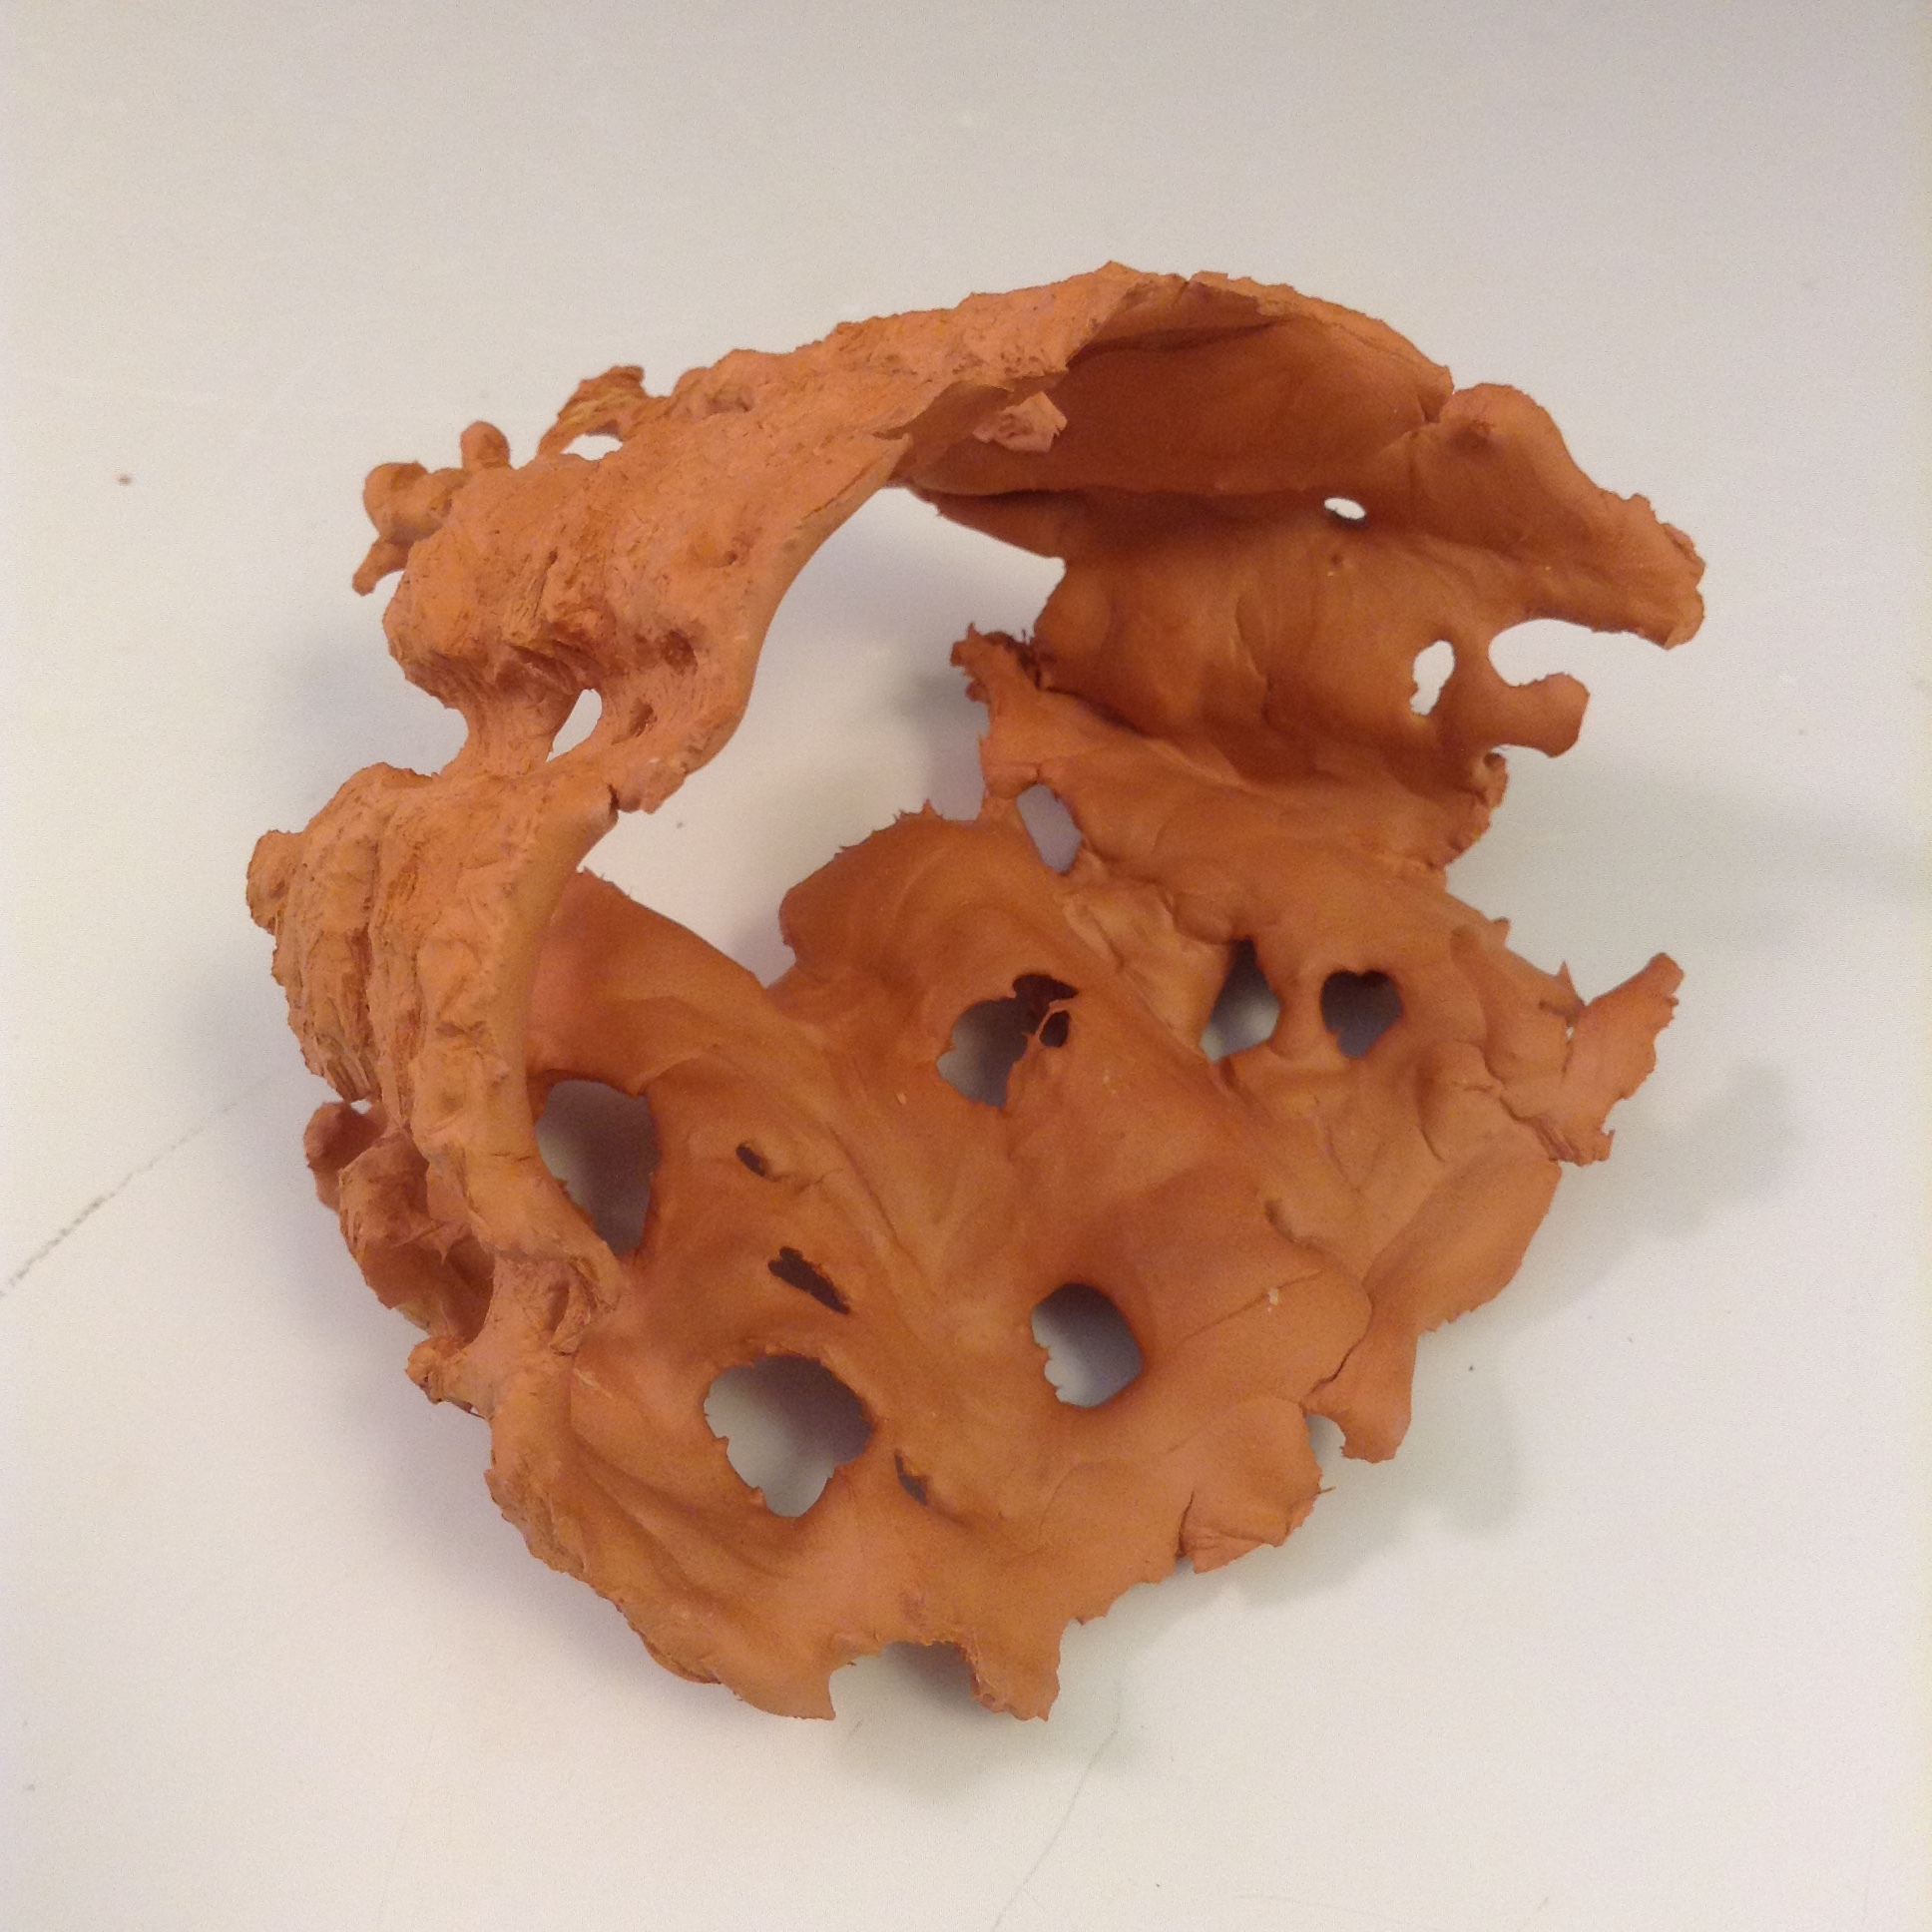
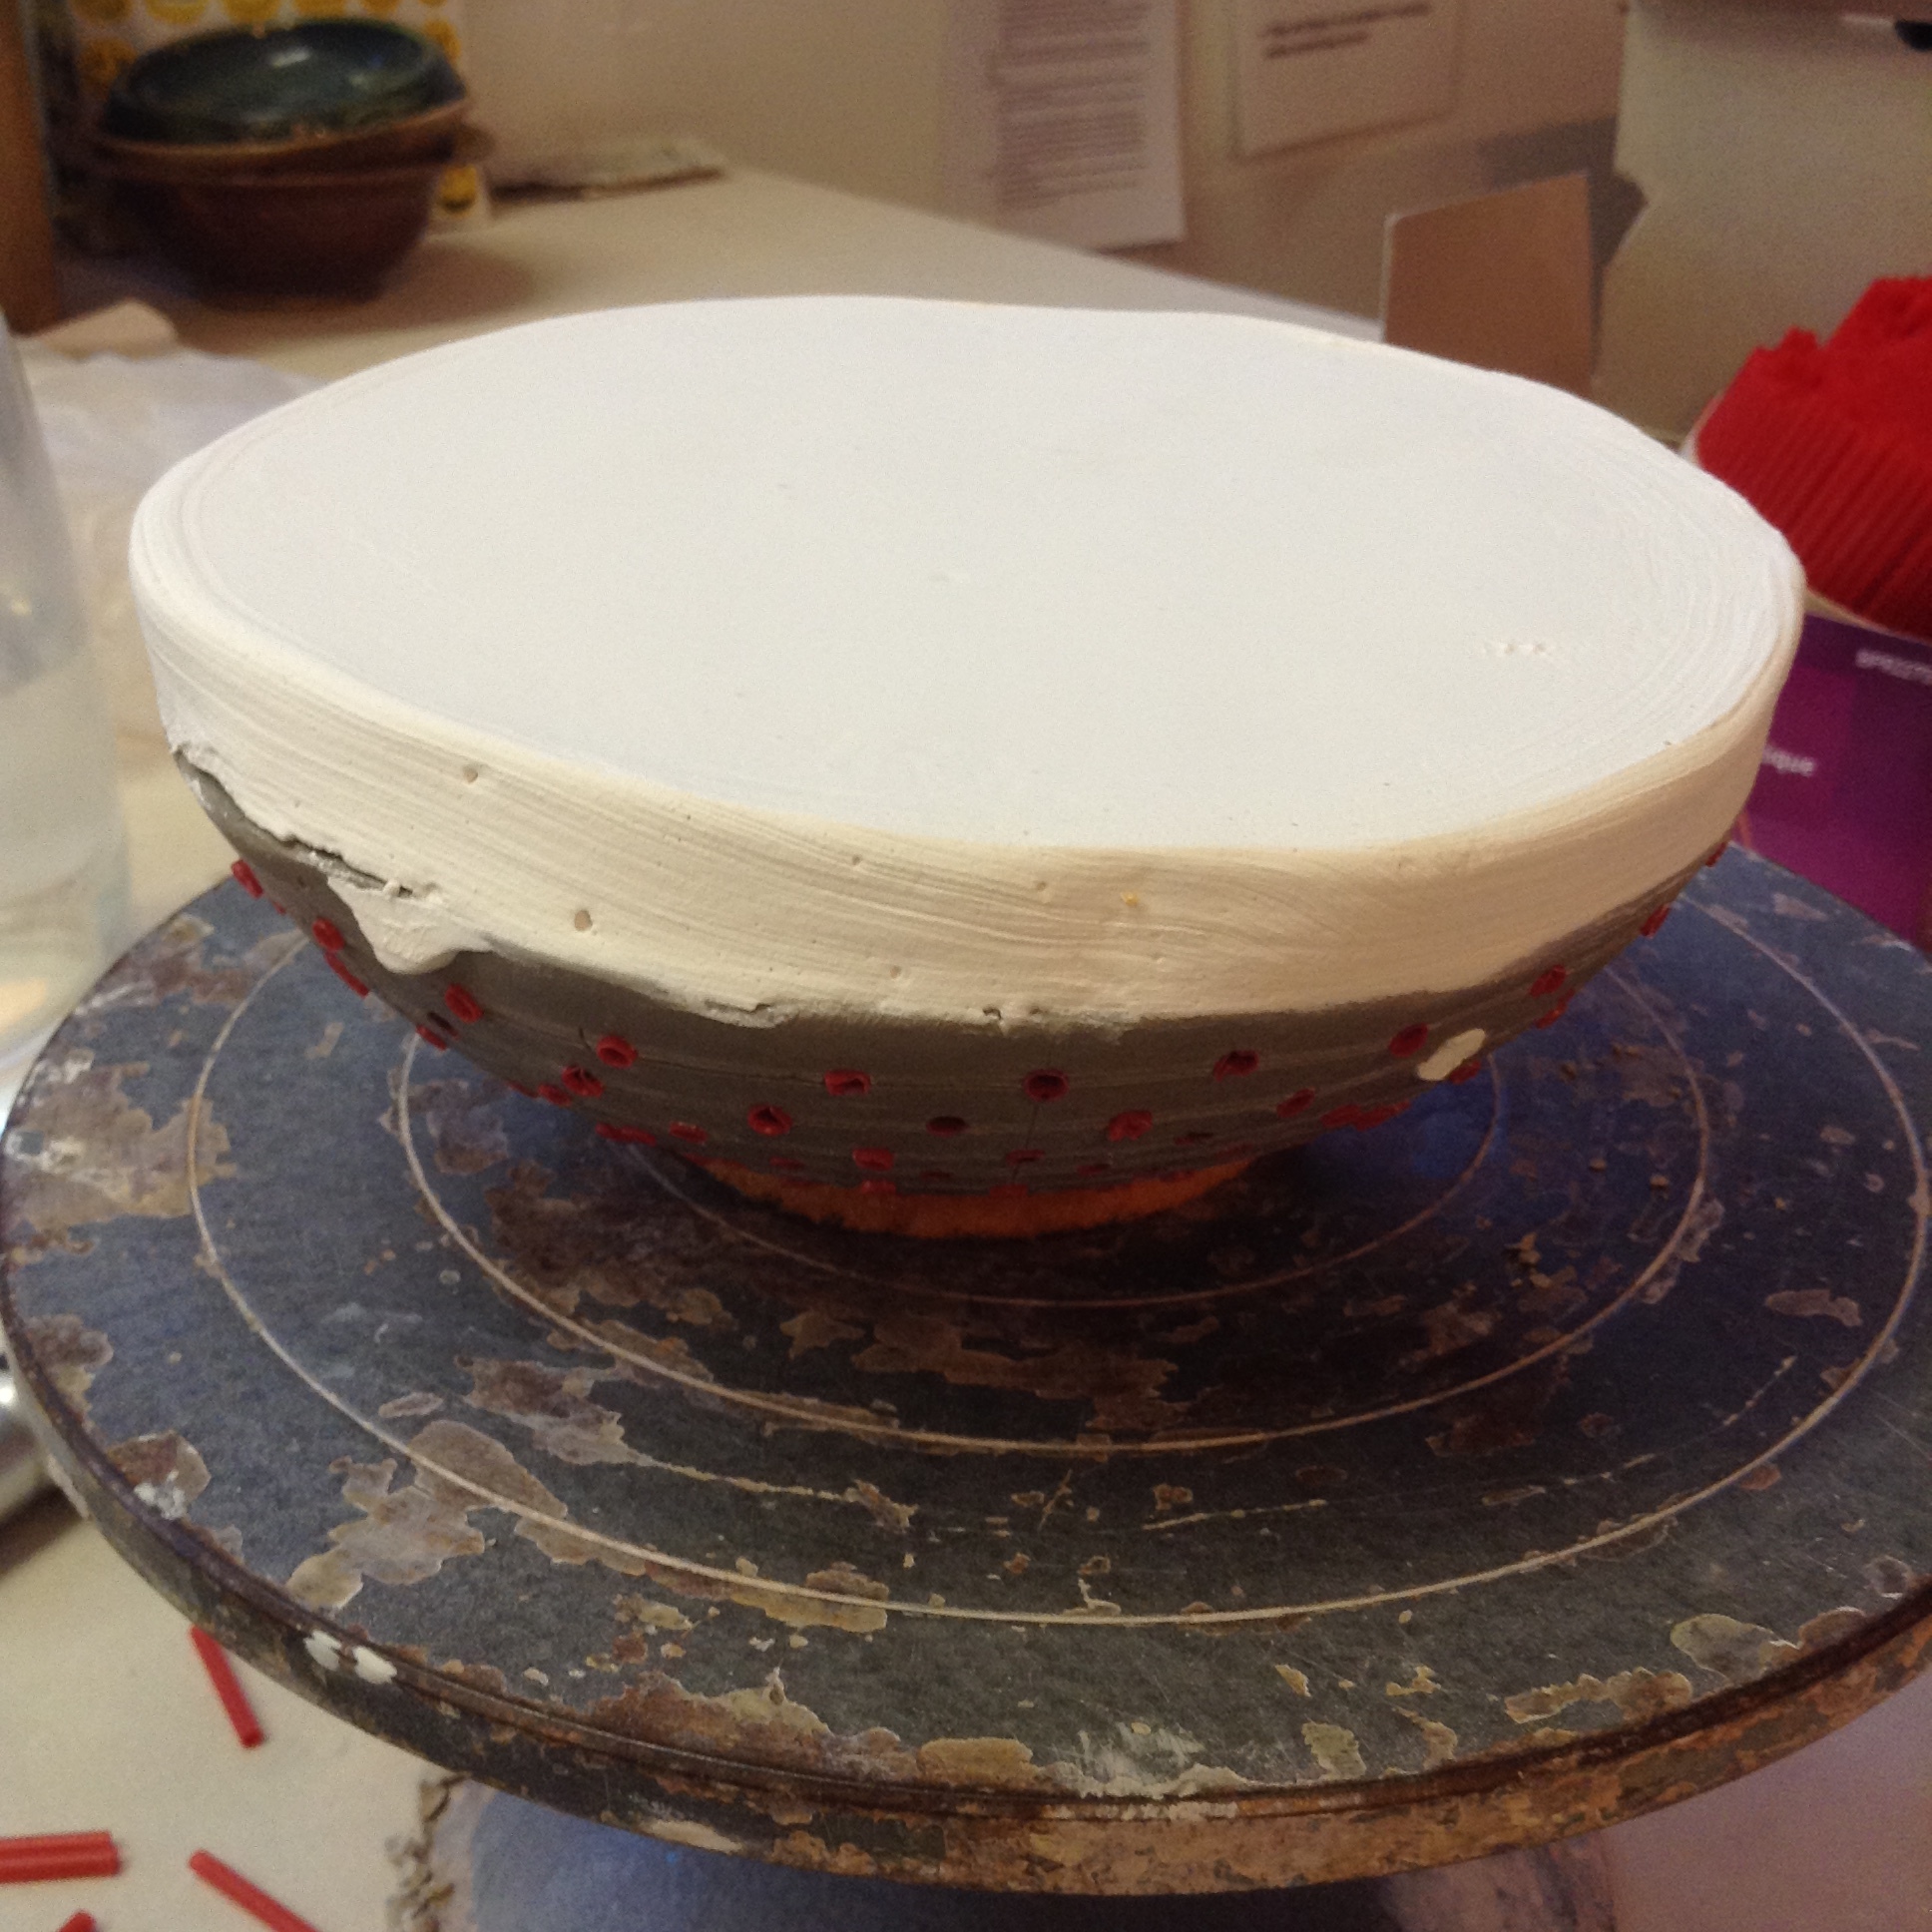
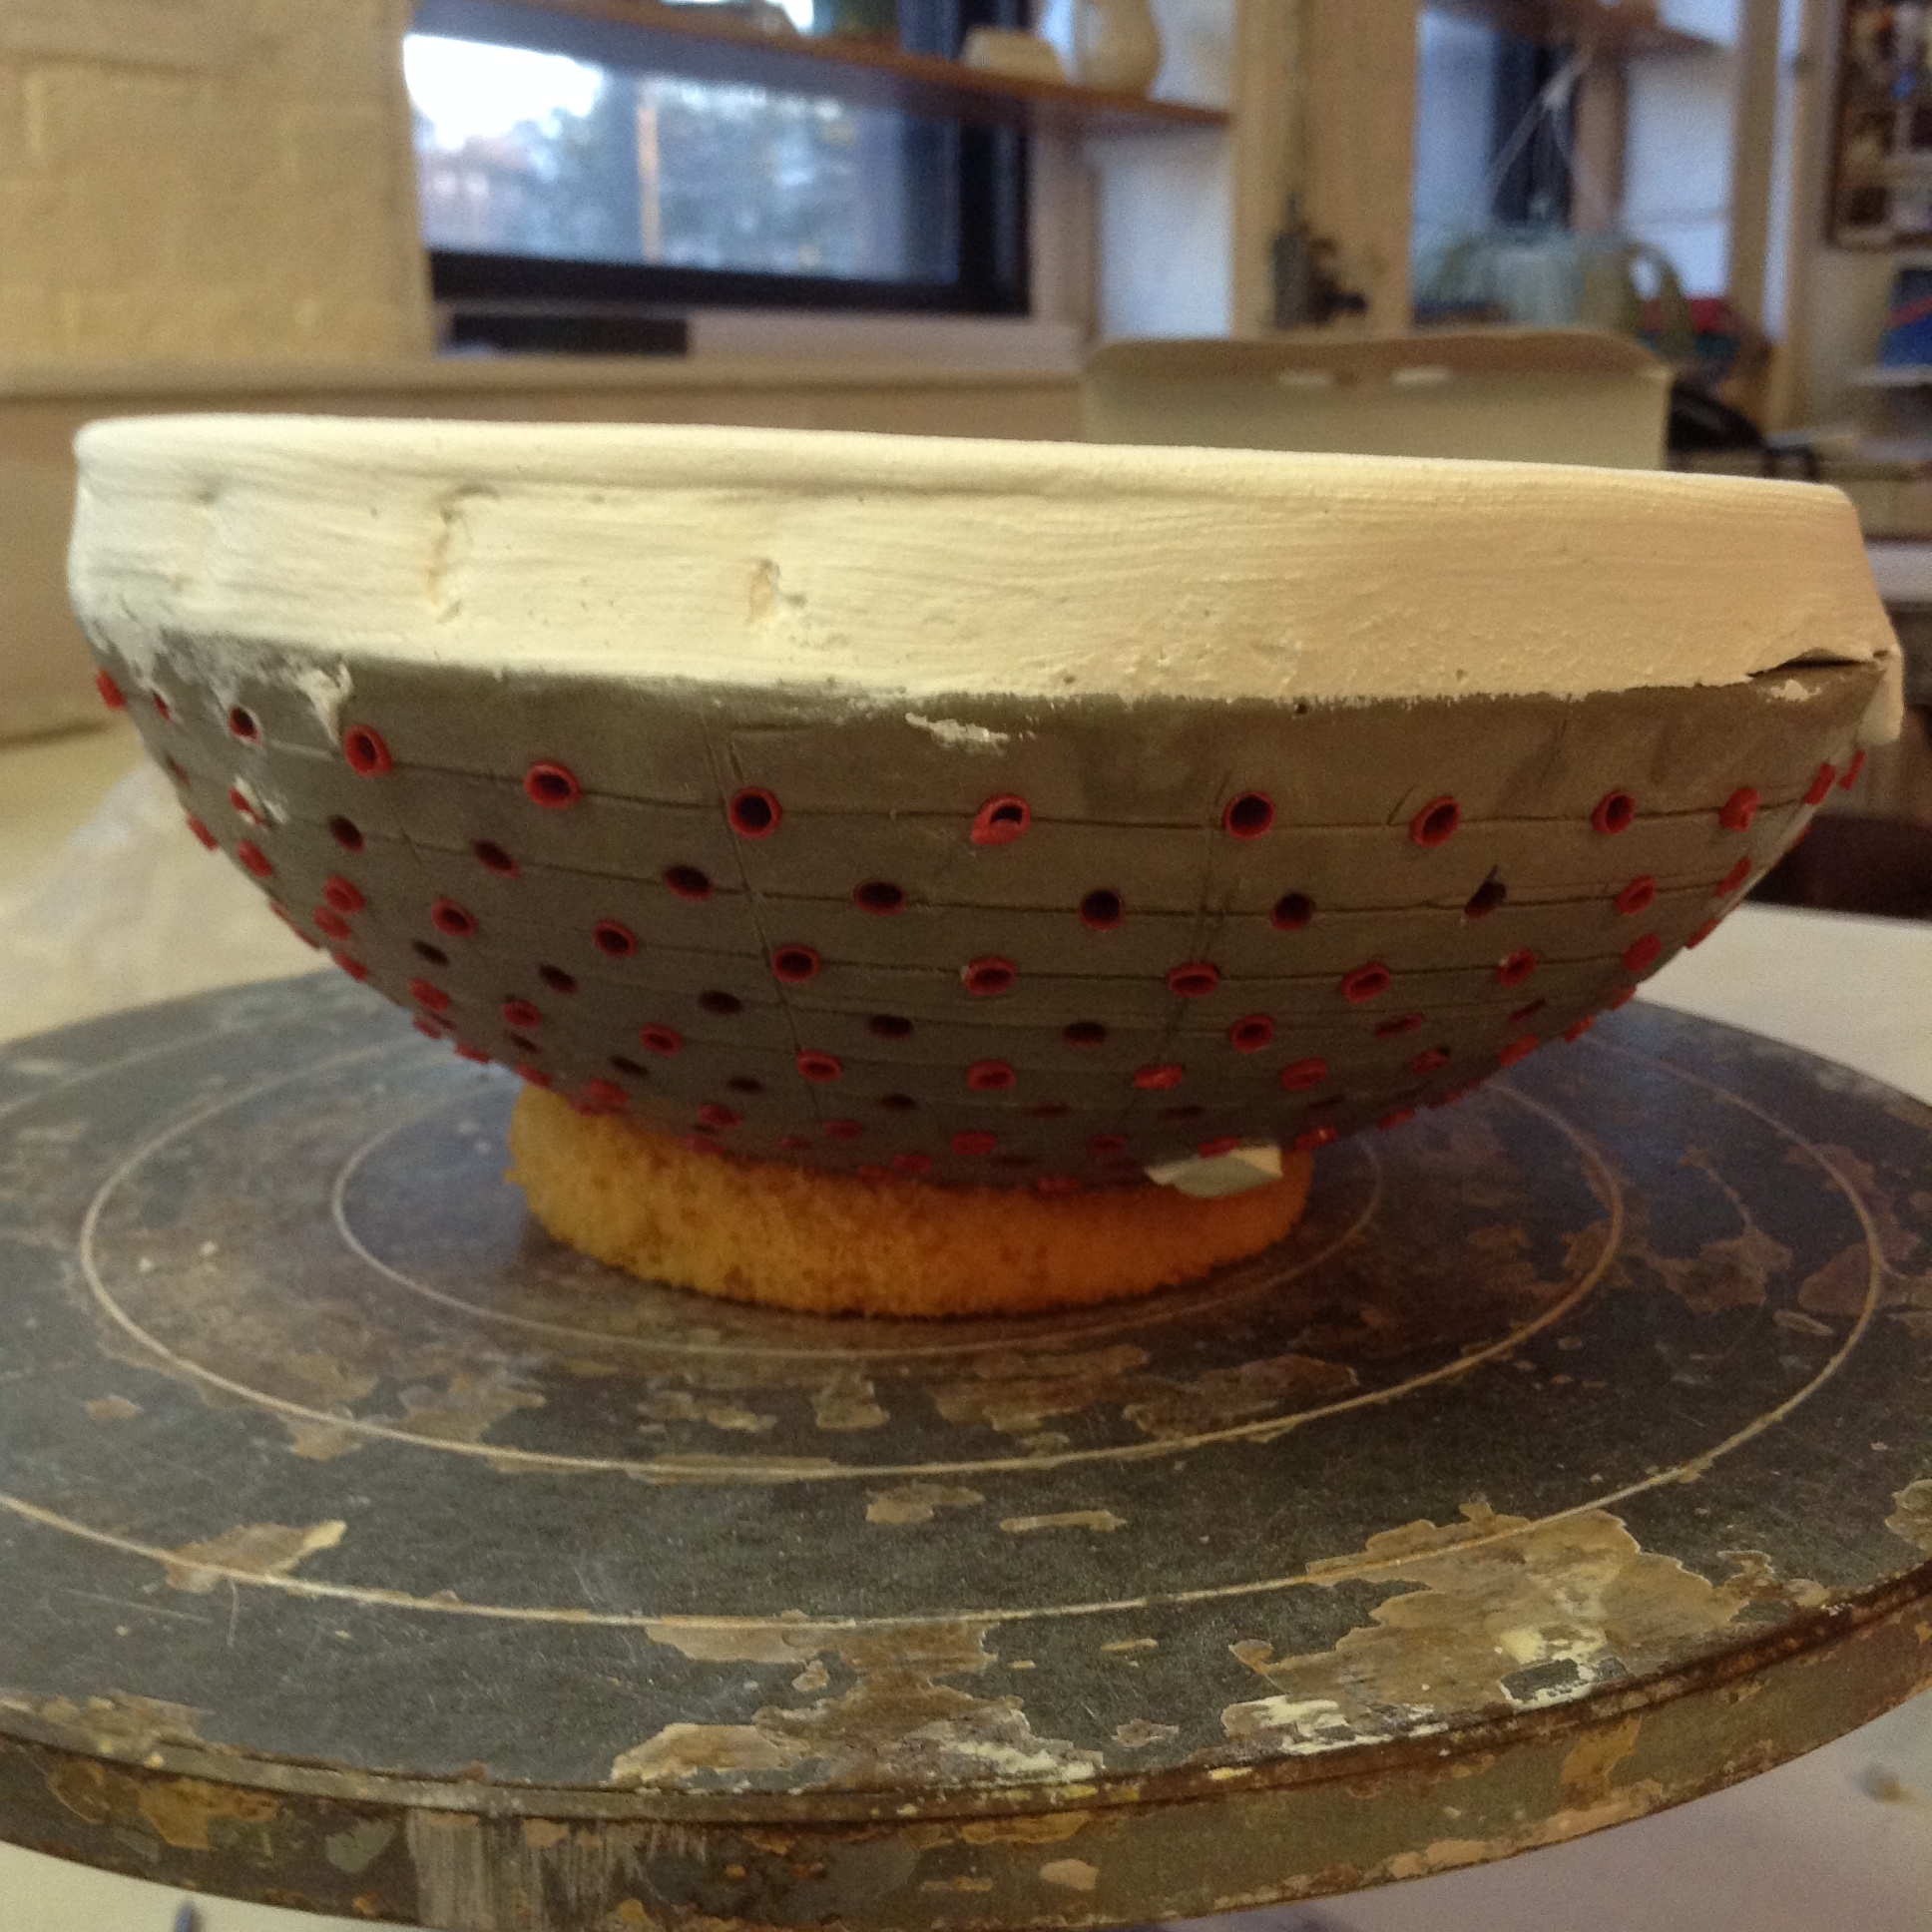
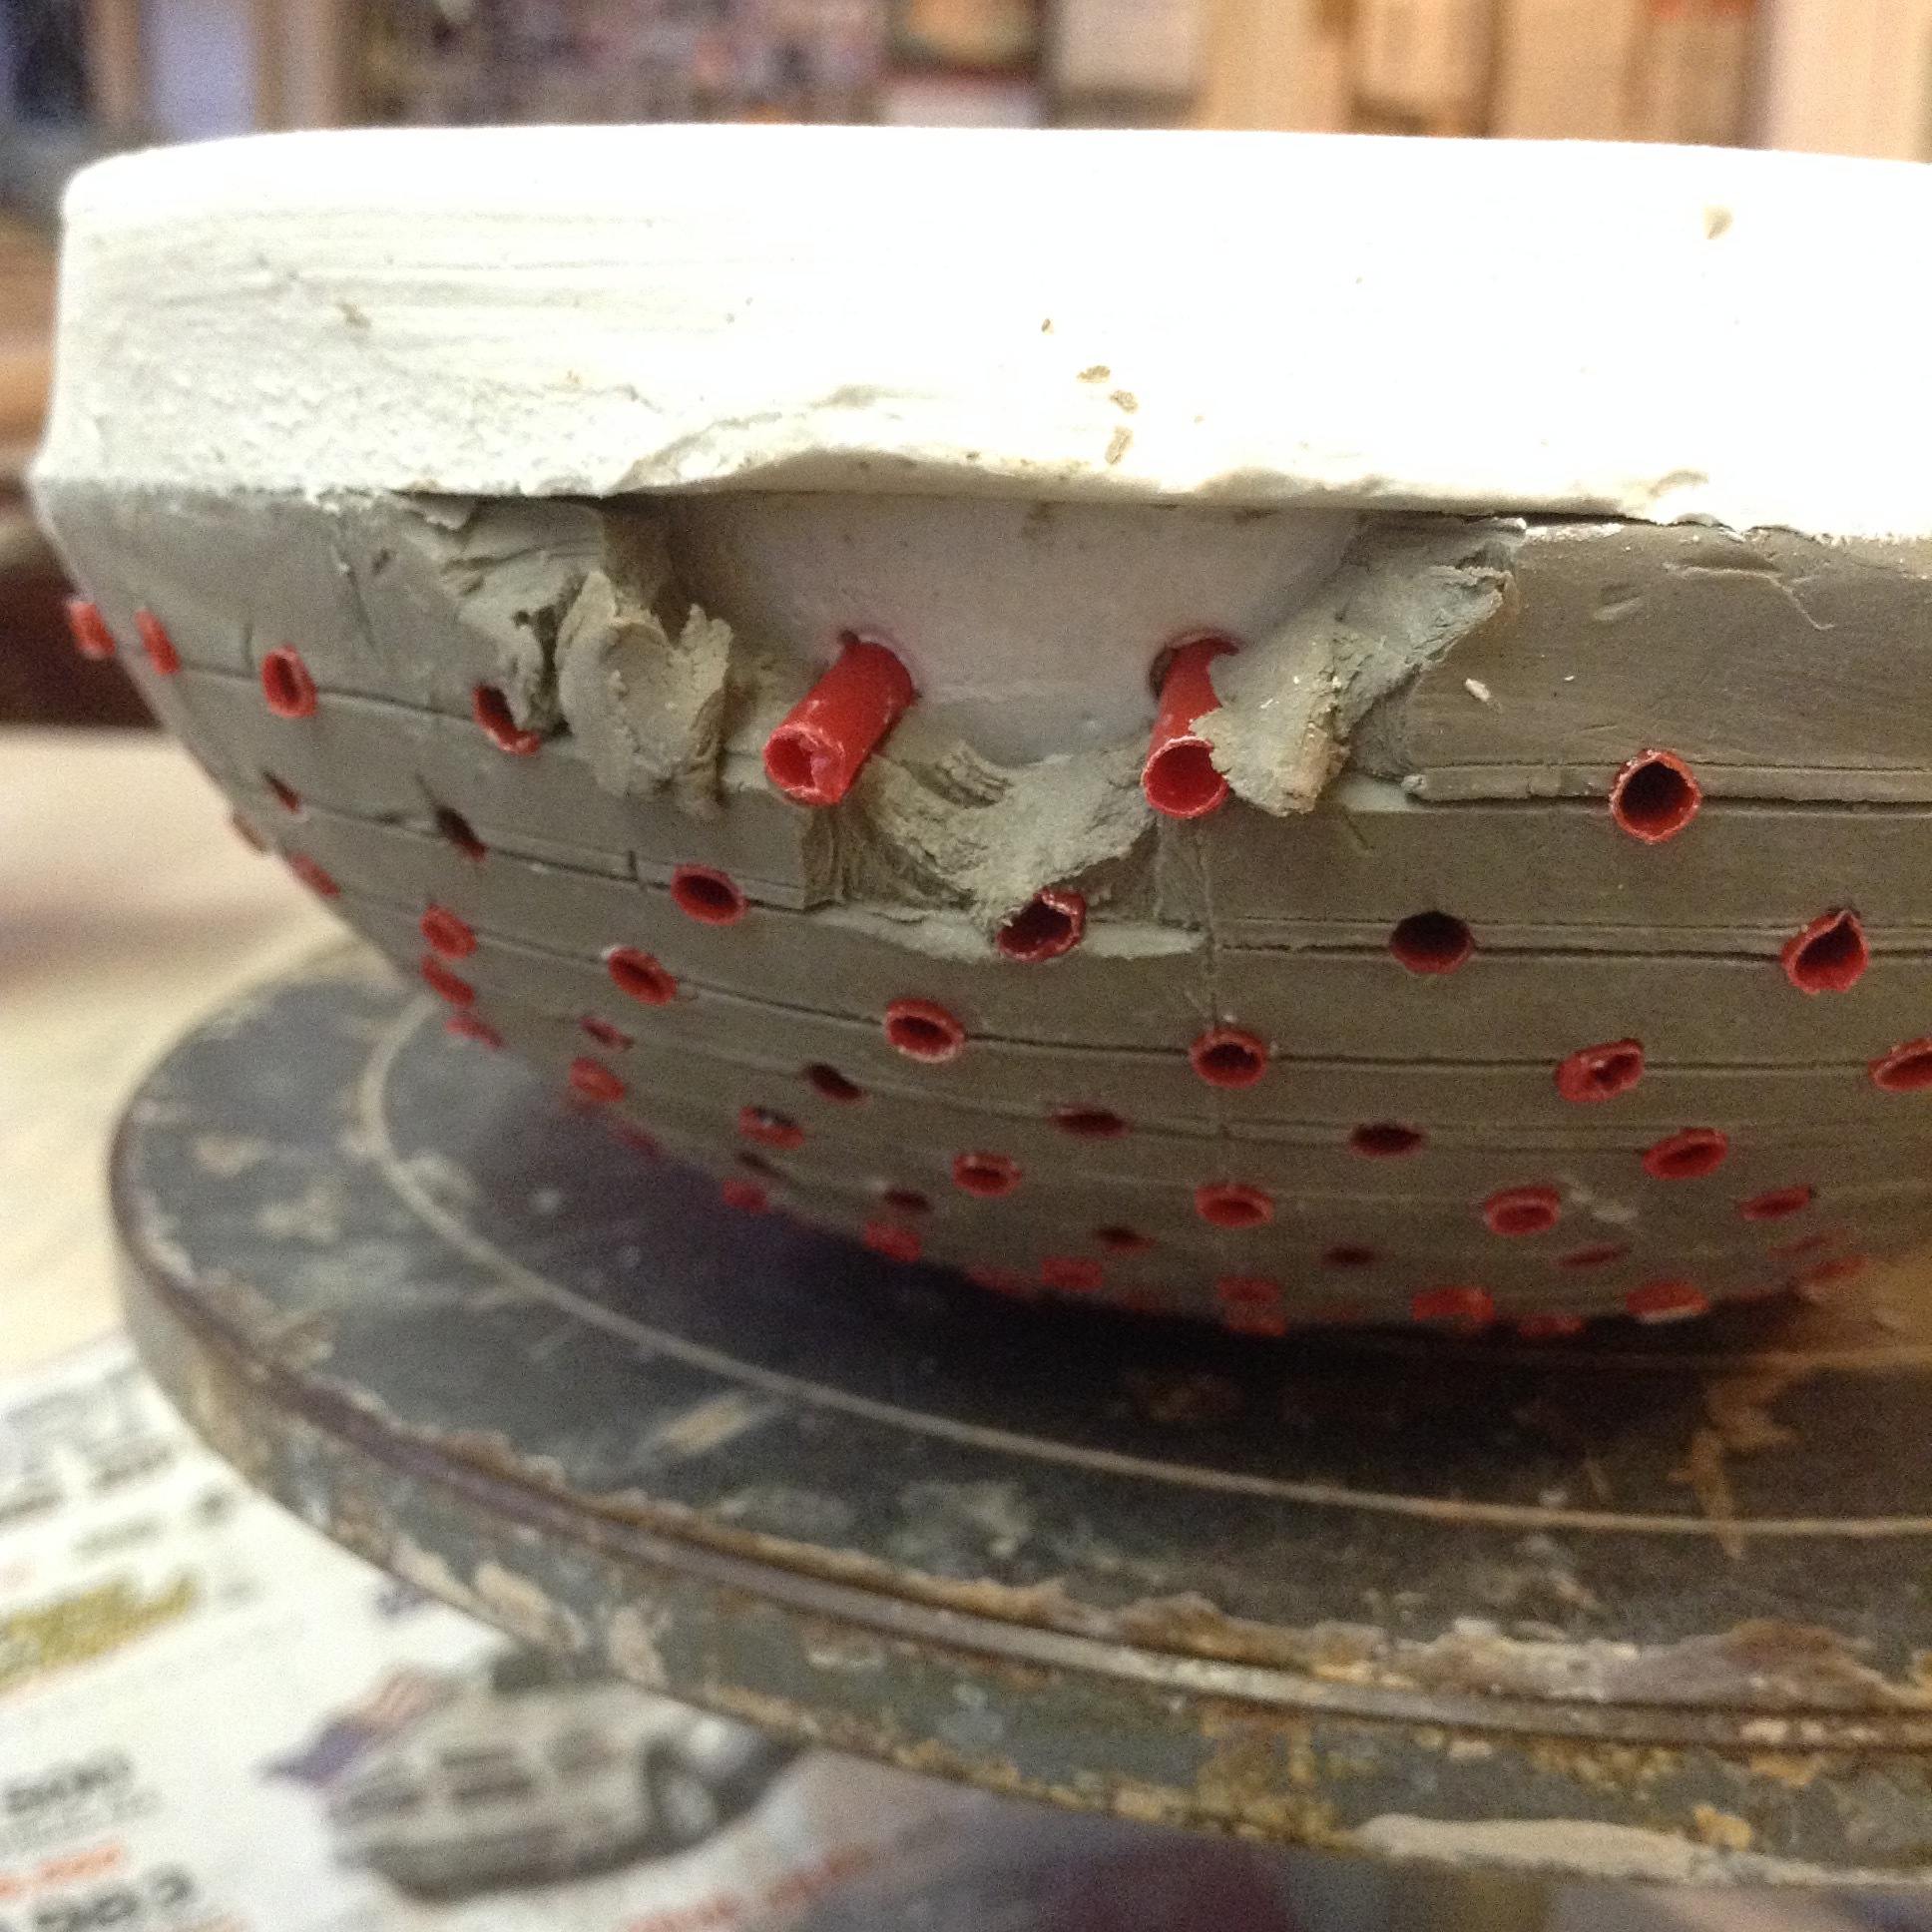
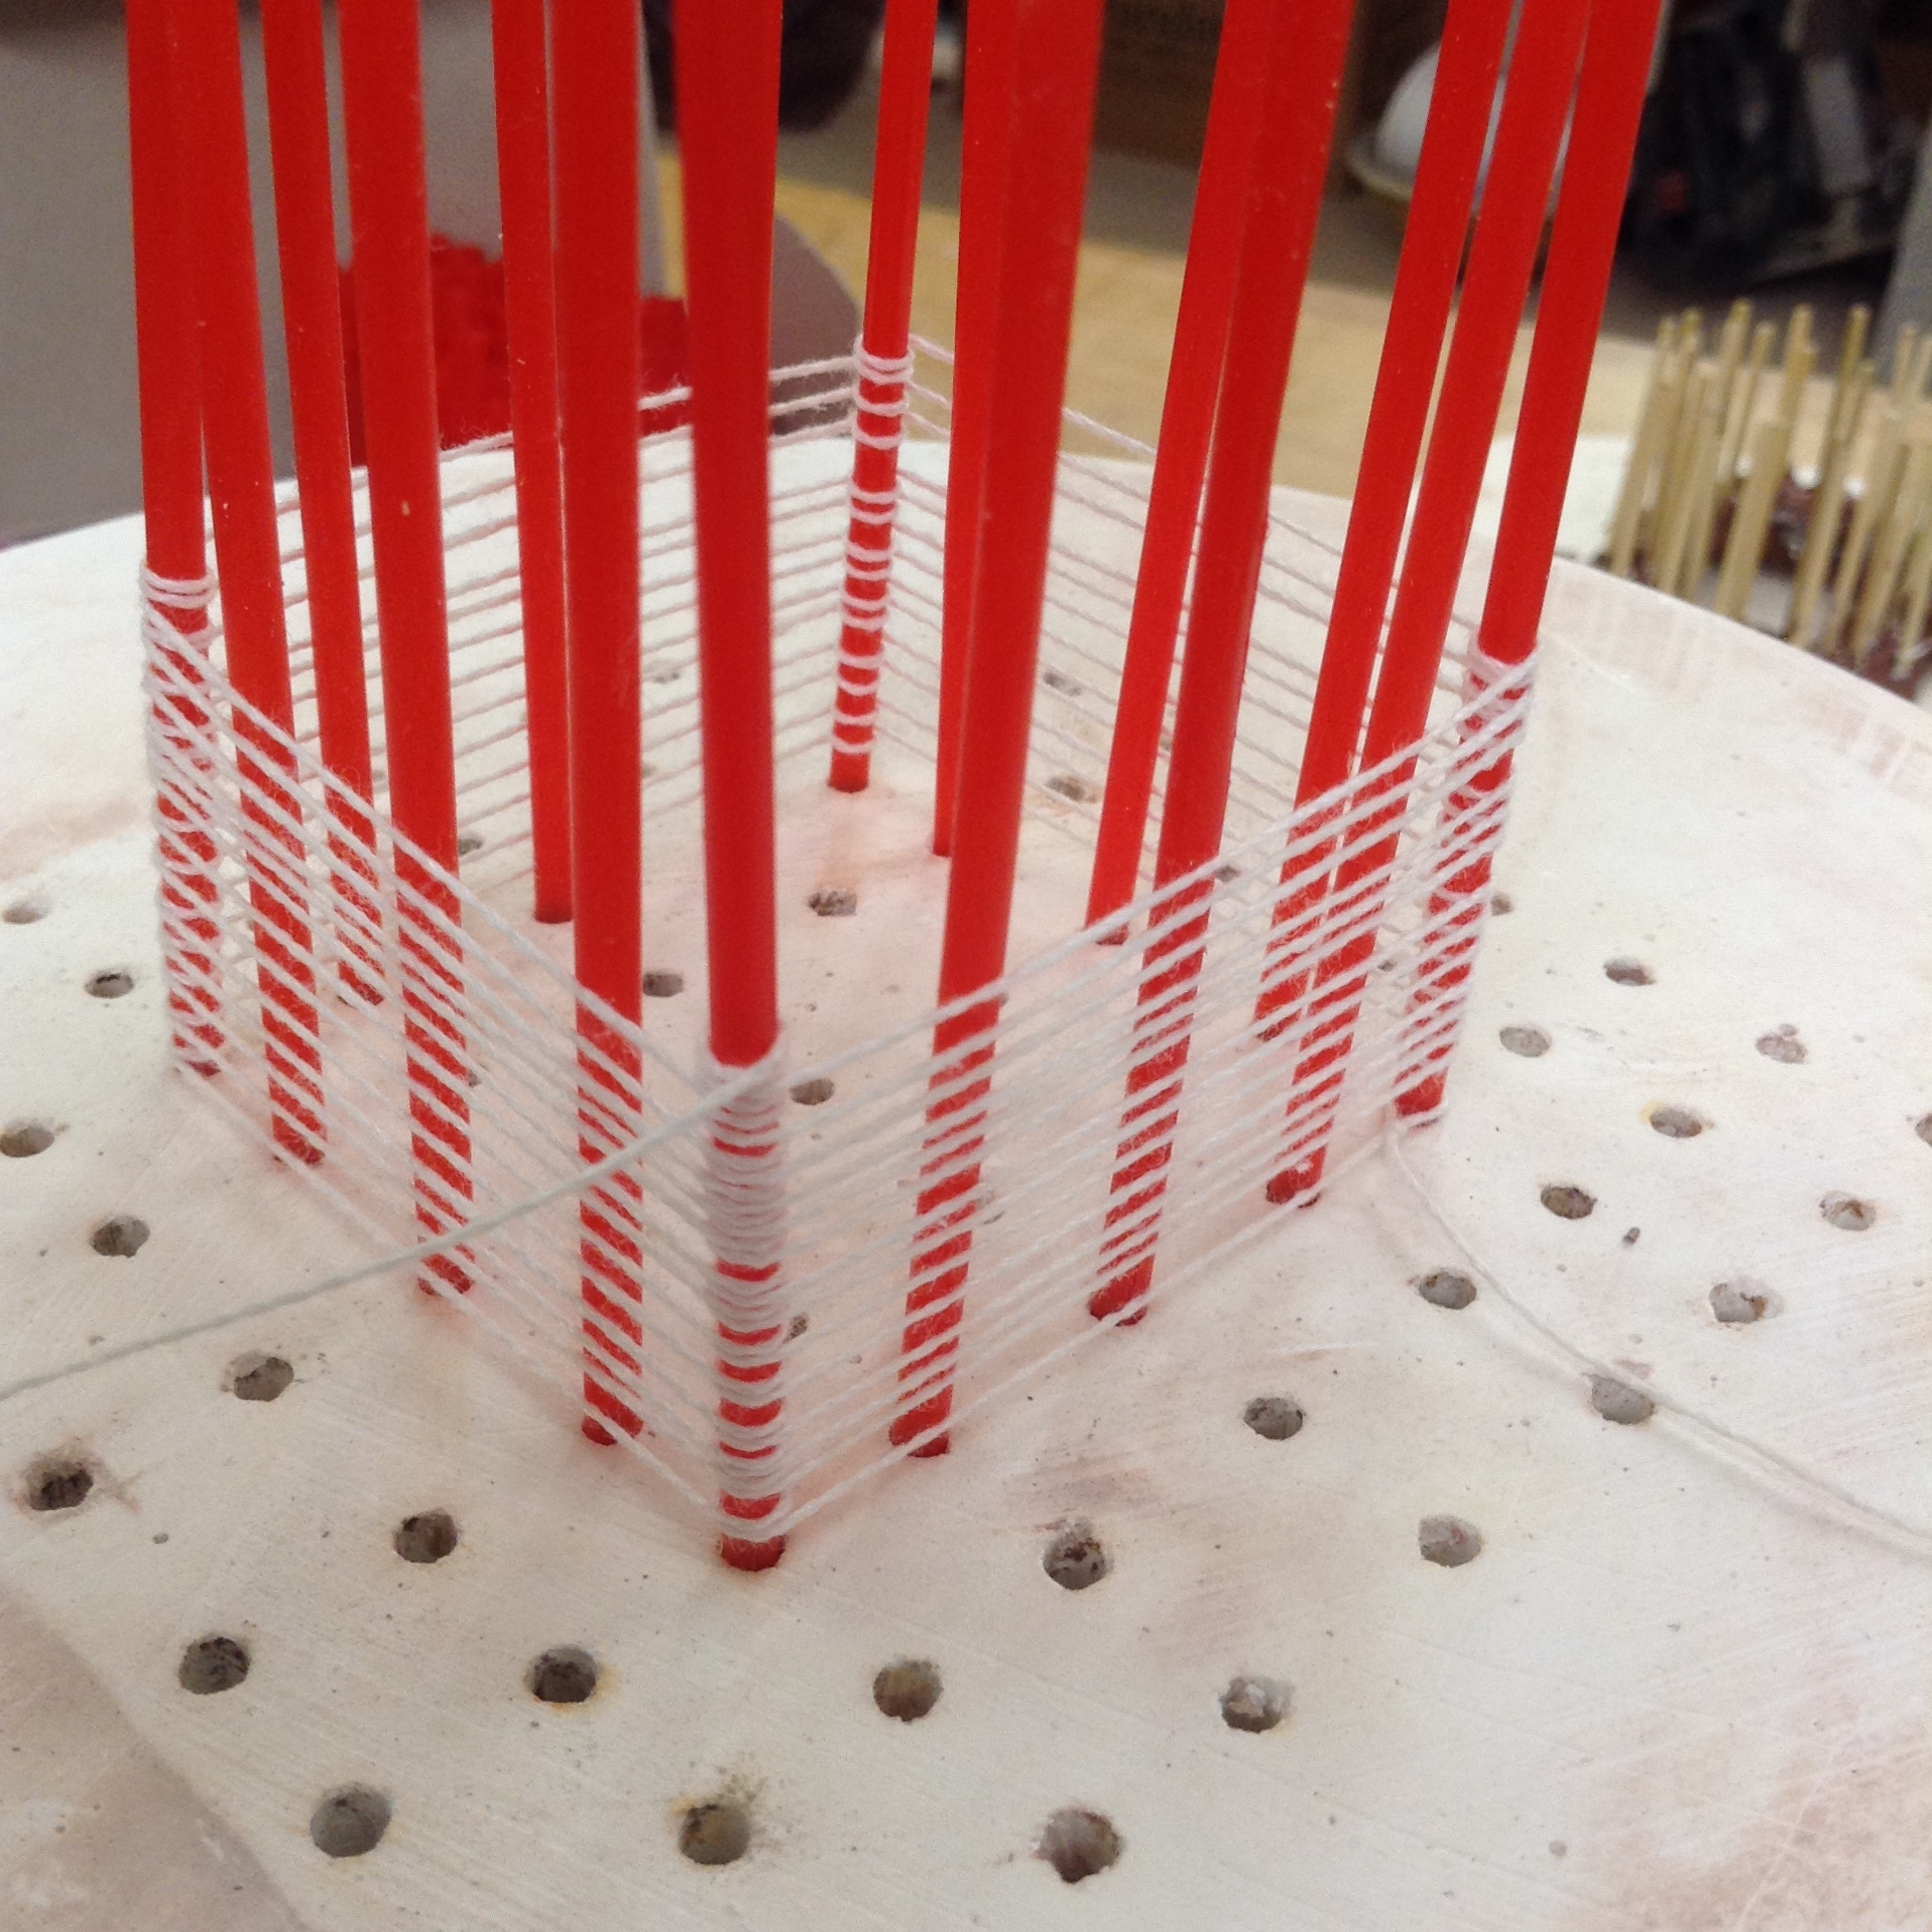
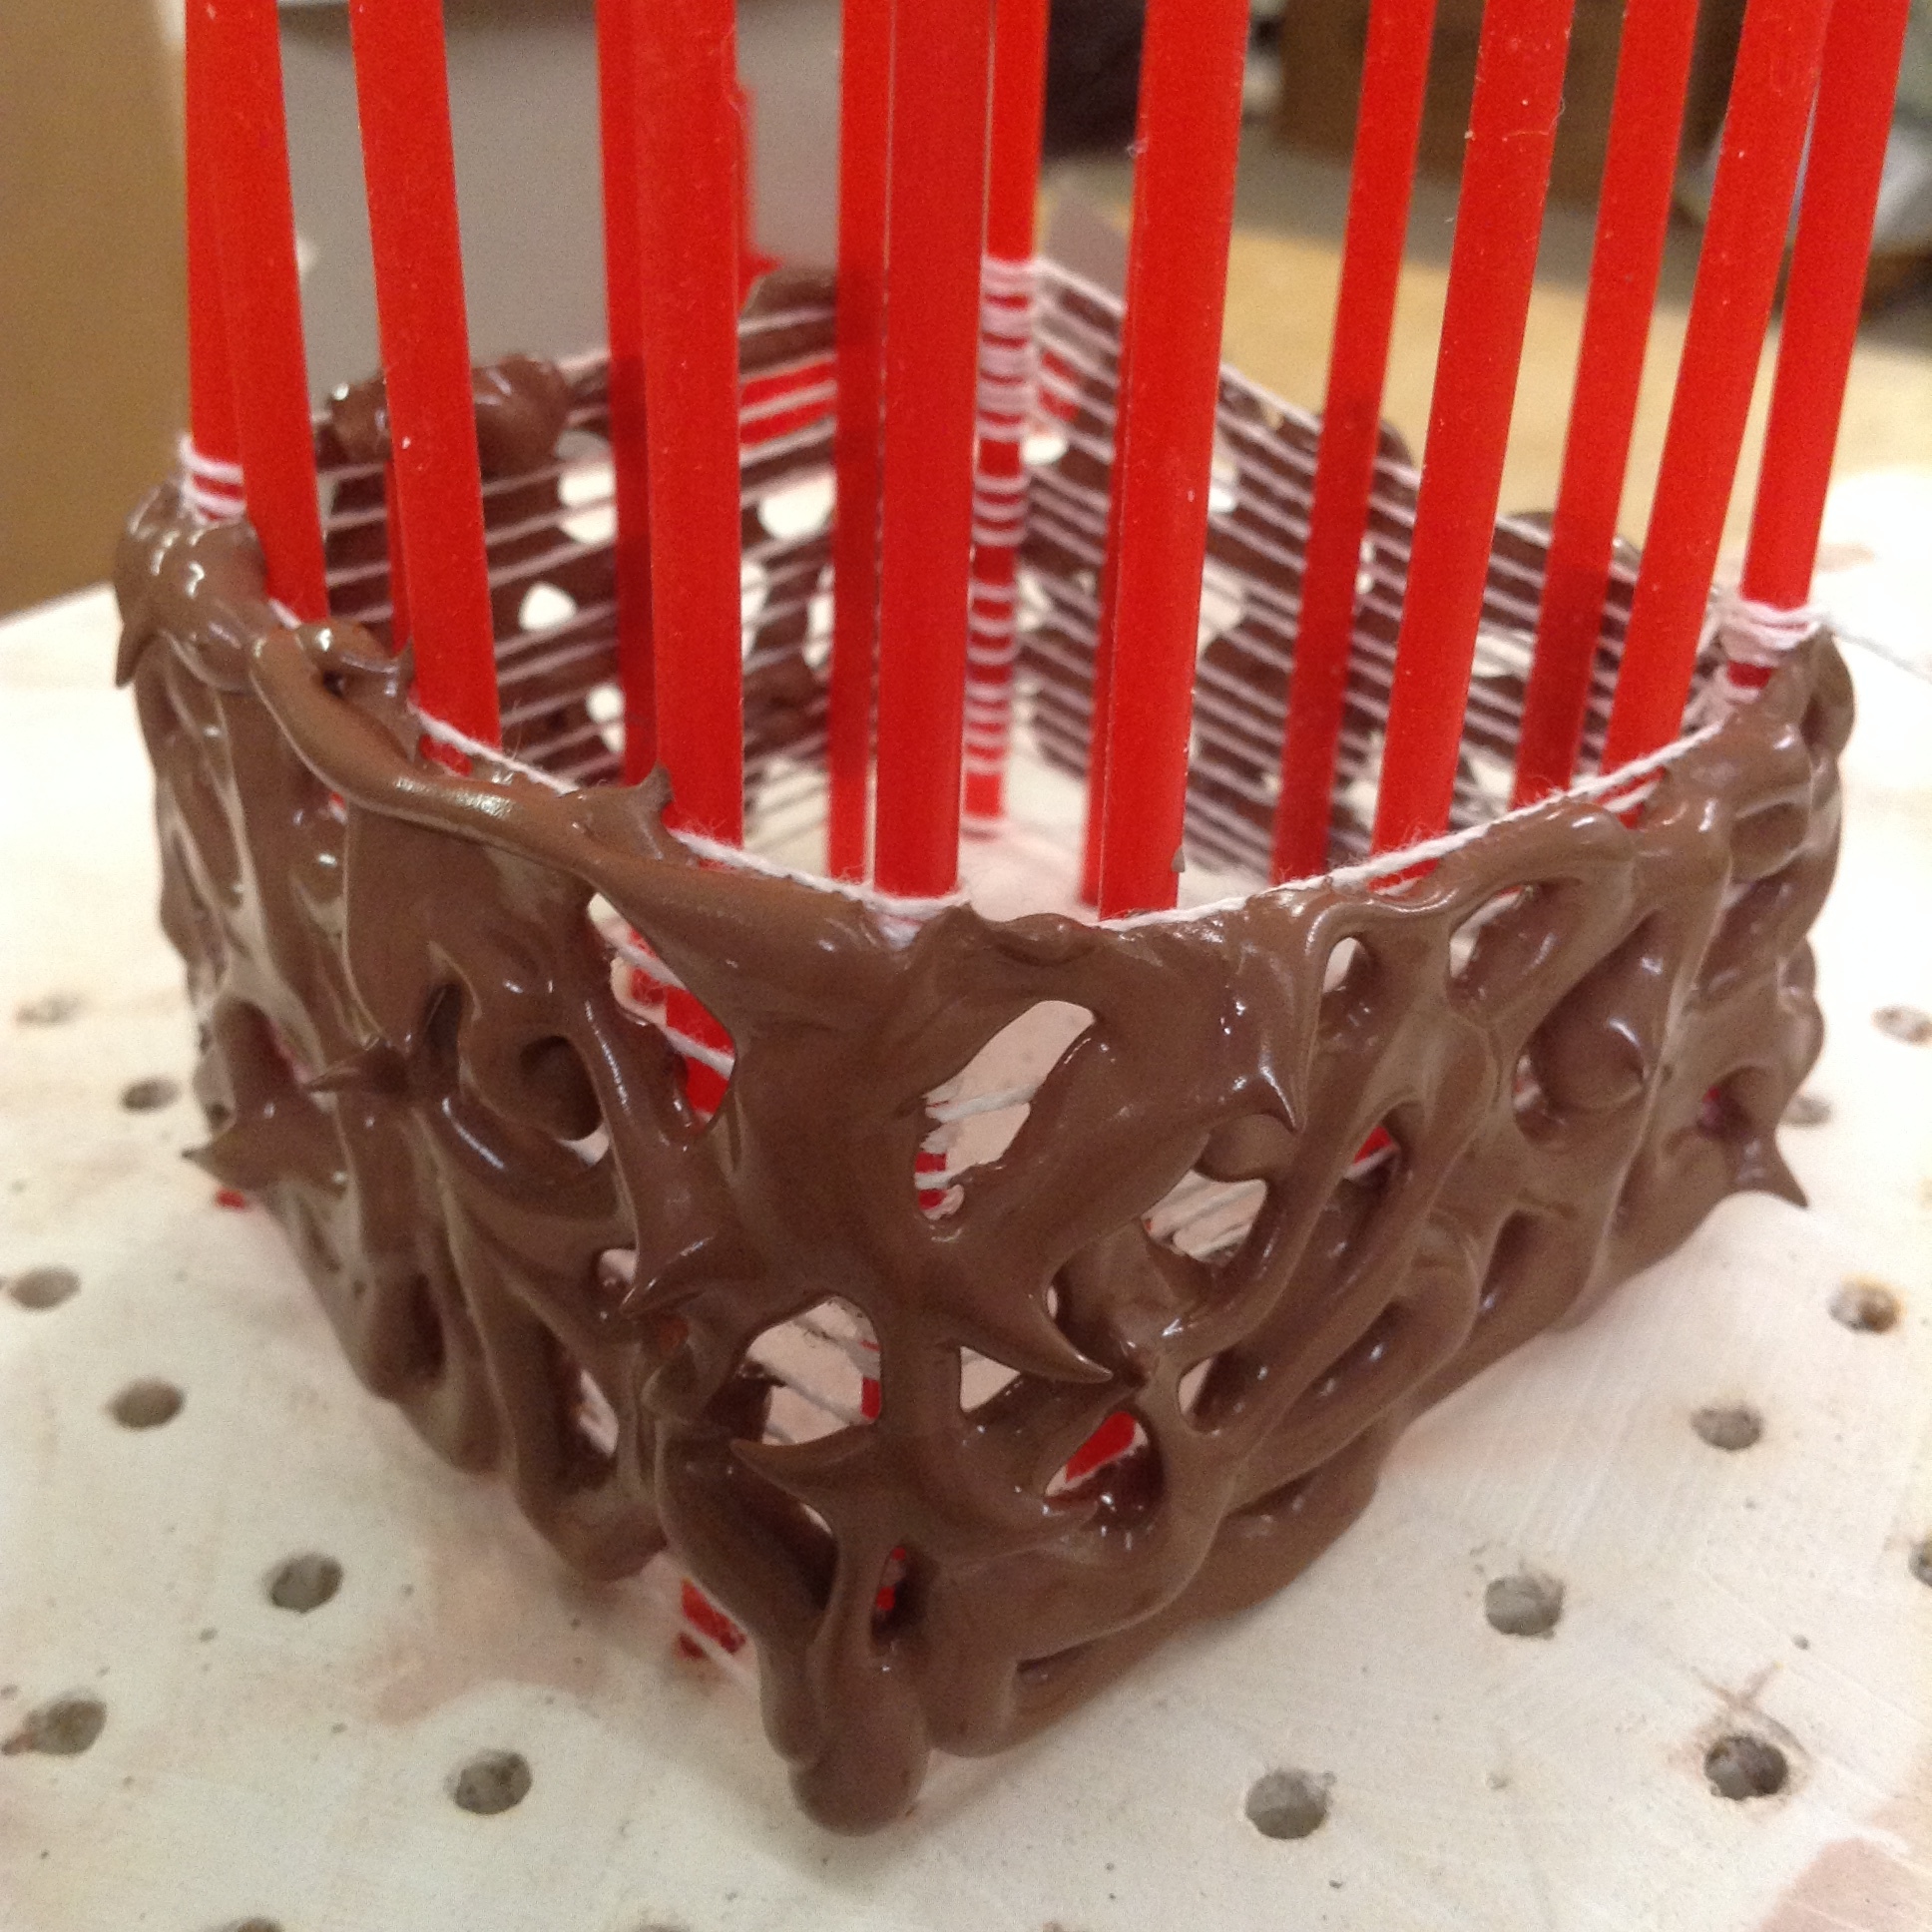
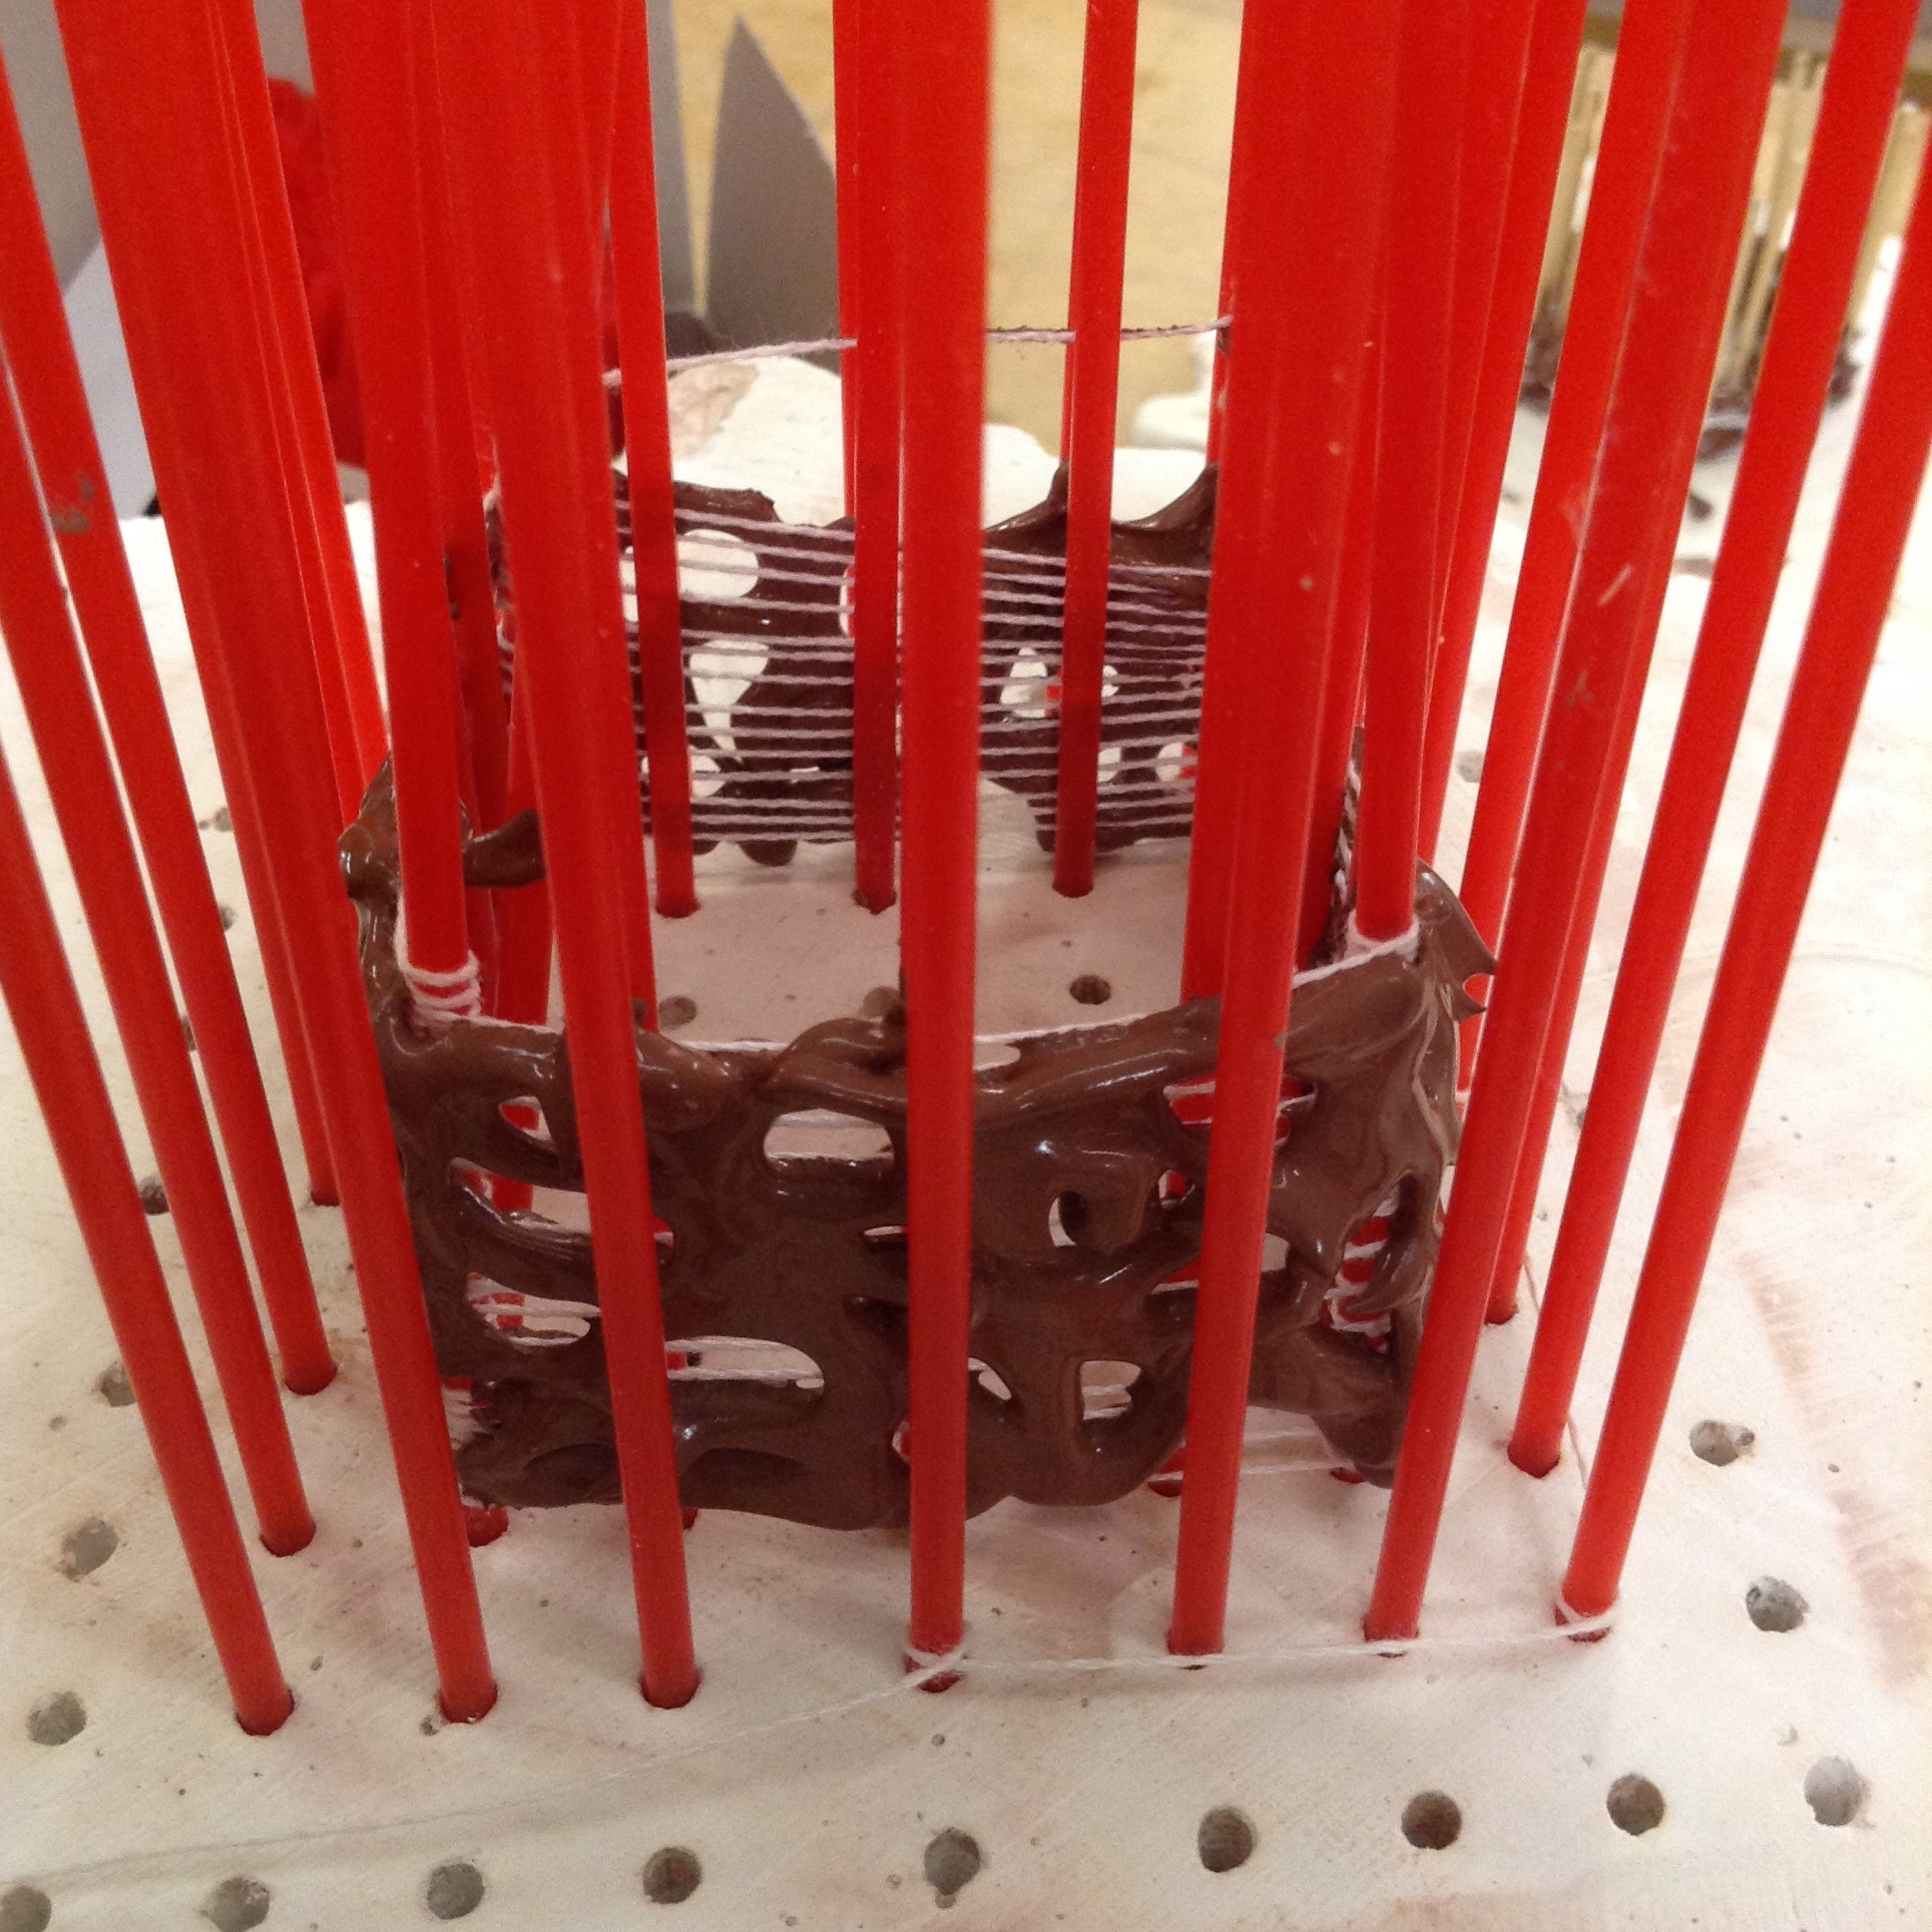
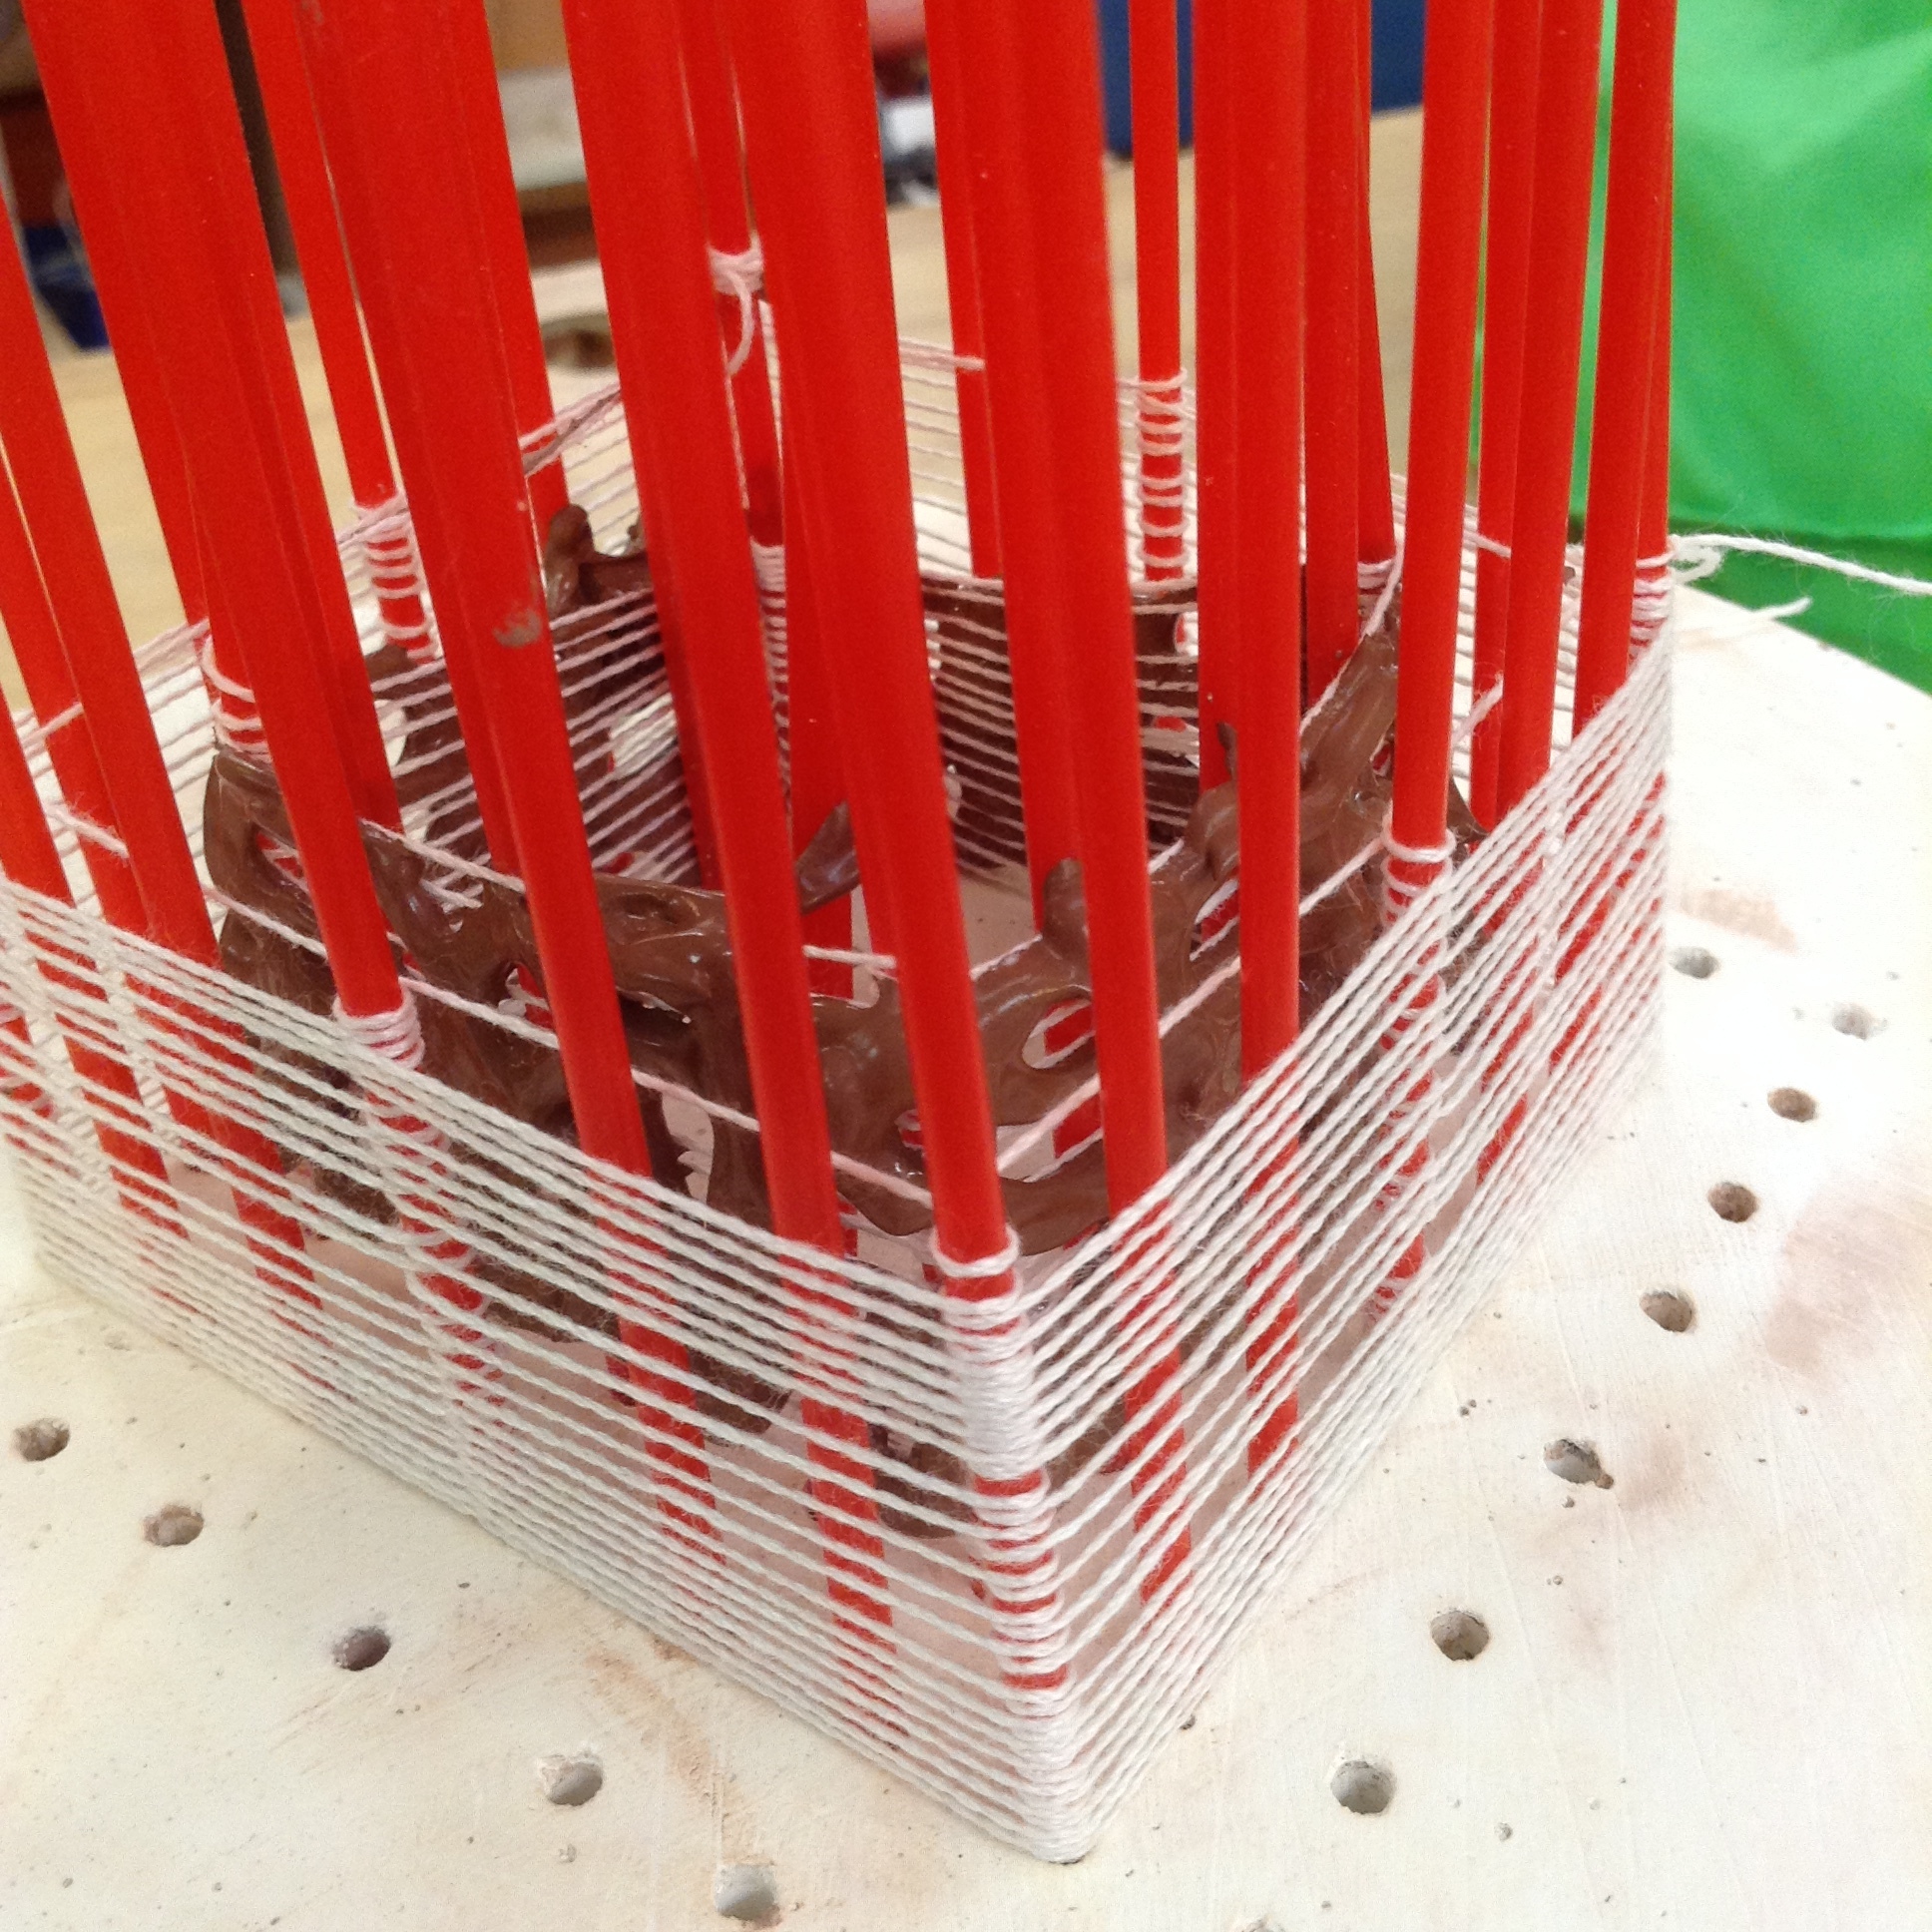
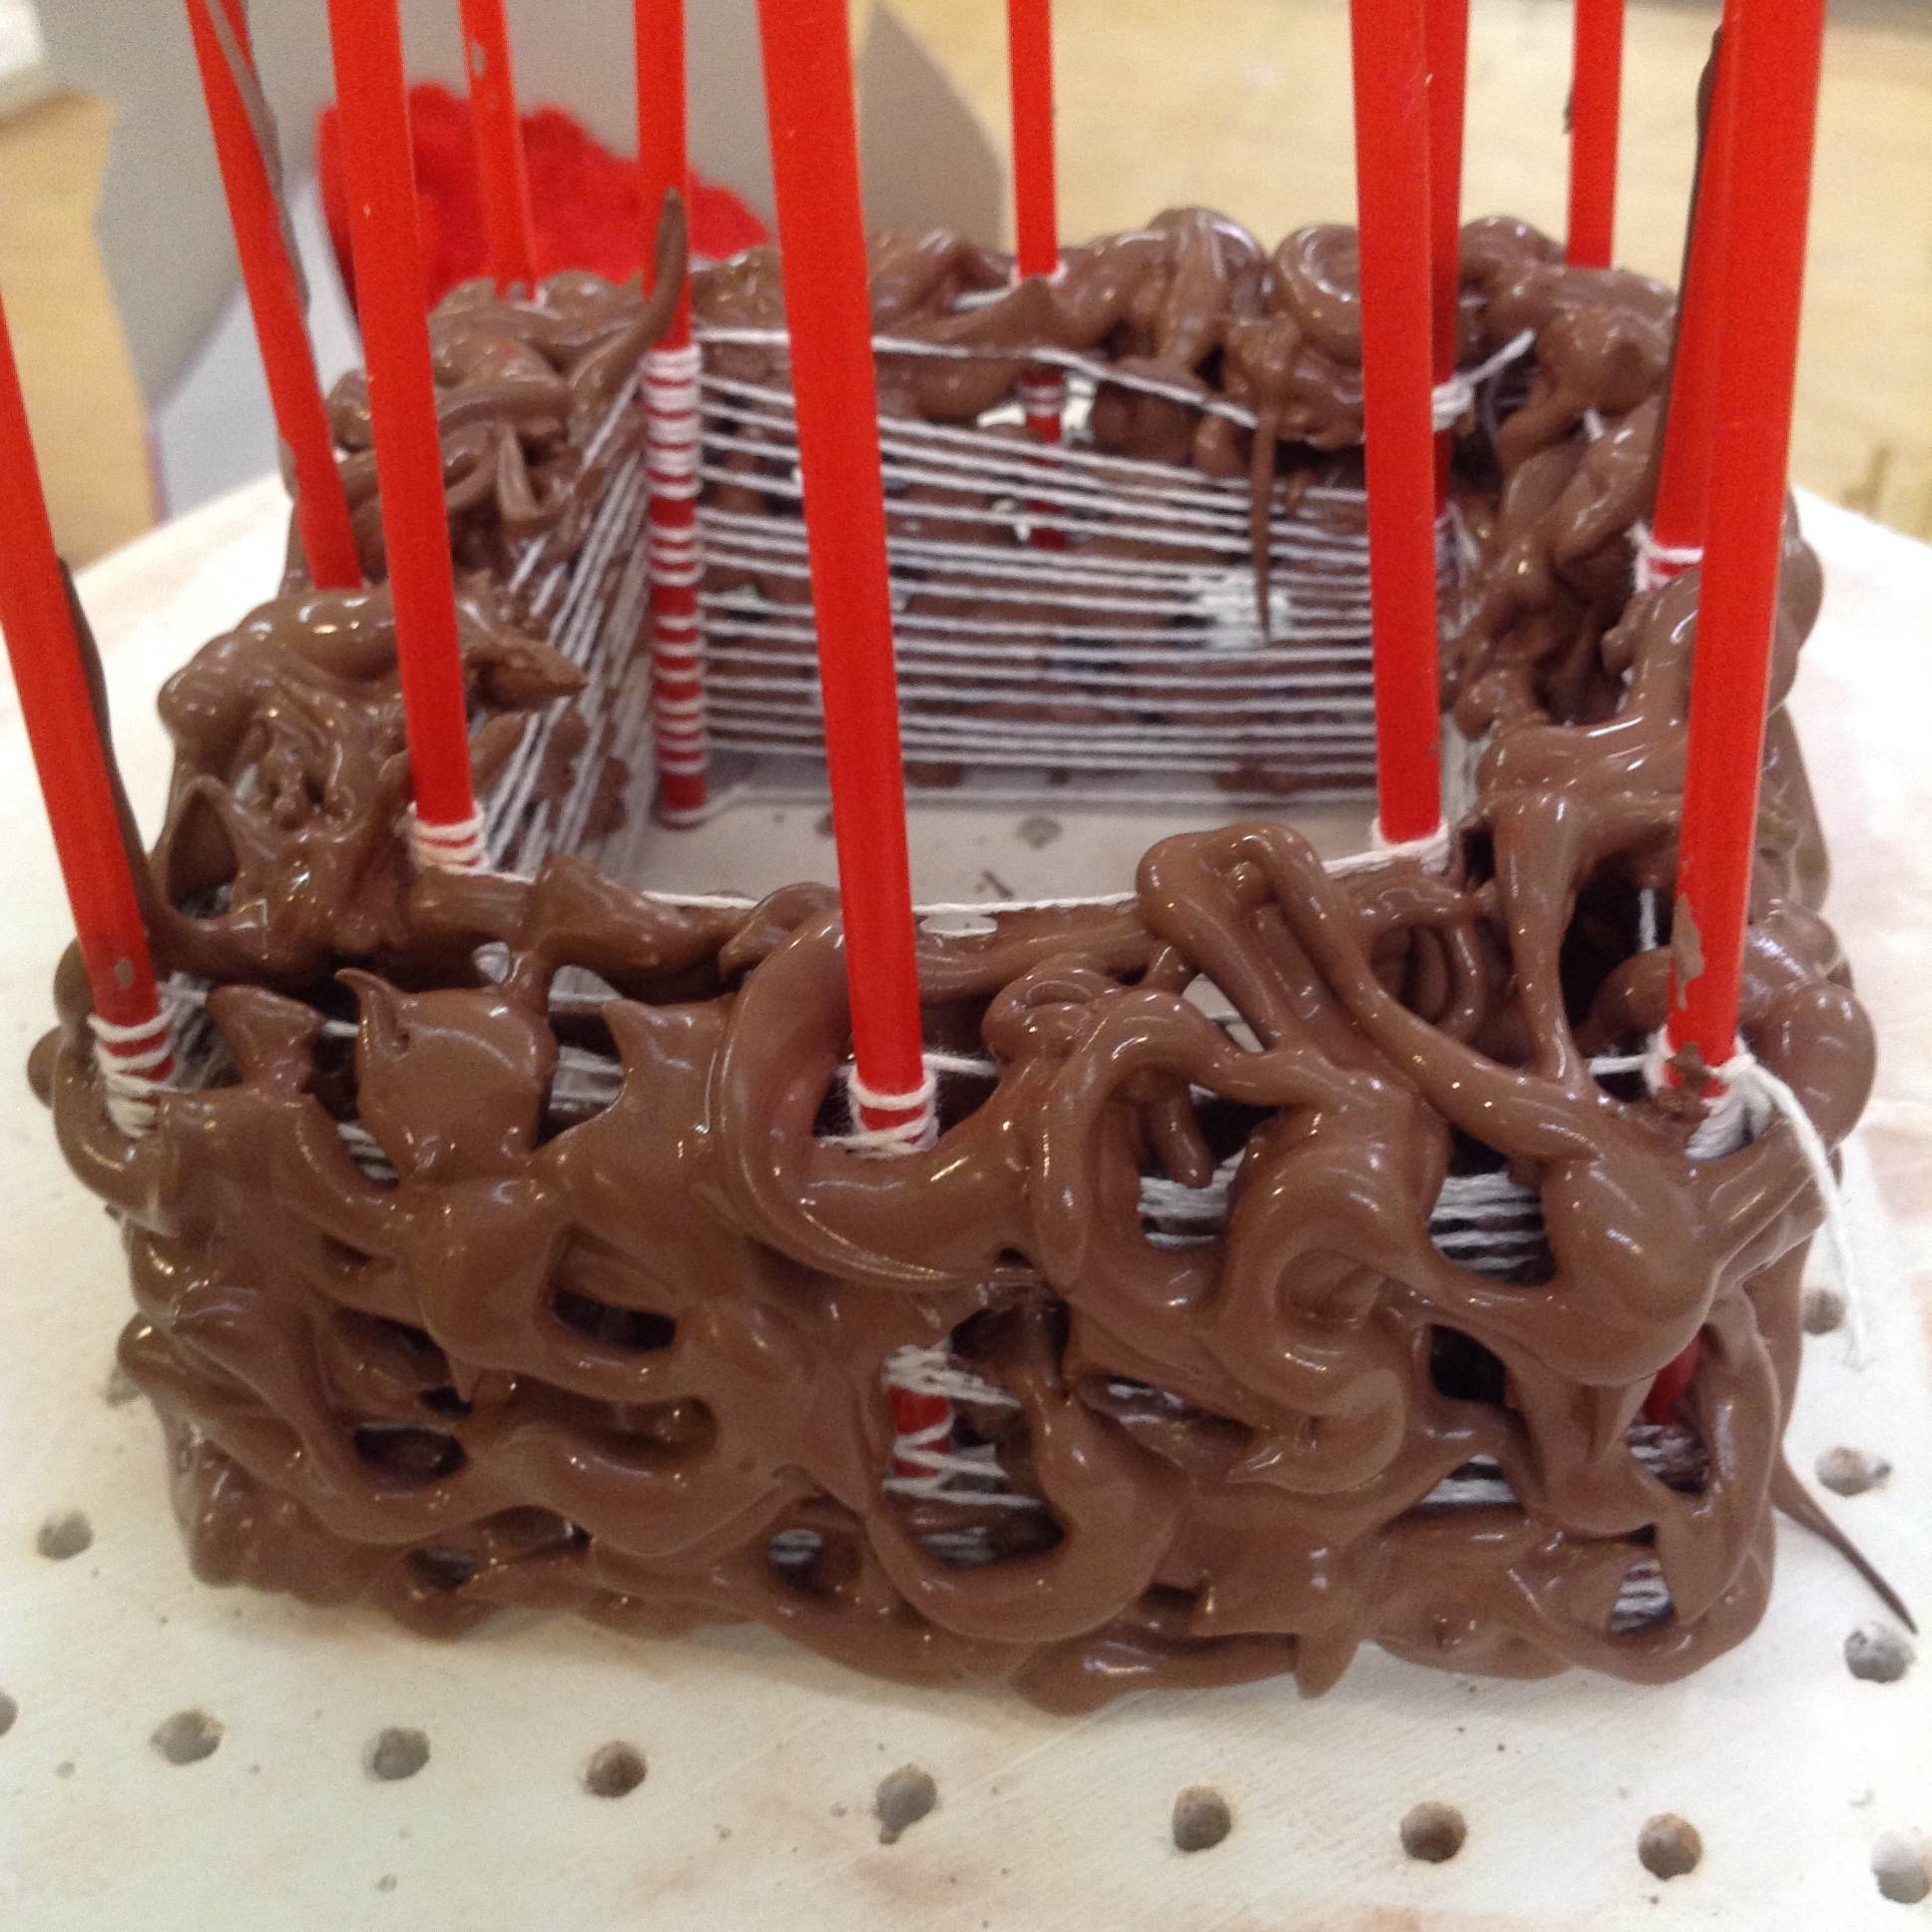
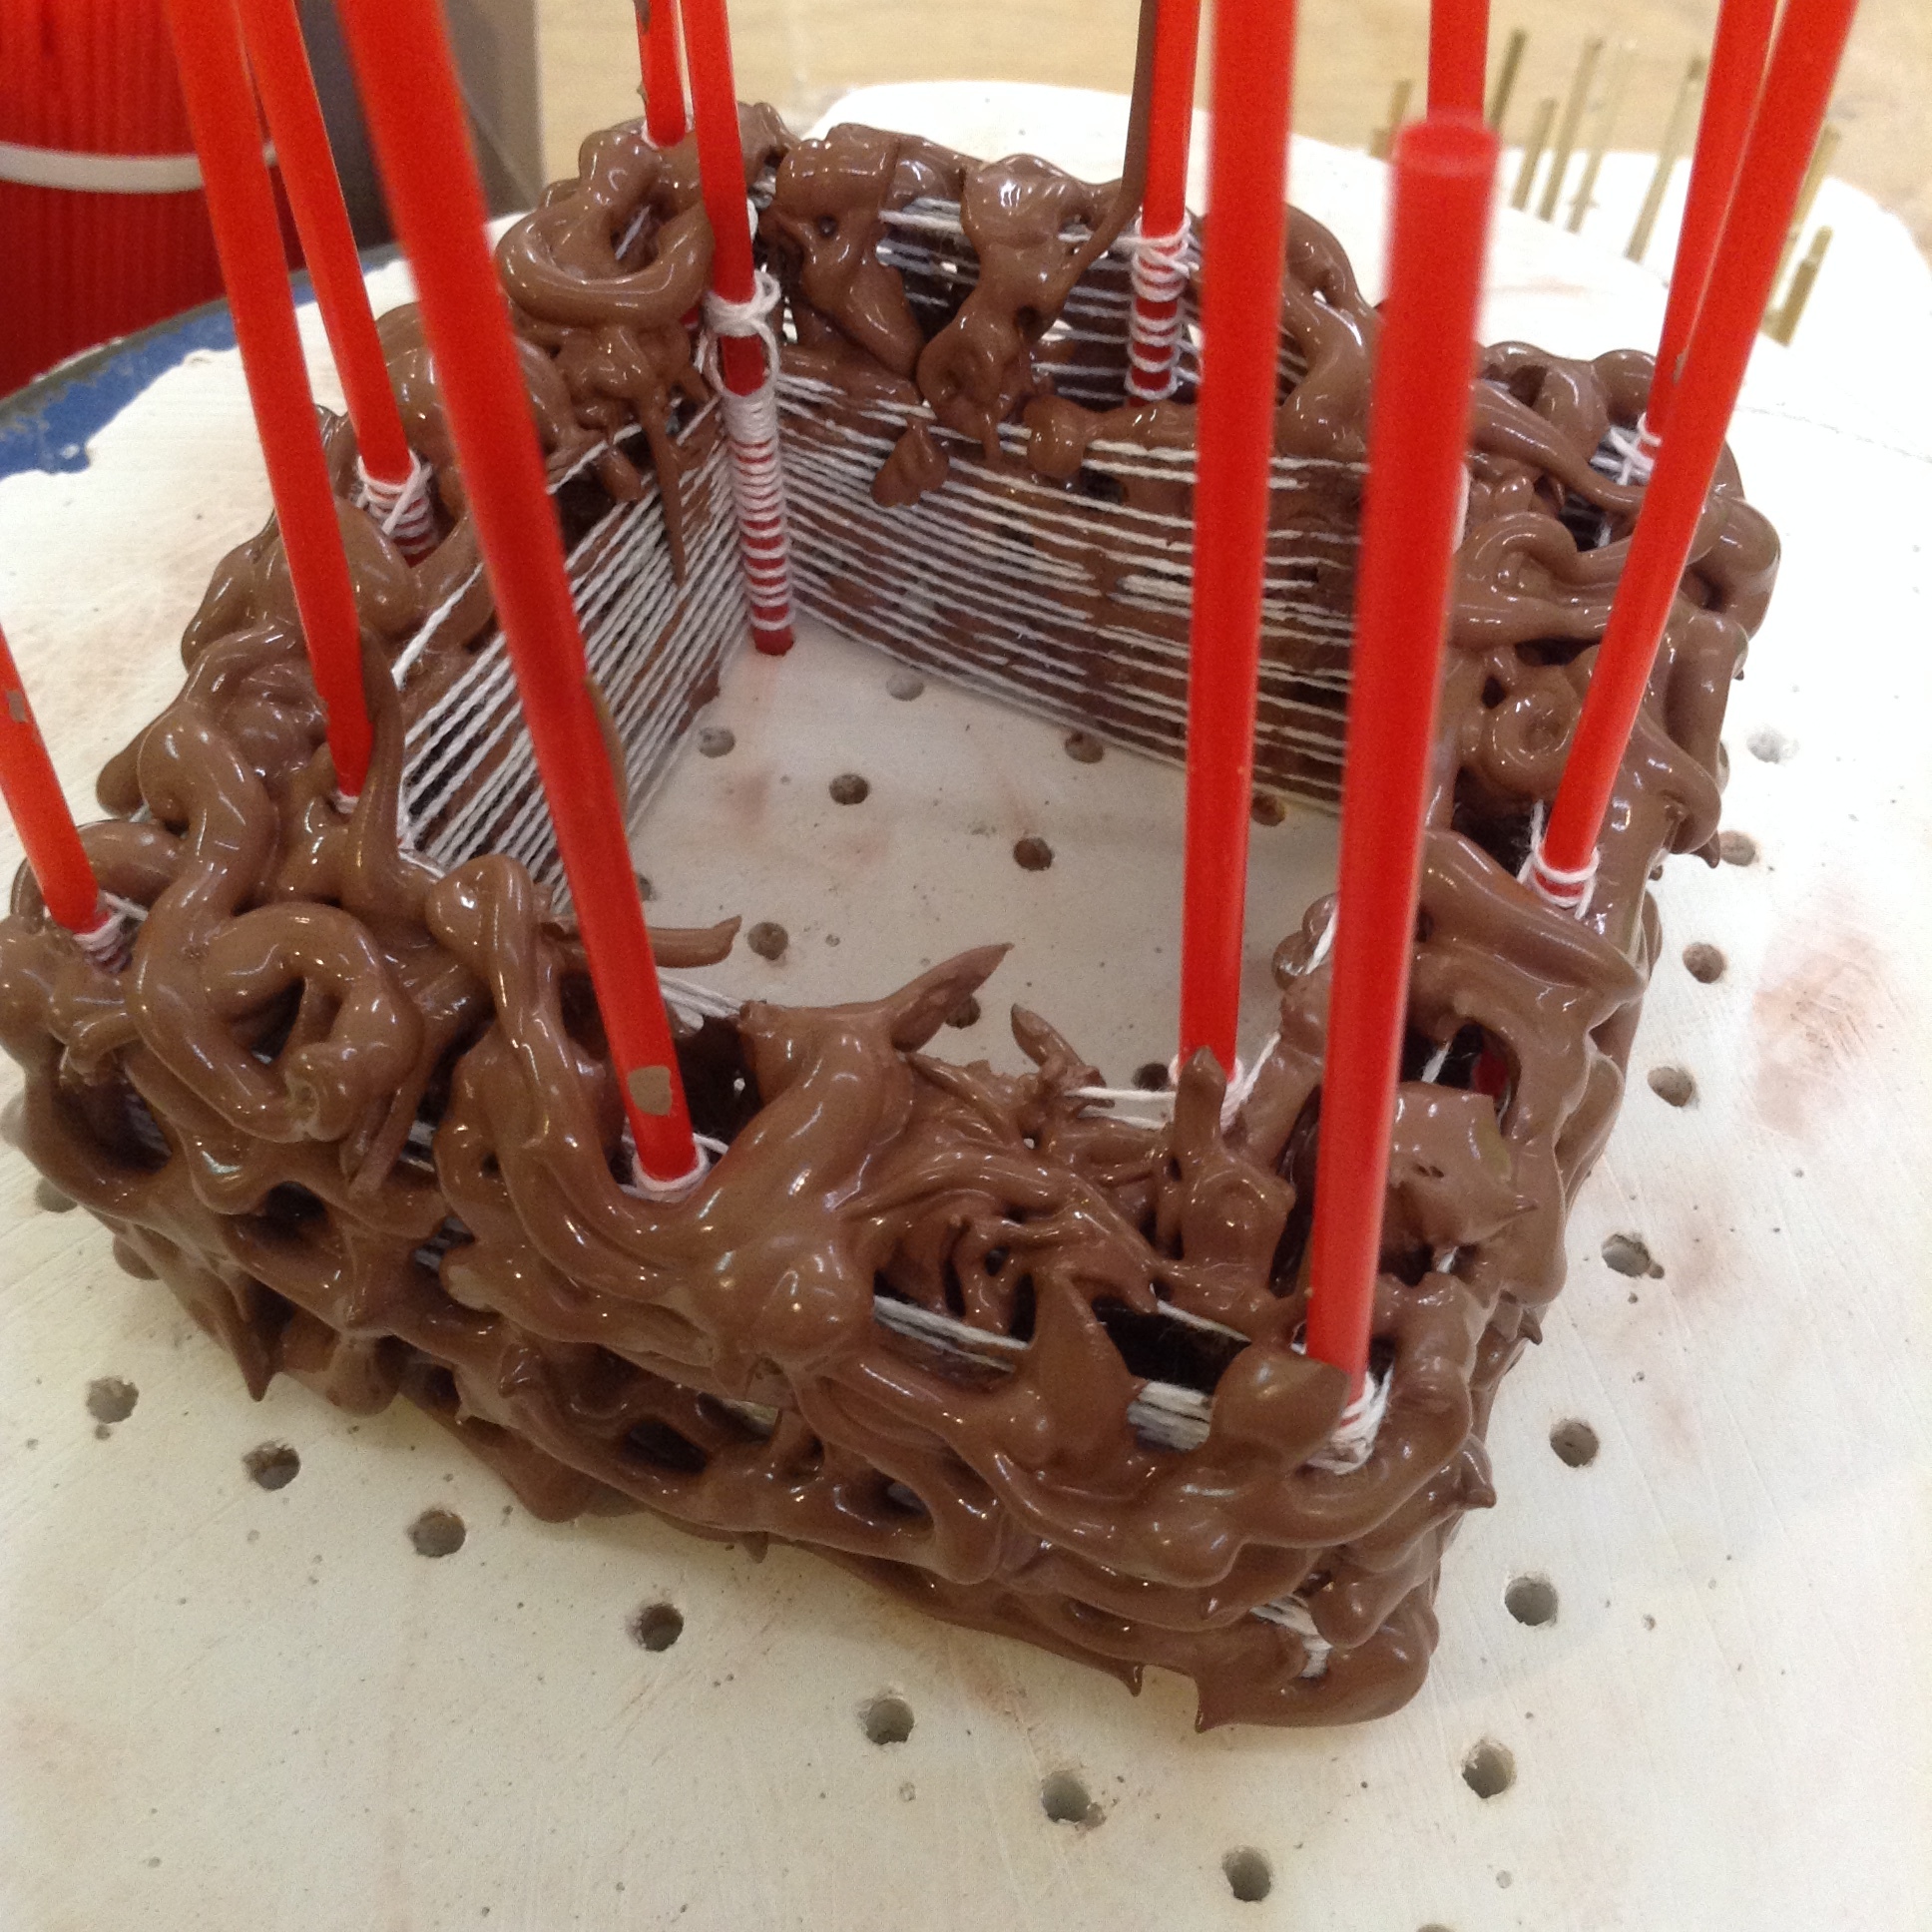
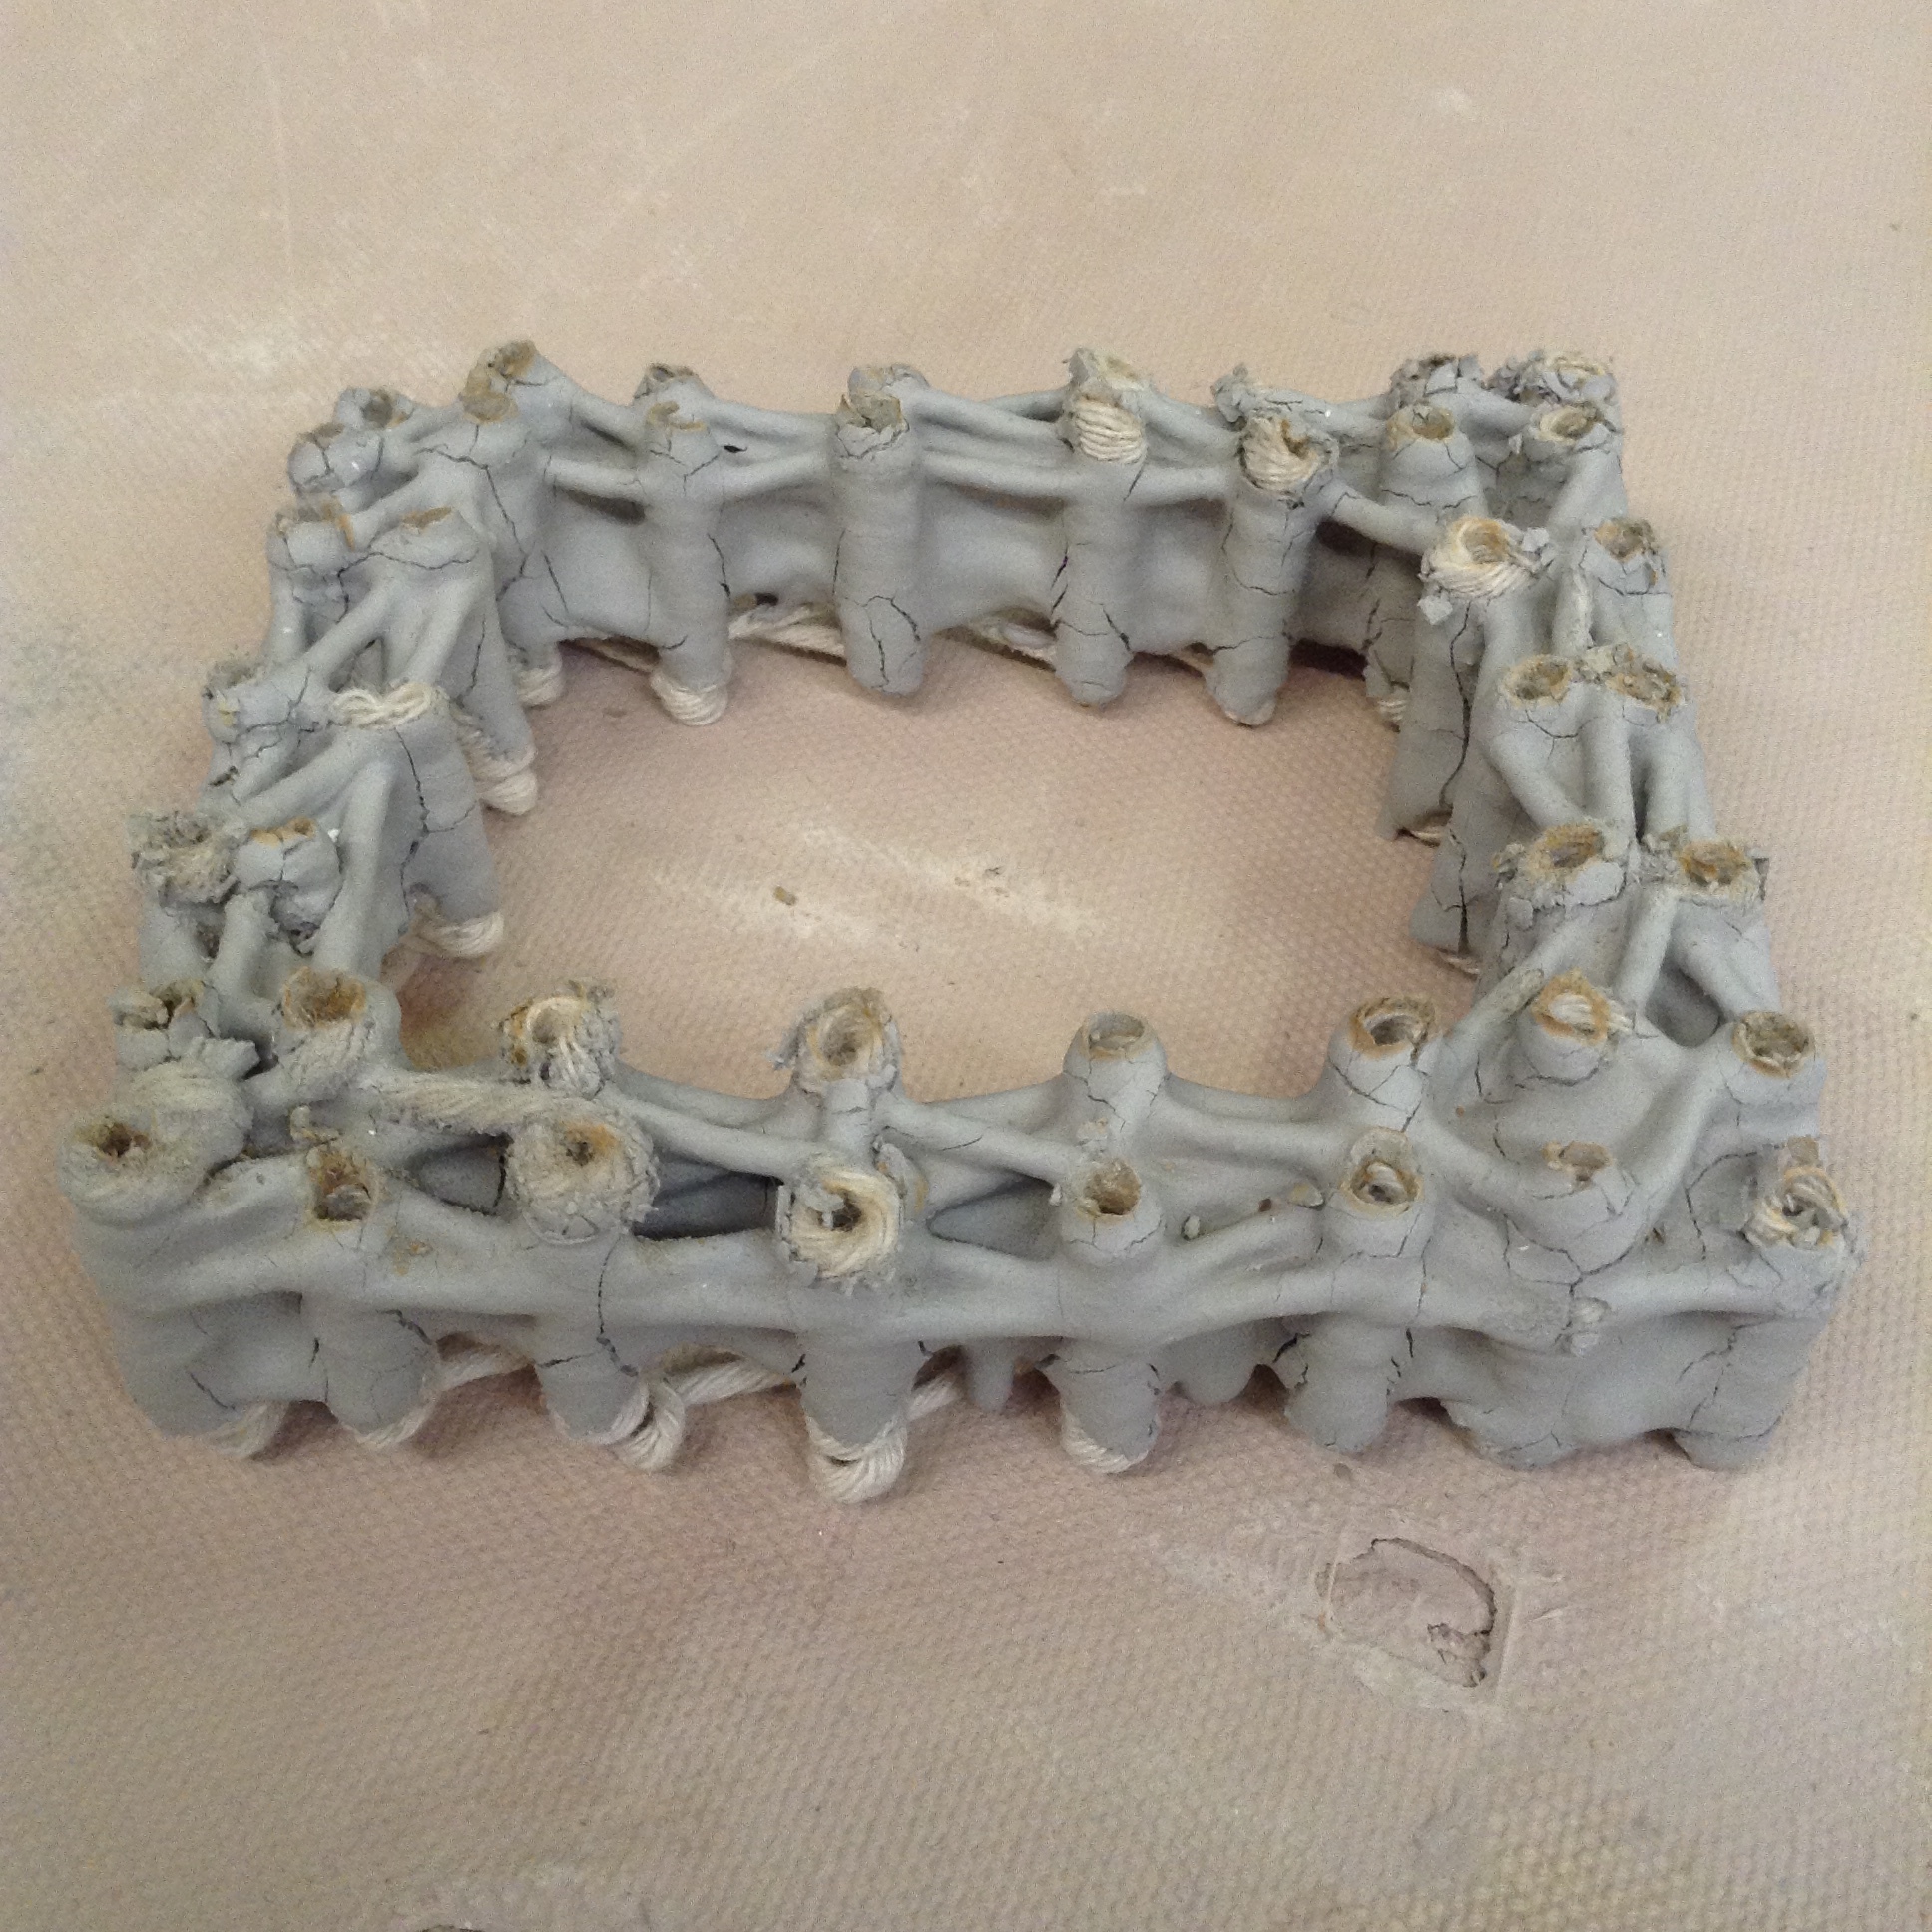
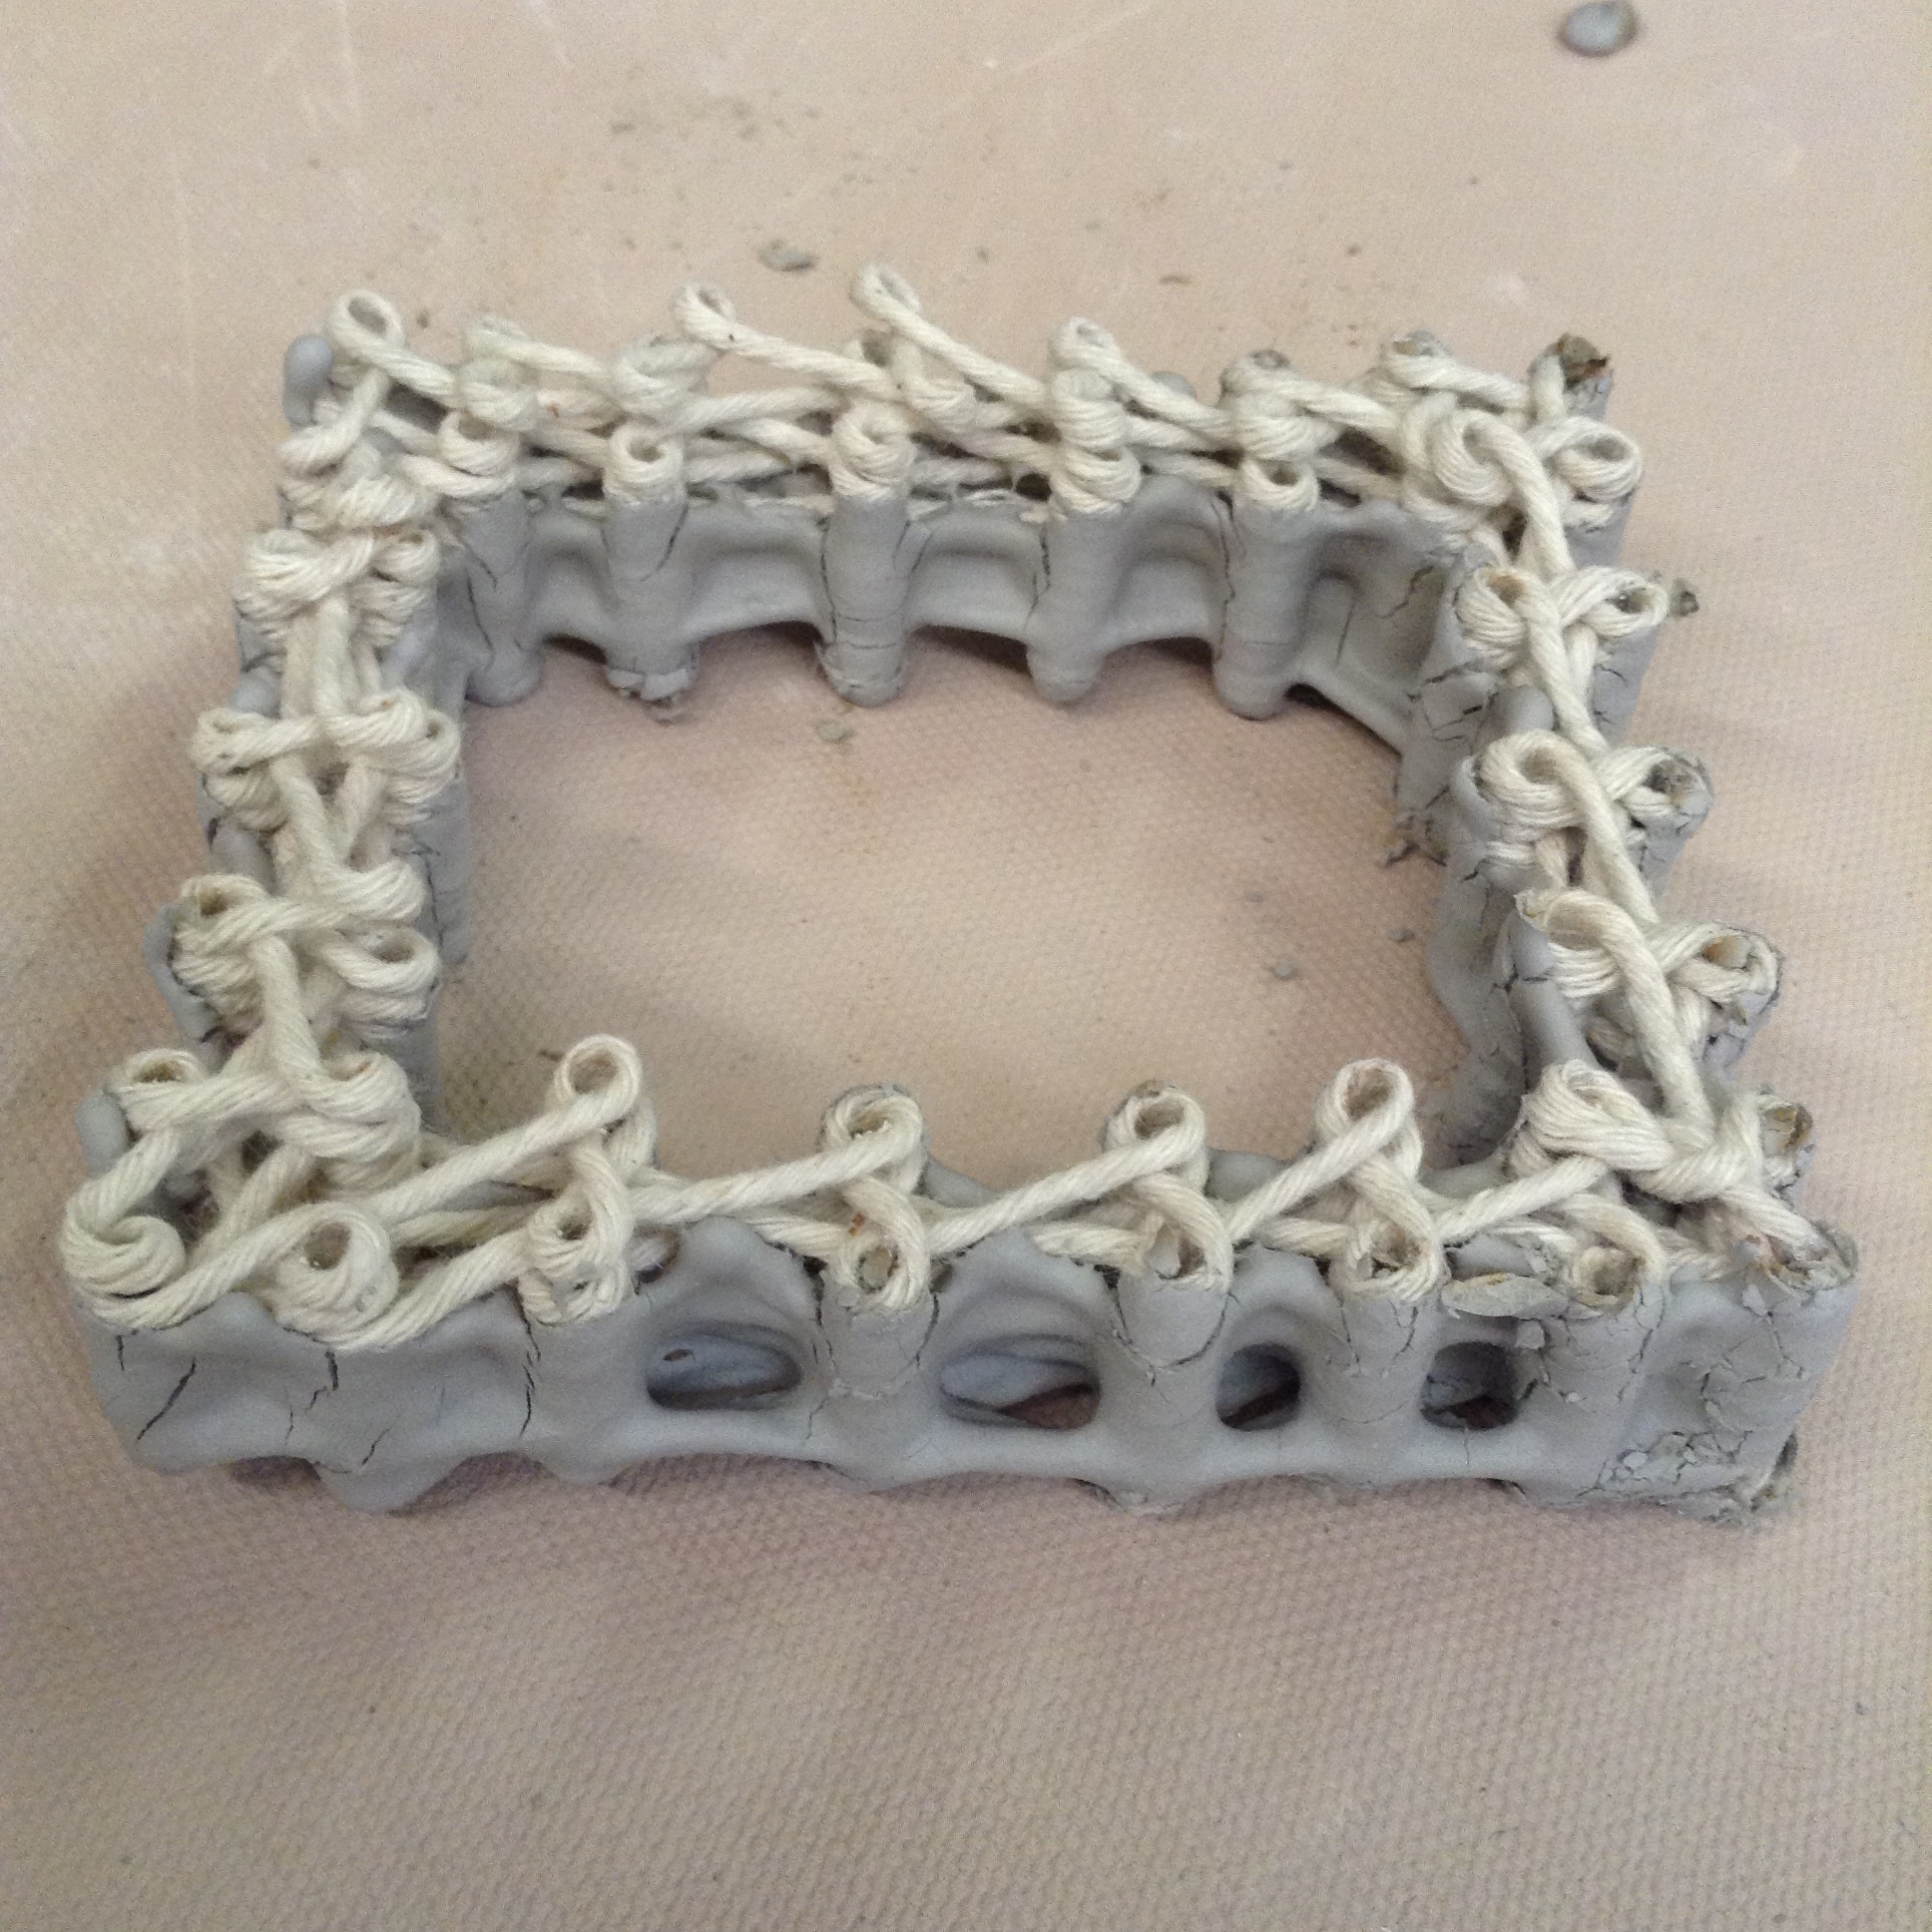
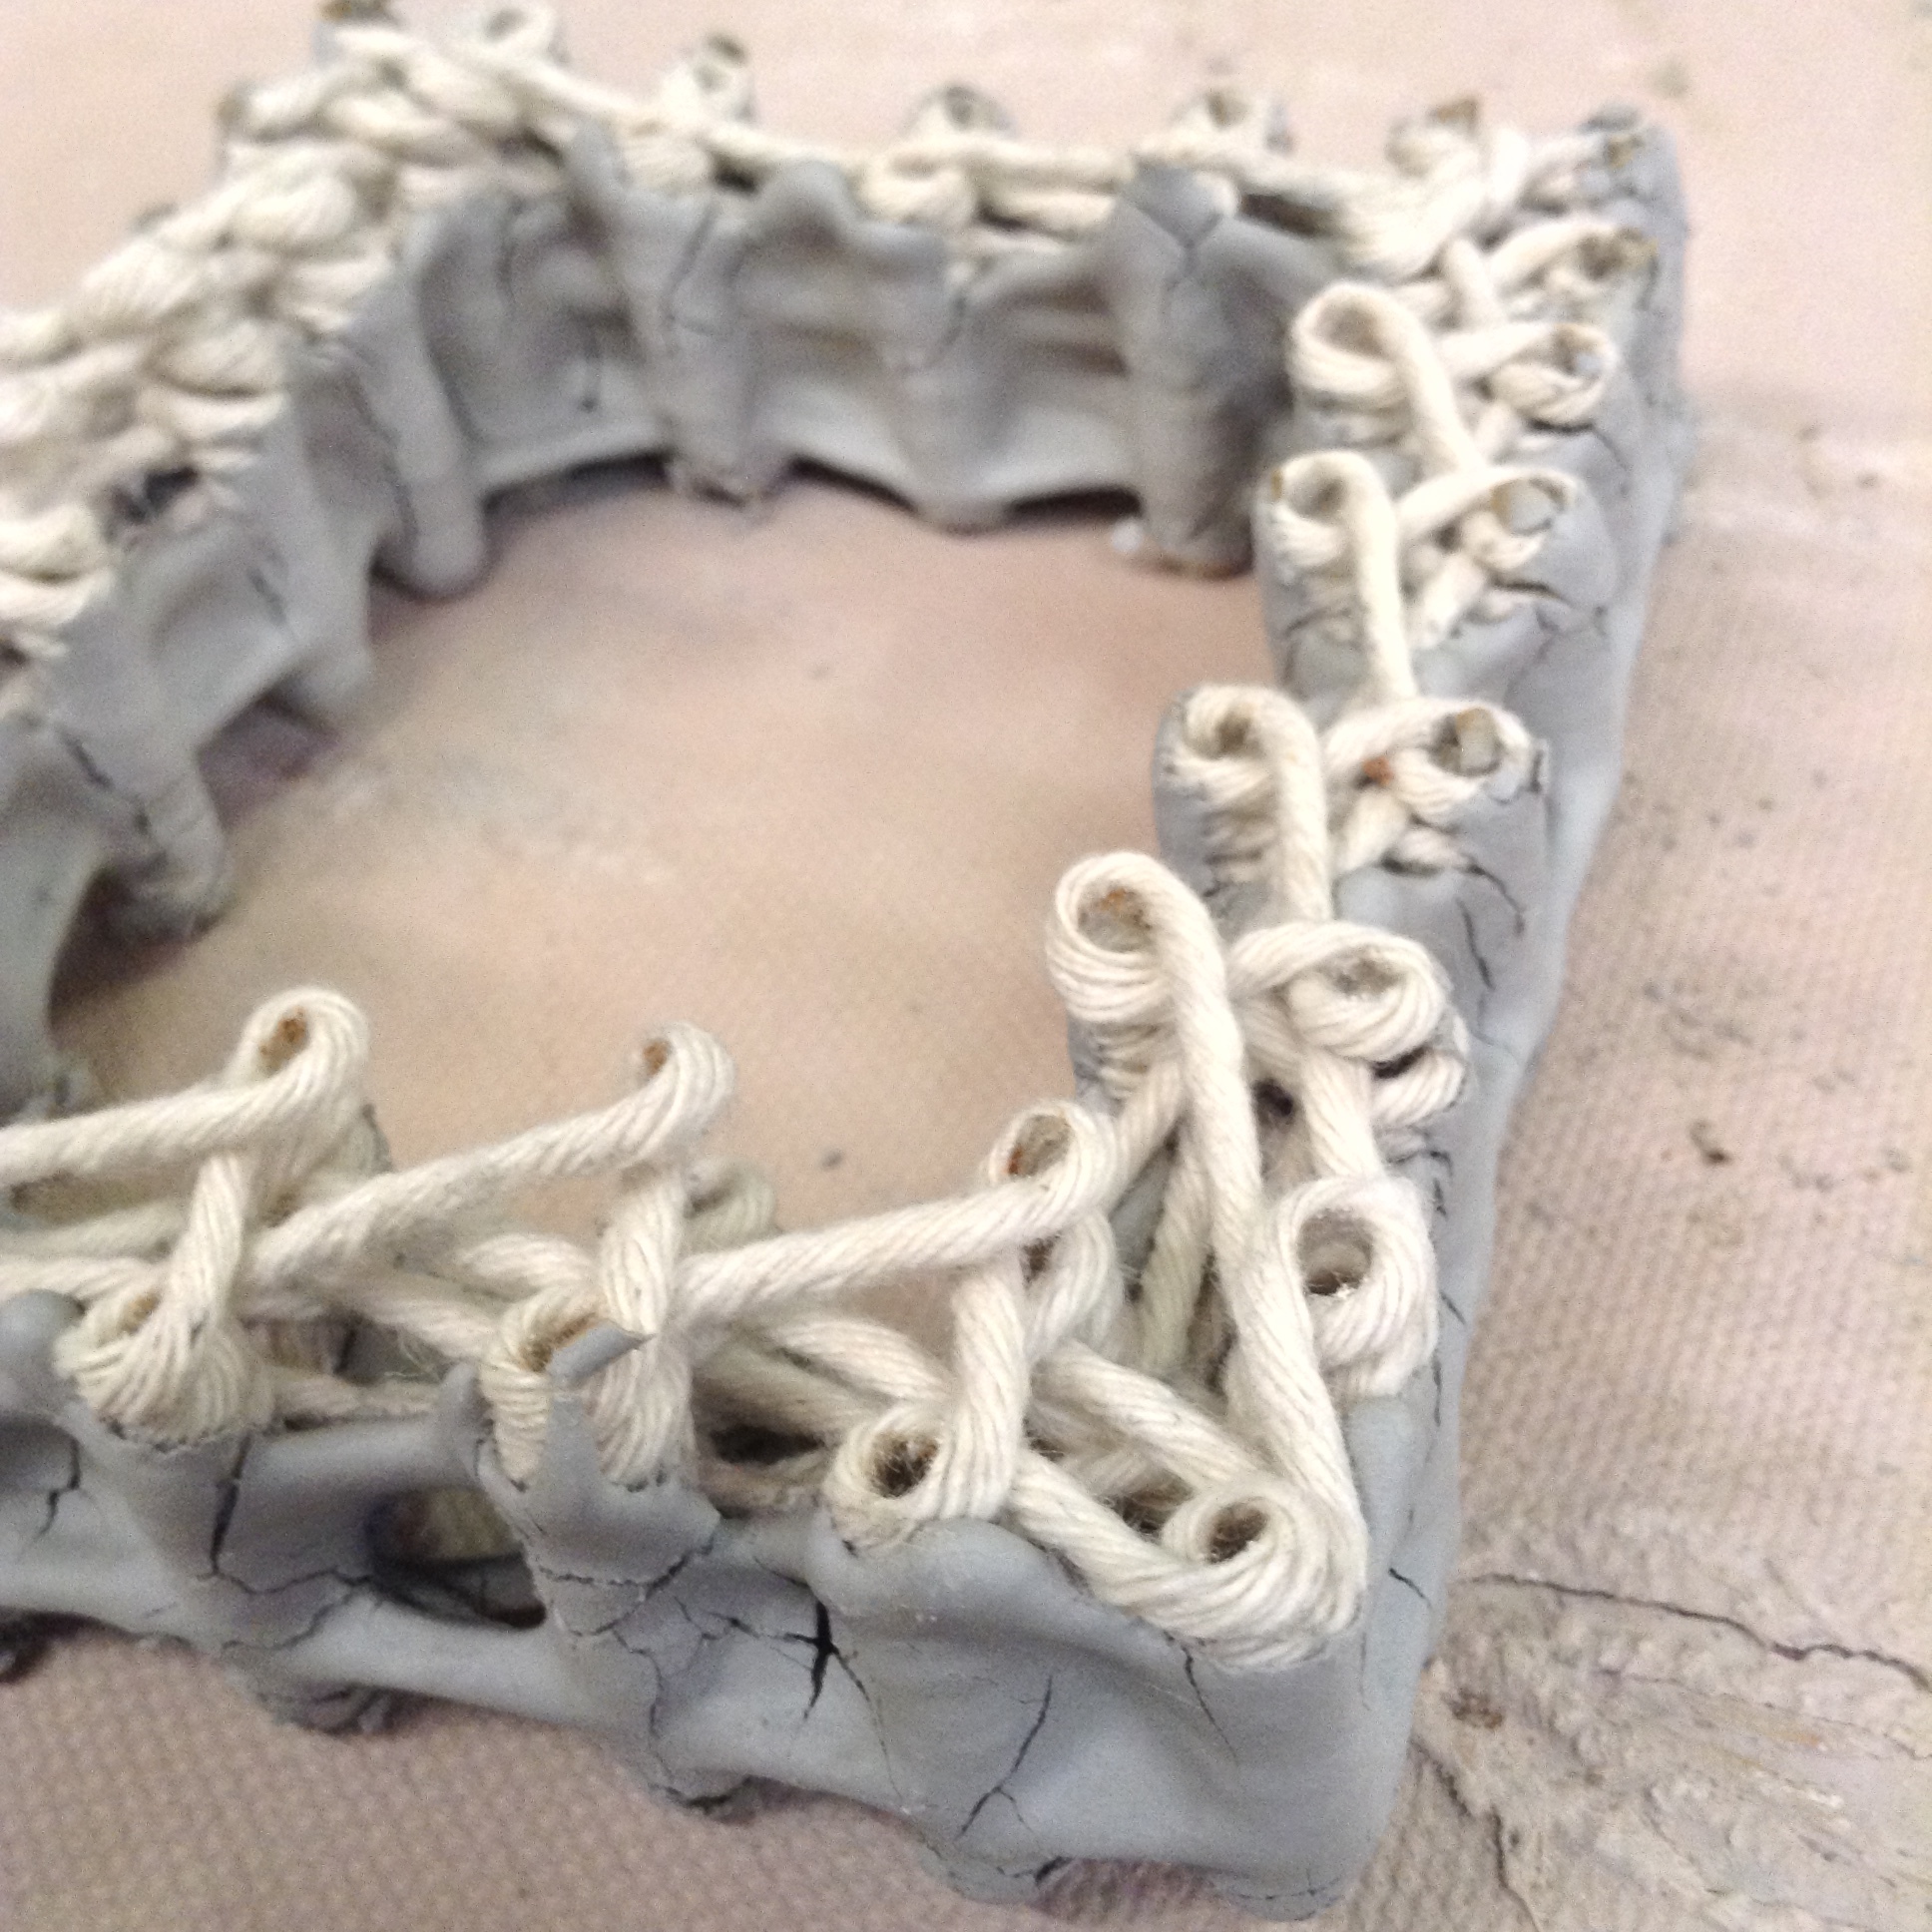
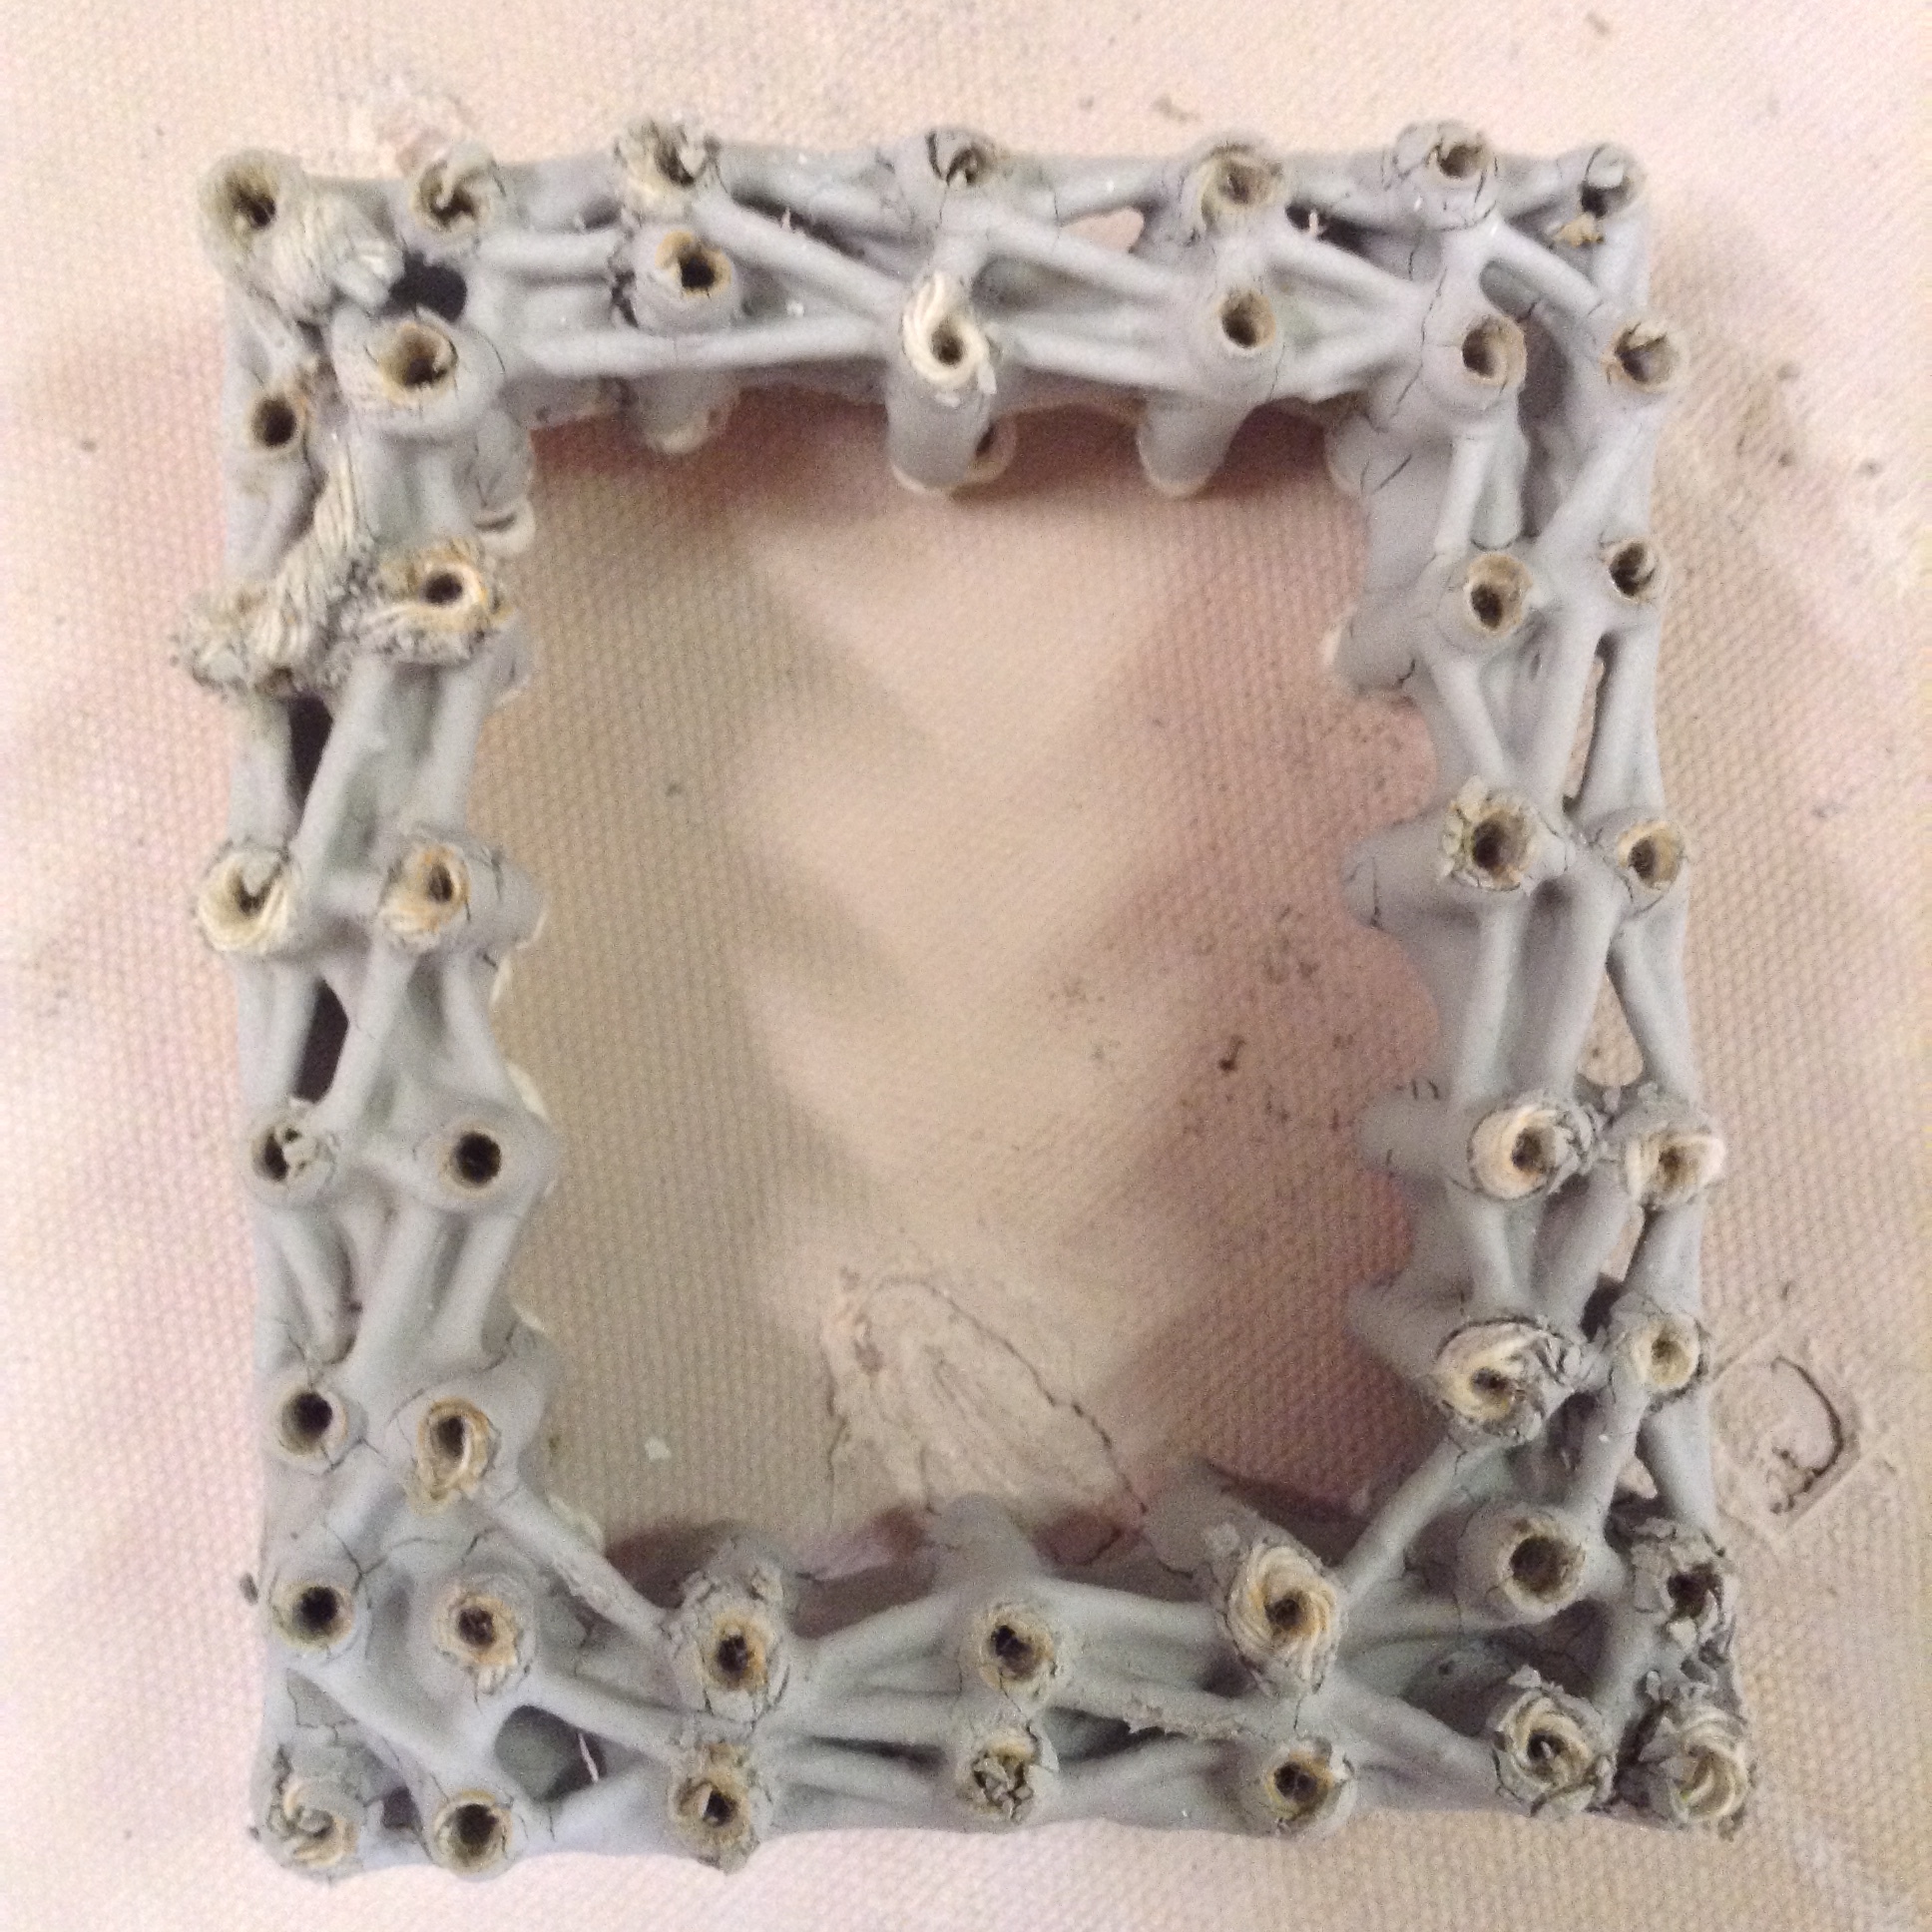
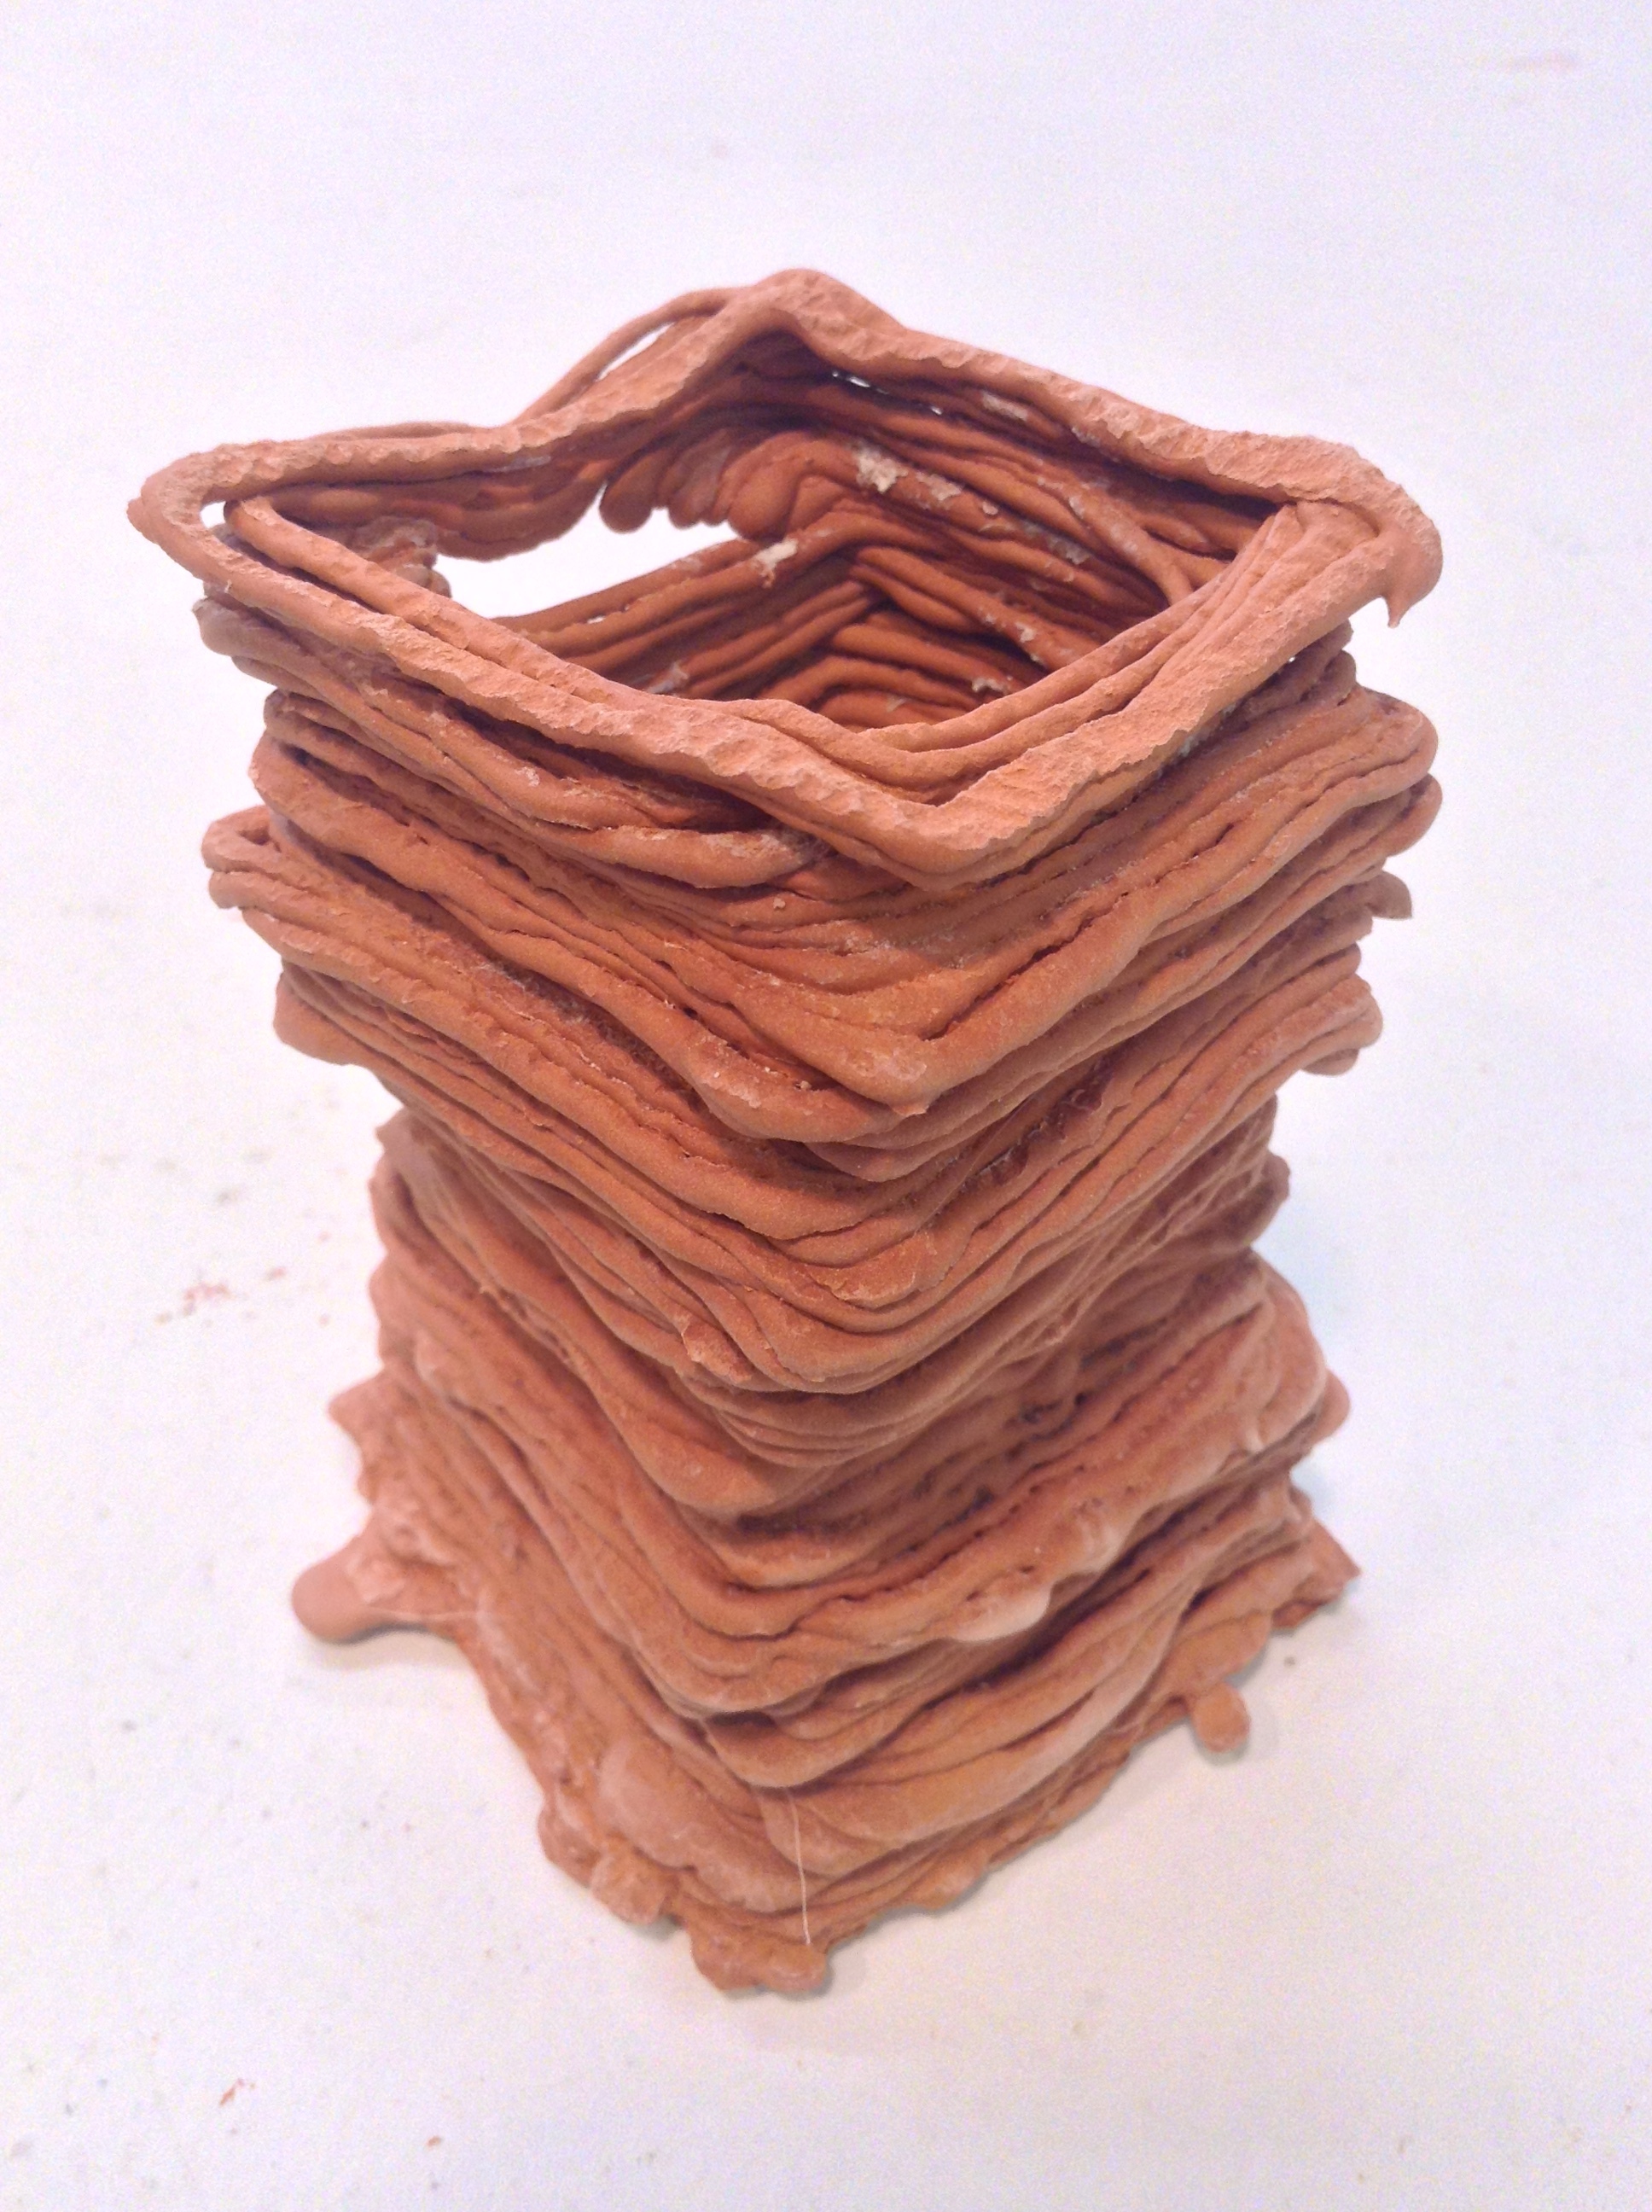
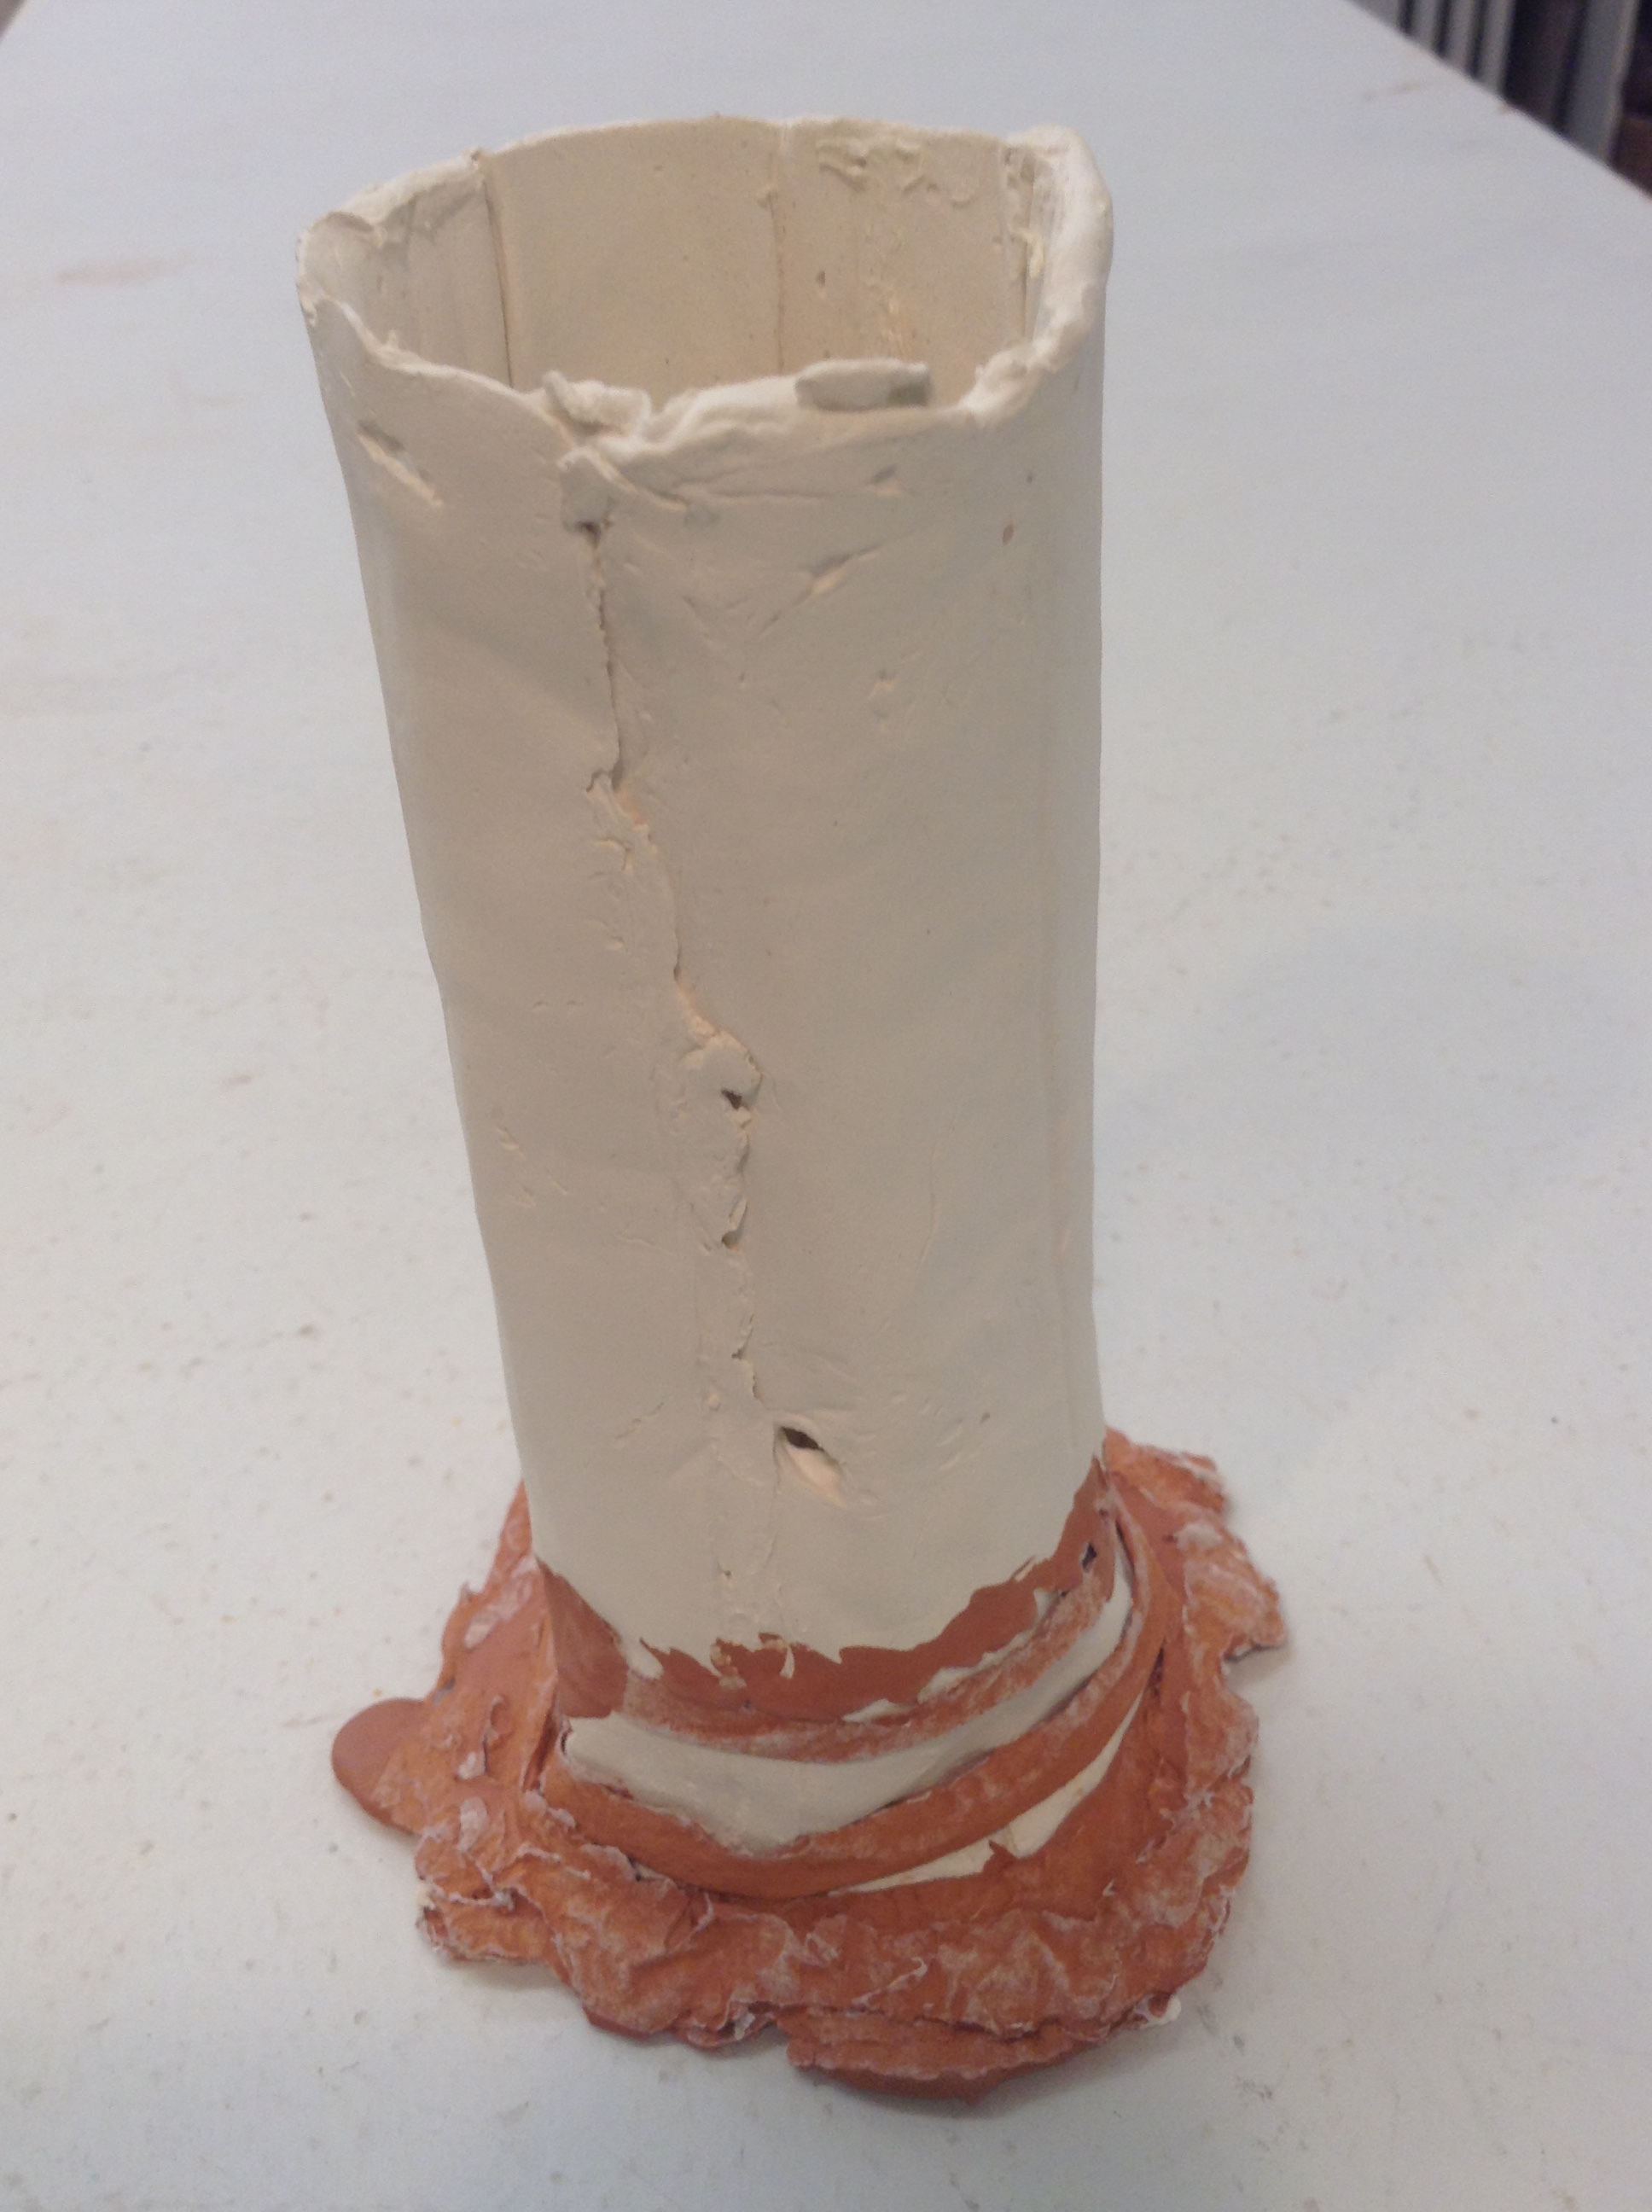
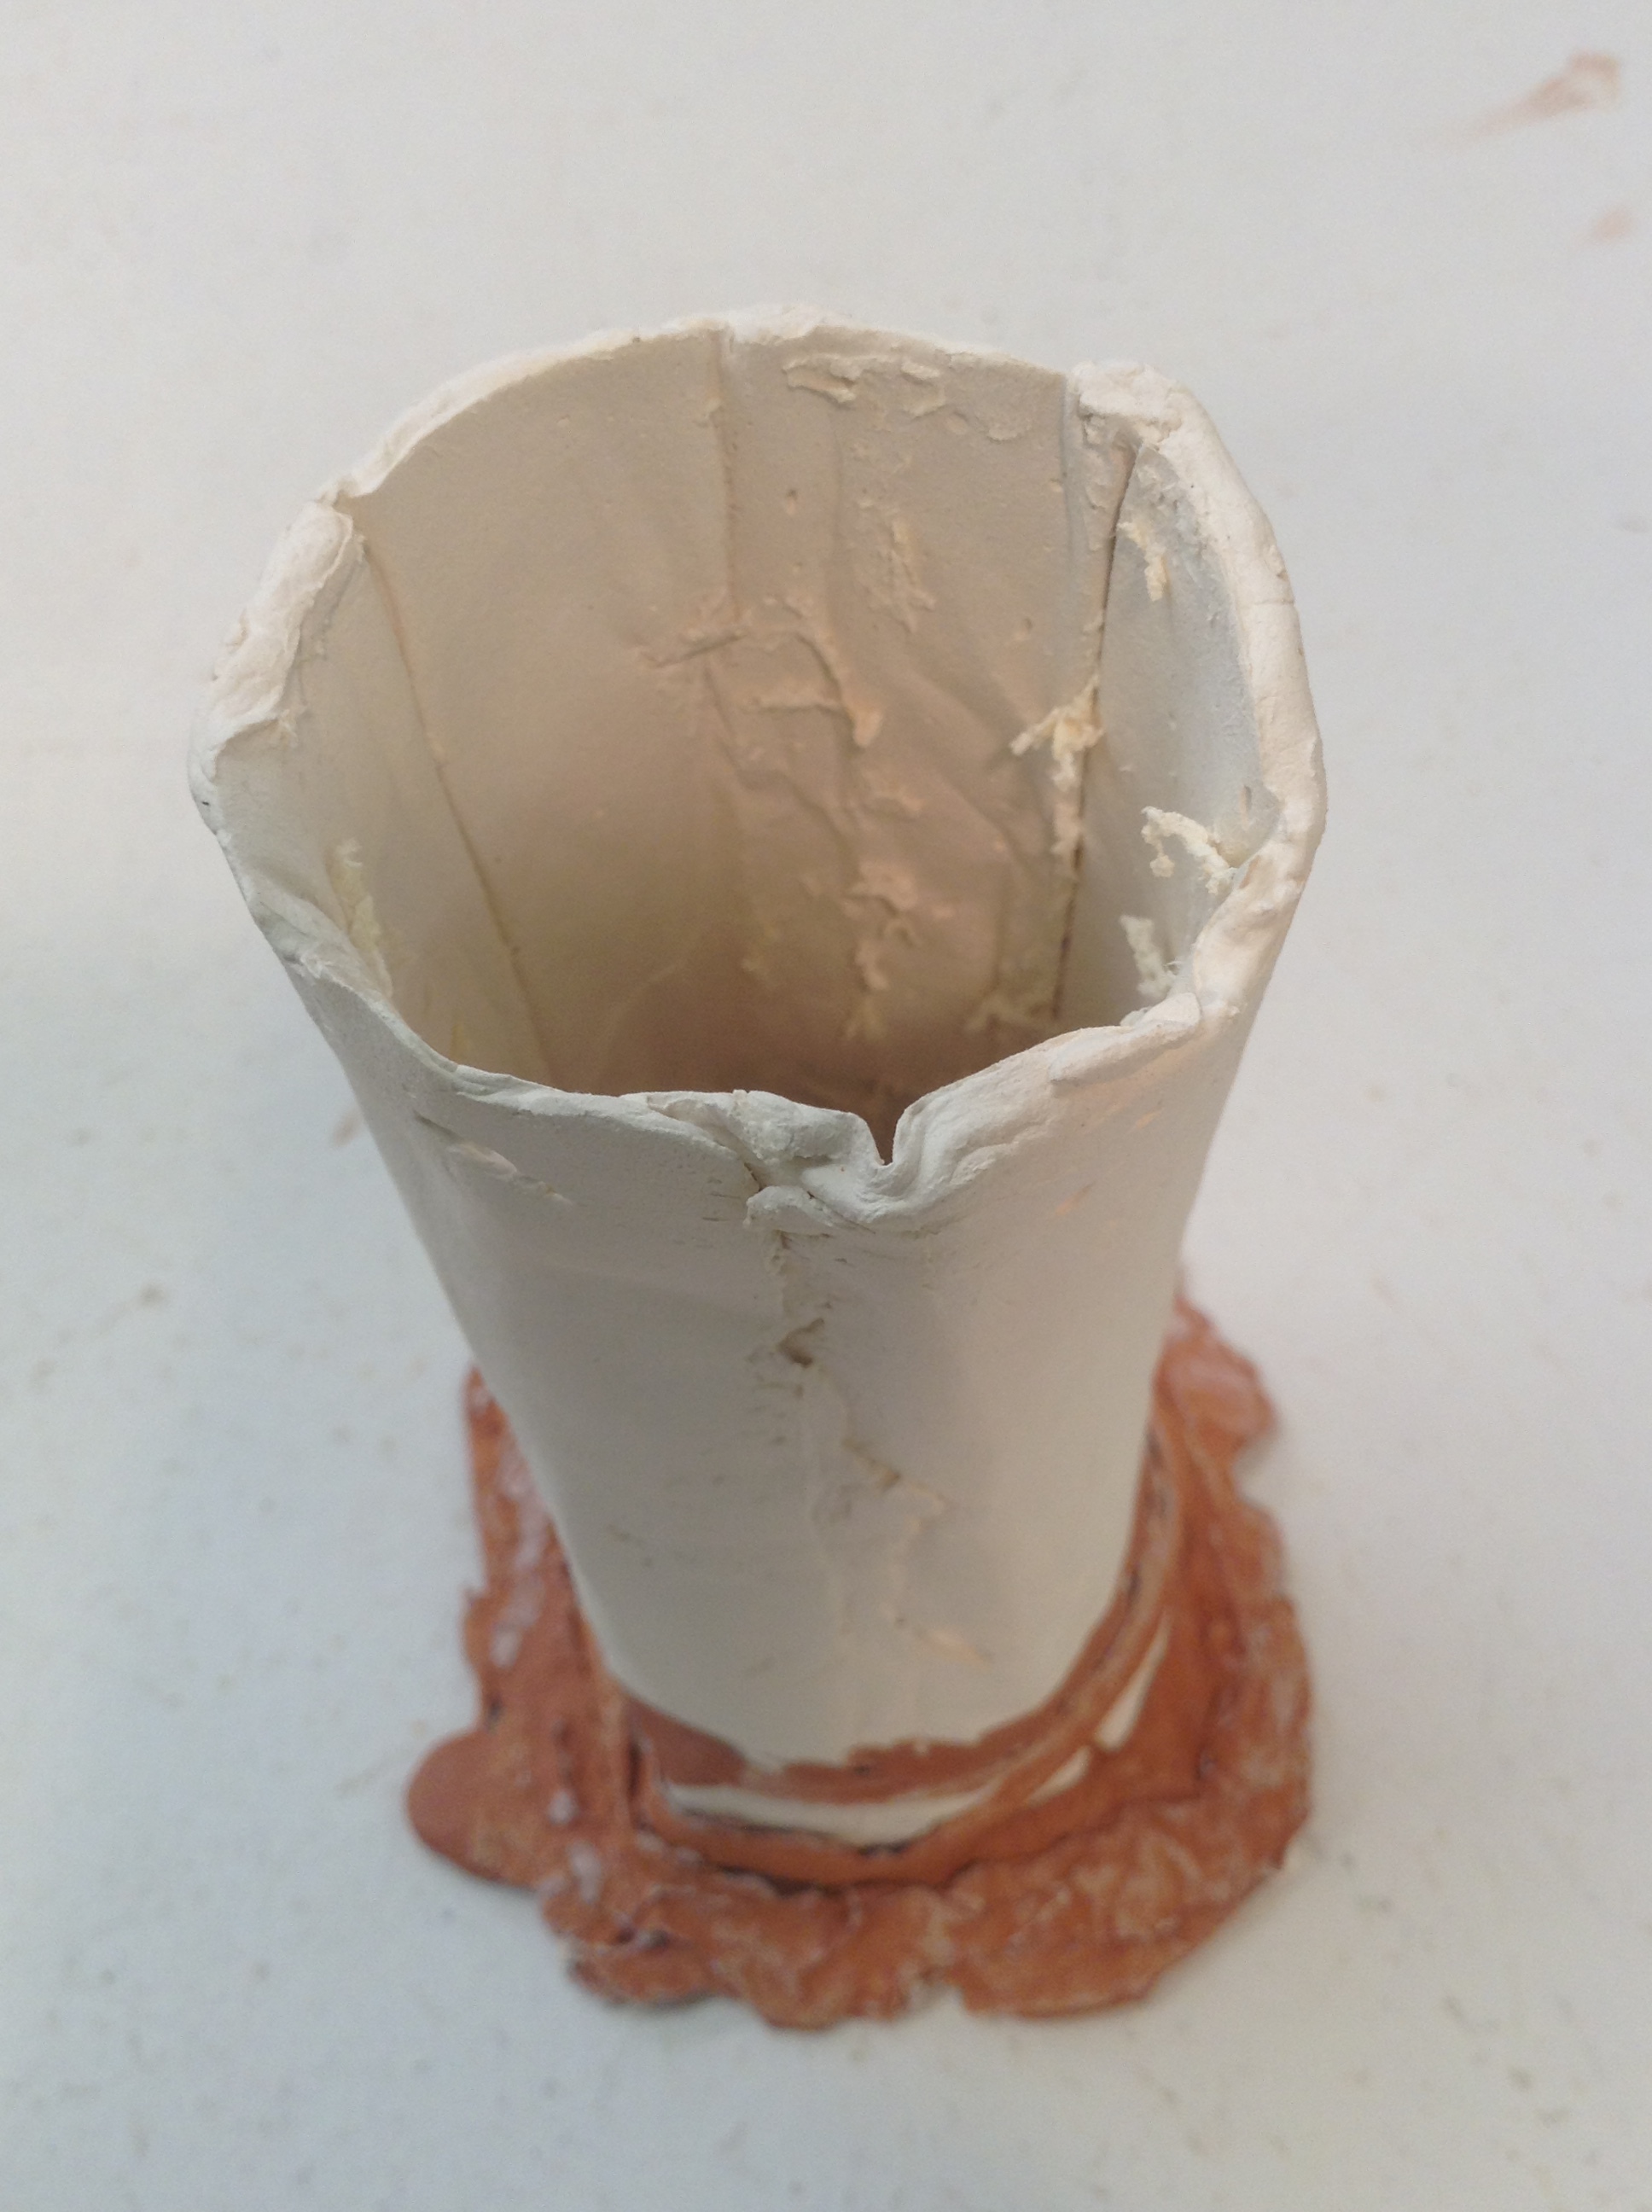
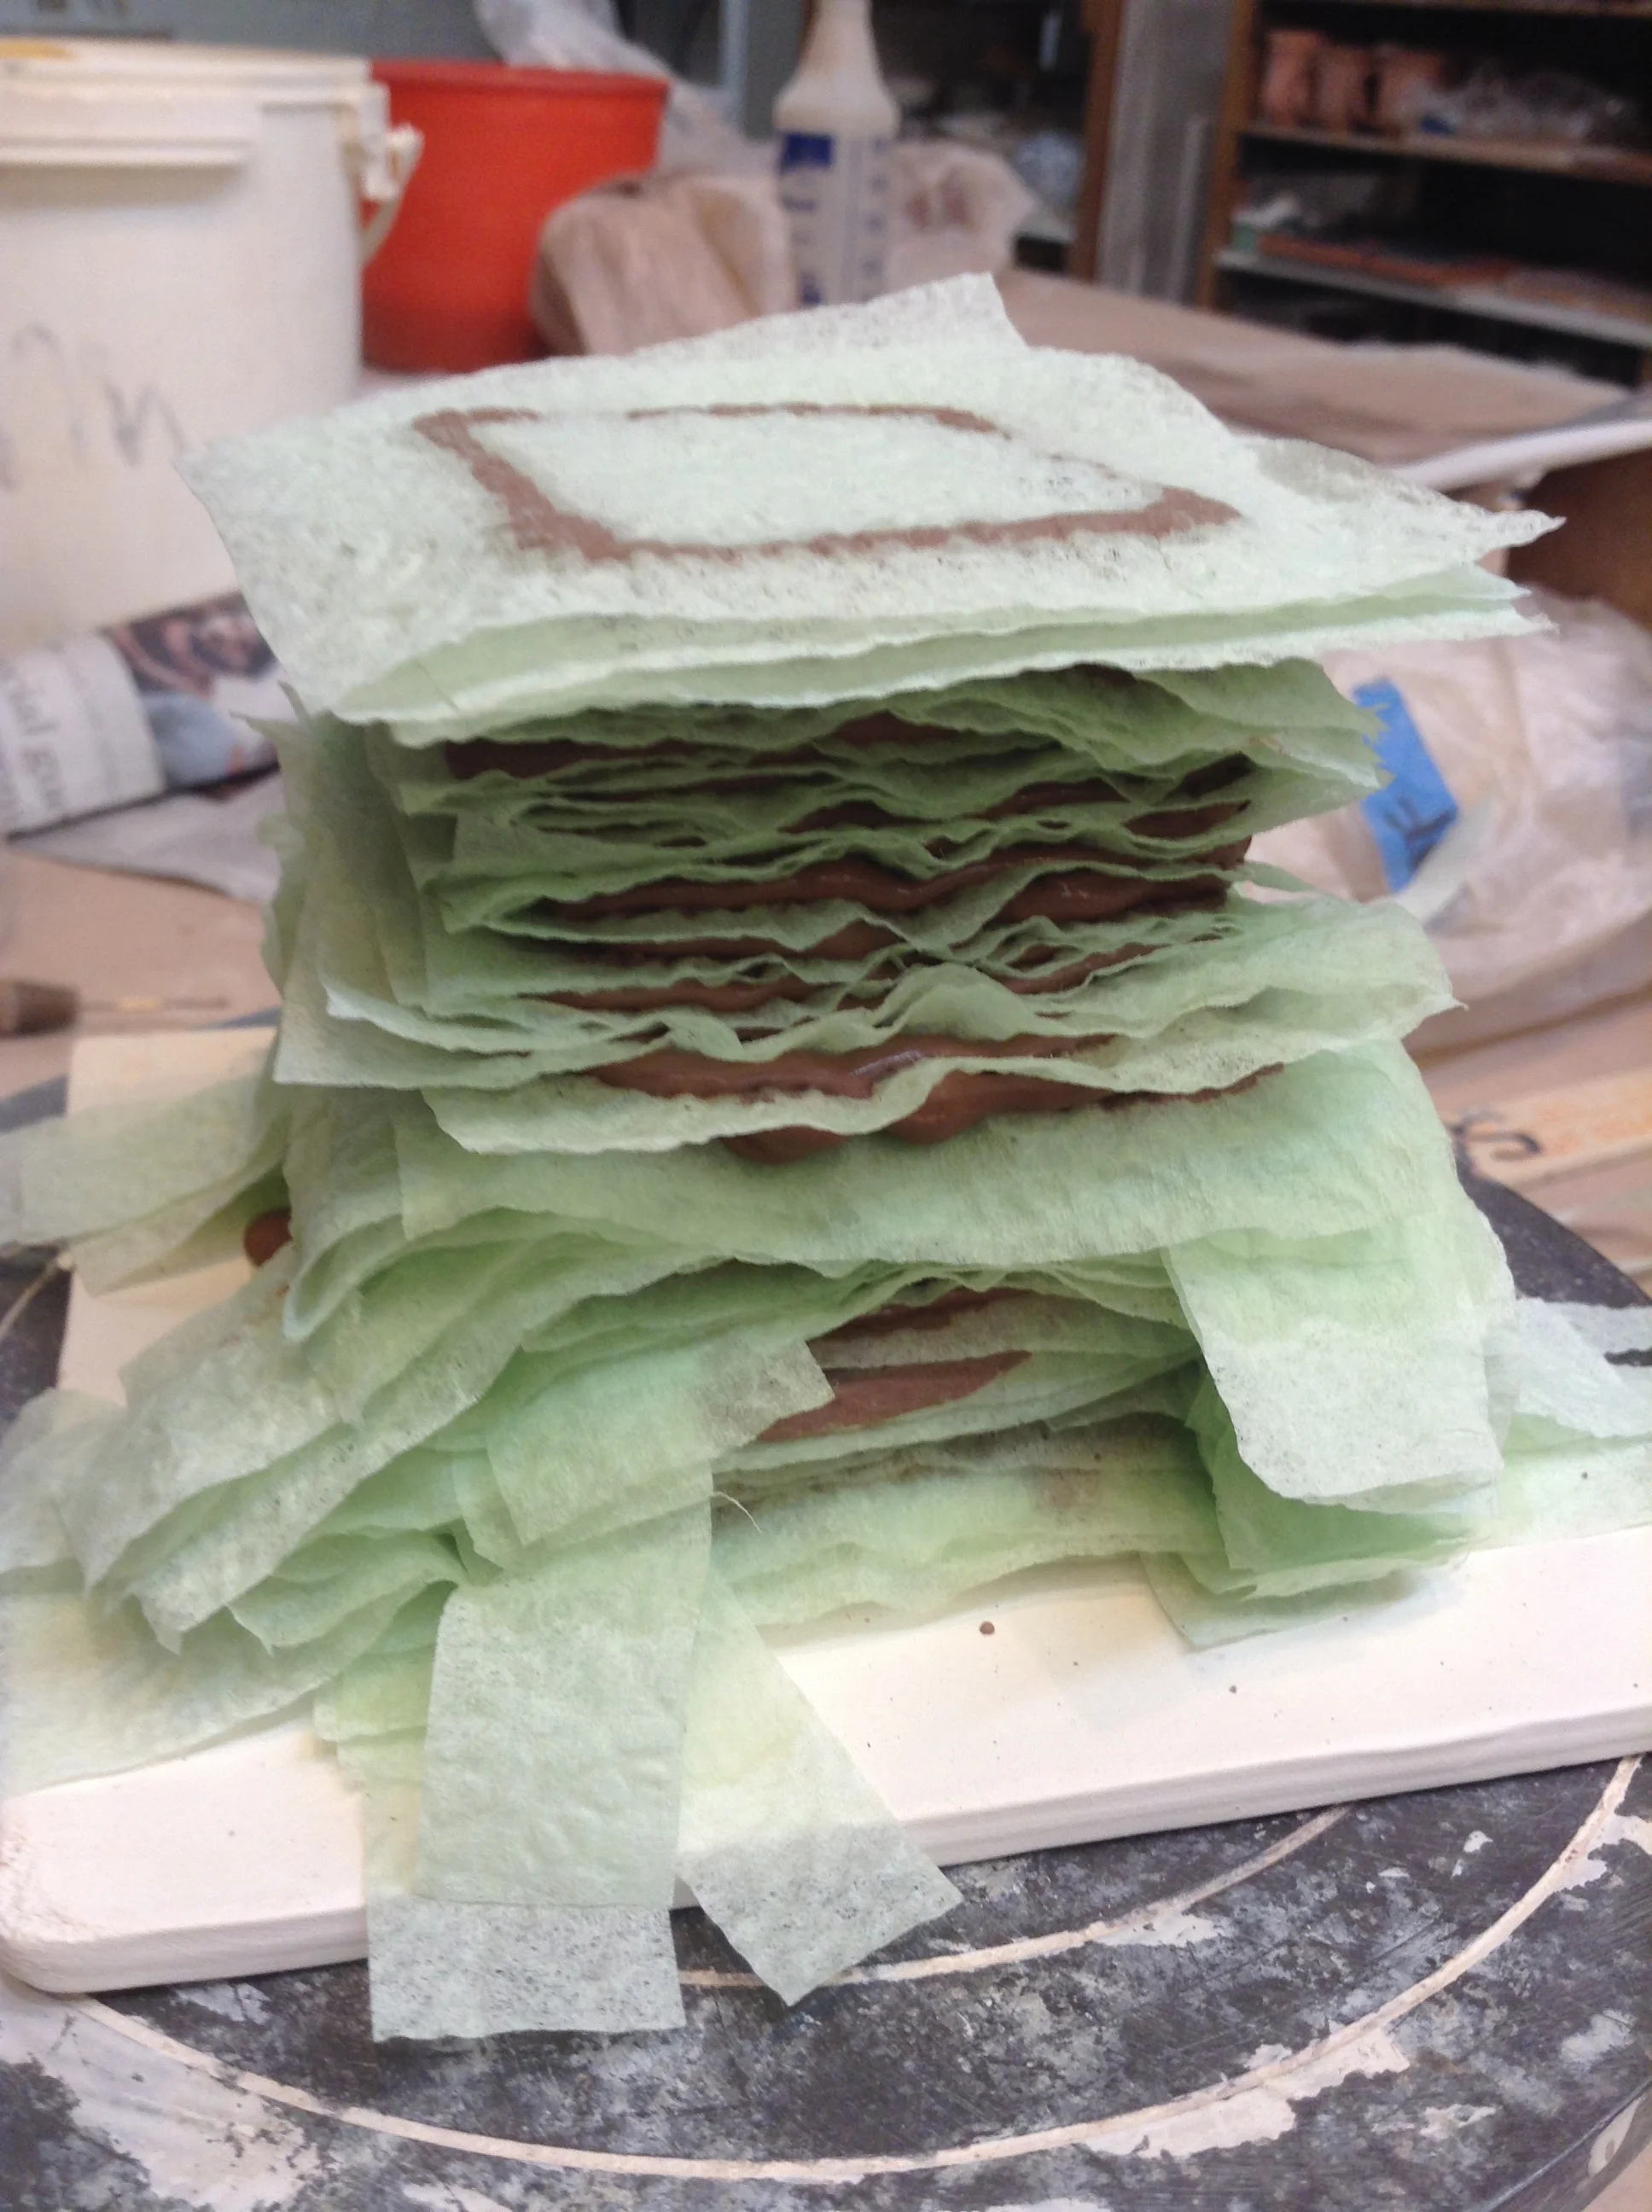
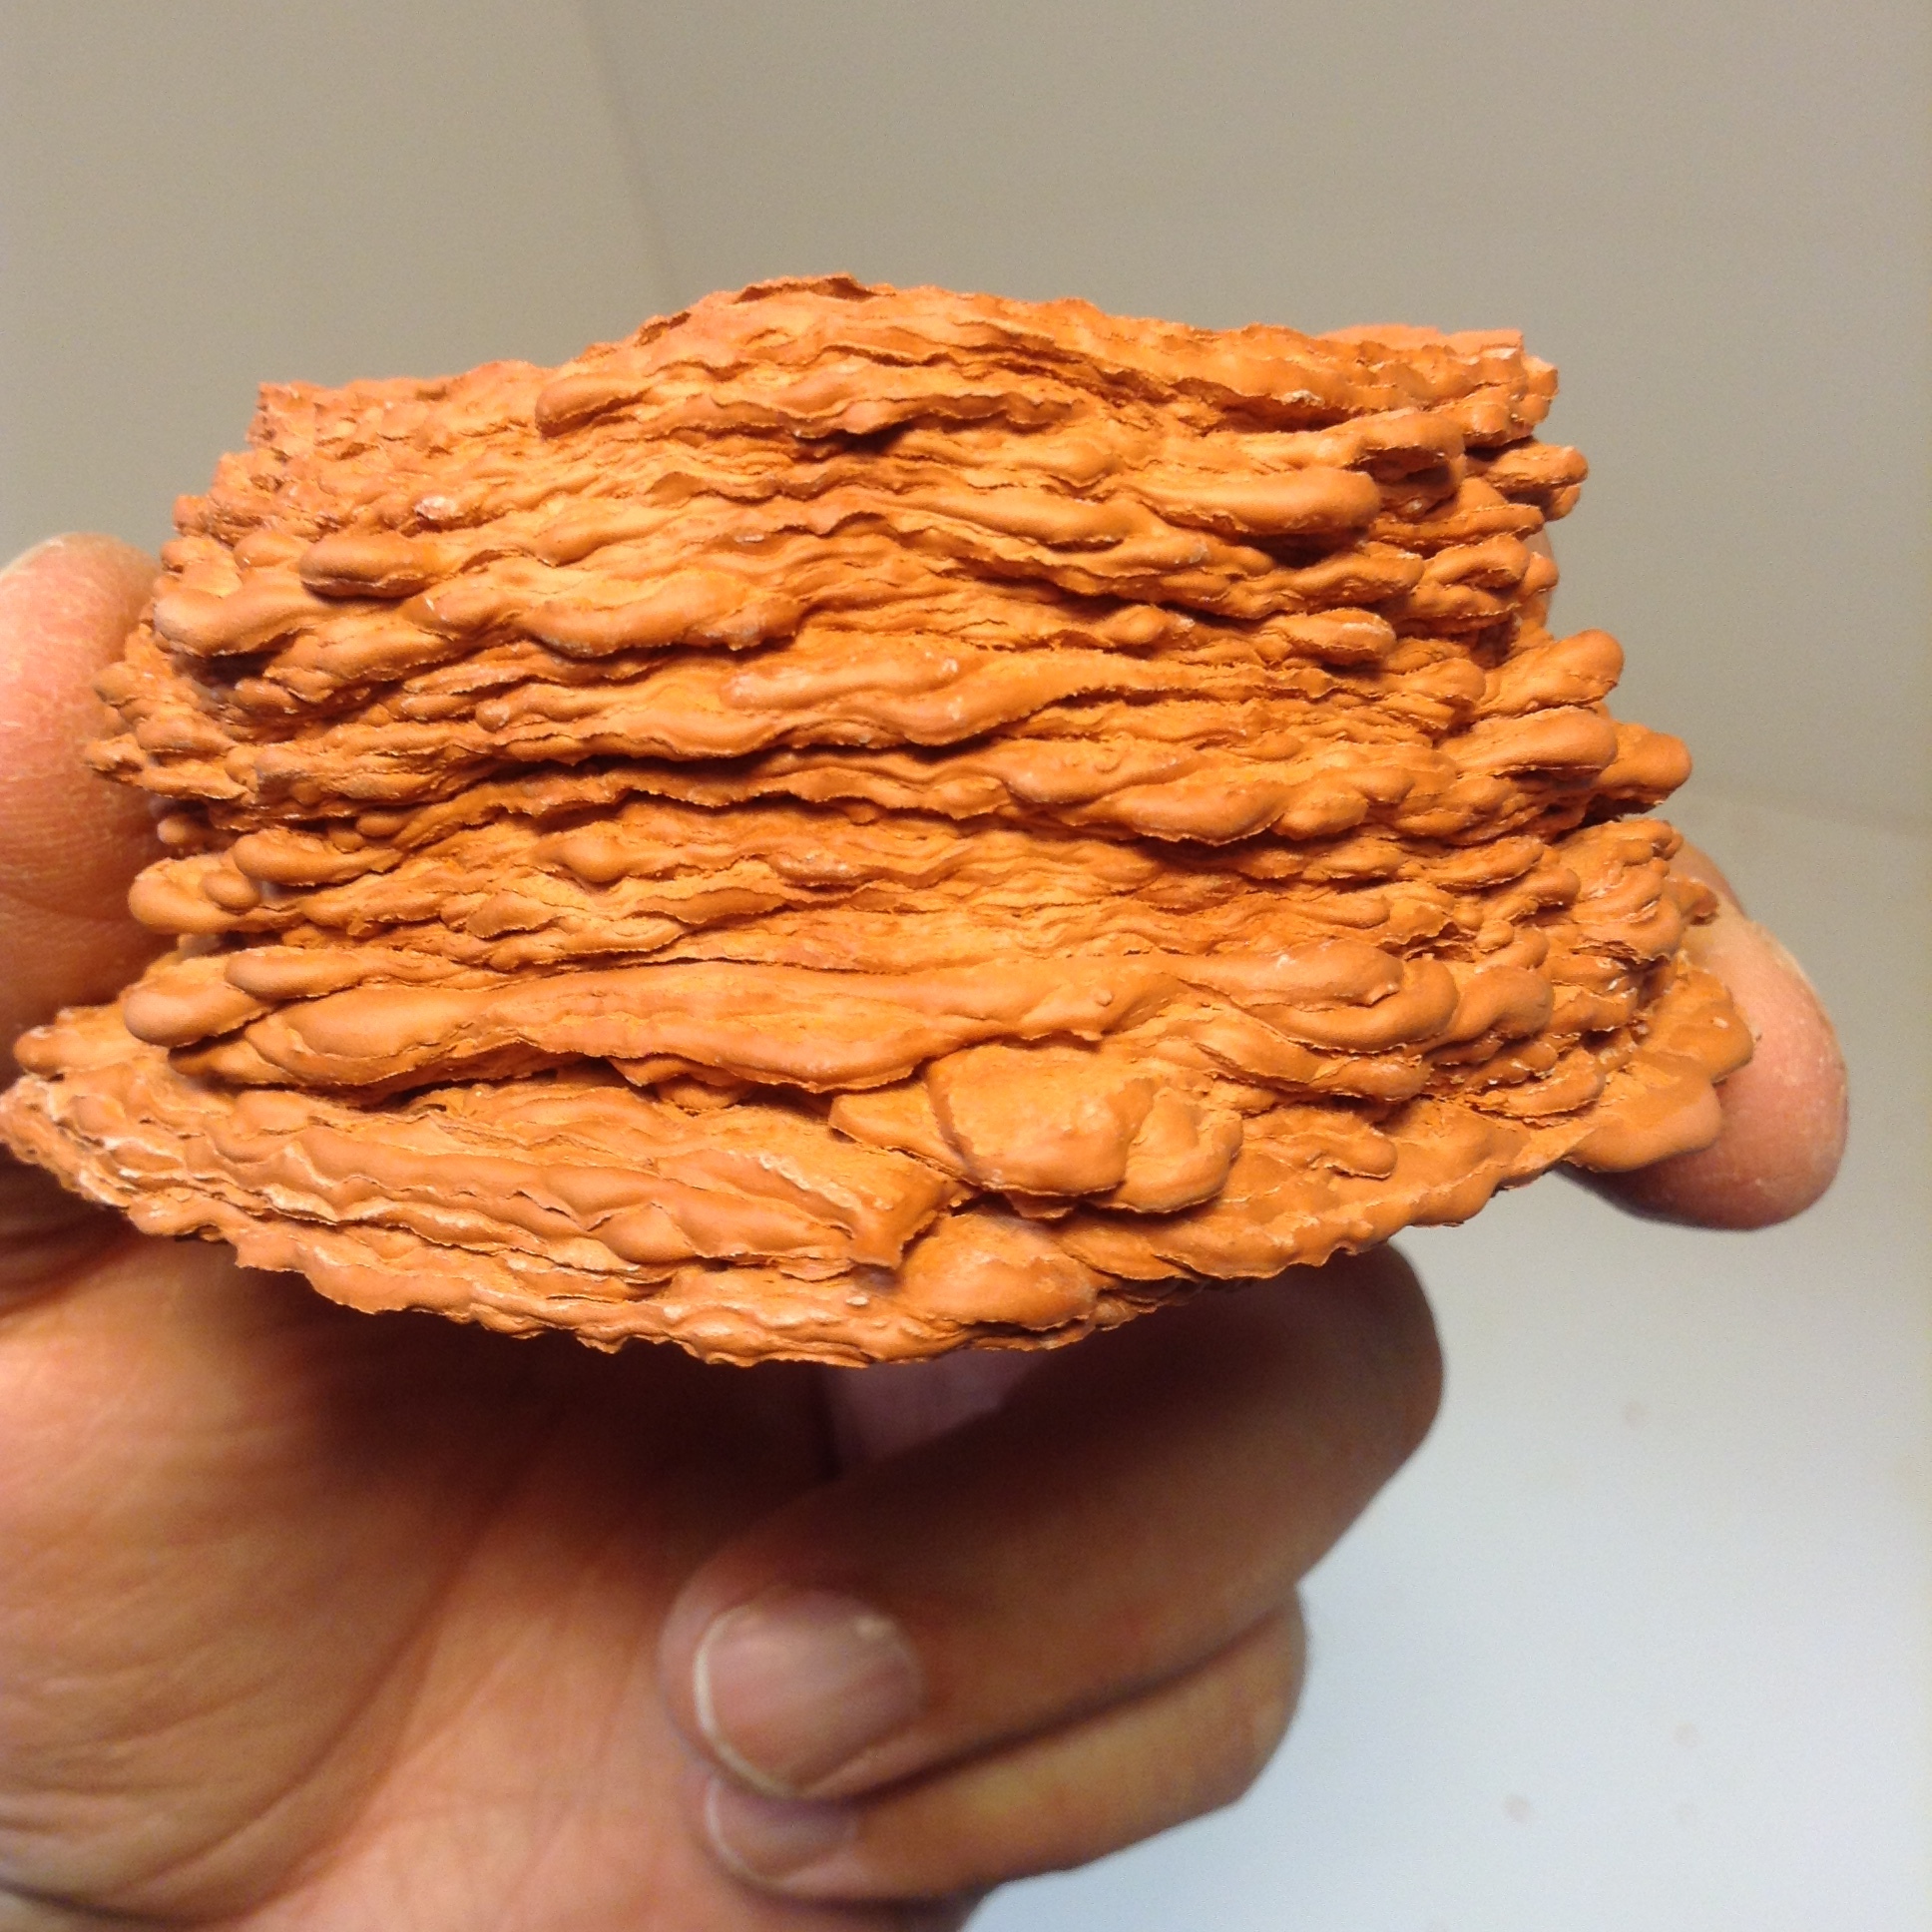
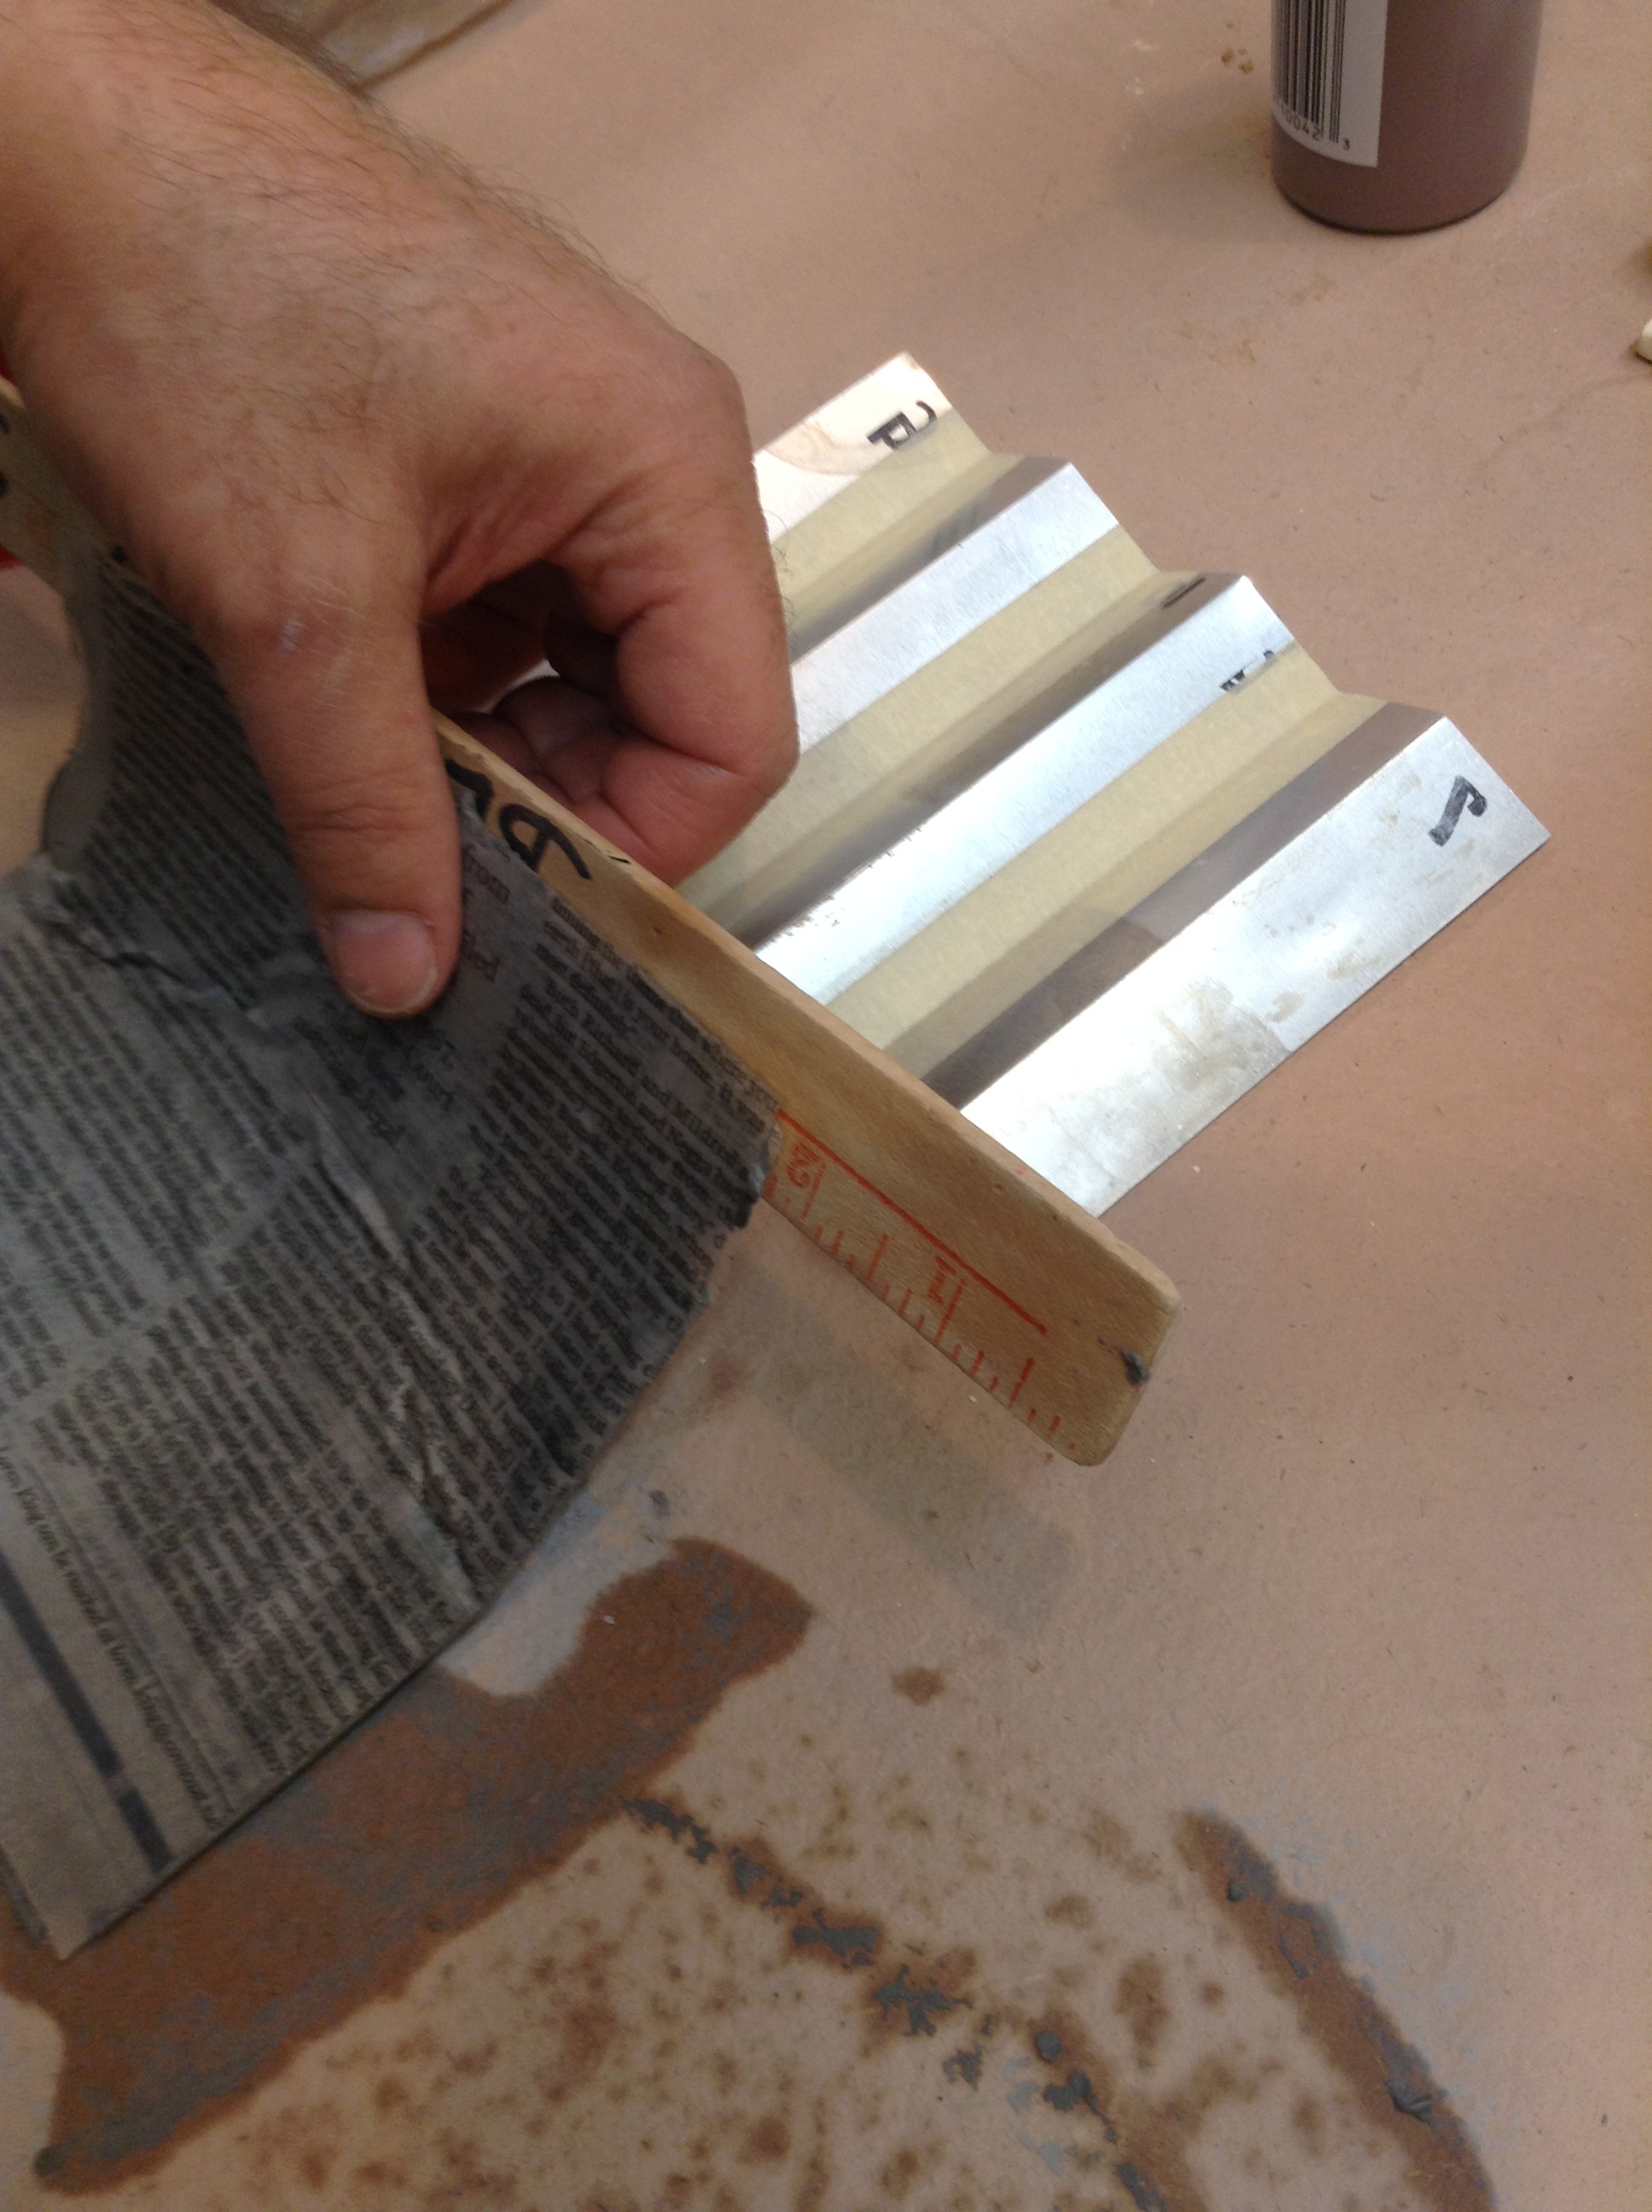
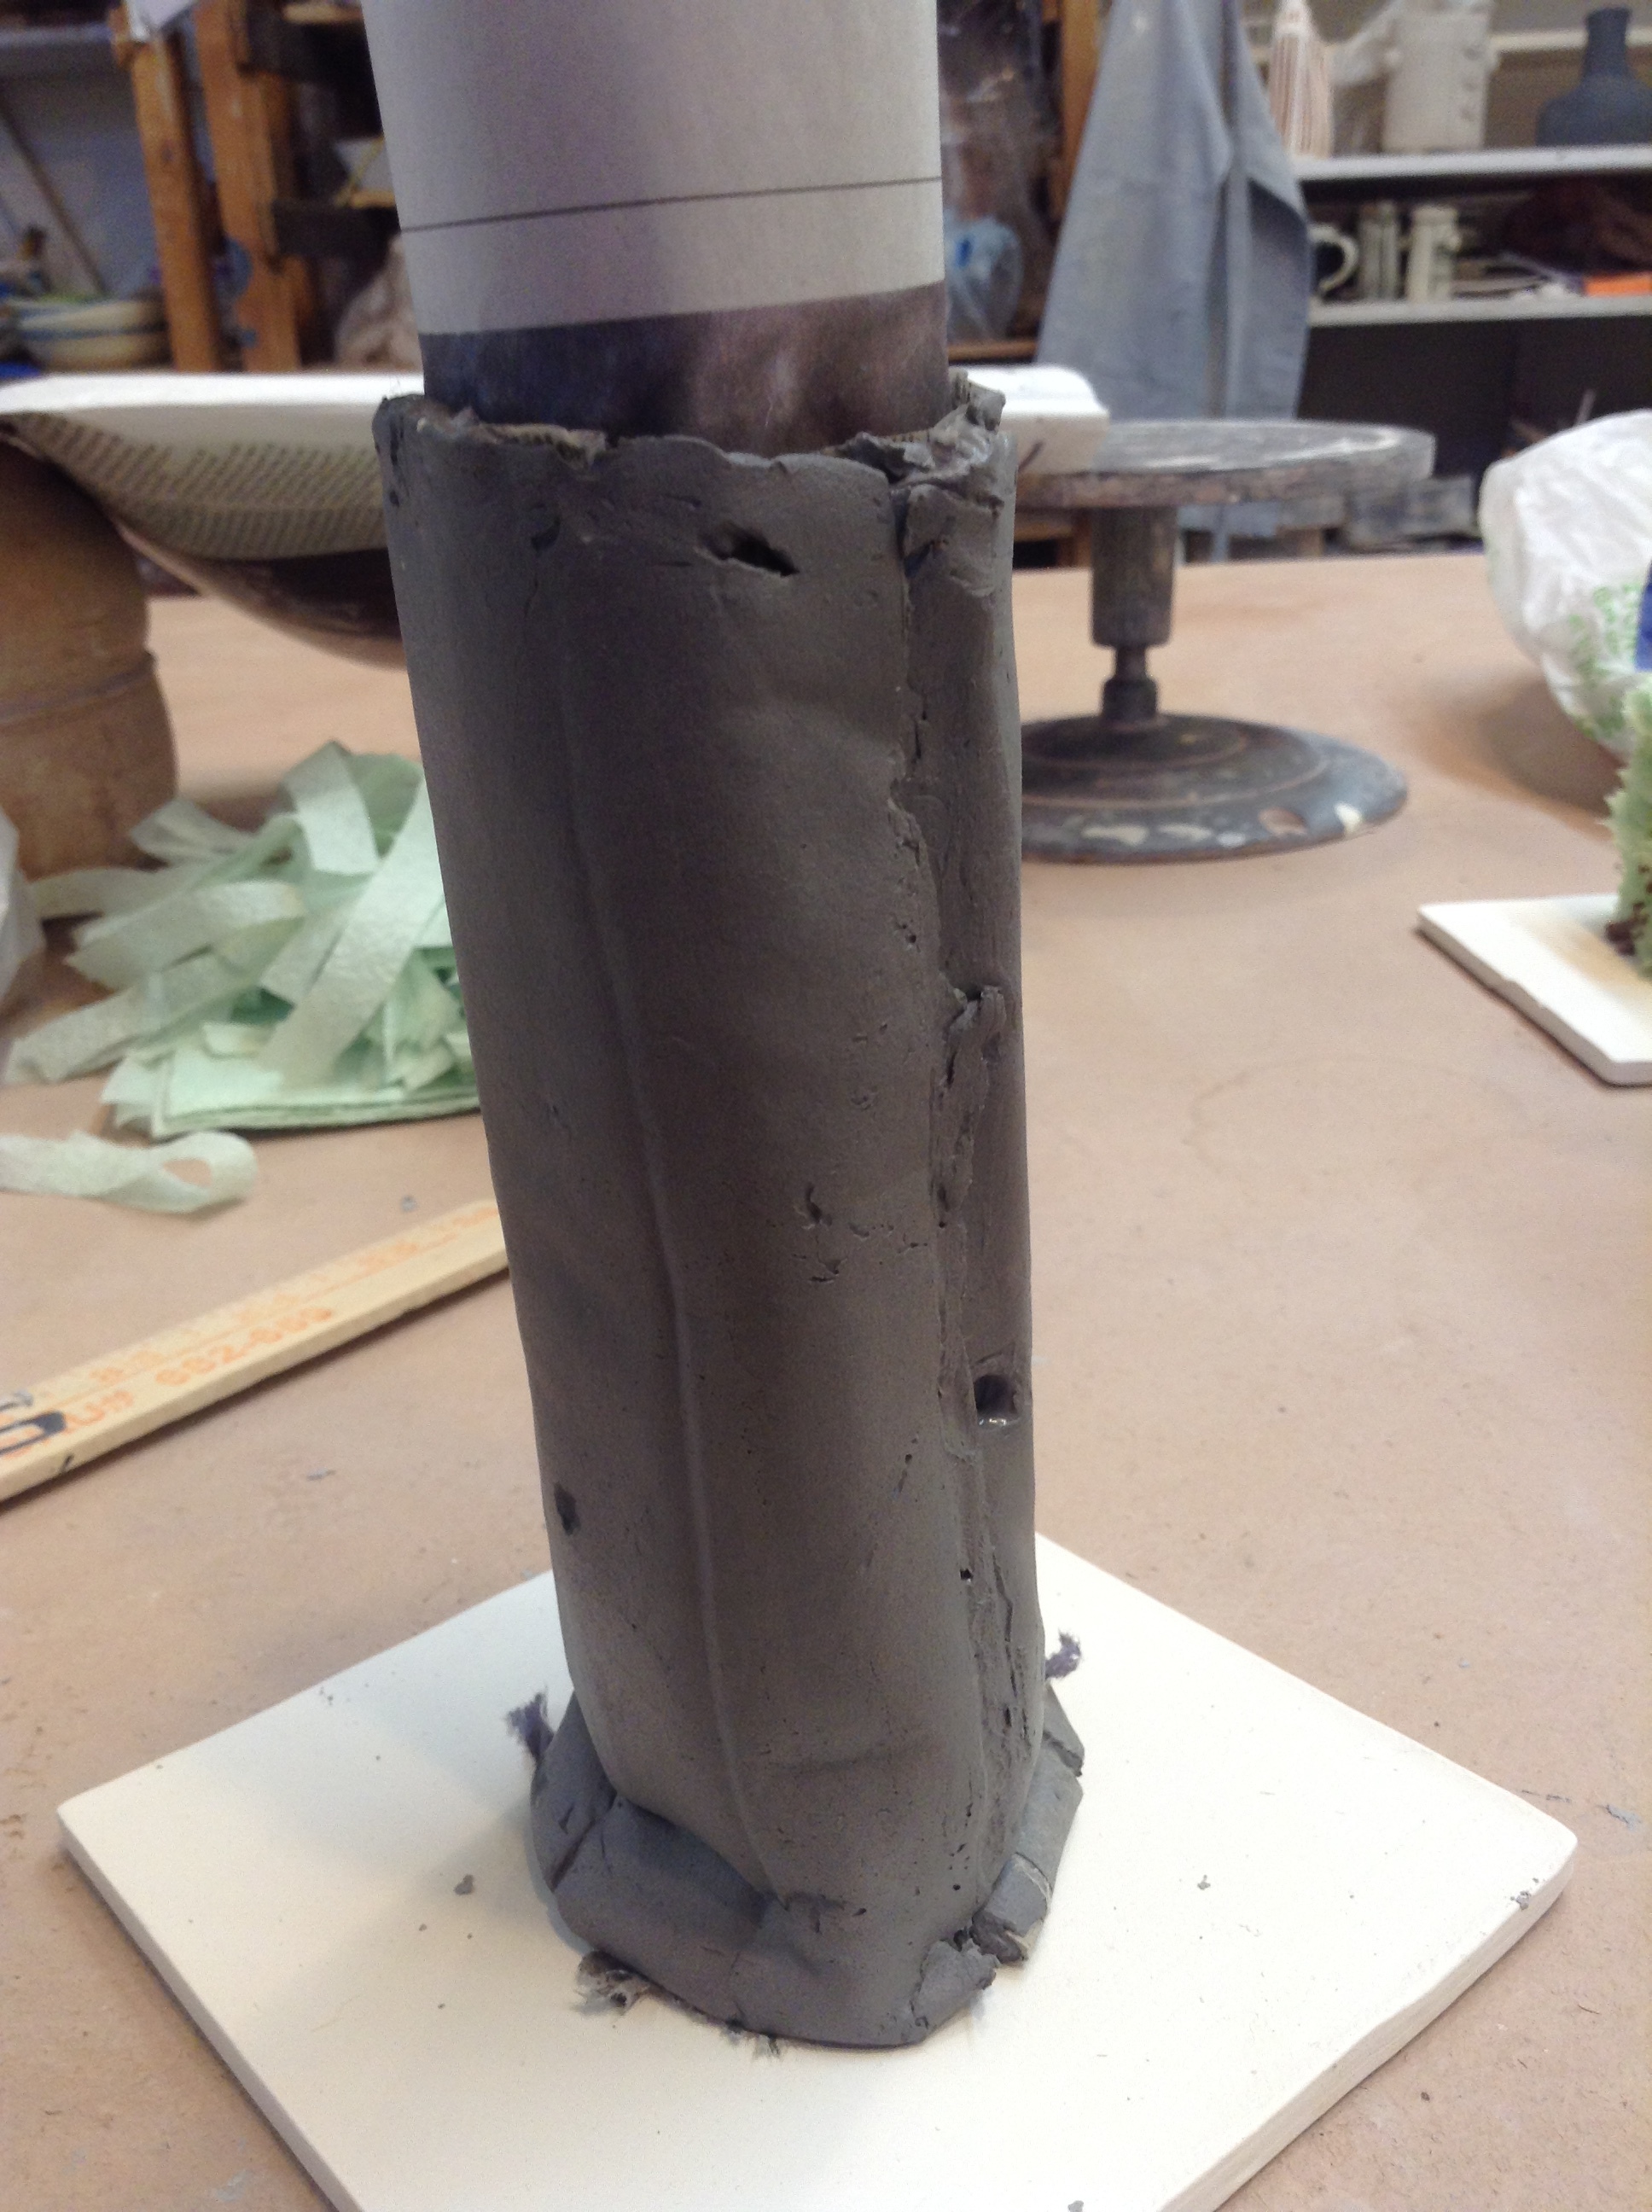
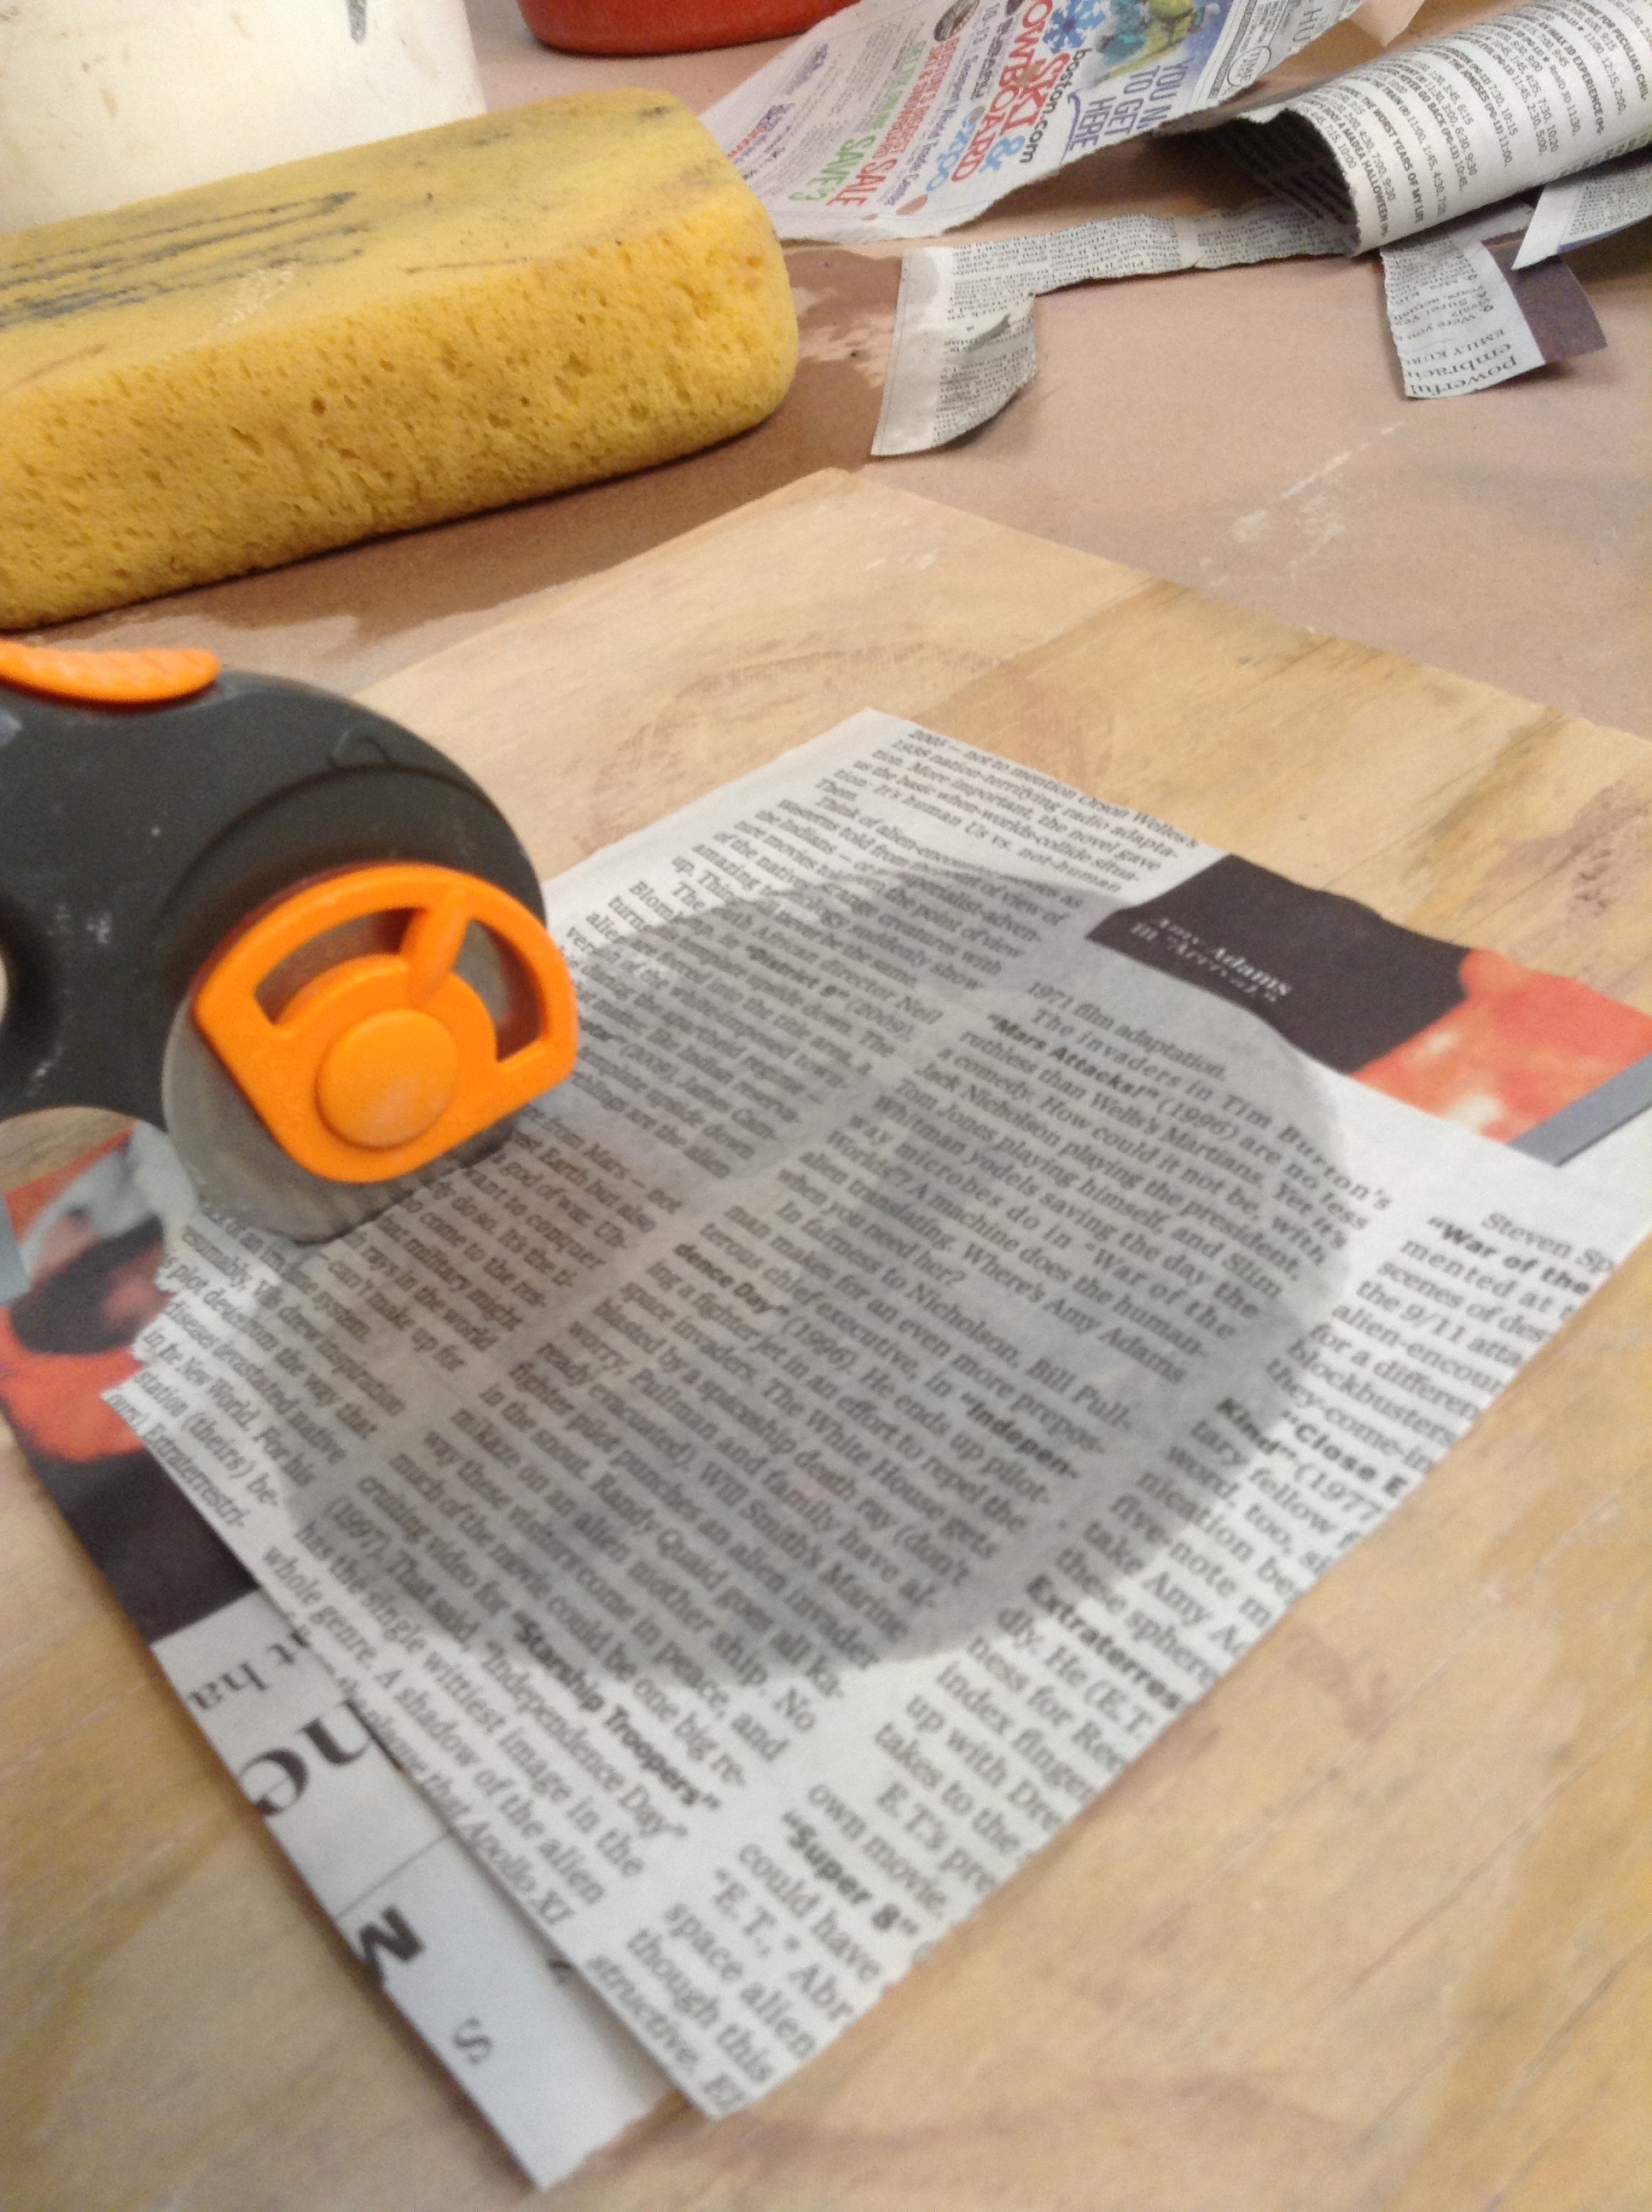
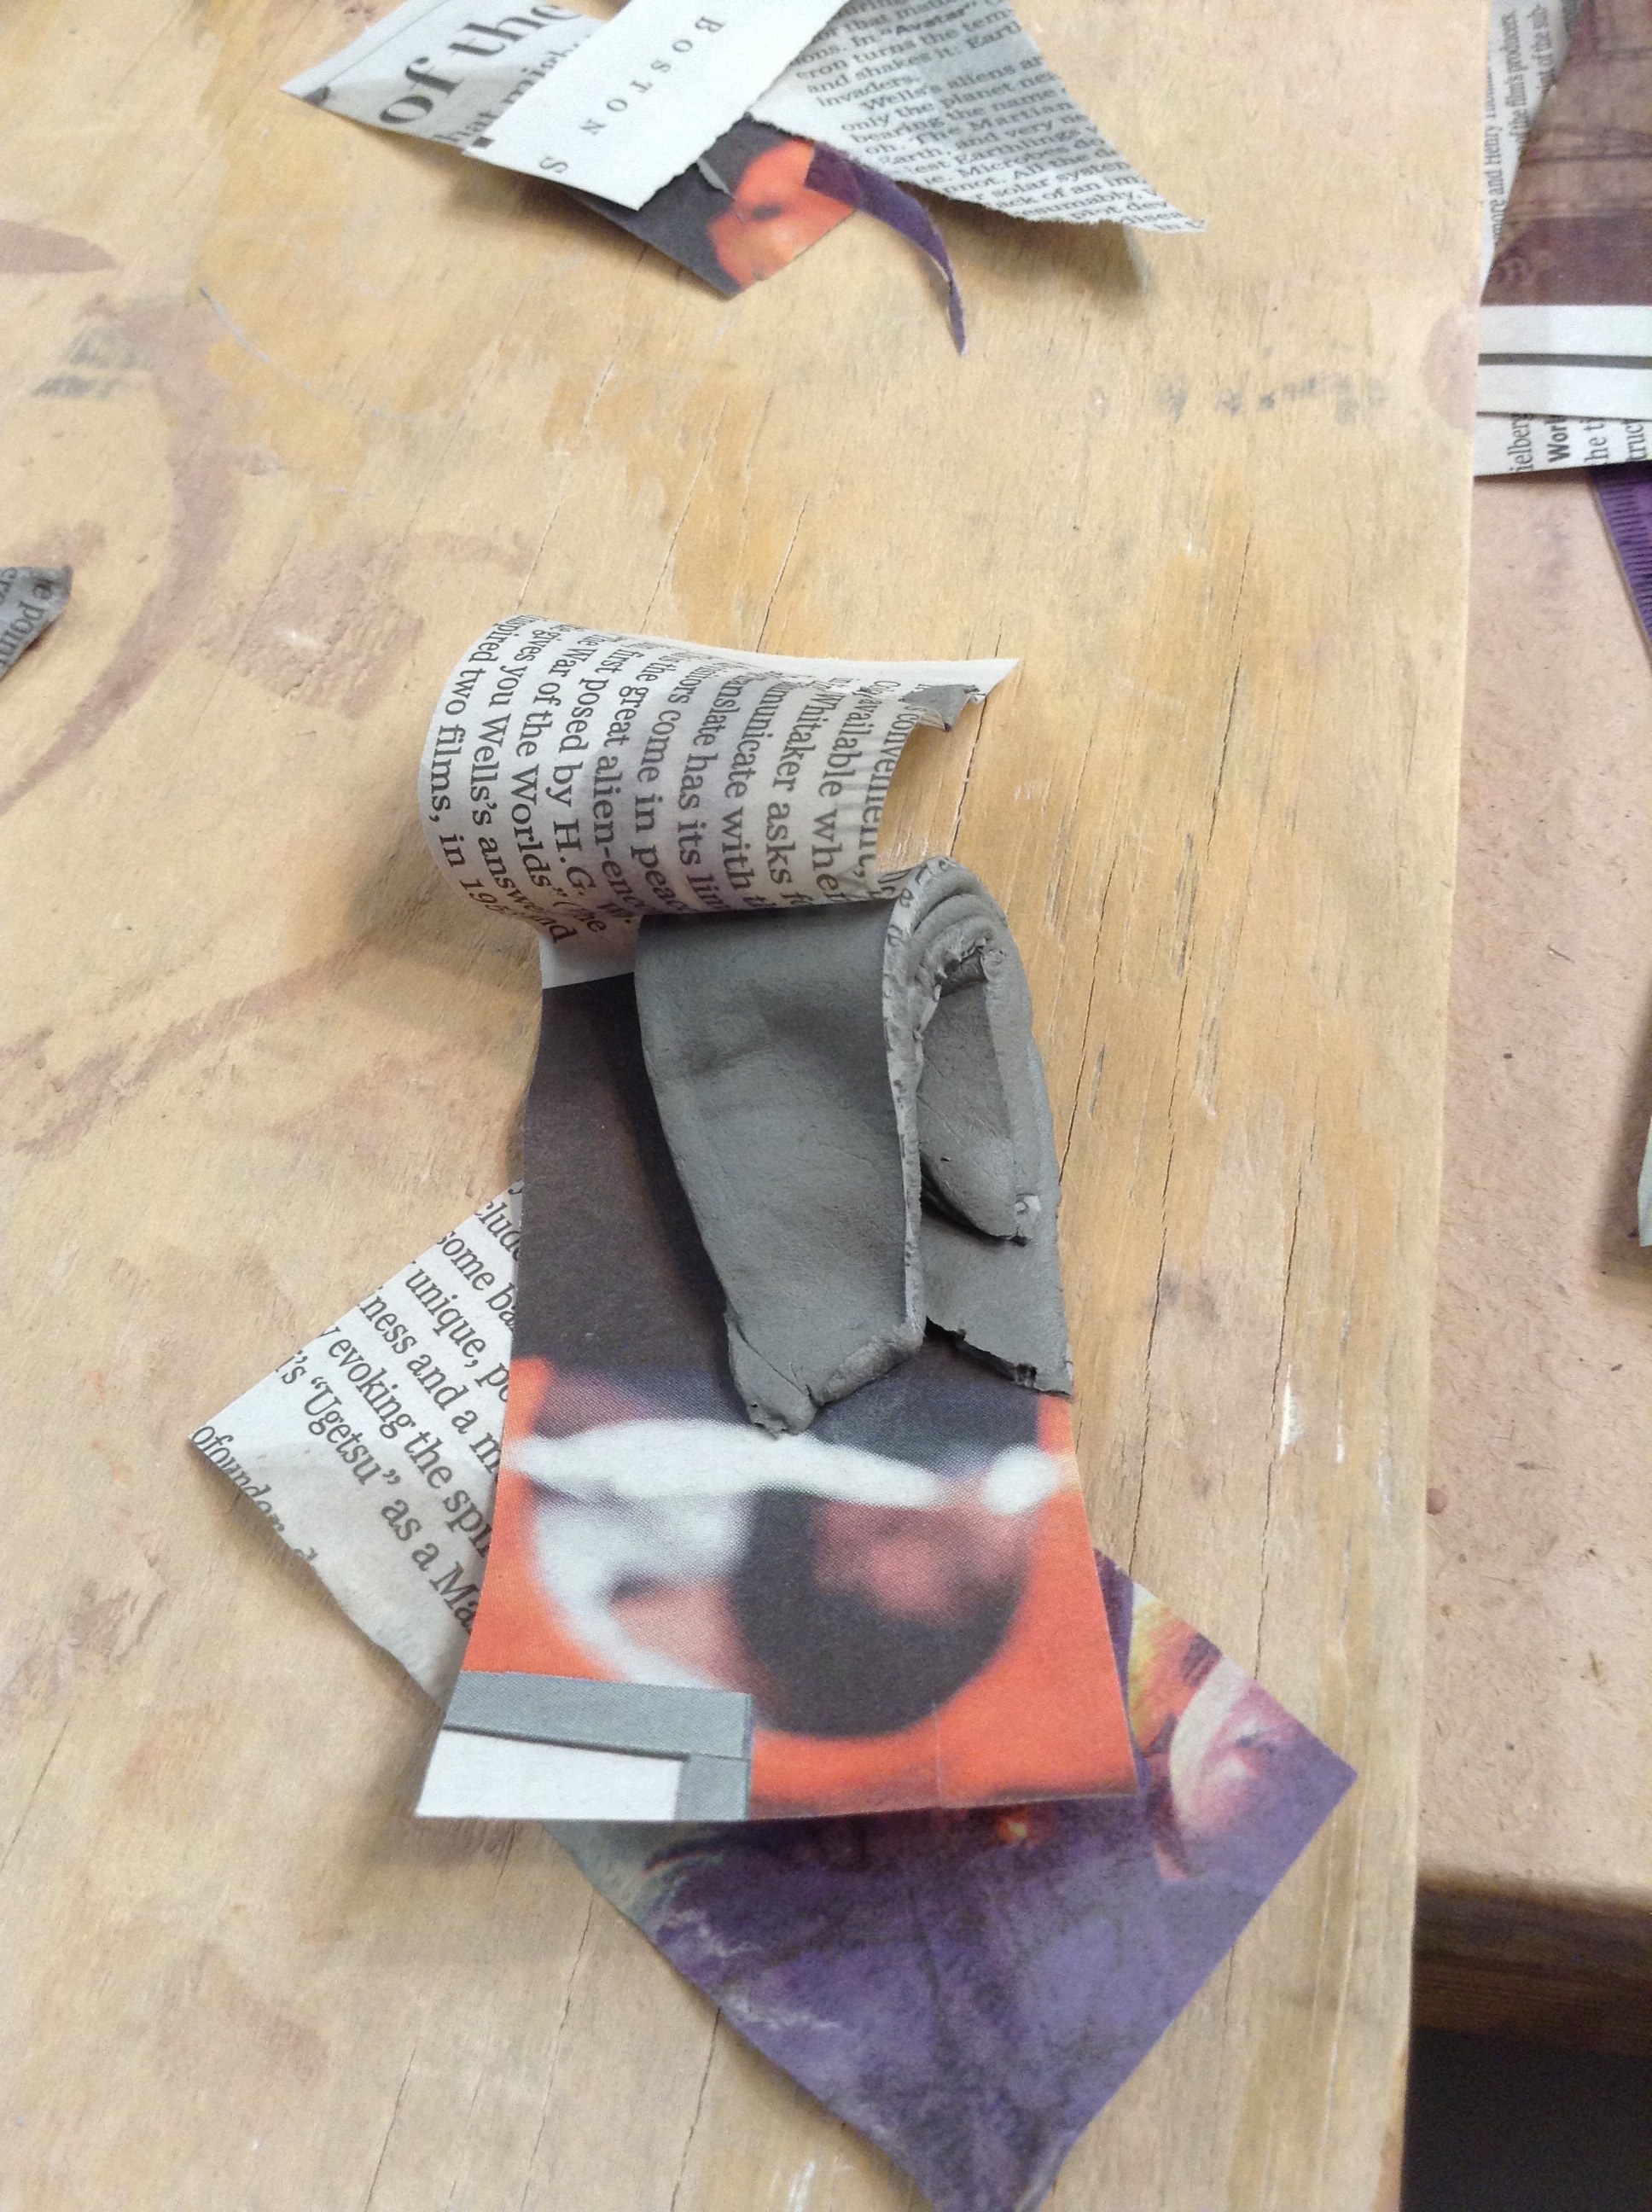
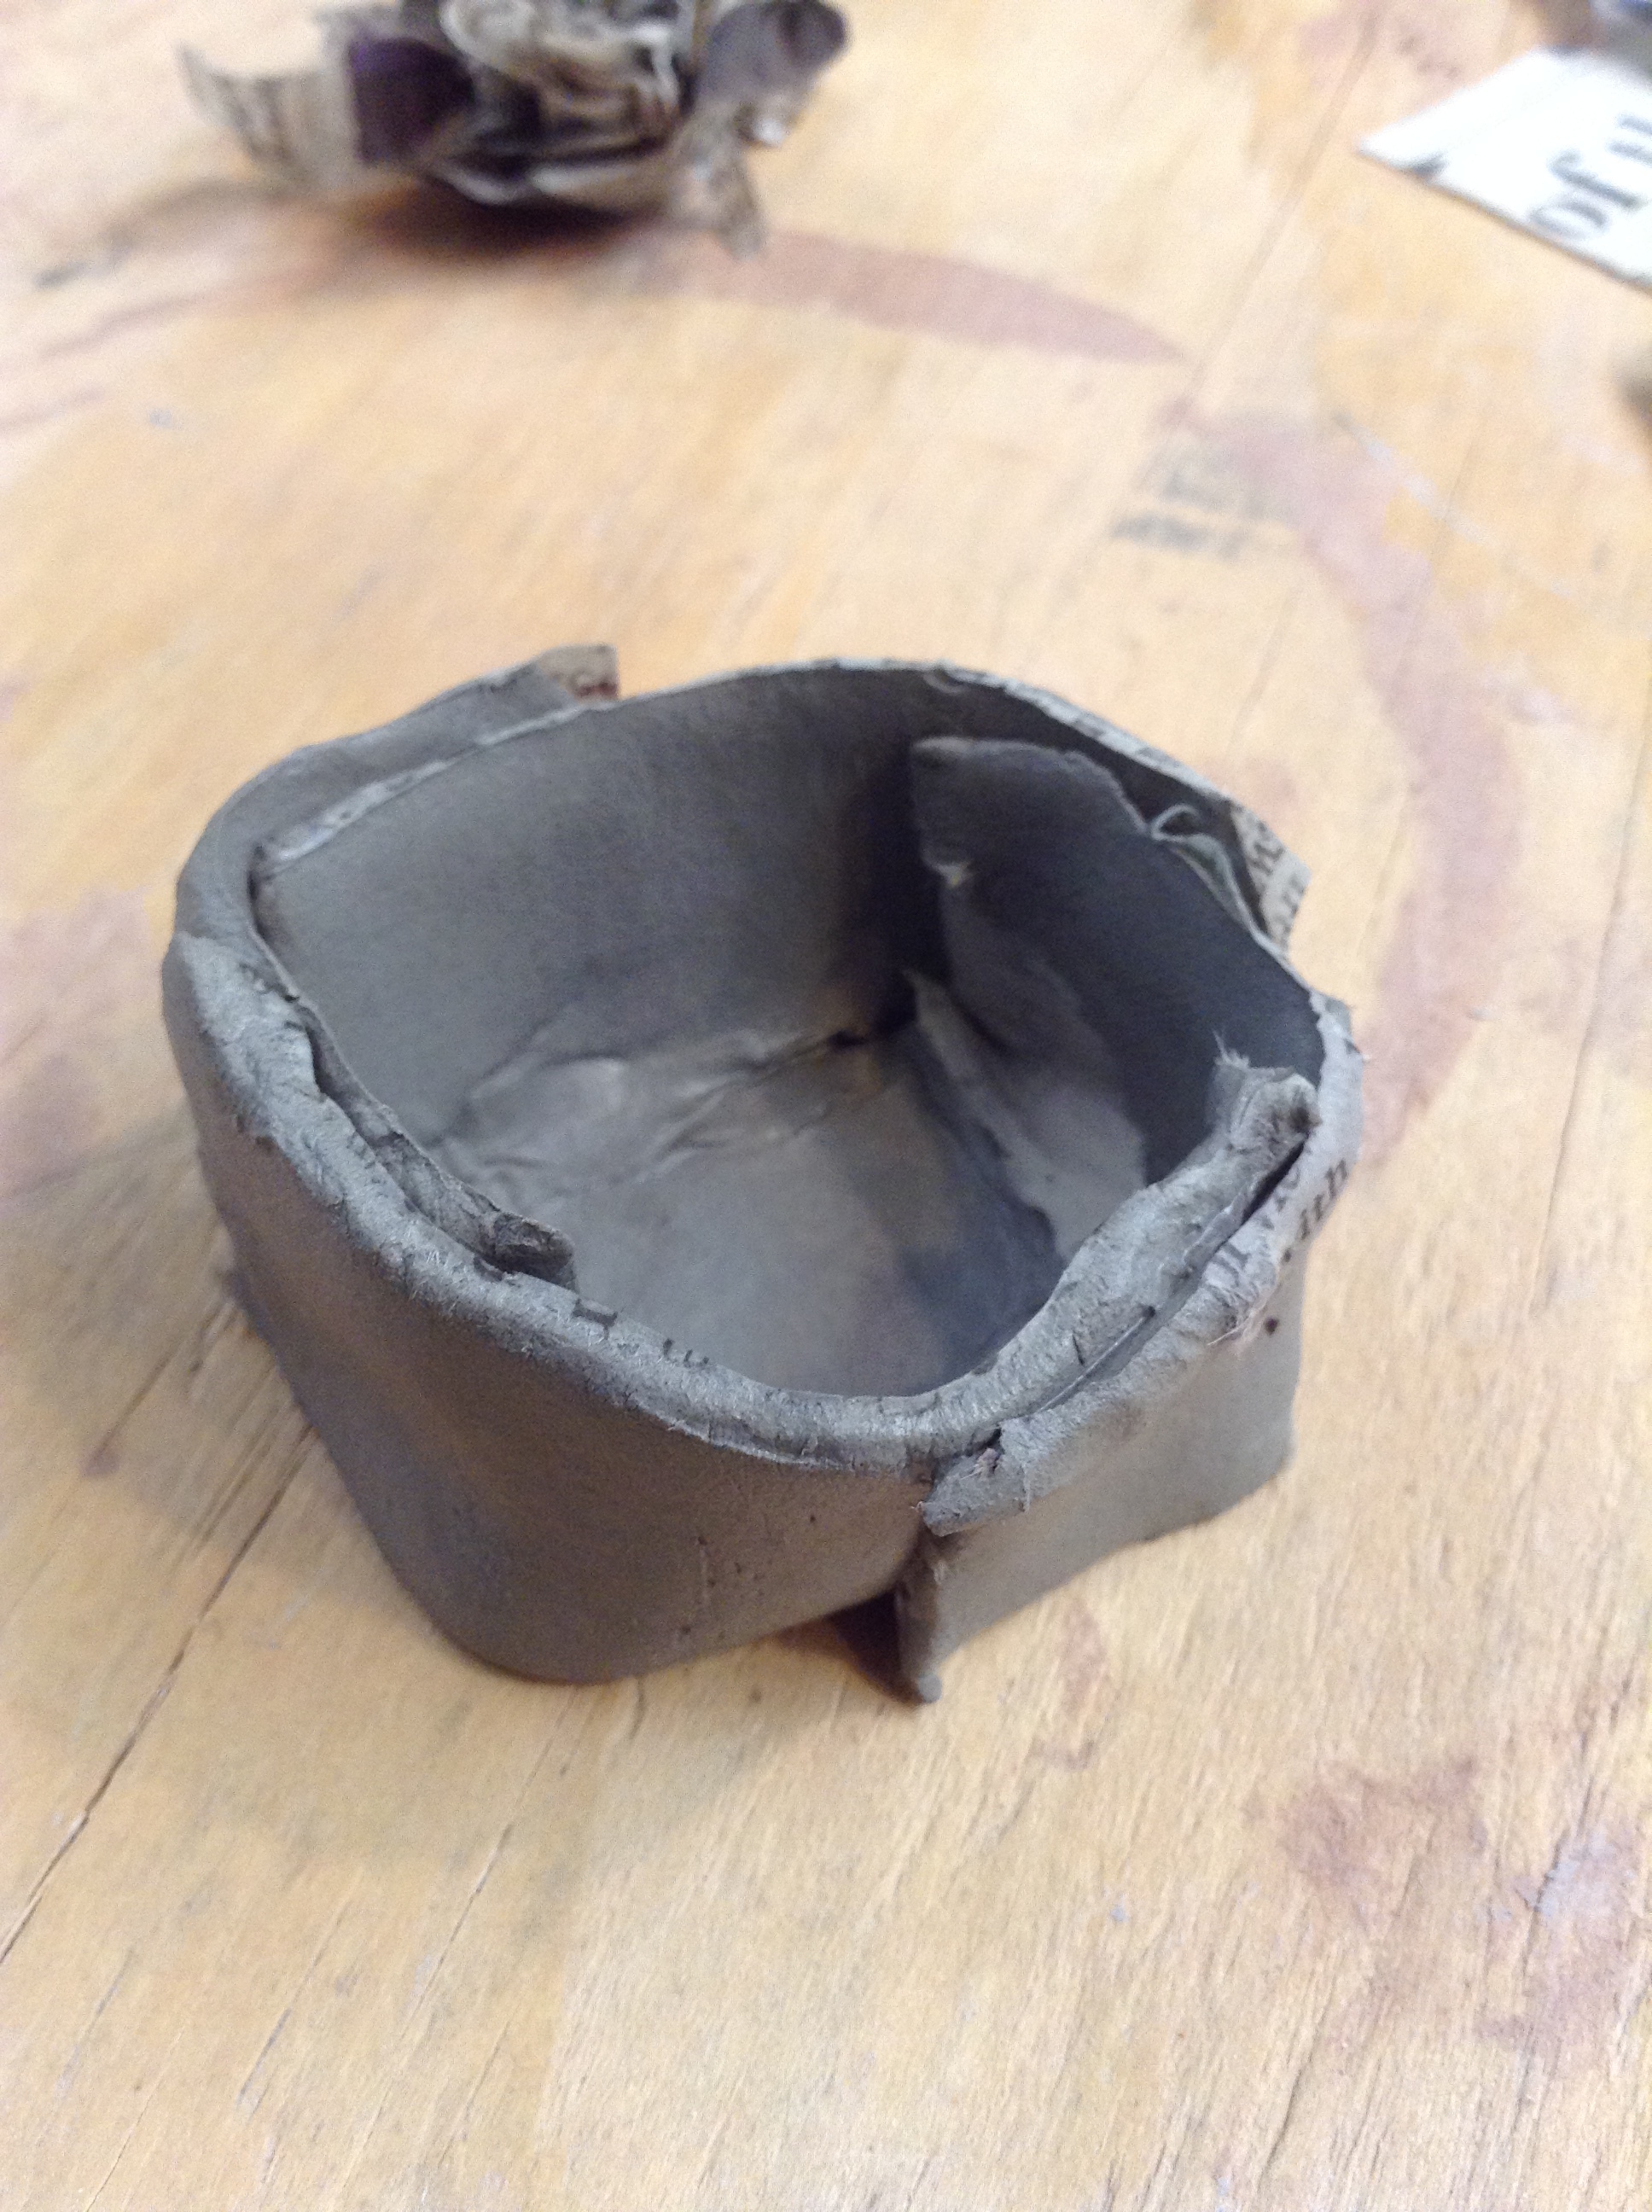
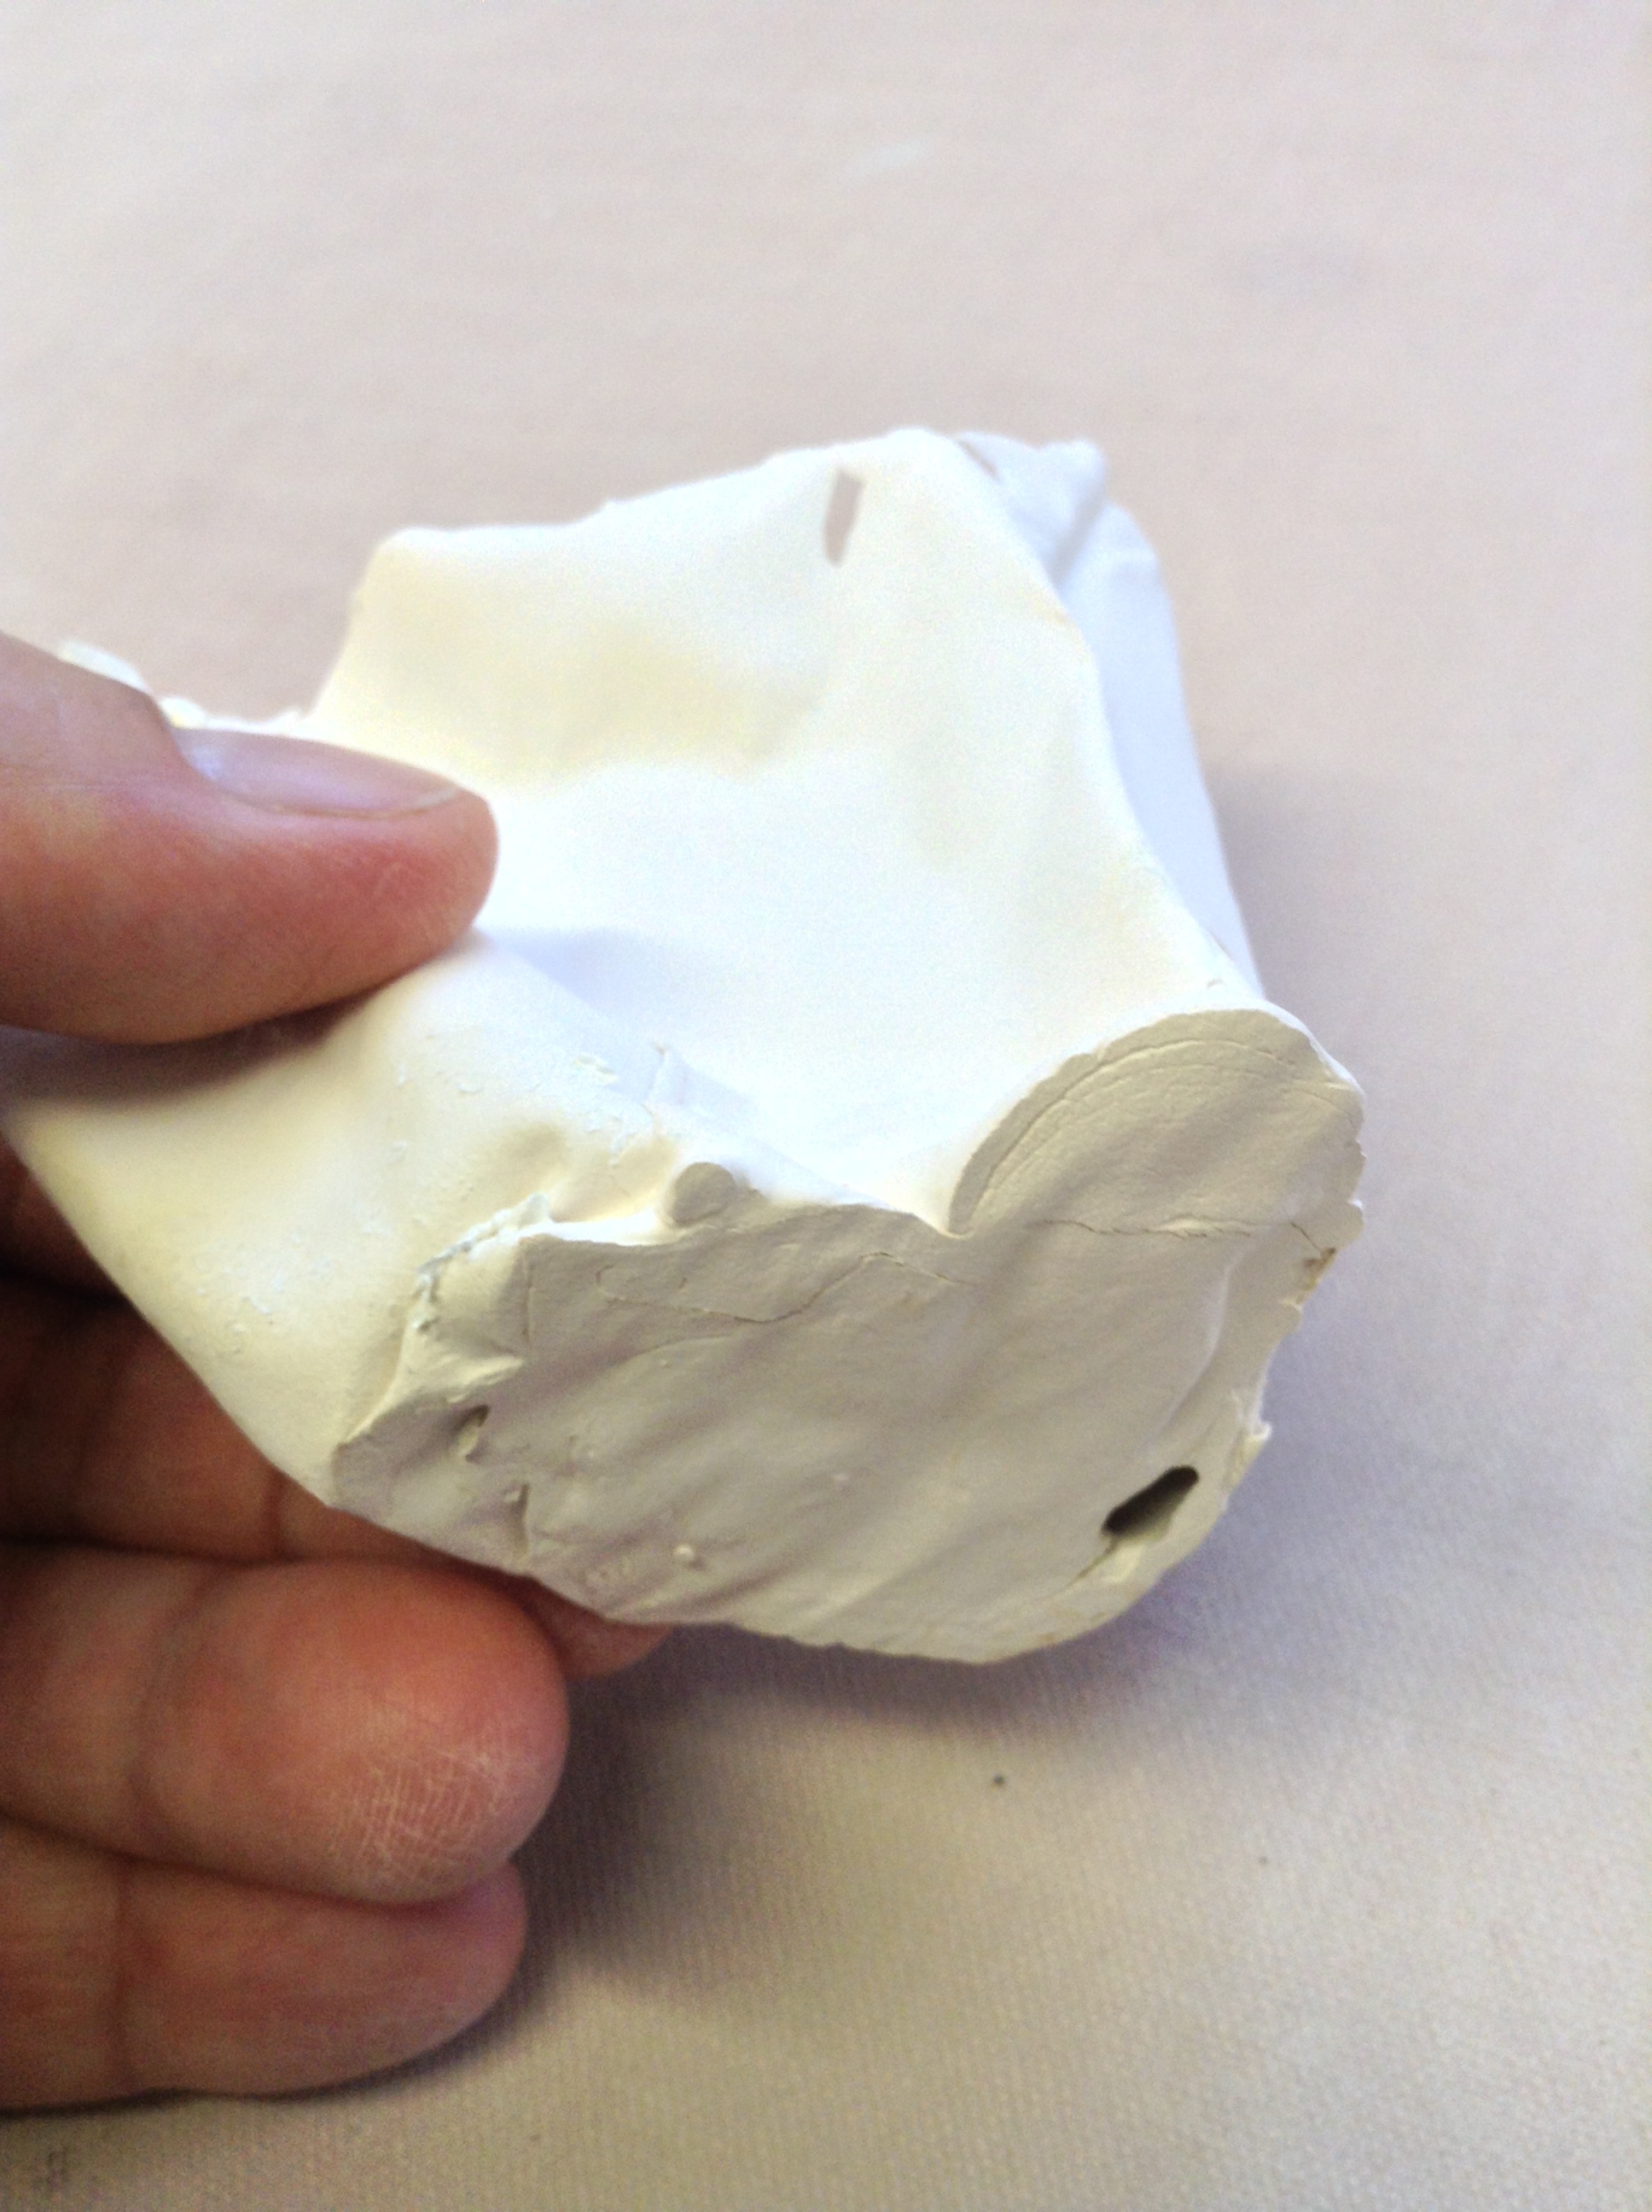
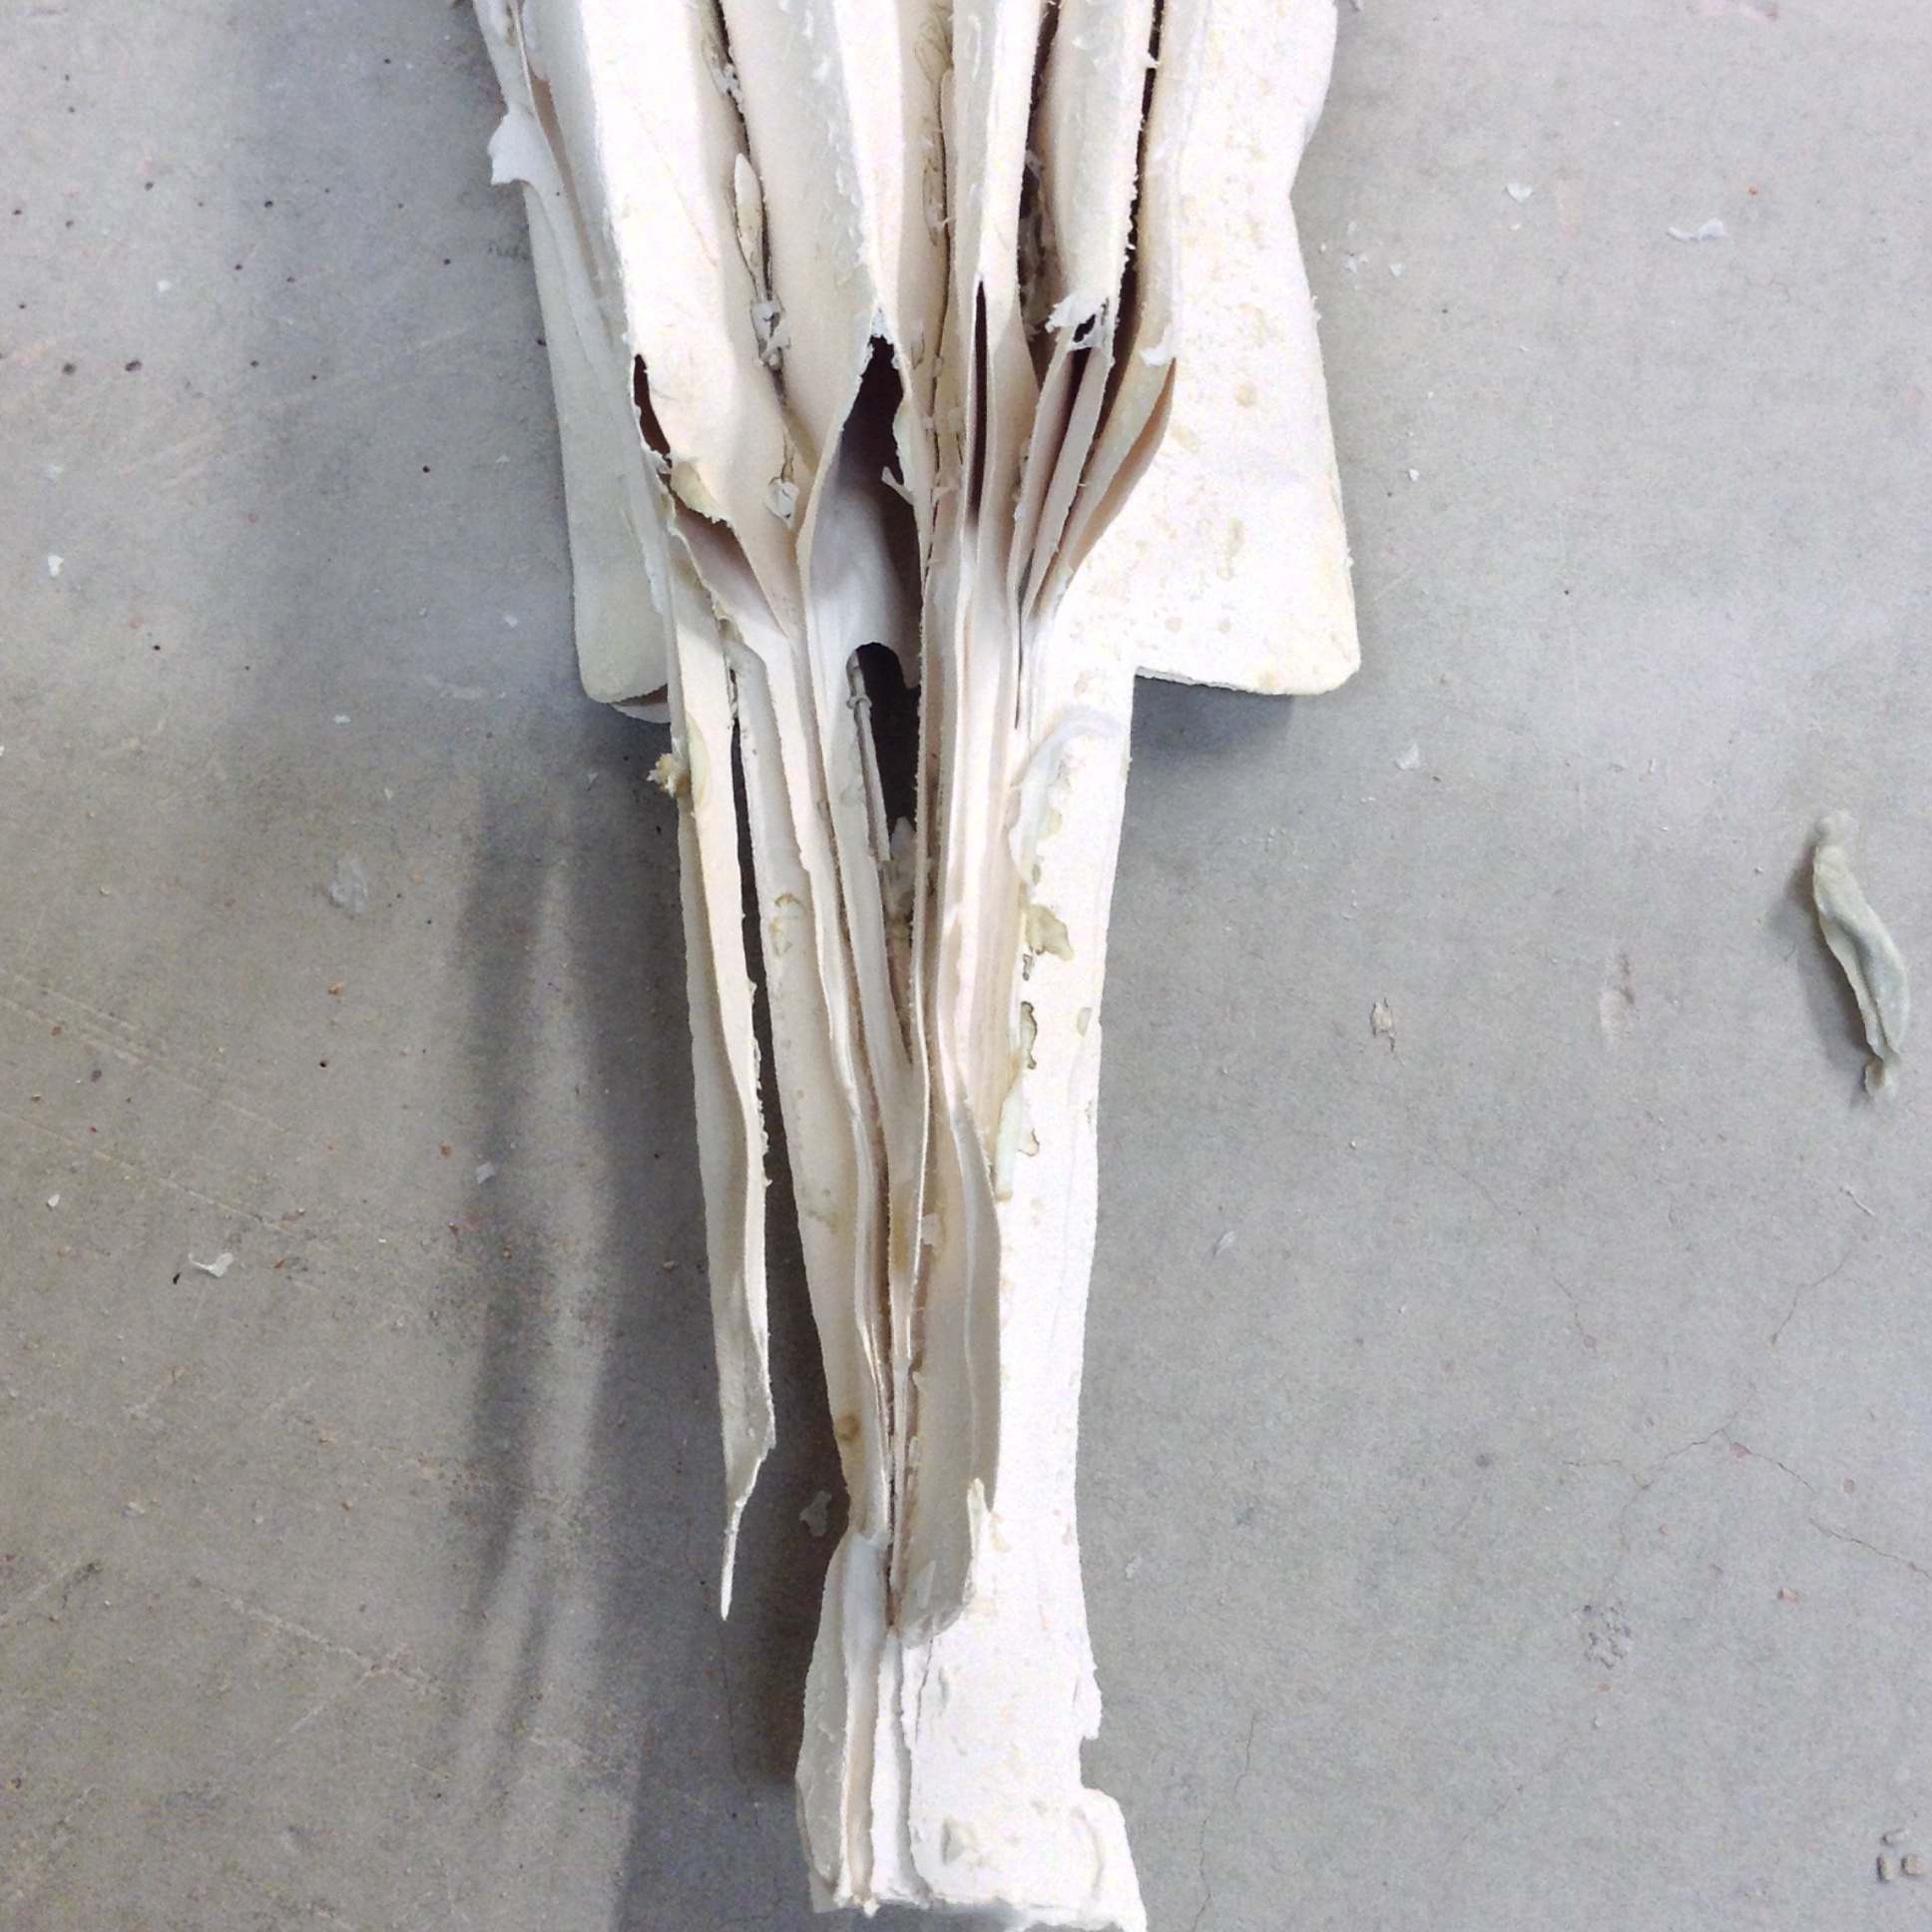
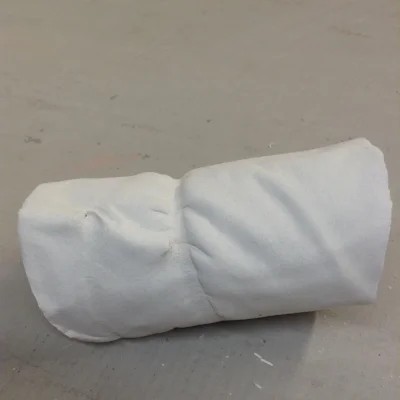
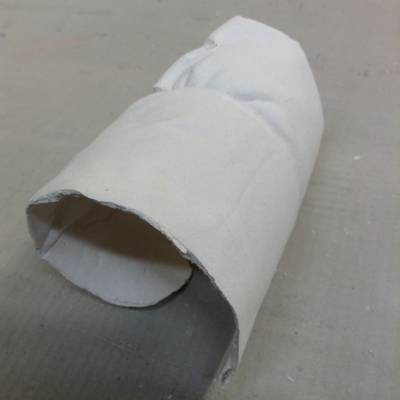
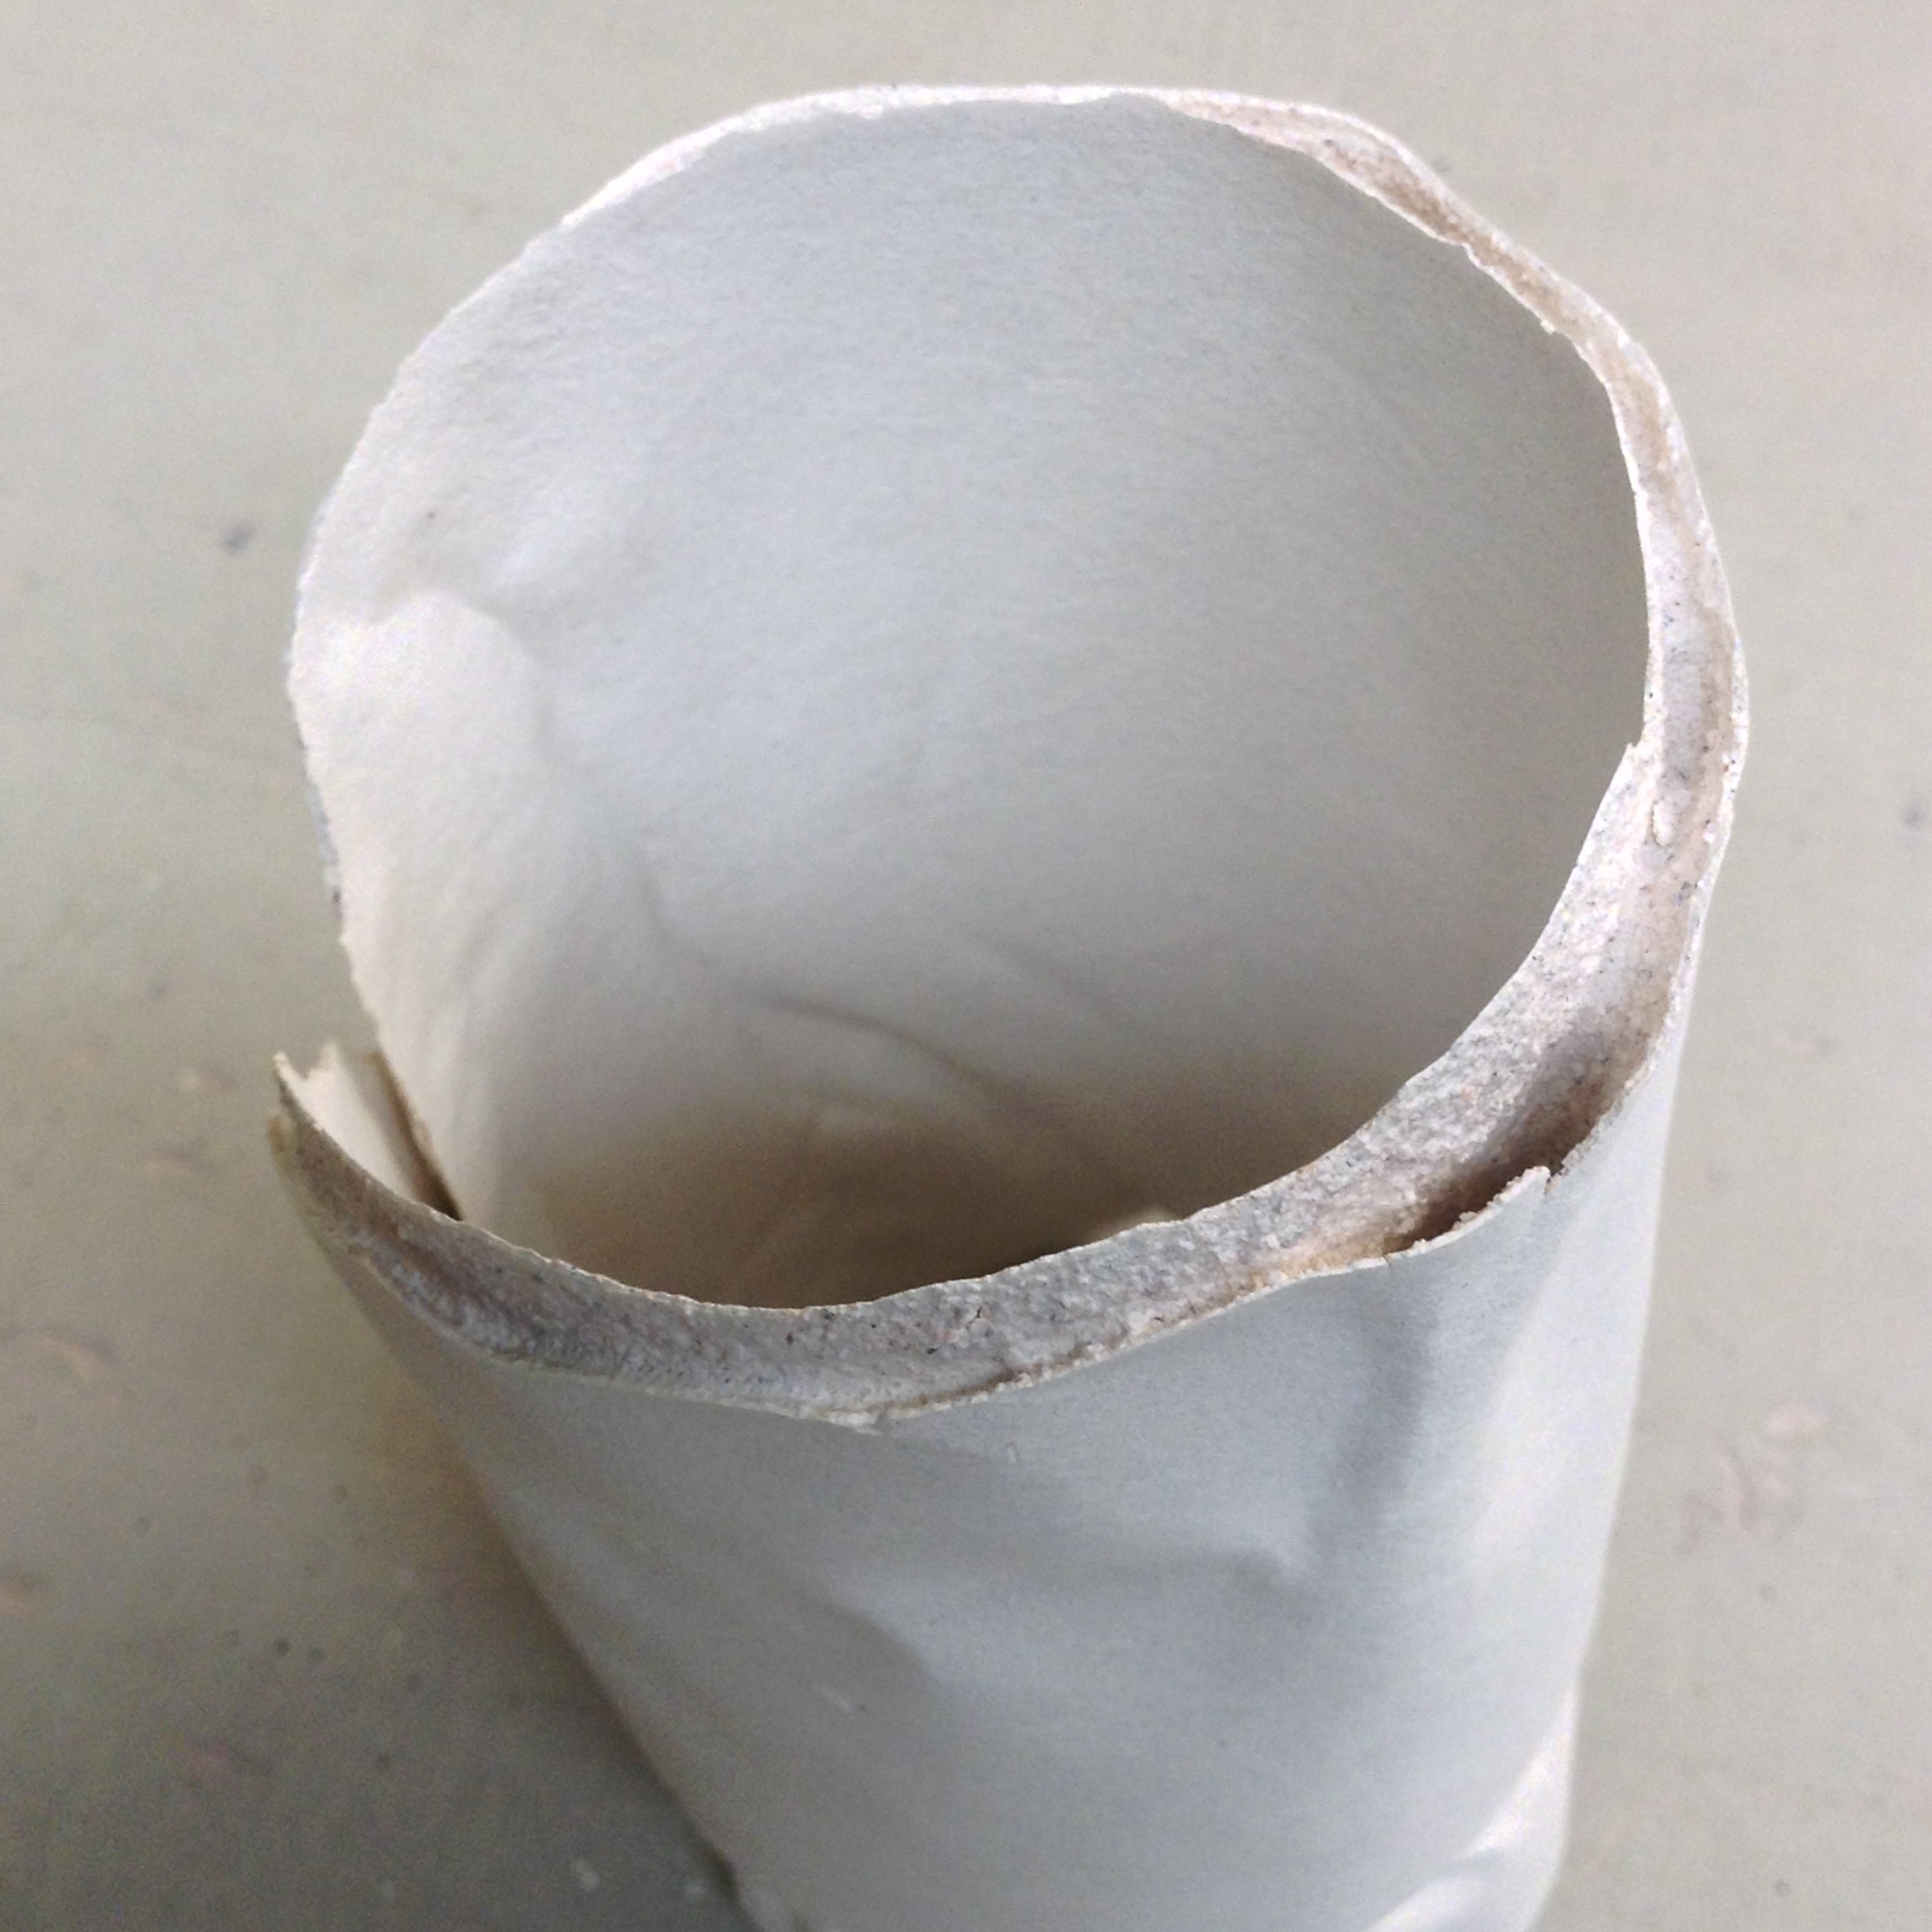
    From and engineering and artistic perspective, there's already a great deal of work using liquid slip as casting material and thicker slip as a drawing medium. To add to that body of work, I'm using paper as non-typical shaping methods for the thickest versions of the slip recipes. Using this paper-clay-paper laminate, I'm exploring the methods needed to make functional pieces or sculptural objects in ways that could scale up to many dozens of pieces. Plus, it's fun and the resulting forms happen fast. These methods have the incremental-slice methodology of digital 3D printing, but also retain some of the analog hand variations possible with sculpting. Since it's a mix of processes, at the moment I'm calling it "hand-printing." 

    From a visceral standpoint, I do wonder if something is missing from the process when we don't touch clay directly. Touching the familiar form of clay holds a great satisfaction for so many people. Soft clay seems to invite the most direct approach of the hand, and records all actions upon it. We make our mark on the blended, soft and moldable stuff from store-bought bags. We wrestle and thrash with the hard-won, rocky, grainy, often sticky piles of it found outdoors near bodies of water. Is there anyone who hasn't touched clay at some point?

    But, that said, for those of us who are as likely to draw as sculpt, or build instead of sculpt, what can clay do? Maybe something like these things I'm exploring here.


    THE SKY'S THE LIMIT.... ALMOST

    What's next? 

    • Larger abstract forms with more than one interior wall
    • Changing the orientation of the growing pile so that the layer direction changes
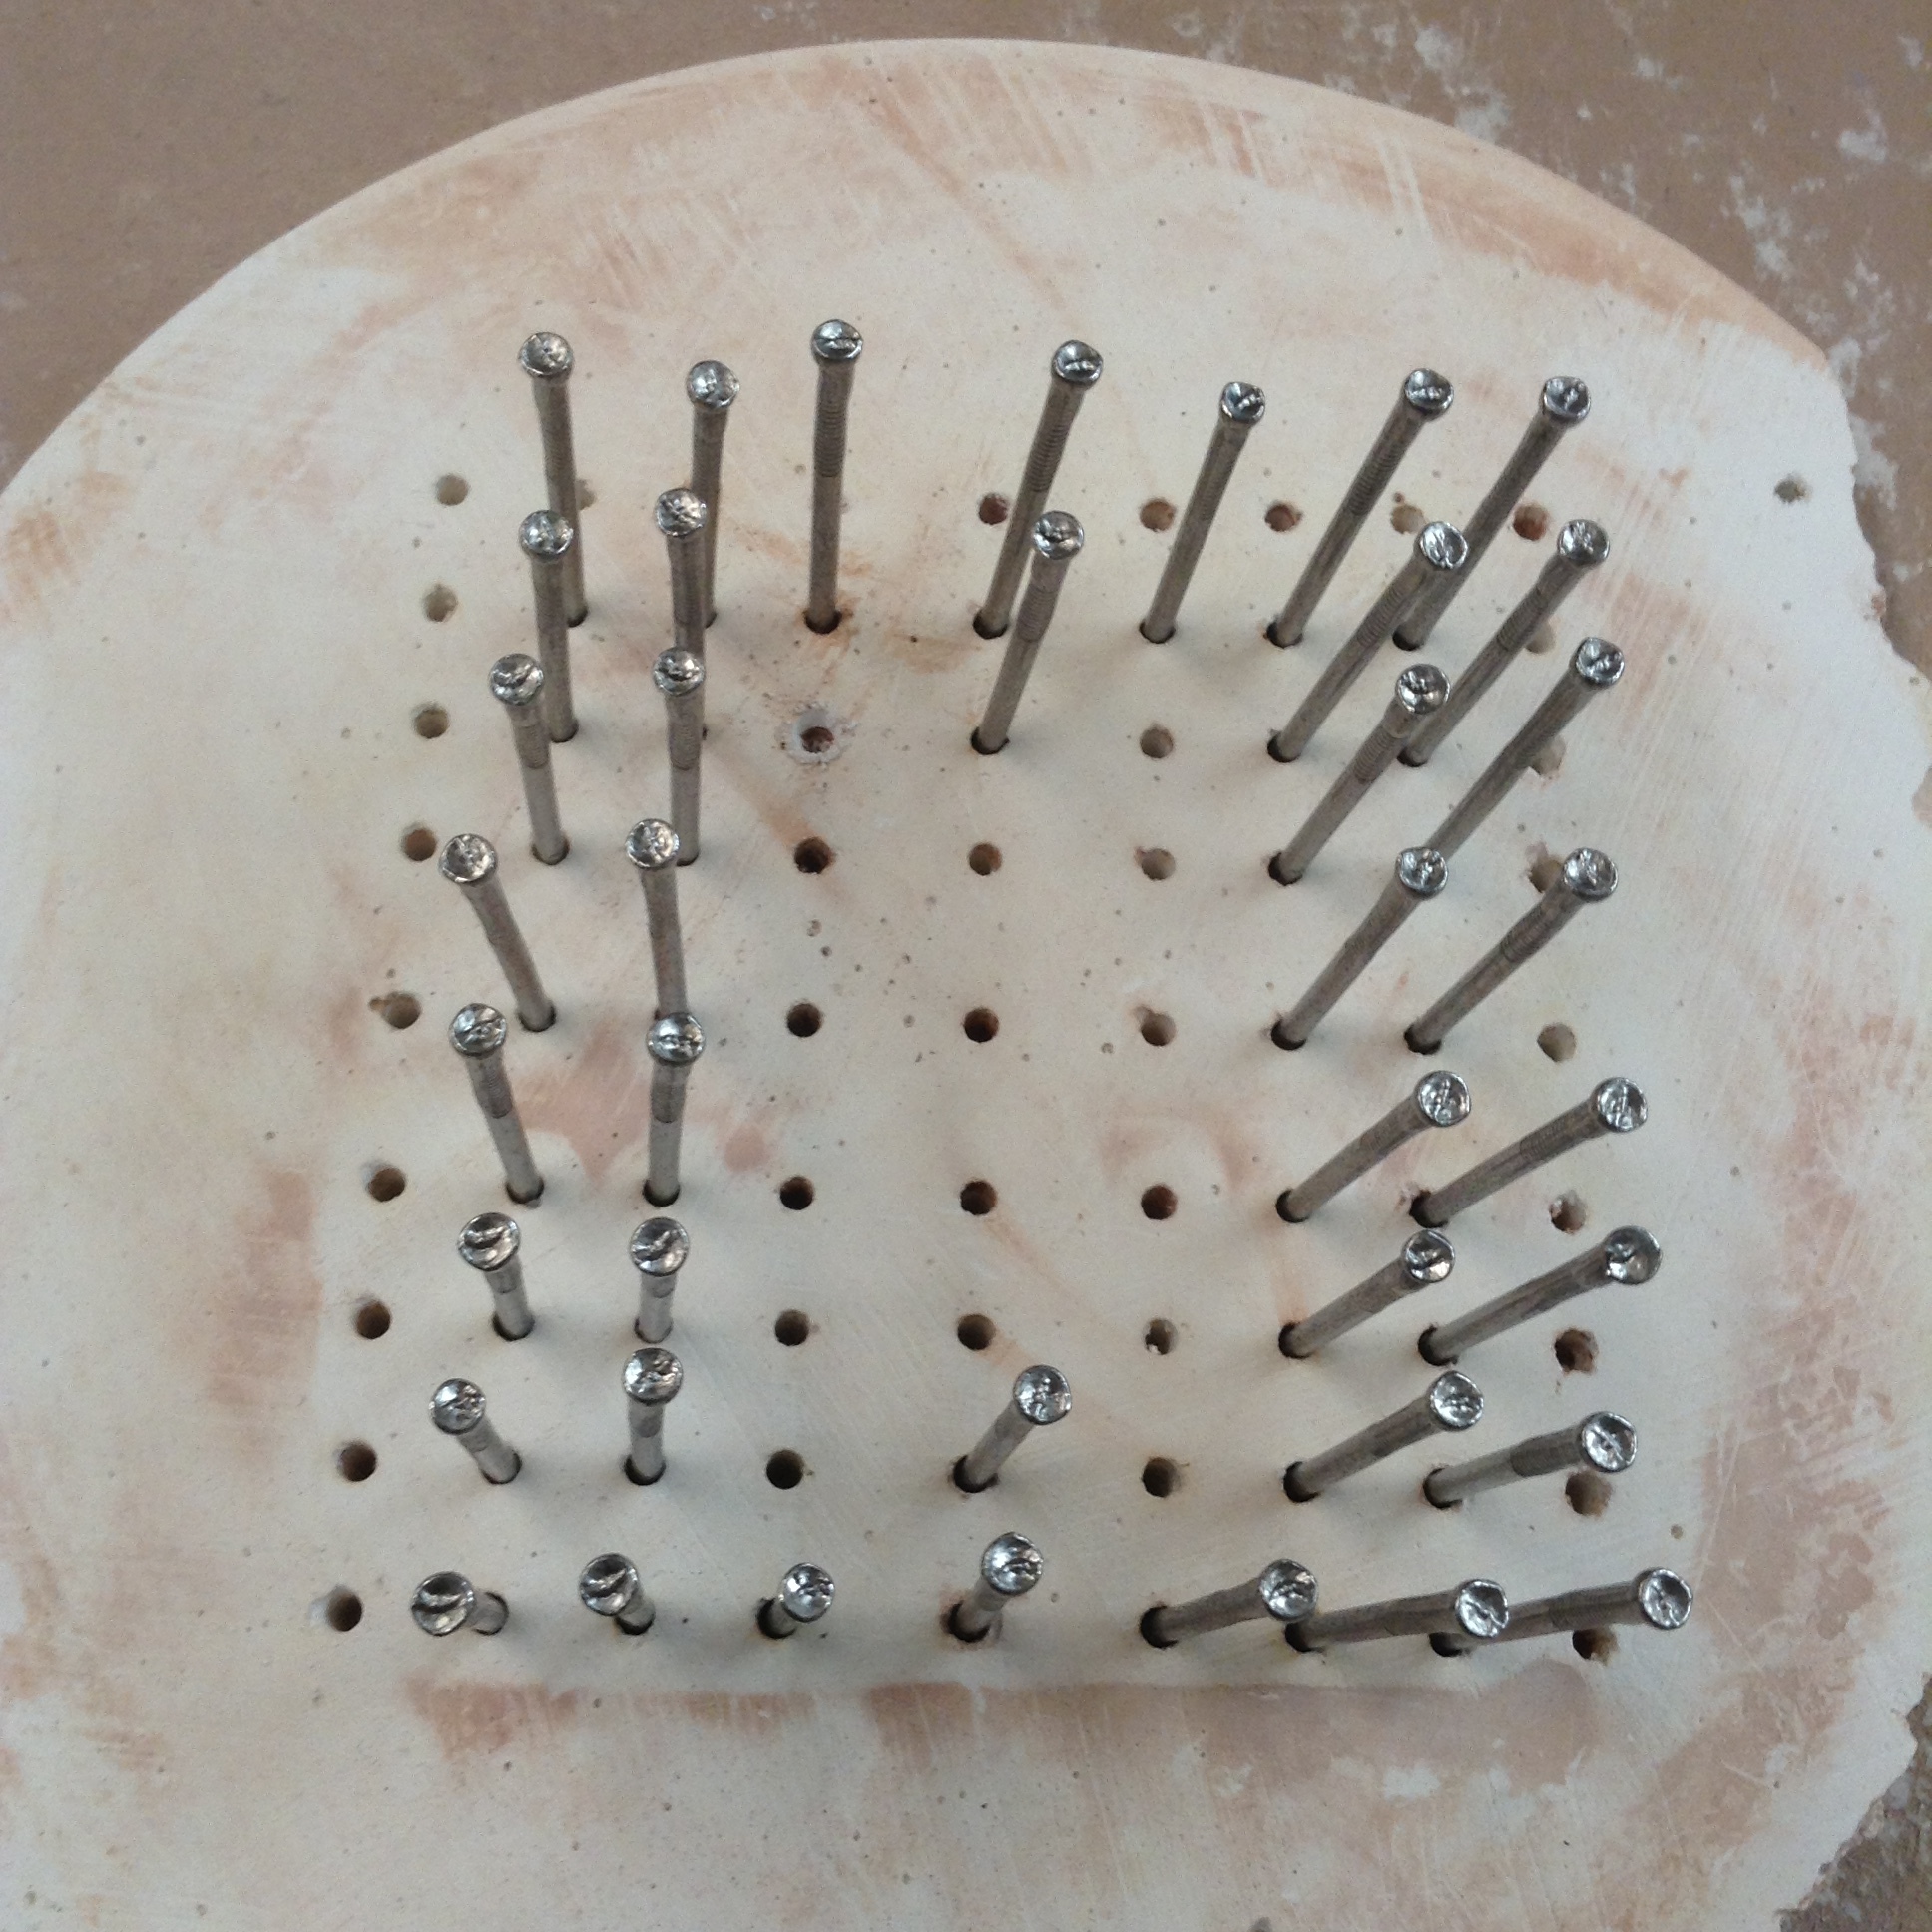
    • Getting significantly different diameter nozzles, so that a layer might have one huge strand or several smaller strands, all combining to become the structural wall
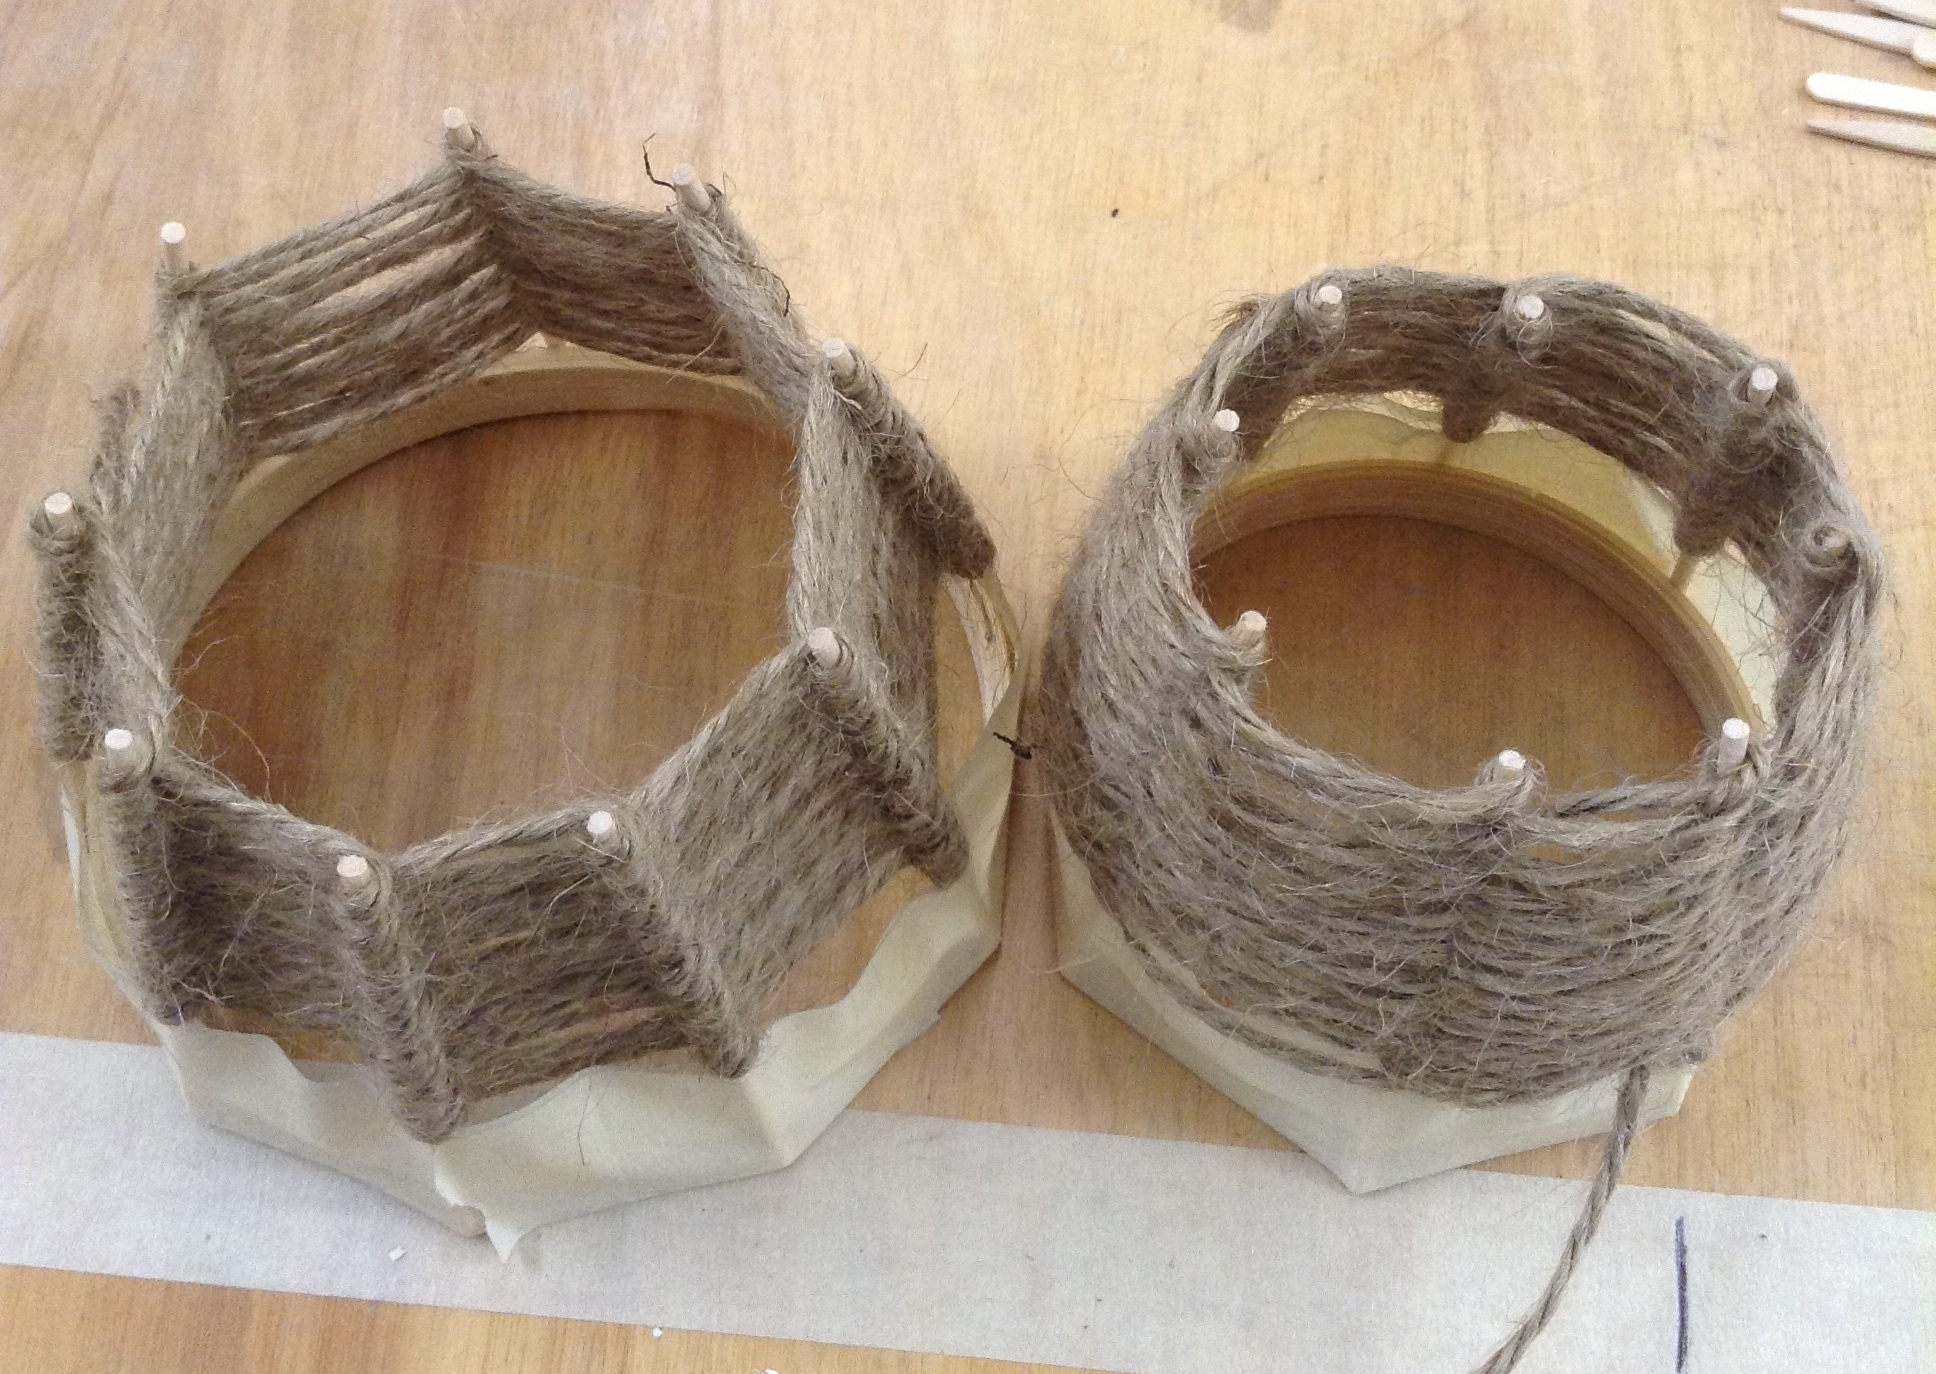
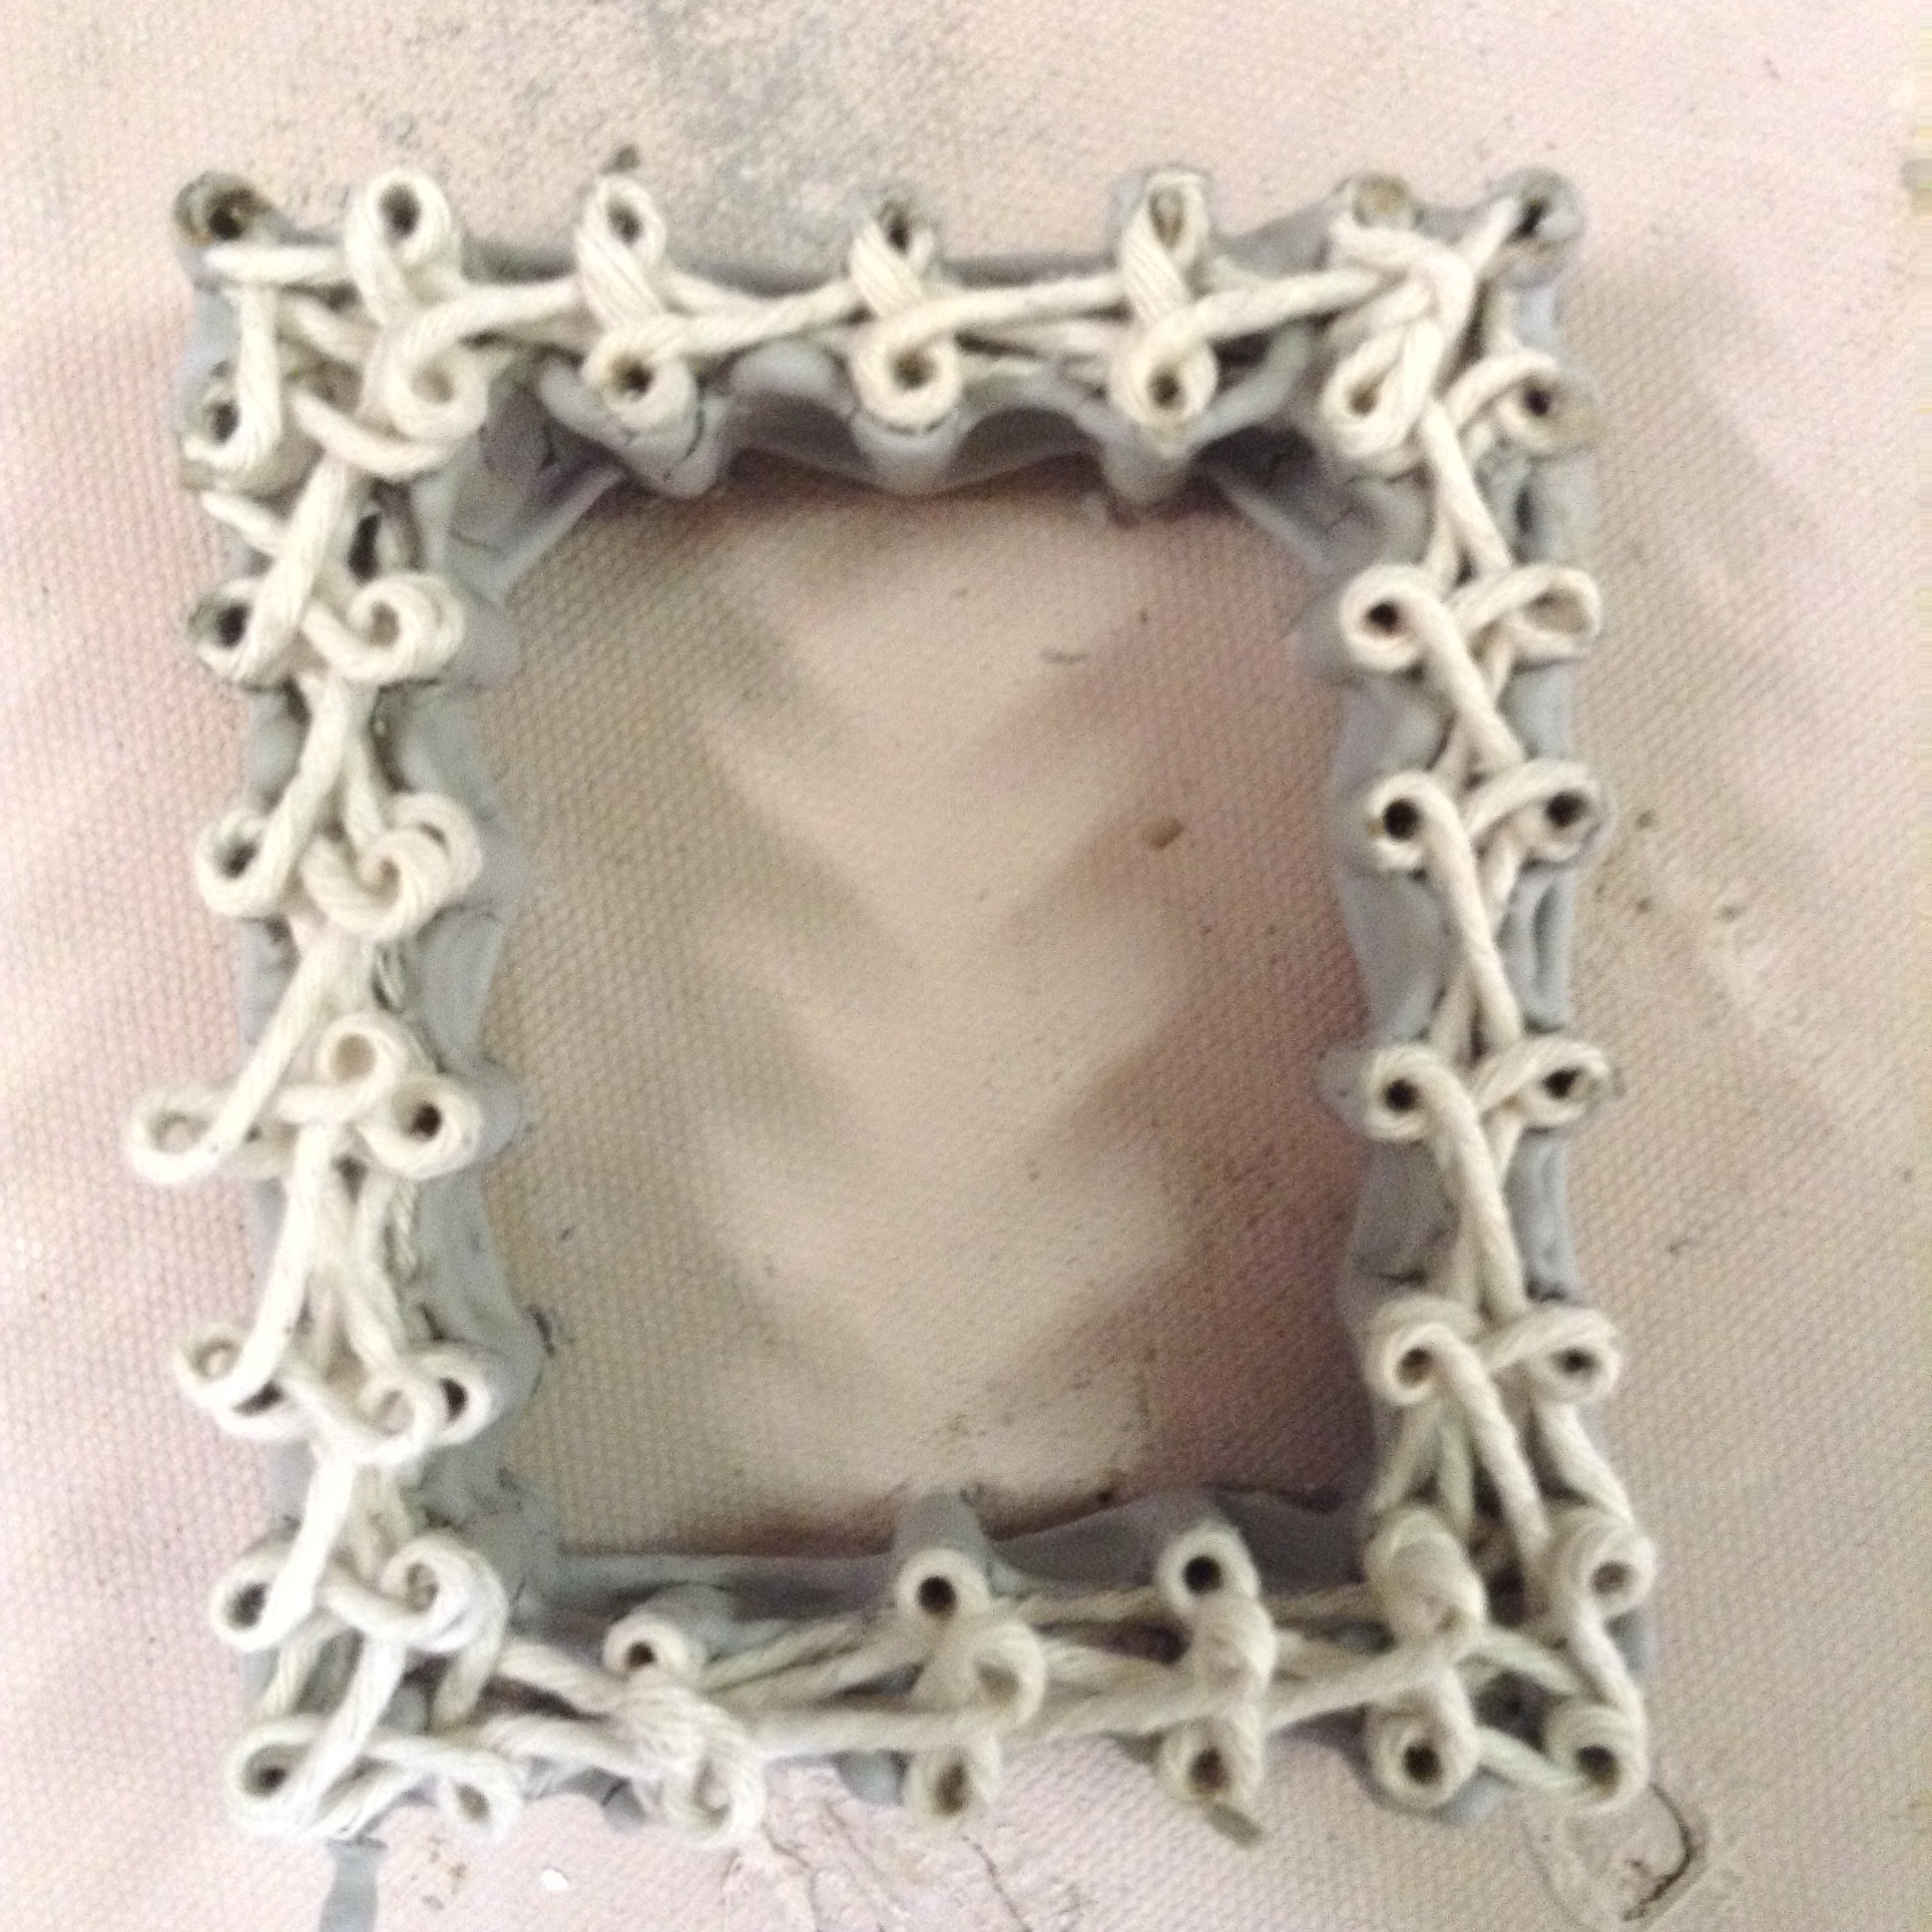
    • Pleated surfaces that are mounted in frames as wall decoration
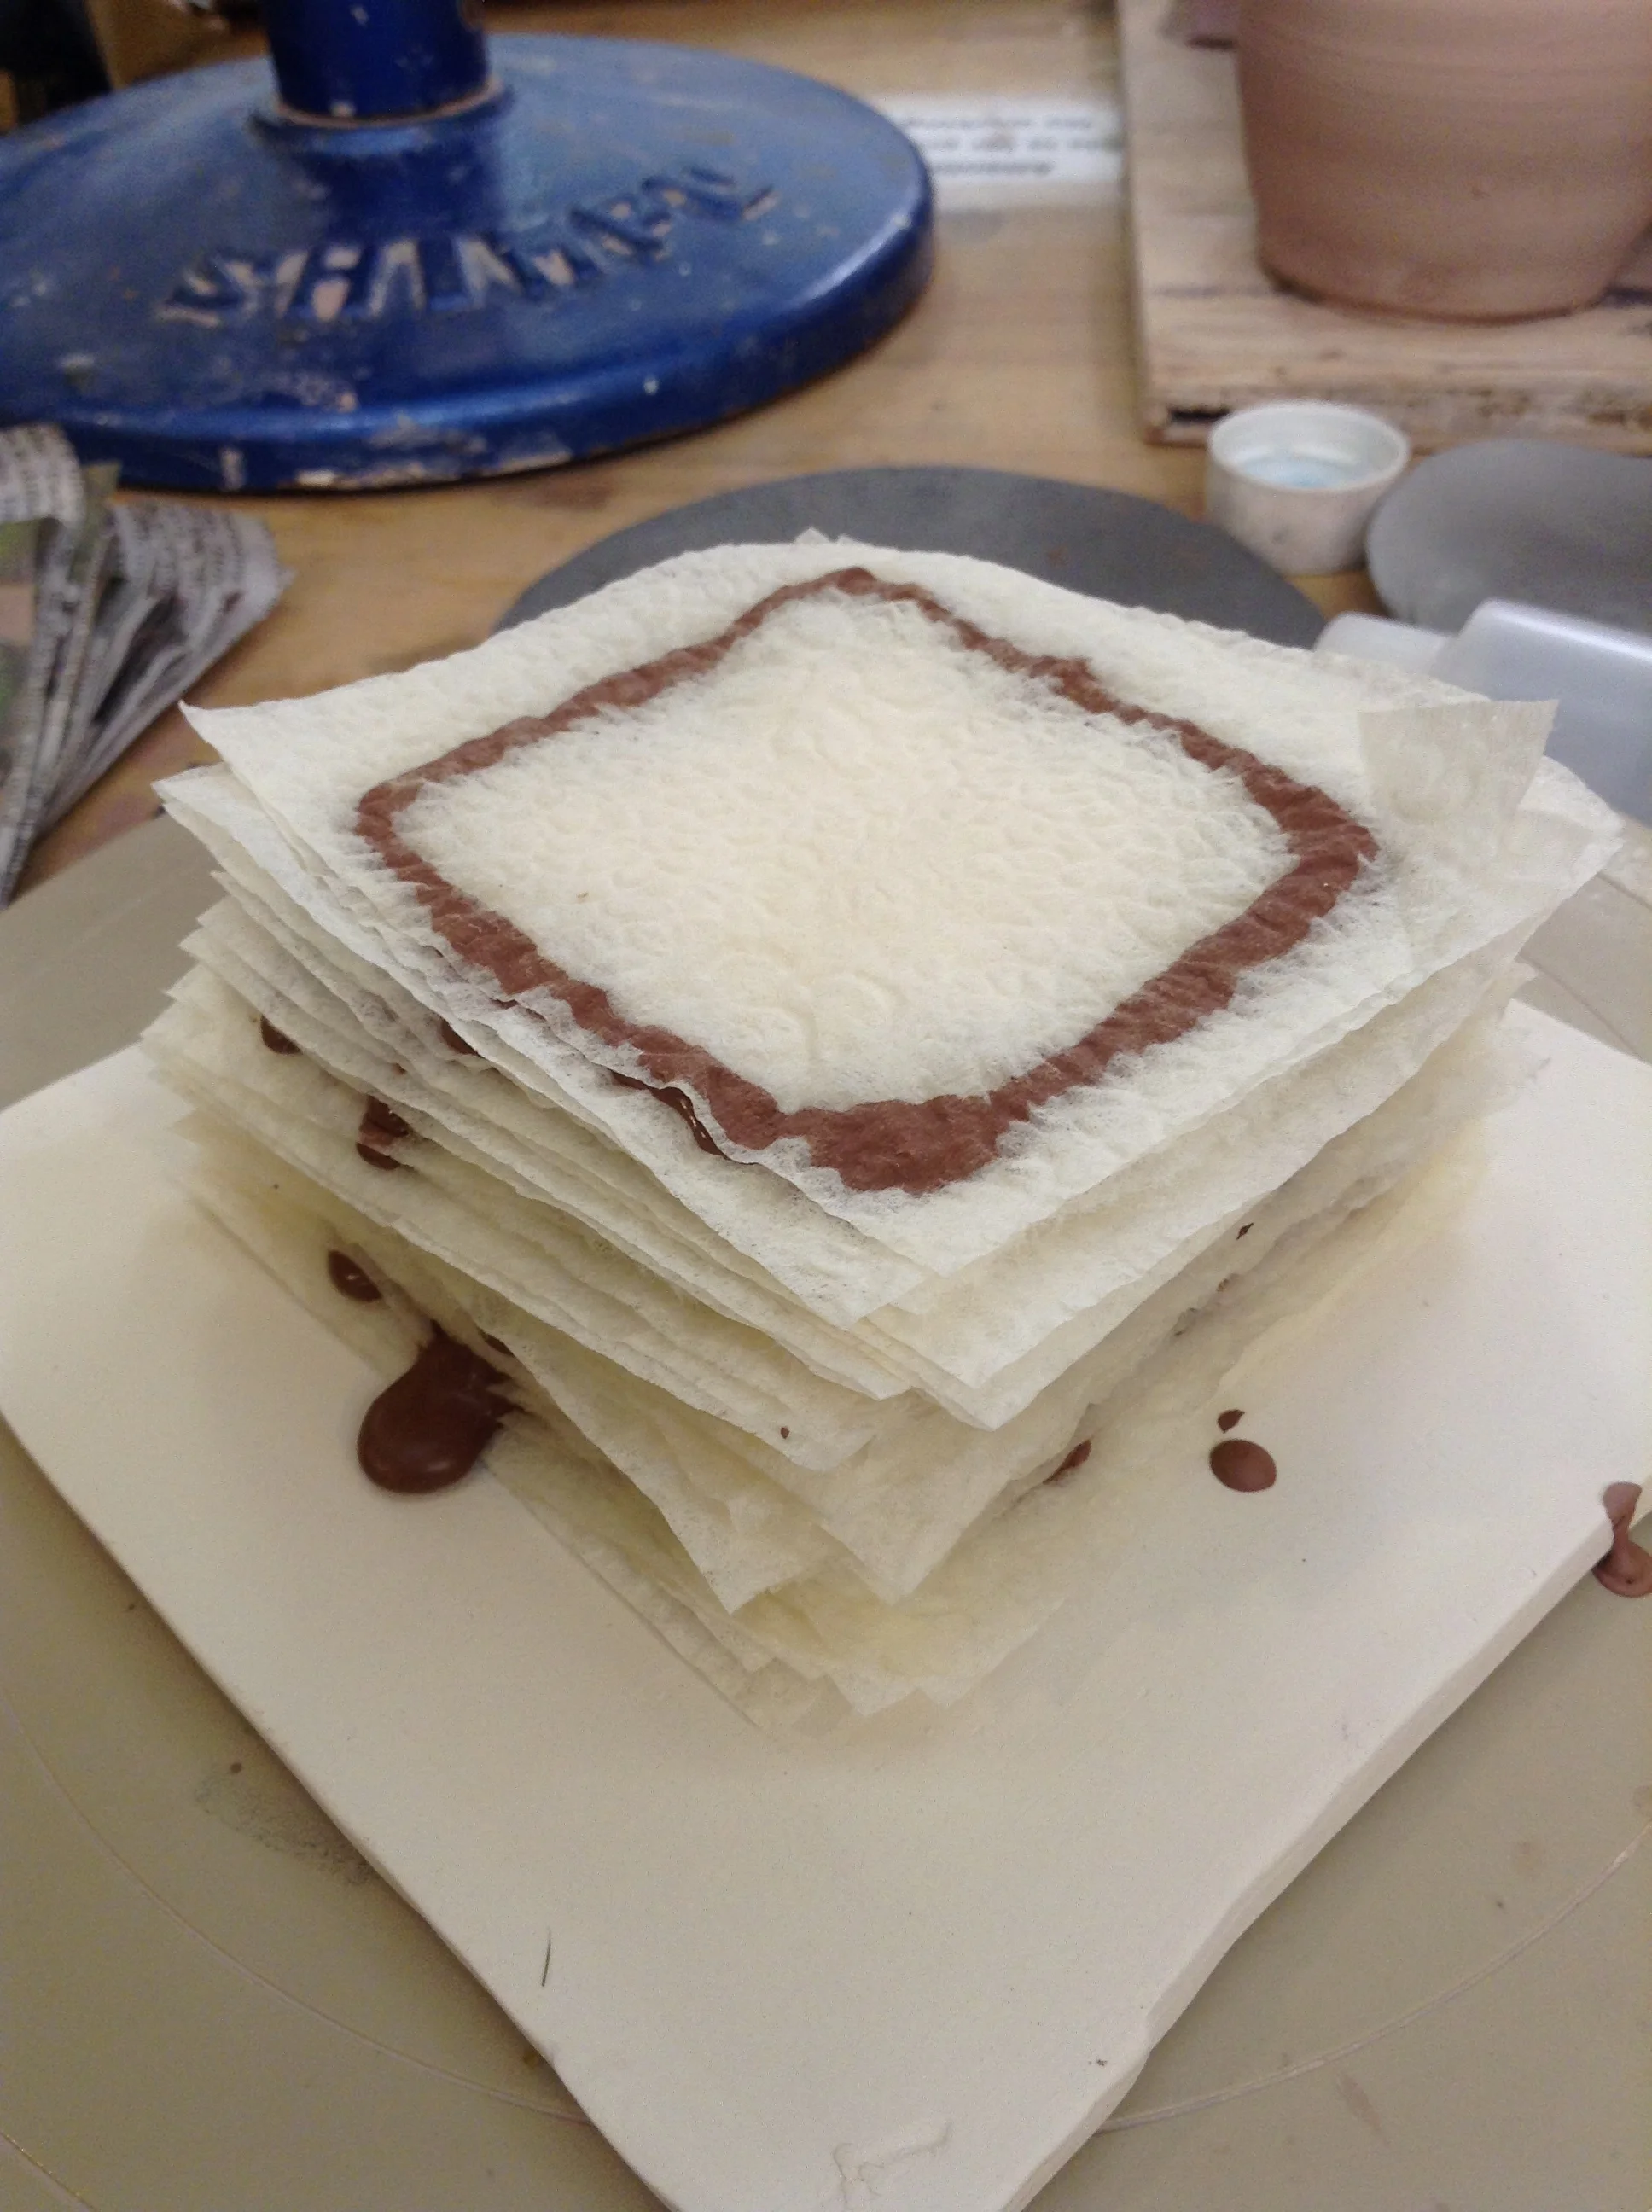
    • Slip trailing as typically used for decoration printed onto newspaper just prior to spreading the thicker structural slip, so that after distortion, the surface is already patterned


    FIN

    Thanks for looking at the pictures, and bonus thanks for reading. This is a small beginning. Let me know what made sense and even better, what didn't make sense.


    Between two paper cones: Slip casting improvisation

    In the ceramics studio where plaster moldmaking is taught and used, there's usually that one person doing experiments with the casting slip. If some material is absorbent, someone has dipped it in slip to burn it out. If it's flexible, someone has tried to capture the form with clay slabs. Here I'm using paper cone forms to get results that are a little of both. Functionally I planned to get a thin cup shape for drinking from, but the results were a little surprising and, possibly, better than I hoped.


    THE SET-UP, or WHAT MARC THOUGHT WOULD HAPPEN

    I use the traditional plaster mold all the time, but wanted a forming method that lets me cast slip as a thin wall, without the draining step. Such solid castings are common practice for items like plates. But a problem of mold release happens when the intended form becomes too enclosed. The mold surface for the inner part becomes caught in the casting it just made. It is far more common for the interior surfaces of cast items to be drained rather than molded by a rigid object.

    This set of cones could allow me to define exactly what shape I want on the interior shape, but avoid much of the problem of using rigid molds. It also allows me to use exactly the amount of slip needed for the cup, without having to drain a heavy mold of the excess. The interior paper form would be easily removable, or, if necessary, could be left in the cup and burned out later.

    Turns out I was mostly right. The forms collapsed from the cone shape, but I kept the results. I like the tree-bark like texture better!
     

    Example template for generating cone pattern. See the website? Follow it for fun templates.

    Example template for generating cone pattern. See the website? Follow it for fun templates.

    The intuitive way to build cones from paper will usually work if the top and bottom edge don't have to be exactly parallel to each other. But in this case I felt like a template would make things easier. I found a great website that helps. This image is an example of the kind of cone I used for this test.

    I made two paper cones by printing the pattern on normal copy paper. My theoretical guess of how much smaller to make the inner cone was a bit off. I set the template for the inner cone and outer cone to have a 3/8 inch gap on all sides. When I taped up the forms, this gap ended up being too small, so I hacked the inner cone to a size I liked better. I used plastic tape used on surfaces that I didn't expect slip to touch, originally to ensure better membrane buildup.

    Single paper cone, taped, as outer shell for containing slip.

    Single paper cone, taped, as outer shell for containing slip.

    Here you see the outer paper cone resting on a sheet of newspaper. Choosing two different papers might seem to add unnecessary variation. But it makes sense here.

    • The cones needed to be made from copy paper because I used the printer template. In the future I could use the pattern on any type of paper by transferring it. Can I print onto newspaper directly? Not on my boss' printer, I can't :)
    • The base needed to be made from newspaper because it releases better from the slip than copy paper does.


    Thick clay slip added sparingly to bottom of cone, with no additional seal between cone and newspaper underneath. Slip hardens slightly on newspaper and forms fragile seal against leaking.

    Thick clay slip added sparingly to bottom of cone, with no additional seal between cone and newspaper underneath. Slip hardens slightly on newspaper and forms fragile seal against leaking.

    Slip is very, very prone to leaking through tiny gaps. But this way of using slip to seal the gap first is unusual, and it worked. Pouring a thin bottom layer first, it sets up enough that it sealed closed the gap between the outer cone and the newspaper underneath. Would it work for larger amounts of slip? Probably not!

    The slip mix has a bit of sand in it for strength. I'm still undecided about the ratios. Half sand, half slip seems like too much sand, so I guesstimated three parts slip to one part sand. This ratio can be adjusted later if need be.

    Detail of clay slip visible through translucent paper. No leaking!

    Detail of clay slip visible through translucent paper. No leaking!

    Here is a detail image of a small amount of clay slip added to the bottom of the cone. This should leak, but doesn't. The small amount of slip that will be filling the gap between the two cones won't exert too much force (fingers crossed!) The newspaper immediately starts to absorb water from the slip, forming a denser skin to seal the two paper shapes together. If I'd poured more slip into this cone all at once, the gap would certainly have leaked.

    Inner paper cone, smaller, with bottom edge sunk into wet floor. Interior circle represents floor after walls are cast. Gap visible between cones creates fill space for slip.

    Inner paper cone, smaller, with bottom edge sunk into wet floor. Interior circle represents floor after walls are cast. Gap visible between cones creates fill space for slip.

    Here the inner cone has been gently lowered down to the level of the very wet slip. The gap between the two cones was roughly estimated by hand, sliding the inner cone smaller before taping it closed. The template maker has settings to change the diameter of the upper and lower circles. I chose an inner cone measurement 1/4" smaller, thinking it would give me the wall thickness I intended, but it was theoretical, and not practical. The inner cone was very nearly exactly the same size as the outer! So I improvised..

    After a little pouring, both paper cones soften. Inner cone folds upwards as simple seal fails and leaks wall slip into interior space.

    After a little pouring, both paper cones soften. Inner cone folds upwards as simple seal fails and leaks wall slip into interior space.

    OOOPS! Lots of activity to see here. As I added liquid slip to the gap, it became clear that the stiffening trick that helped prevent leaks out of the outer ring, were not helping with leaks toward the inside of the form. The paper softened as I knew it would, but it also lifted up and let lots of slip into the interior. Suddenly I get a mold that needs to be drained!

    Is there a way to toughen the seal of the inner cone like the outer cone had? Maybe. I could have stiffened up the clay by leaving it longer, or by forcing it dry with a heat gun or hair dryer, but I didn't have either of these things handy. Again, I improvised and realized I might like the distortions. I continued filling the gap, allowed leaks, and rearranged the paper edges.

    Collapsed form raised off of table and held.

    Collapsed form raised off of table and held.

    After I filled and distorted the cones, I felt should hold it by one of the edges. Aside from the artistic guess, technically I felt that there was far too much clay in the form to survive in the kiln without cracking that was going to be uninteresting cracking. To drain the form, I pulled the cones up from the newspaper bottom. This caused the layers to drain and collapse. The hole revealed by the newspaper can be seen. 

    Blurry: sorry. Bottom edges of both cones, showing slip draining from interiors.

    Blurry: sorry. Bottom edges of both cones, showing slip draining from interiors.

    Detail view of self-supporting collapsed cones, back on new newspaper sheet. New slip poured into bottom of collapsed structure (not visible) that clings to newspaper will form new bottom.

    Detail view of self-supporting collapsed cones, back on new newspaper sheet. New slip poured into bottom of collapsed structure (not visible) that clings to newspaper will form new bottom.

    Looking at the form closely, the different thicknesses became very interesting to me! I had not planned to make hollow forms, but this could be a good way to do it intentionally.

    Here I got lucky about the bottom: When the collapsed form still had a flat enough bottom edge to continue to stand up under its own weight, I decided to put it back on a fresh sheet of newspaper, and re-pour a bottom layer inside. This technique might be a good way to make watertight forms, like planters, even if the form is quite distorted.

    Detail of collapsed form during drying, showing great variety of wall thickness, ranging from 1mm-15mm.

    Detail of collapsed form during drying, showing great variety of wall thickness, ranging from 1mm-15mm.

    Luckily, collapsed form can still support its own weight.

    Luckily, collapsed form can still support its own weight.

    I especially want to set up these crumpled forms with as wide a variation as possible between thinnest and thickest wall areas. Generally, we avoid great differences because it can make a clay object crack, but in this case, cracks might be appealing.

    Profile view of fired structure.

    Profile view of fired structure.

    After burnout, the grey raw clay has been transformed into its white final color, the paper has all burned off. I'm left with a lot of detail that is interesting. A great deal of the form, especially the edges, is fragile. Interestingly, a coating of glaze might make things a little stronger. But do I want to add a shiny coating? Maybe, maybe not.

    Bottom layer created by pouring slip into collapsed form while balanced on newspaper. Hole is accident, but interesting!

    Bottom layer created by pouring slip into collapsed form while balanced on newspaper. Hole is accident, but interesting!

    This view of the bottom shows the intact surface (ignoring the hole, of course.) In the context of ceramics, this connection method isn't too rare. But pouring clay with time delays between pours is more commonly used in molds, where the form is completely supported, and also involves surface colors, rather than structural walls. The fact here that the two layers are structural will lead to more experimenting with delays between pours in more elaborate shapes.

    Close view of the many surfaces and drips that happened. I see this process ending up as planters, textural pieces mounted behind glass, many organic things.

    Interior detail of layers, showing drips and tatters of ash, not yet washed away.

    Interior detail of layers, showing drips and tatters of ash, not yet washed away.

    Interior detail of many layers and thin edges.

    Interior detail of many layers and thin edges.

    WHAT'S NEXT?

    I like this shape, but I think it would be very interesting if there were more of them. It is very easy to make the paper cones wider or shorter, and arrange the different heights in some pleasing way. The resulting shapes could be mounted in a glass-covered frame like a delicate fragment of nature.

    The slip can be colored, of course. And I could glaze these forms by spraying or dipping.

    I'm looking forward to making more paper shapes and using them to get these abstract organic forms. I hadn't planned on the cones getting so distorted, but that led me to the idea of making things like the drawing below. The amount of detail is probably my favorite aspect of this process.

    It looks like my shipment of more white slip and brick red slip has just arrived. So I have to go try more things immediately.....

    Drawing of sculptural application using several slip forms made in the manner discussed. Coral reef? Flower? Surely, nothing that was man-made.

    Drawing of sculptural application using several slip forms made in the manner discussed. Coral reef? Flower? Surely, nothing that was man-made.

    Using newspaper and pleated copy paper to cast new clay shapes

    UPDATE: COLOR information happening soon!

    A manipulative way to use casting slip: without plaster!

    Liquid casting slip made from clay is often poured into a plaster absorbent mold, and then poured out after a thick skin has formed on the inside of the mold. That skin dries out a bit, detaches itself, and is ready to be cleaned up and used by the artist. Molds can become pretty complicated puzzles to build and to use. As much as I Iove designing and using new types of plaster molds, I often explore ways to use ceramic slip that don't involve the plaster mold.

    Many people dip combustible materials in clay slip, or pour slip into burnout things, or spray slip, and have achieved wonderful effects.

    This essay describes a recent set of pieces that use folded paper and newspaper to hold the liquid slip in a particular shape and lets it dry there. This builds on my interest in paper manipulation, pattern, and generative art. Let me show you what happened.

    Two versions of the tray form, showing the undulating edge effects that happen automatically.

    Two versions of the tray form, showing the undulating edge effects that happen automatically.


    Pleats and folds: Form #1, The star-shaped tube

    The familiar chevron pleat makes a flat sheet of paper able to withstand more pressure without buckling, so I thought I'd try building a tube to hold the liquid slip while a skin formed. I started with a full sheet of 8.5" x 11" copy paper and made 16 creases in it across the wide dimension. This was taped into a tube shape. I added paper rings around the outside and a paper tube in the middle, with the idea that these structures might add support.

    Paper folded shapes intended to make a hollow, star-shaped extrusion. Paper immediately softened, buckled outward, and leaked downward into sand catch basin. But not all was lost!

    Paper folded shapes intended to make a hollow, star-shaped extrusion. Paper immediately softened, buckled outward, and leaked downward into sand catch basin. But not all was lost!

    I’m exploring methods of making objects that make explicit the distinction between an object that was made and an object which happened. The work is sometimes clear. The work is sometimes interesting. My work is always at risk of overstating what could instead be implied. My work is always at risk of enunciating clearly something that makes no sense regardless.

    I wanted the cast form to have a bottom, but I did not want to build from paper a custom bottom for the tubes. This would have taken a long time. I have used sand as an absorbent bottom-forming substance in the past, so buried the bottom of the paper shapes an inch under the layer of sand. Of the many things that didn't work, the sand-seal worked fine.

    The slip was poured between the center circle tube and the star-shaped pleats on the outside. My slip was a little thick and didn't pour very quickly or fluidly. This might be a good thing or a bad thing, depending on the material I'm pouring into. At first I guessed that the thick slip would form a thicker coating, and it did, but I also had a difficult time pouring it evenly into the space provided.

    About one minute after the form was filled, I could see the paper softening, buckling outward. Then the slip began to disintegrate the folds themselves and started to leak out the form. At this point I knew it would collapse. So I pulled the paper form up out of the sand, and immediately all the slip drained out of the paper form, which now looked like a soggy, deflated, somewhat folded husk. I should have known! So now two things were going on:

    1. I couldn't figure out what to do with the failed paper form
    2. I now had a great deal of slip mixed in with the sand

    I kept the paper form and placed it on its side to dry. The result is very interesting and I'm glad I didn't give in to my original impulse which was to throw it away.

    Clay form made from the collapse of a star-shaped, paper tube, pleated for strength, but not enough! 

    Clay form made from the collapse of a star-shaped, paper tube, pleated for strength, but not enough!


    Detail of the very thin and beautiful membranes of clay that appeared as the clay drained out of the paper form.

    Detail of the very thin and beautiful membranes of clay that appeared as the clay drained out of the paper form.

    Work which happens once can happen again, and the connection to manufacture is important aspect of leverage for me. If something can happen more than once —if I can set up the situation— then it proves my intent. A philosophy has been established. Manufacture does not have to look a certain way.

    I’m exploring the idea that something liquid might still be folded. This is subtly different from folding something and pouring liquid into it. I like both; I’m trying harder for the former.

    I’m exploring the idea that edges are not made but happened. This will at first look like something has been broken, or broken off. It may or may not fit with our idea of finished product. Yet, is this not what we’d see through the microscope of any object we find in the natural environment?

    I’m exploring the idea that the concept of manufacture need not dictate style. I’m making systems that are definitely —at least theoretically— as repeatable as any other, but with outcomes that look natural, or broken, or generative.
    This is the back of the form, showing some of the sand that is embedded in the clay surface. The edges are sharp and remind me of flower petals.

    This is the back of the form, showing some of the sand that is embedded in the clay surface. The edges are sharp and remind me of flower petals.

    I was delighted to see the end result when all the paper burned away in the kiln. There is a clear impression that at some point the form was regular, or at least had several pleats. There is also evidence that something catastrophic happened! All captured in clay. The photo shows still some of the ash that remains of the copy paper. This was rinsed off after the photo was taken.

    The entire shape. Look at the tiny bits of clay that flowed along the sides of the large pleats, seen to the left in the picture.

    The entire shape. Look at the tiny bits of clay that flowed along the sides of the large pleats, seen to the left in the picture.

    As makers we progress from set-up through “sufficiently final” result. How much are we involved in those stages? Can we argue convincingly for those times we deliberately invite random effects? How do we argue for our authority in such chaotic systems? Is this artifact the result of a process, or philosophy, or both?

    Our liquids flow then harden. Our wet powders dry, sinter, melt, and cool. Our hands obey and rebel. The artifacts never lie, but never tell the whole backstory, either. I am interested in making more of the process visible, to make the backstory explicit, to make a convincing argument within the piece itself that this choice was made over that one. I won’t always be around to explain the work, and so it must take care of itself.

    SOFT FOLDS IN NEWSPAPER SANDWICH

    The next set of pieces I made were cast from the slip that leaked all over the sand in the first attempt. I knew that sculptors and potters will add different materials to the clay slip to improve some aspect of it. Adding paper fibers, for example, makes the slip stronger and less likely to warp and break before it is fired in the kiln. Adding sand helps with strength as well. Having stirred the slip into the emergency sand, I had perhaps two cups of slip to experiment with.


    PAPER TYPES HAVE CLAY IN THEM
    Newspaper has almost no clay in it, and so burns away at 1900 degrees Fahrenheit with very little ash. The copy paper I used, however, has more fine clay in it so that it is smooth to print on and write on. That paper was used for the pleated form, and there was much more ash to wash away.
    Clay slip with a lot of sand is spread like frosting on a single sheet of newspaper.

    Clay slip with a lot of sand is spread like frosting on a single sheet of newspaper.

    Newspaper on top and bottom of wet slip. Grey foam rectangle placed in middle. Edges of paper cut and folded over foam. Note that layer of paper closest to foam extends further inwards than outside layer of newspaper.

    Newspaper on top and bottom of wet slip. Grey foam rectangle placed in middle. Edges of paper cut and folded over foam. Note that layer of paper closest to foam extends further inwards than outside layer of newspaper.

    The distortions of the newspaper + slip sandwich --or maybe it is a crepe!-- capture much of the soft qualities of the slip without being marred by the touching of my fingers. I am especially pleased that the edges of the slip have been affected by the sliding difference between the two layers of newspaper. The inner and outer layers of newspaper have to travel a certain distance around the foam and so create this organic edge.

    The clay stiffened overnight and I removed the foam carefully. I broke a few pieces off the edge by accident. I also removed what I could of the newspaper. The pieces went into the kiln and all the newspaper burned off, just as in the first example the copy paper burned off. The end which was drawn up into a kind of point looks like a dumpling. This would be difficult to sculpt, but here it took seconds. The opposite end was simply folded a few times.

    Several views of the envelope-like piece

    Several views of the envelope-like piece

    COMPARE TWO TRAY SHAPES

    The use of the foam block inside the newspaper-clay crepe allowed me to have a hollow shape inside. The second tray shape had more elaborate folds at the narrow ends. It was also trussed up with tape to help with the flatness I felt was a little boring in the immediately previous form.

    Stabilized forms with foam support removed, most of paper removed. Ready to dry out for kiln.

    Stabilized forms with foam support removed, most of paper removed. Ready to dry out for kiln.

    Trussed shape with tape. It mostly worked.

    Trussed shape with tape. It mostly worked.

    Fired form, all paper burned away, leaving many interesting folds and curves where the paper turned on itself and where the tape held the shape less flat.

    Fired form, all paper burned away, leaving many interesting folds and curves where the paper turned on itself and where the tape held the shape less flat.

    Better view of interior and folds at narrow edges.

    Better view of interior and folds at narrow edges.

    TUBE SHAPES, AND MY FAVORITE EDGE EFFECT

    Another version of the experiment was not a pleat or tray, but a kind of tube that could one day be modified into a vase or cup. The same newspaper plus clay crepe form was made as previous, but this time was wrapped around a tube and tightened in one place with a rubber band. In the pictures you can see my most favorite part of that style. The edge is very unusual. The edge shows the smooth, uneven sides where the clay contacted the newspaper directly. But inside the edge, where the clay is shrinking and changing shape, you see the grainy lining. This is very, very interesting to me.

    The clay slip is inside the outer sleeve of newspaper, where the darker, wetter area can be seen. The rubber band is holding the layer shut, but also adding its own wrinkle pattern to the paper and clay.

    The clay slip is inside the outer sleeve of newspaper, where the darker, wetter area can be seen. The rubber band is holding the layer shut, but also adding its own wrinkle pattern to the paper and clay.

    The tube itself has paper on it to enable the clay sleeve to be removed when it is stabilized enough to hold its shape. Removed too soon, the clay form will slump into something less round. Removed too late, and the clay shell will crack from shrink…

    The tube itself has paper on it to enable the clay sleeve to be removed when it is stabilized enough to hold its shape. Removed too soon, the clay form will slump into something less round. Removed too late, and the clay shell will crack from shrinkage around rigid tube, or careless flexing movement.

    Good view of the rubber band tightening around the form, leaving marks in the clay.

    Good view of the rubber band tightening around the form, leaving marks in the clay.

    The tubes kept their shape perfectly, but the reason this one doesn't curve all the way around onto itself is that I broke off a part earlier in the process removing the newspaper. Ironically, since the edges on these forms are all atypical, the bro…

    The tubes kept their shape perfectly, but the reason this one doesn't curve all the way around onto itself is that I broke off a part earlier in the process removing the newspaper. Ironically, since the edges on these forms are all atypical, the broken edge doesn't call attention to itself.

    Of all the results in this series of experiments, this edge quality is almost my favorite. Smooth parts next to rough parts, hollow cavities that go down into the wall. The rough quality is the sand mixed into the slip. And all of it almost complete…

    Of all the results in this series of experiments, this edge quality is almost my favorite. Smooth parts next to rough parts, hollow cavities that go down into the wall. The rough quality is the sand mixed into the slip. And all of it almost completely automatic. 

    Another view of my favorite edge effect. This tube is completely enclosed on itself. It is not connected at that overlap because paper was between the clay layers. If this piece were glazed, the glaze would fuse those edges together for stability.

    Another view of my favorite edge effect. This tube is completely enclosed on itself. It is not connected at that overlap because paper was between the clay layers. If this piece were glazed, the glaze would fuse those edges together for stability.


    TOWARDS SOMETHING FUNCTIONAL

    The last example in this series shows the effect of a newspaper and clay sandwich cut in specific places while wet, then gently folded upon itself to fit into a bisqued piece as a former. Like the cardboard tube was the inner former in the example above, the bisque form is the outer mold for this next one. This strikes me as a bit simpler than casting liquid slip into the form, since here I get to use the overlapping shapes as sculptural elements. I see these developing as flowers, in addition to simply geometric forms.

    I used scissors to cut slits in the wet sandwich. The clay only leaked out a little bit, and was surprisingly tolerant of being moved around while being fitted into the mold form. As above, the object in the photo has thin unconnected areas where one clay element overlapped another while paper was in between. But if this were glazed to make it functional, the thin airspace would seal up perfectly.

    The orange-brown angled form underneath is just another clay box I built. Here I'm using it to hold the wet clay layers in an overlapping position until they dry enough to stay there.

    The orange-brown angled form underneath is just another clay box I built. Here I'm using it to hold the wet clay layers in an overlapping position until they dry enough to stay there.

    The completely fired bowl form with cut overlapped edges easily seen inside and out. The upper edge of the bowl is unchanged from the edges that happened when the slip was spread on the newspaper.

    The completely fired bowl form with cut overlapped edges easily seen inside and out. The upper edge of the bowl is unchanged from the edges that happened when the slip was spread on the newspaper.


    TO GLAZE OR NOT TO GLAZE?

    I would glaze these pieces between the thin gaps between overlapping areas, if for no other reason than to make them stronger. For decorative purposes, I might spray a very light coating of clear. I think it would be very easy to make a mistake coloring these the wrong way. I know I already like the dry surface. 

    I would be much more likely to experiment with colored slips, since the integral color of the slip makes more sense to me than applying some color afterward. There is no reason why the original slip on the newspaper can't be more than one color.


    WHAT'S NEXT?

    I see the newspaper being printed or painted with slip patterns before the structural coat goes down. This will allow me to use pattern on these distorted surfaces before they are made. I don't see it as fun or interesting to manually render patterns on these types of surfaces after they're formed. Firstly, it's hard to do. Secondly, the many places that can't easily be reached should have patterns, too. If both sheets of newspaper have patterns on them in slip that get transferred to the form, I can get pattern anywhere on the form. I'm looking forward to this.

    I plan do more forms which could function as containers for plants or drinking vessels.

    But for the moment, I'm pleased with the abstract pleat and tube shapes, and the slightly more functional tray and bowl shapes.

    Personal archiving, research project underway

    I've written so many handwritten notes over the years, I can no longer find things.

    Even the two binders of material I wrote during my Artist-in-Residence at Feet of Clay Studio have been mocking me while I try to remember what I wrote. I've made a website through Google Sites as my own wiki. Each page of notes is being scanned and organized by date, and by keywords. I'm even generating an index.

    I'm treating this as a semester project, ending in mid-December. I hope I can hold out that long.

    One binder of two, with notes to be transcribed. Ideas to be built.

    Other people's work on Pinterest: My board of STRUCTURAL INSPIRATION

    I'm getting so much inspiration from other people's work and pictures that I use Pinterest to keep track of it all. On this blog here, I want to write about the things I see there. Let me present one of my boards that I have, called "Structural Inspiration."

    I made this board to keep track of compelling objects that are very complex in shape. I'm including objects that are man-made and natural. As a sculptor, I am very interested in establishing a clear hierarchy of detail in my work. It isn't always easy: I tend to make things that are very minimal to the point of being boring, or so engorged with details that the viewer is overwhelmed. The hierarchy or structural organization of the objects in these pictures makes it easier to handle.

    I can learn a lot from these objects.


    New pottery technique videos

    I'm excited to be shooting several pottery videos a week. I've wanted to do it for a long time.

    My technological process is anything but fancy: I'm shooting the video on my iPad Mini, with the microphone jammed to mute it (settings don't seem to mute like they should). Then, I open it in some dubbing software and add a voiceover. It helps me to be doing one thing at a time, either throwing or talking about throwing. I do it during class all the time, but somehow I like the separation when I'm making the videos. After I like the audio, then I upload it to YouTube, add tags and annotations, and publish it. I feel so accomplished.

    The most recent set of videos features the technique for making large, flat serving platters. From a teaching standpoint, I decided to make the same style of platter from different amounts of clay. The amounts of clay were 2.5, 3.5, and 4.5 pounds, each in its own video. The list of weights might not mean much to non-ceramics people. But if you work with clay at all, you'll know that this range is roughly equivalent to "probably easy" to "a little challenging" to "fairly challenging or gently impossible (depending on your experience.)"

    I directed some traffic to the hardest technique and have gotten a lot of views from a ceramics online community. It means a lot to have complete strangers comment on your work.

    Here's a demonstration that shows the making of a 4.5 pound platter. Enjoy!

    Techniques for dividing plaster without kerf, dust, or noise

    Here are three short videos that illustrate the process of using thin metal plates to divide plaster before it hardens, improving accuracy and saving effort and cleanup. 

    Since Fall 2014, I've been developing techniques for building geometric shapes from plaster that avoid a few of the inconvenient aspects of traditional methods. Using saws generates dust, damages the brittle plaster, creates noise, and is limited to very planar changes.

    I noticed that thin metal plates can be inserted into the gelling plaster and would stay in place. After the plaster hardens normally, it breaks apart cleanly where the metal plates are. 

    Aside from being a nifty trick in its own right, this discovery is leading me to very complicated shapes in plaster that afterward function as ceramic slip casting molds. The resulting shapes would be very tedious to make otherwise.

    In another blog post I share an academic paper I wrote relating this plaster forming method to abstract sculpture processes.


    Coming soon: Group of pottery videos for beginners, right after I subdue the English language

    A short blog entry while I wait for YouTube to make updates to a video:

    I'm writing scripts to dub over several video captures of myself making pottery on the wheel. My general goal is to make videos that clay workers at all levels will want to watch. My dialog for videos aimed at beginners should make the largest problems easy to recognize and offer some understandable solutions they can discuss with their live teachers. But beginners typically have problems when they leave the computer and head over toward the wheel:

    How can I remember everything?

    Maybe viewers can just hit play and pause a few times.... but then....

    How do I get clay off my keyboard?

    How do I unwind my earbud wires from the vase I just made?

    To improve the situation, my analytical brain should be writing dialog that highlights important things so they stick in the viewer's memory long enough to be portable during computer-downtime.

    But my today analytical brain wants instead to nitpick over the use of language in the hundreds of other instructional videos I've watched. Concise use of language is important for writers and teachers in all subject areas, right? Perhaps moreso in a subject of such physical and variable processes, like wheelthrowing. And yet, I can't tell whether language issues I'm having will lead to actual improvements in my own narrative, or will just make me anxious over things nobody else notices.

    I guess it will depend on the day!

    For example, this is a growing list of words which, my brain insists, shouldn't be used interchangeably:

    • approach
    • strategy
    • technique
    • method
    • process
    • recipe
    • procedure
    • plan
    • practice
    • rule
    • formula

    Aside from arguing over the above nuances "recreationally," I'm most sensitive to legitimately problematic usage that ought to be easy to prevent. Misapplying the word "beginner" causes problems for viewers of otherwise solidly constructed, informative videos. I can't recall how many times I've watched a video with the word "beginner" in the title or dialog that has content far beyond the level of beginners.

    The mislabeled audience and imprecise language in some videos leaves the viewer that the information is too basic, too complex, unpackable, indivisible, and undigestible. Does the beginner come away thinking that pottery is too hard? Or worse, that they're not able to comprehend it at all? When I calm down from the threat of such missed opportunities, I get back to work on my own materials.

    I'm on the lookout in my own scripts for such language slips.

    That is, if I get any real writing done on them at all.

     
    There are even a few videos that have that word “beginner” in the title that demonstrate a technique I’m not sure even *I* could do without a few rough drafts first. How do we prevent this?

    New Candleholder Design: Magnolia-Lotus-Orchid-acae Flower

    Autumn is coming, keeping me on track to make things that might be good gift ideas for the holiday seasons.

    But yesterday I had much less noble goals. I was feeling restless because my "to-do list" didn't seem interesting enough. After doing a bit of cleaning and organizing--you KNOW I must have been restless to do a bit of cleaning when not otherwise threatened--I realized I could make a new design of candleholder and also revive a sculpture skill I haven't used lately.

    FLOWER CANDLEHOLDER SPEEDS THROUGH R&D. The early results are shown in pictures below. The design is based on a flower-like shape I'm fond of that is very loosely based on forms I learned to make while sculpting fruits and vegetables professionally. Don't bother looking up the species, because it doesn't exist. It has qualities of a magnolia, of a lotus, and an orchid. All flowers I adore. In the center is a little raised bowl for the actual candle. It is separate so that cleaning is easier.

    The last photo is of another candleholder in the same clay and color style I plan to use on the flower candleholders. The clay is a toasty brown with a white shiny glaze. Details on the edges will be brown.

    So far I've made two flowers. Who knows how many more I'll make!

    I think the edges should be brown, don't you? Or some kind of pattern inside the petals? Only making two flowers might not leave enough room for experimentation.....


    Two flower forms, shown with three separate candle-holding cups.

    Two flower forms, shown with three separate candle-holding cups.

    A side view showing wildly curving petals on the raised base.

    A side view showing wildly curving petals on the raised base.

    First flowers will be decorated like this: Example of another candleholder I've made showing the brown warm clay color surrounded by white shiny glaze.

    First flowers will be decorated like this: Example of another candleholder I've made showing the brown warm clay color surrounded by white shiny glaze.

    Brainstorming Process for patterns in "Stitched" Series of Decoration

    I draw many patterns in my spare time. Here I'll share a few pages from my notes about using short dashes as embroidery-style patterns on pottery.

    During Summer 2015 I started a new decorating technique for pottery that results in patterns that look like embroidery. You can see the current outcome over on the page about Stitched and Scorched Series. Early attempts shown here in drawings look mostly like running stitches, which is sewing terminology for the dash-space-dash type of stitch.

    THE GENERAL PROCESS. The ceramics version involves making piles and piles of small pieces of clay shaped like dashes. For color, I currently I use a white clay and a black clay. I extrude clay through a tiny hole to get a long strand, about as thick as pasta: if you must know, thinner than spaghetti, thicker than angel hair. These strands get completely fired and broken into dashes. If I'm in the mood I sort them by length. Then when I have a wet piece of clay, I select the right sizes of stitch and push them into the clay surface.

    Very calming.

    These drawings below show some of my ideas for more complex designs. So far, I've made a few dozen items that use the stitches.


    Relatively simple arrangements in two, three, or four stitches.

    Relatively simple arrangements in two, three, or four stitches.

    Square or rectangular panels that are much denser, built up from regular arrangements of individual stitches

    Square or rectangular panels that are much denser, built up from regular arrangements of individual stitches


    These are more intended for borders or narrow bands that might go around a piece horizontally, or drop down from a rim vertically. 

    These are more intended for borders or narrow bands that might go around a piece horizontally, or drop down from a rim vertically.


    The larger sketches are combinations of circular shapes put first, then meandering lines put second. I might have to try using these before the rectangular motifs shown on other pages.

    The larger sketches are combinations of circular shapes put first, then meandering lines put second. I might have to try using these before the rectangular motifs shown on other pages.

    These rather large patterns were drawn when the idea first hit to render embroidery on pottery after seeing a collection of Japanese Sashiko patterns on an embroidery blog.

    These rather large patterns were drawn when the idea first hit to render embroidery on pottery after seeing a collection of Japanese Sashiko patterns on an embroidery blog.

    Generative art paper I wrote for 2014 conference in Rome, Italy

    I work with plaster casting molds to create unusual shapes in ceramics. Rather than design an object directly first, then build a mold around it, I design the separation planes of the mold first, allowing their interactions to govern what shapes are possible. The result is a set of interlocking plaster pieces for which any missing number of pieces is the "final object" of the casting.

    An example of the process is shown below in the poster I made for the conference. For more details, look at the pretty pictures in the paper, linked below.

    The overall result is not nearly so academic: I plan to use these techniques to design a series of functional wares and lighting fixtures, to be presented sometime in 2016.


    Links:

    The paper was presented at the Generative Art Conference in Rome, Italy, in December 2014. Lot of pretty pictures of different types of plaster structures that would work as ceramics casting molds.

    The poster shown below was fun to make and gave people a quick glance at a sculpture being made, from start to finish. Link to the larger version for details.