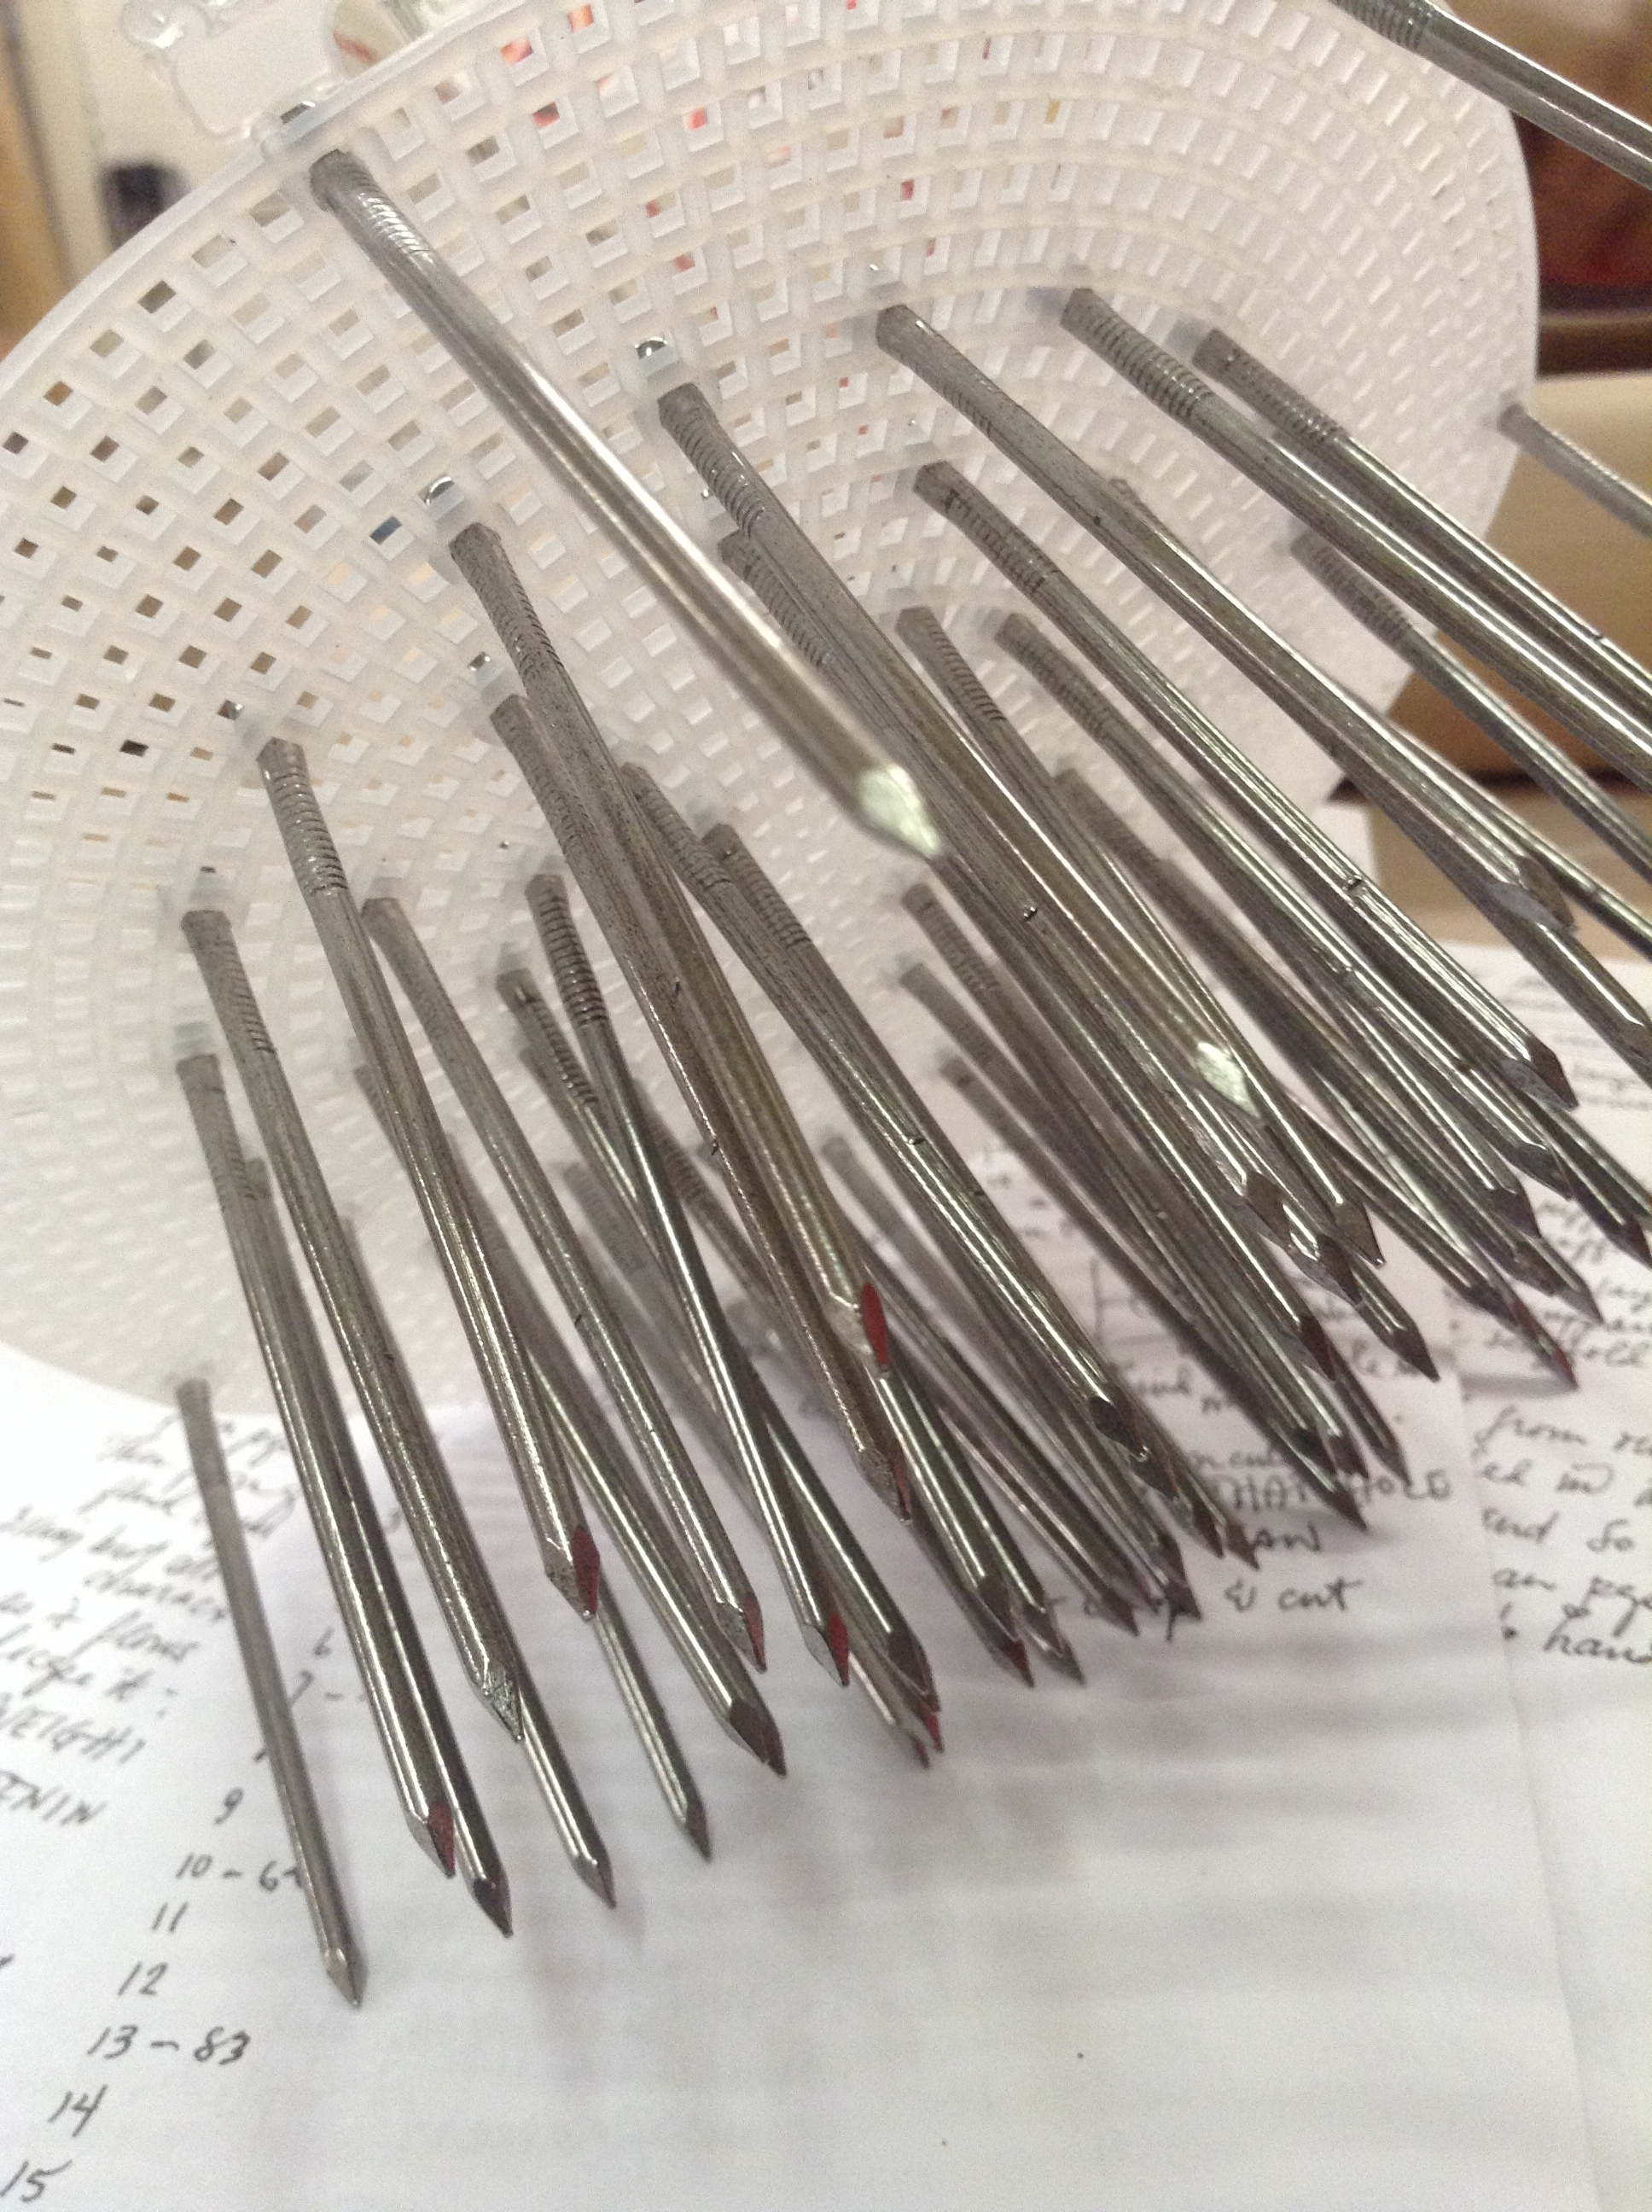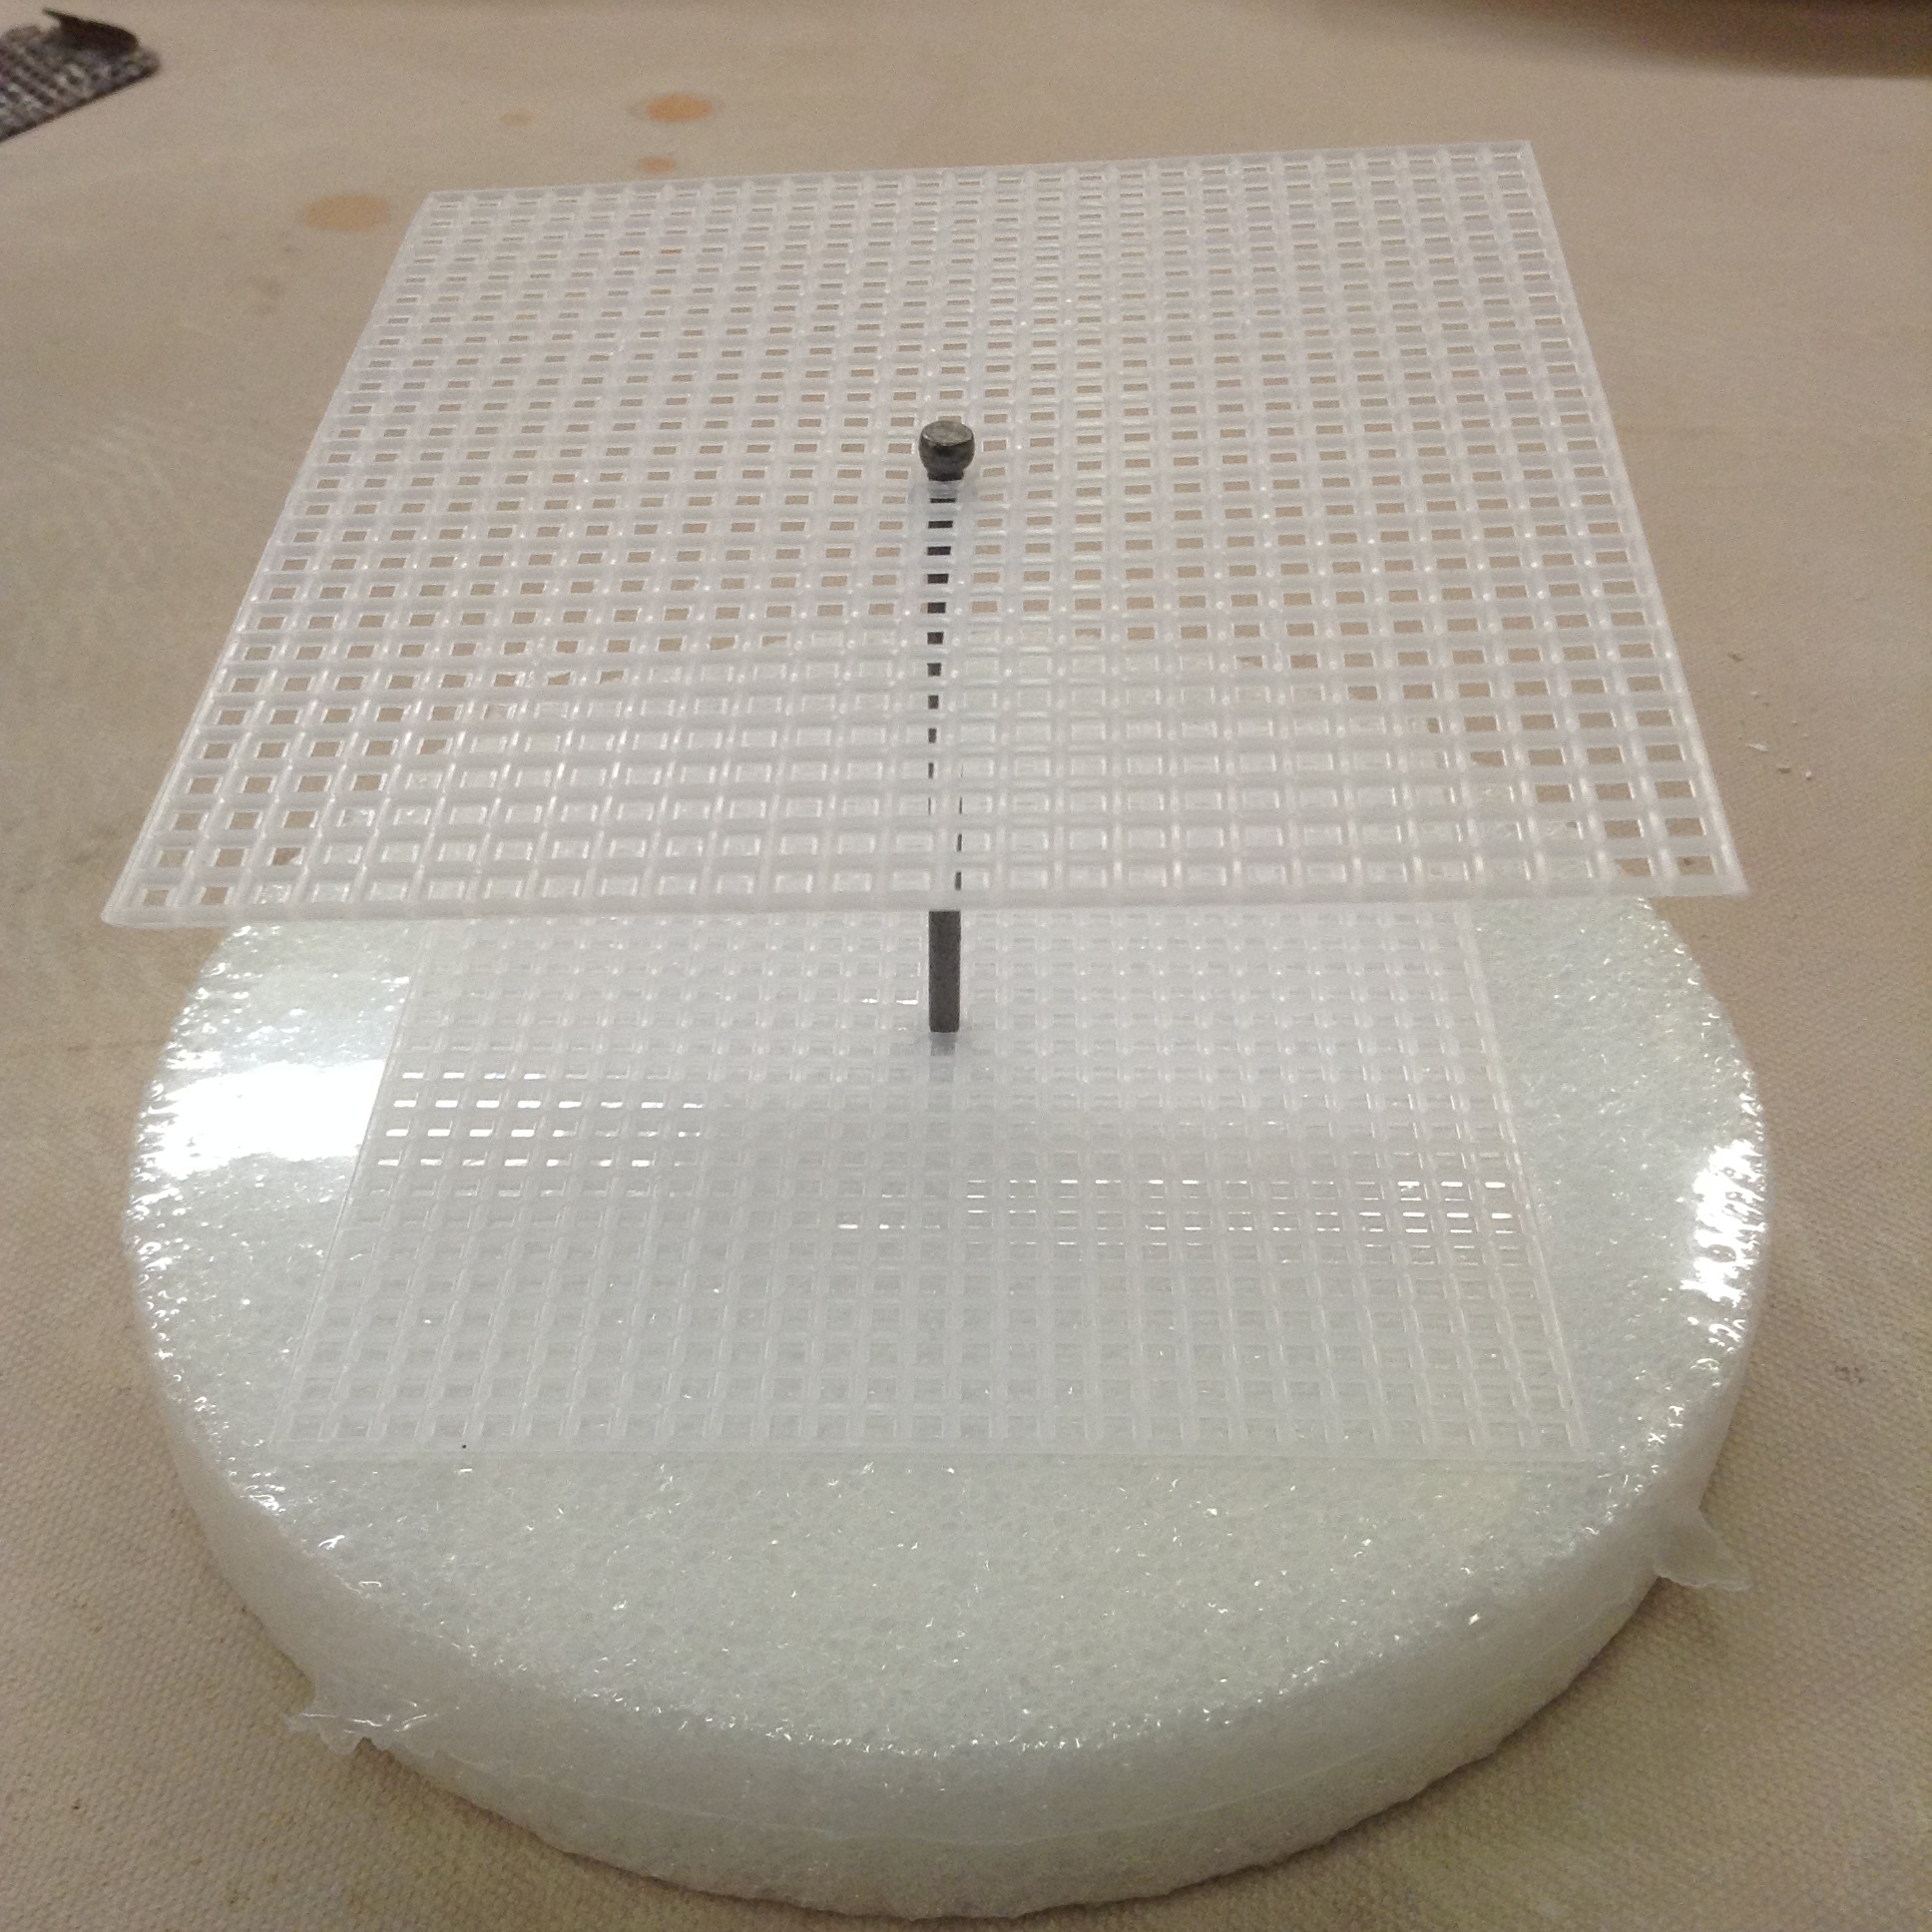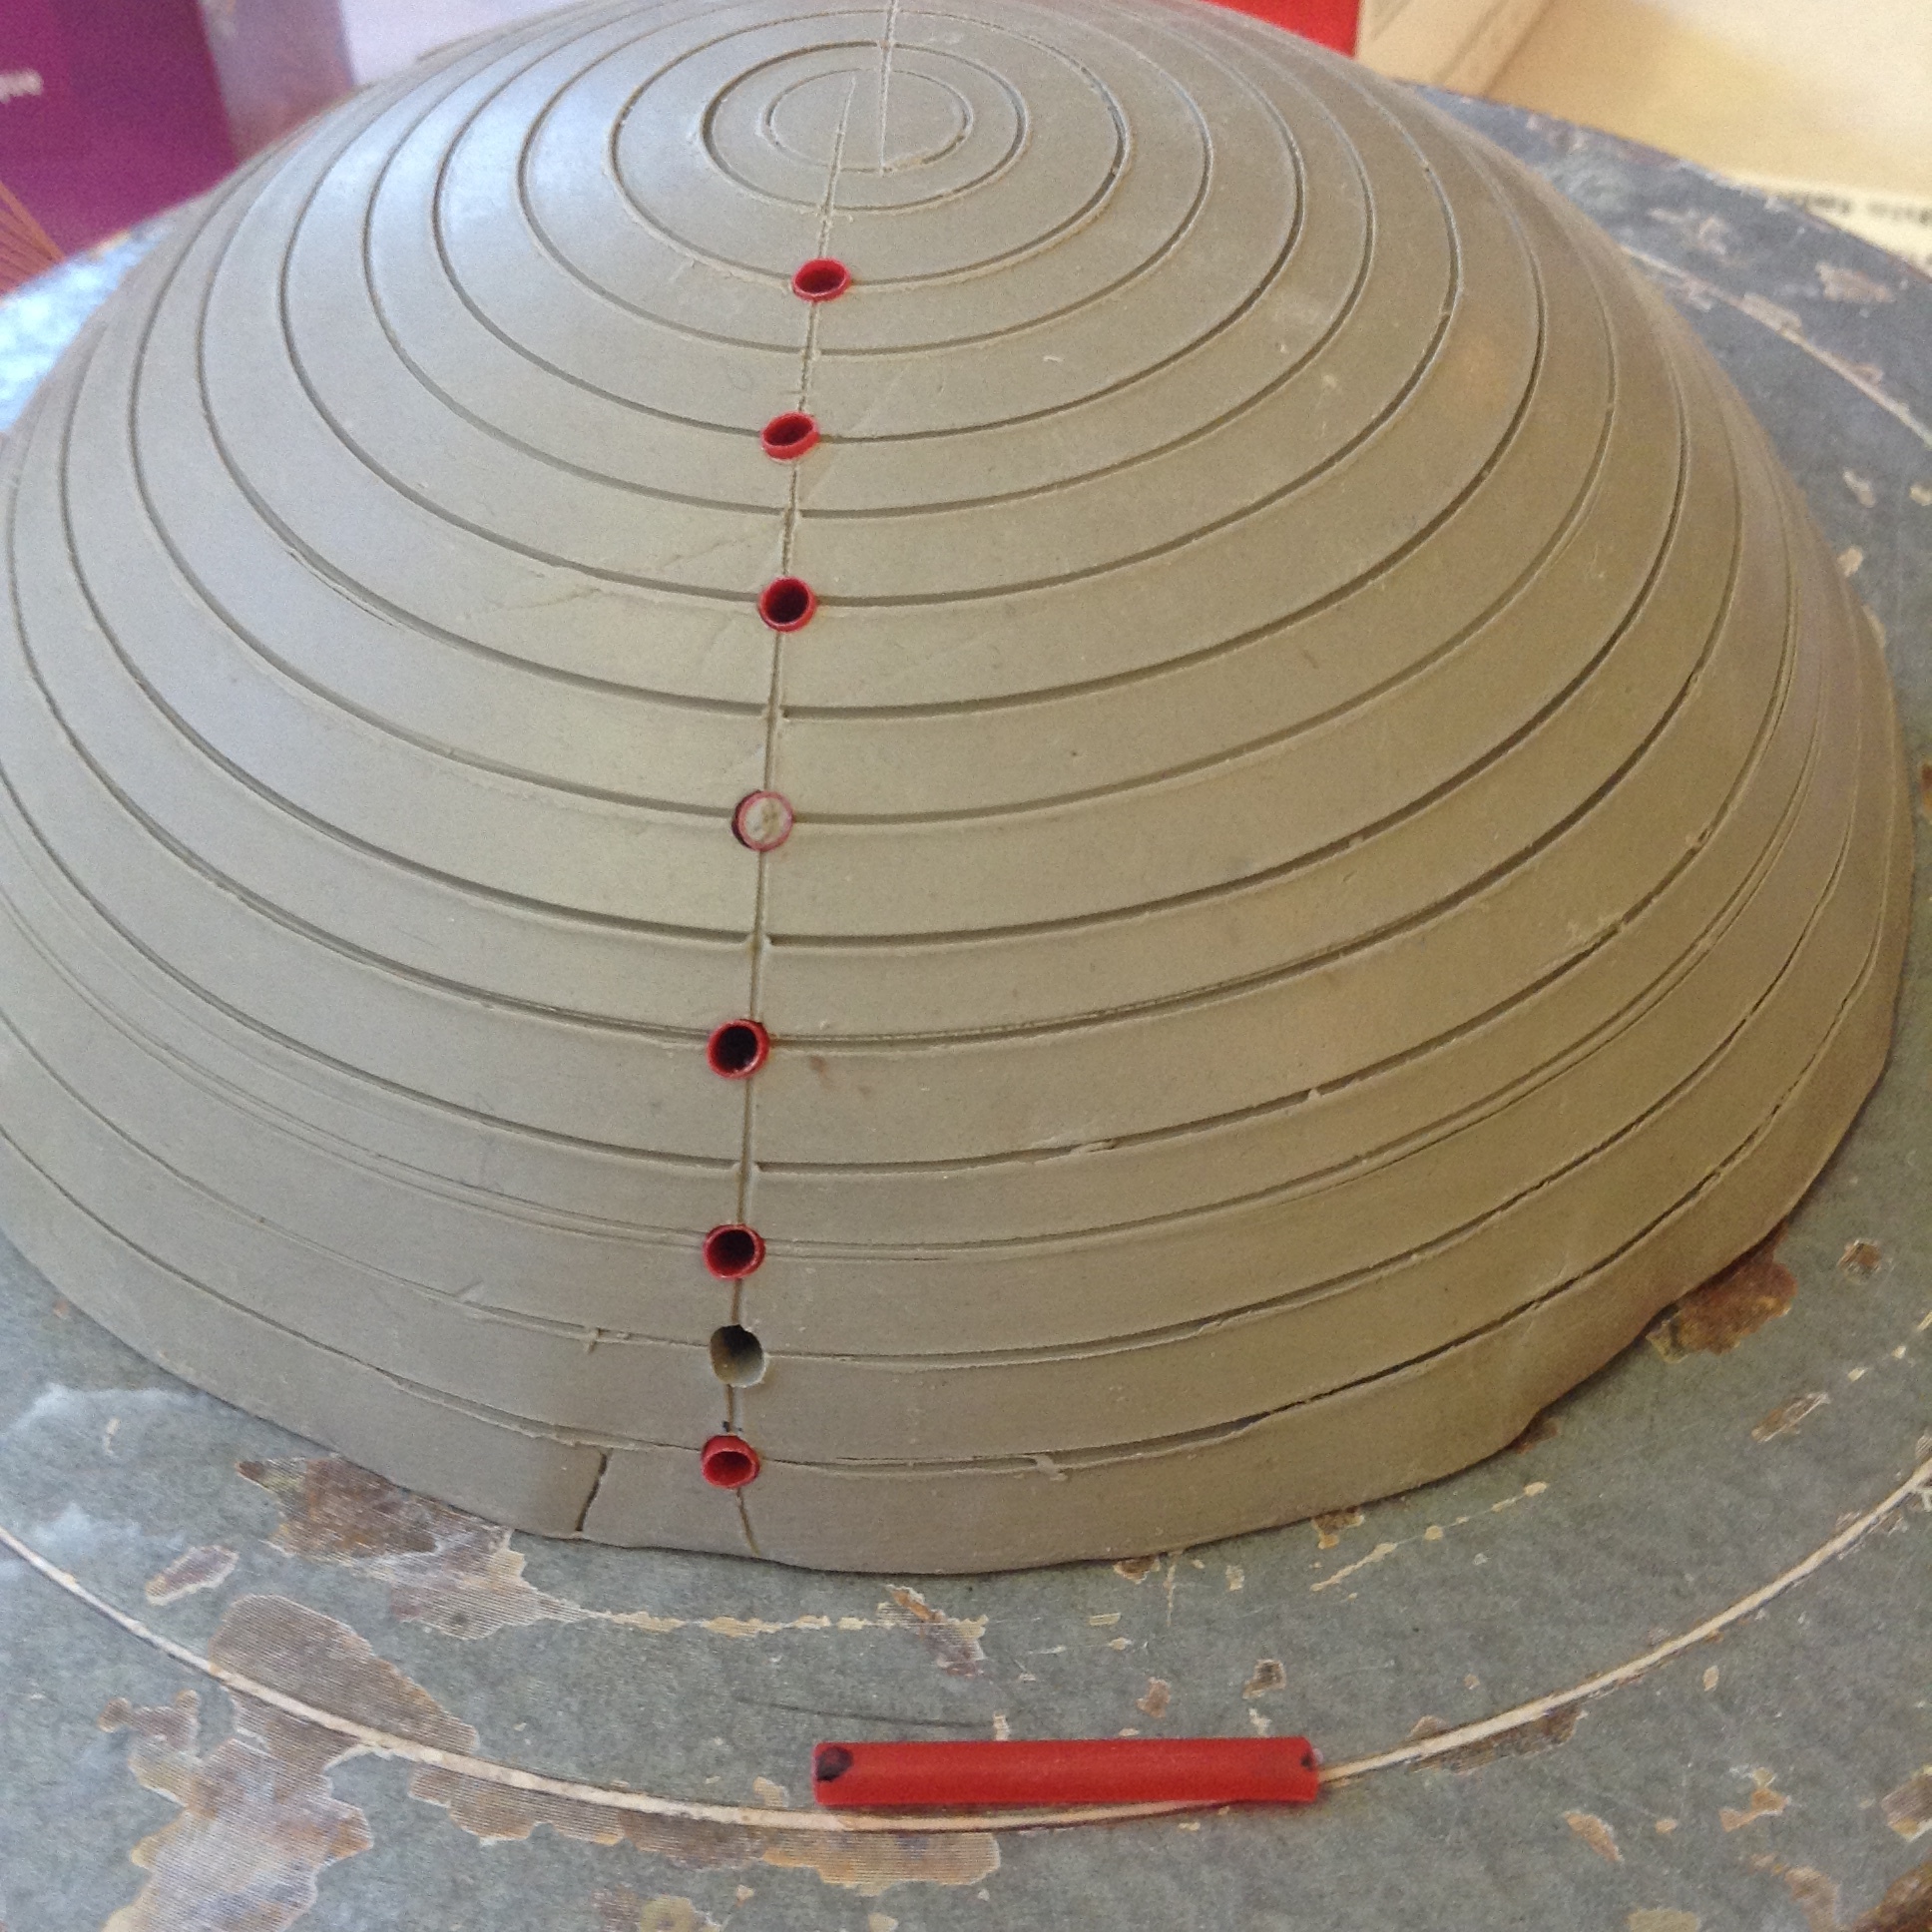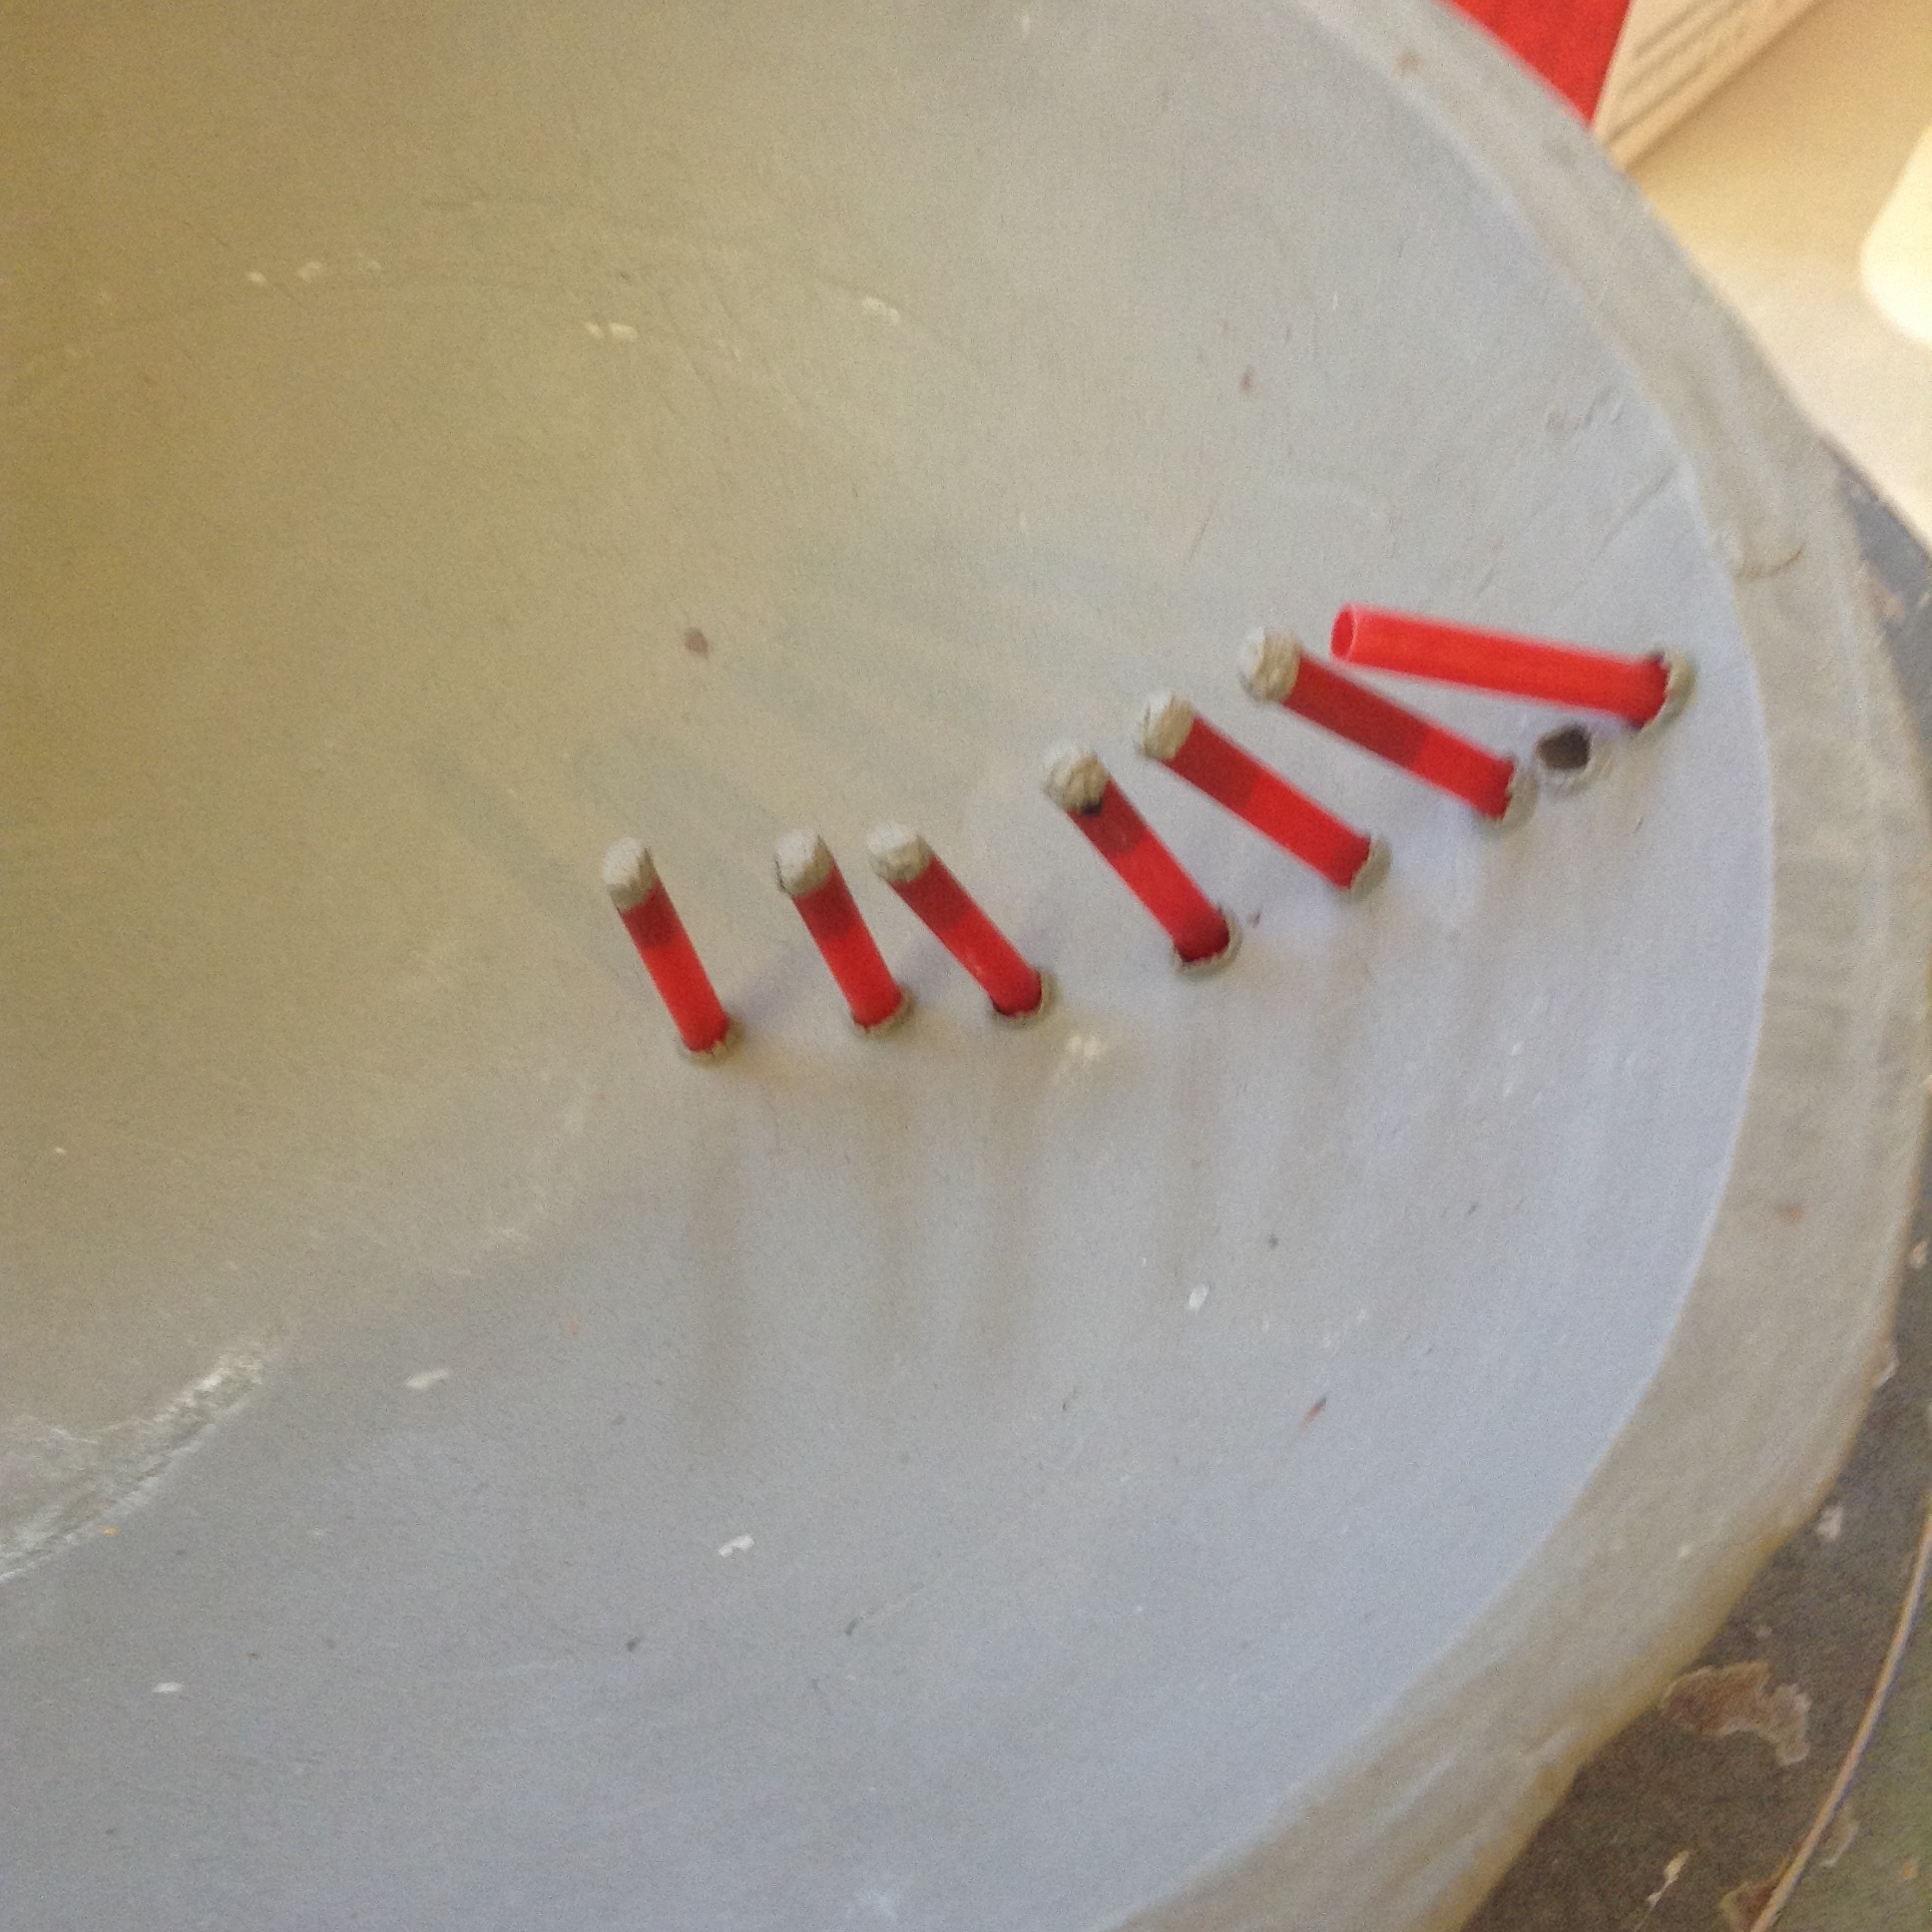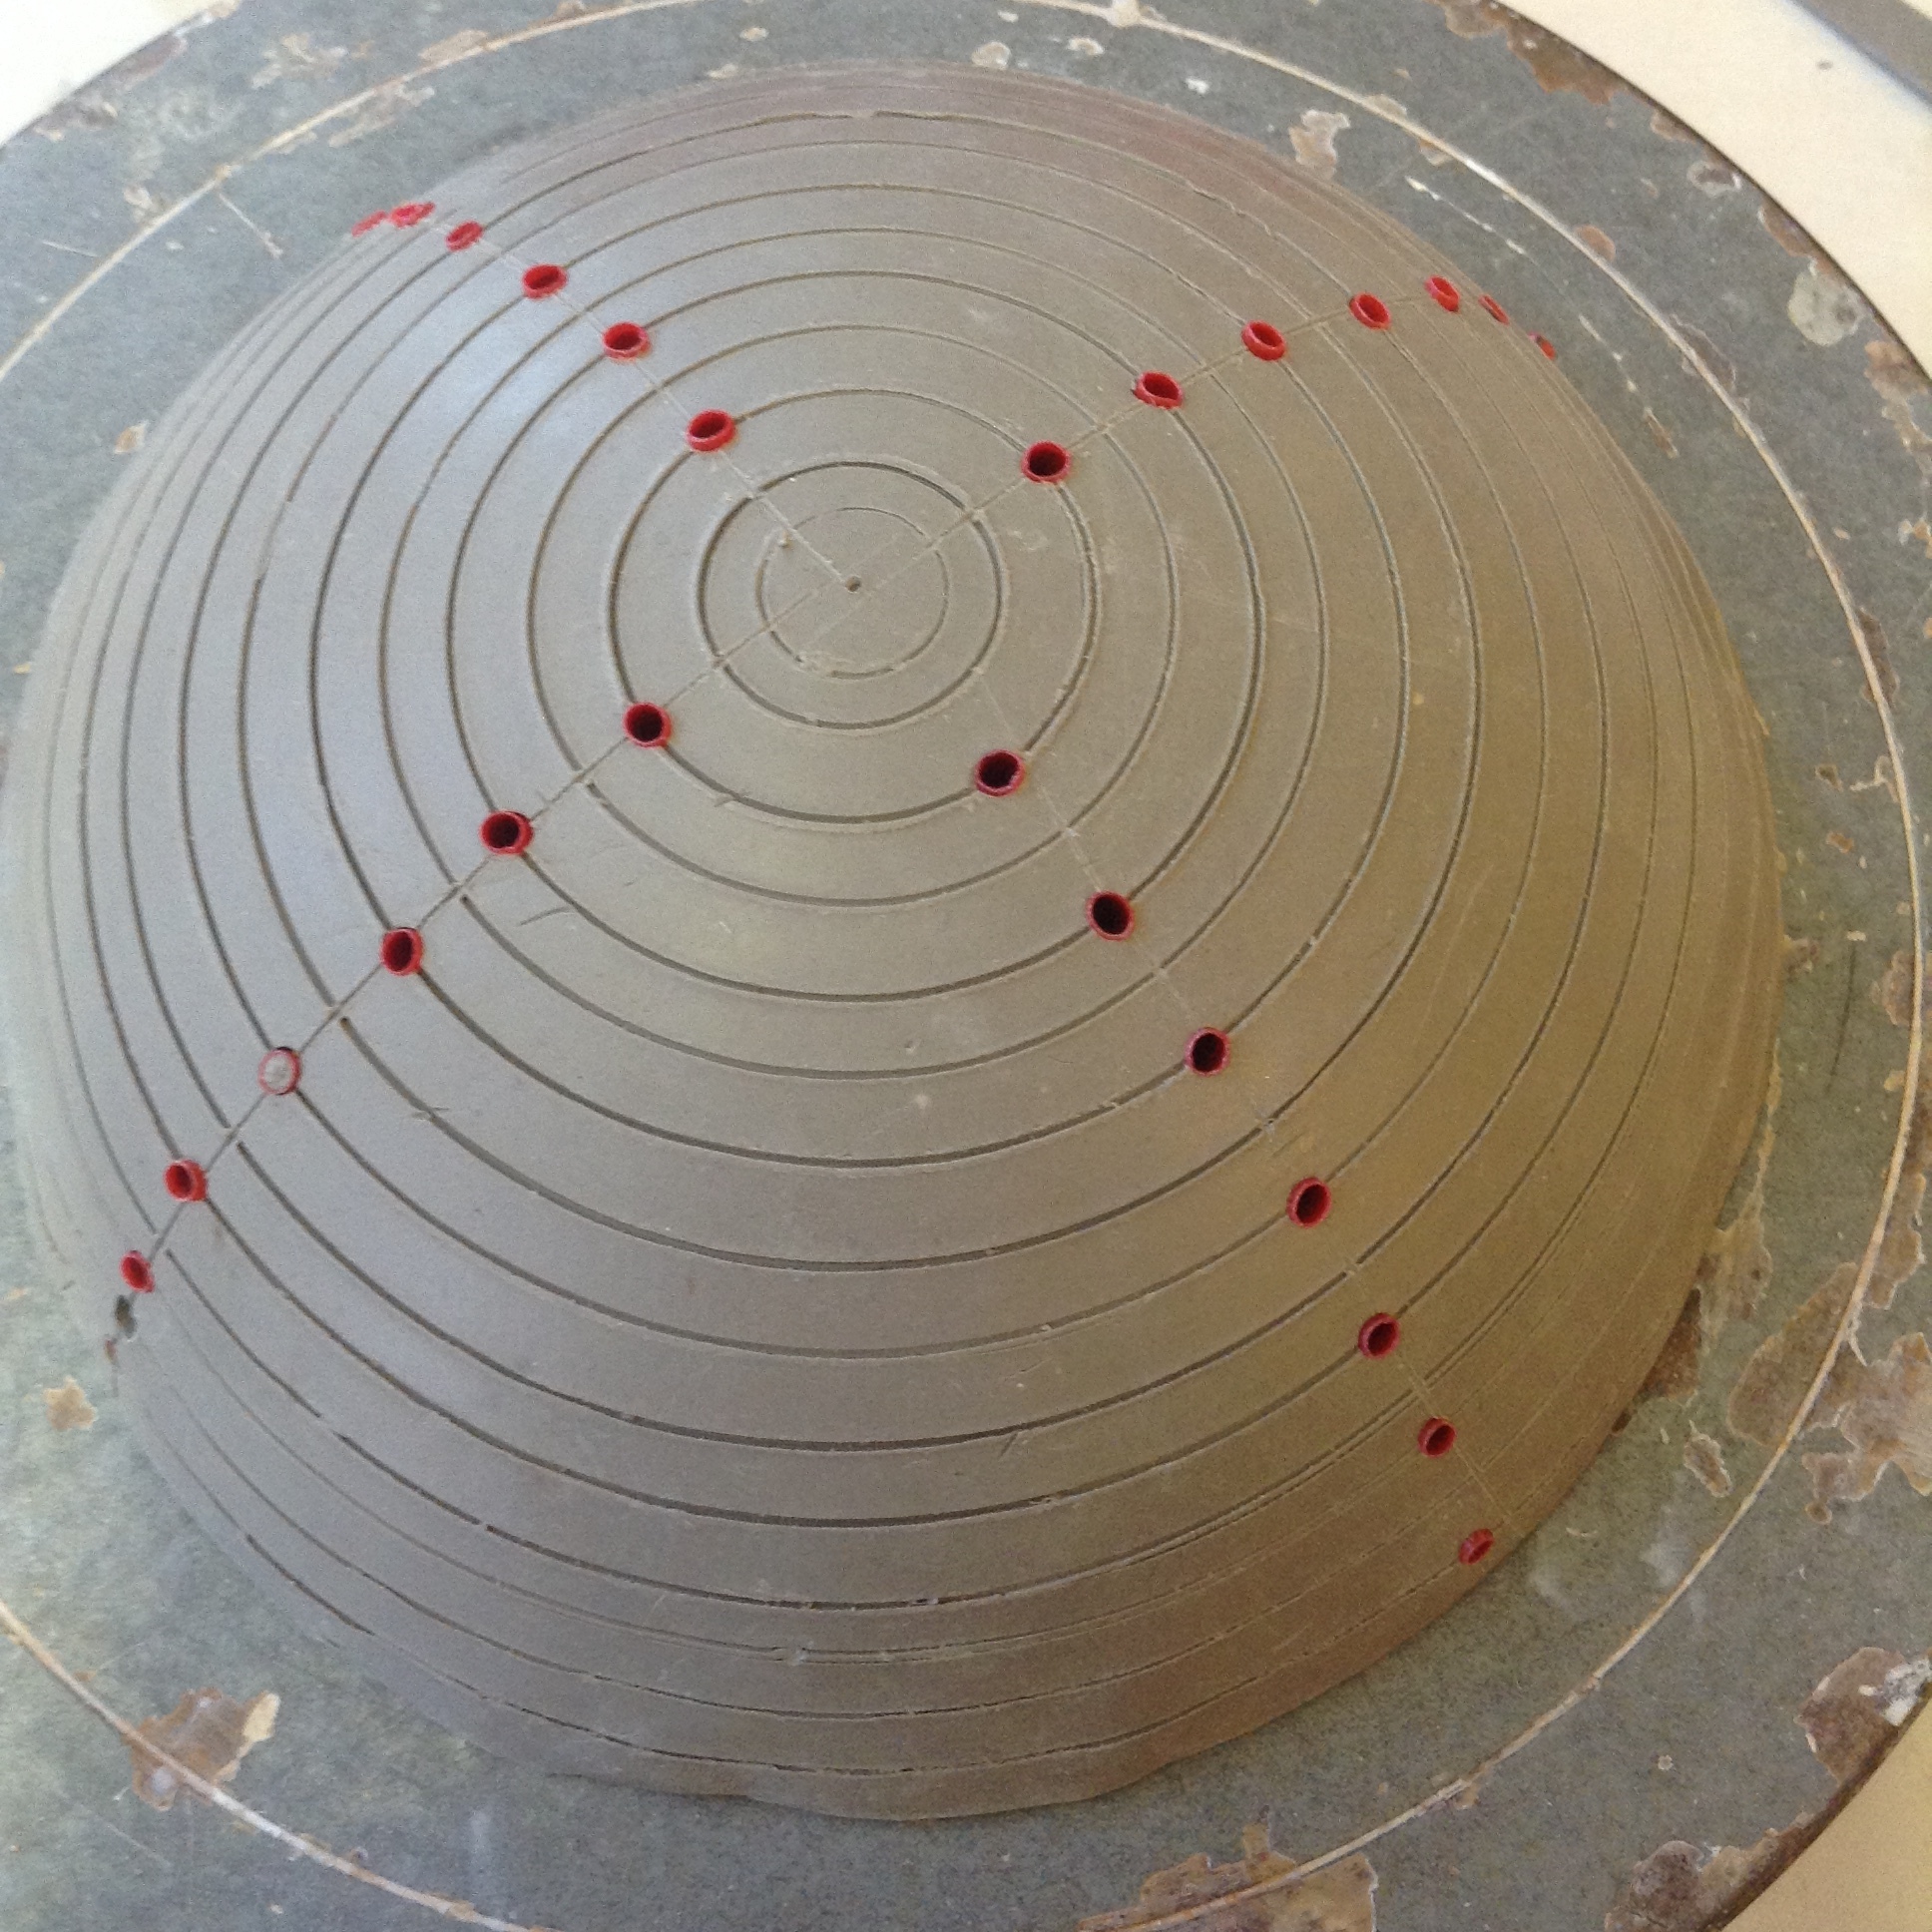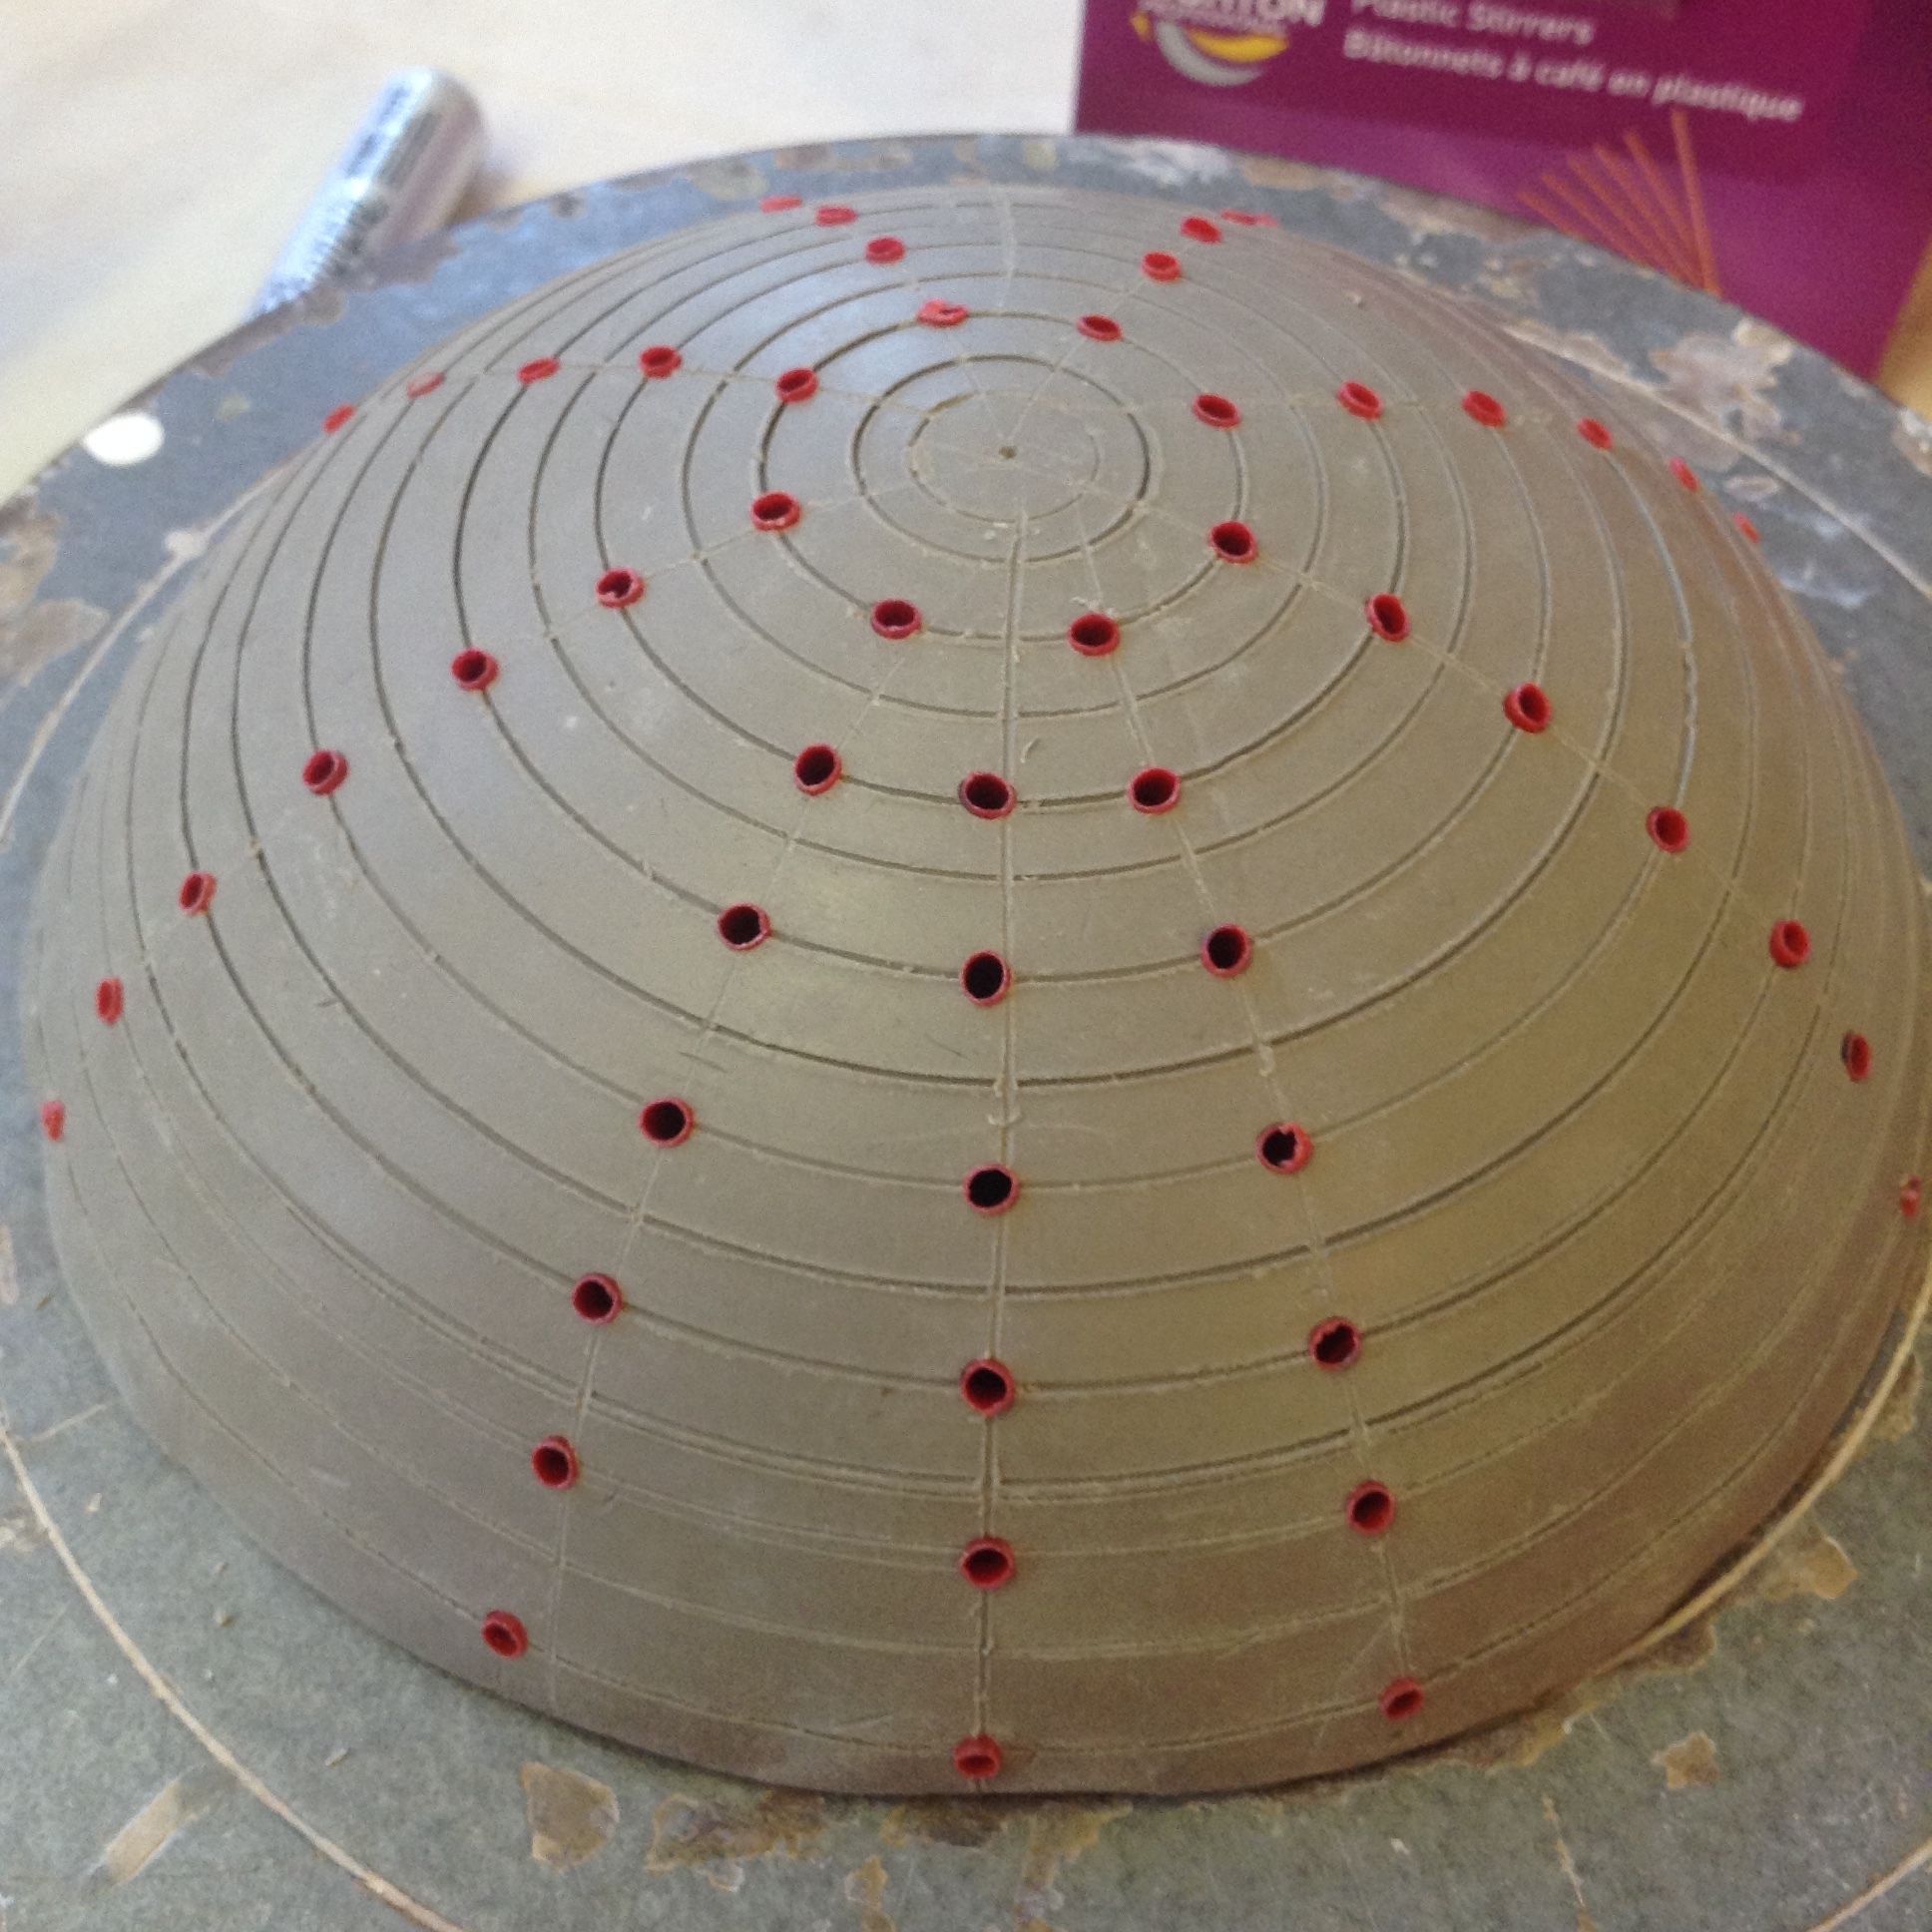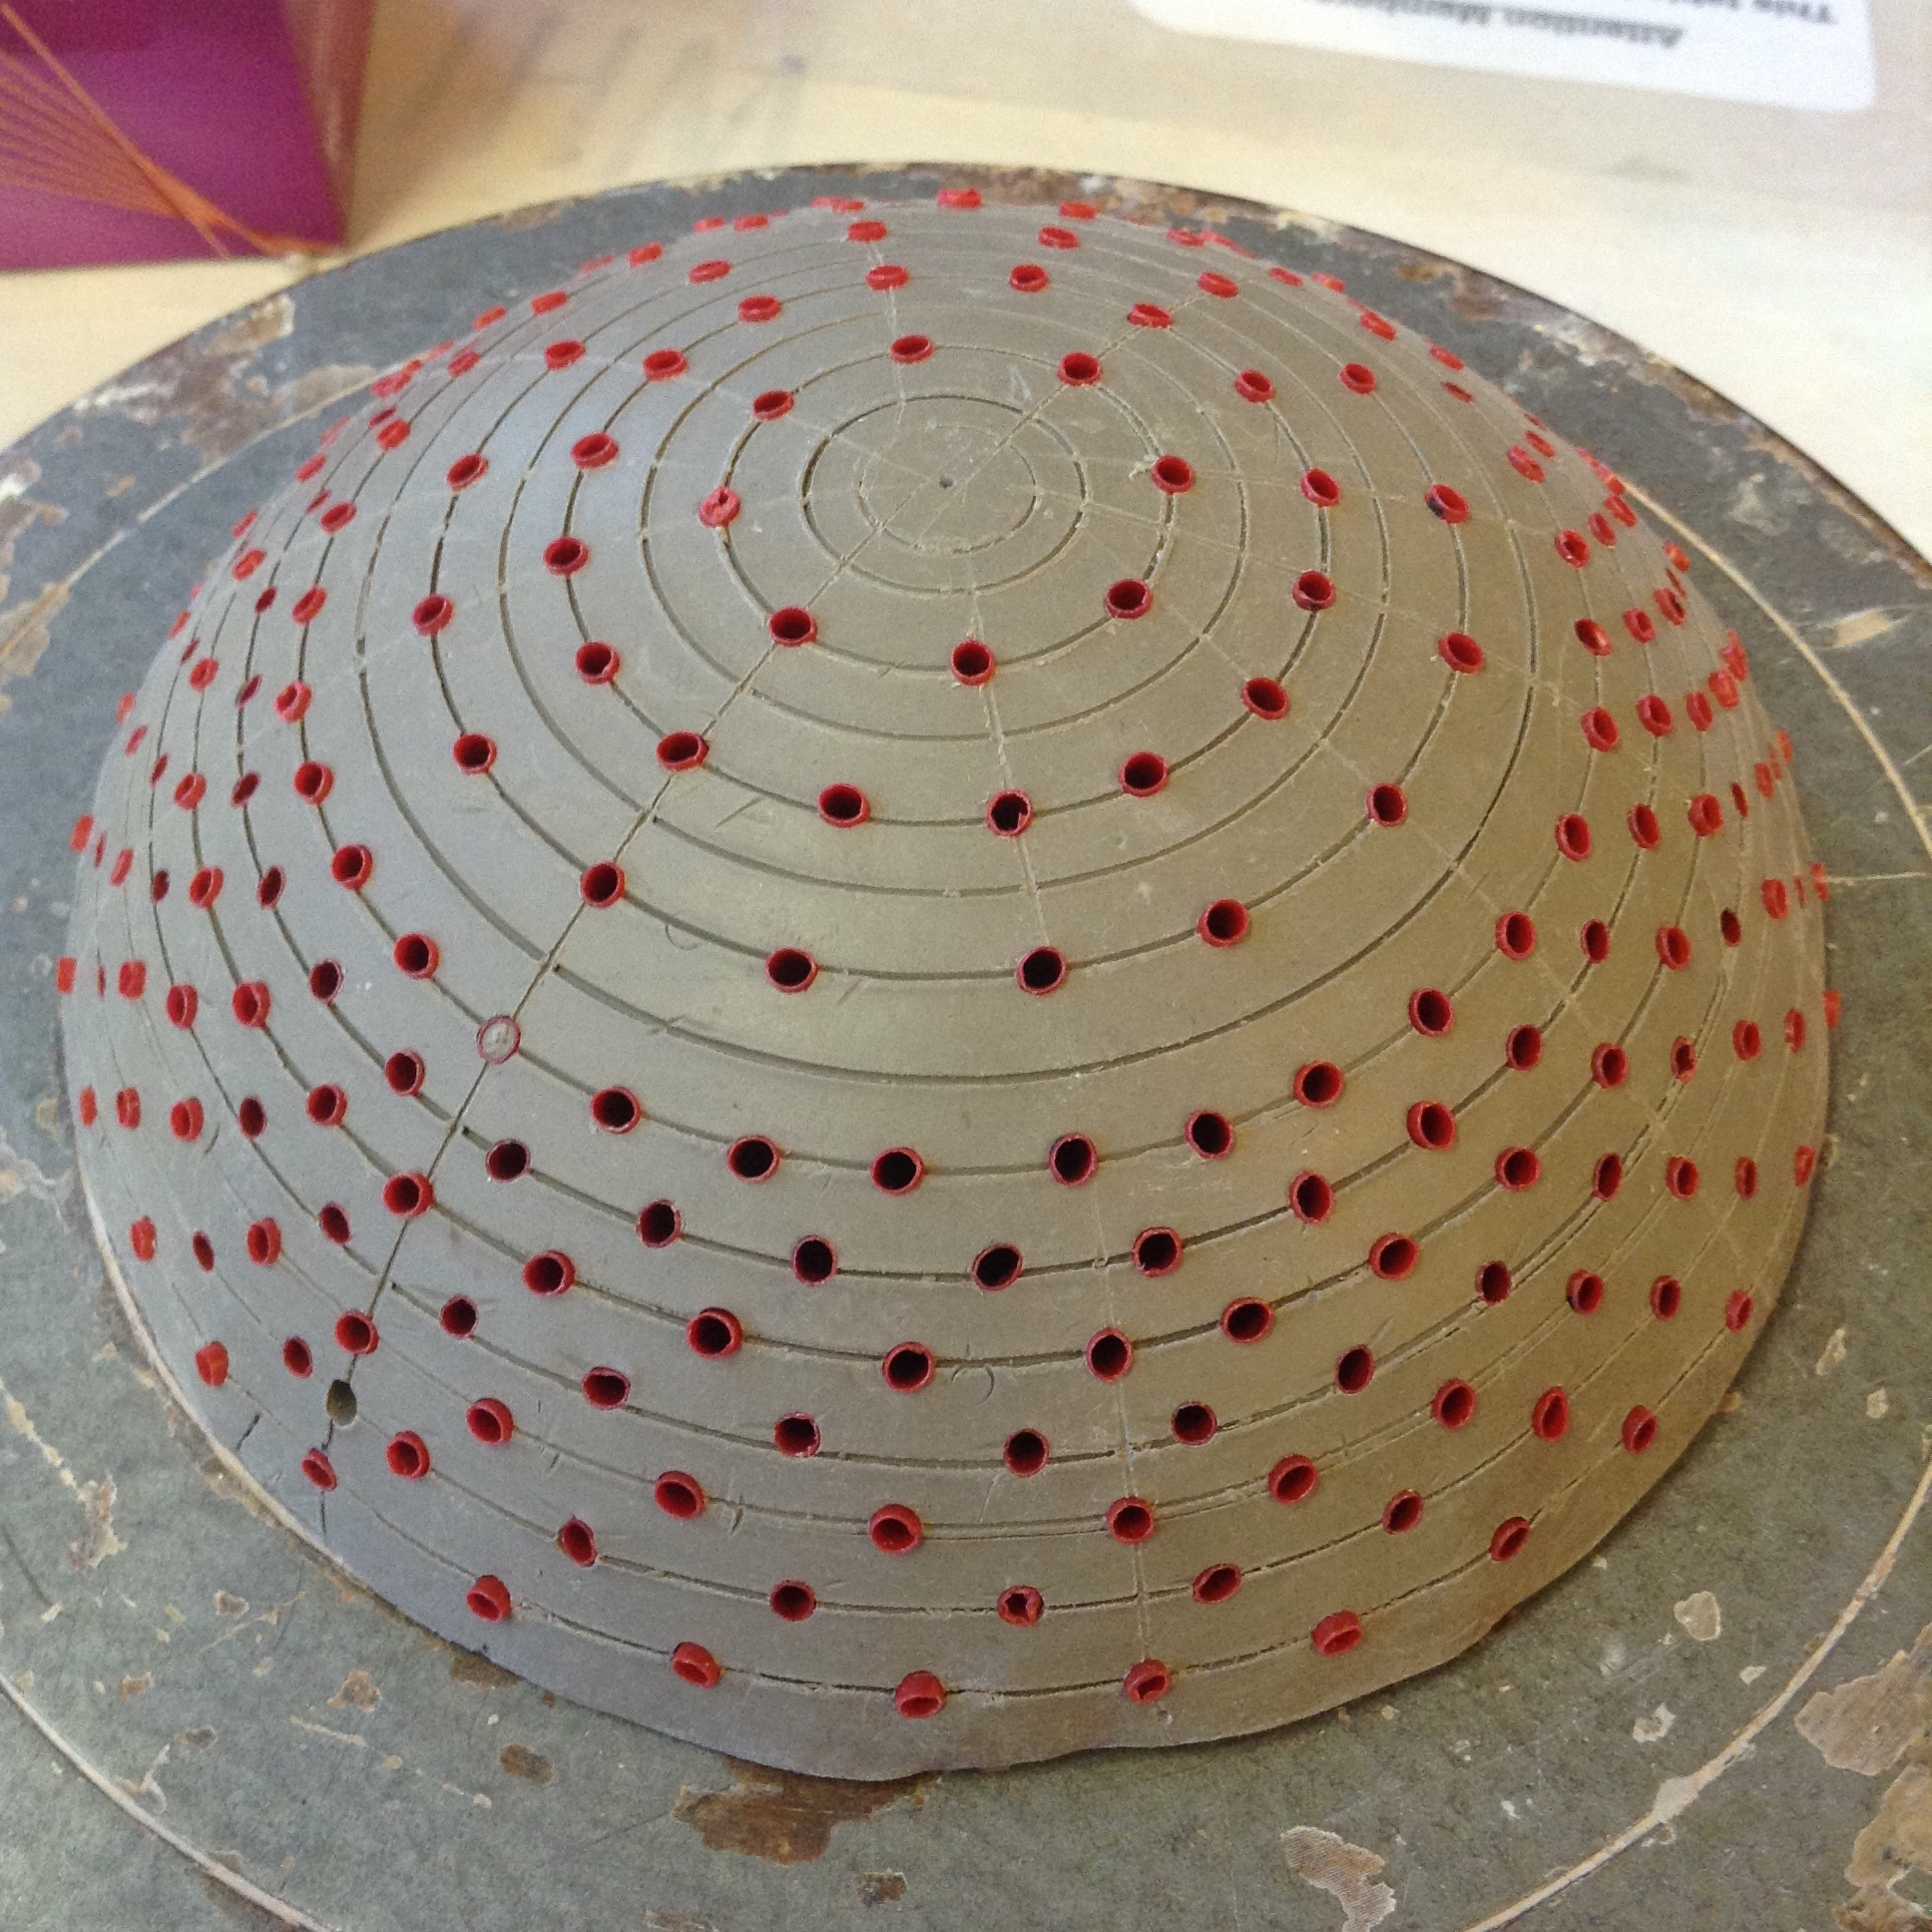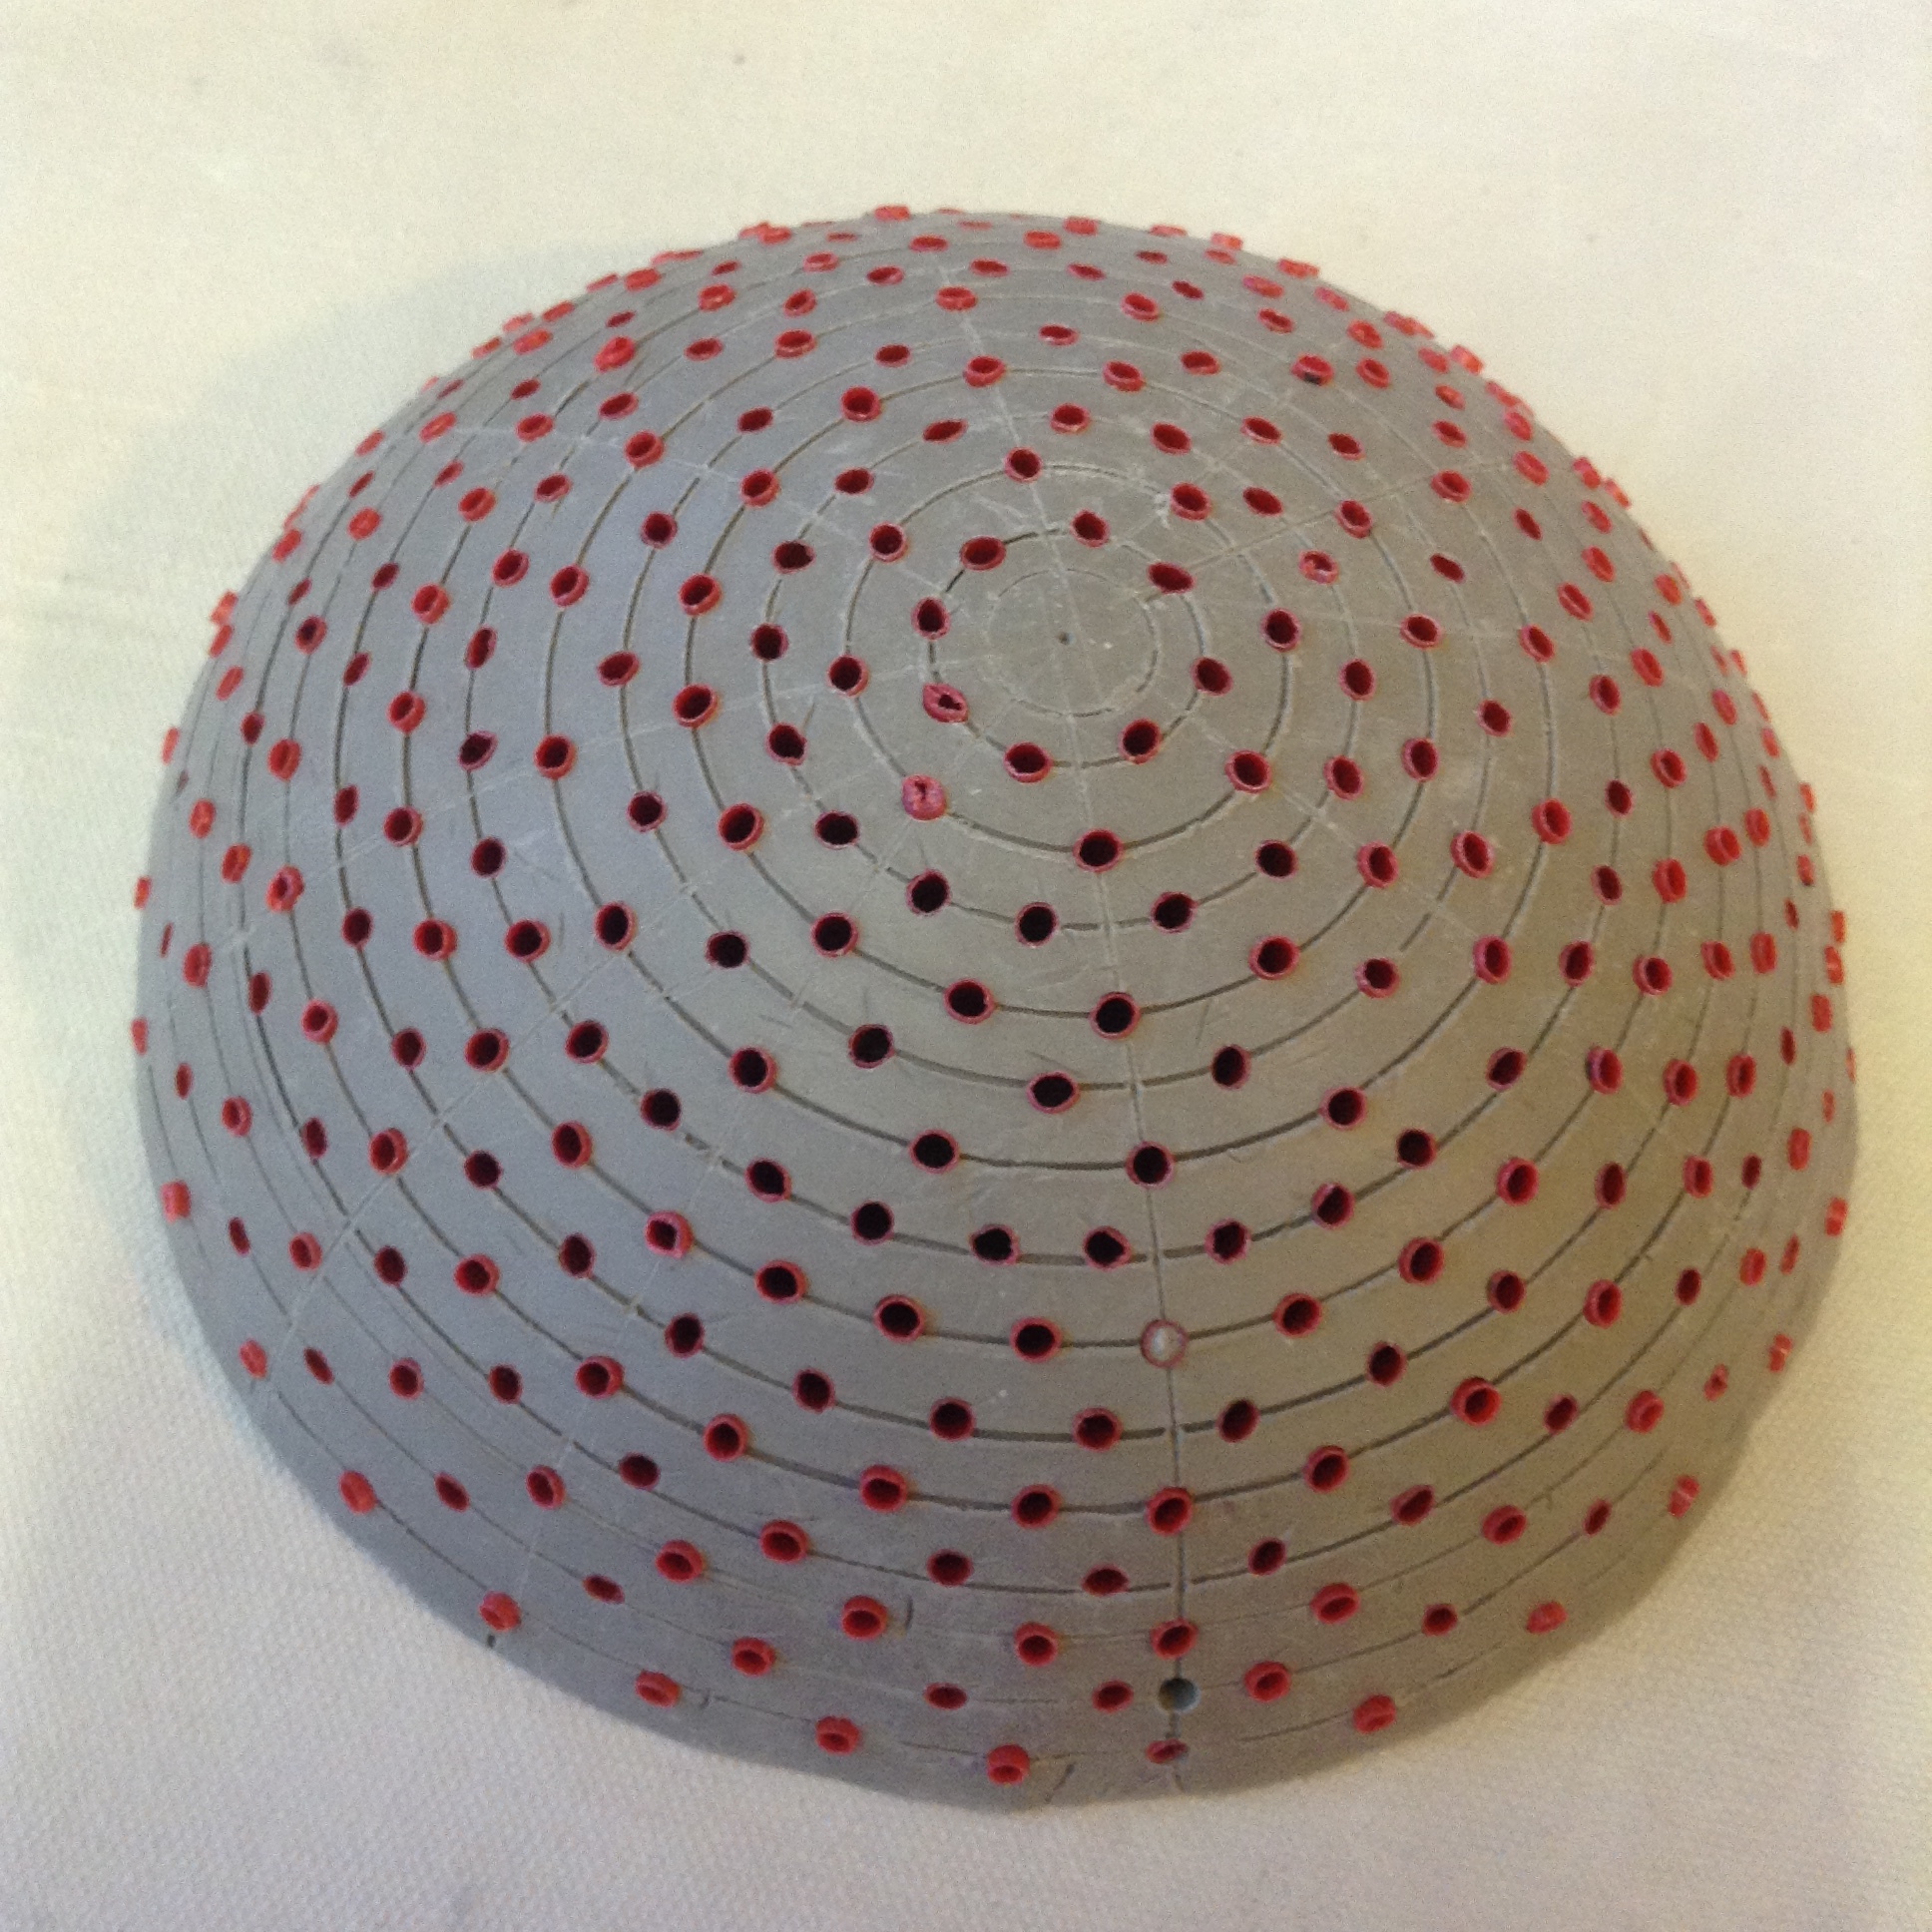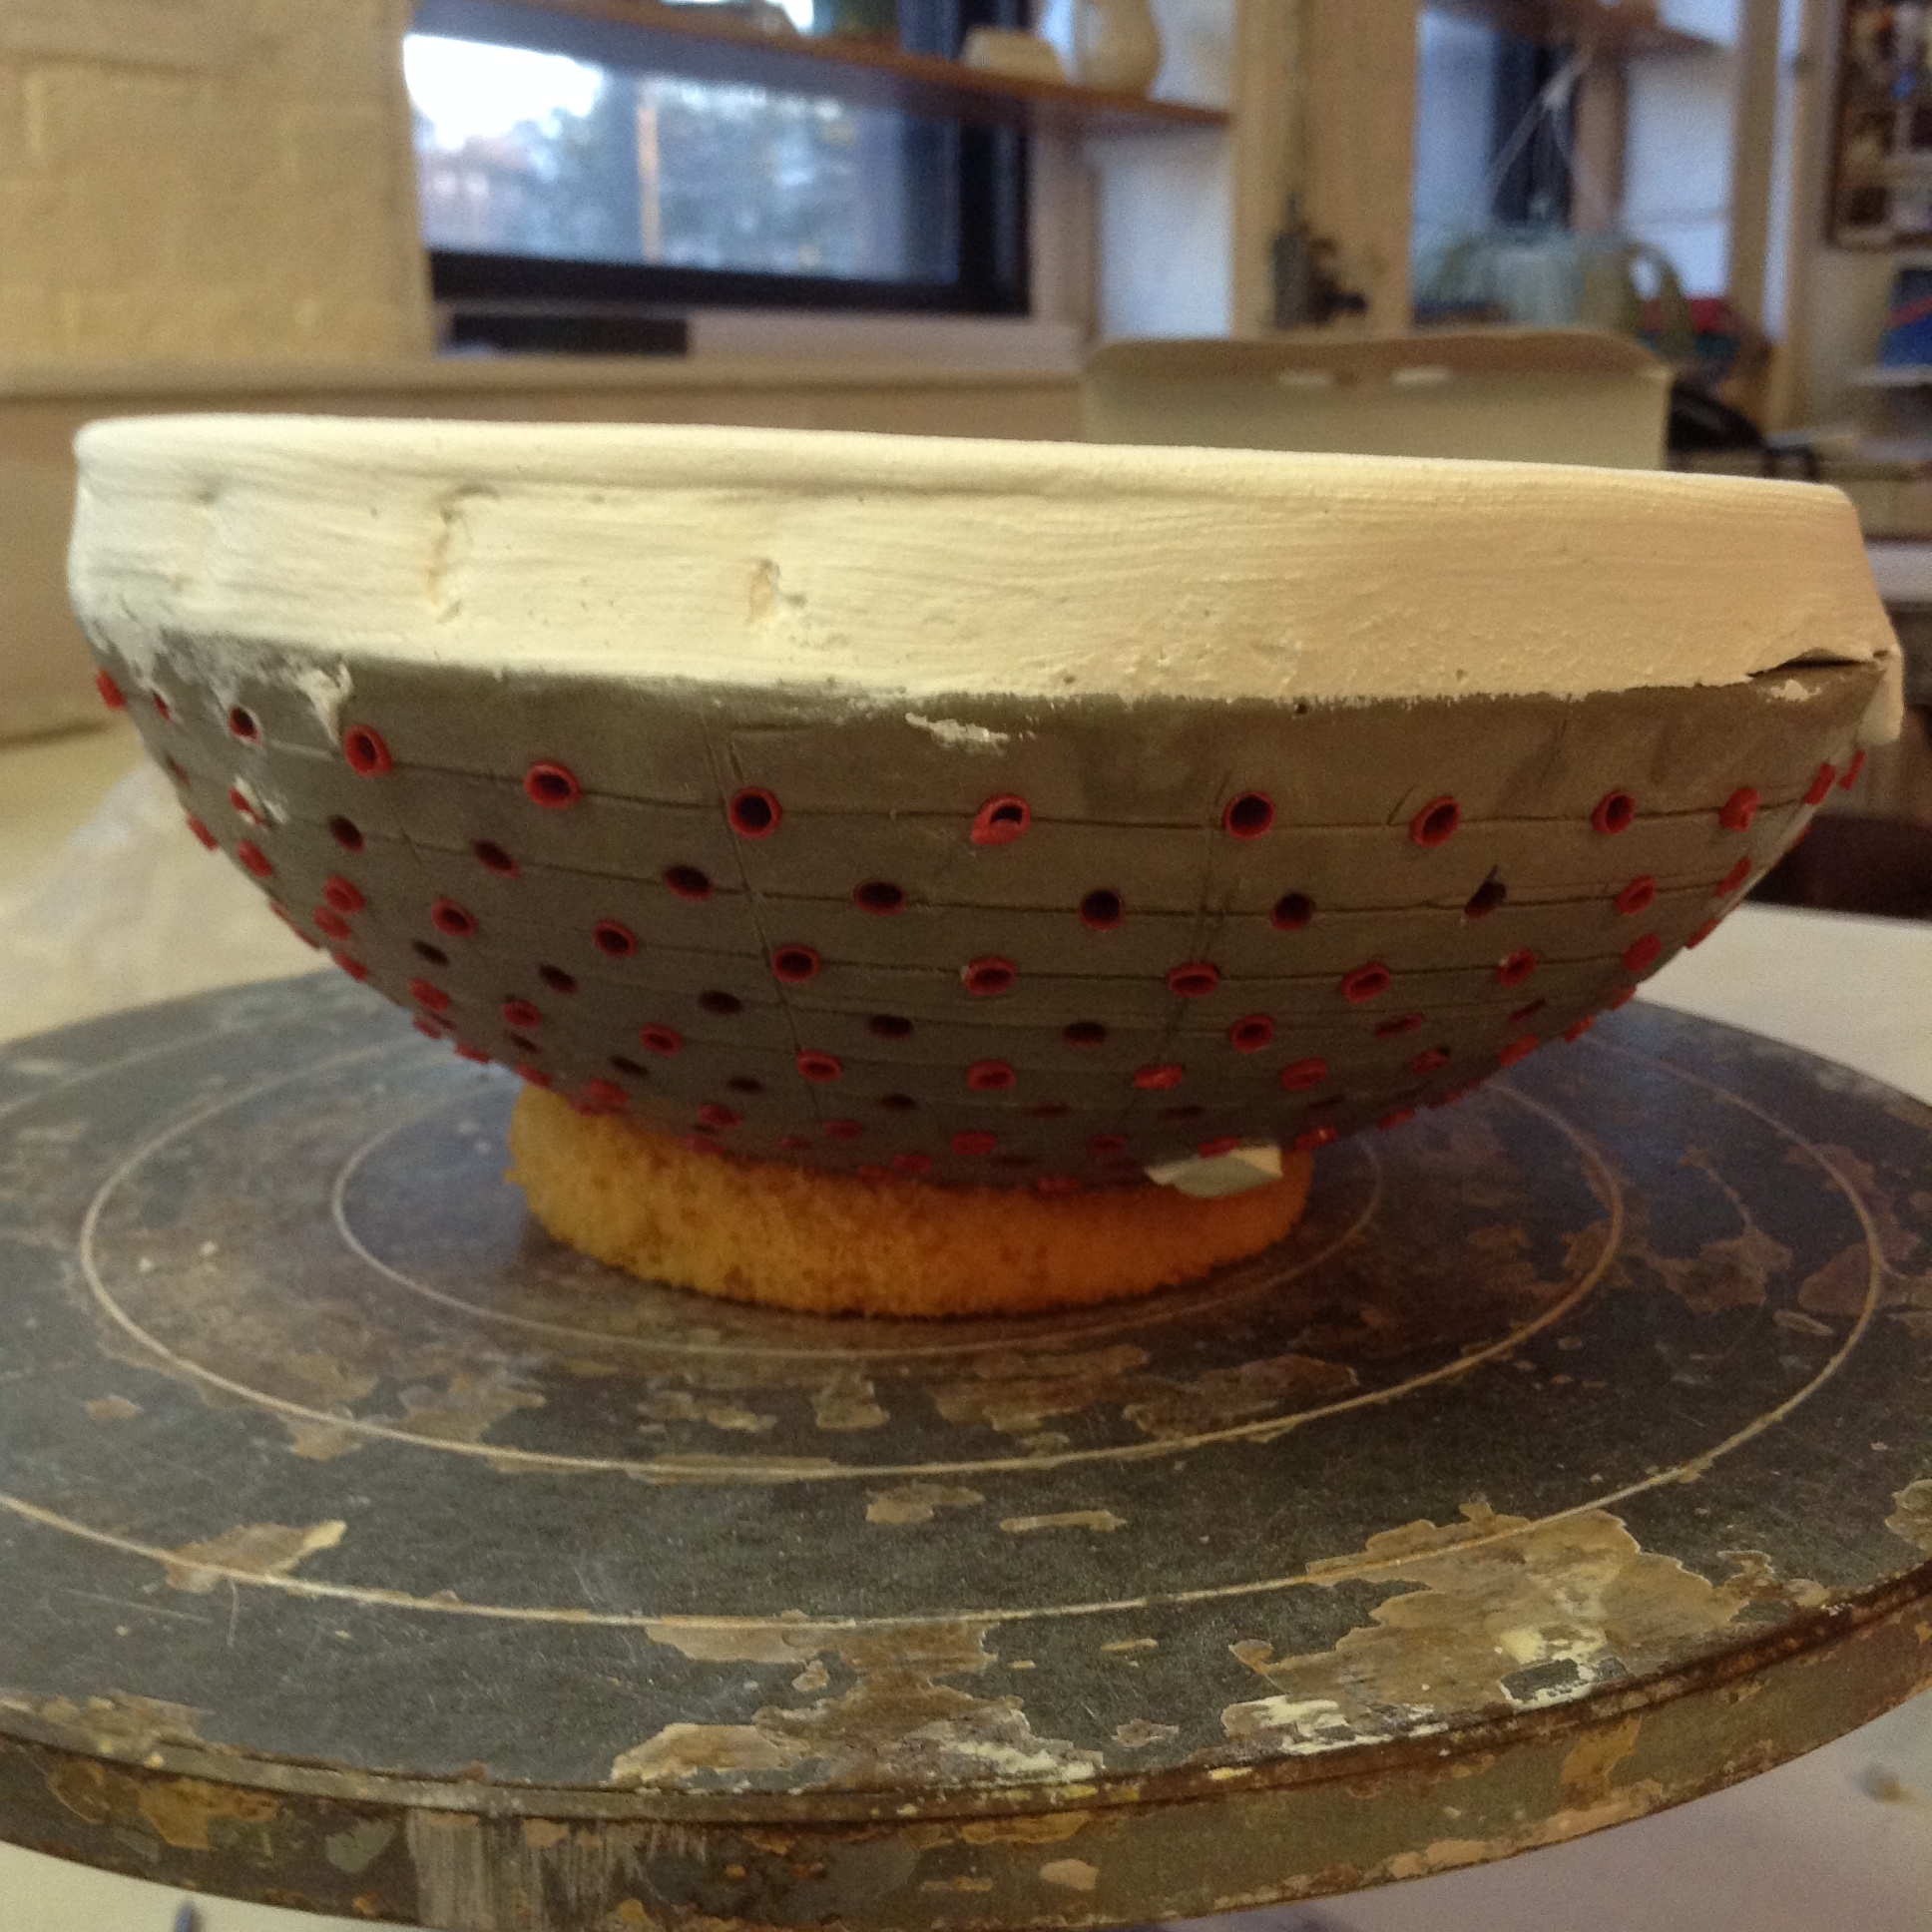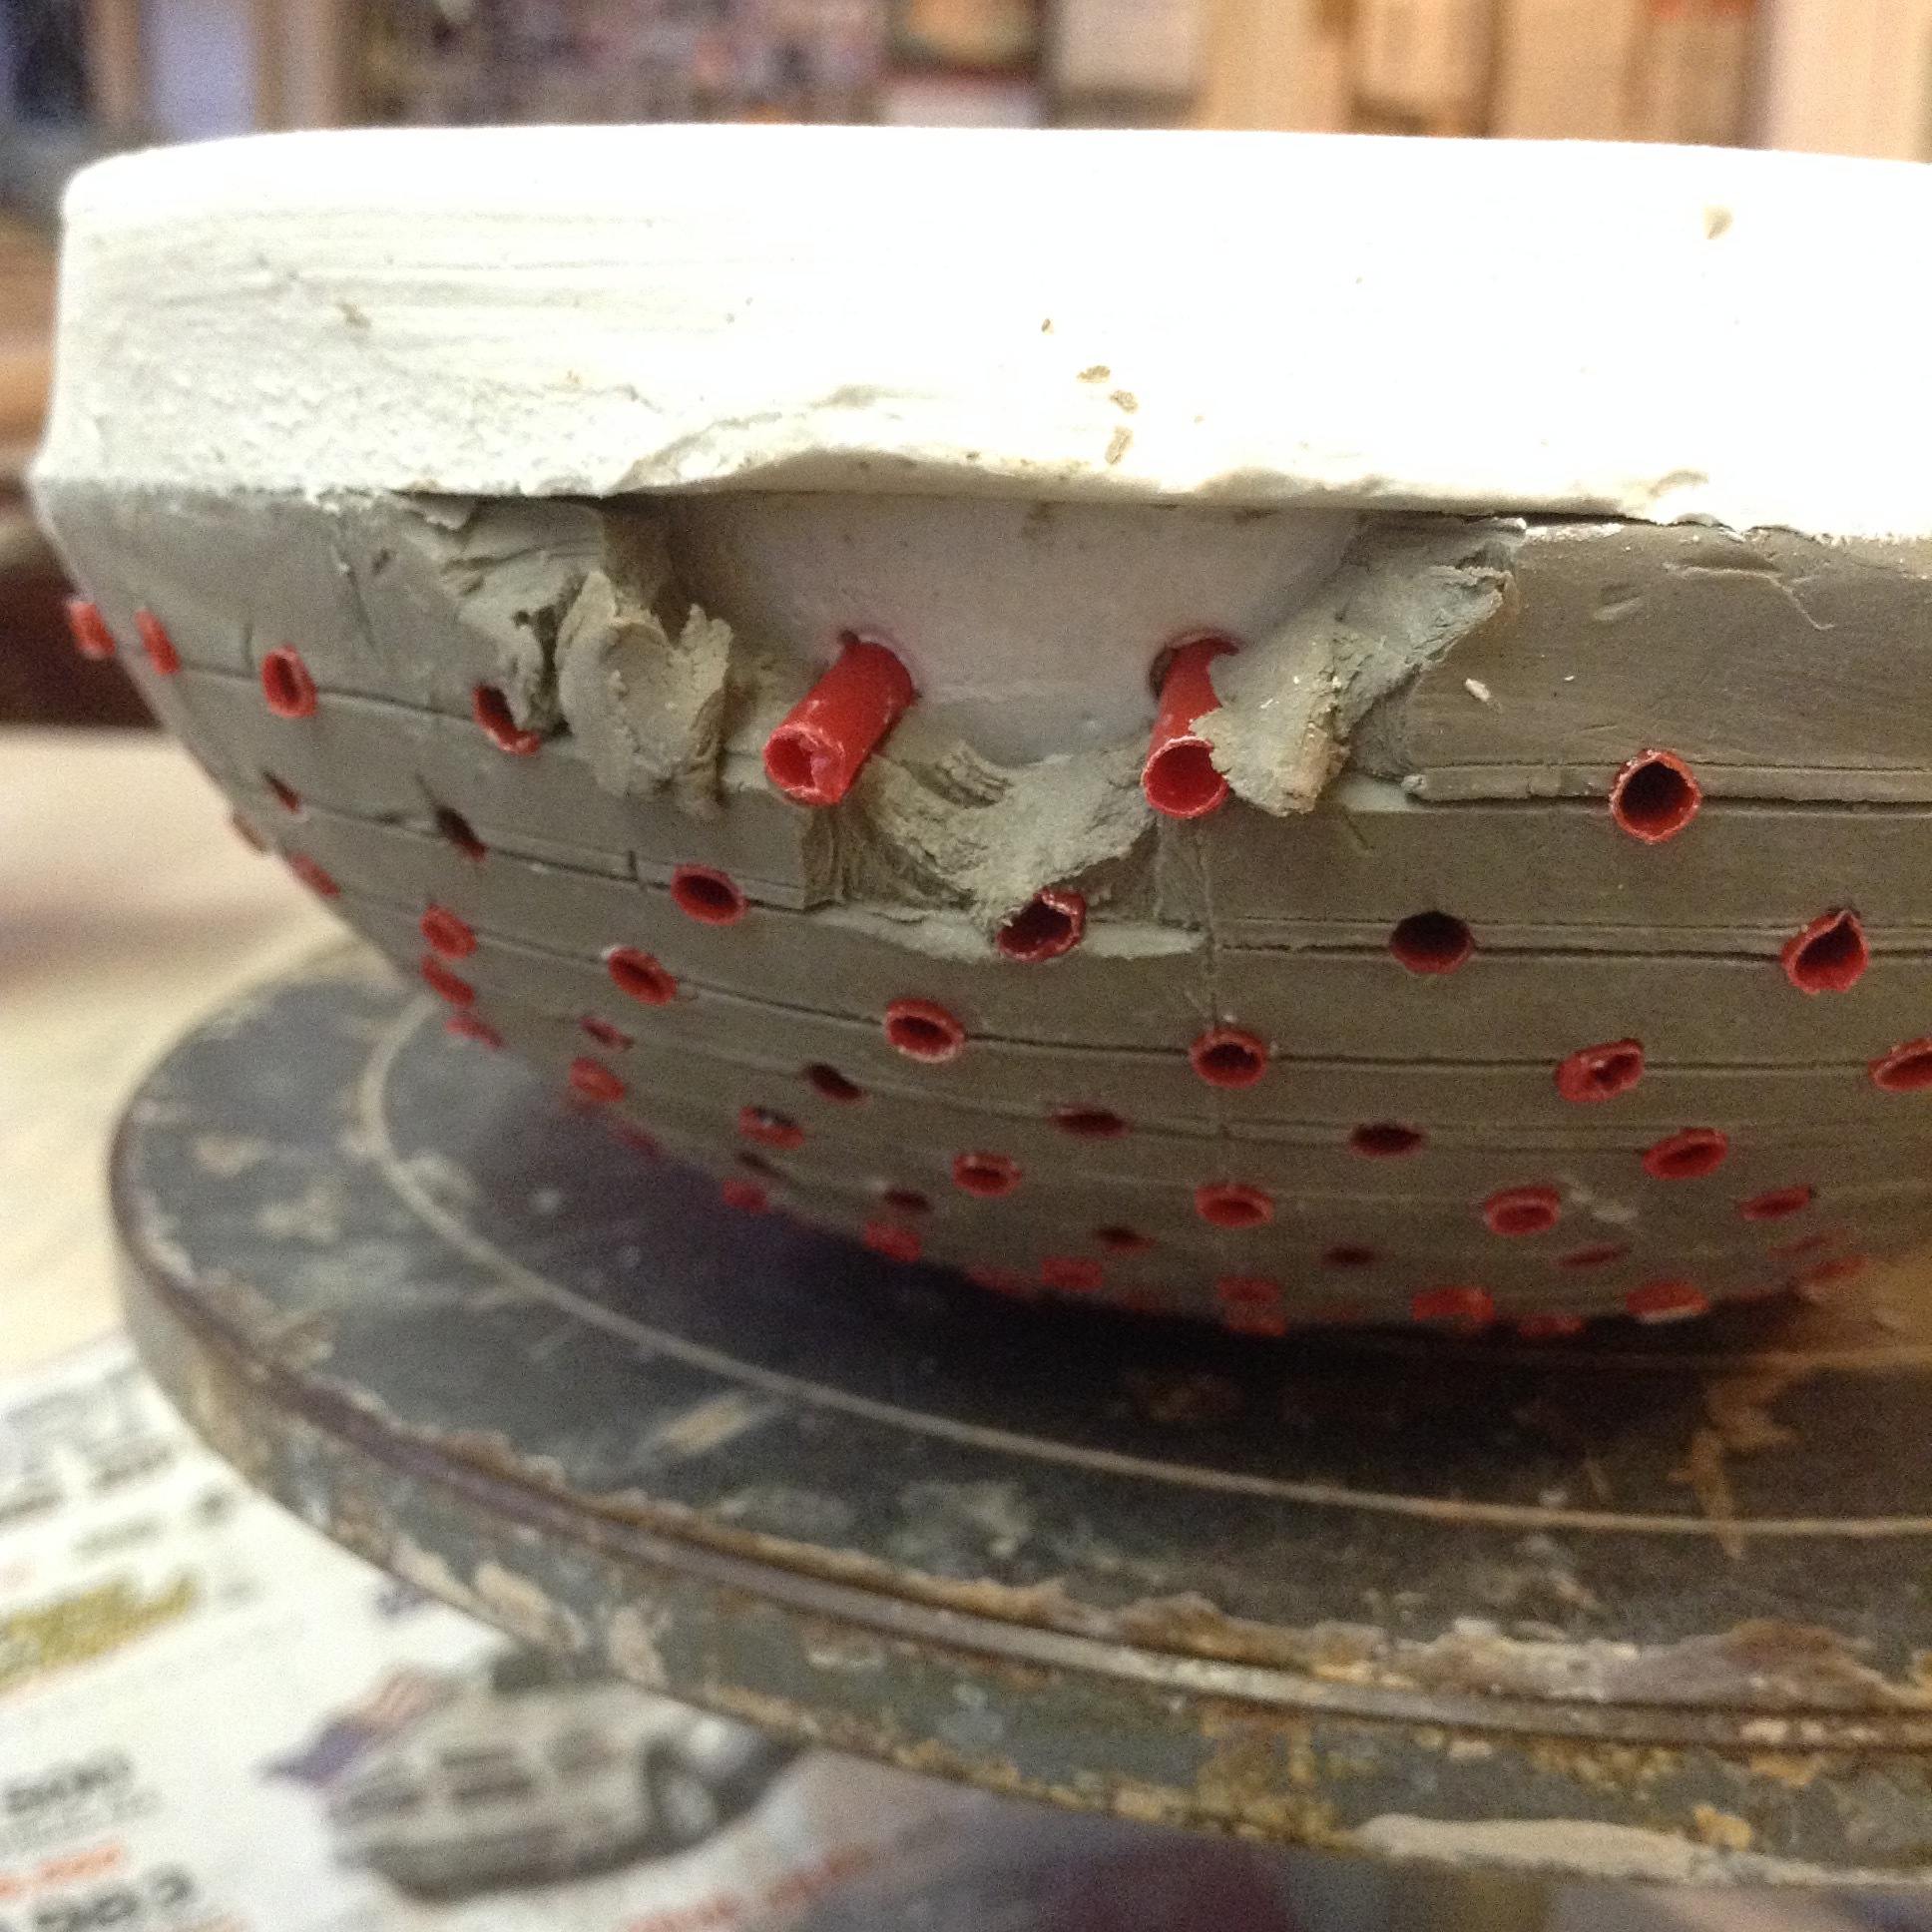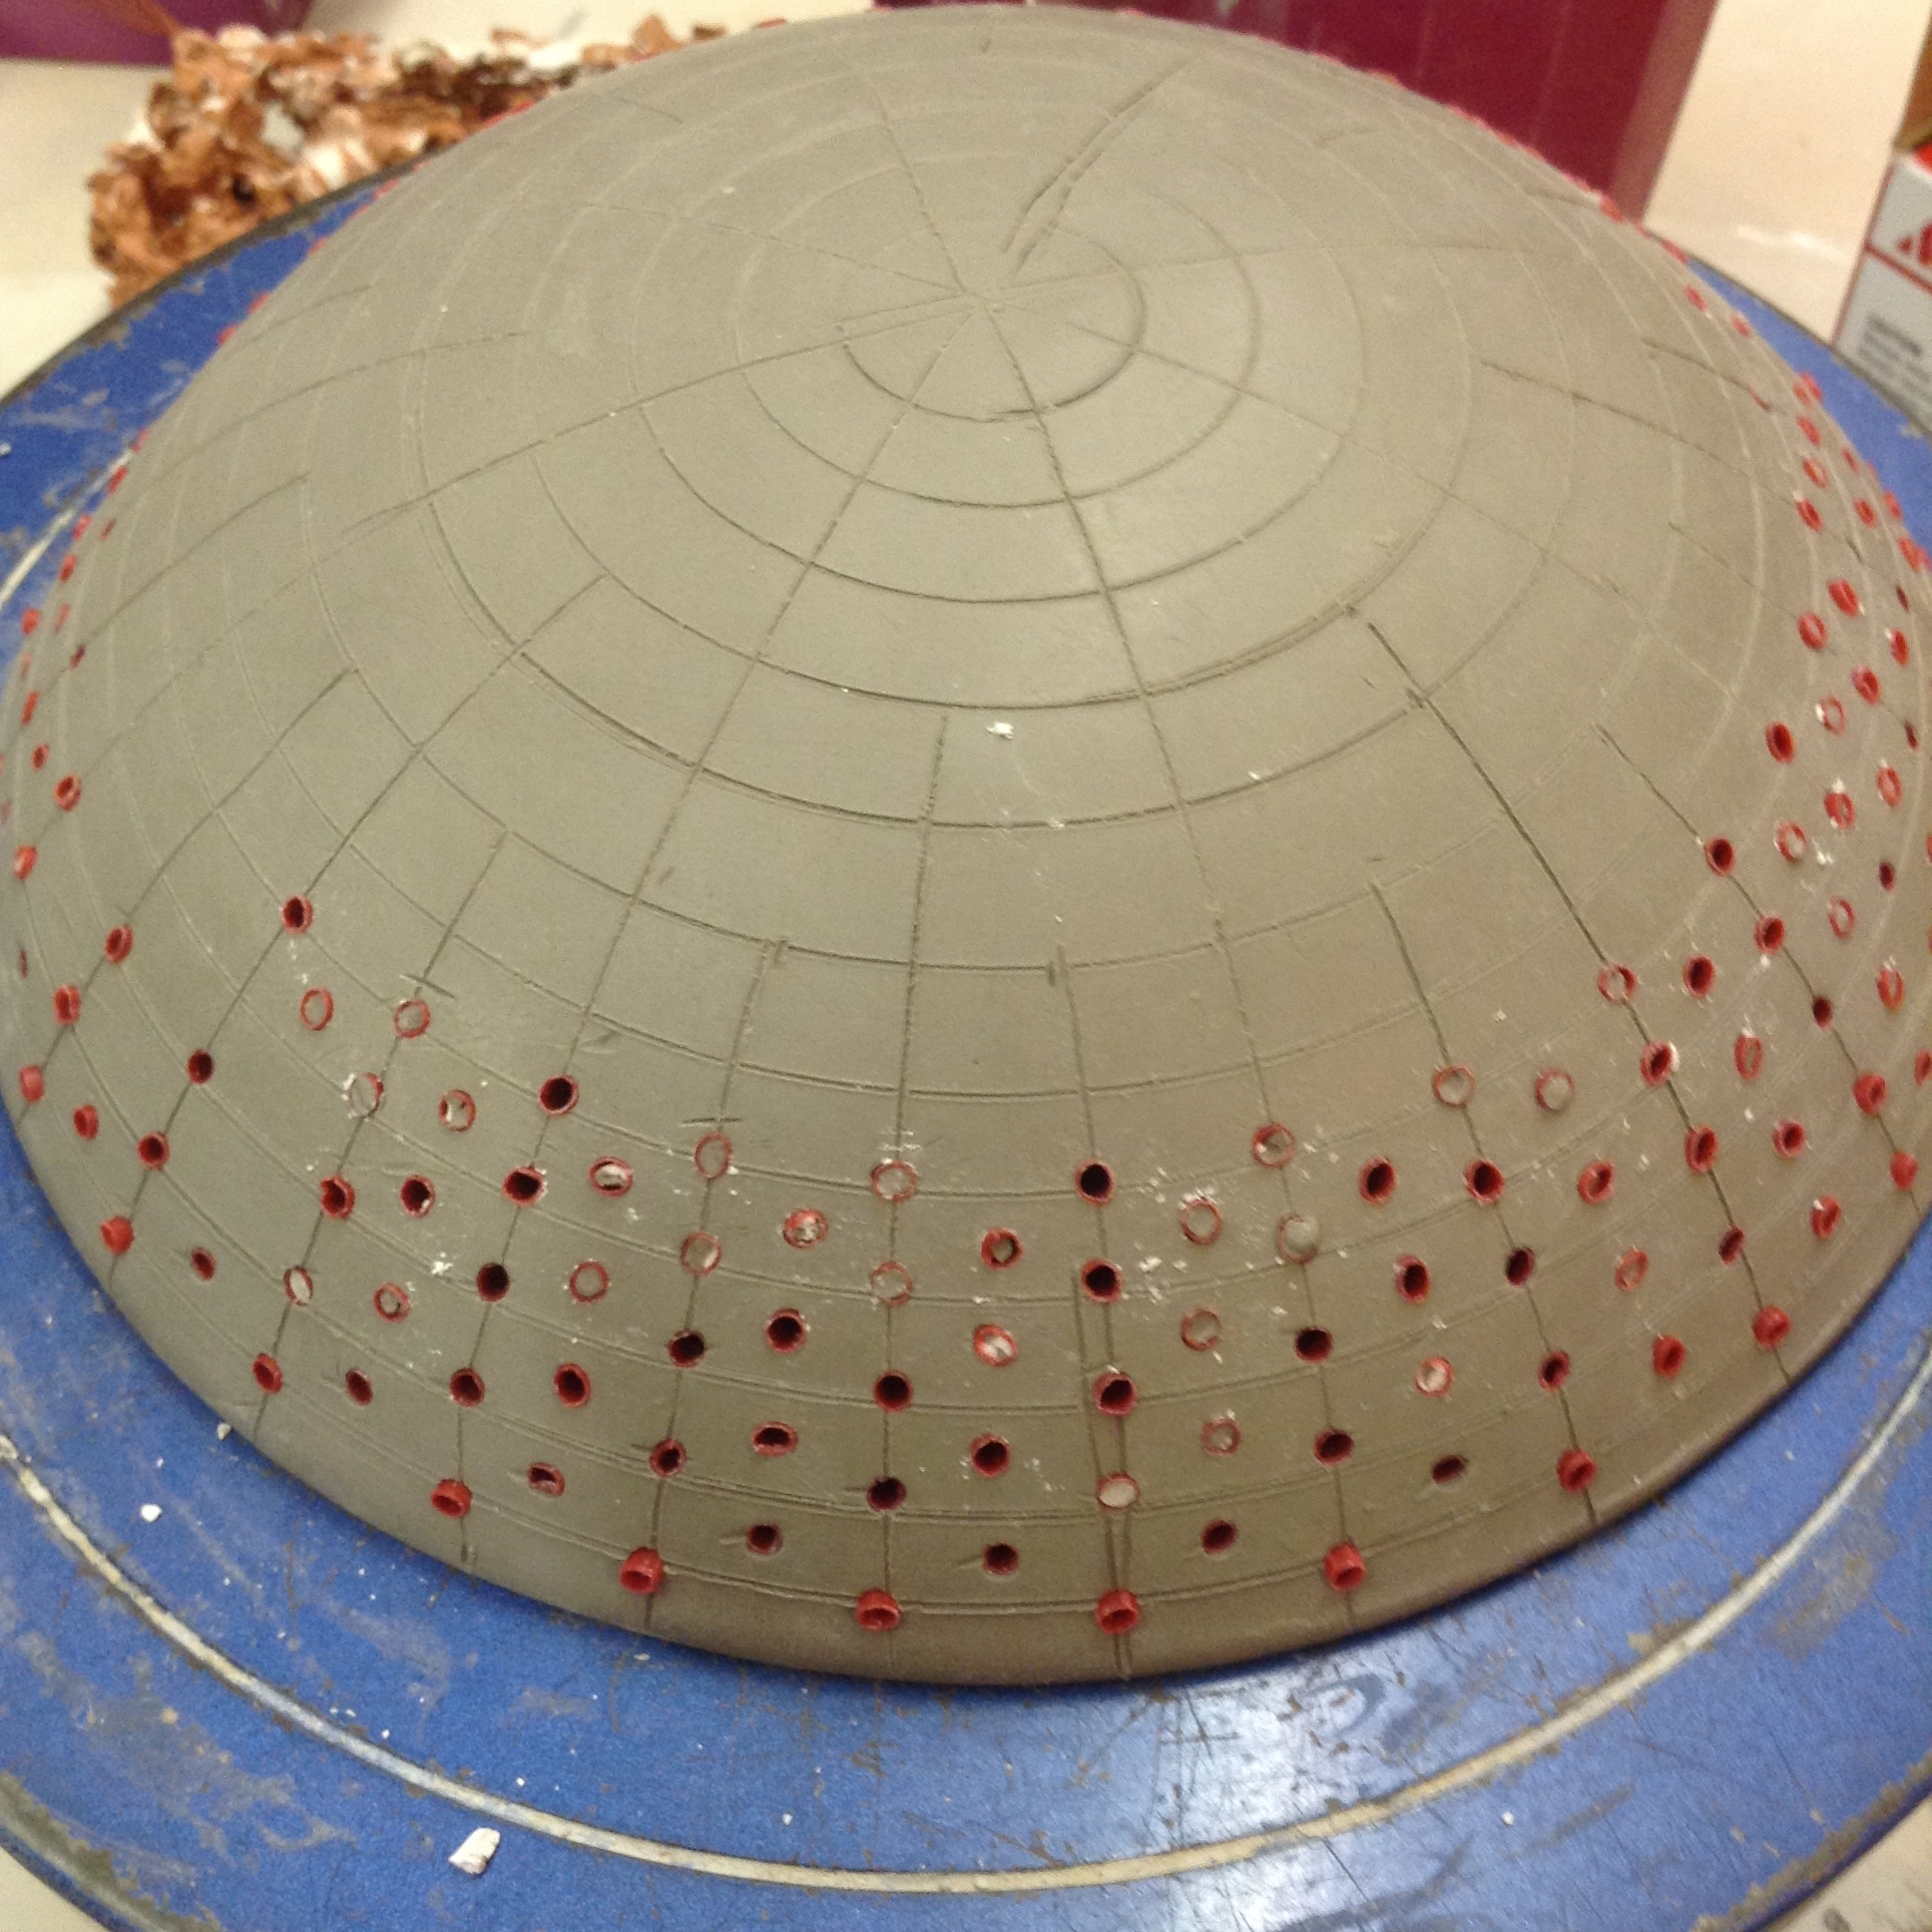
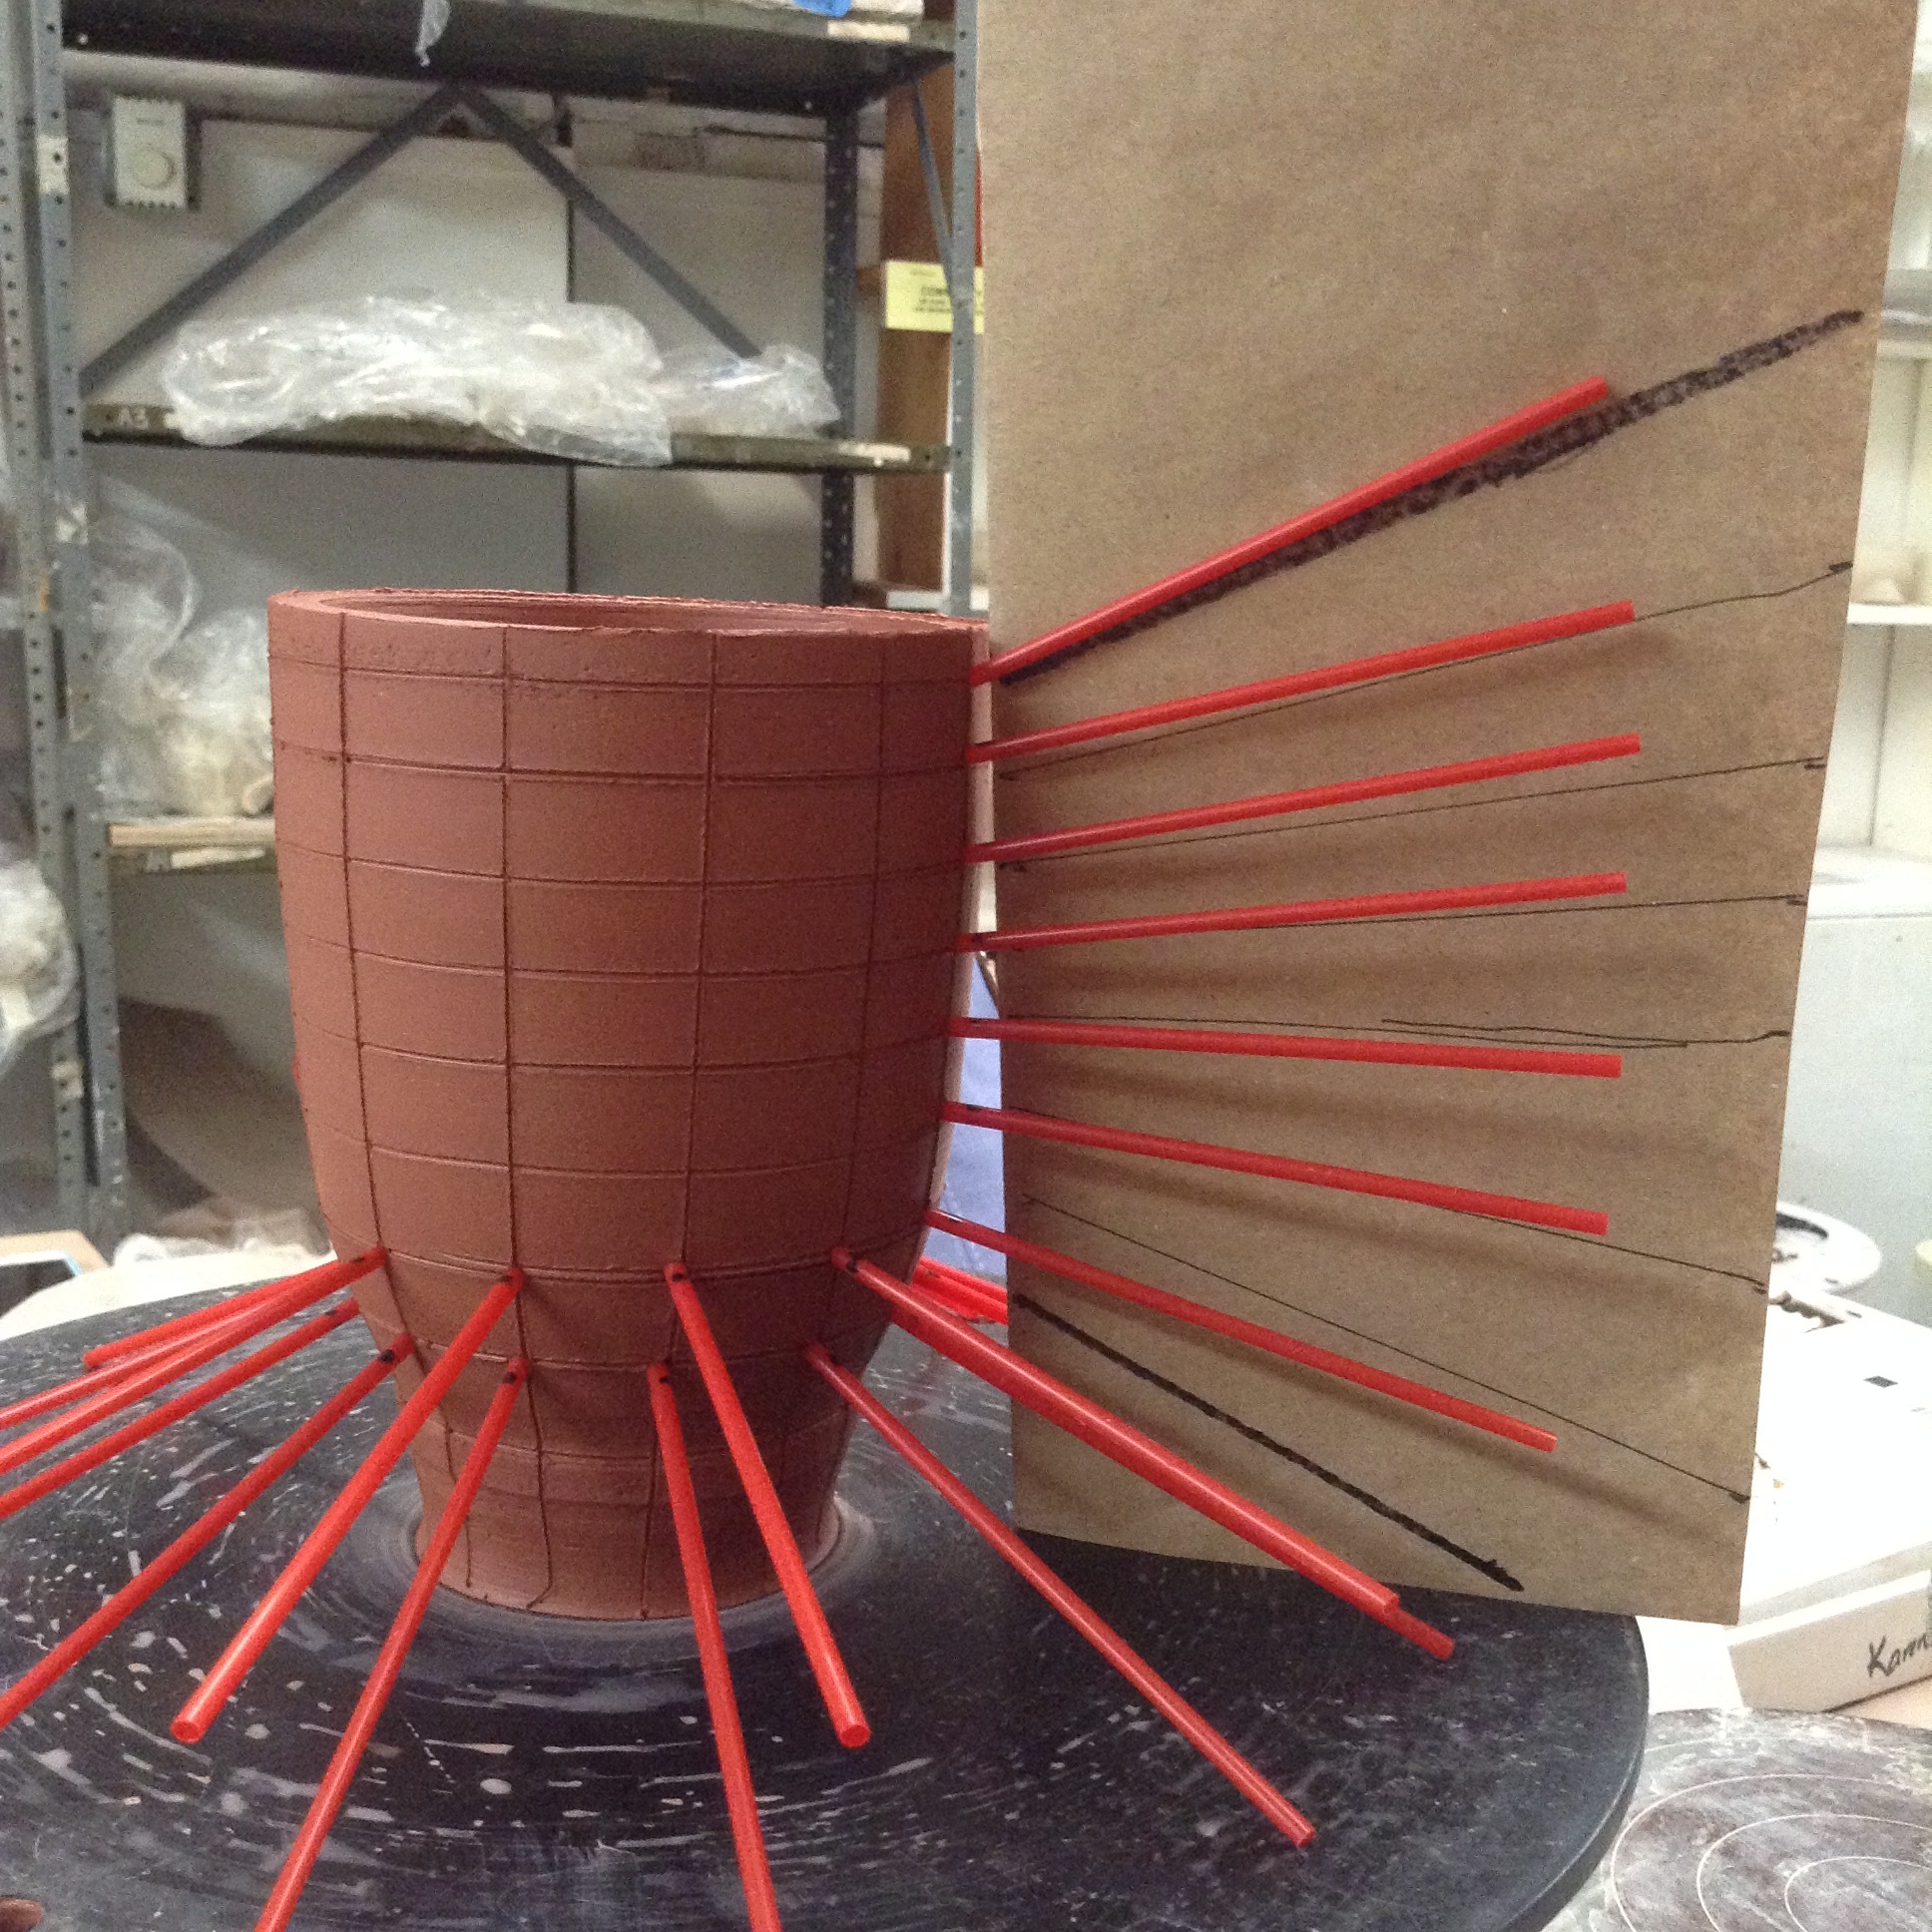
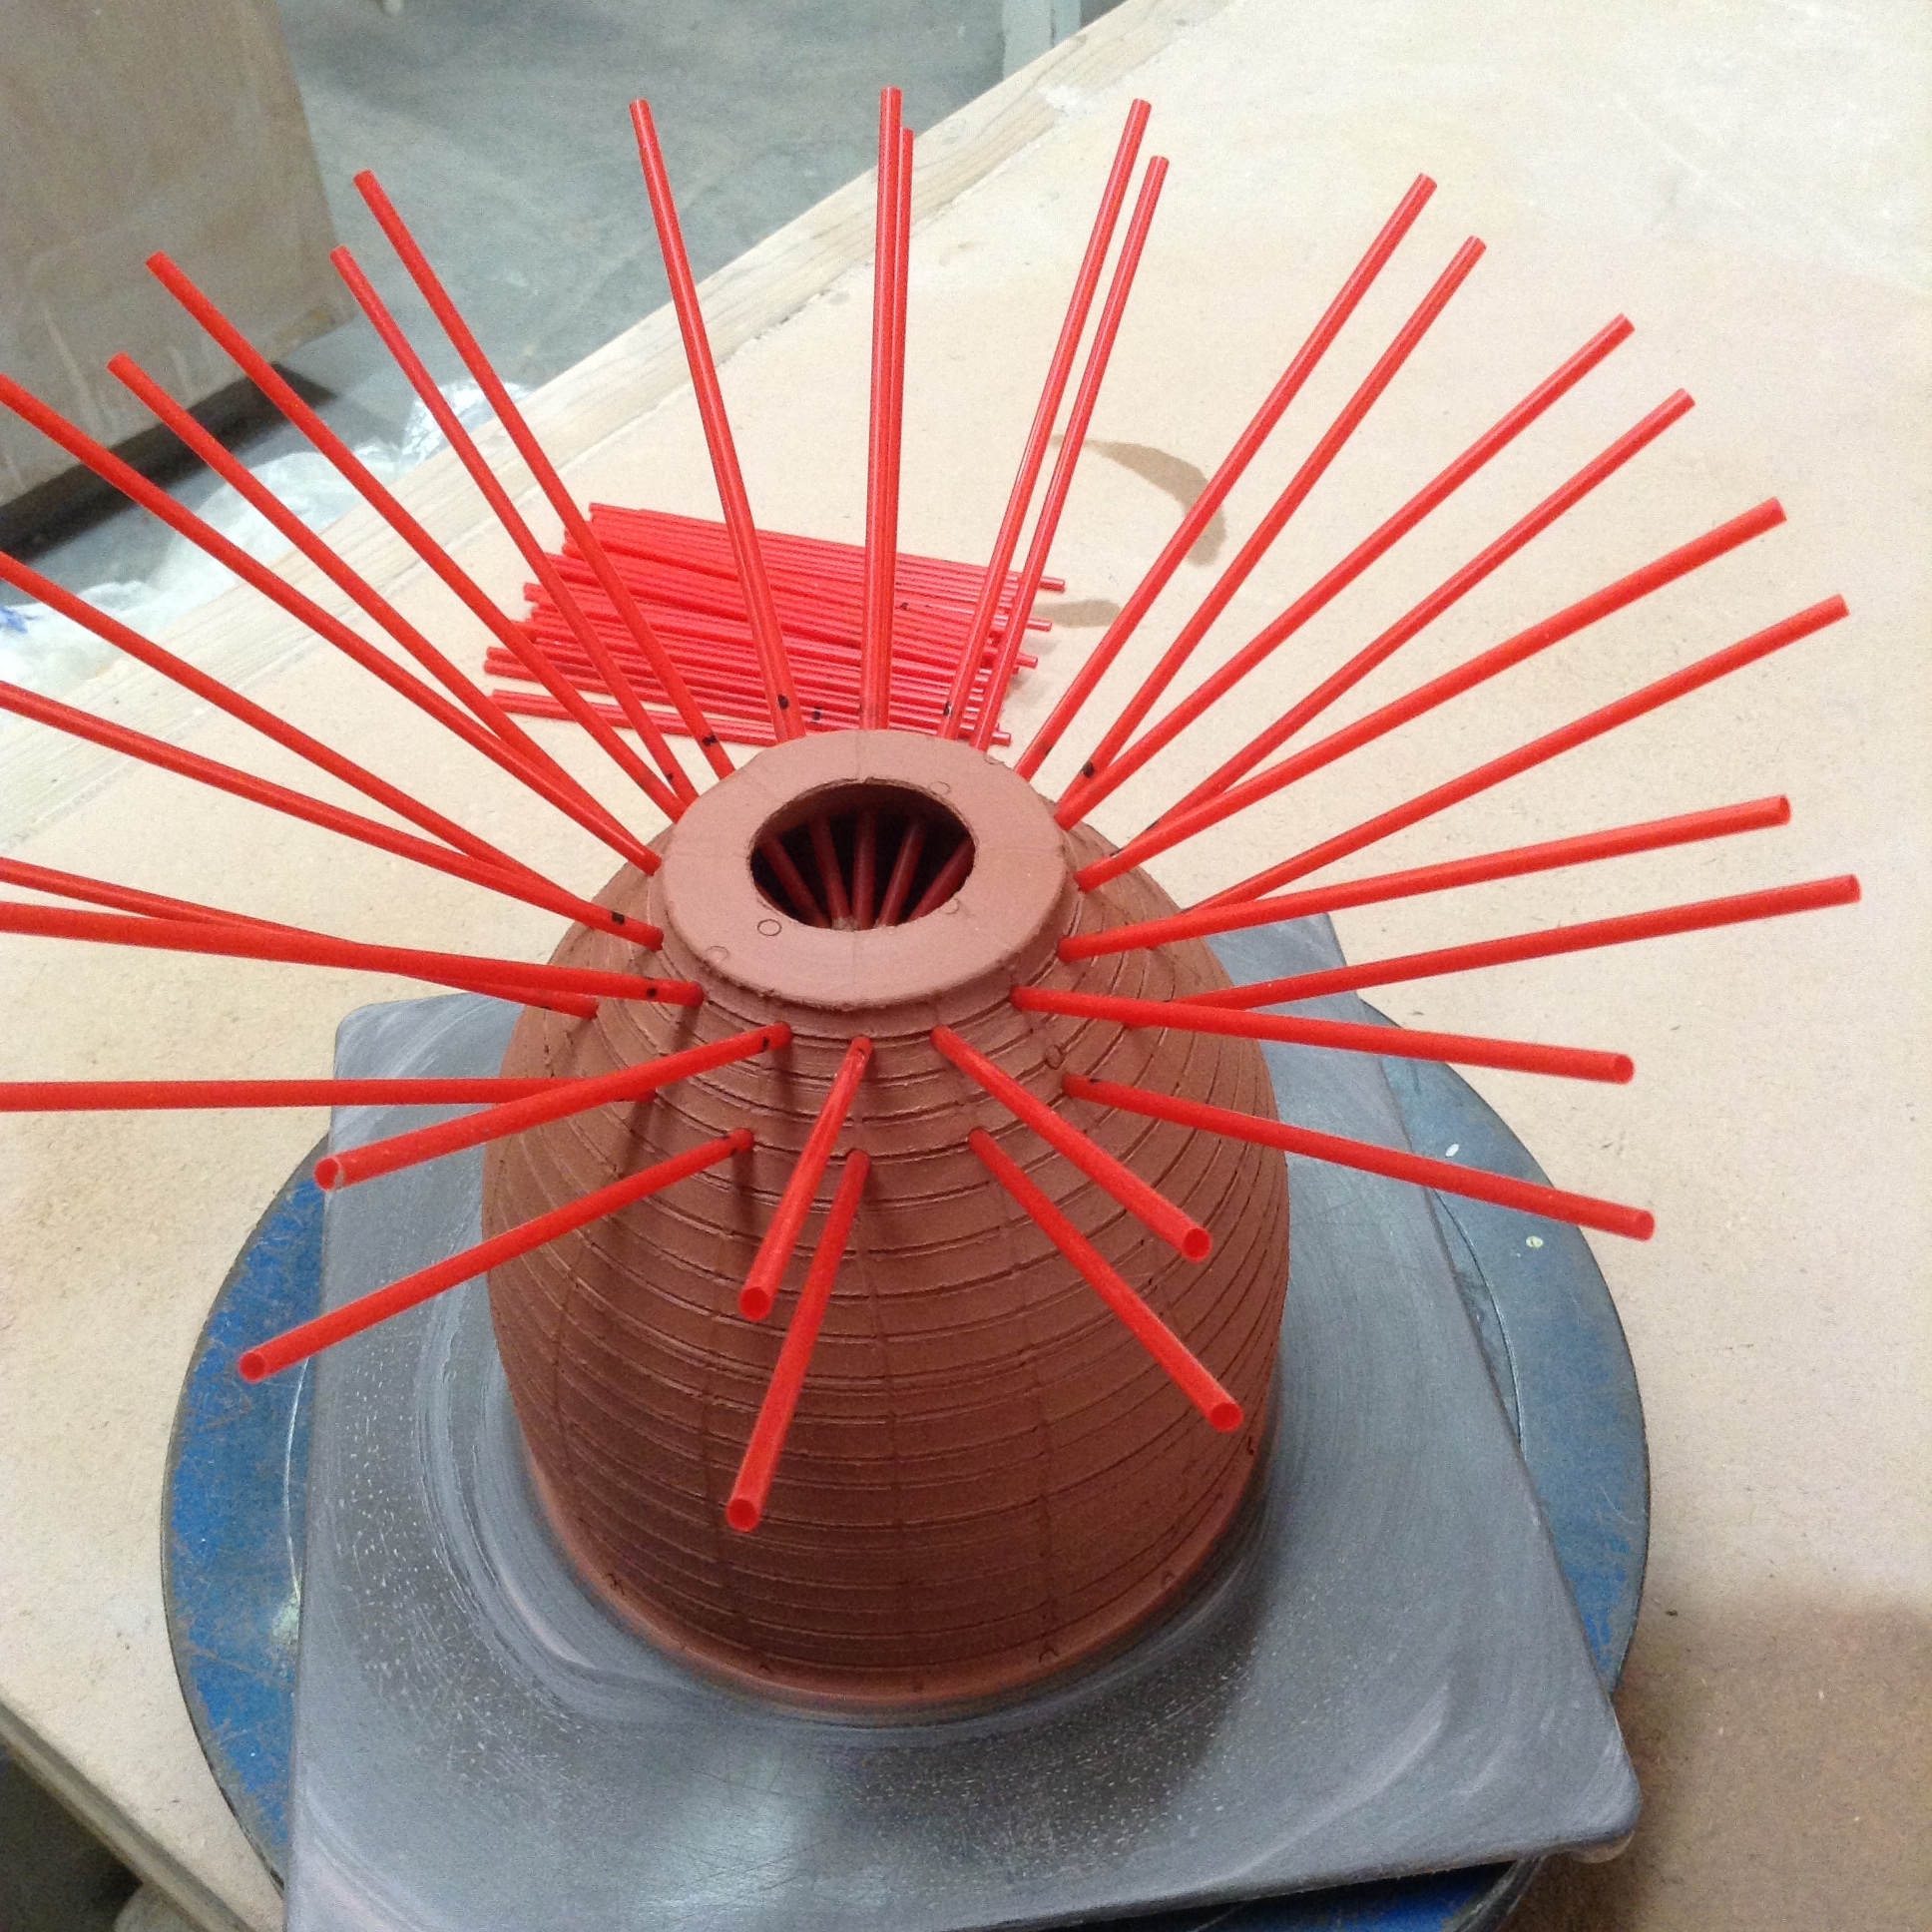
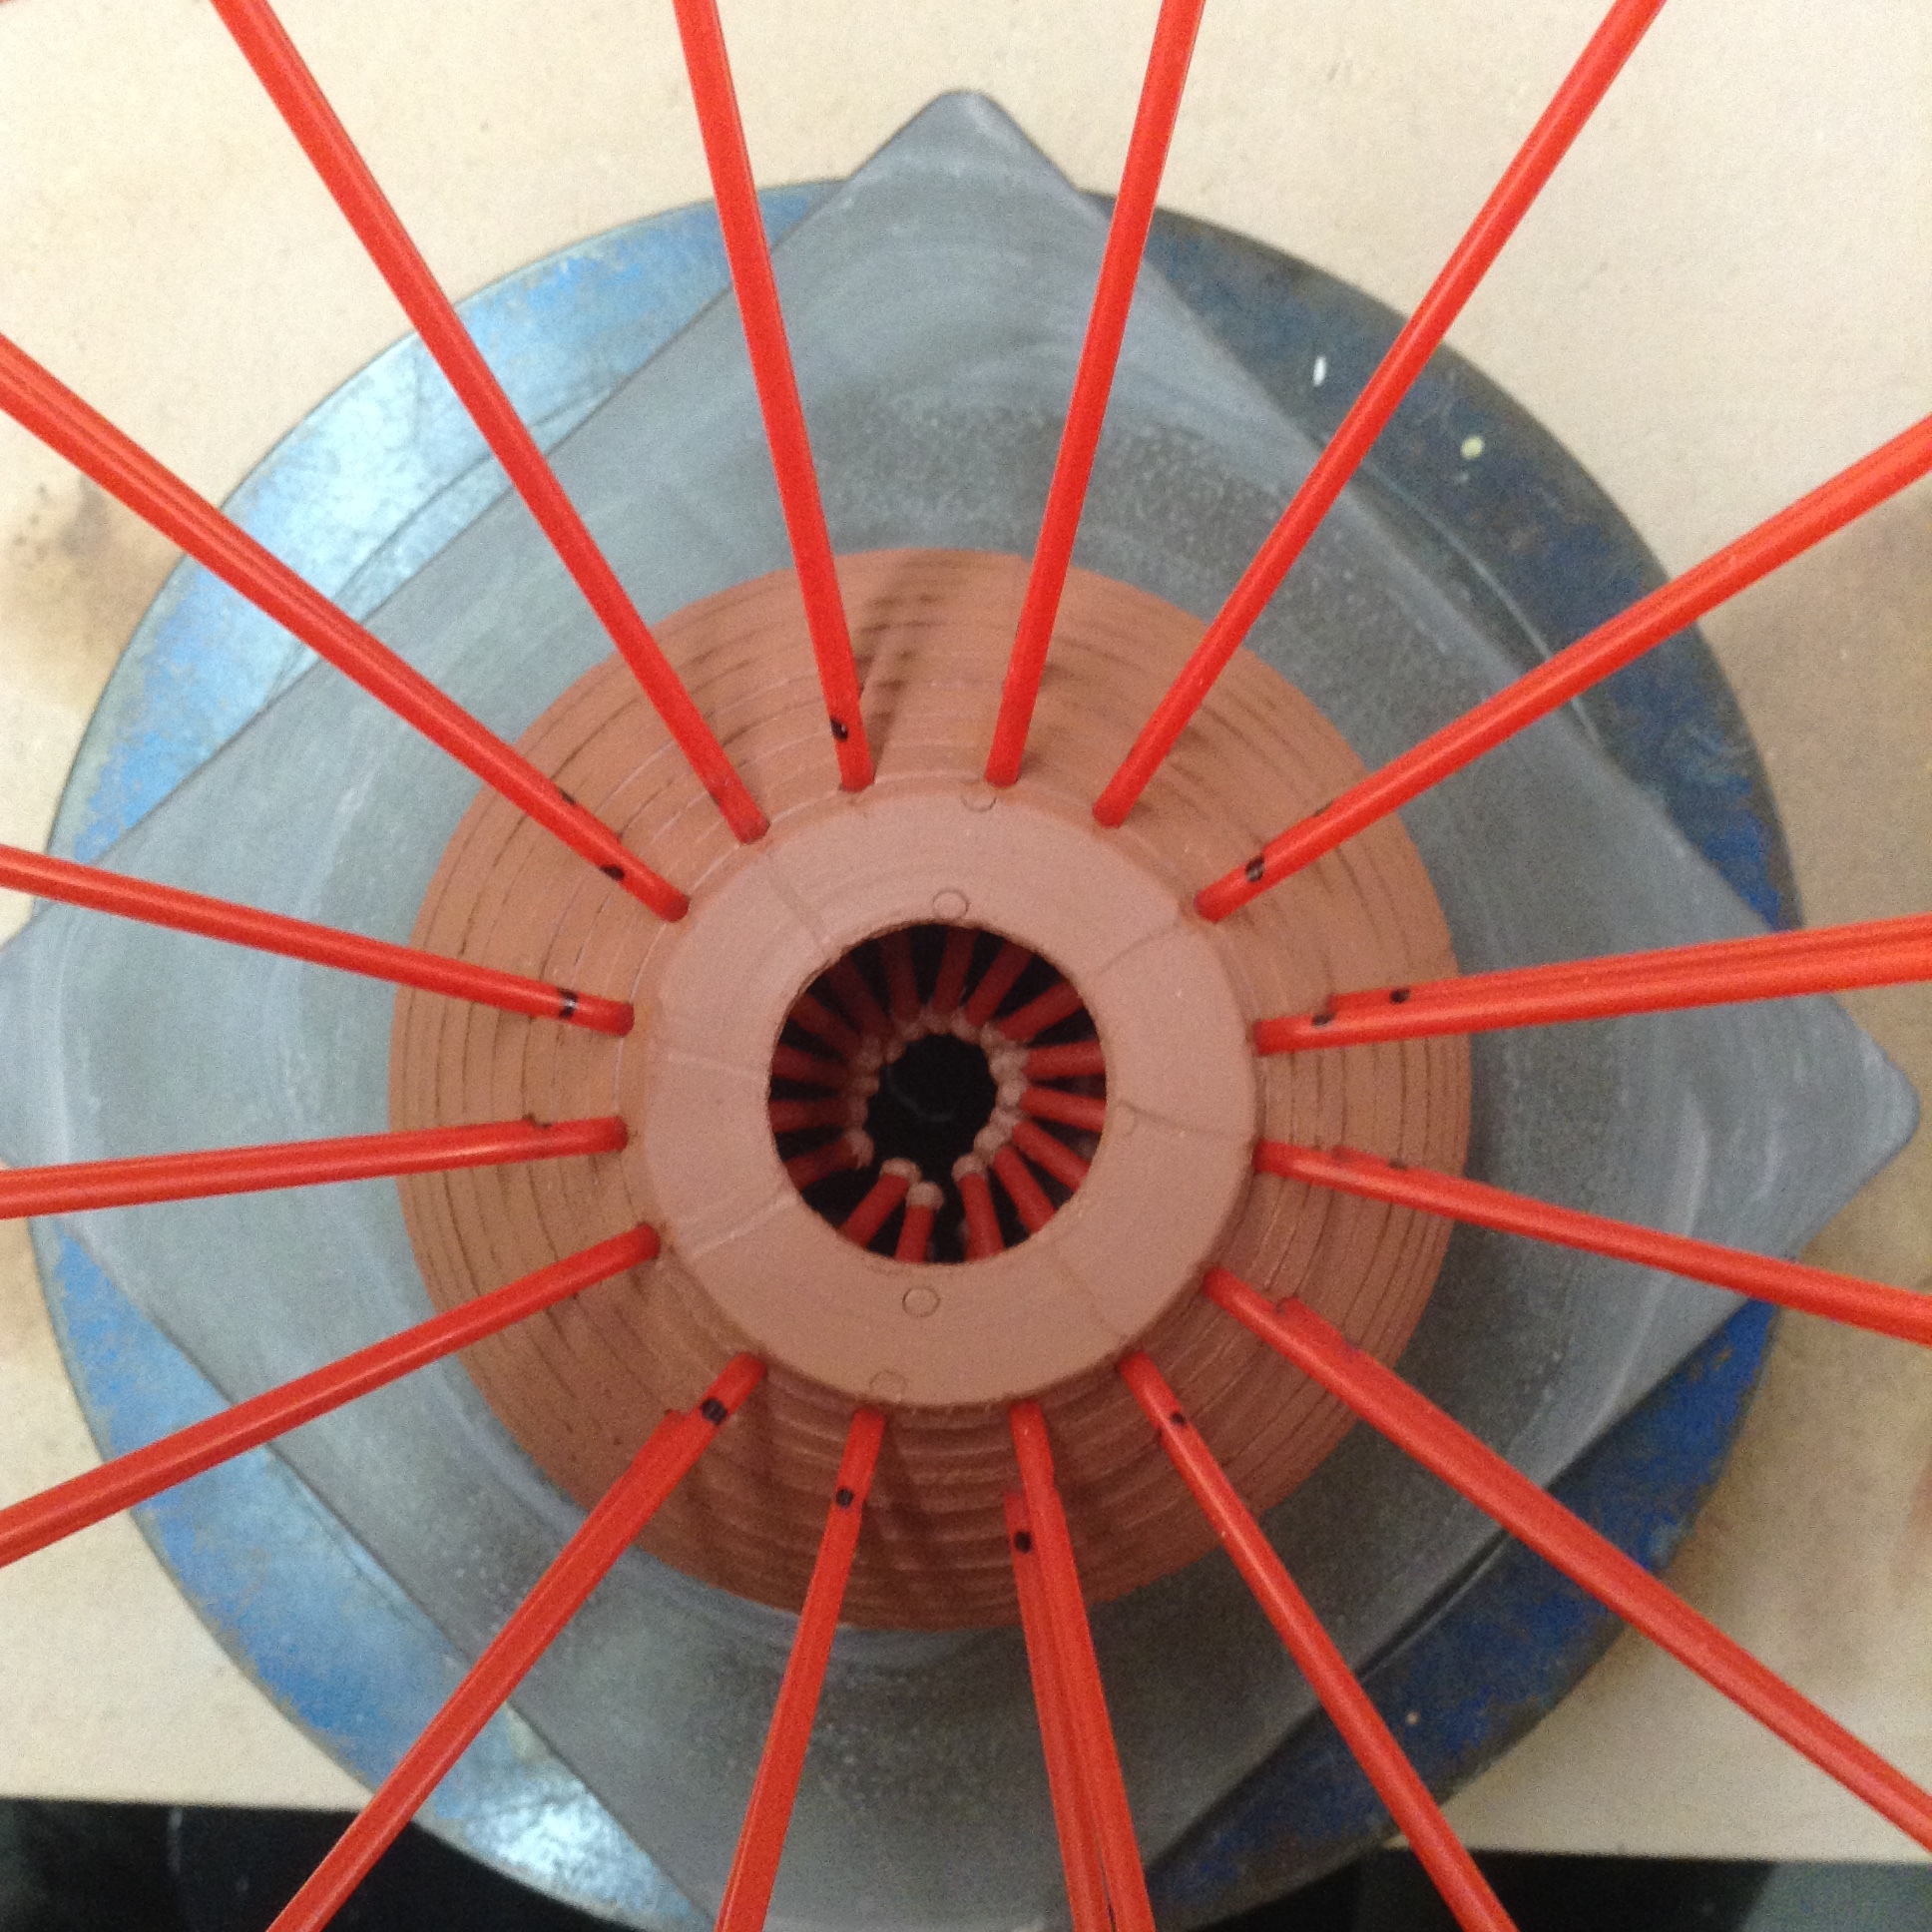
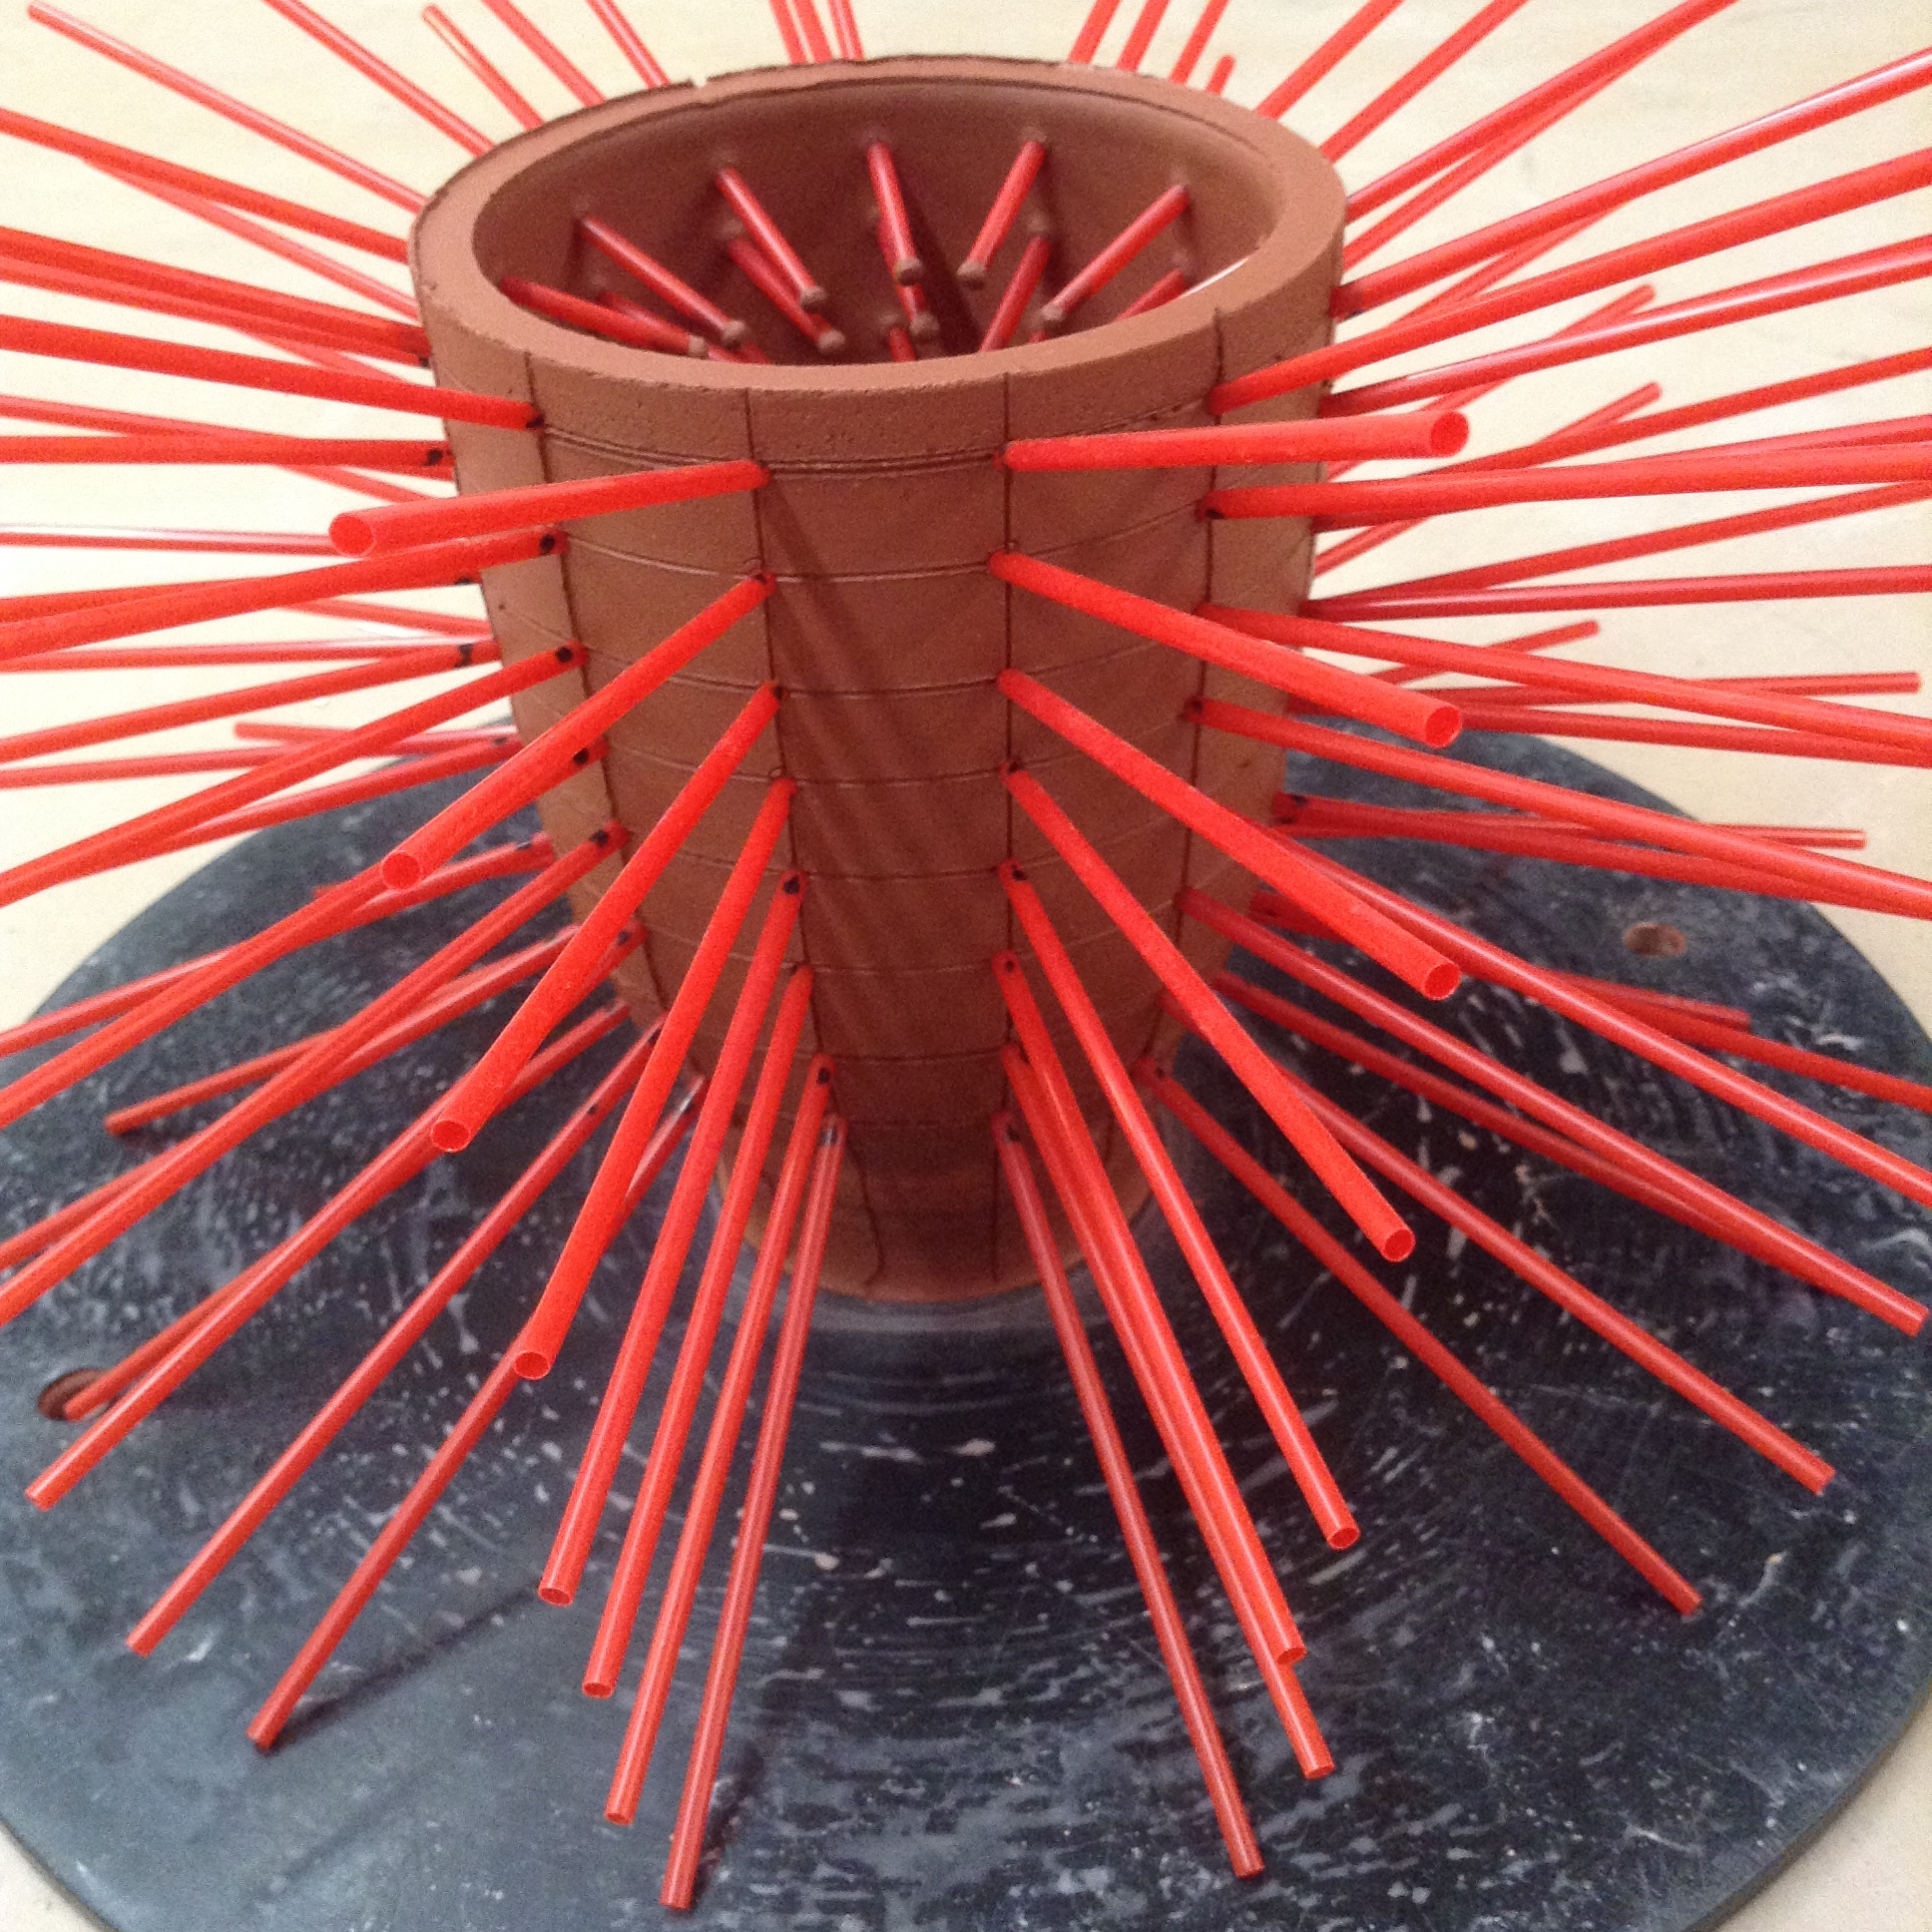
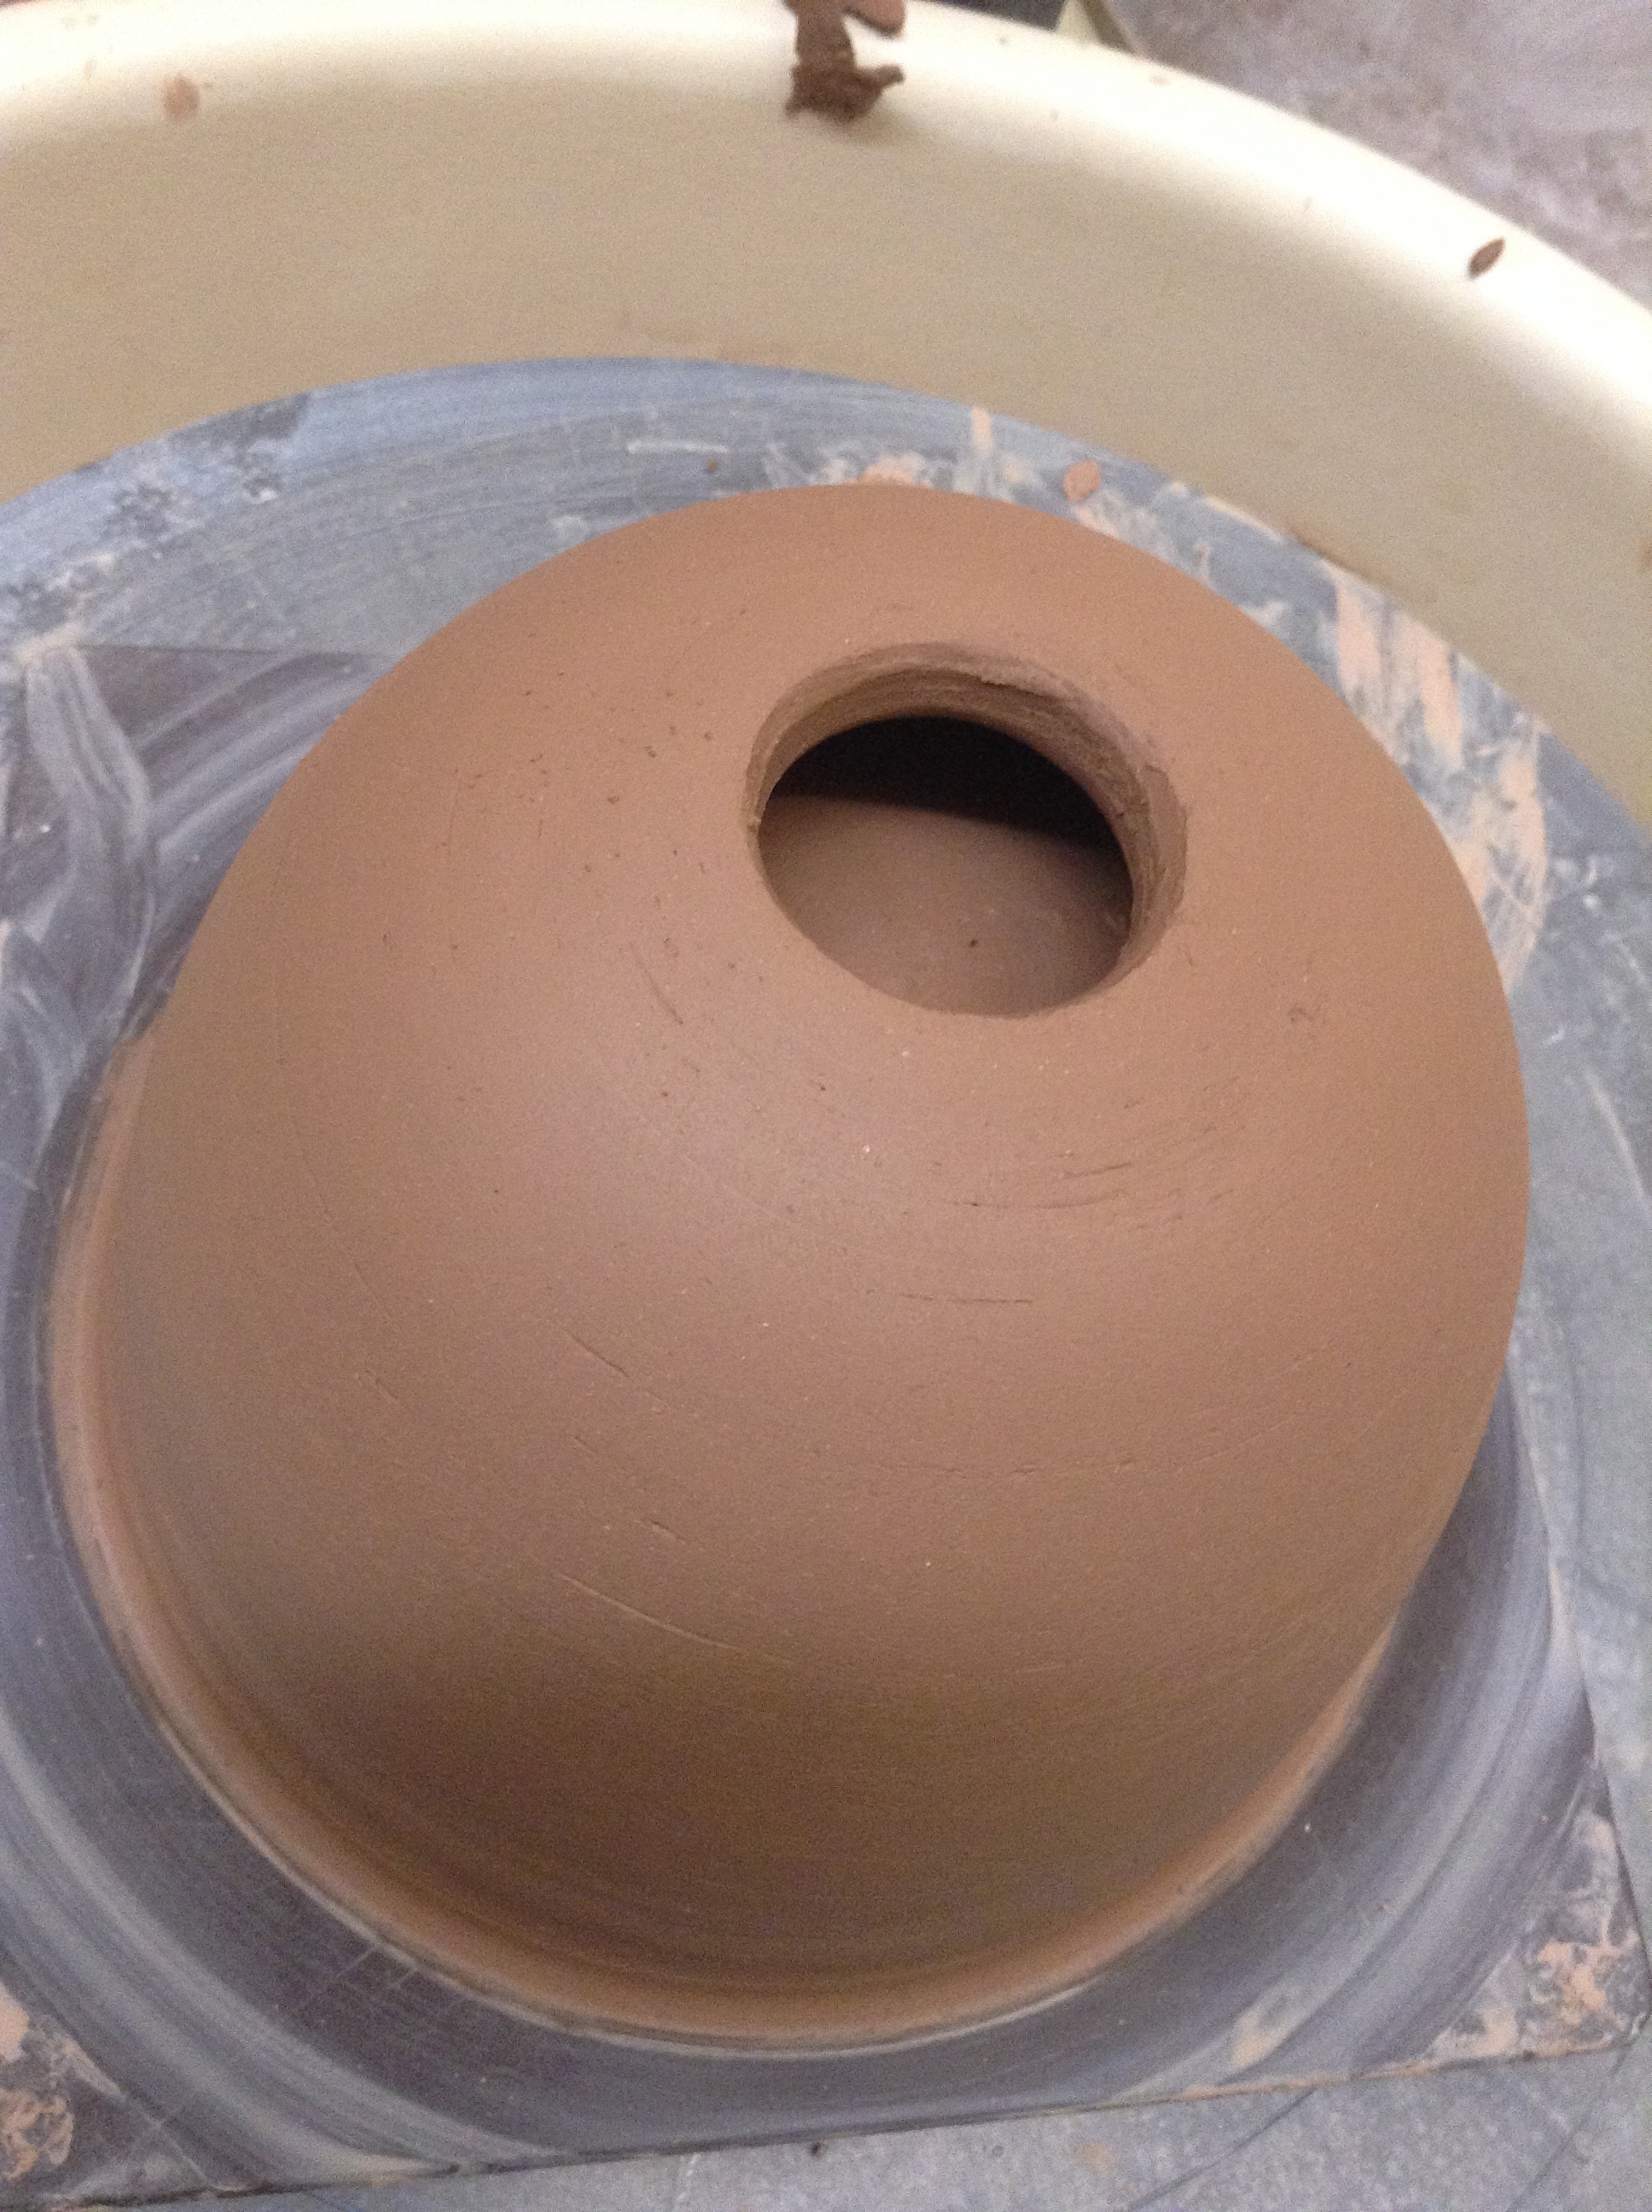
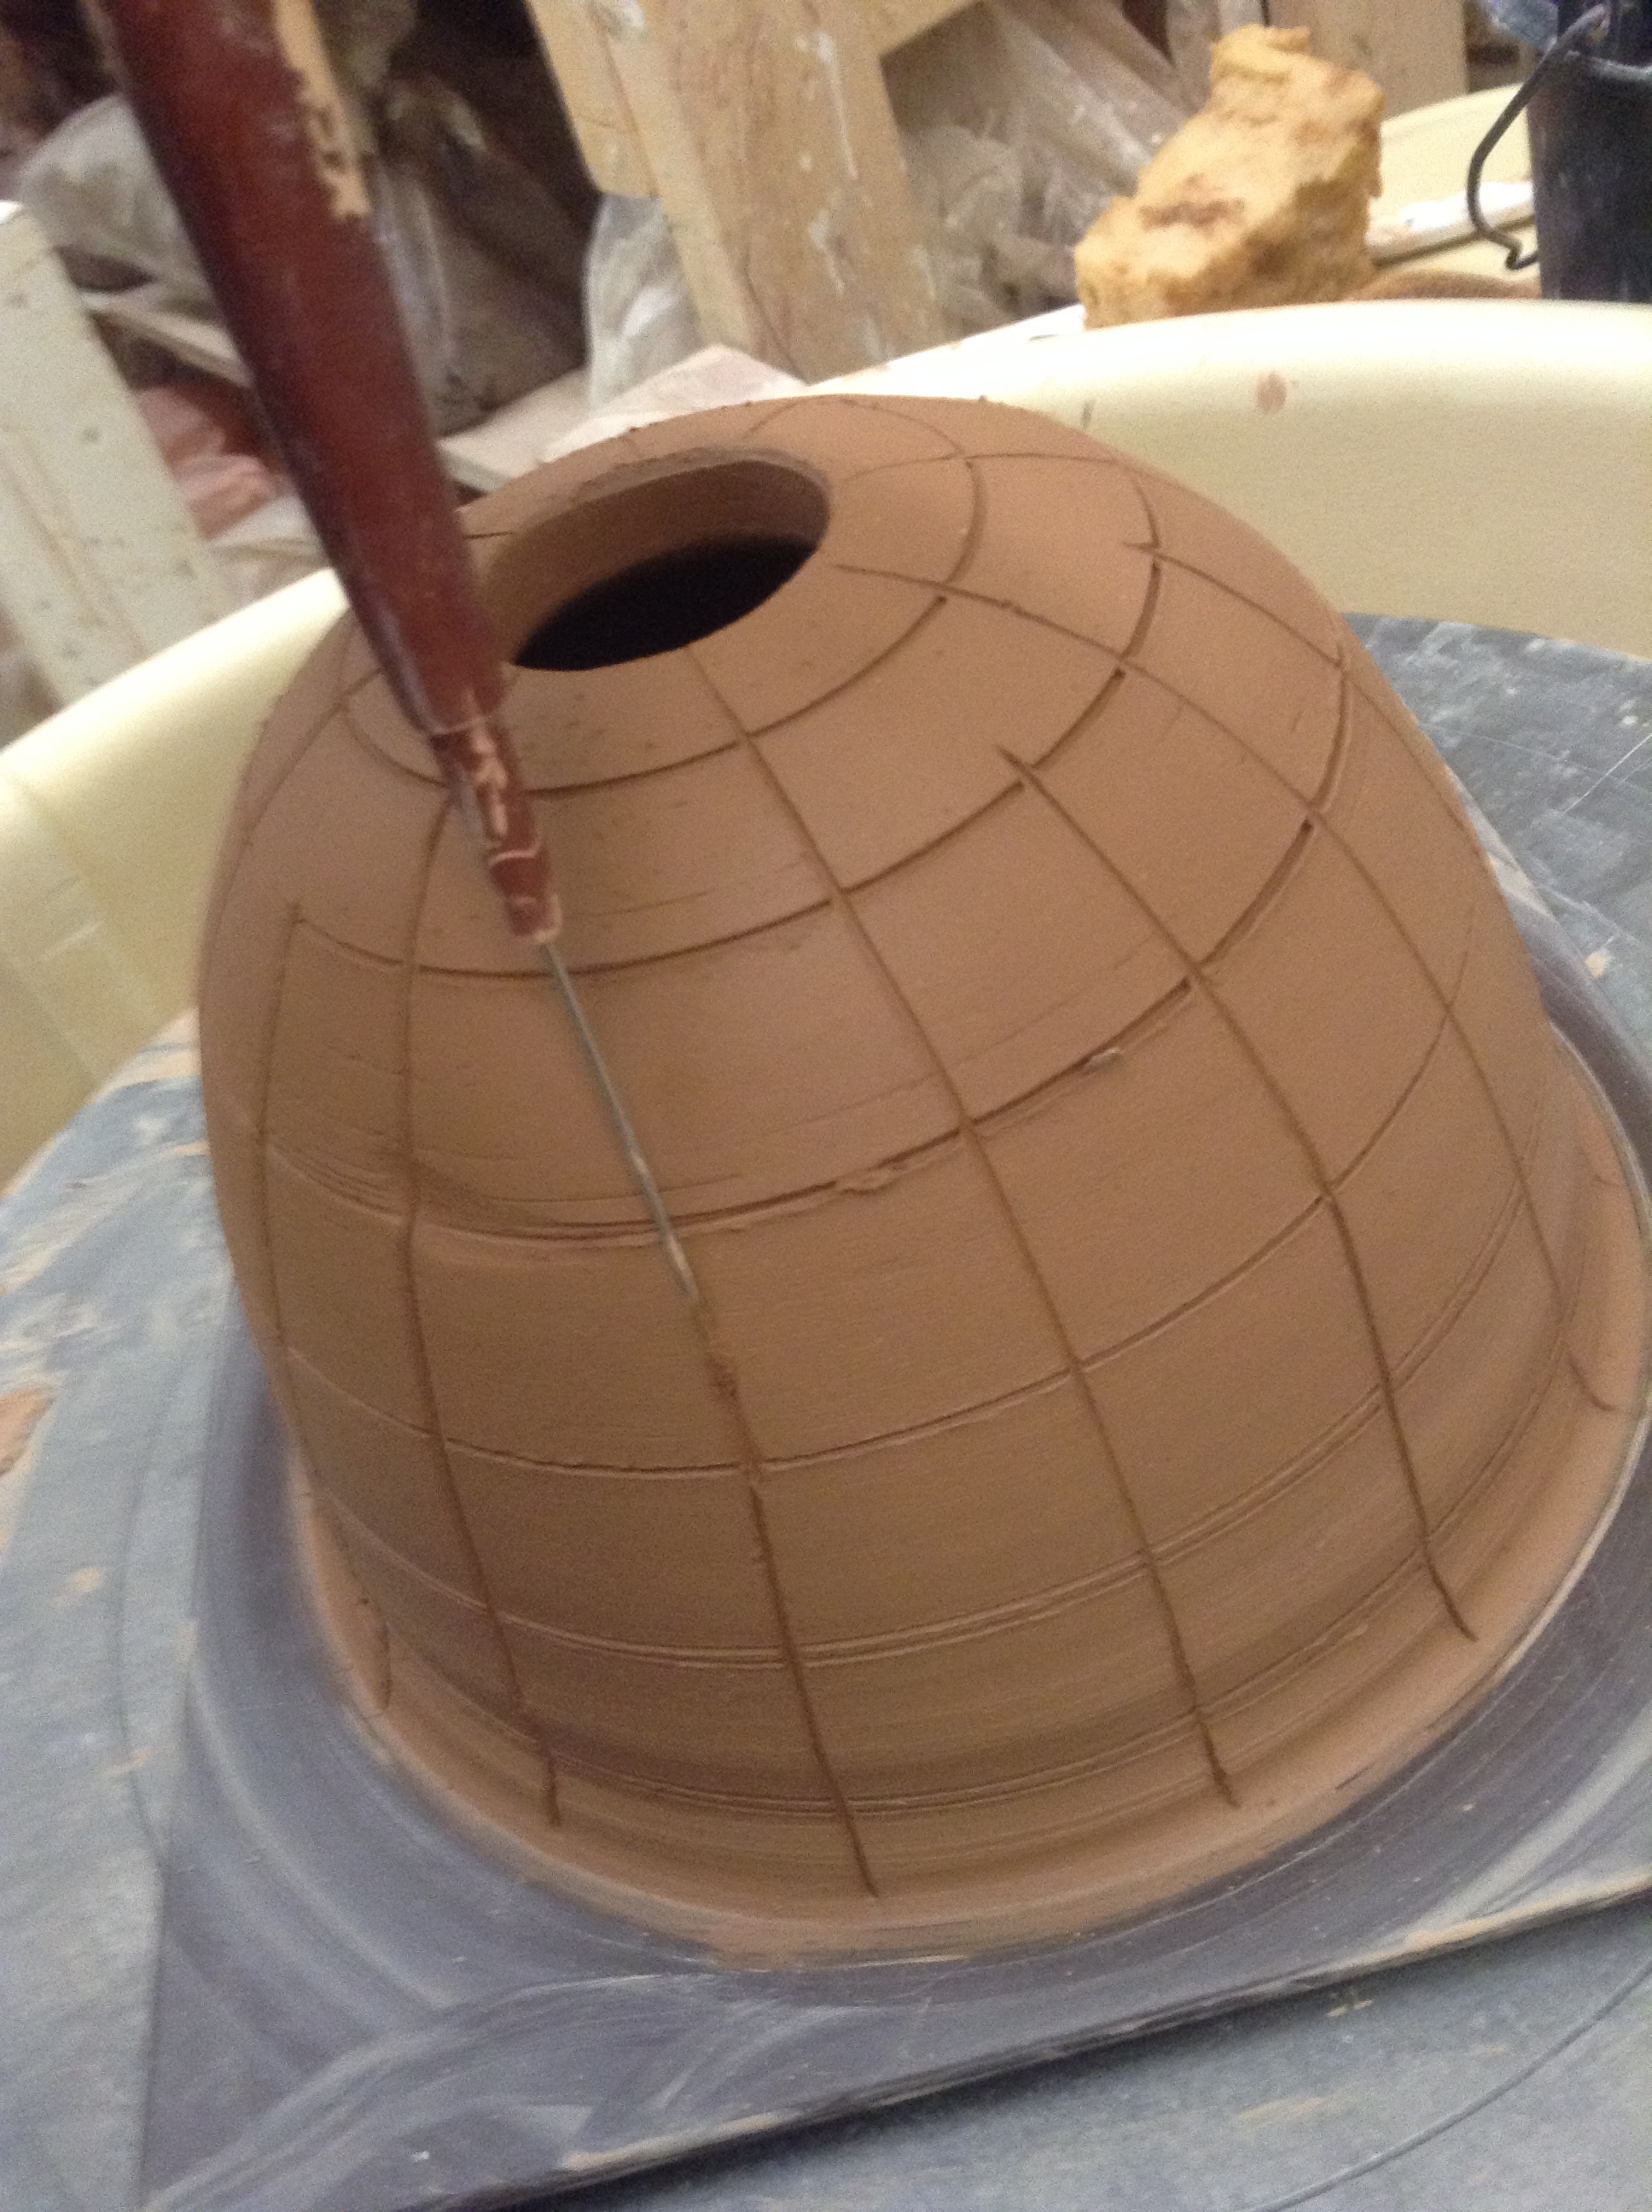
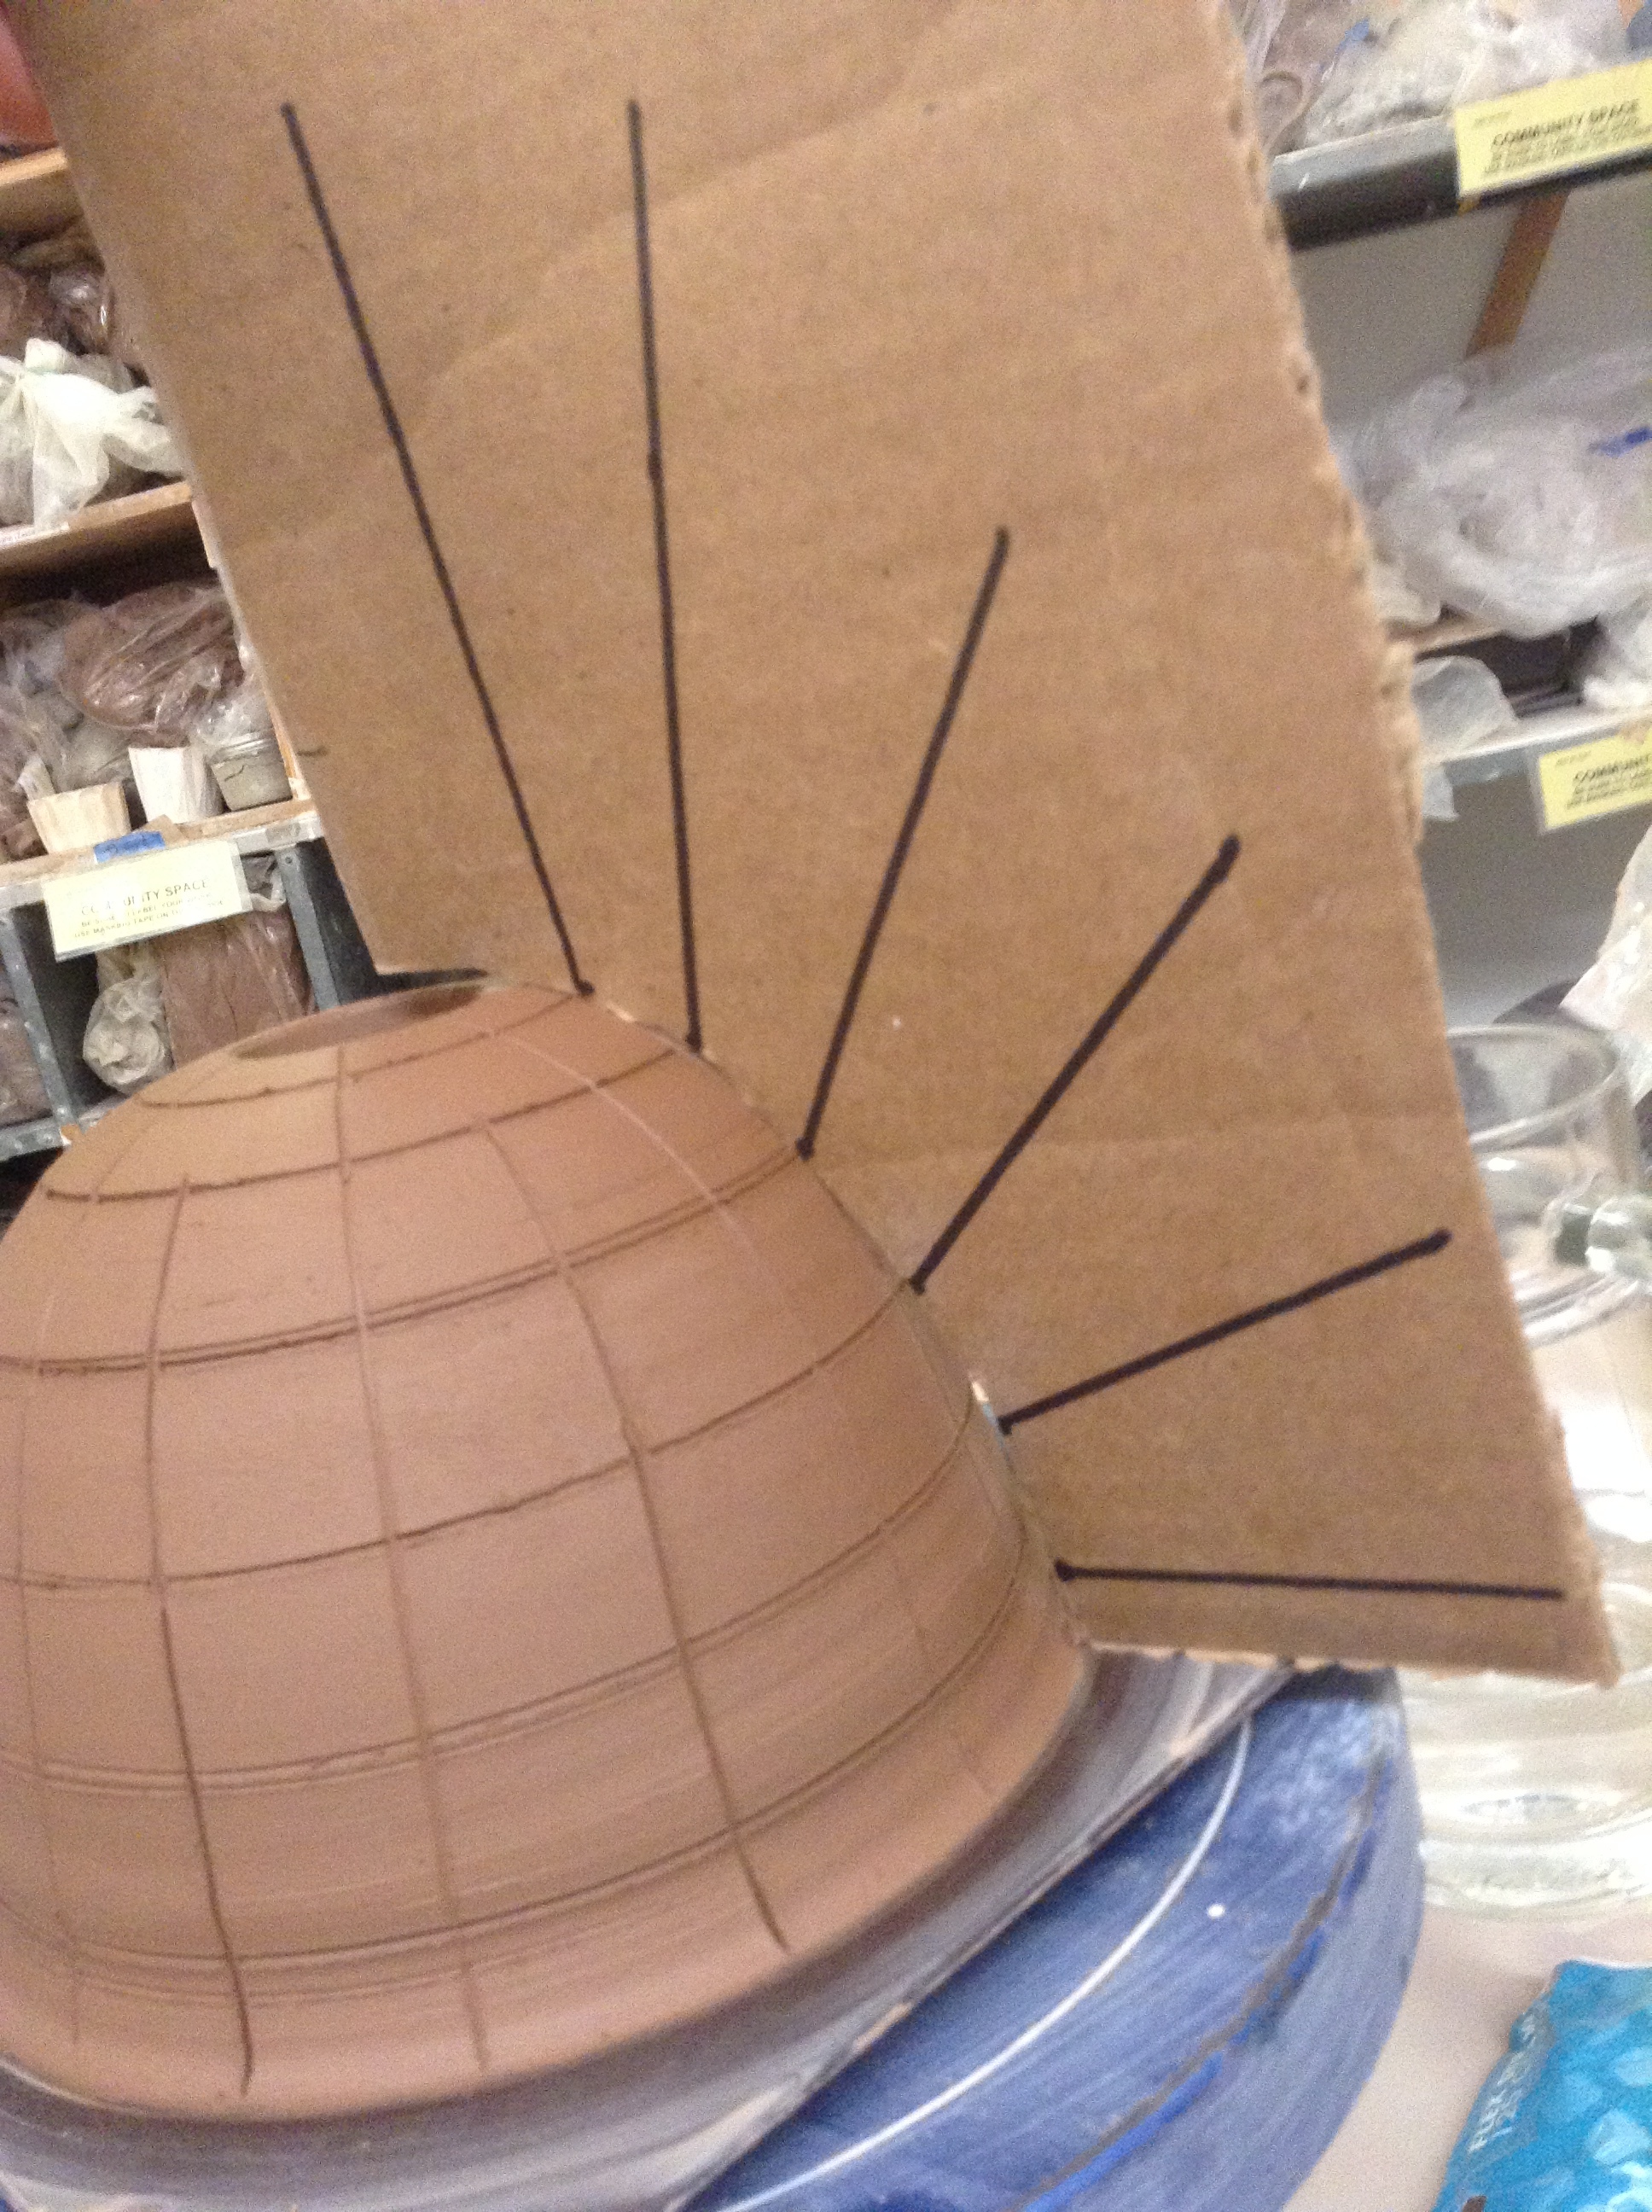
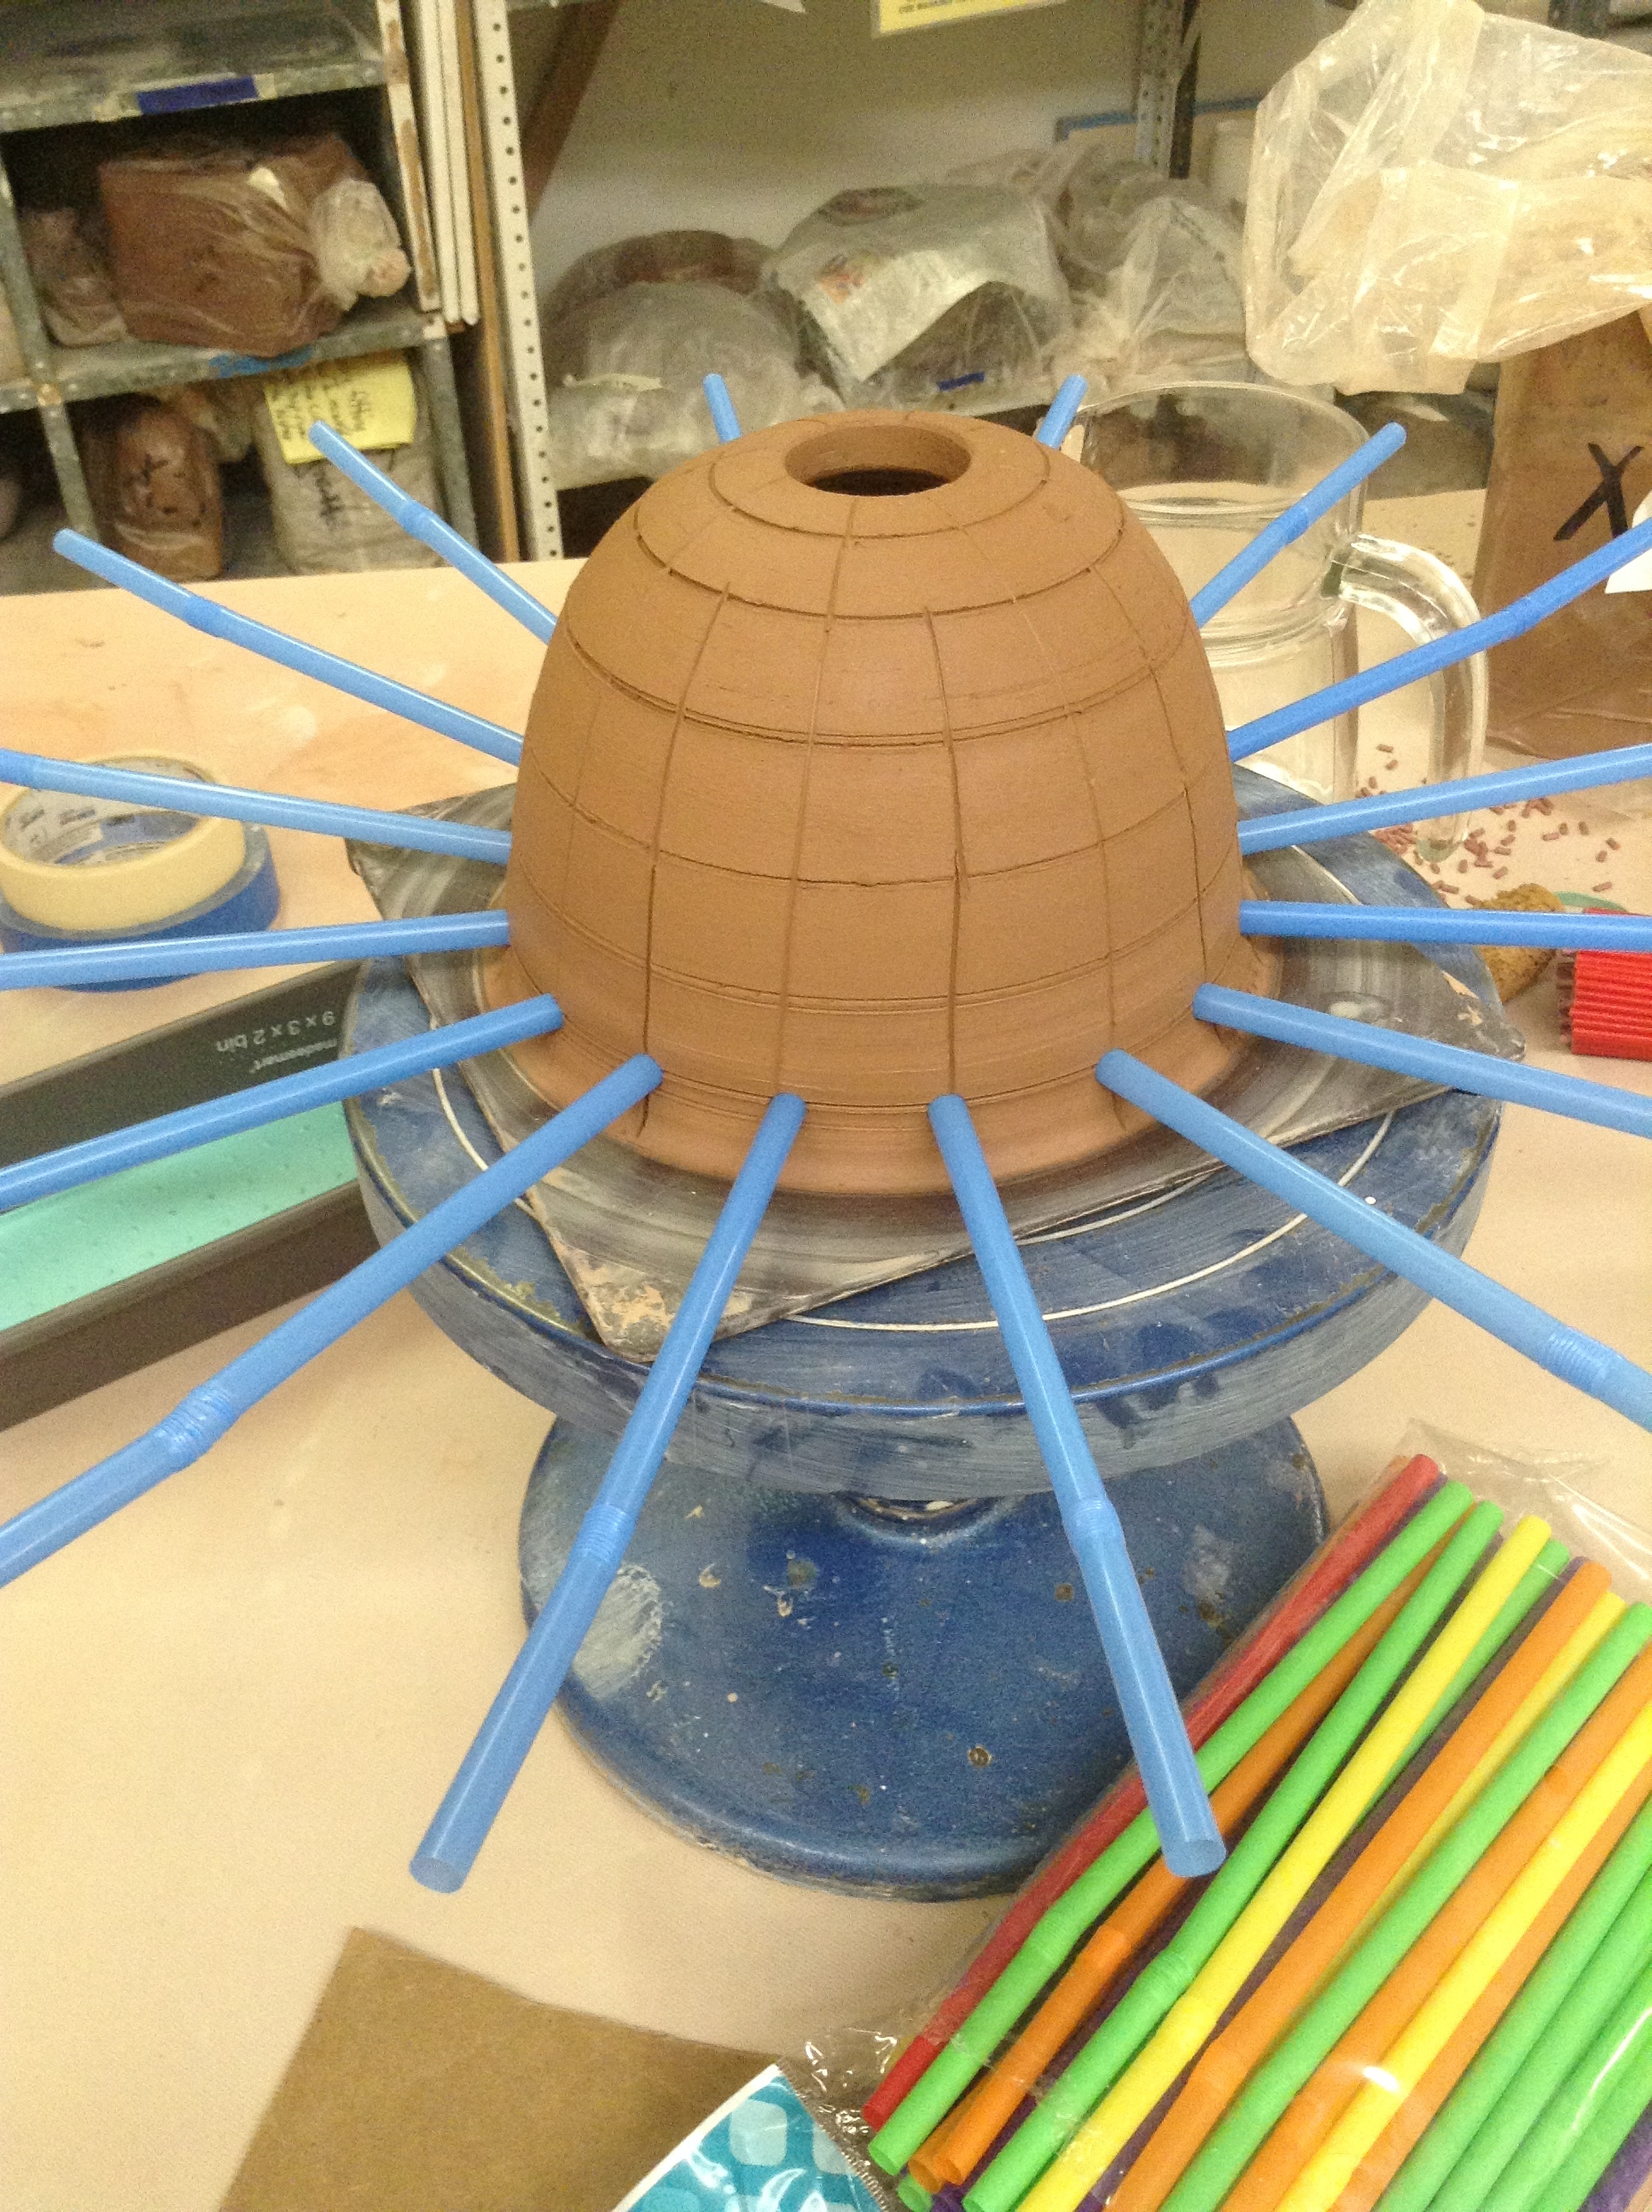
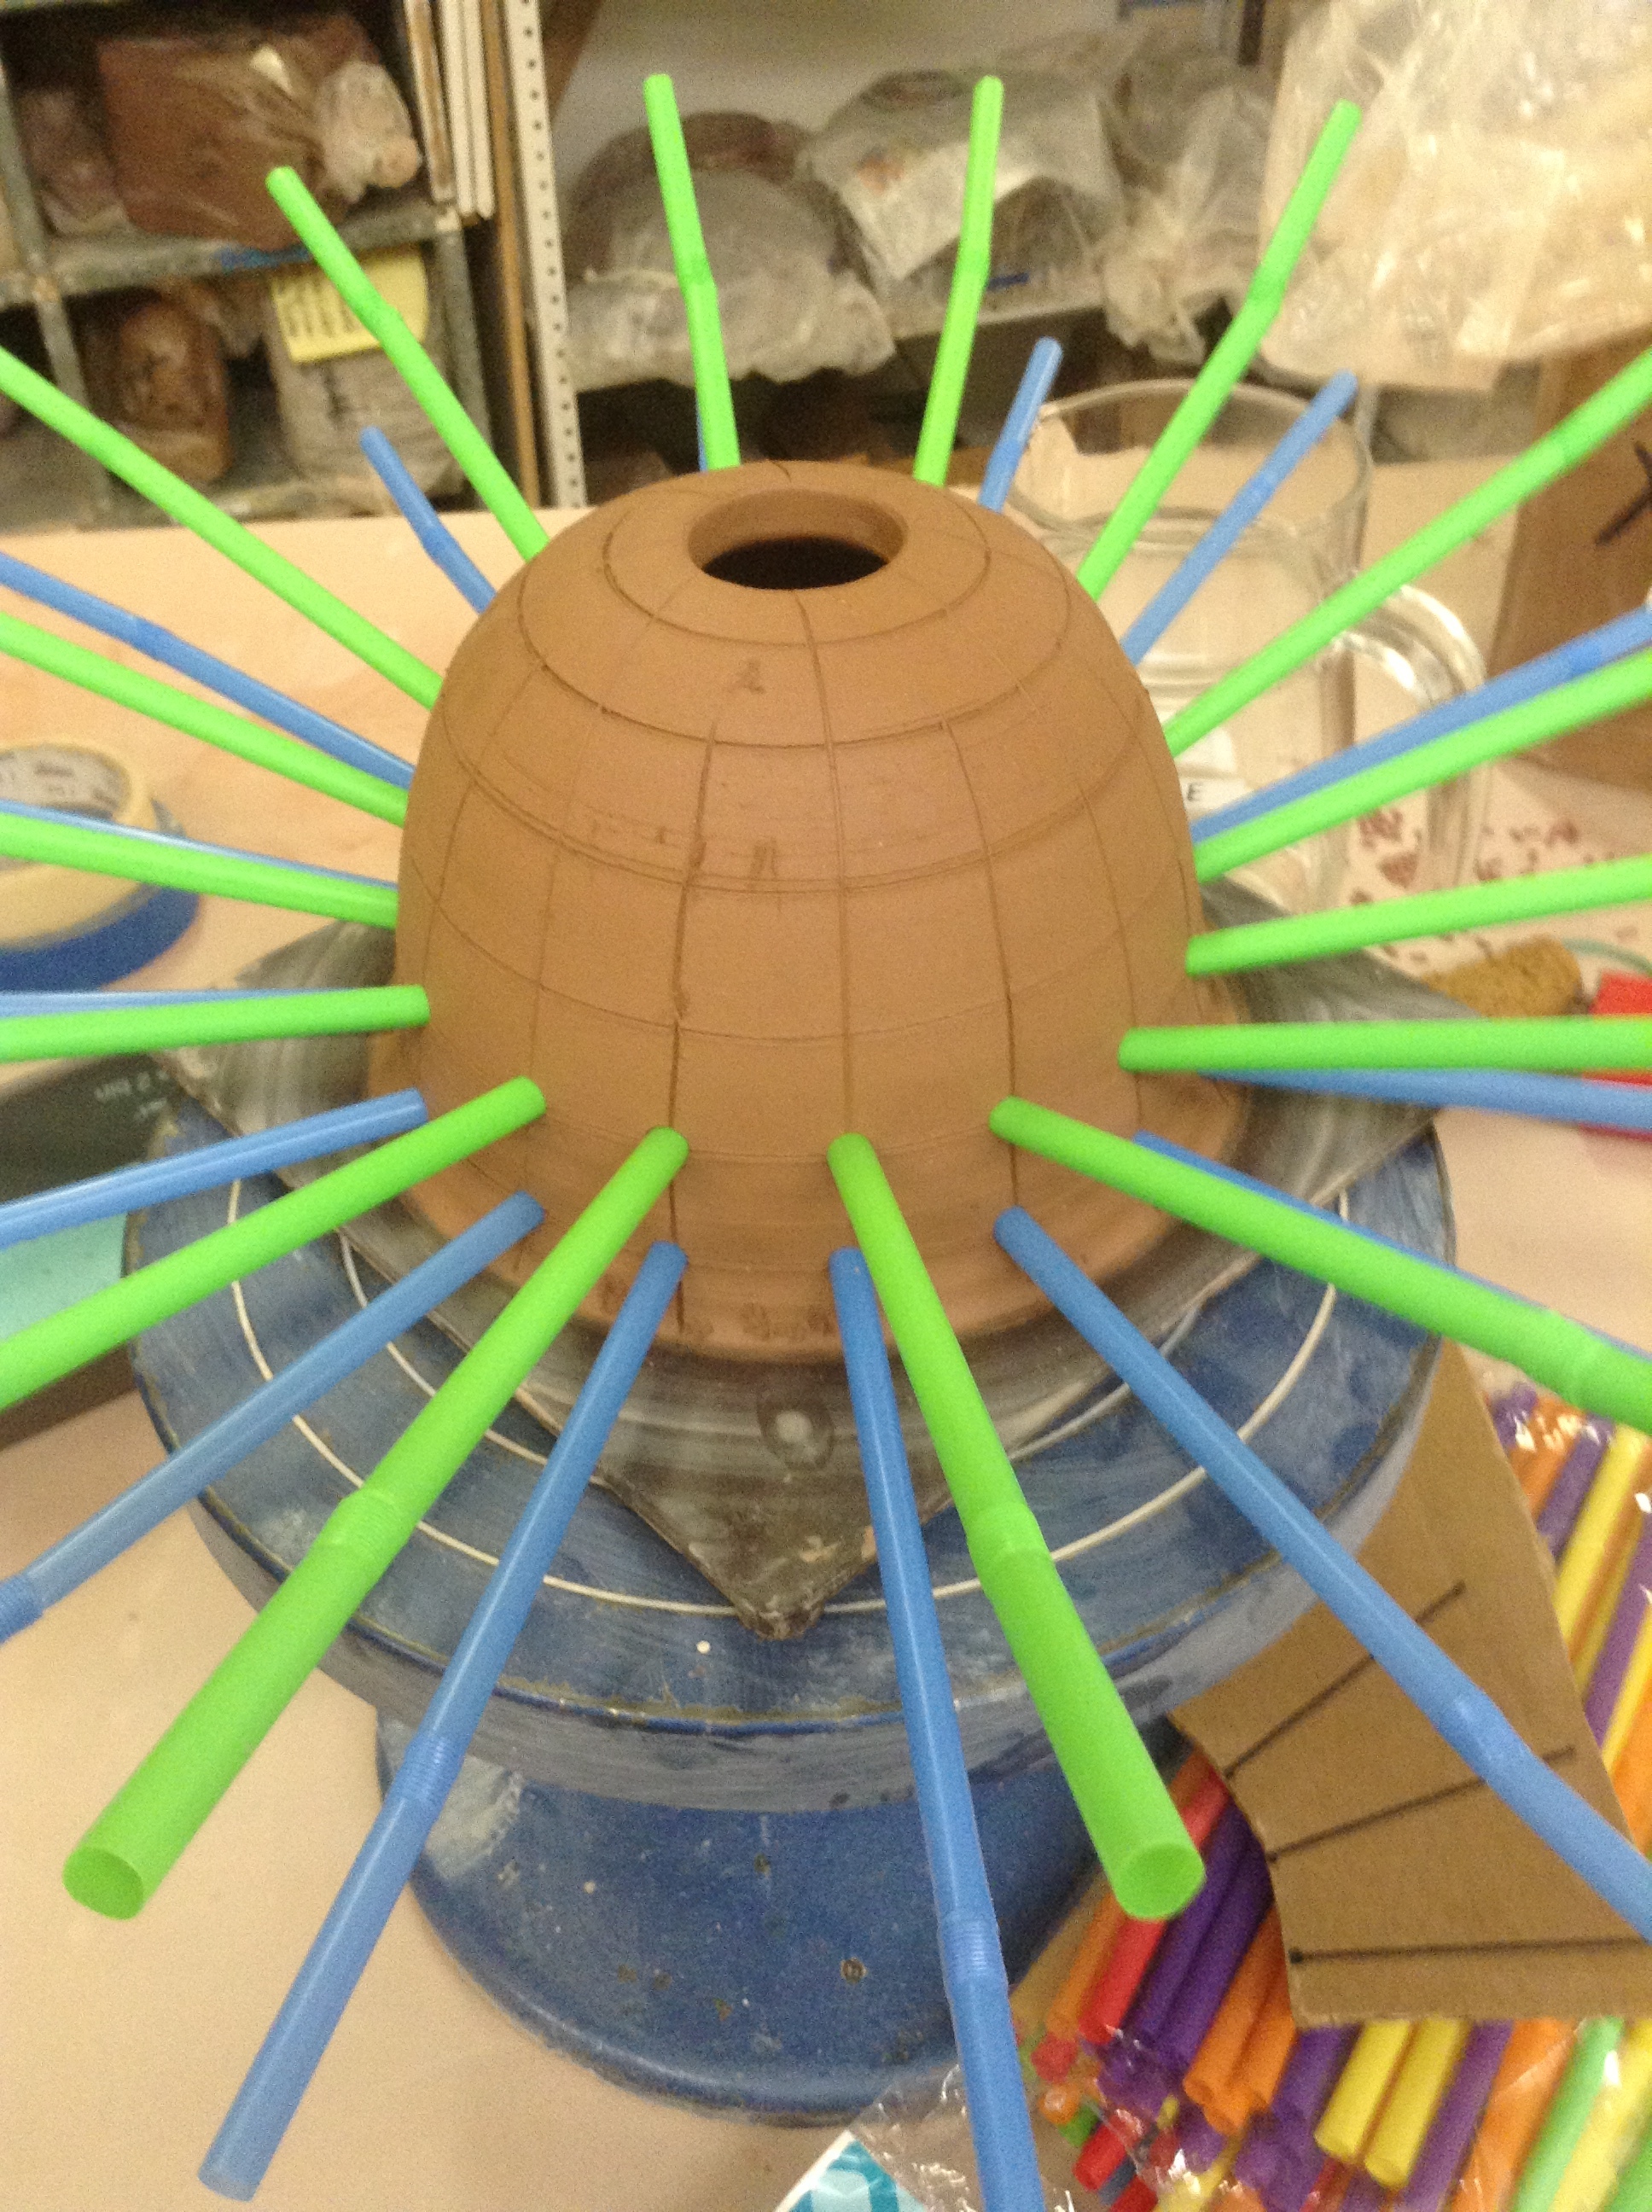
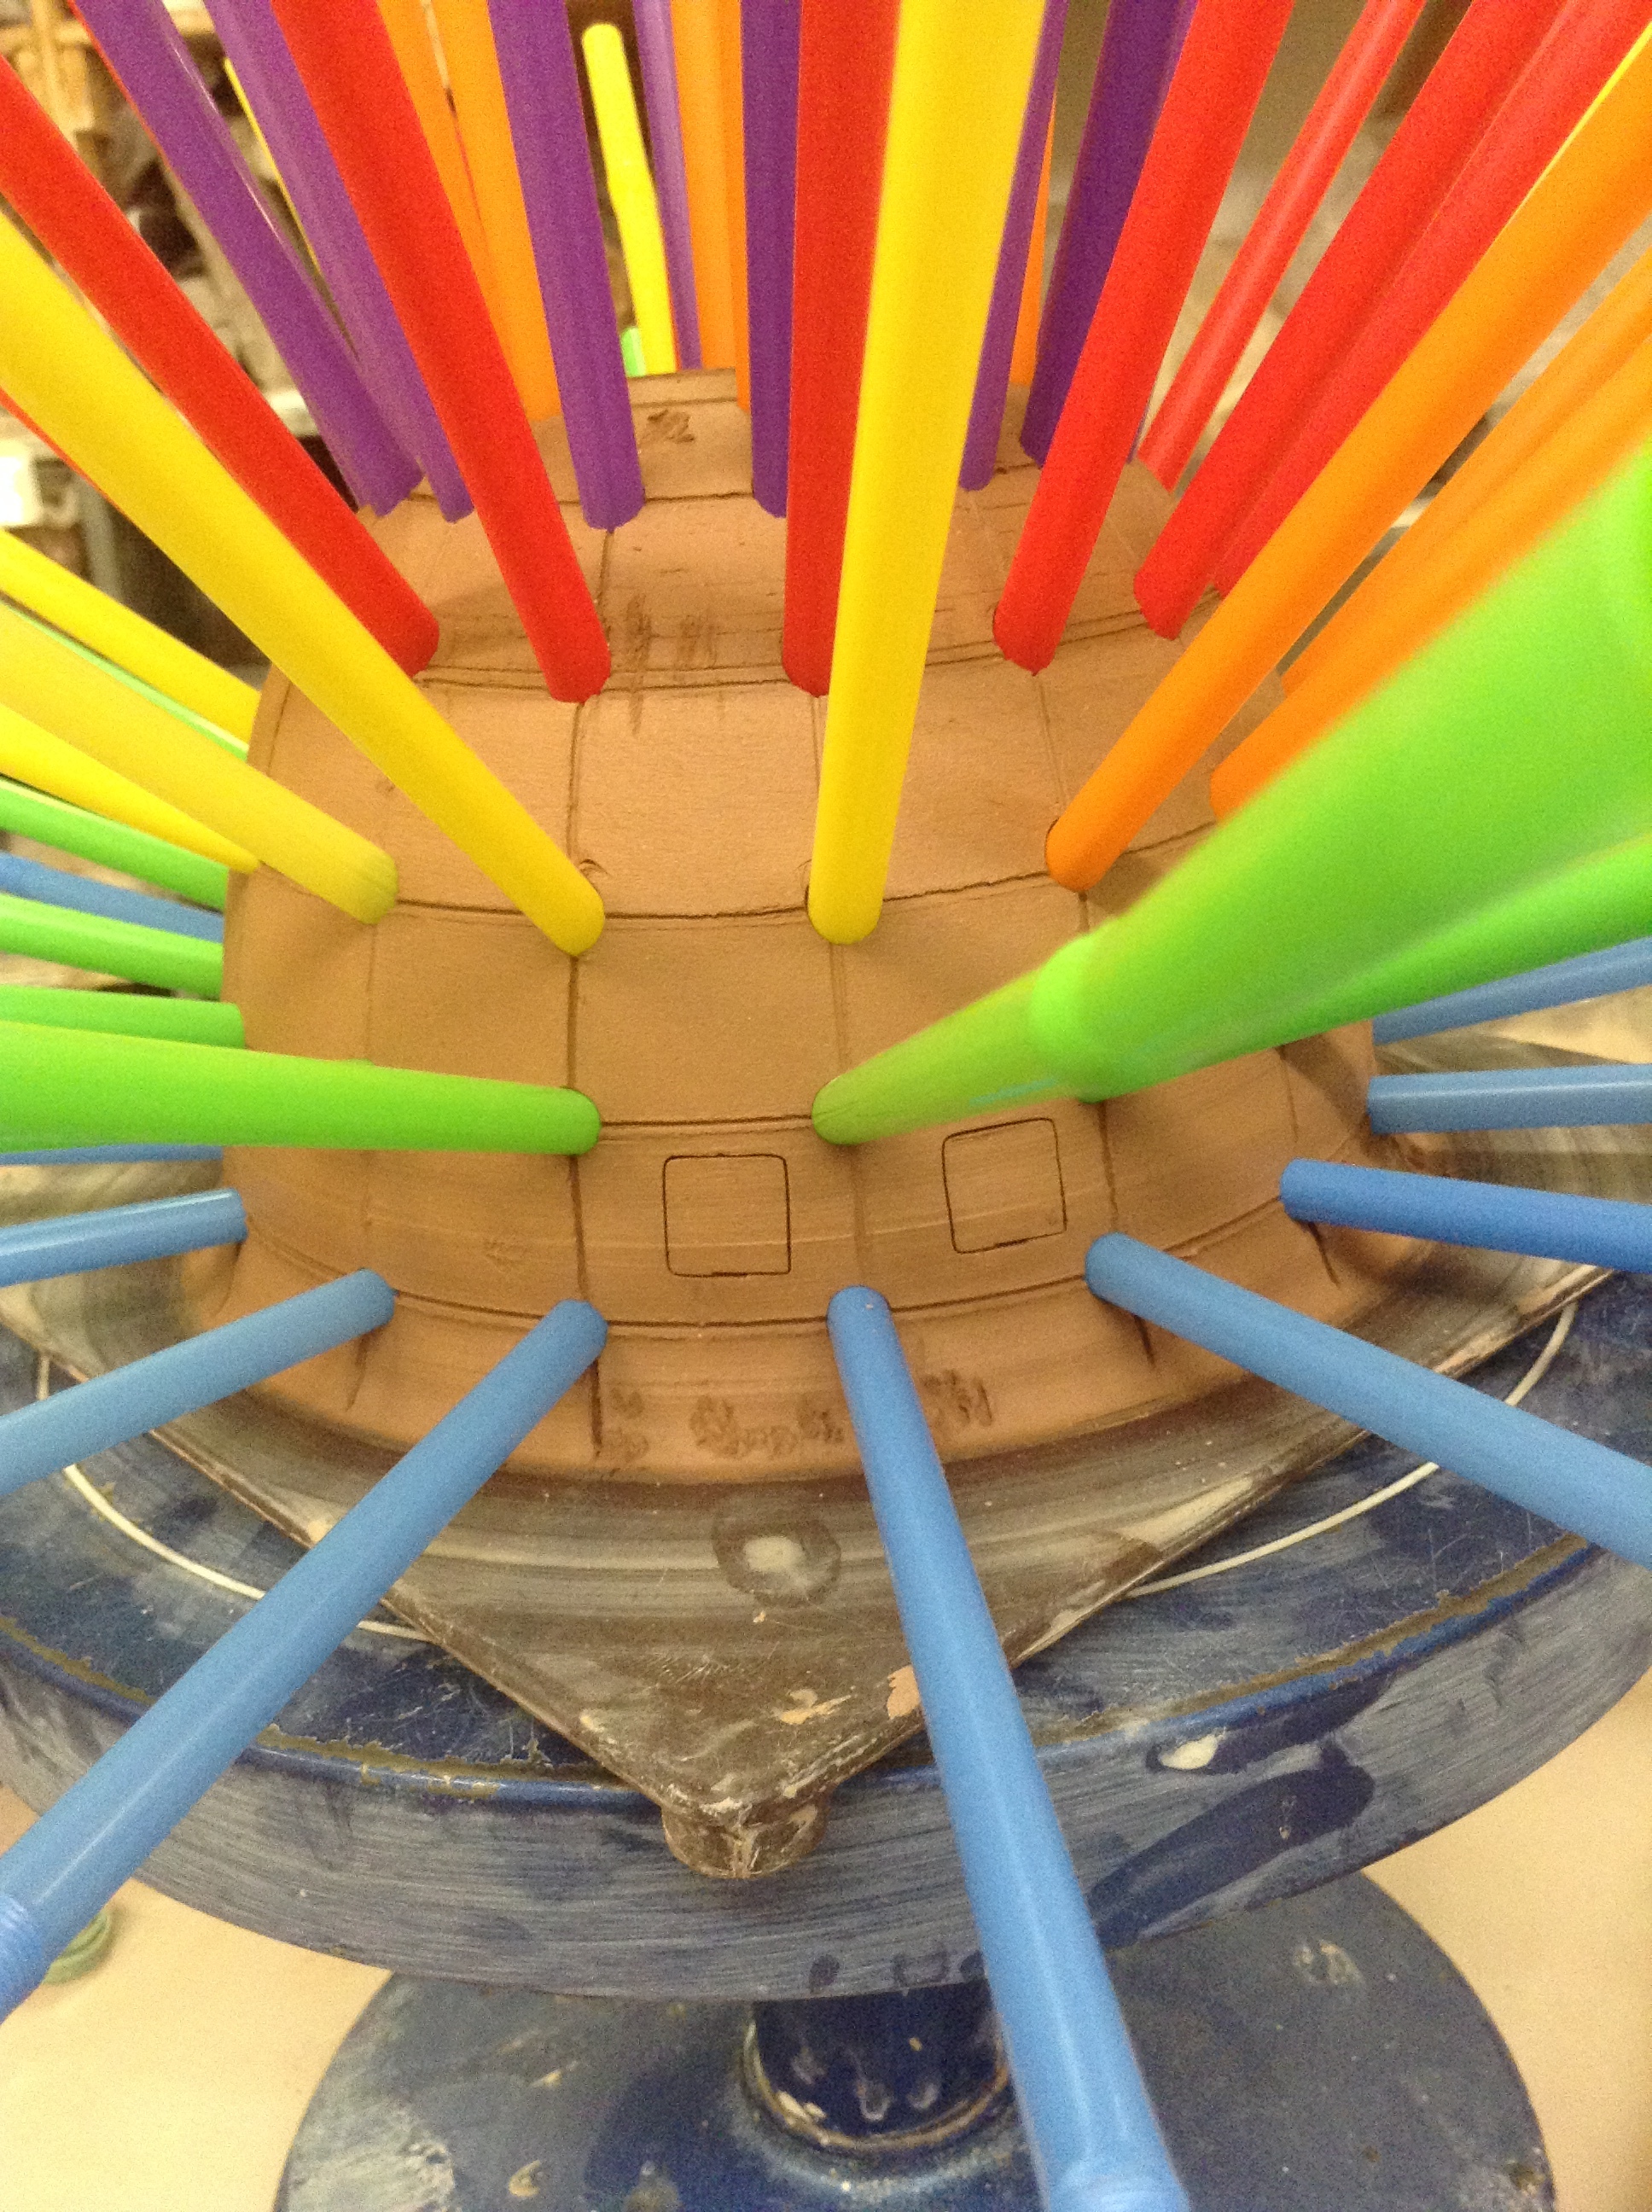
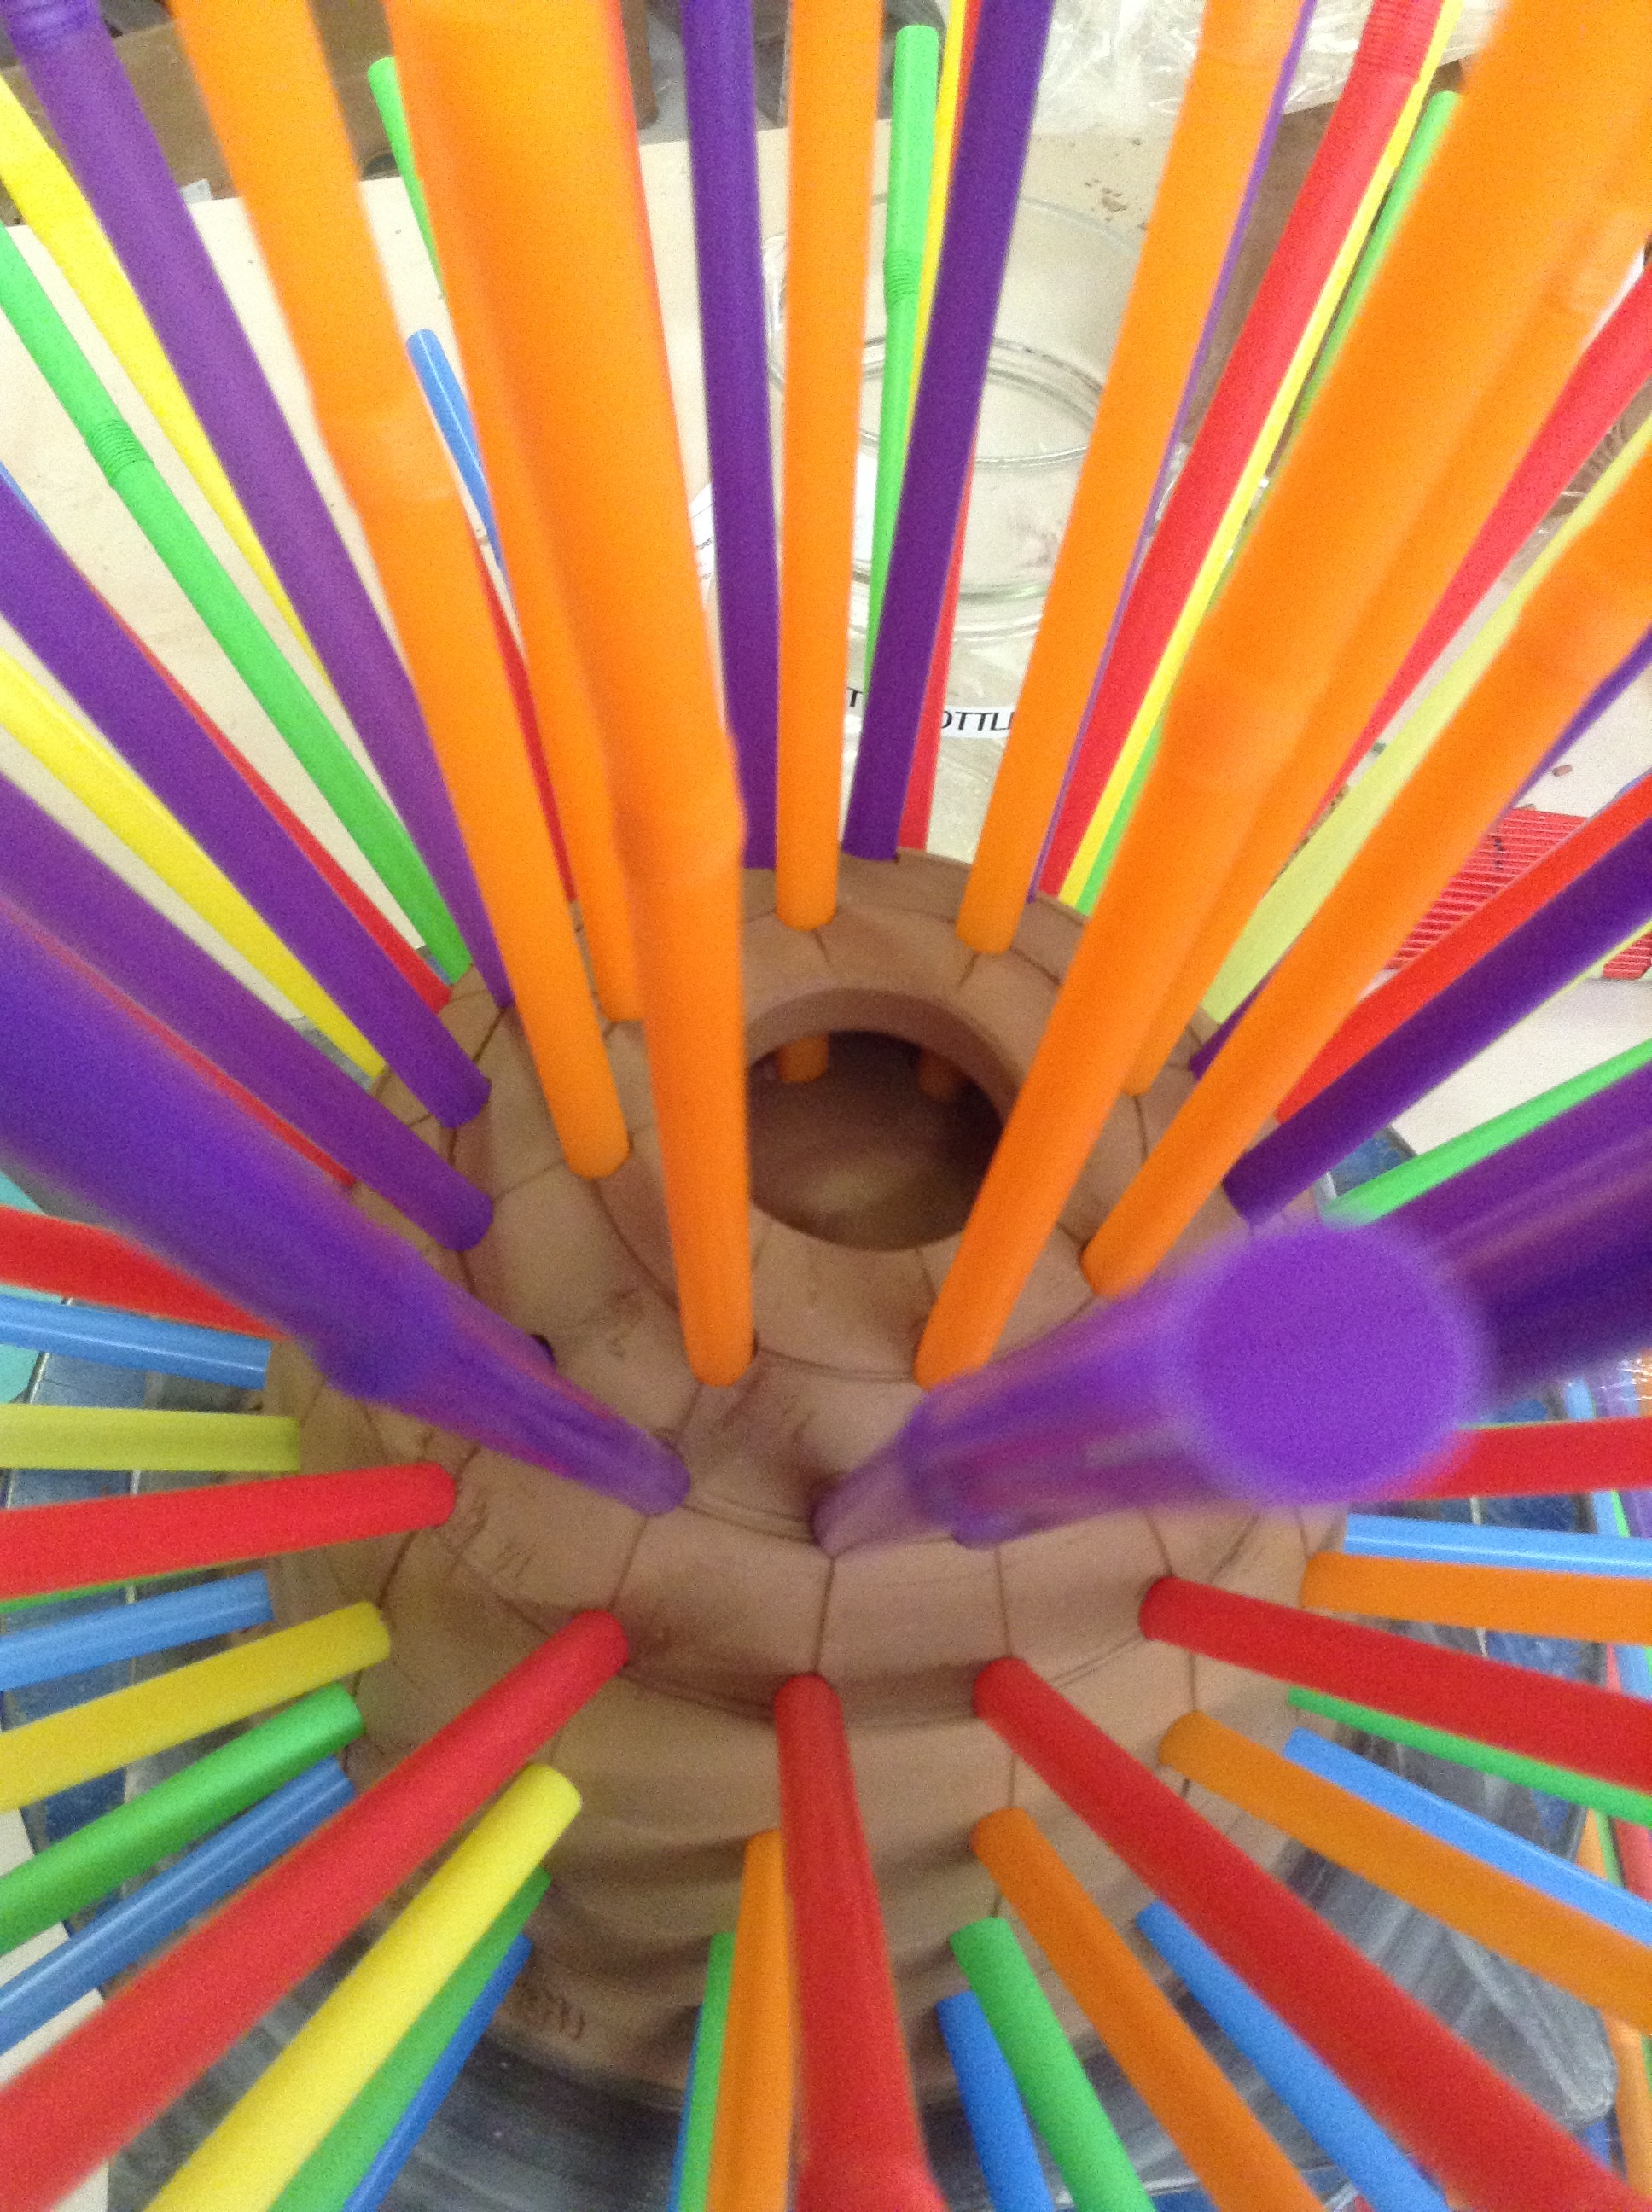
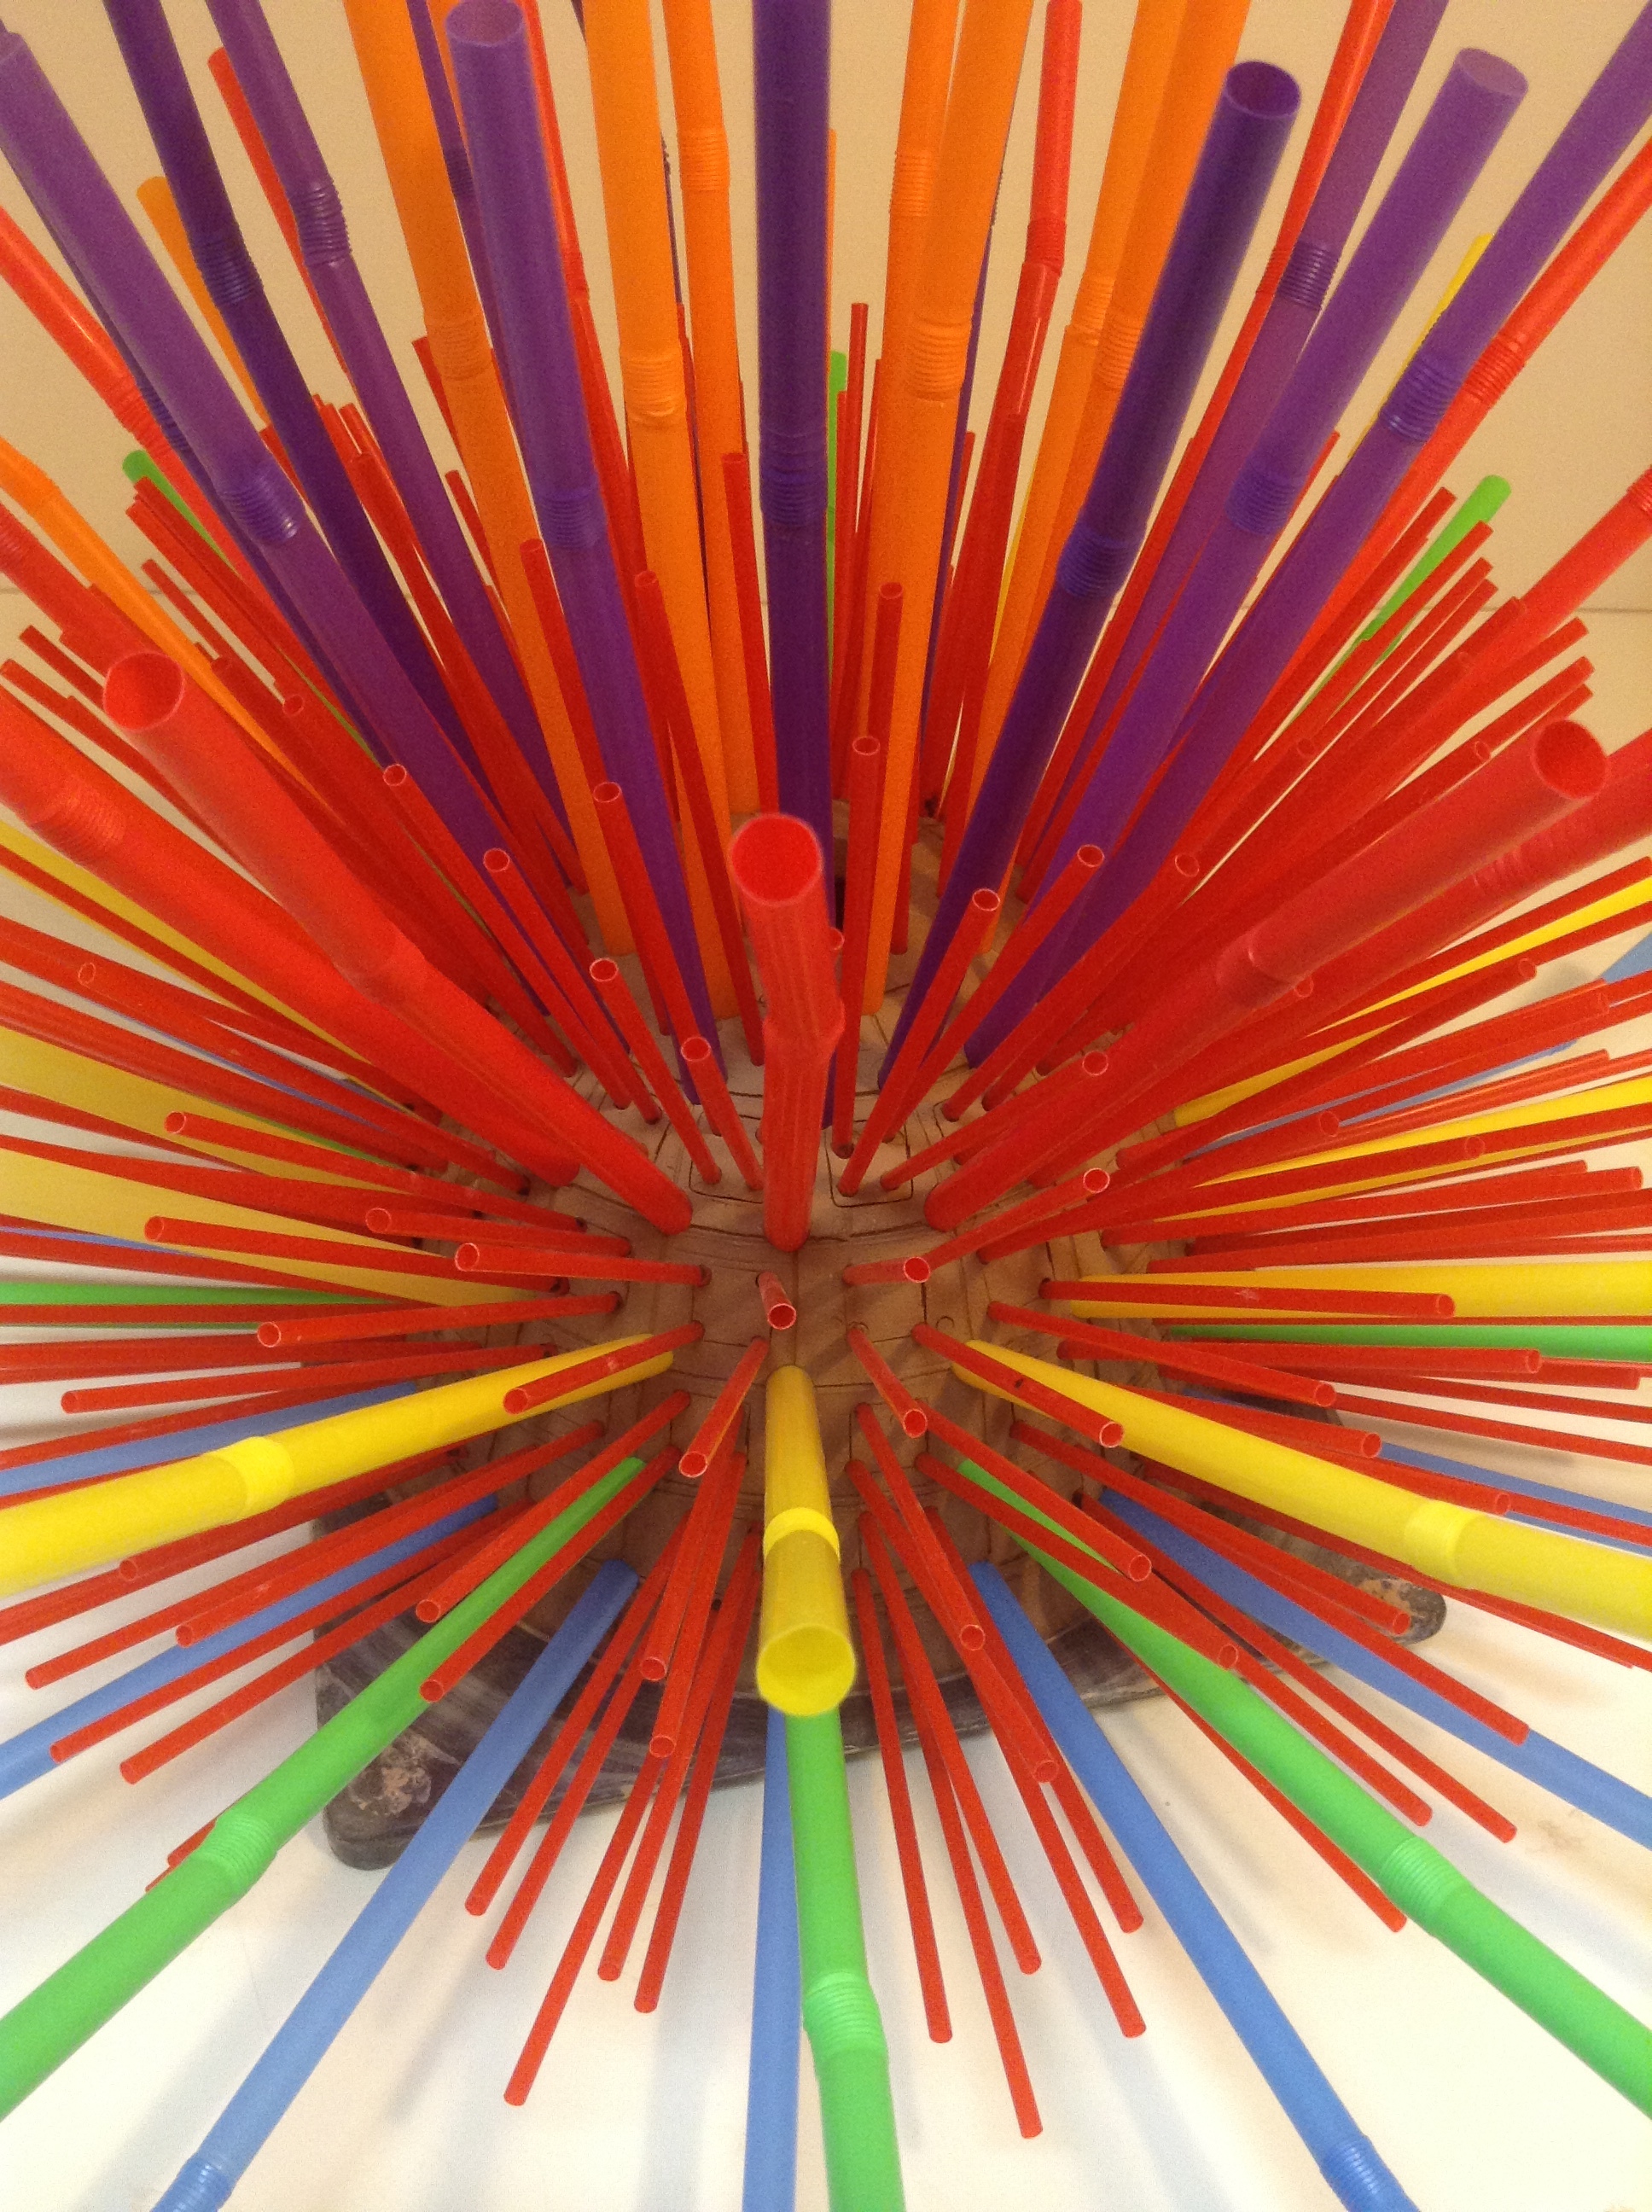
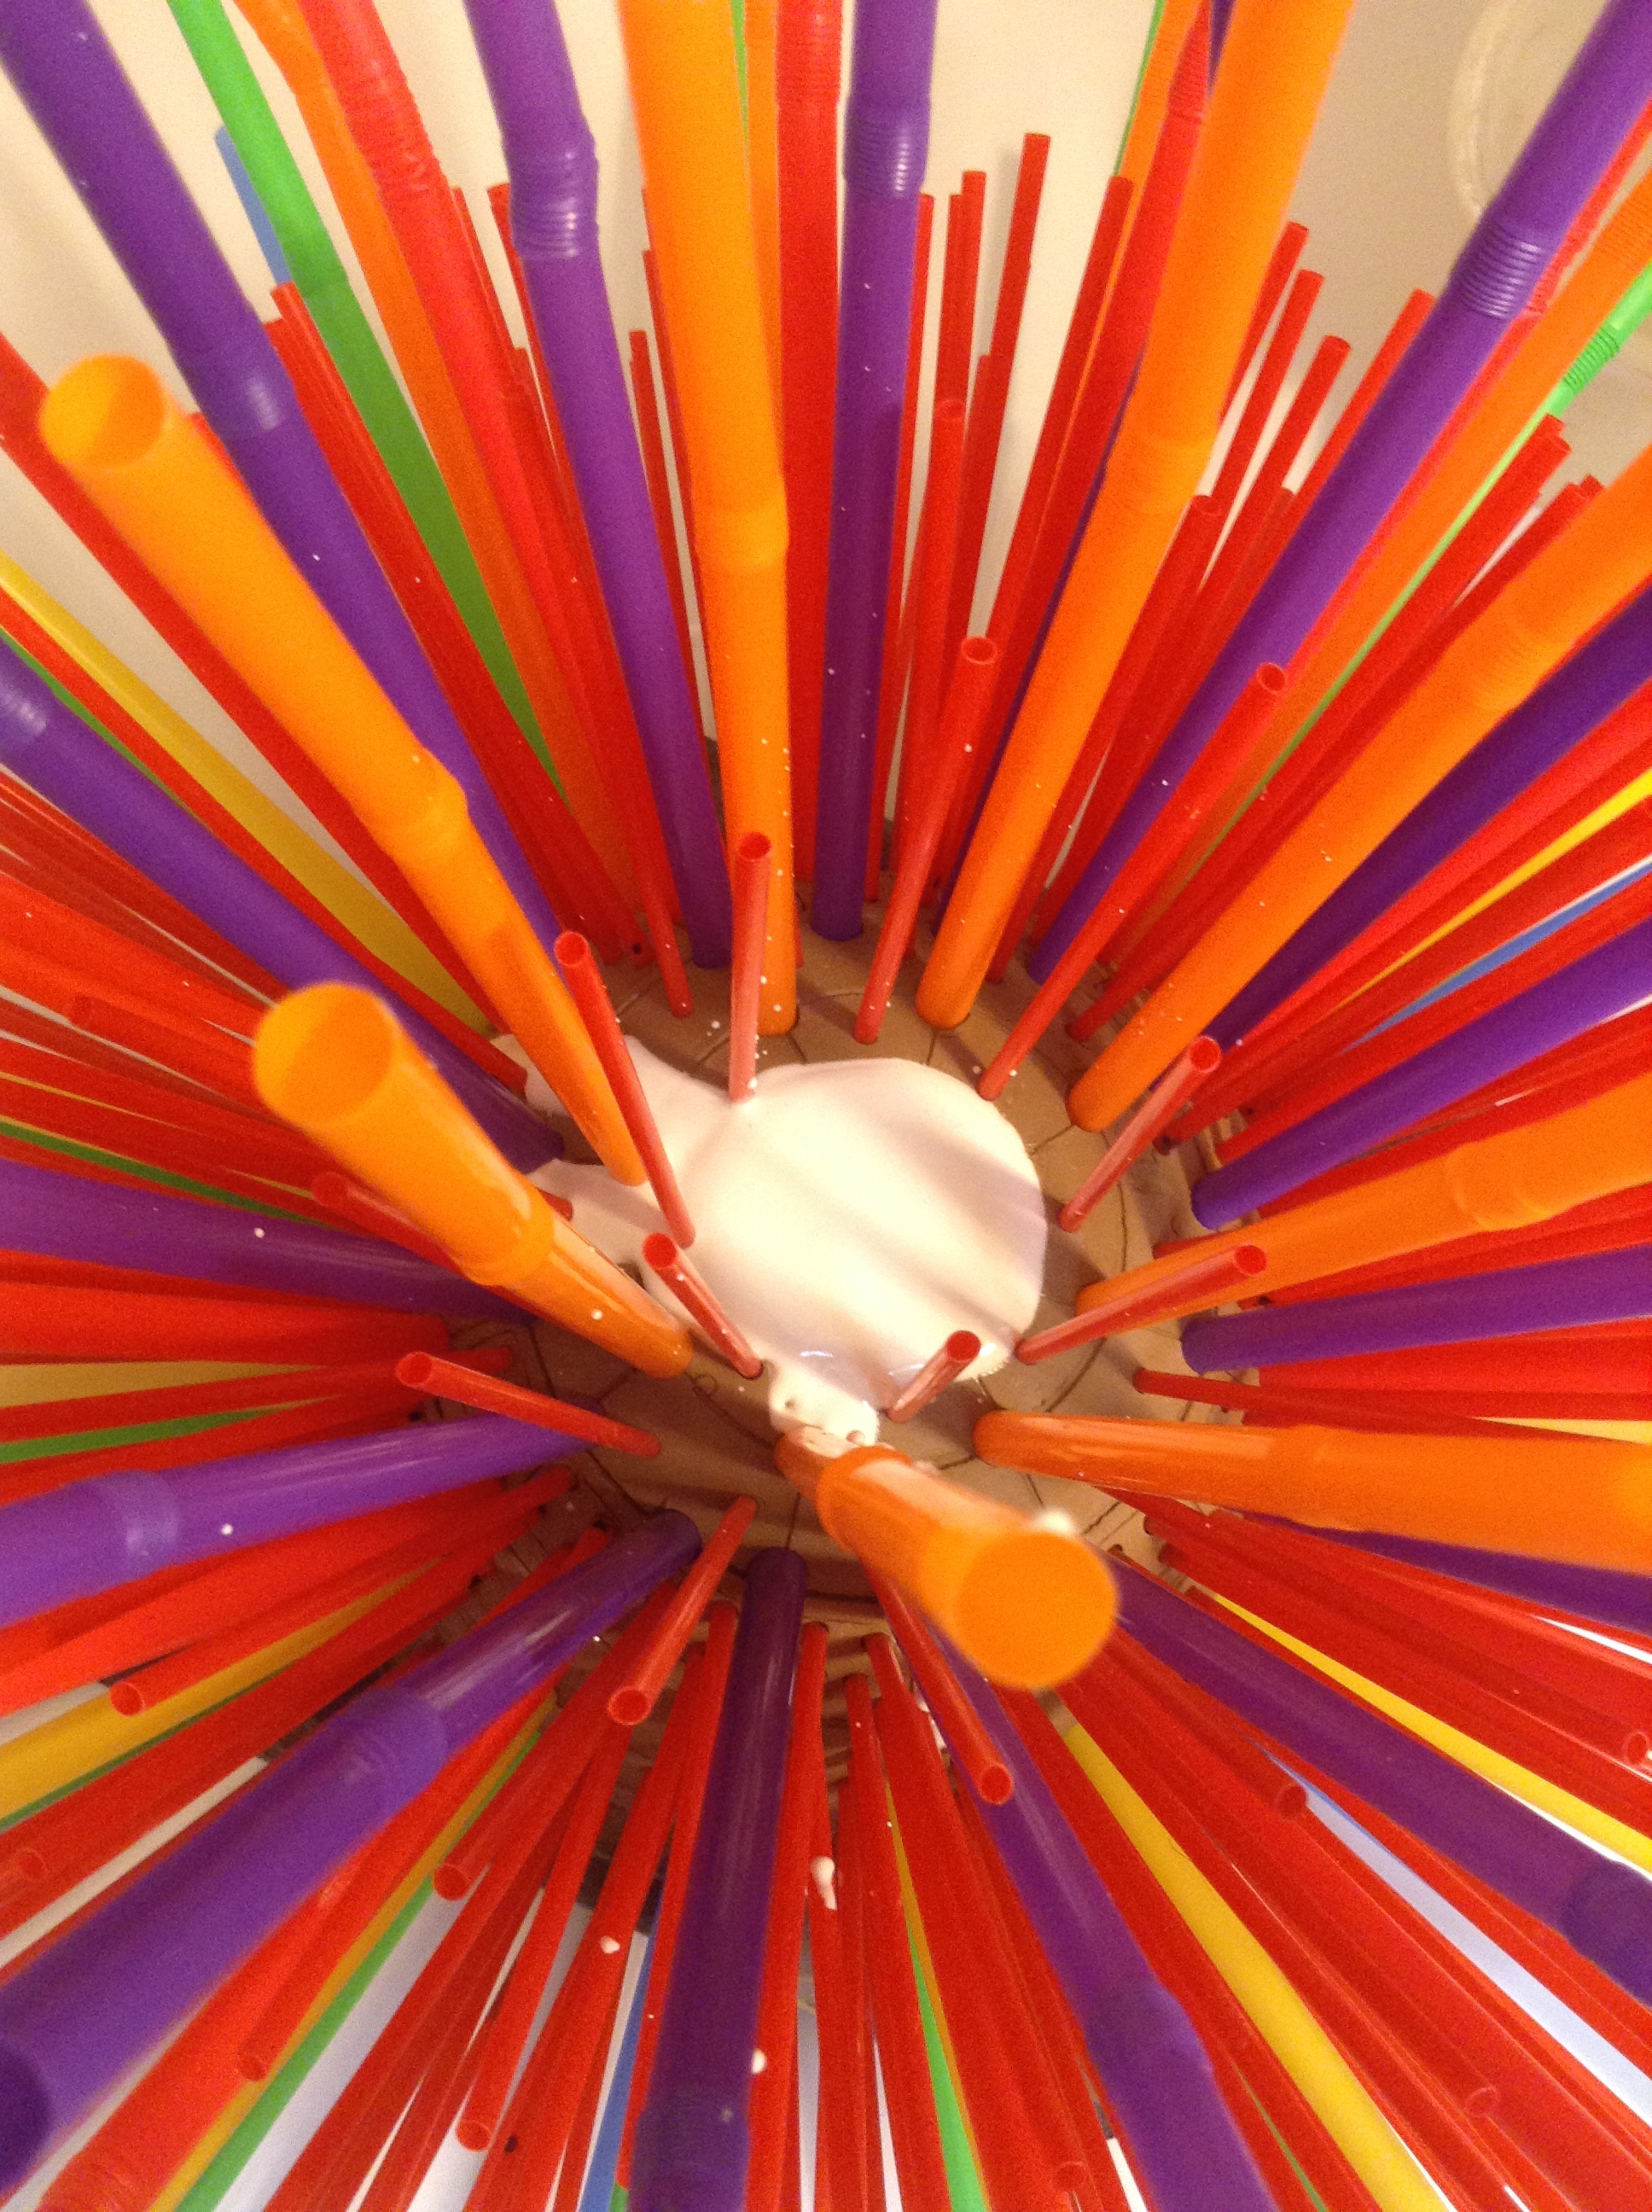
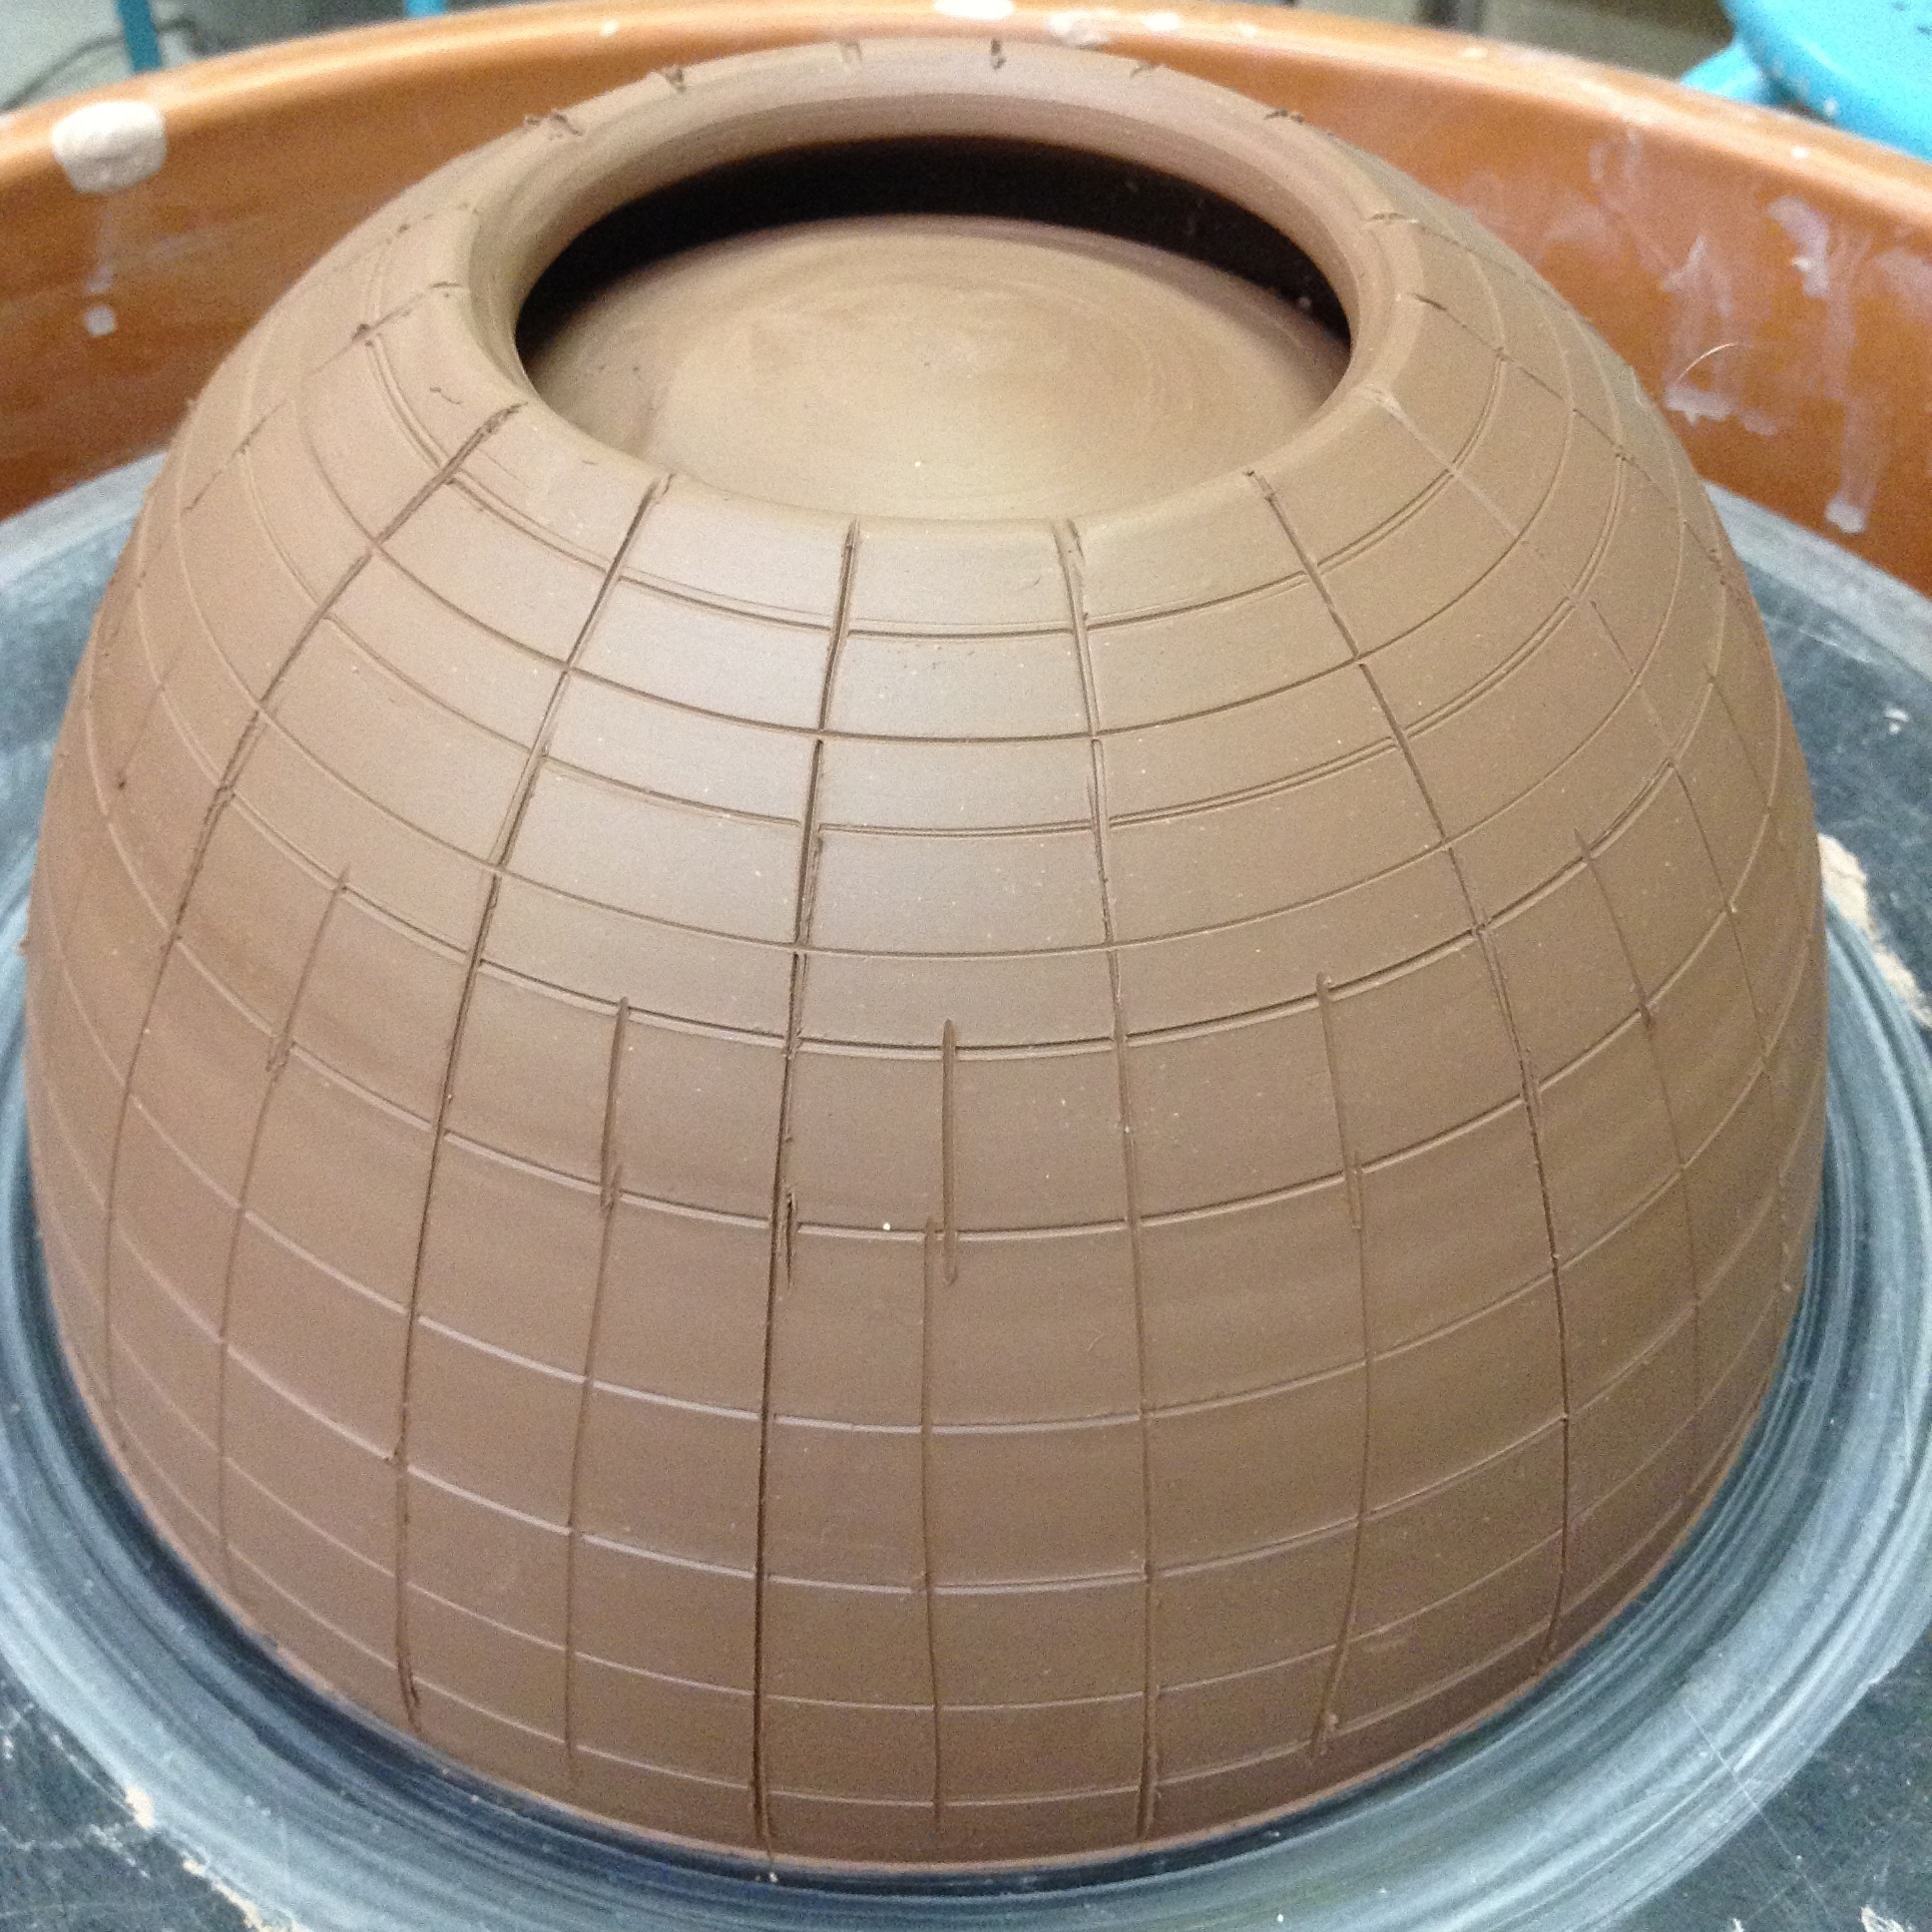
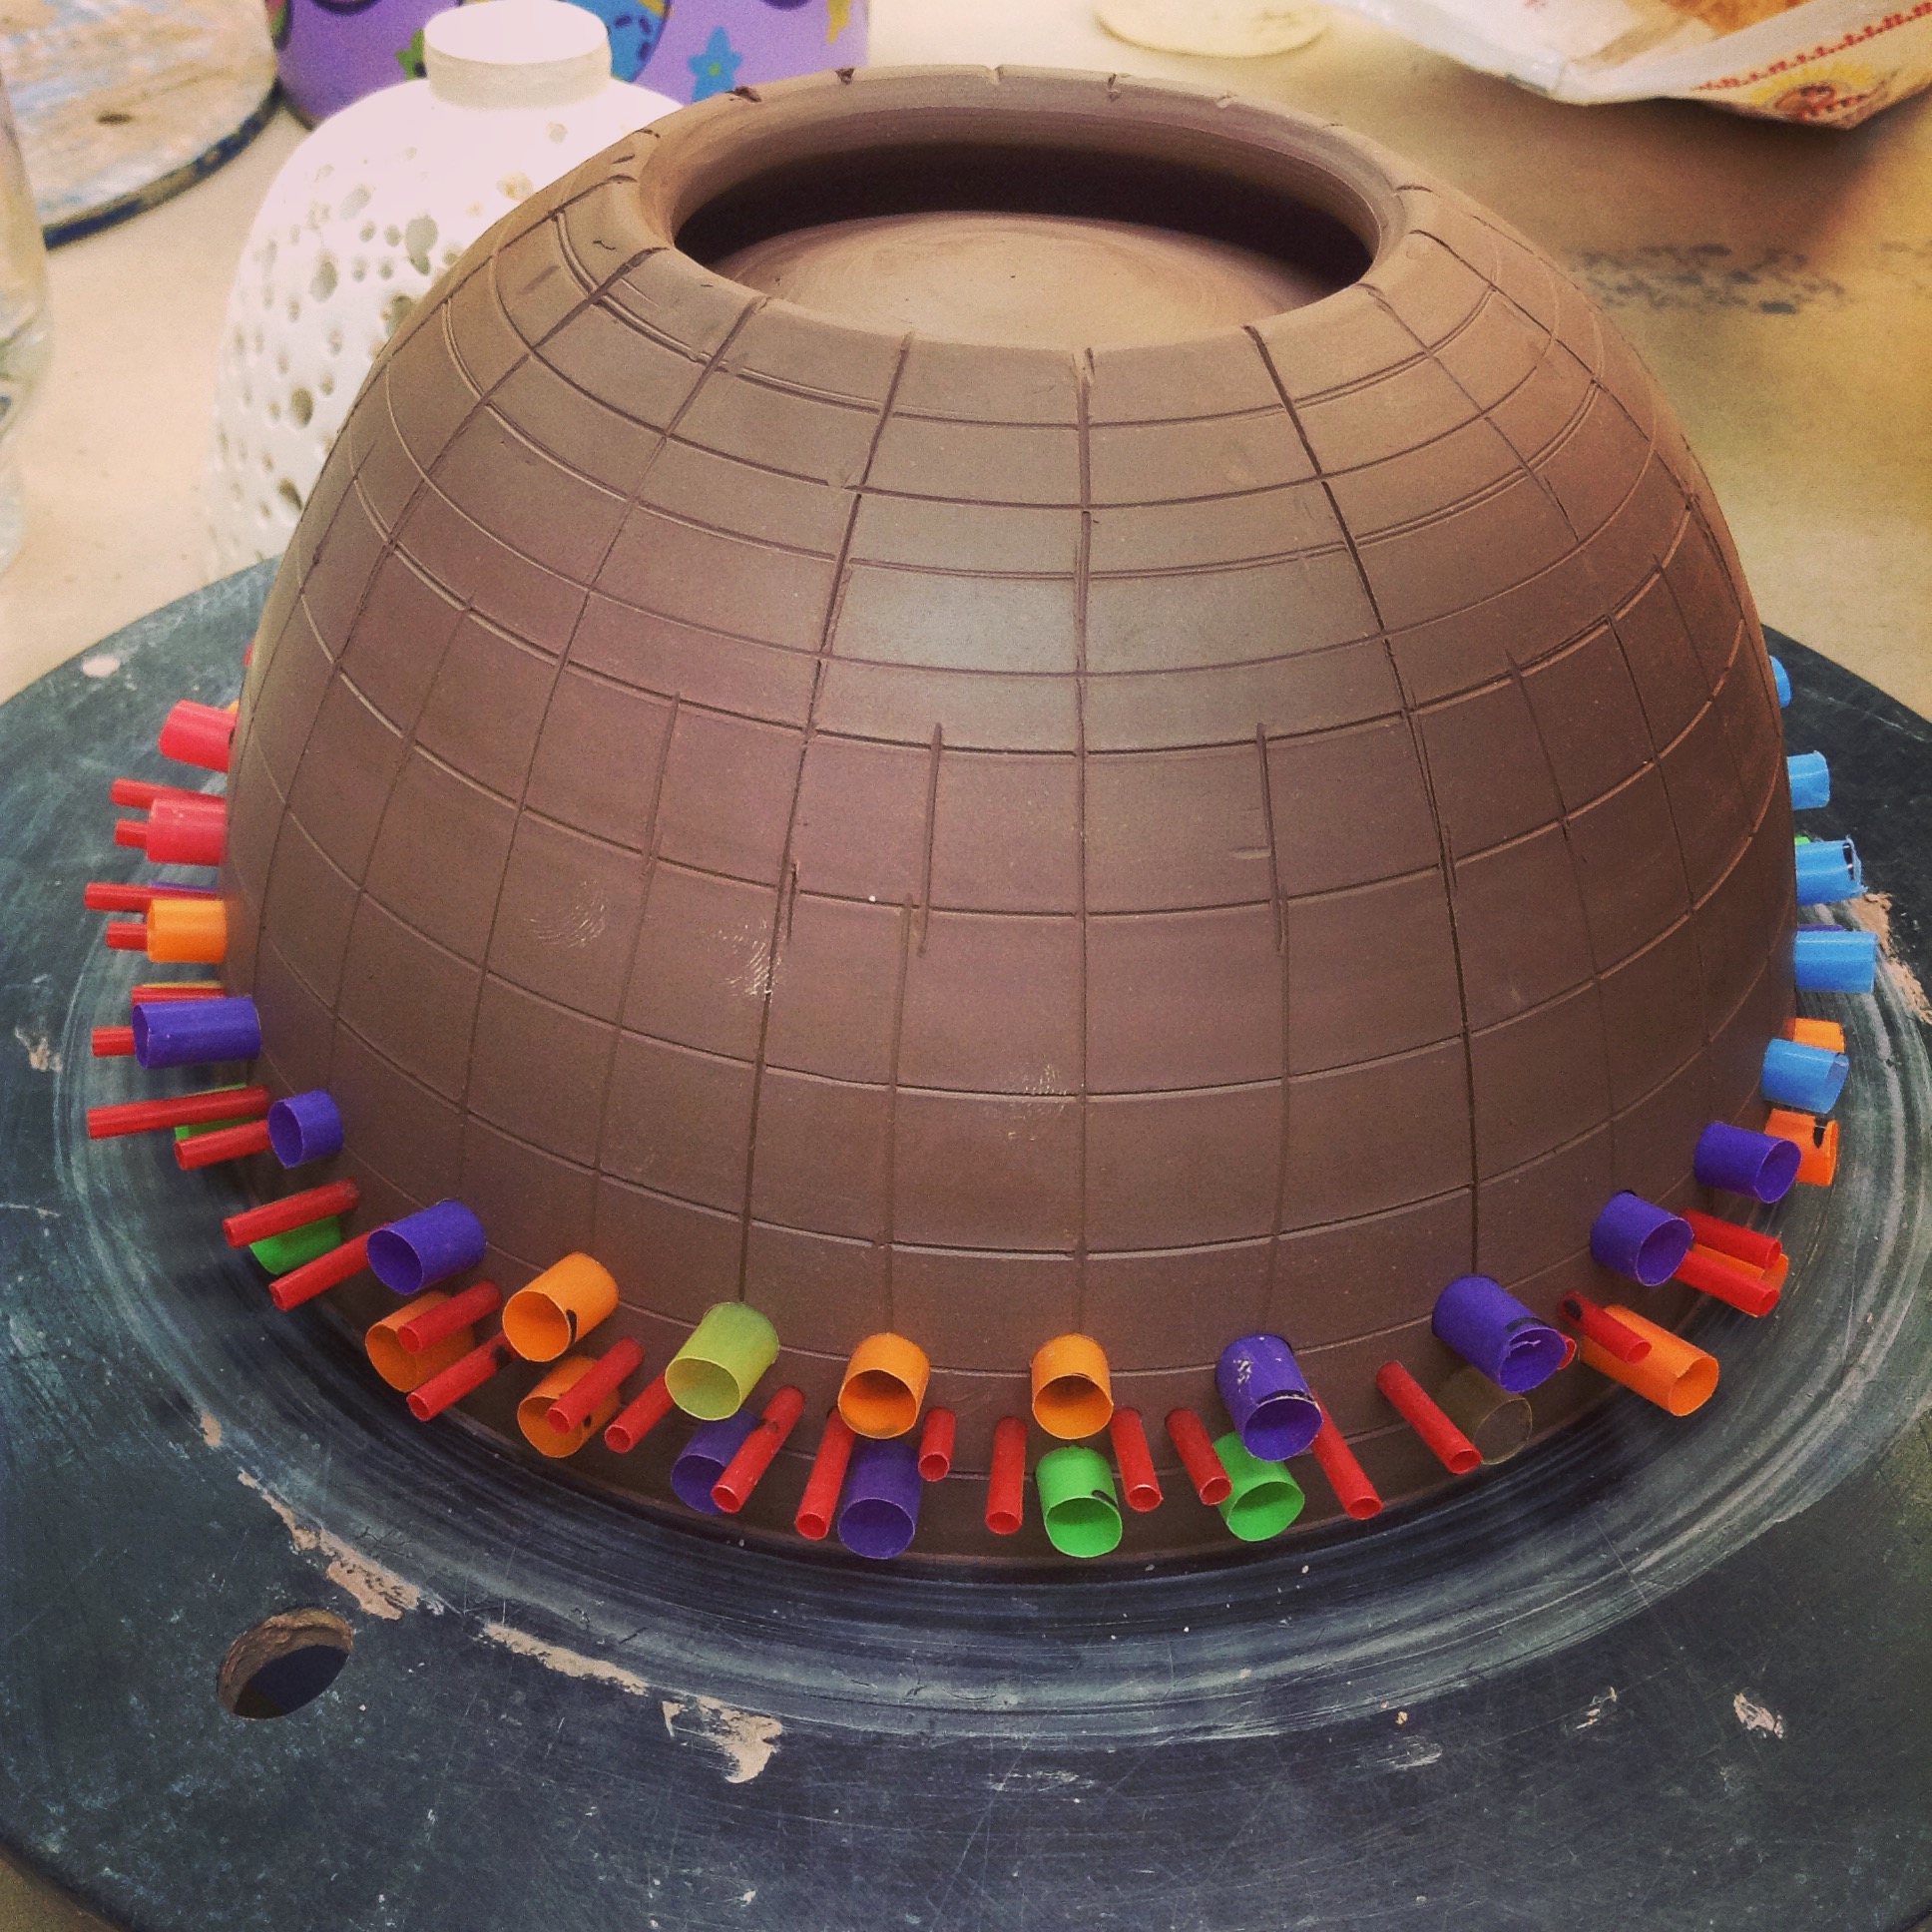
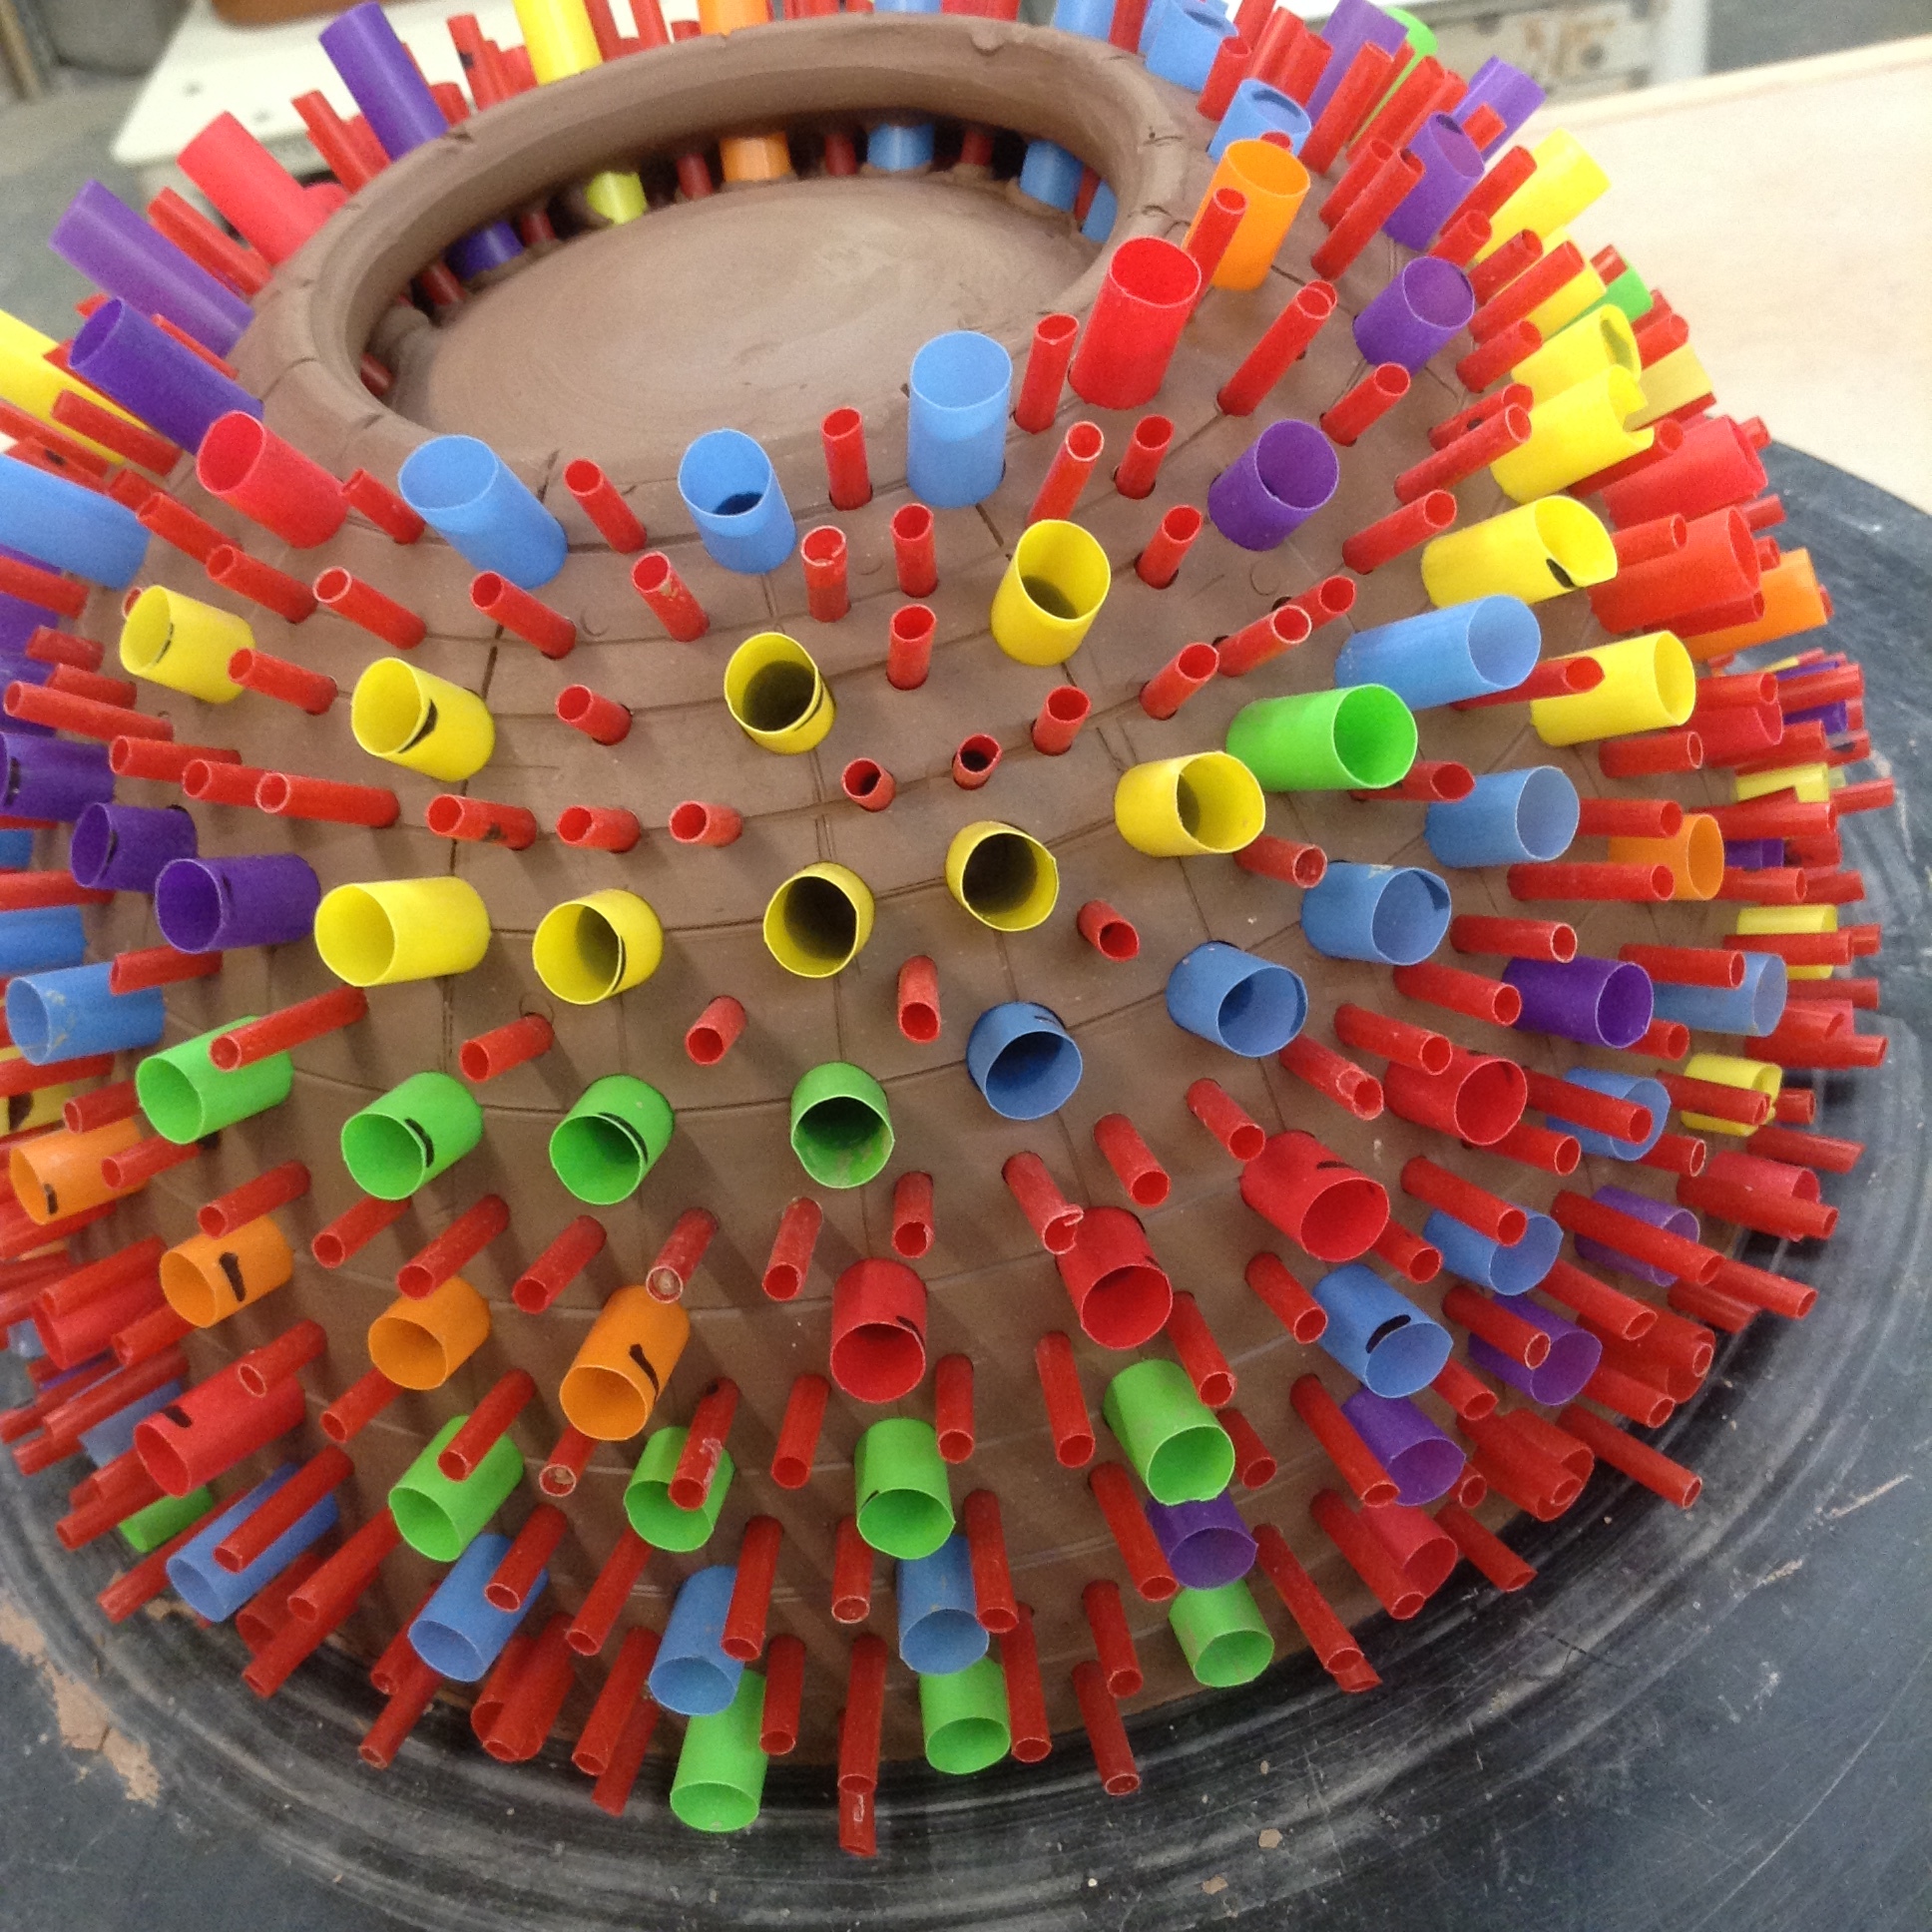
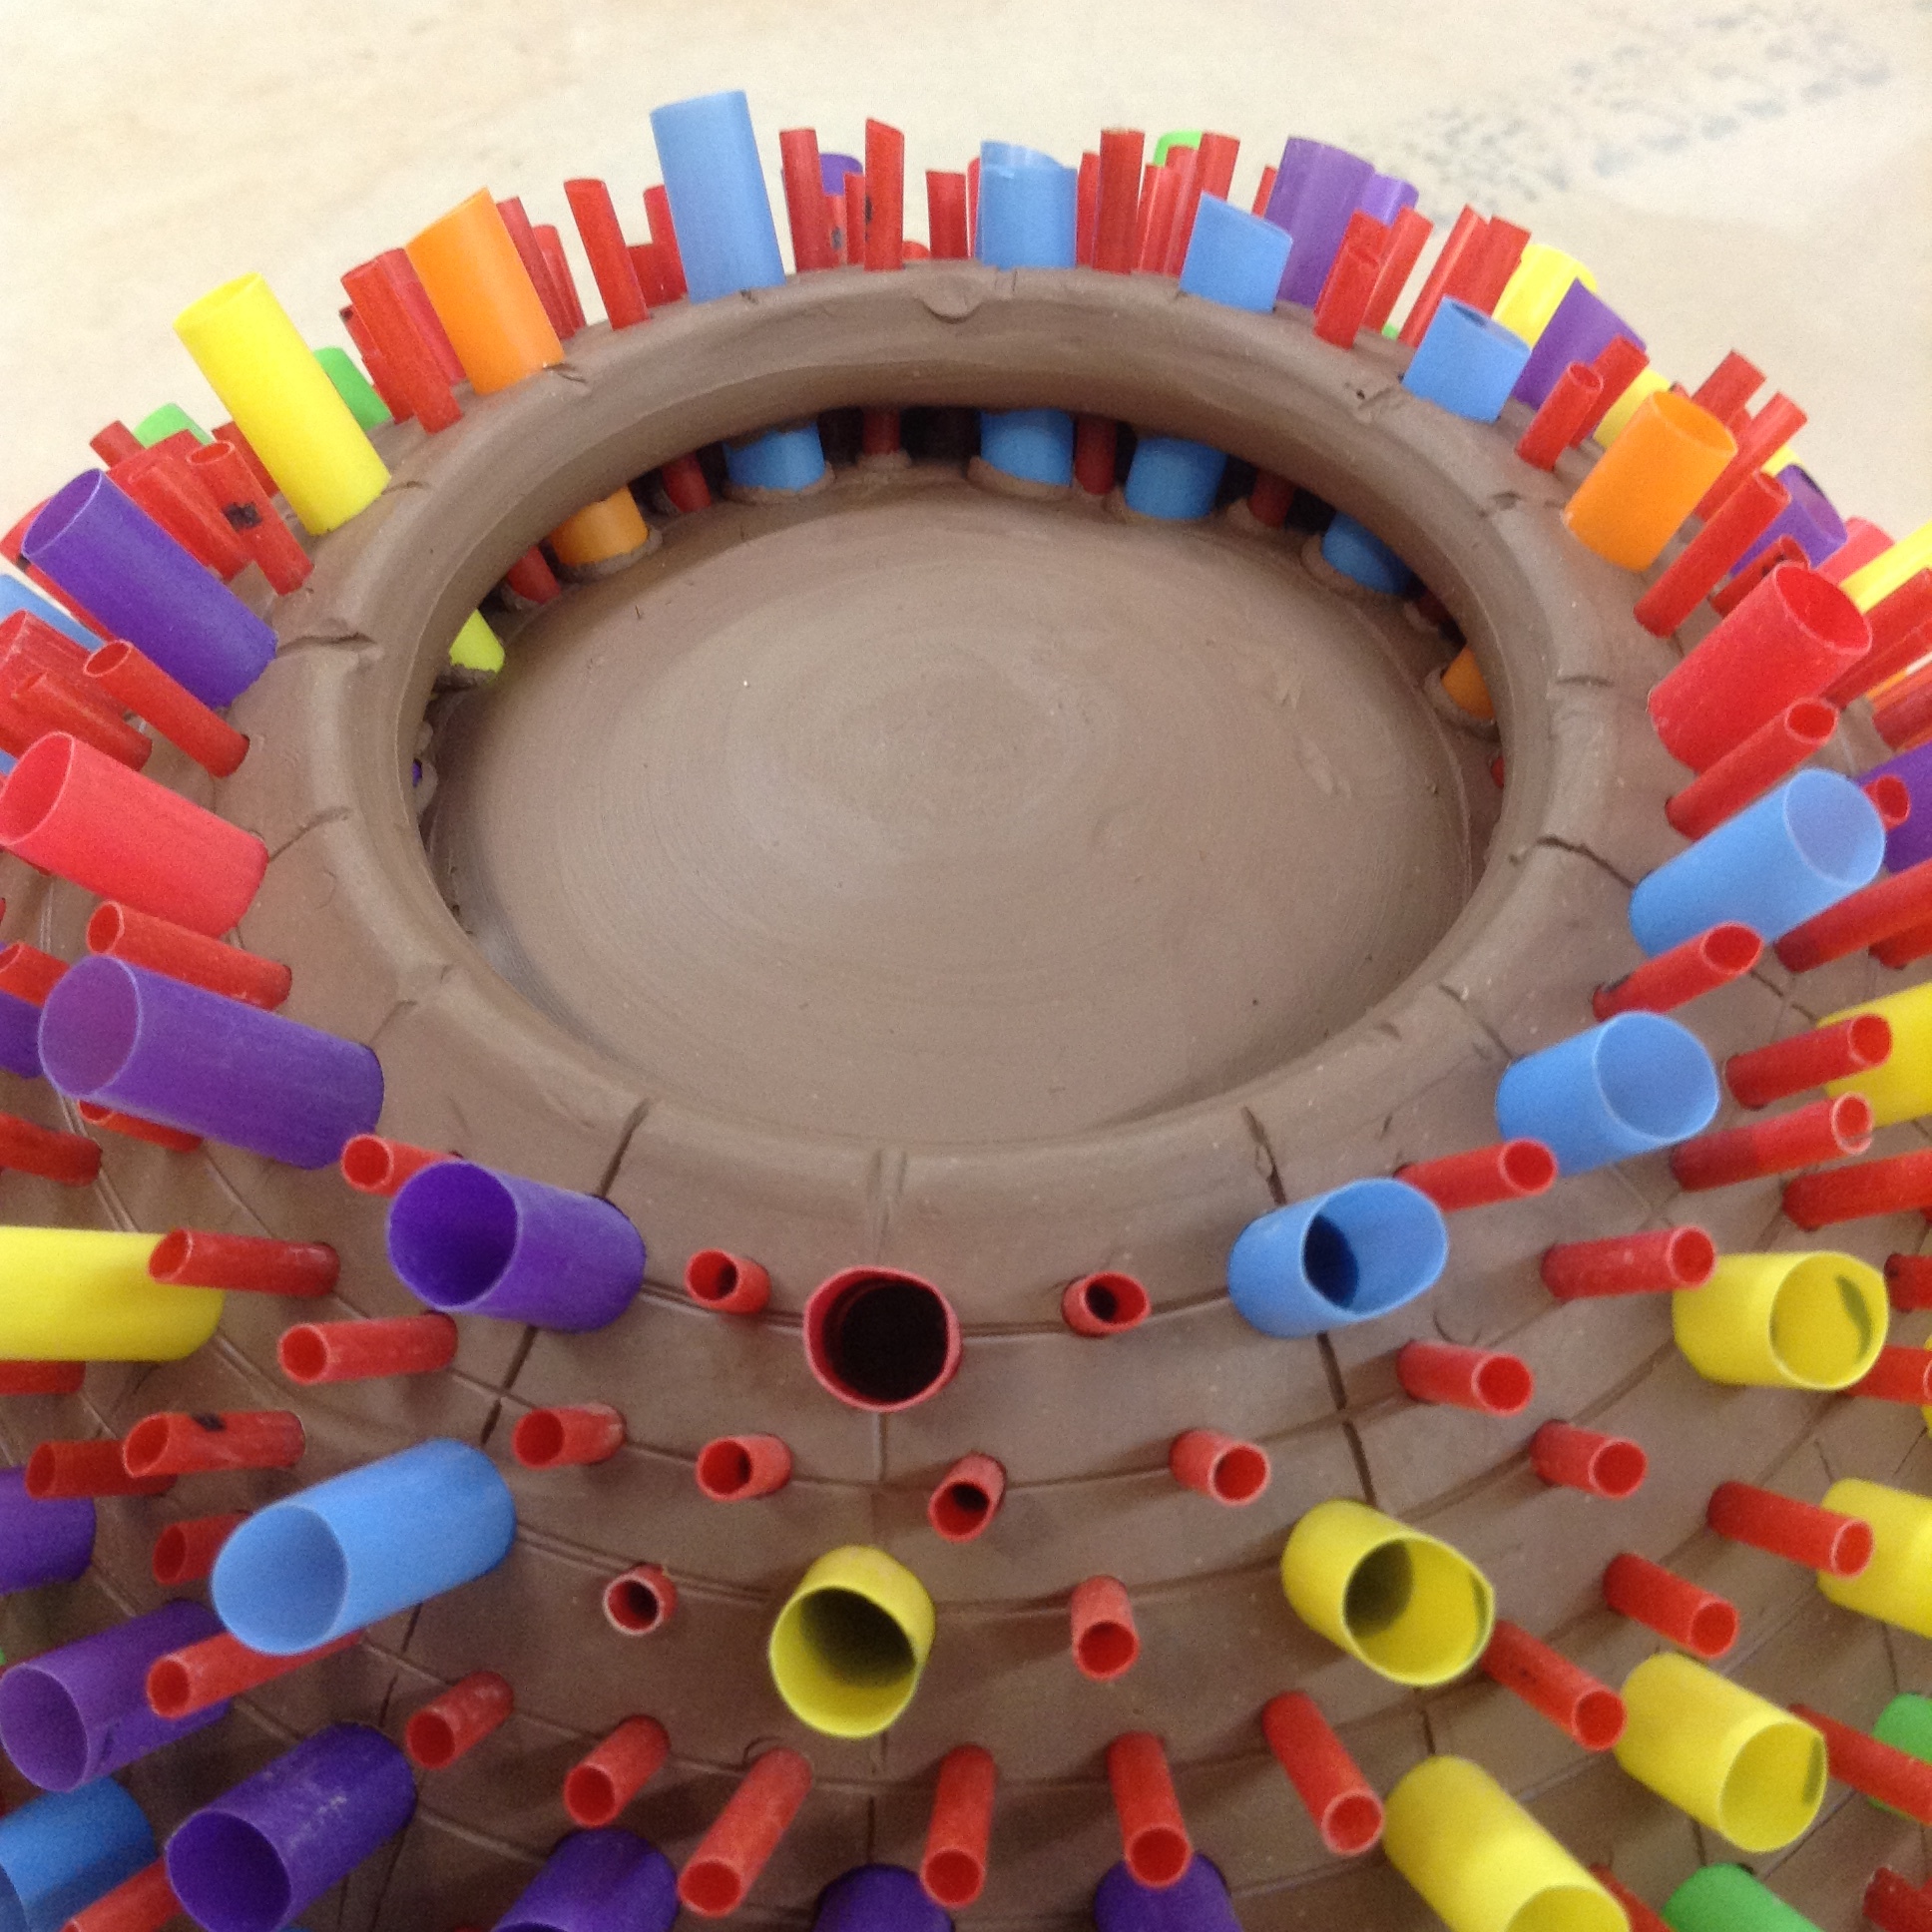
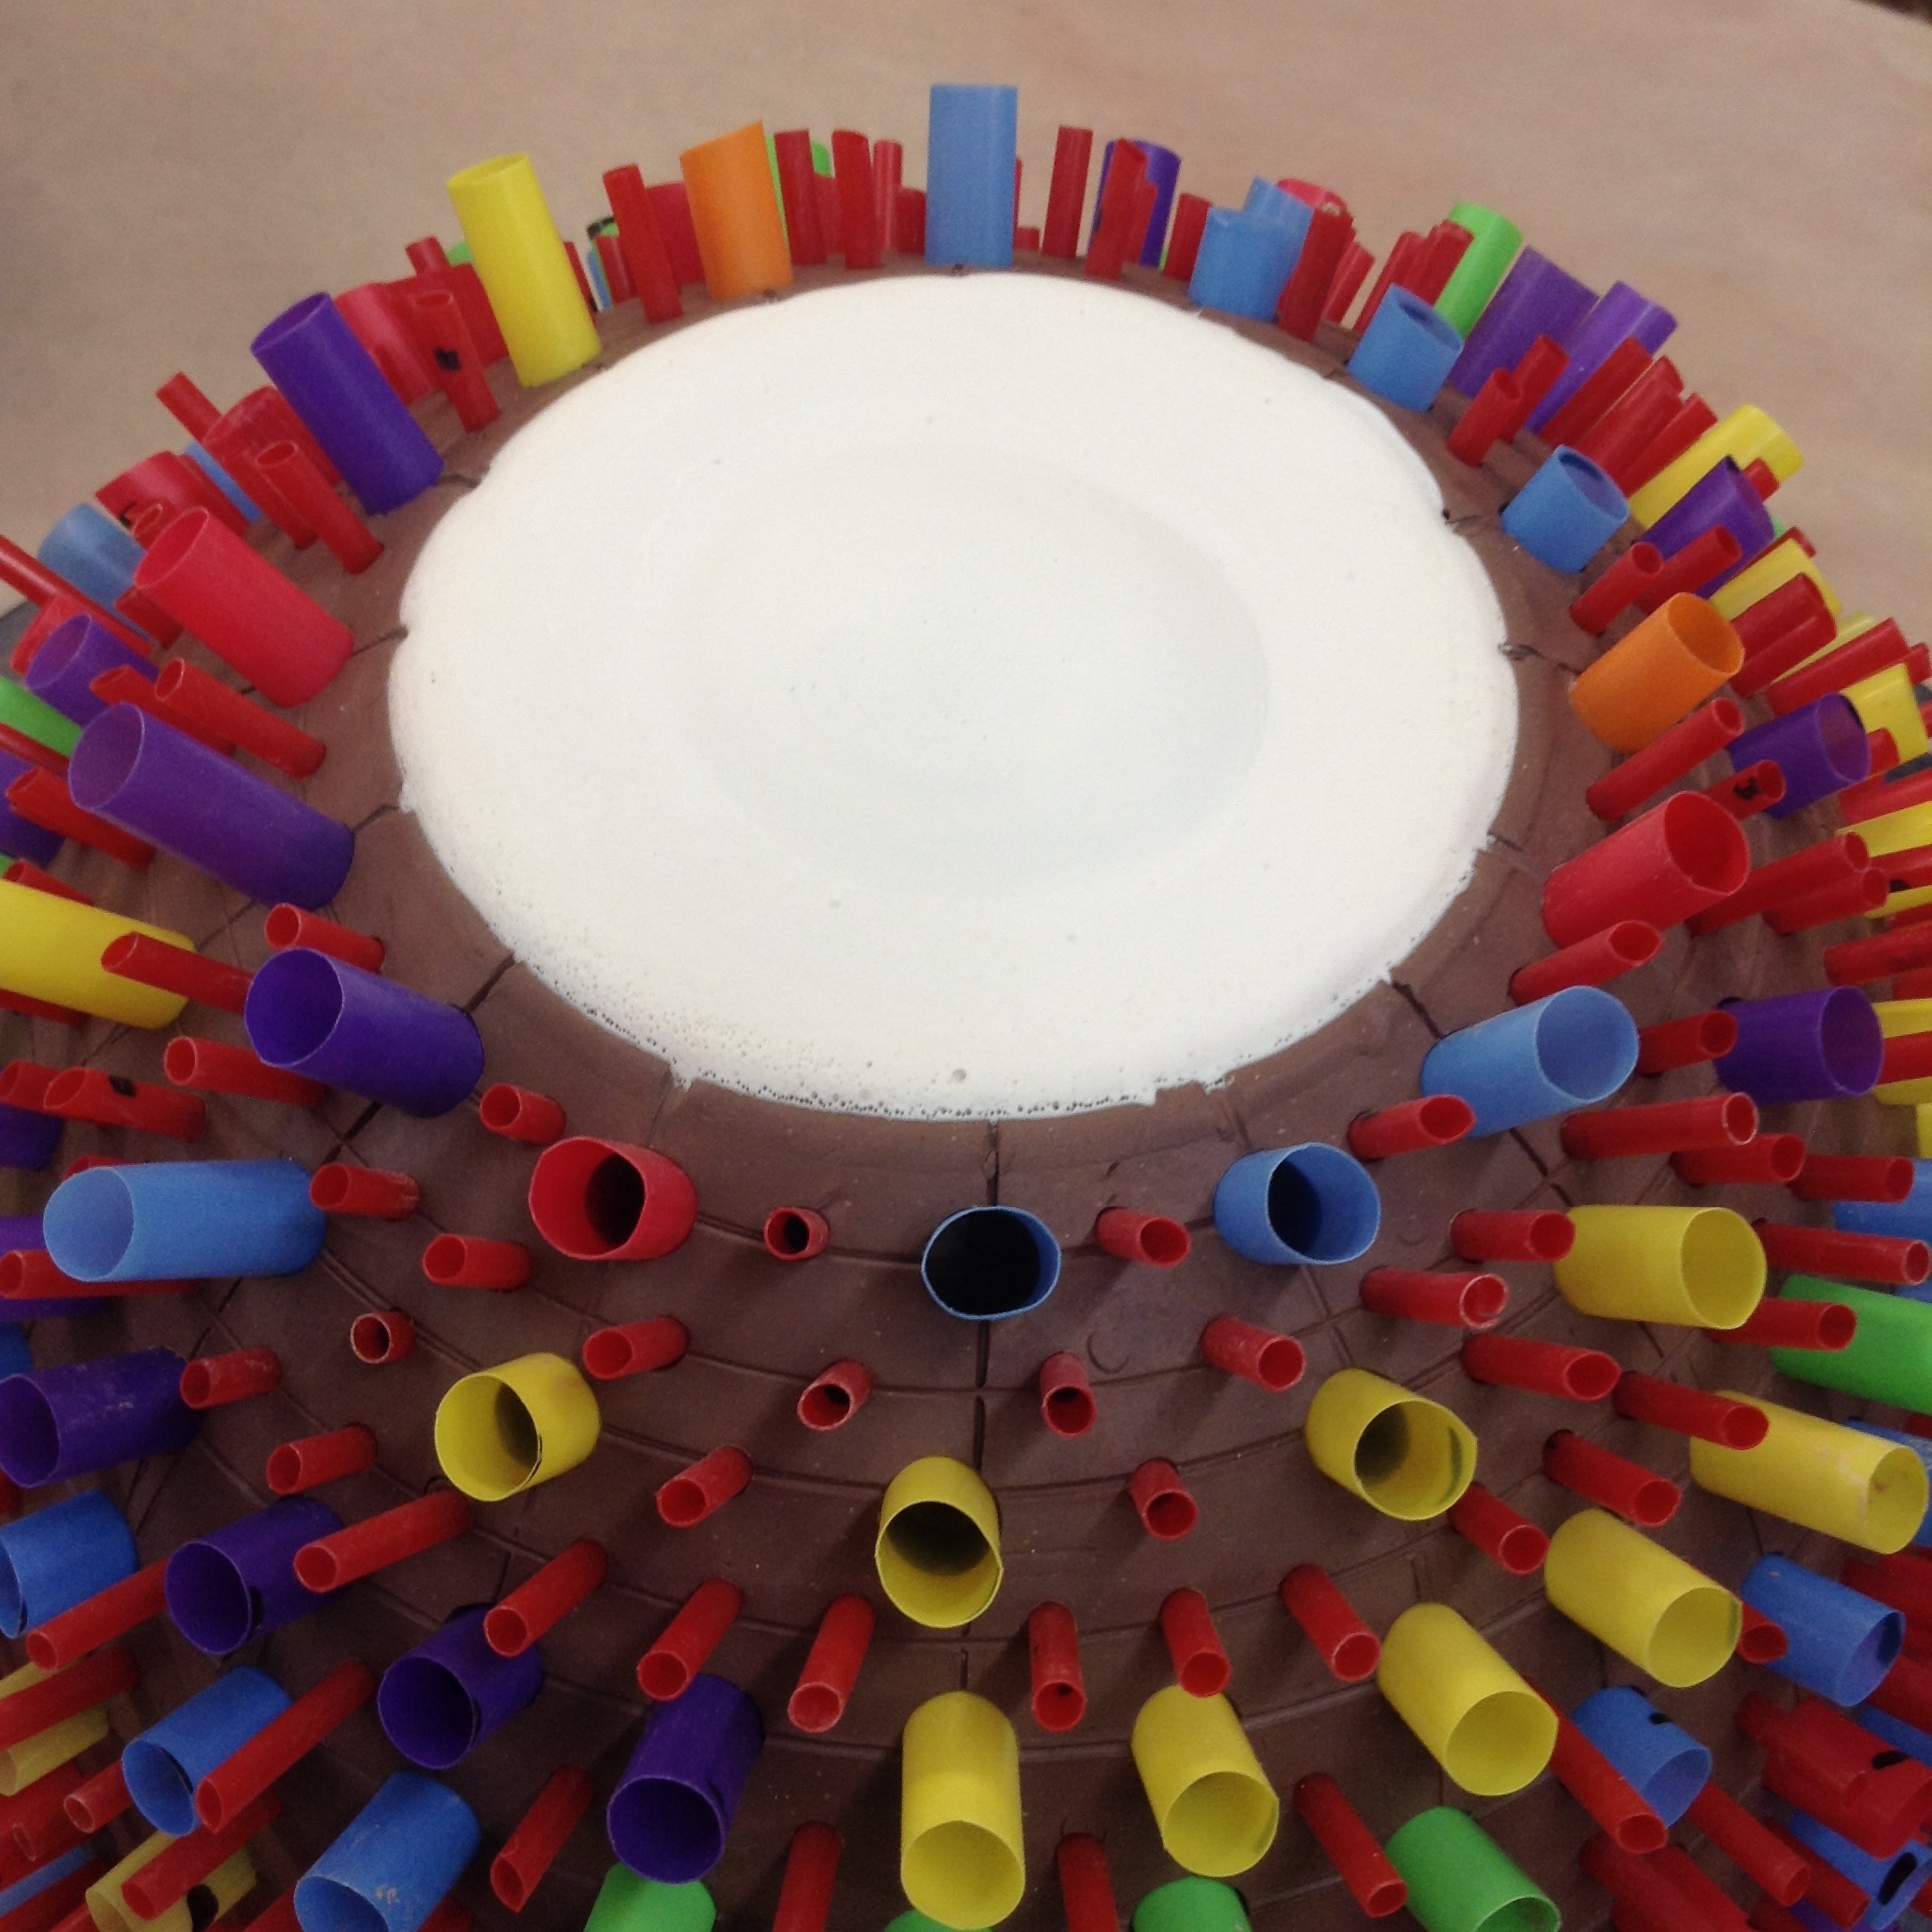
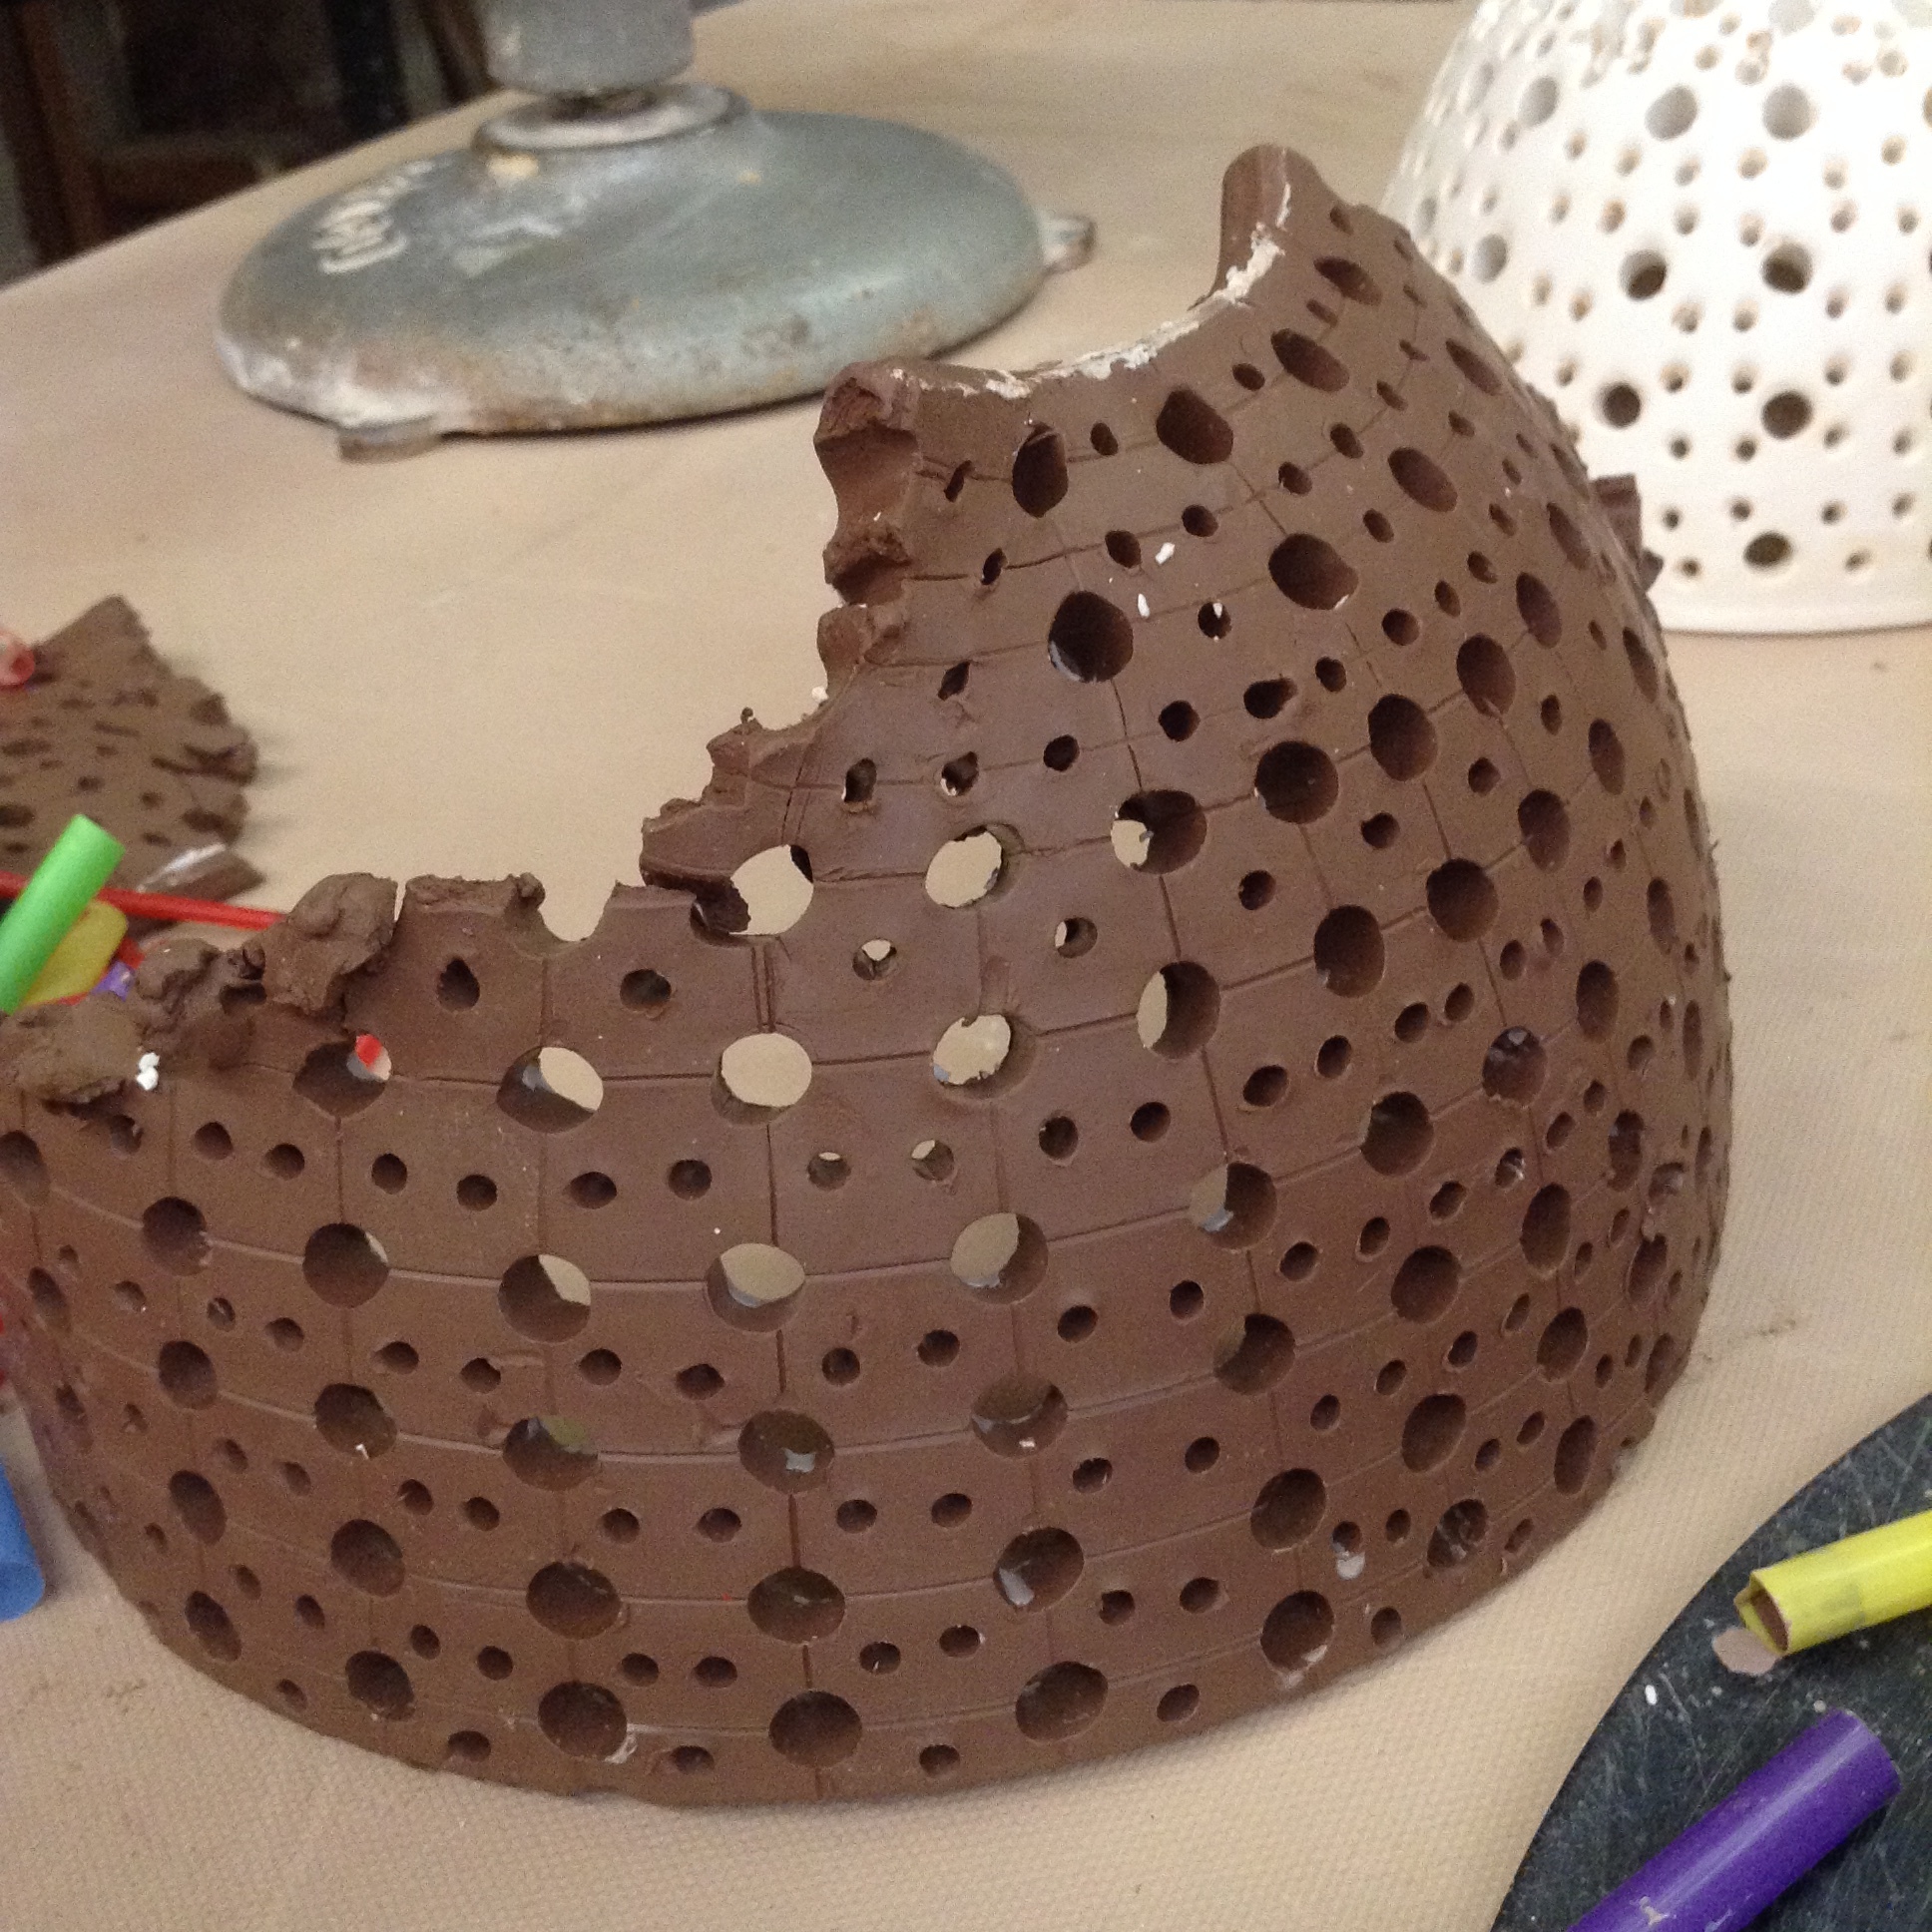
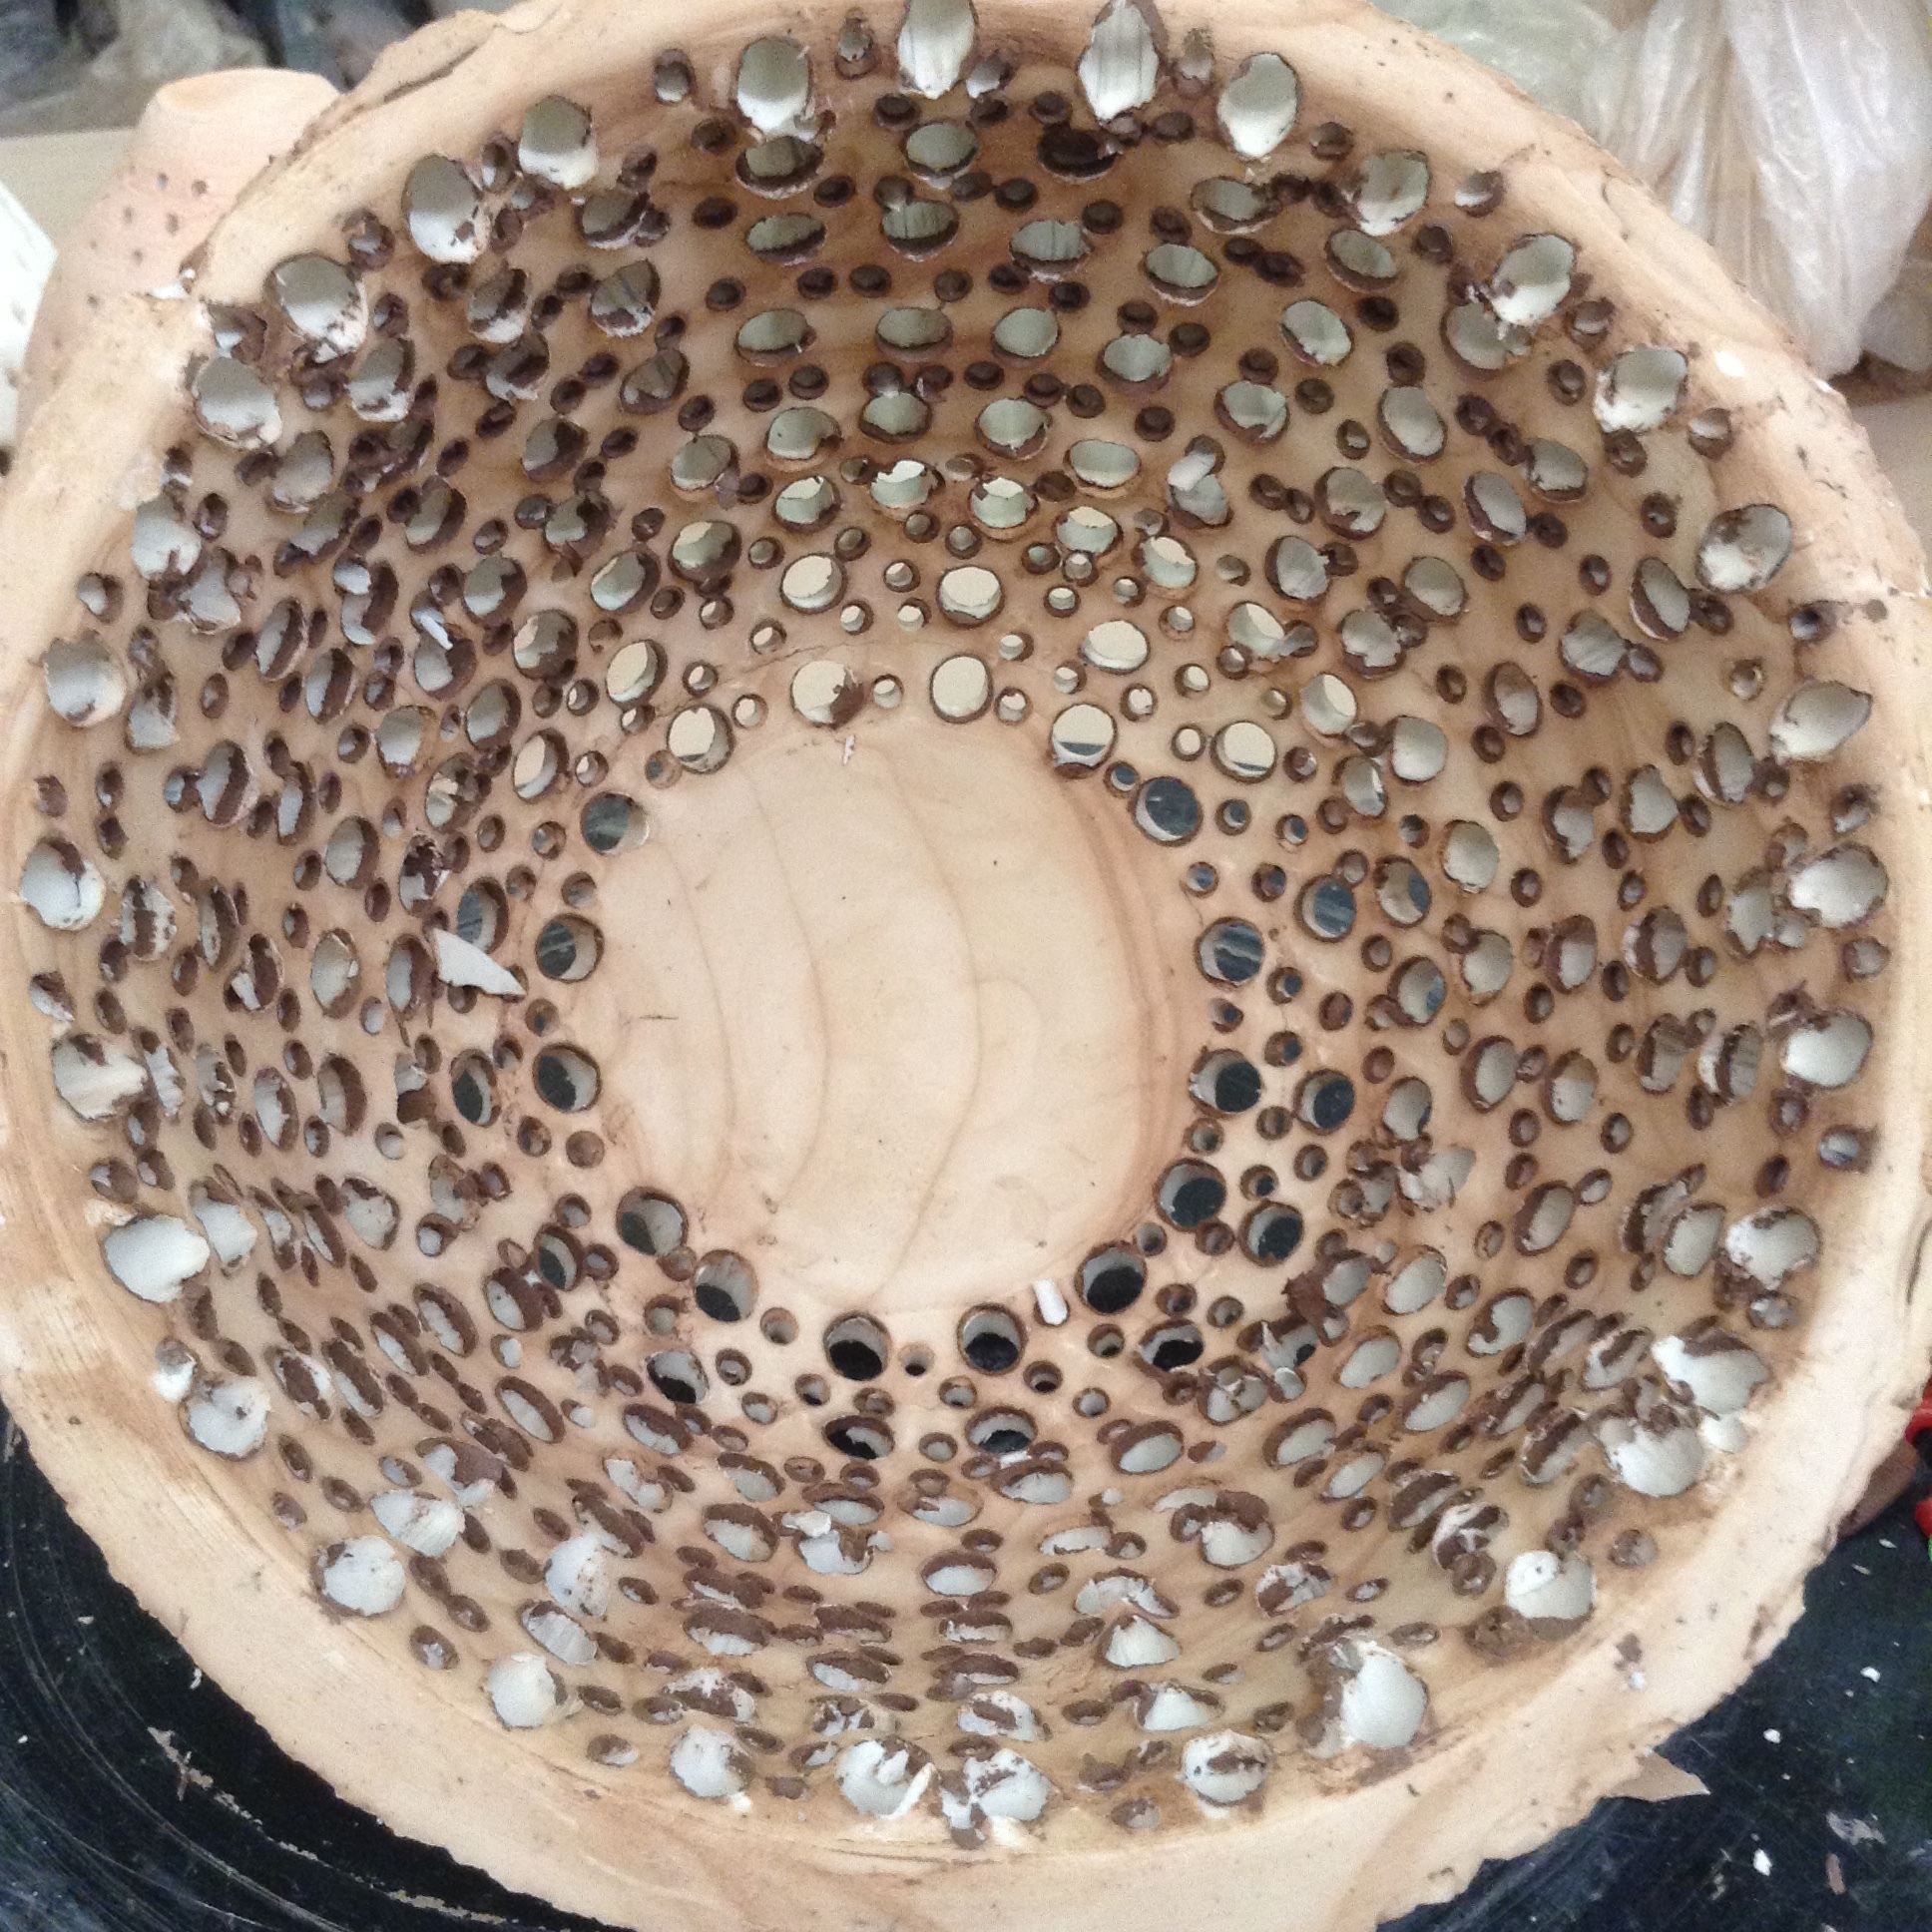
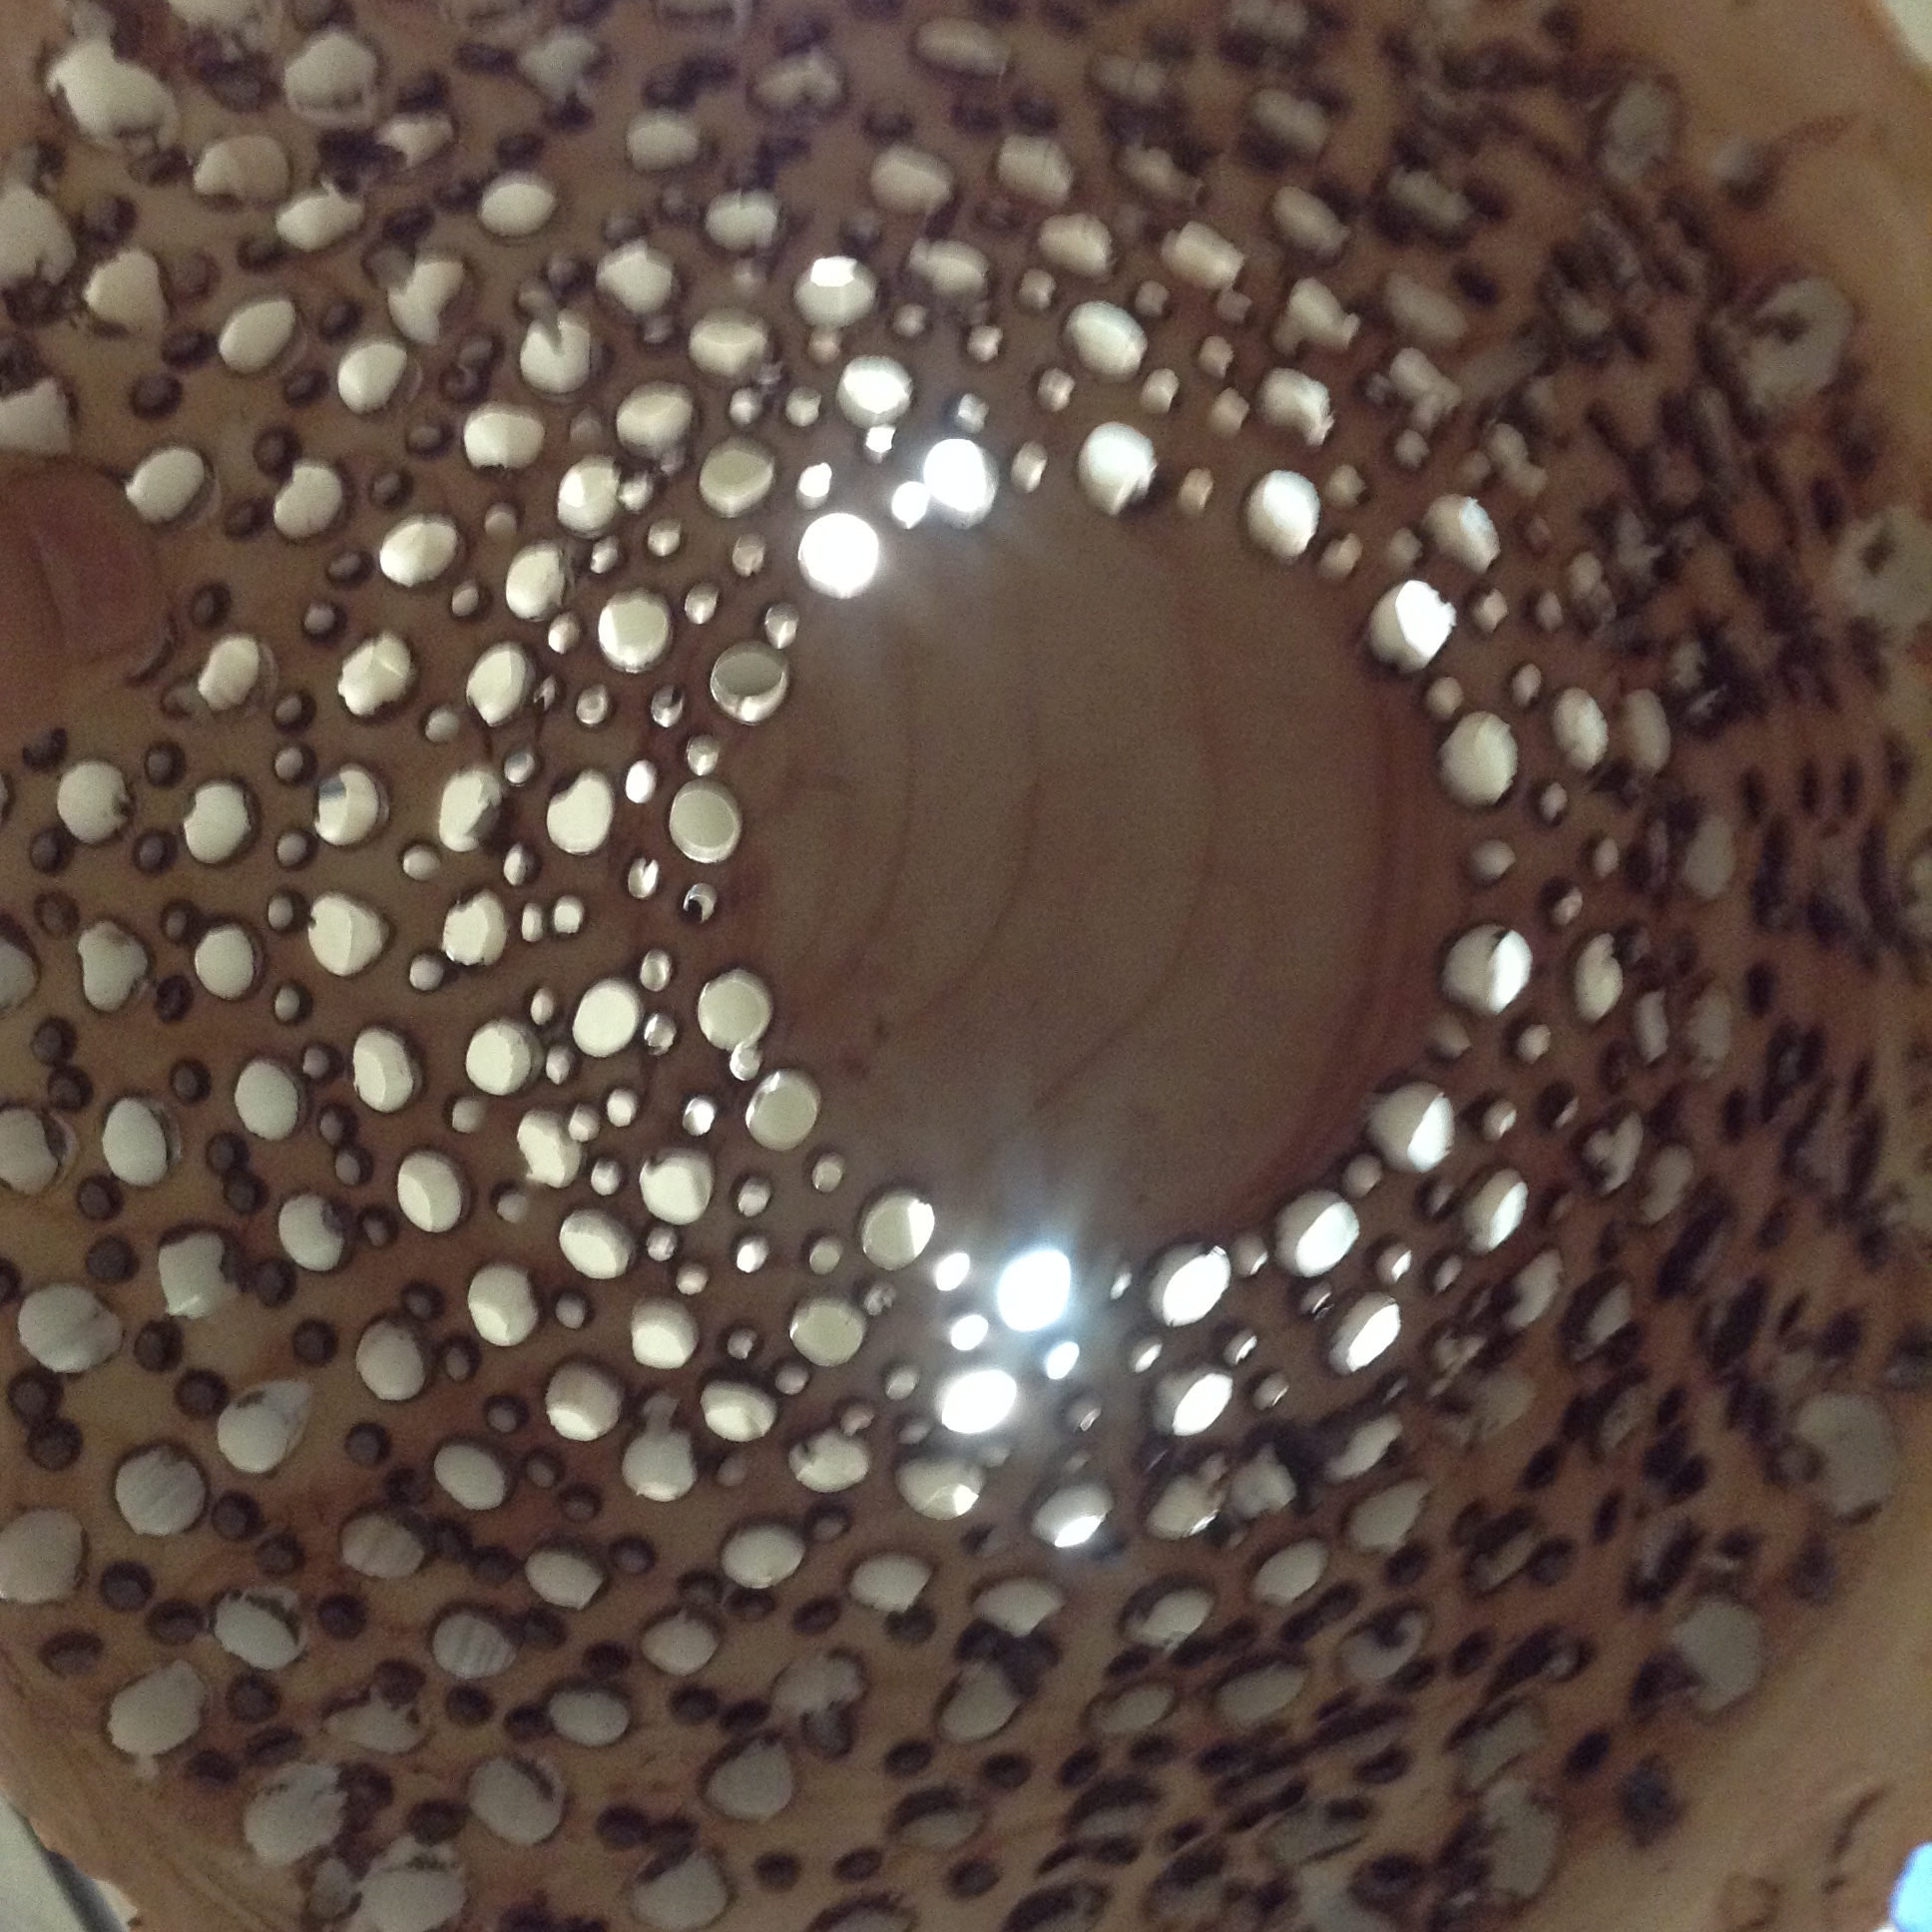
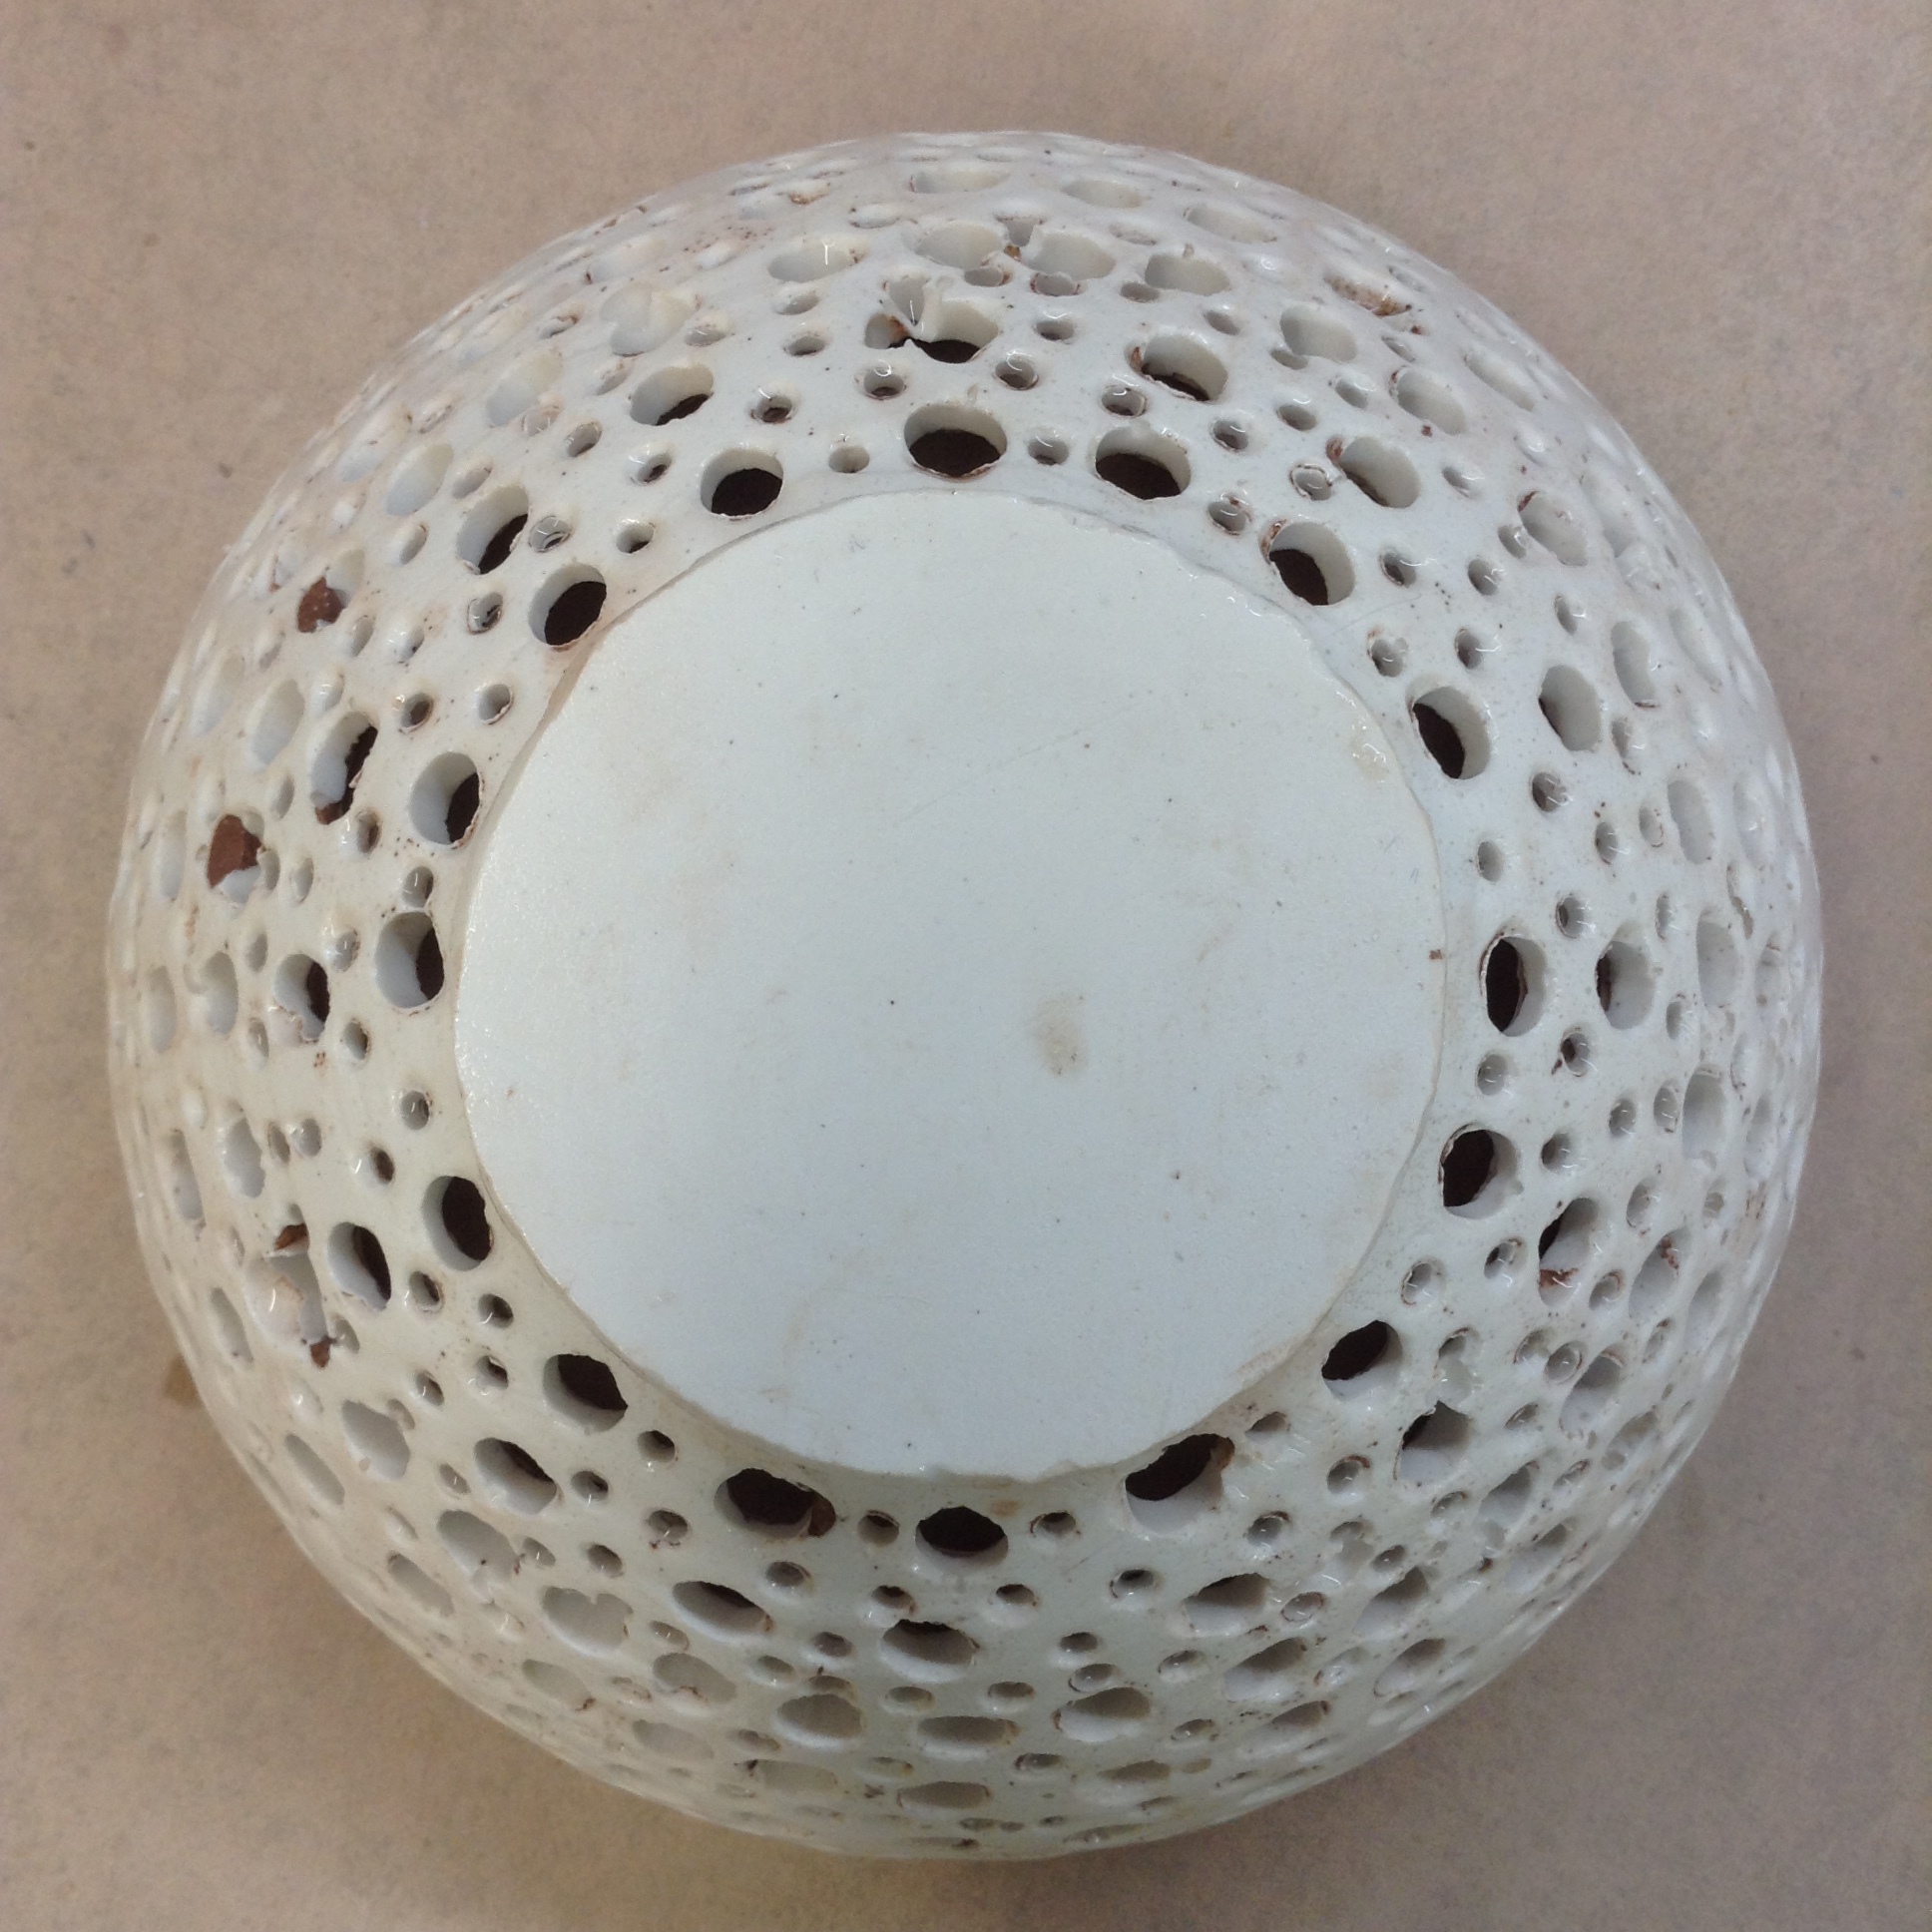
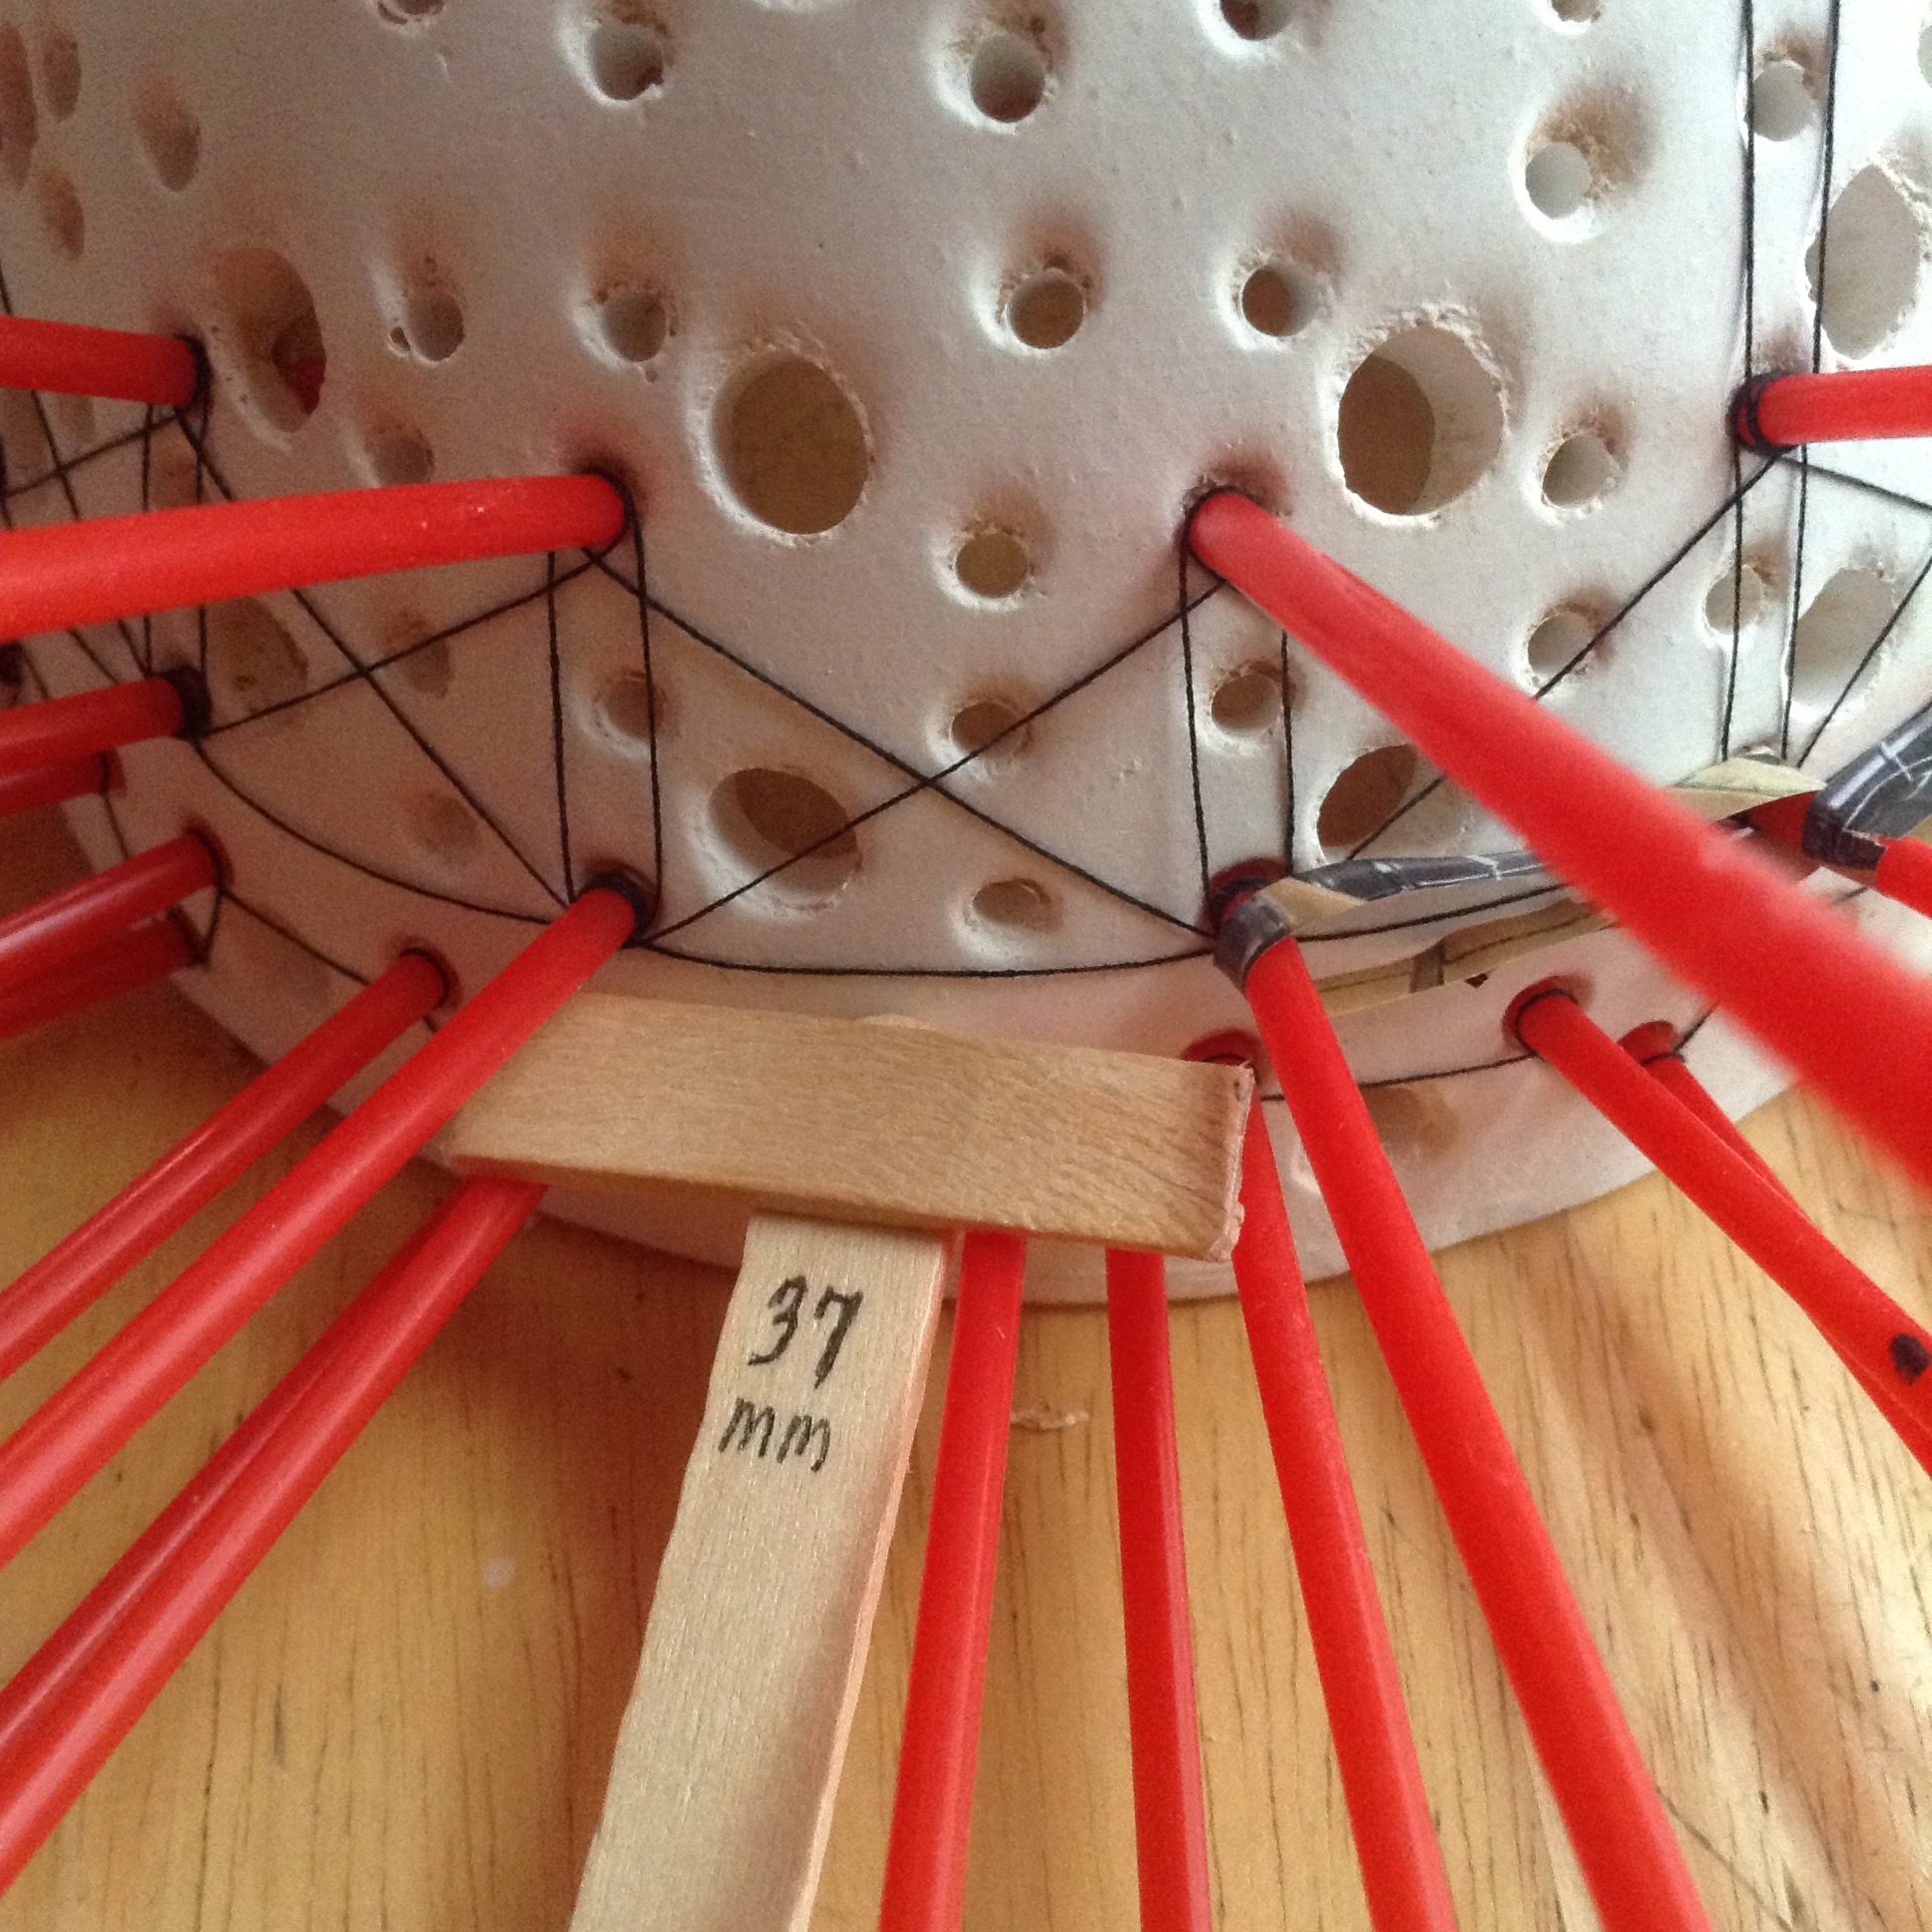
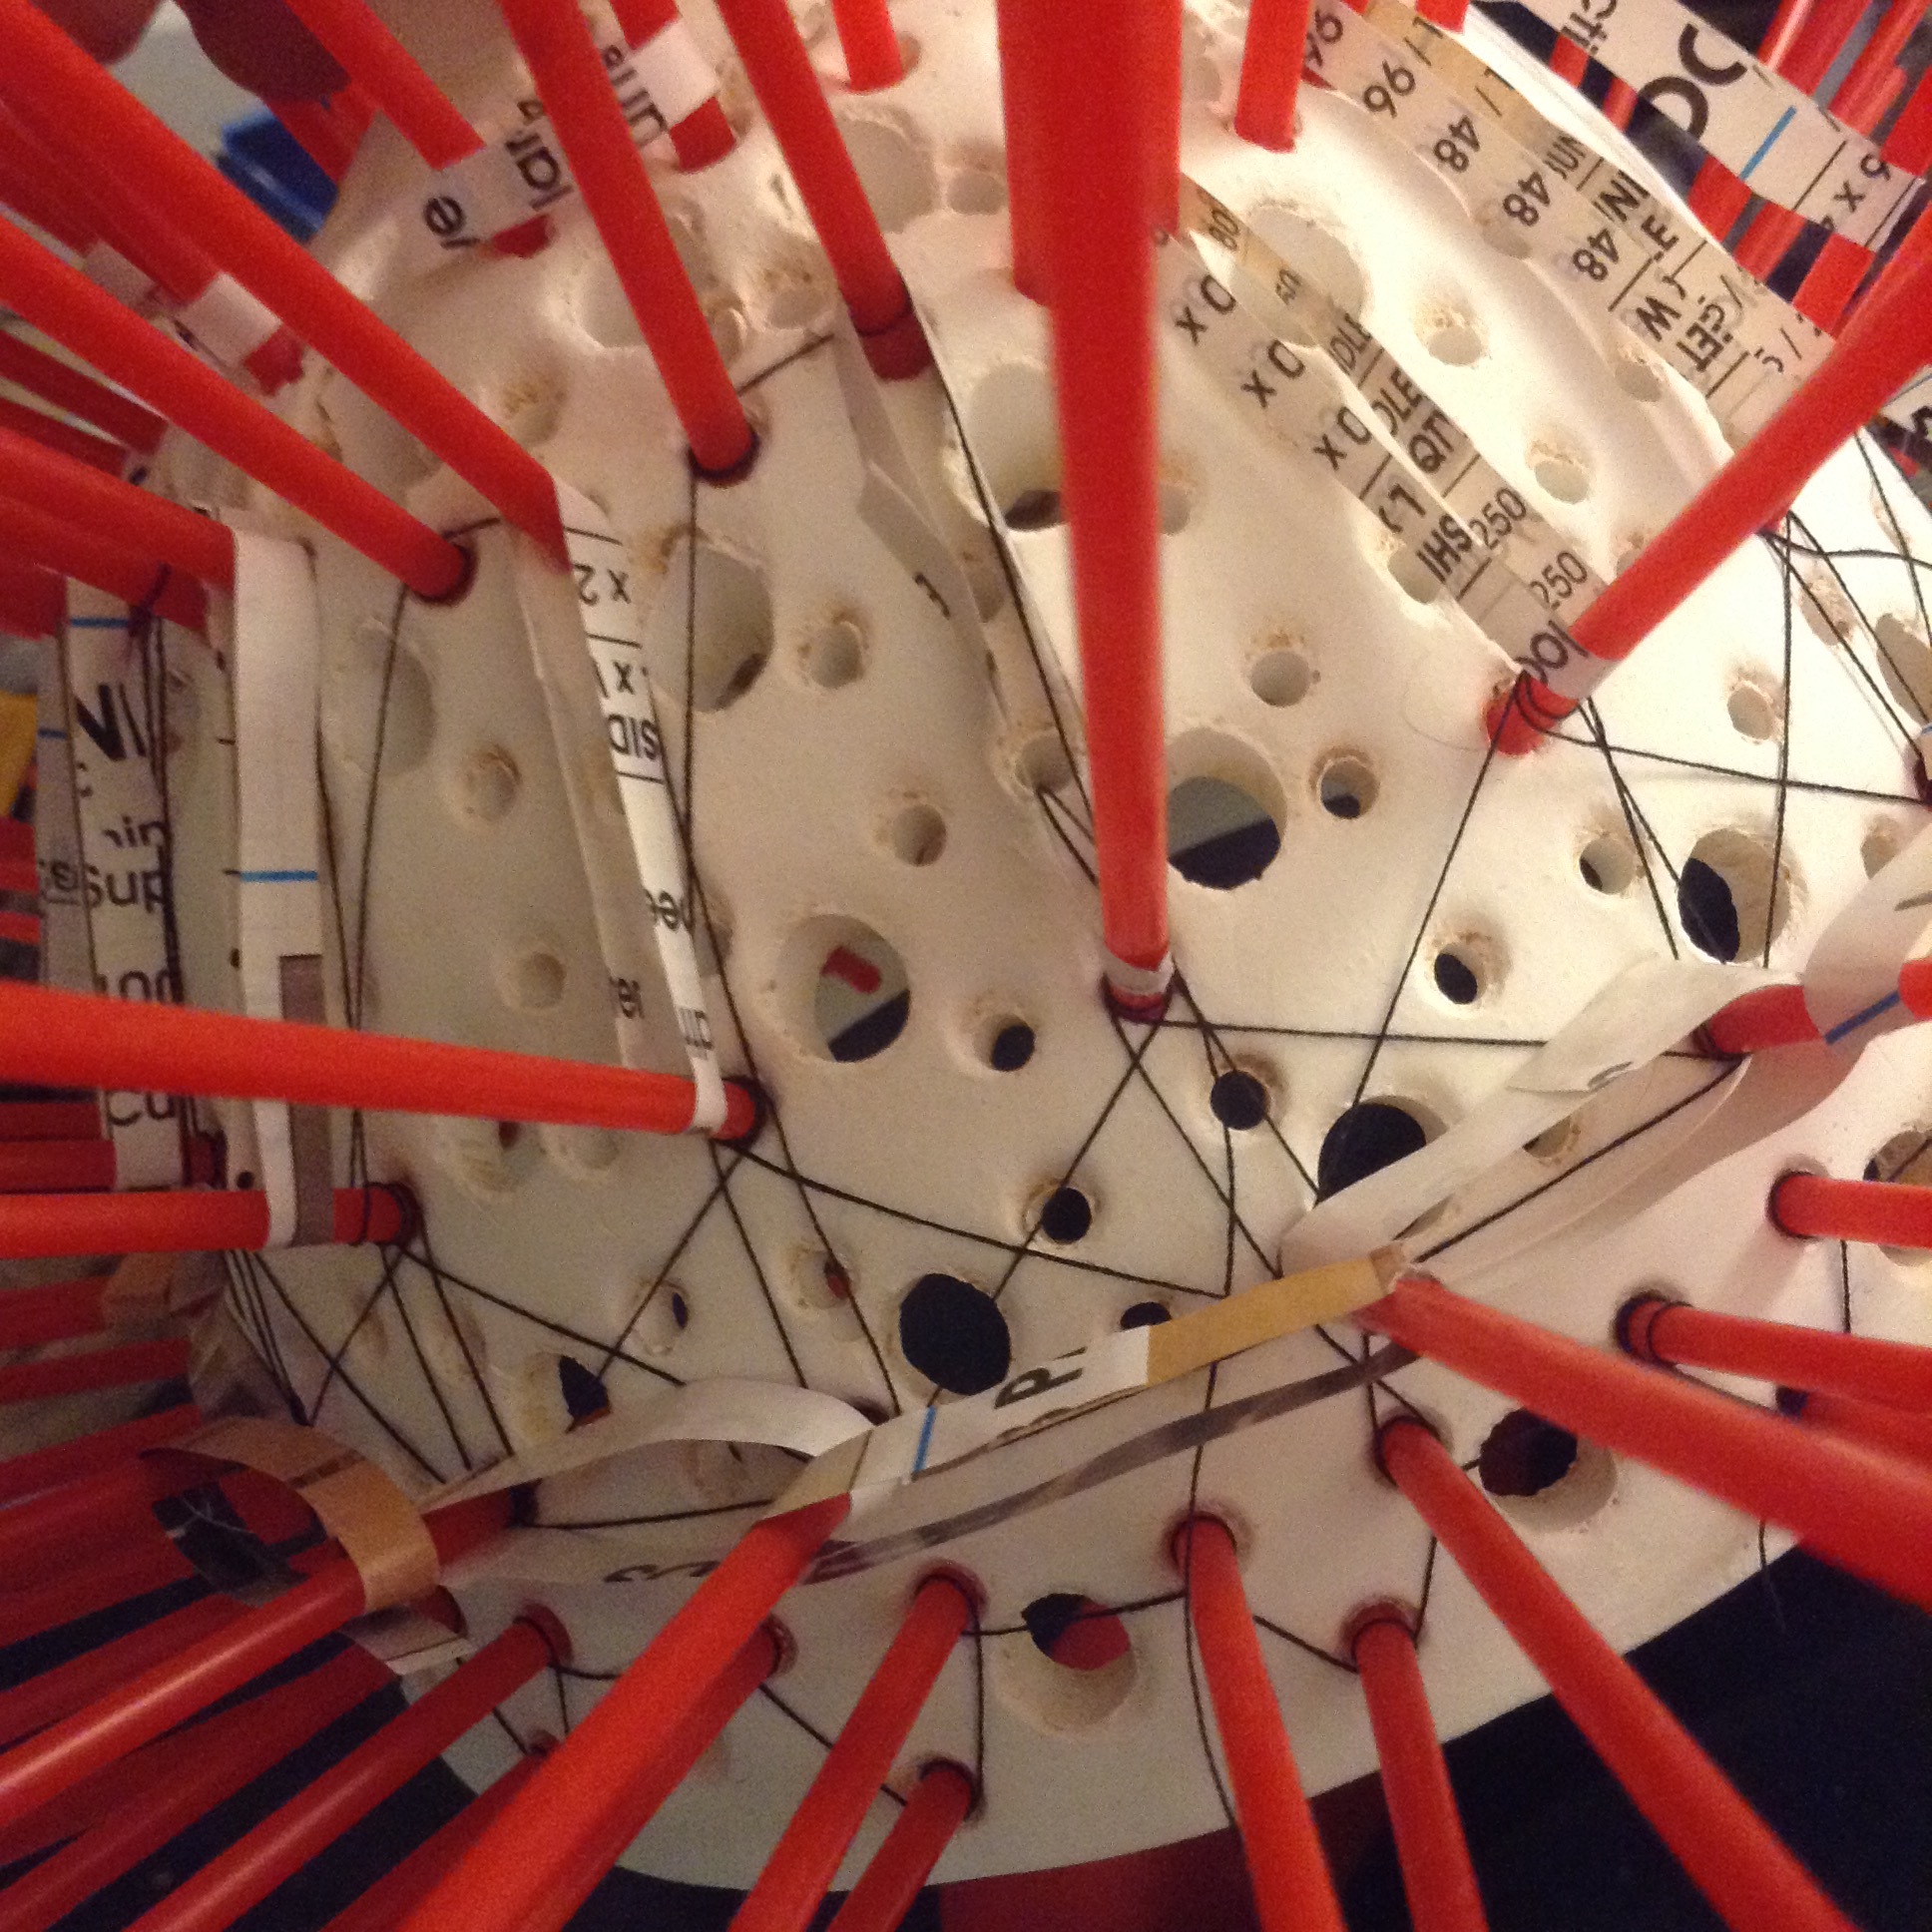
Wet pottery shapes make good temporary vessels for casting plaster. To create holes in the plaster without having a drill press, I'm pushing red plastic straws (coffee stirrers) through the clay wall to poke into the interior. When the plaster is poured, it flows around the rods, leaving those holes later when disassembled. These forms allow me to build string meshes more similar in size to the plaster core shape.
NOTES FOR POTTERS
The fact that I'm stabbing these forms with plastic straws might be irrelevant to your needs, but throwing these forms for plaster filling is easily something you might need. Here are some comments that might help:
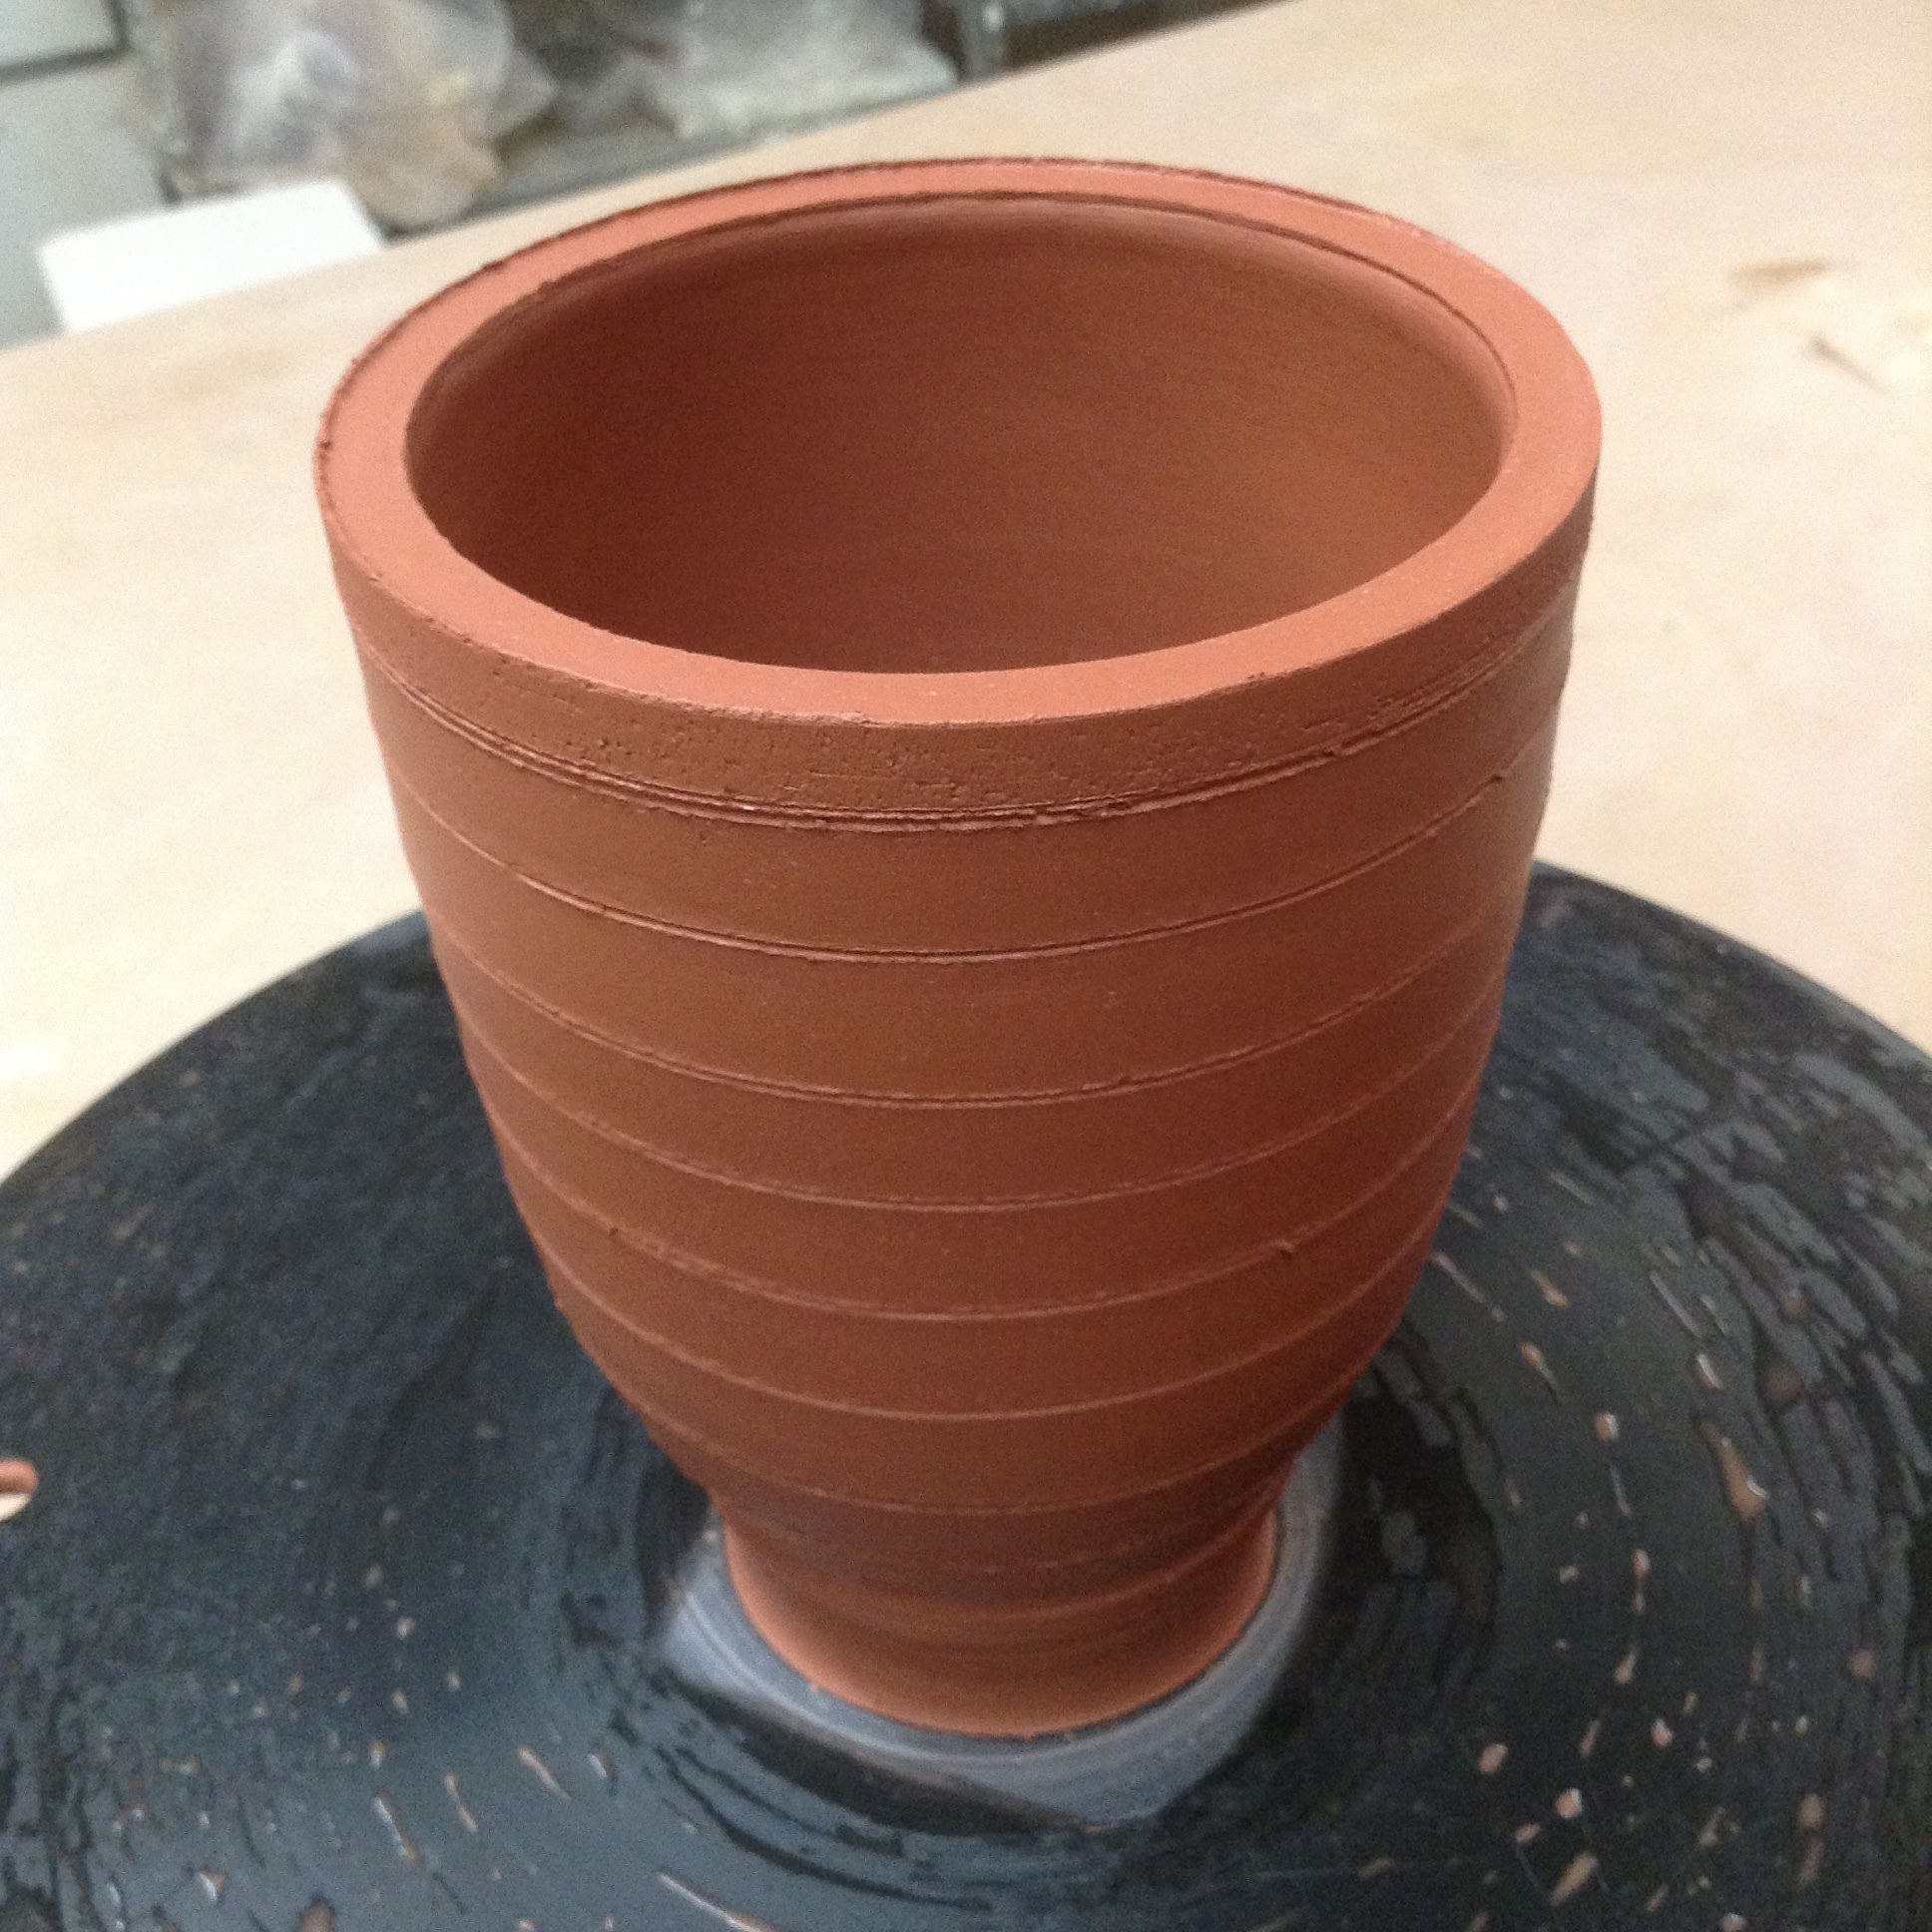
- Think about how much time you have for the project. If you want to throw the forms and pour the plaster within a few hours' time, throw with as stiff a clay as you can manage, so that you don't worry that the weight and water content of the plaster doesn't collapse your form before the plaster sets harder.
- For more leisurely timing across a number of days, throw with any clay you can handle, let the forms get to leather hard on their own. Make sure that tall, narrow forms get to the late leather-hard stage for stability.
- Use a flexible rib on the interior of the outer form, and on the outside of the inner form, to remove water, slip, throwing lines, and to refine the shape, if that's a priority for you. Freshly thrown clay, especially if wide of design, and made of really floppy clay, might collapse under the weight of the plaster. For the double wall form, where both forms are connected by their rims to the throwing surface, shape distortion is less of an issue.
- Check to see whether the rim of your forms are level. It will be convenient if the rim is parallel to the table surface where you'll be pouring the plaster. Use a cutting tool to trim off any extra height wobble the thrown piece may have. This will allow you to fill the entire for with plaster.
- It will be very convenient if the rim of the outer form is flared slightly when made. This flare flattens against the base surface, which can then be flattened and sealed with your fingers.
- Don't make the walls thinner than about the thickness of your pinky finger. This shouldn't give you too much trouble throwing, and will still be stable enough to support the weight of the plaster.
- Try smaller shapes first, possibly setting up two or three. Then when you mix the plaster, you can fill all the molds at once.
SOLID PLASTER FORMS FROM SIMPLE THROWN SHAPES
Here are videos of the pouring plaster, and of the dismantling of the plaster after it has hardened.

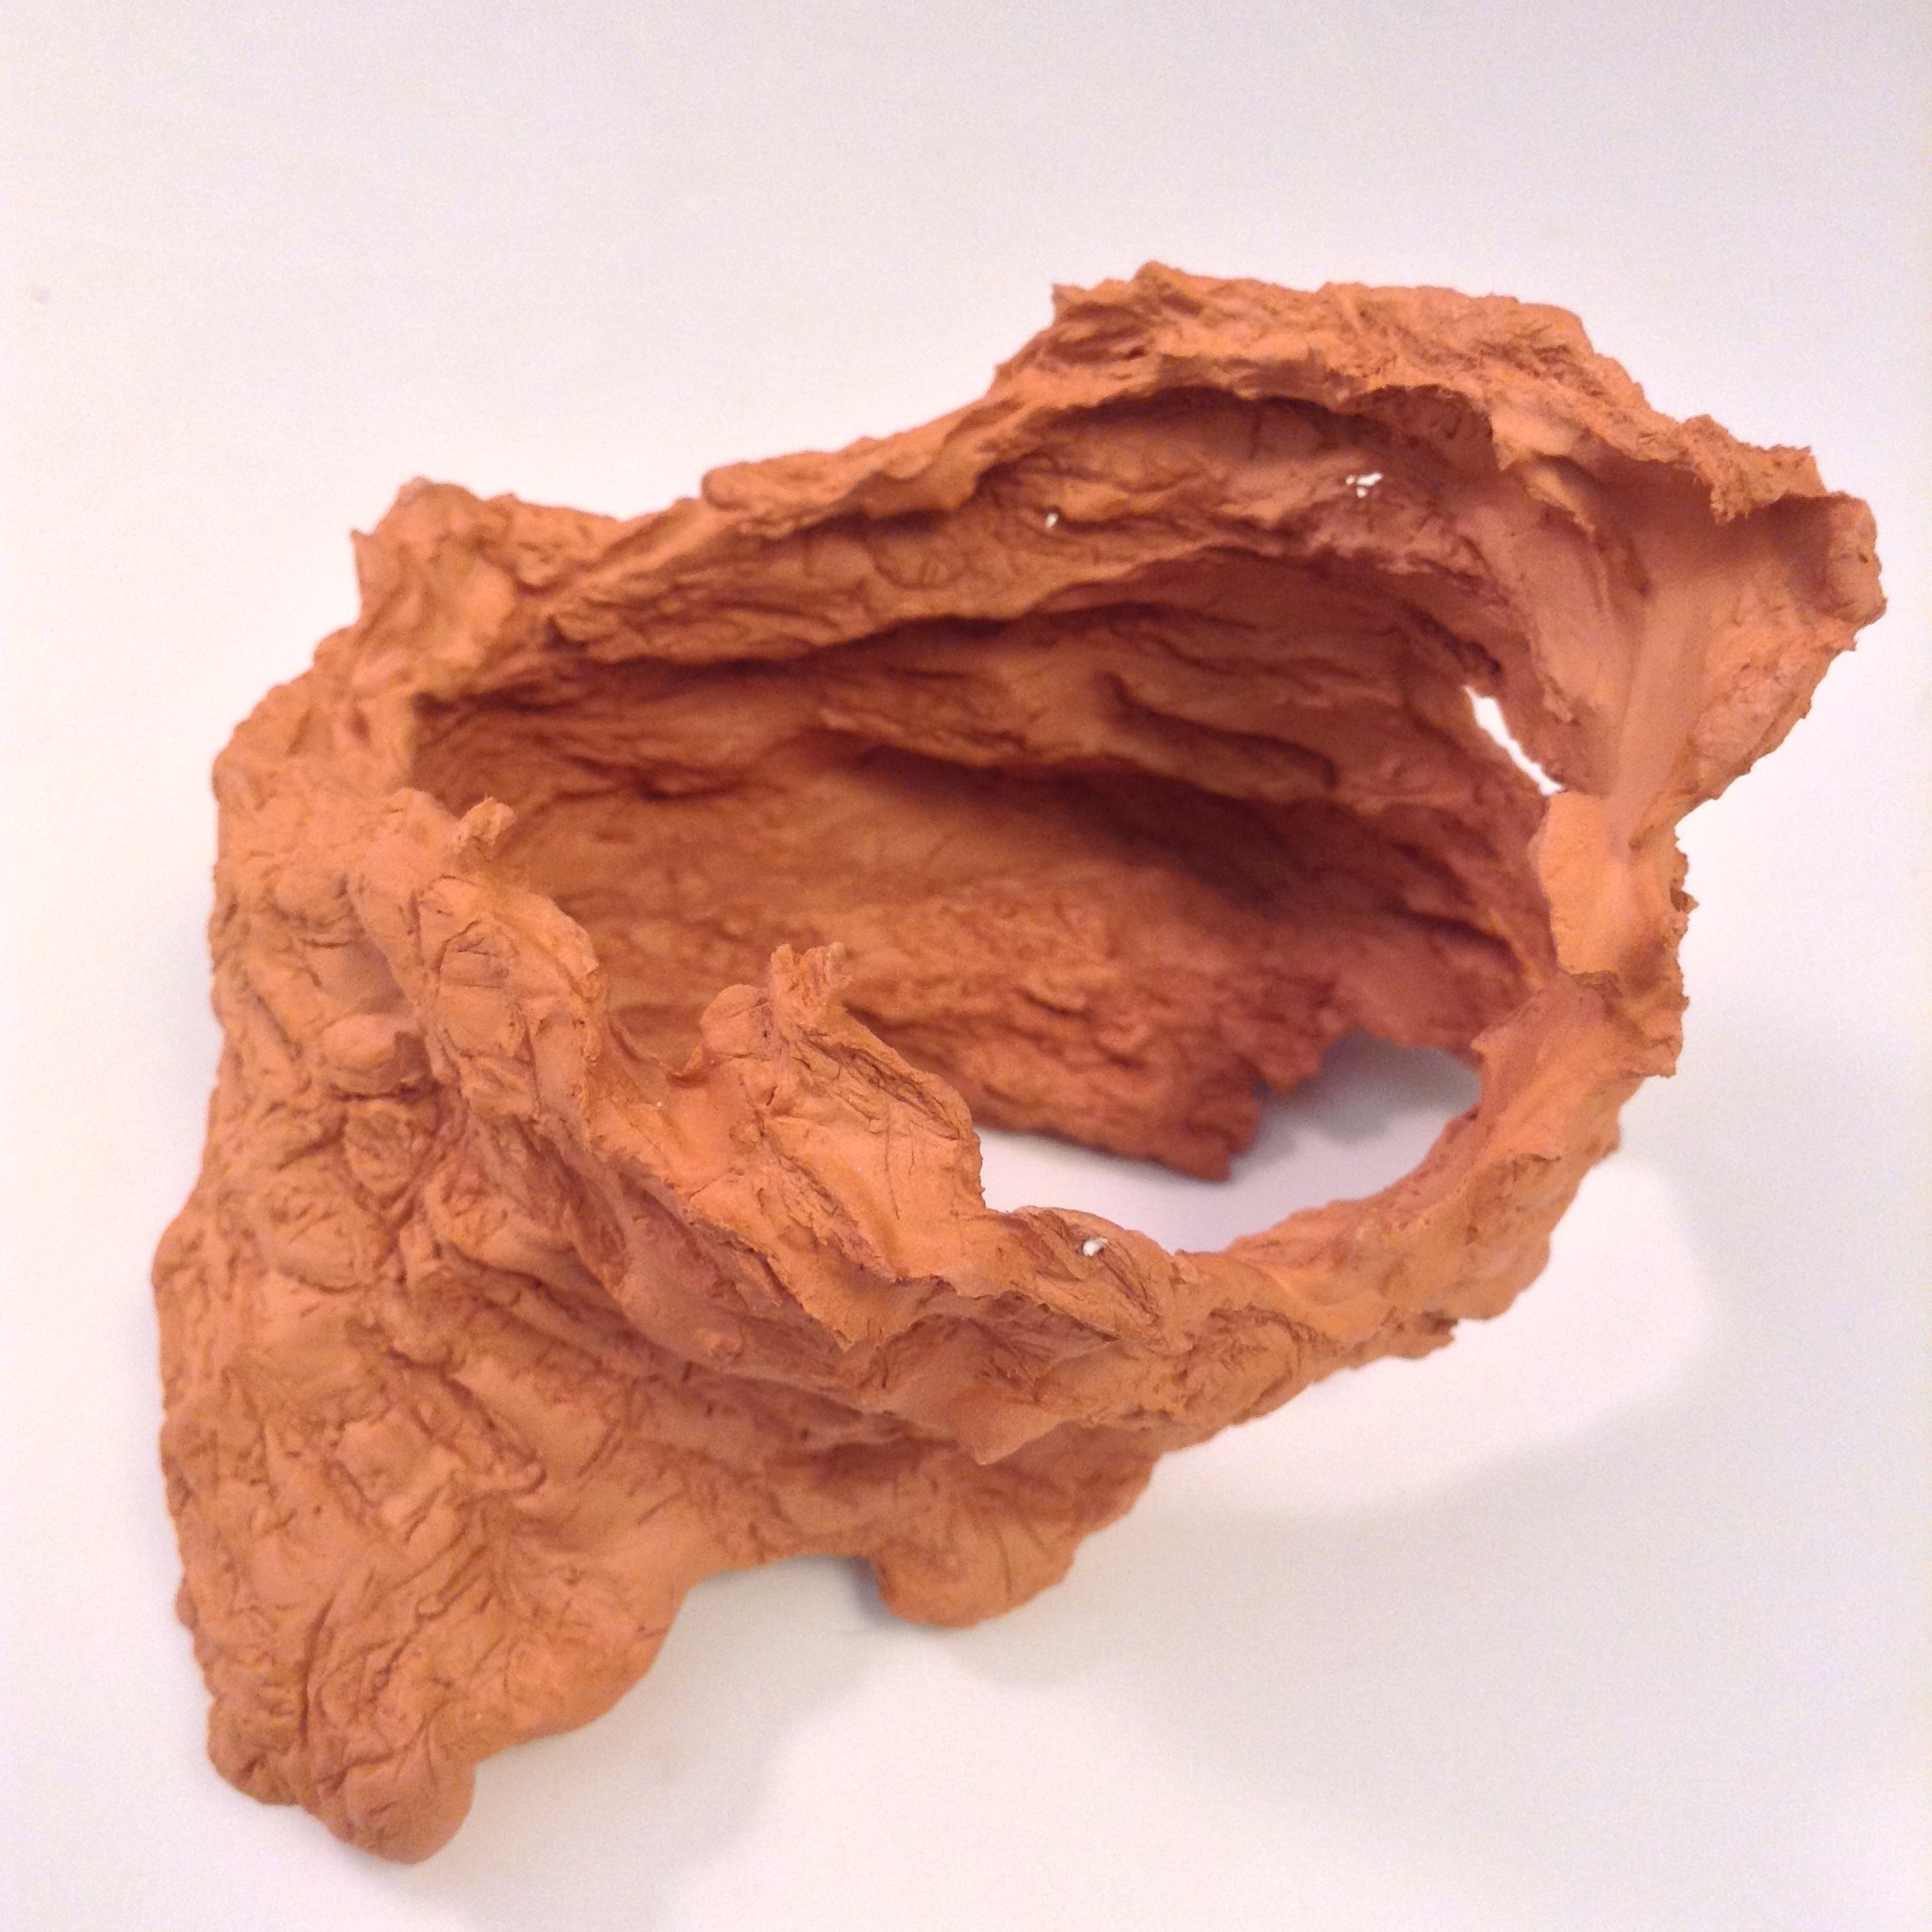
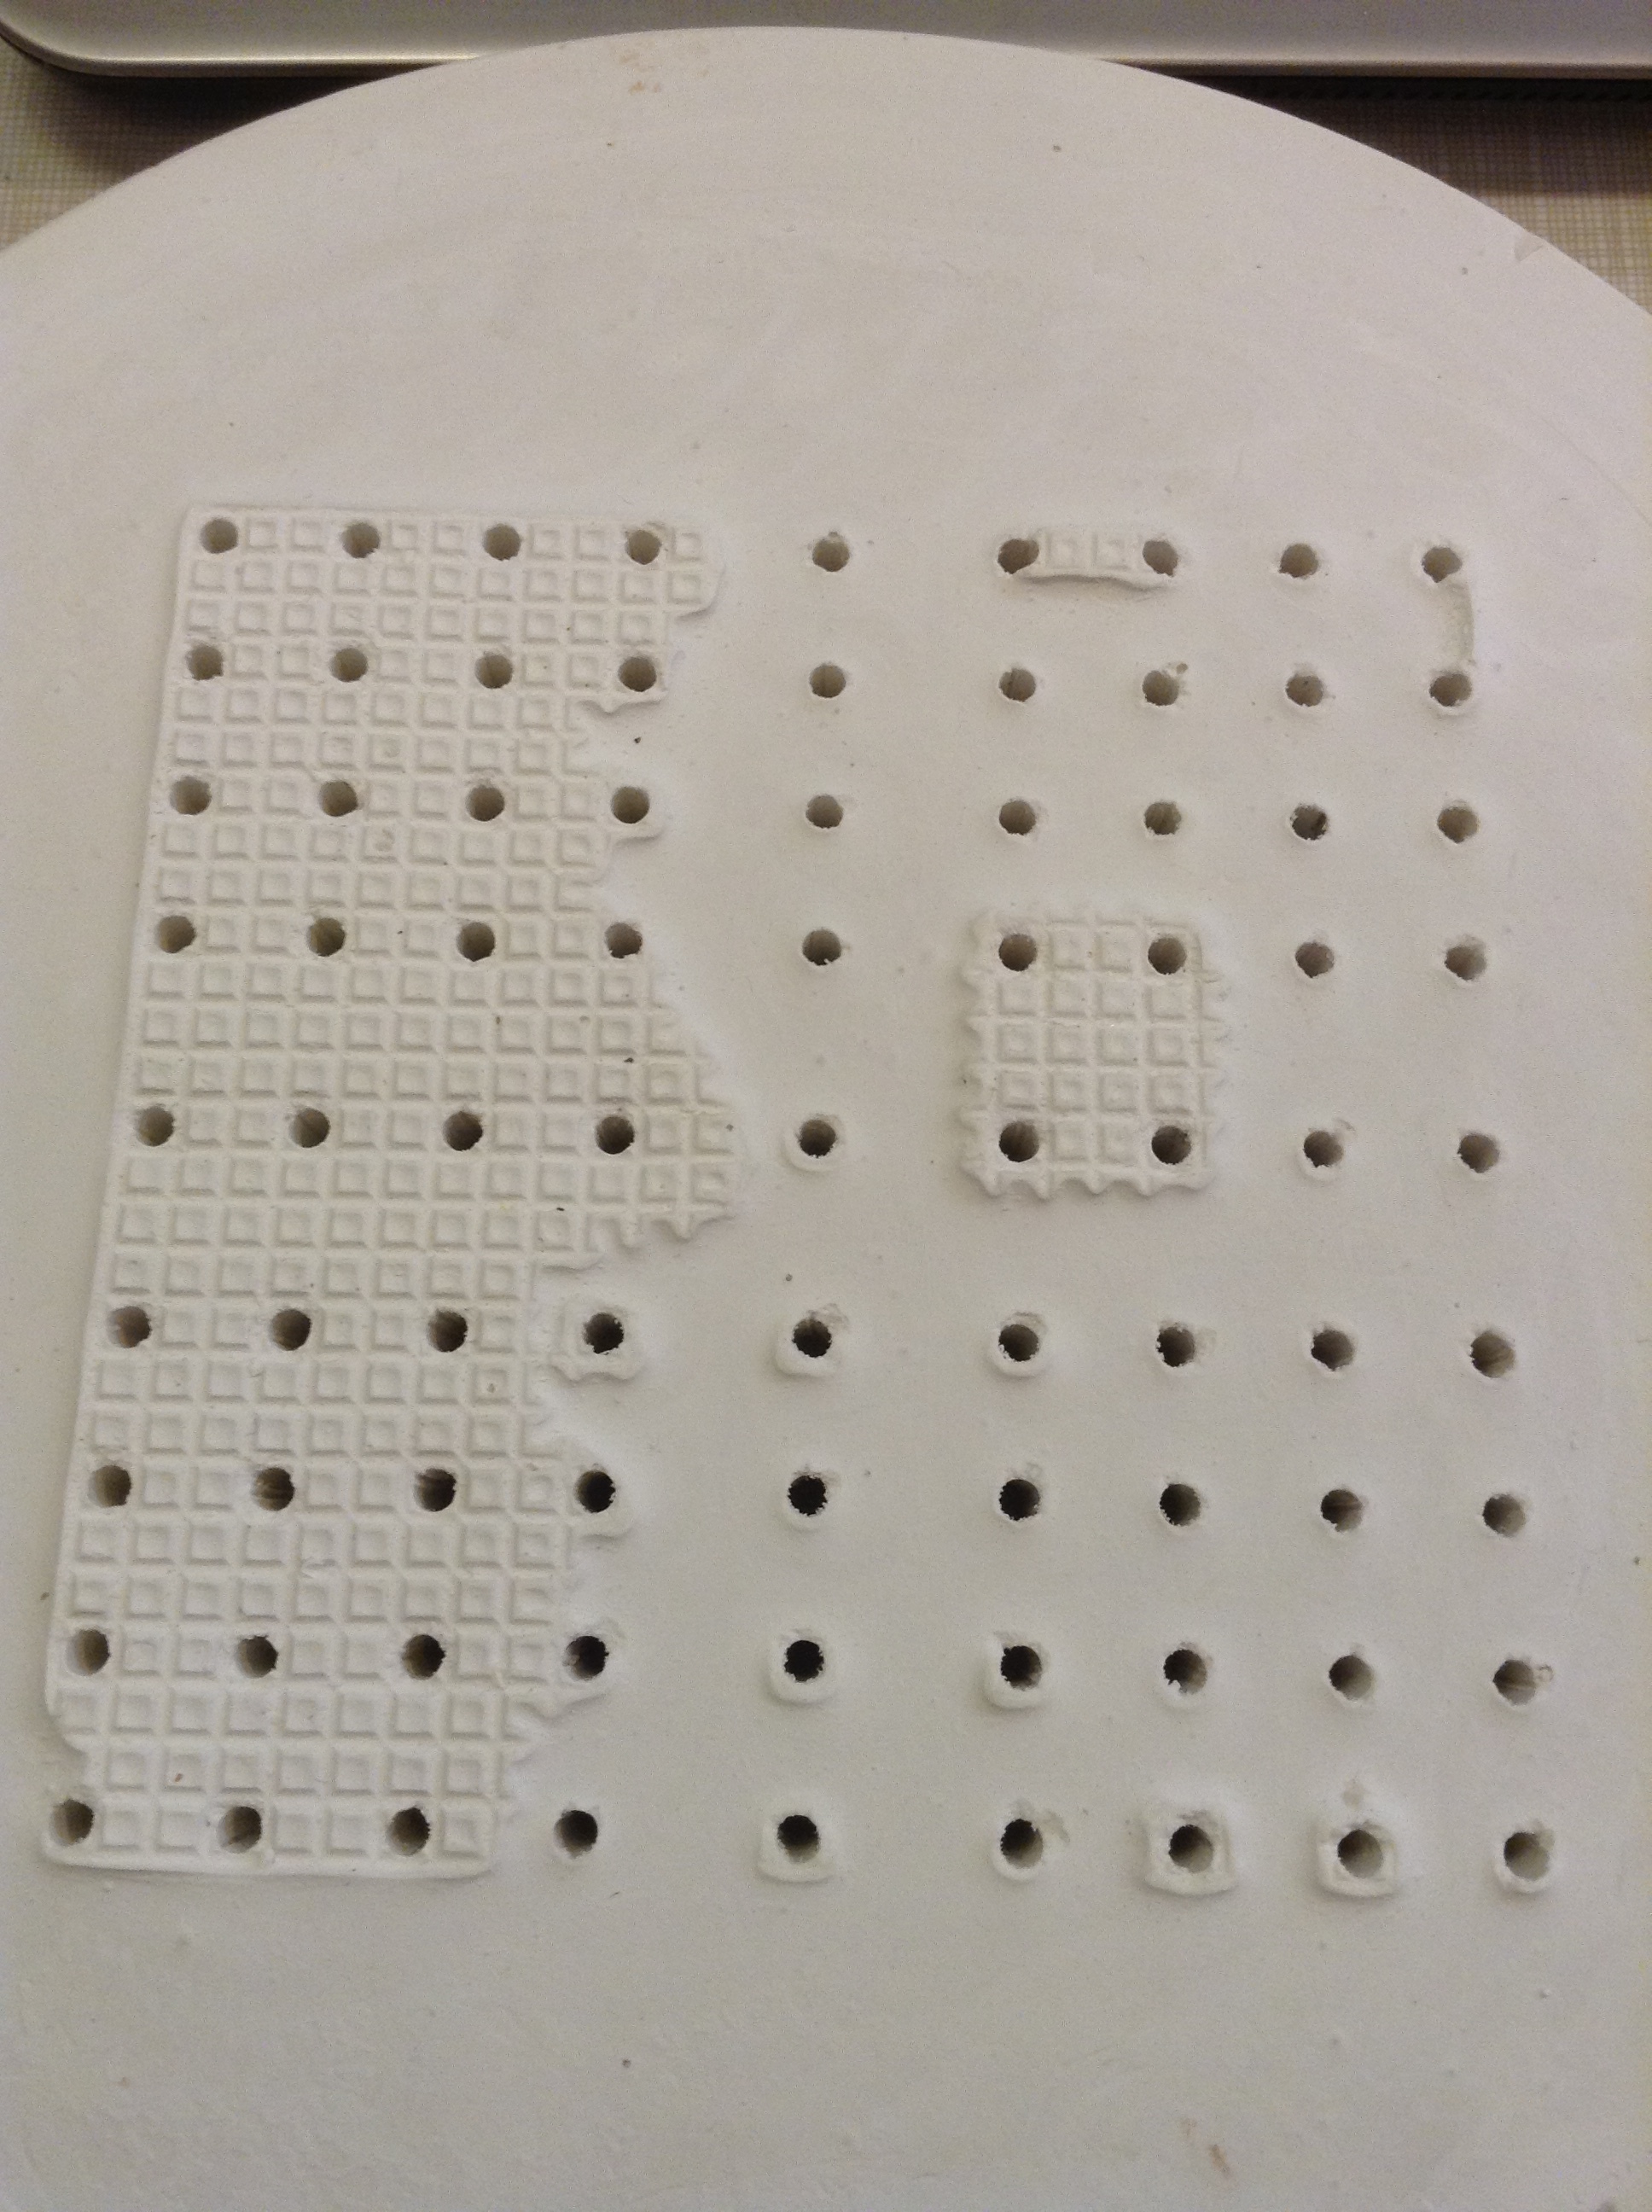
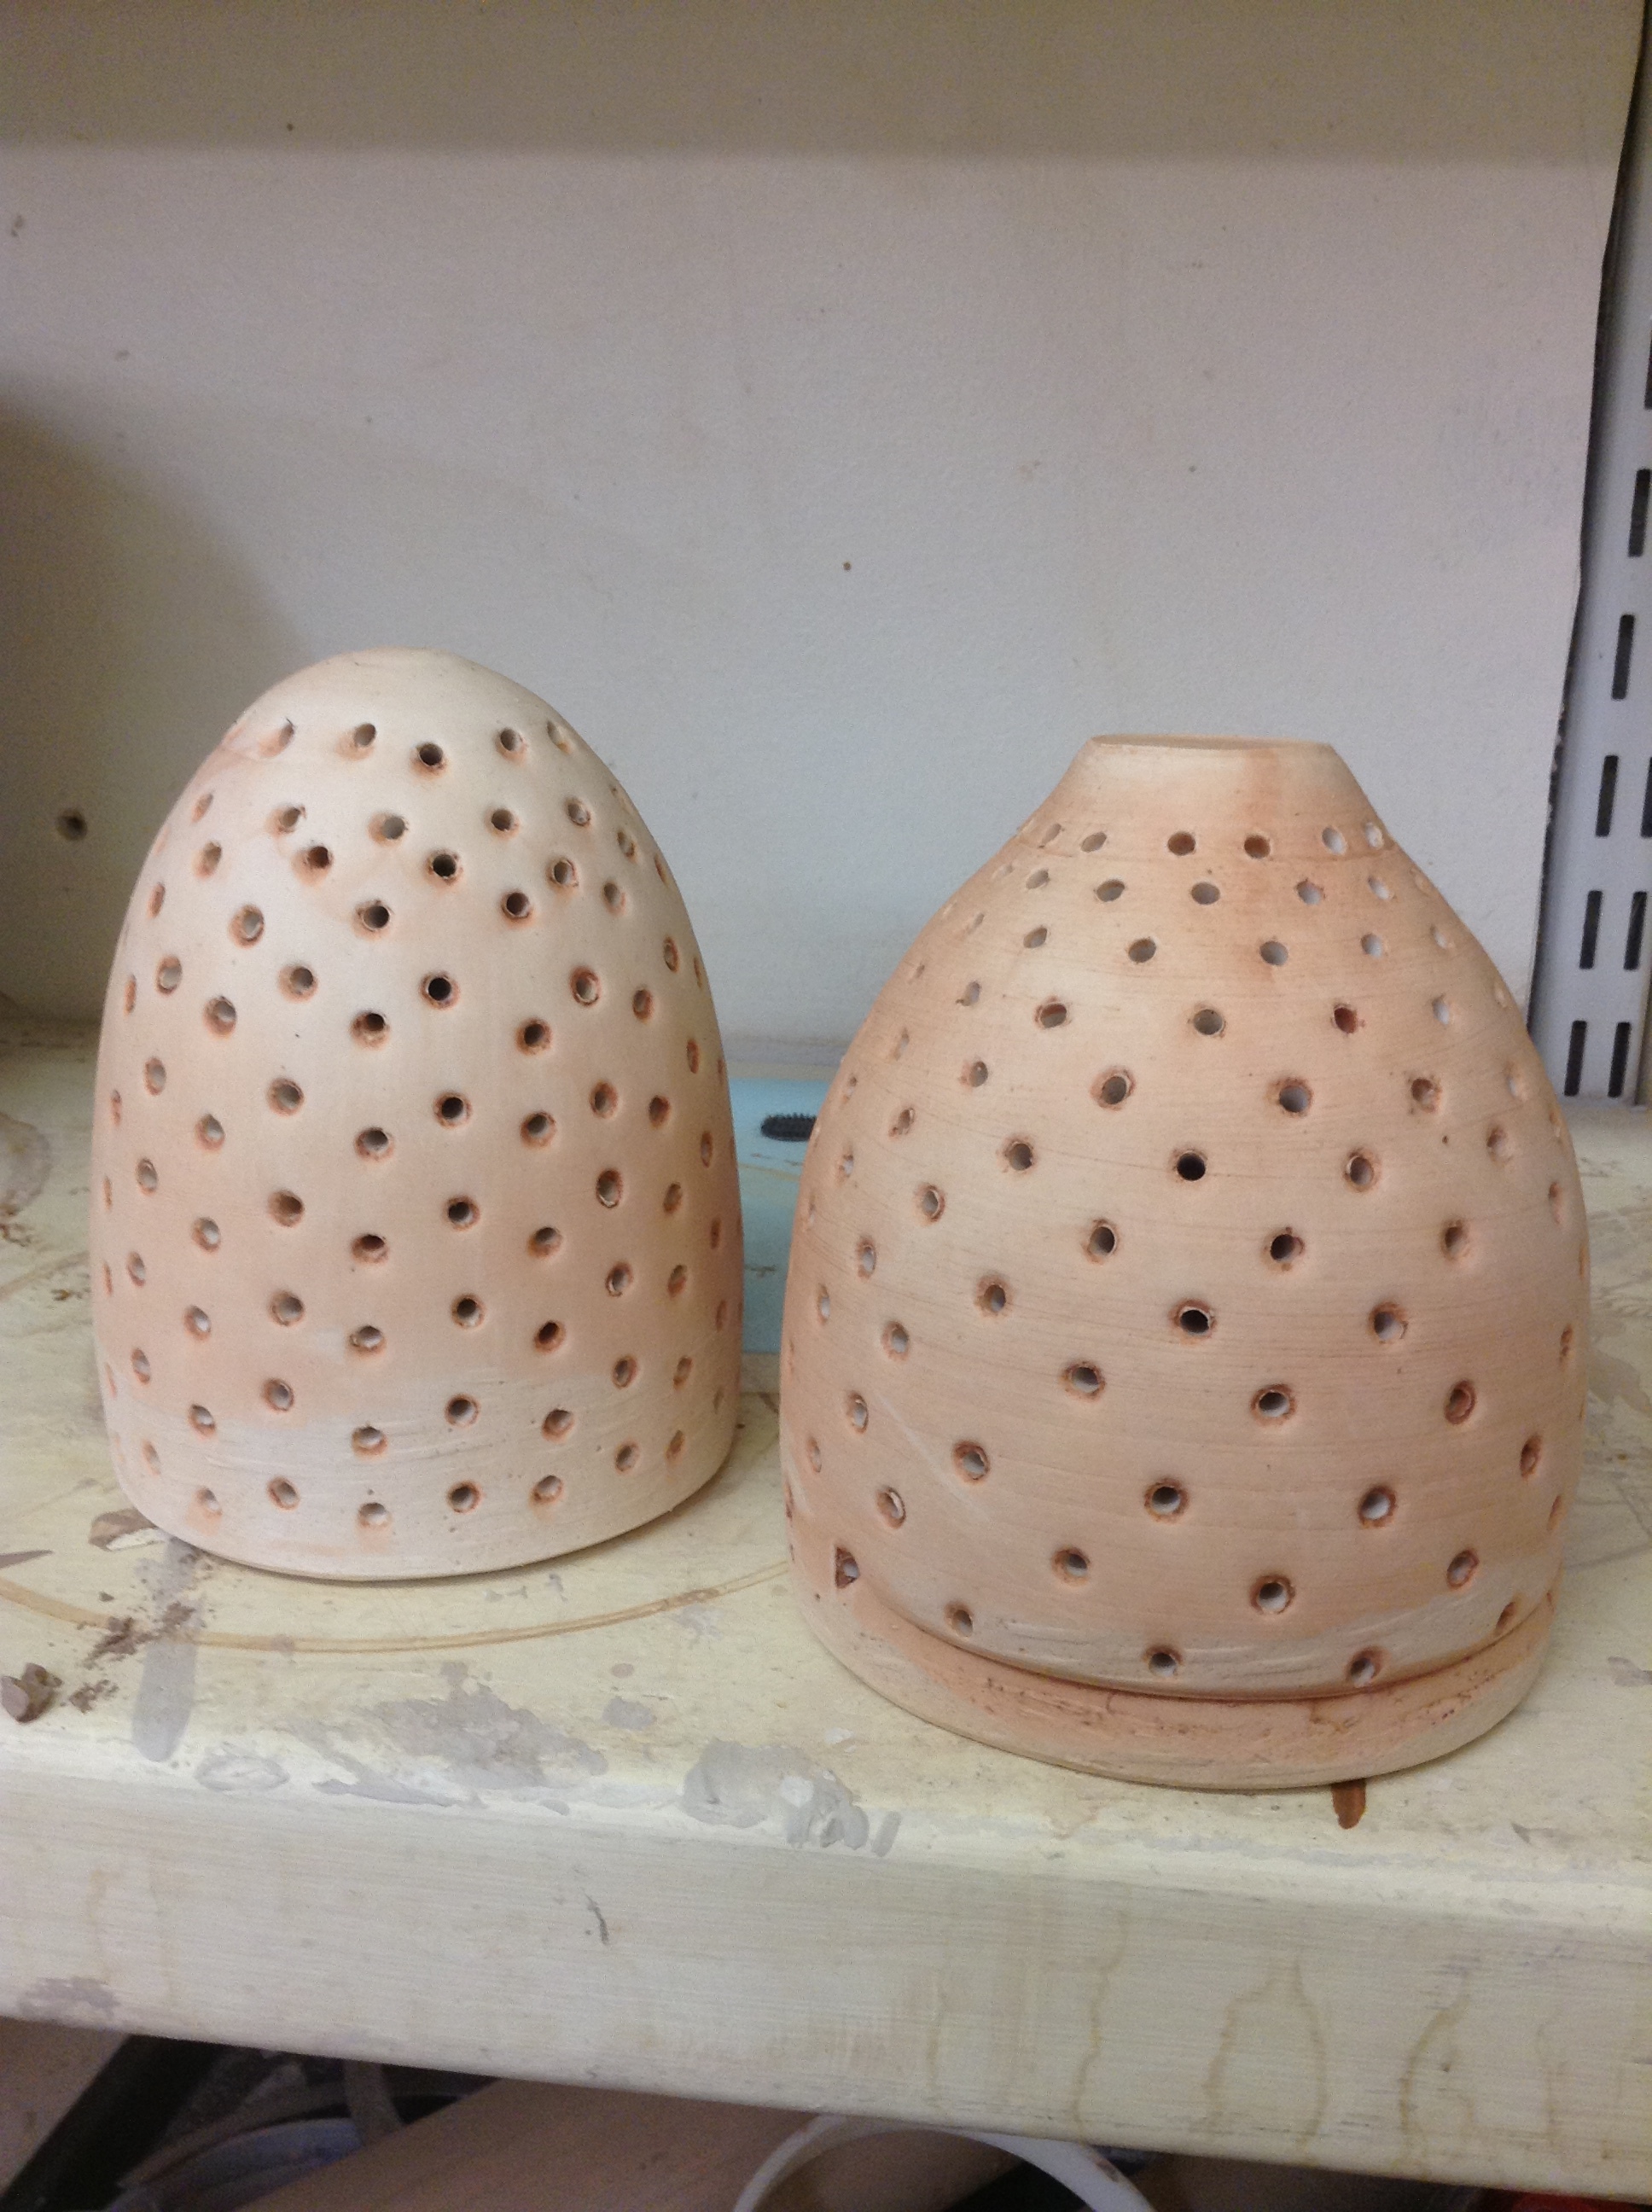
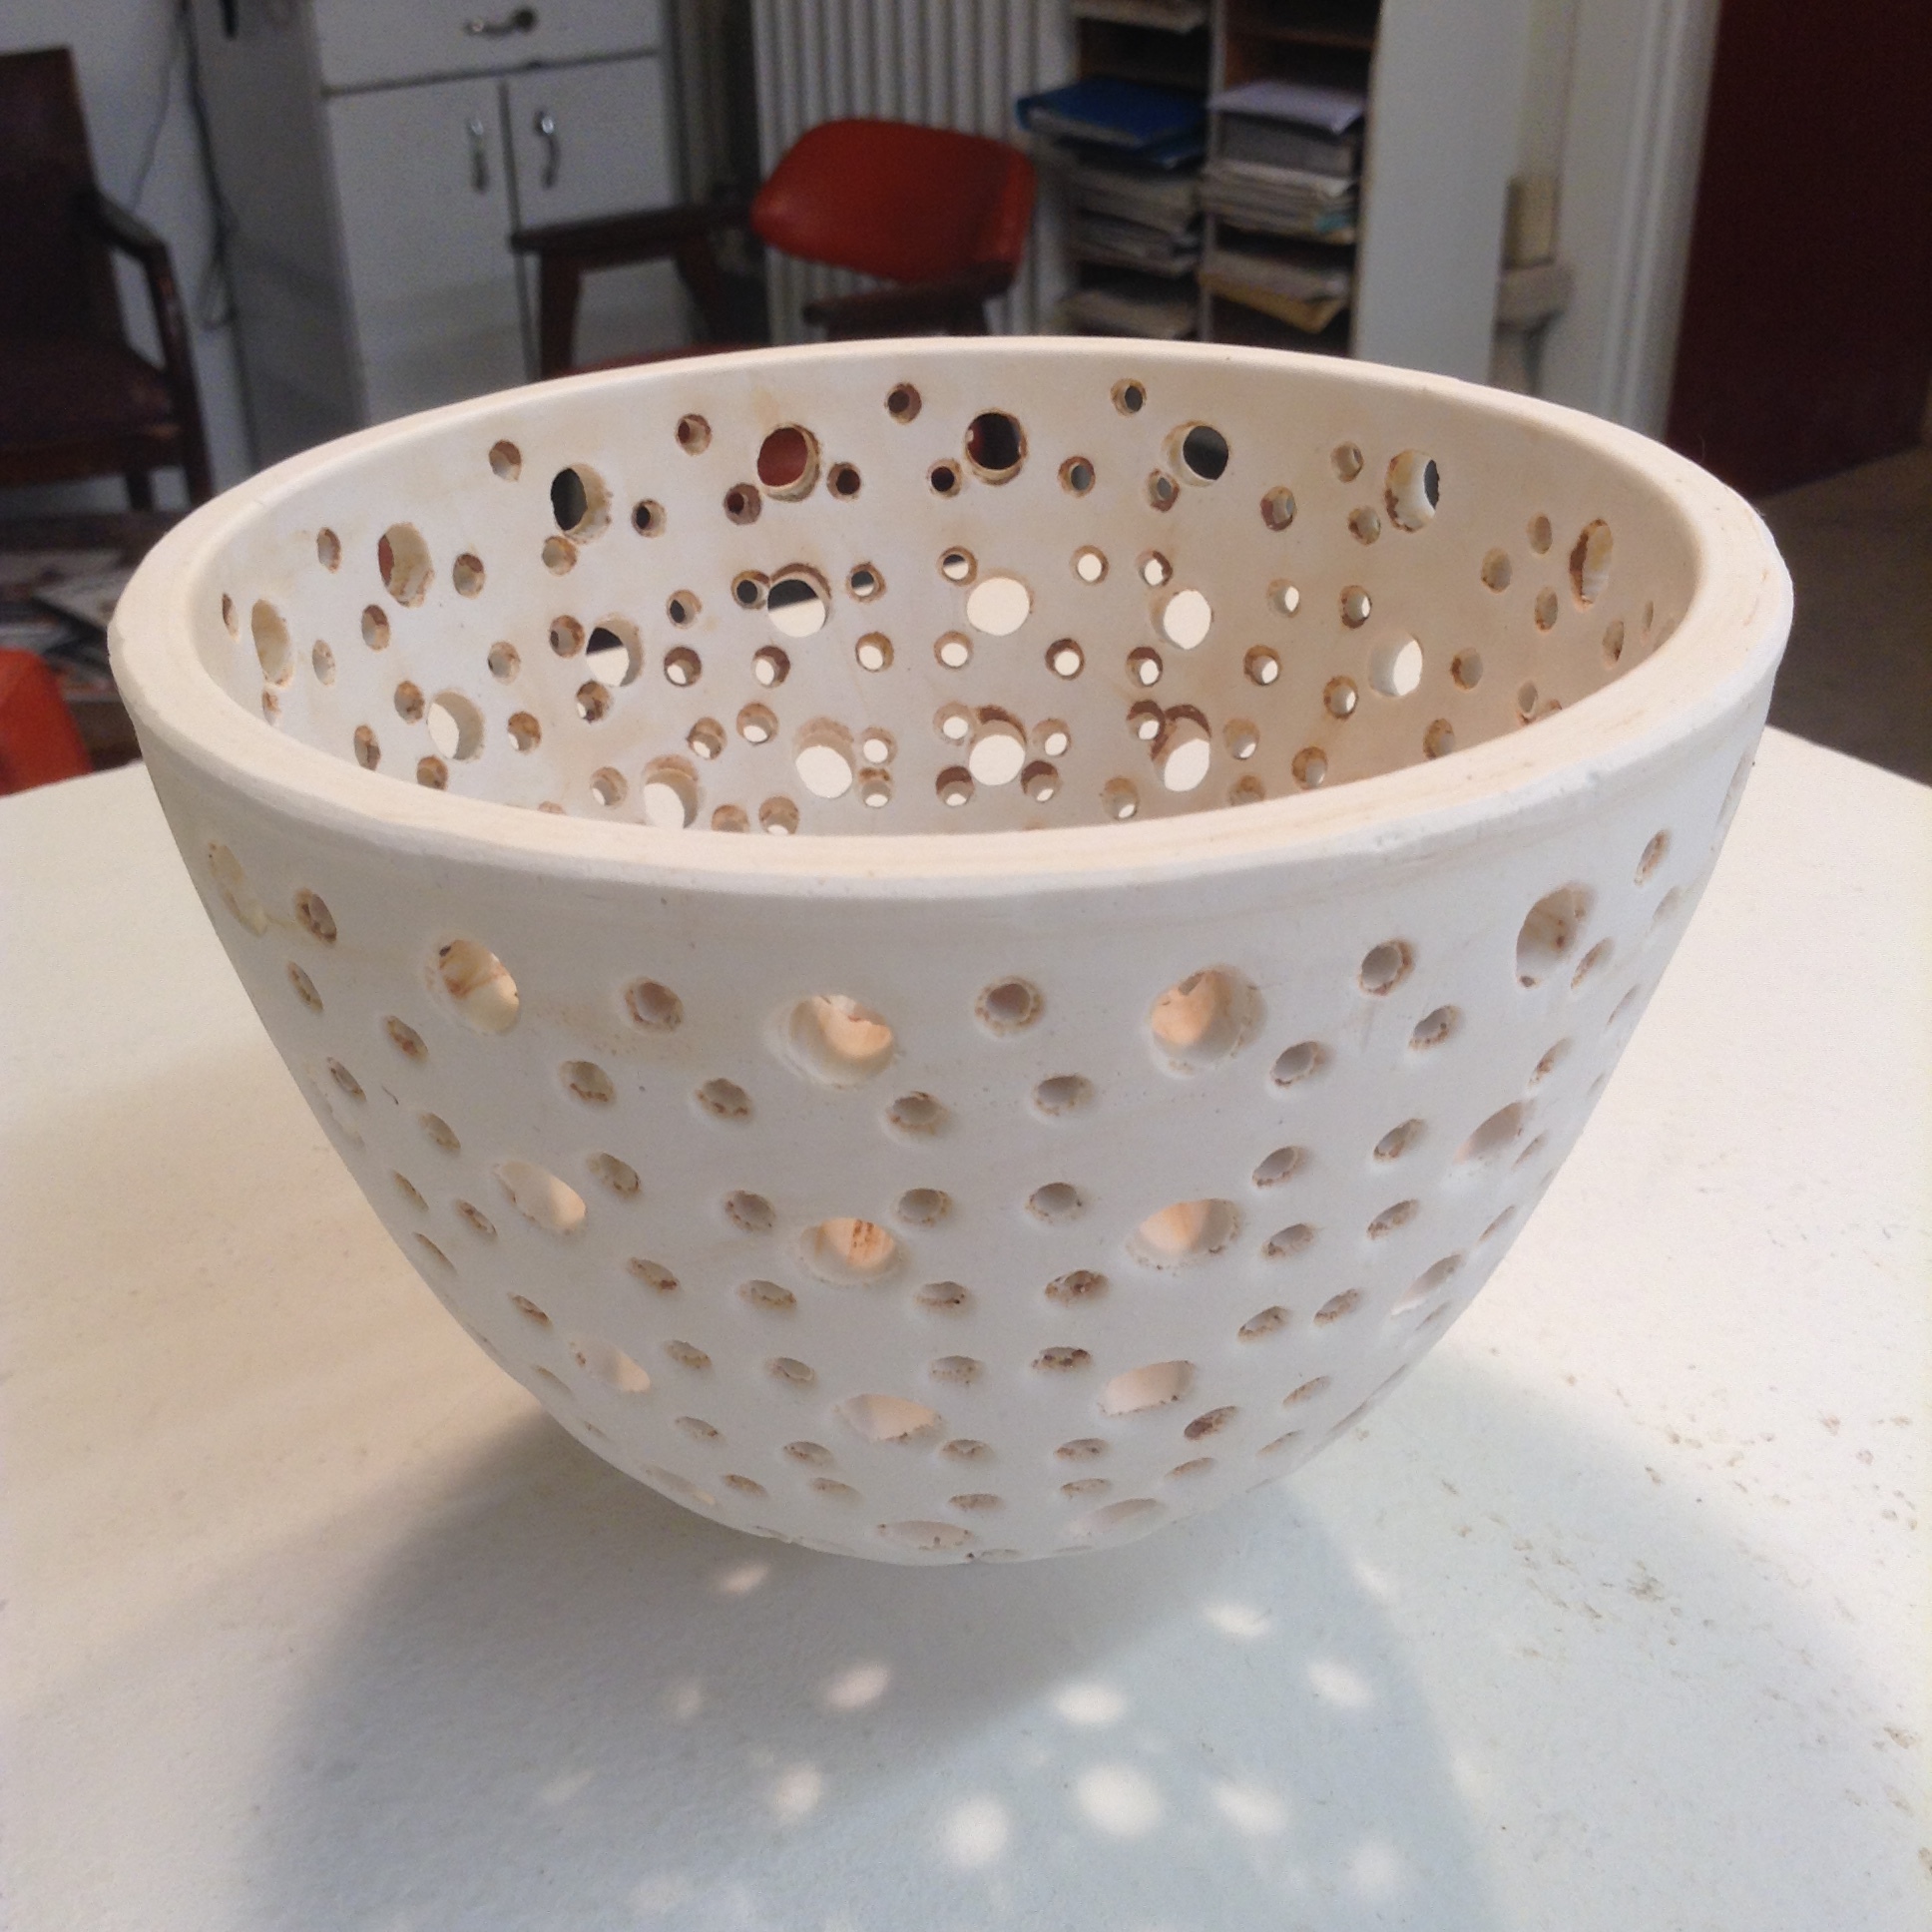
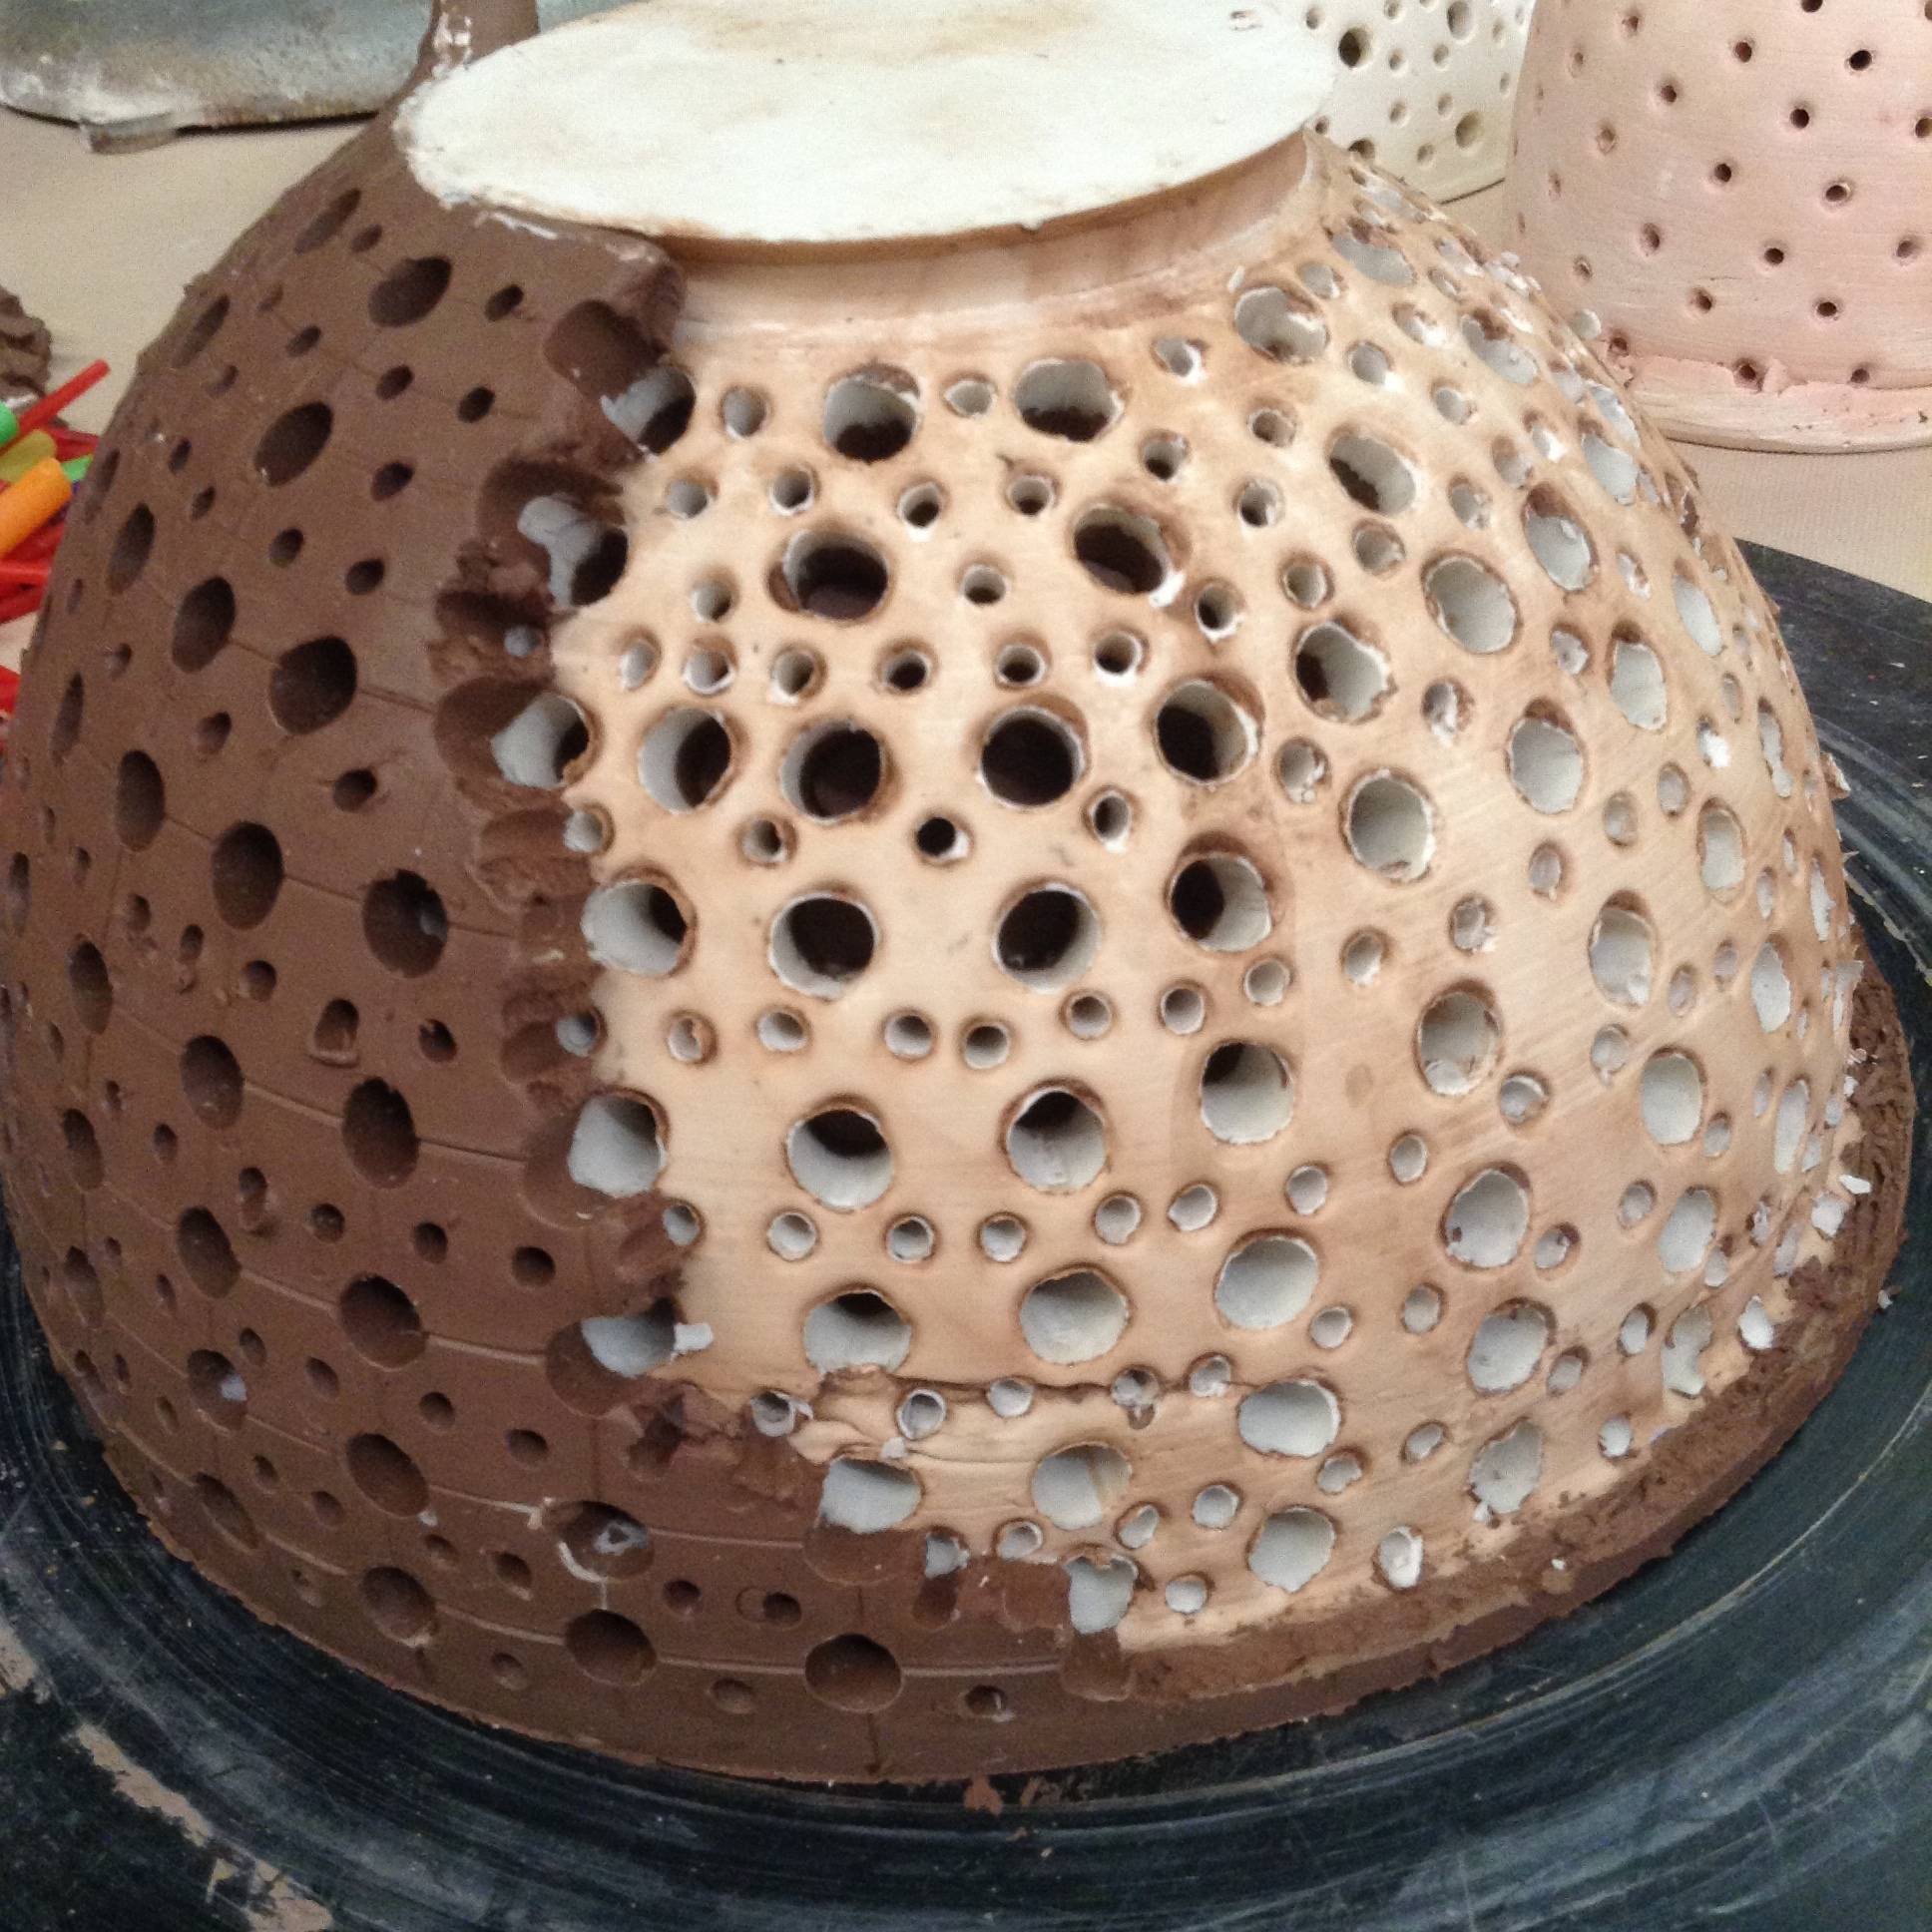
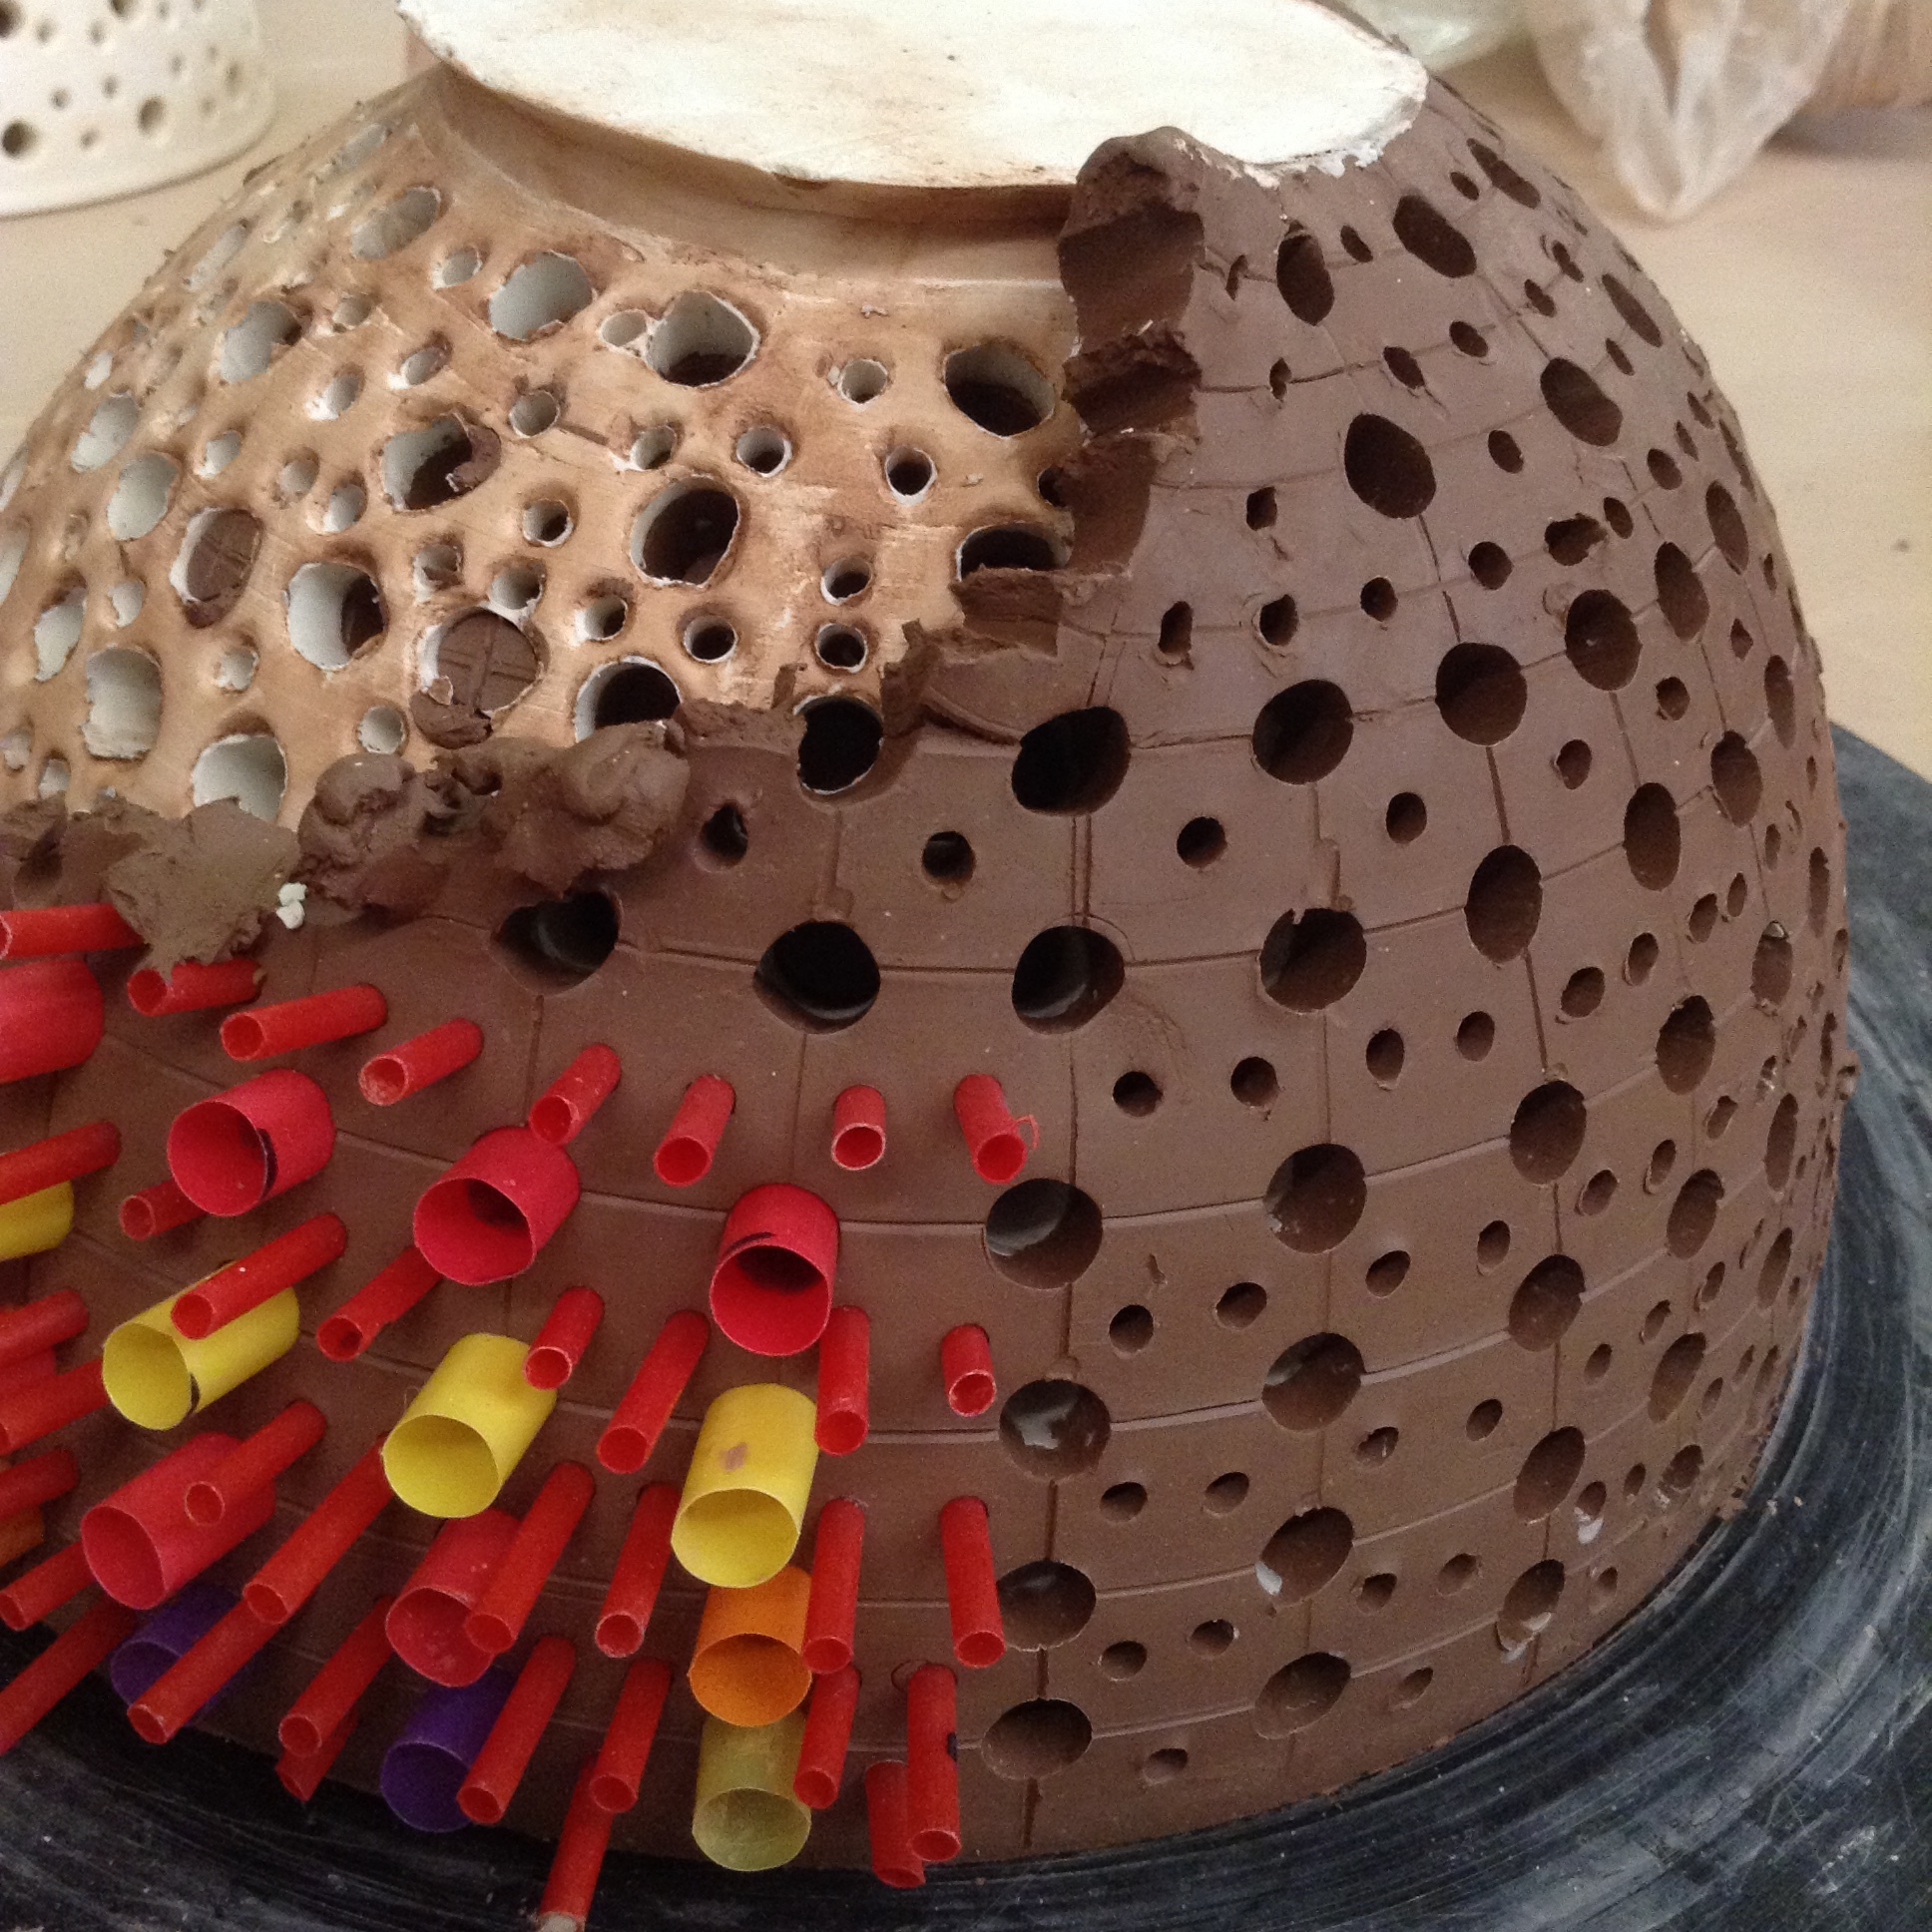
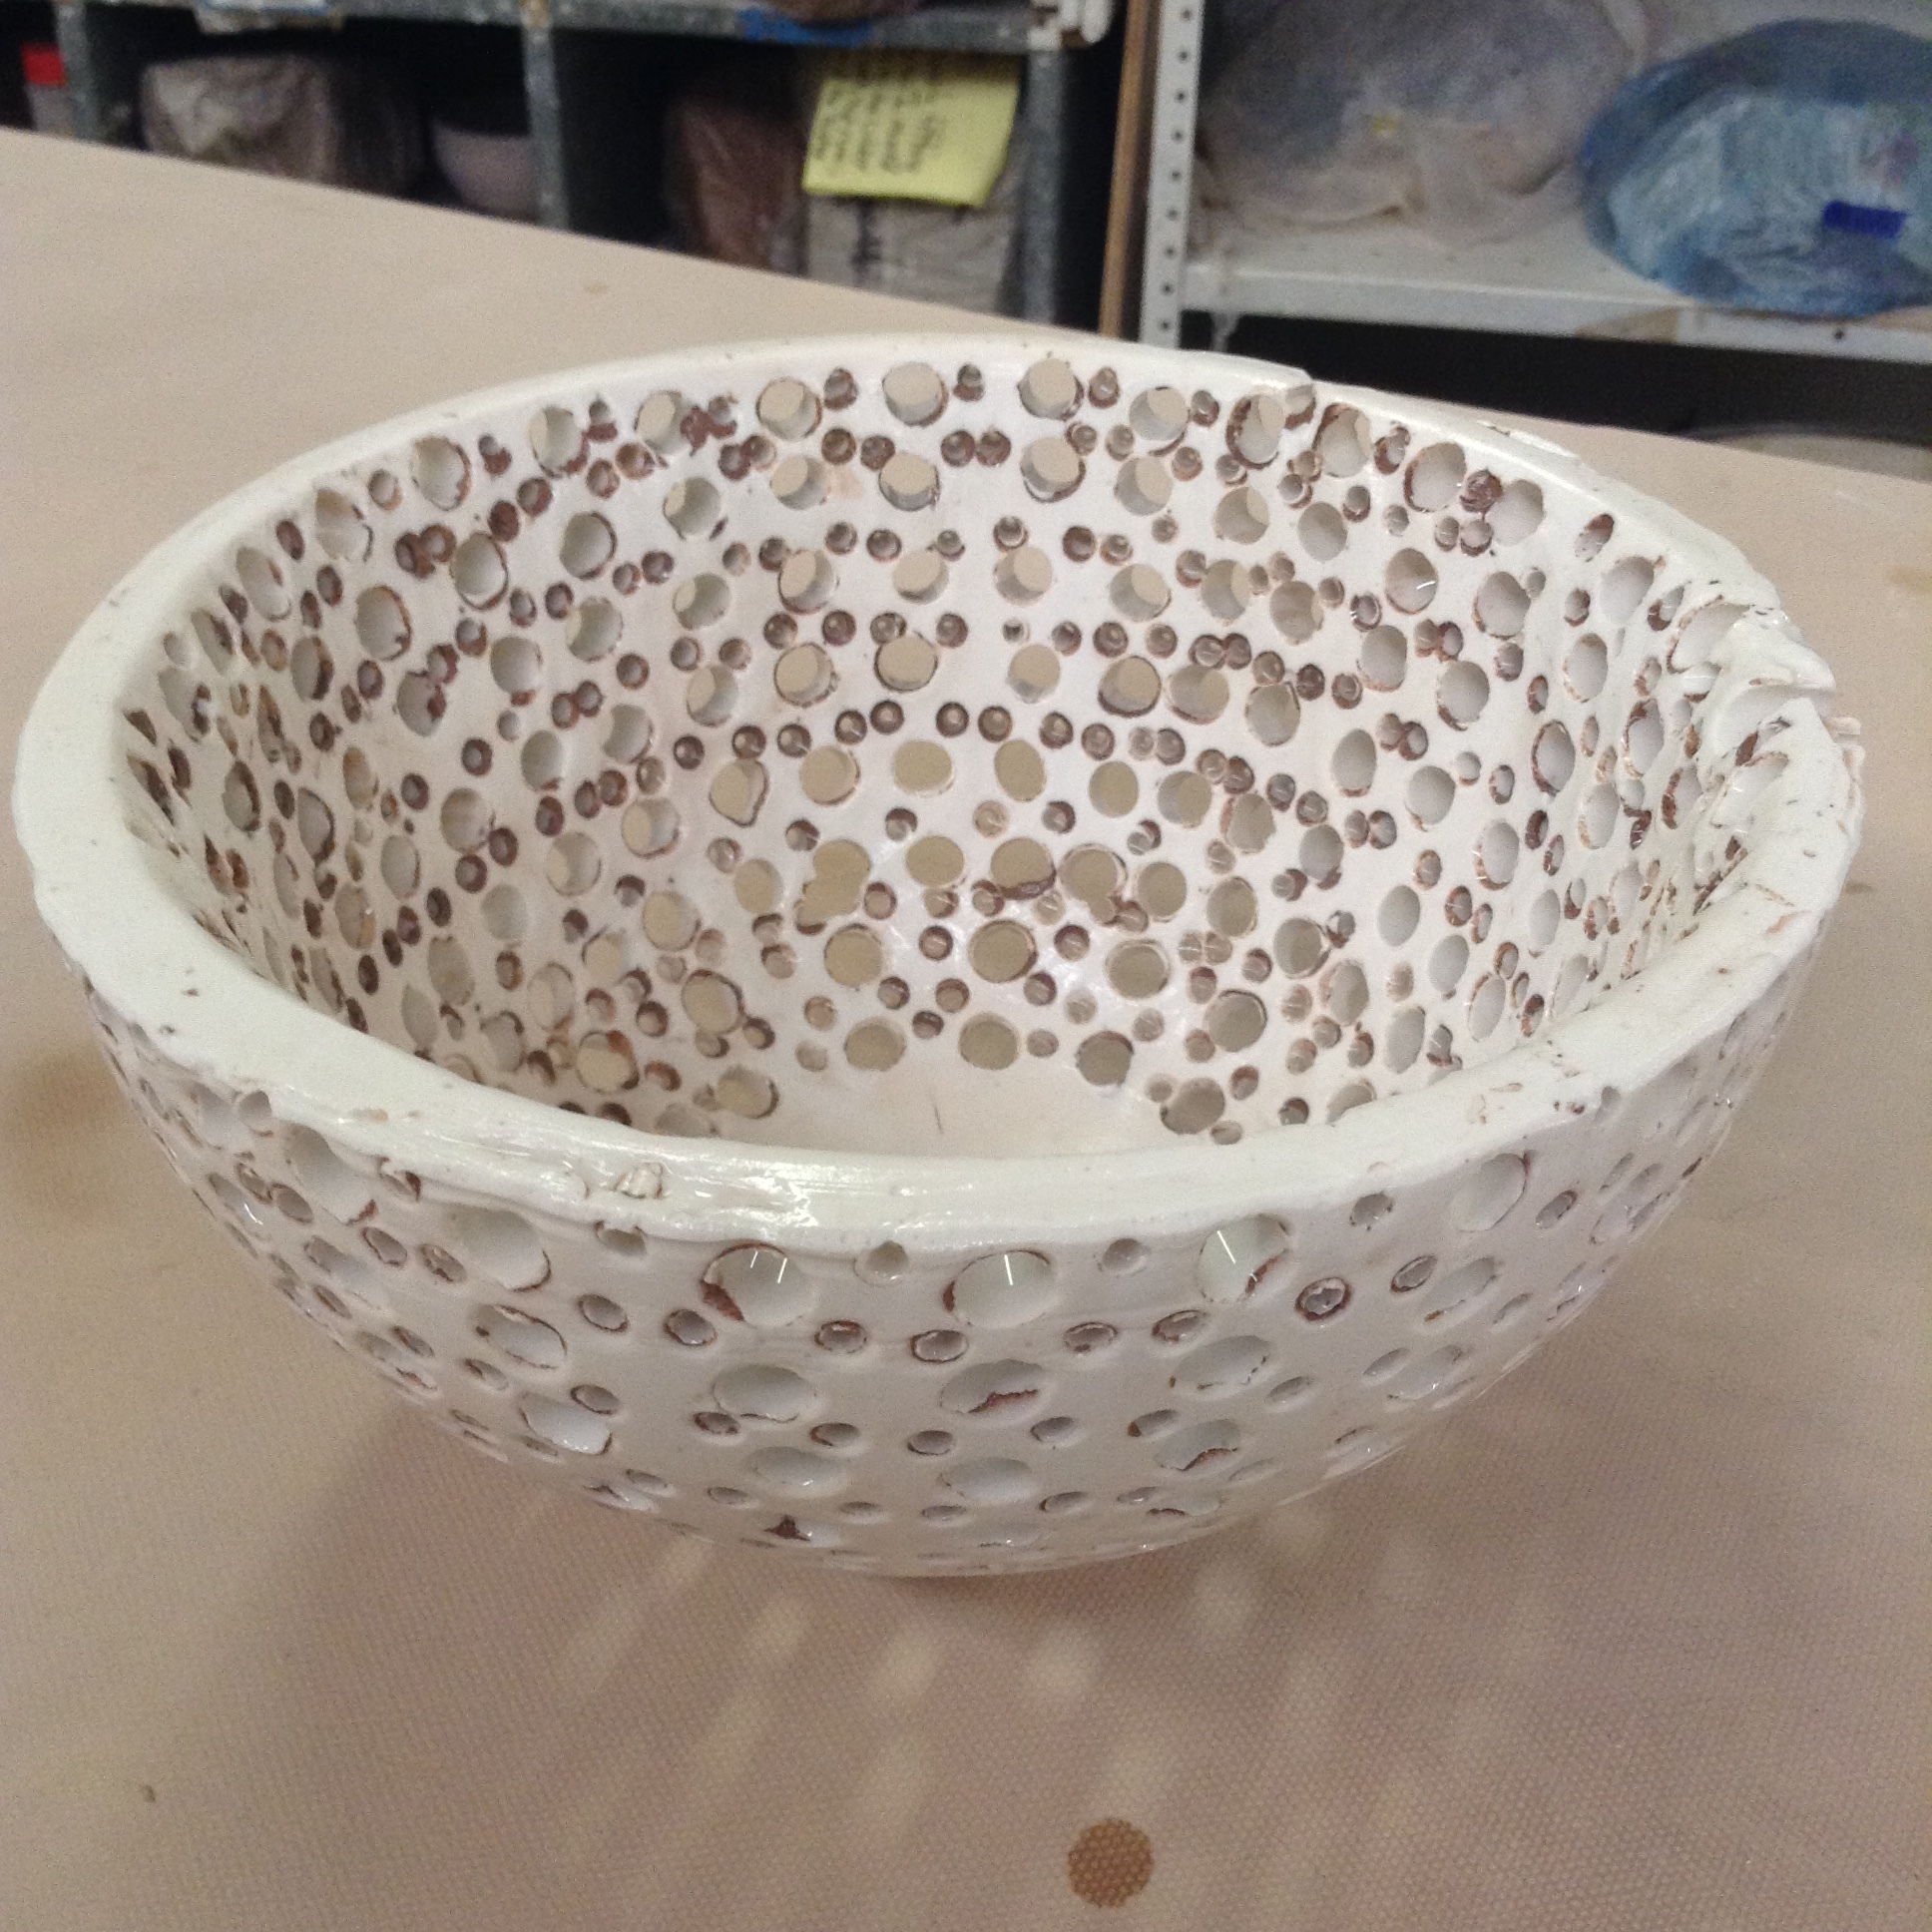
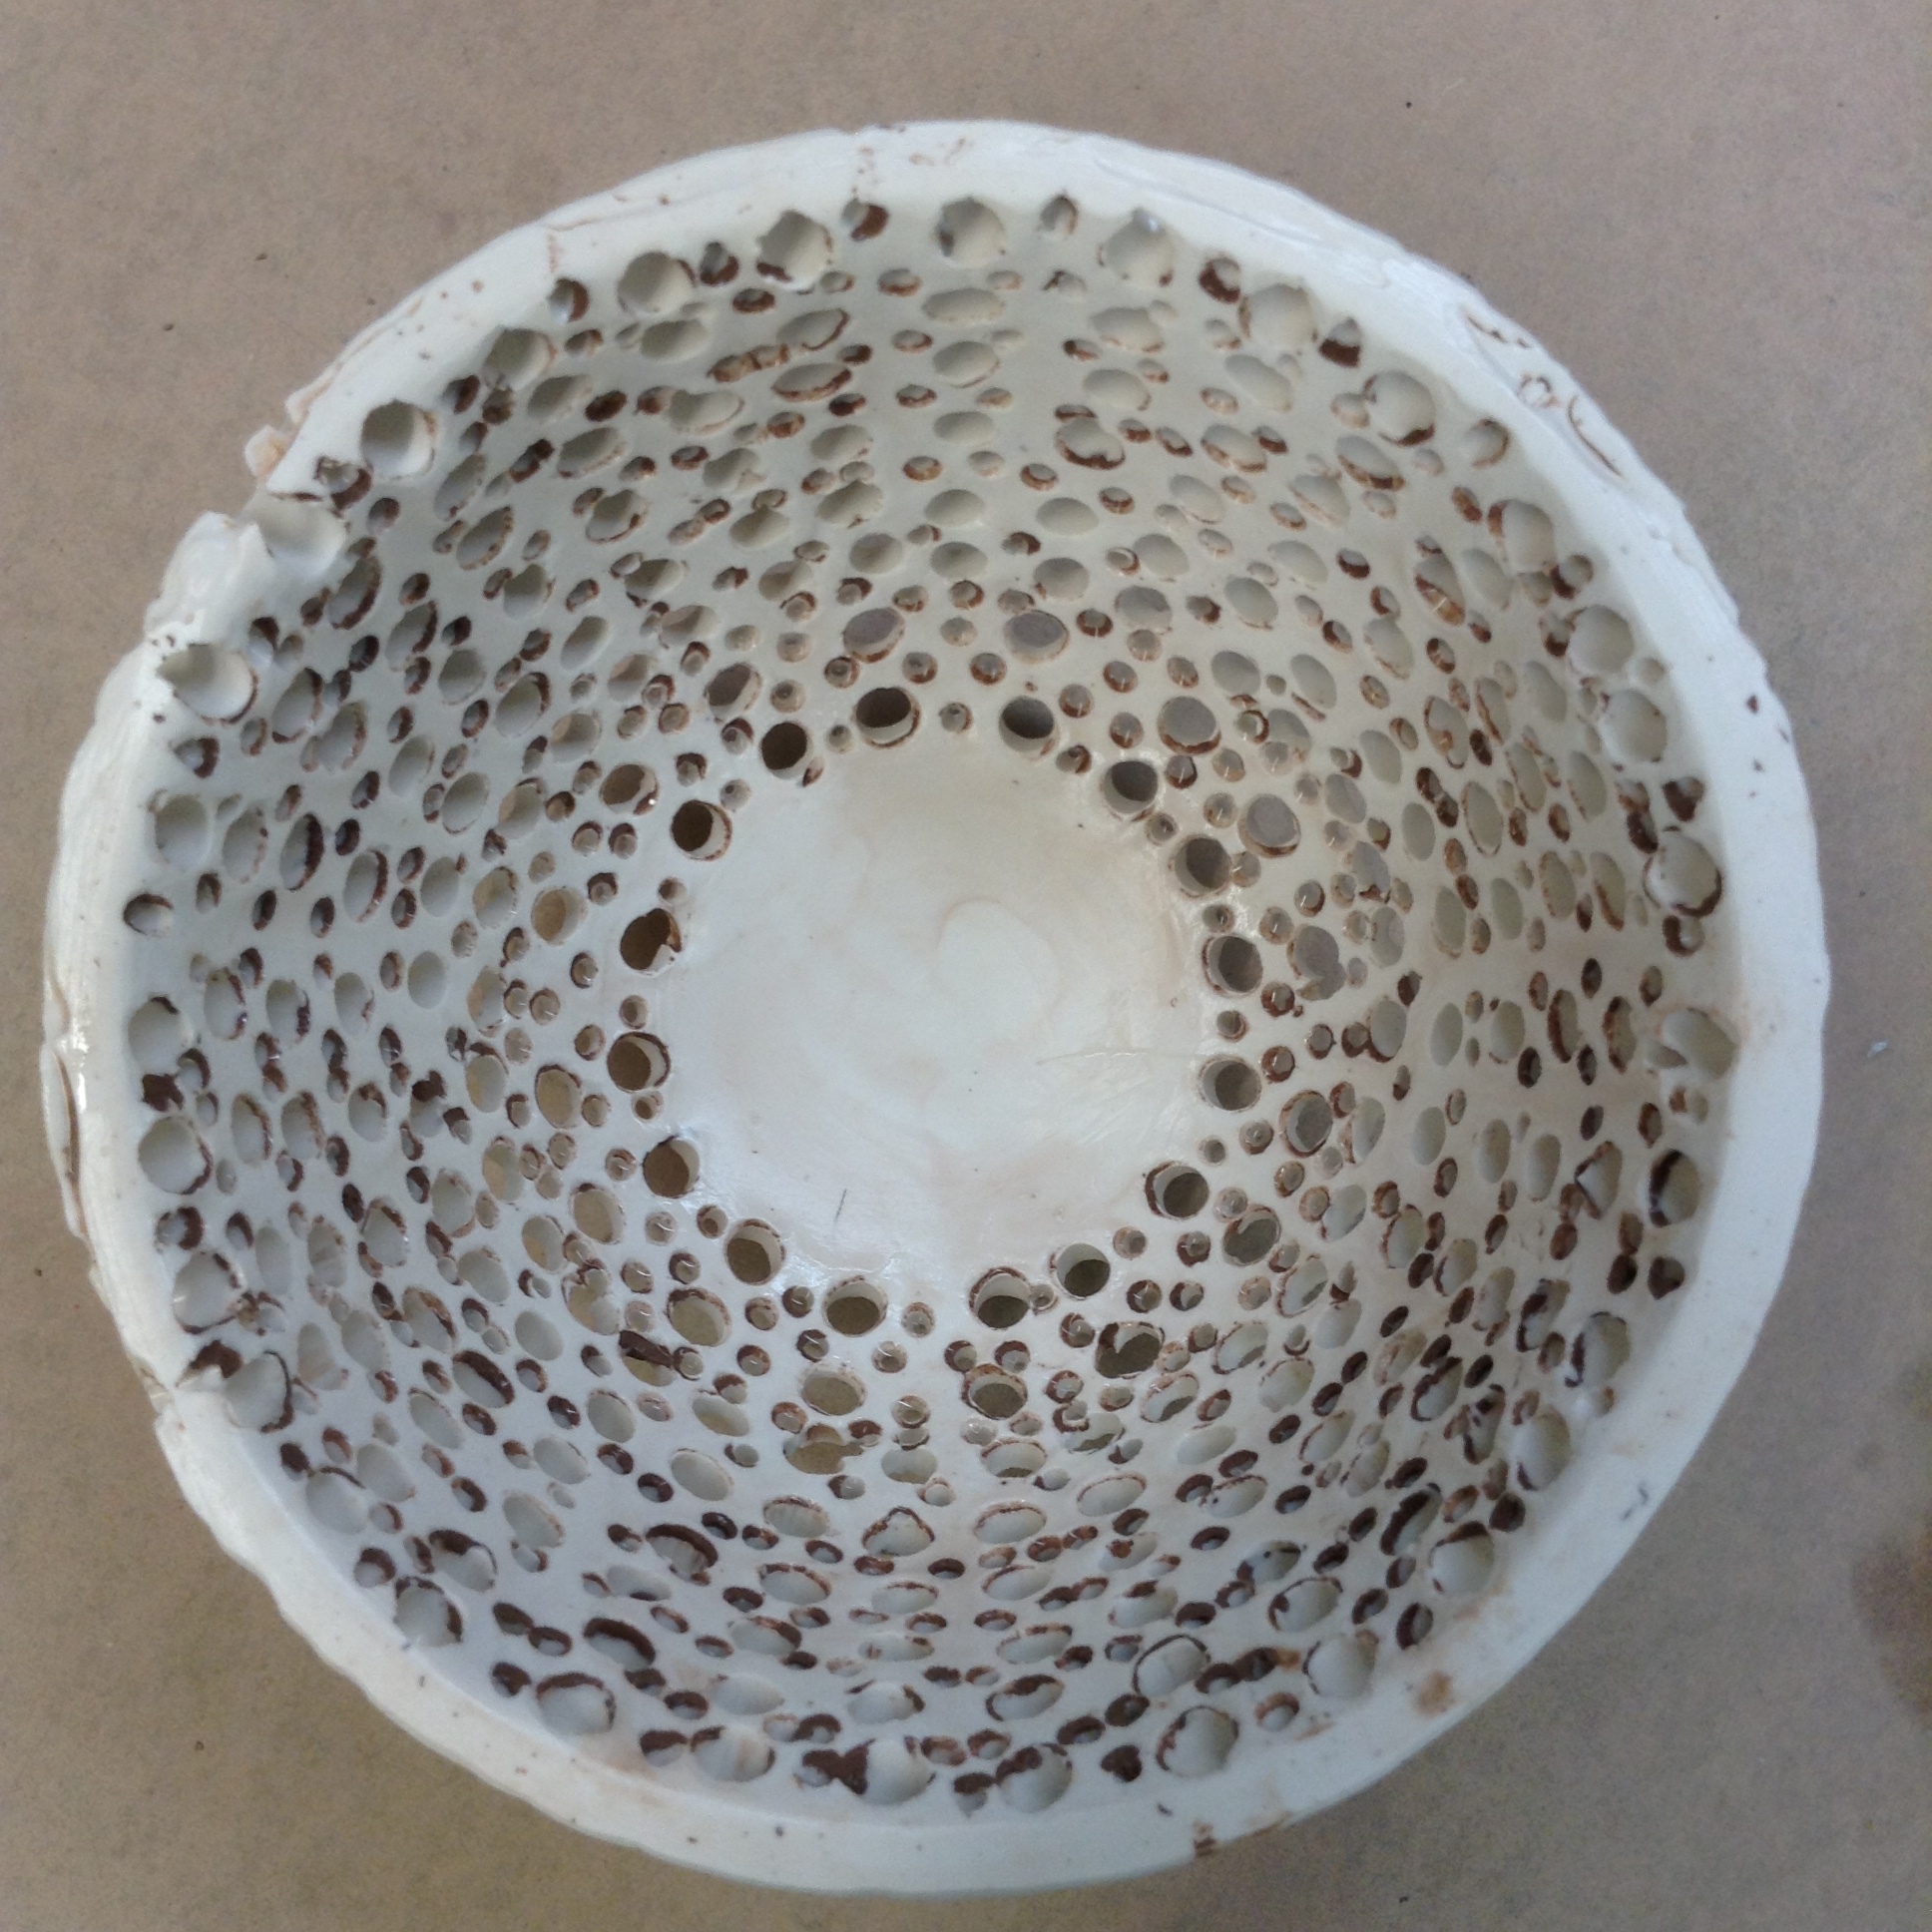
These are solid plaster, with holes. The videos in this section show how they were made.
COMMENTS ON THE STILL PHOTOS
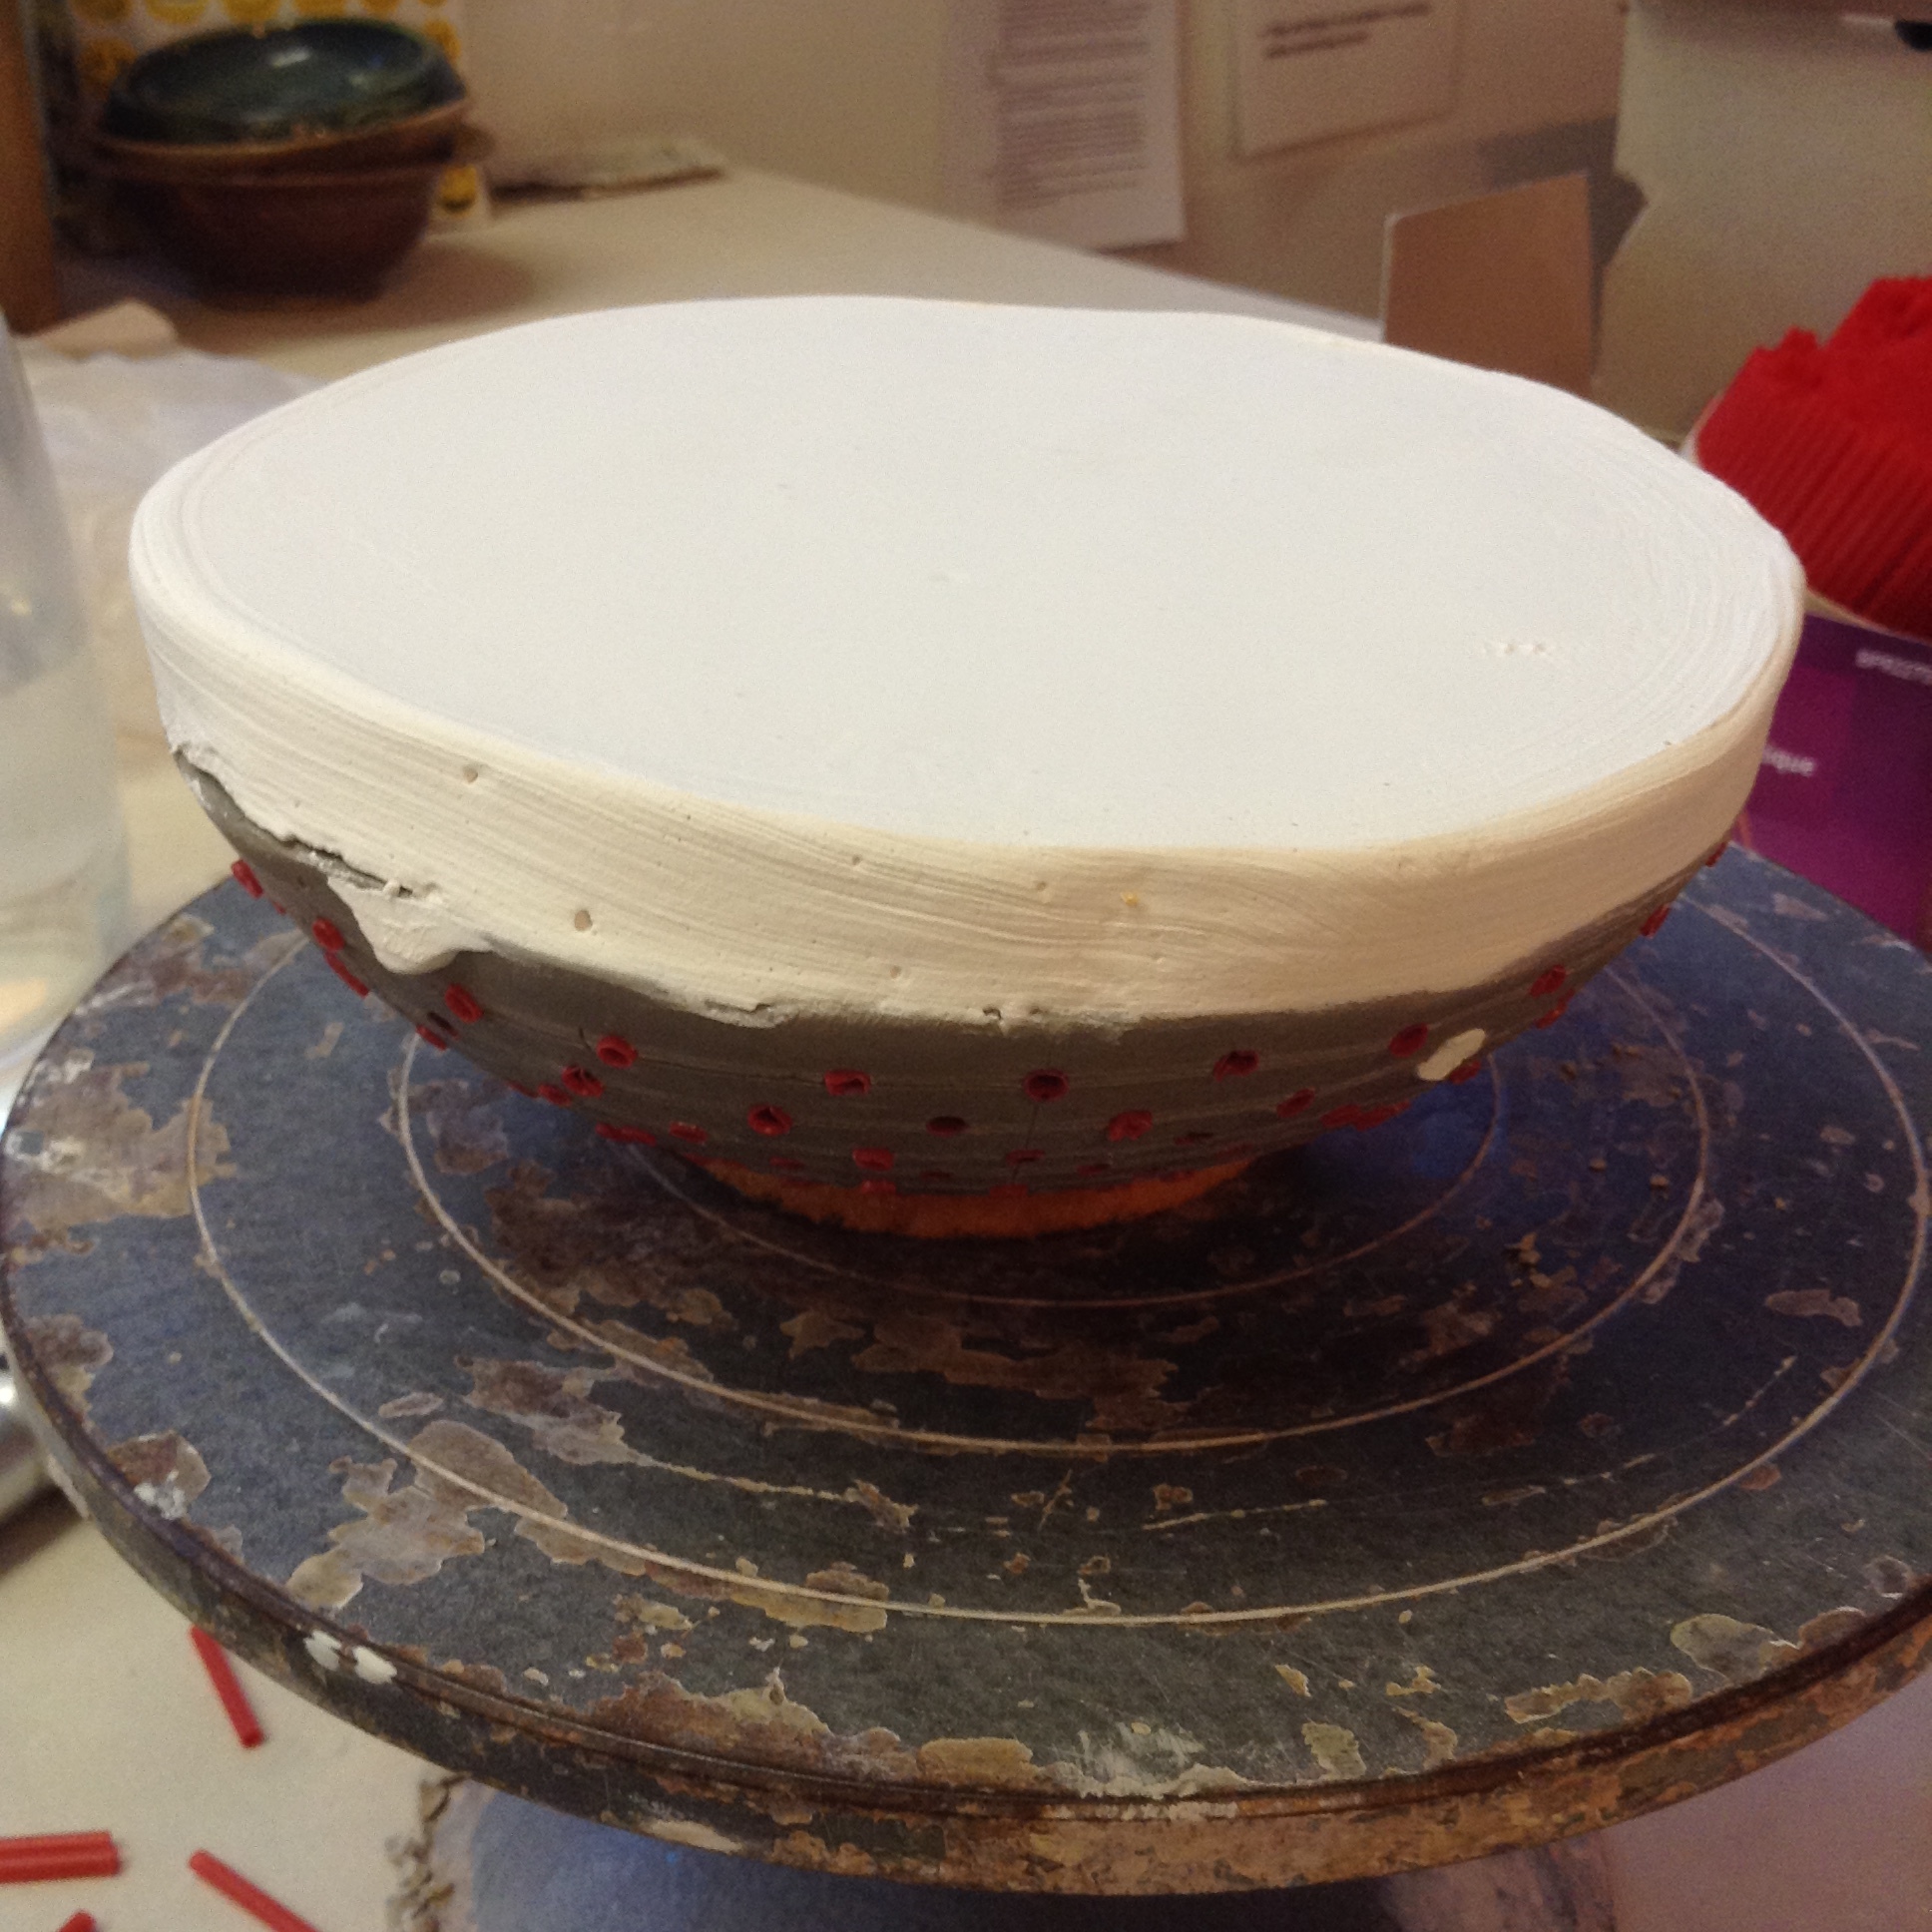
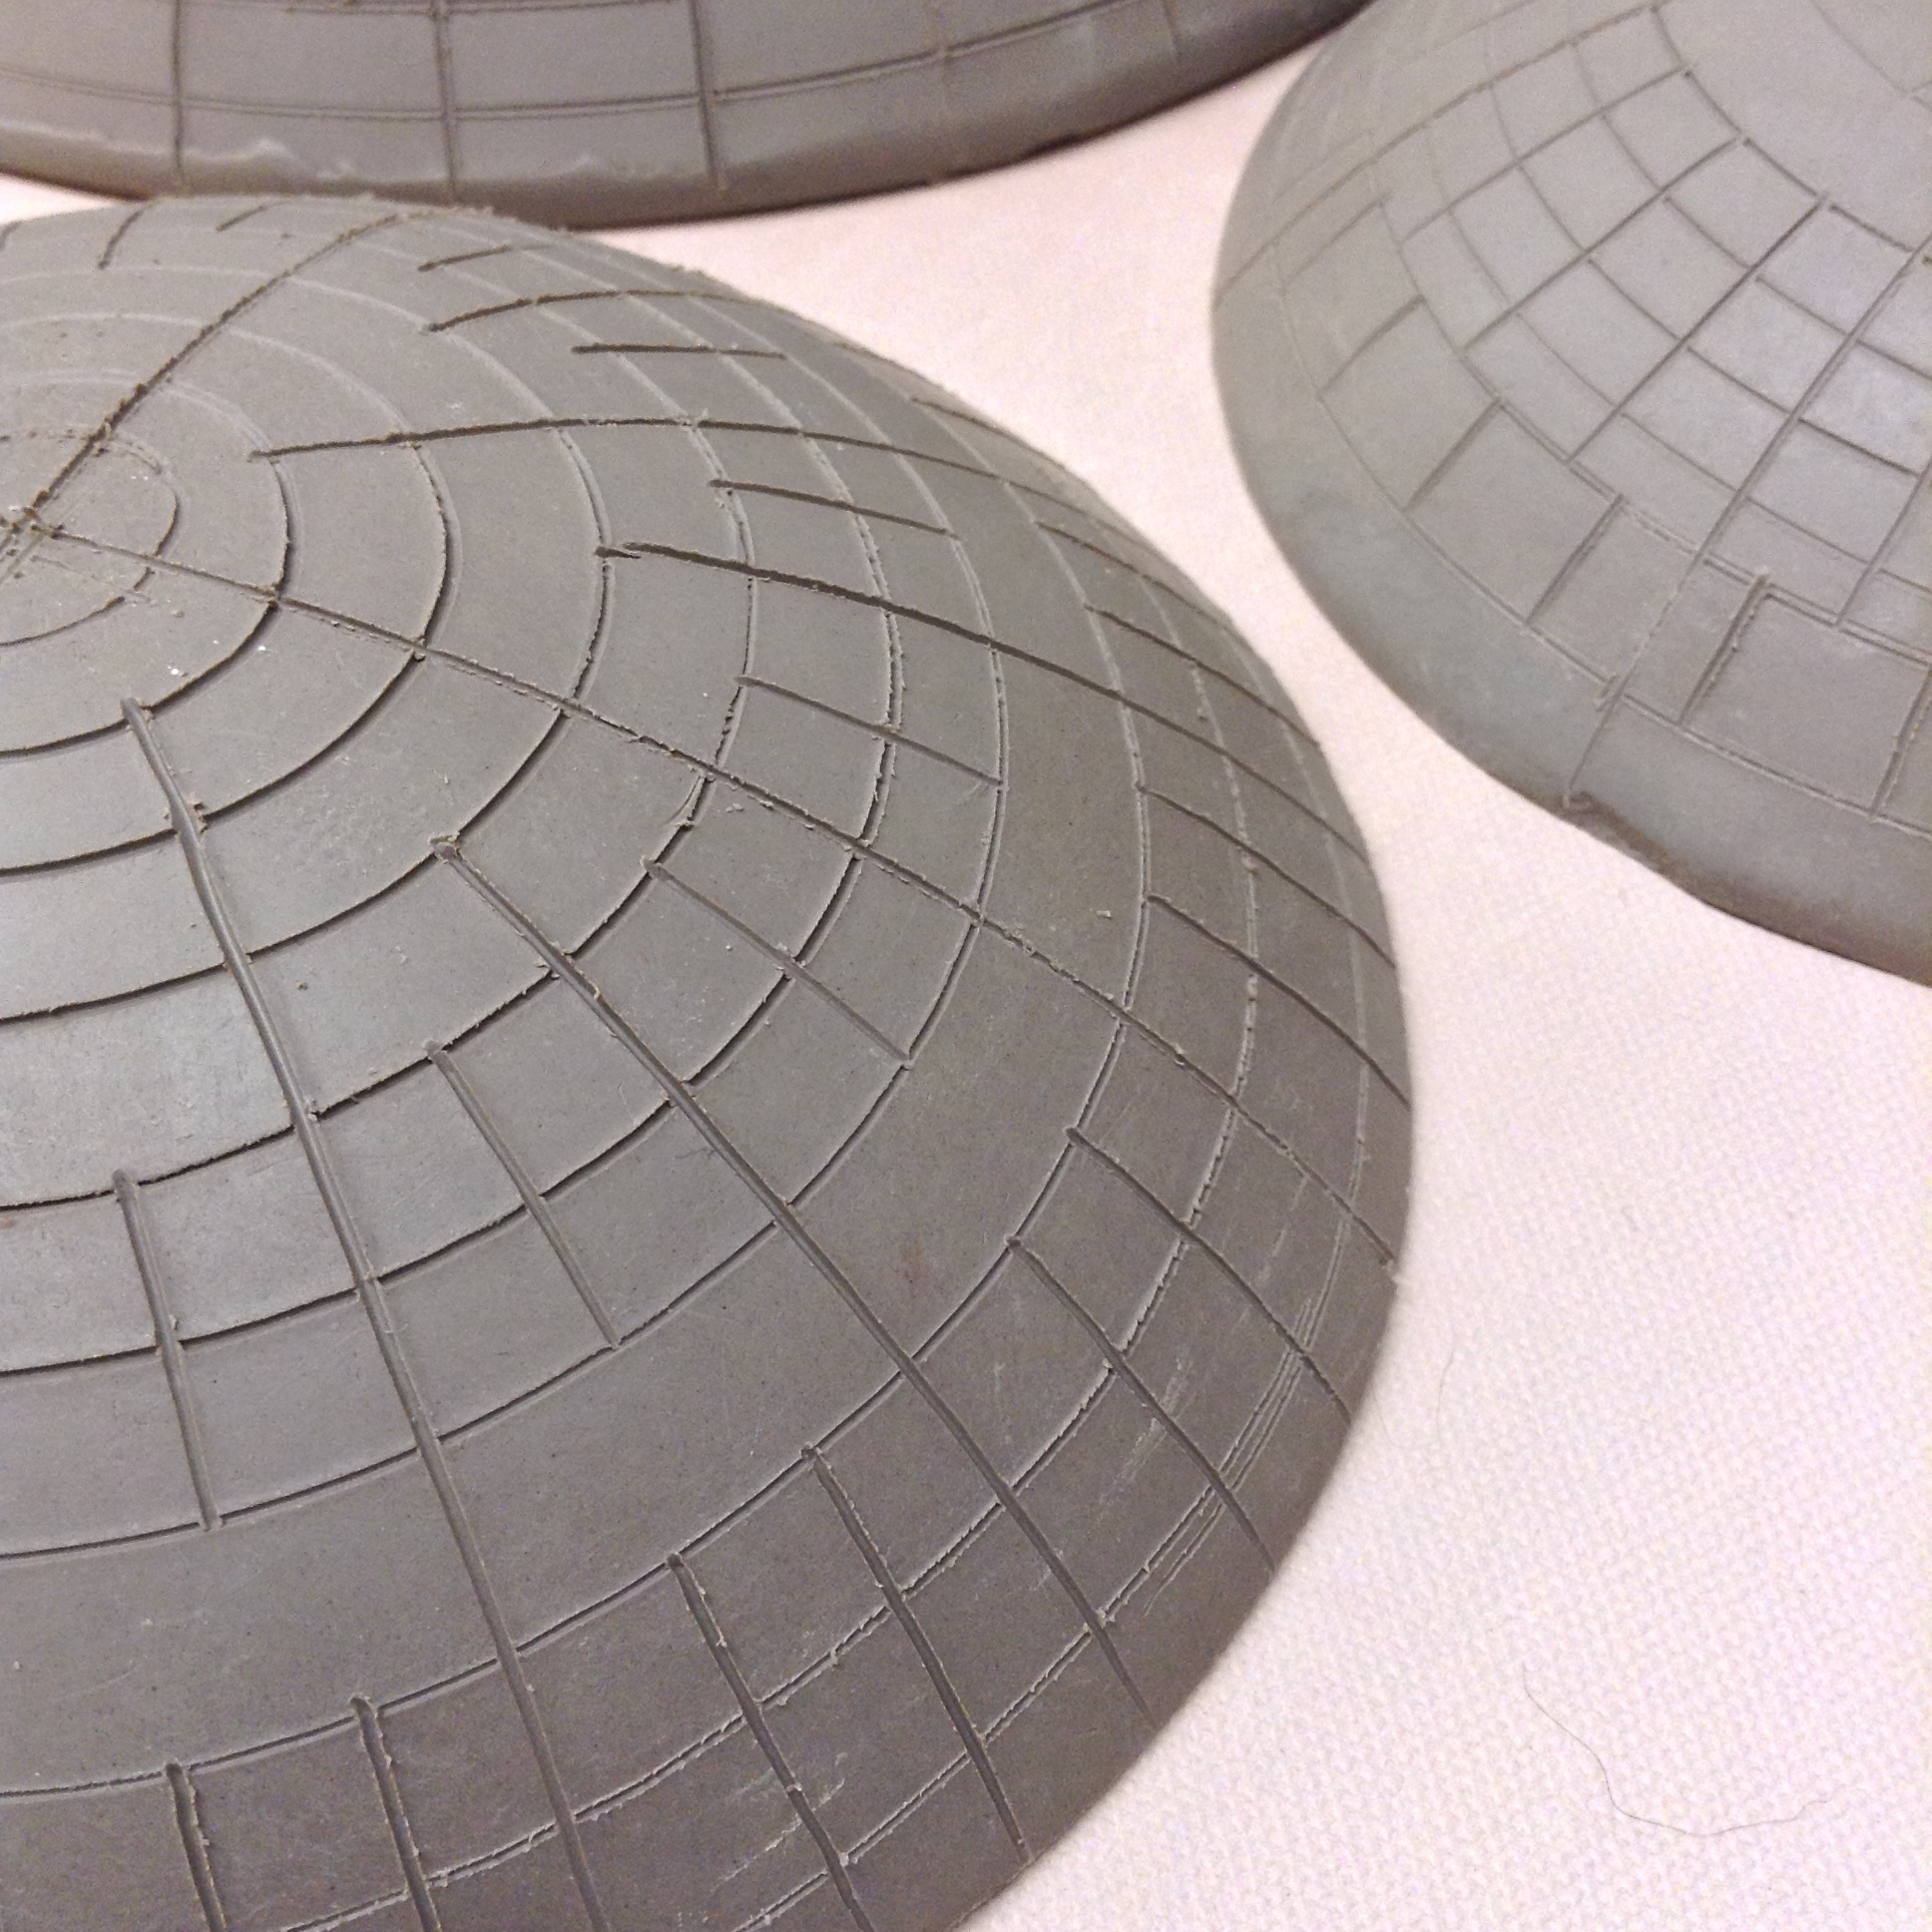
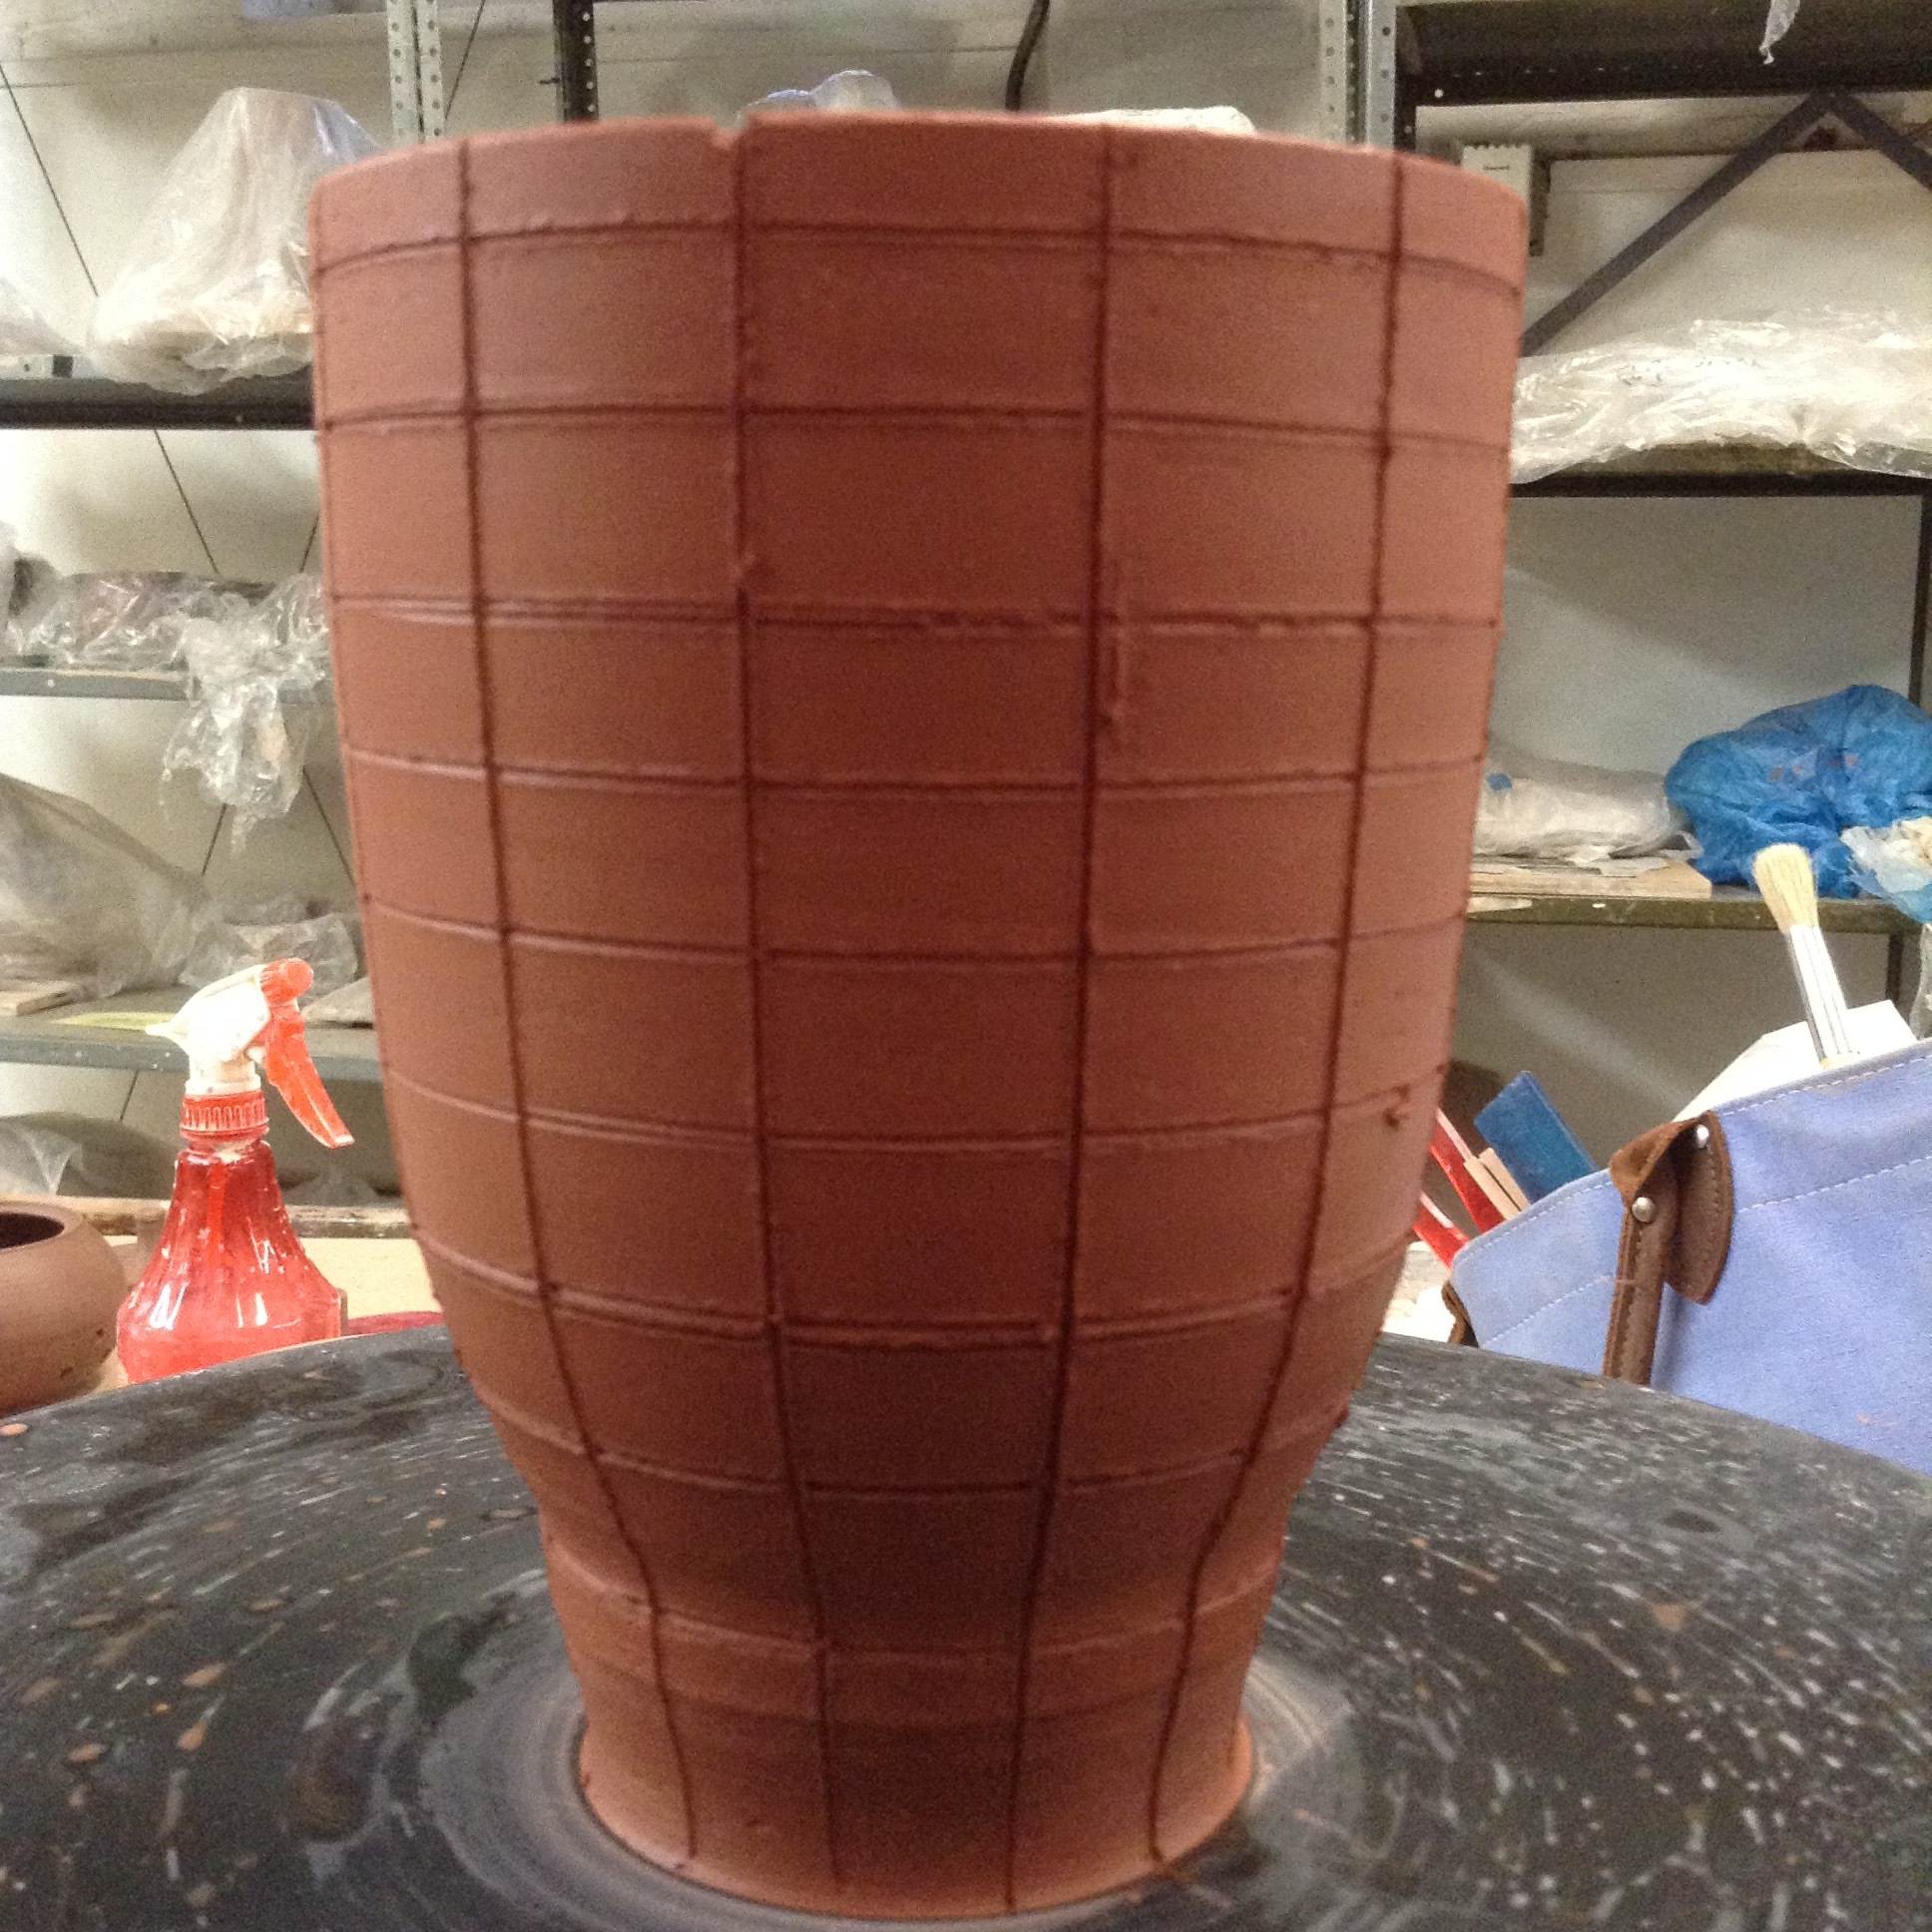
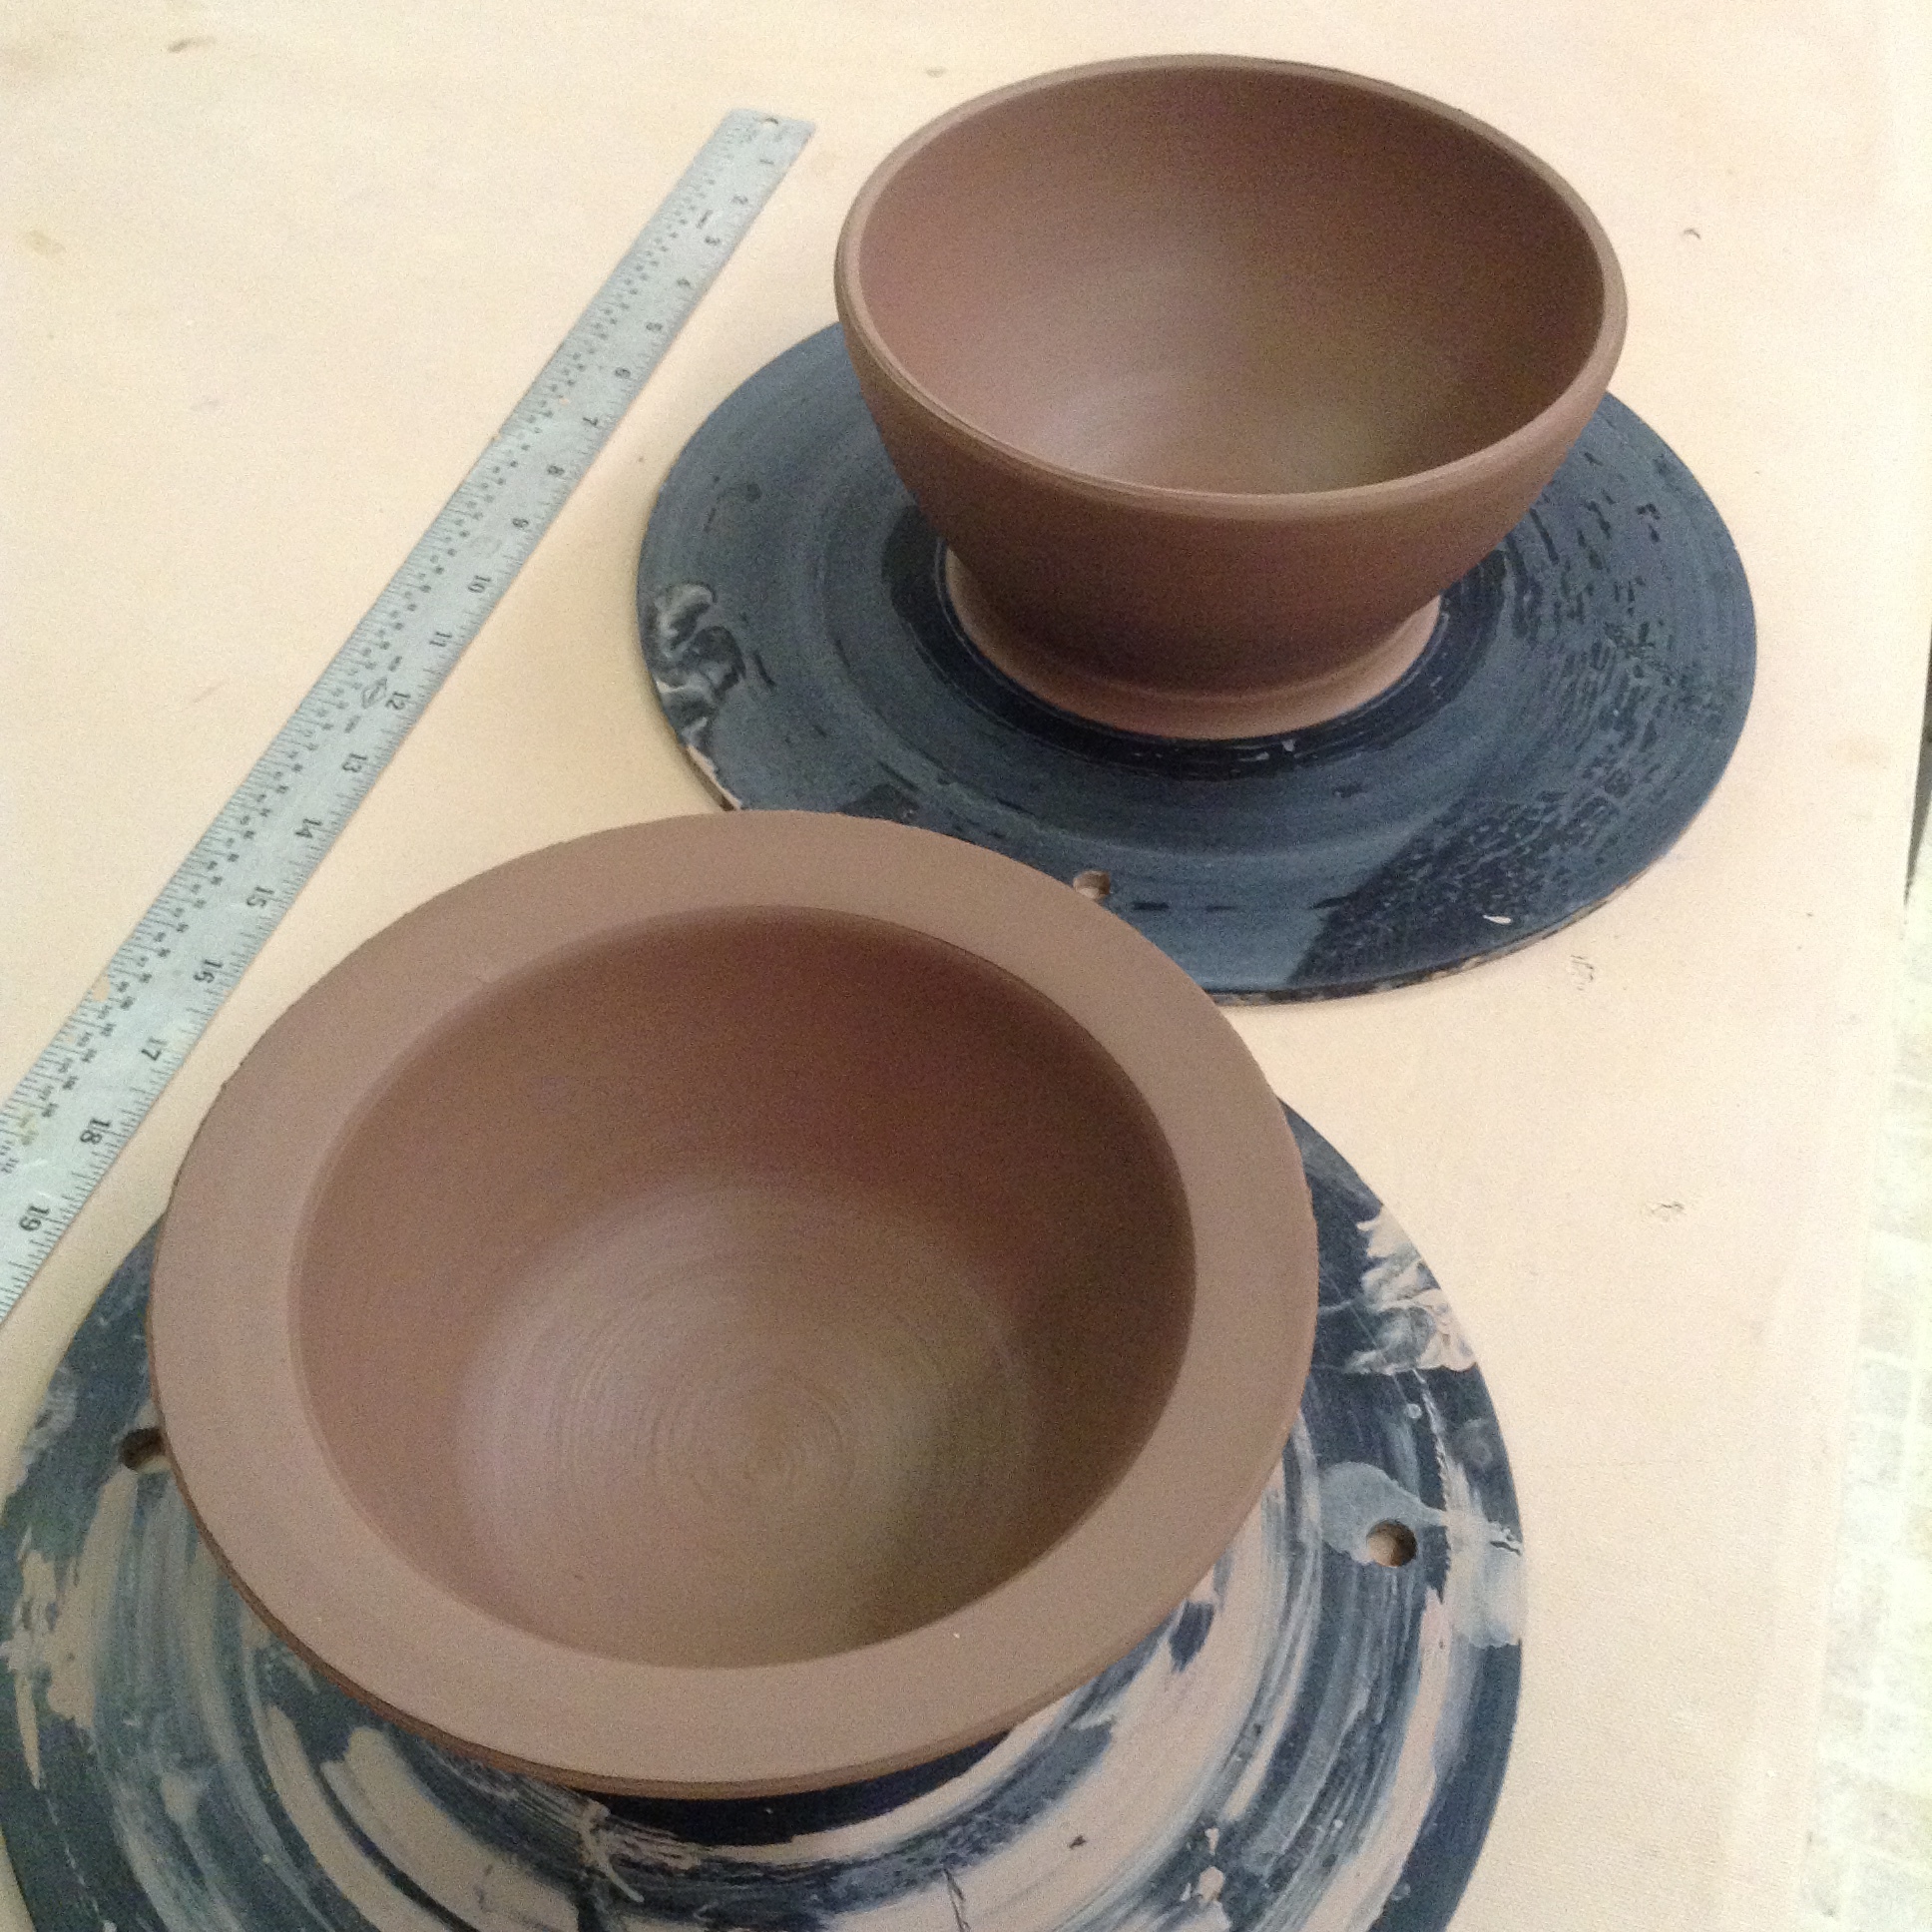
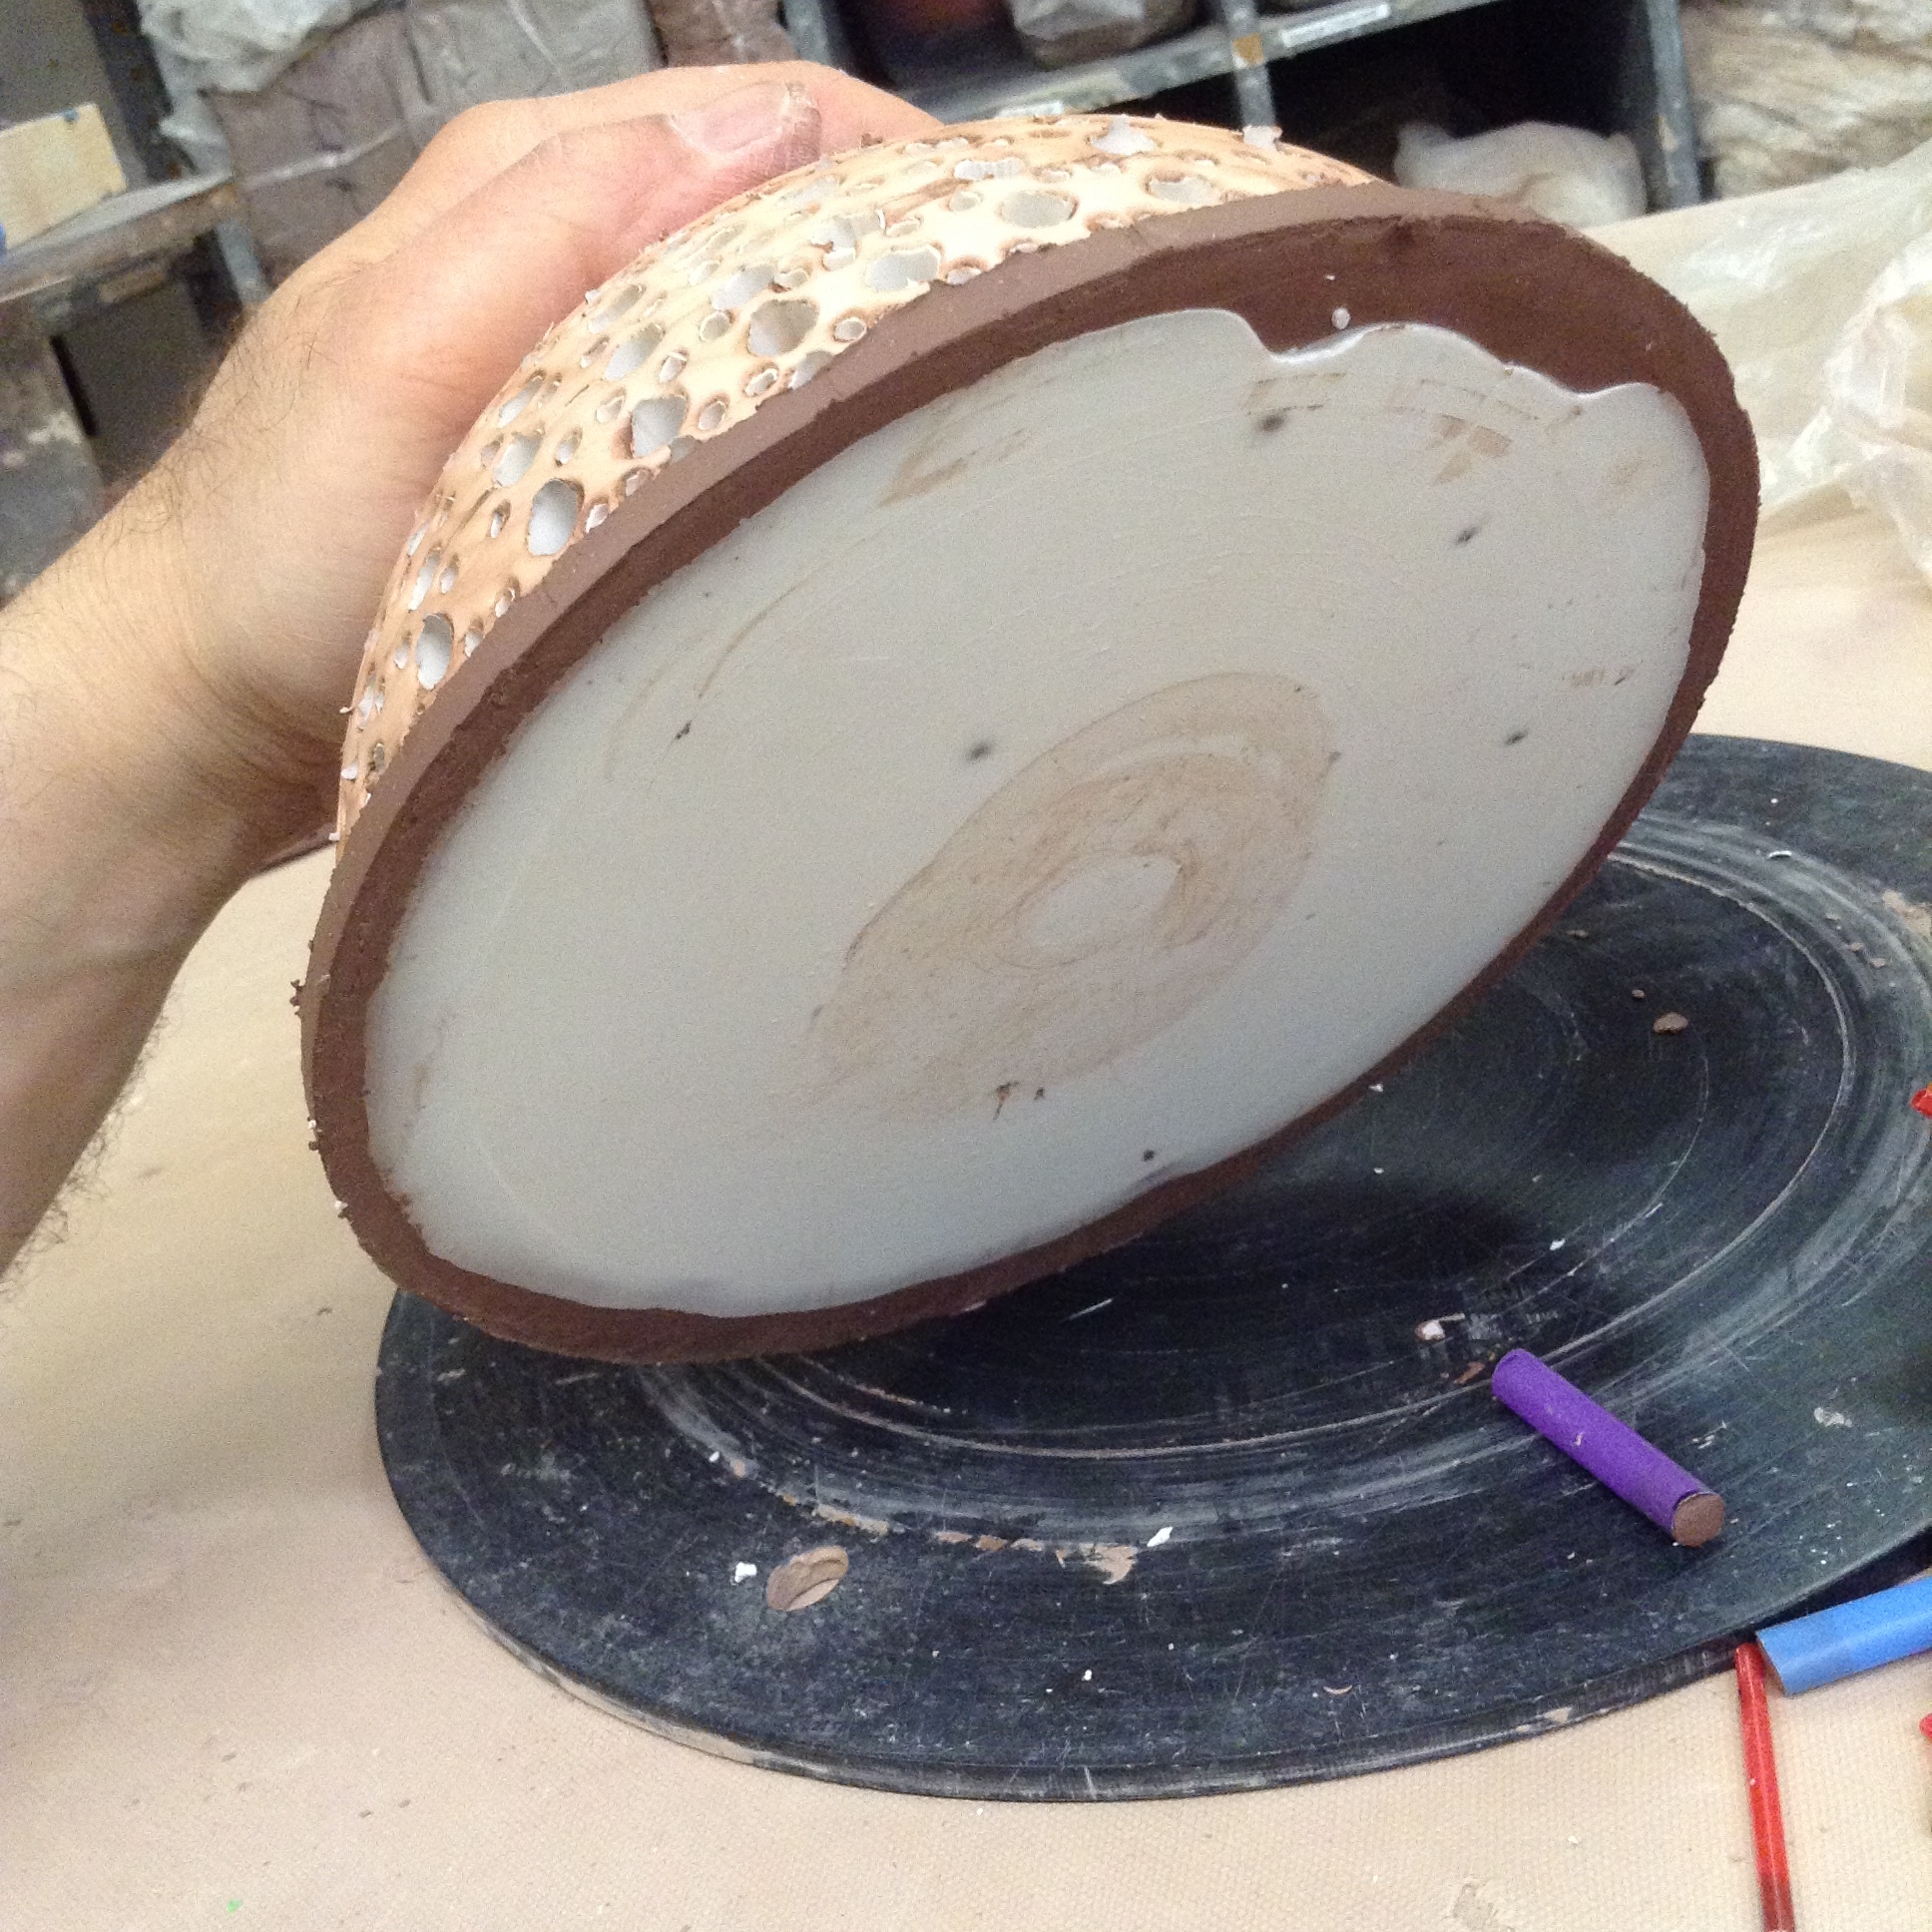
These photos show how you might approach making a nice plaster form that matches the inside of a clay form. The fairly stiff clay was very stable even when filled with plaster. Even if you don't want to stab the form with holes, this method lets you make plaster forms for using later as molds.
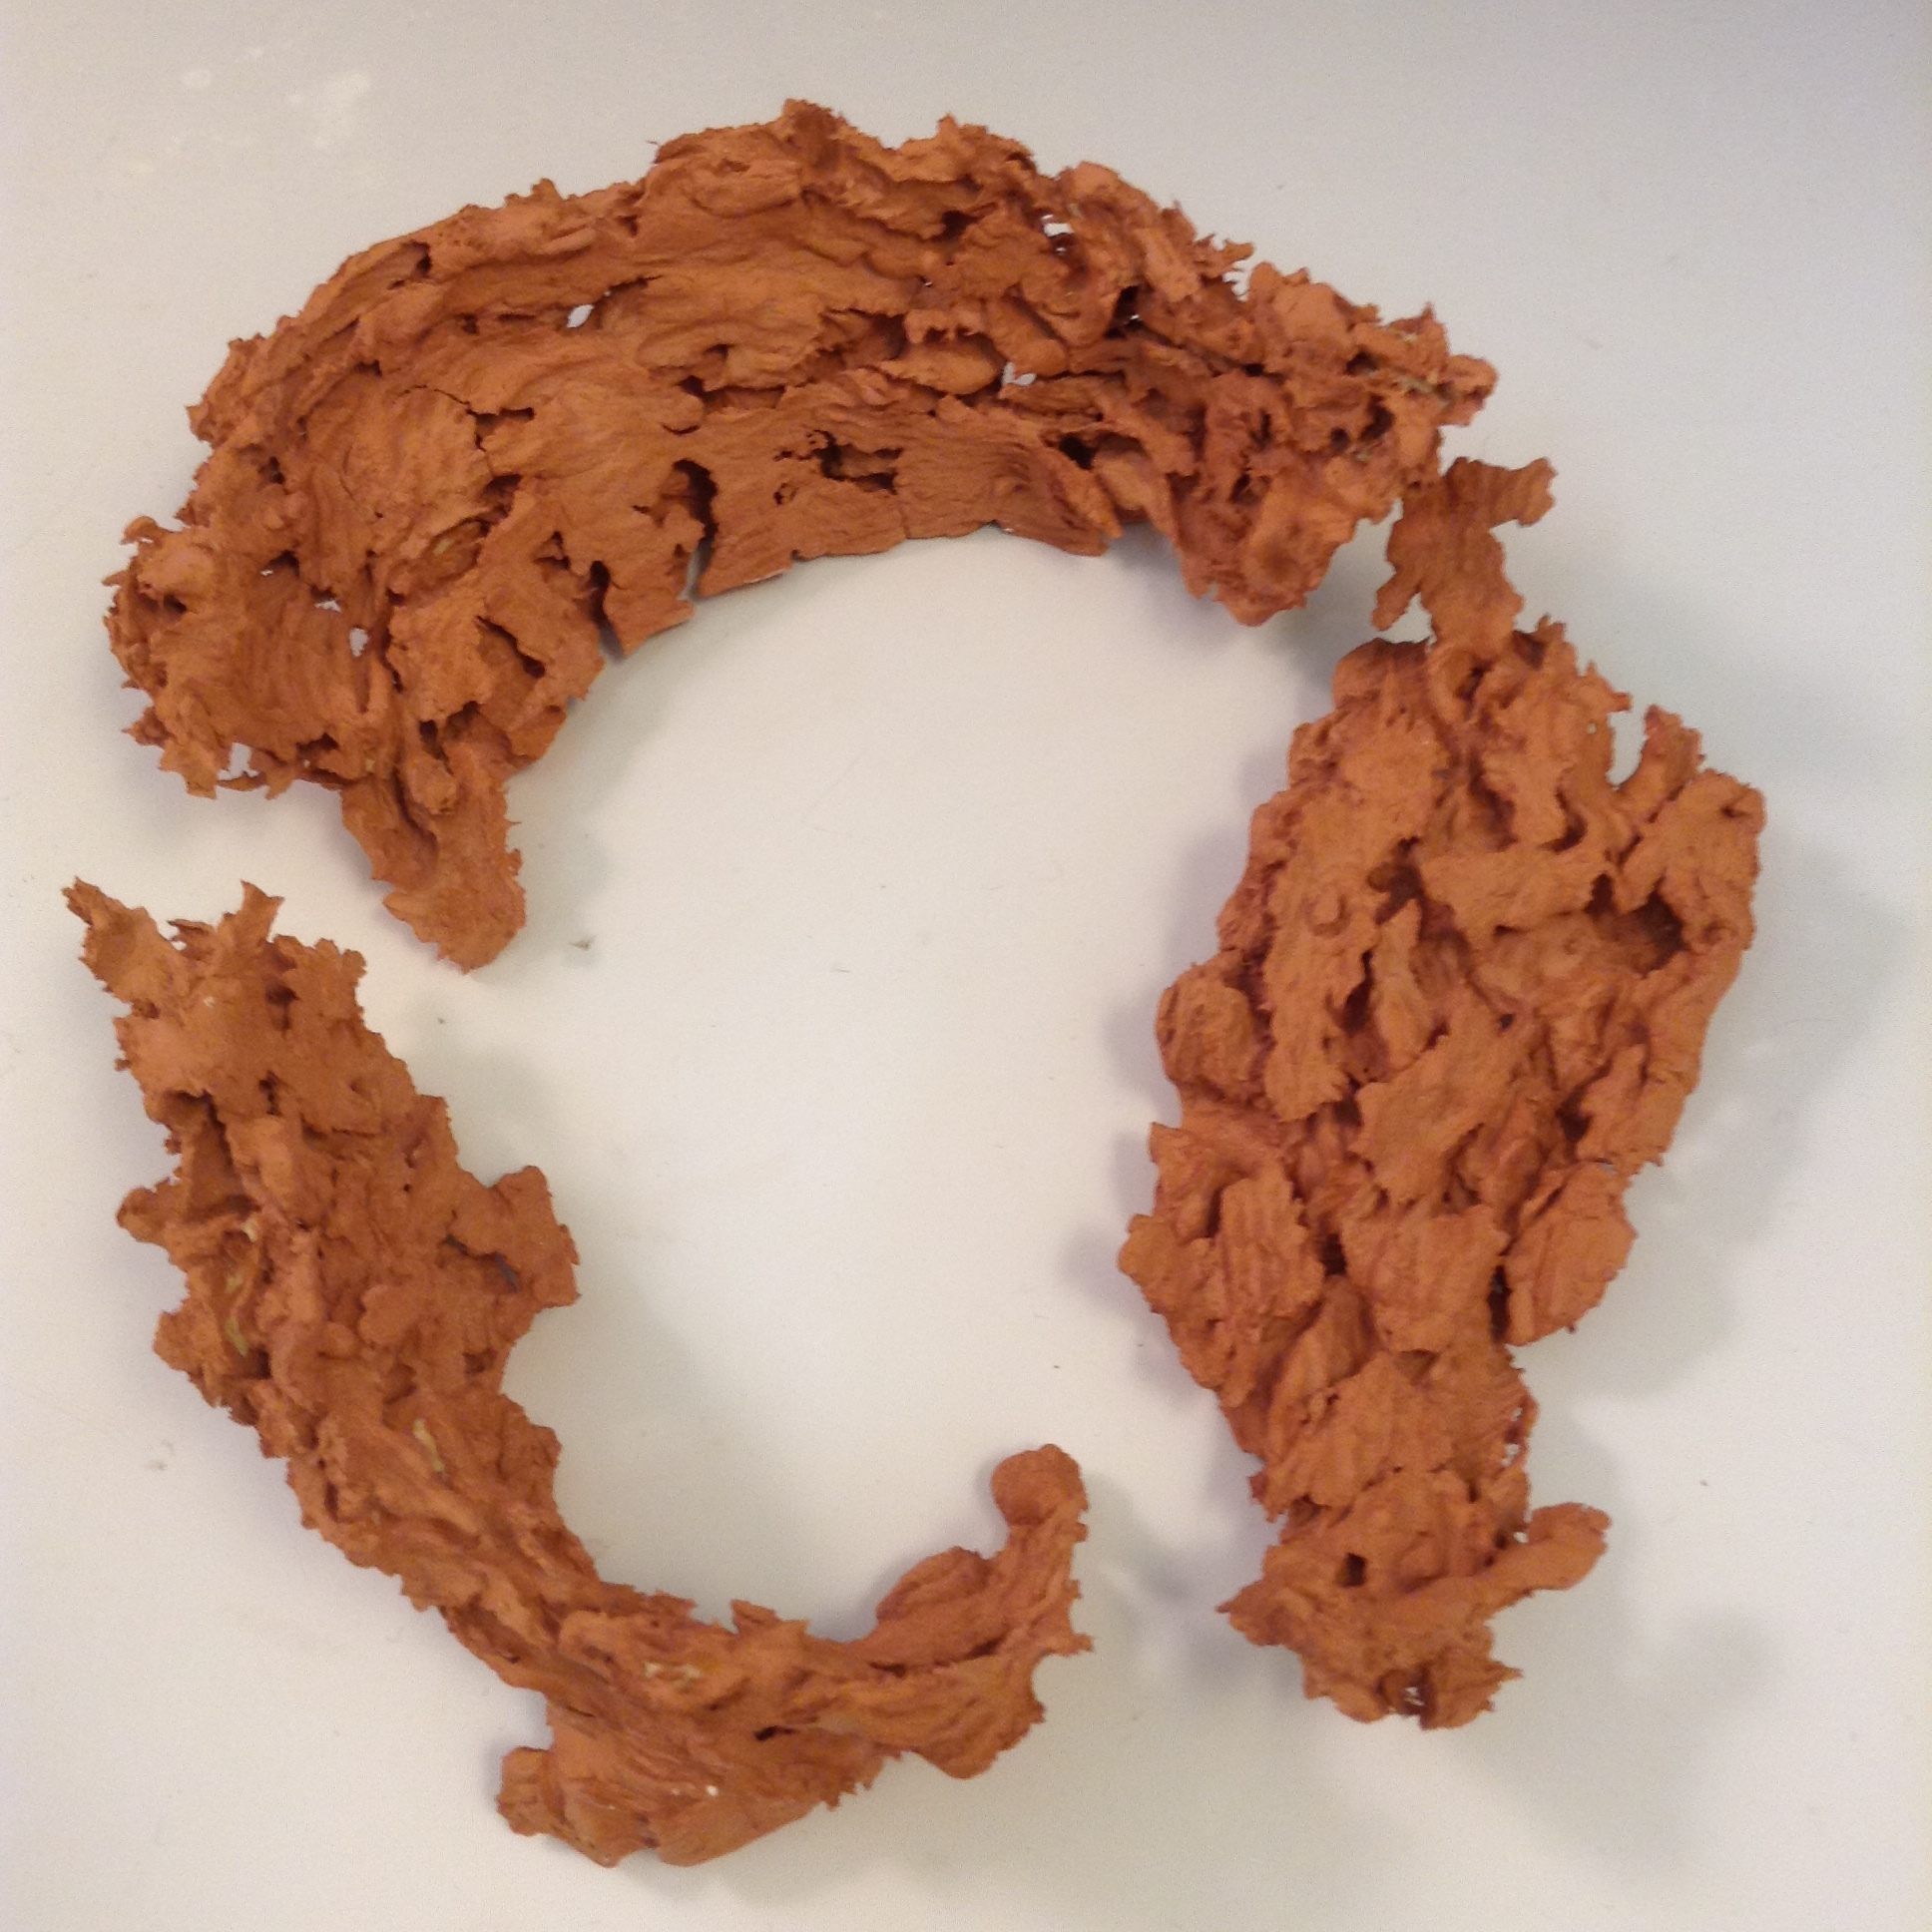
I made the two shapes thinking I wanted one narrower, but that was the only planning I did. Next time I might make the rims of the thrown vessels more equal in diameter so that the resulting plaster forms match when stacked. They do okay, now, though.

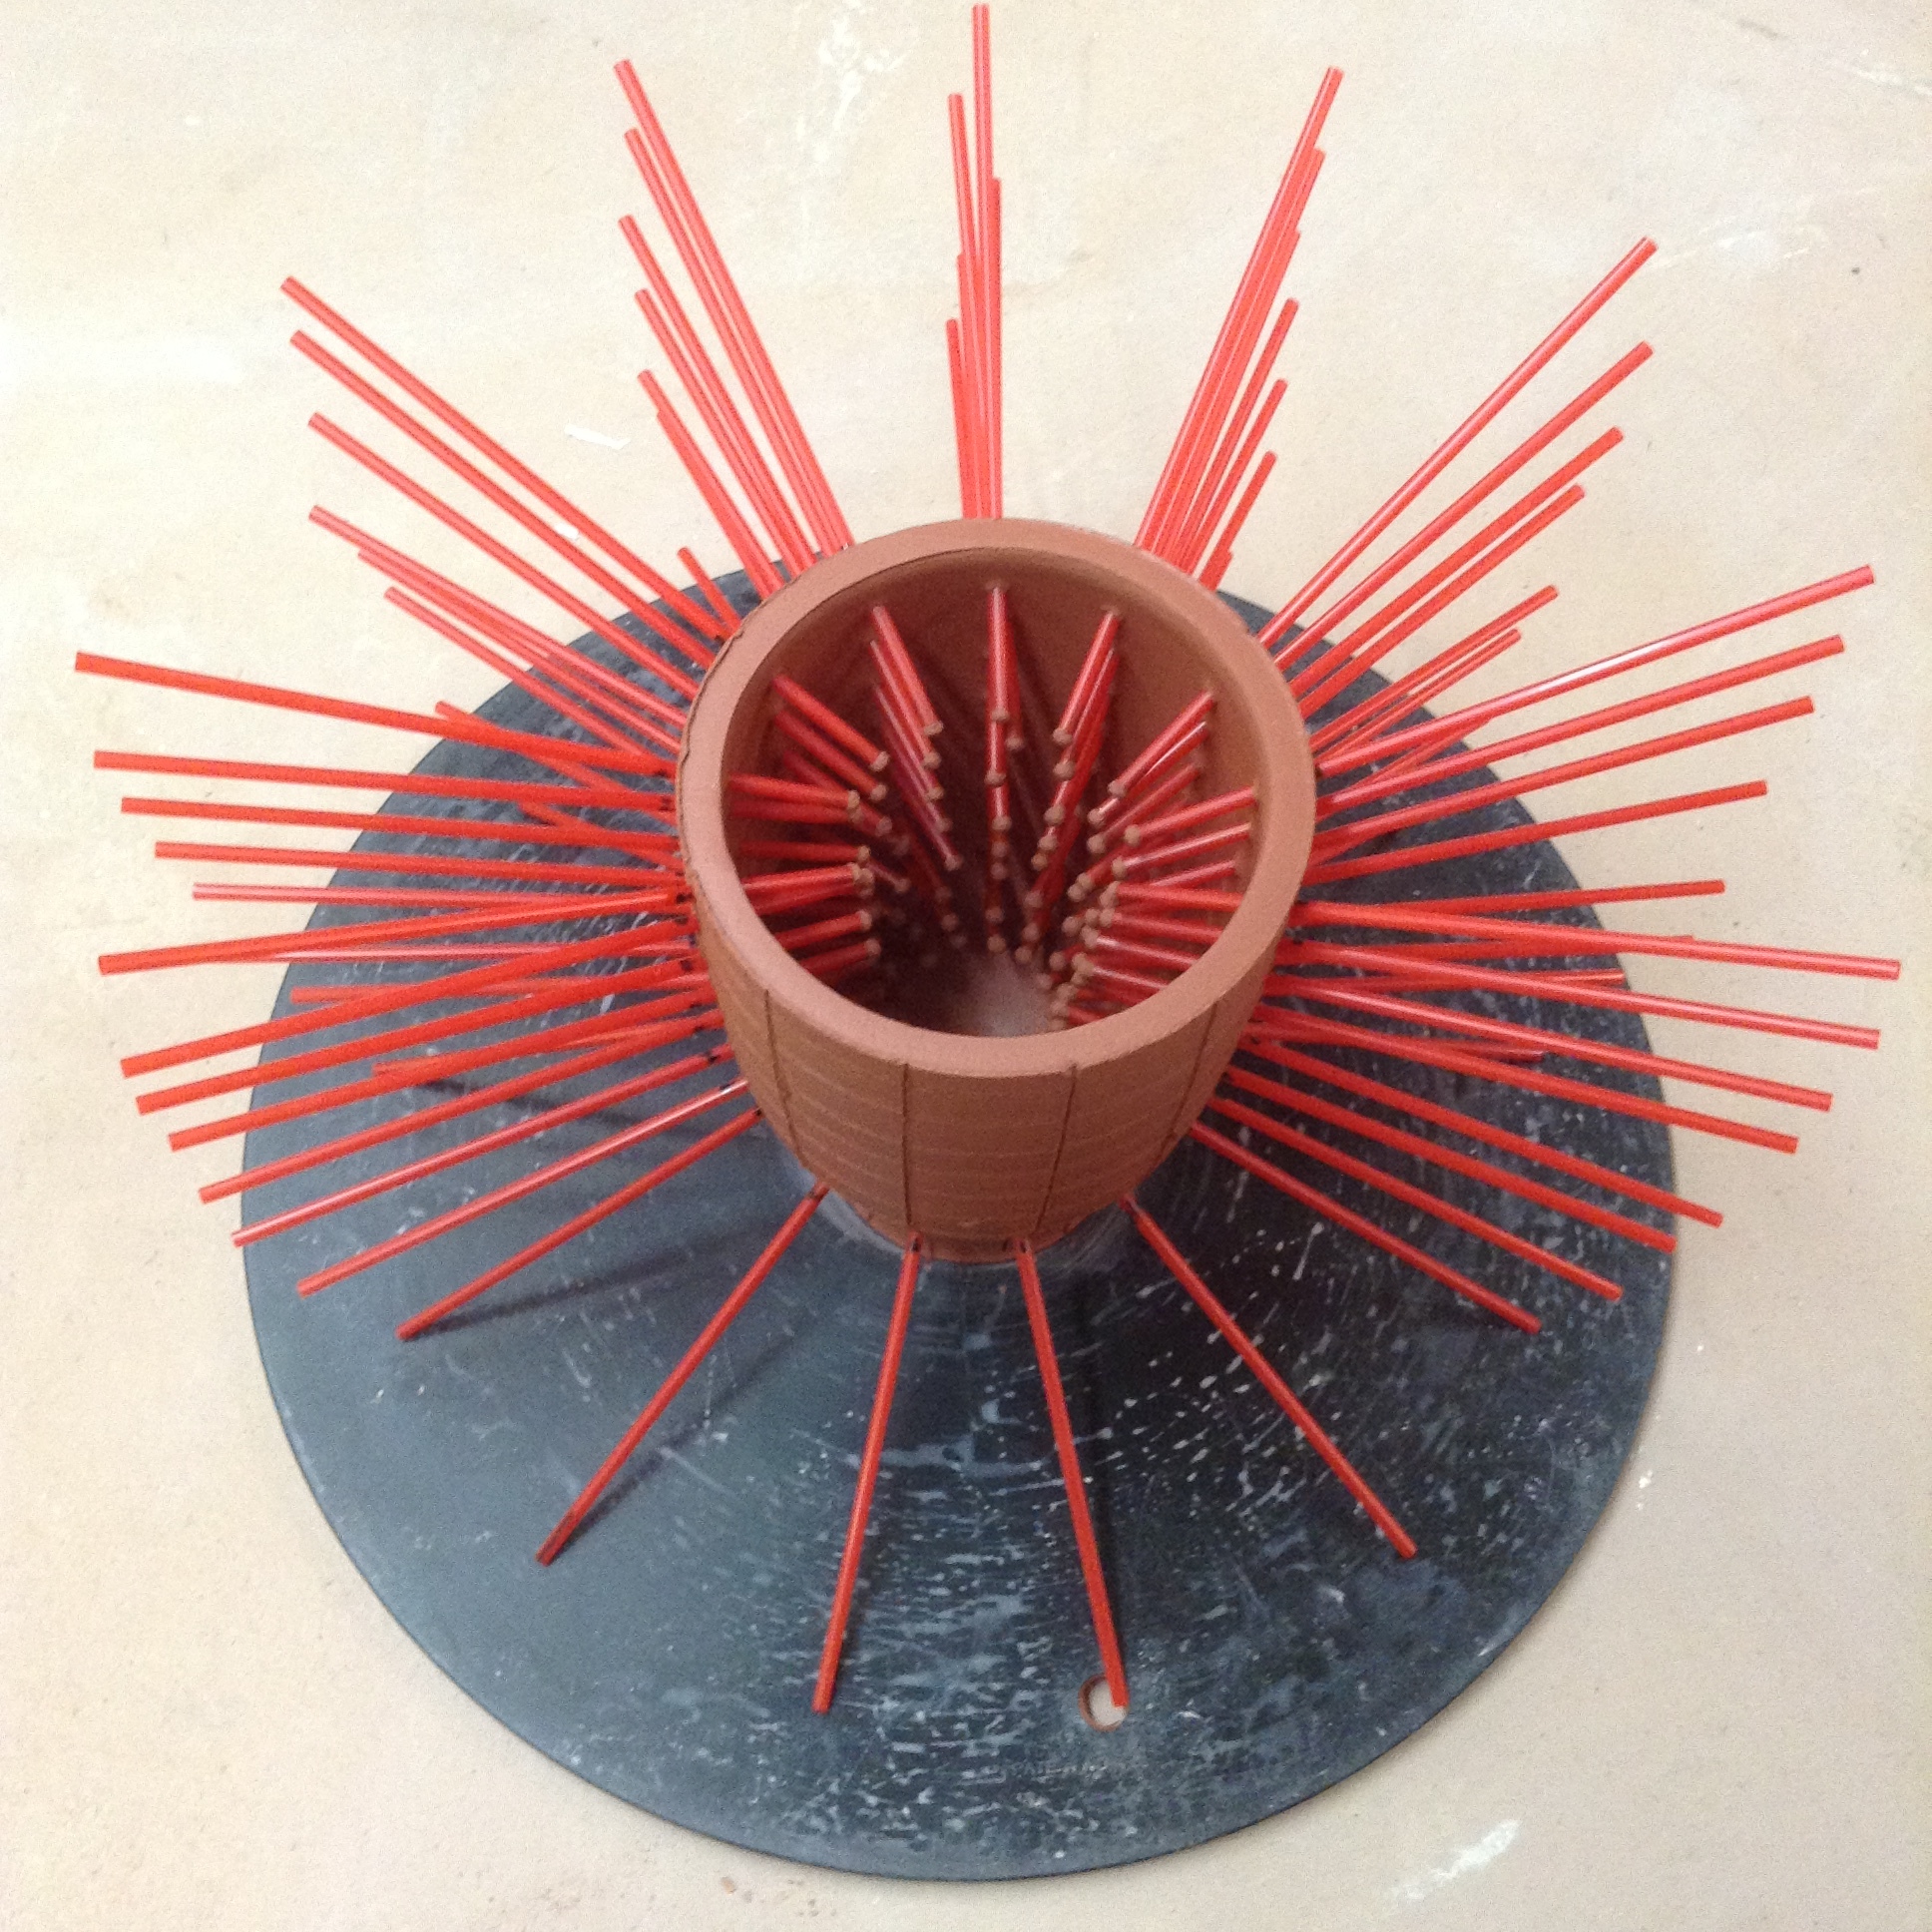
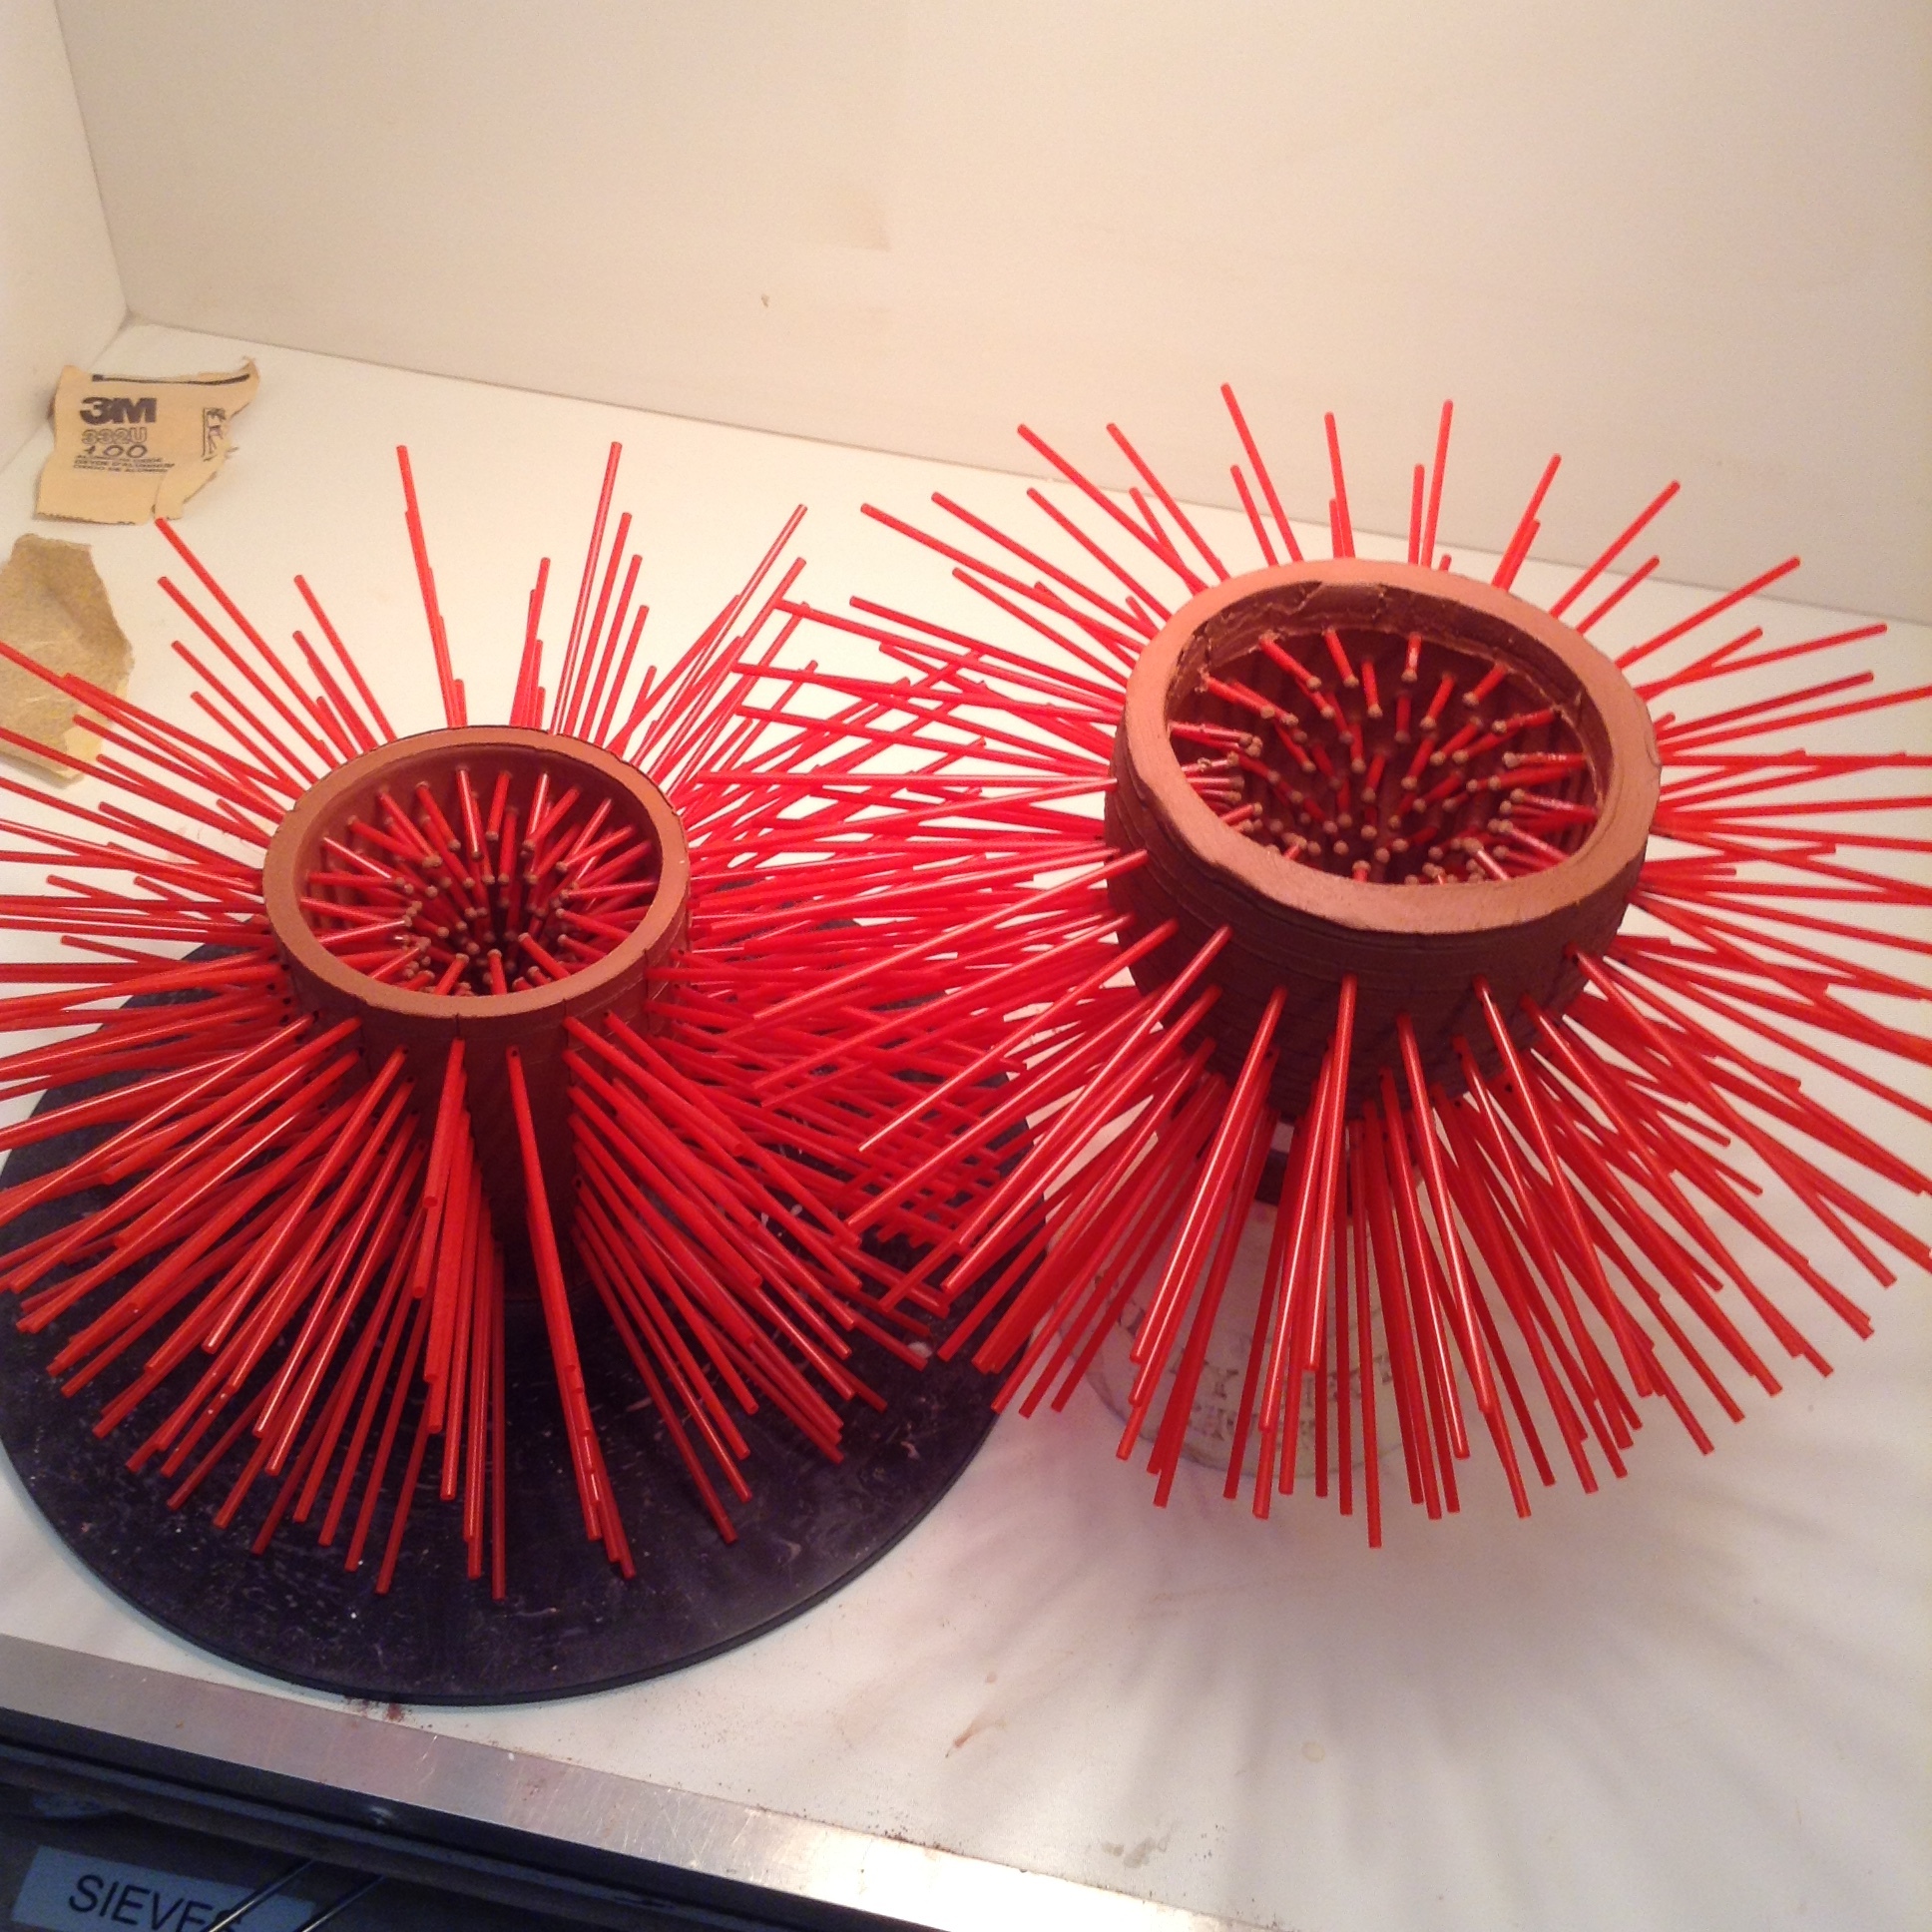
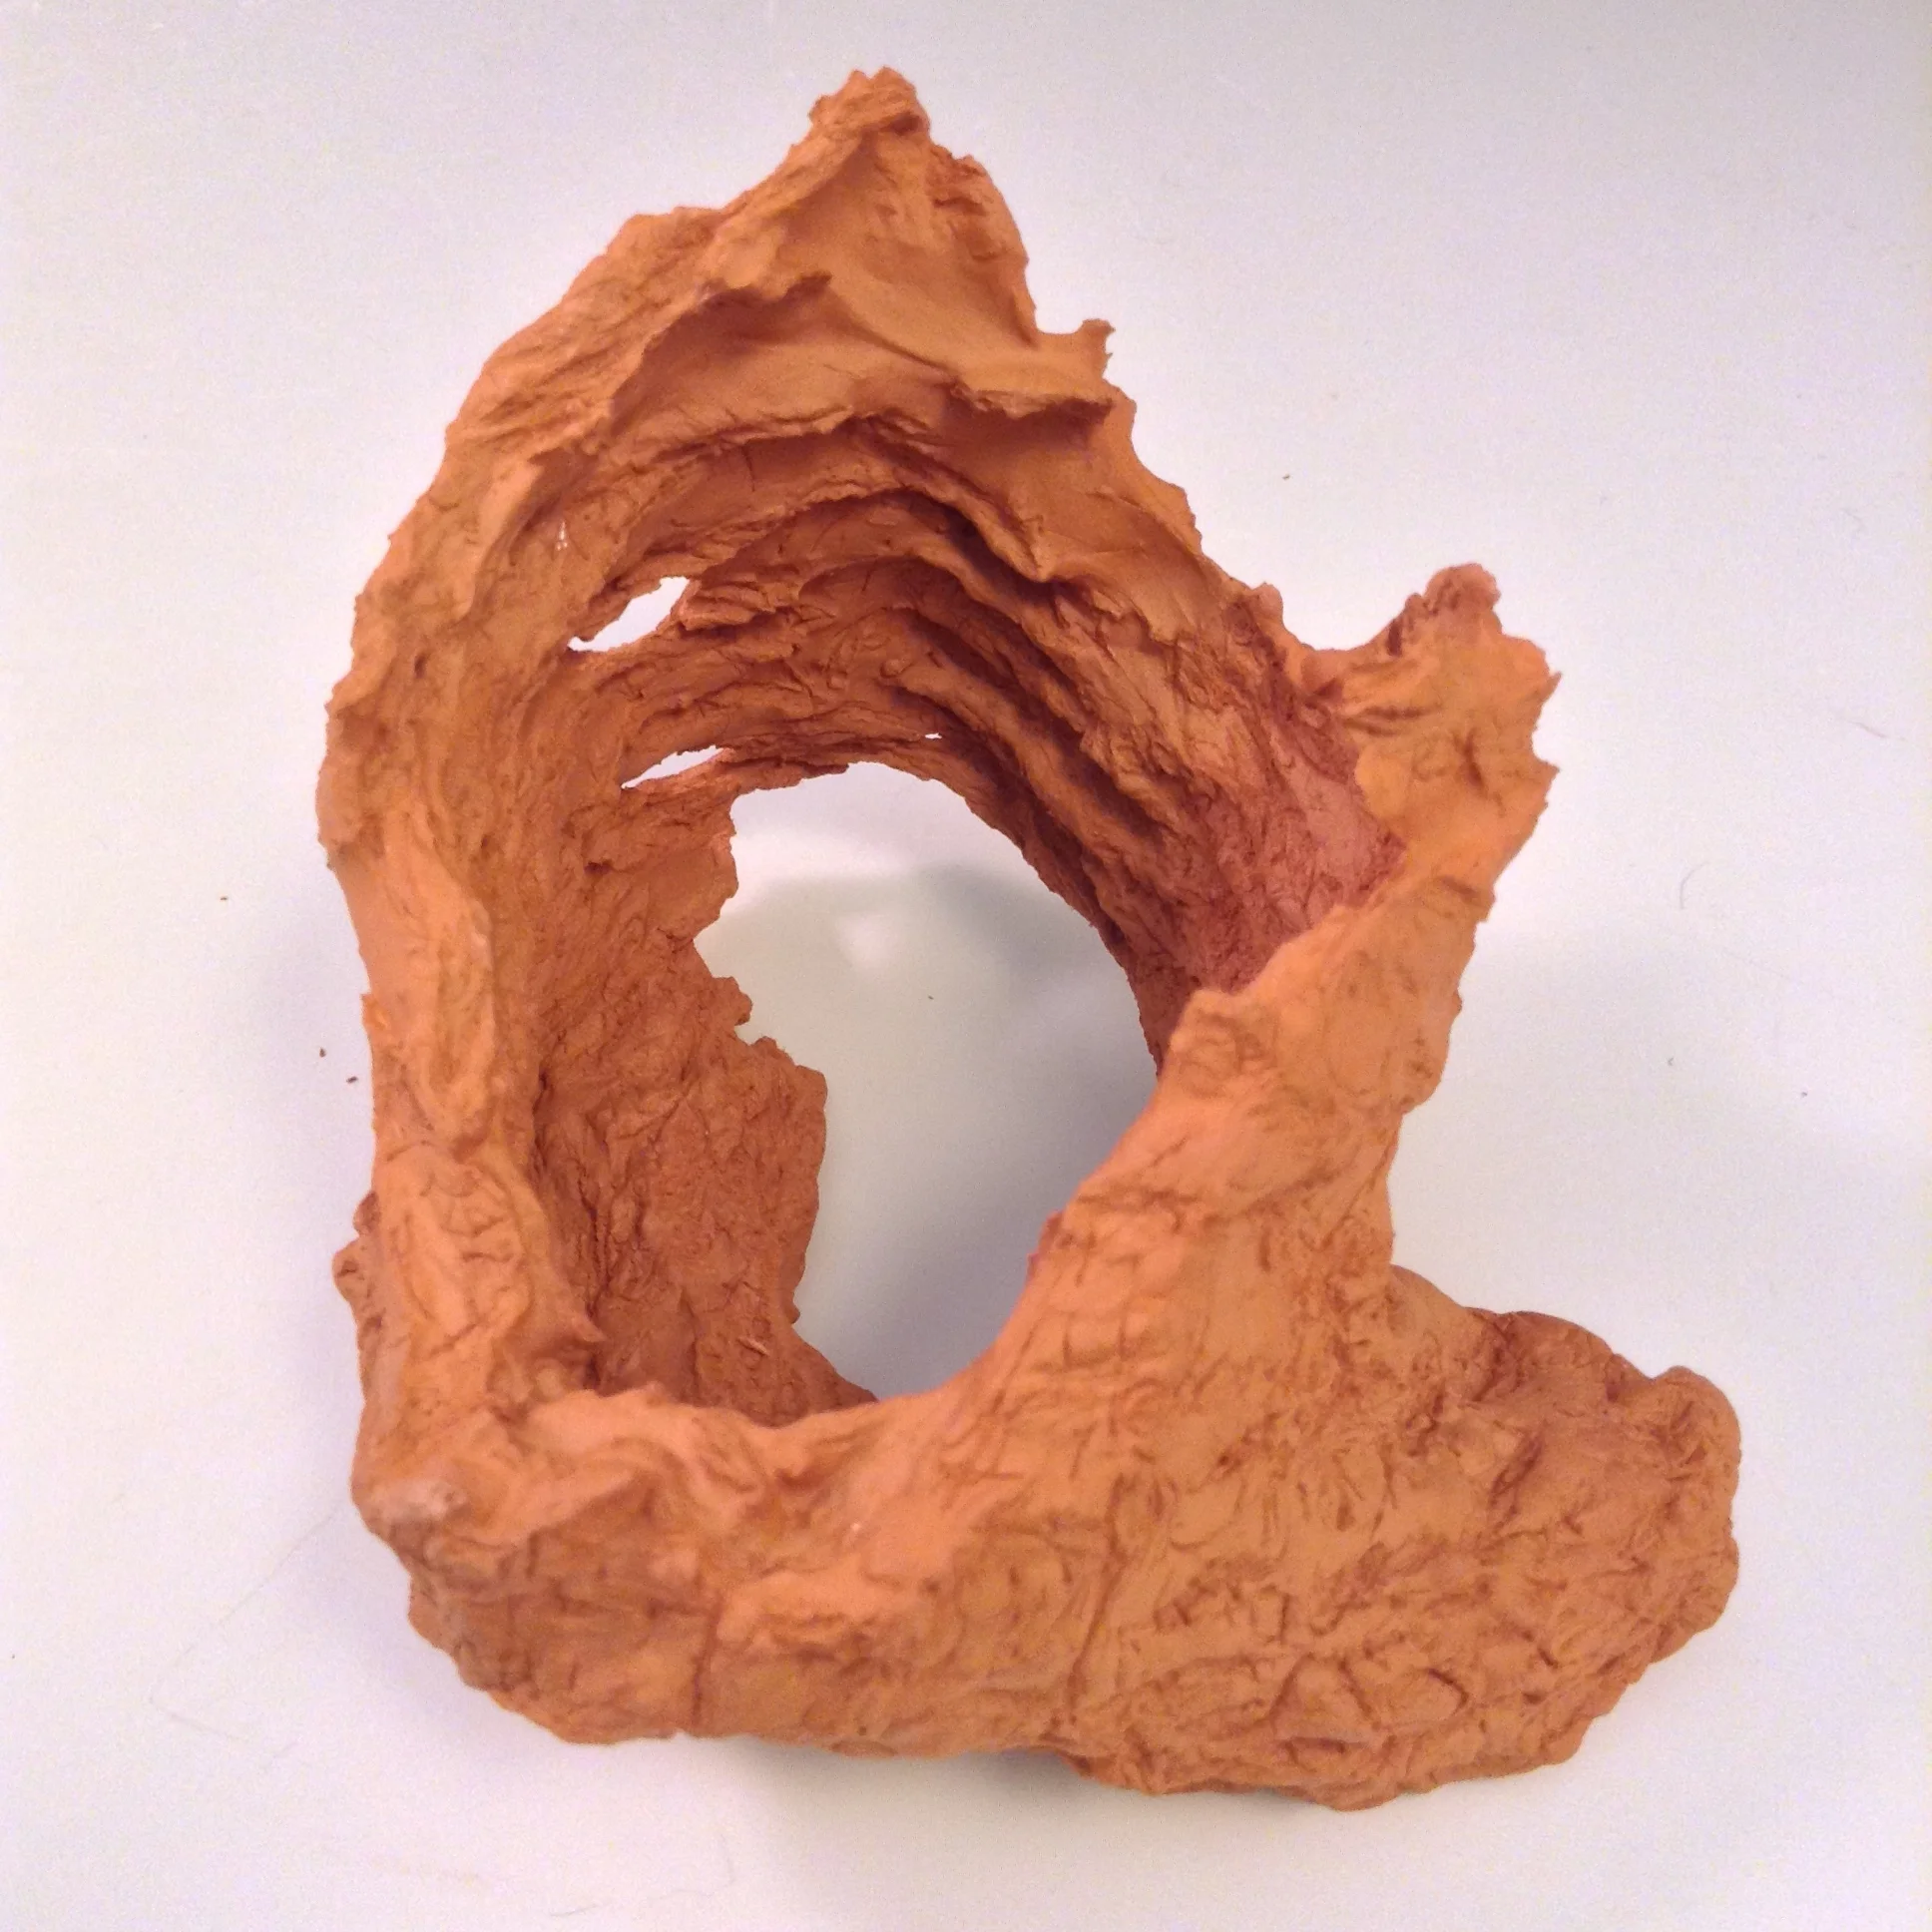
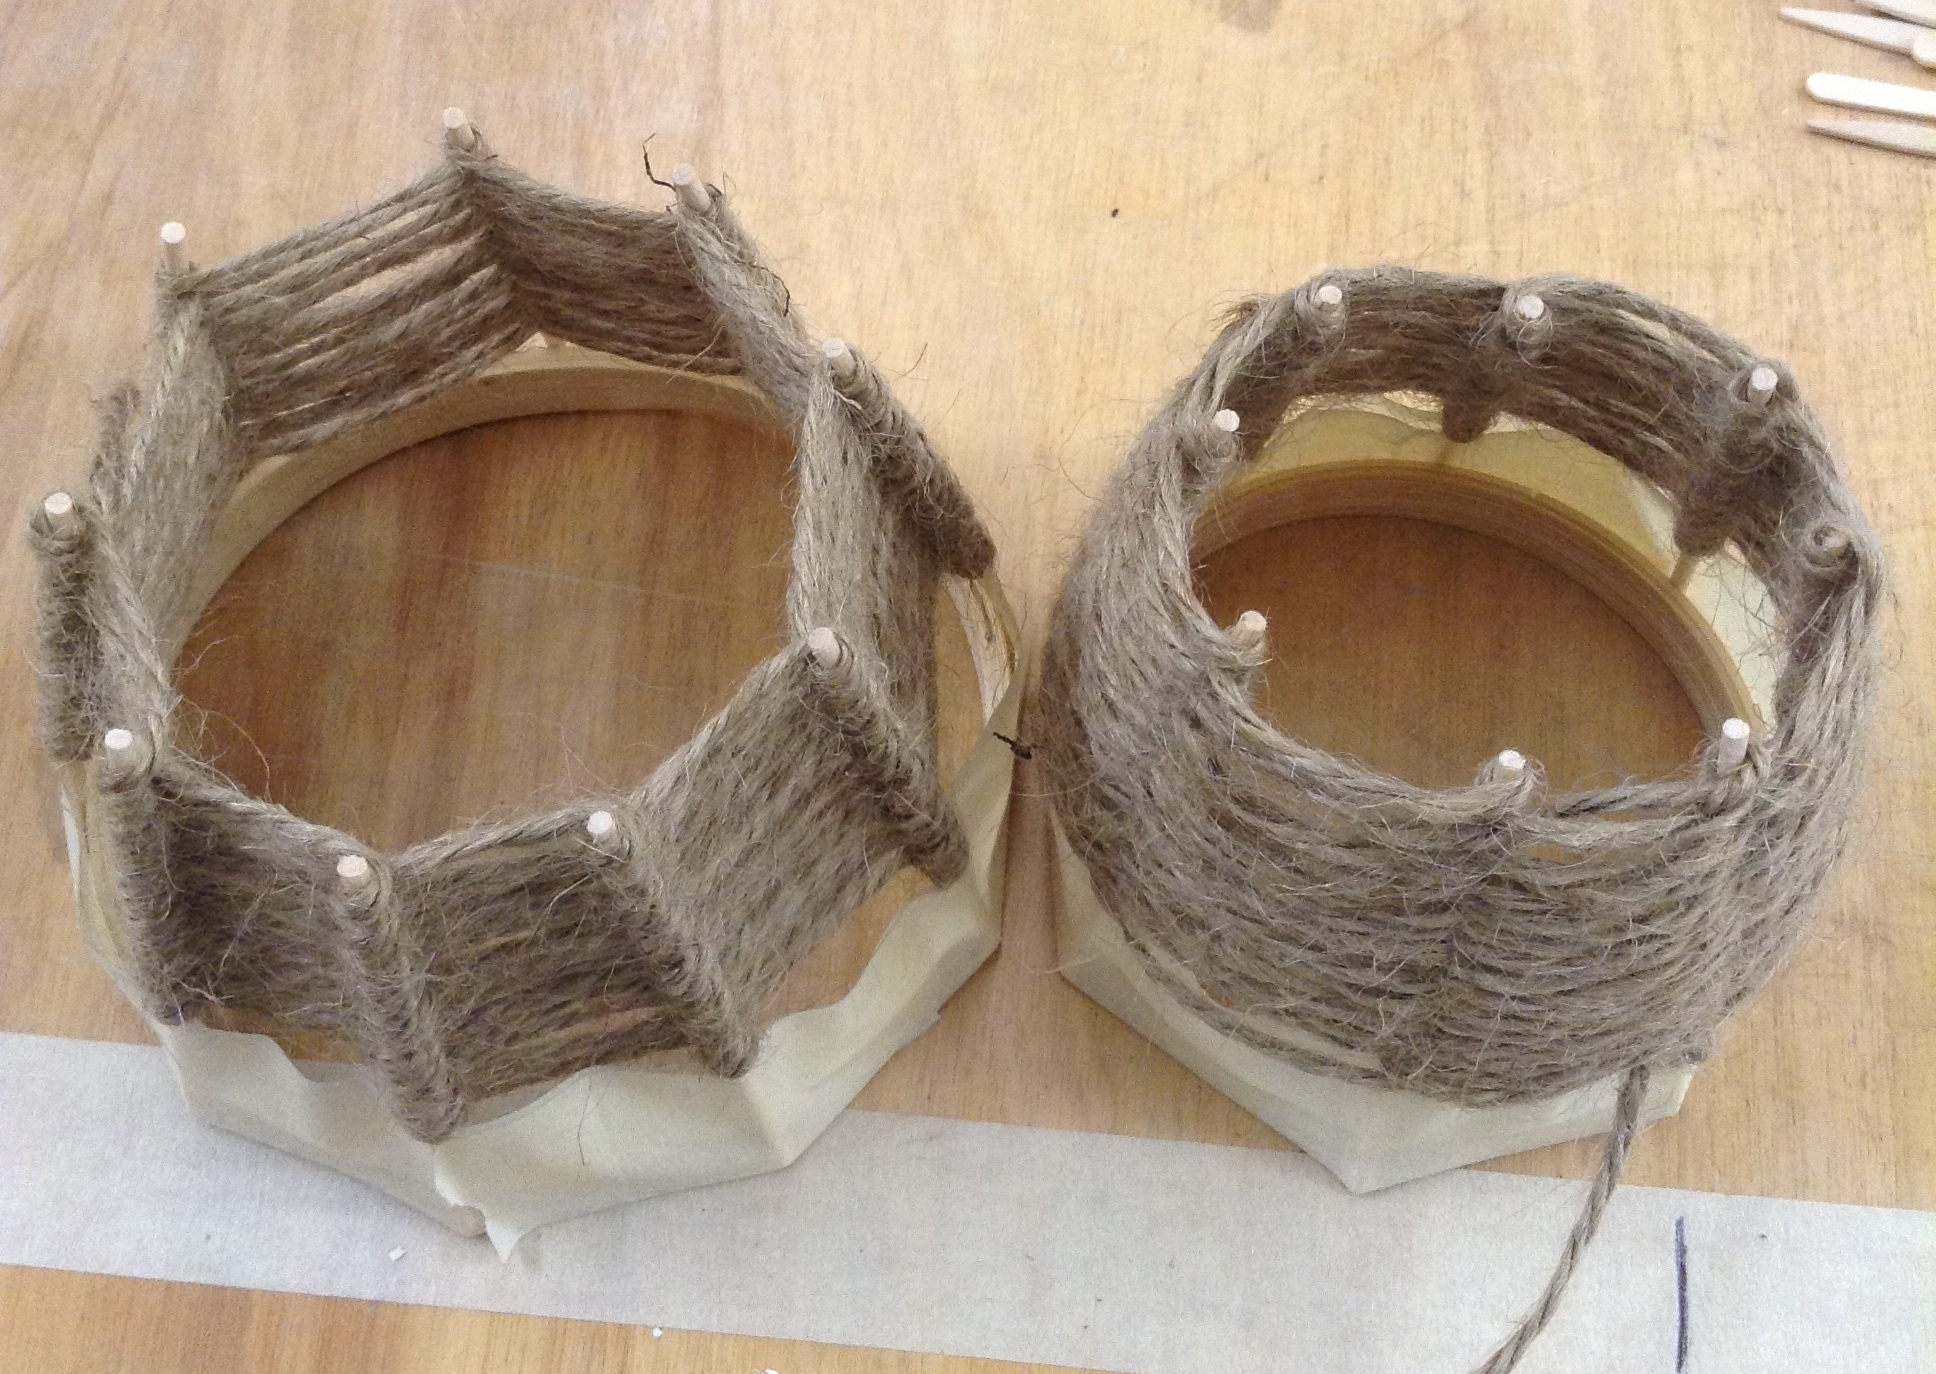
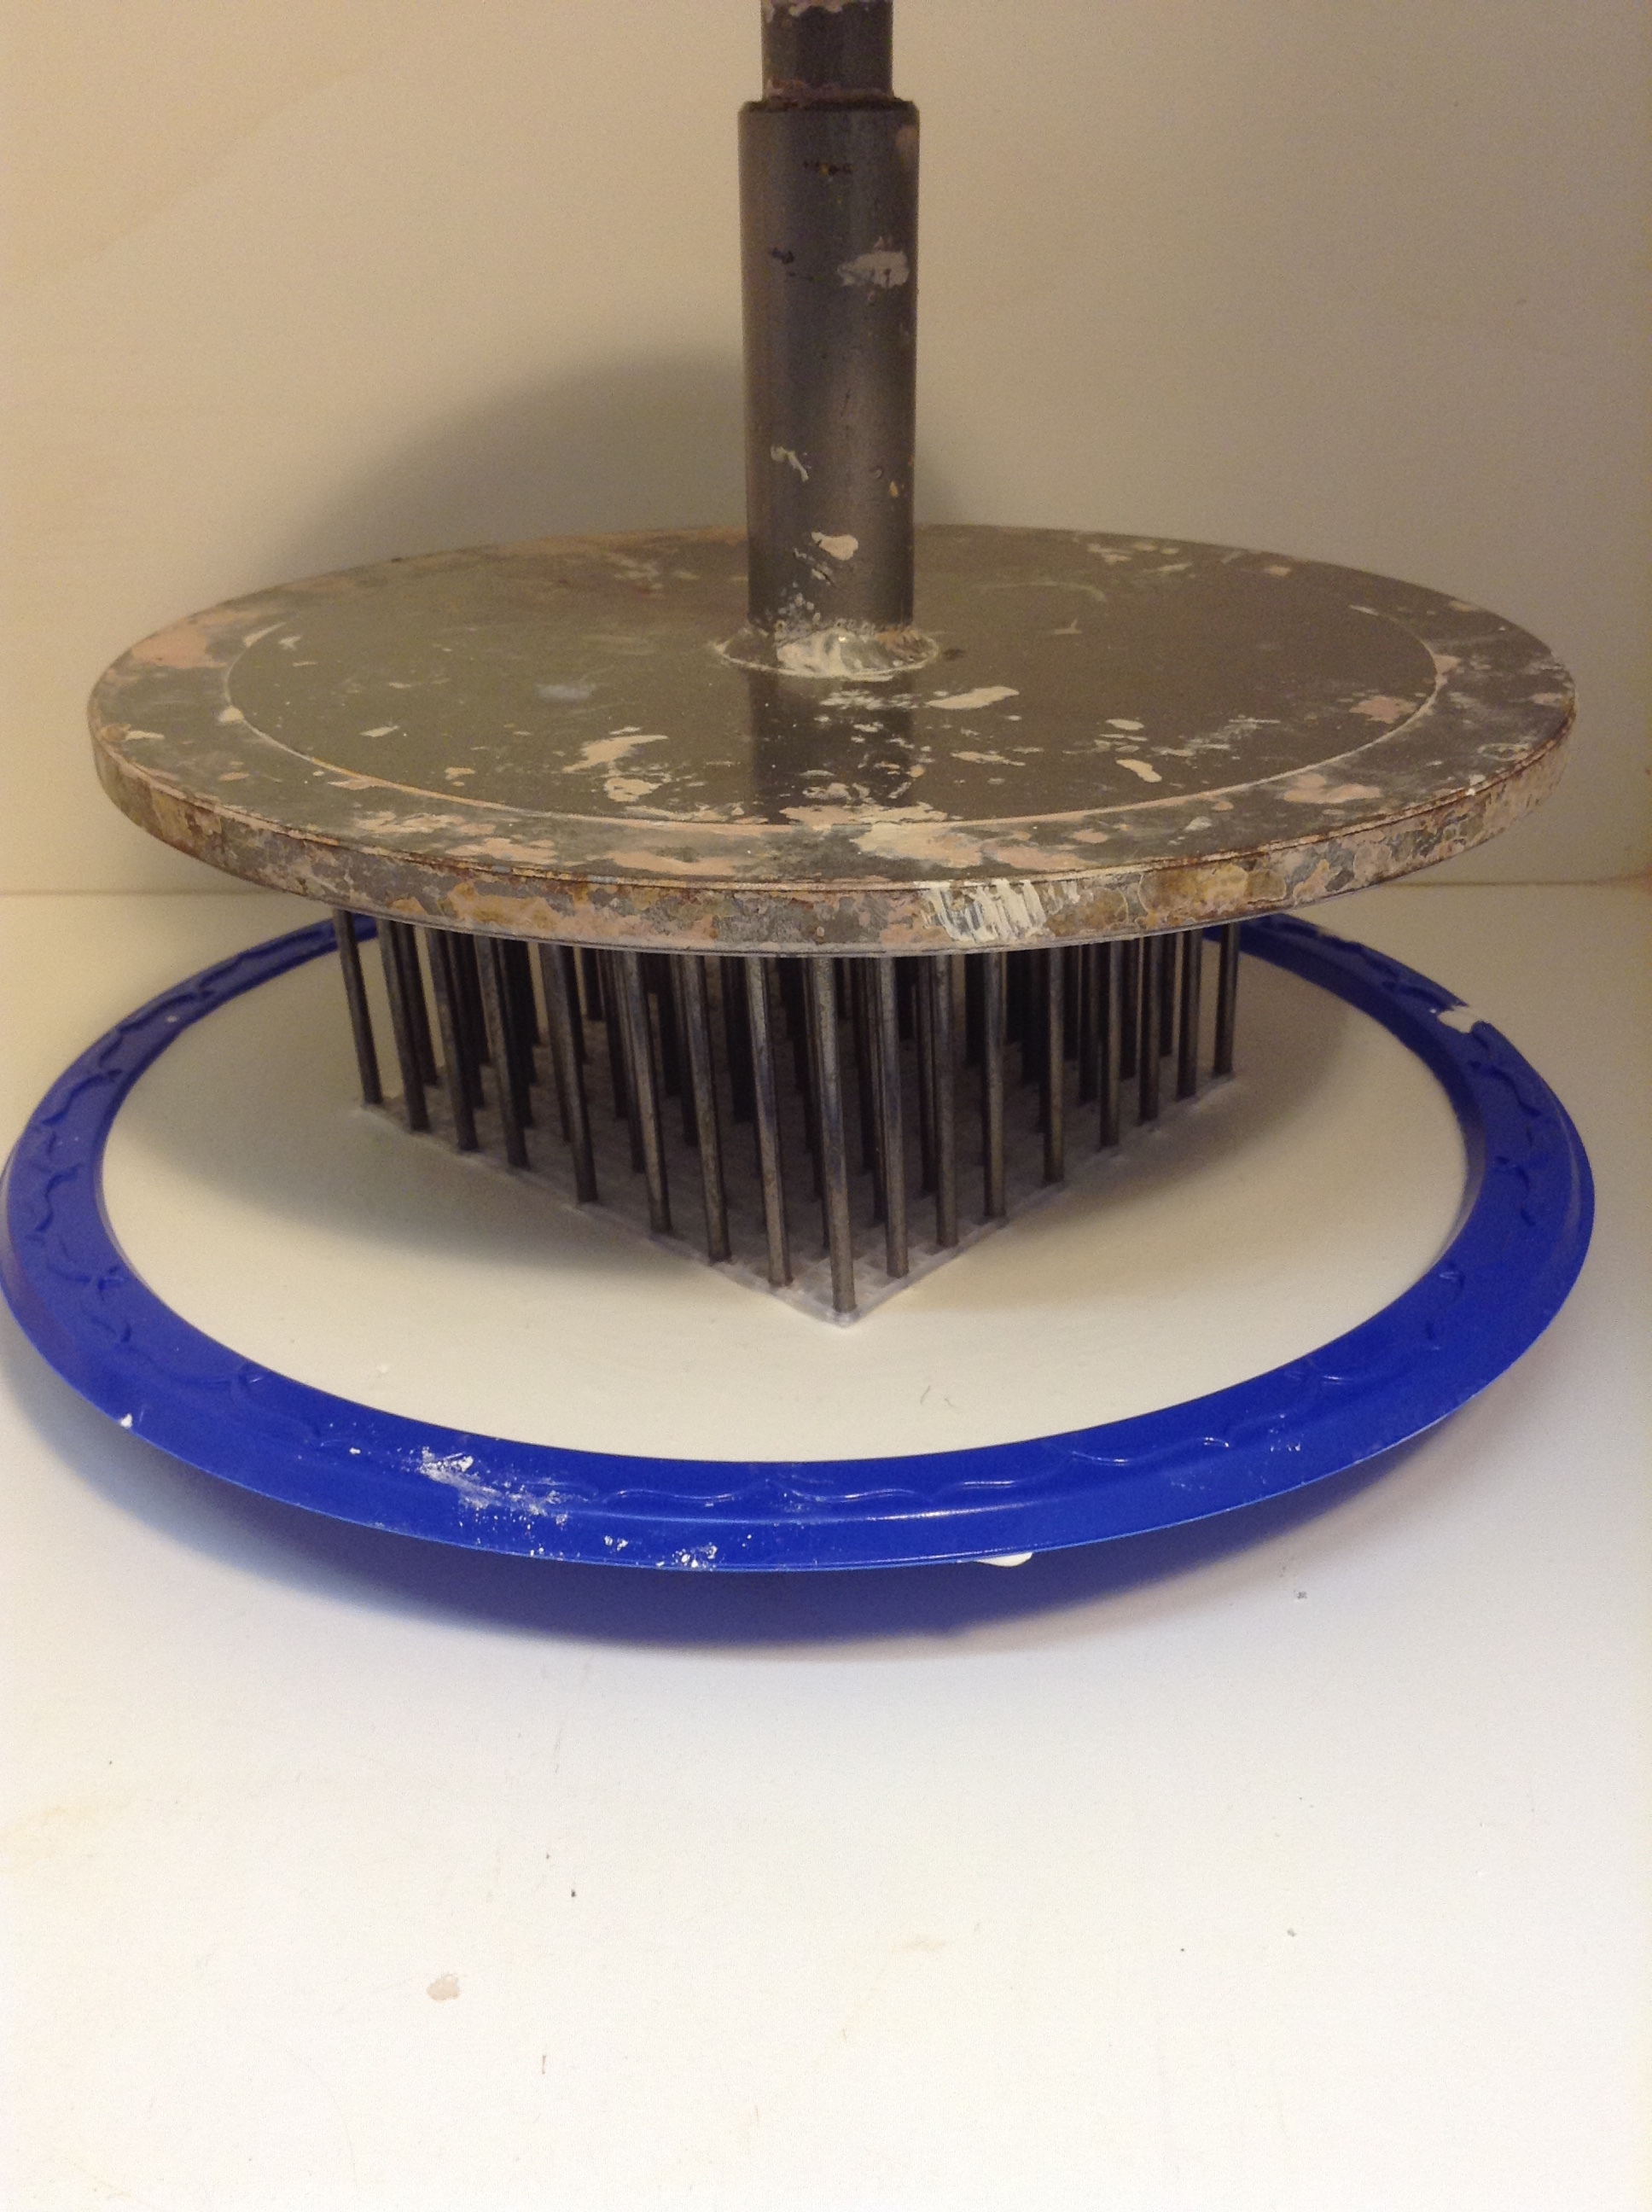
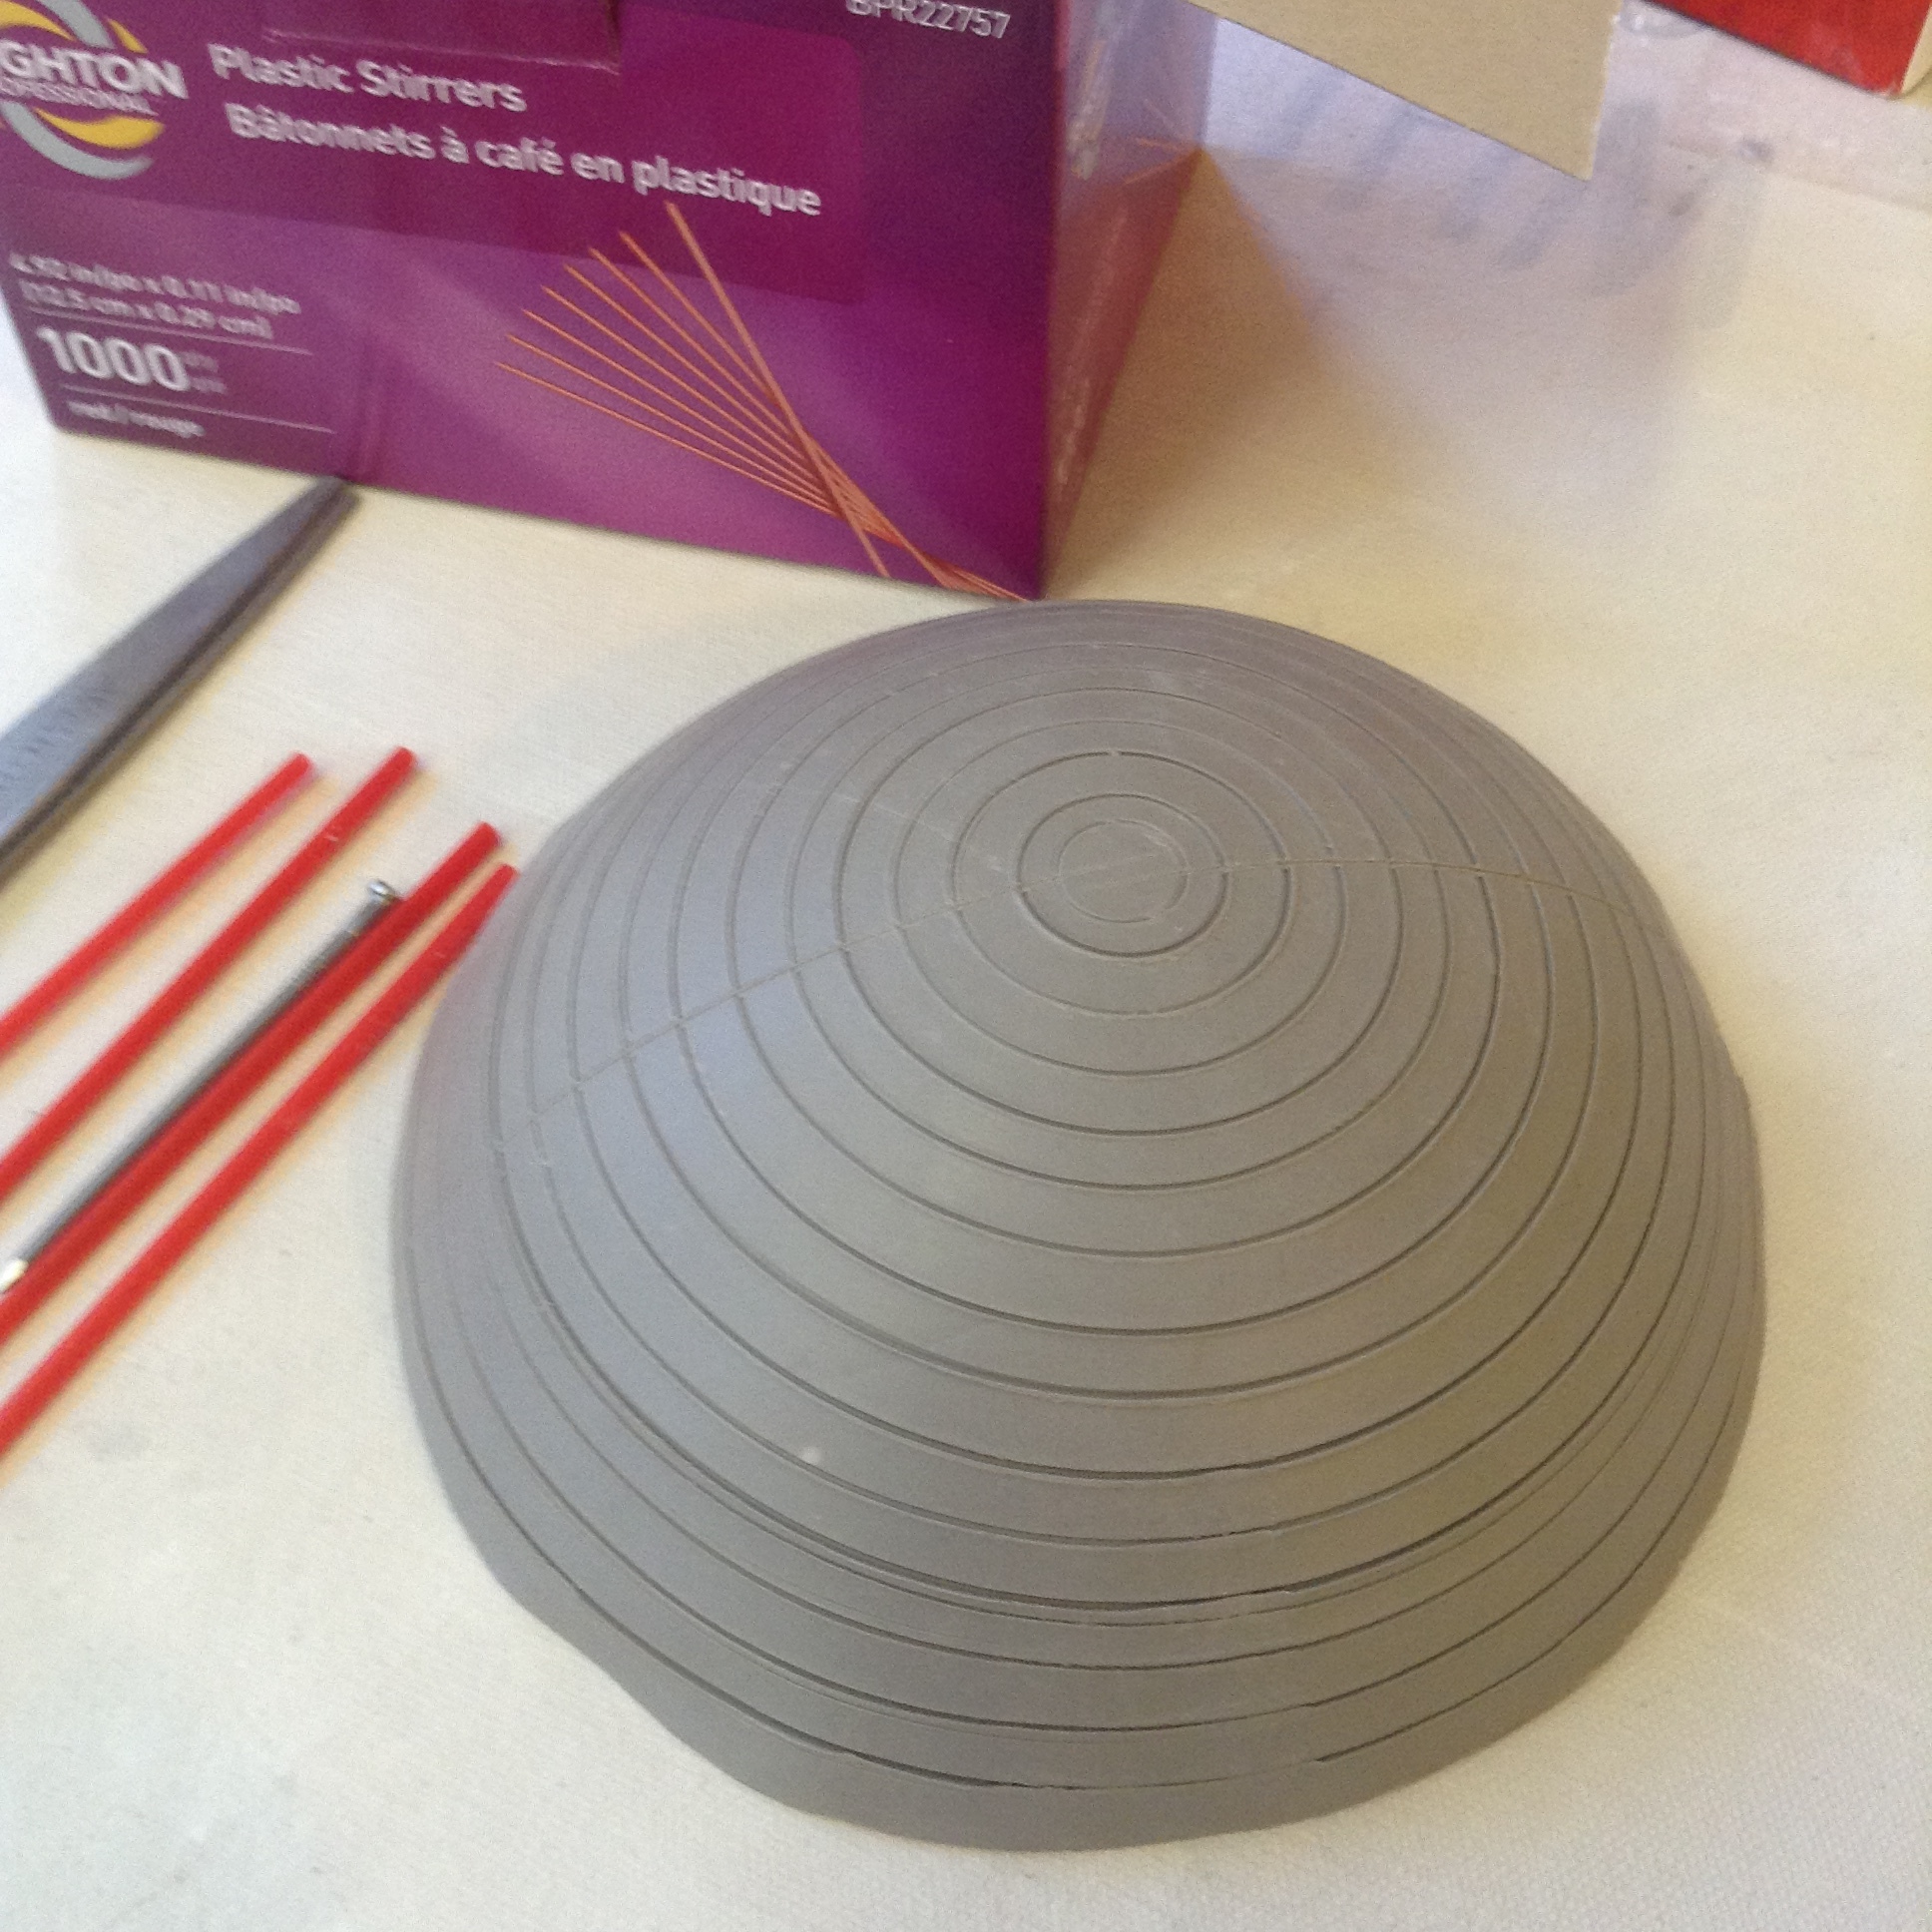
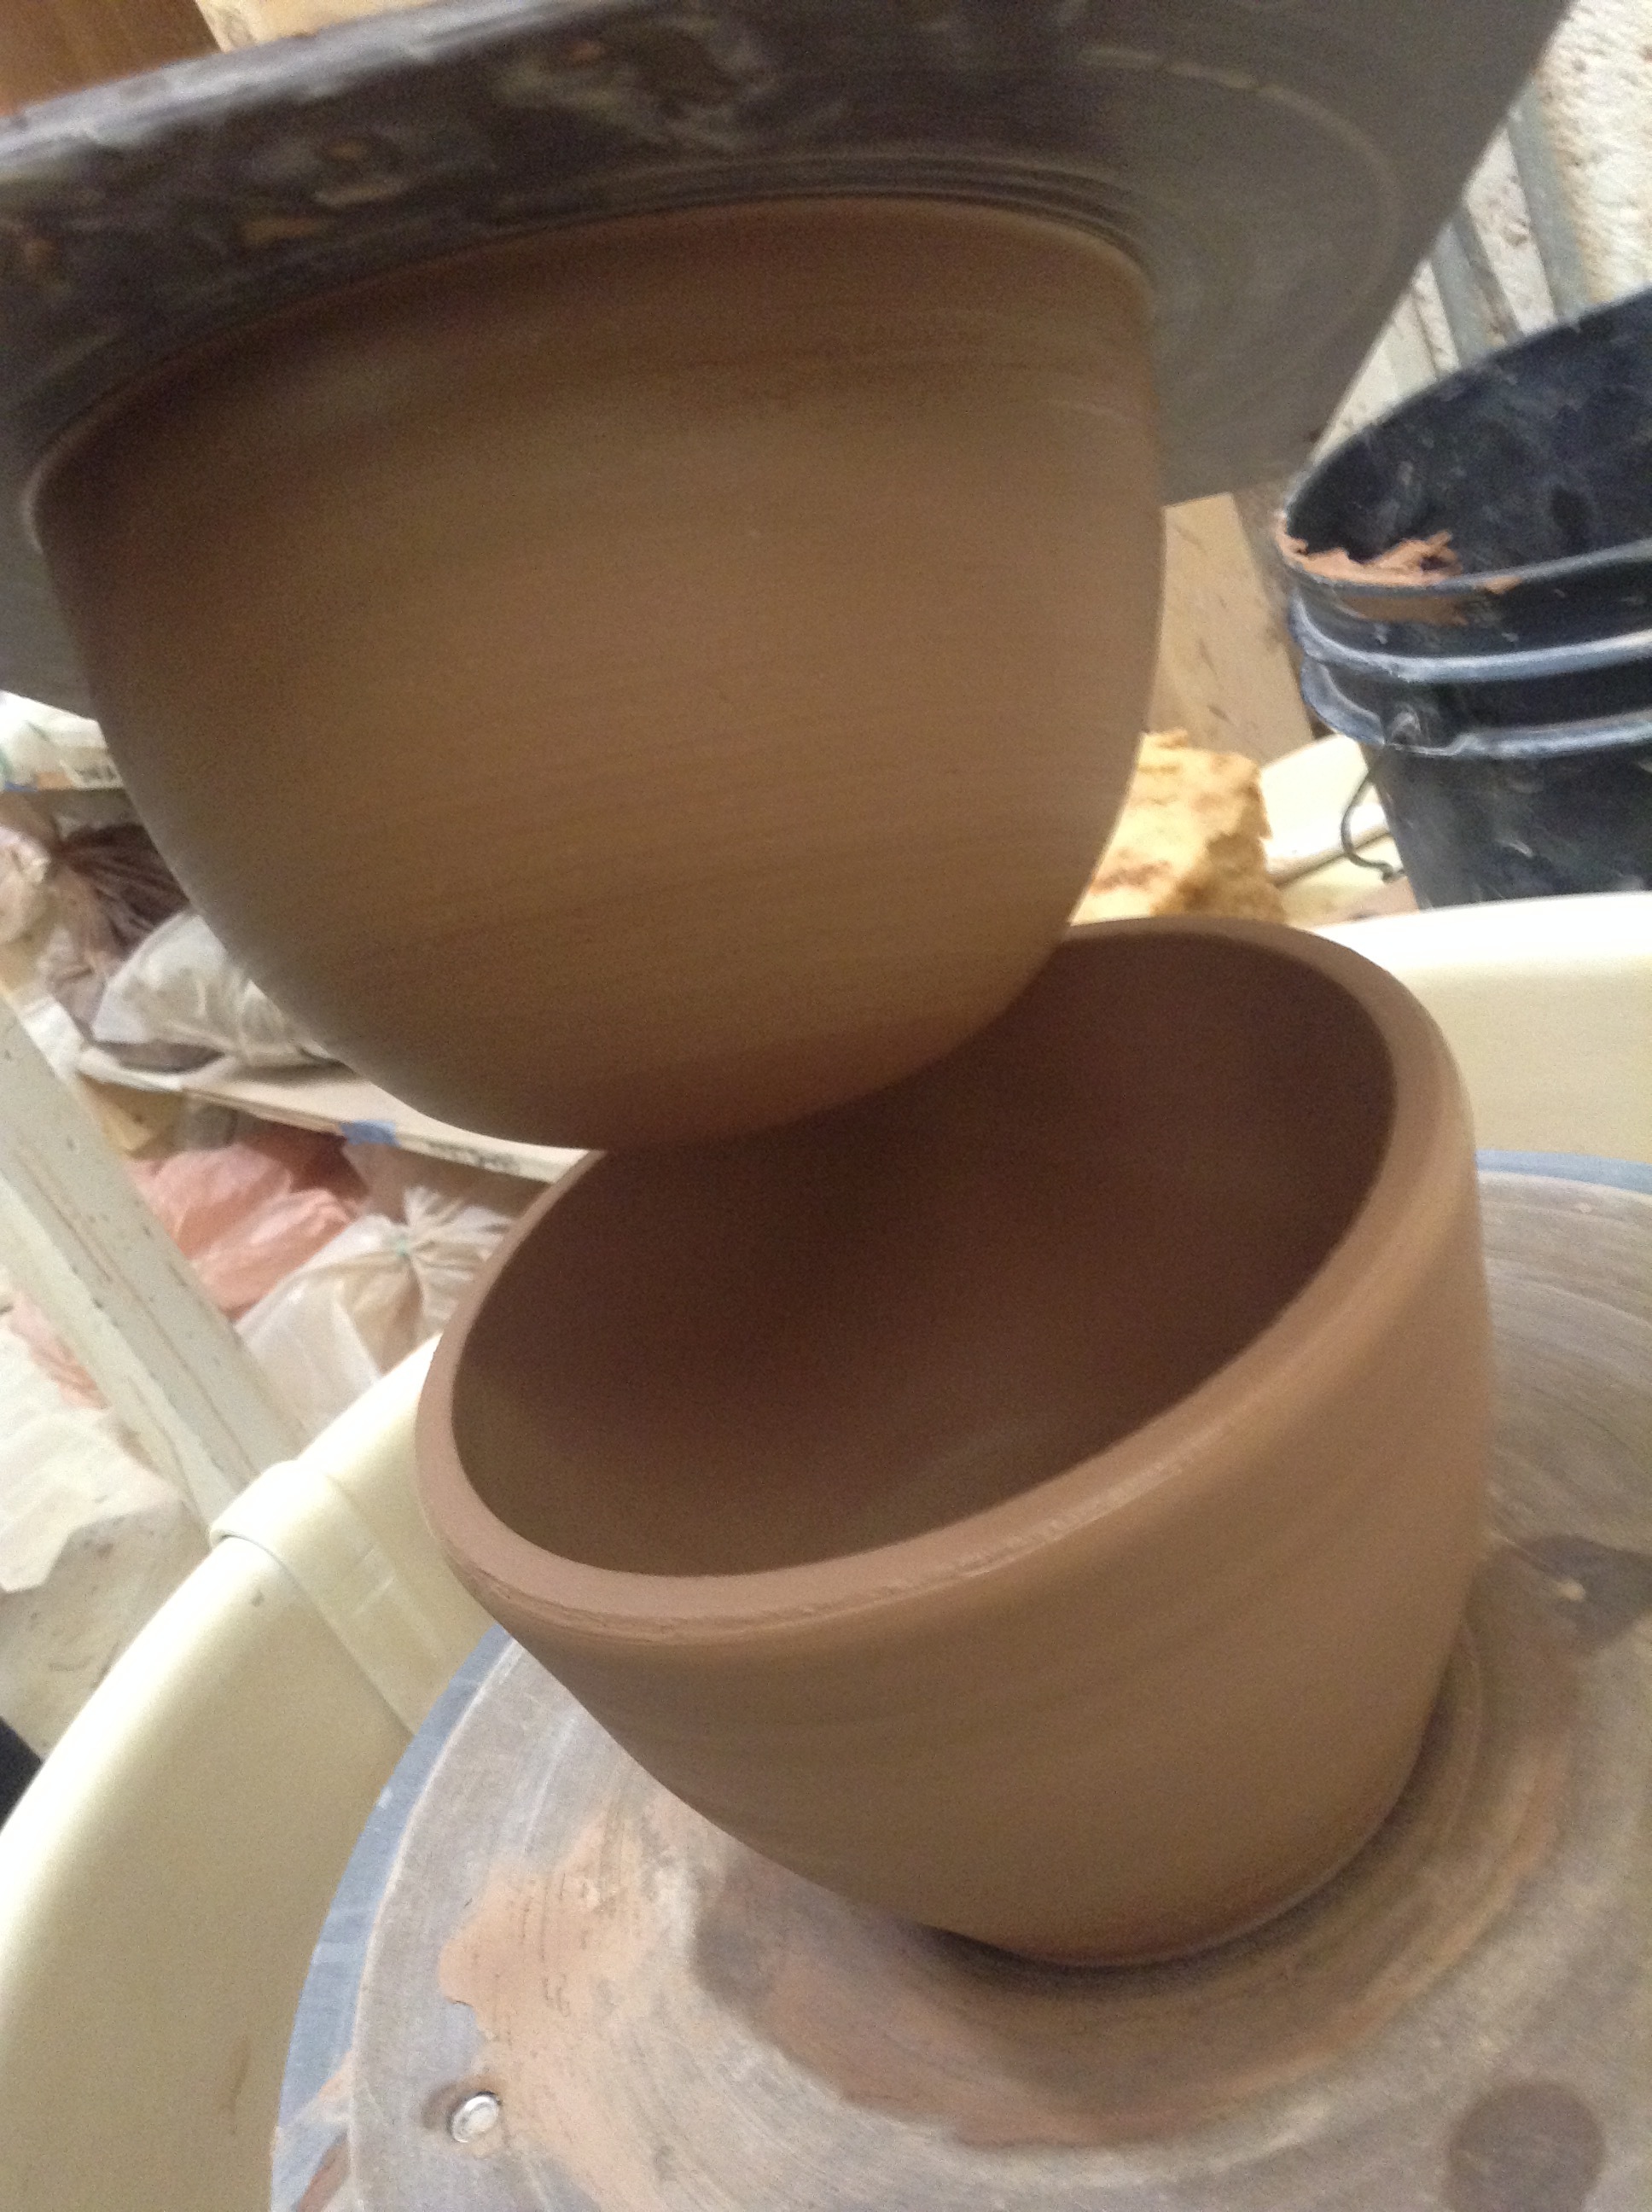
DOUBLE-WALLED NESTING WHEEL THROWN FORMS: Small and large
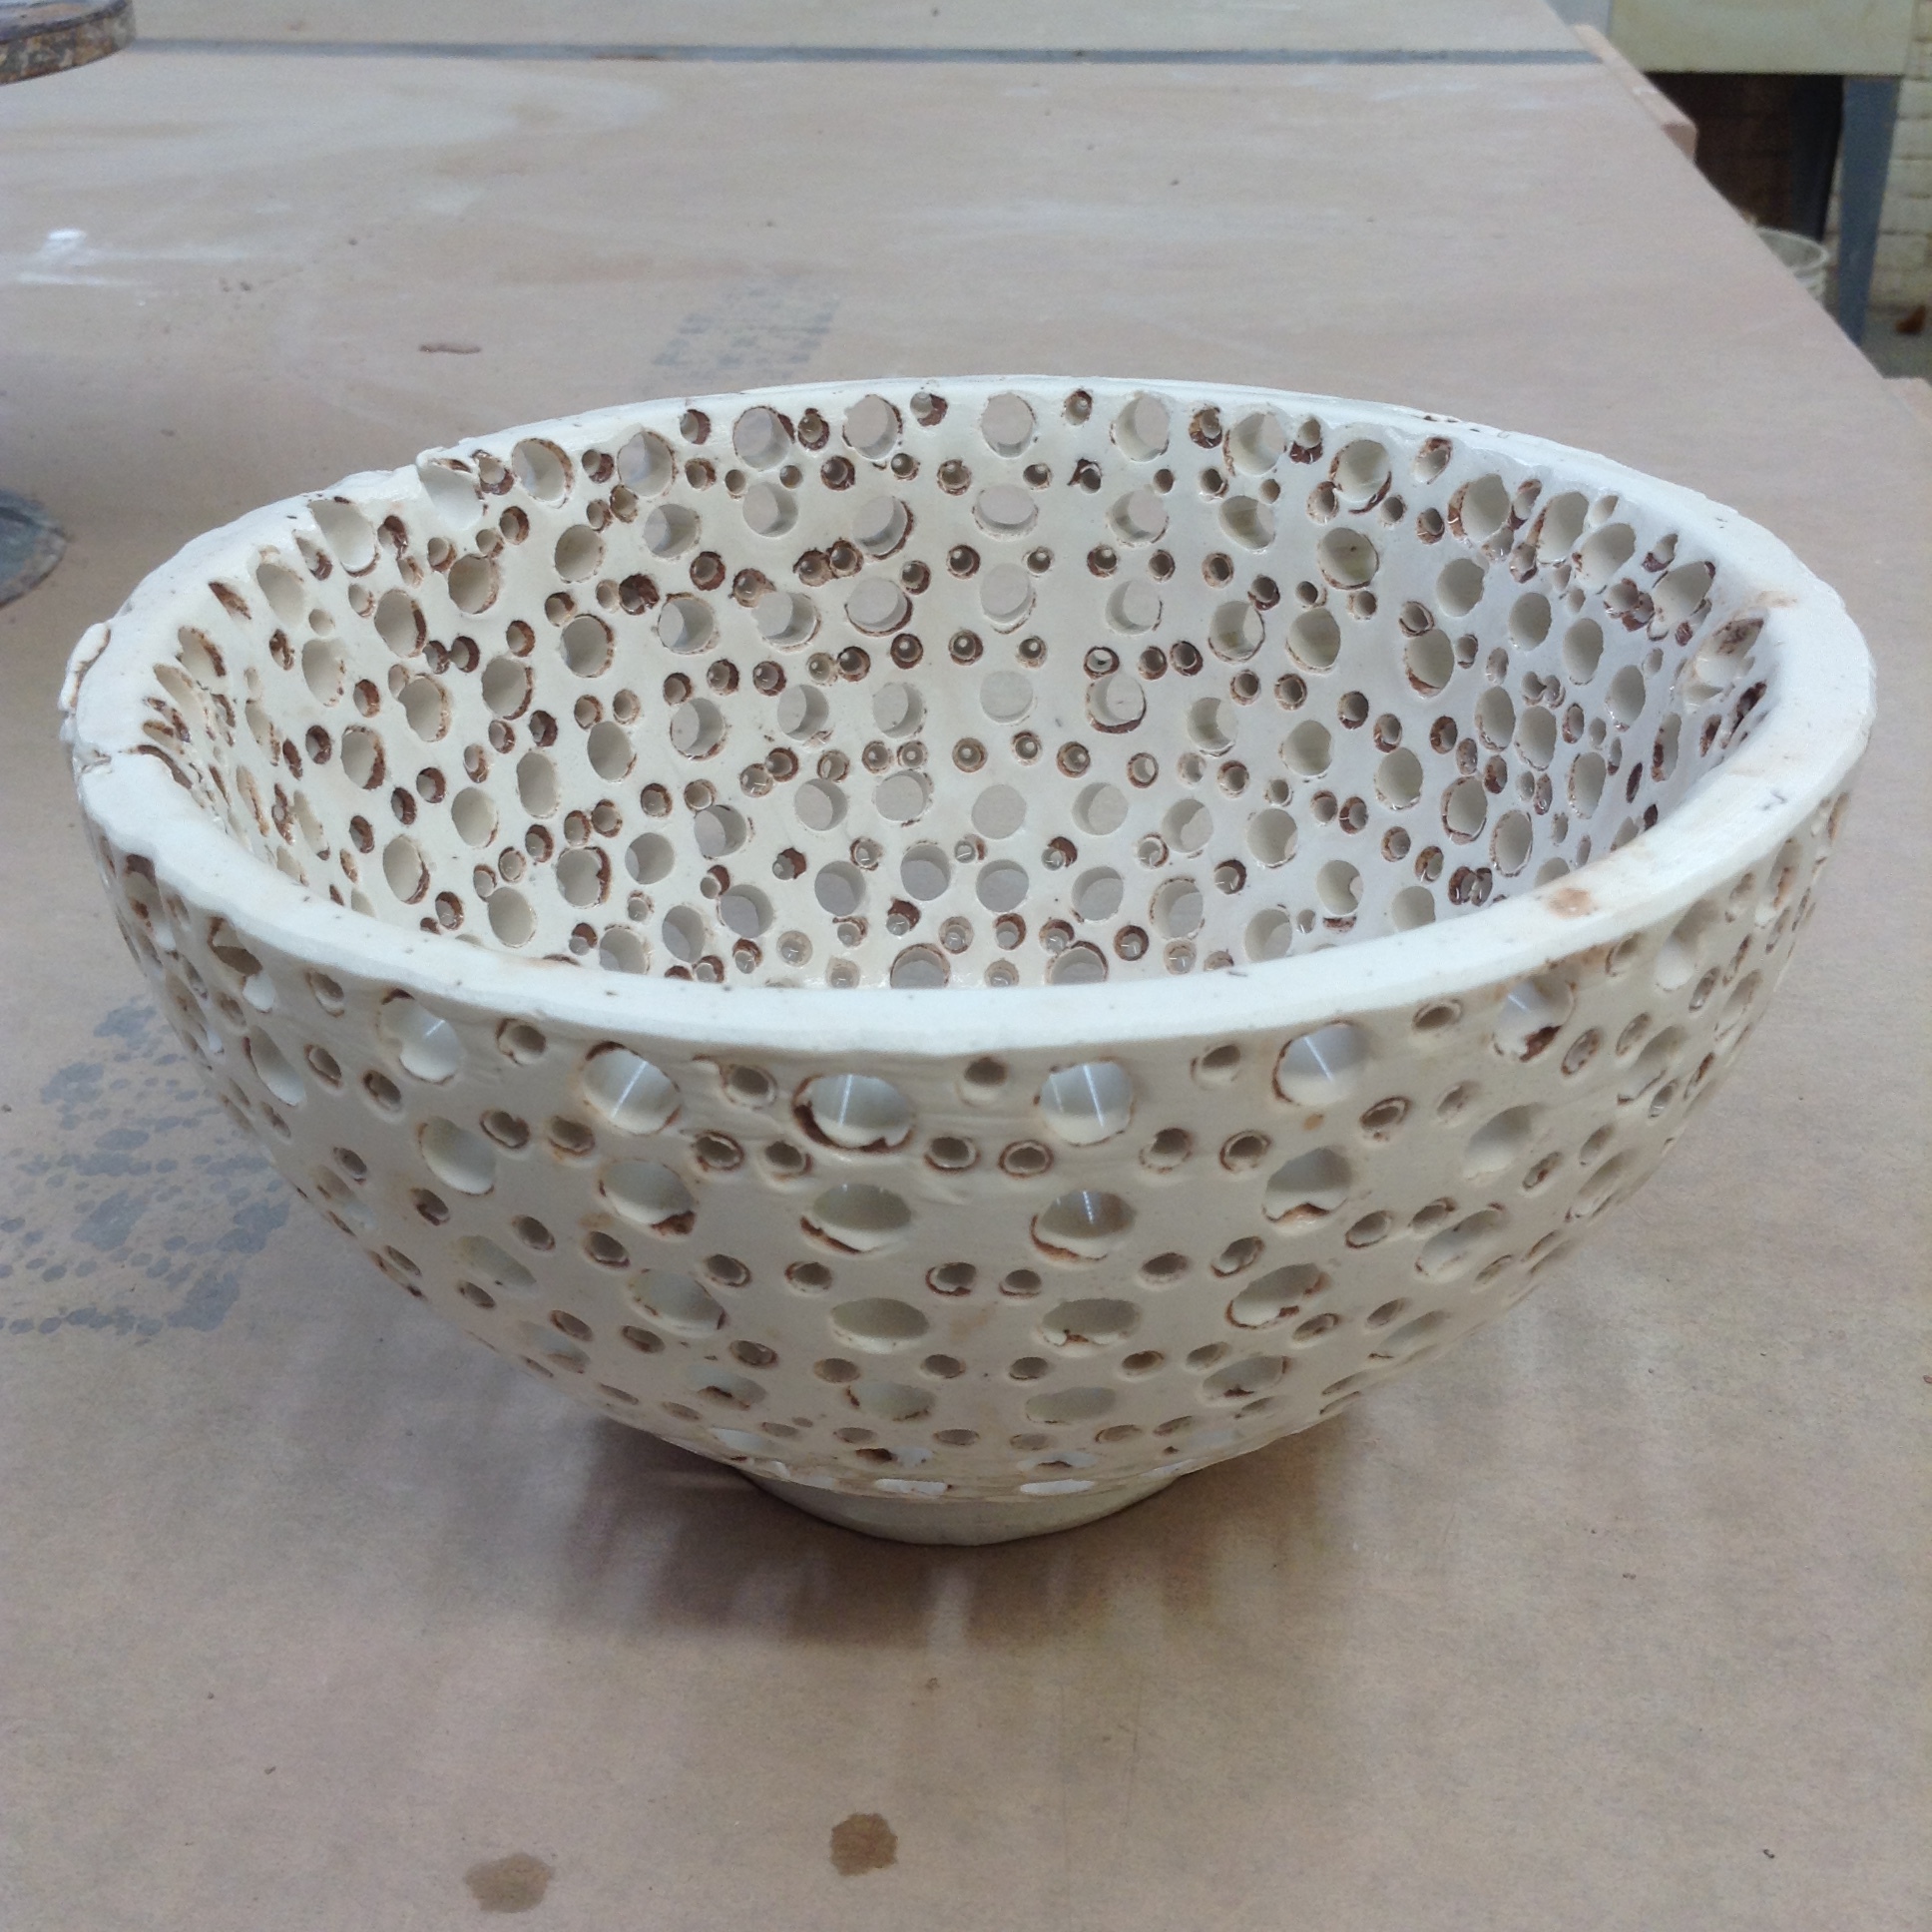
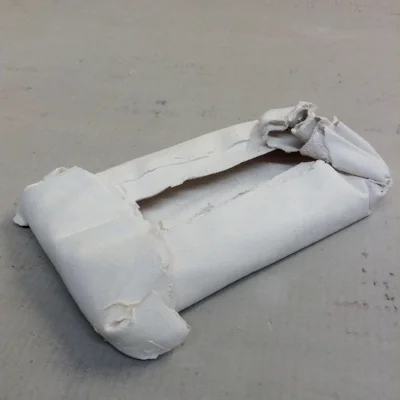
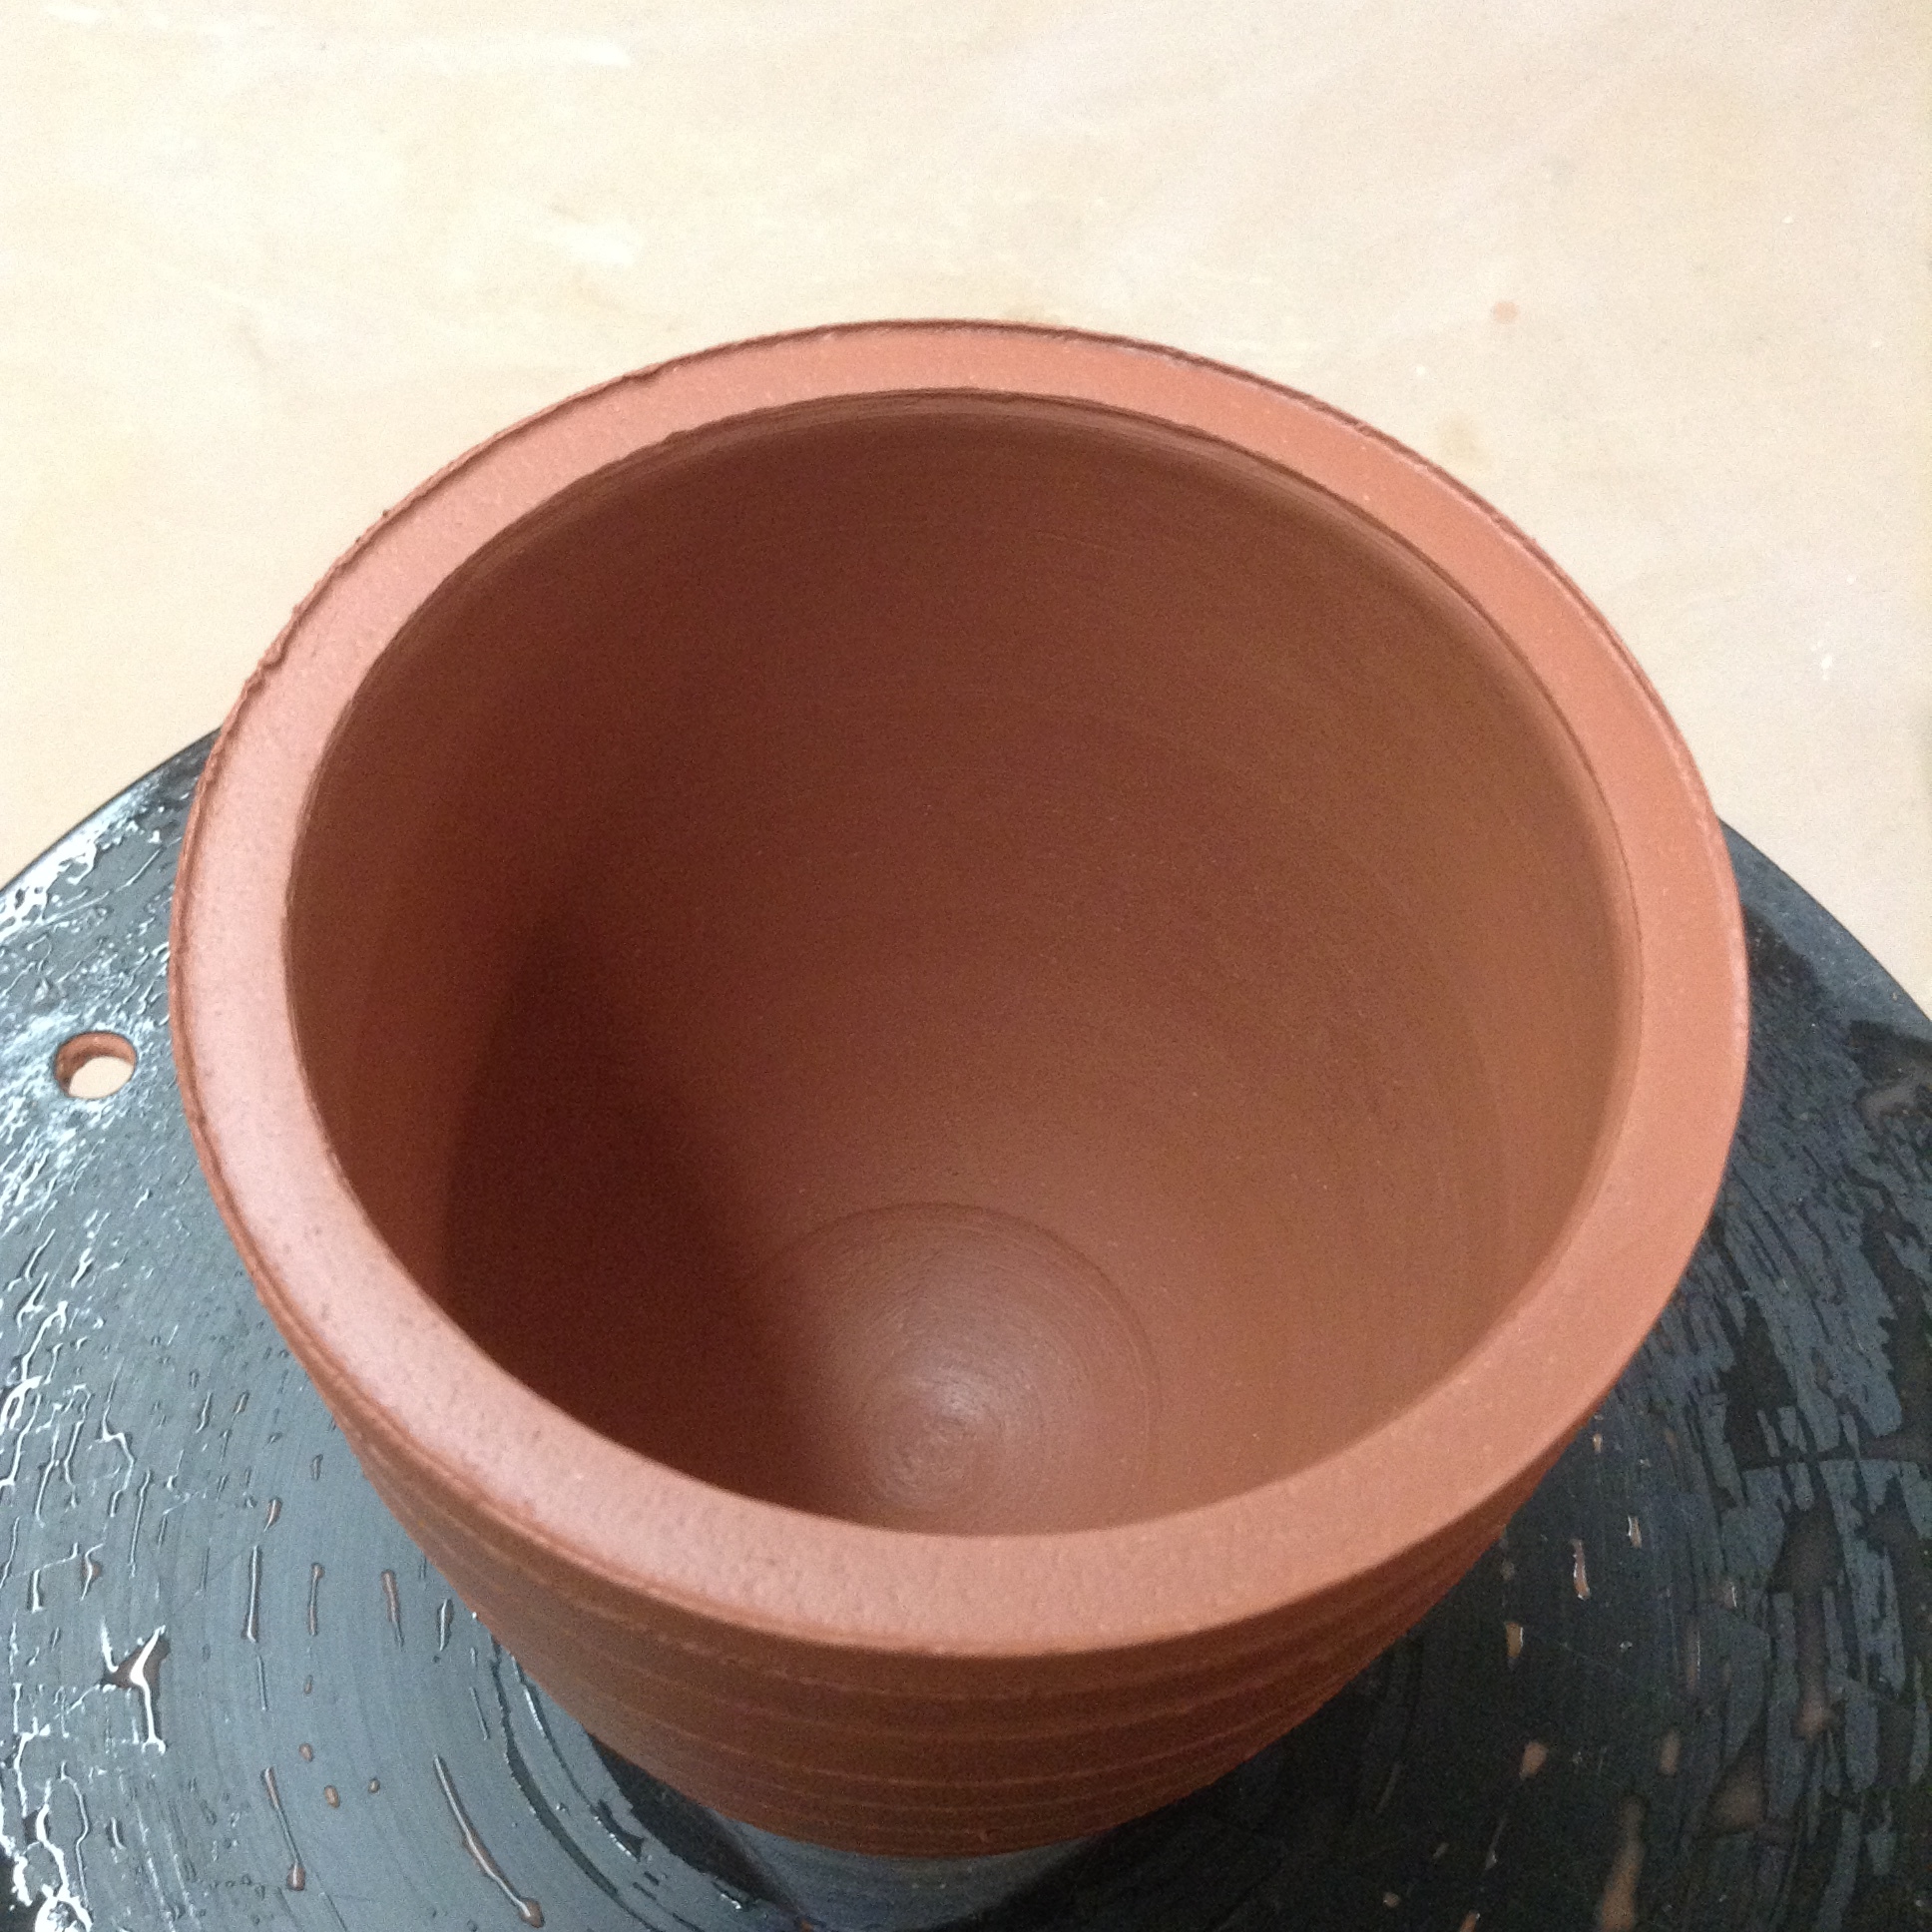
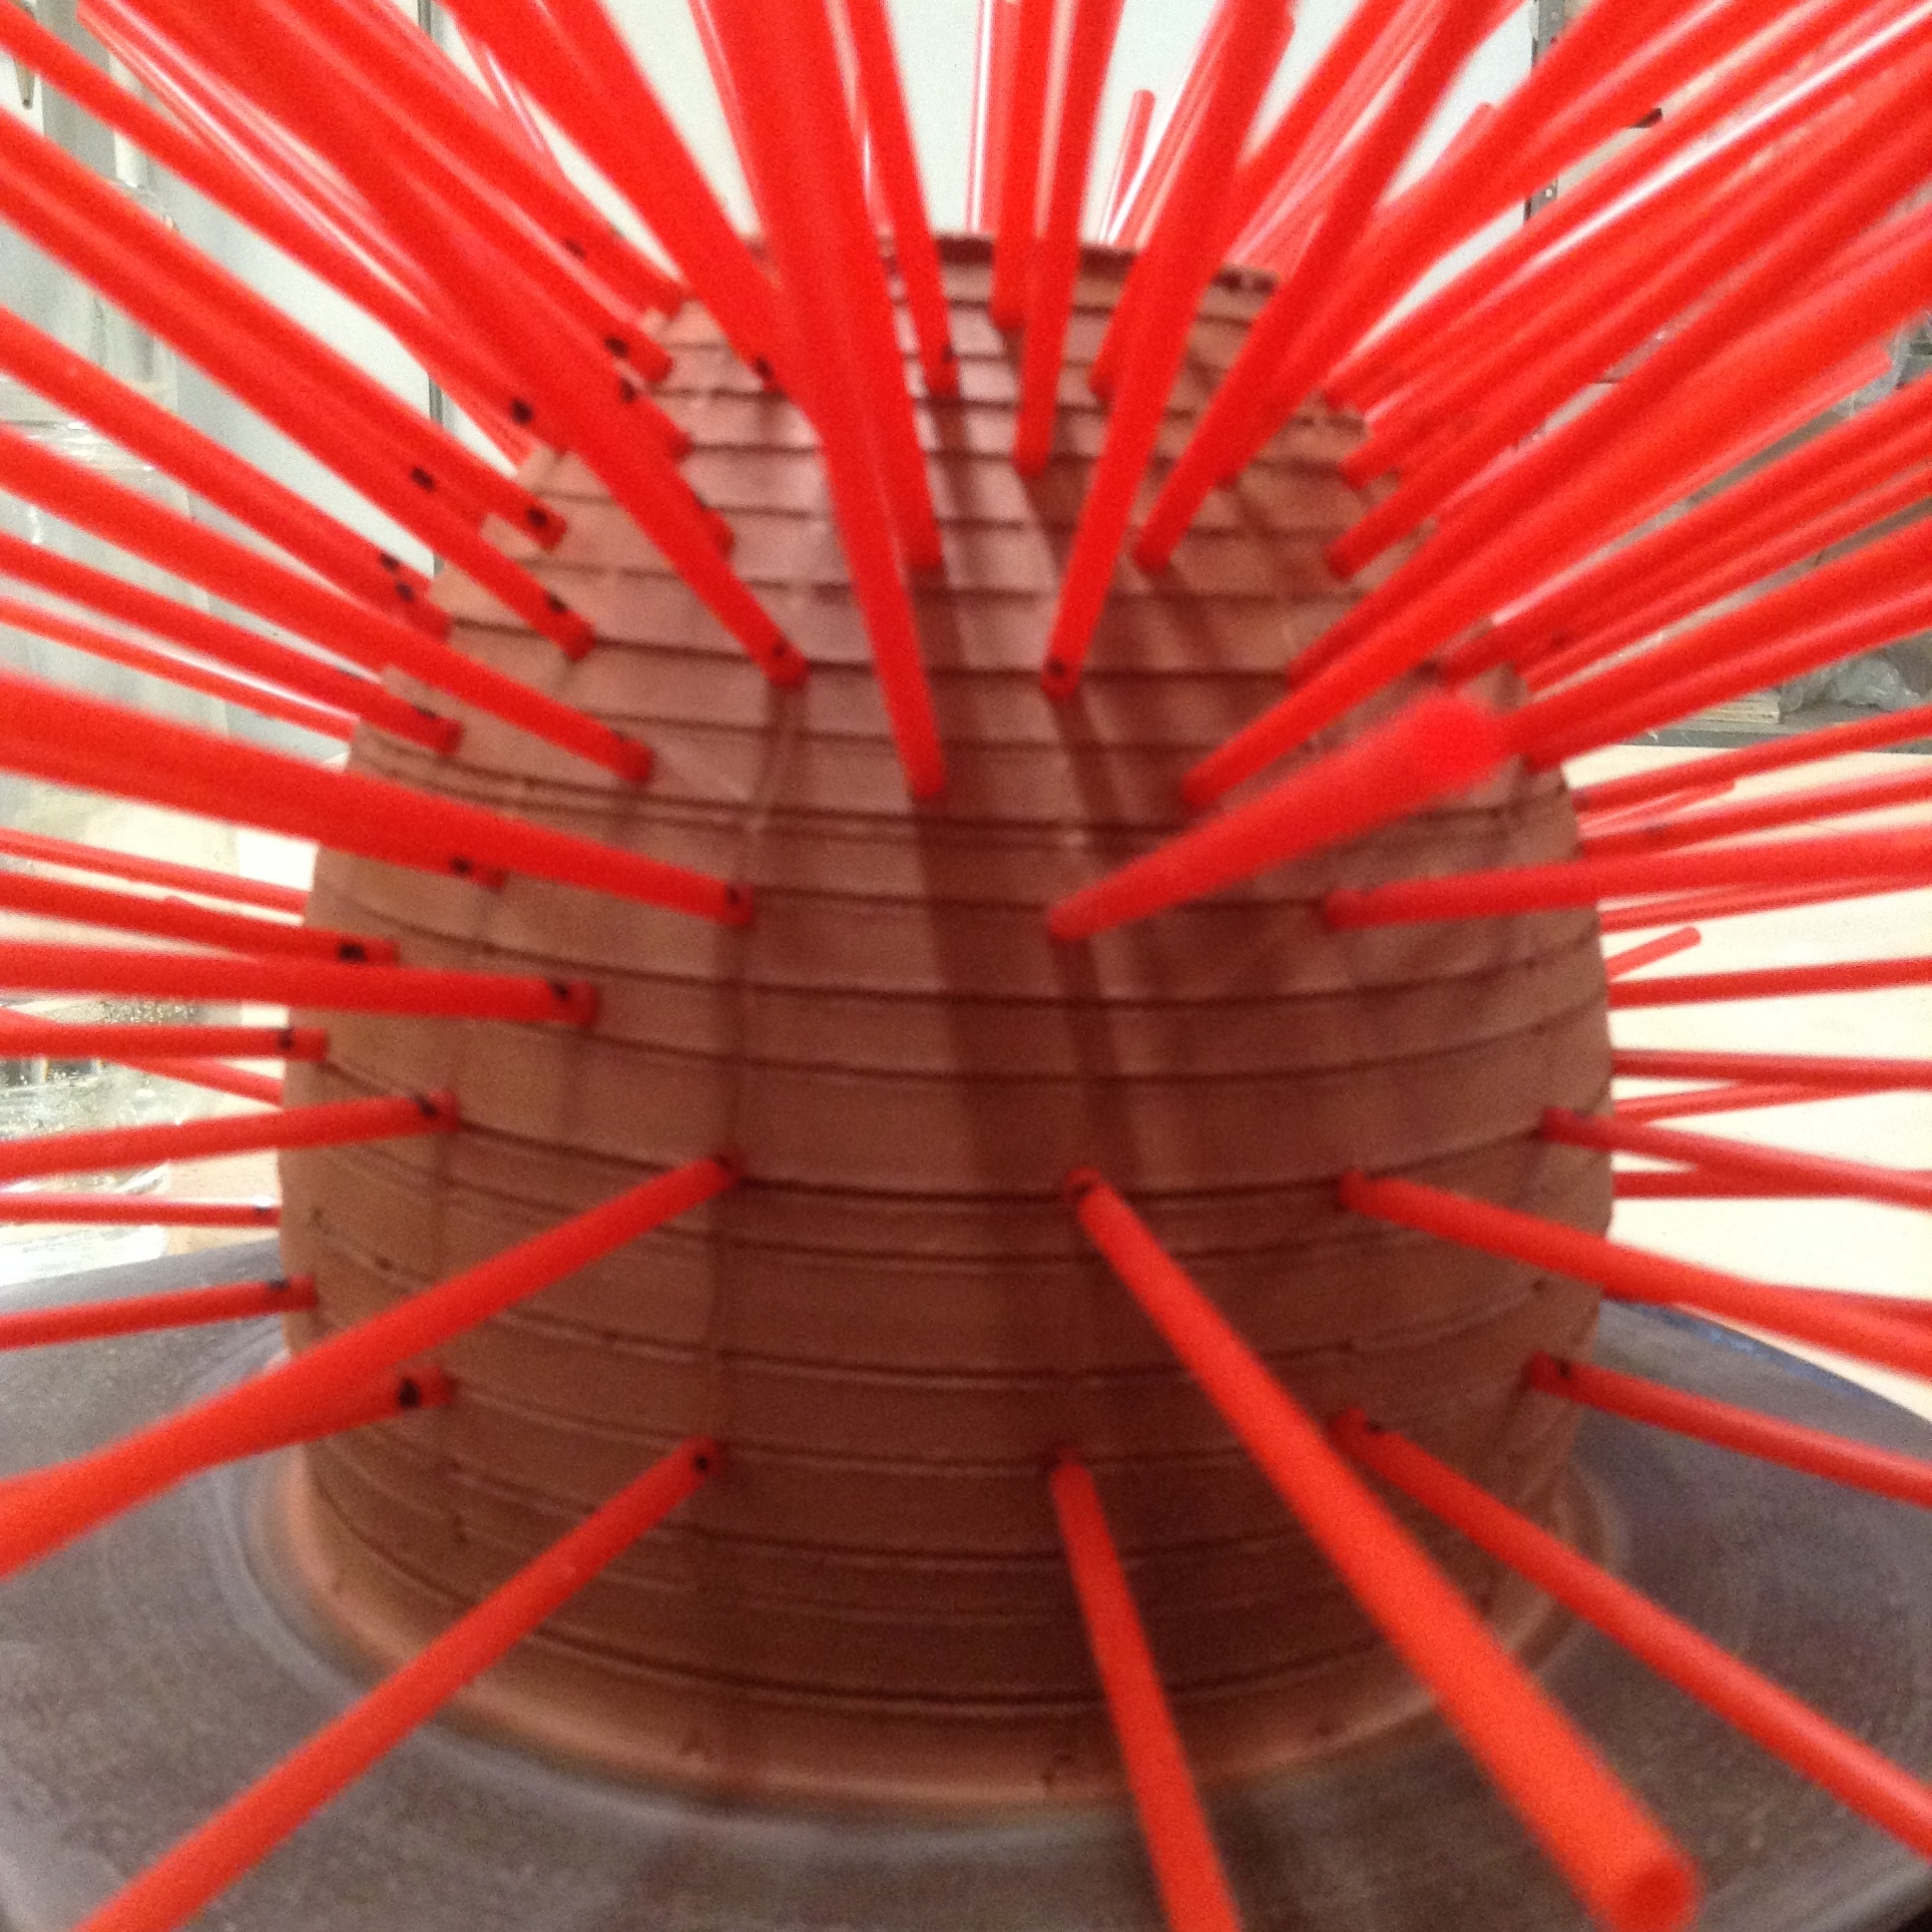
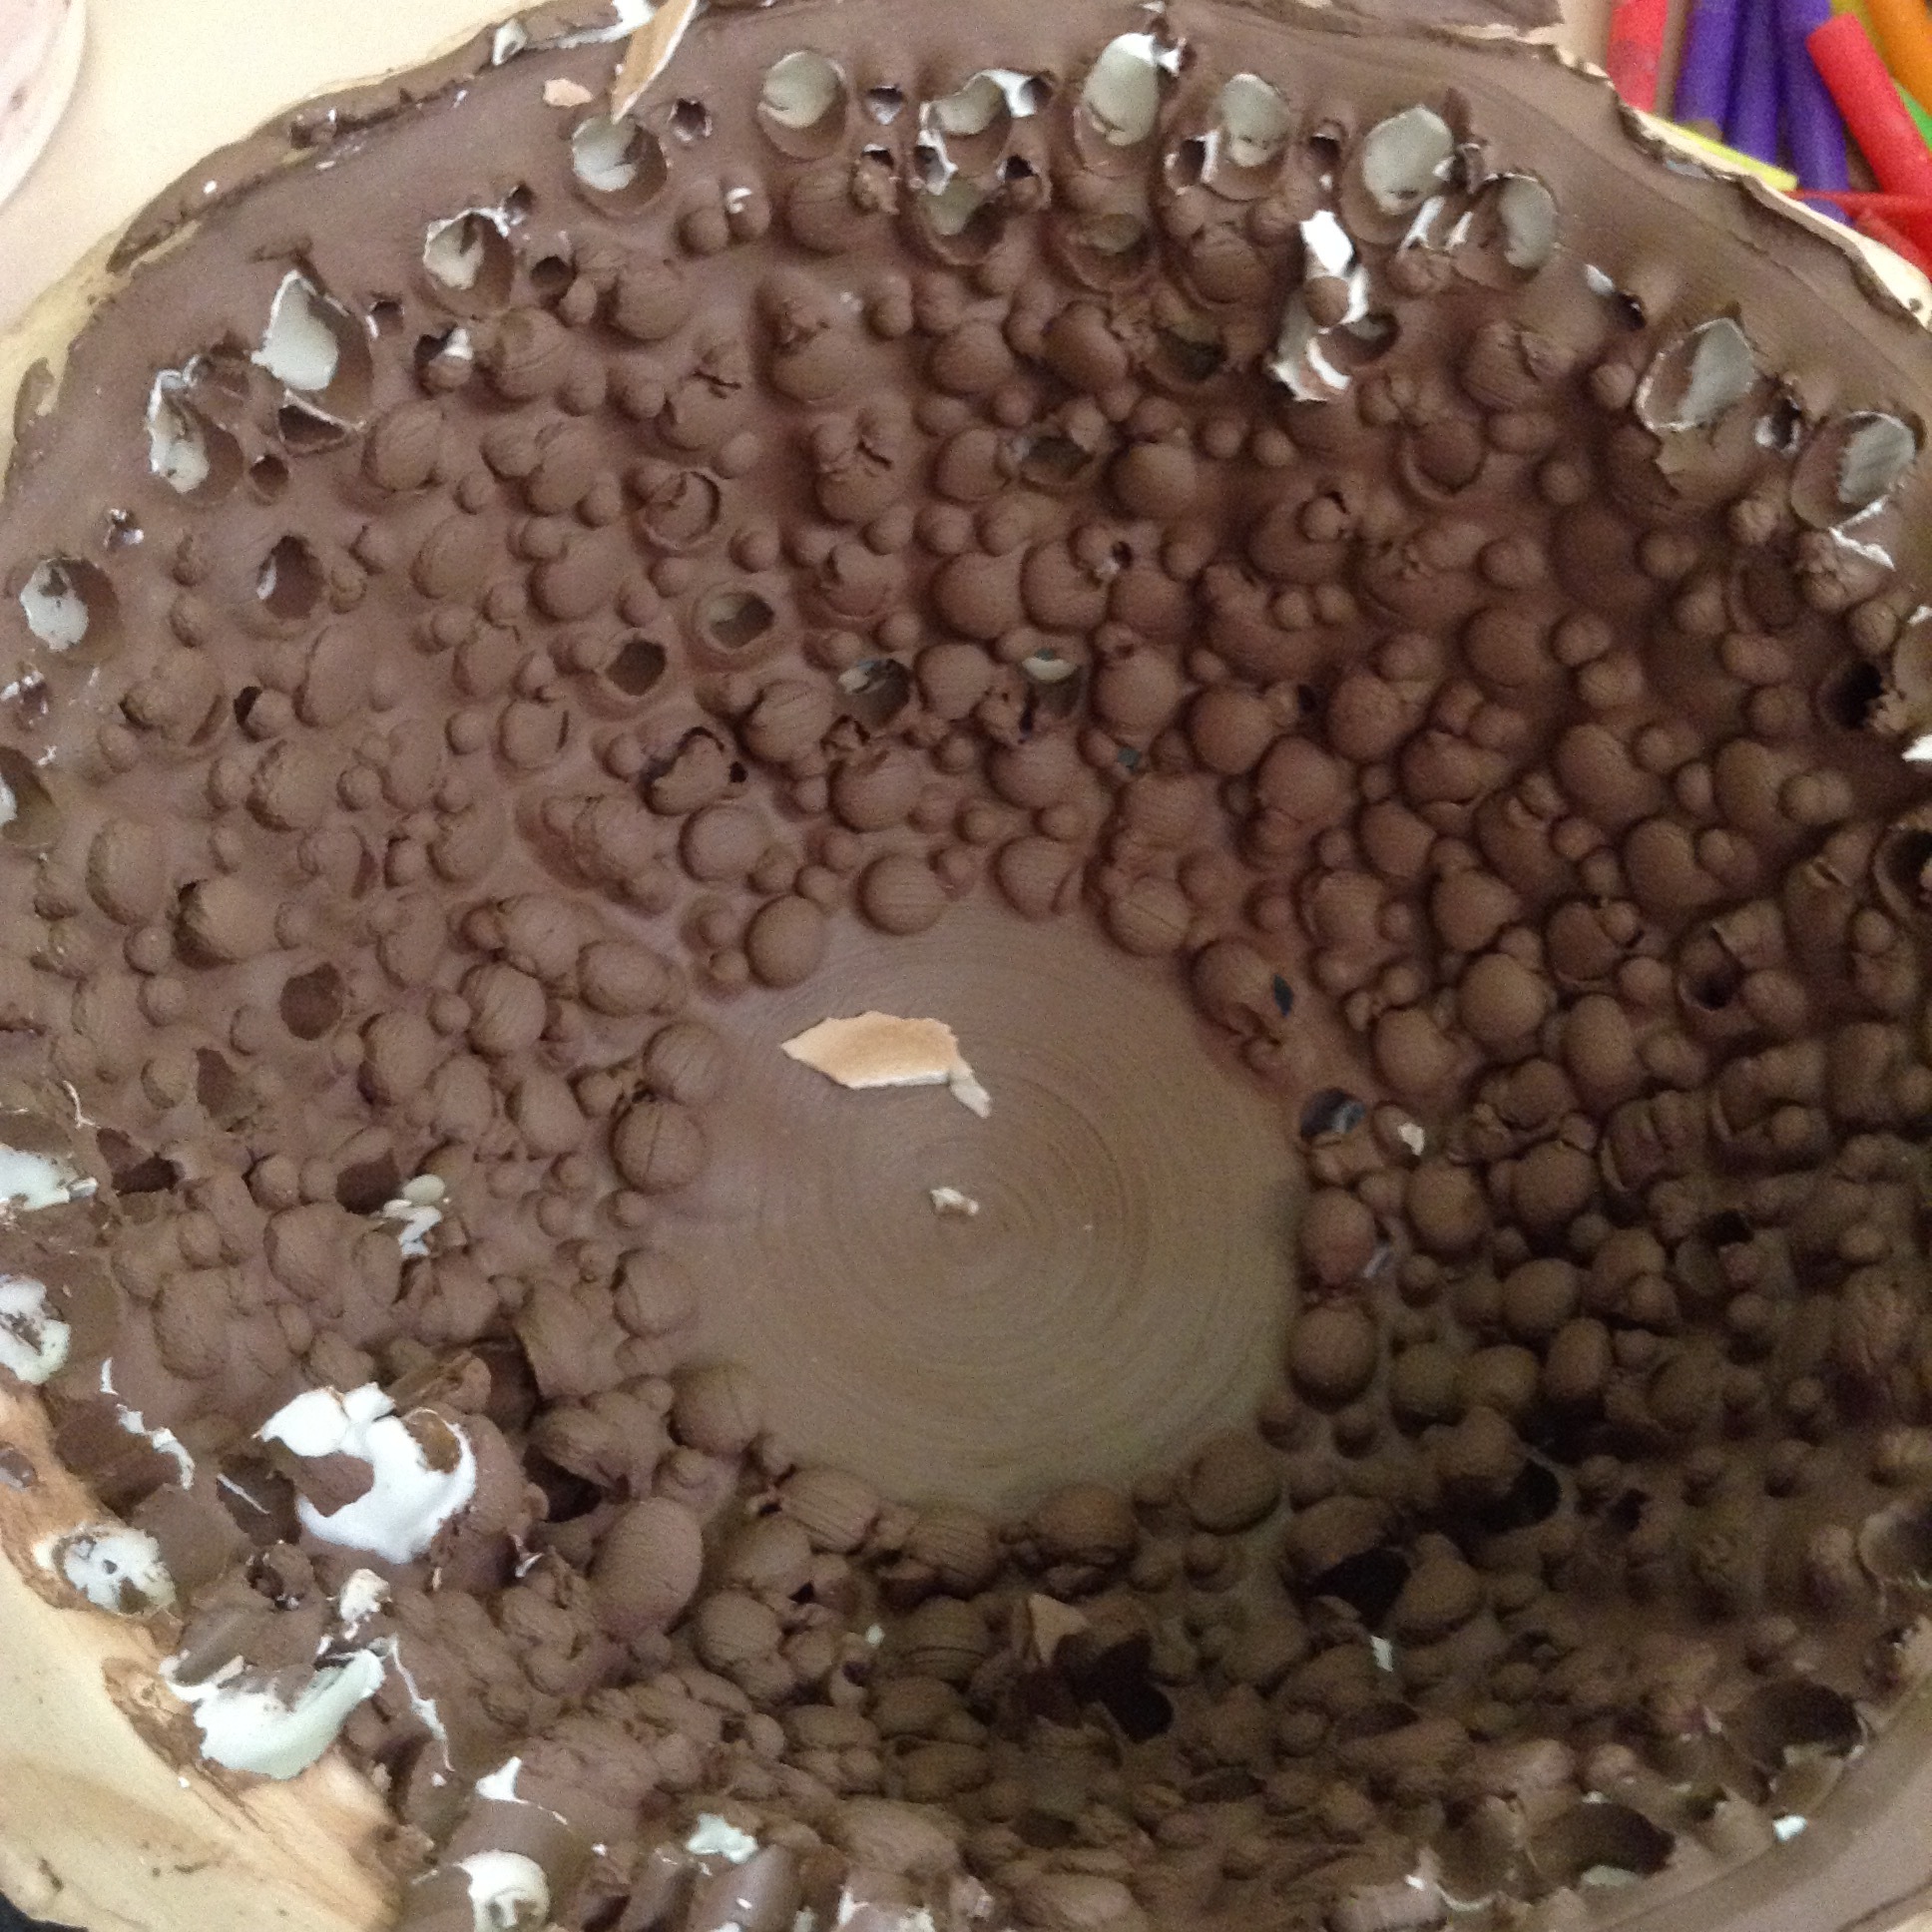
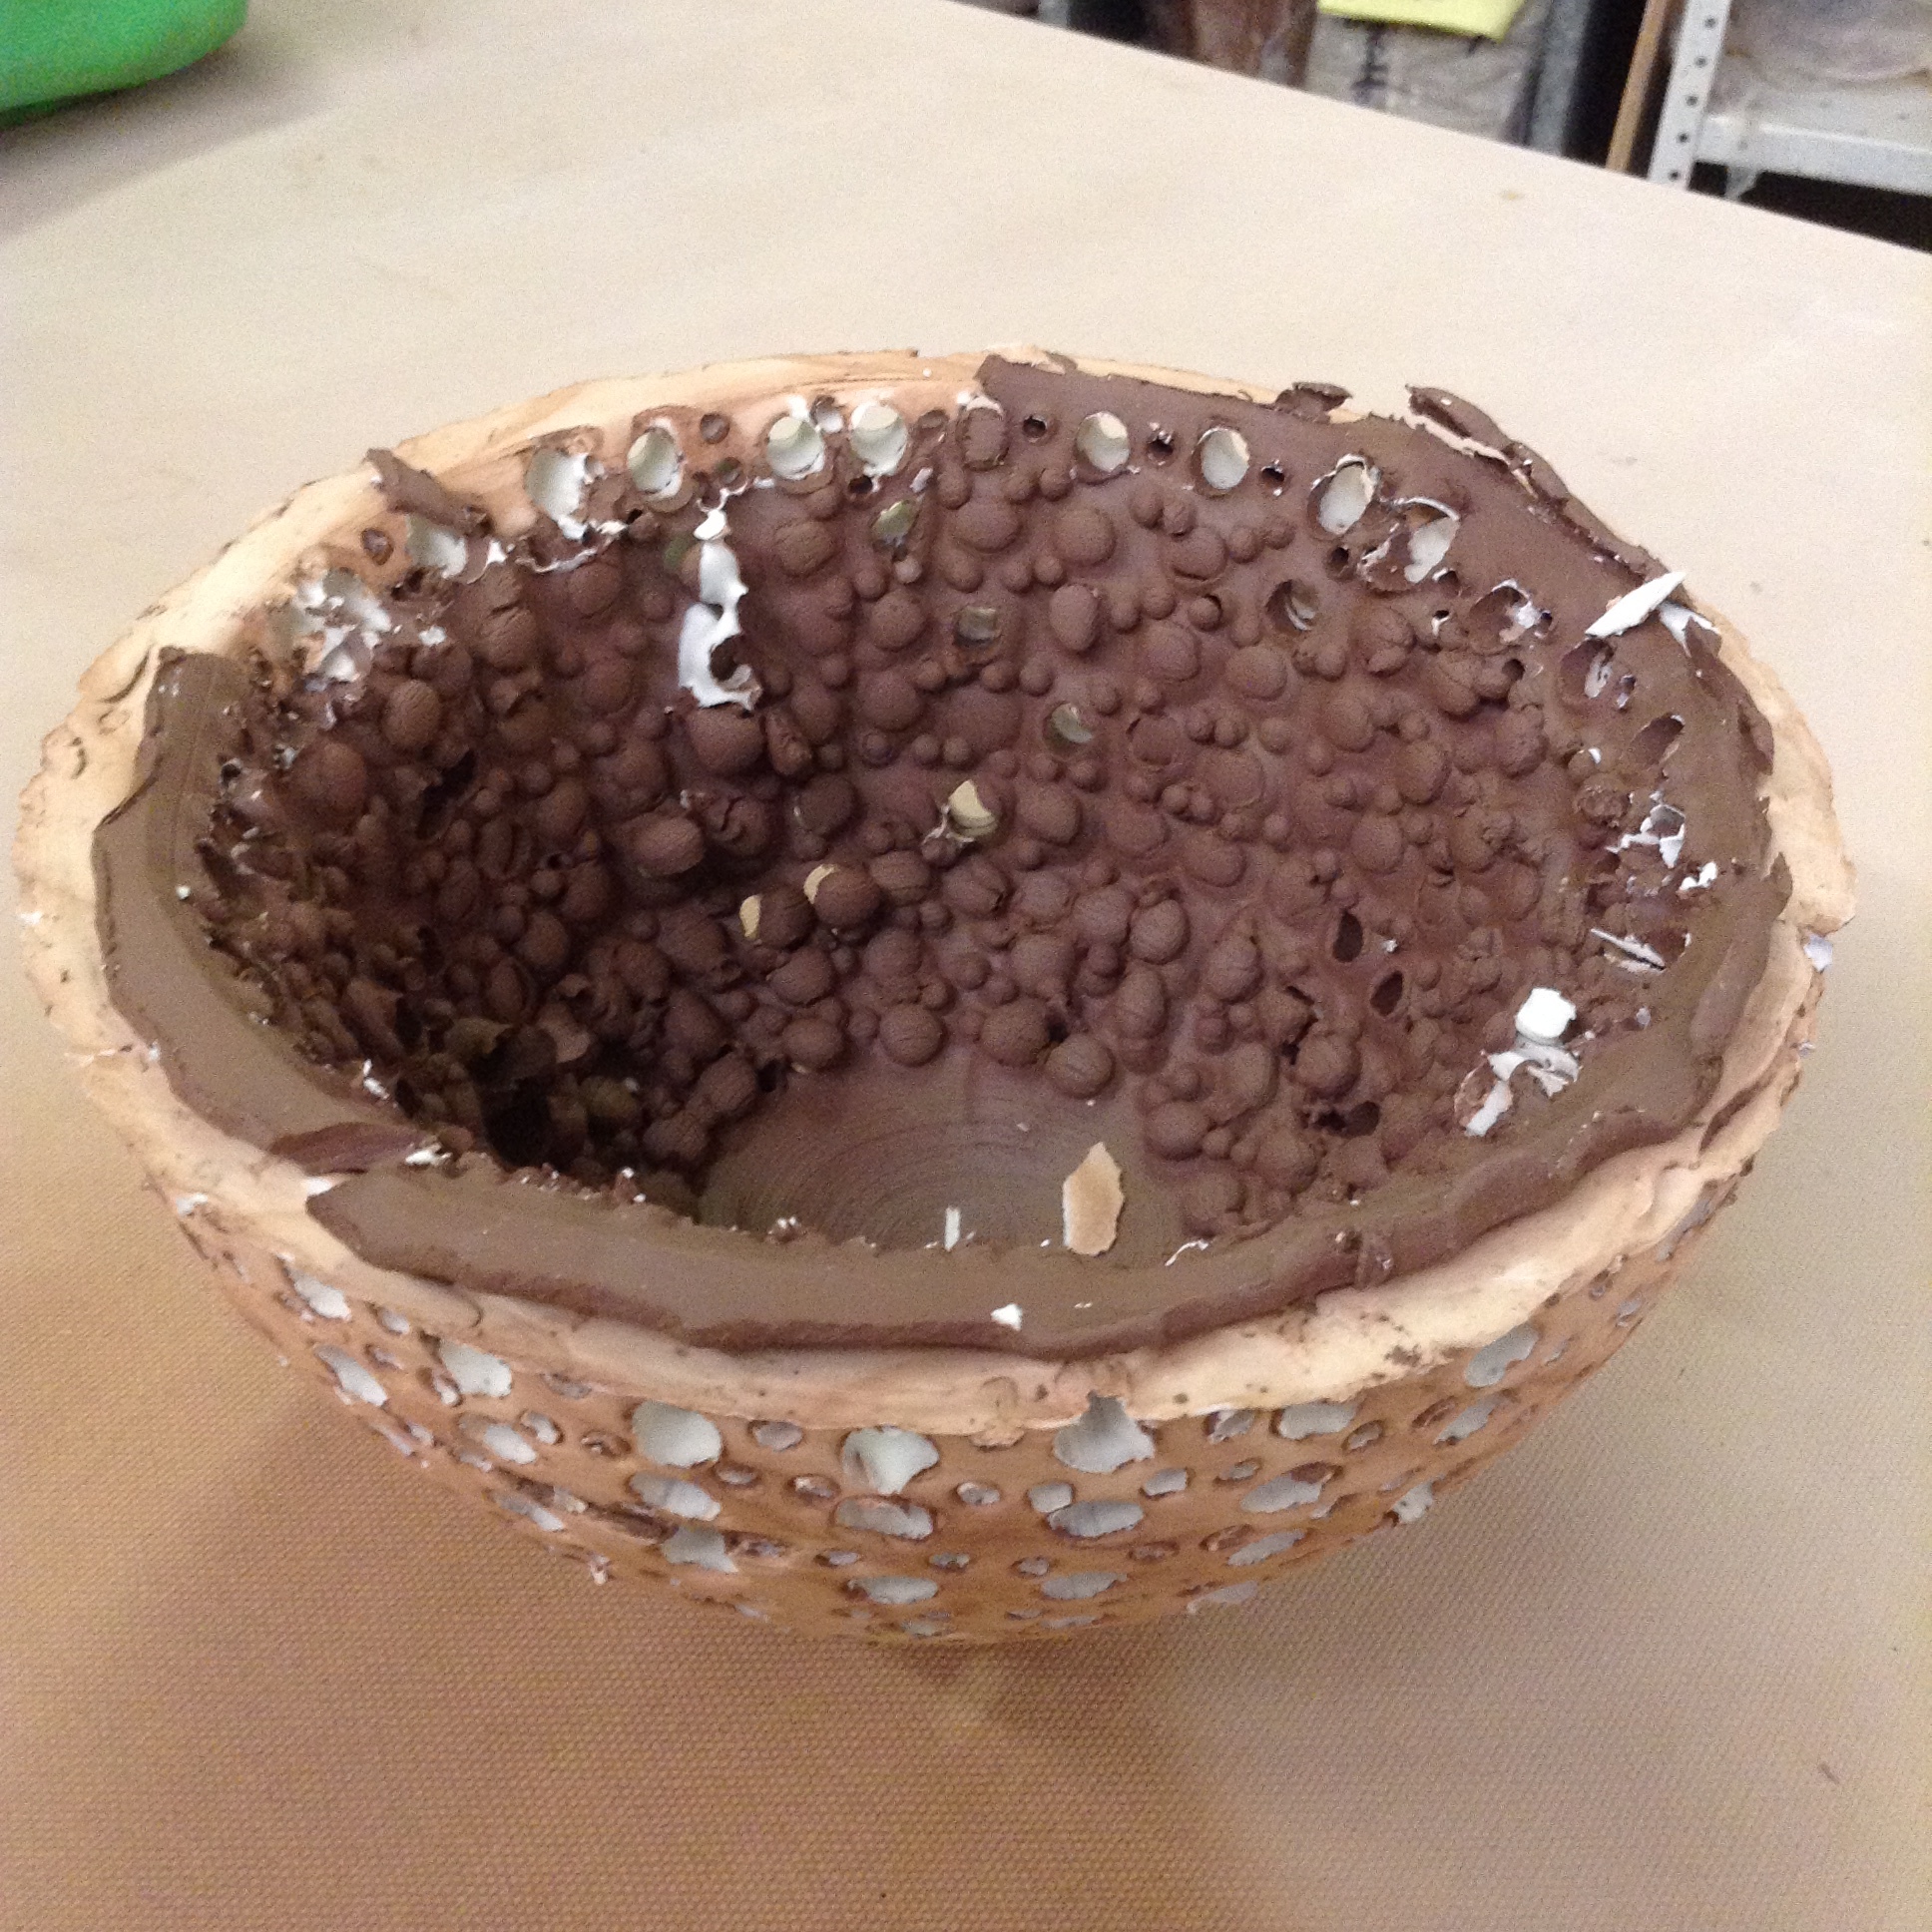
This plaster bowl is an example of using the space between two nesting clay forms.
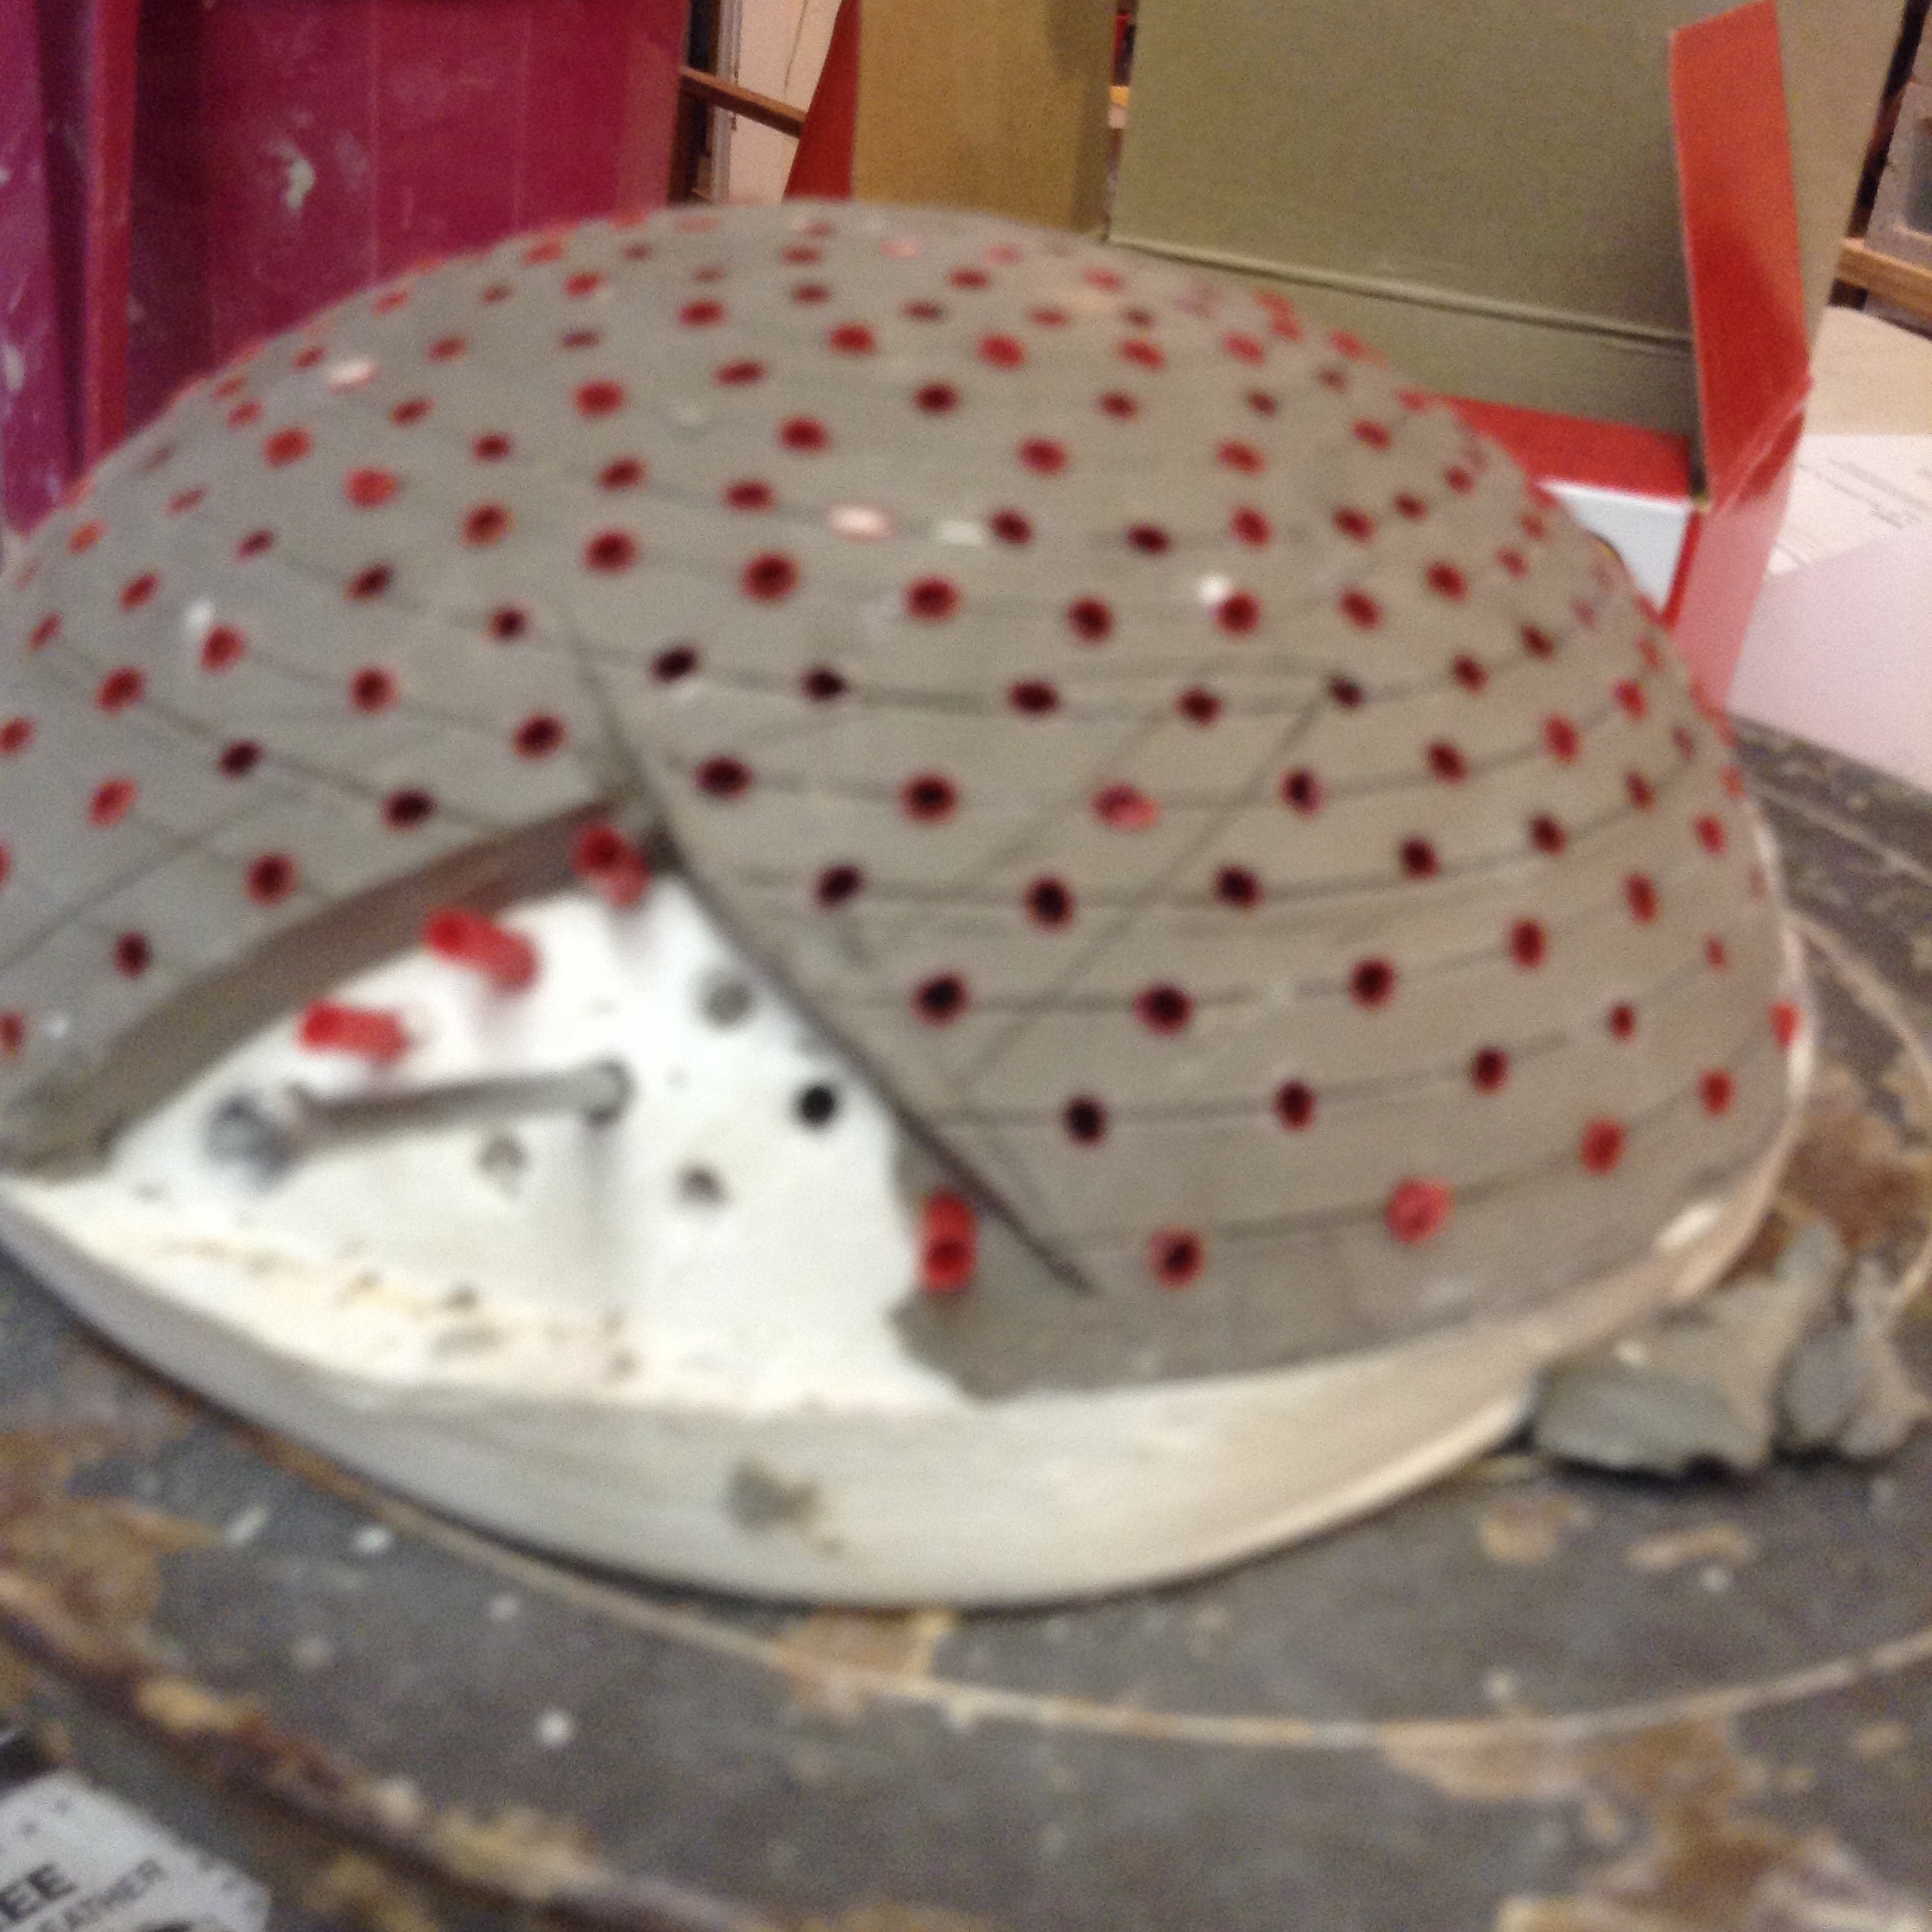
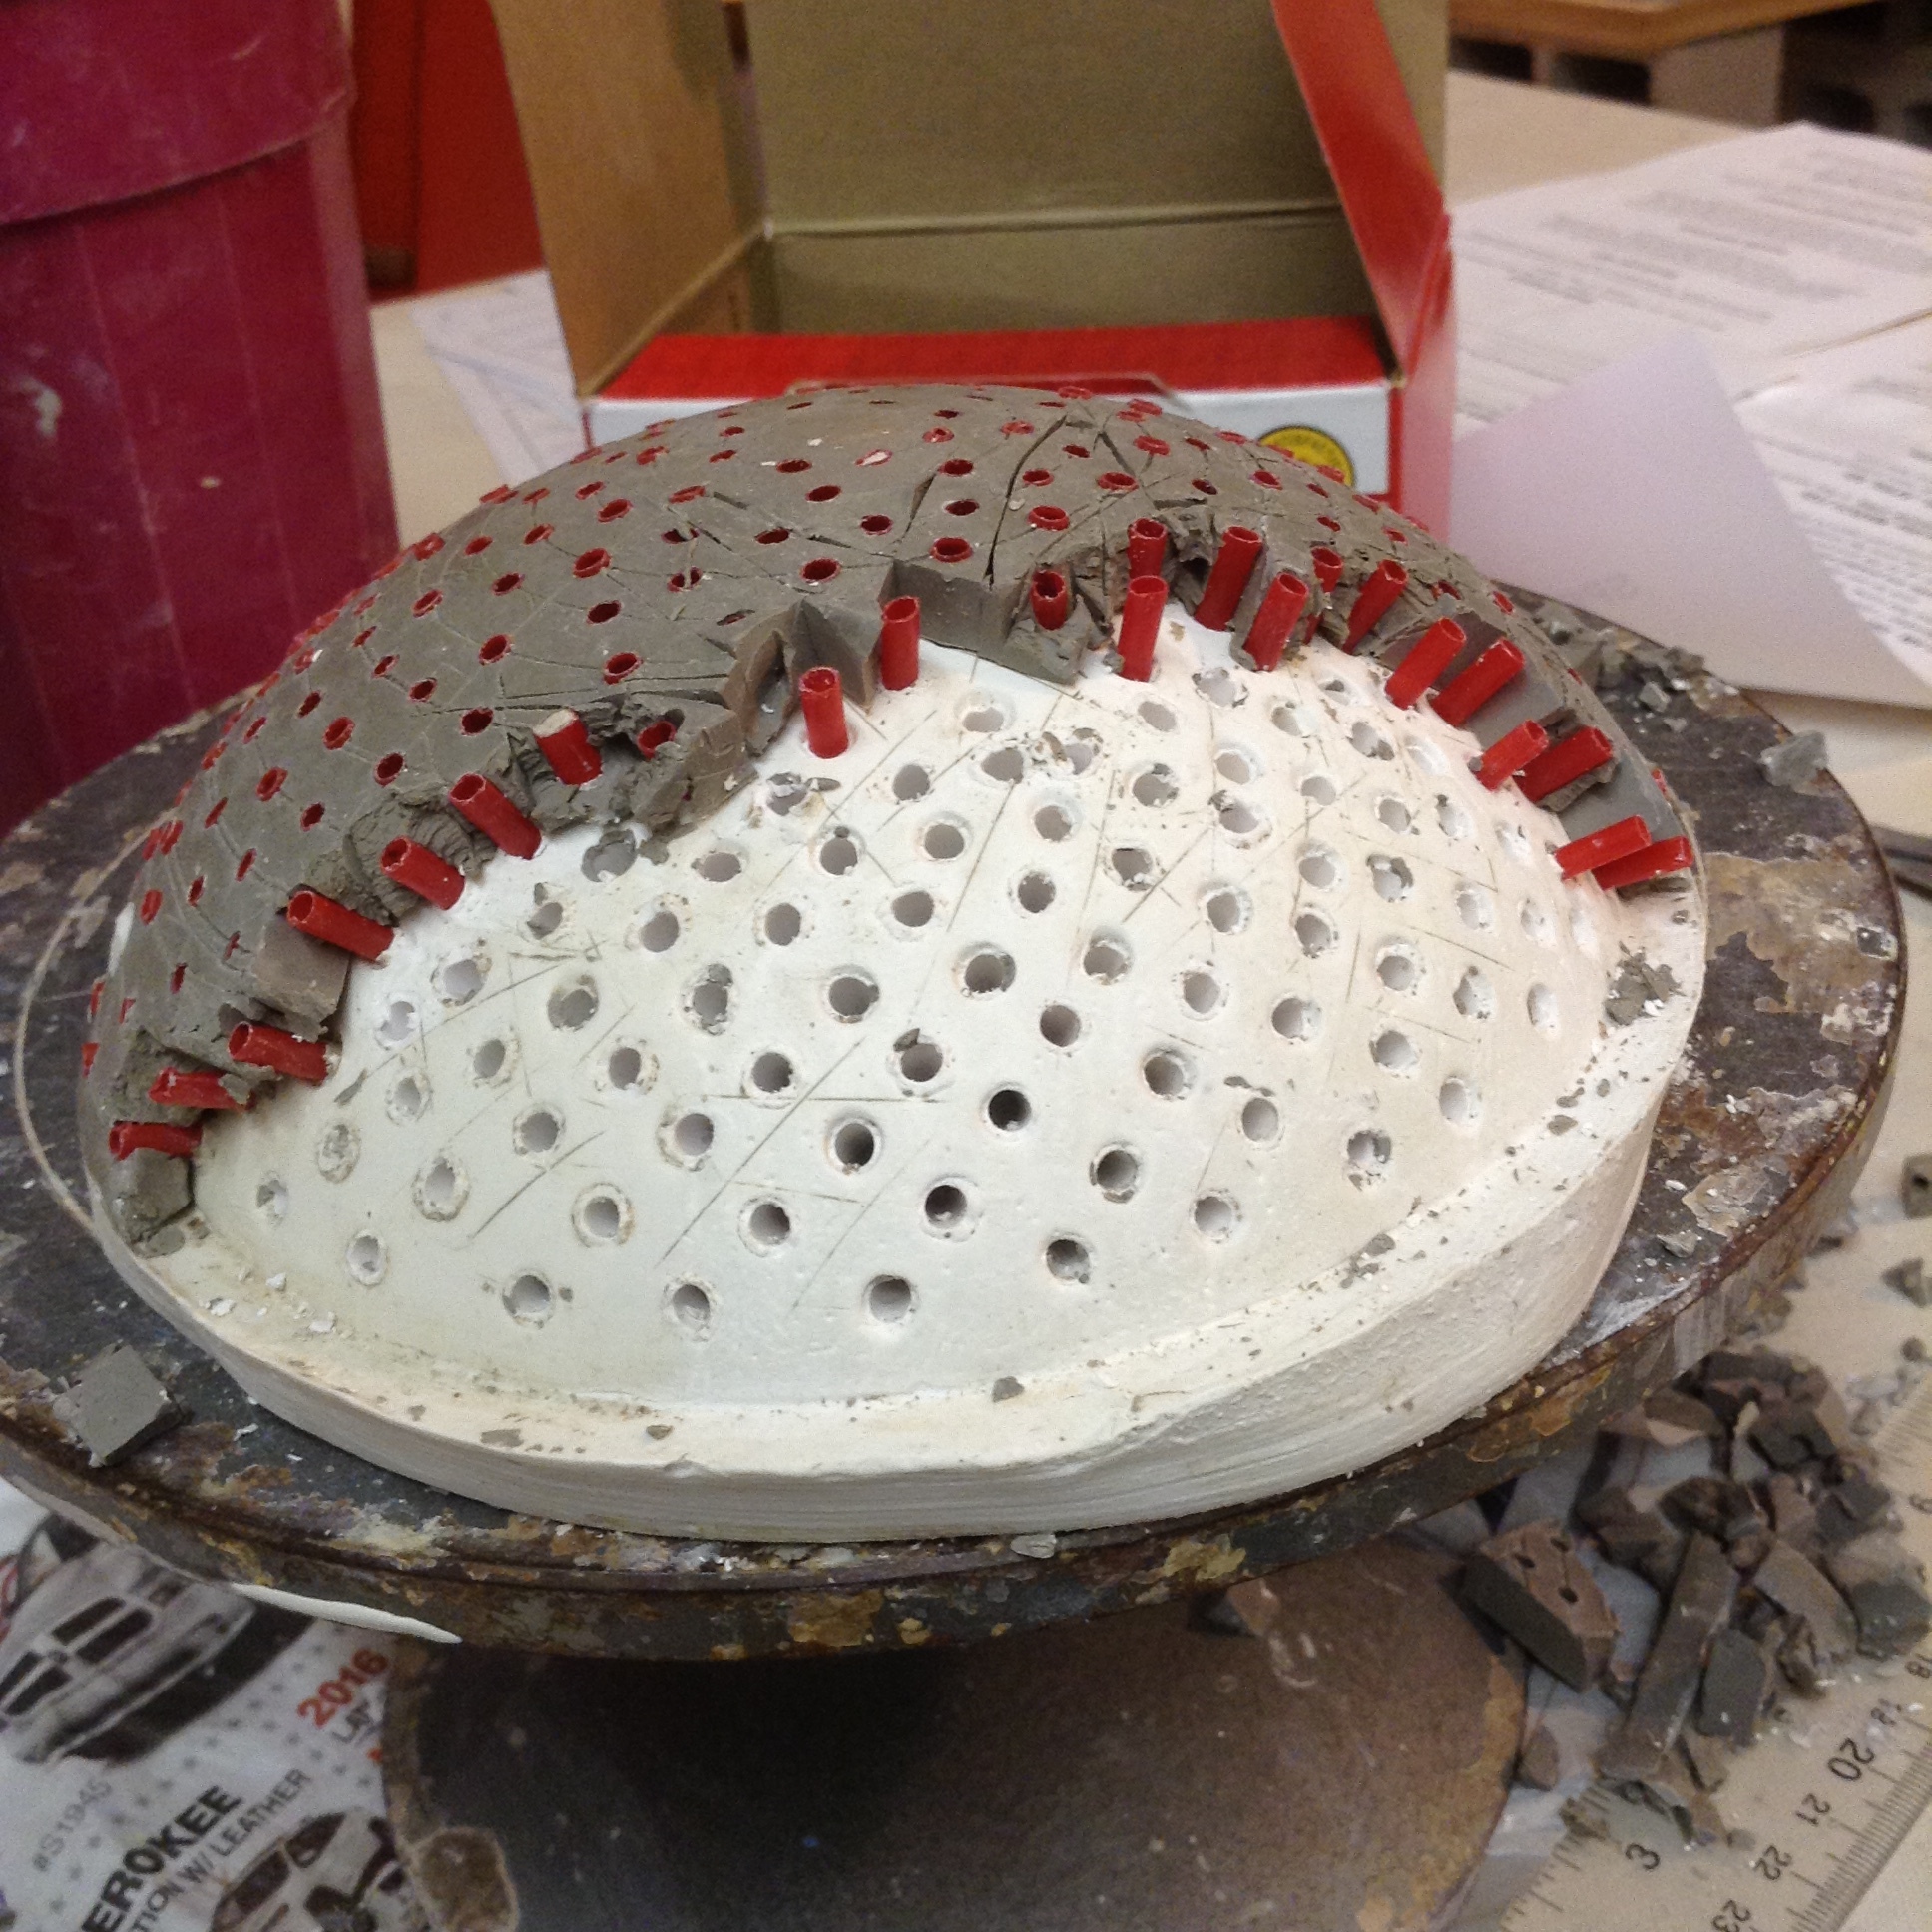
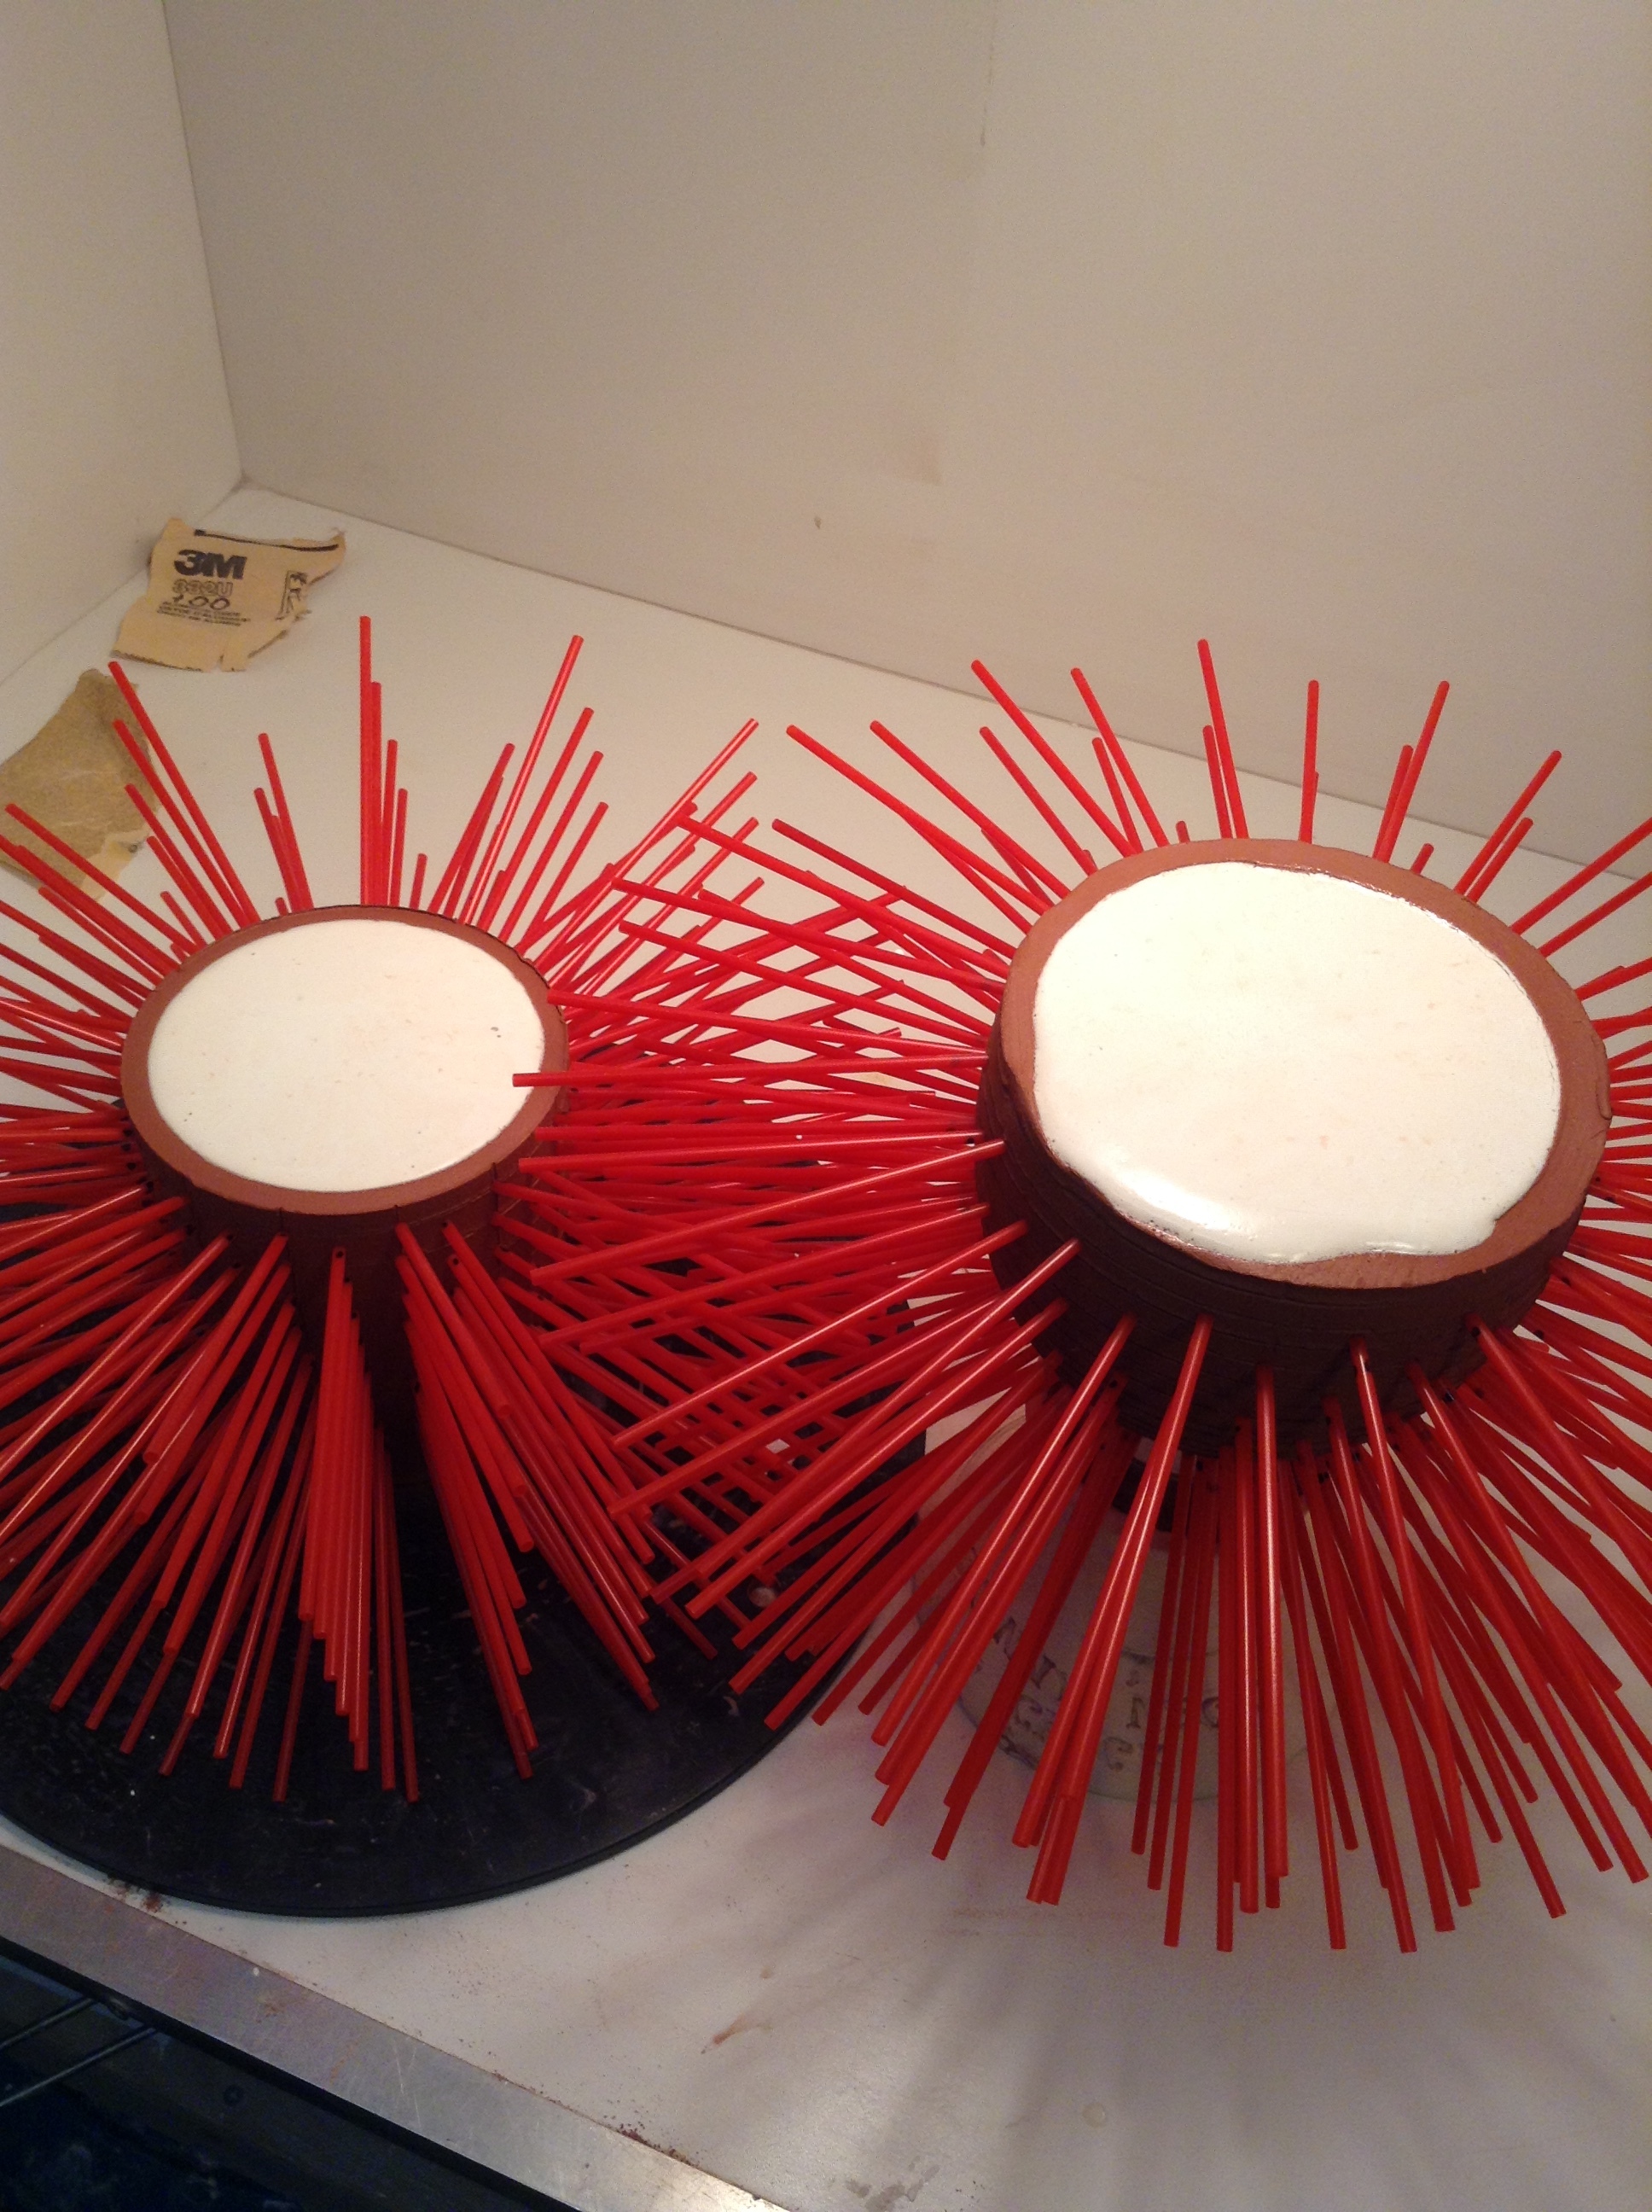
These videos show a variation on the methods above where a second, smaller bowl form is made to go inside the larger one. The difference in sizes between the two bowls create an airspace when they're both rim-down on the table. This interior space is where the plaster flows, hardens, and is removed. Here again, you don't have to be using the straws, but you might find a use for a plaster bowl in the studio. It's also good throwing practice to think about the shape that might result.
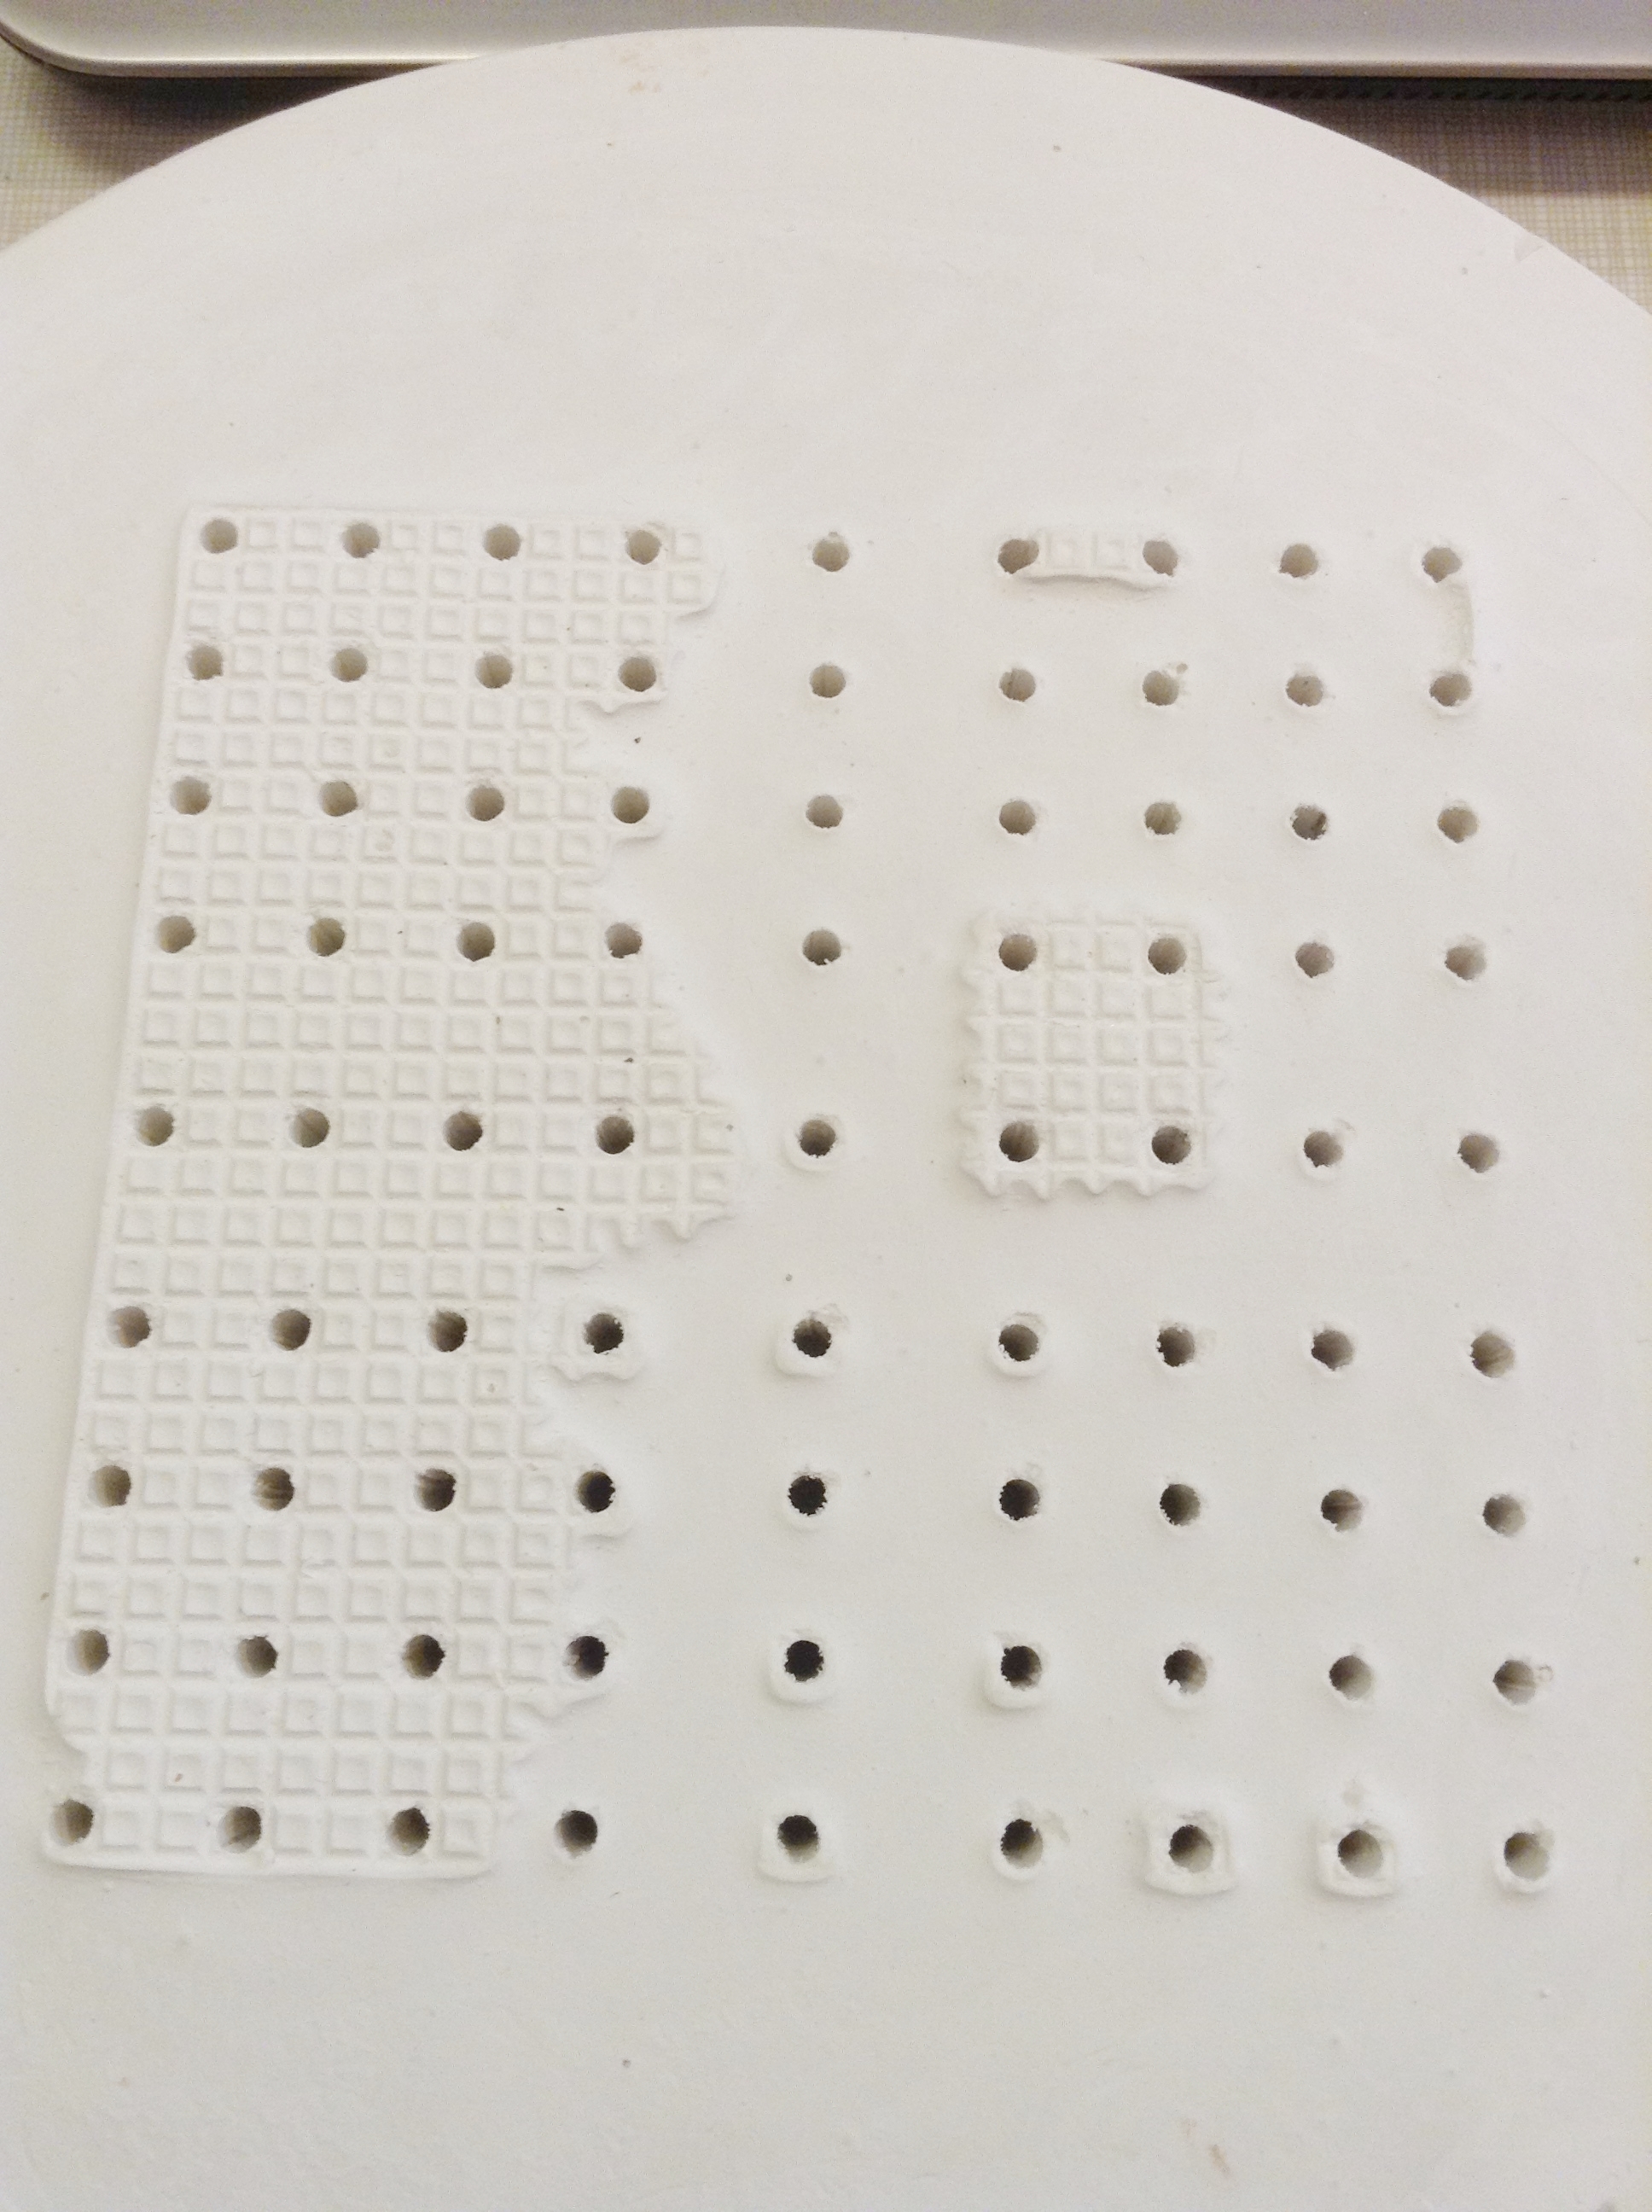
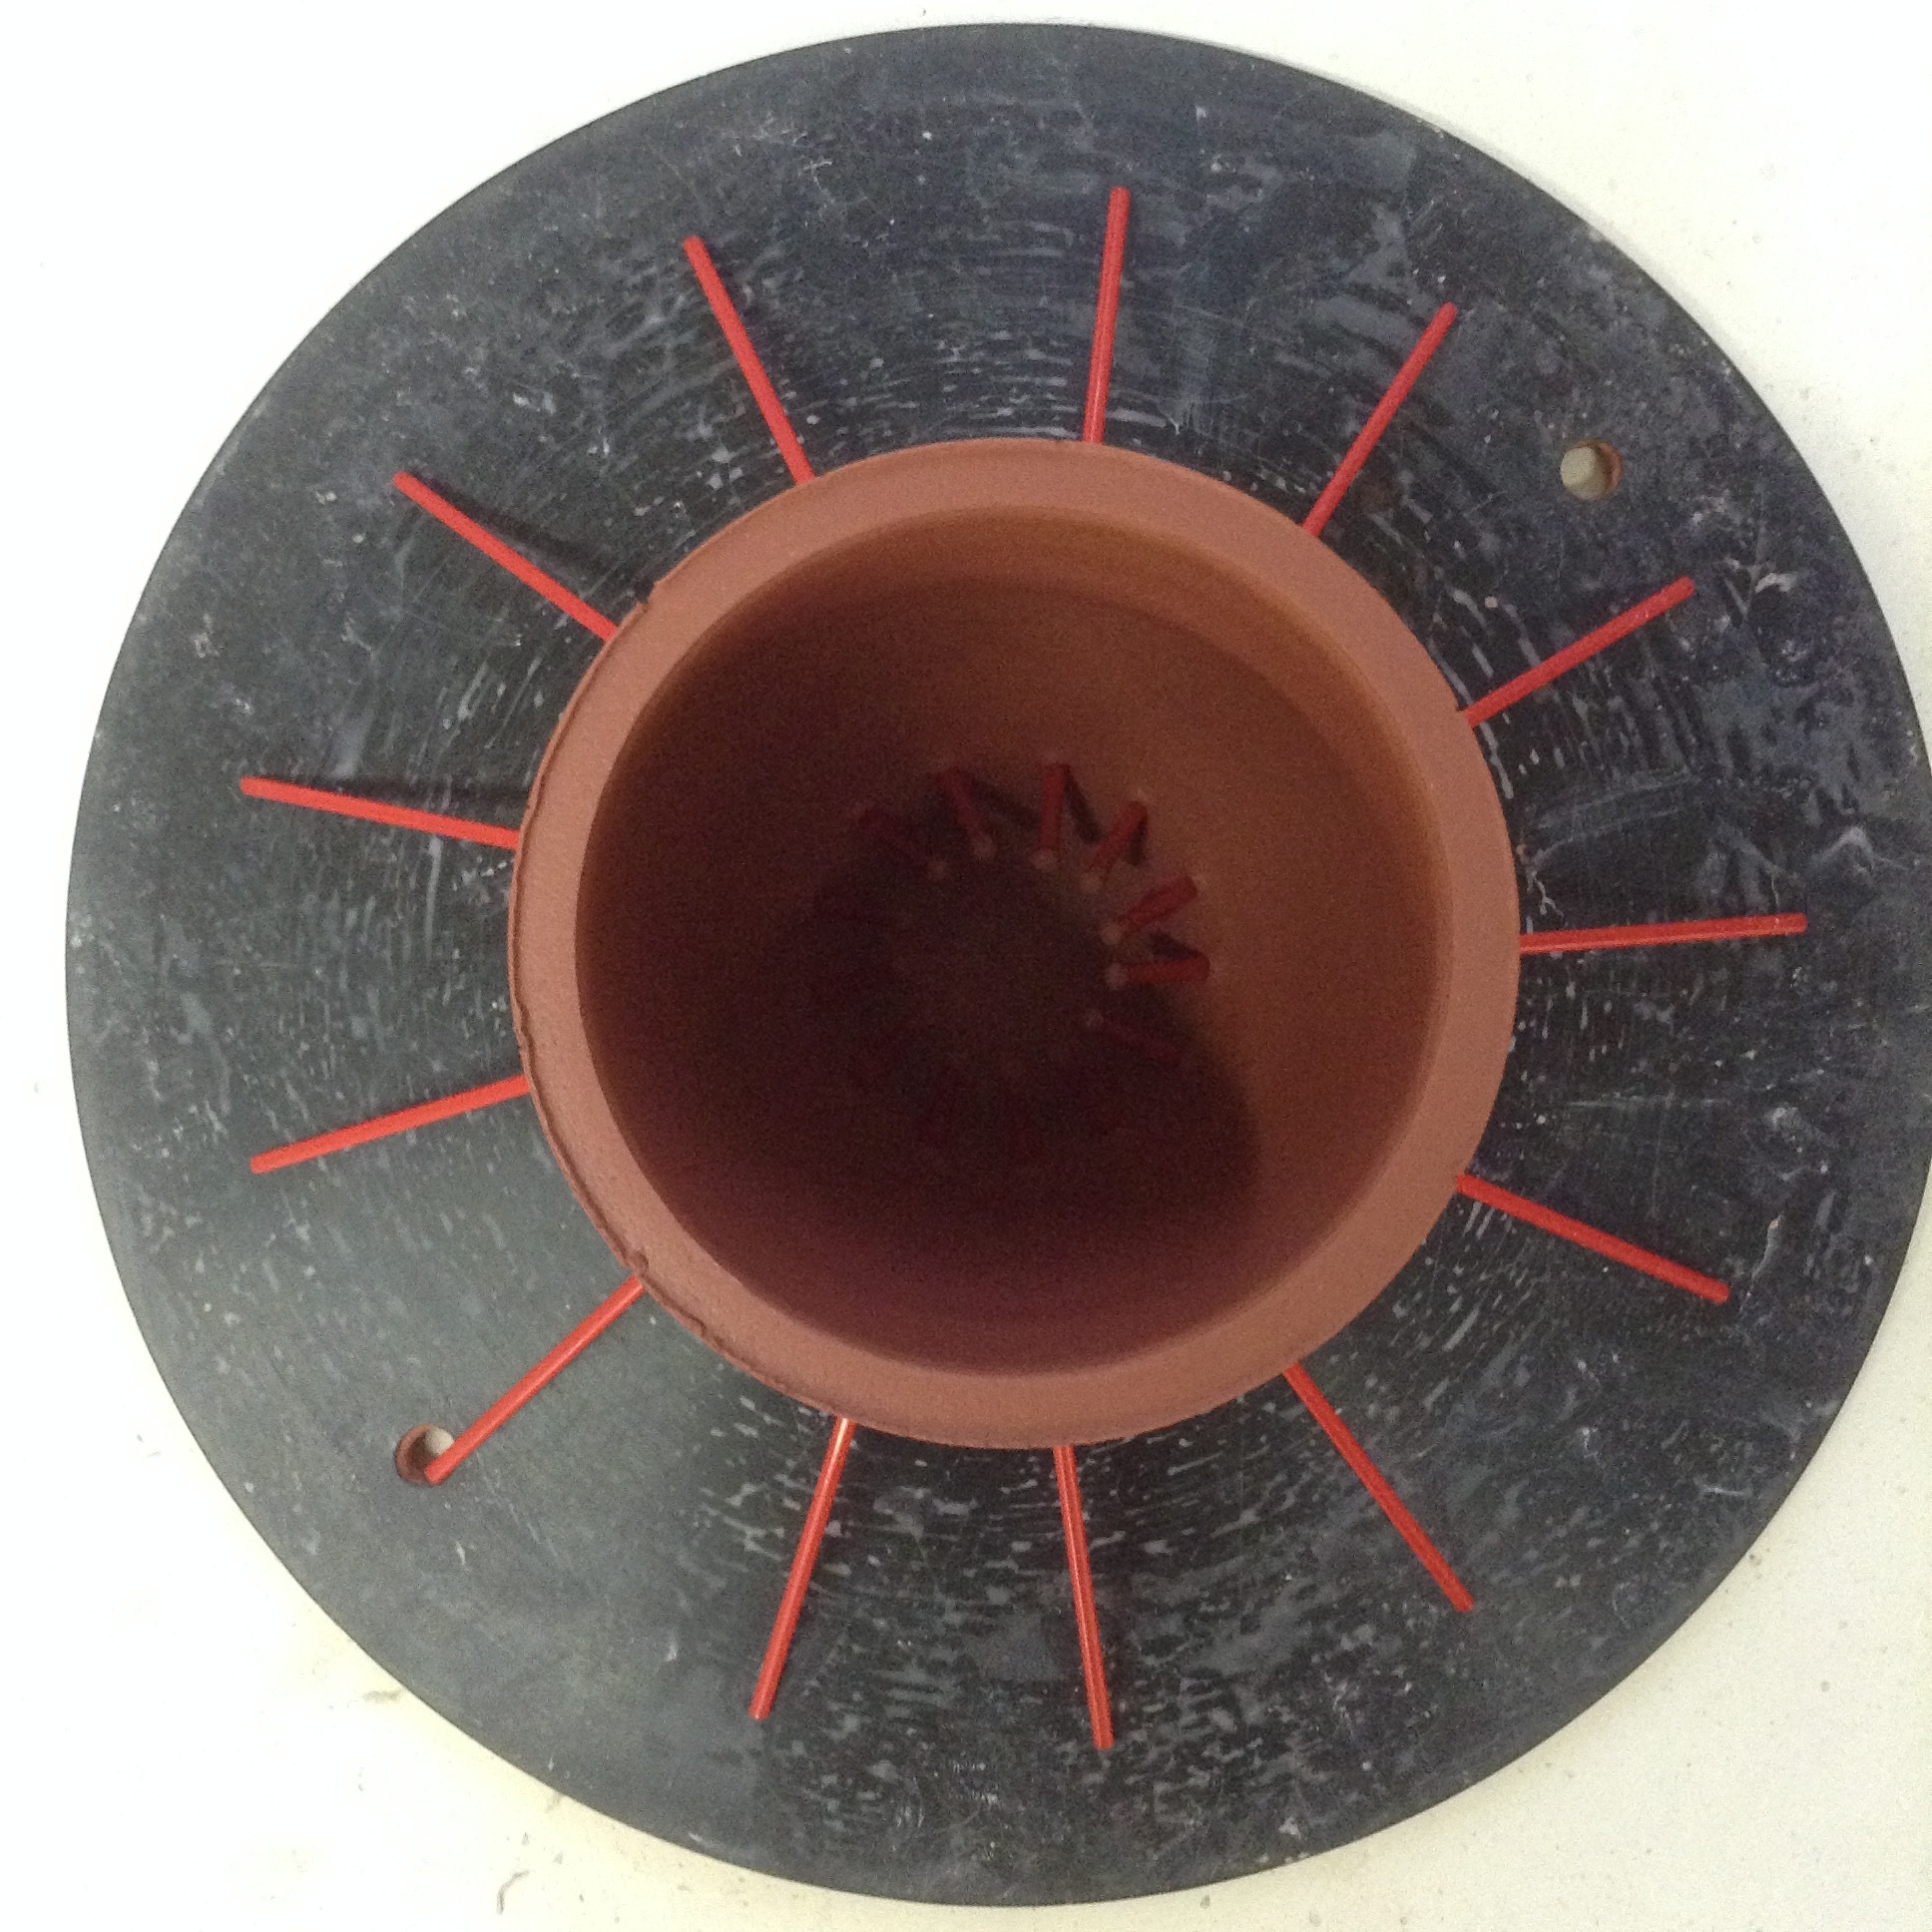
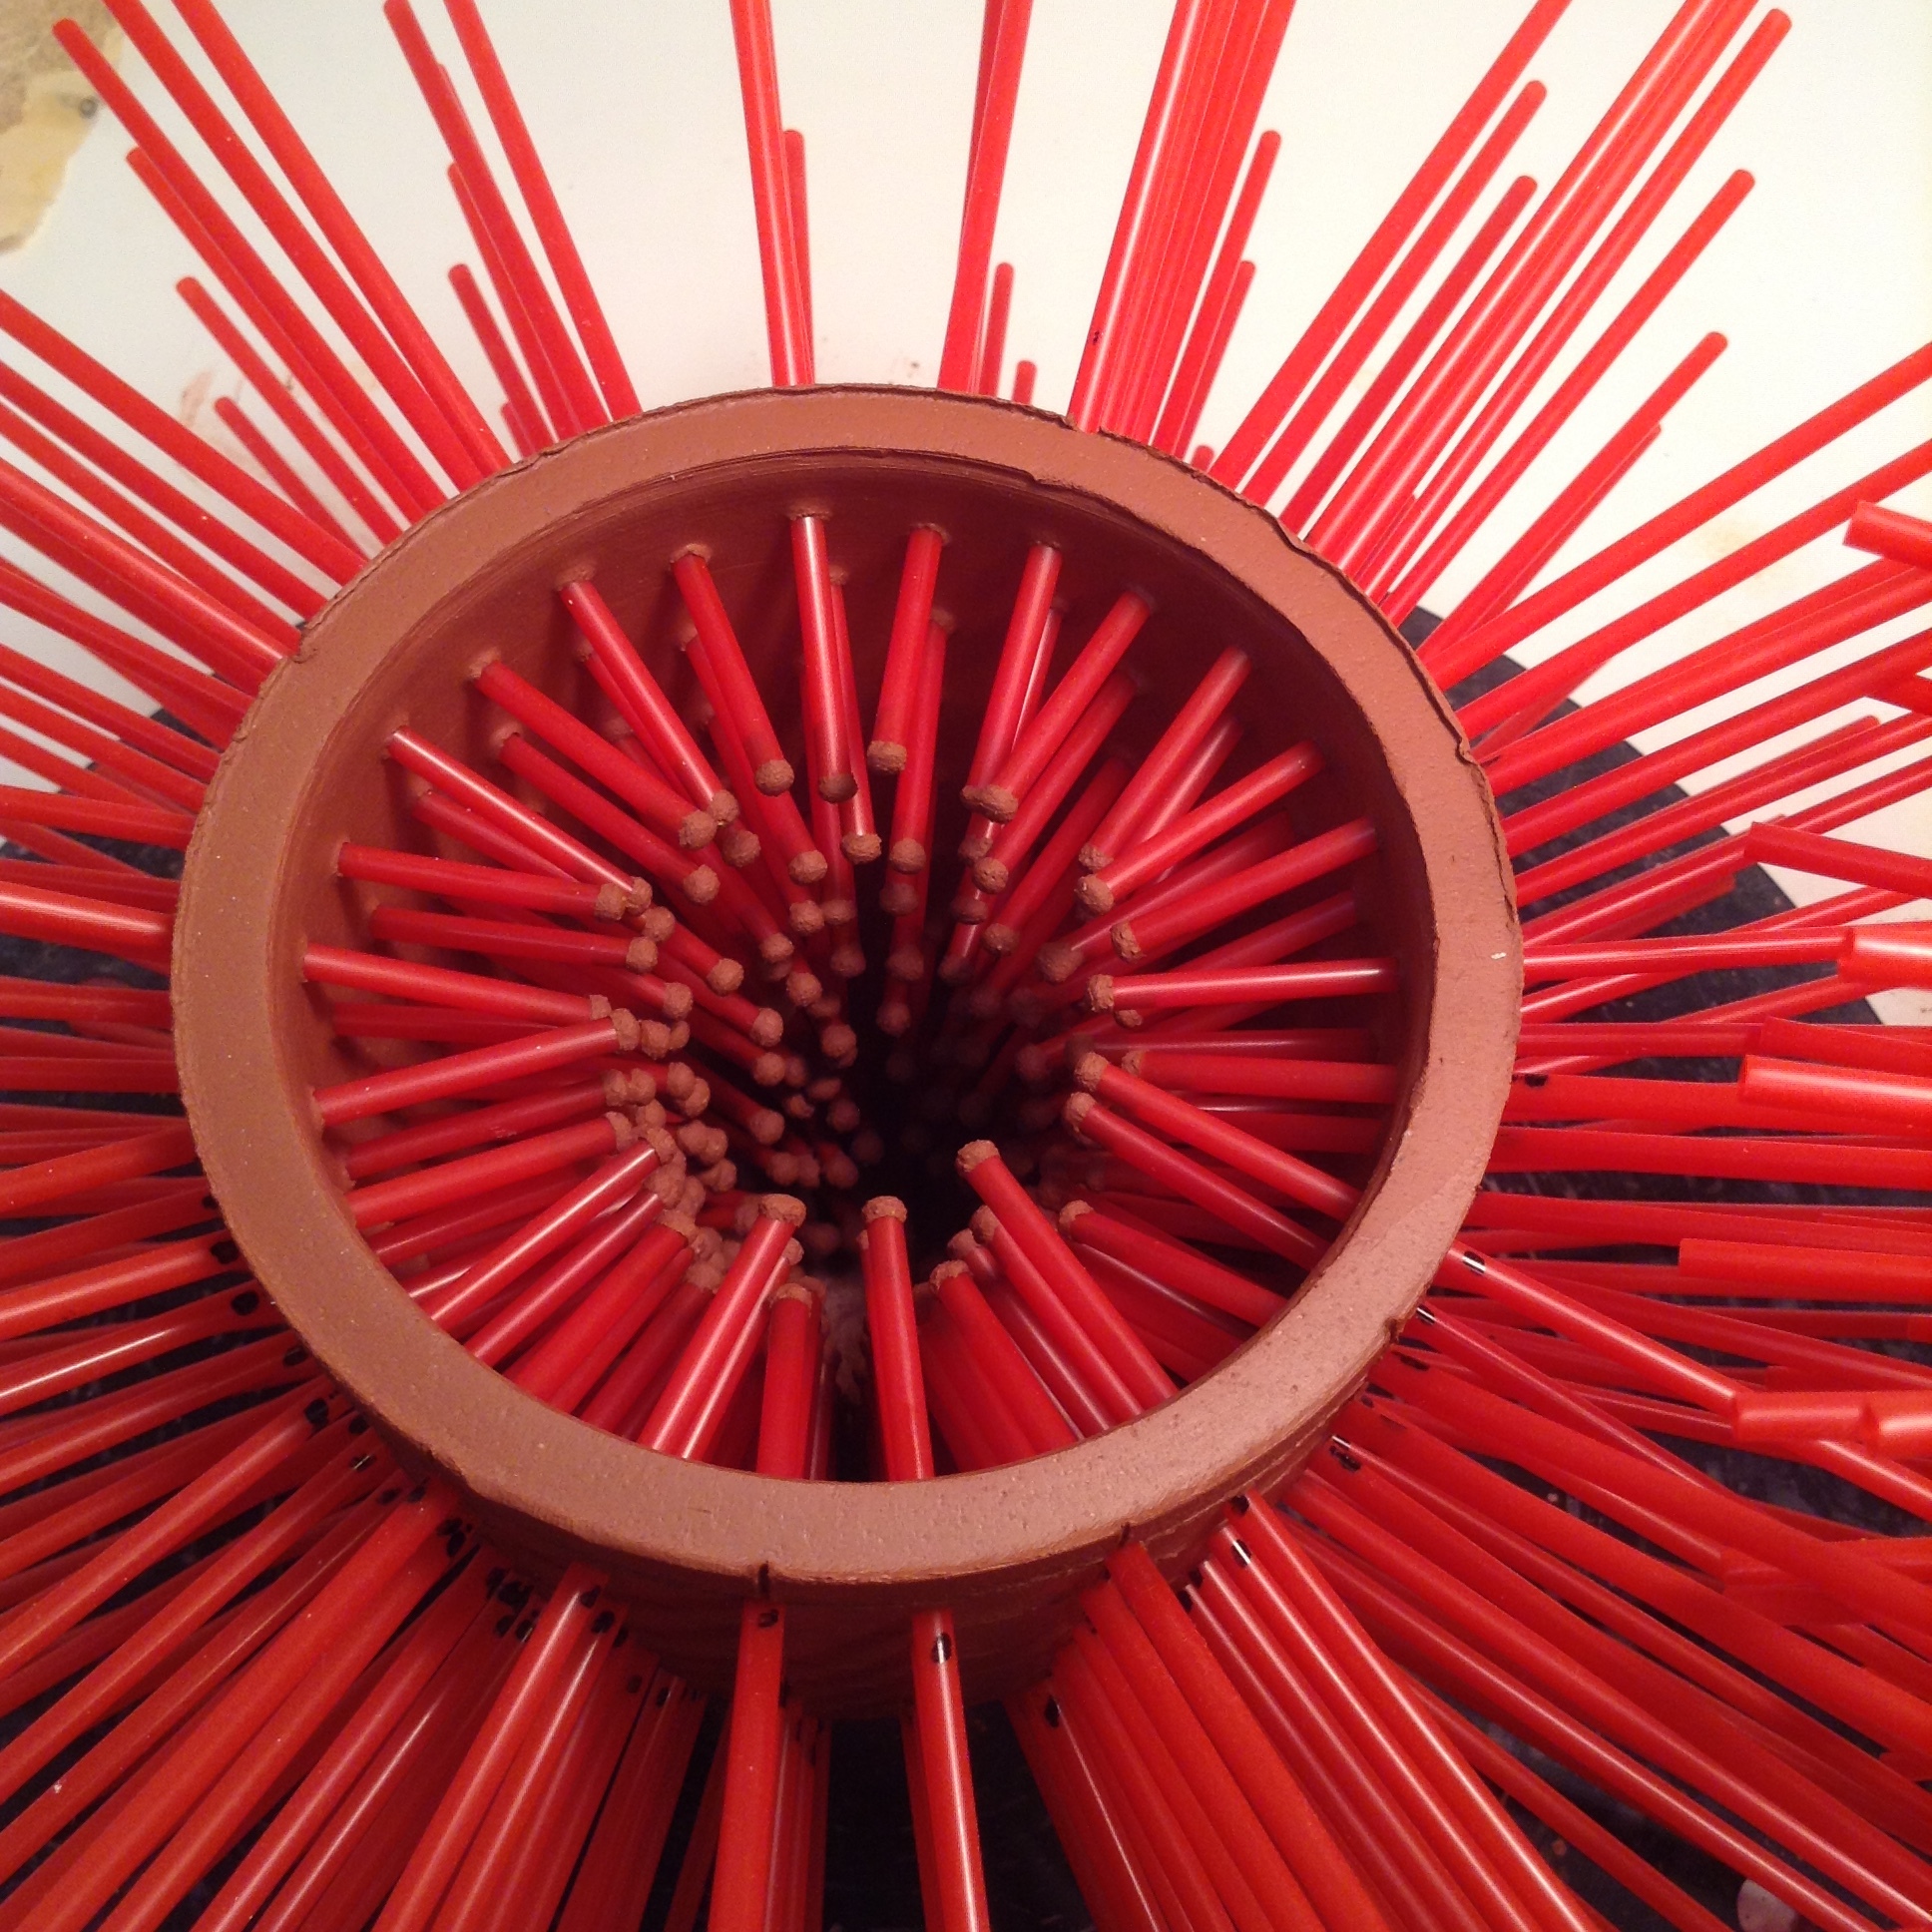
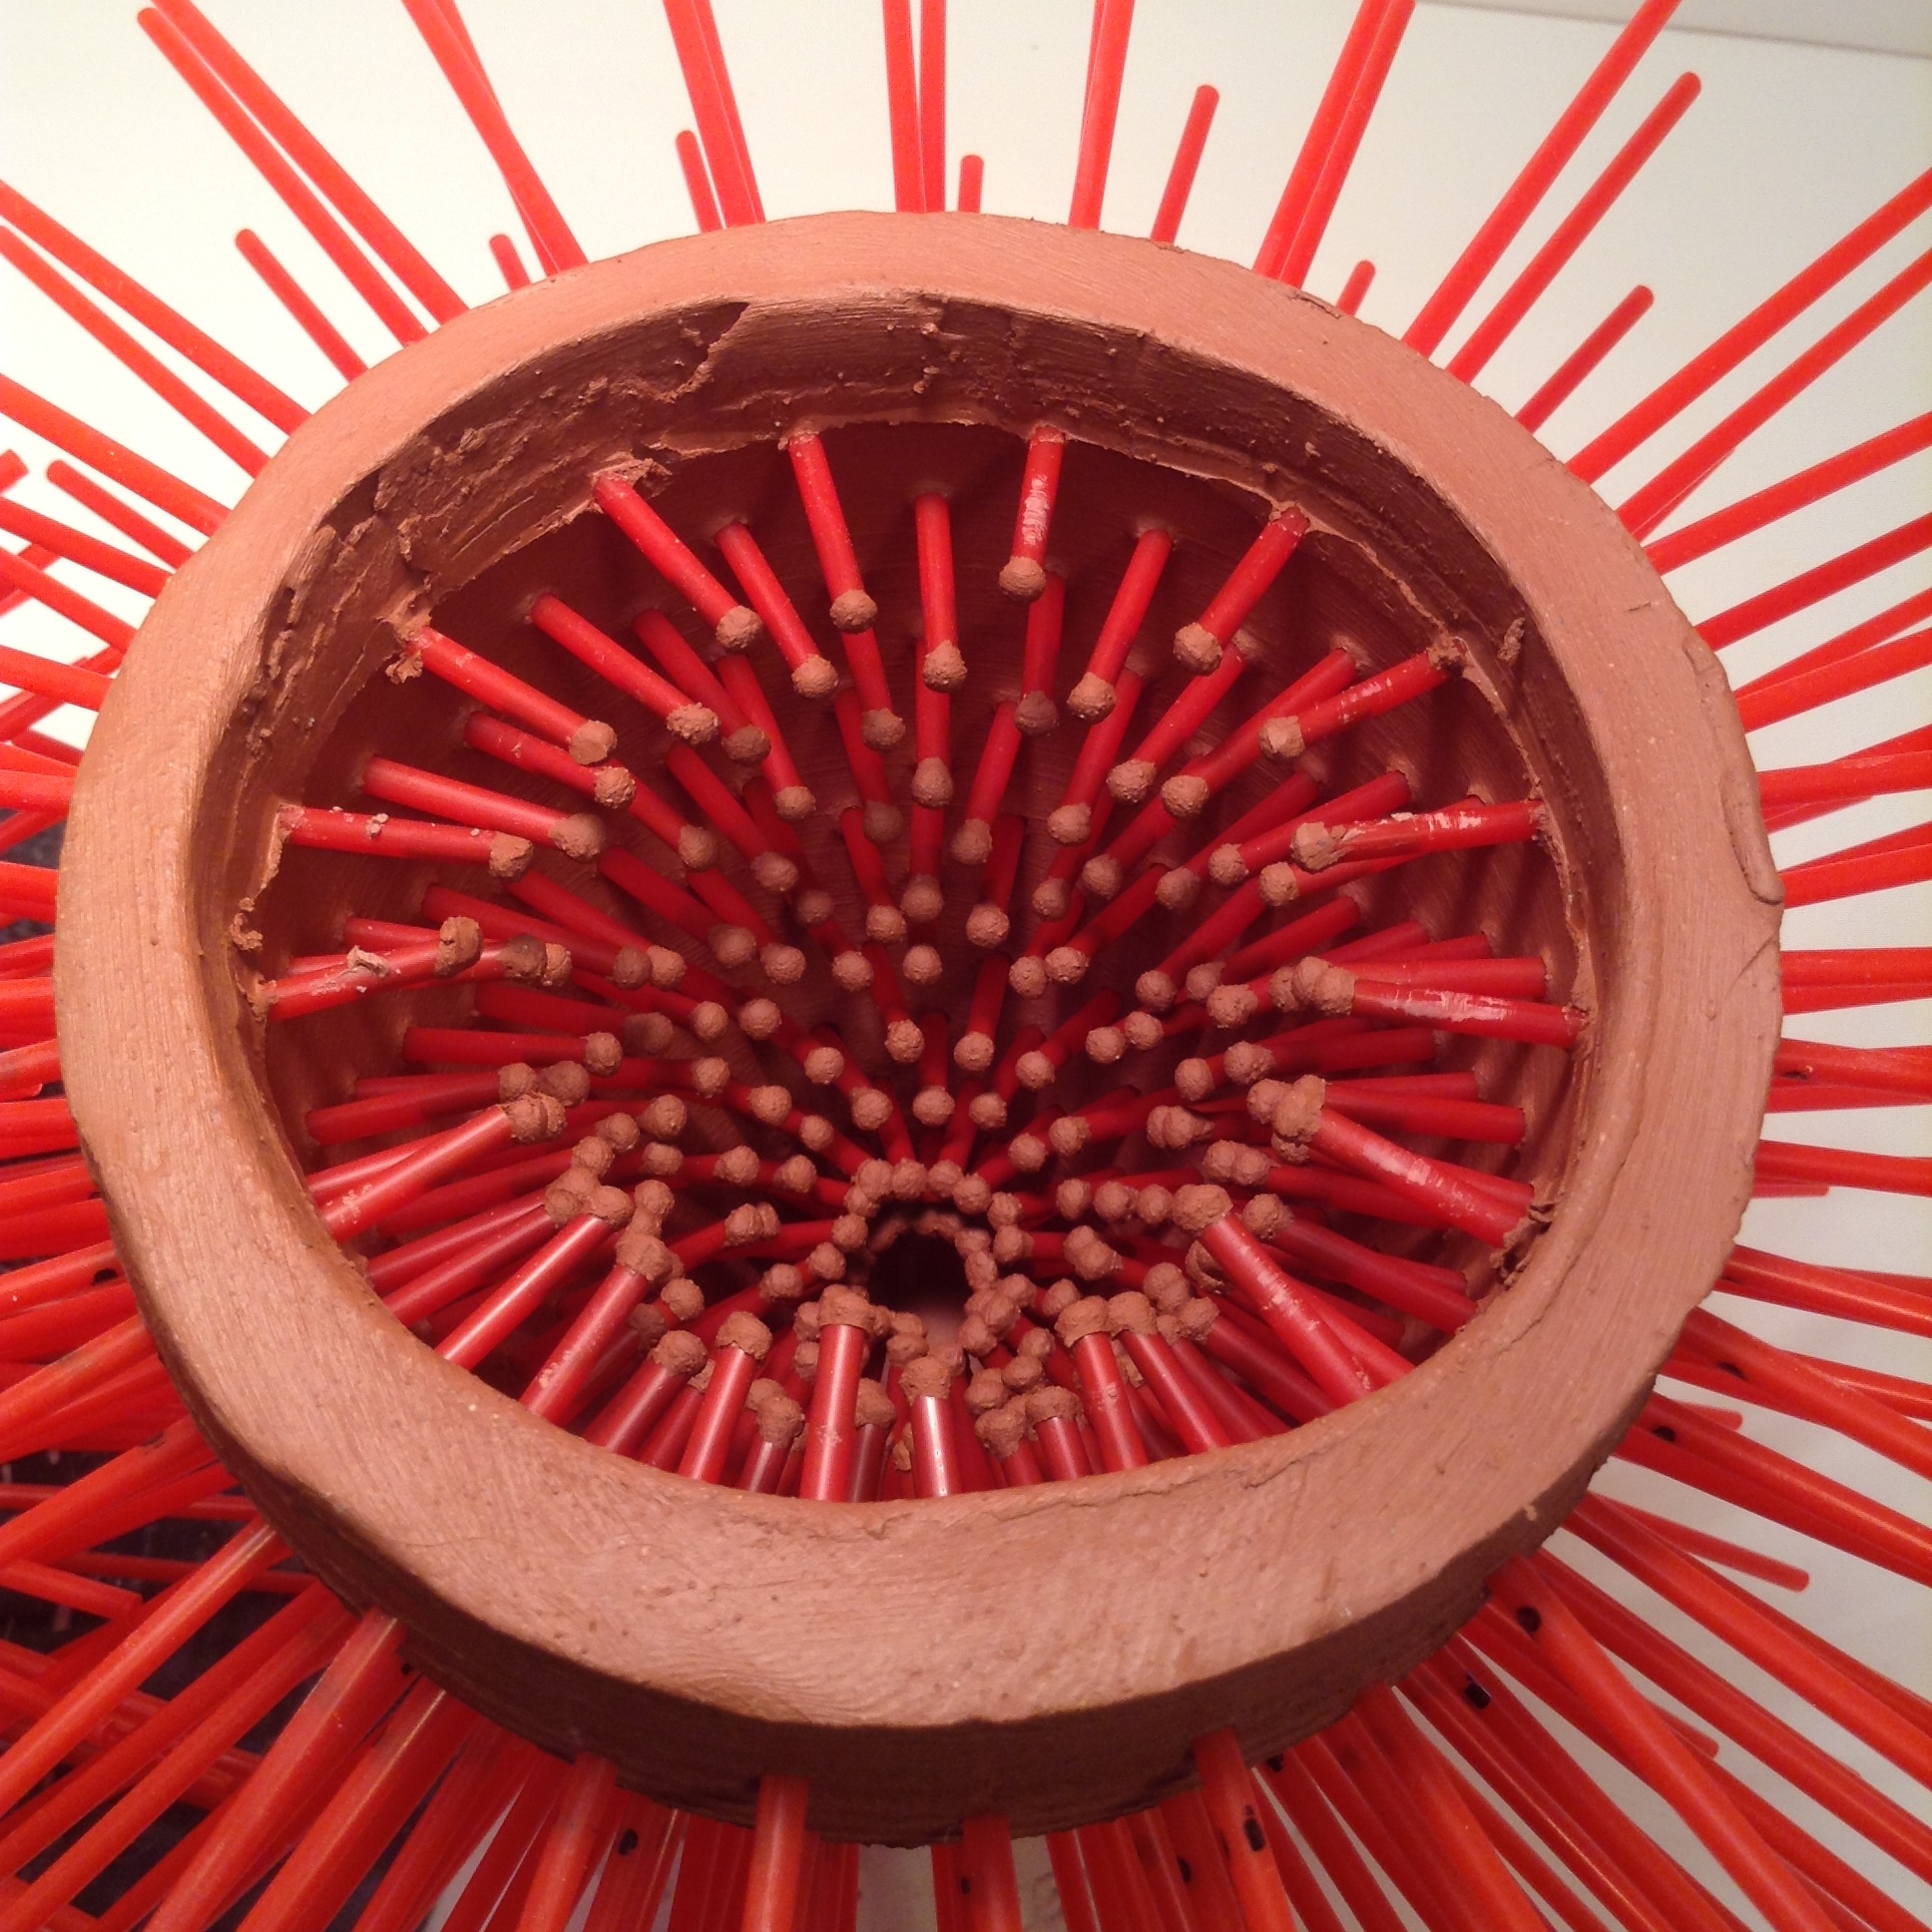
STILL SHOTS OF DOUBLE WALL FORM
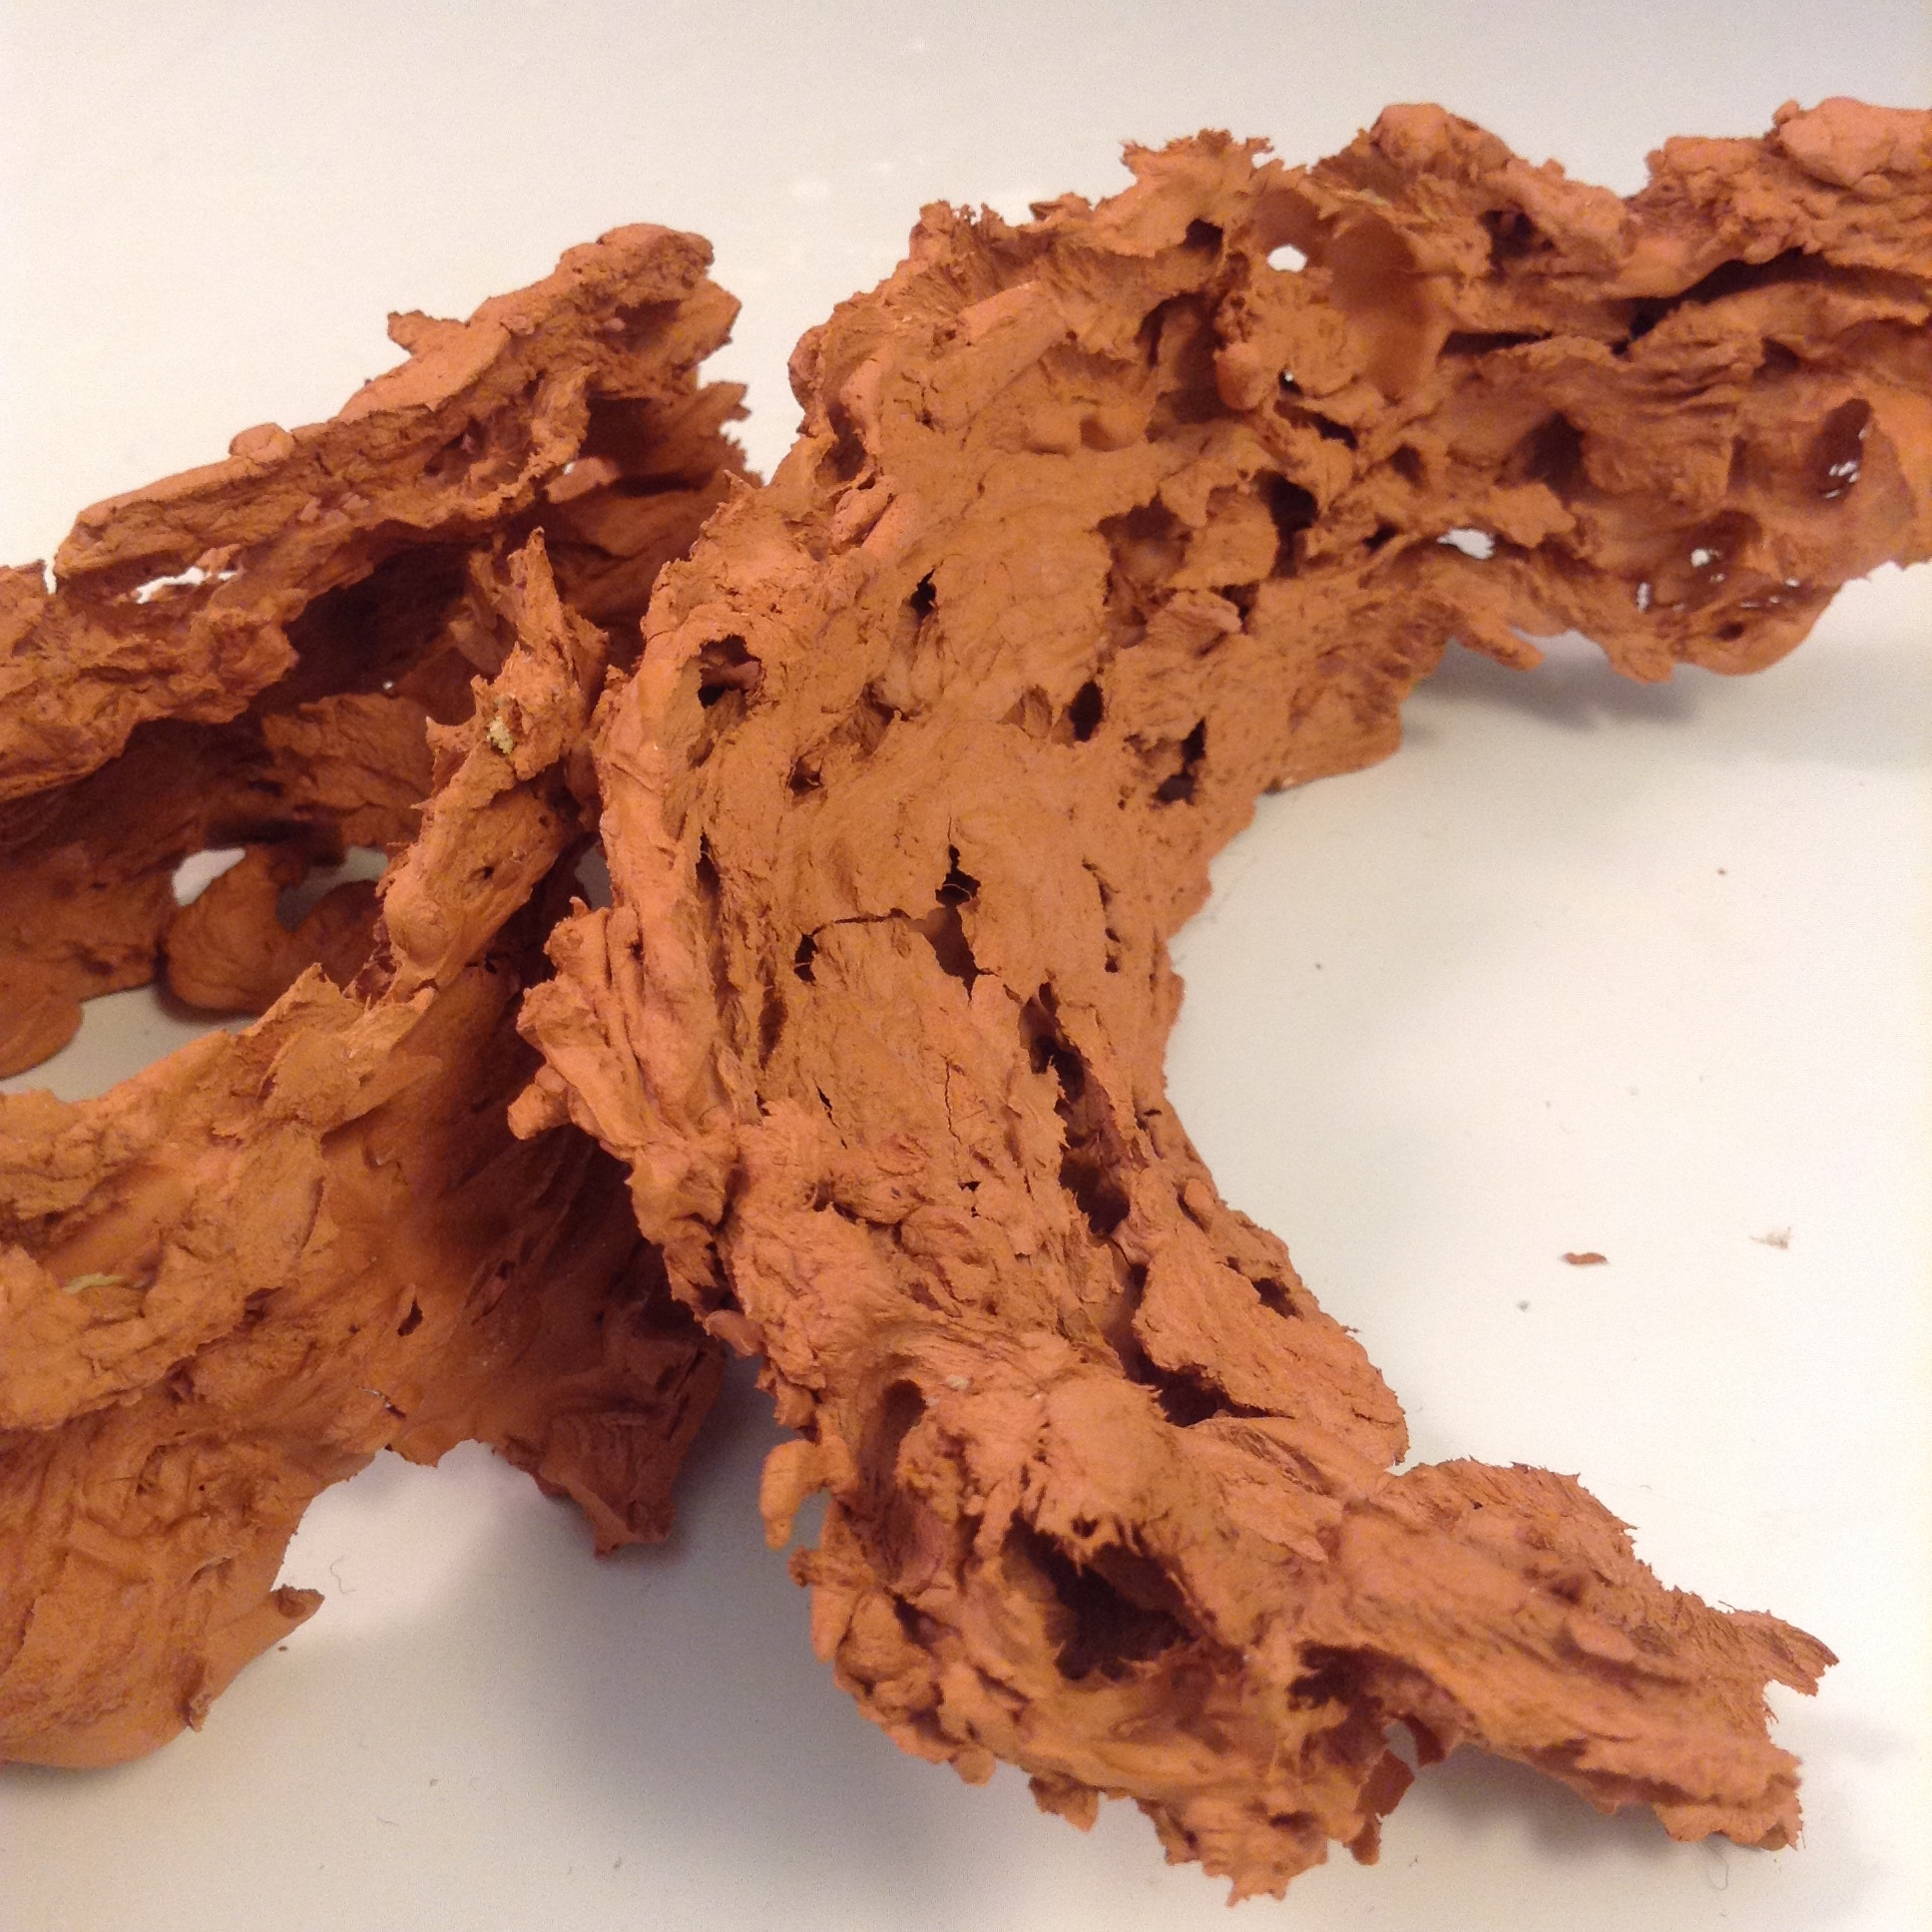
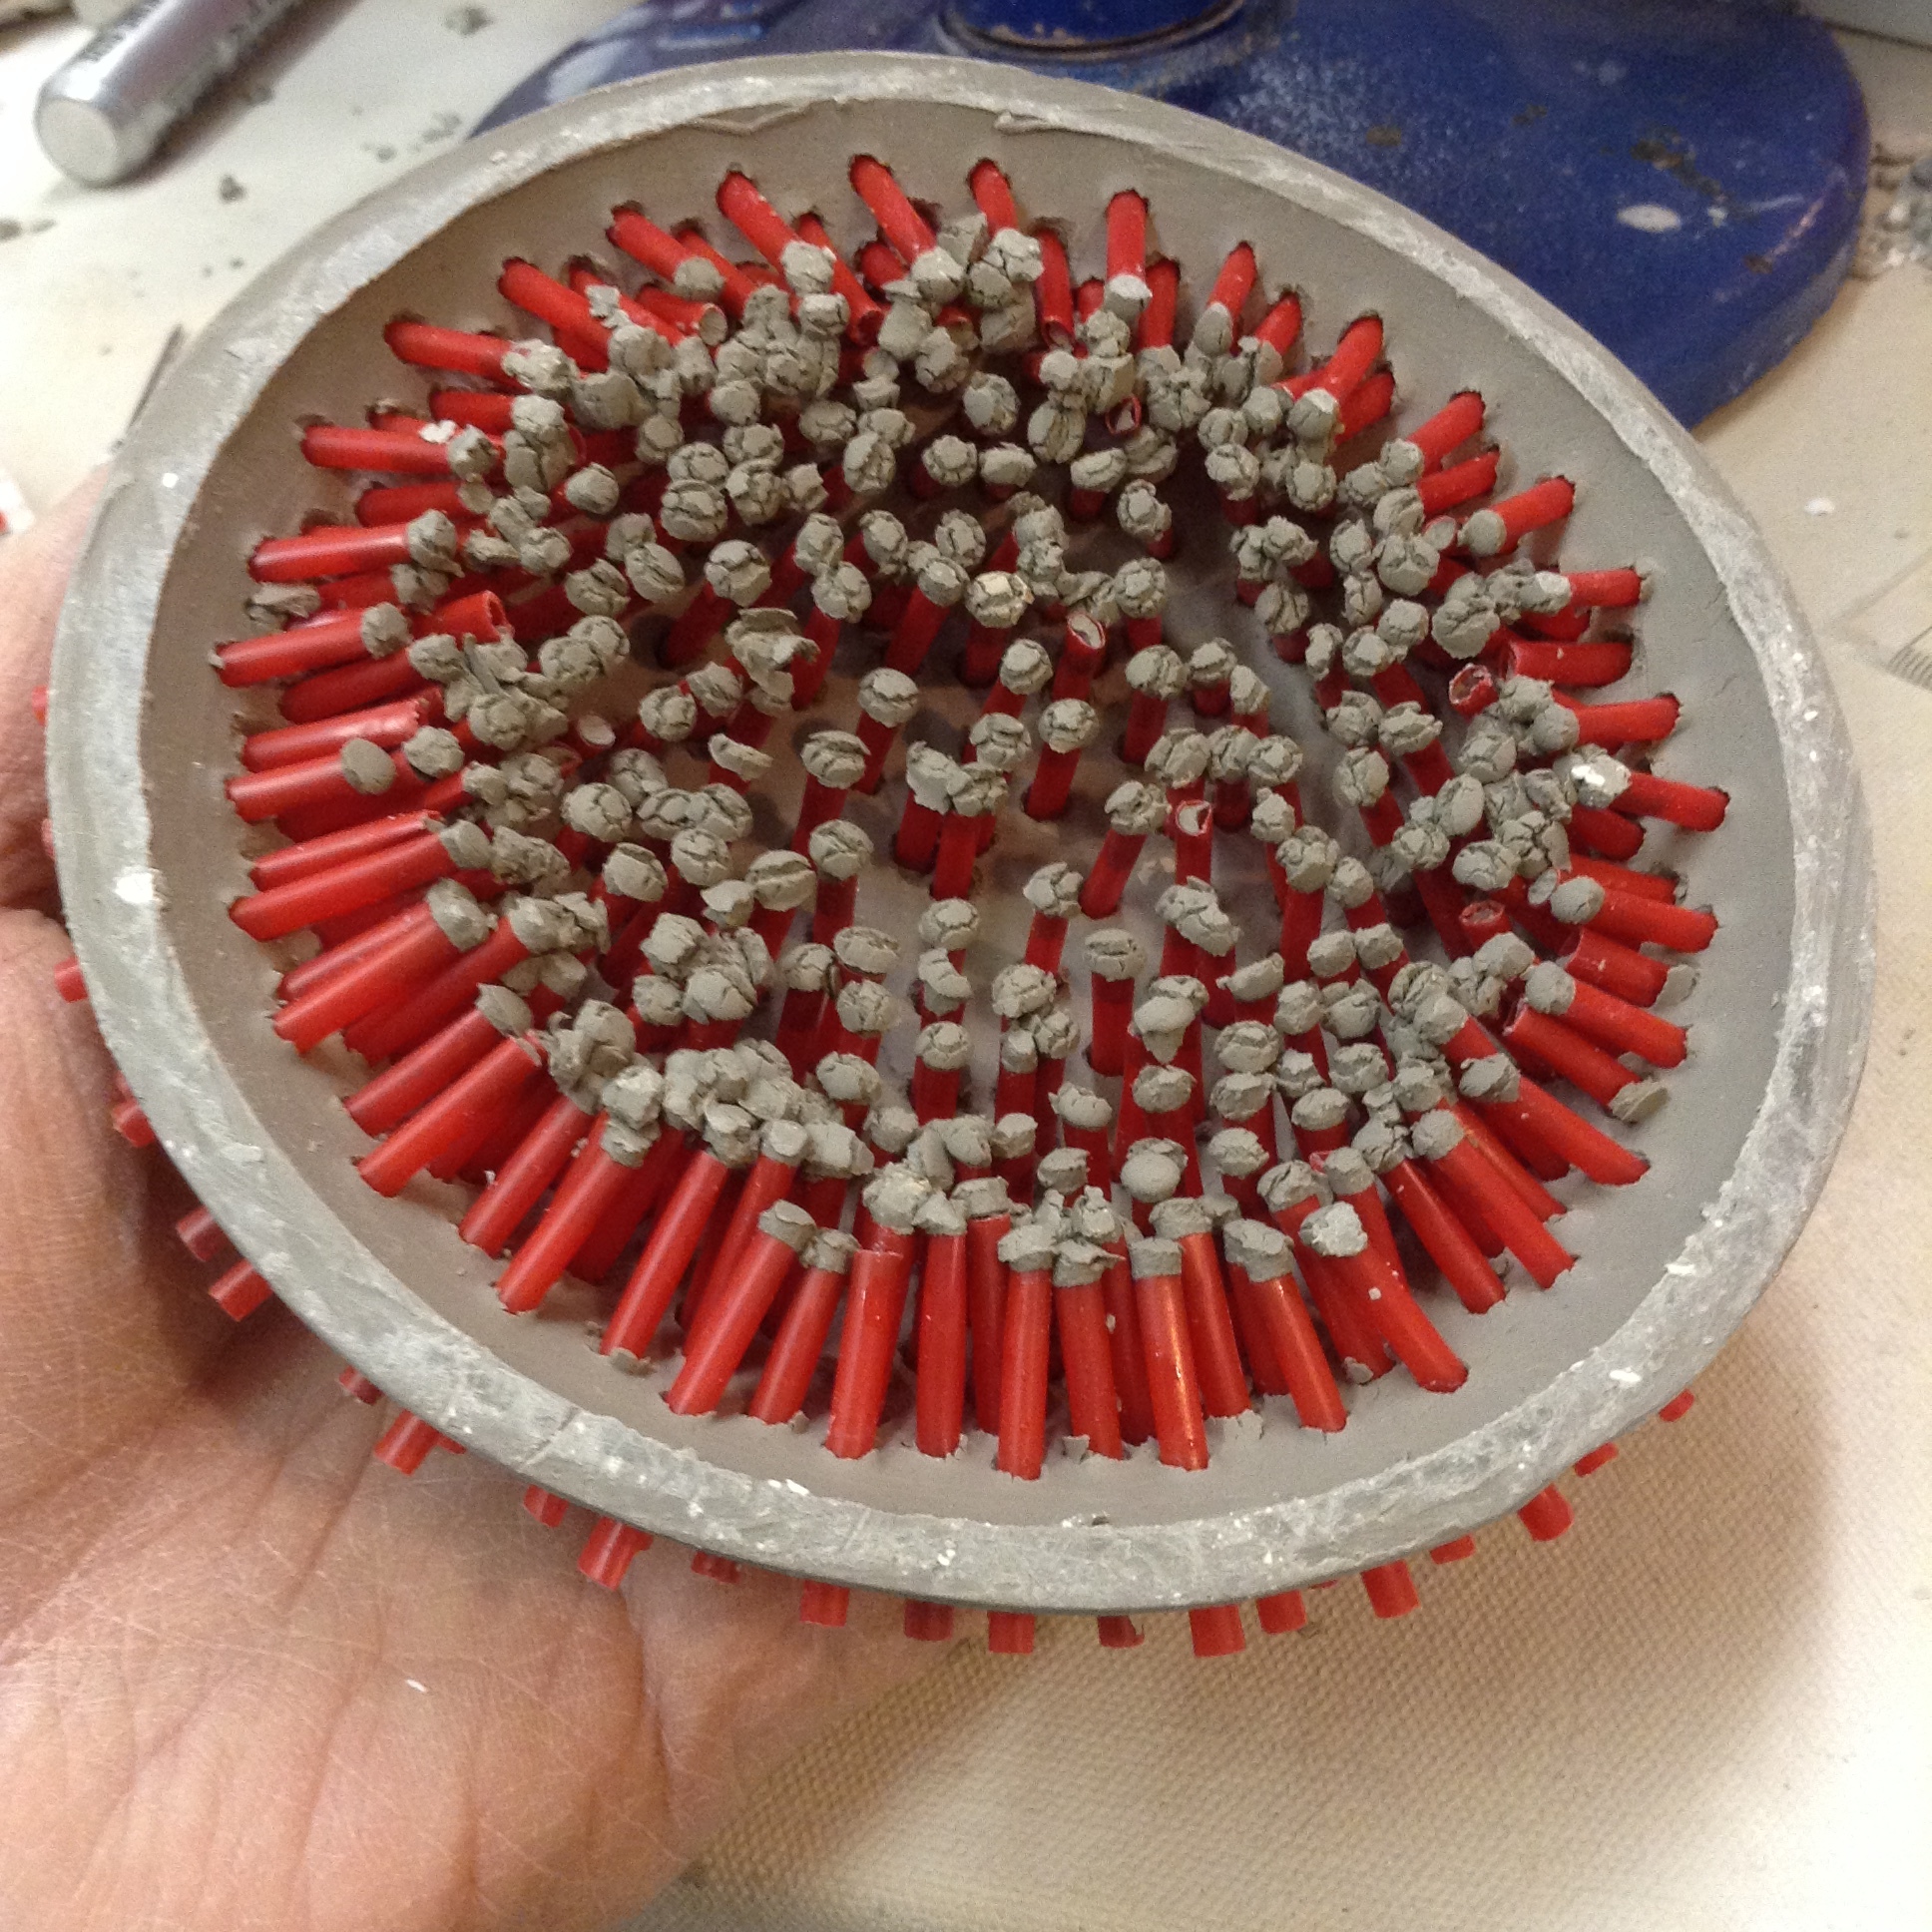
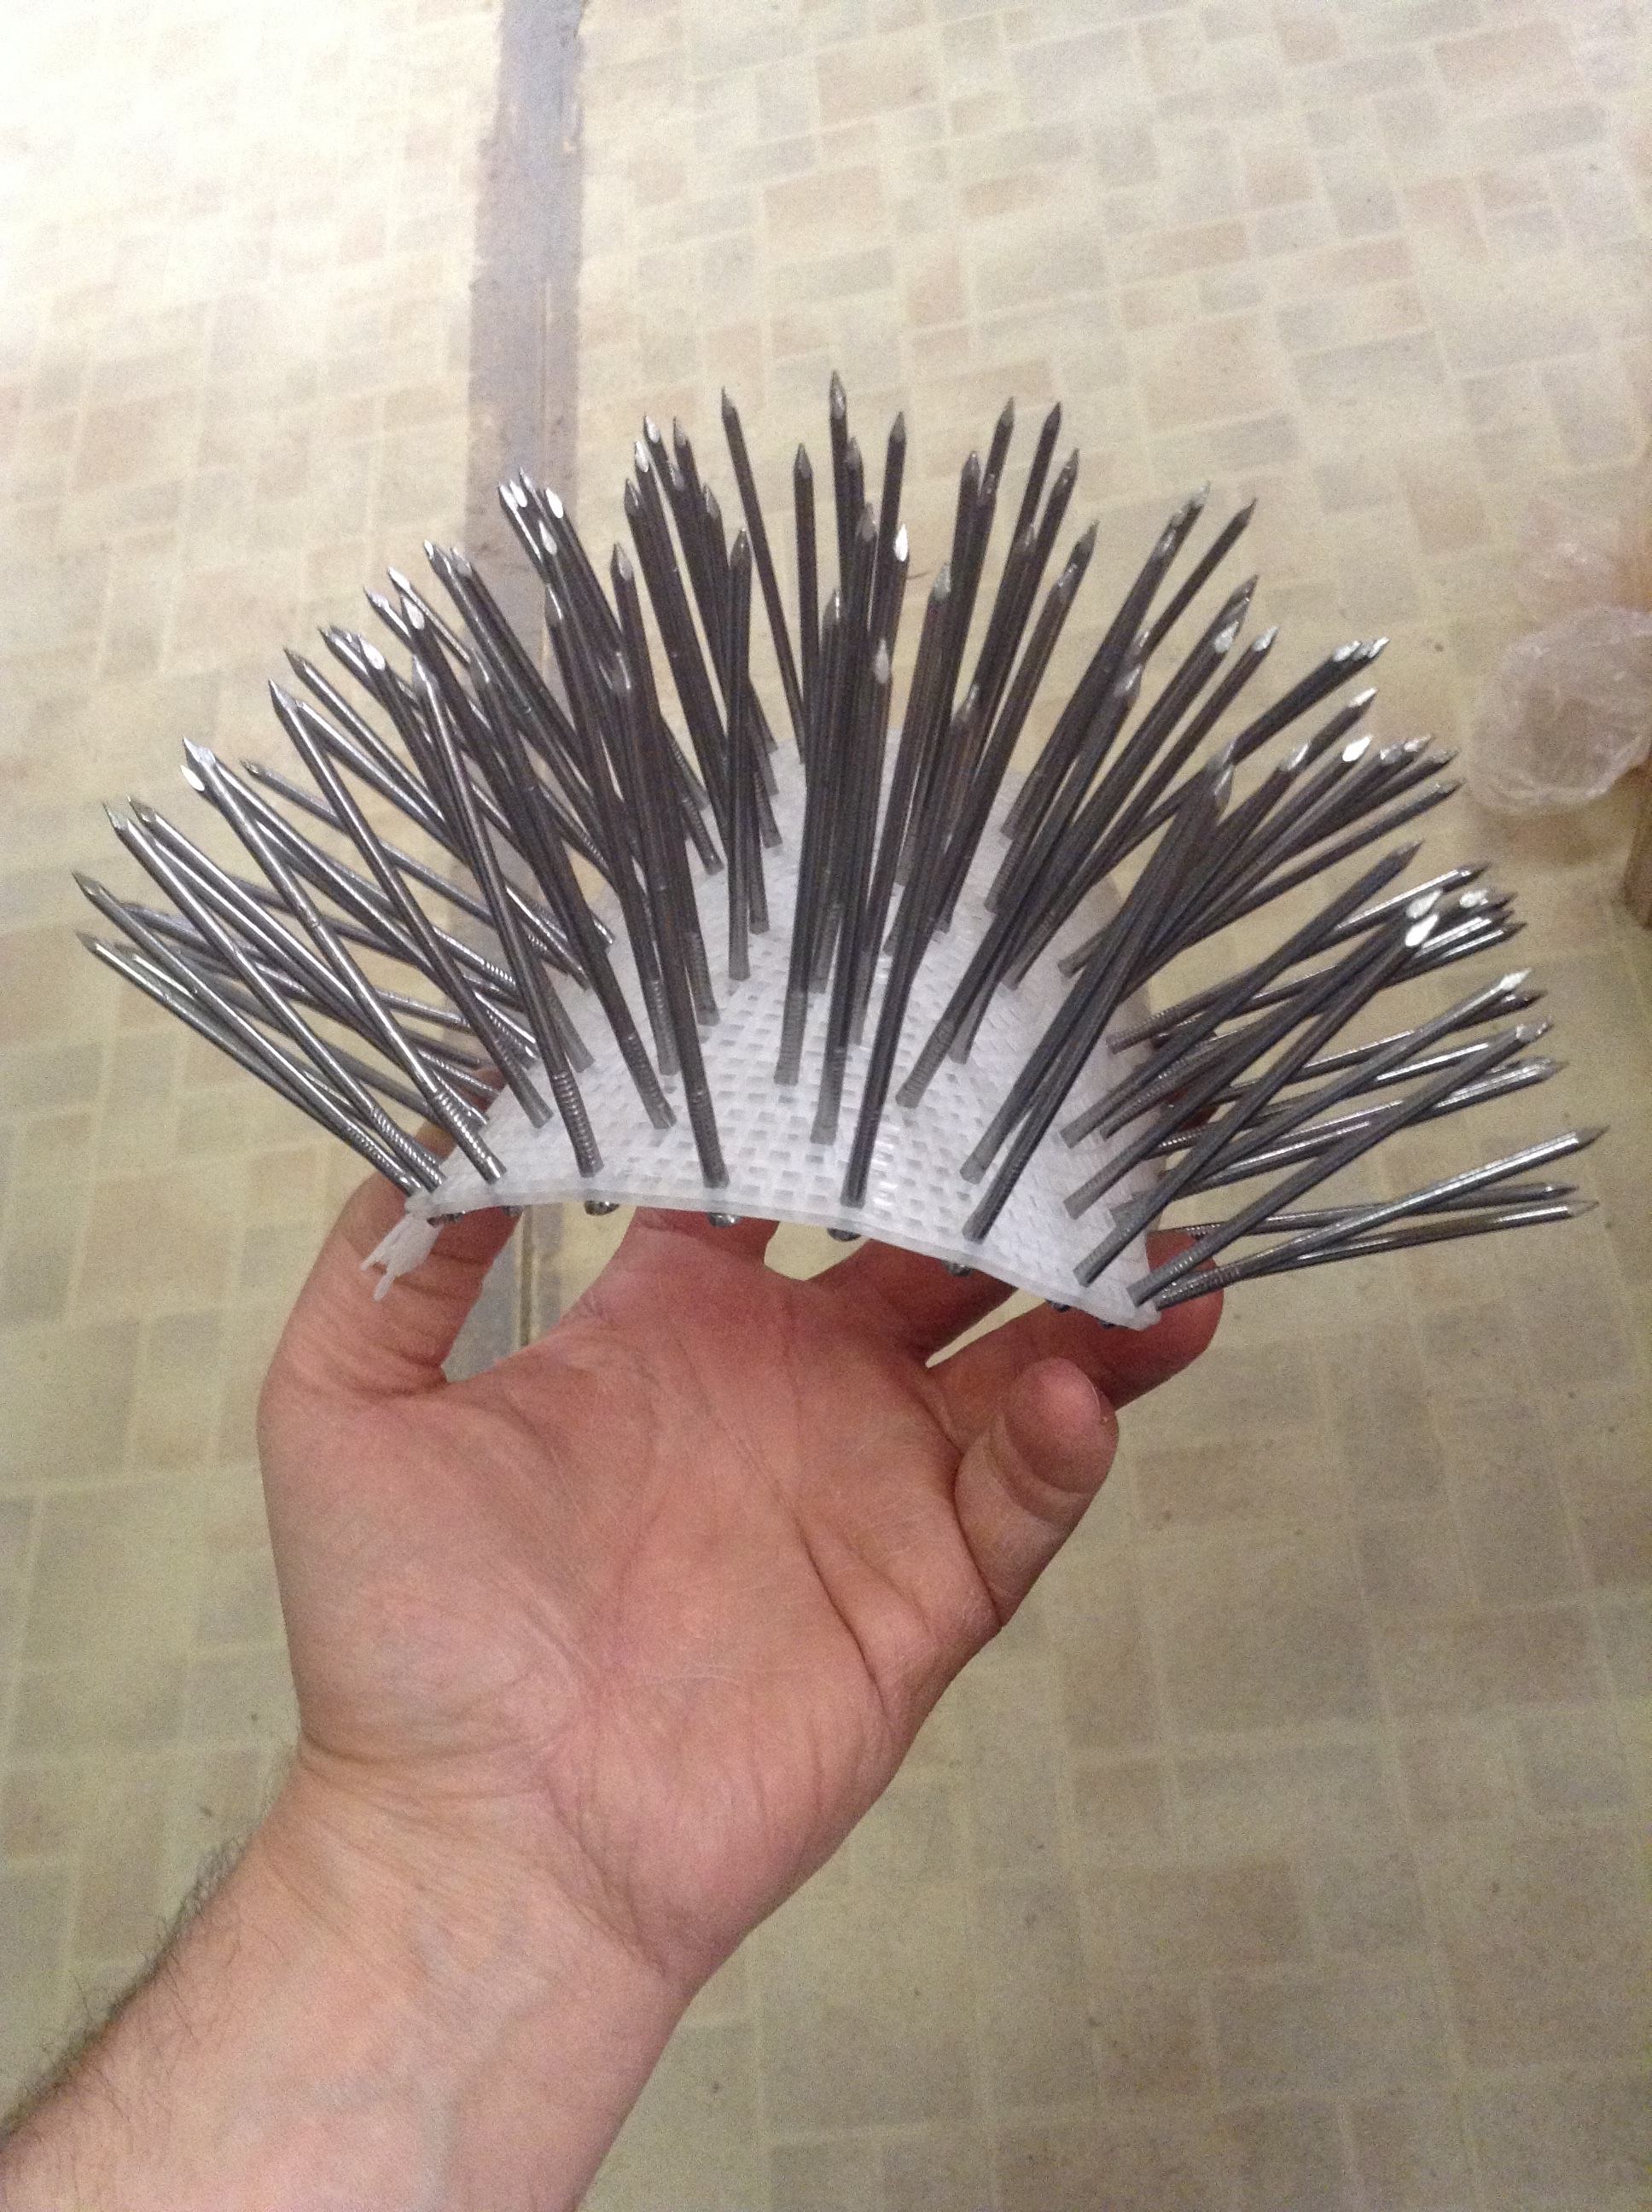
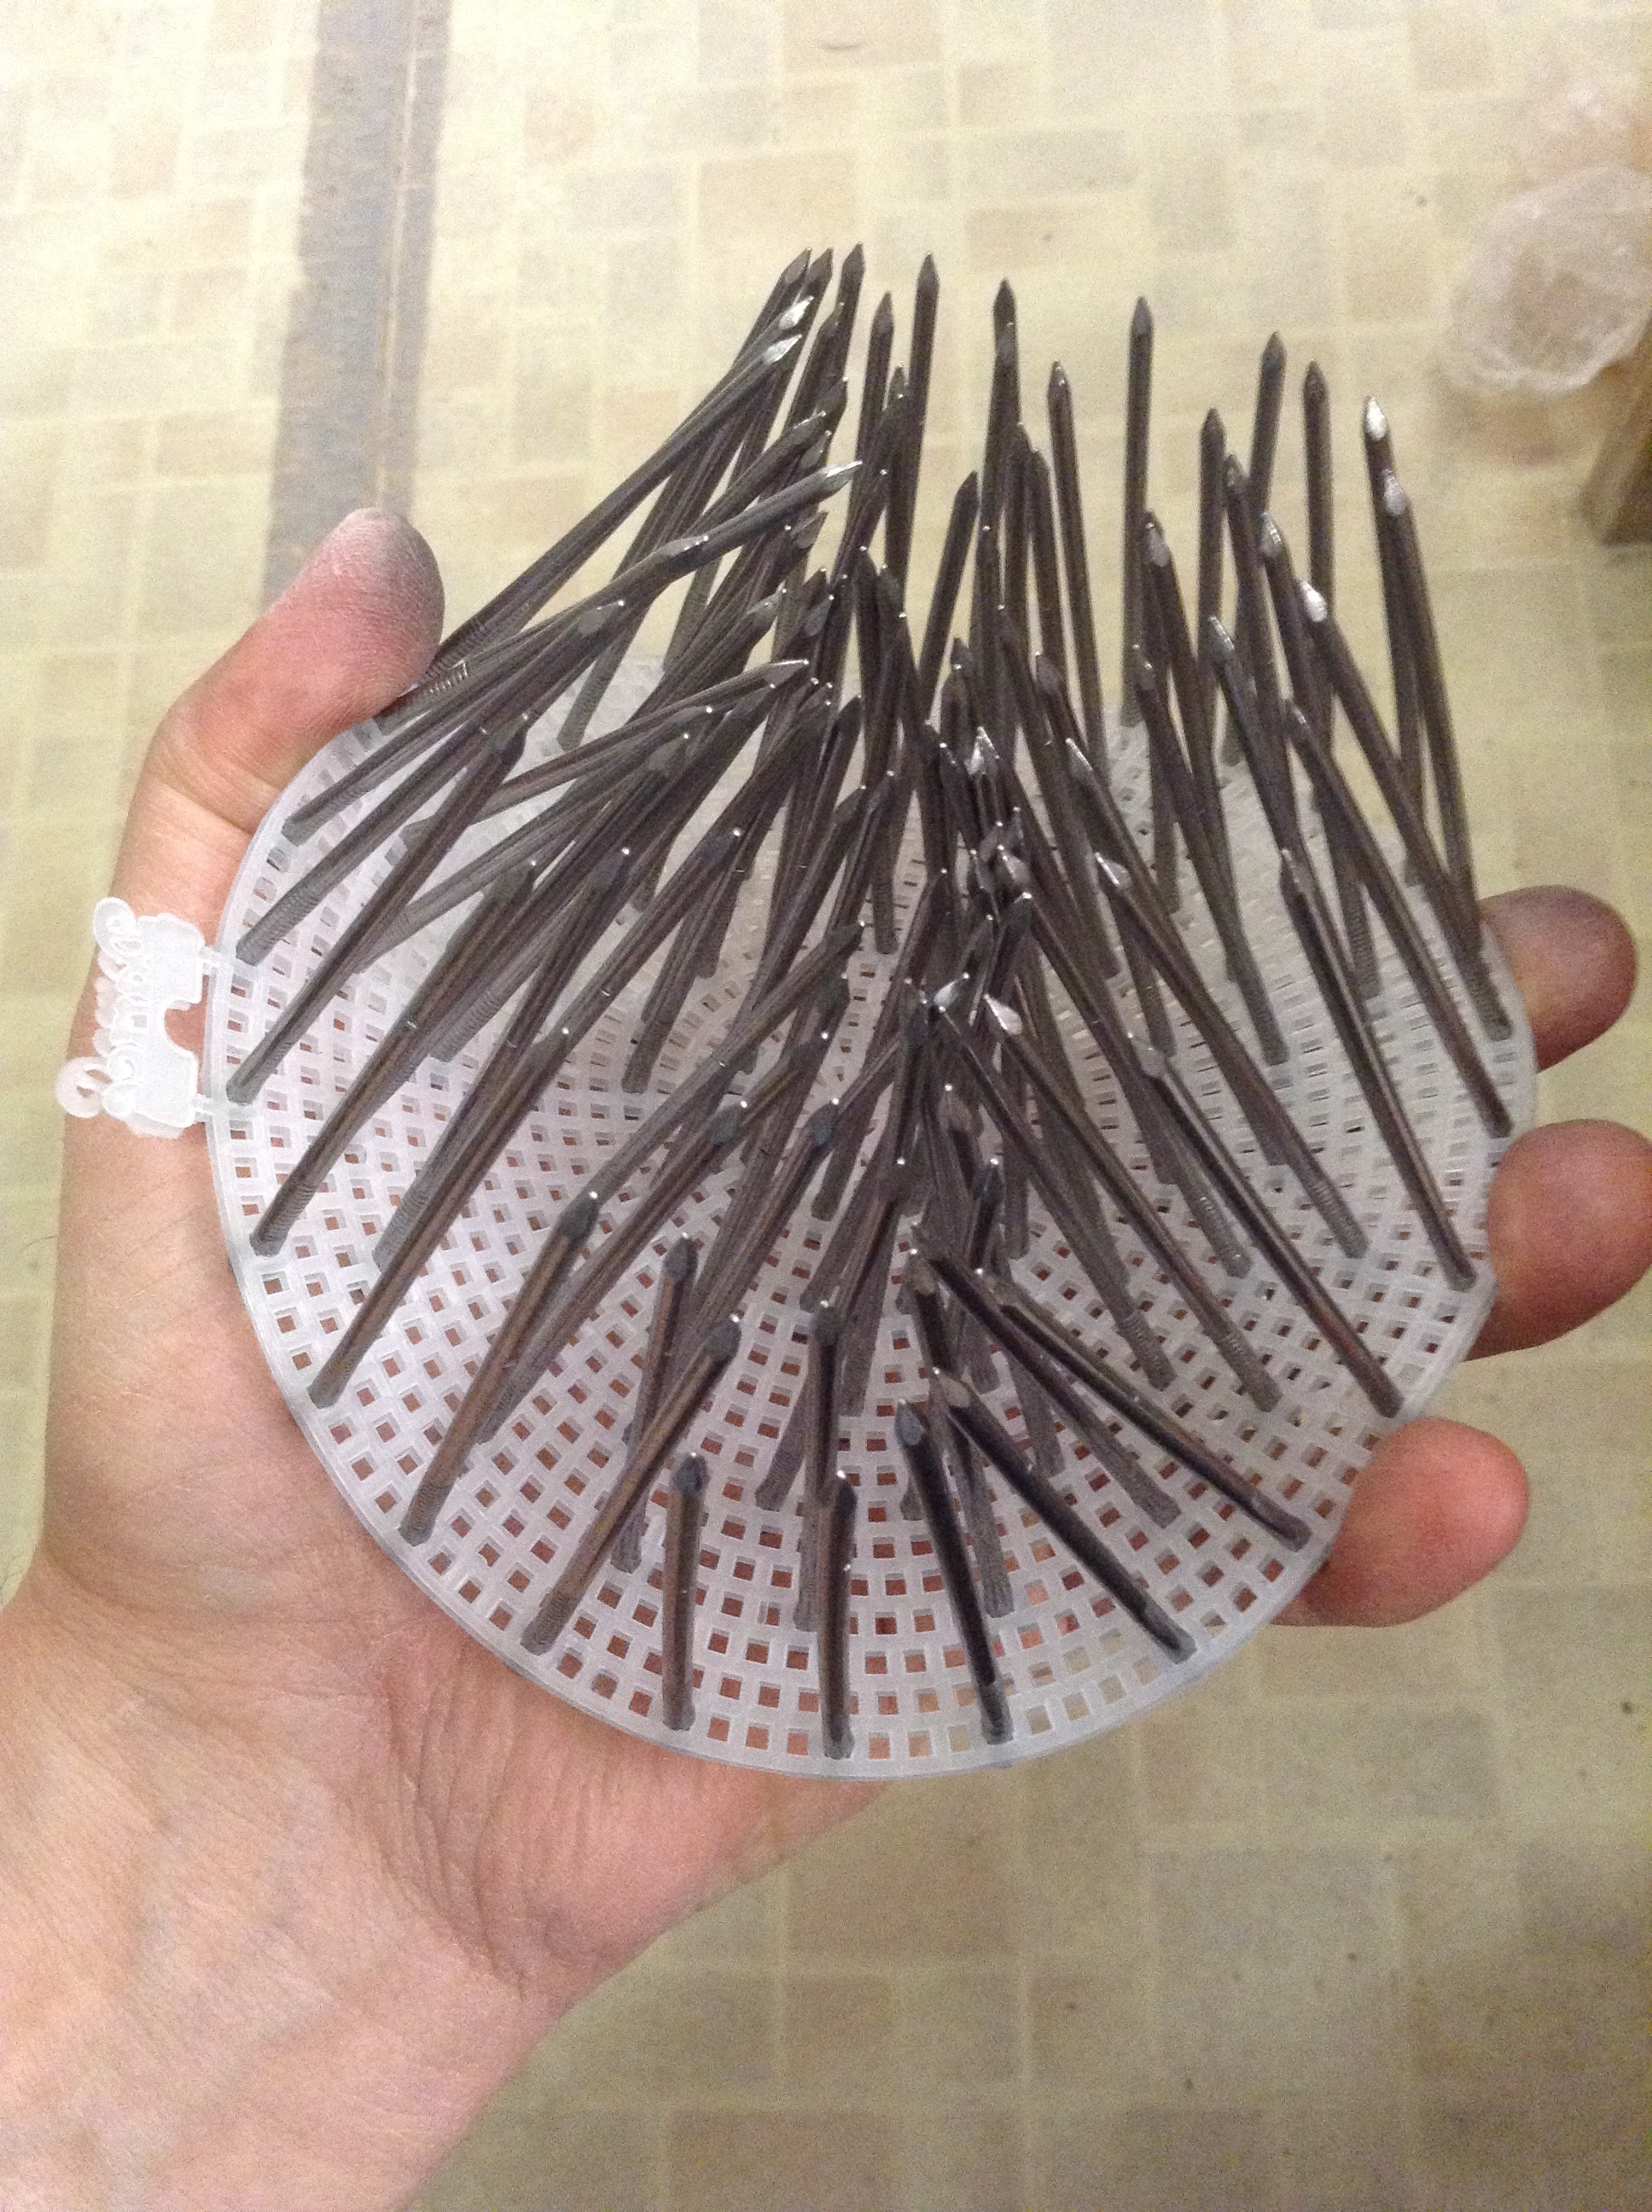
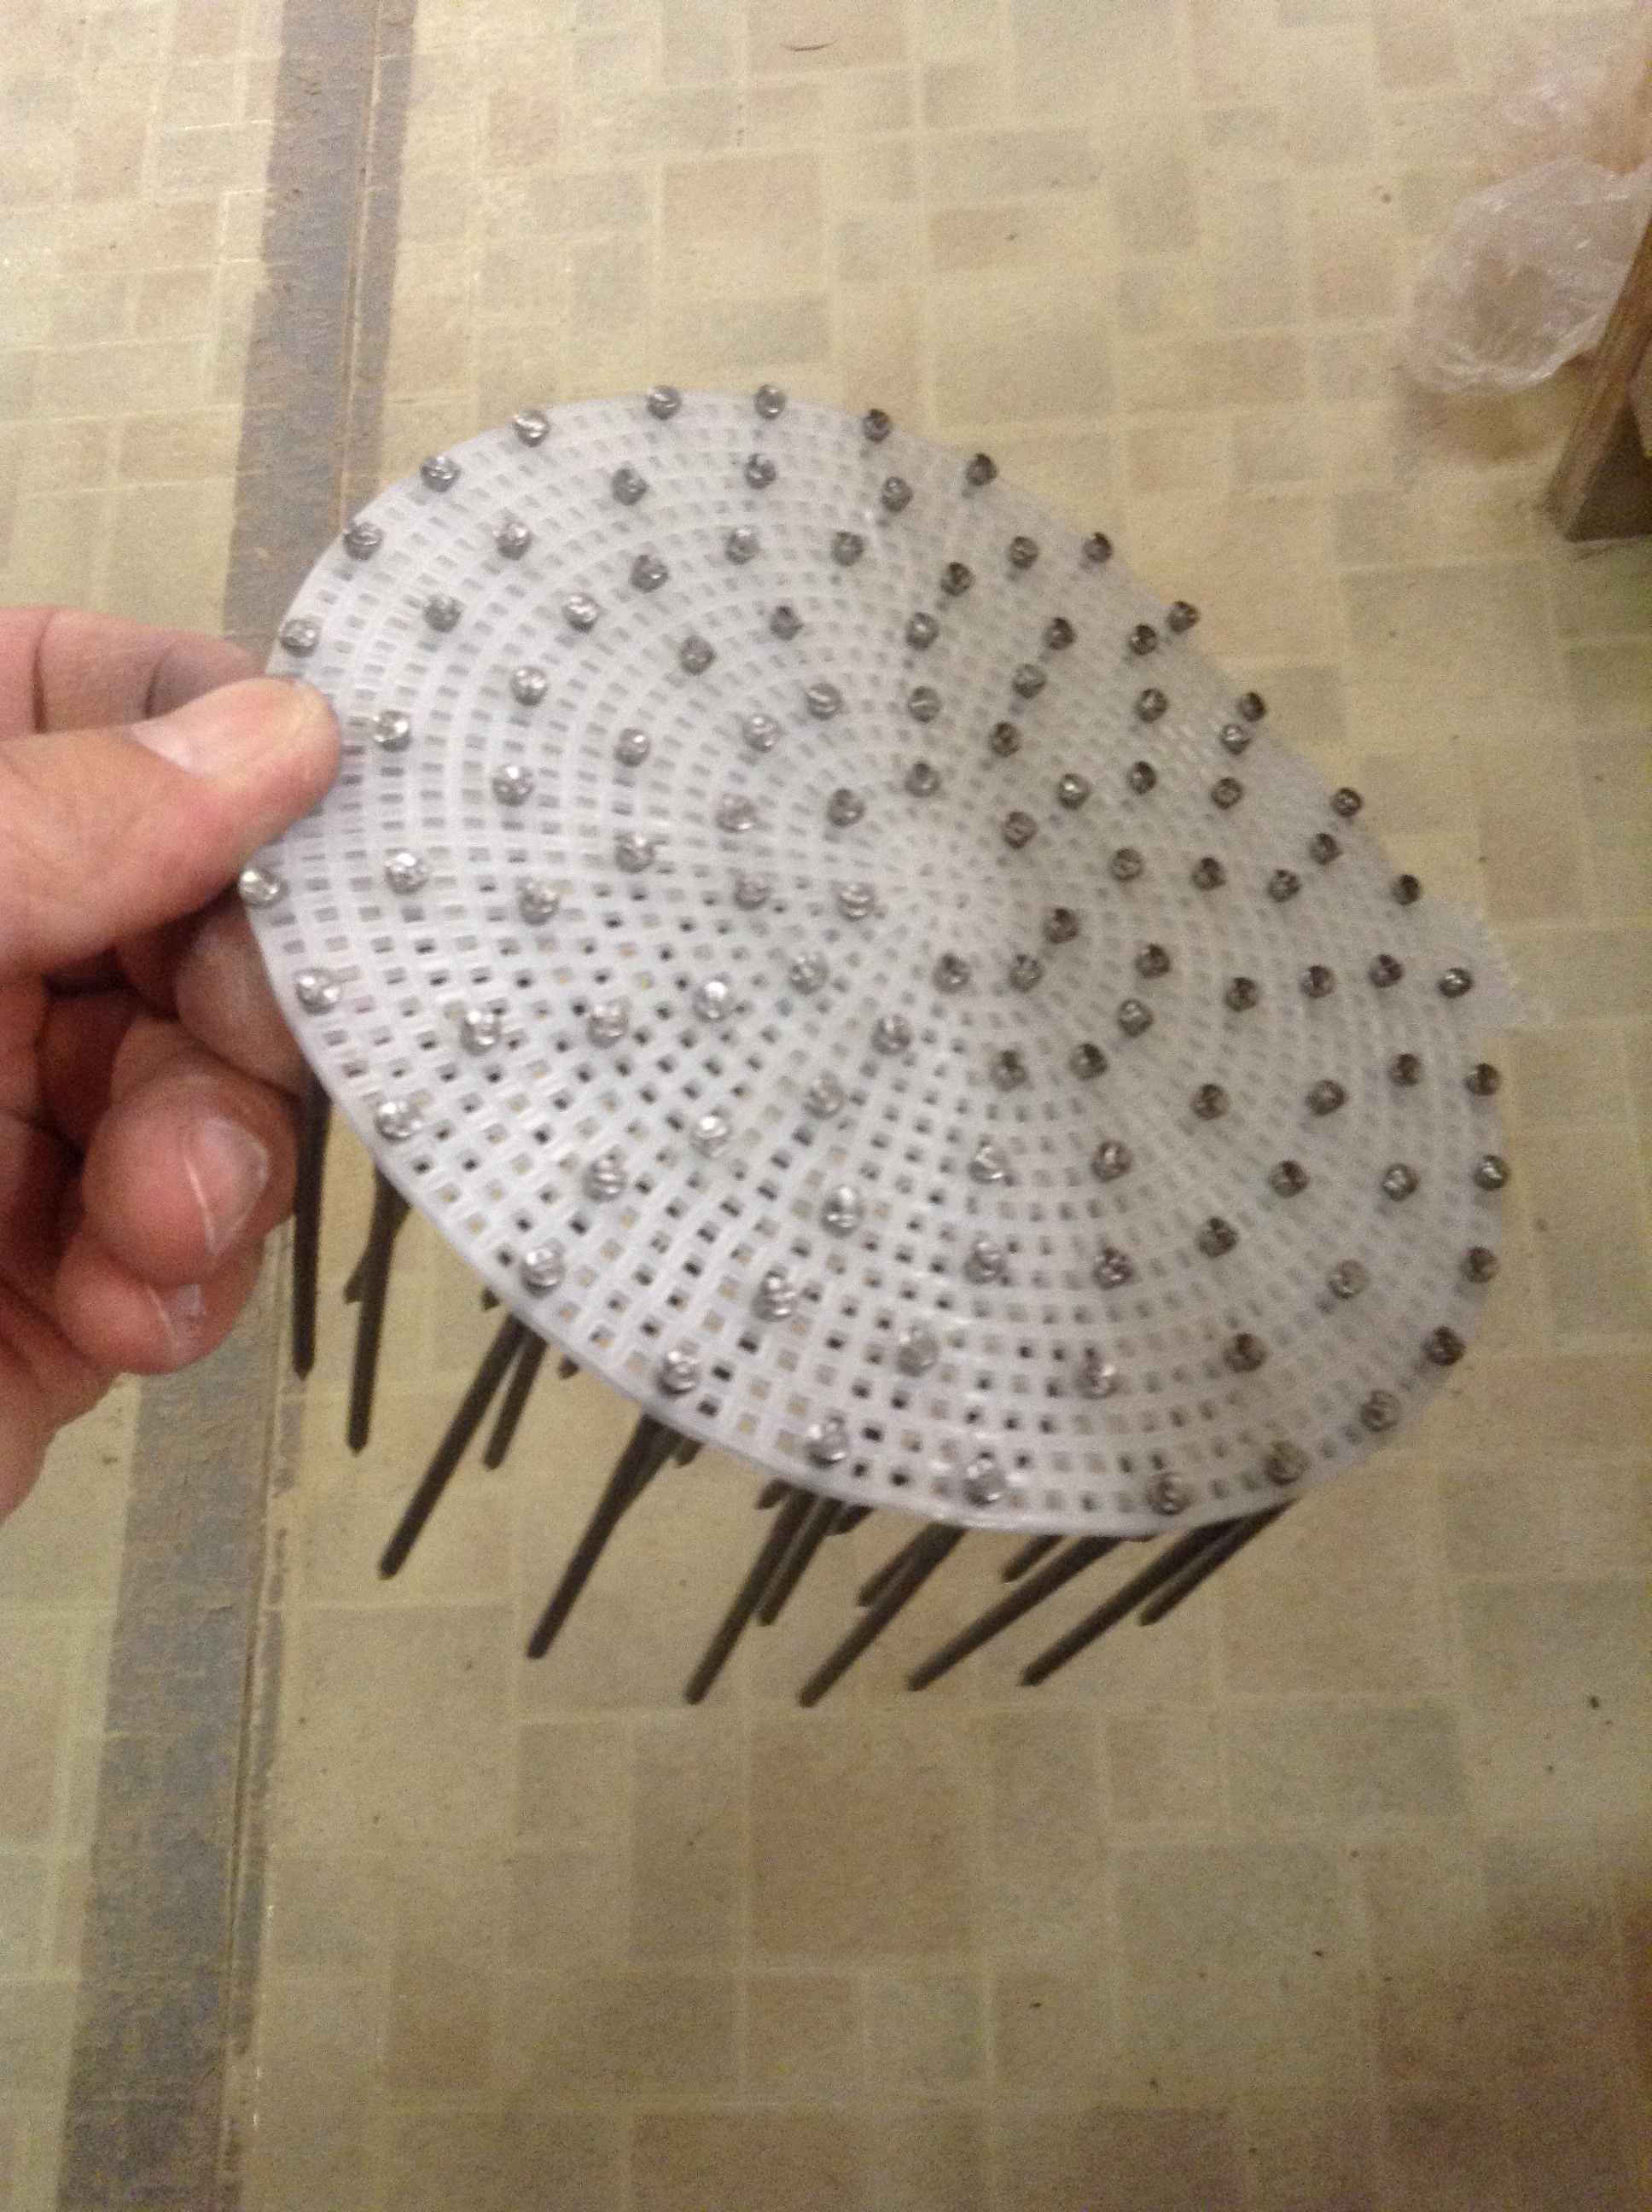
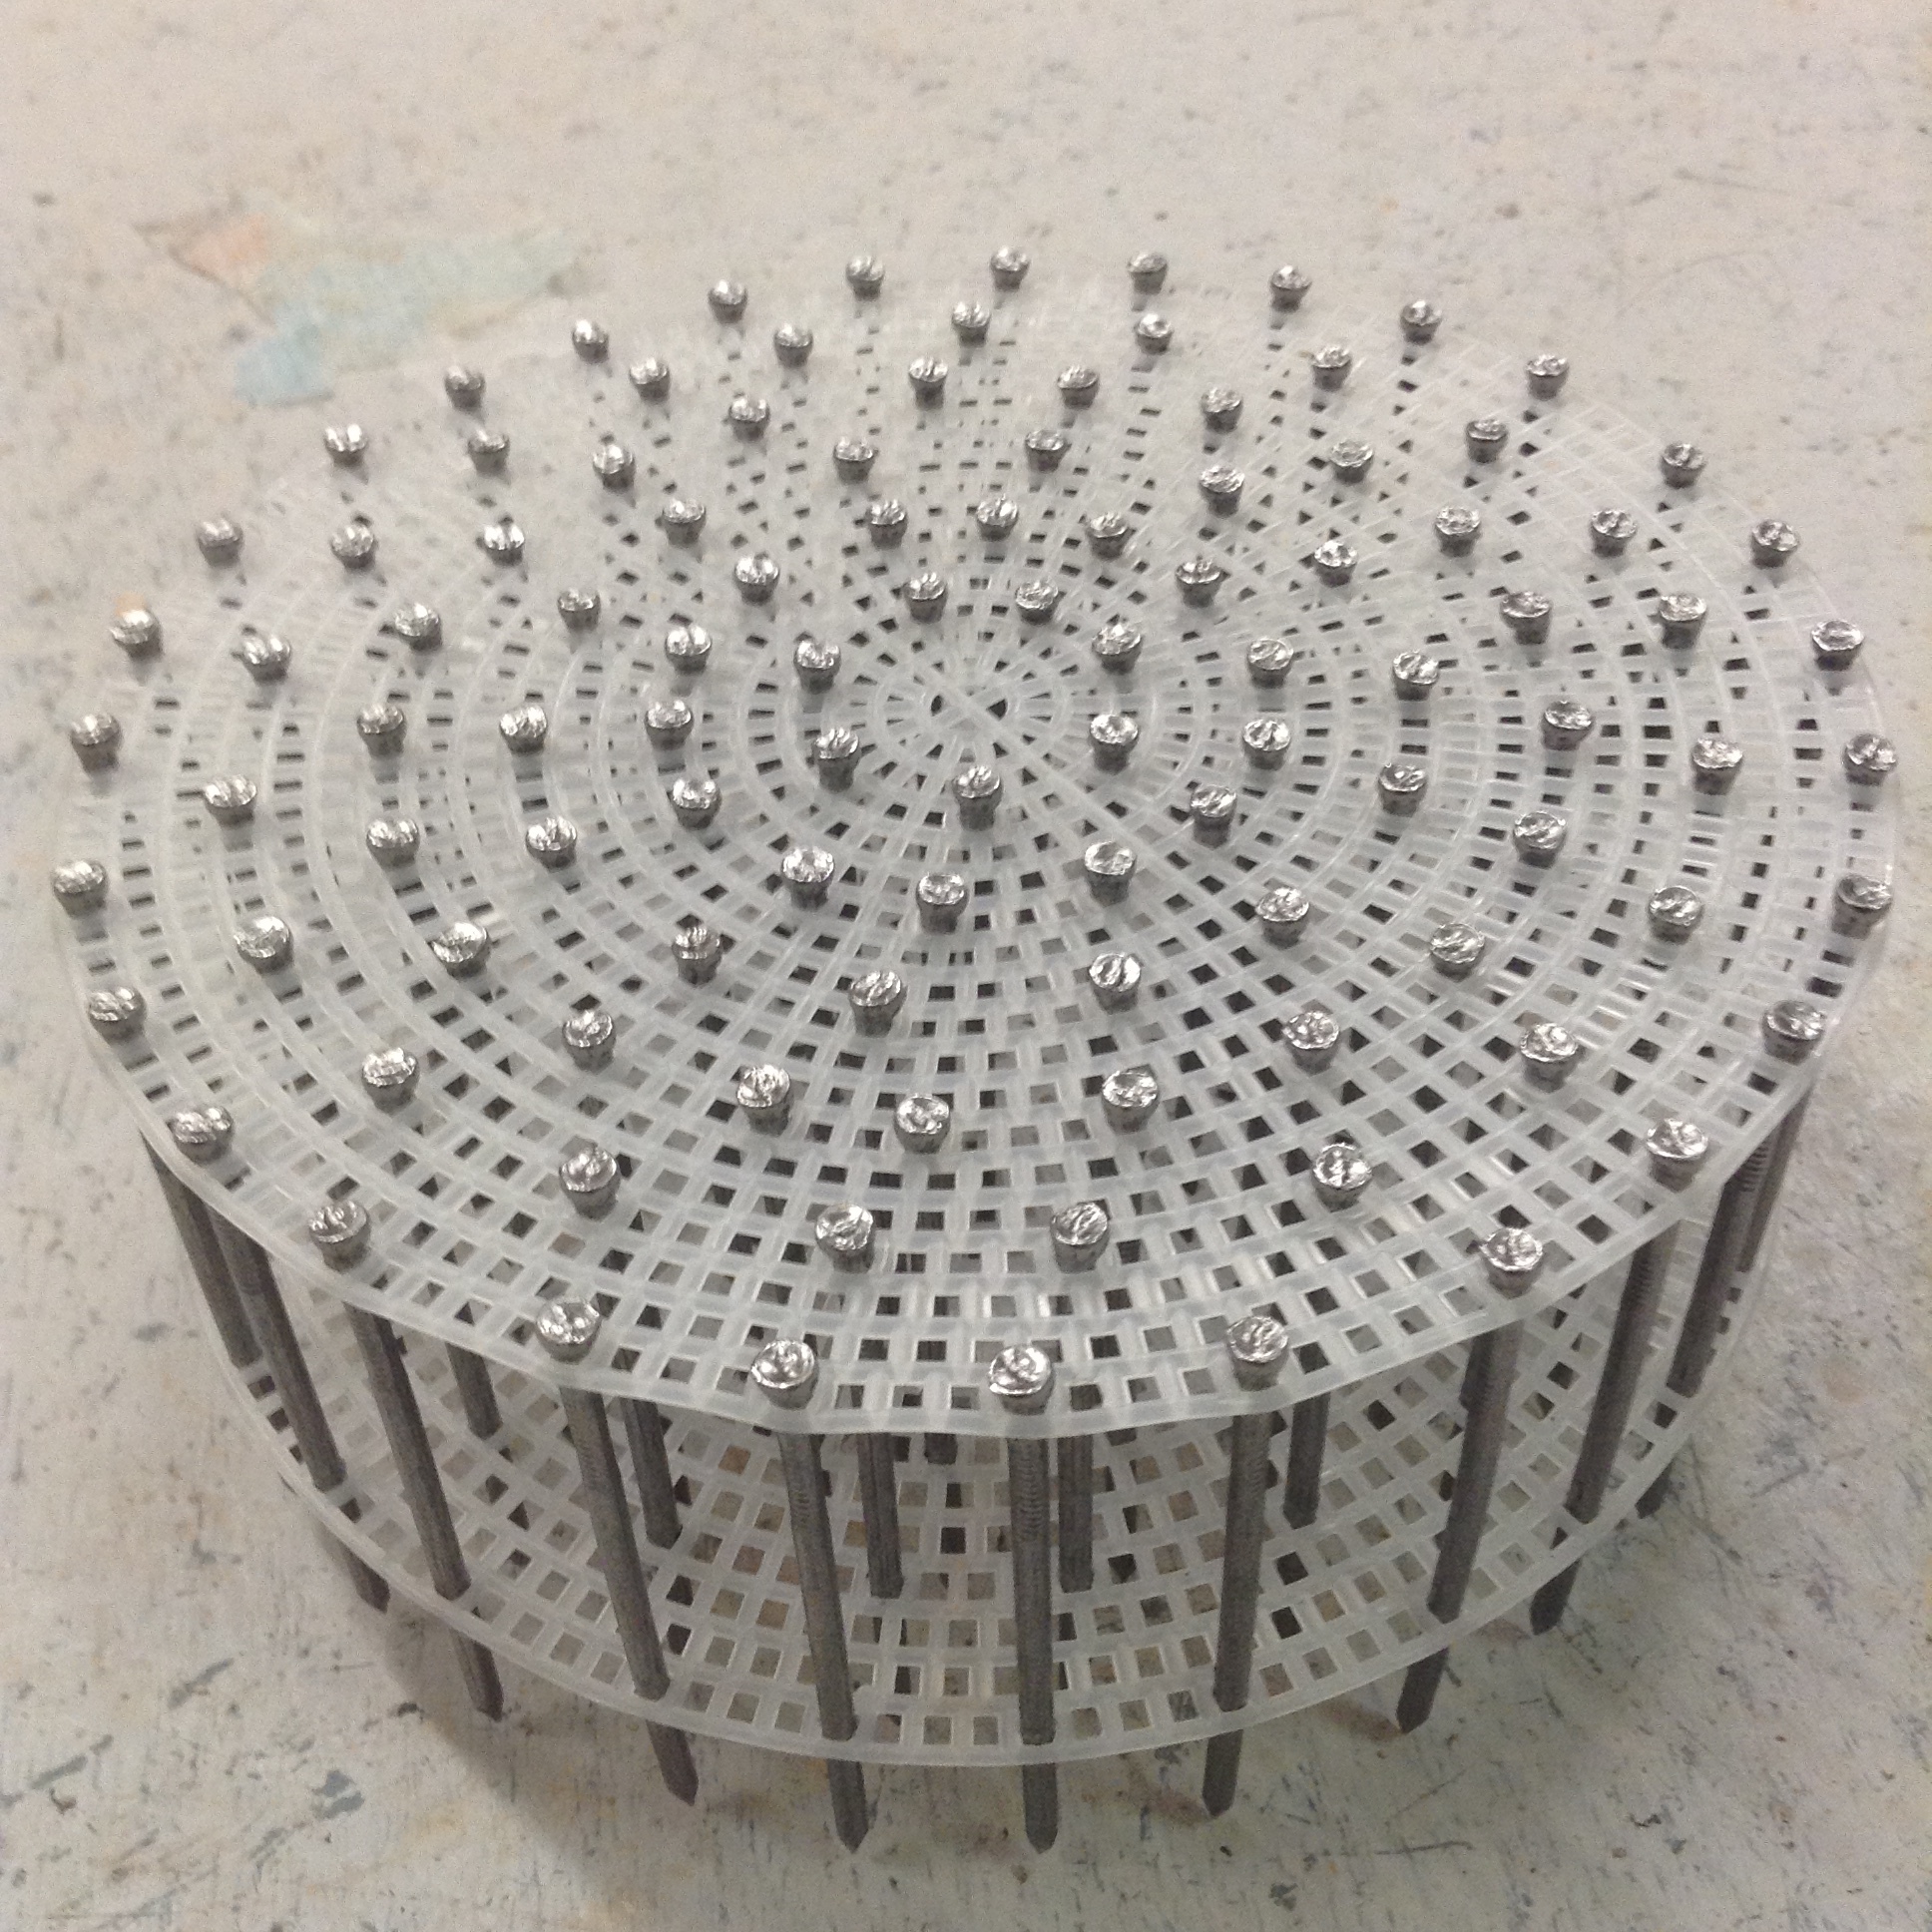
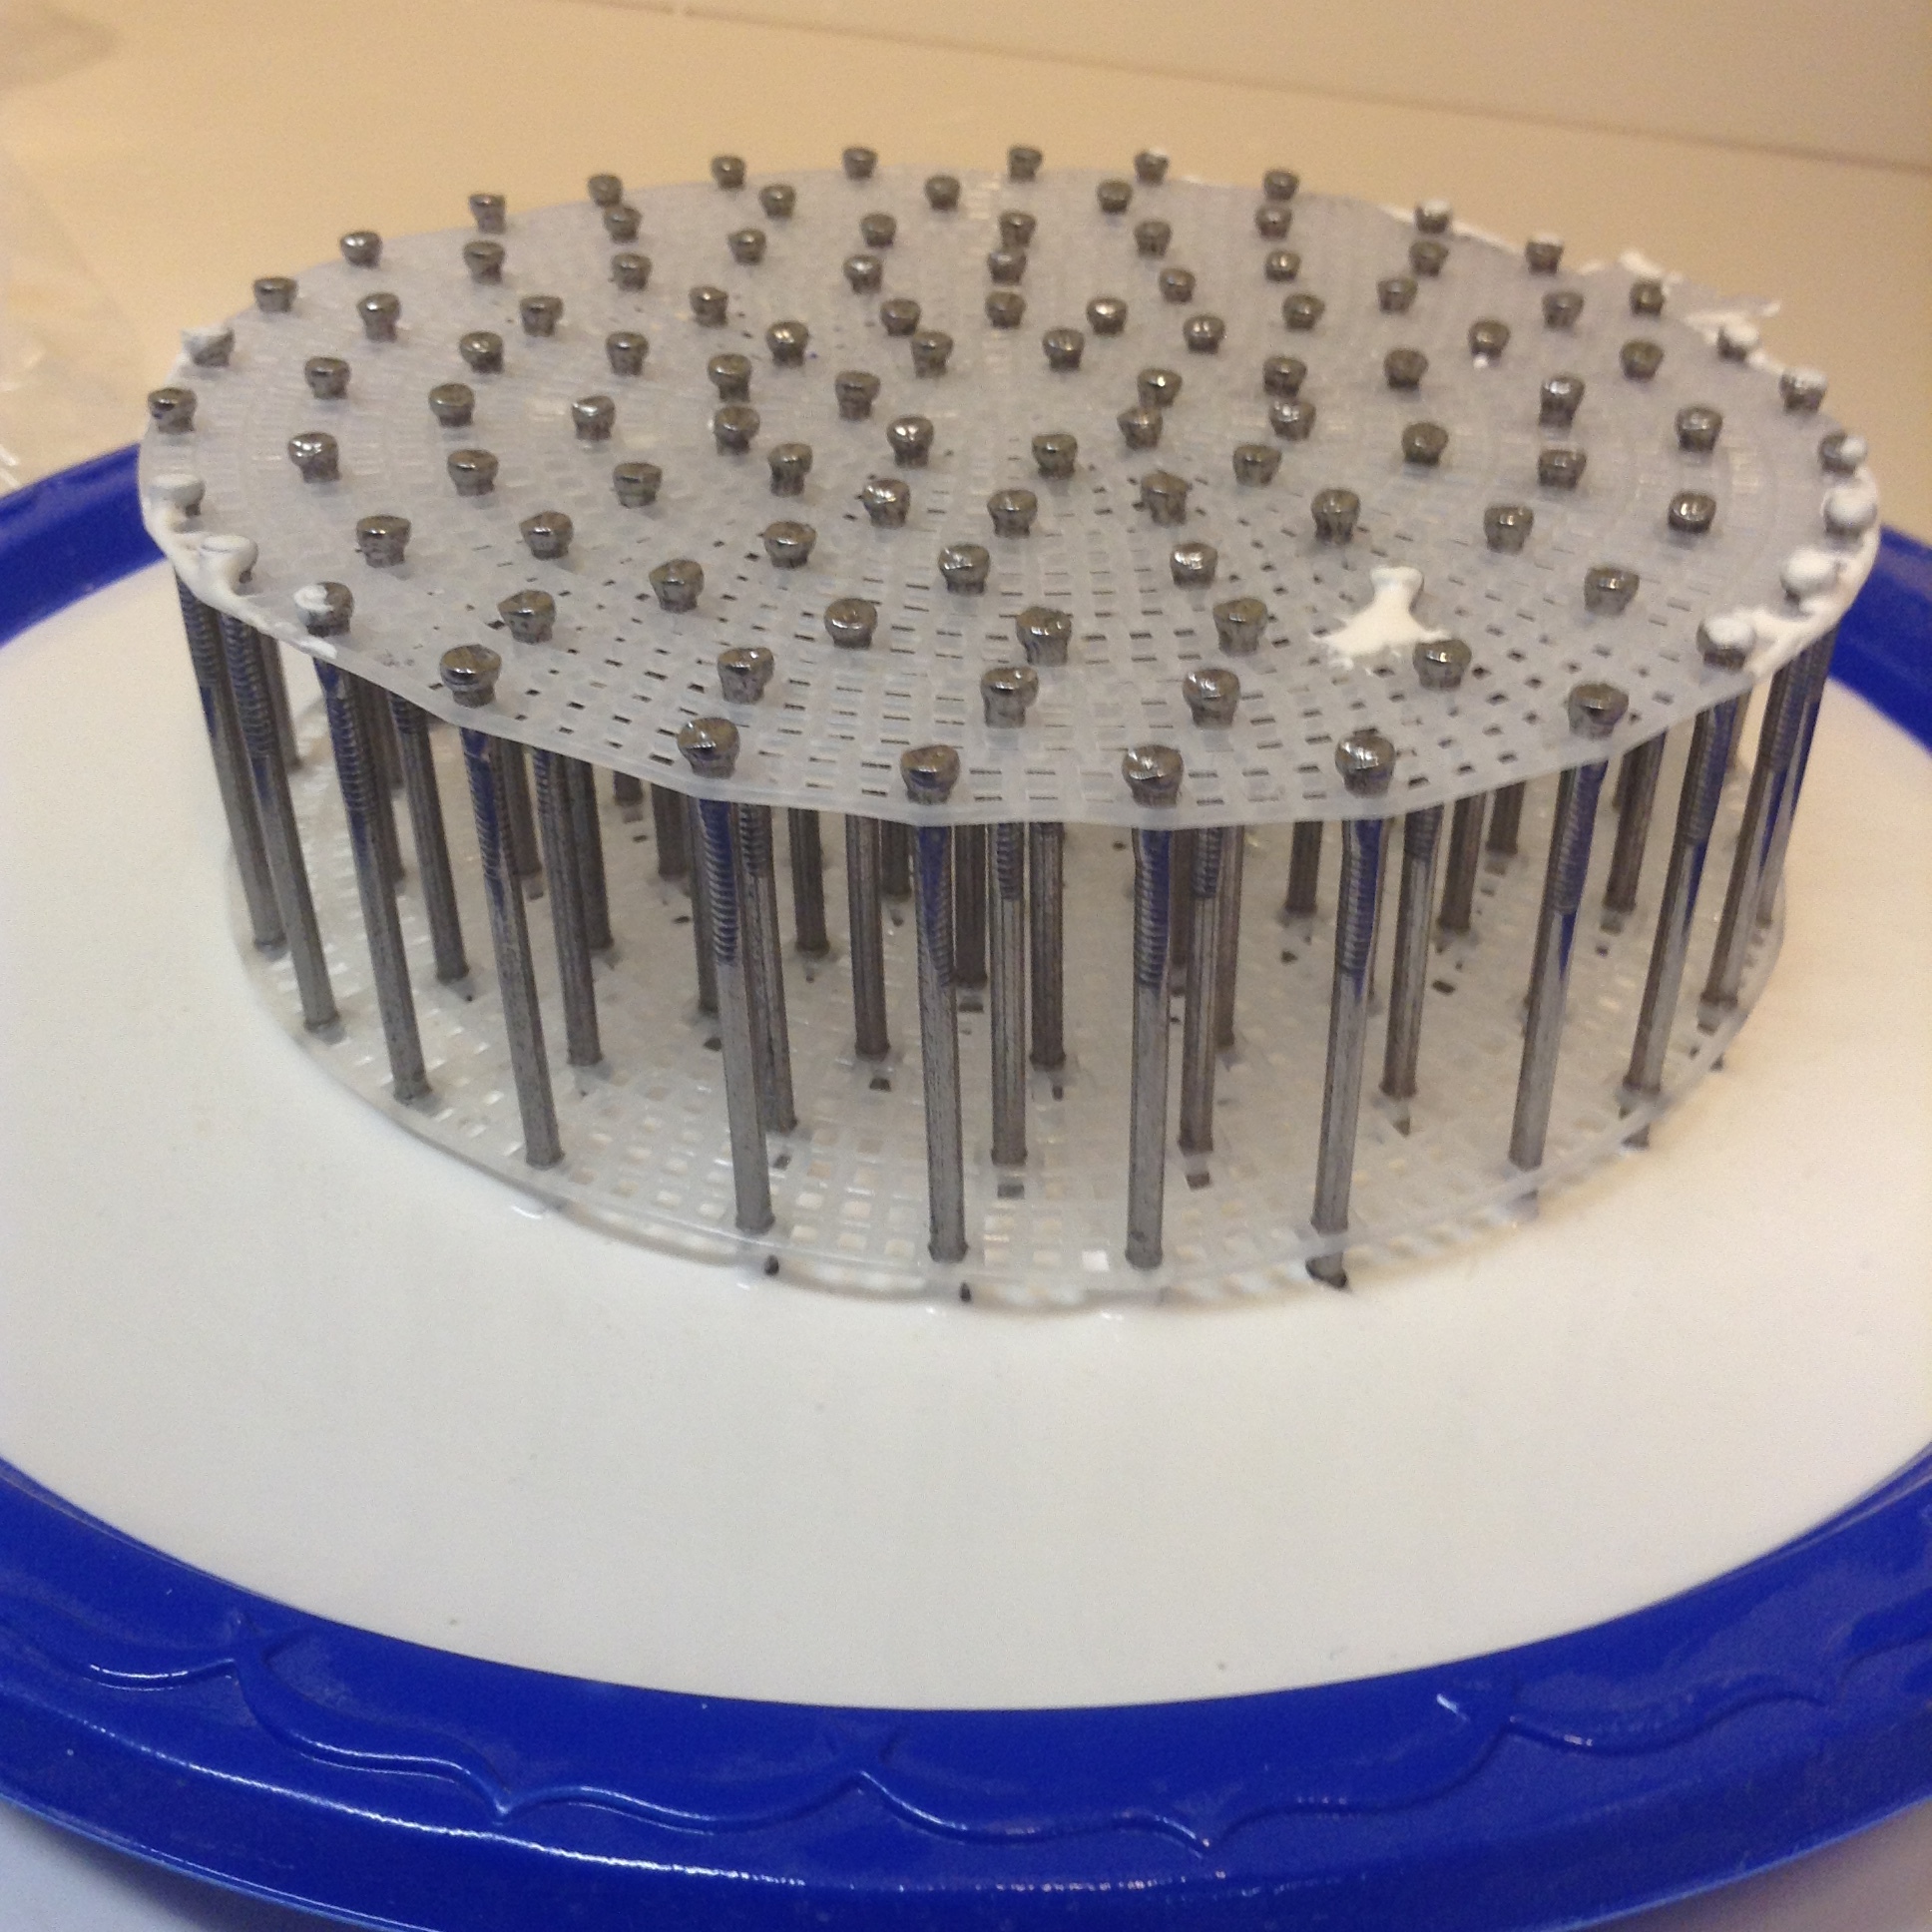
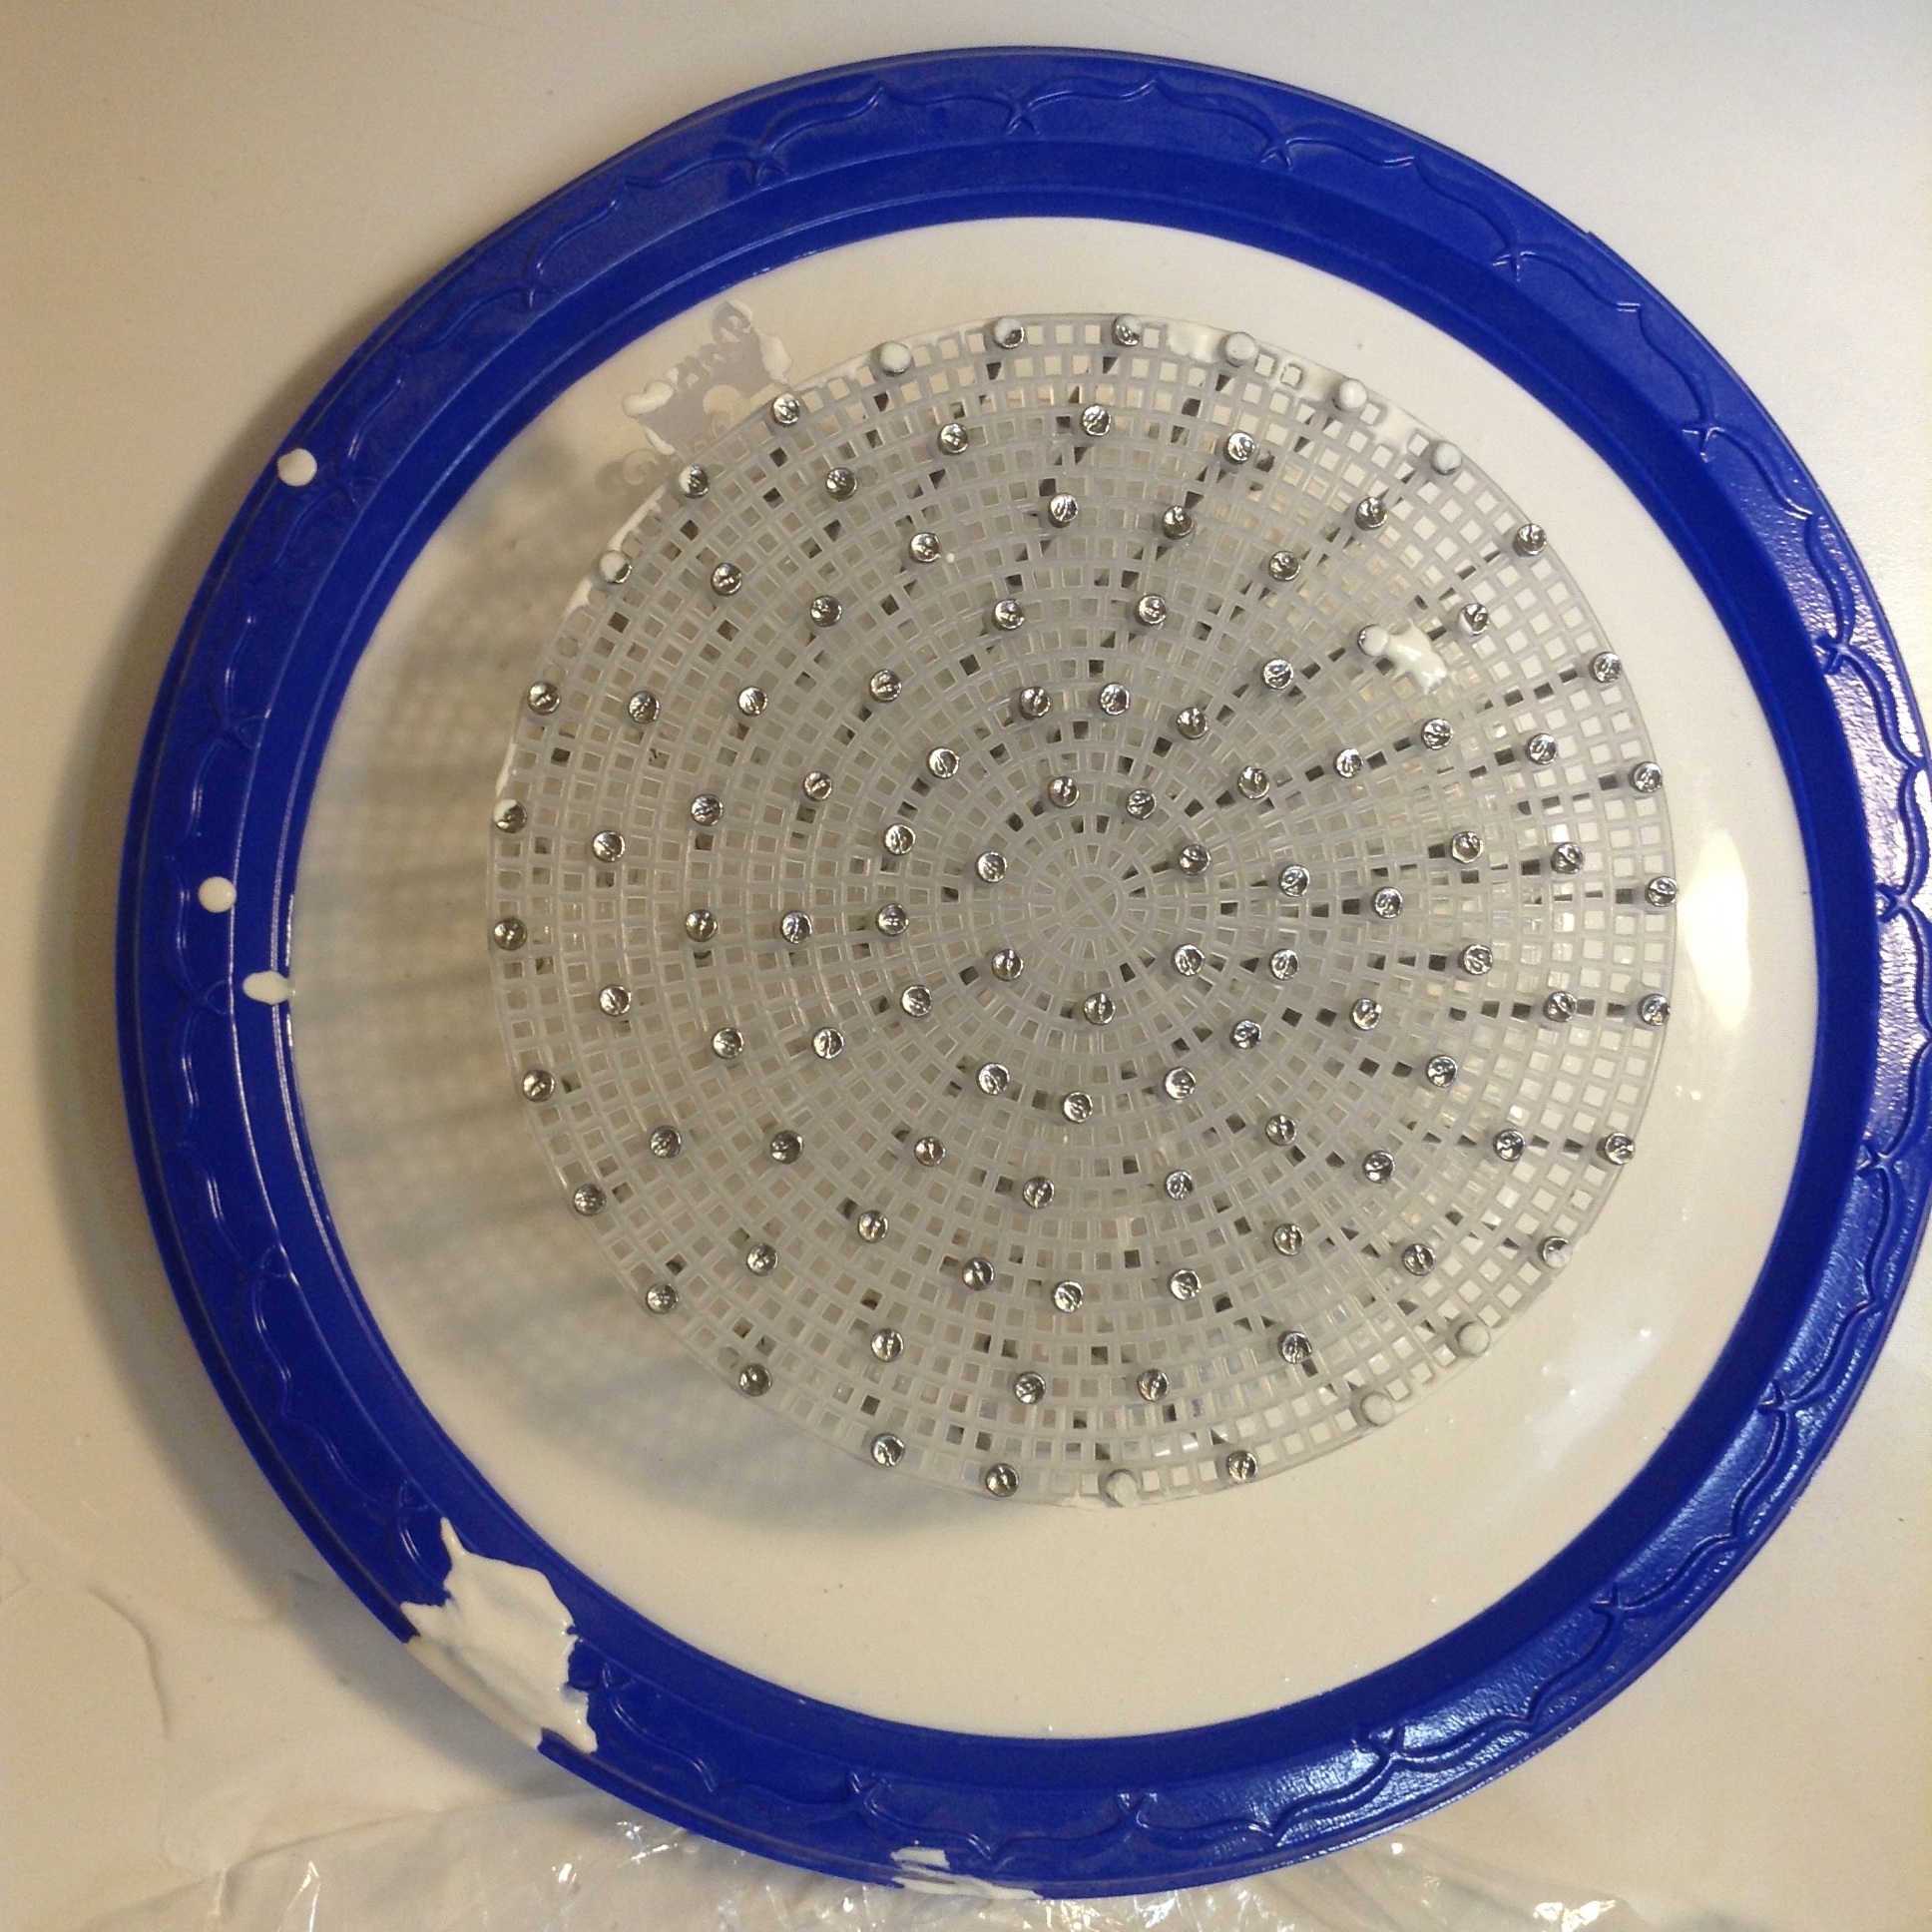
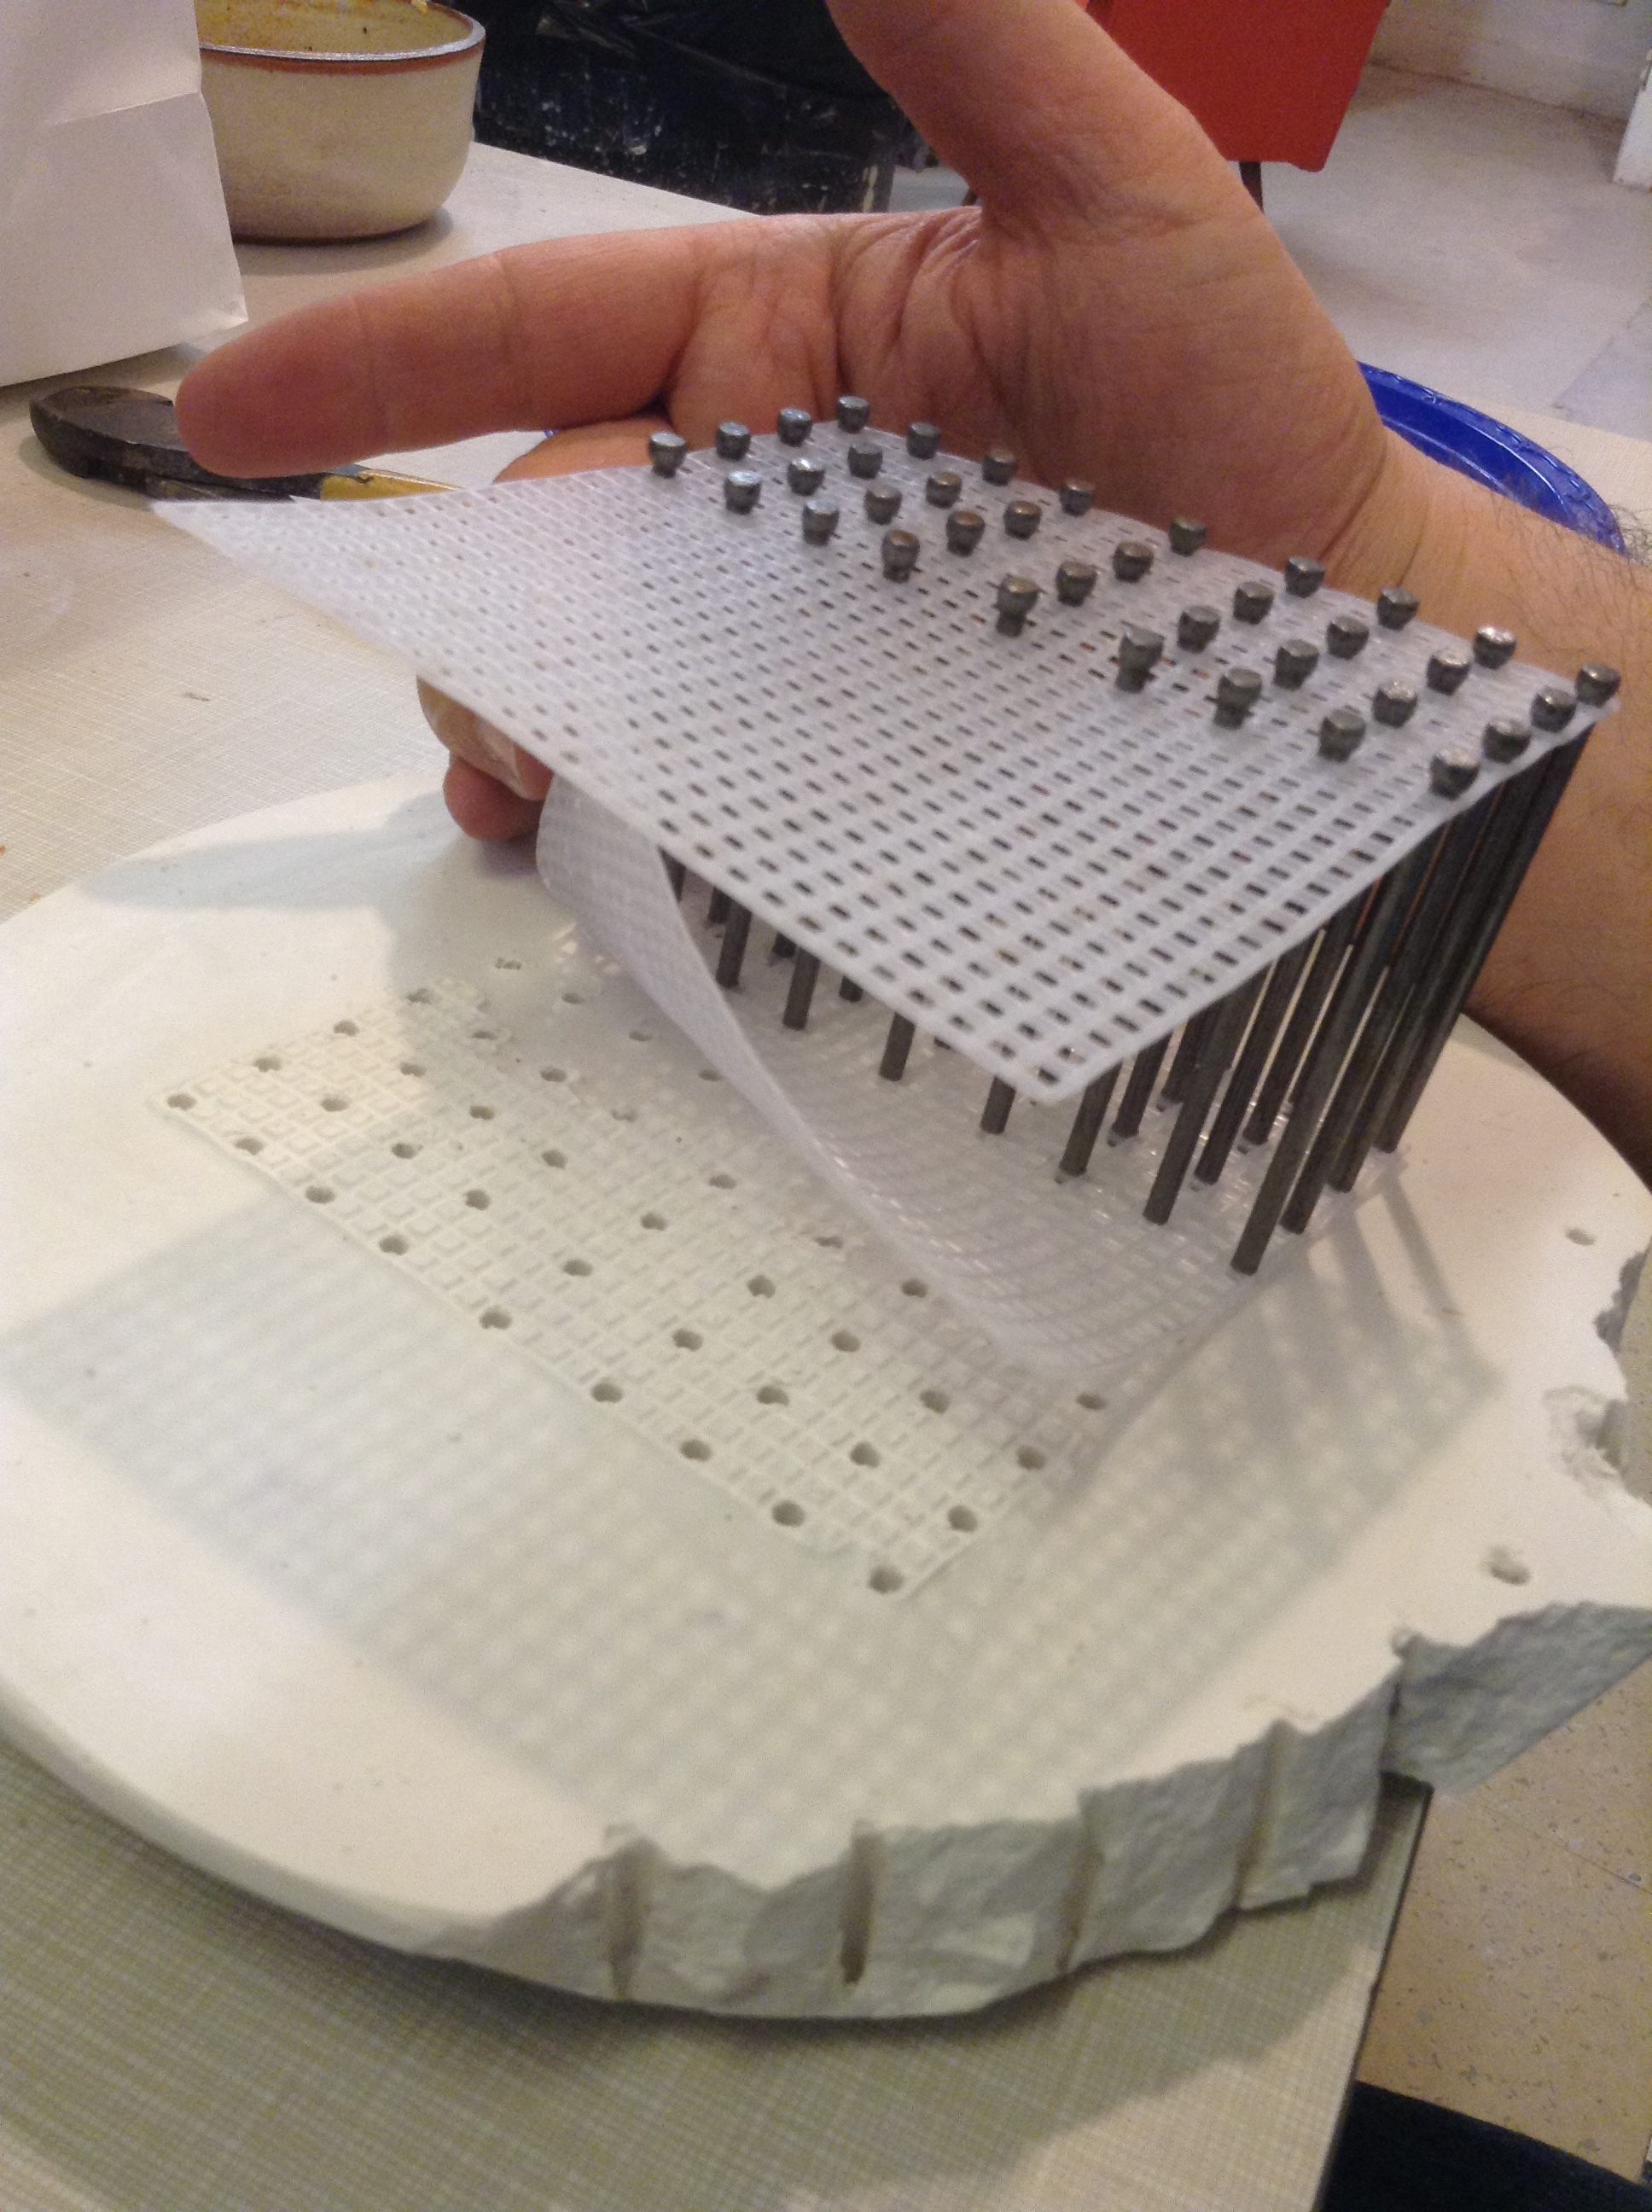
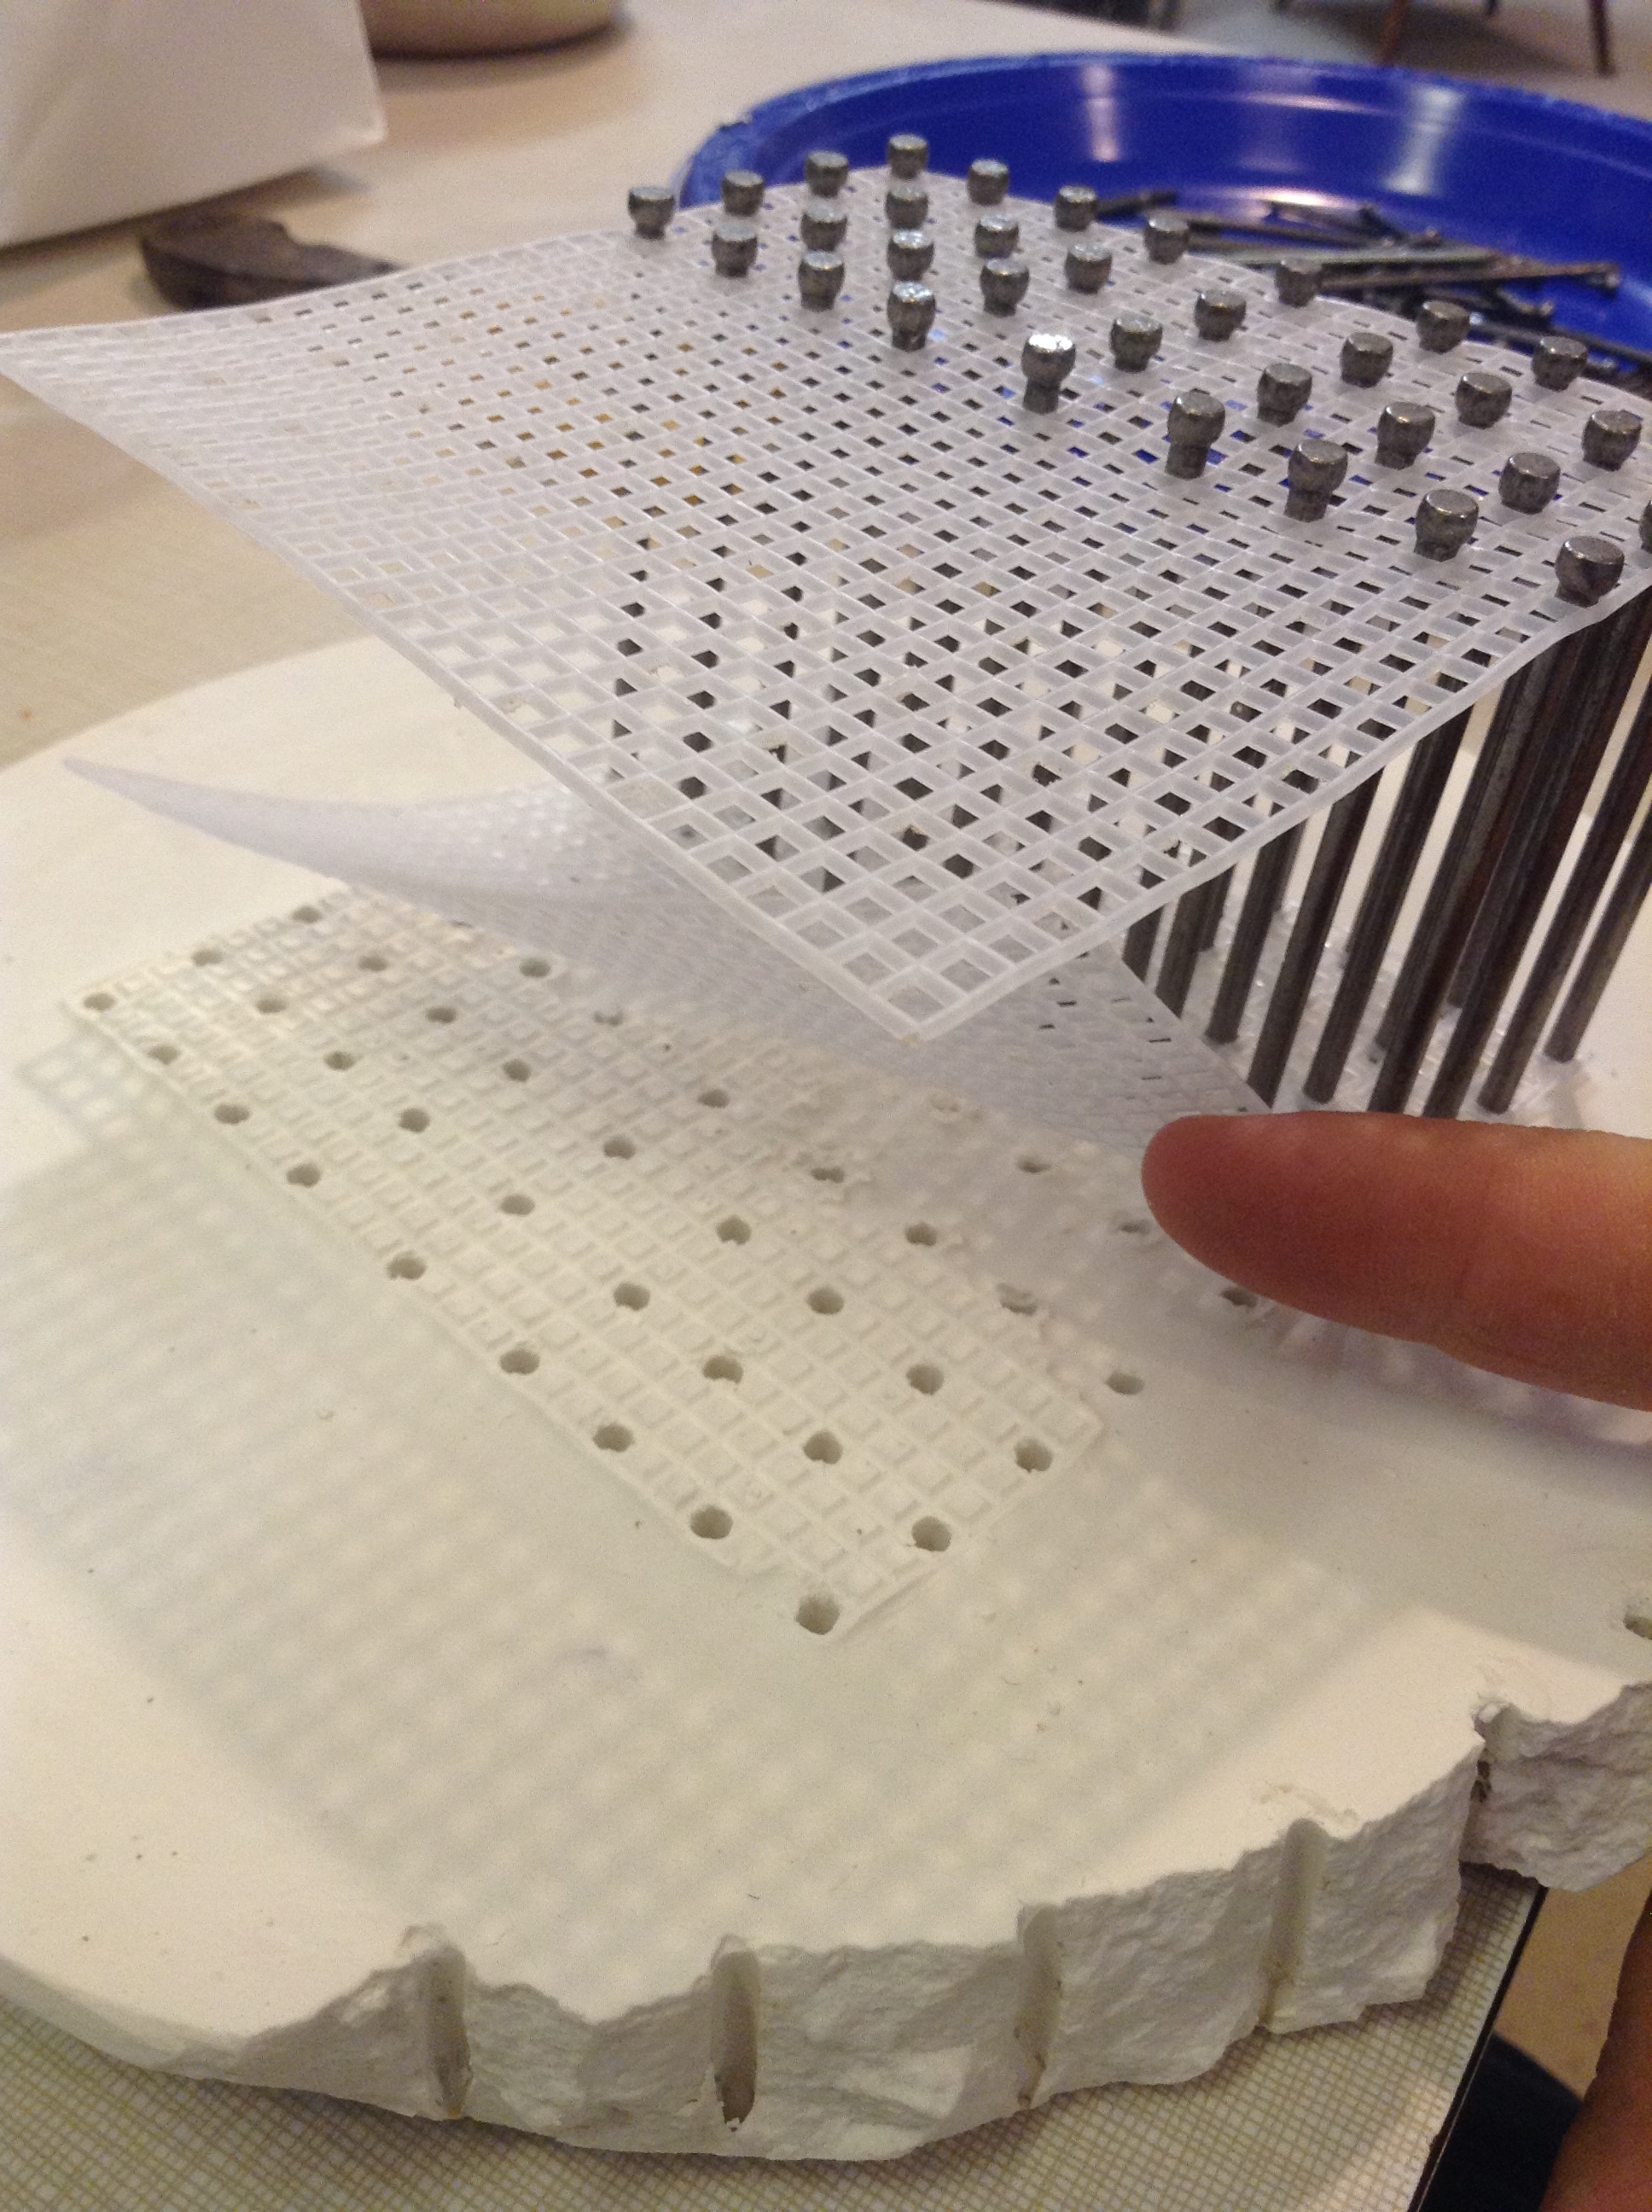
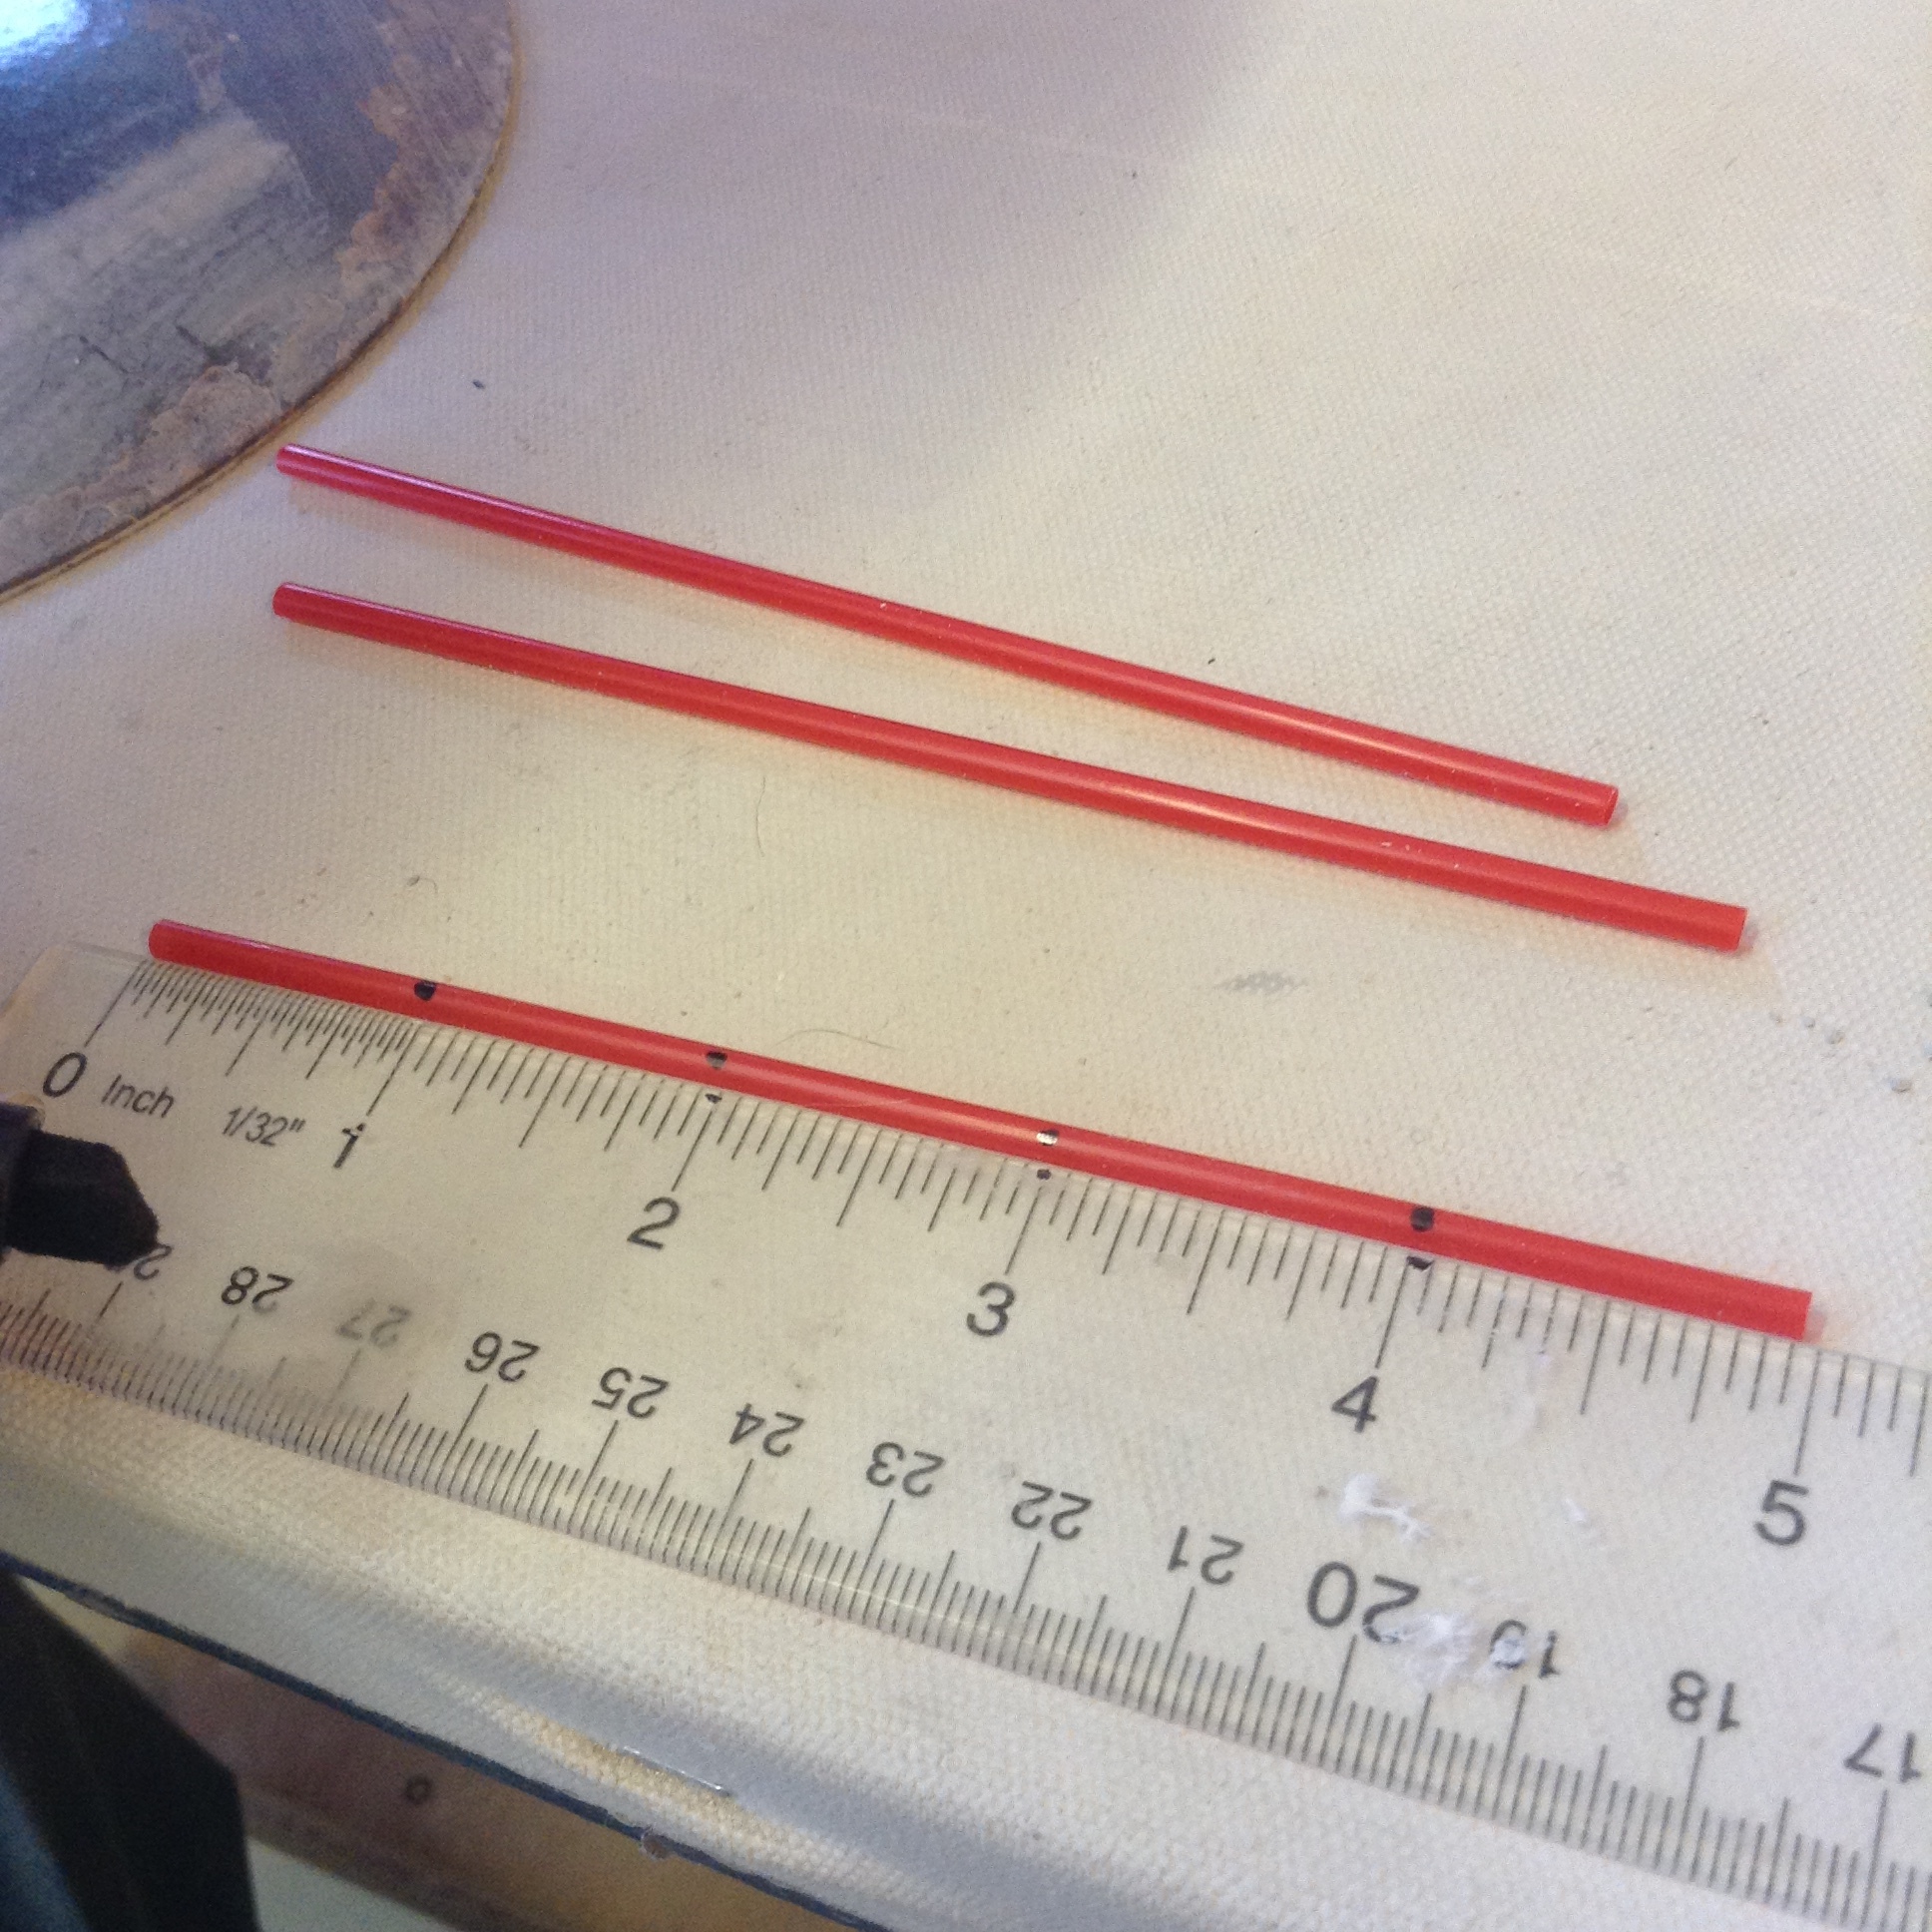
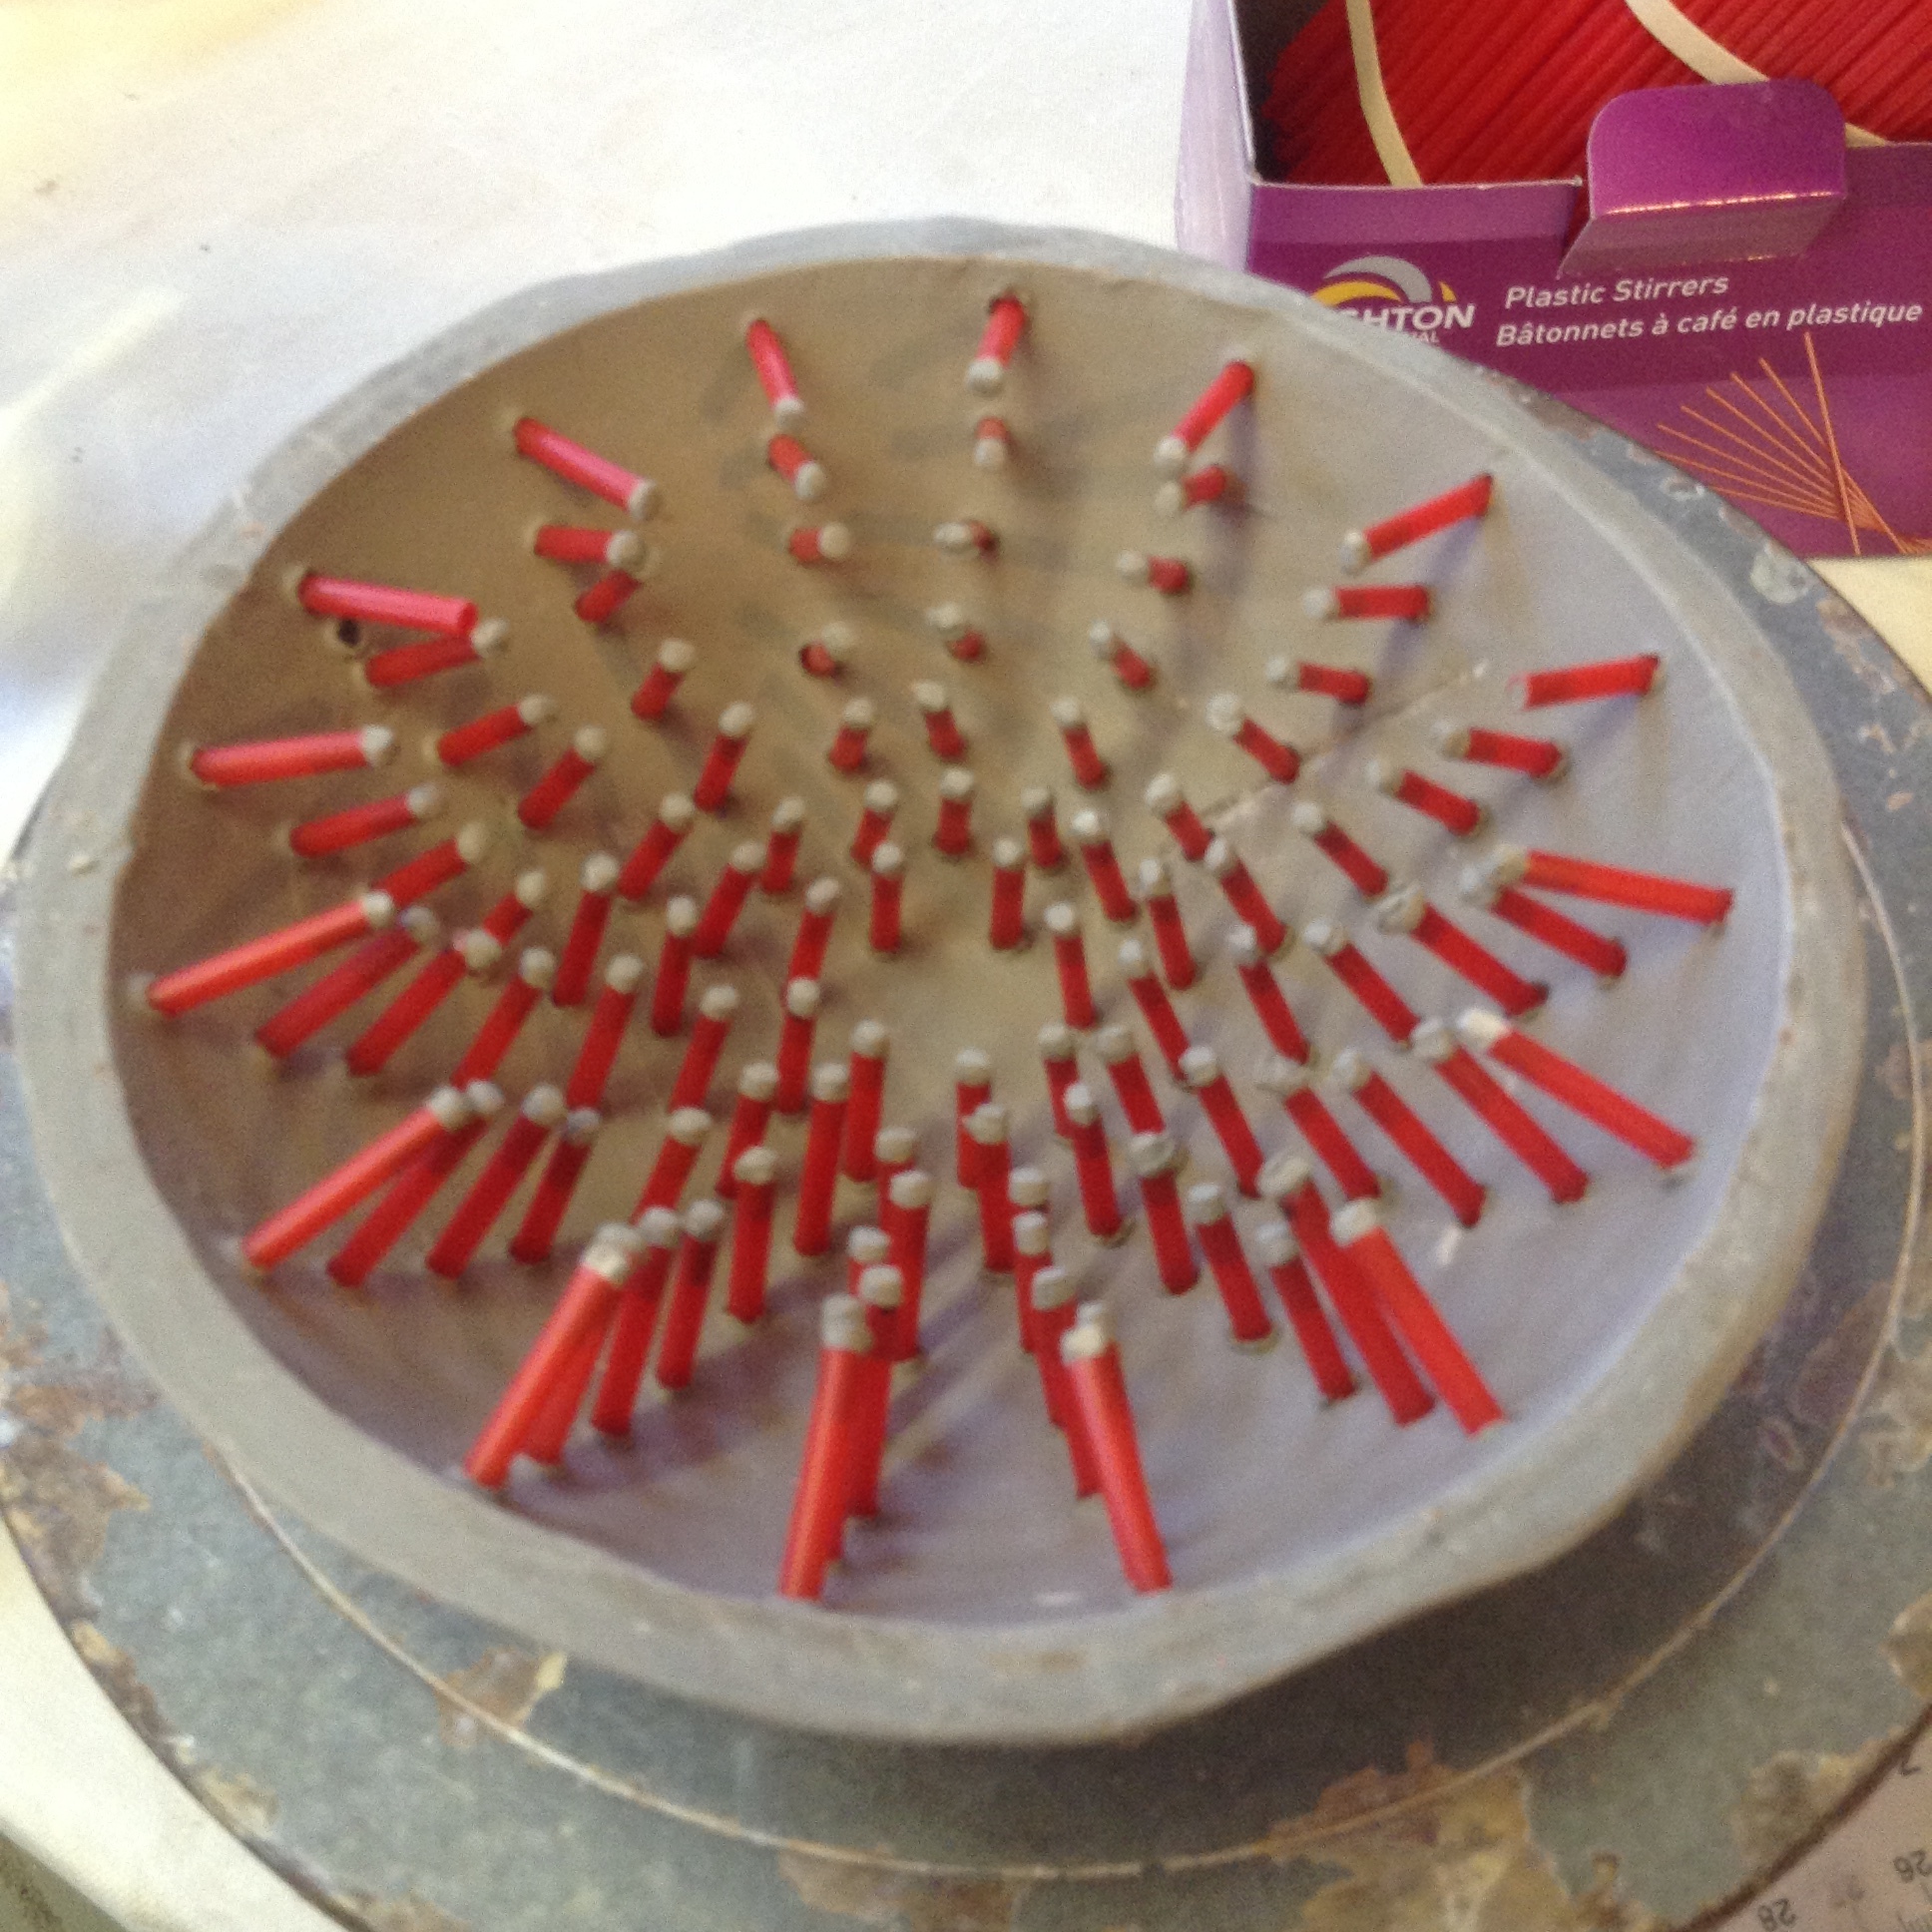
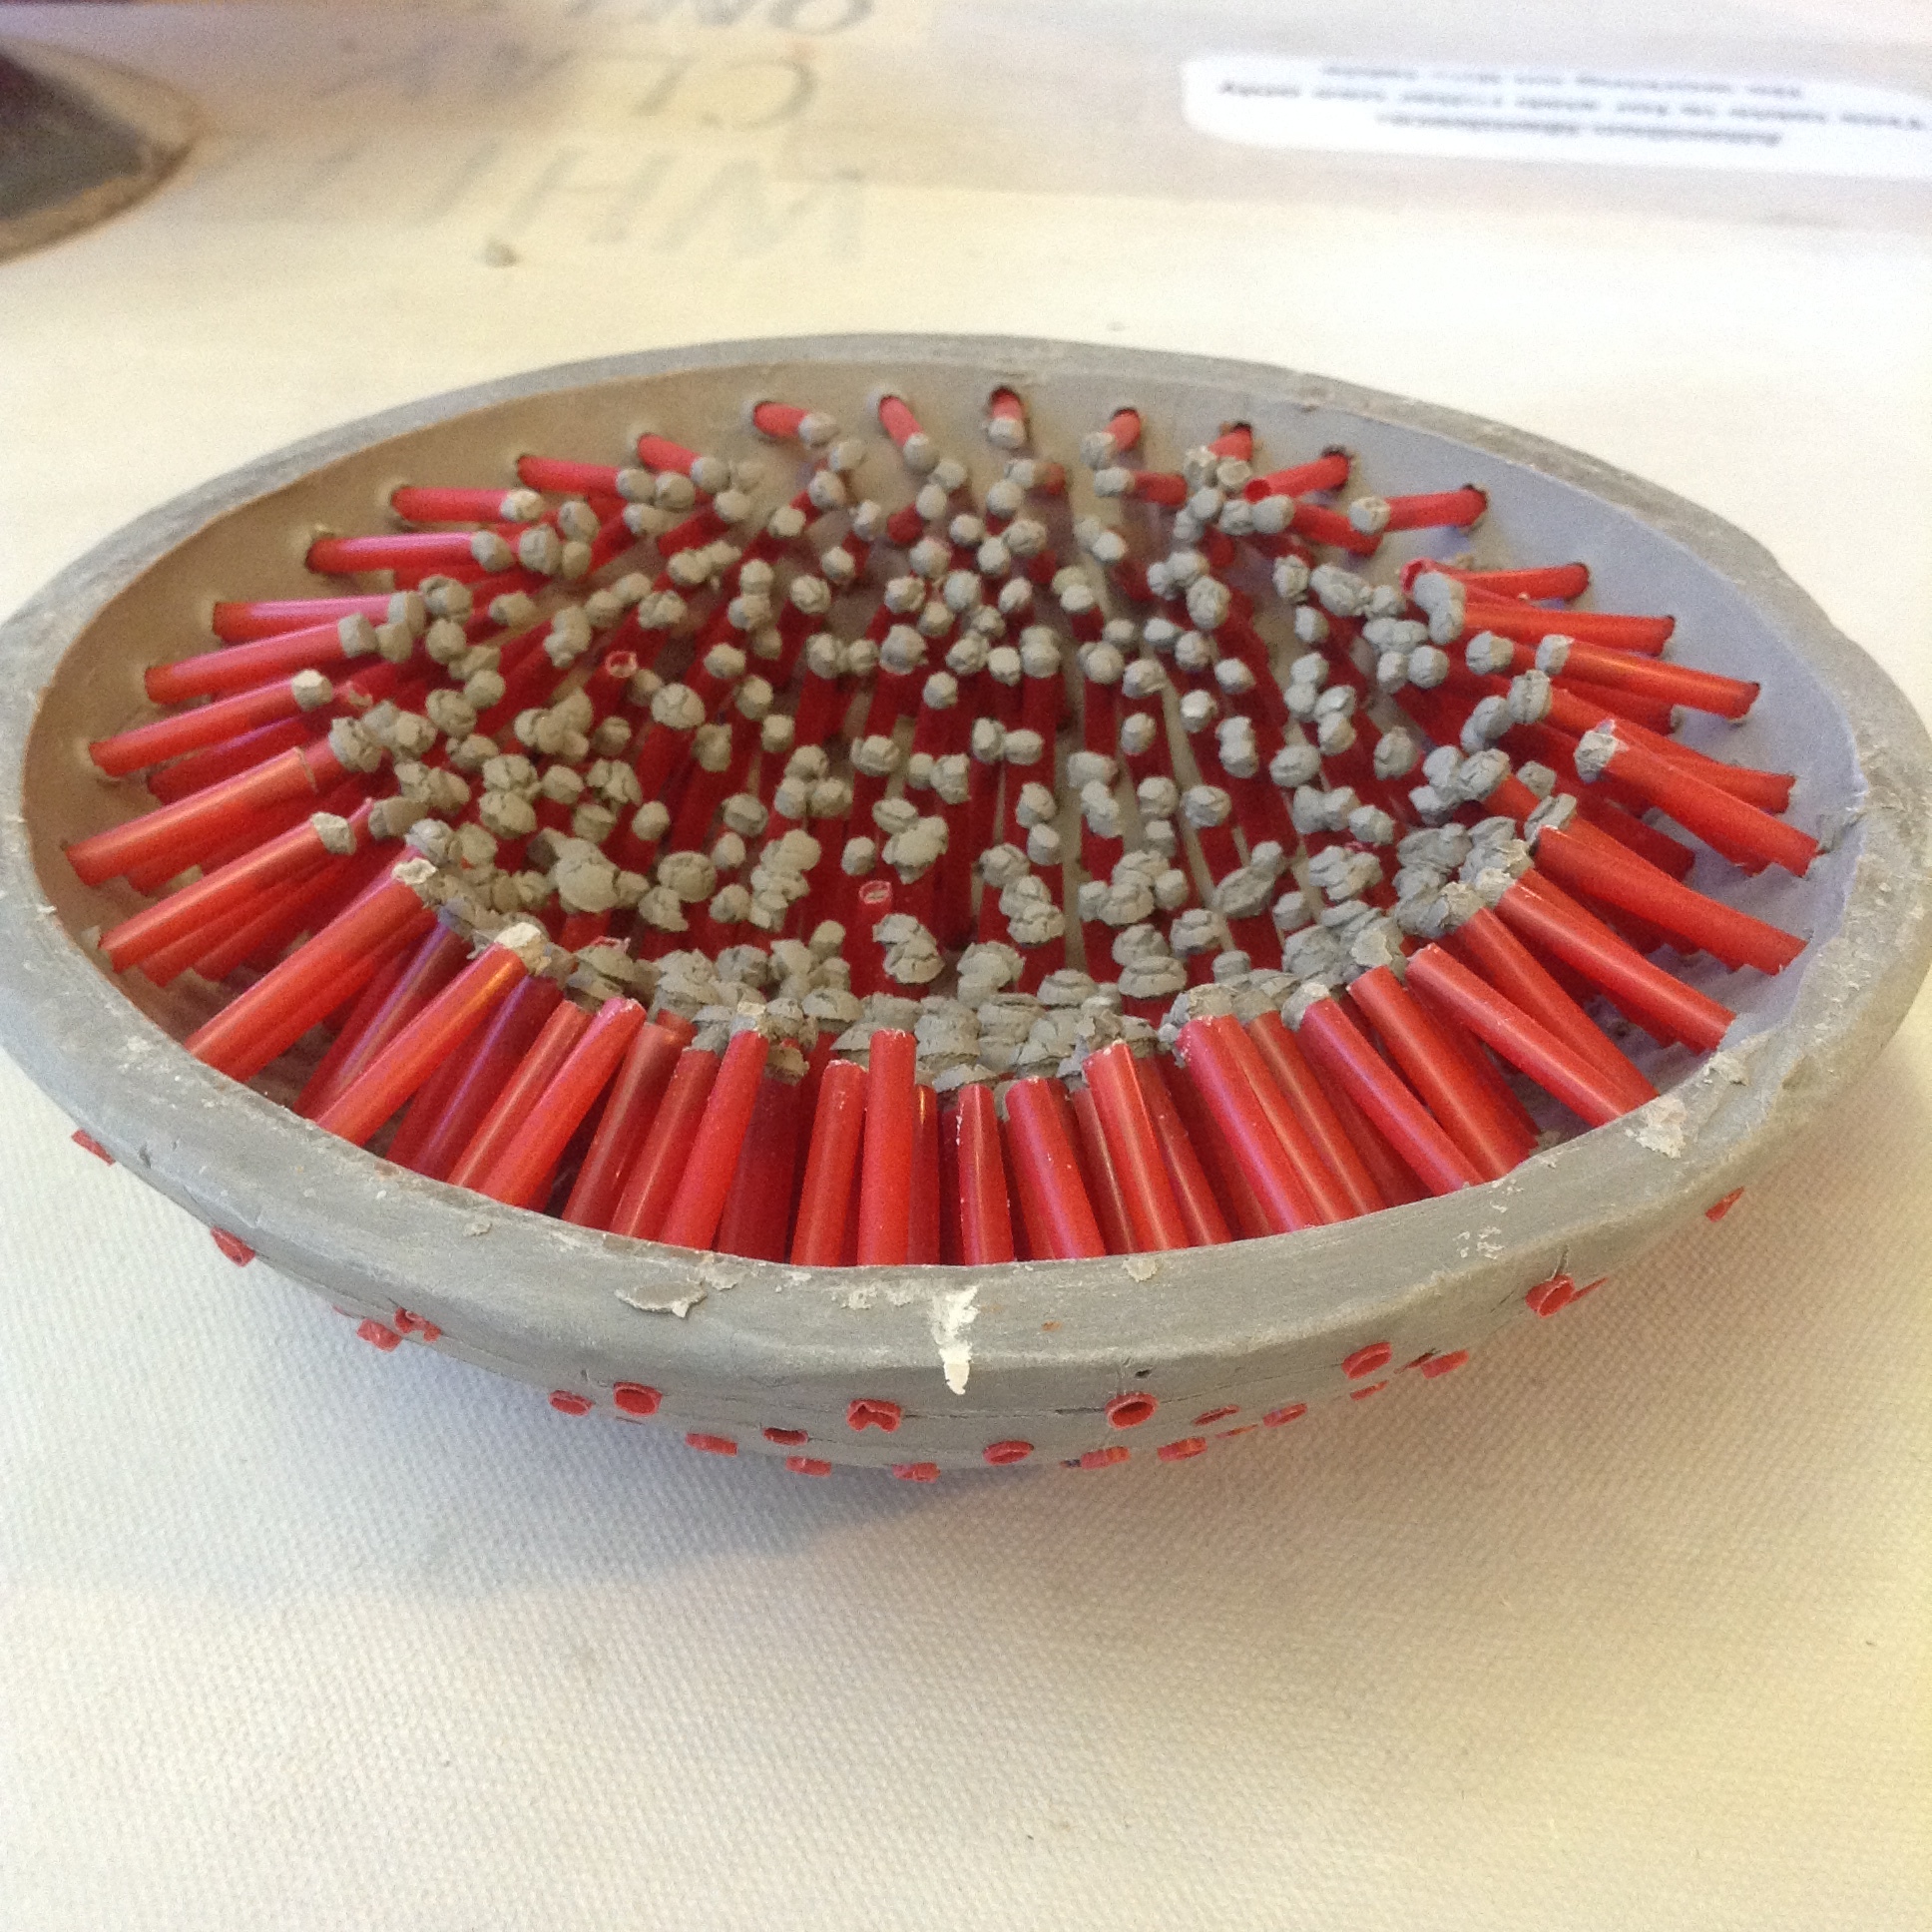
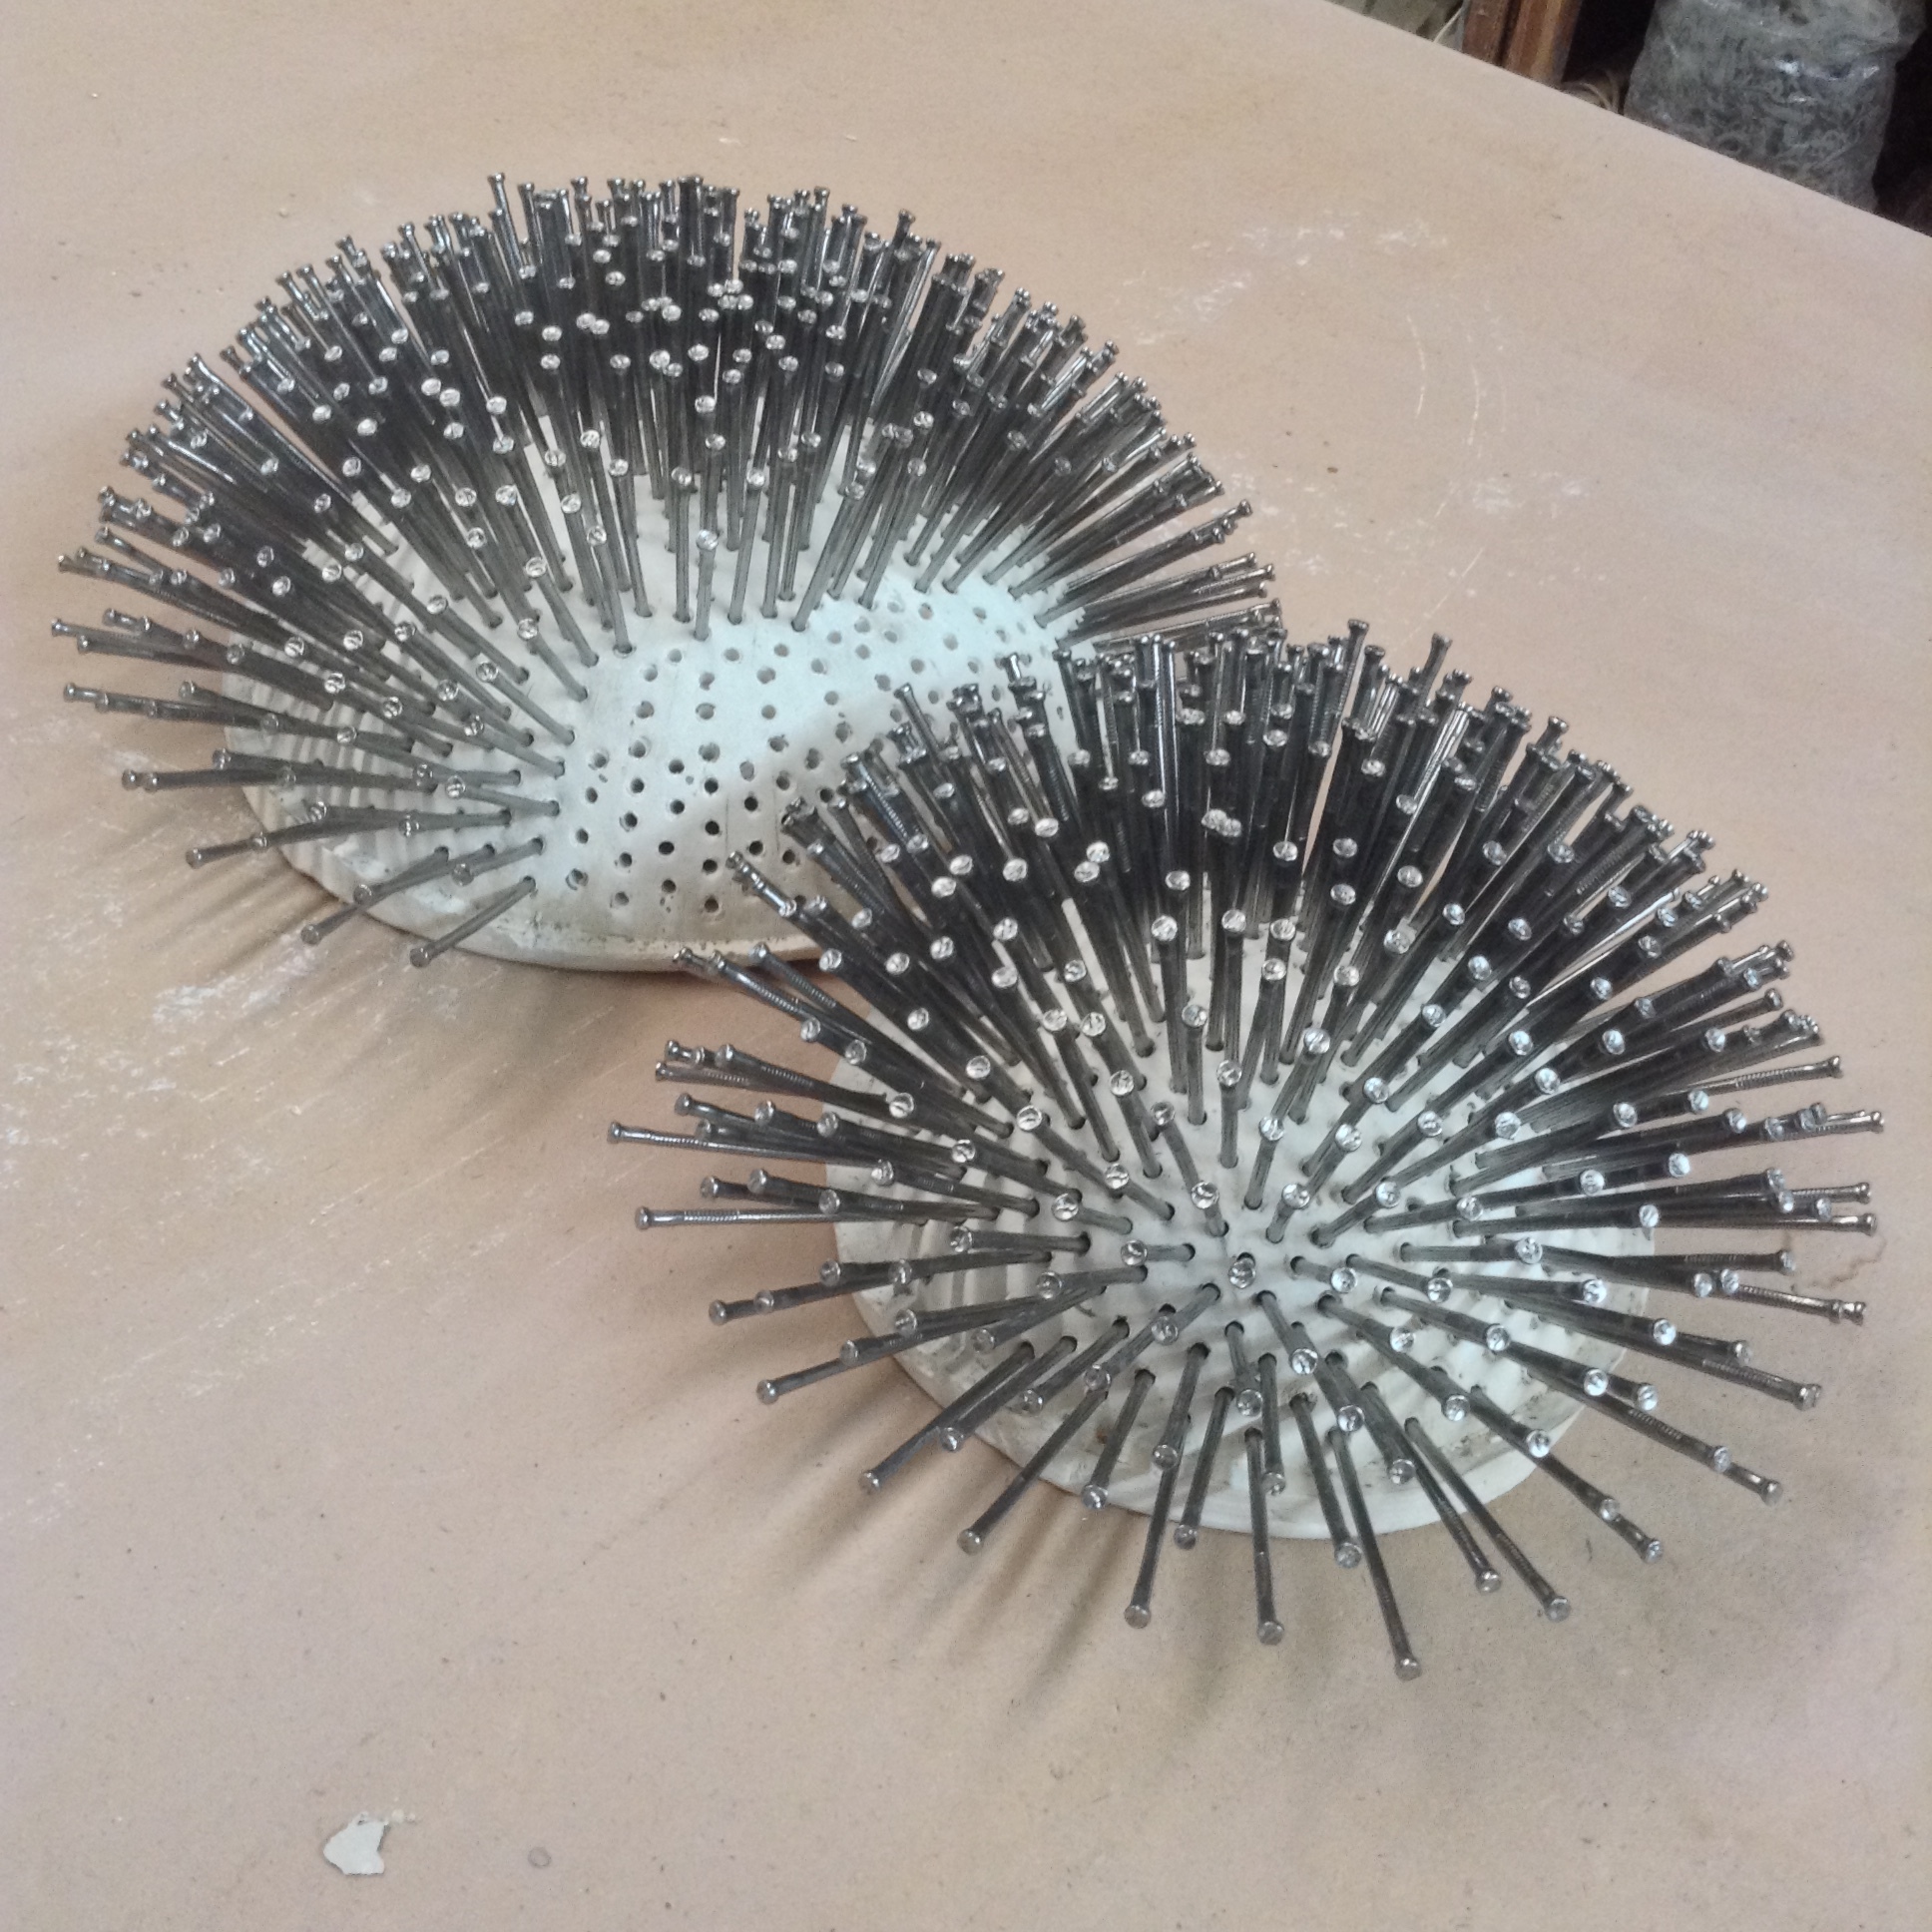
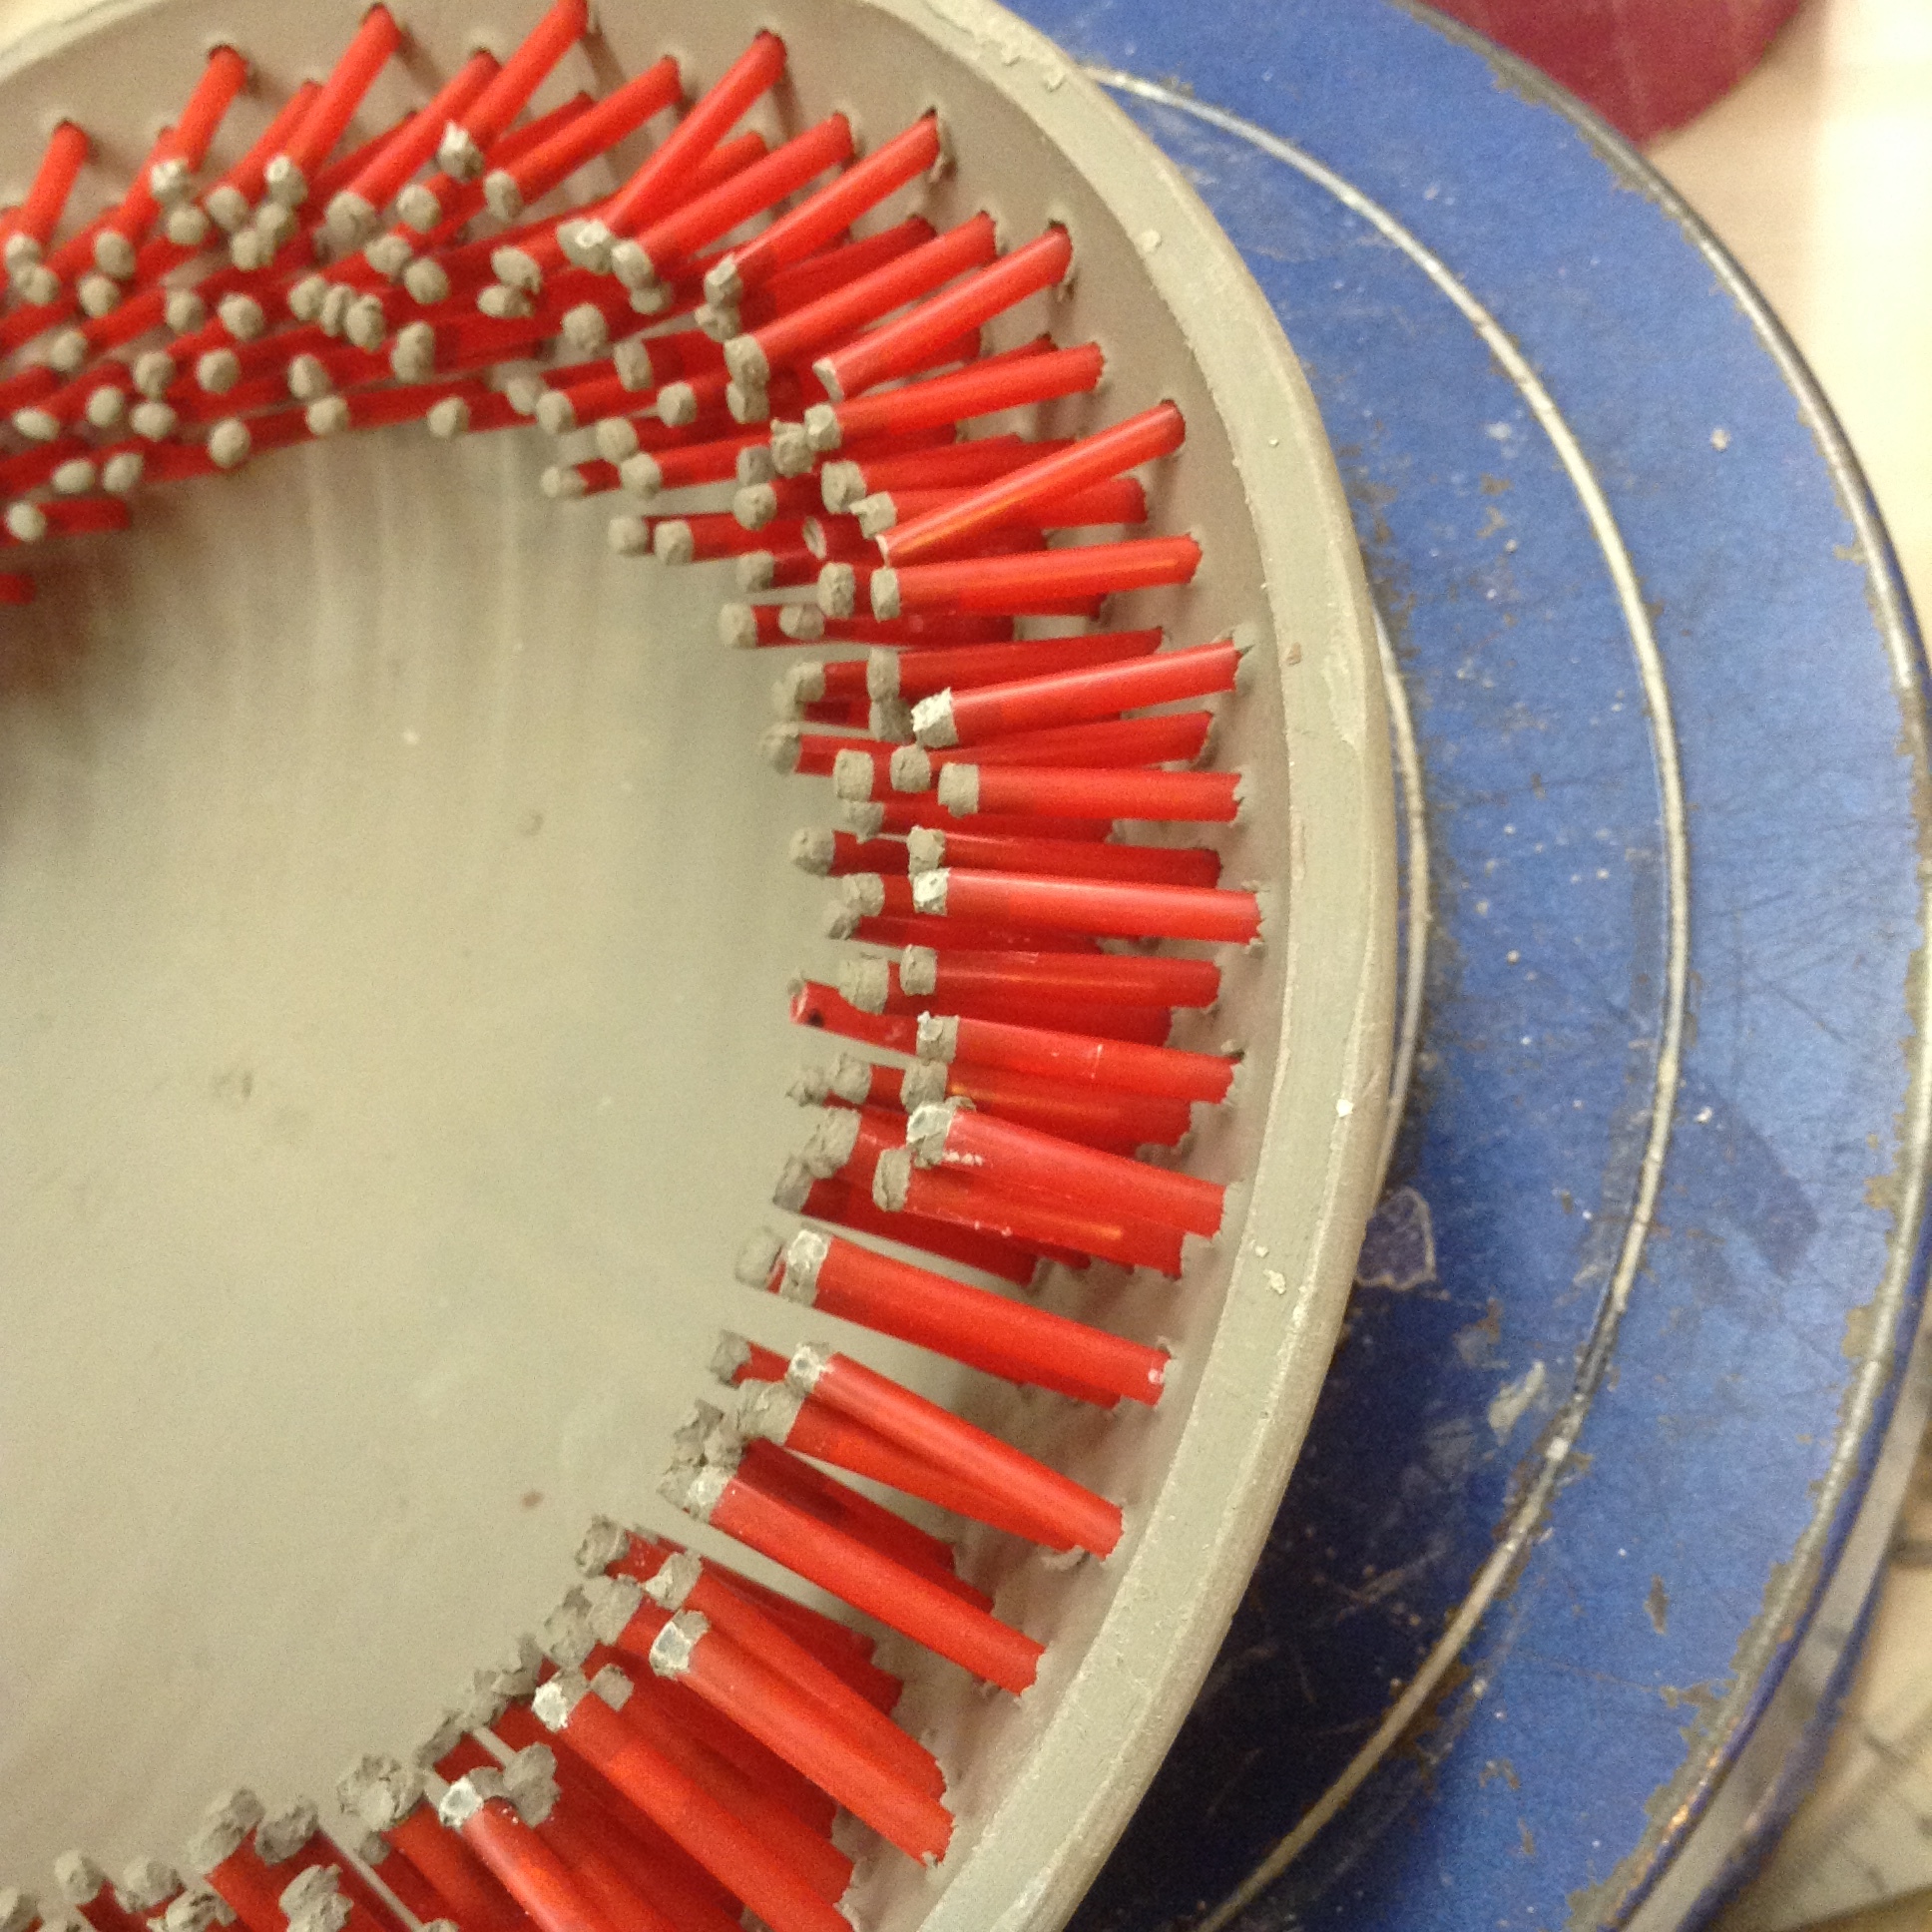
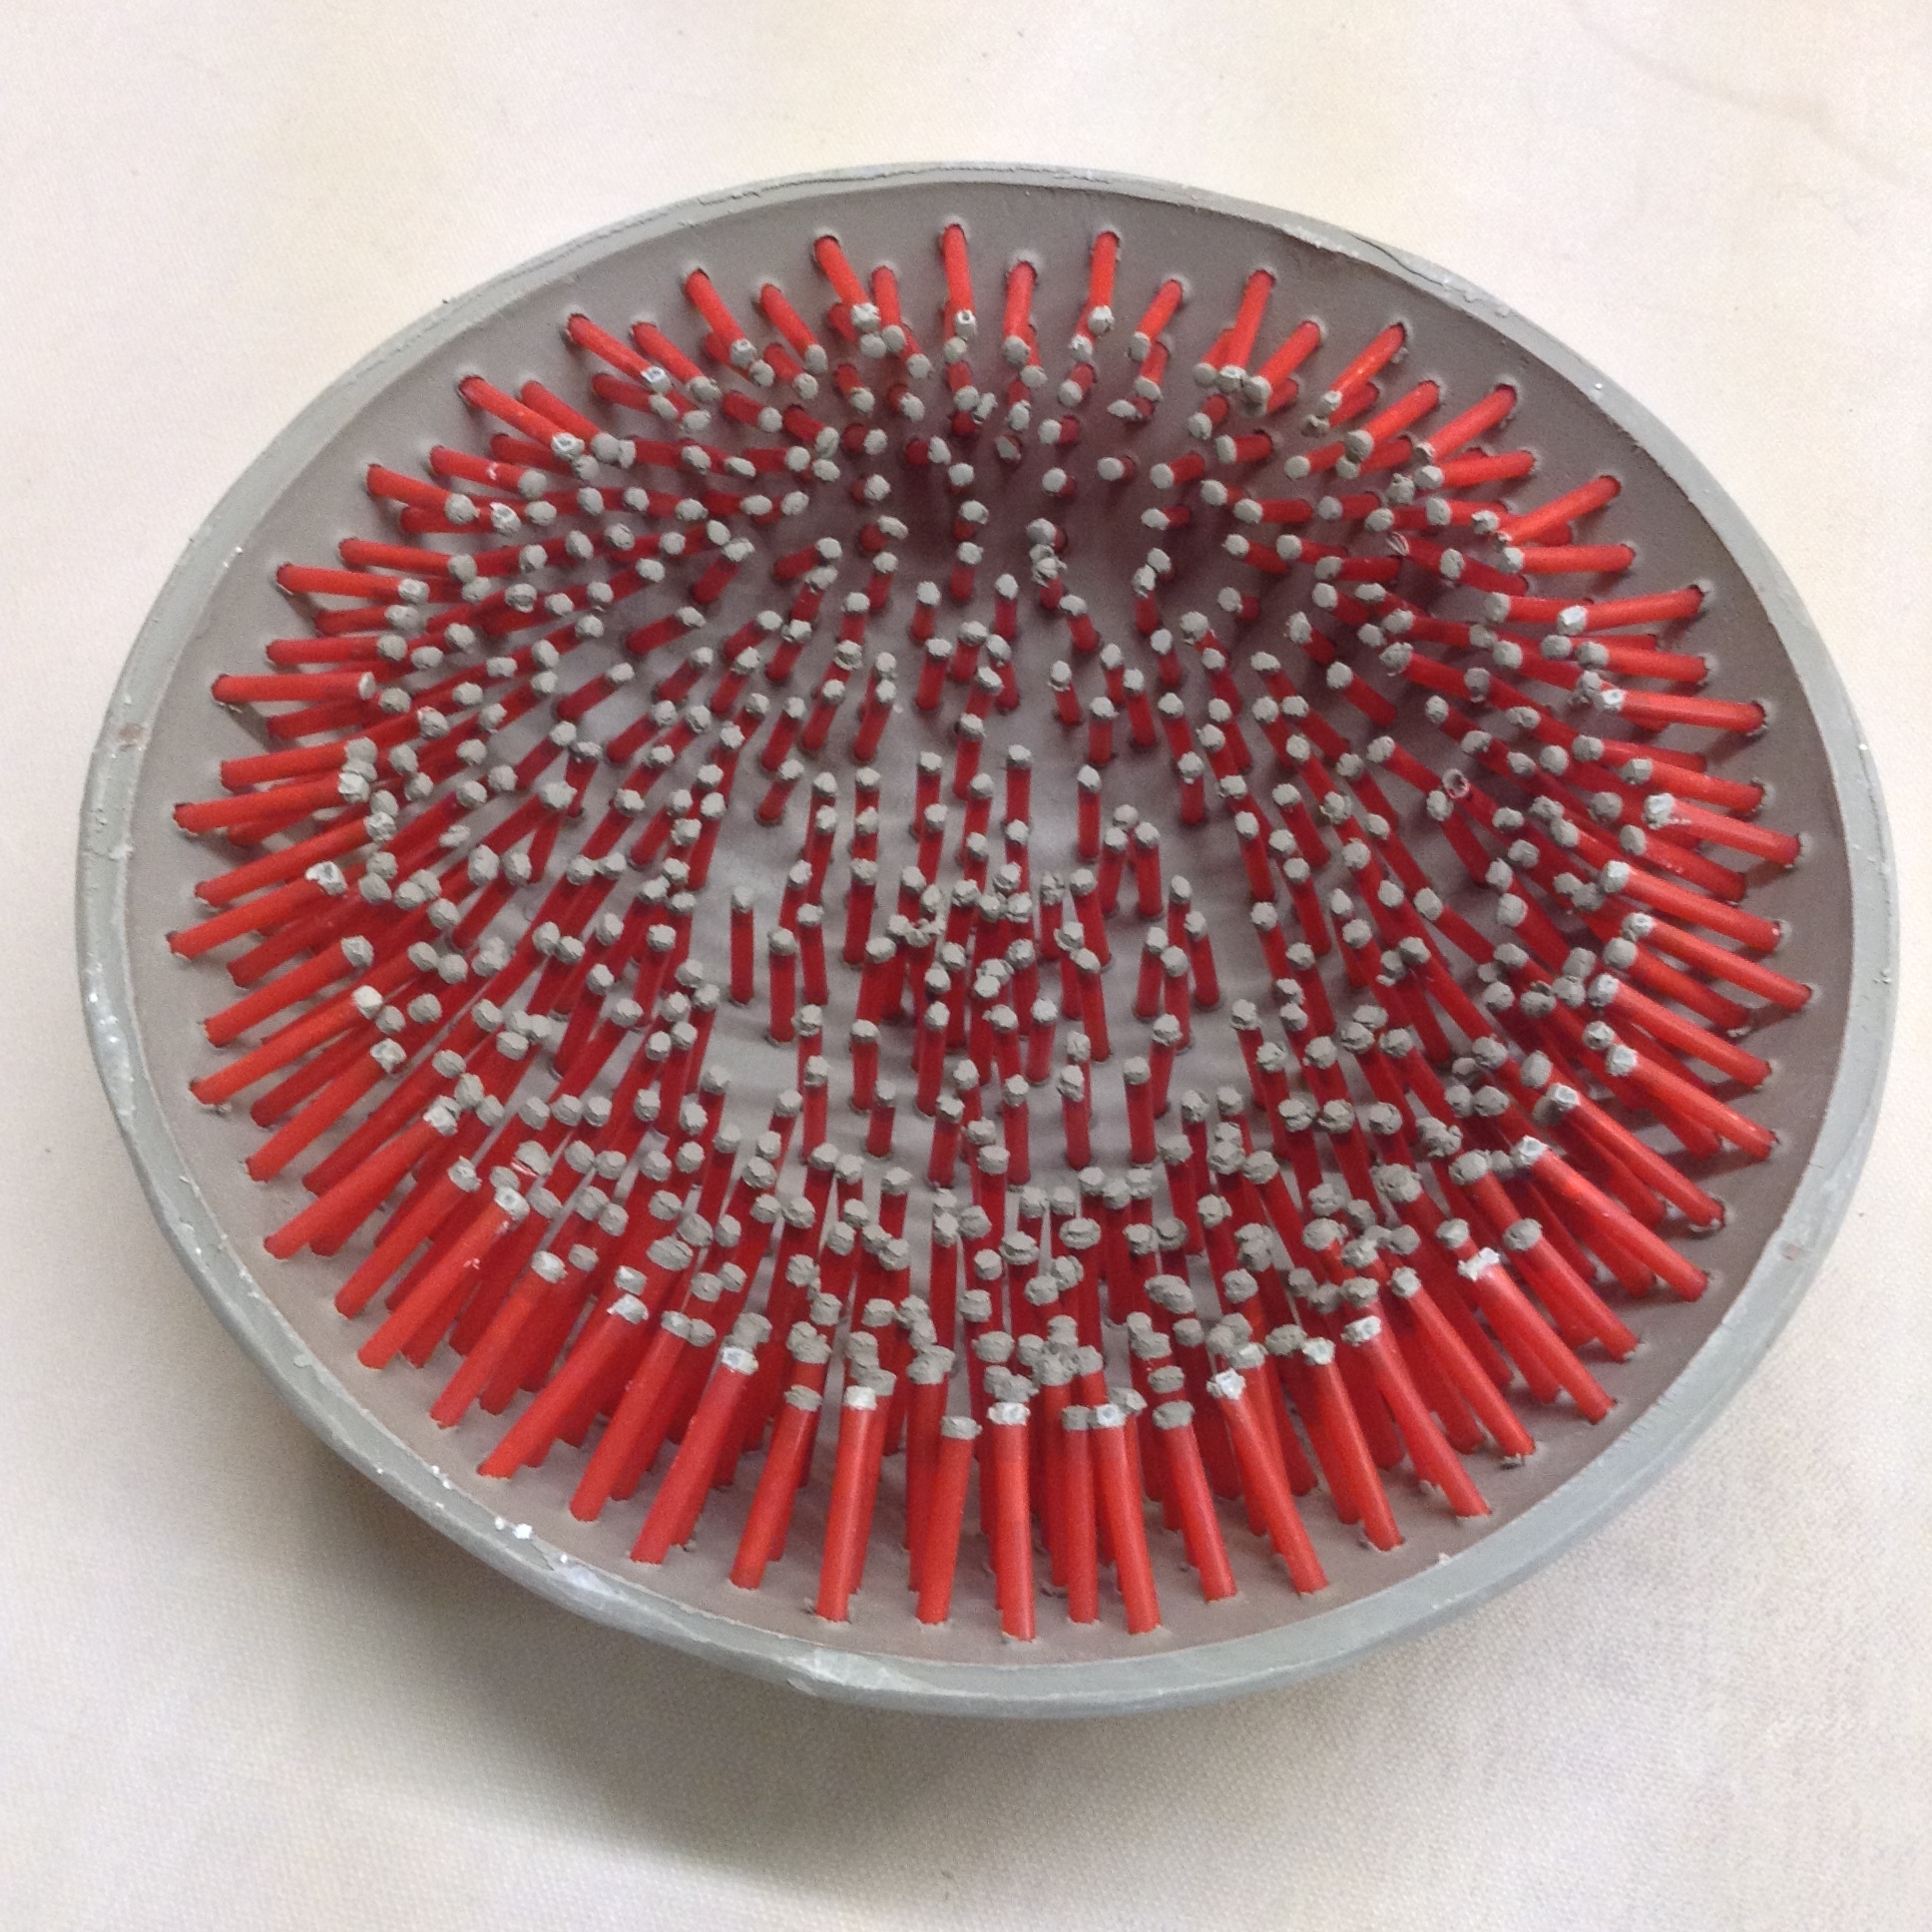
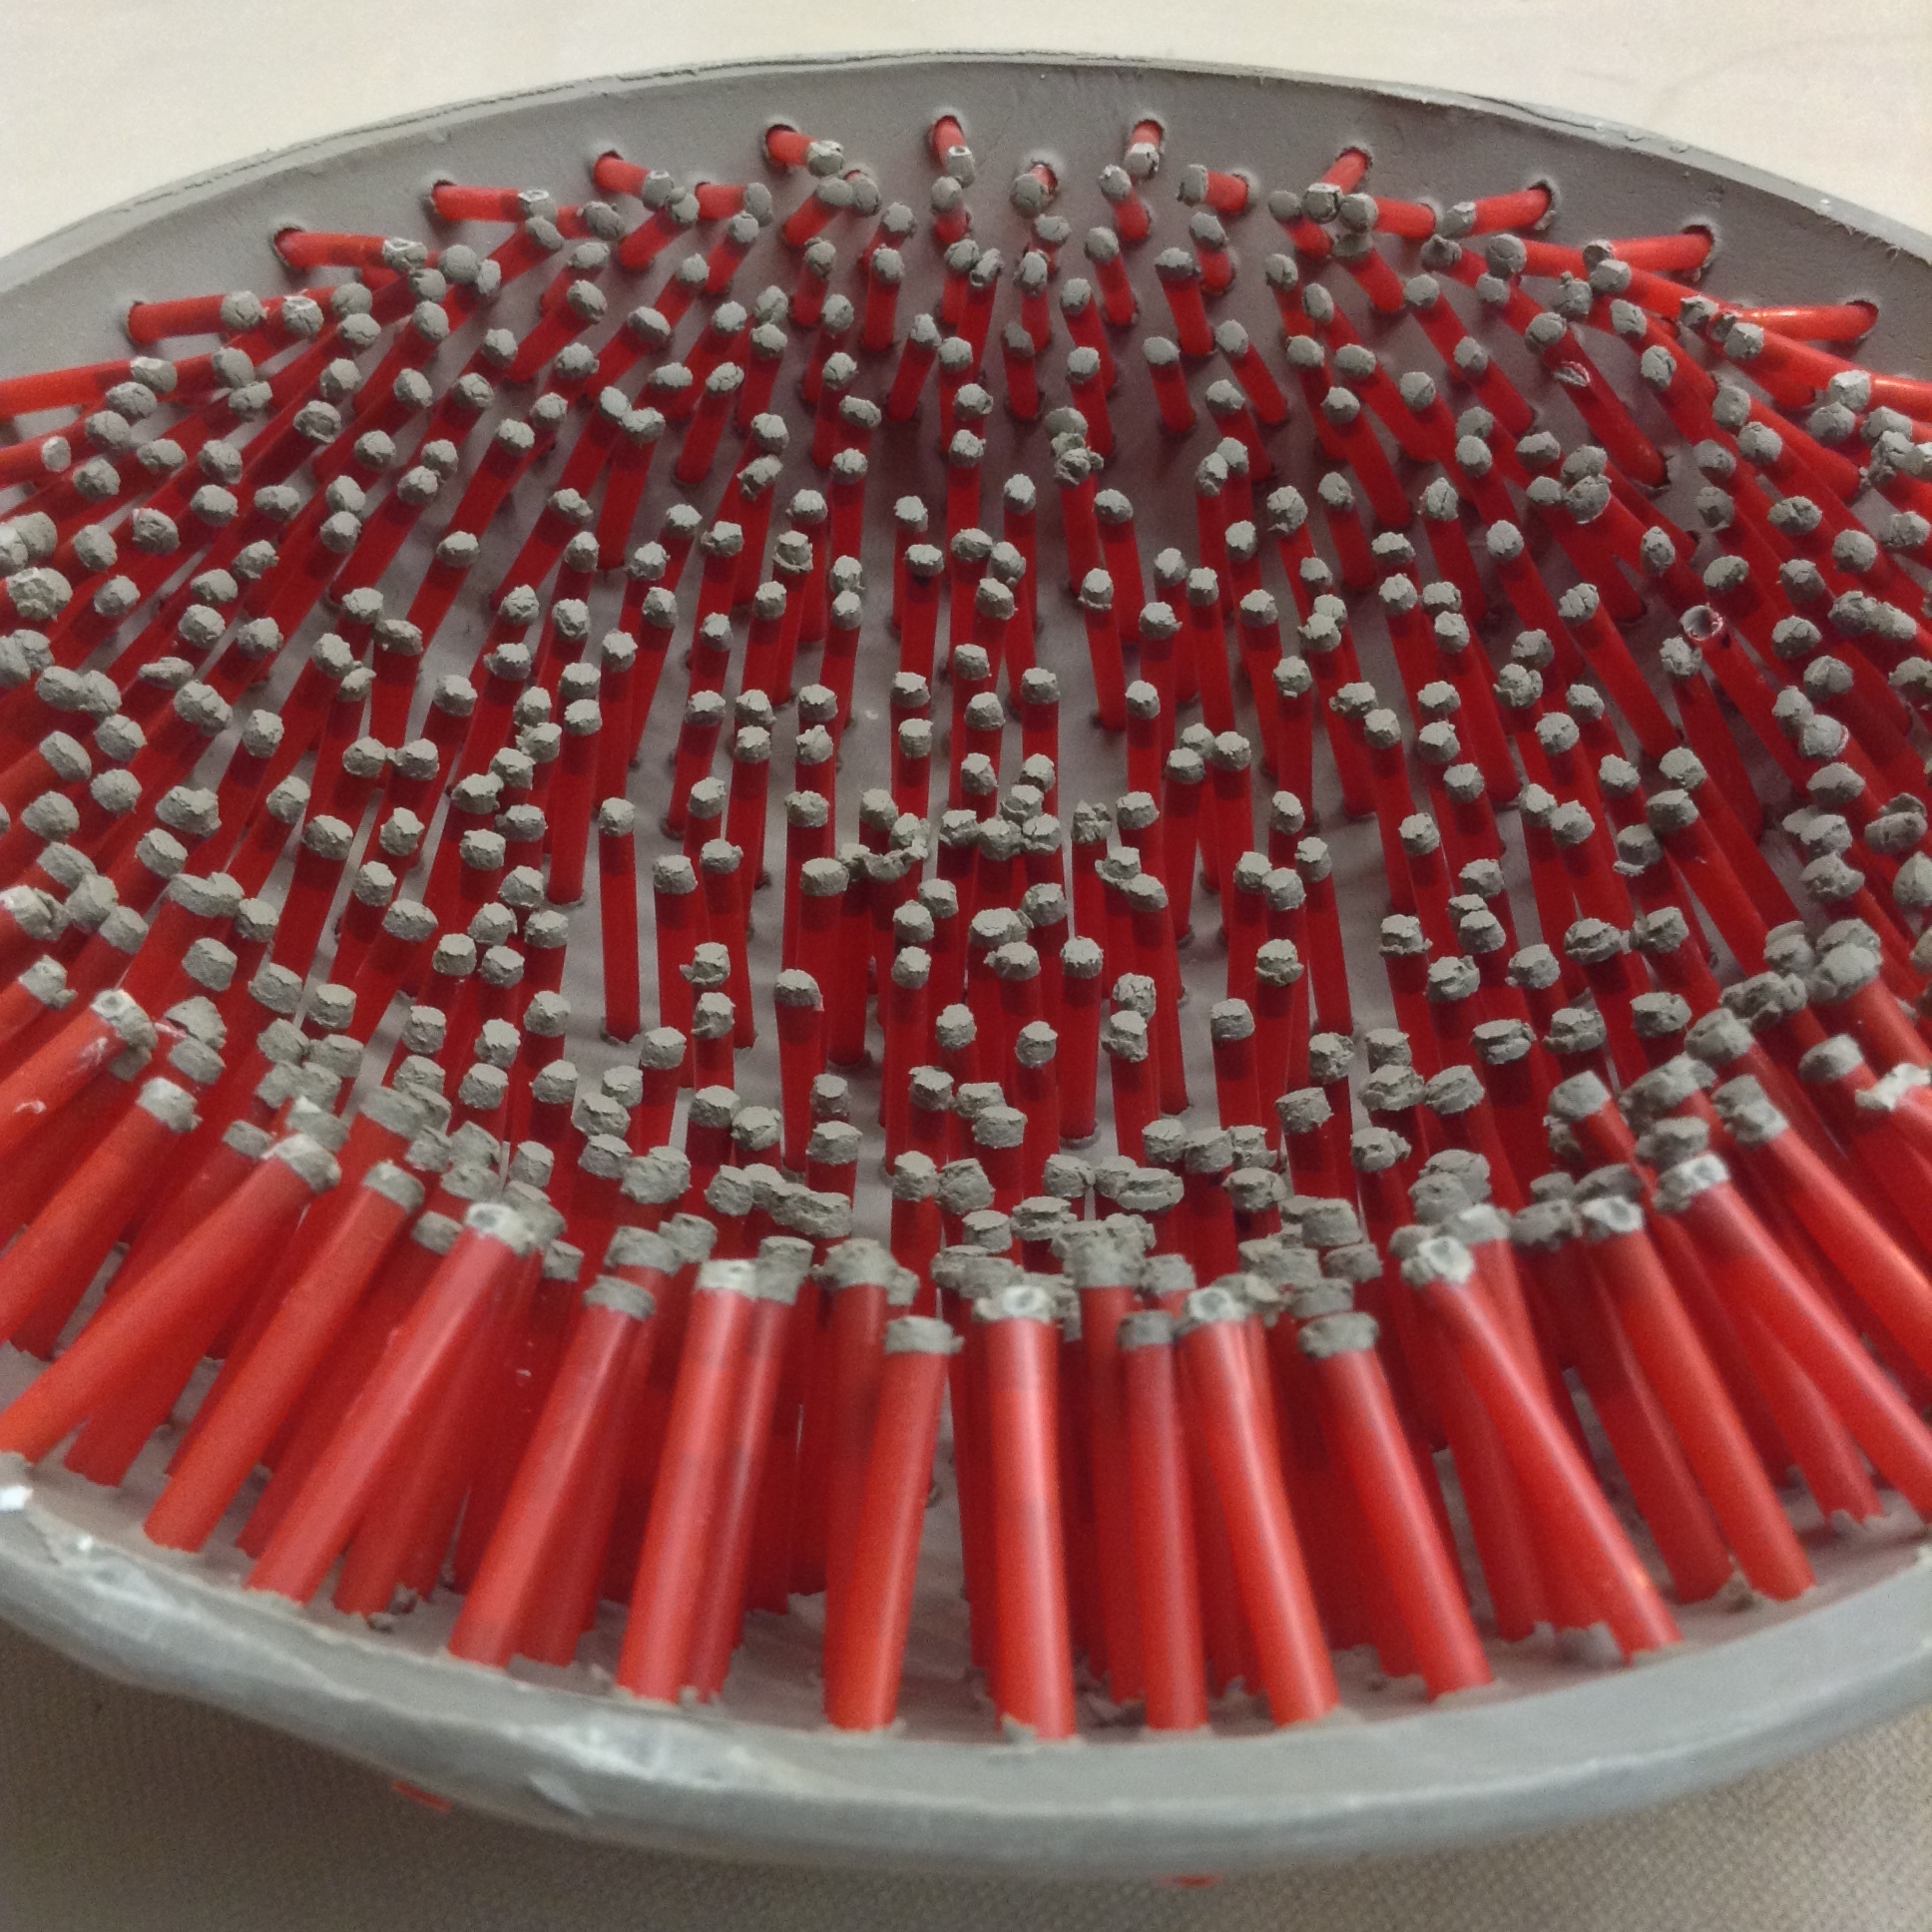
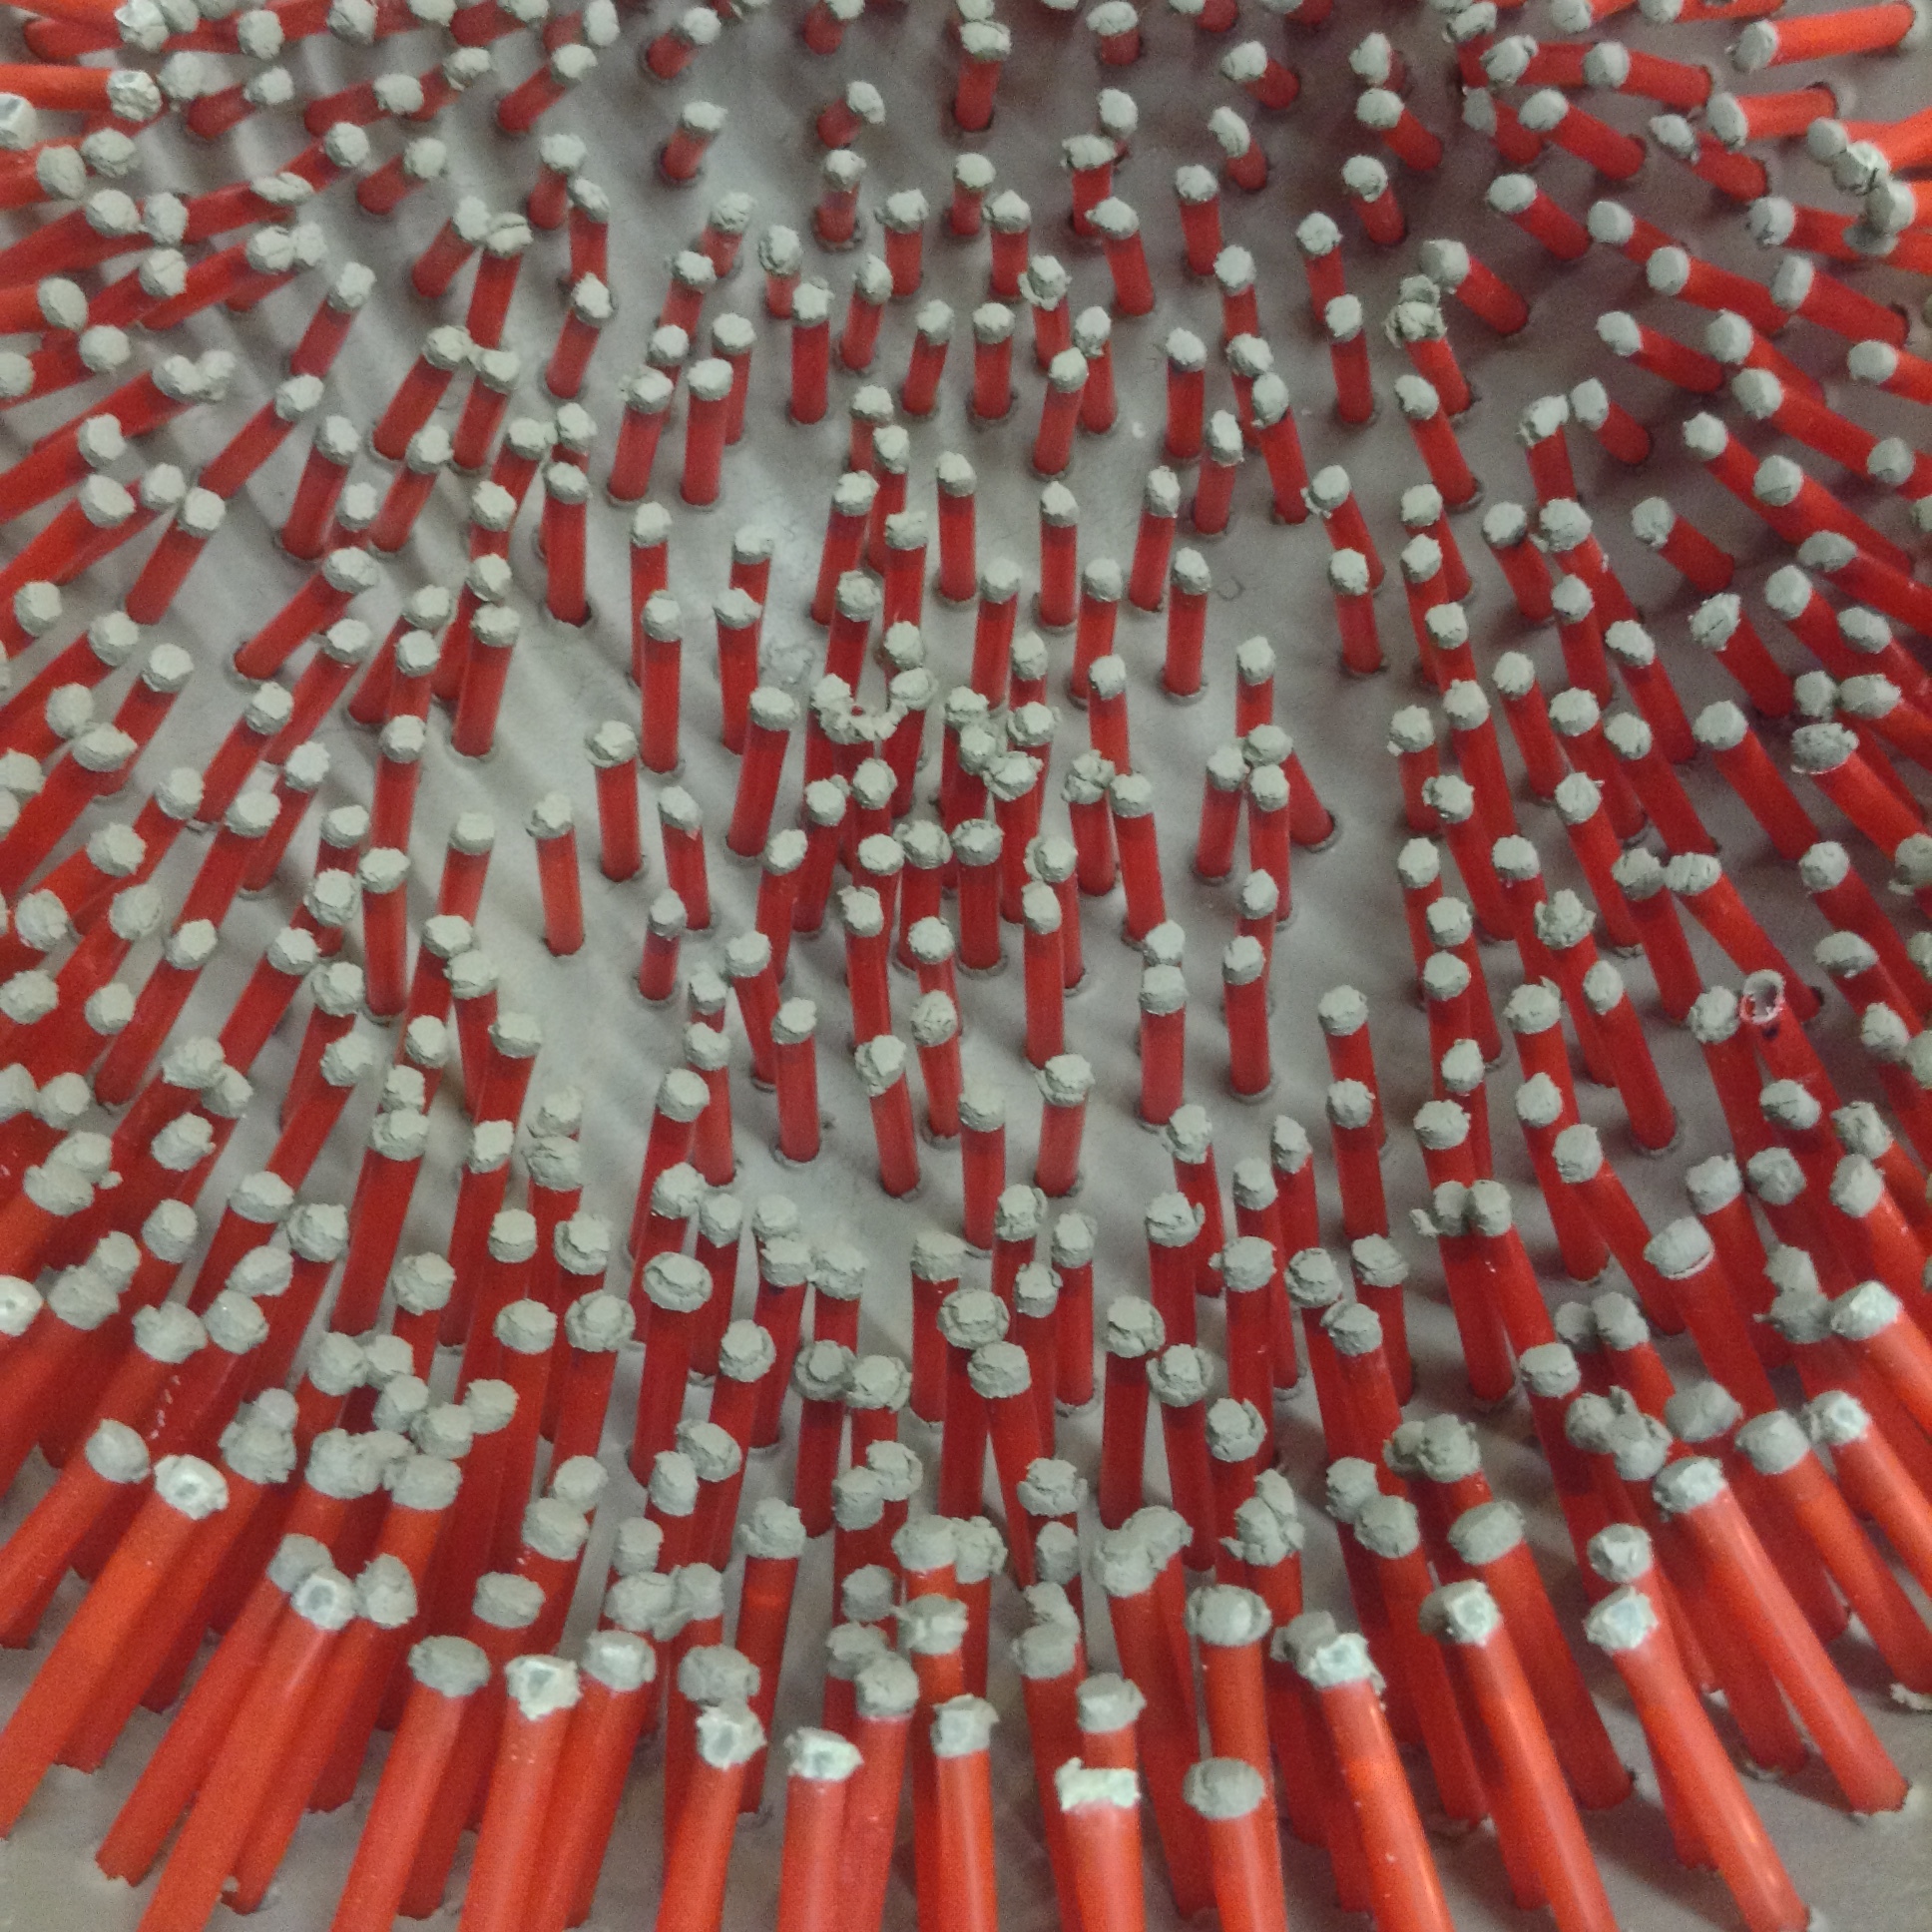
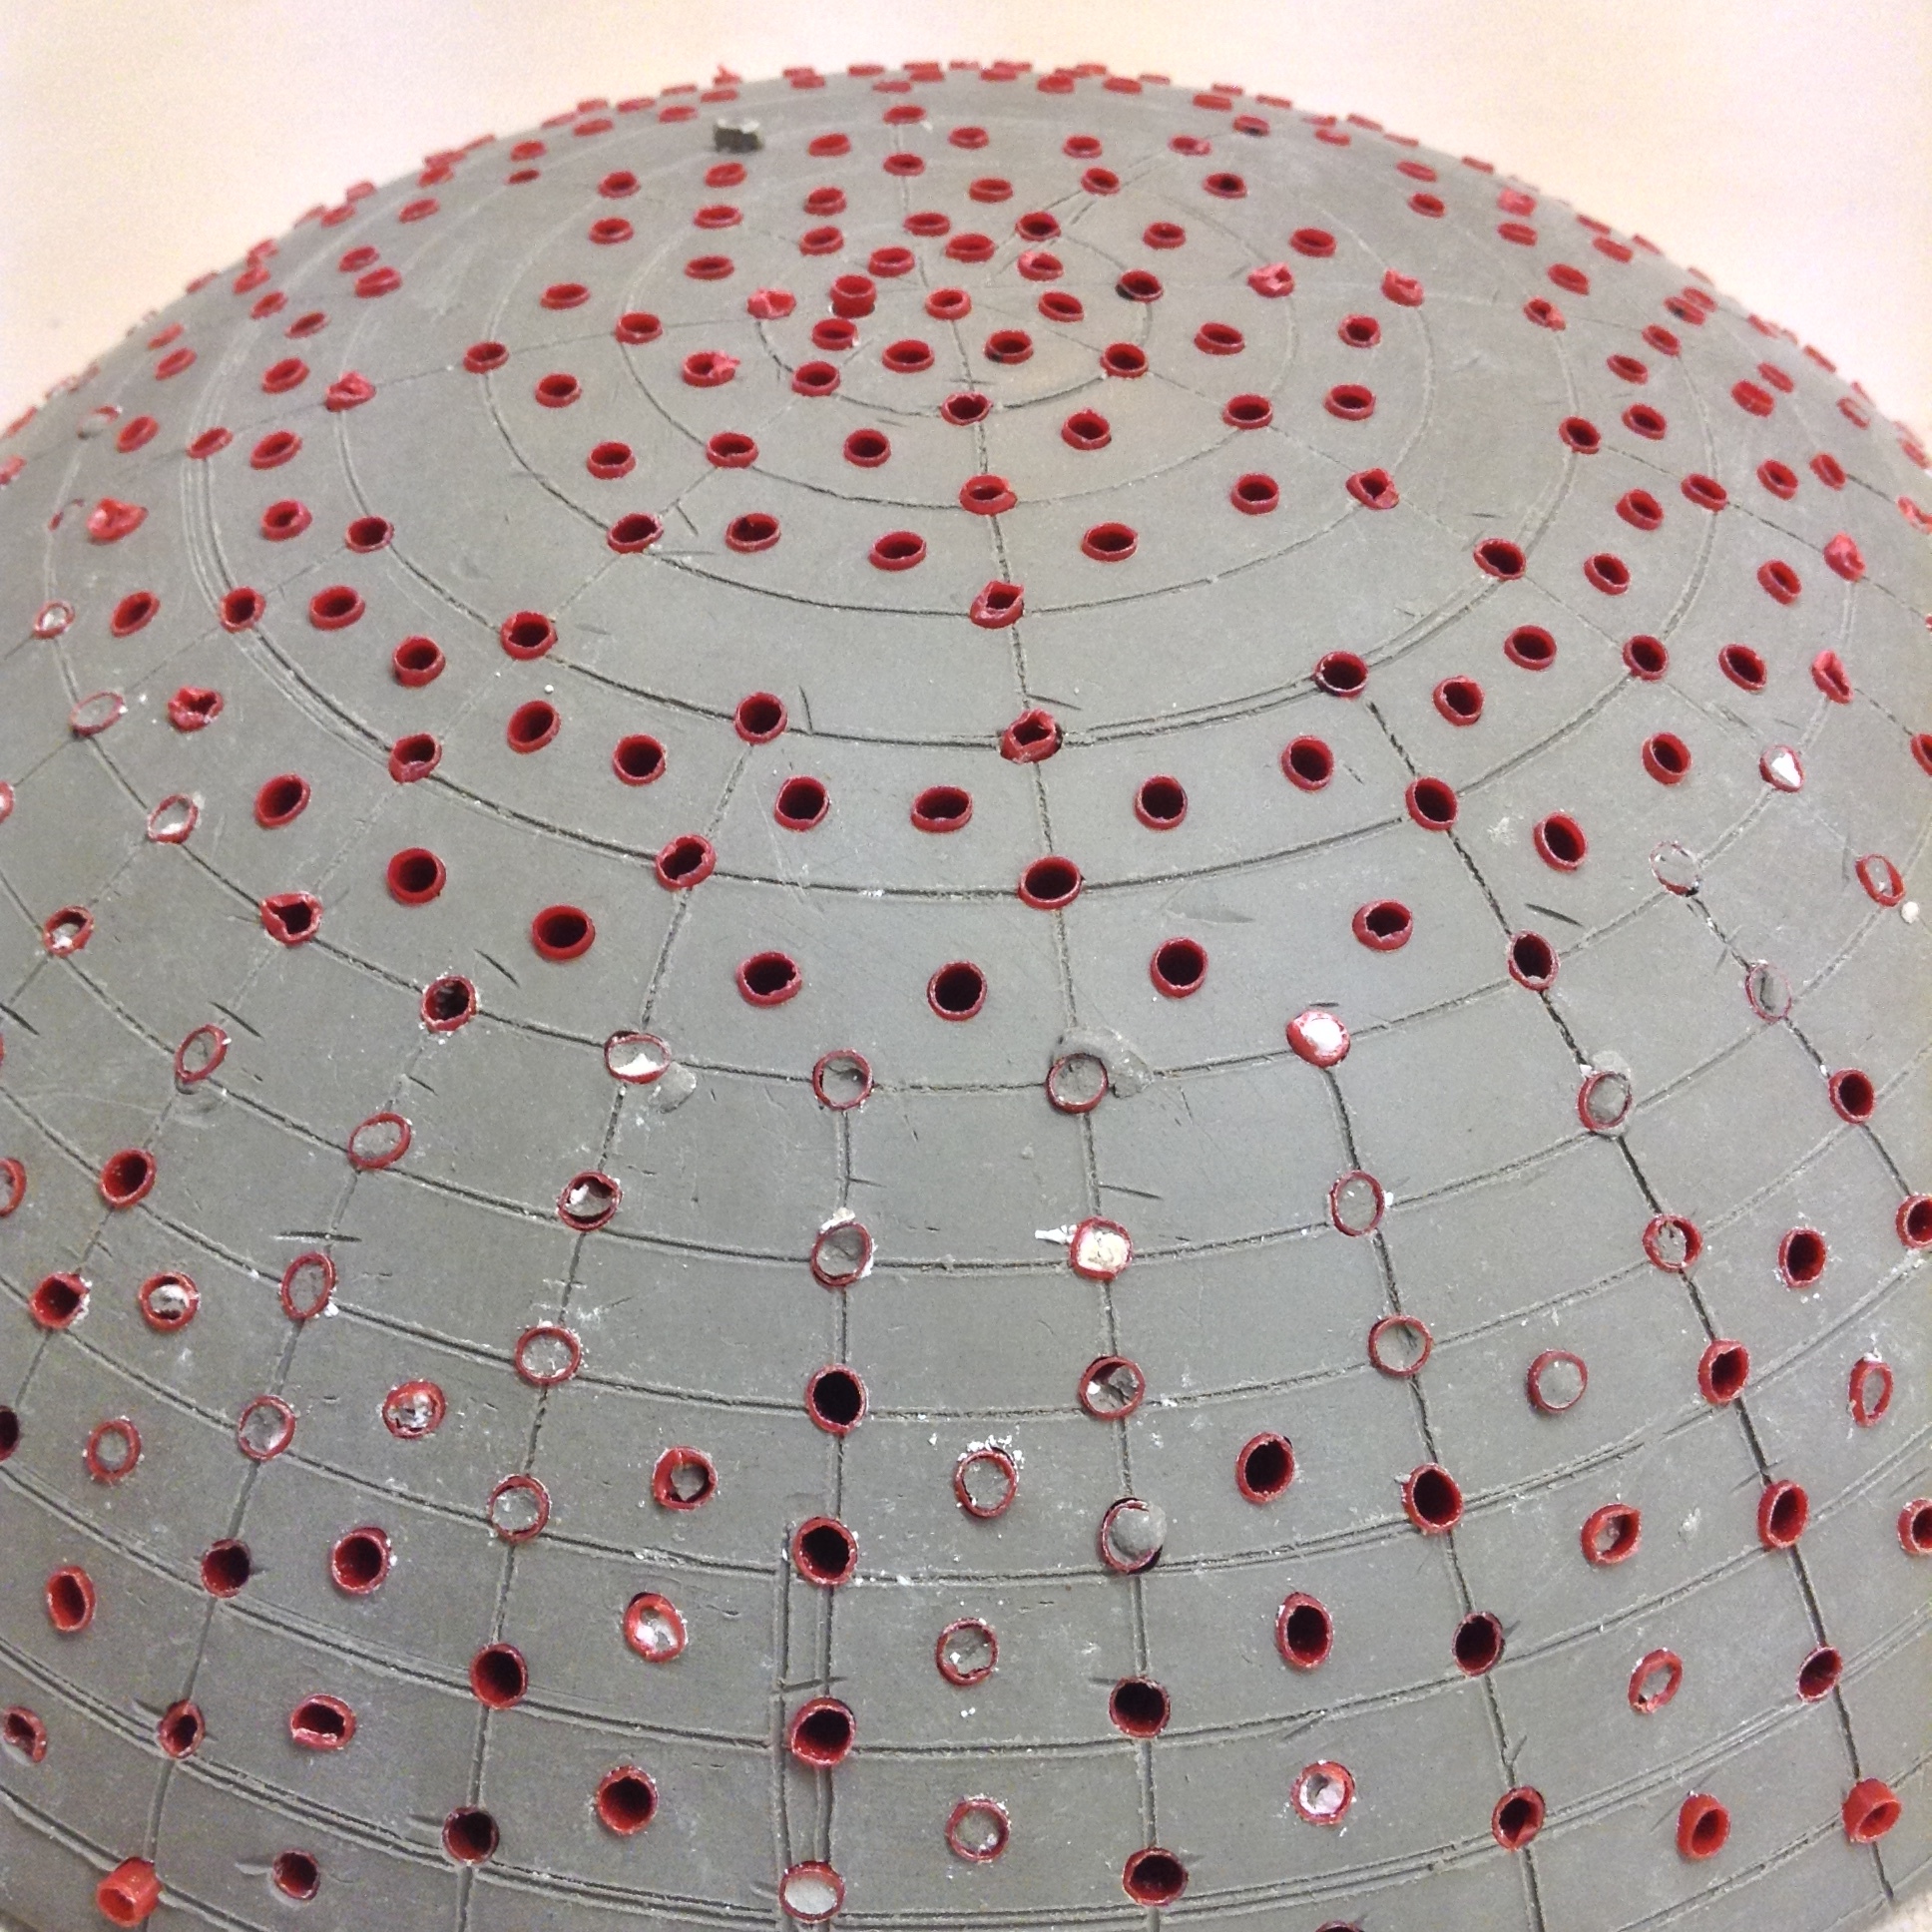
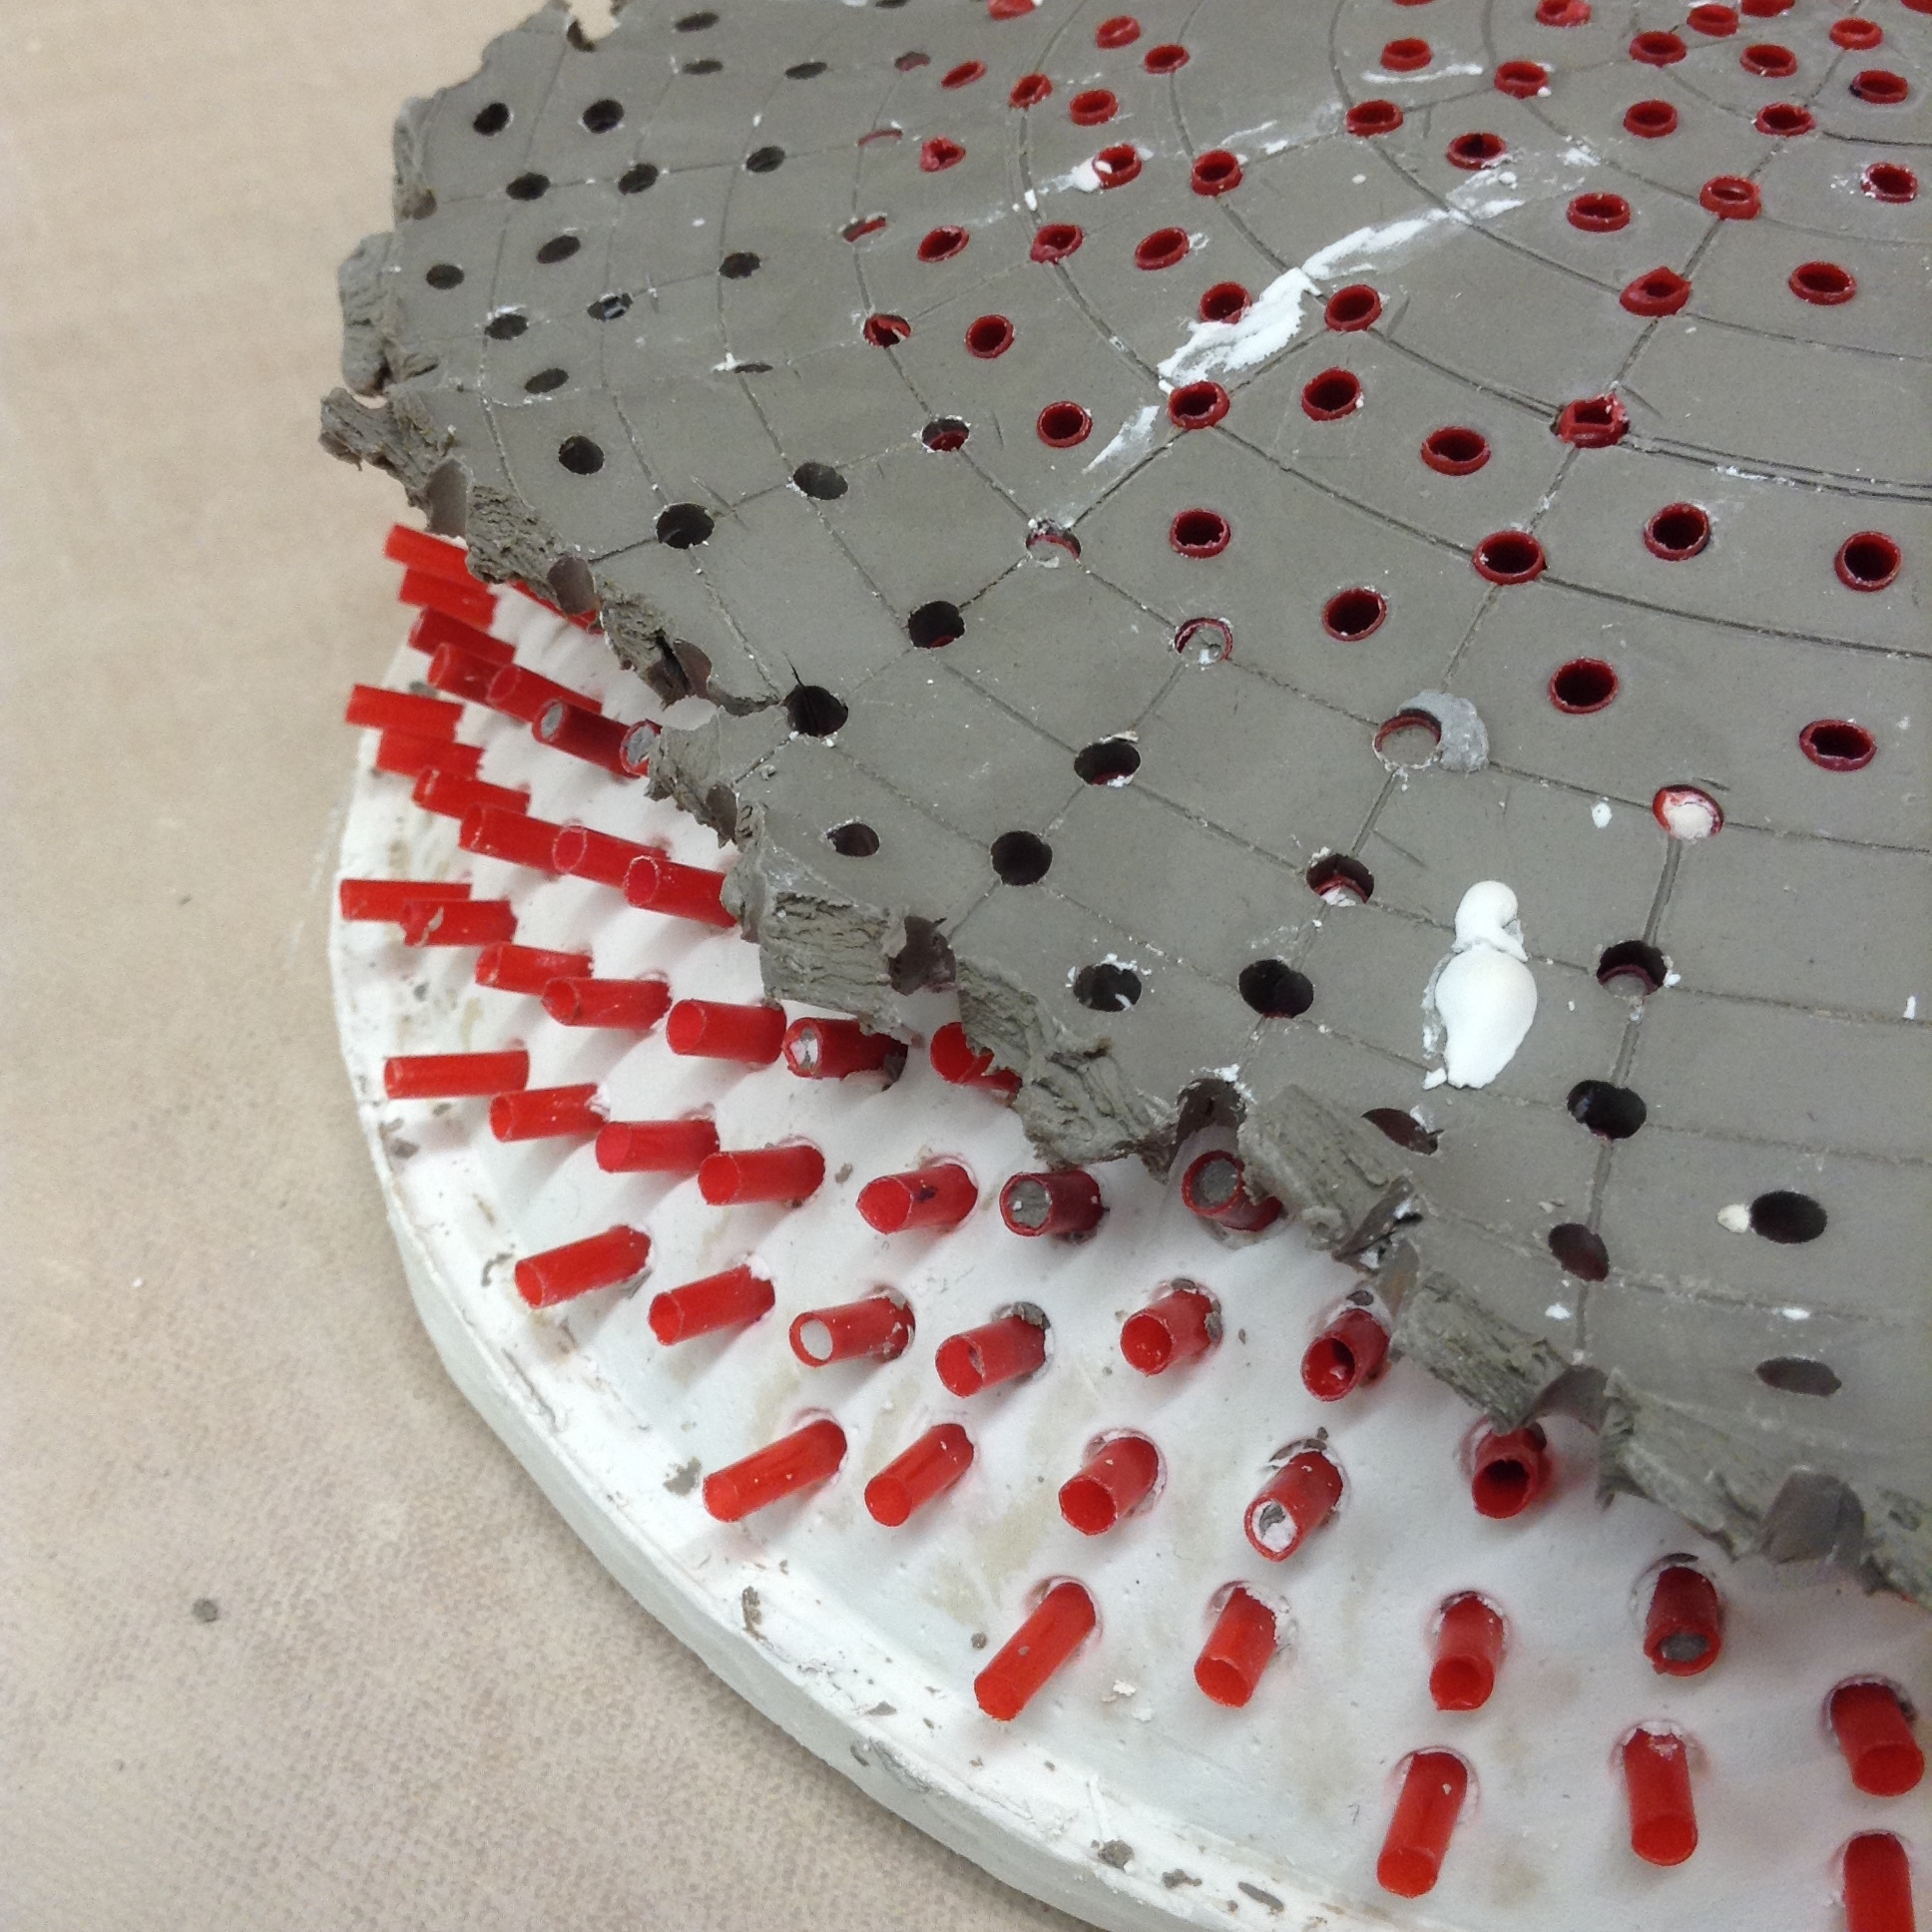
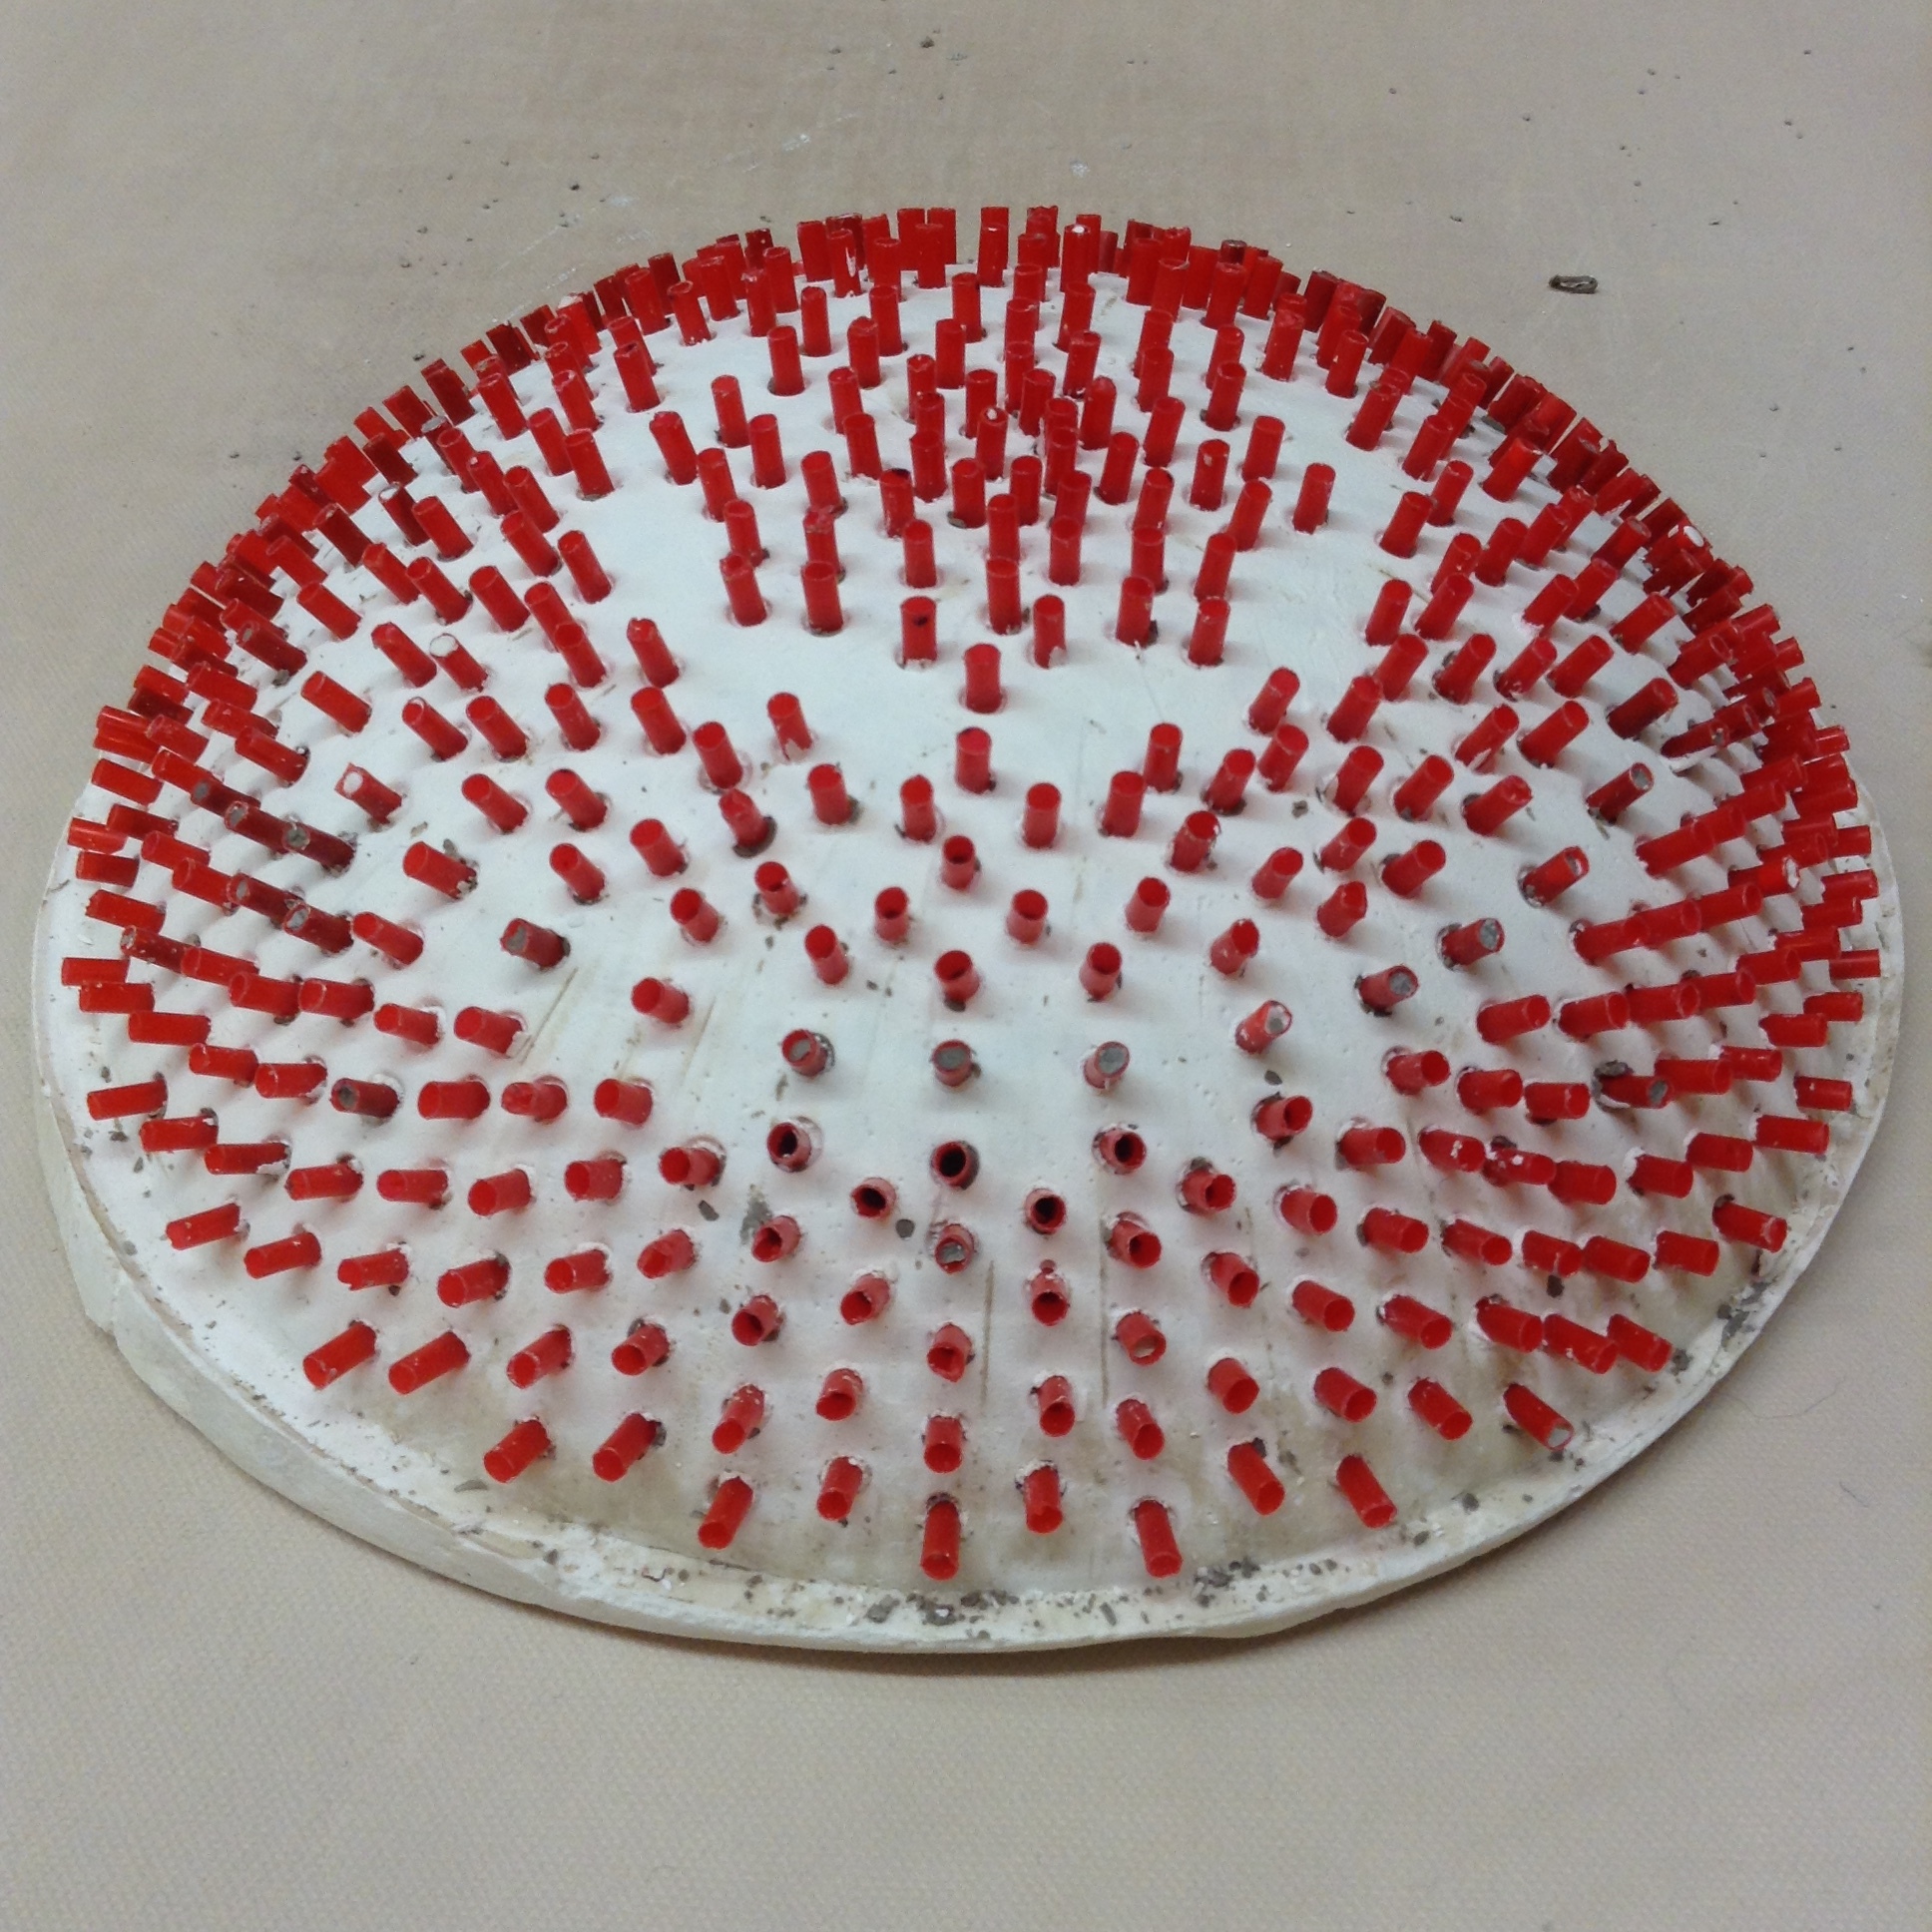
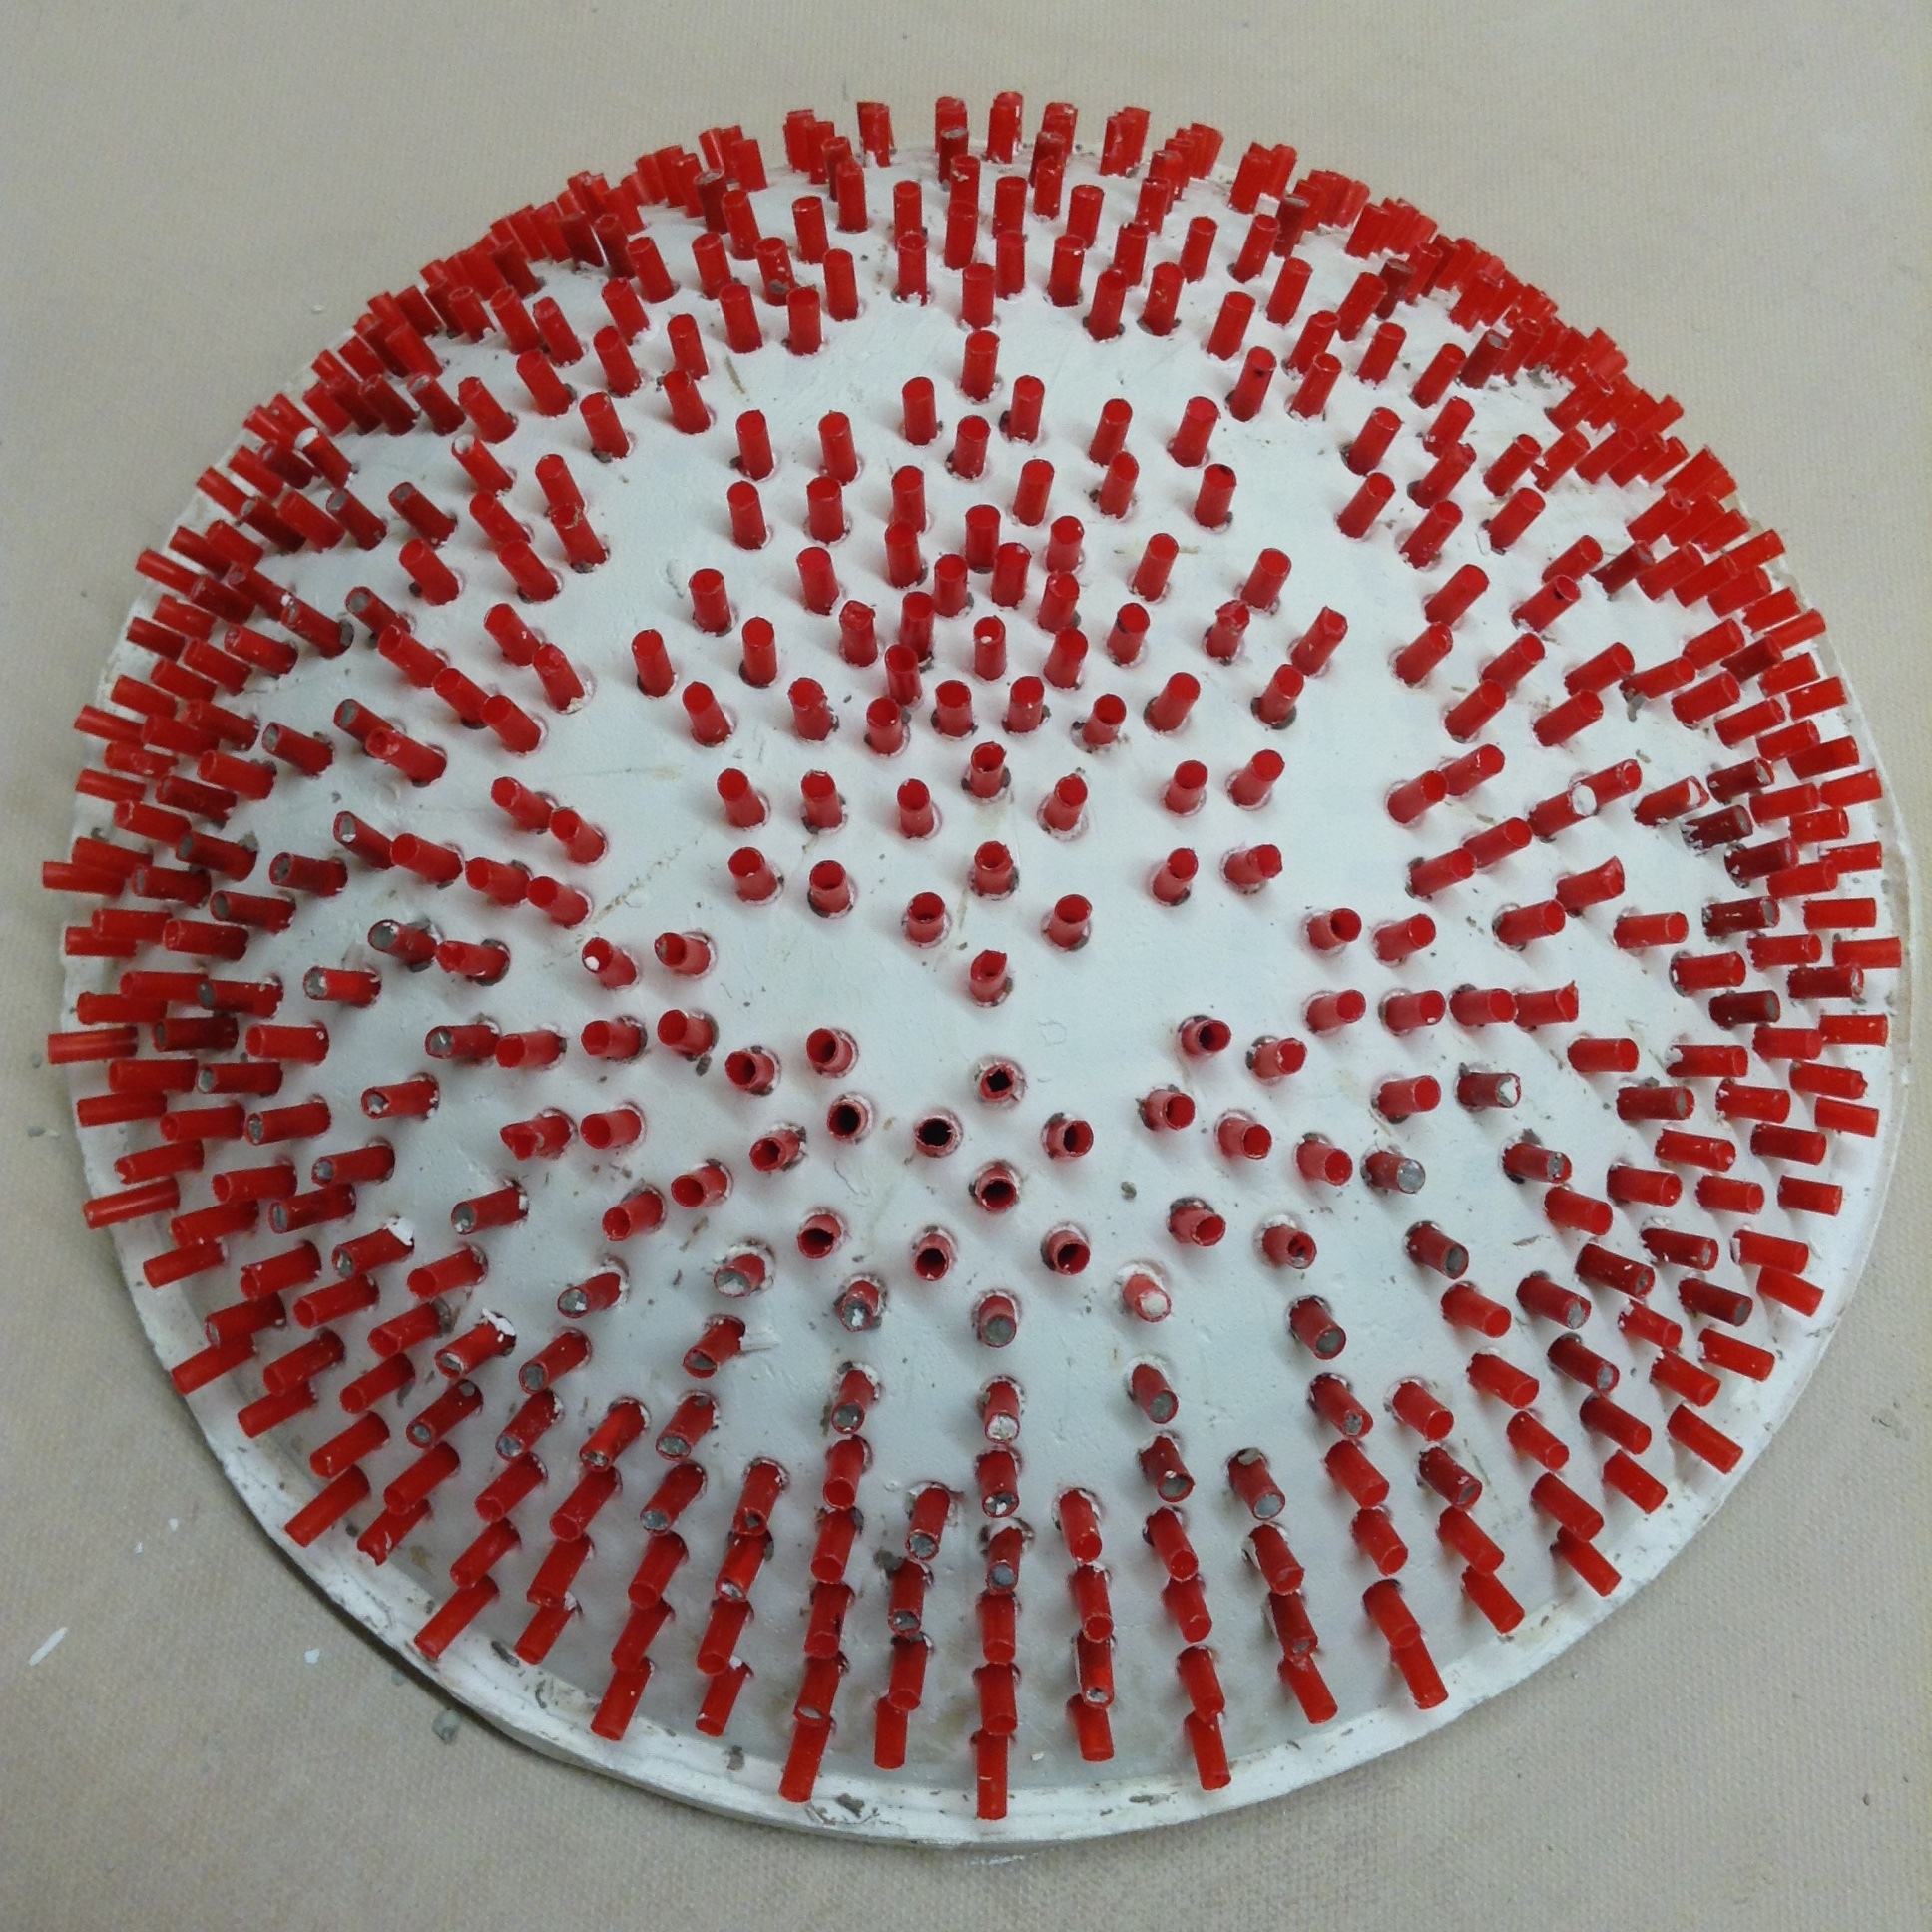
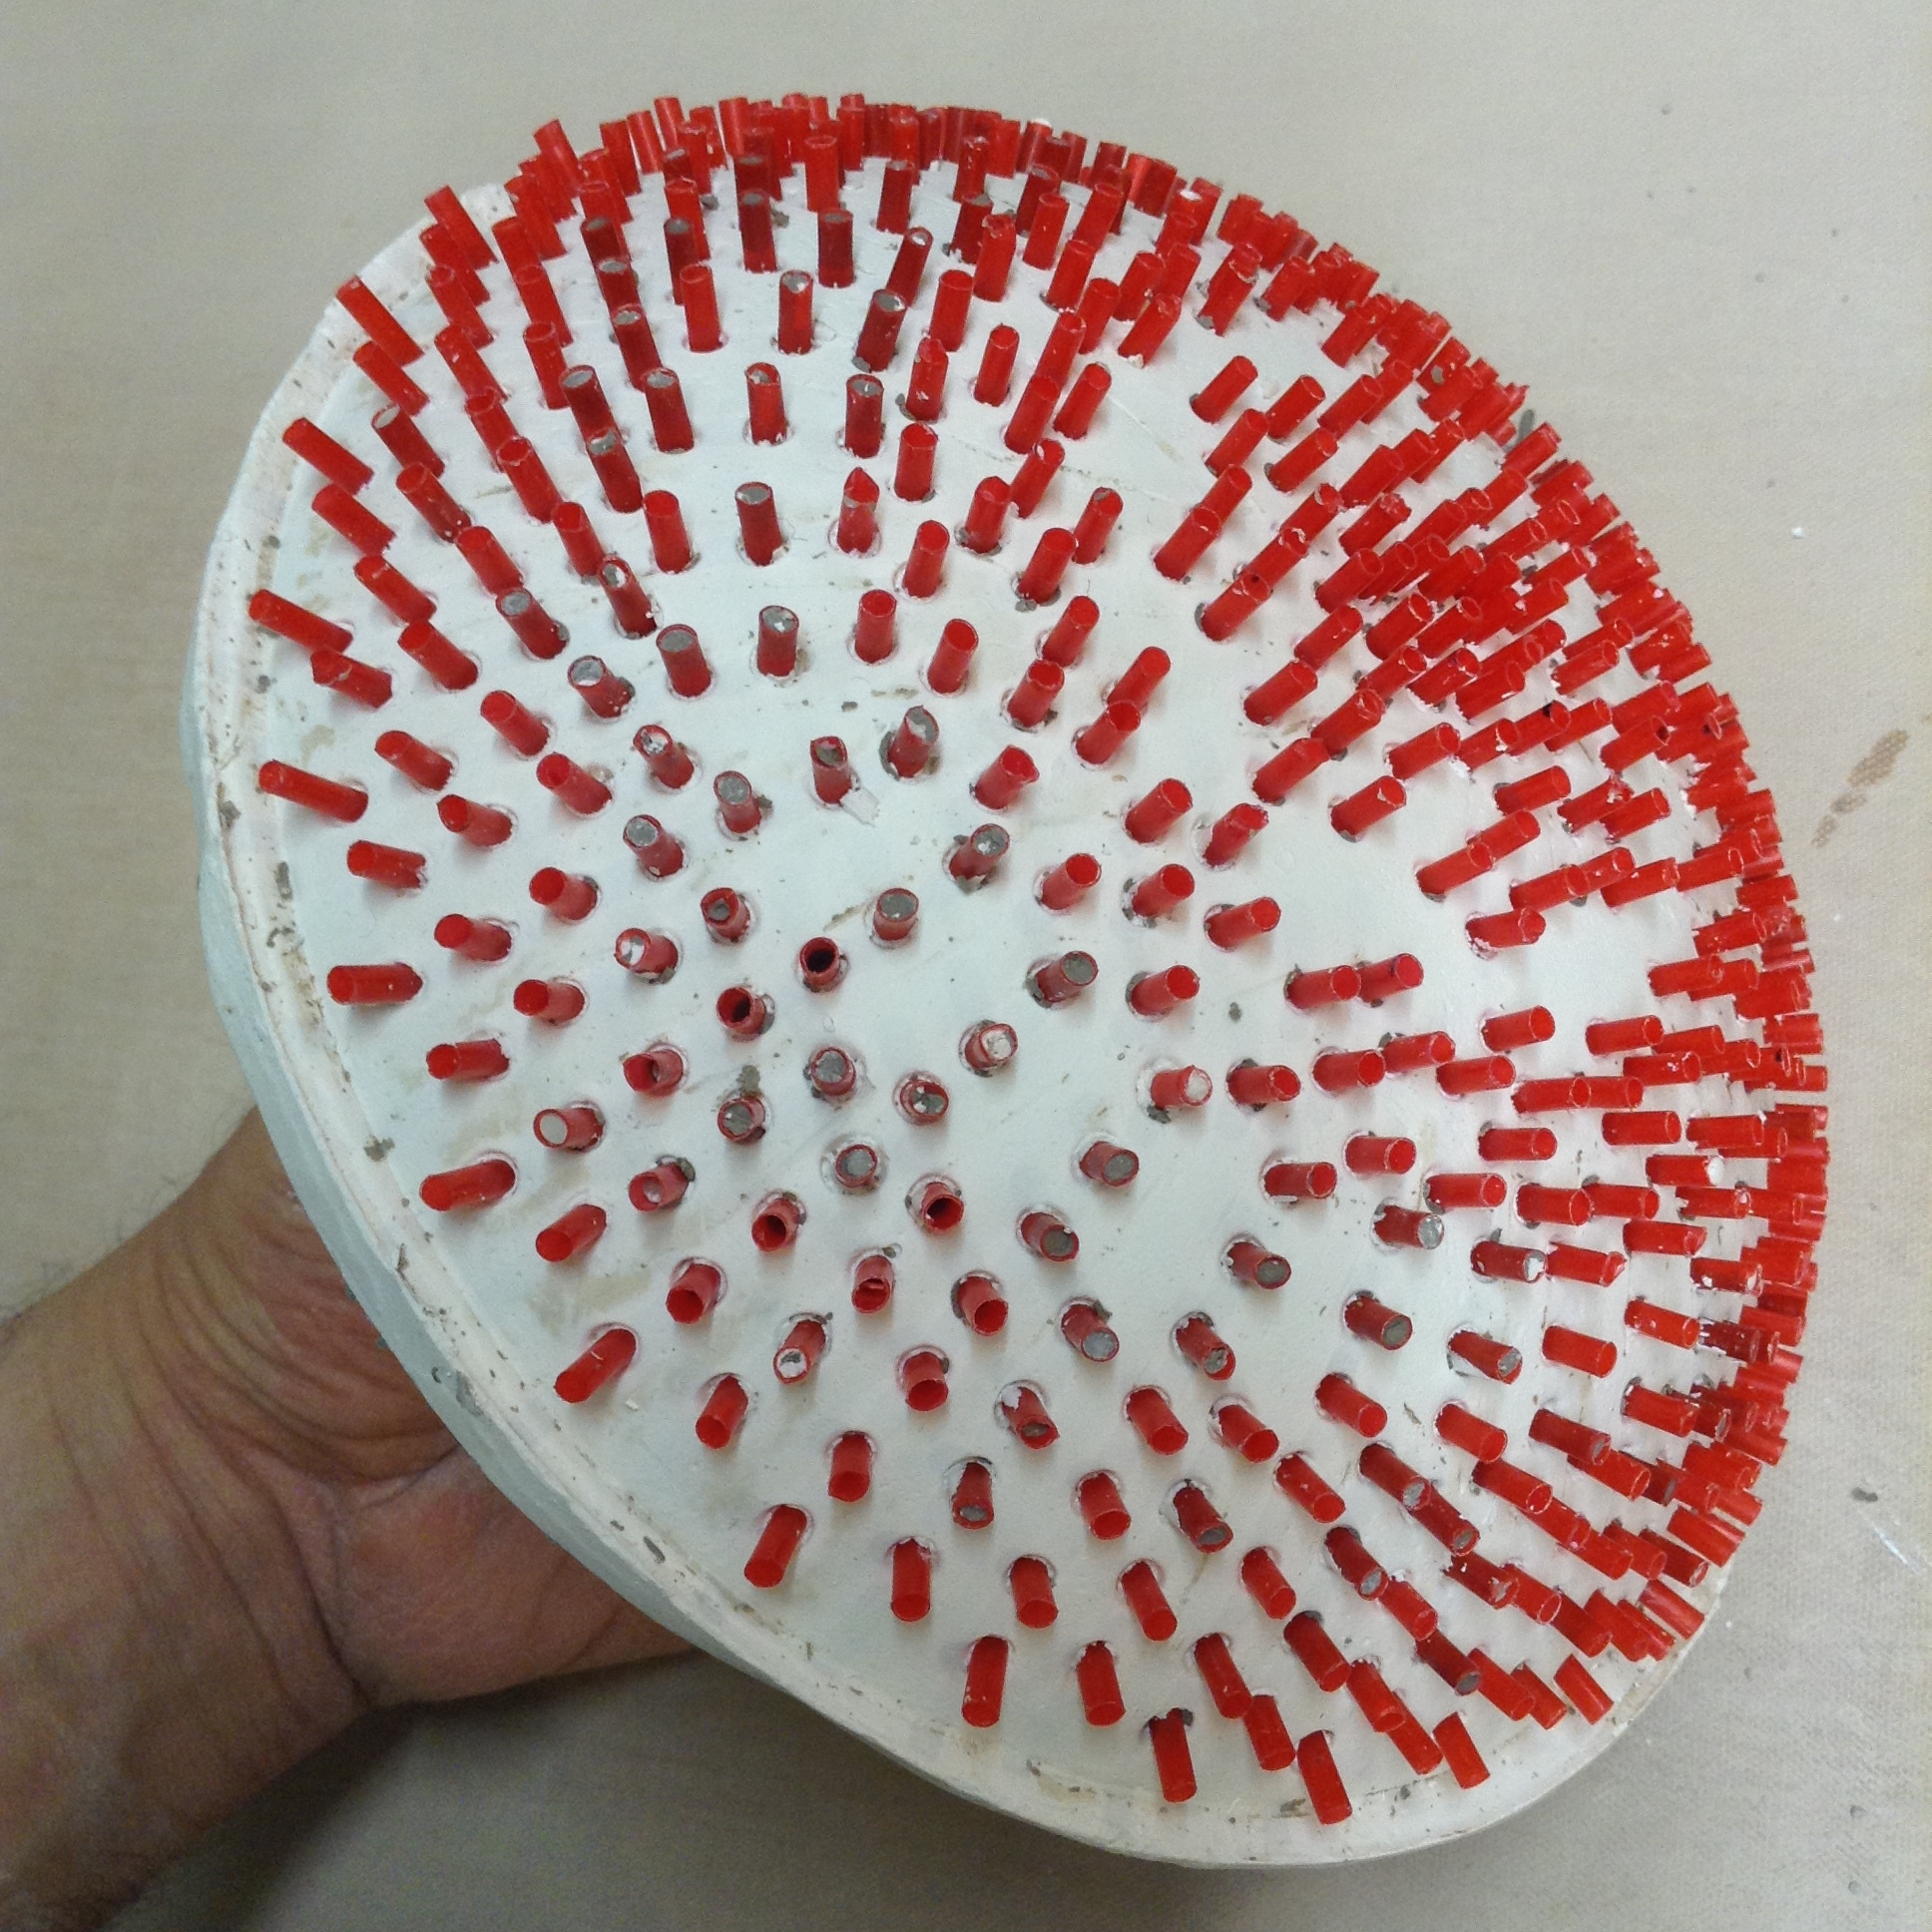
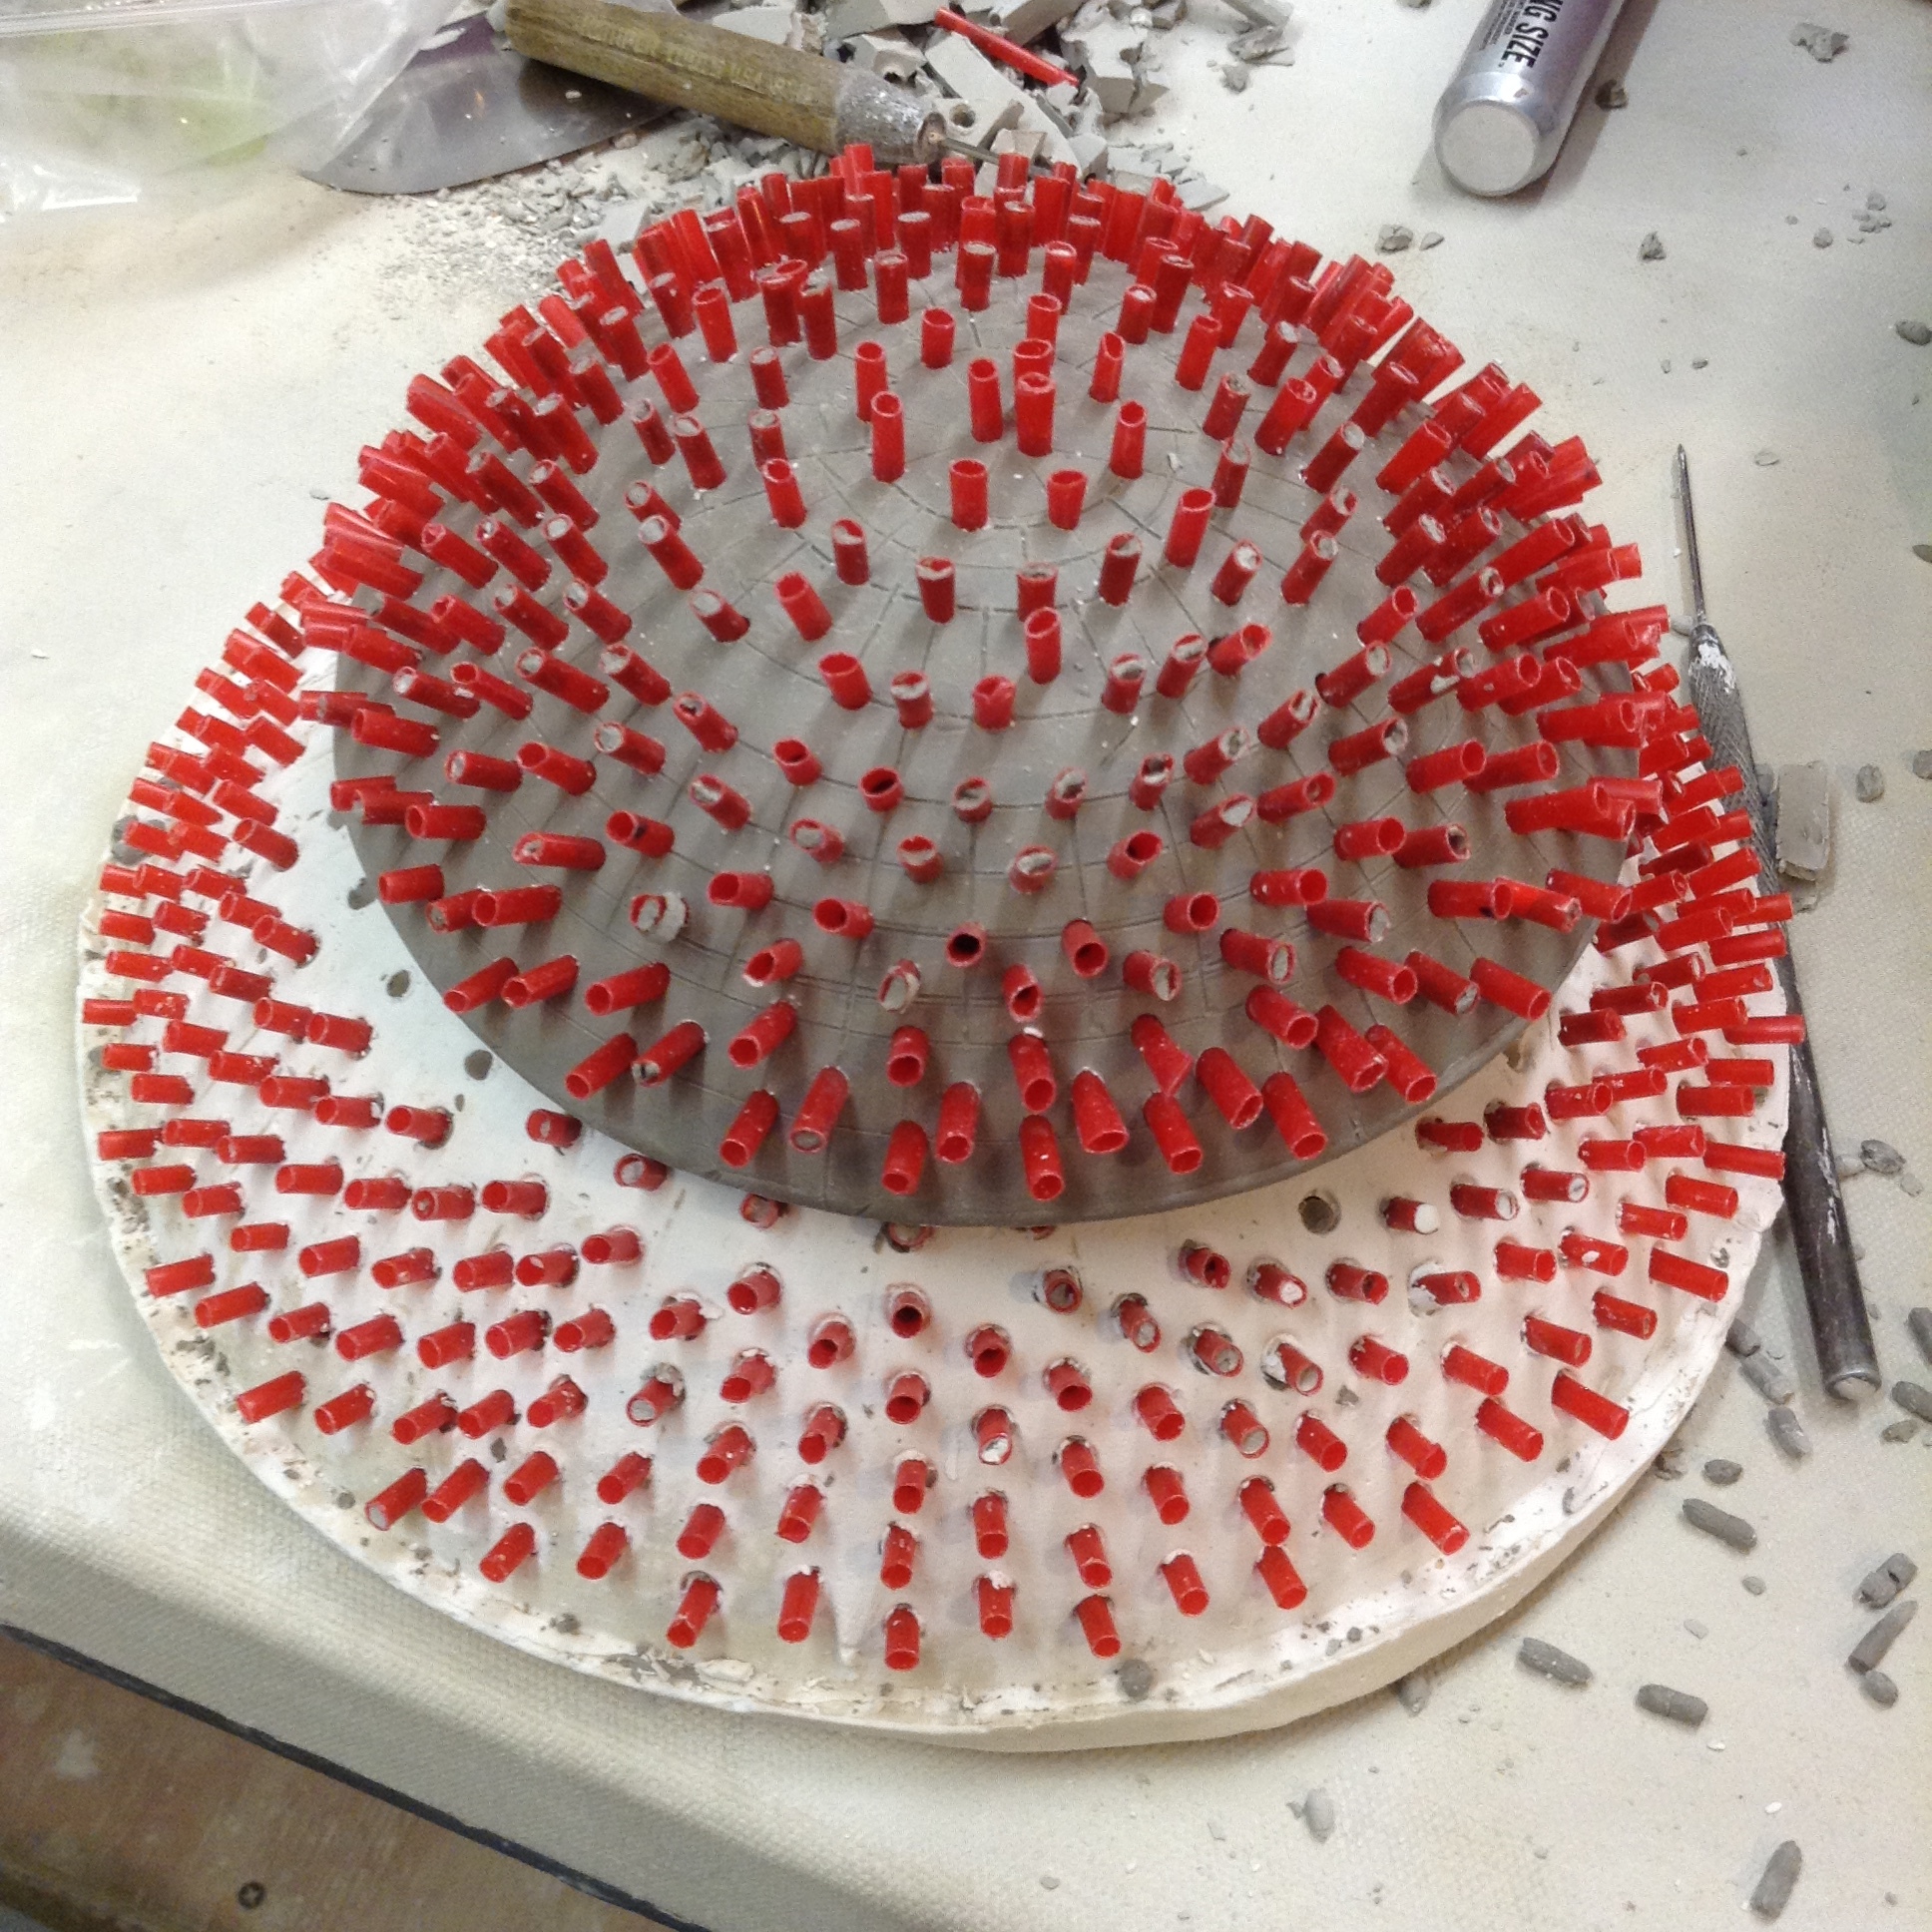
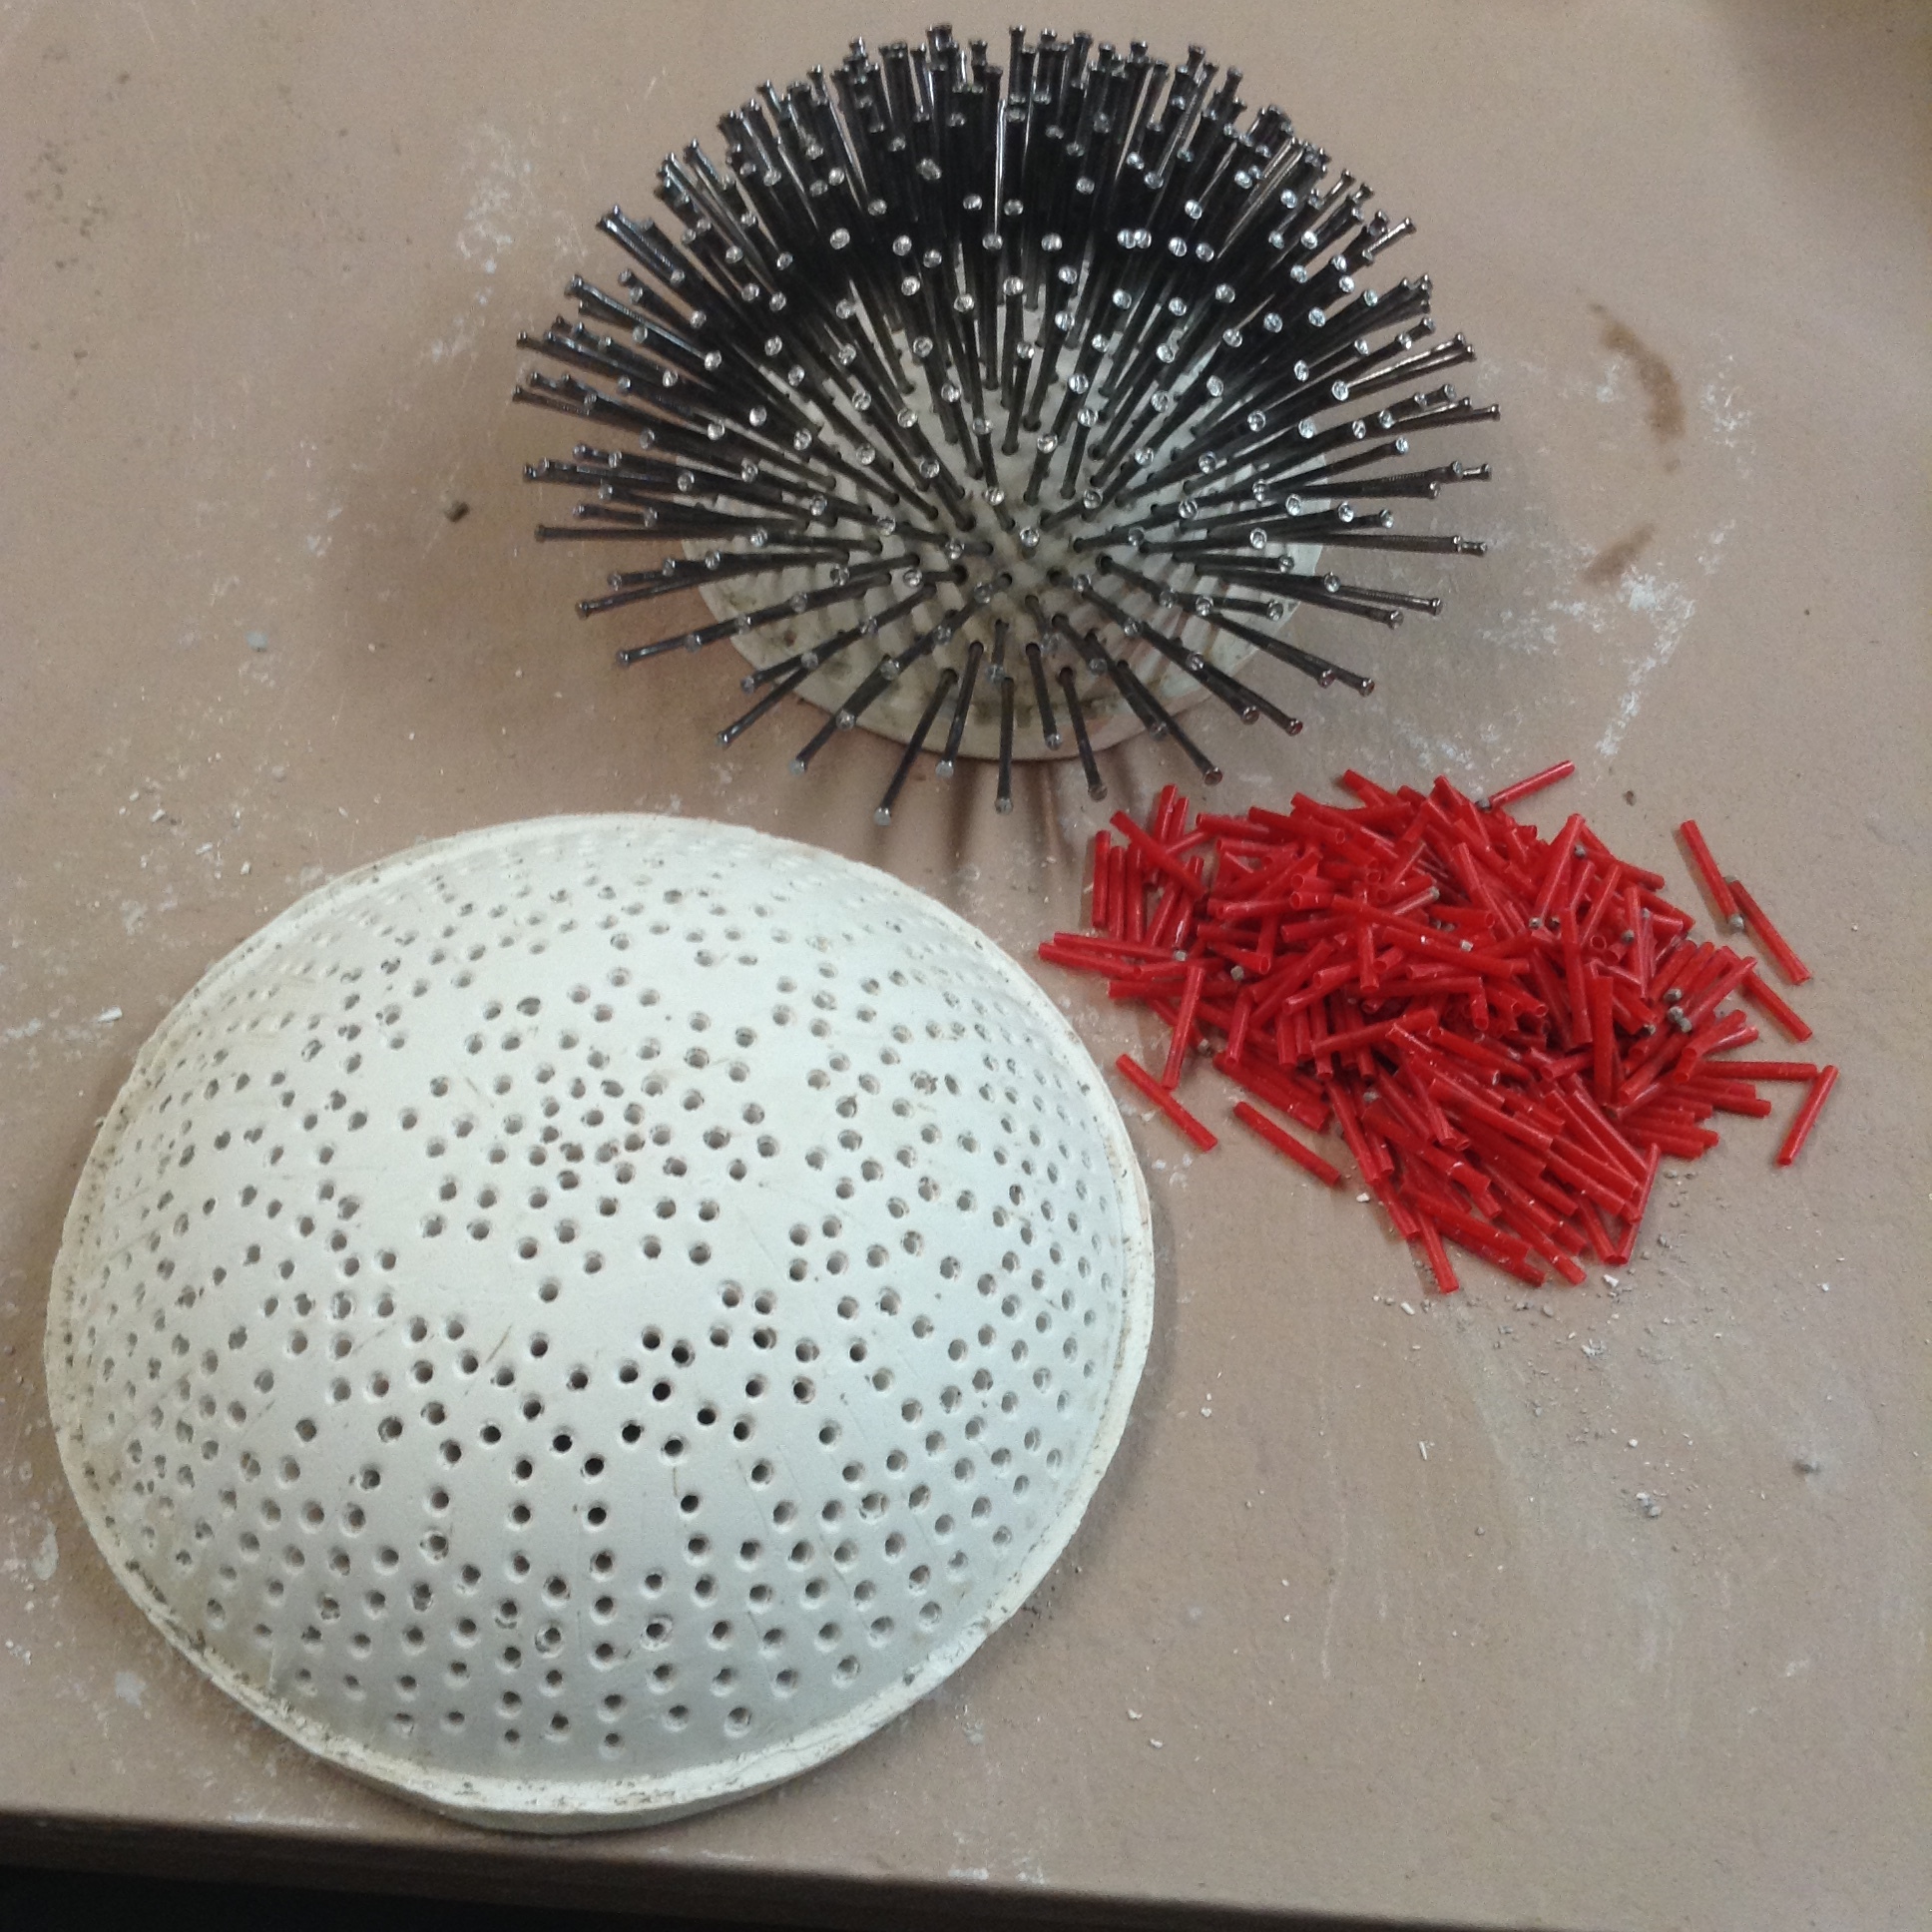
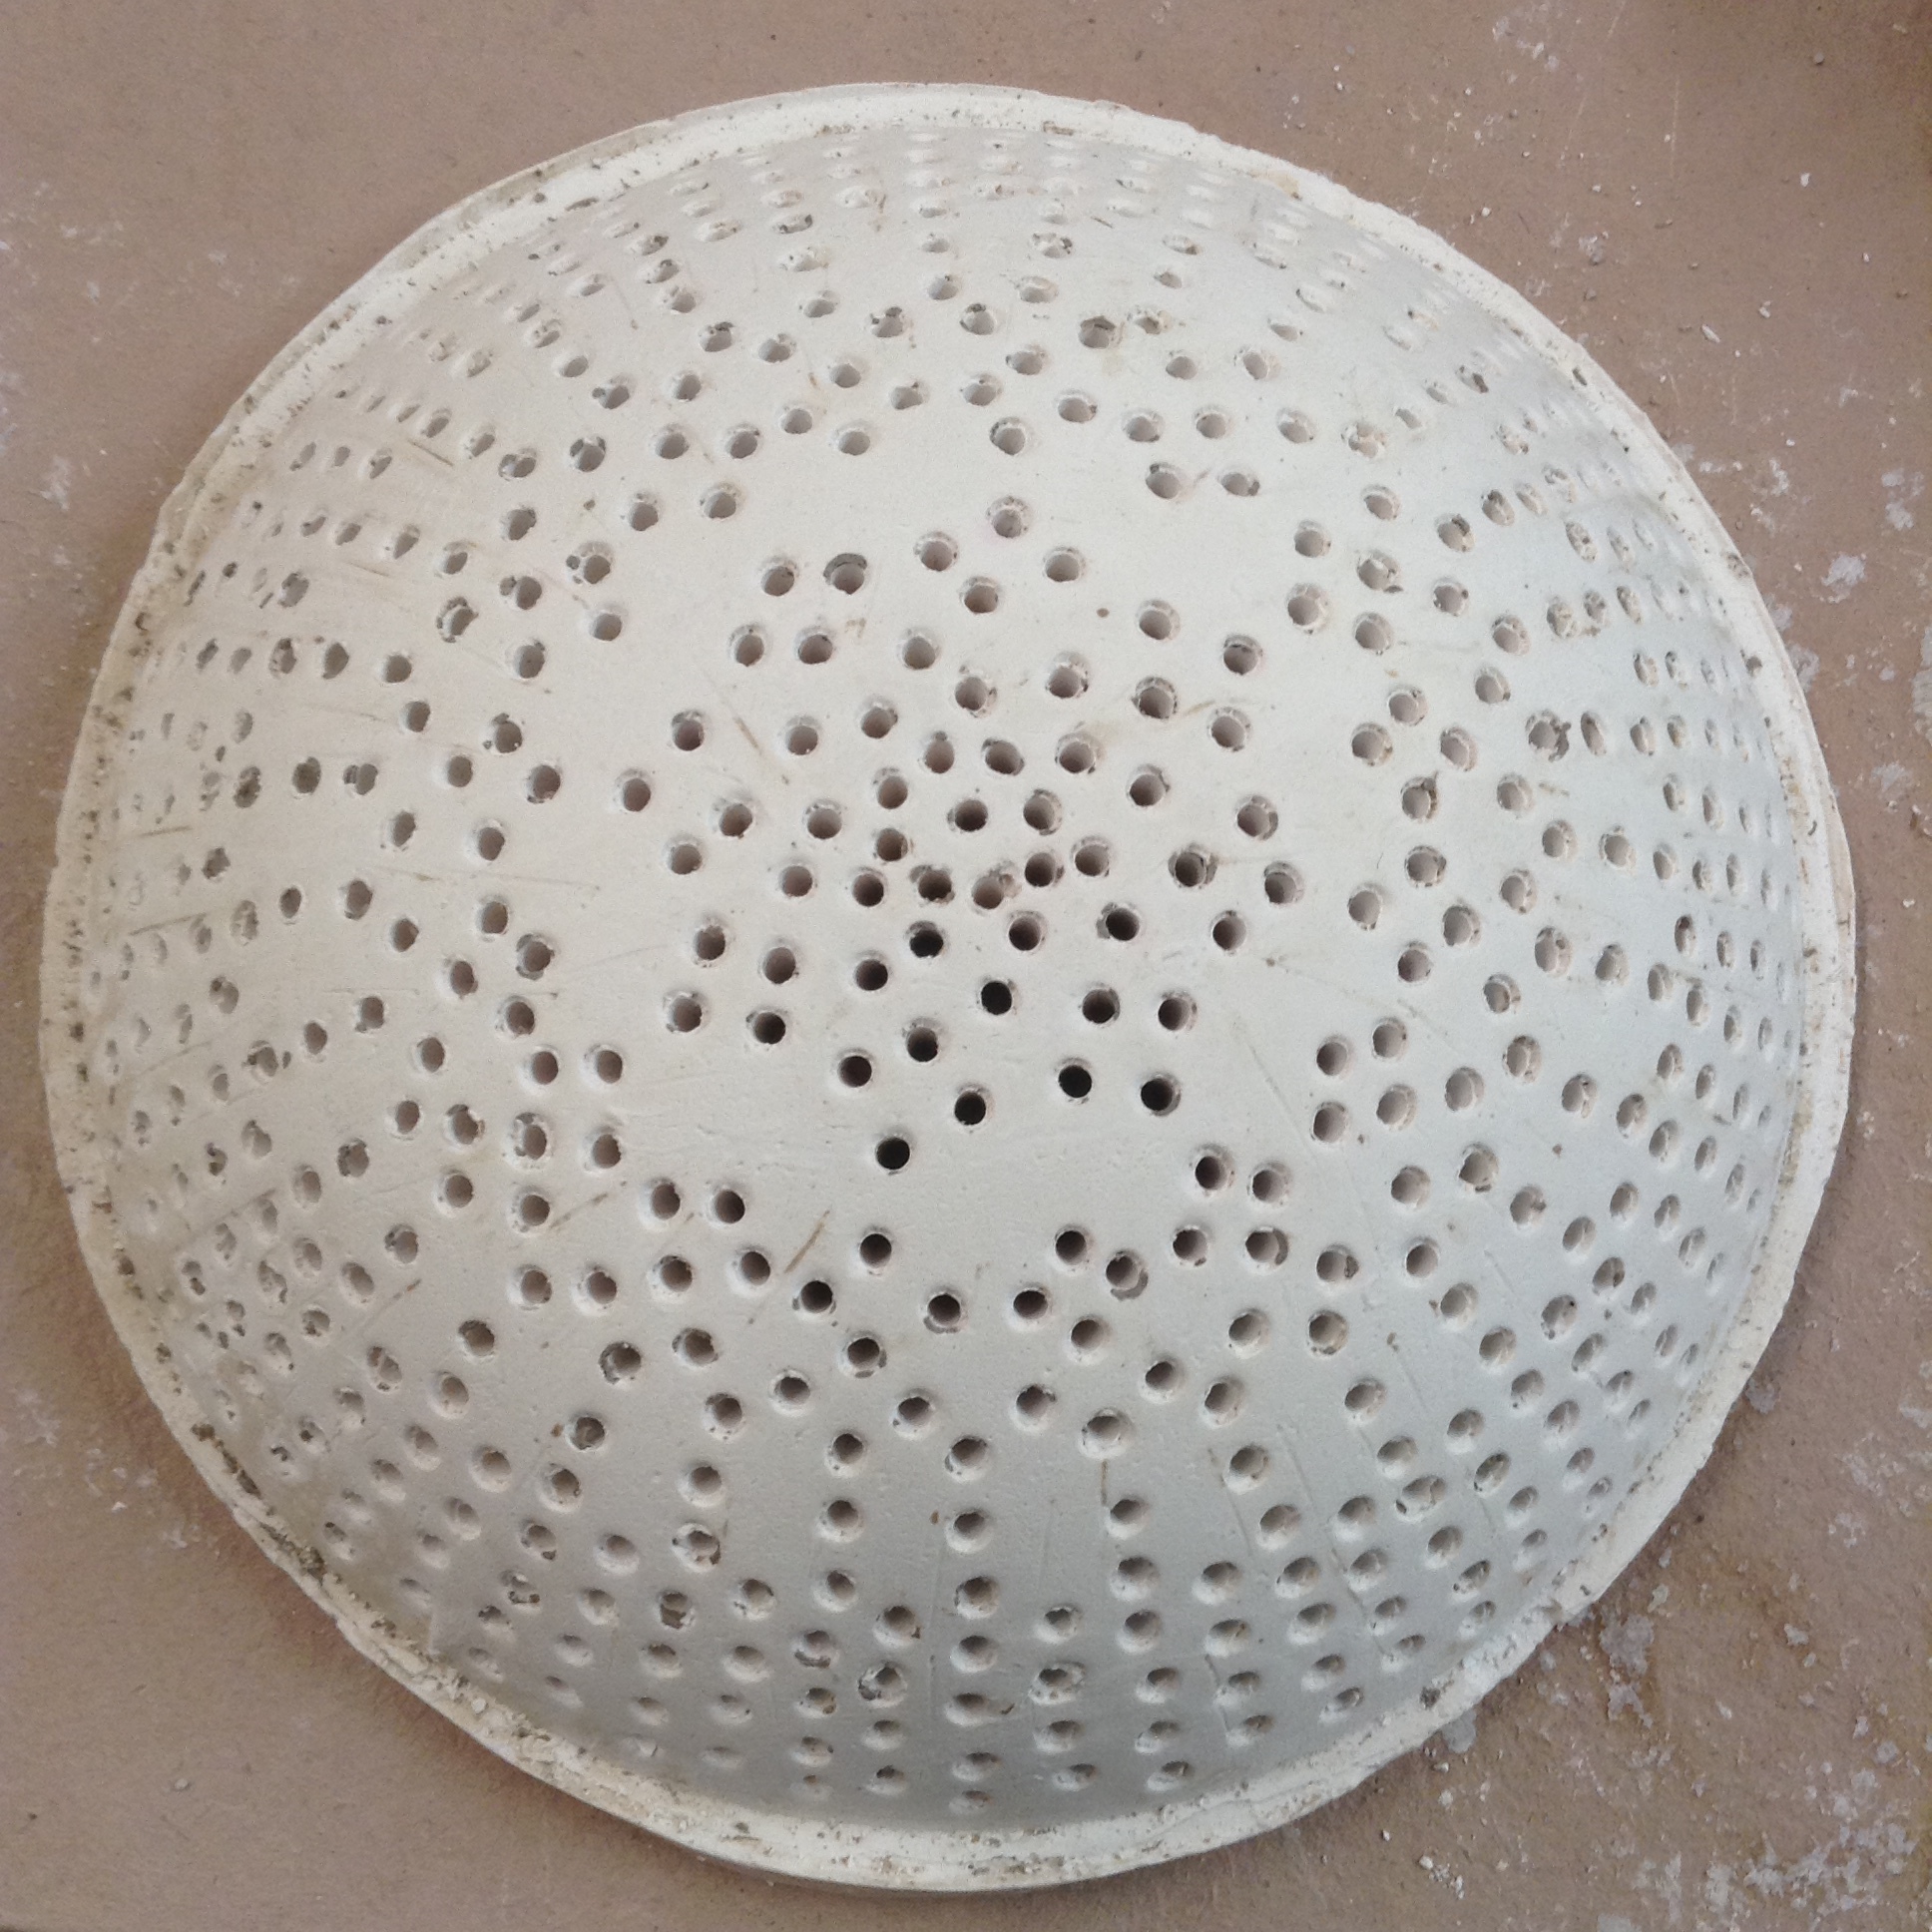
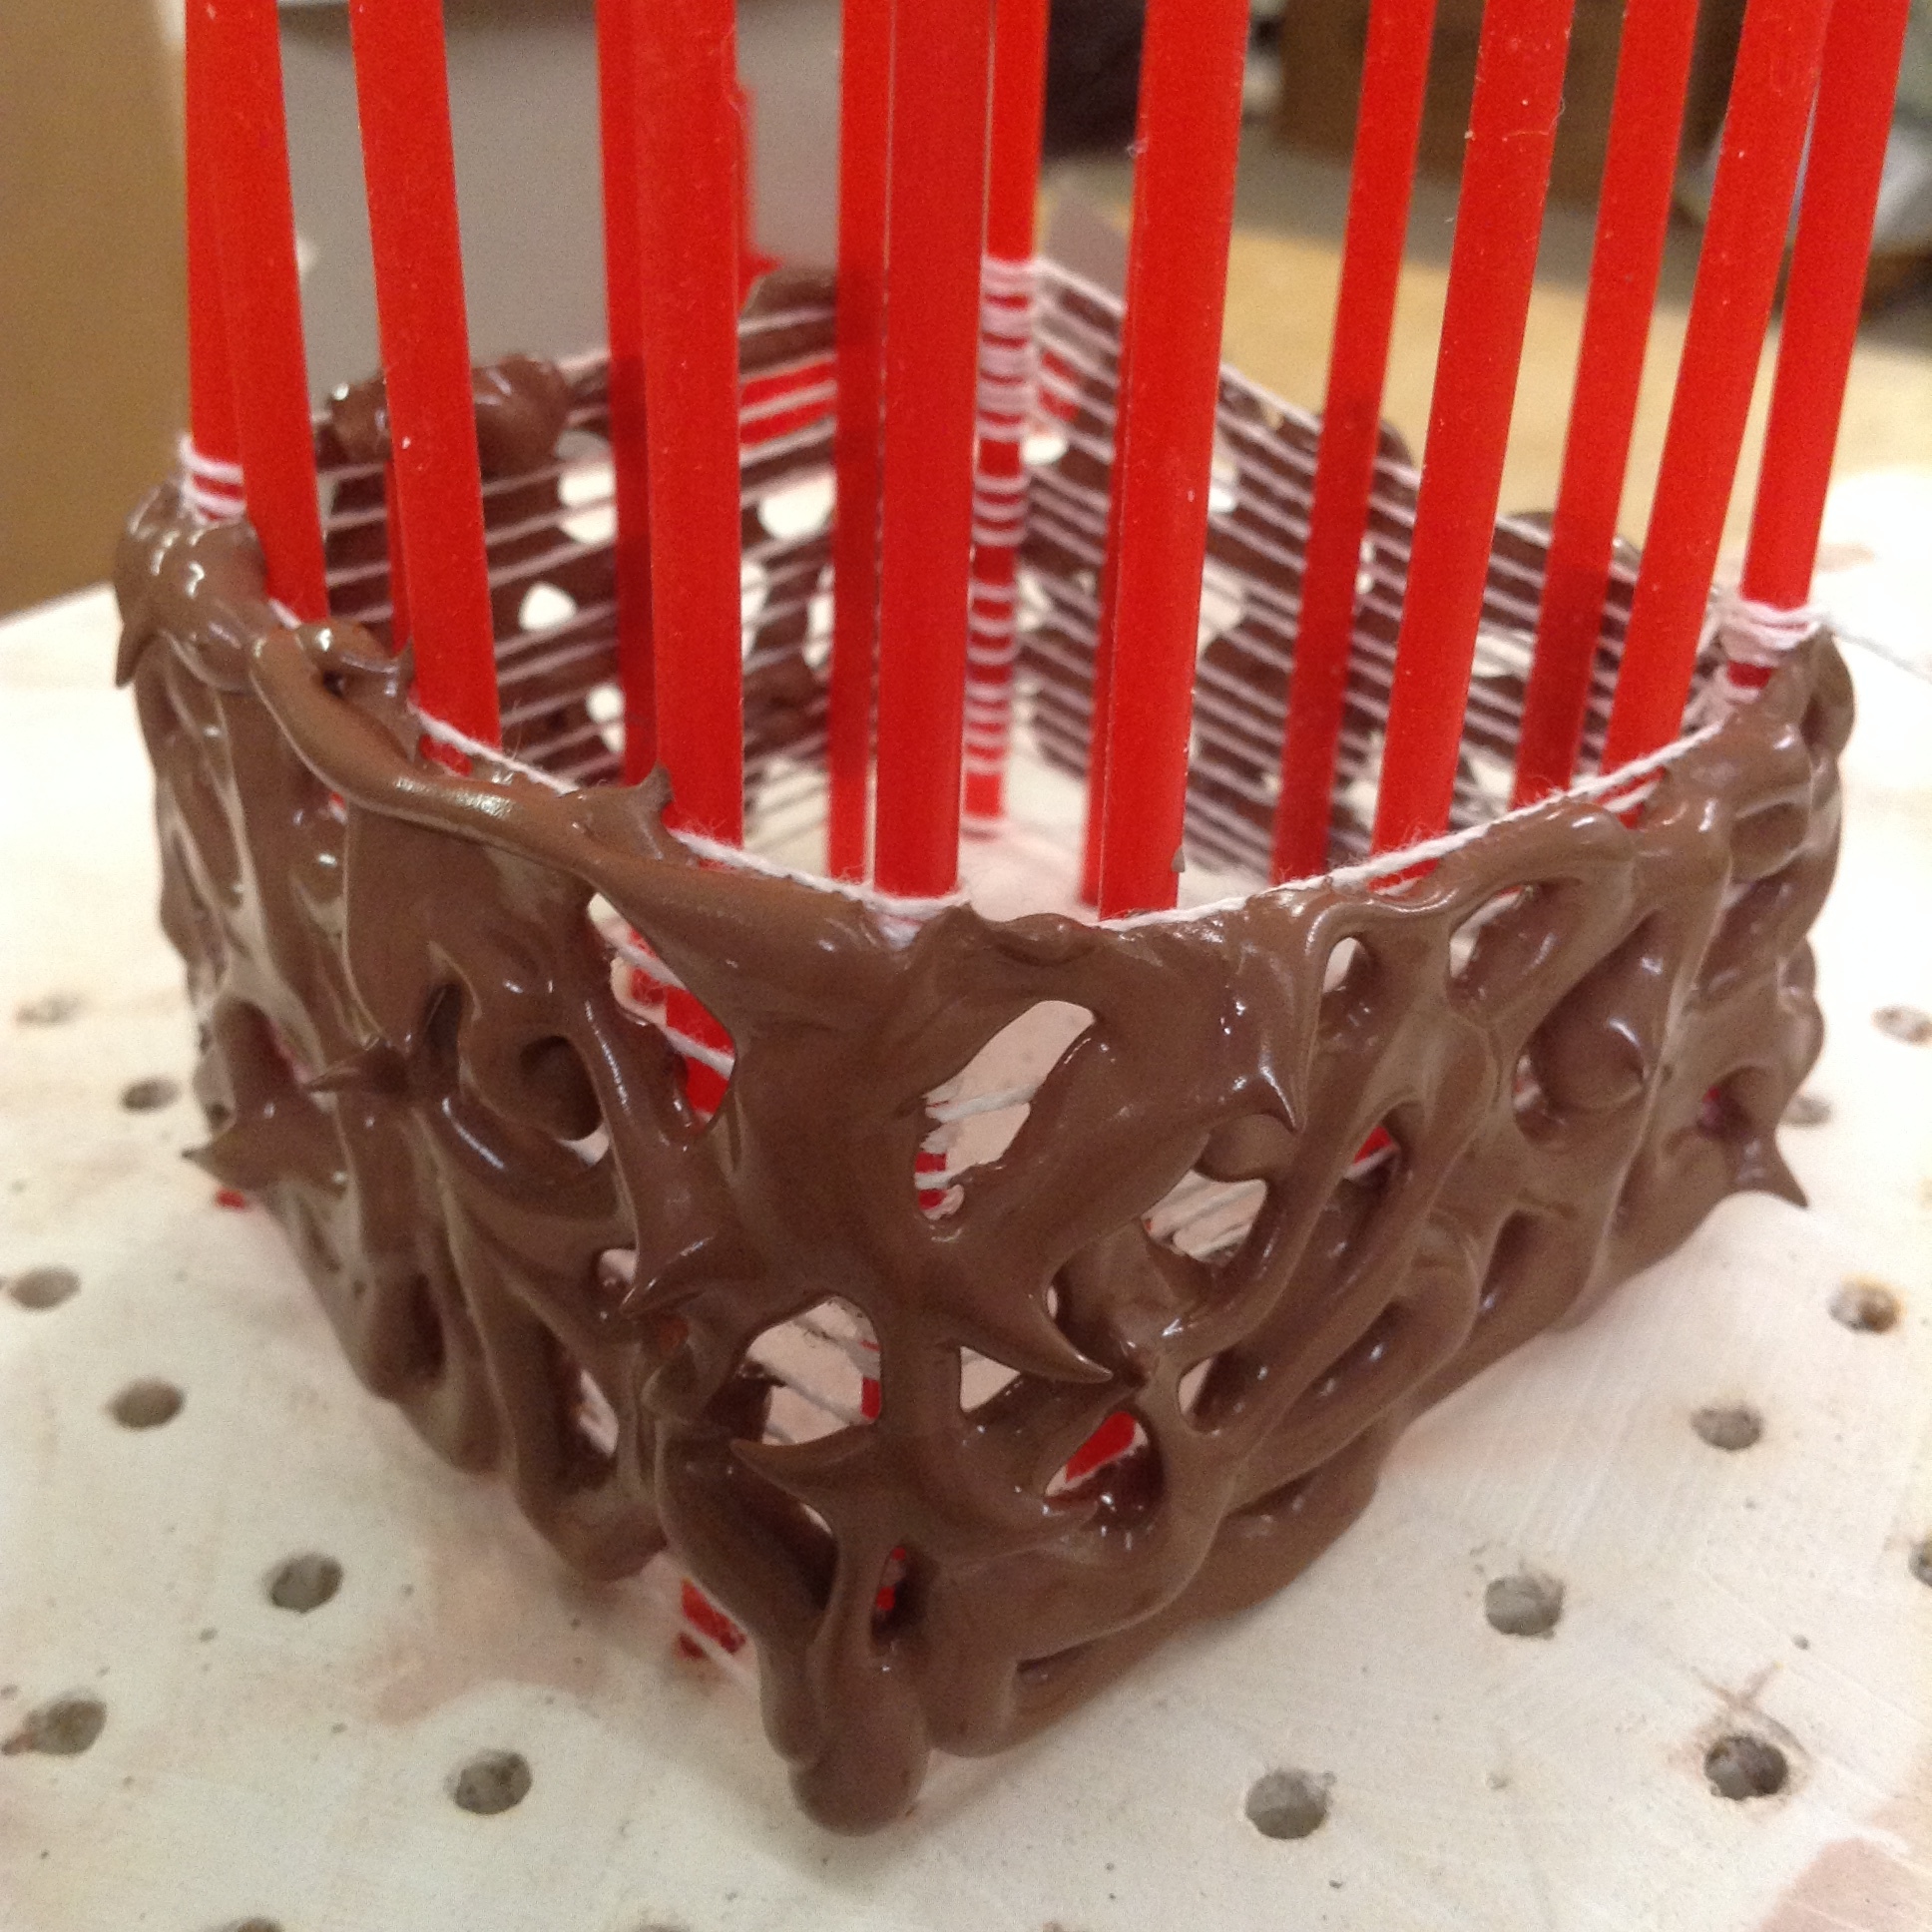
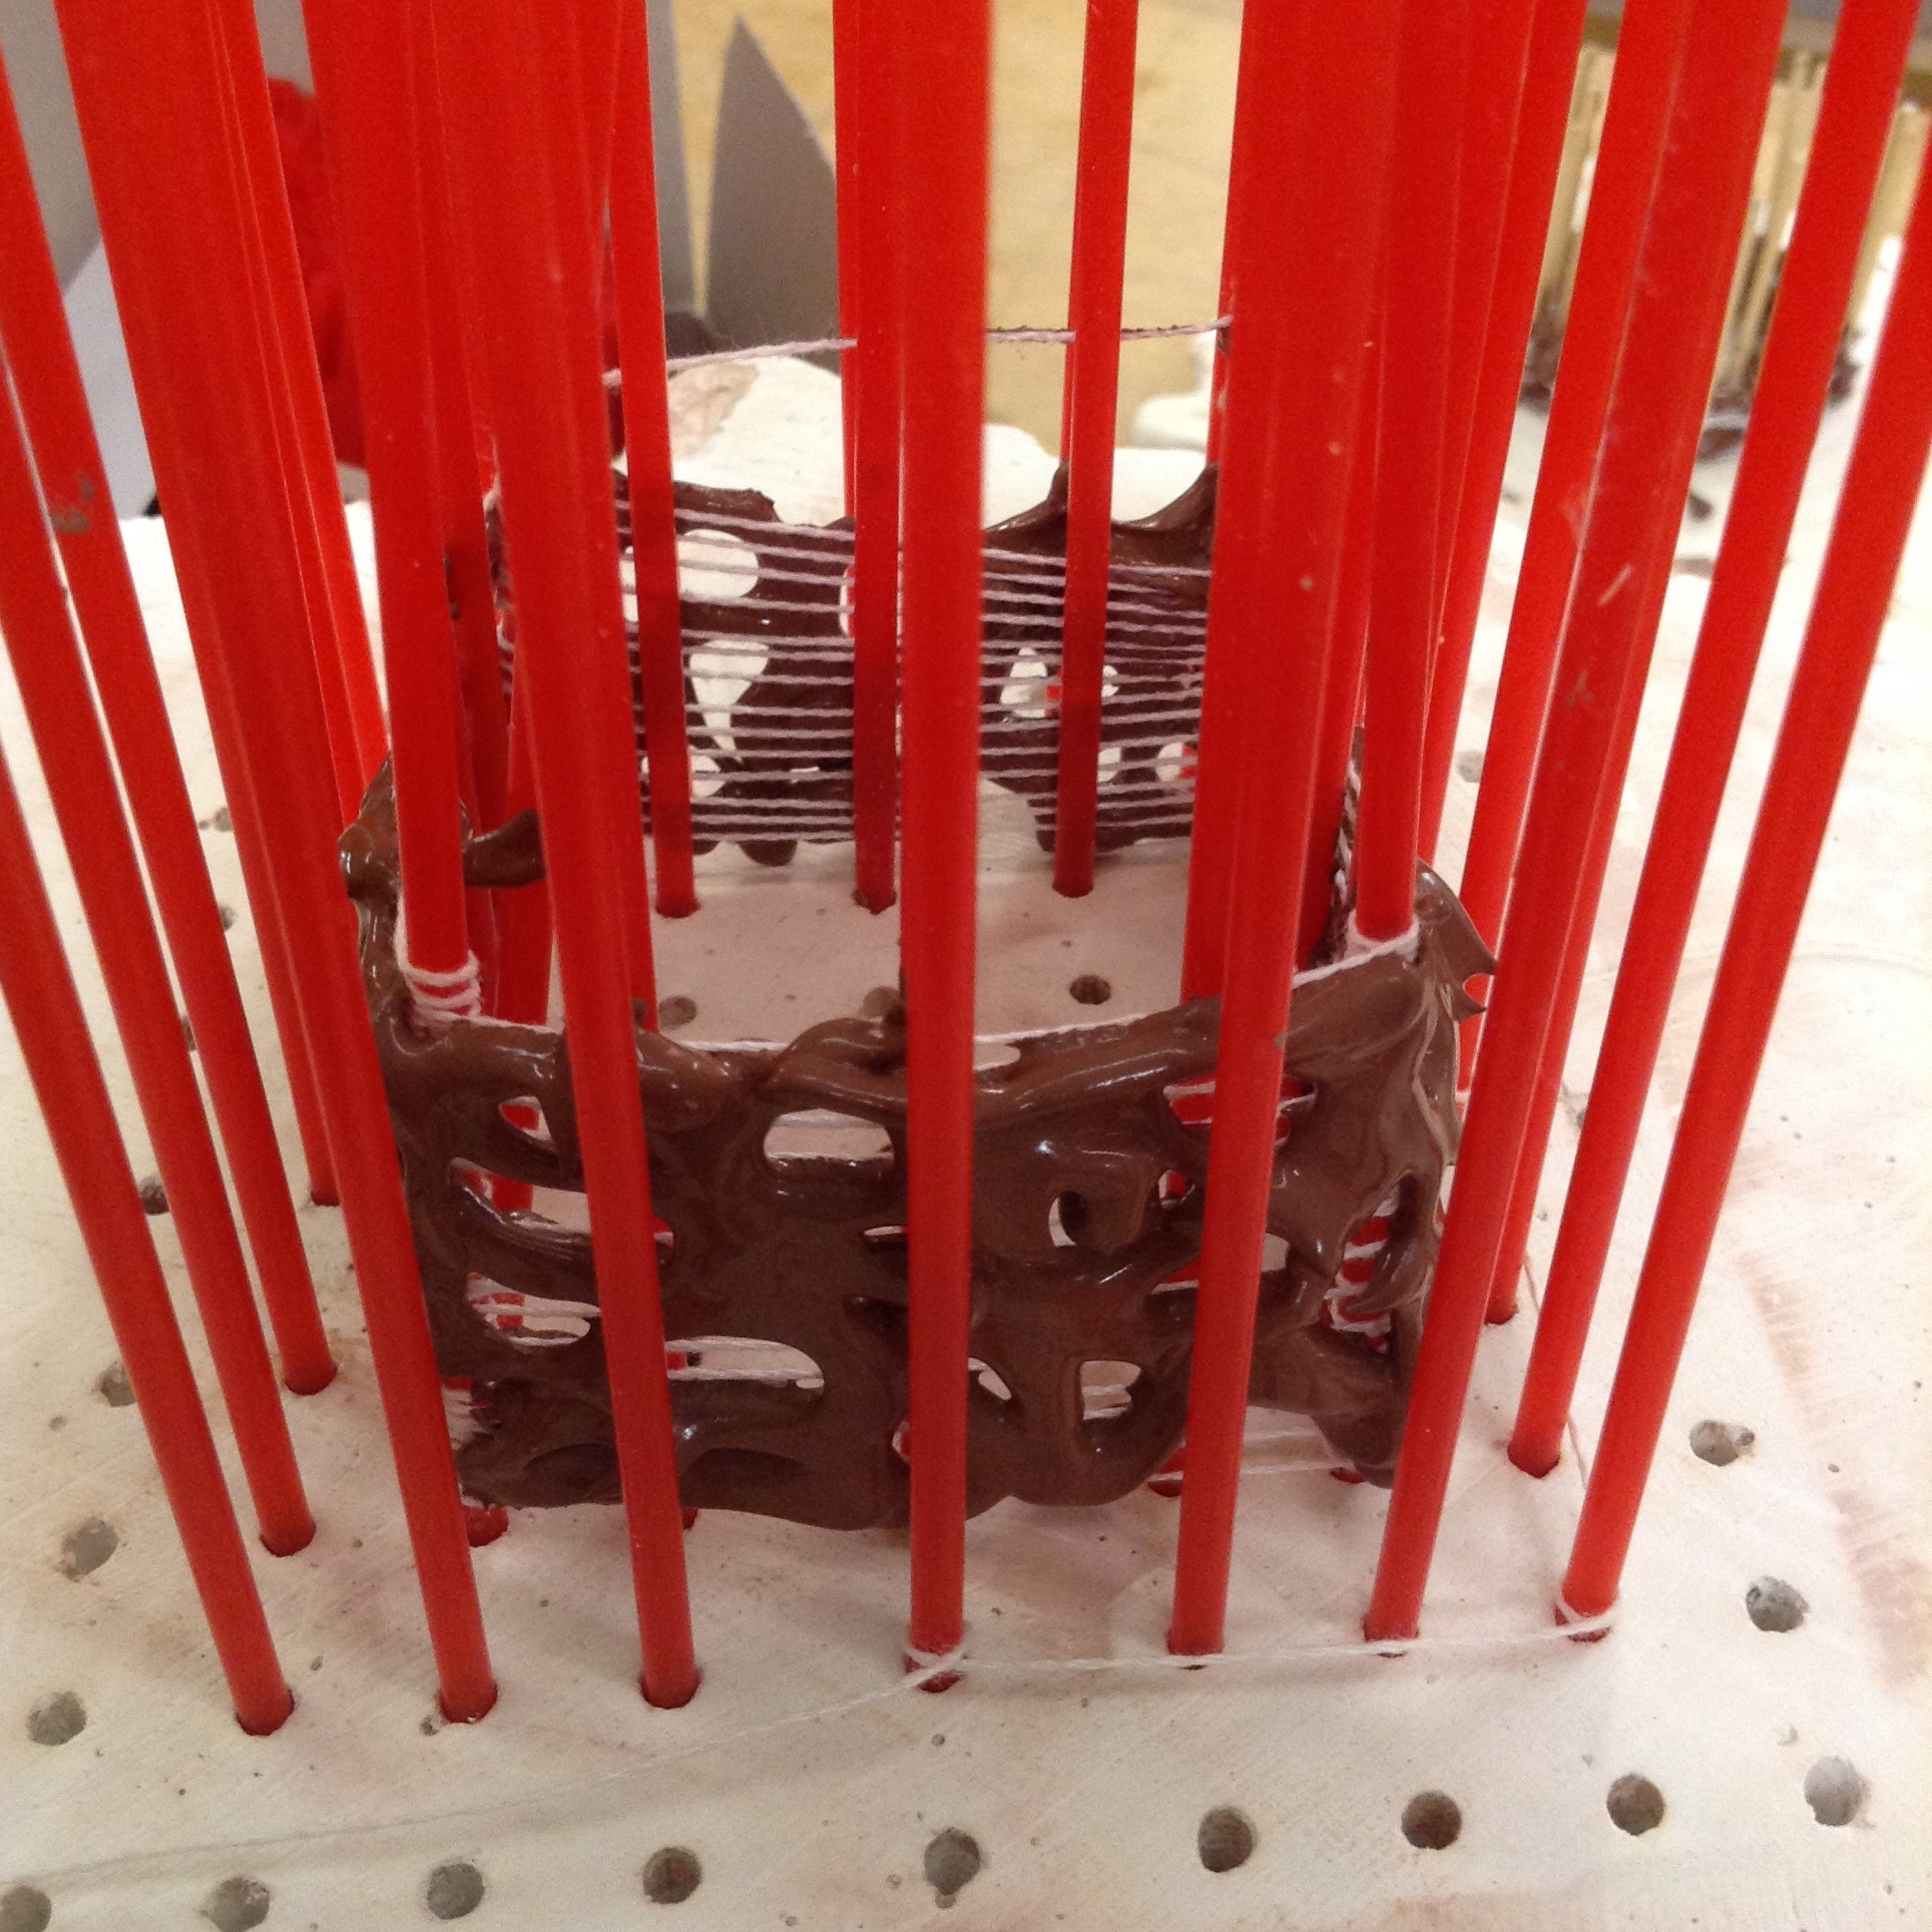
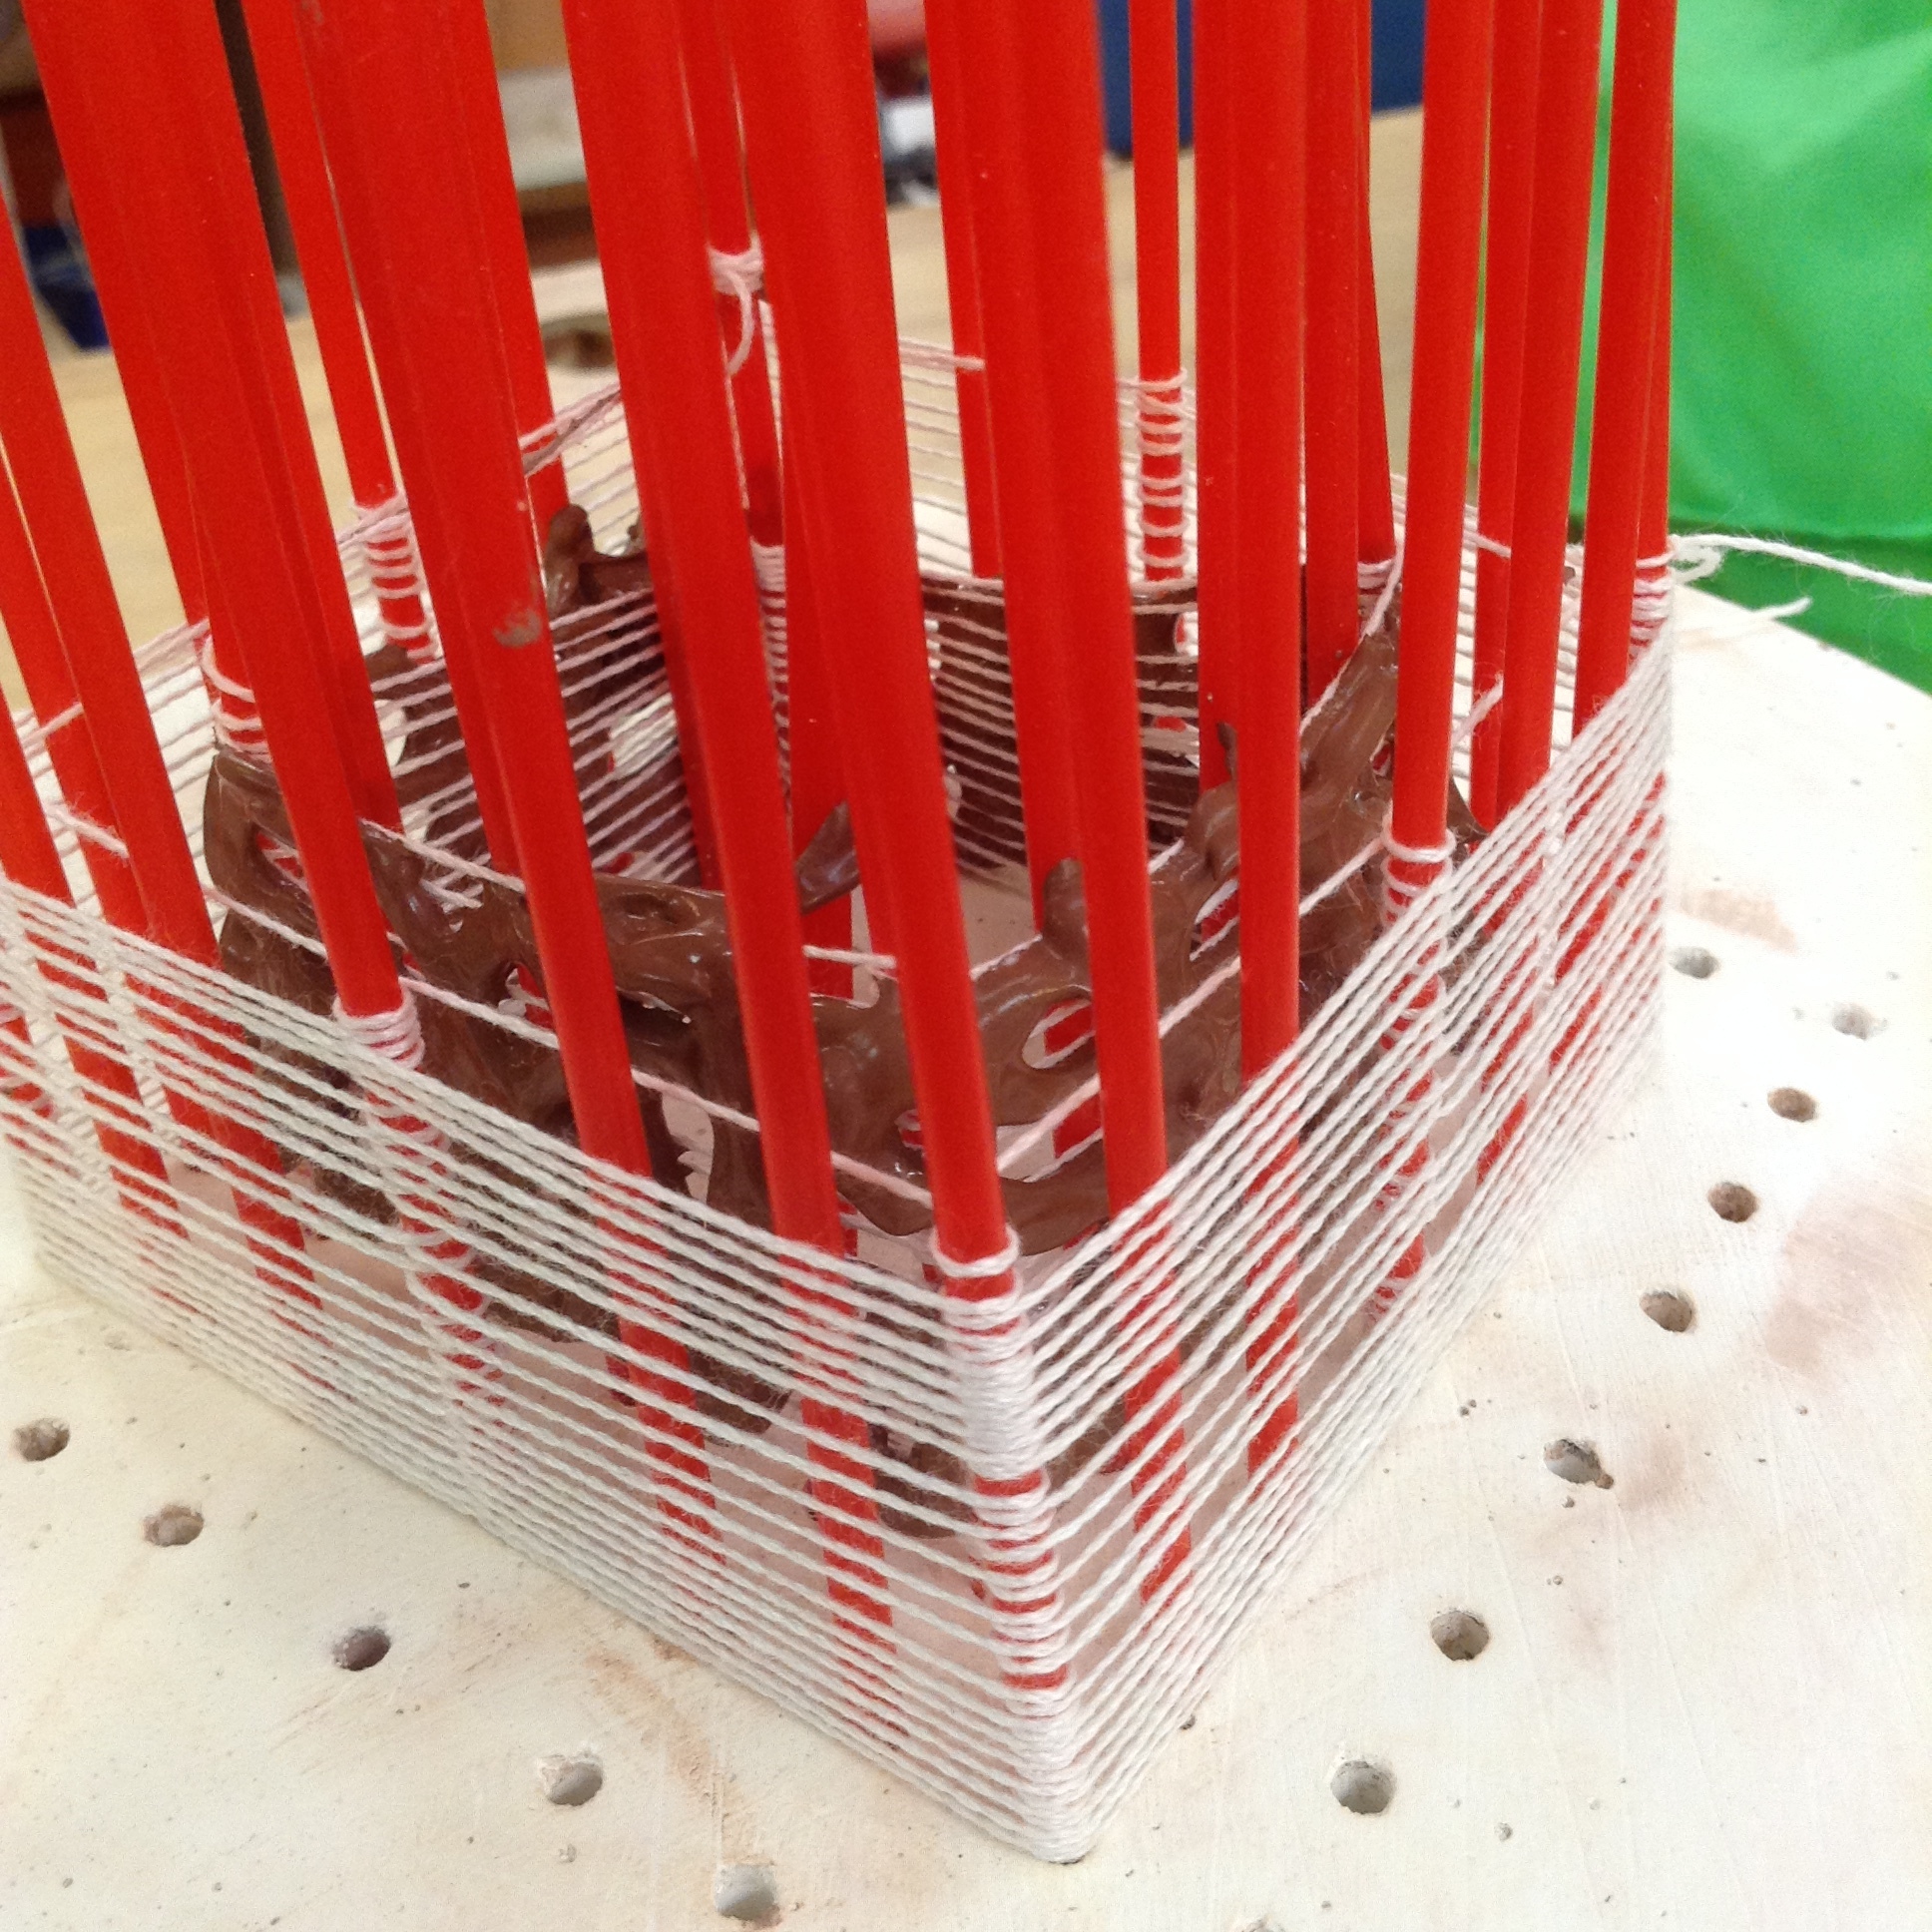
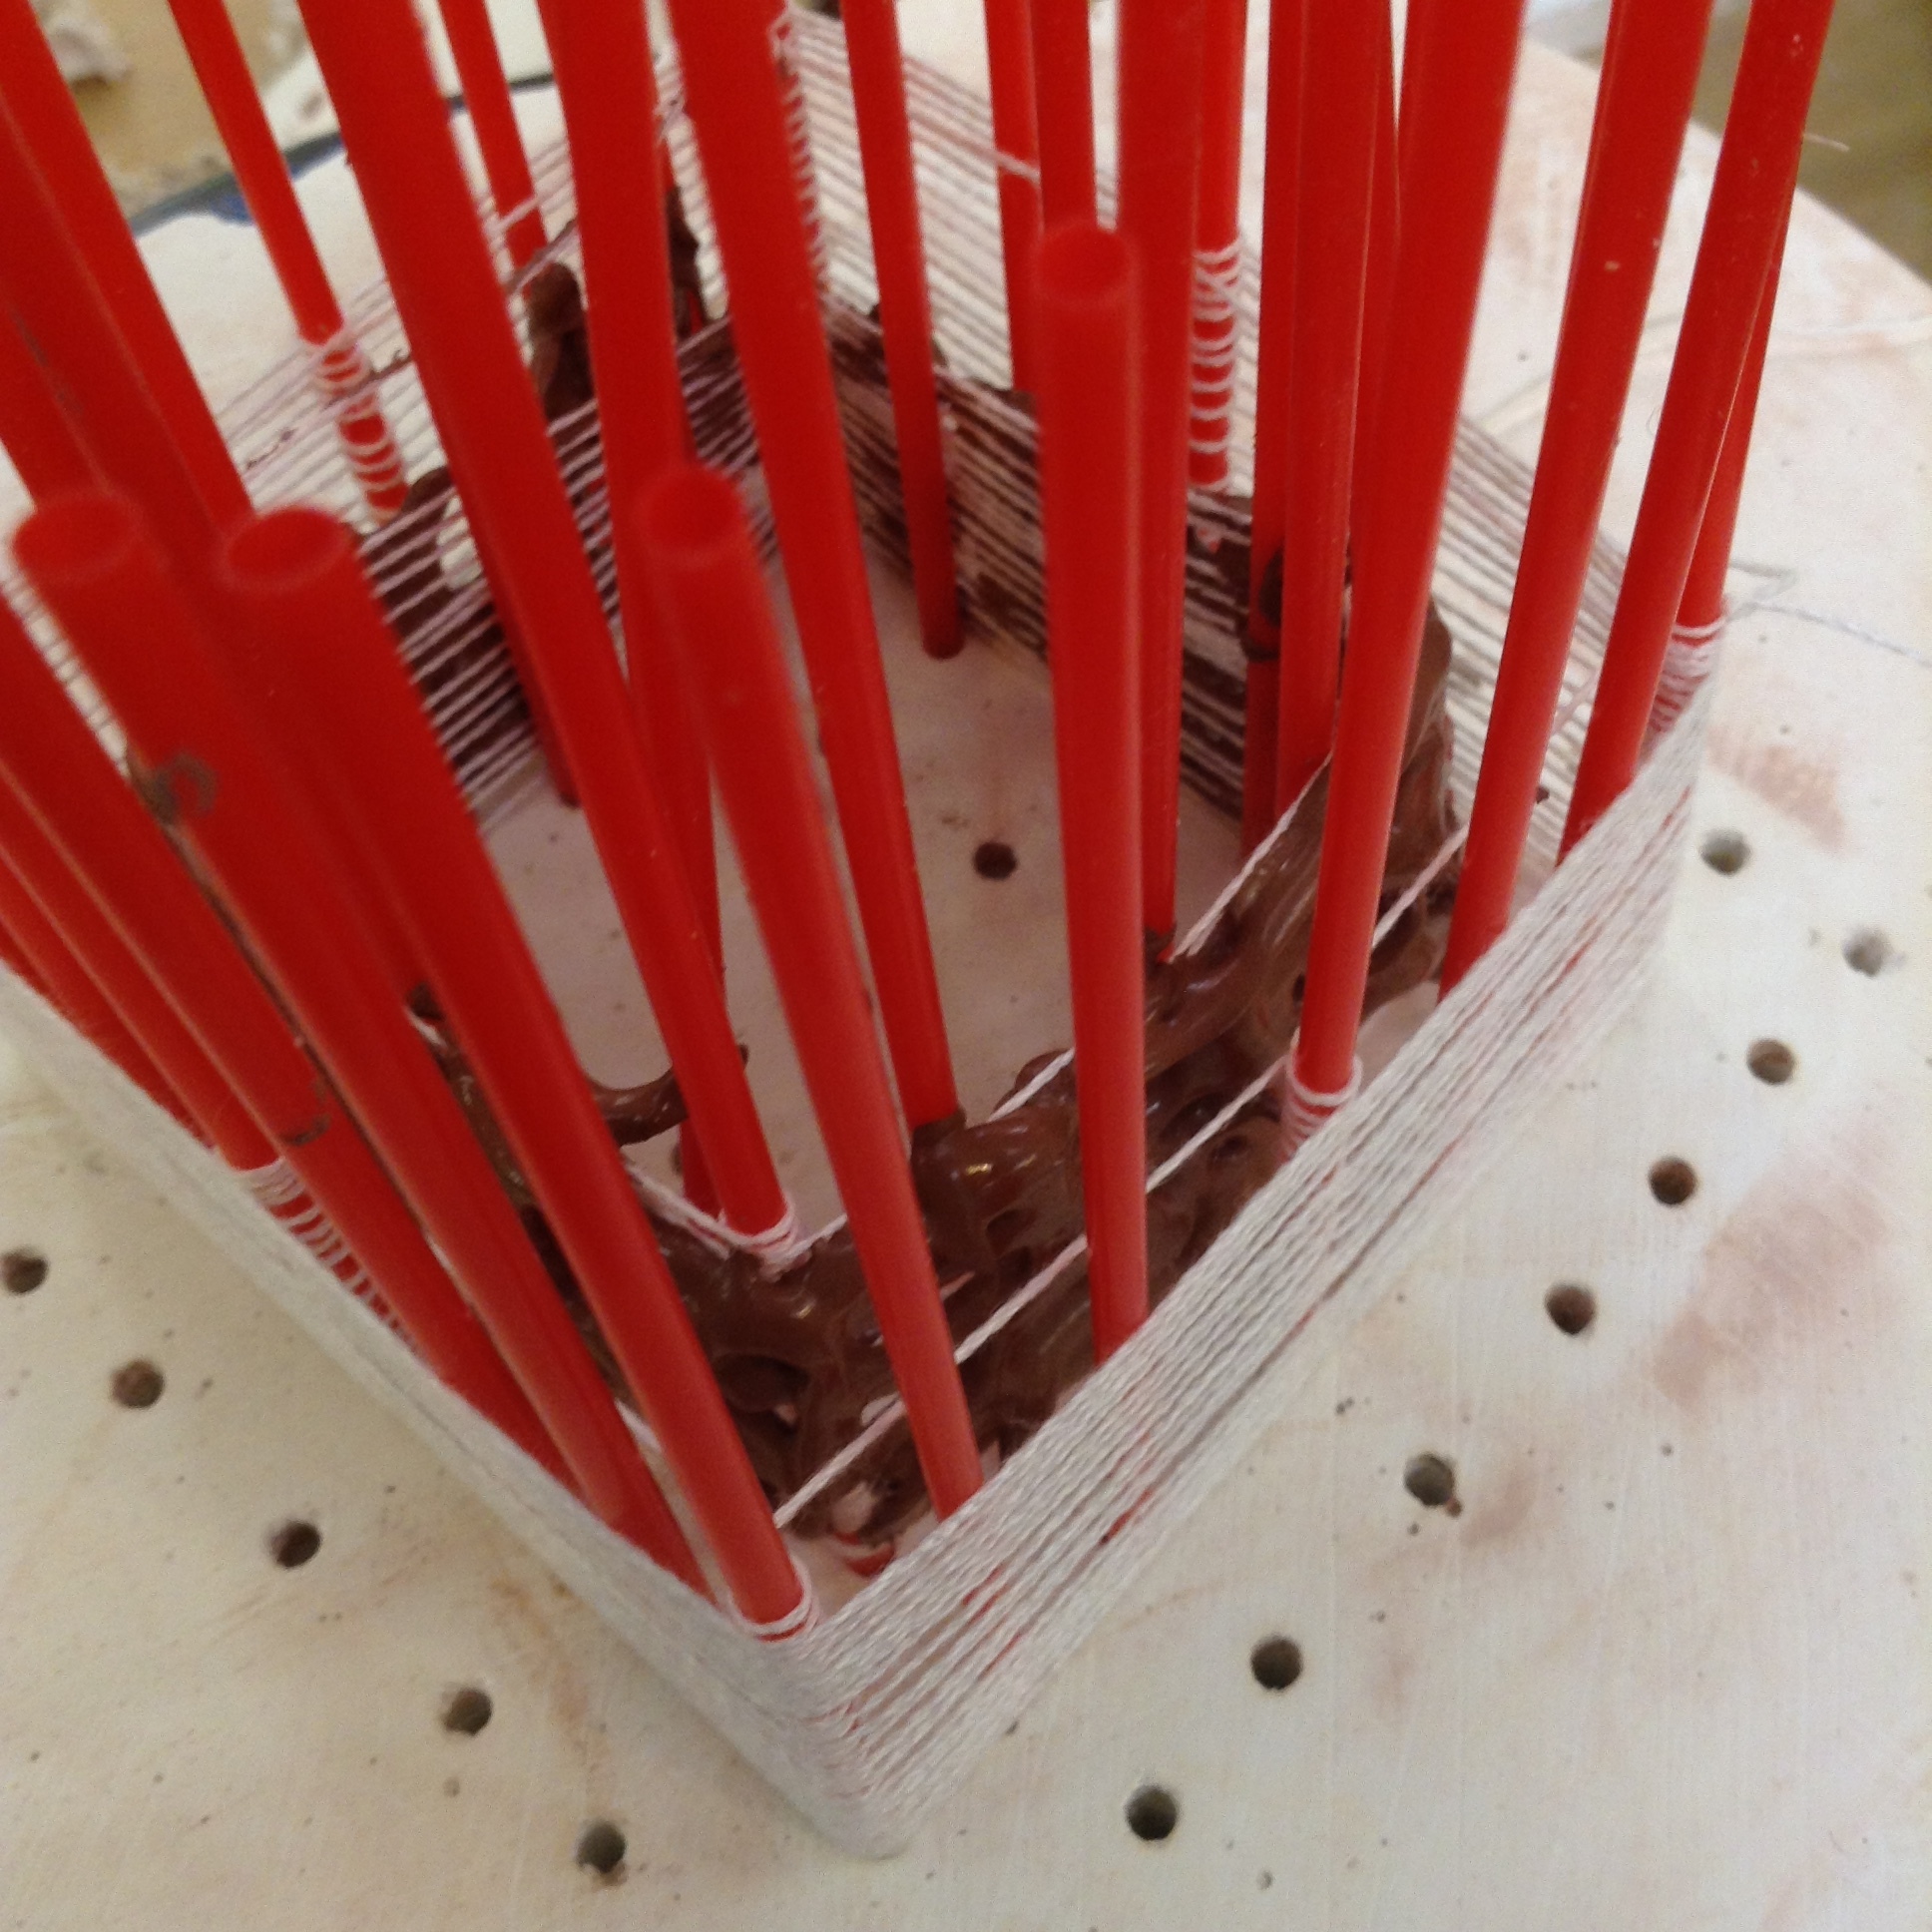
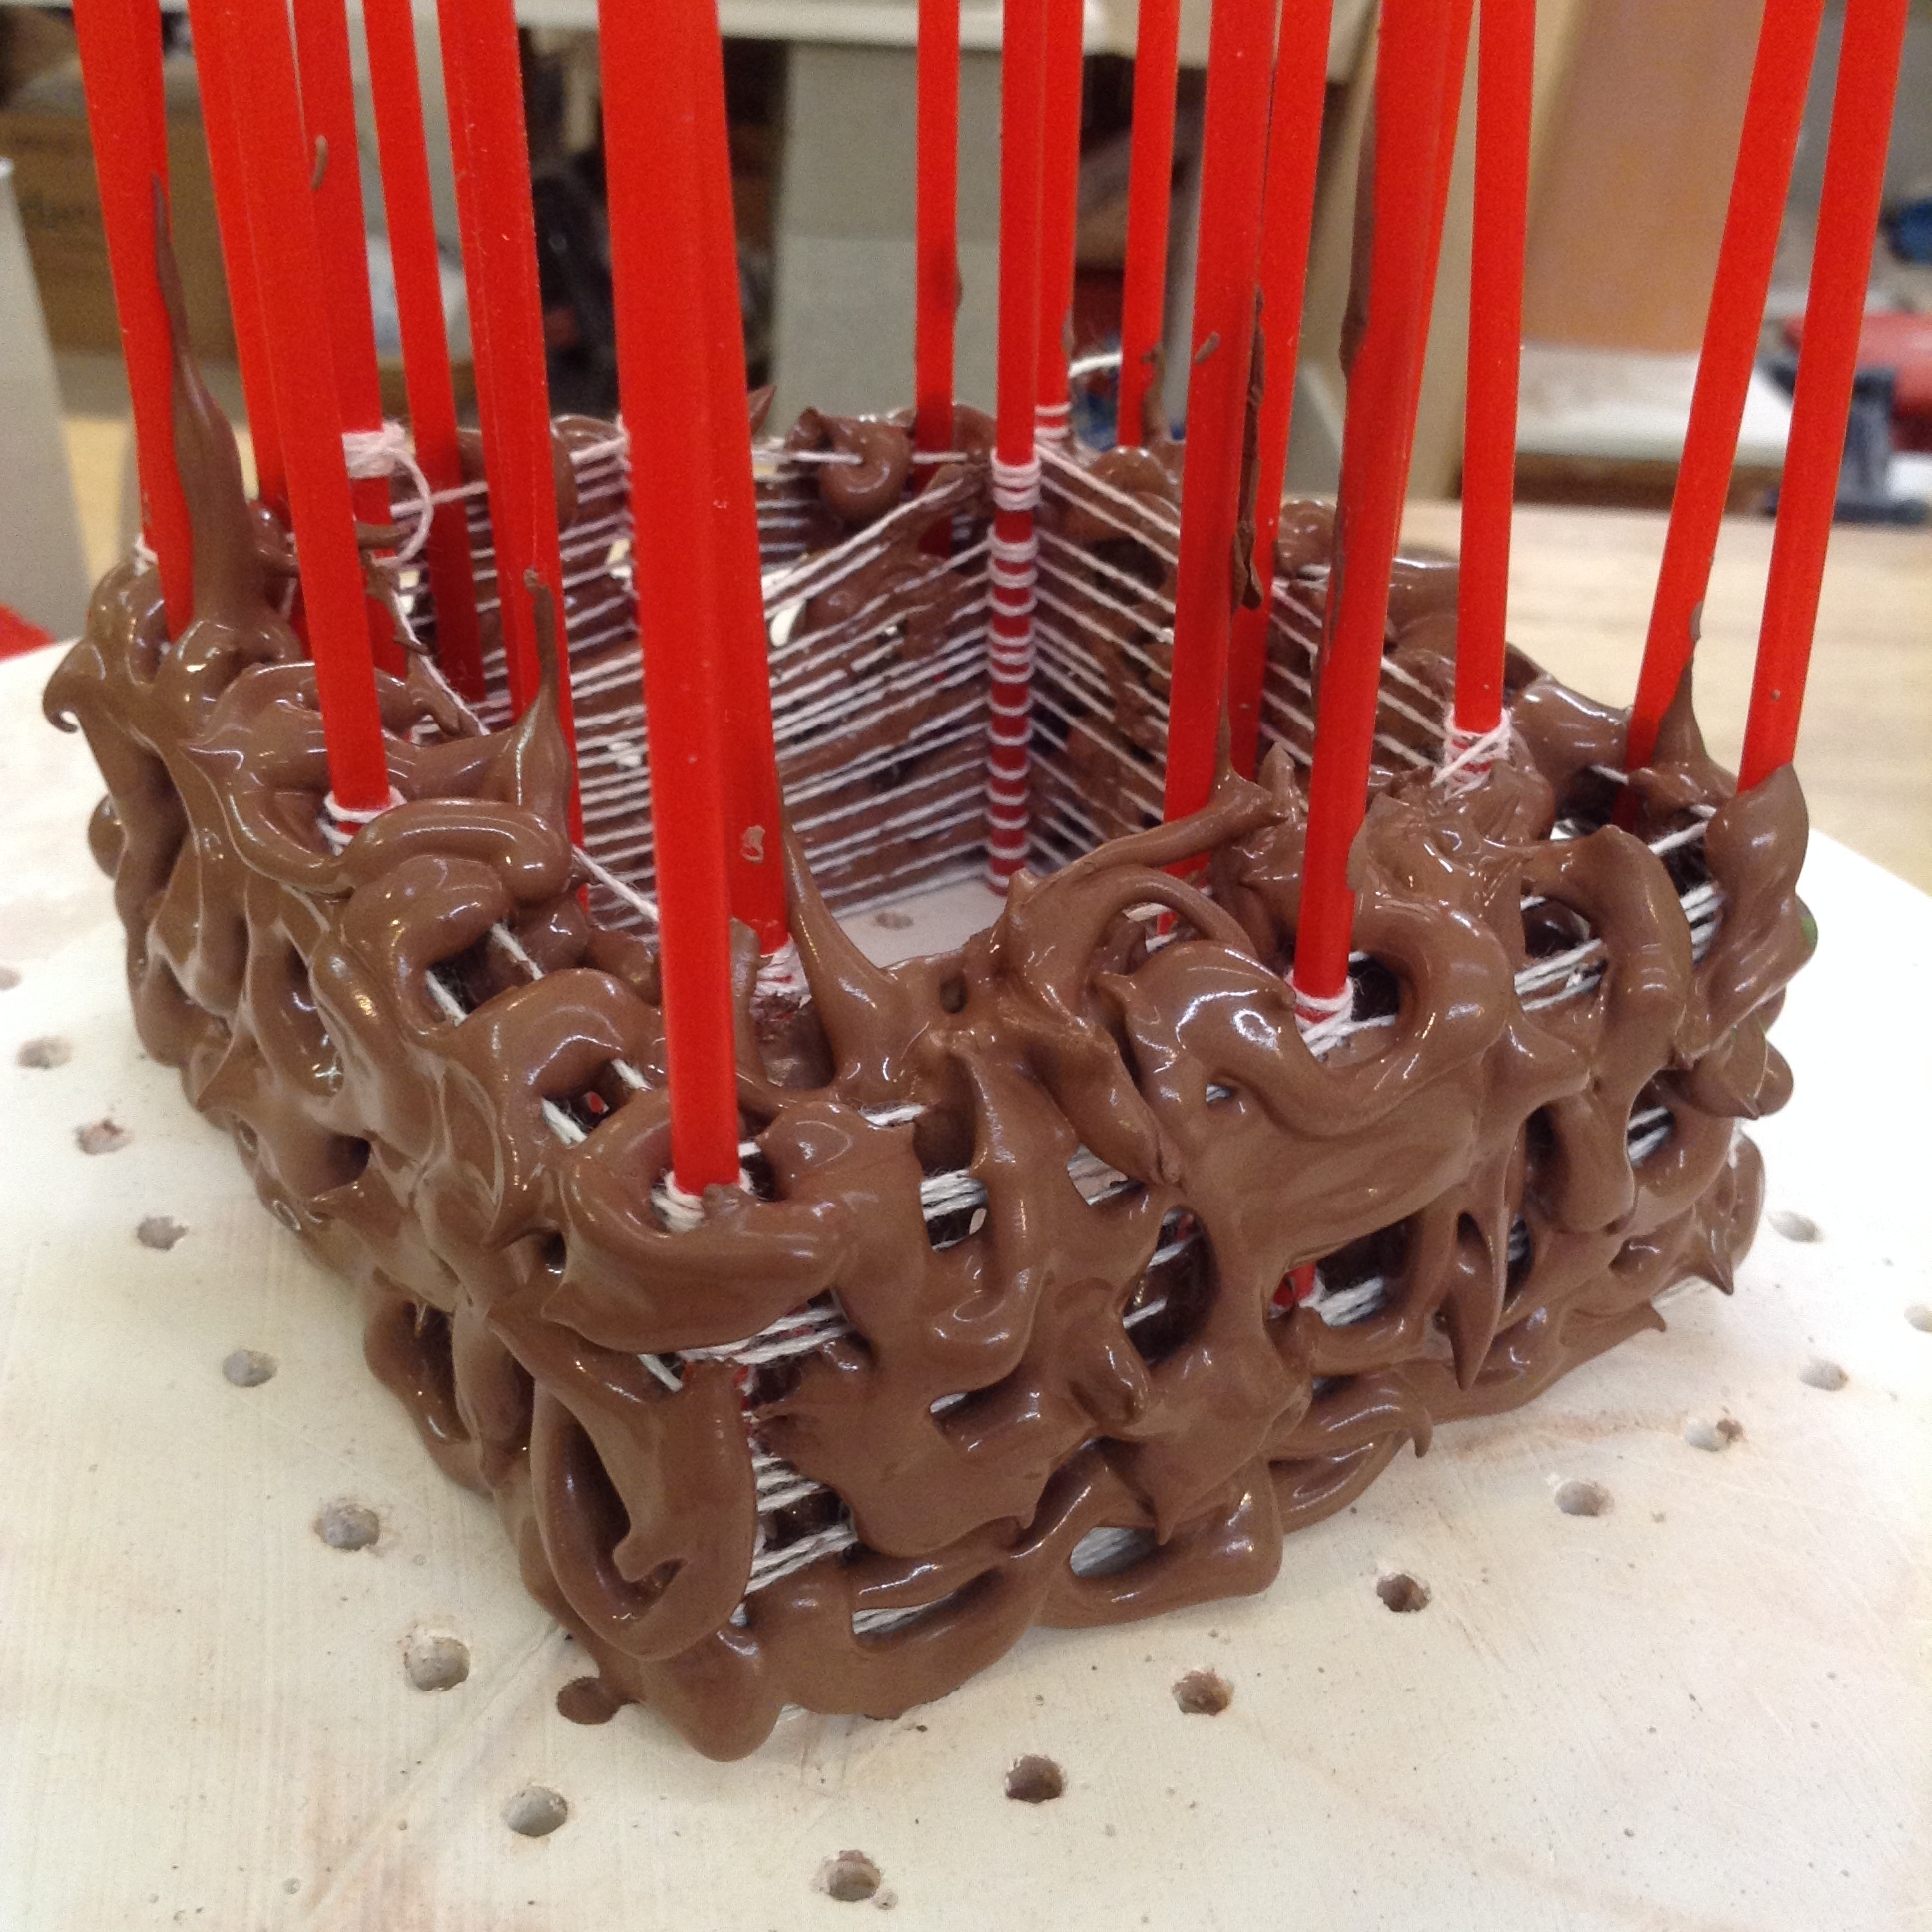
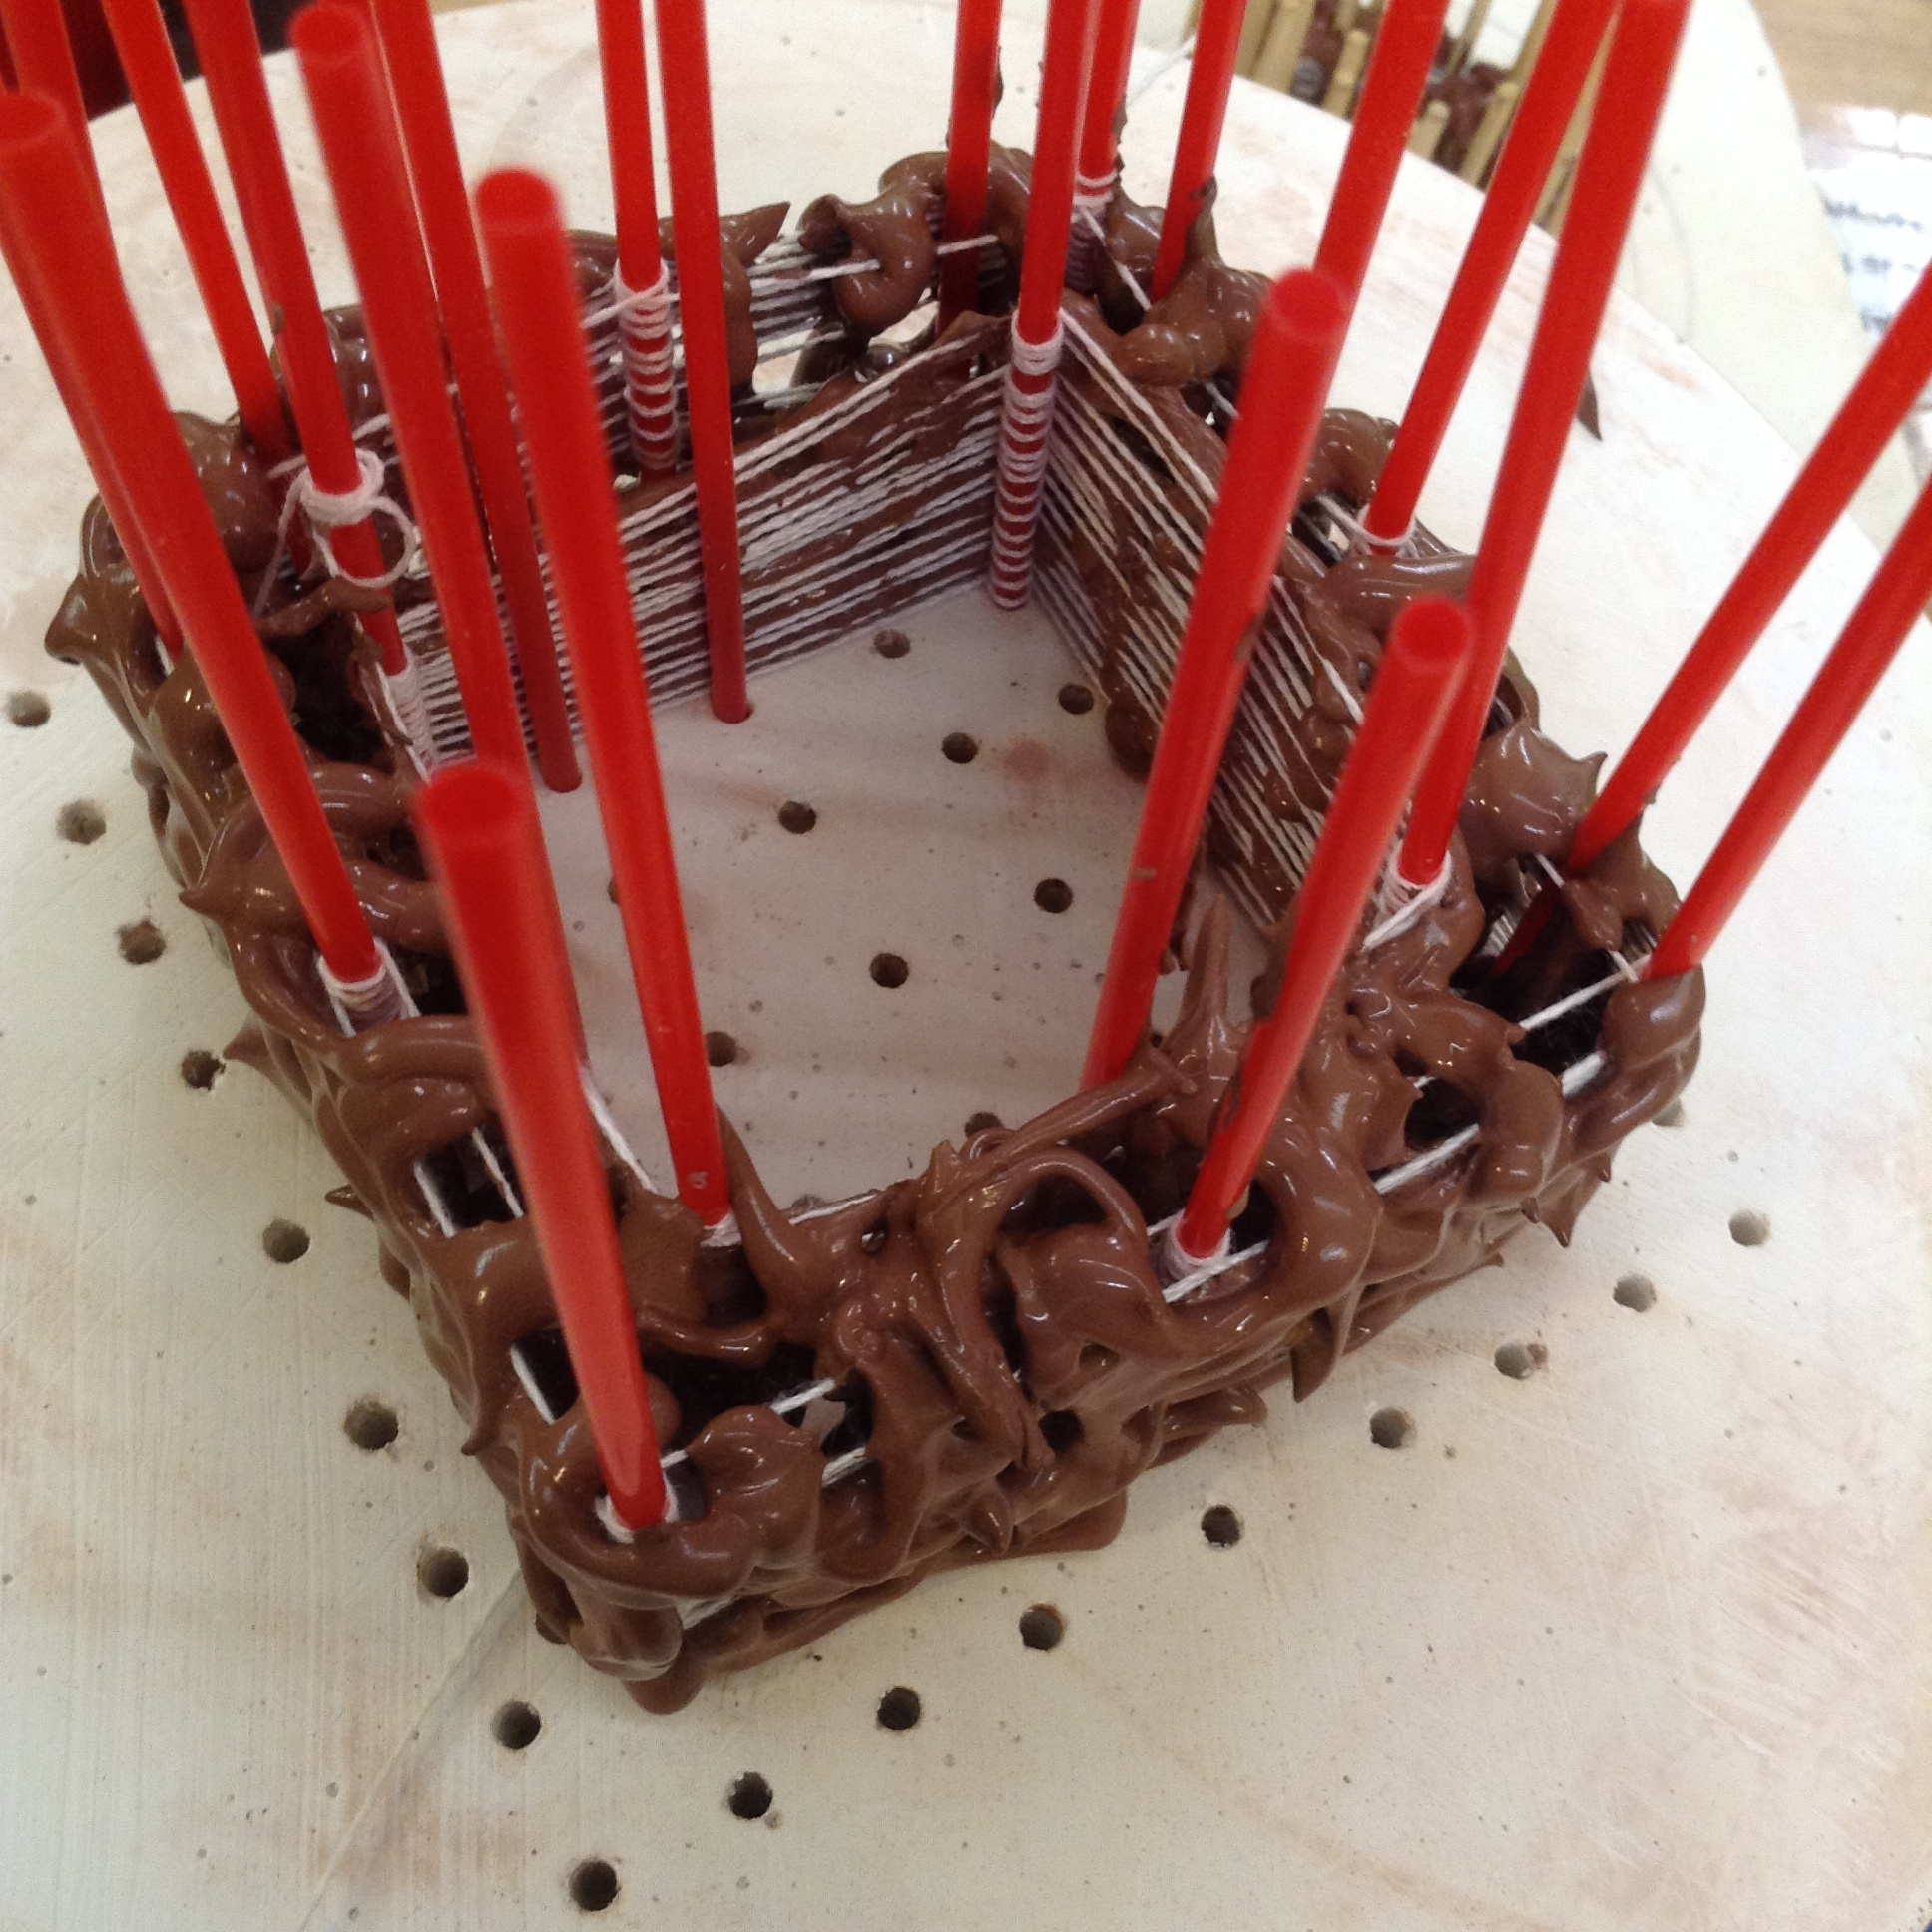
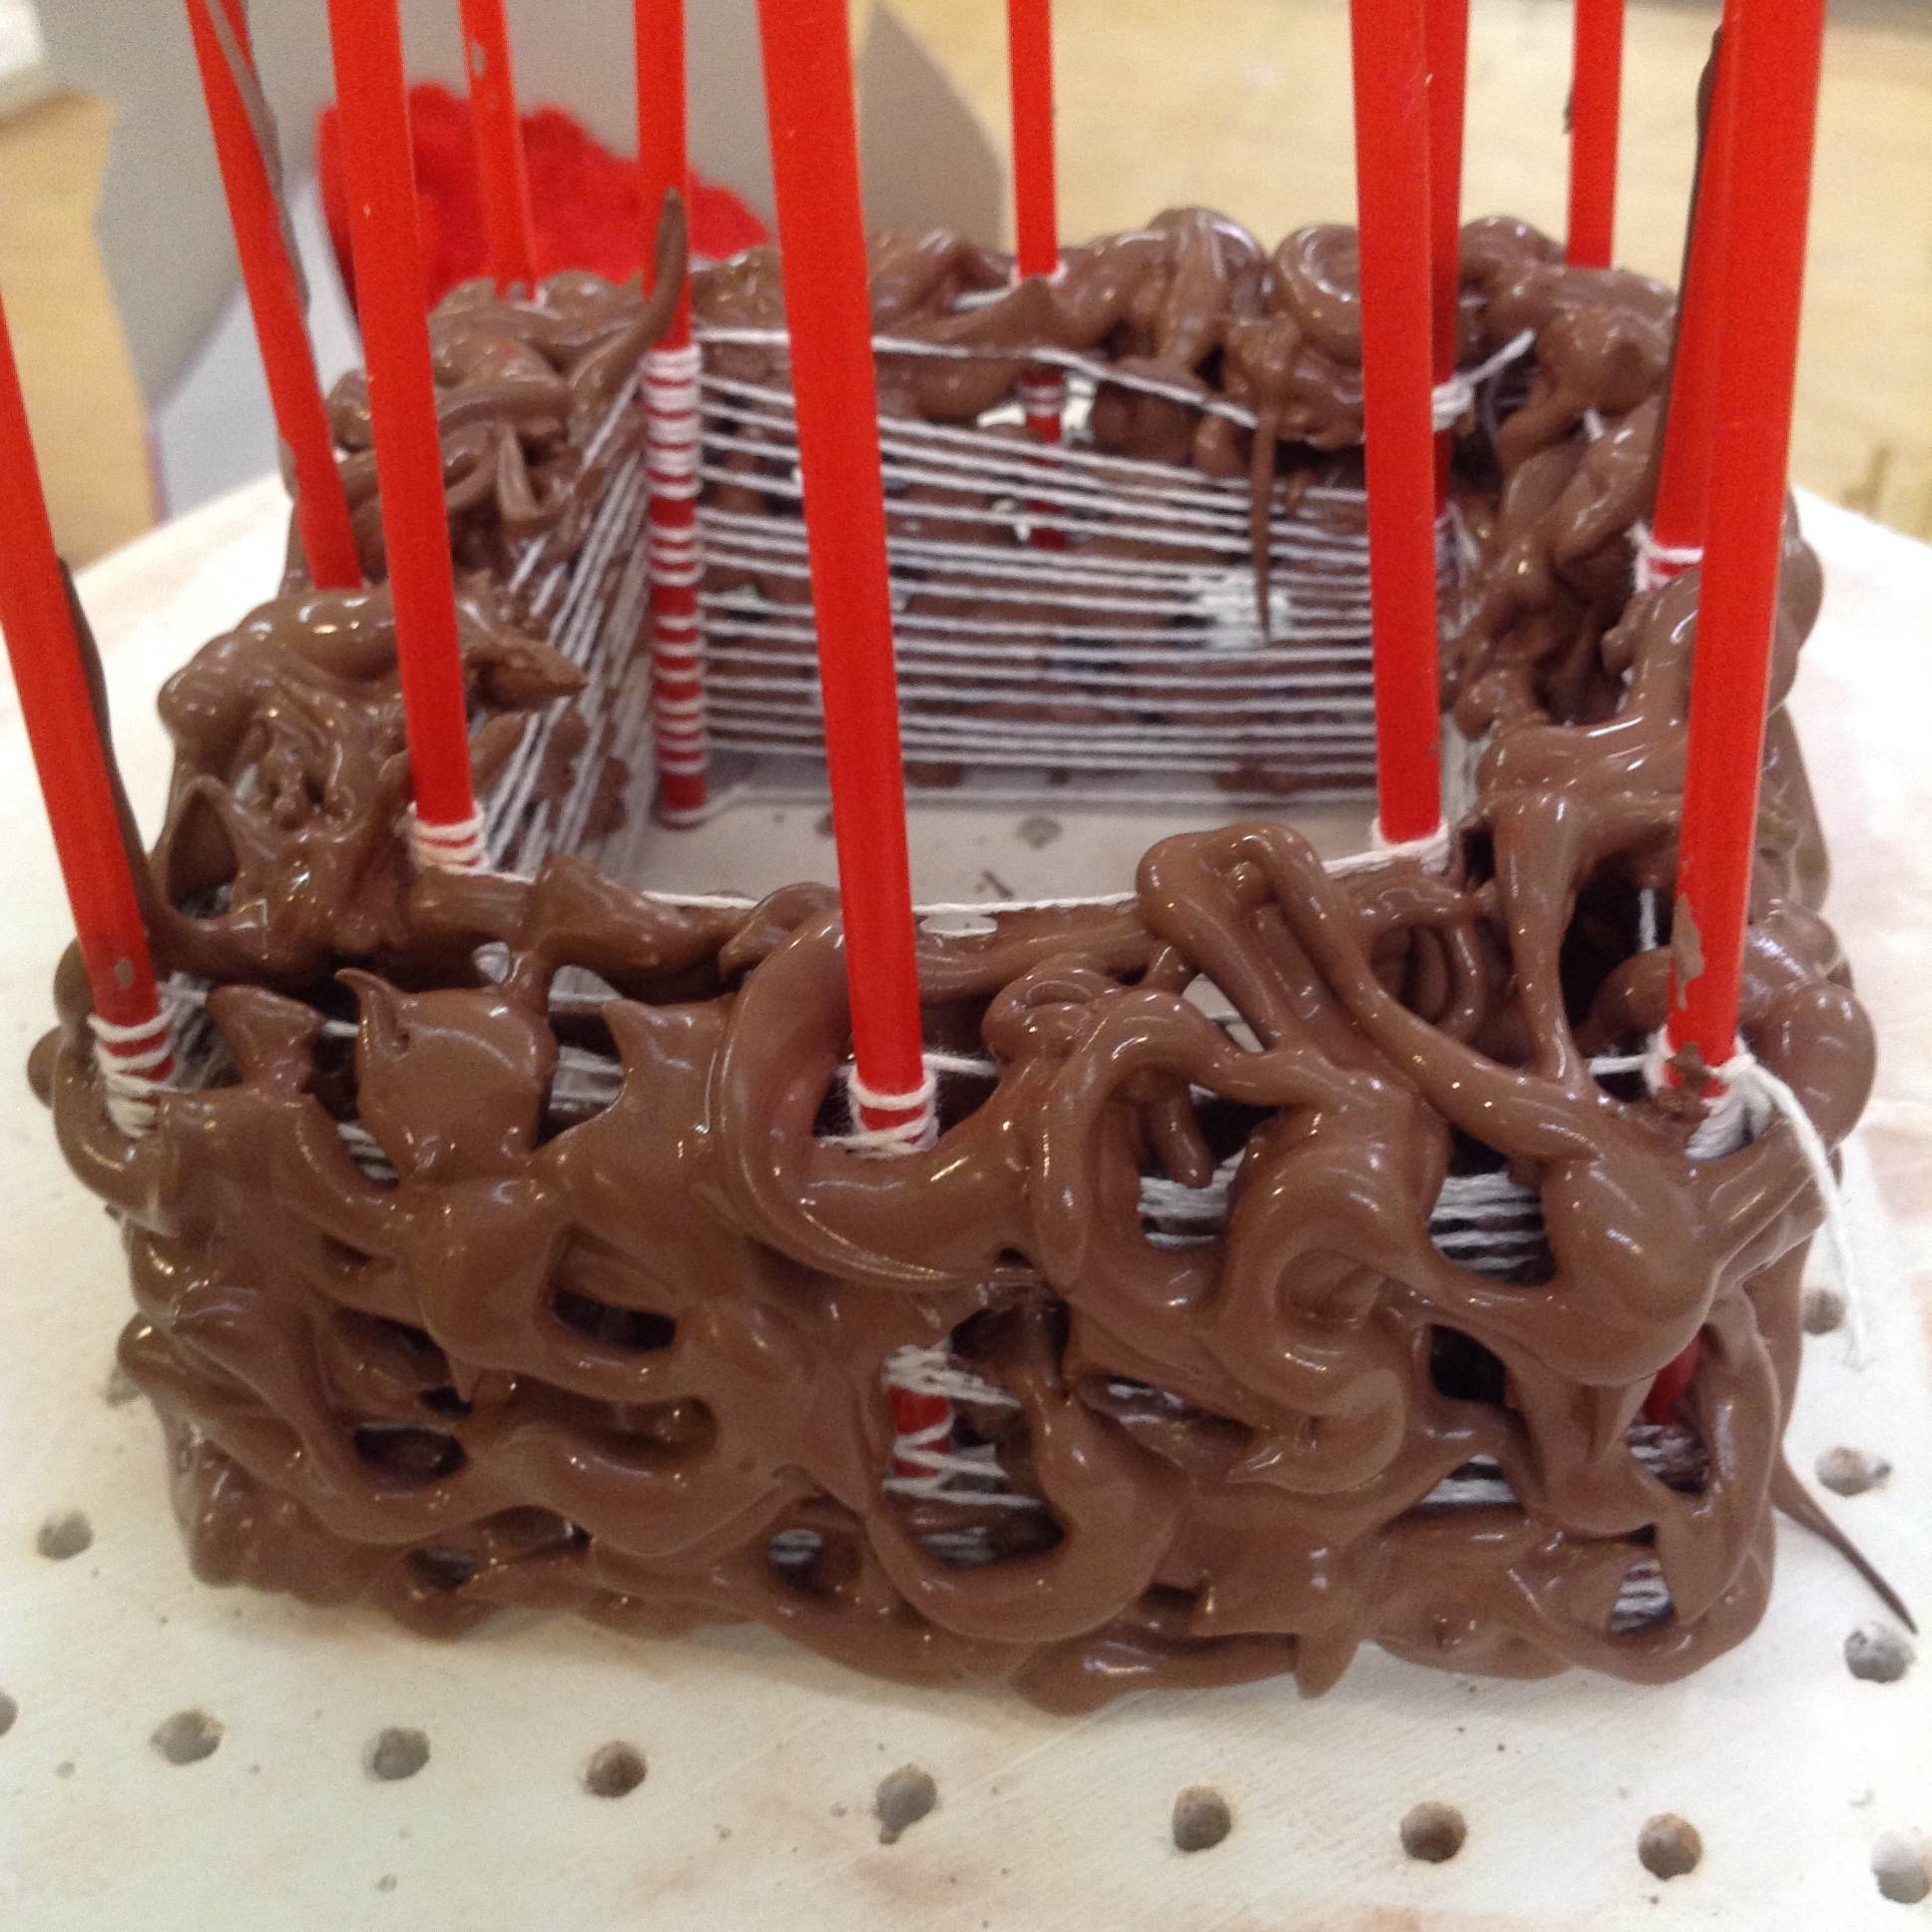
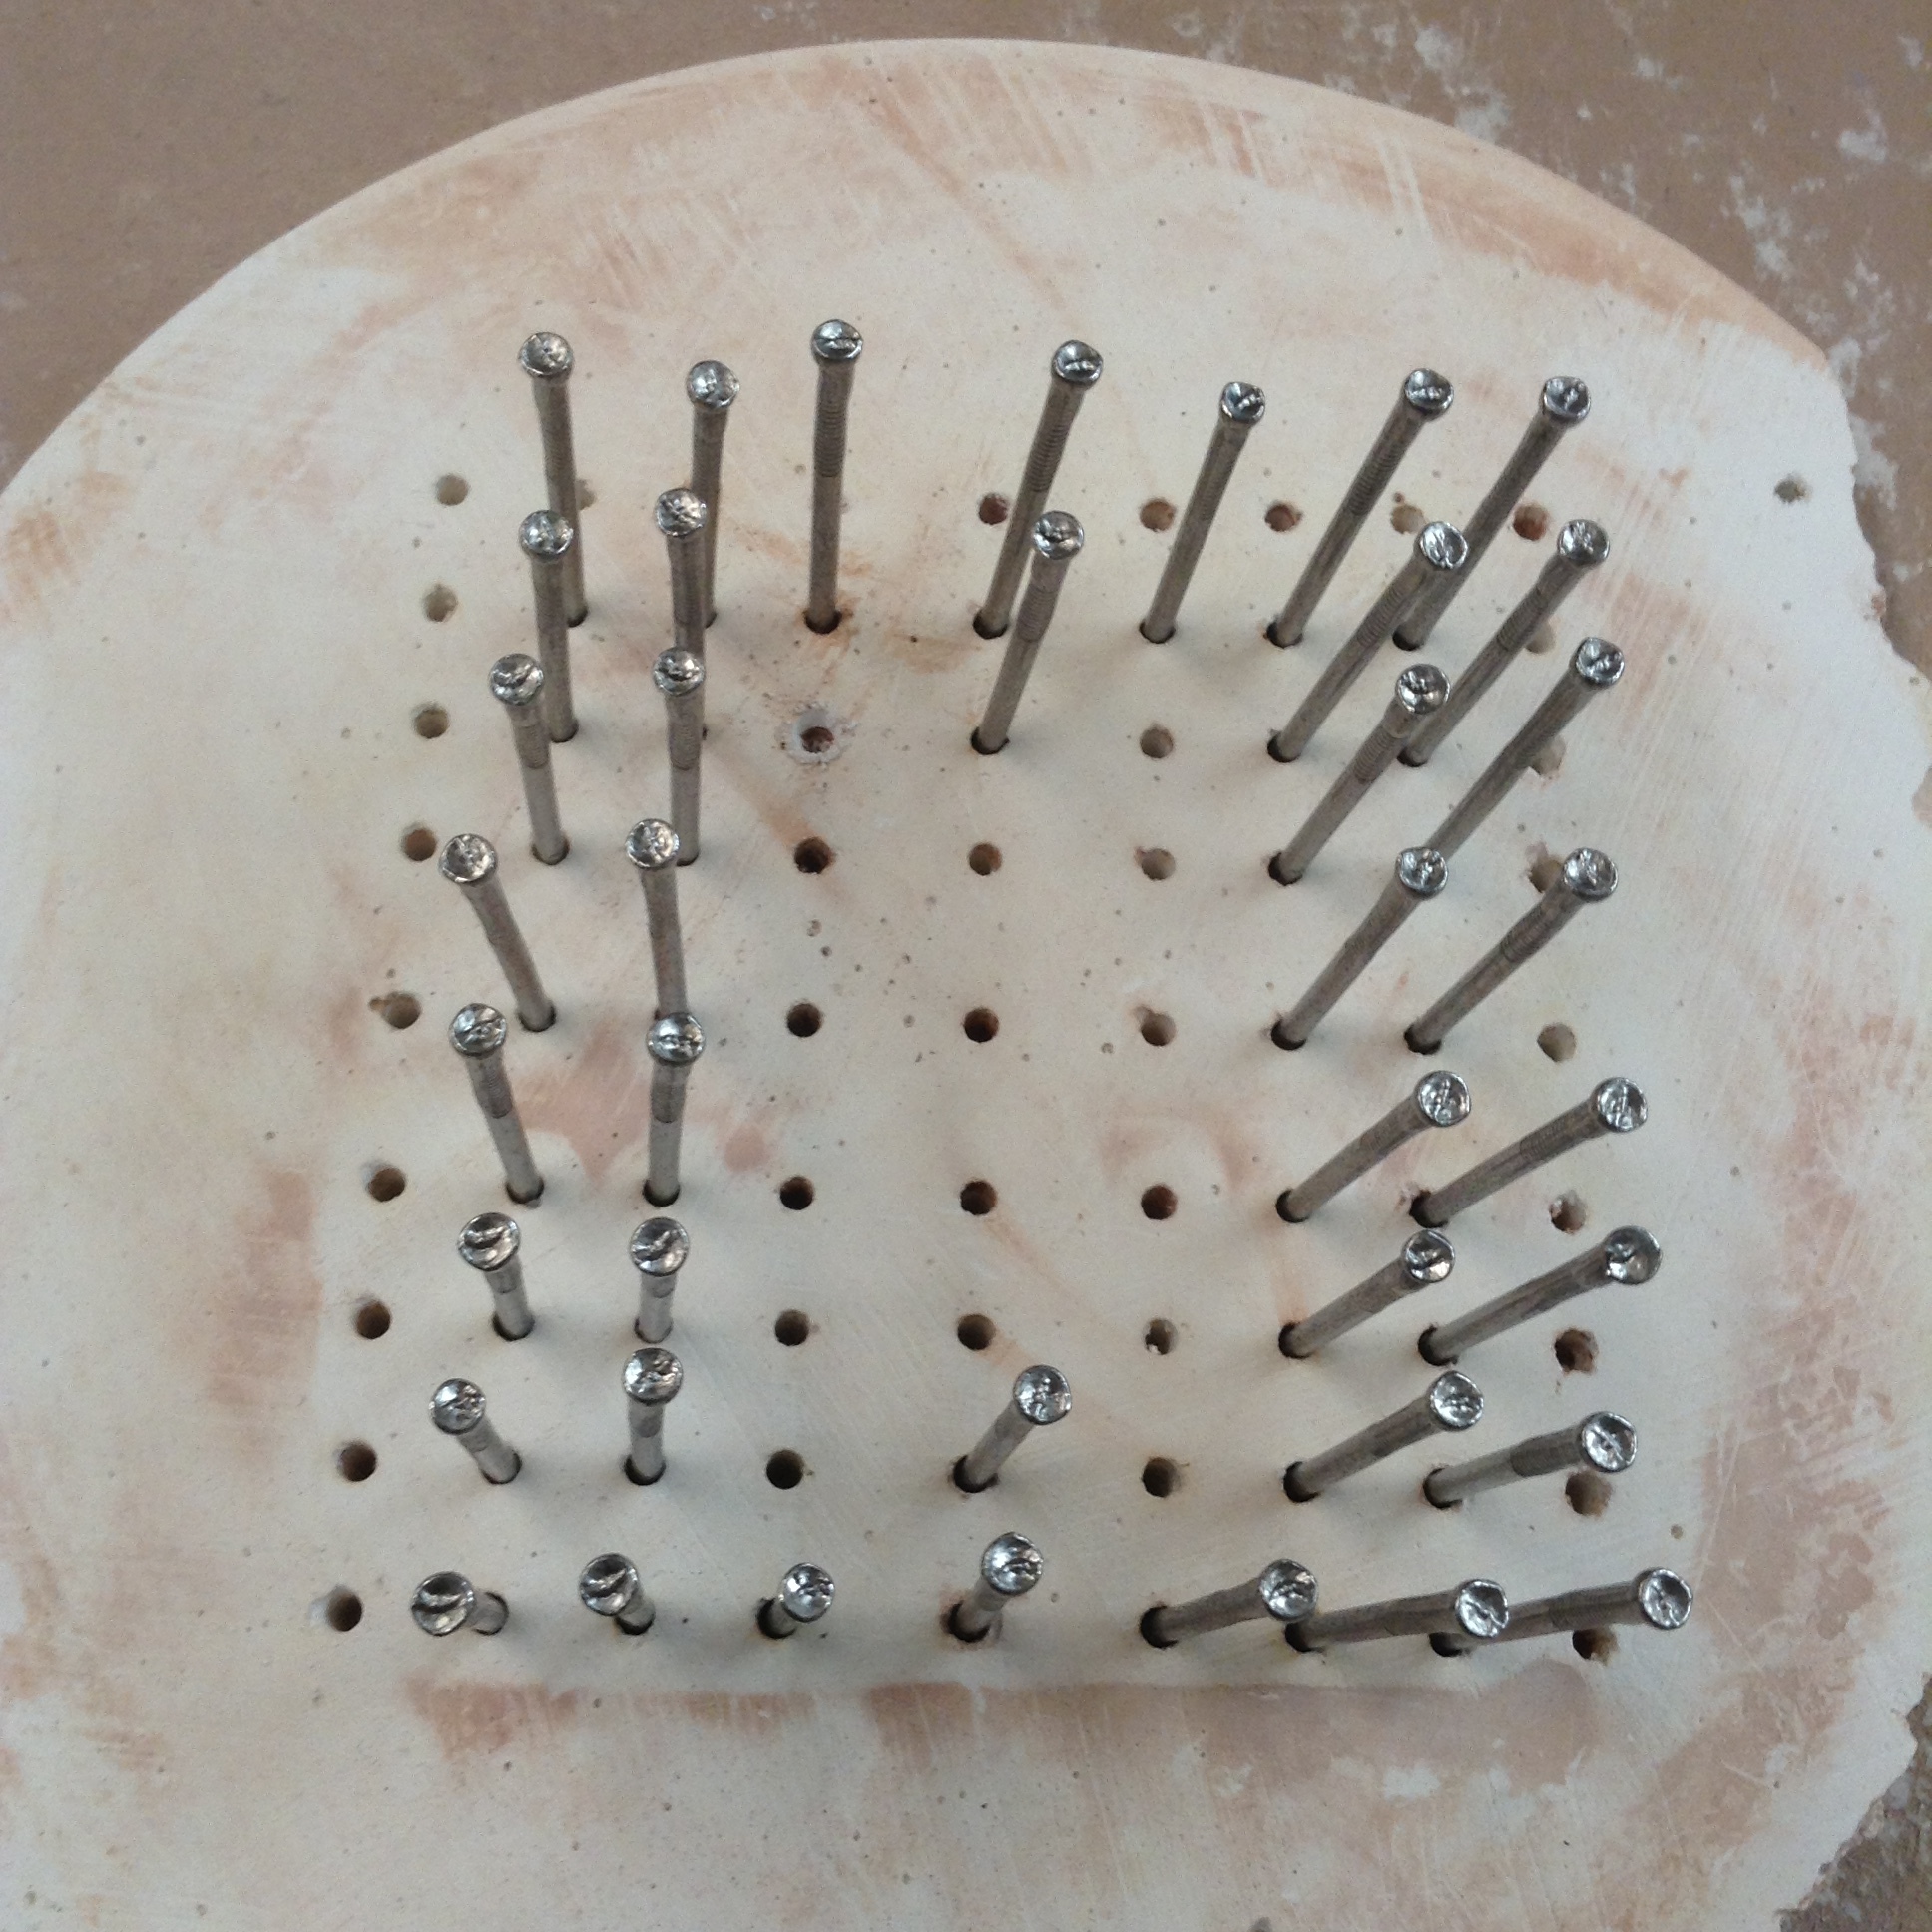
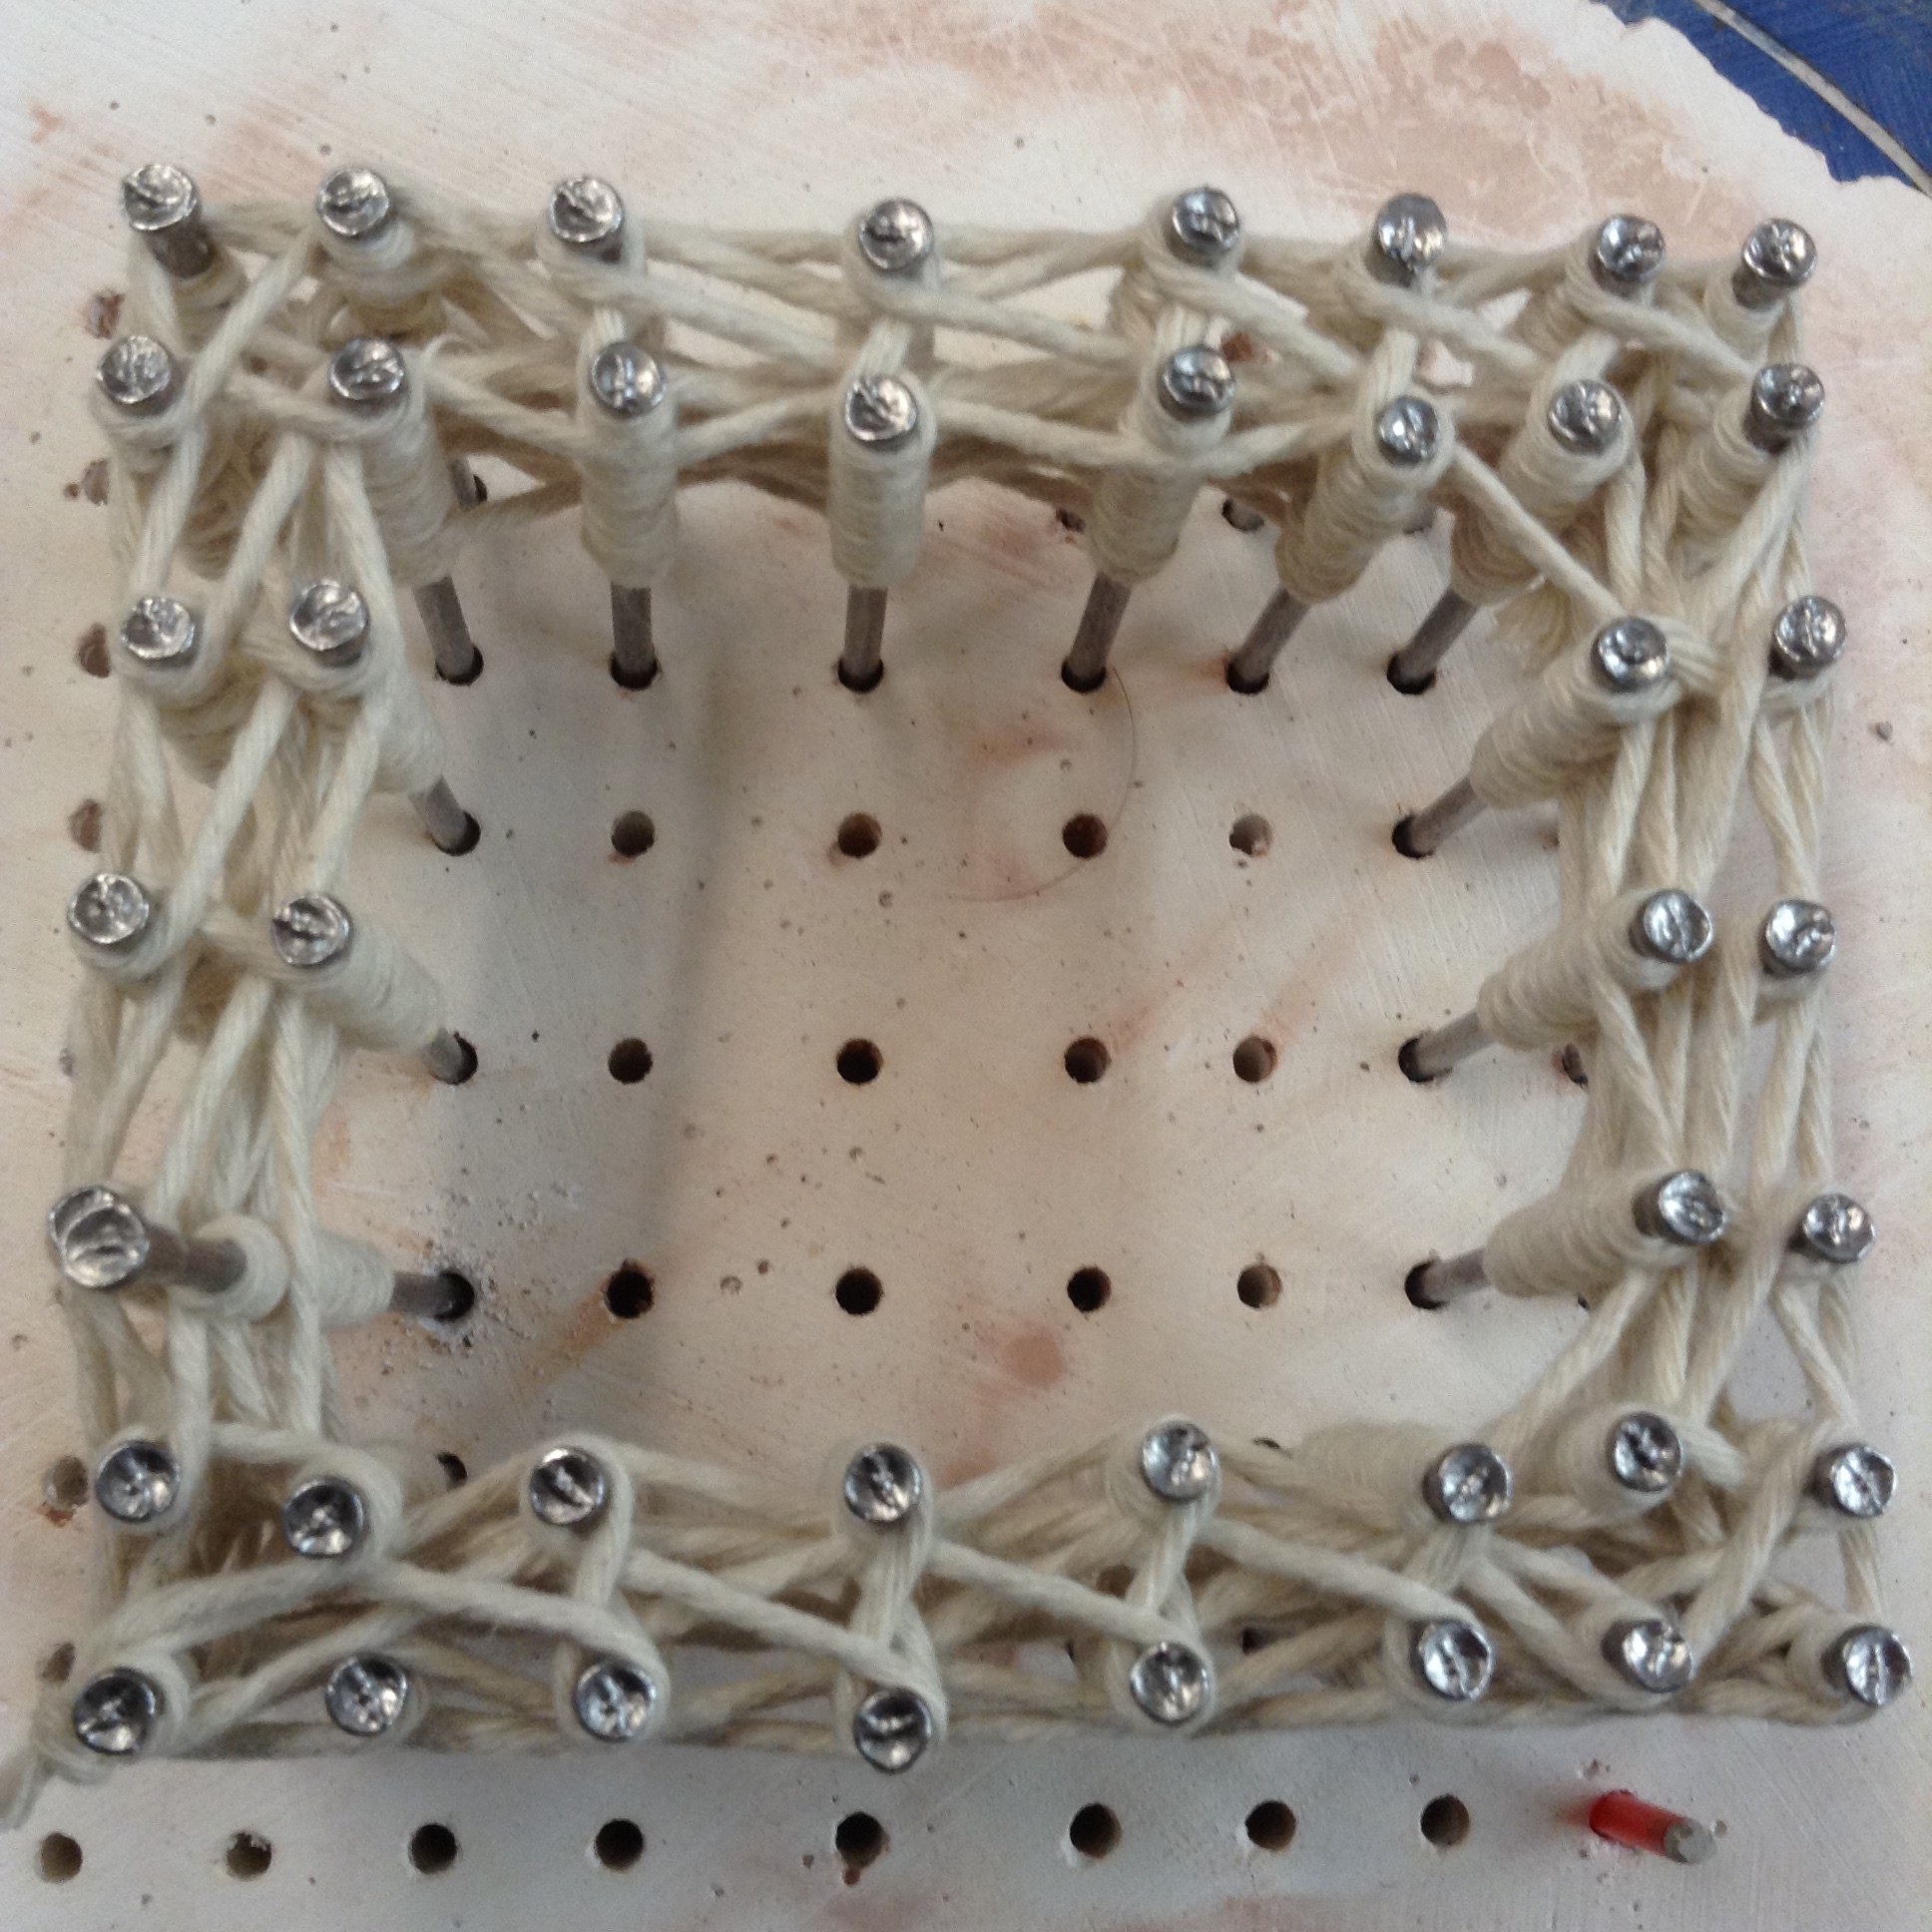
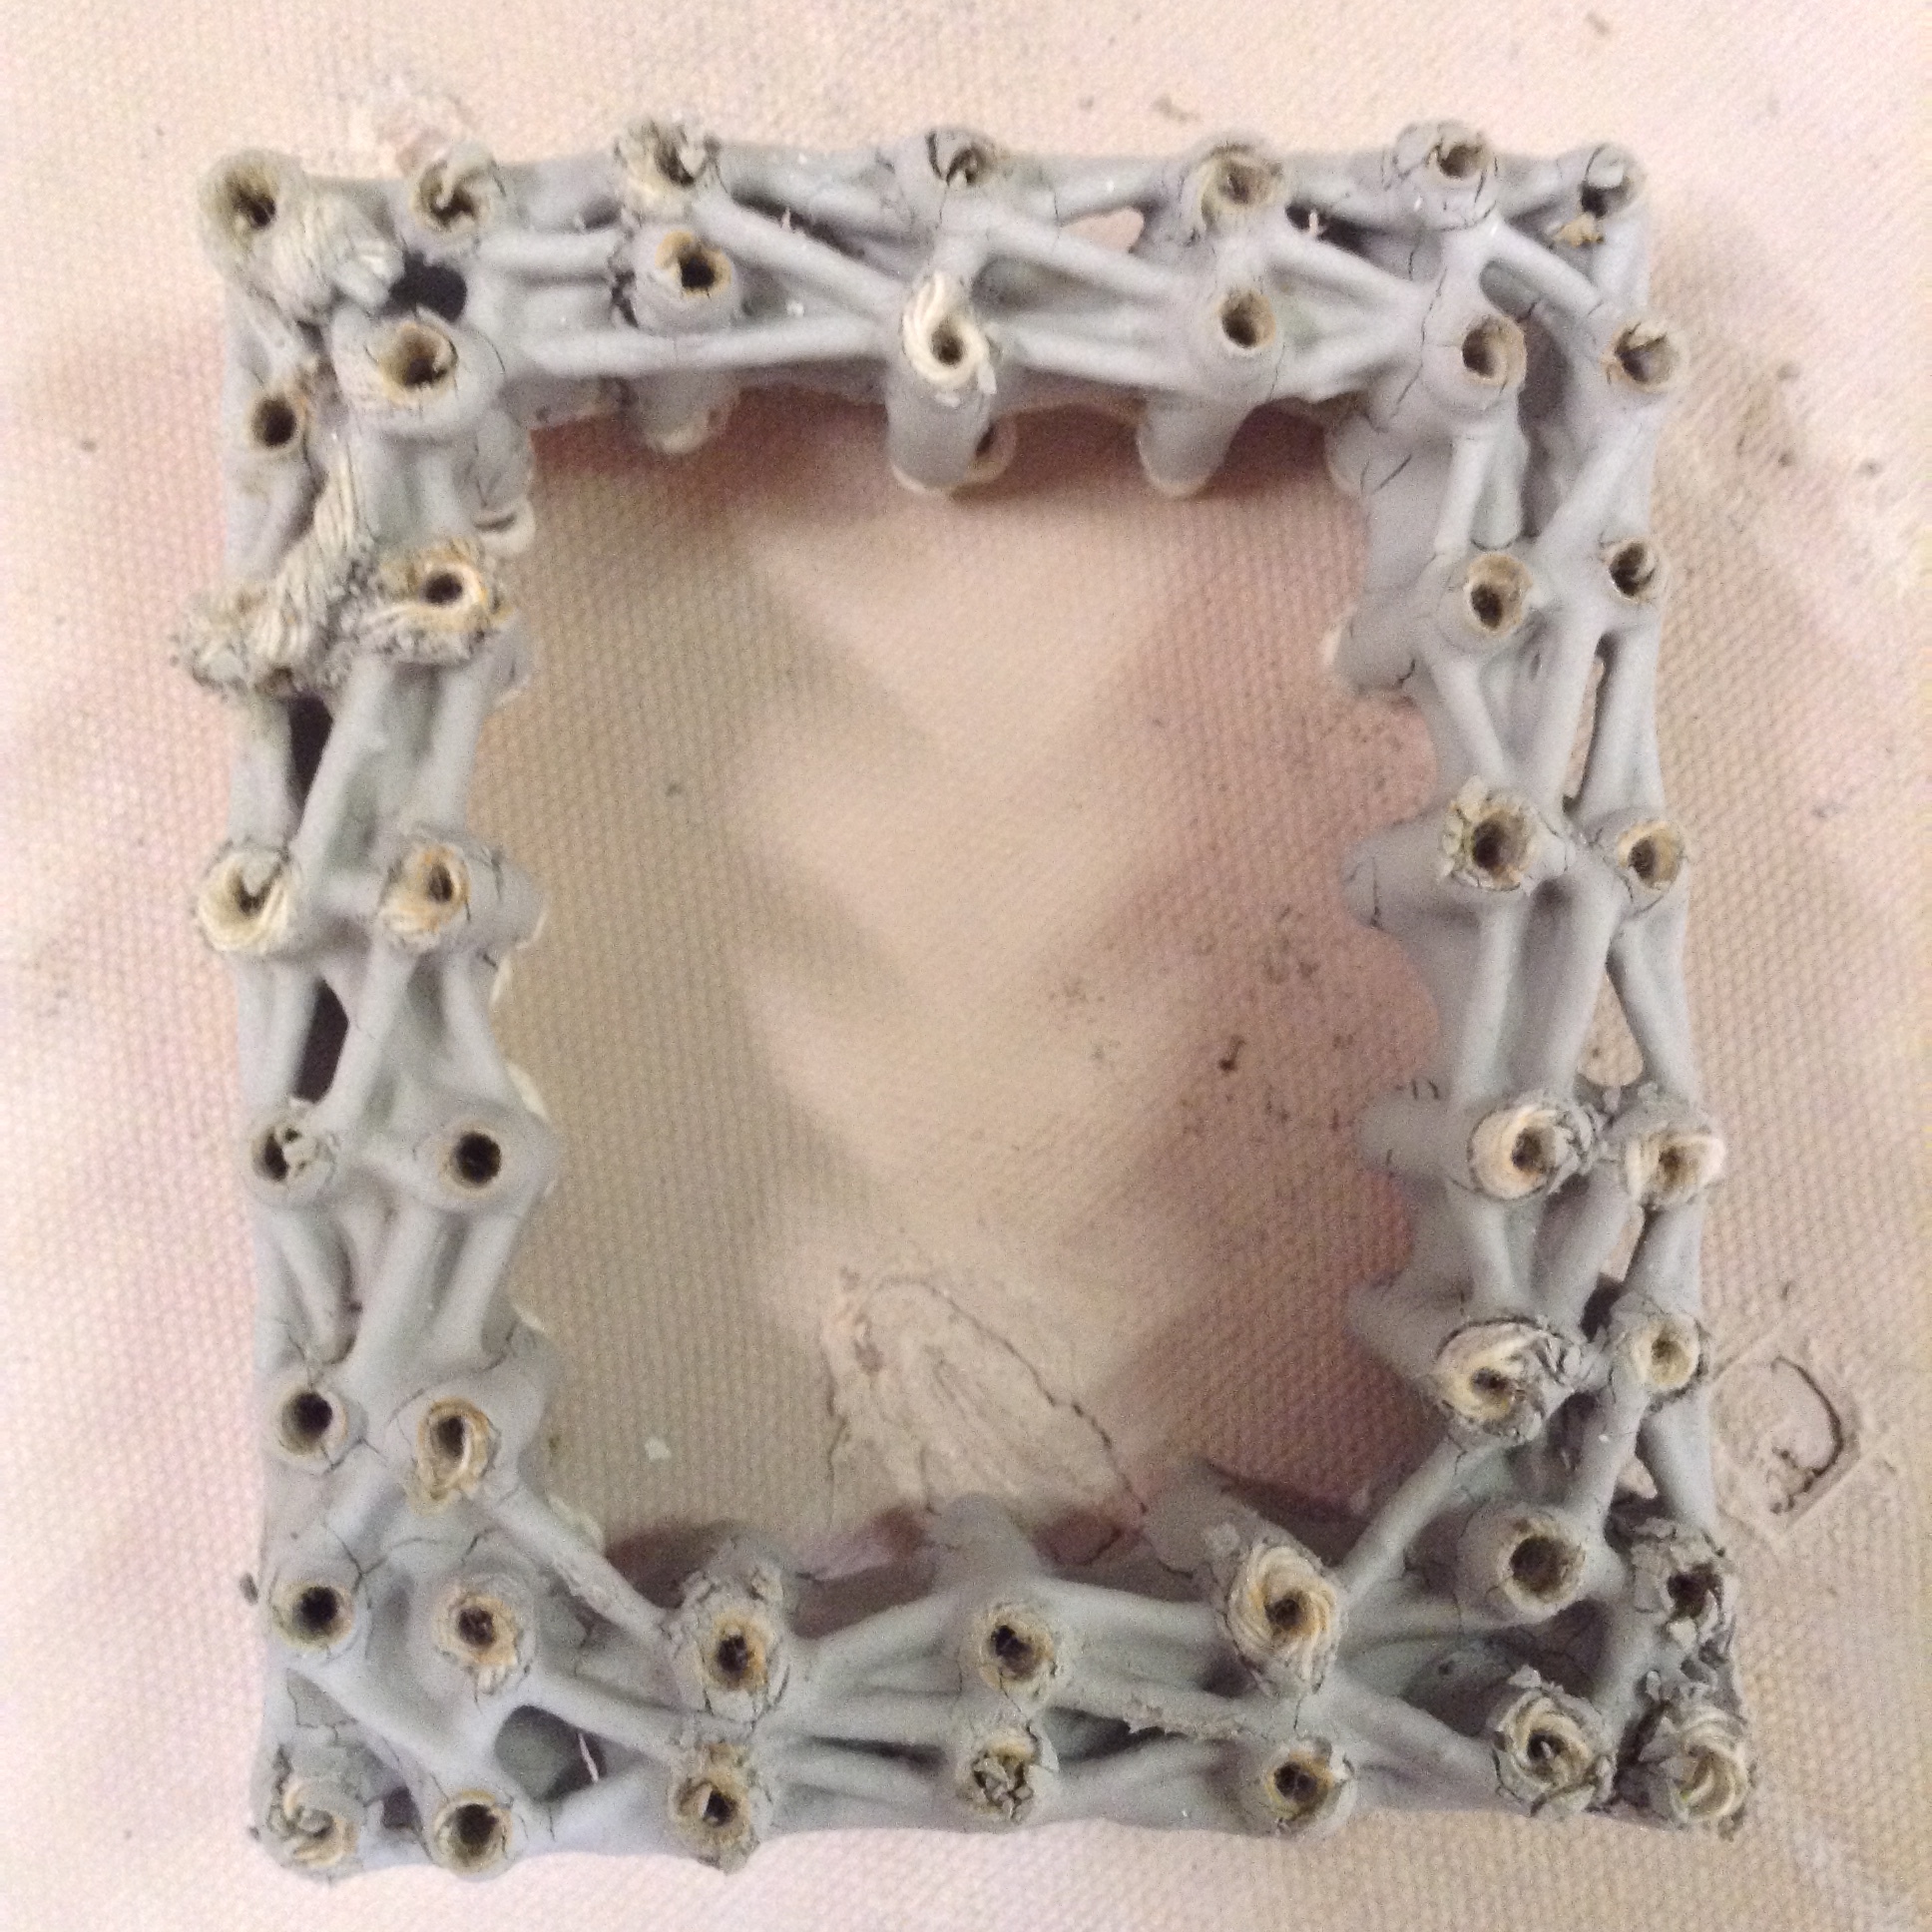
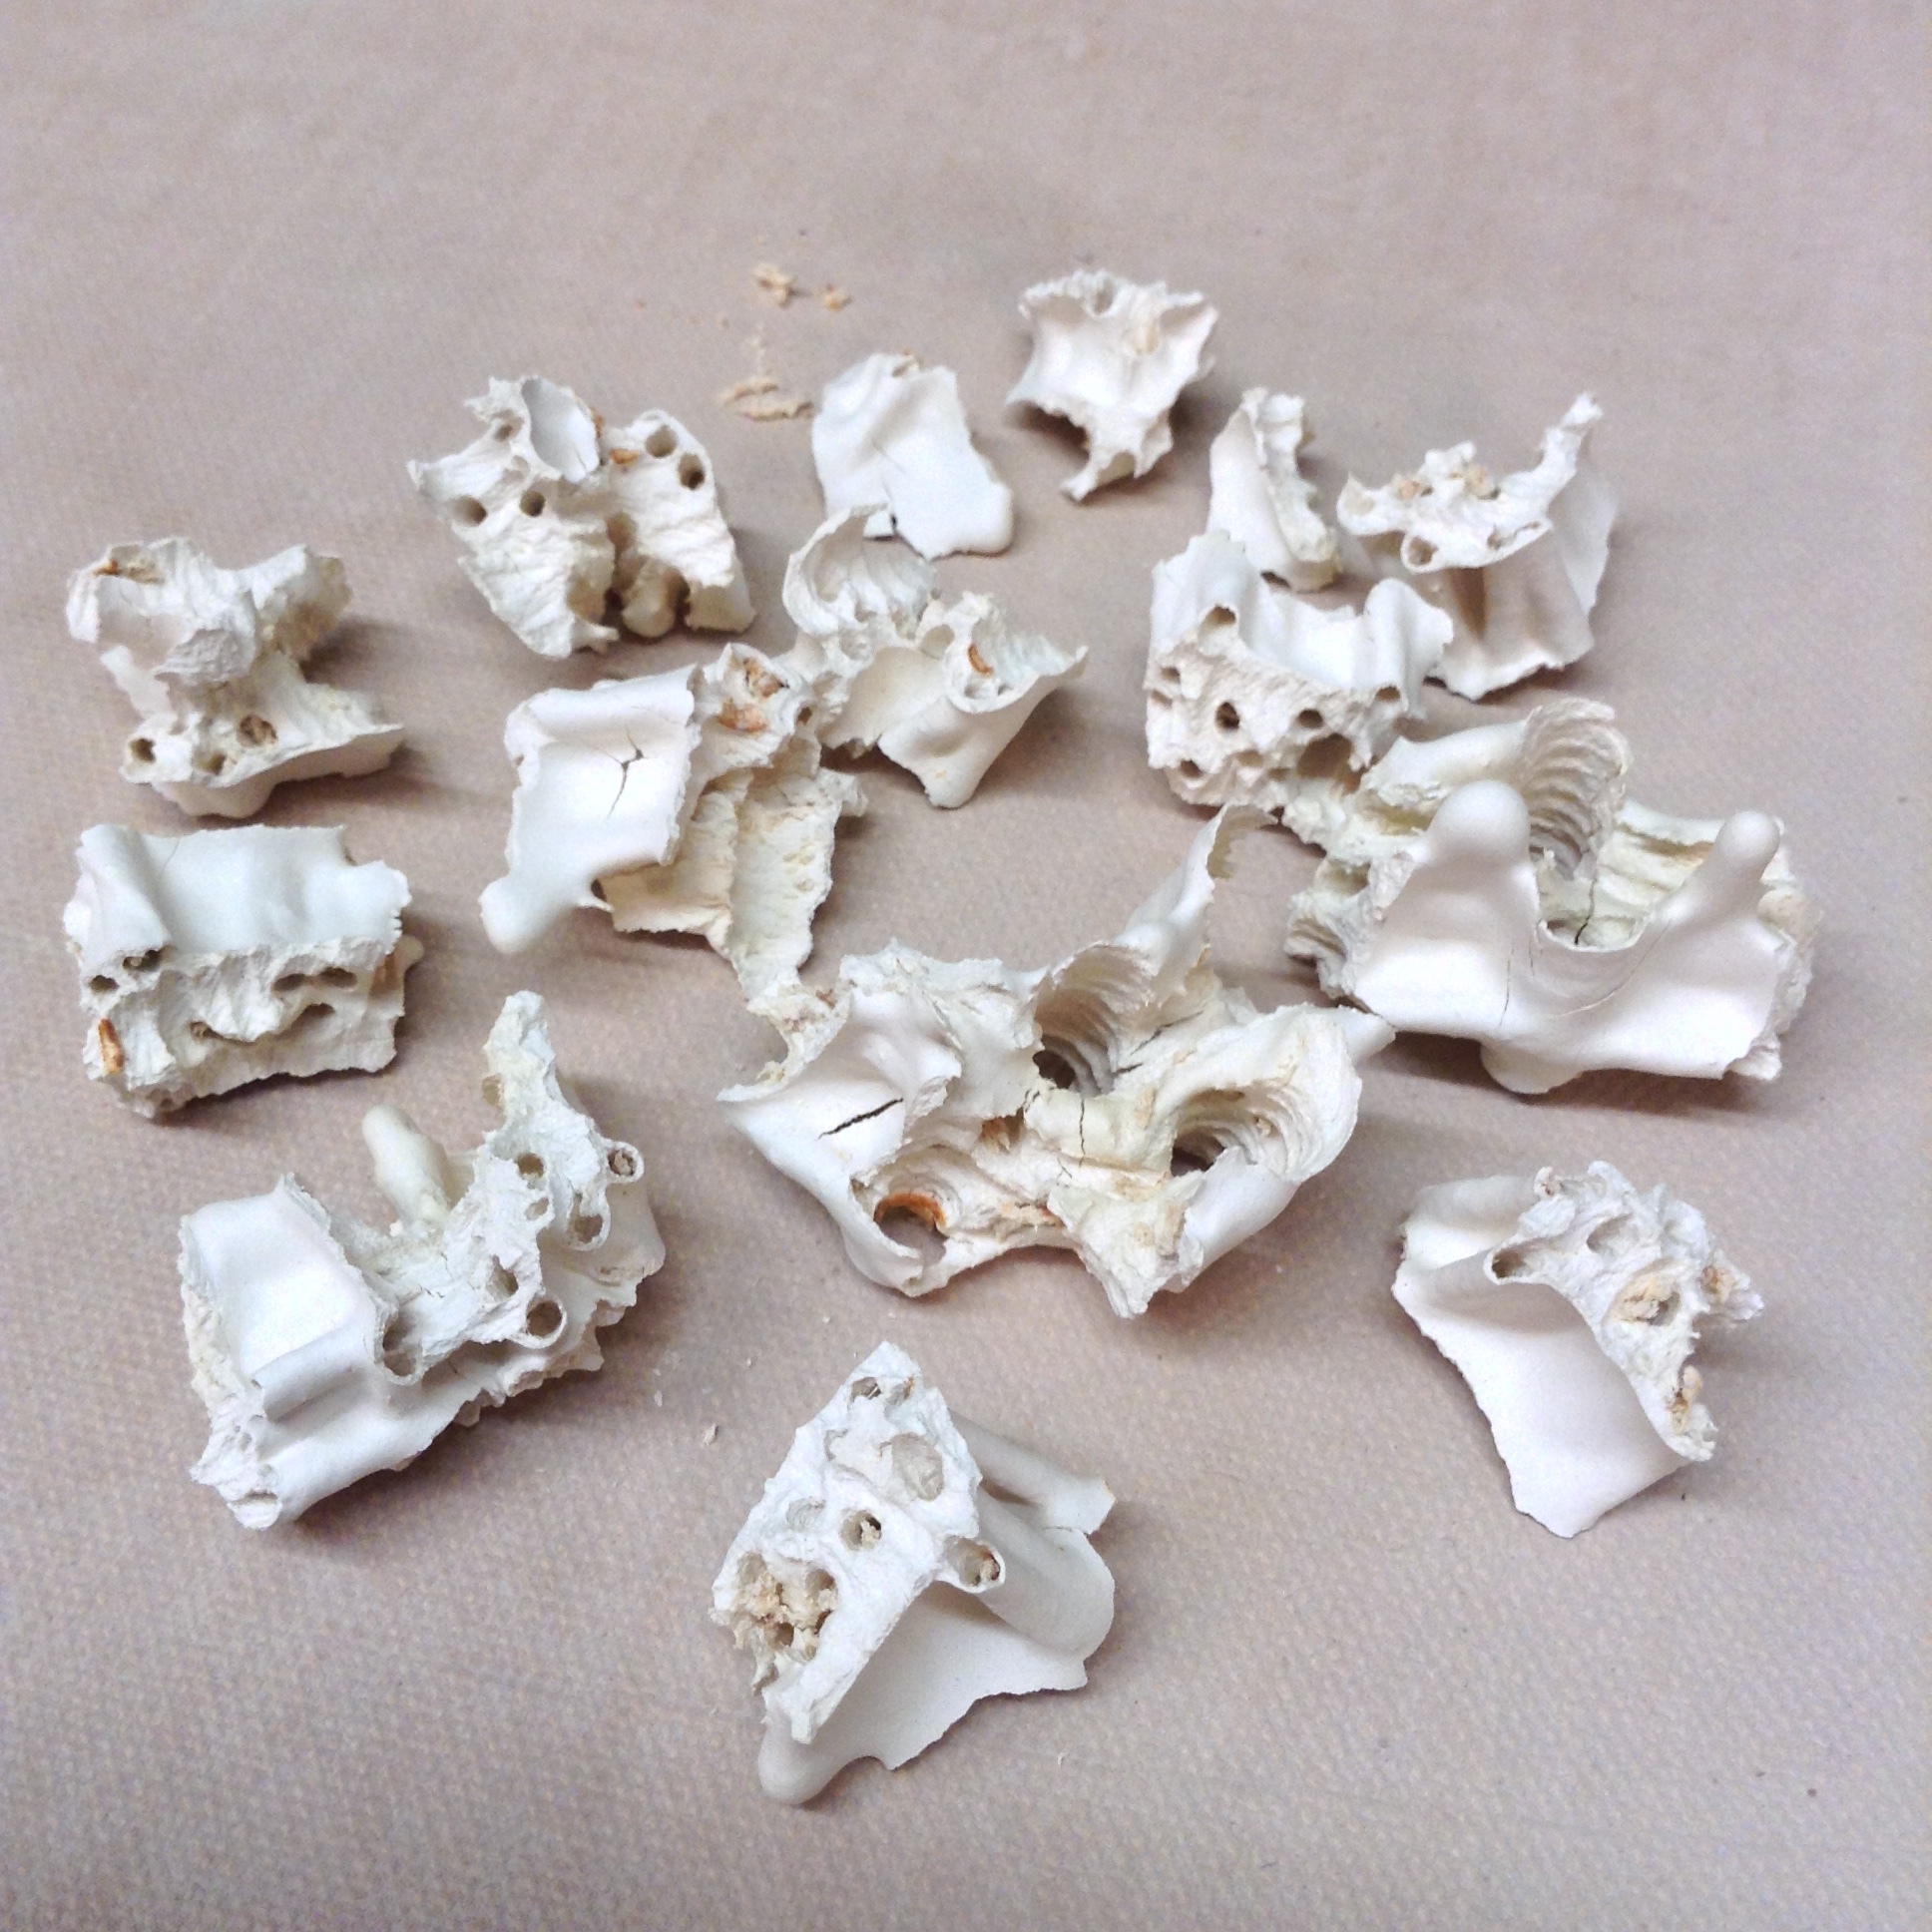
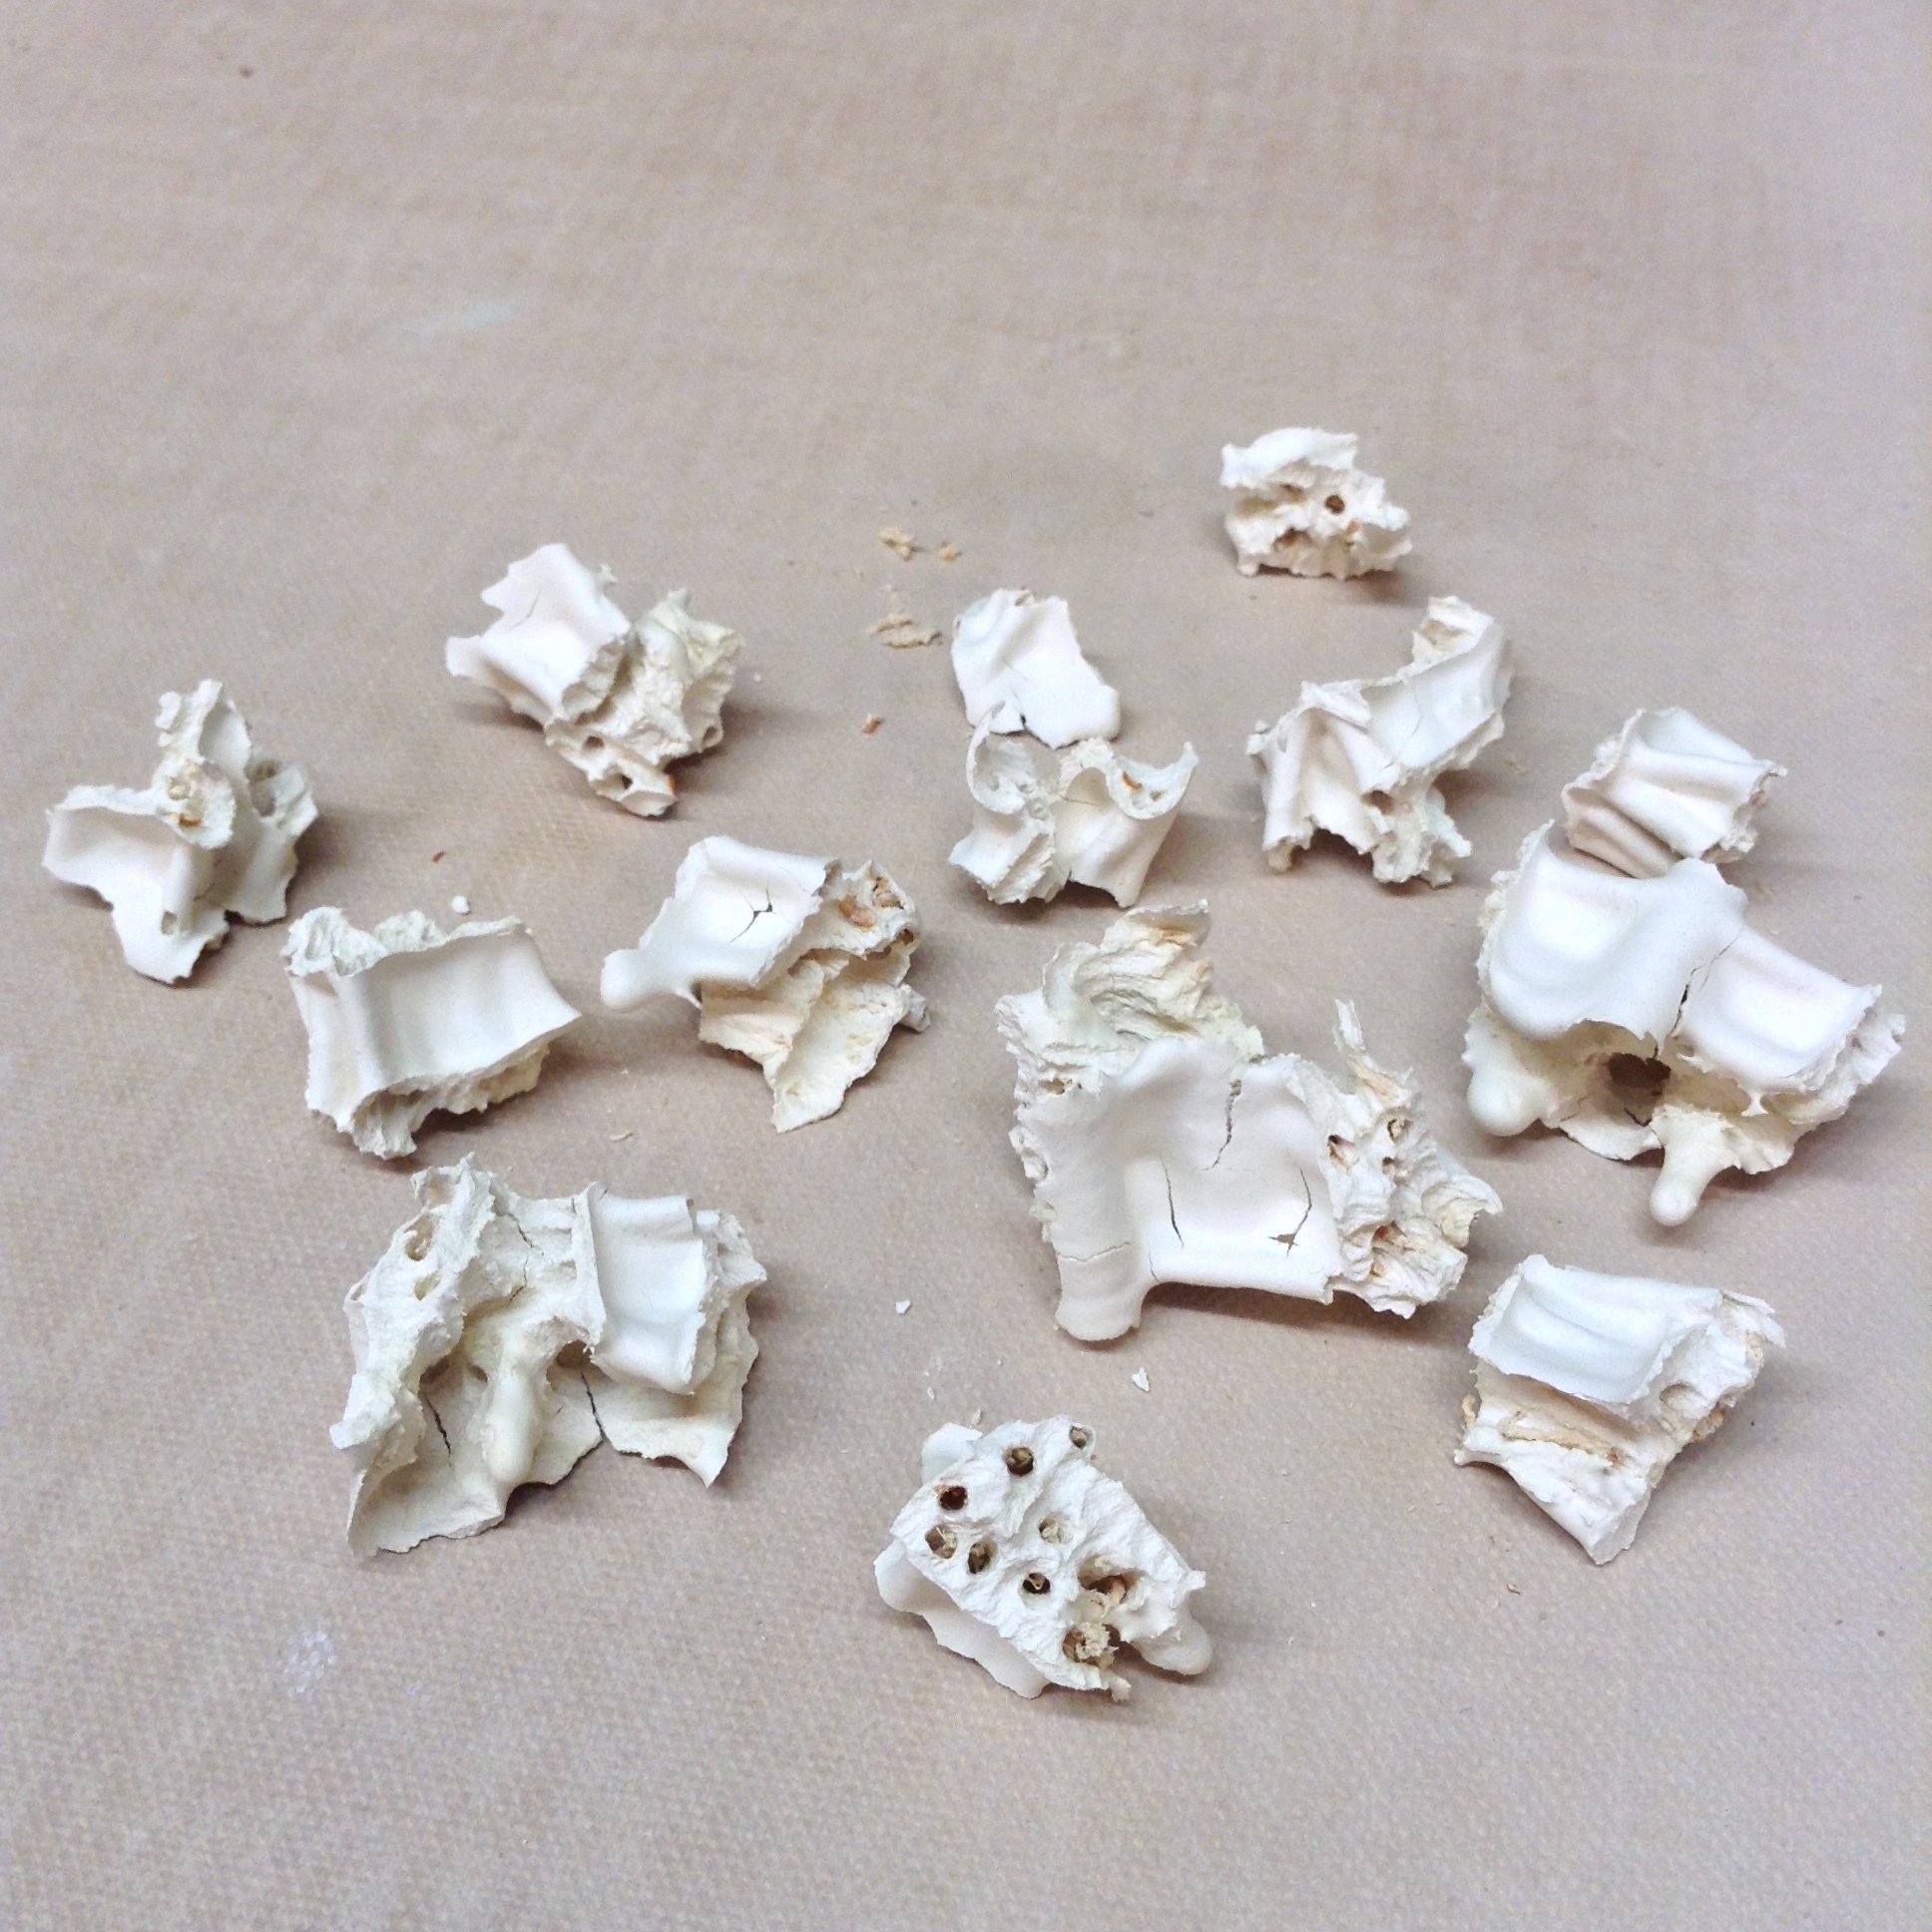
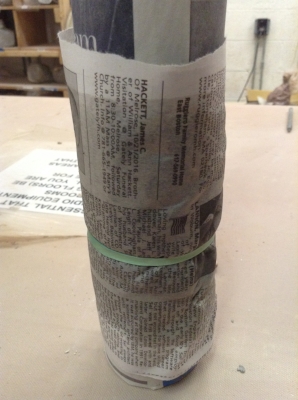
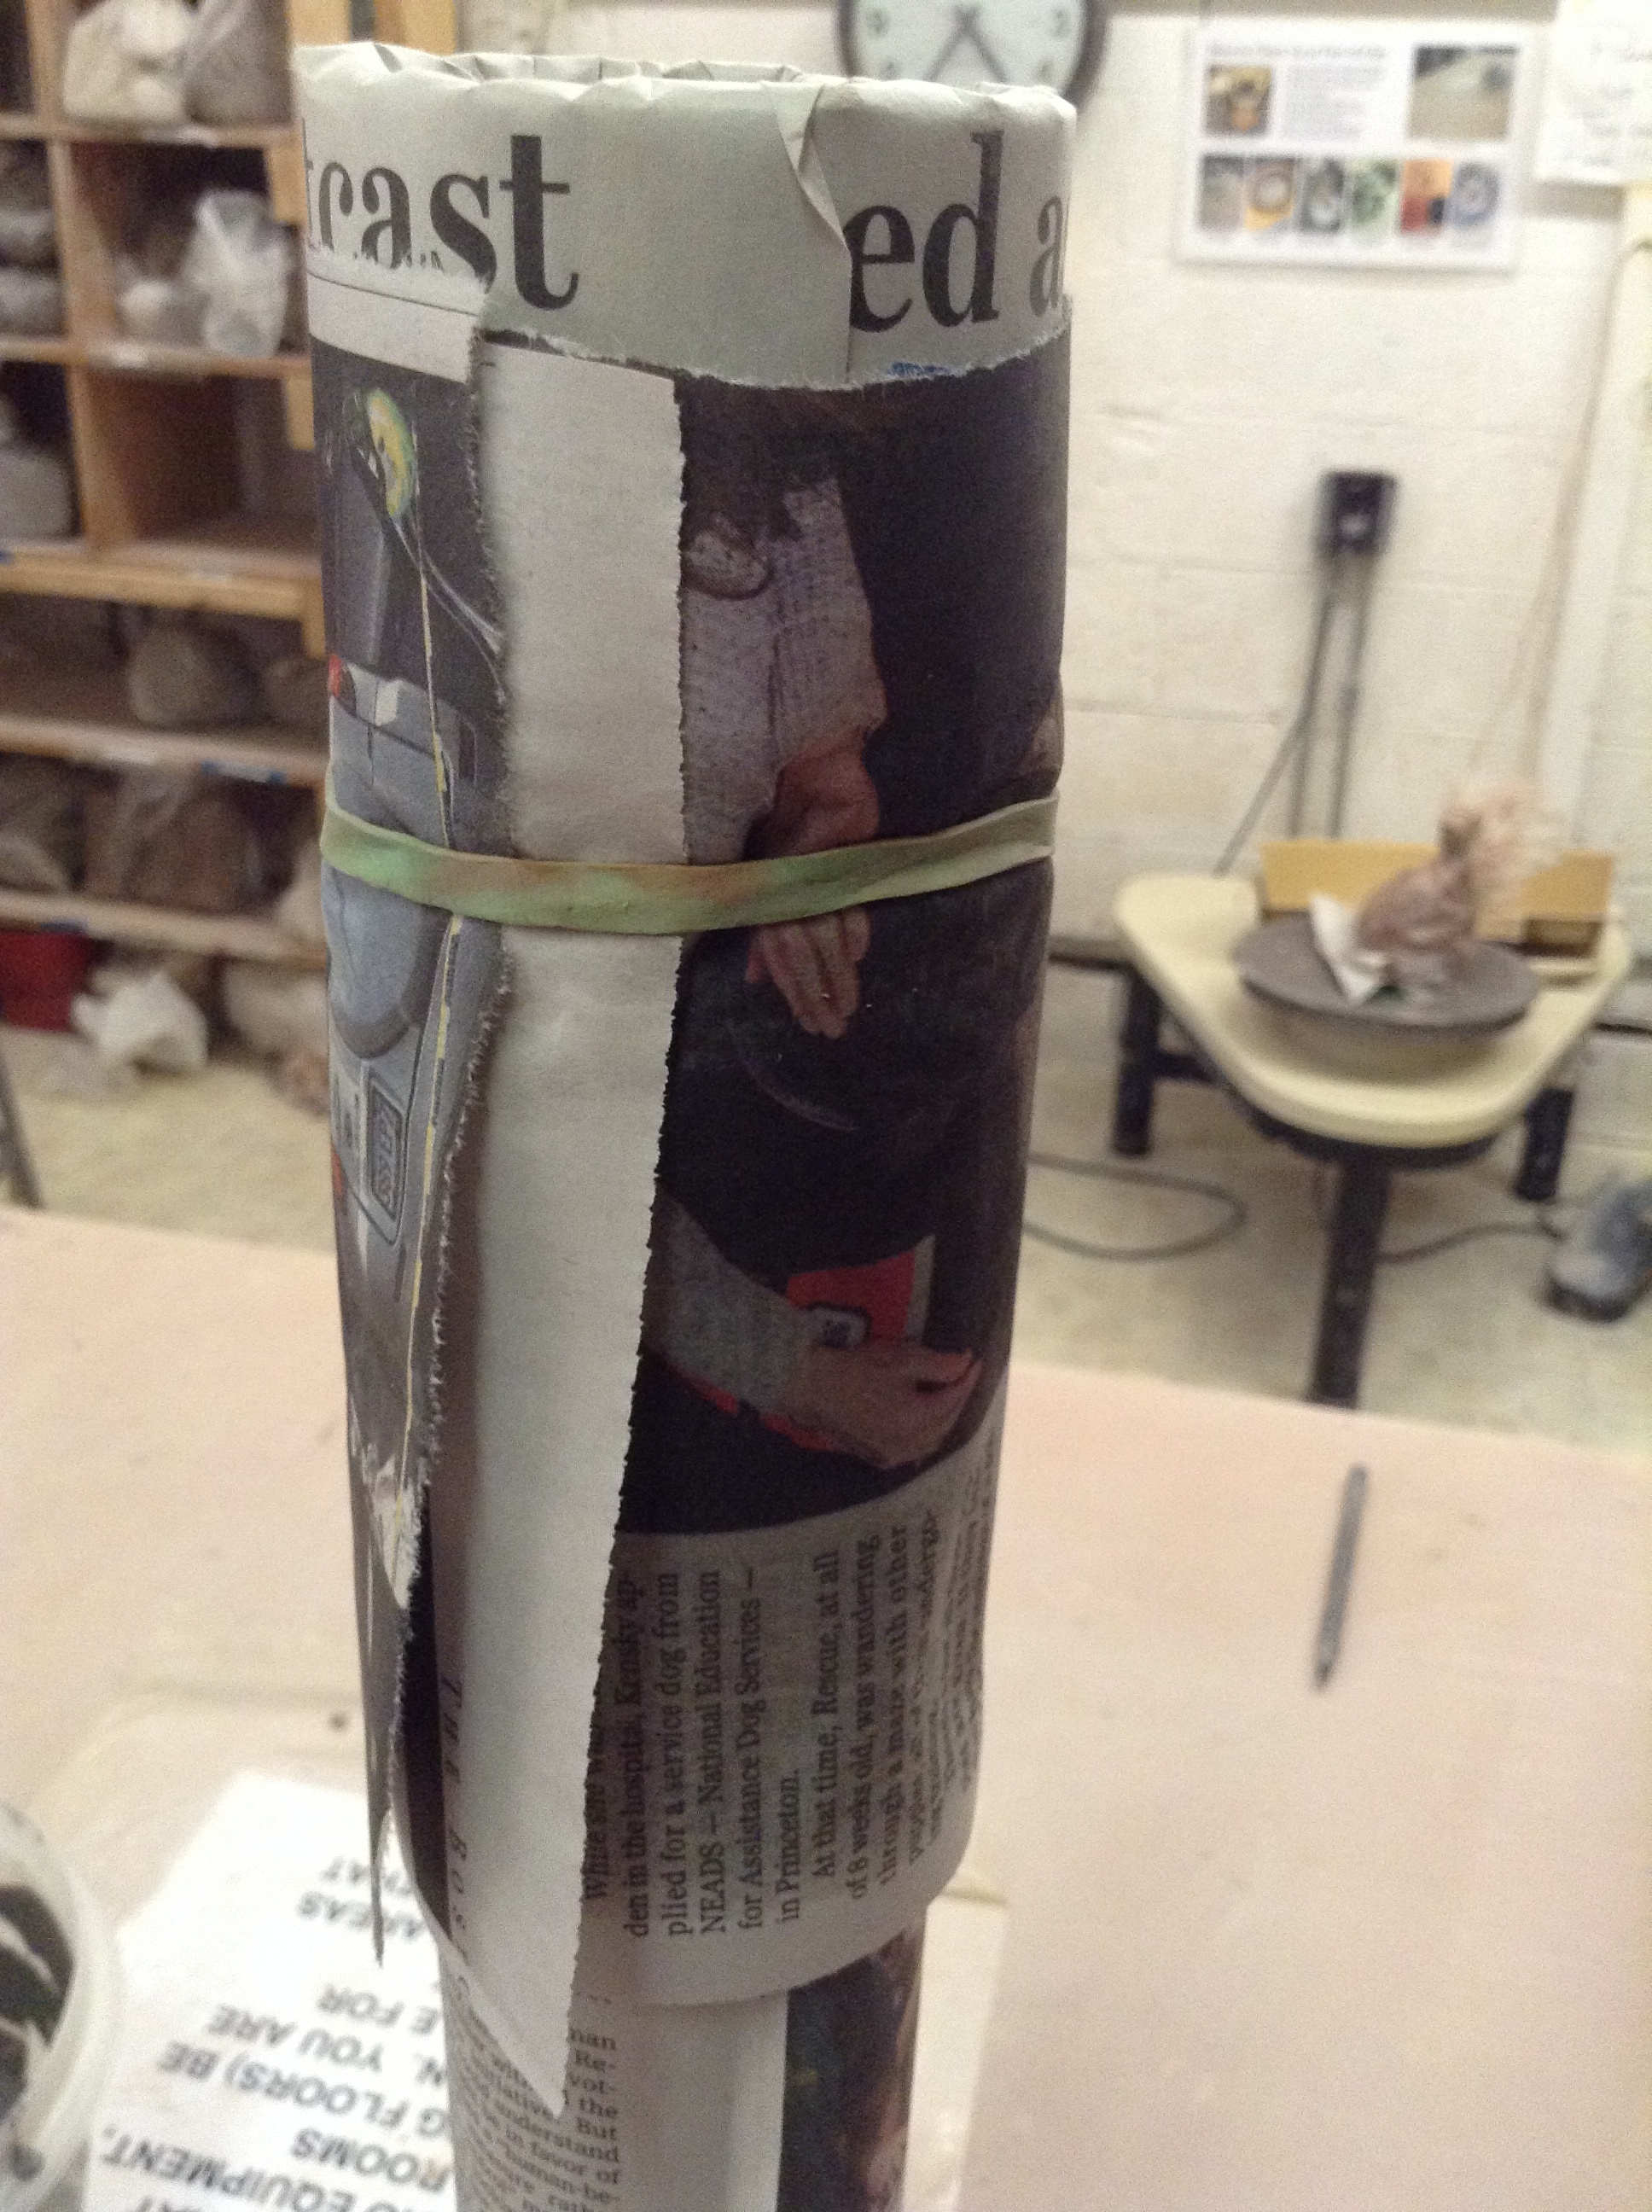
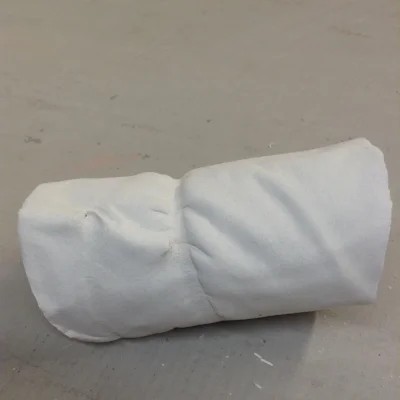
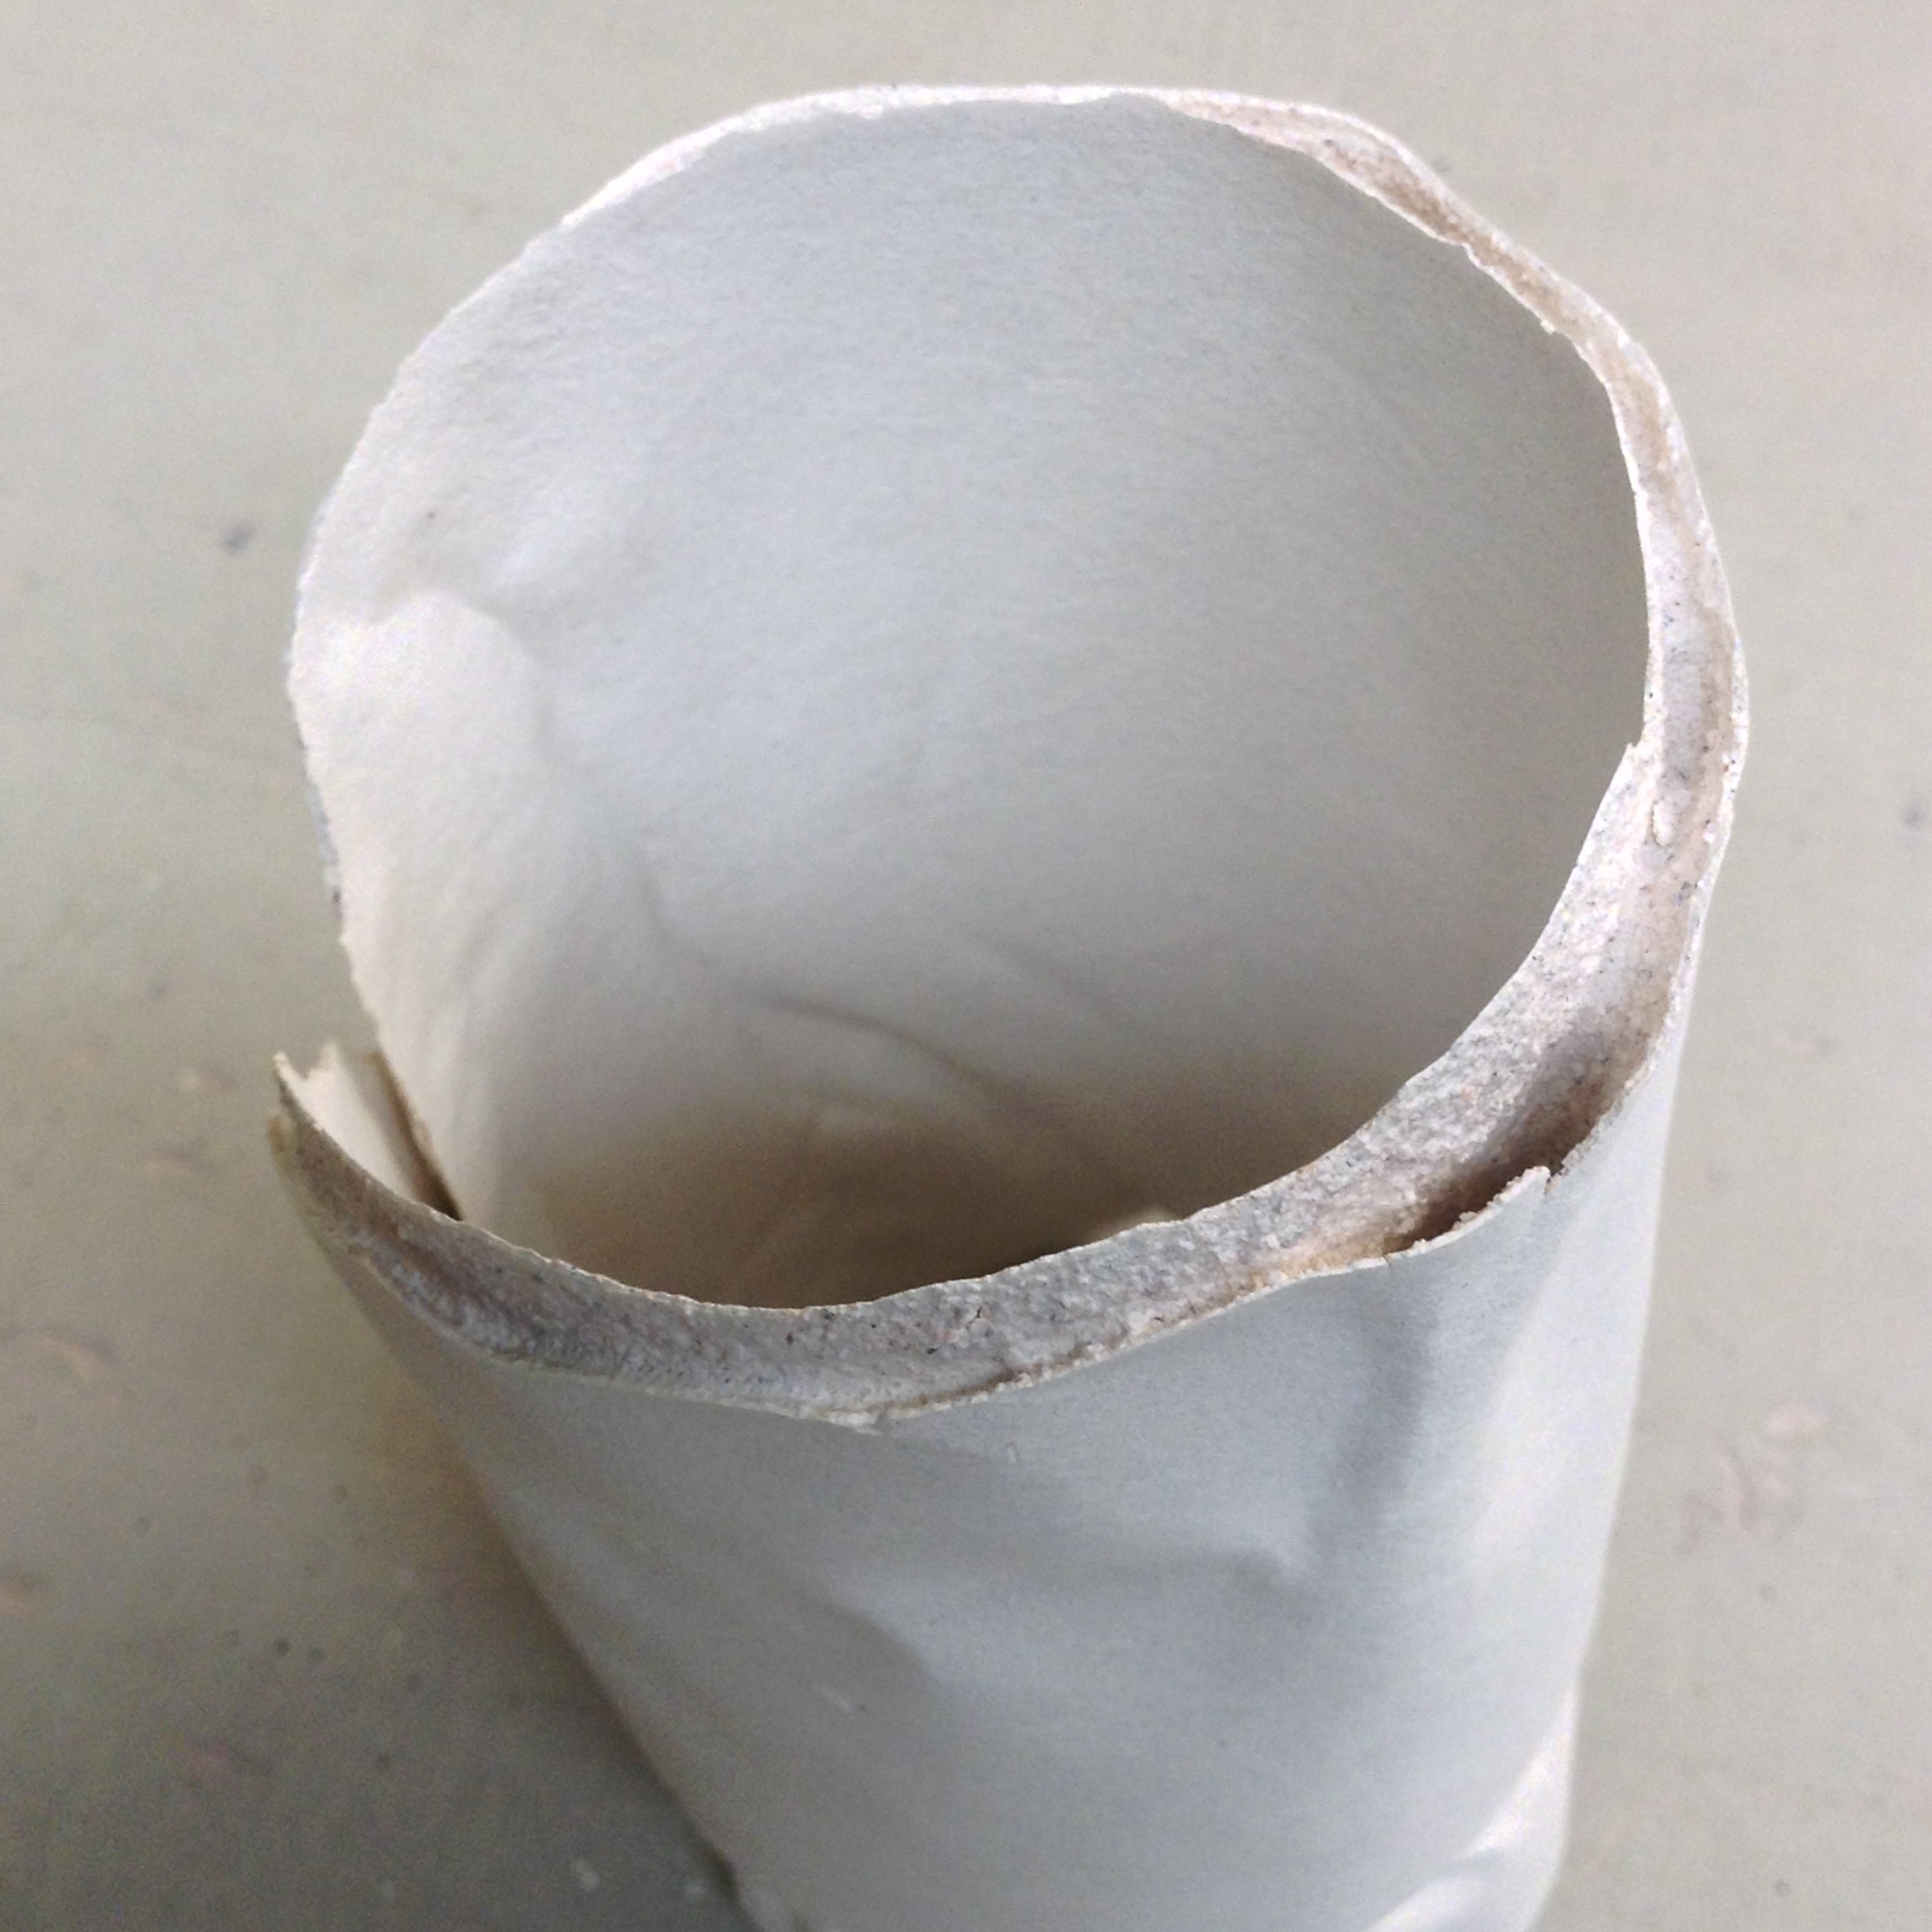
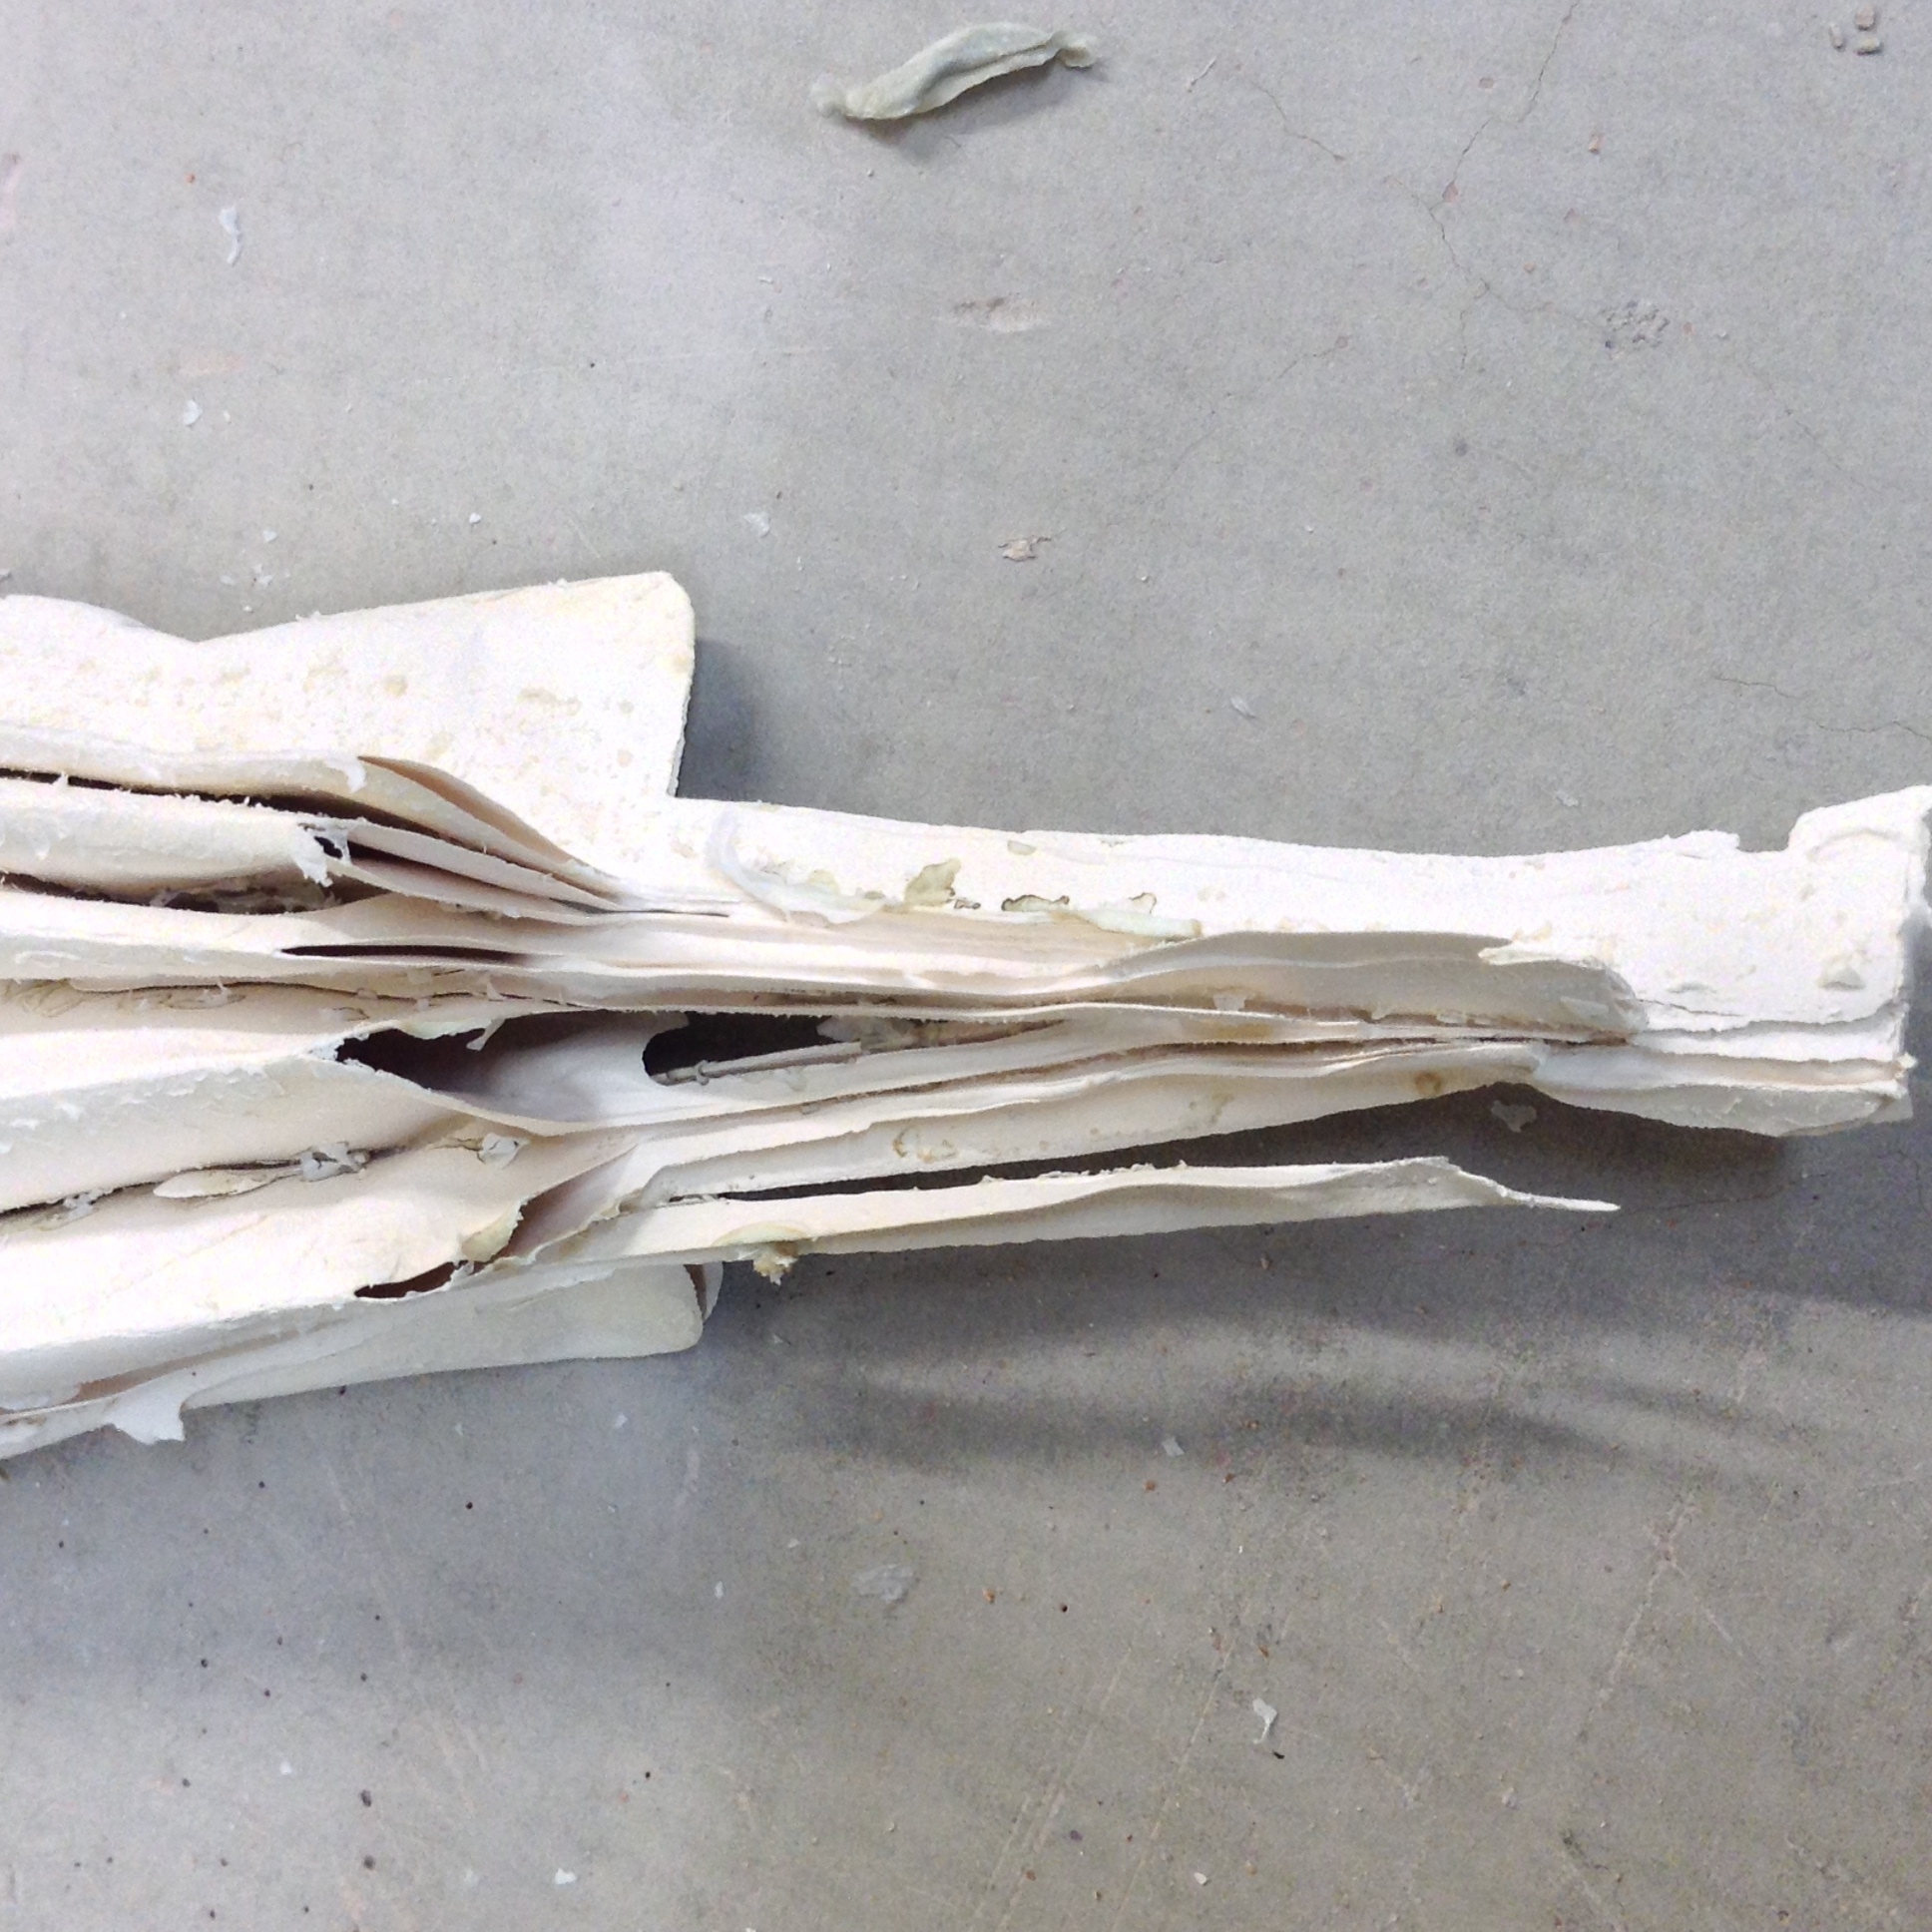
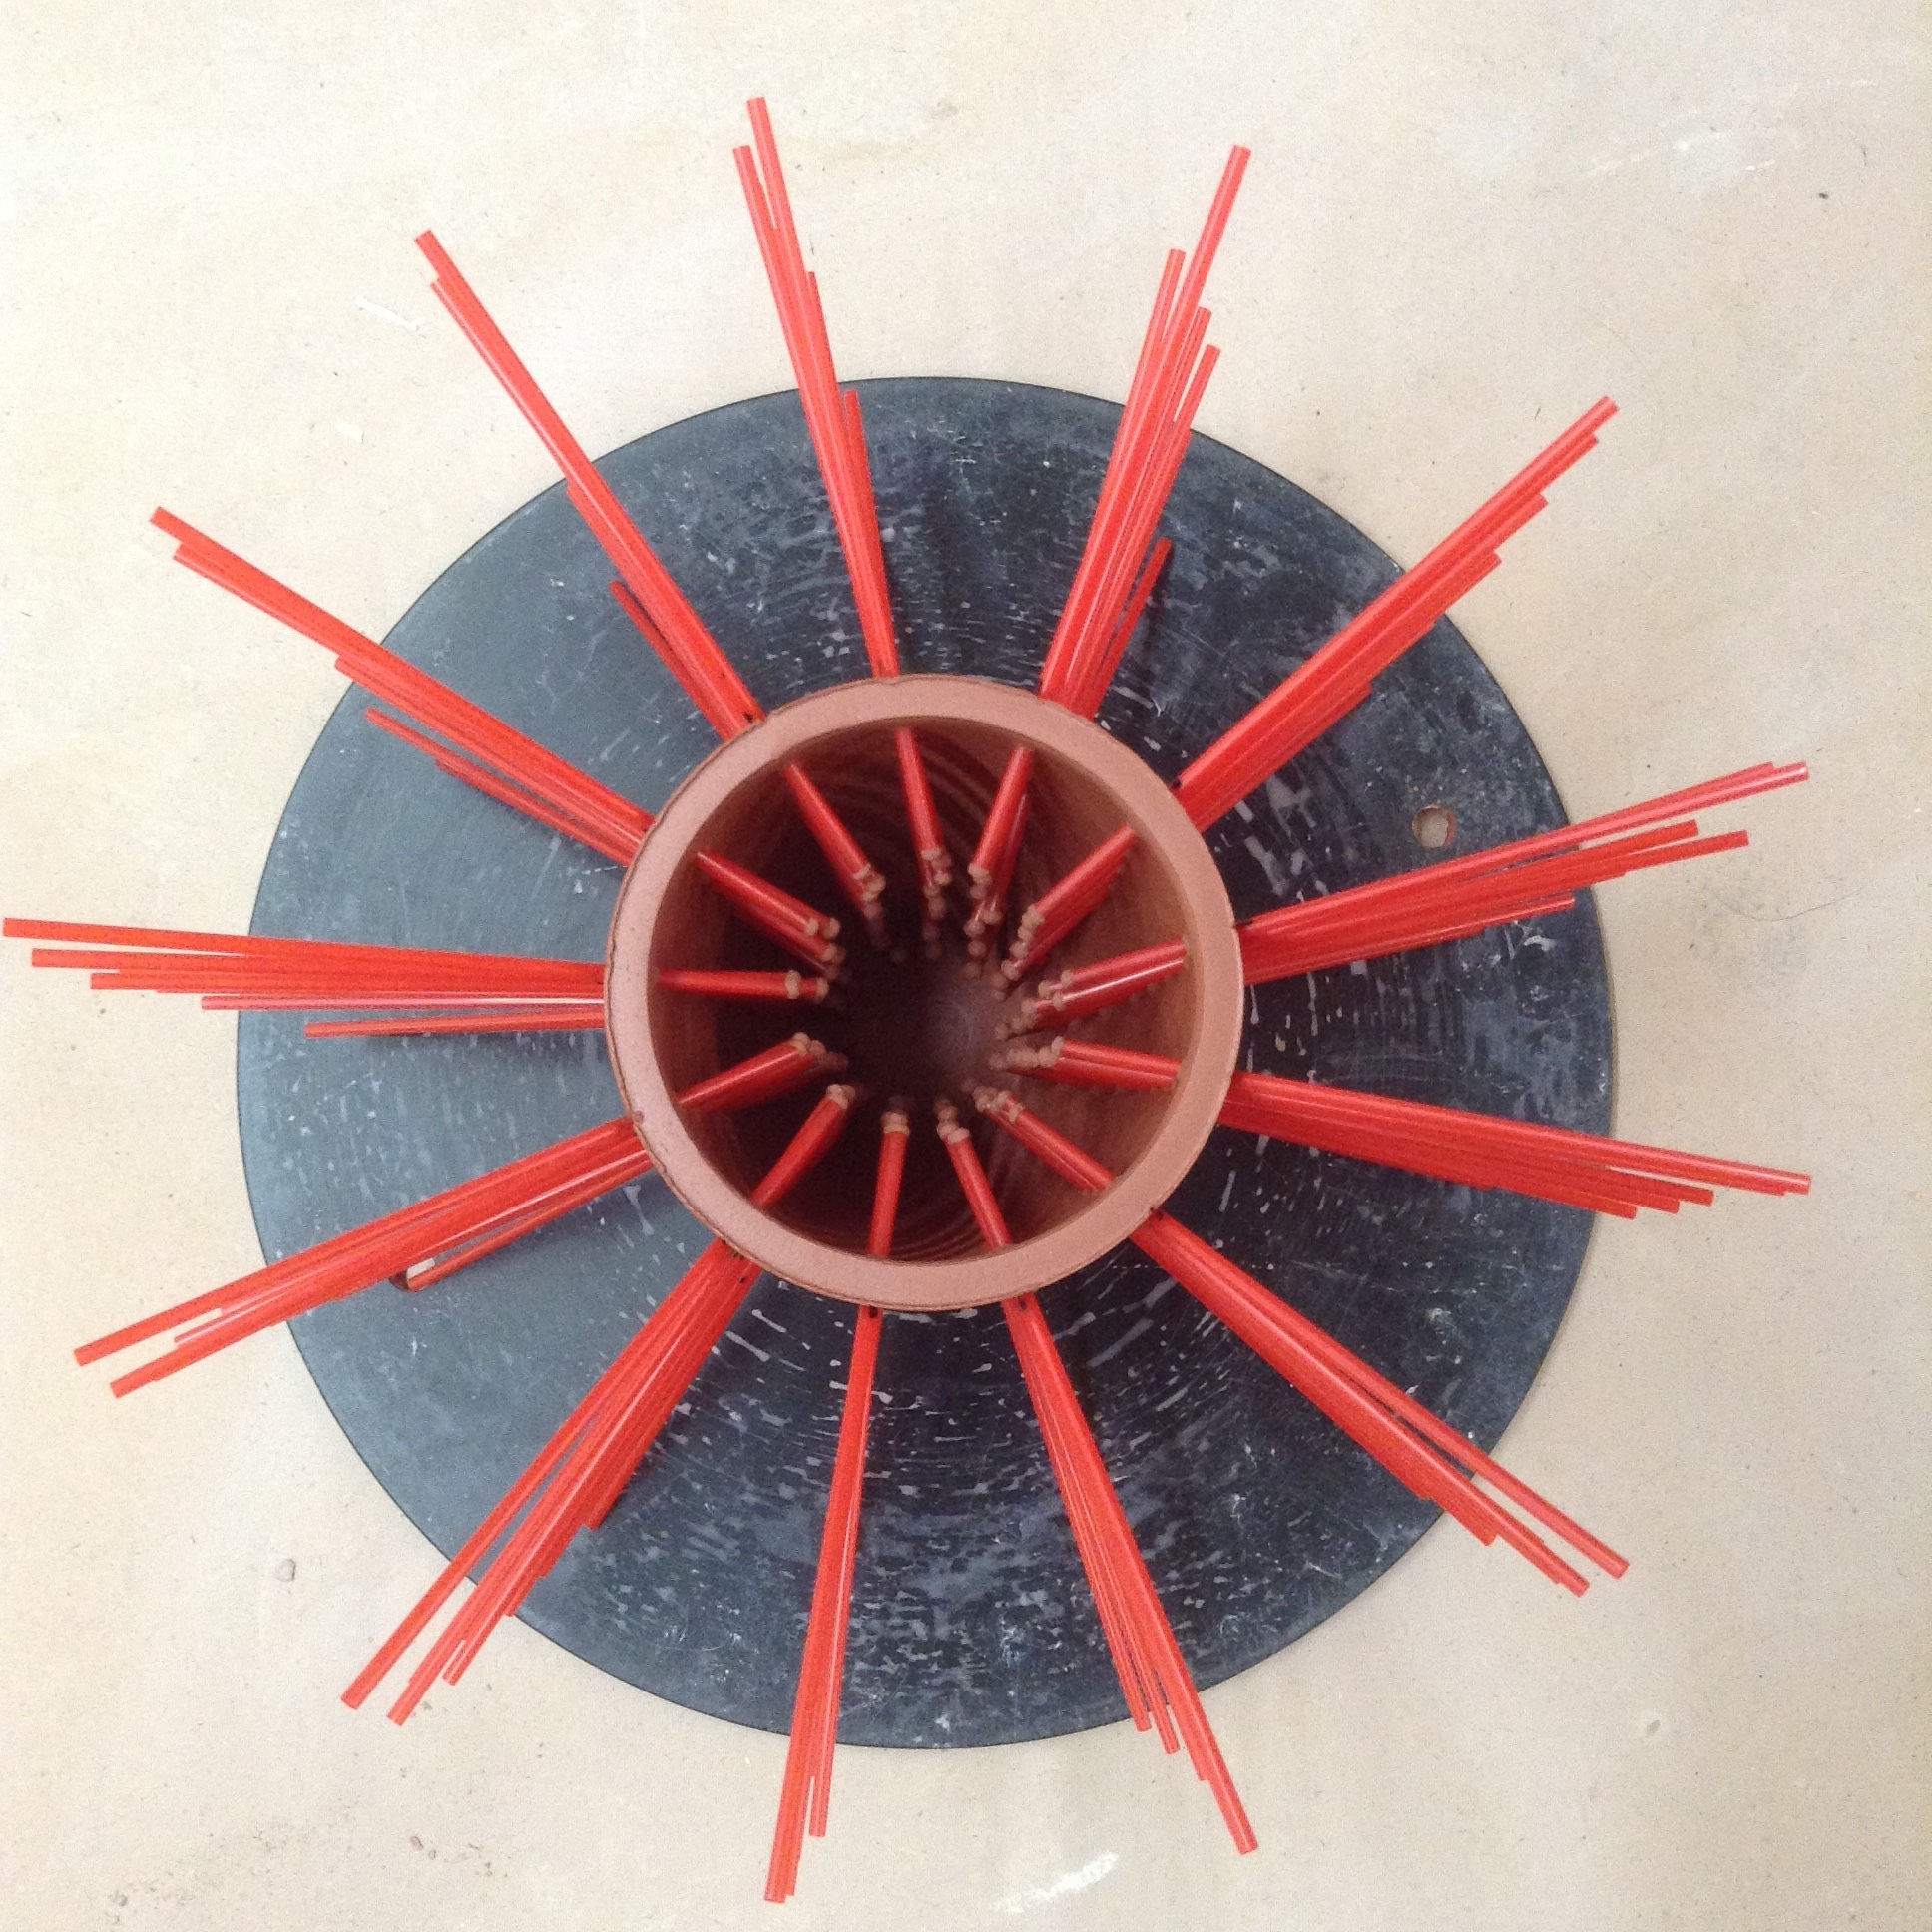
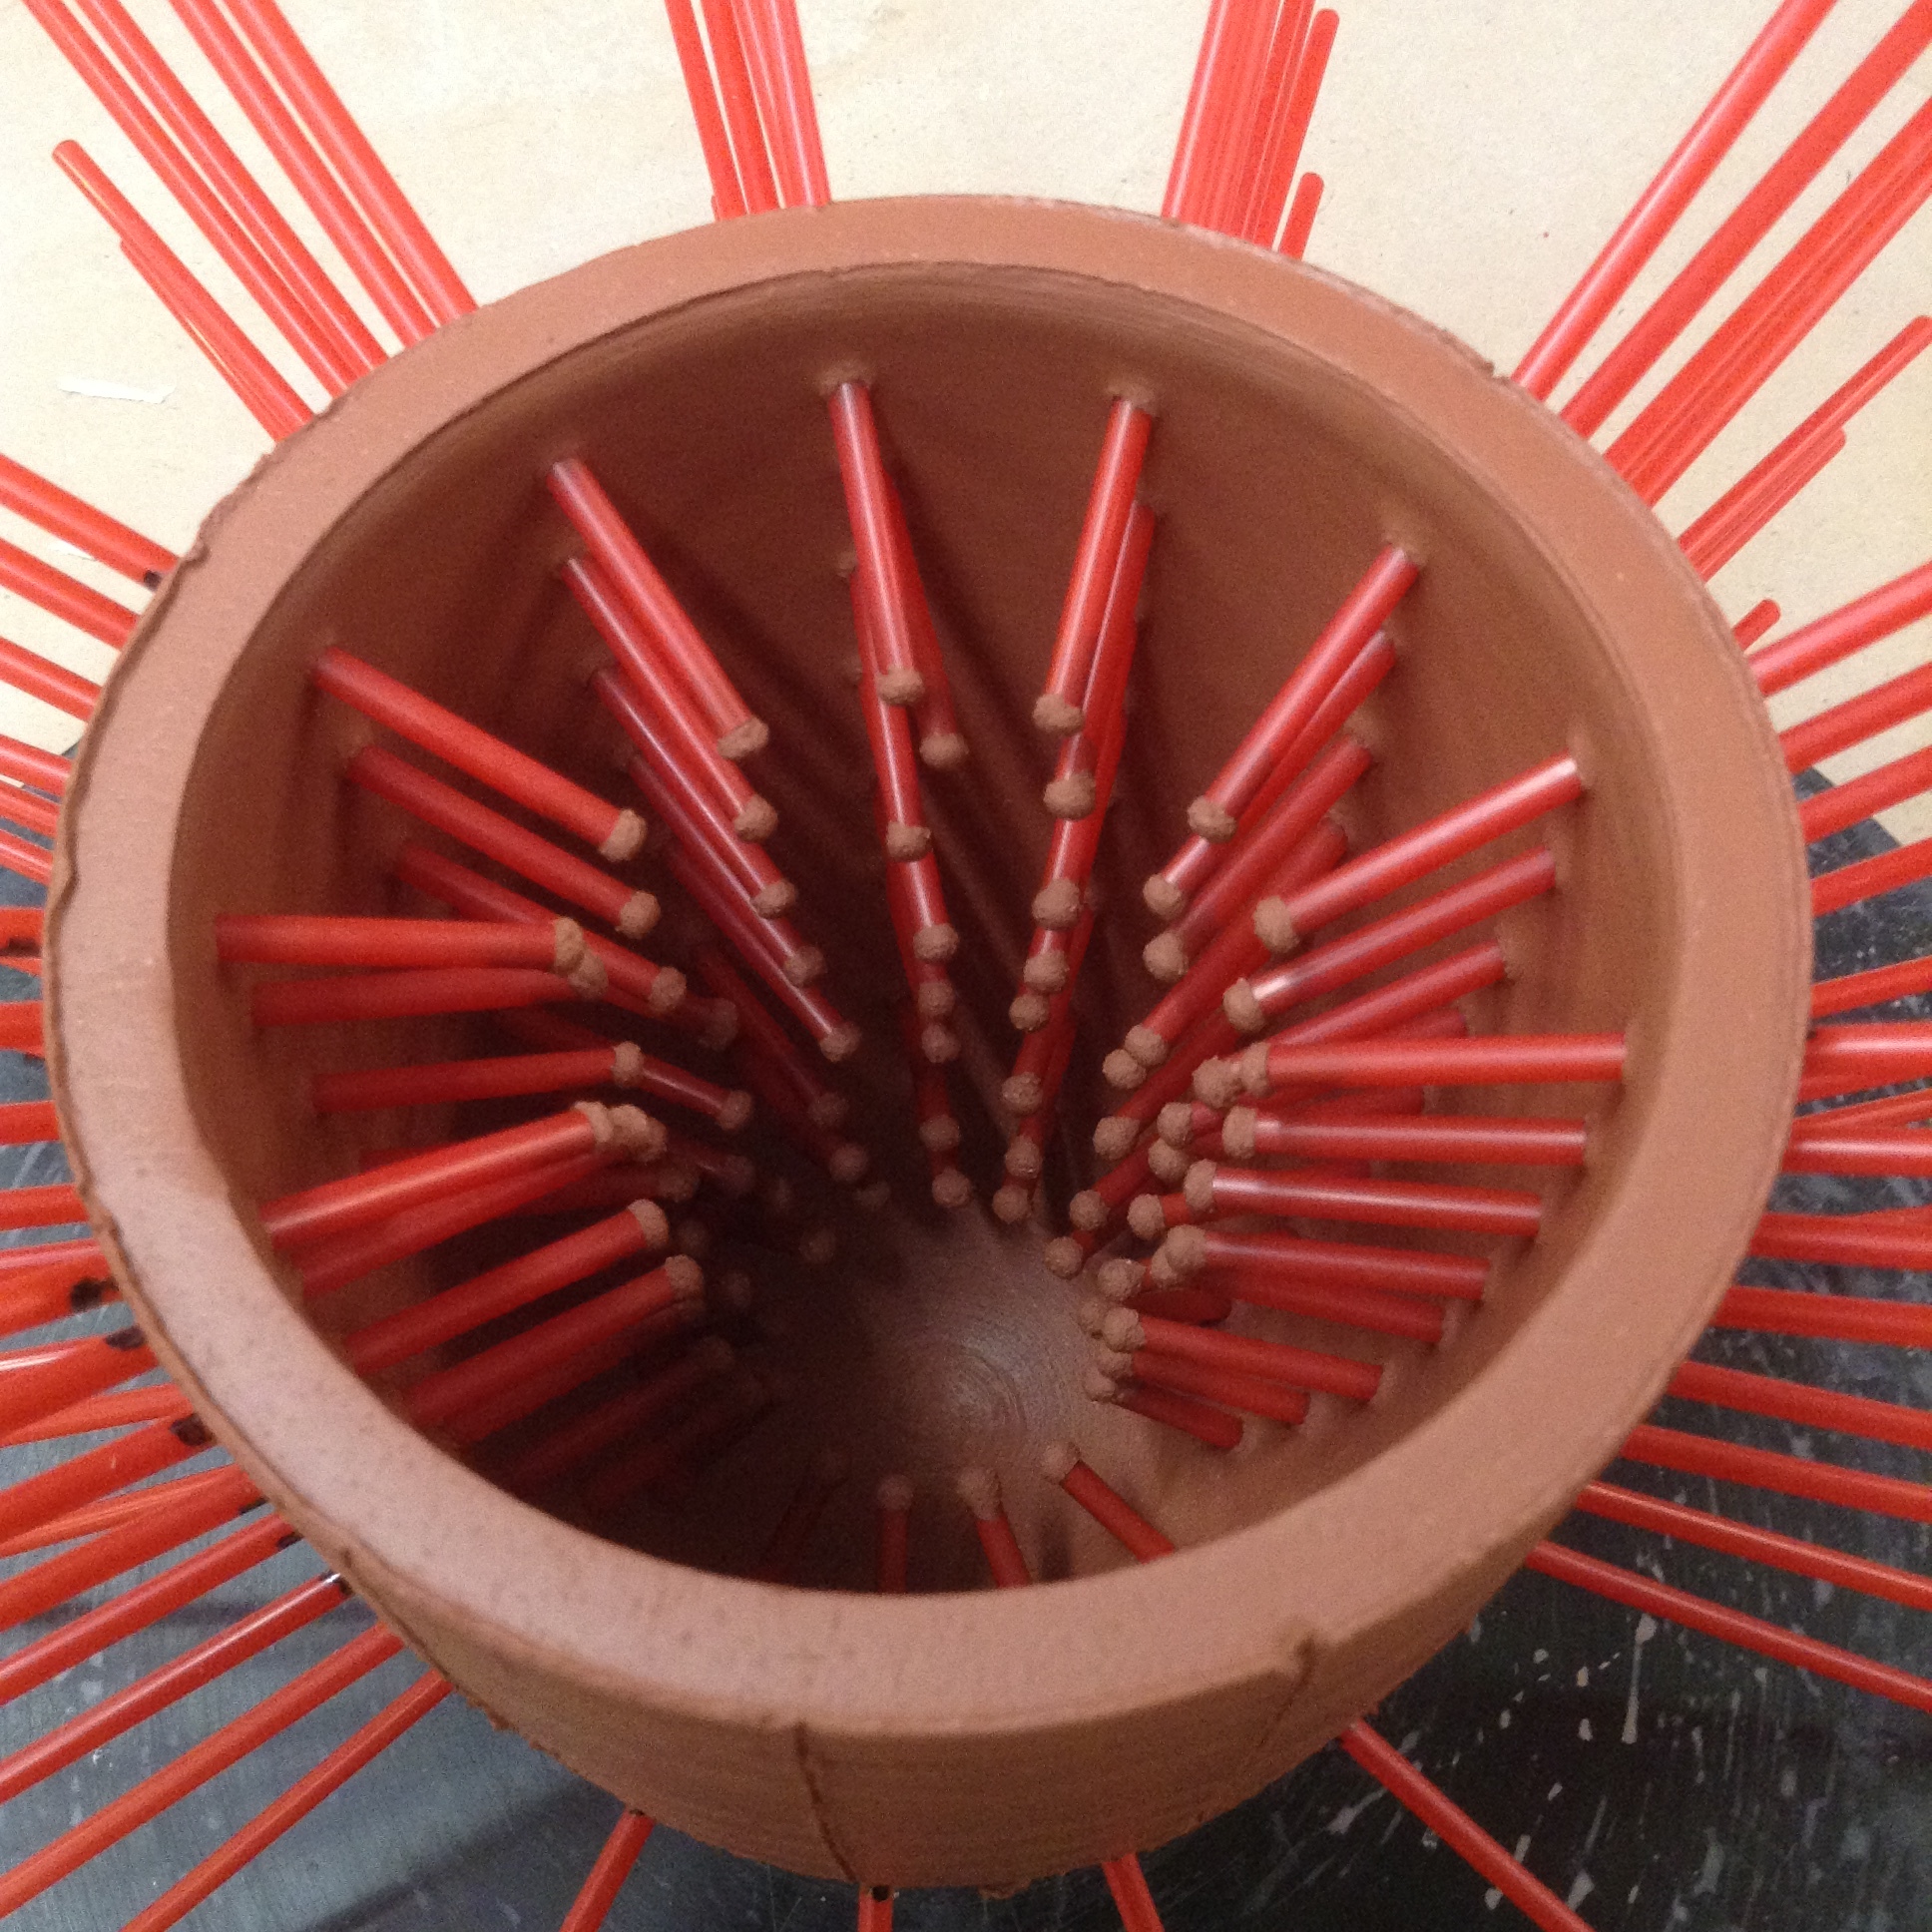
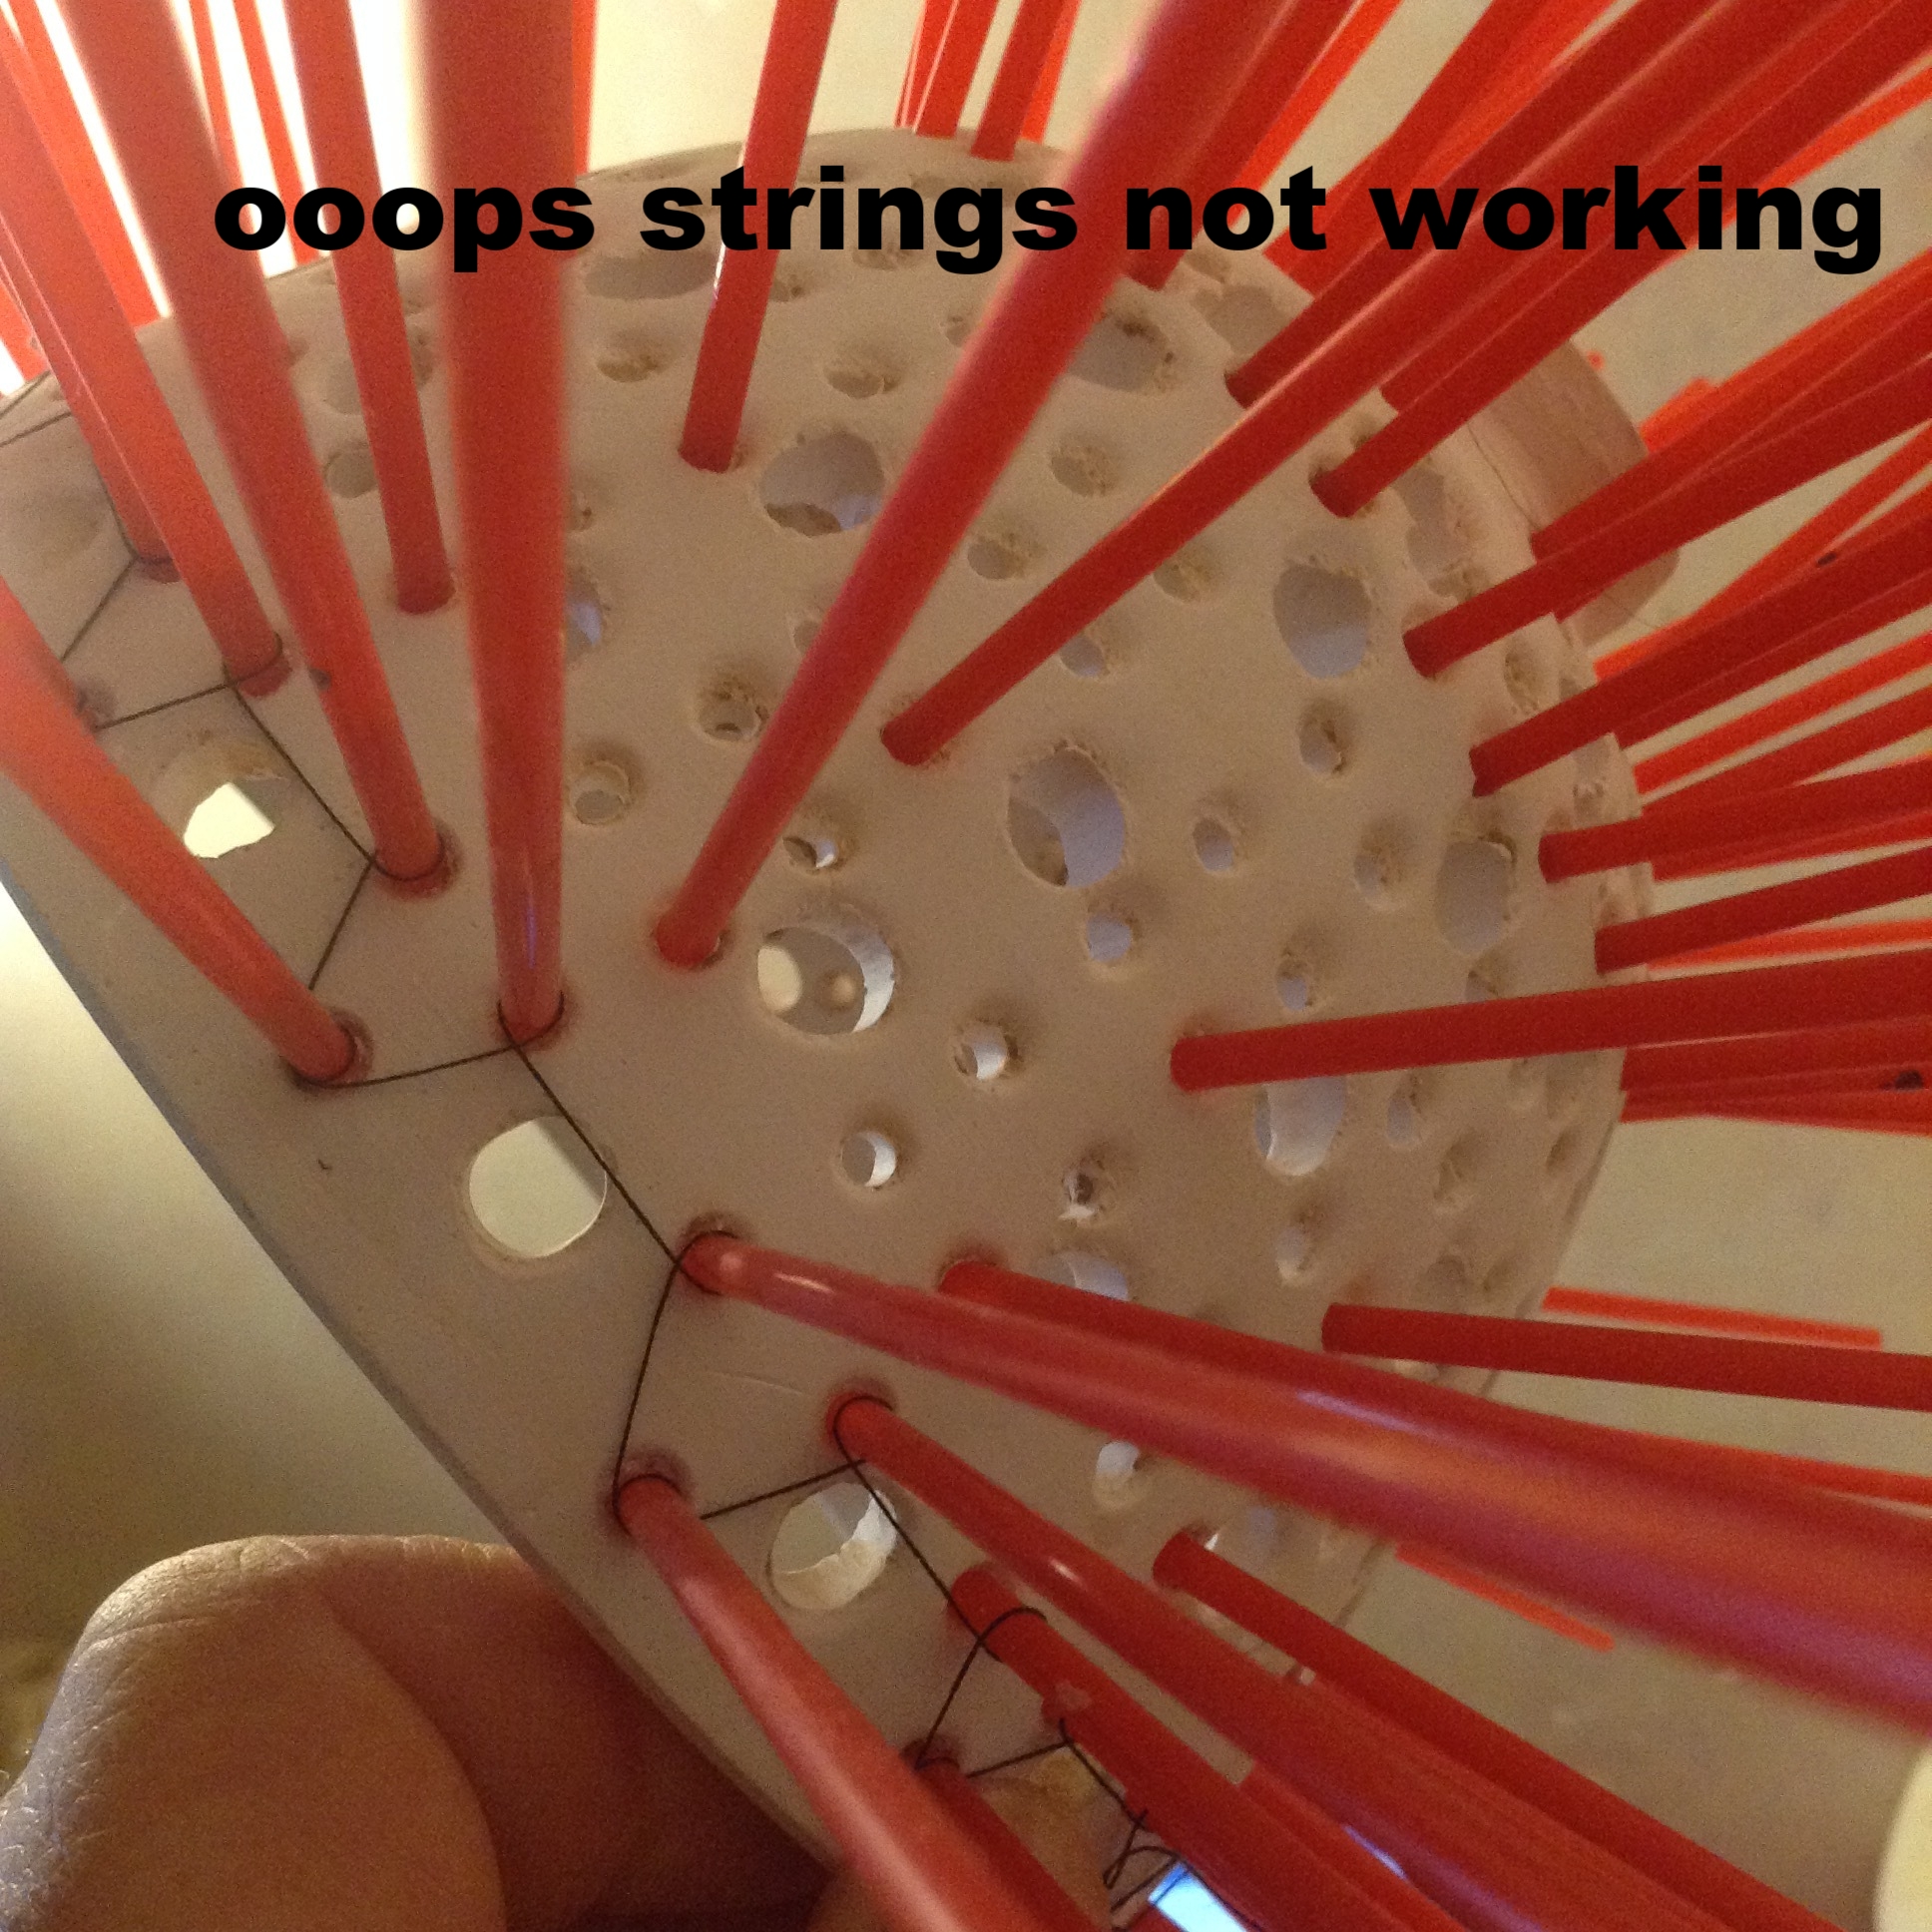
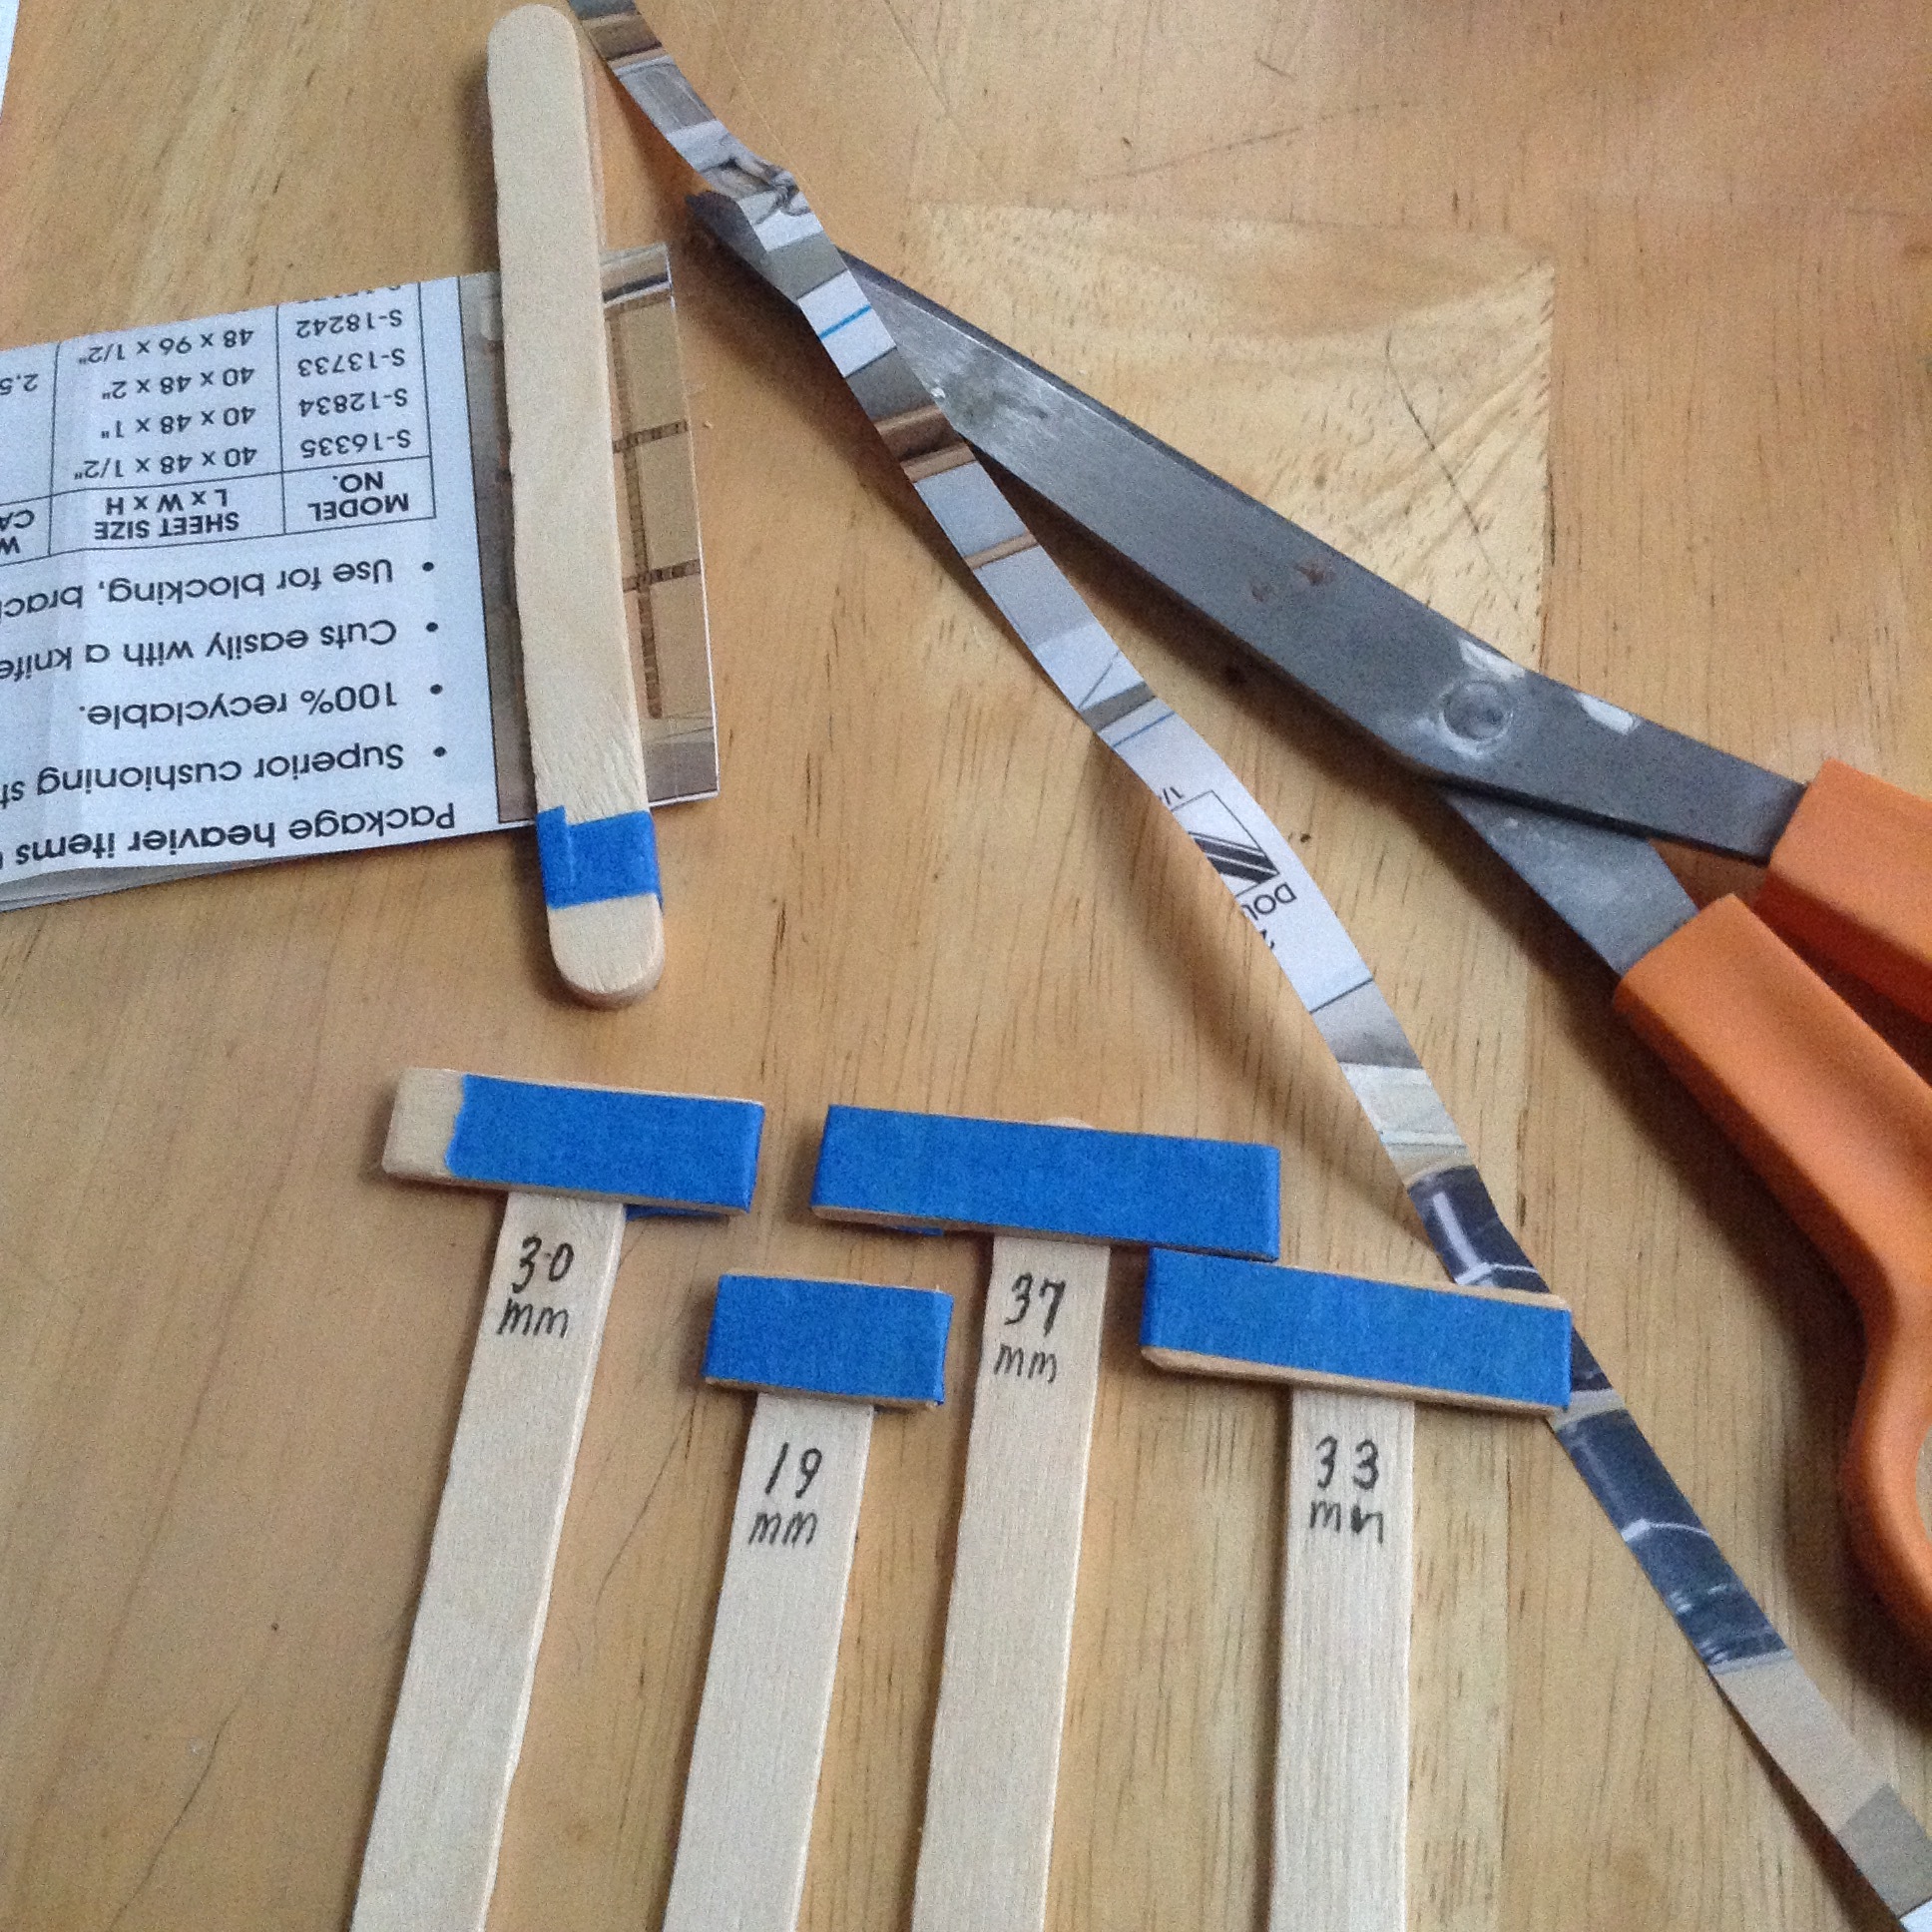
Still shots of the process of making the clay forms, and stabbing the straws through both layers. The large number of straws of each color look very pretty. If you're going through a package of colored straws and NOT trying to put them in some kind of order, there's something wrong with you. The finished unmolded plaster shape is shown last. It is ready for use as form for the string scaffolding.
PLASTER BOWL NUMBER 1

PLASTER BOWL NUMBER 2

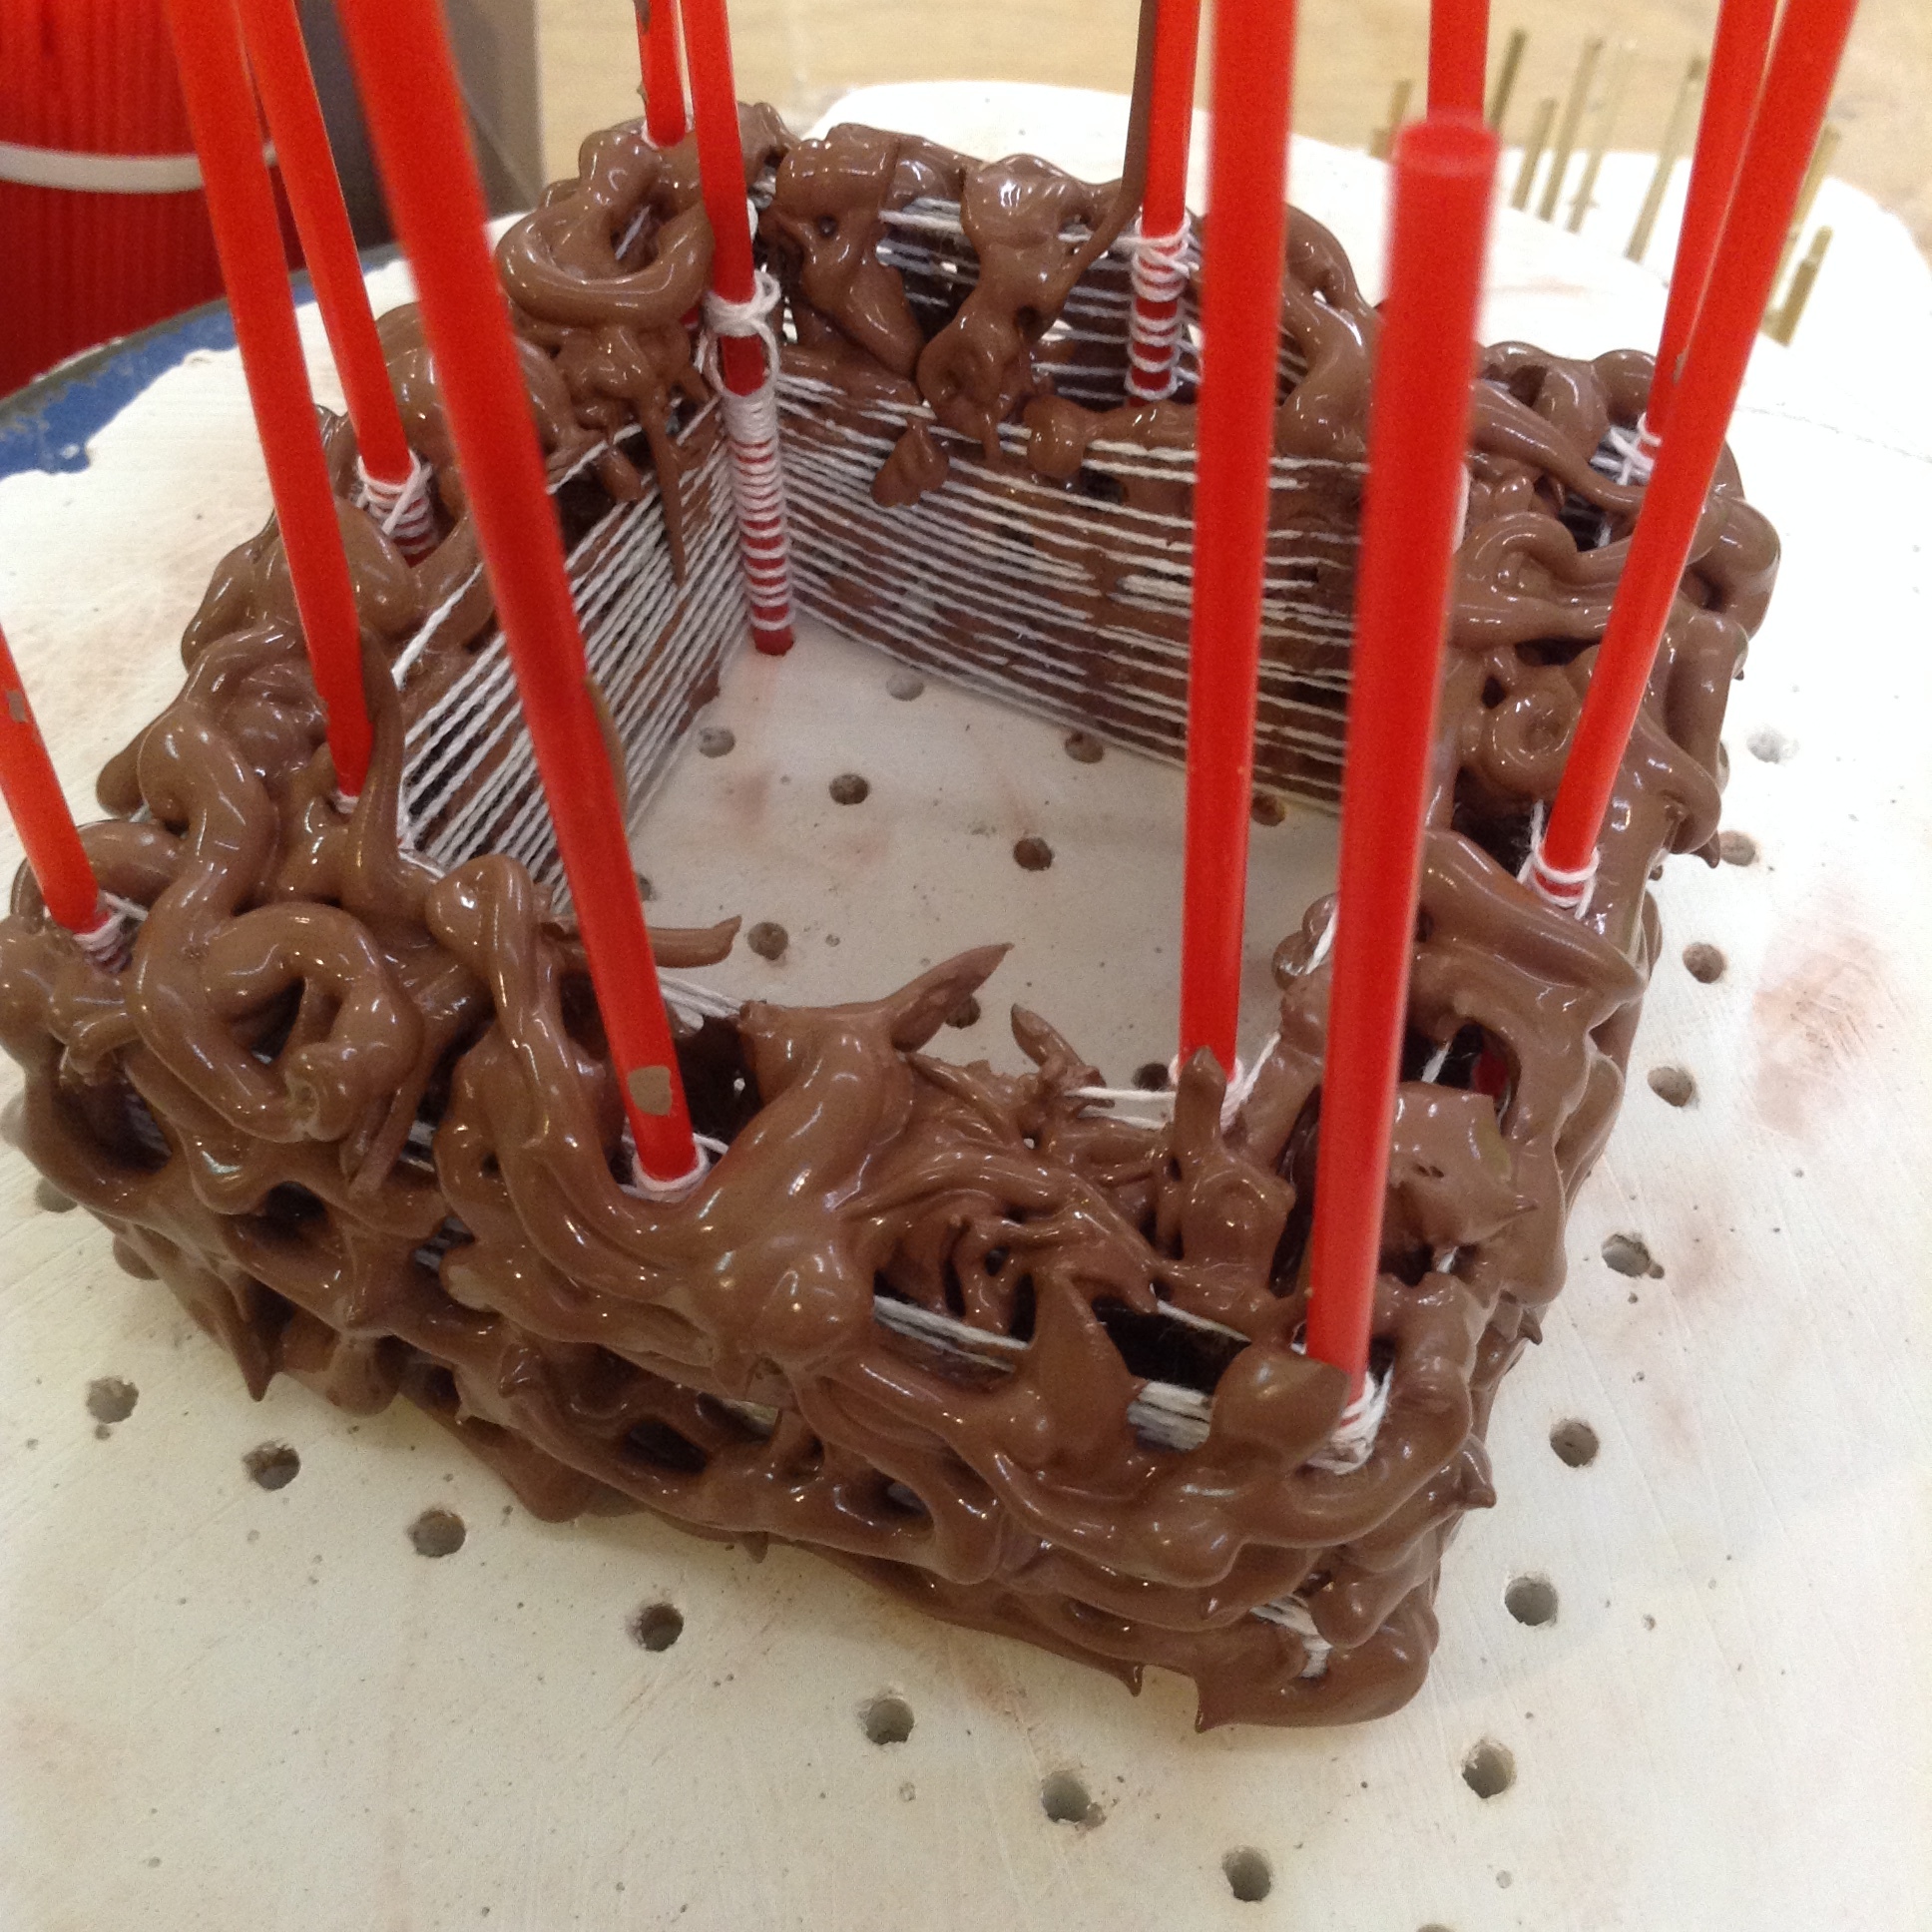
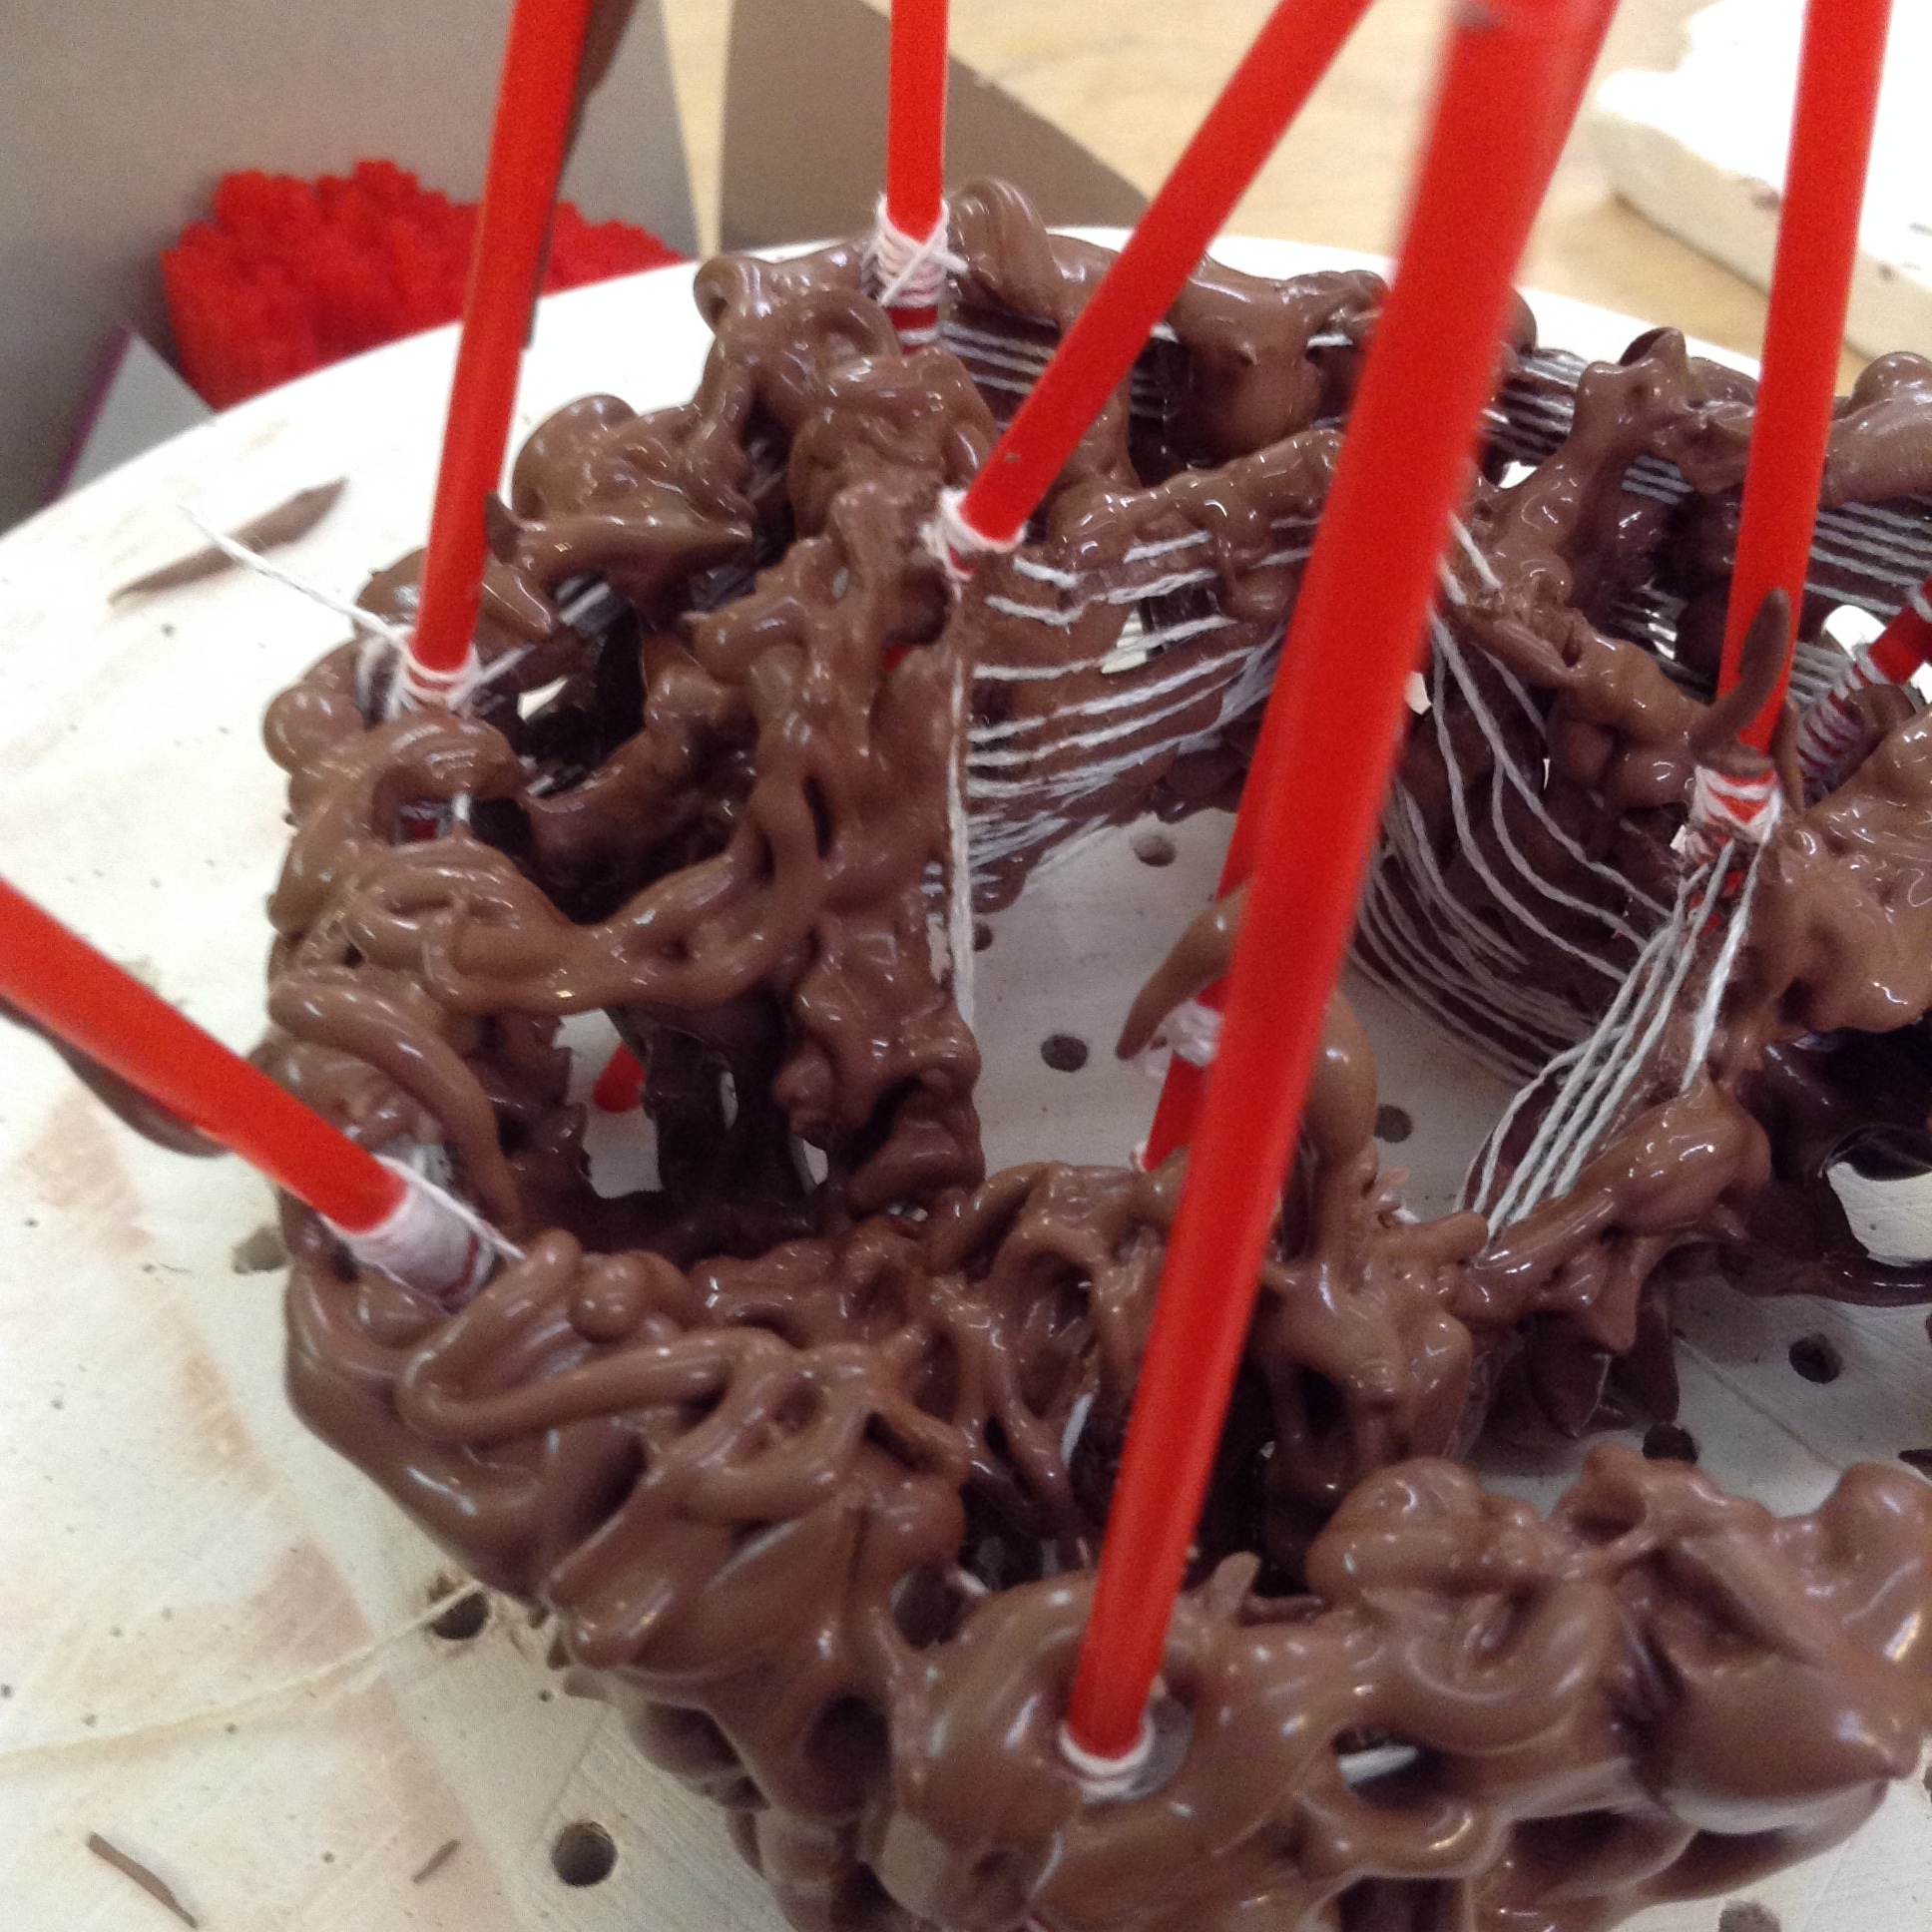
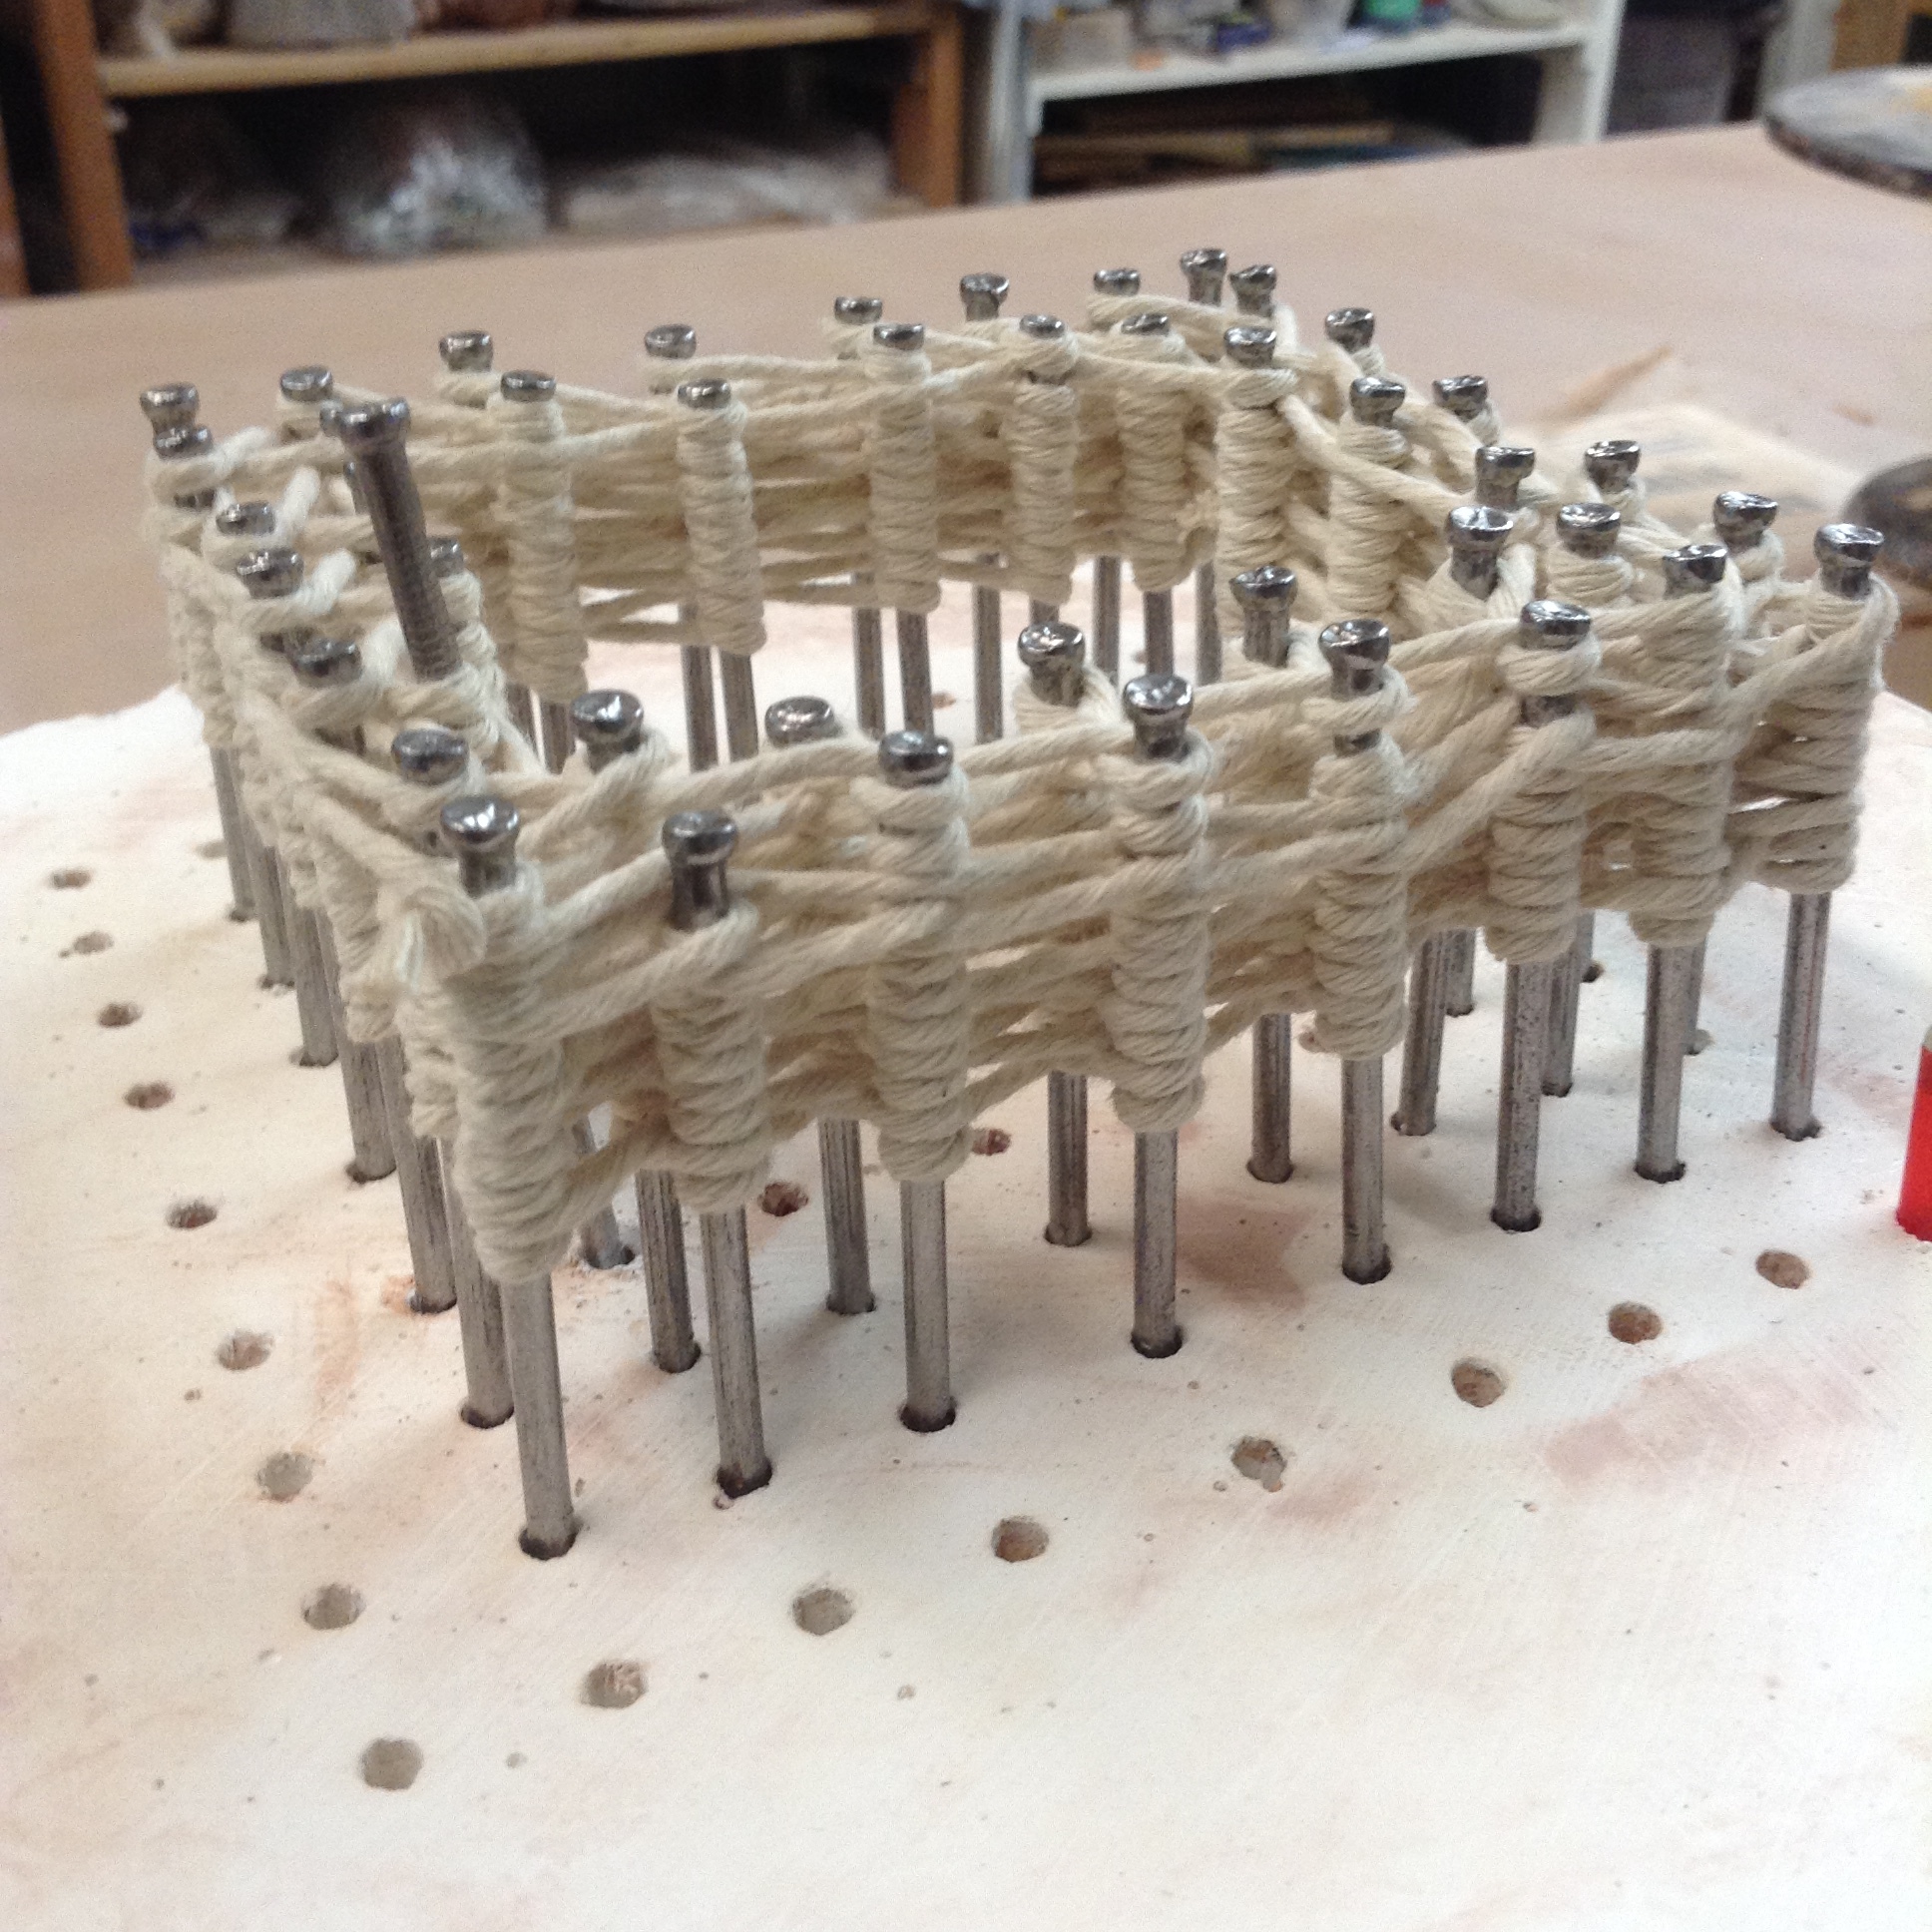
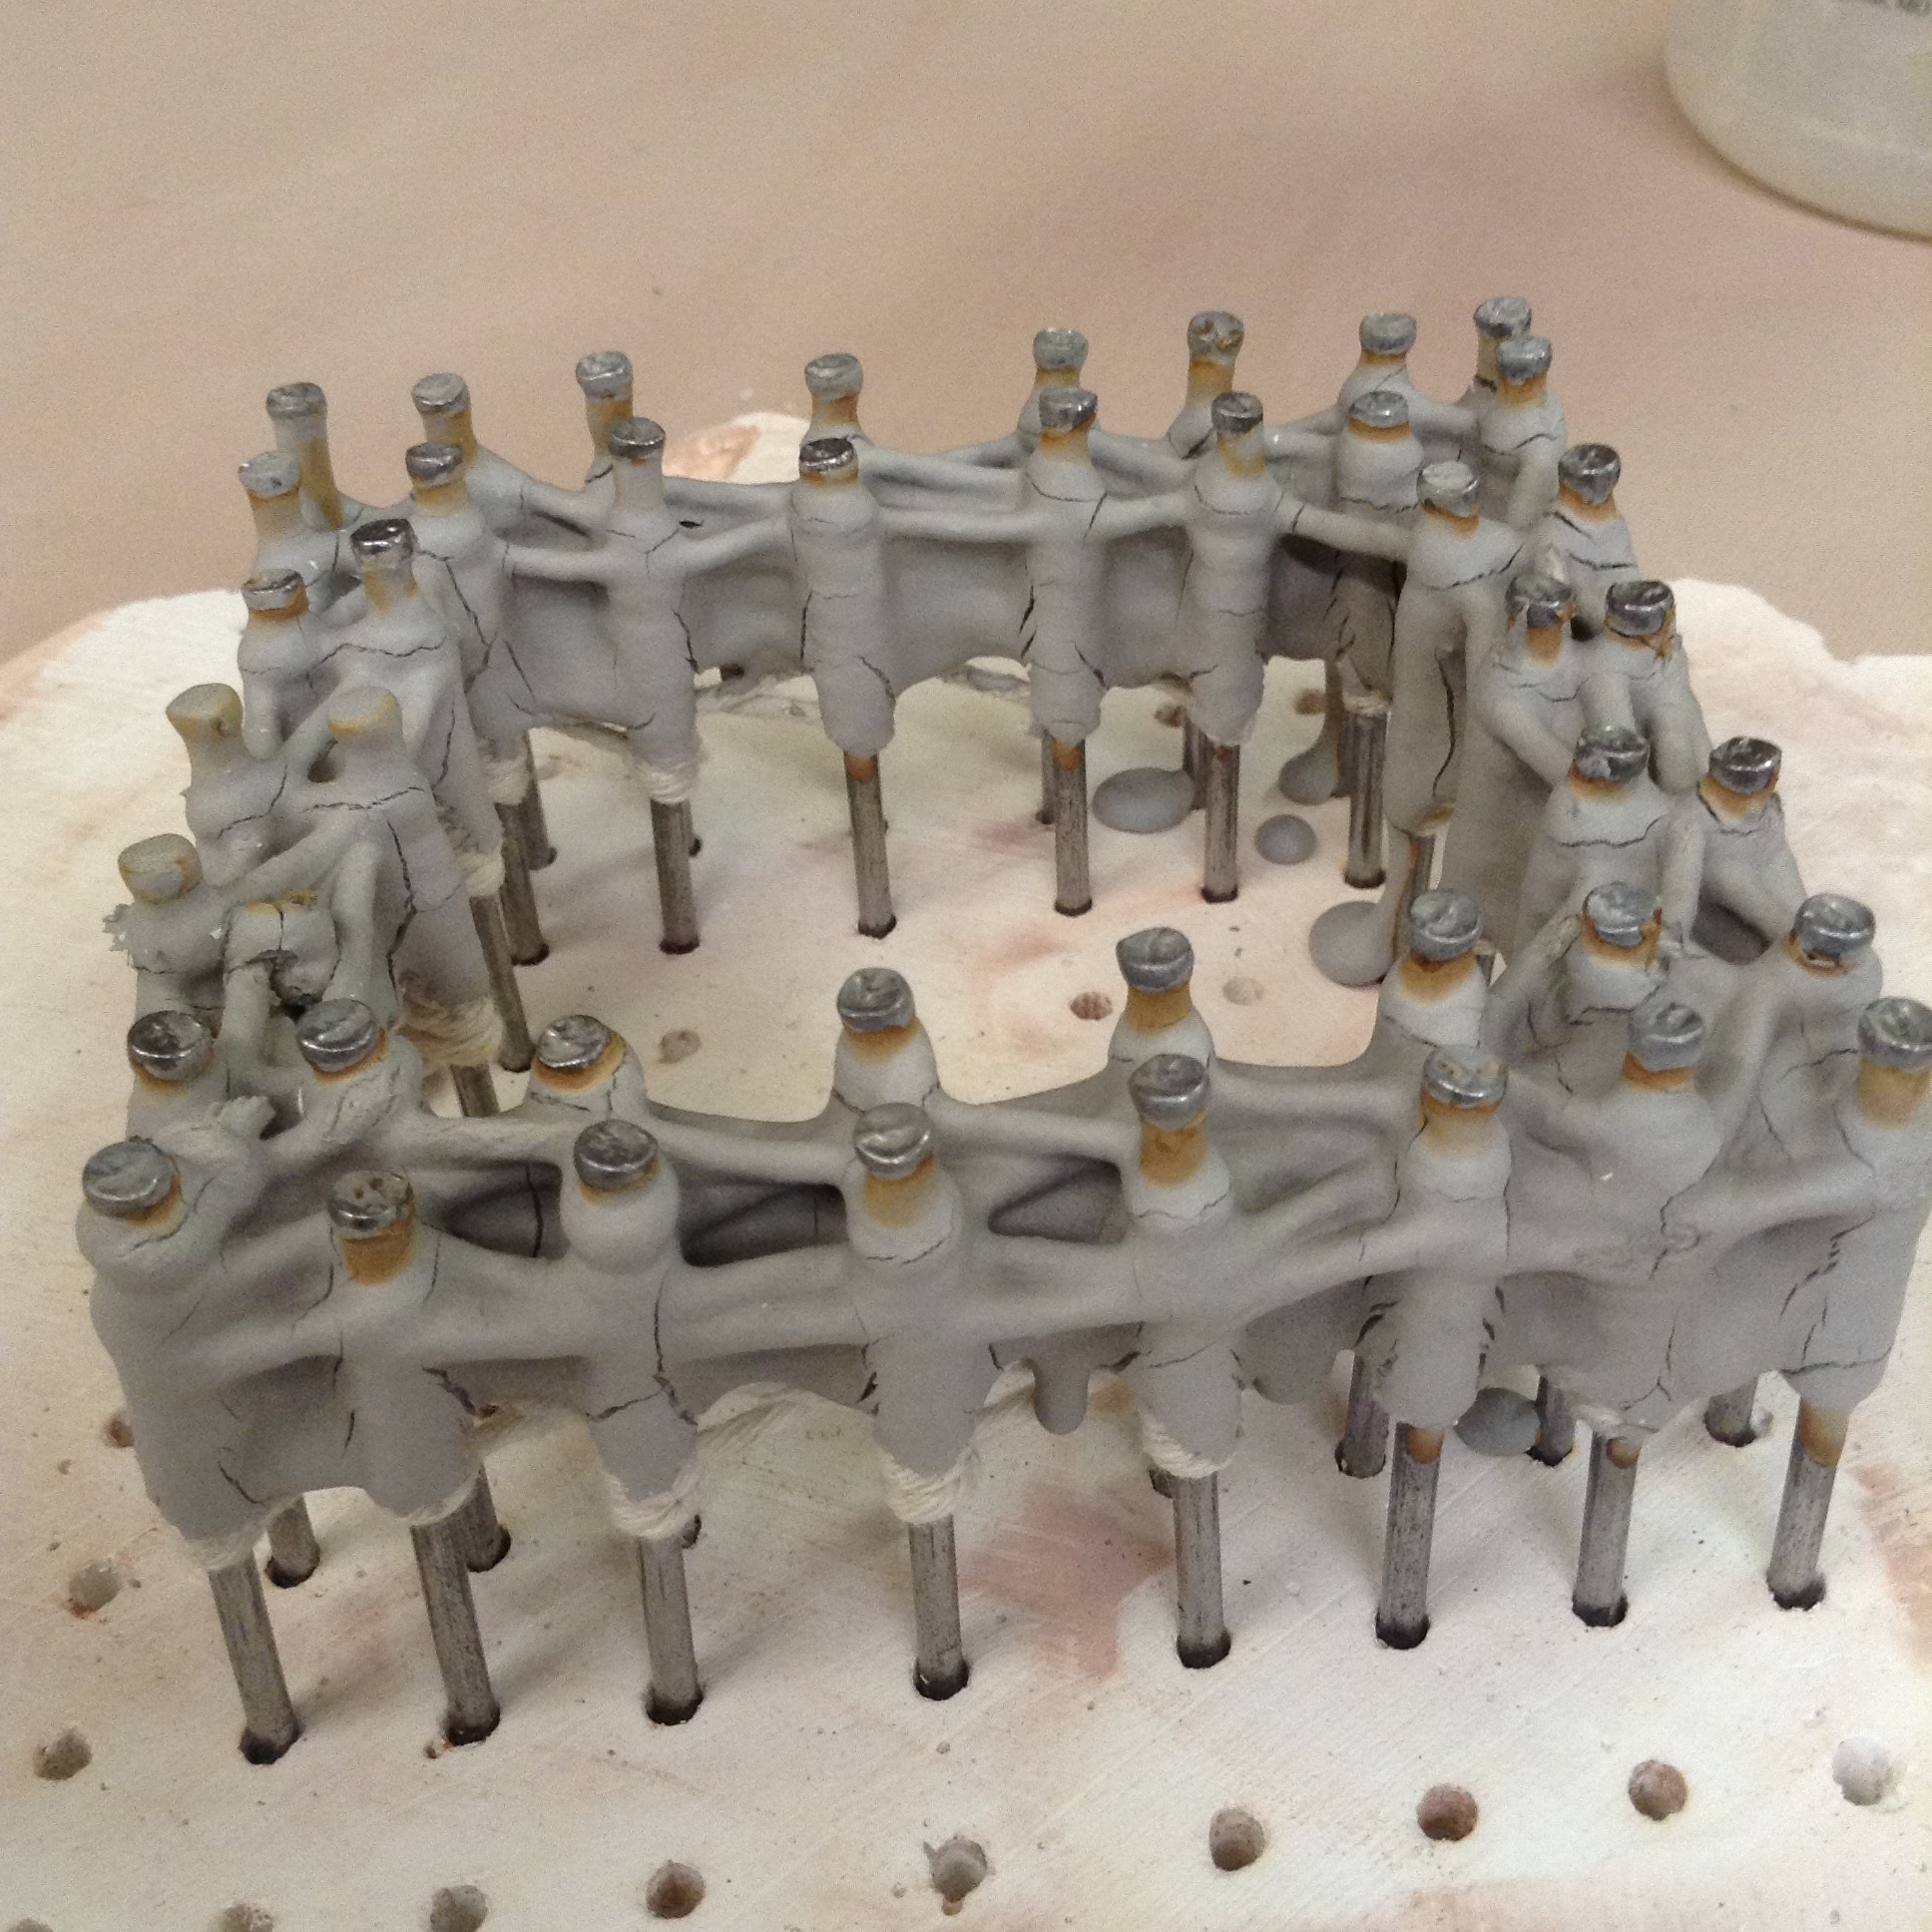
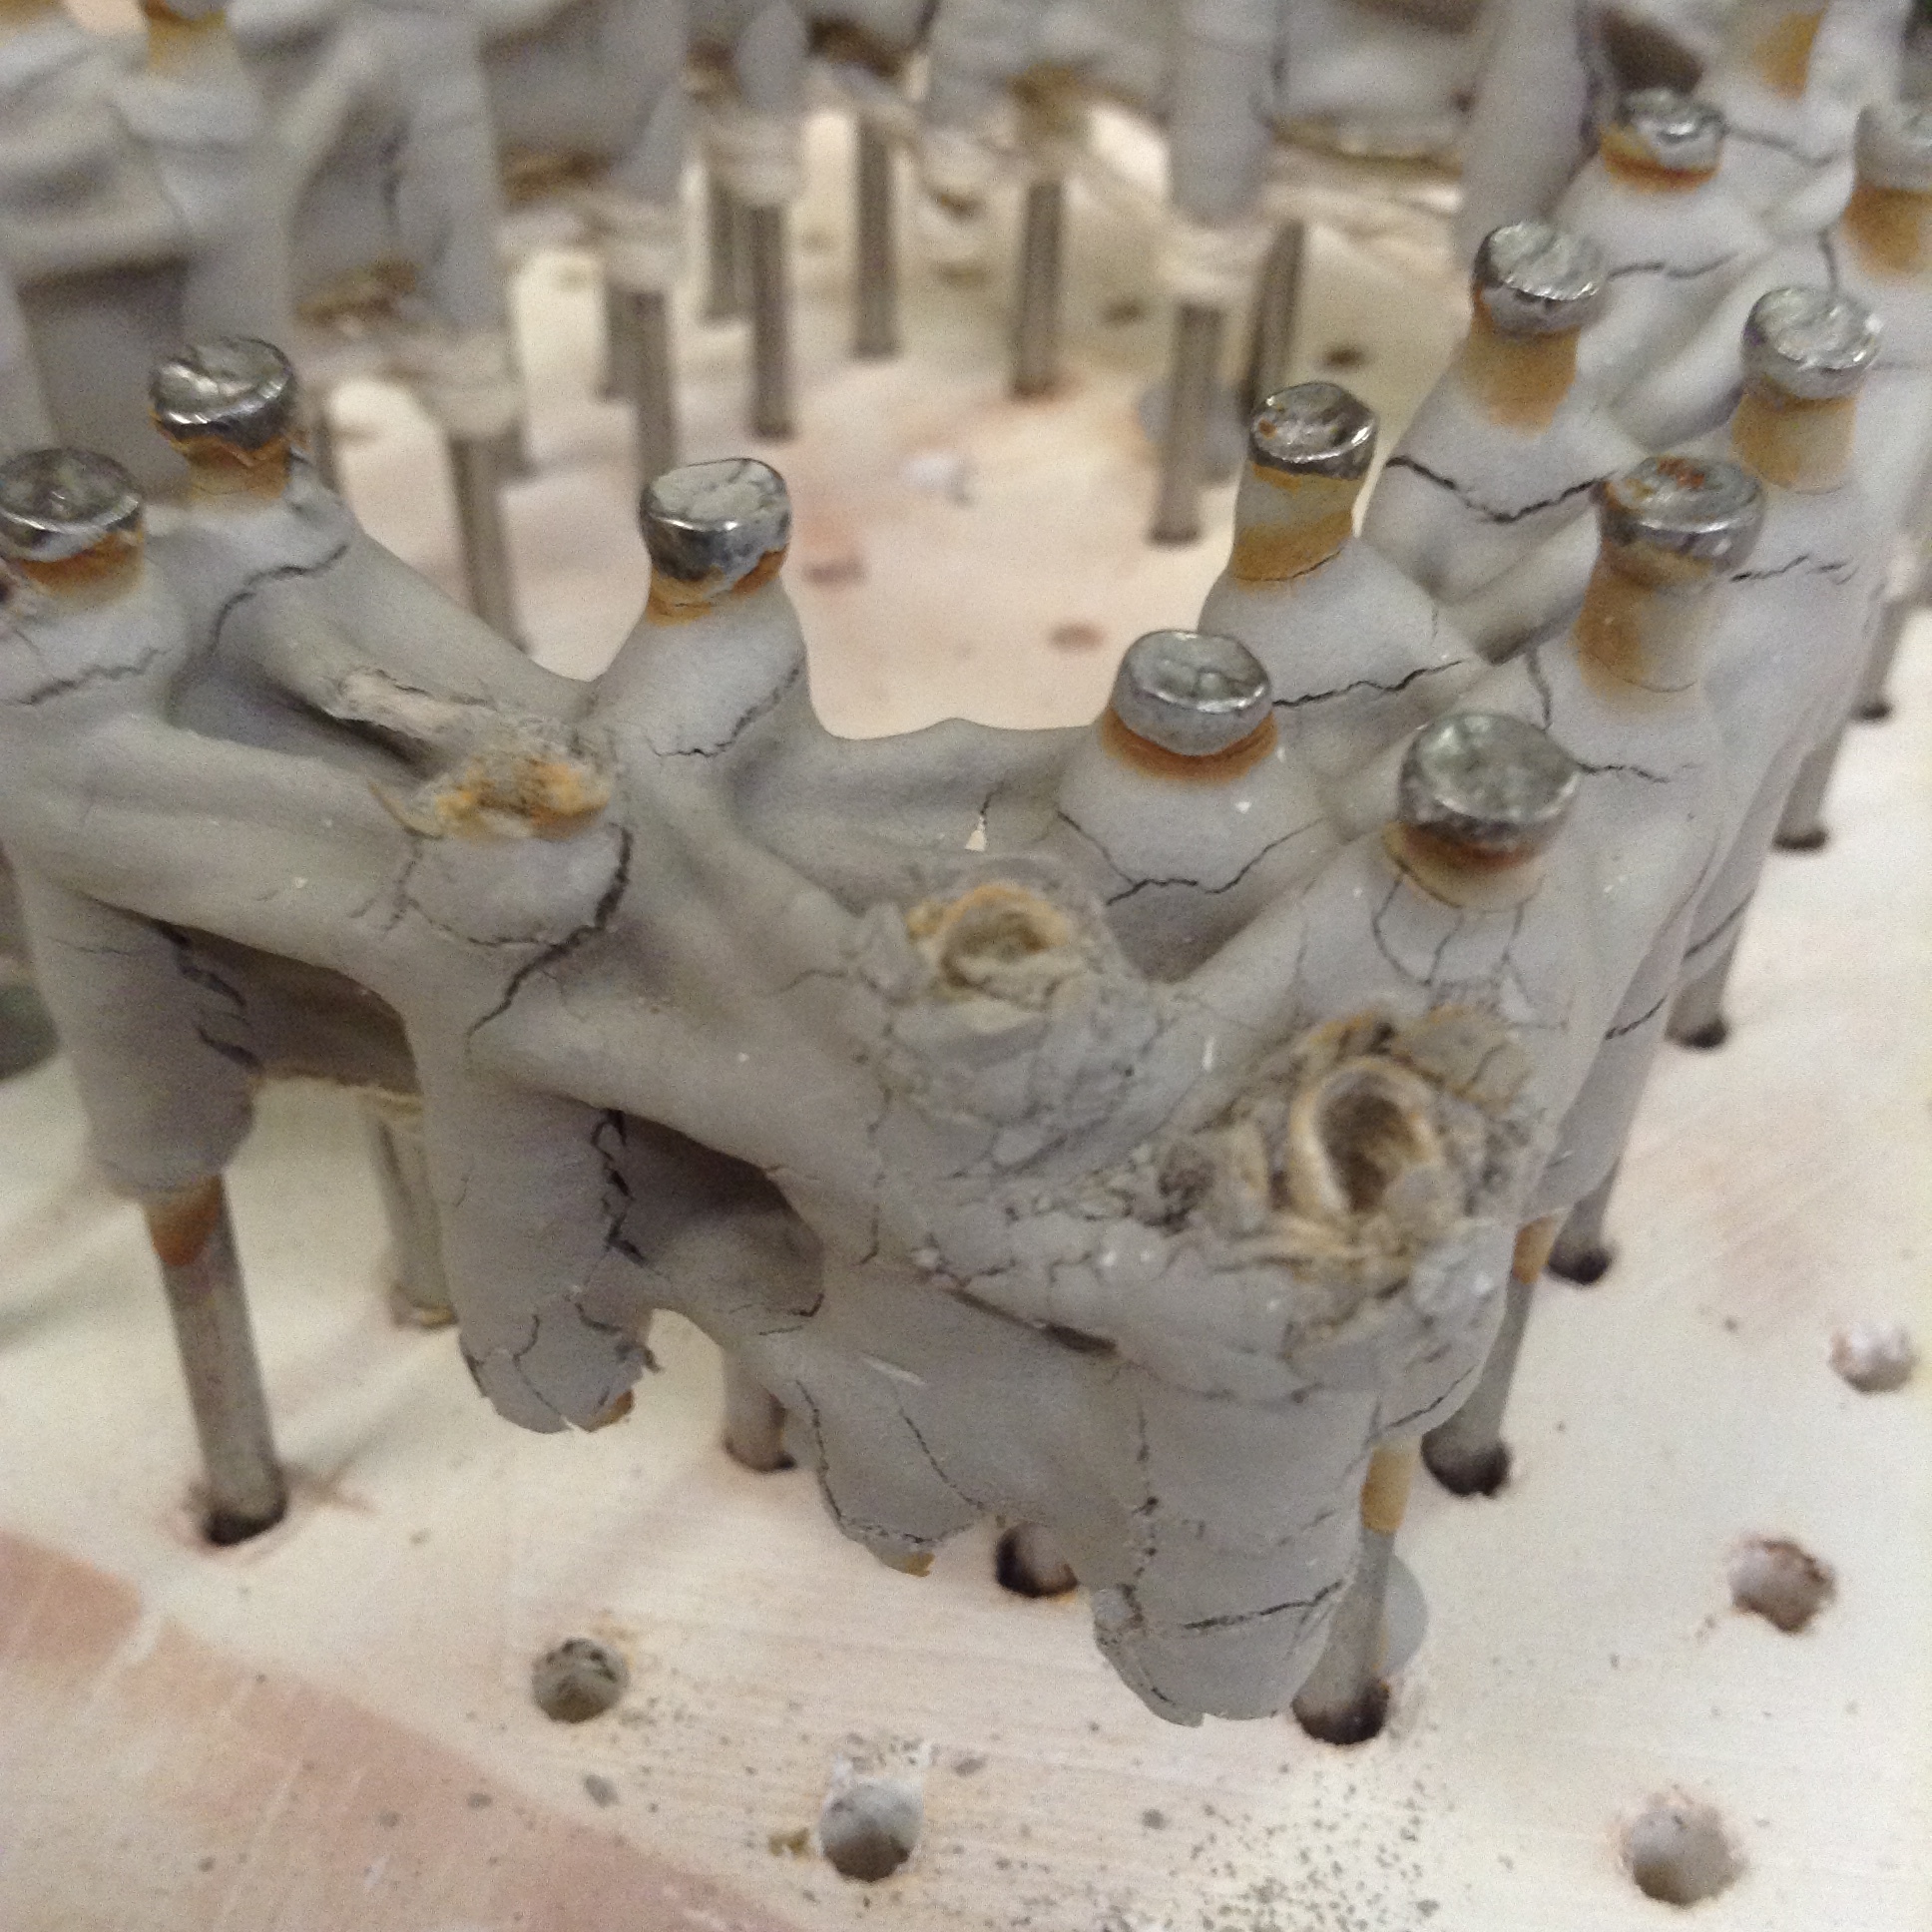
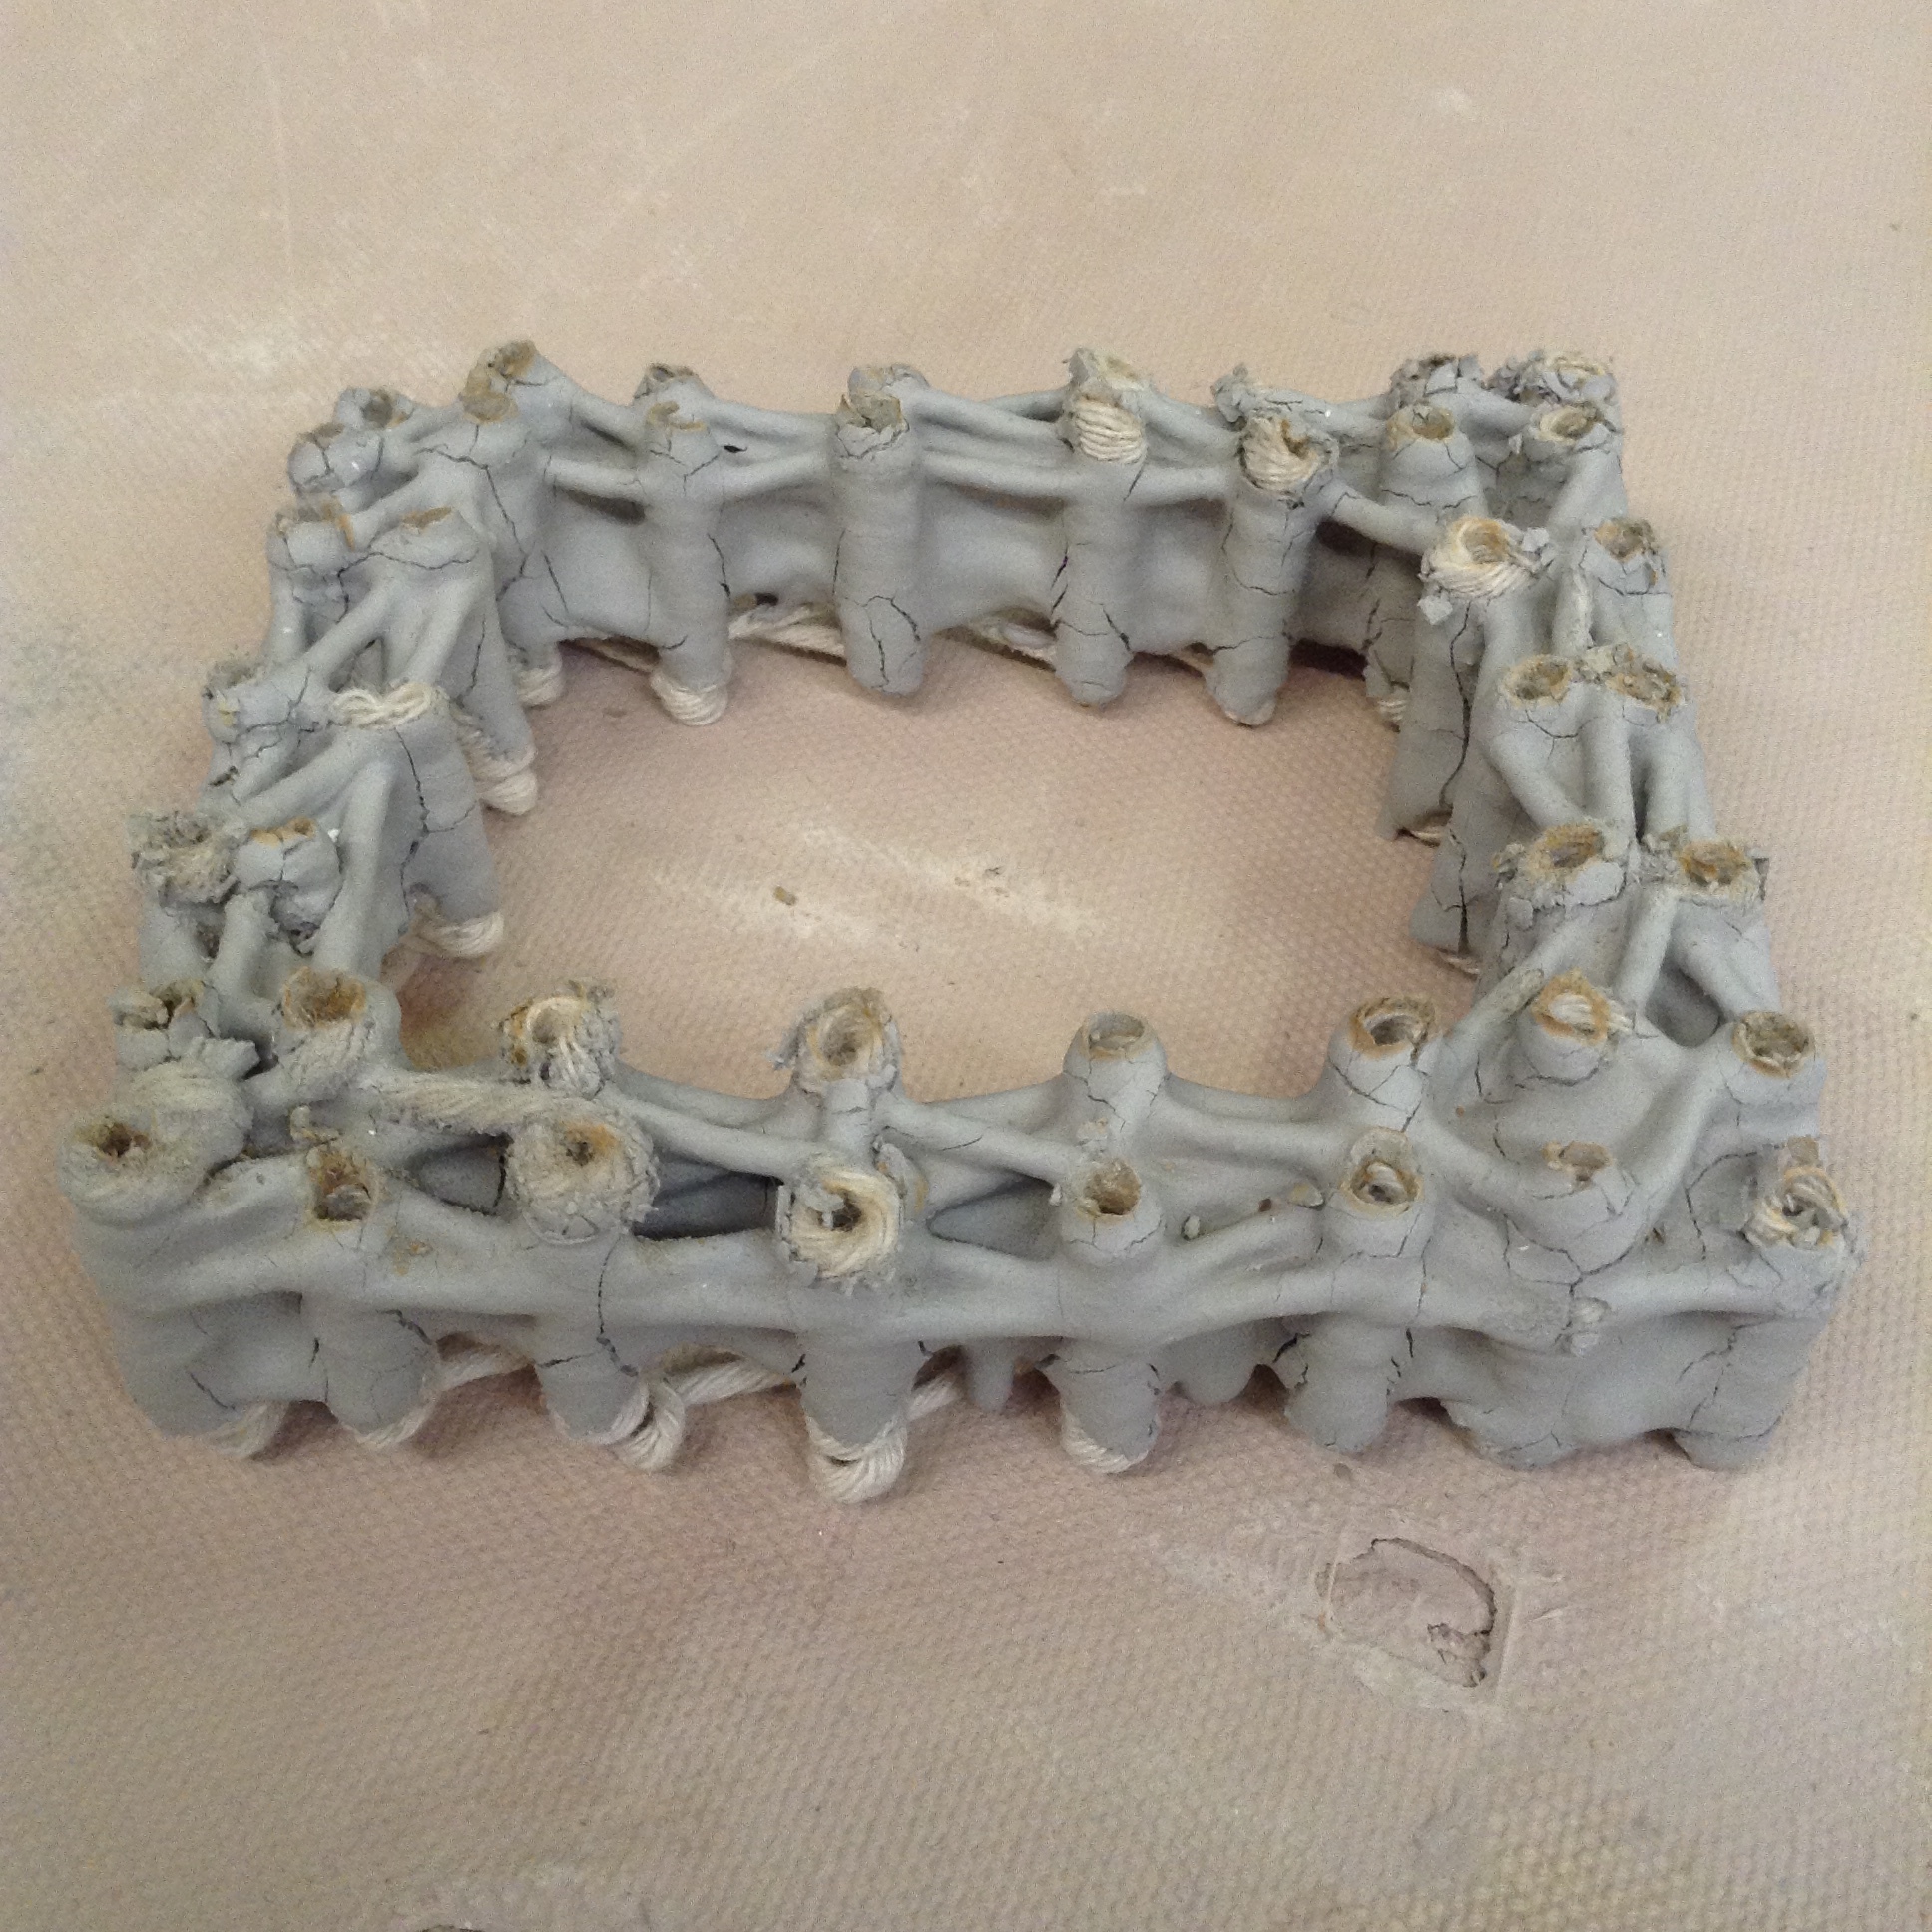
WRAPPING IT ALL UP, or at least trying
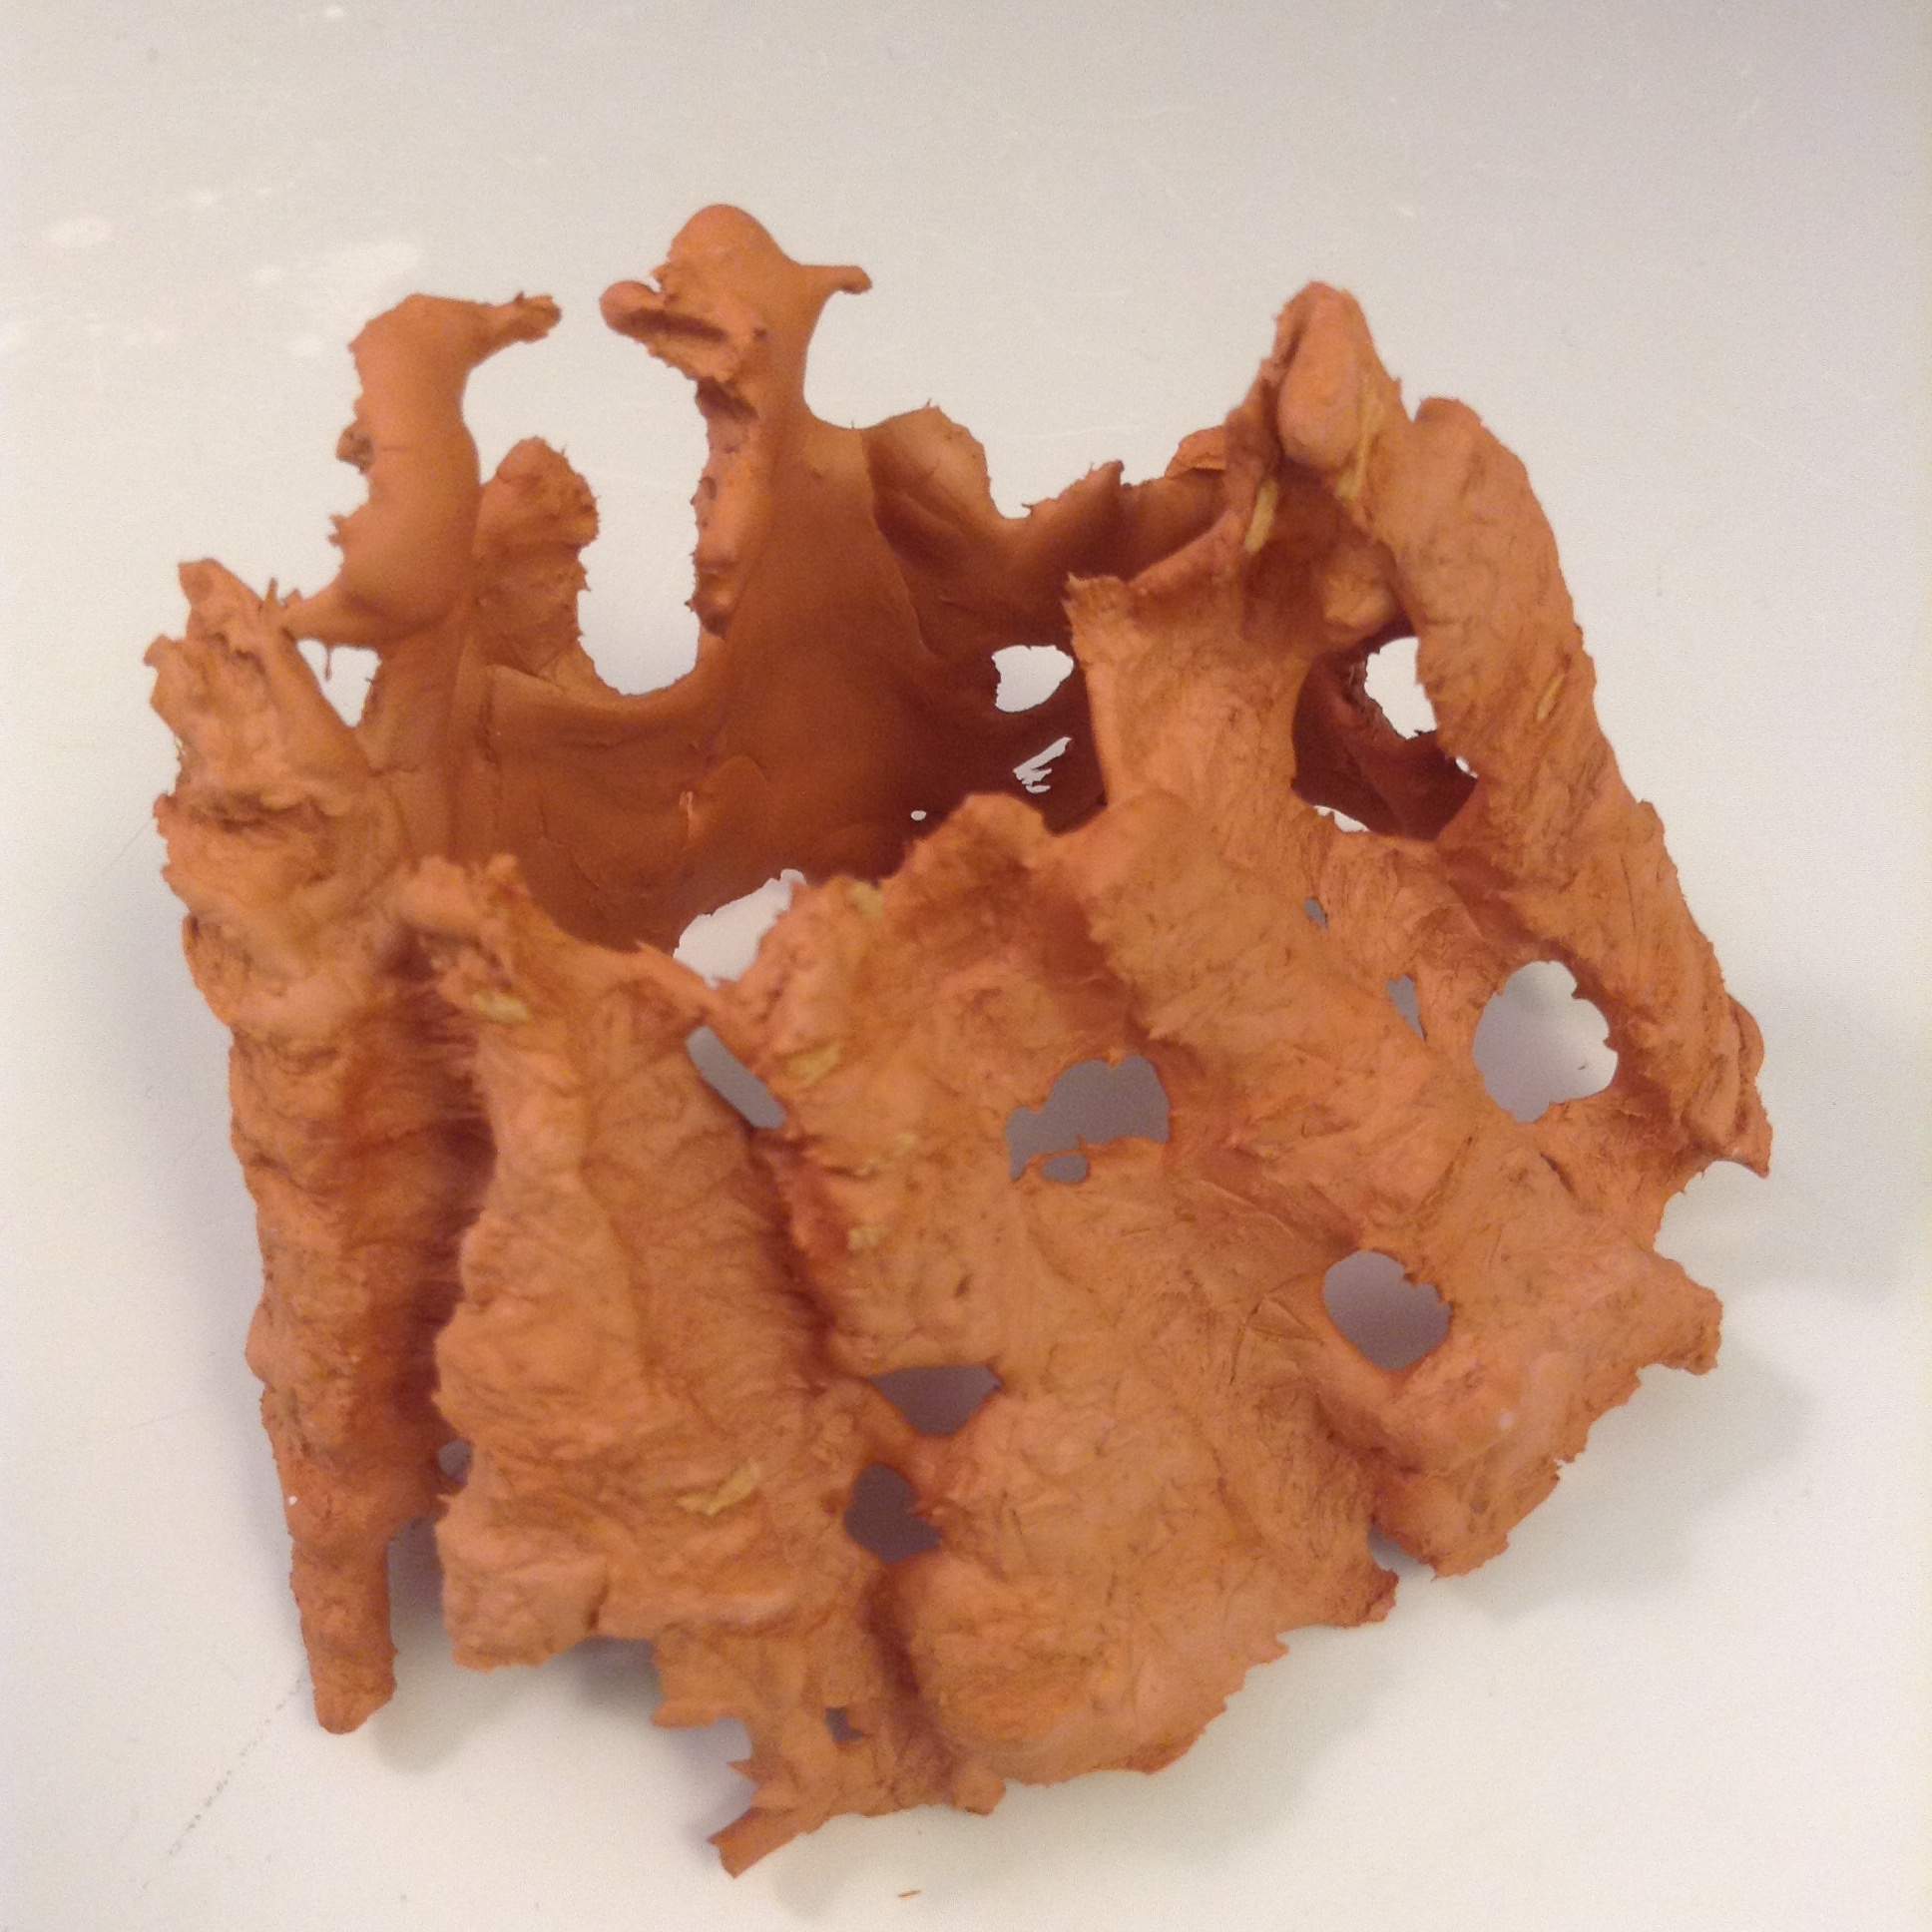
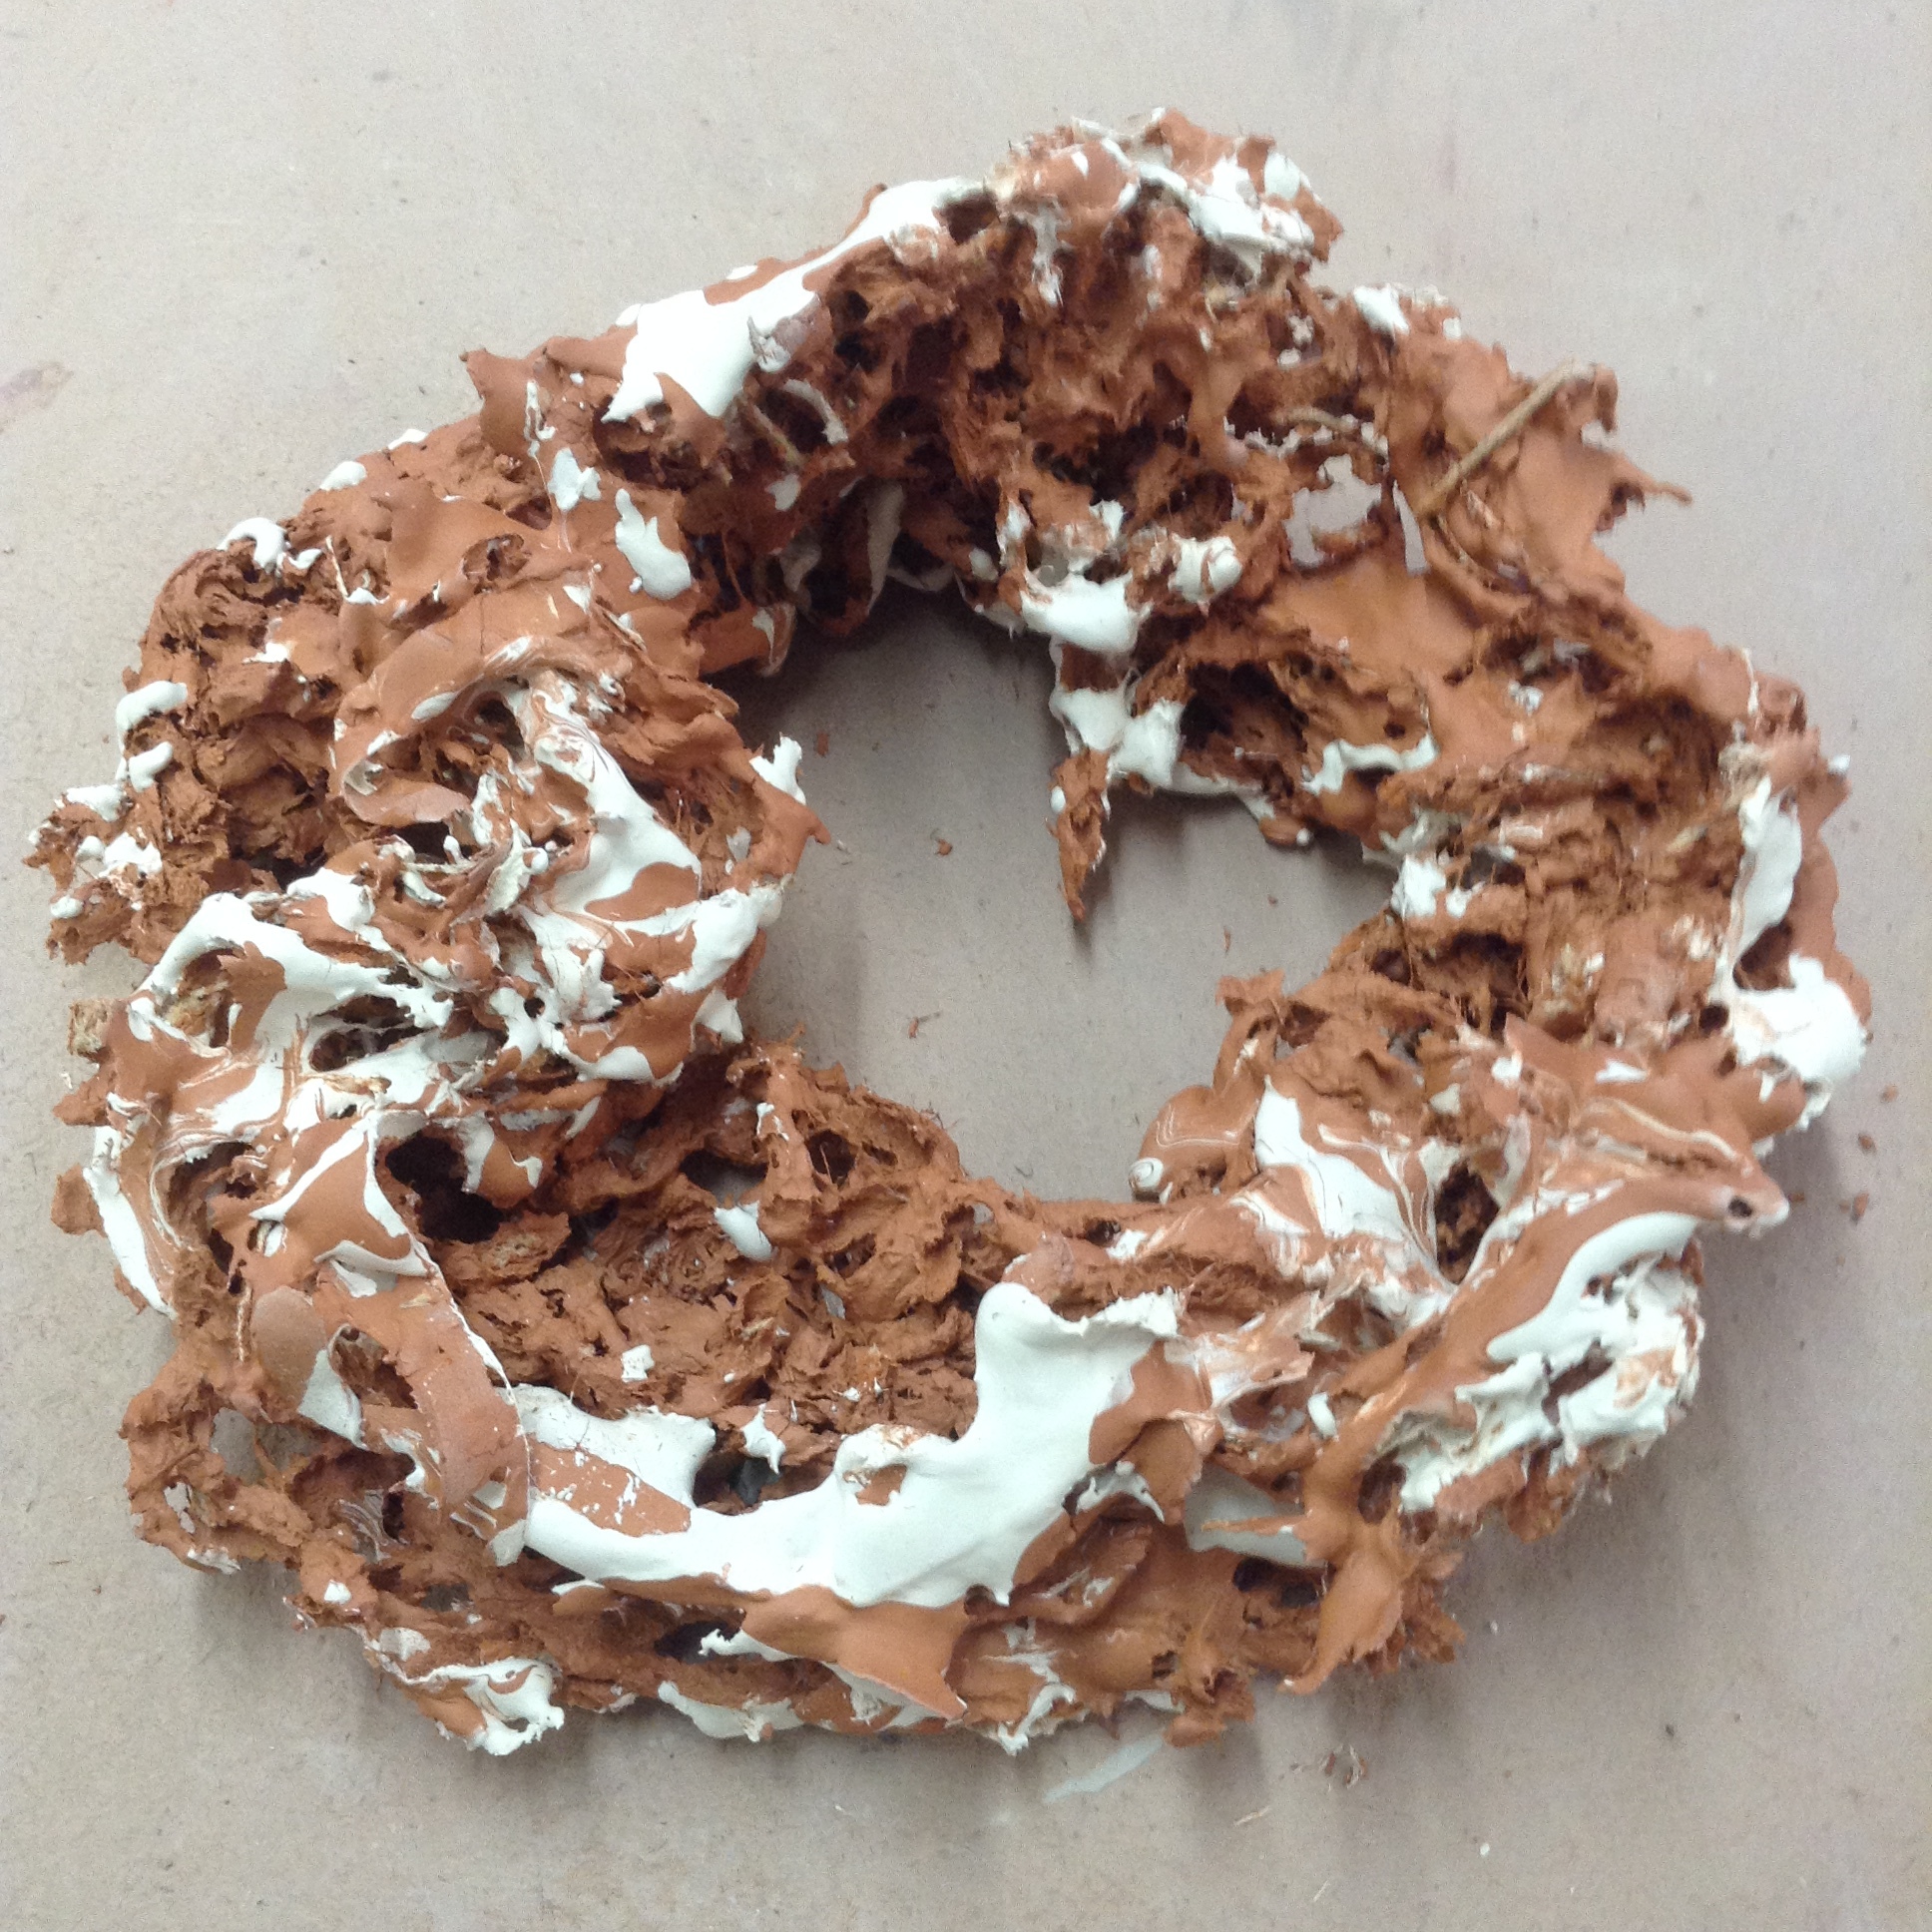
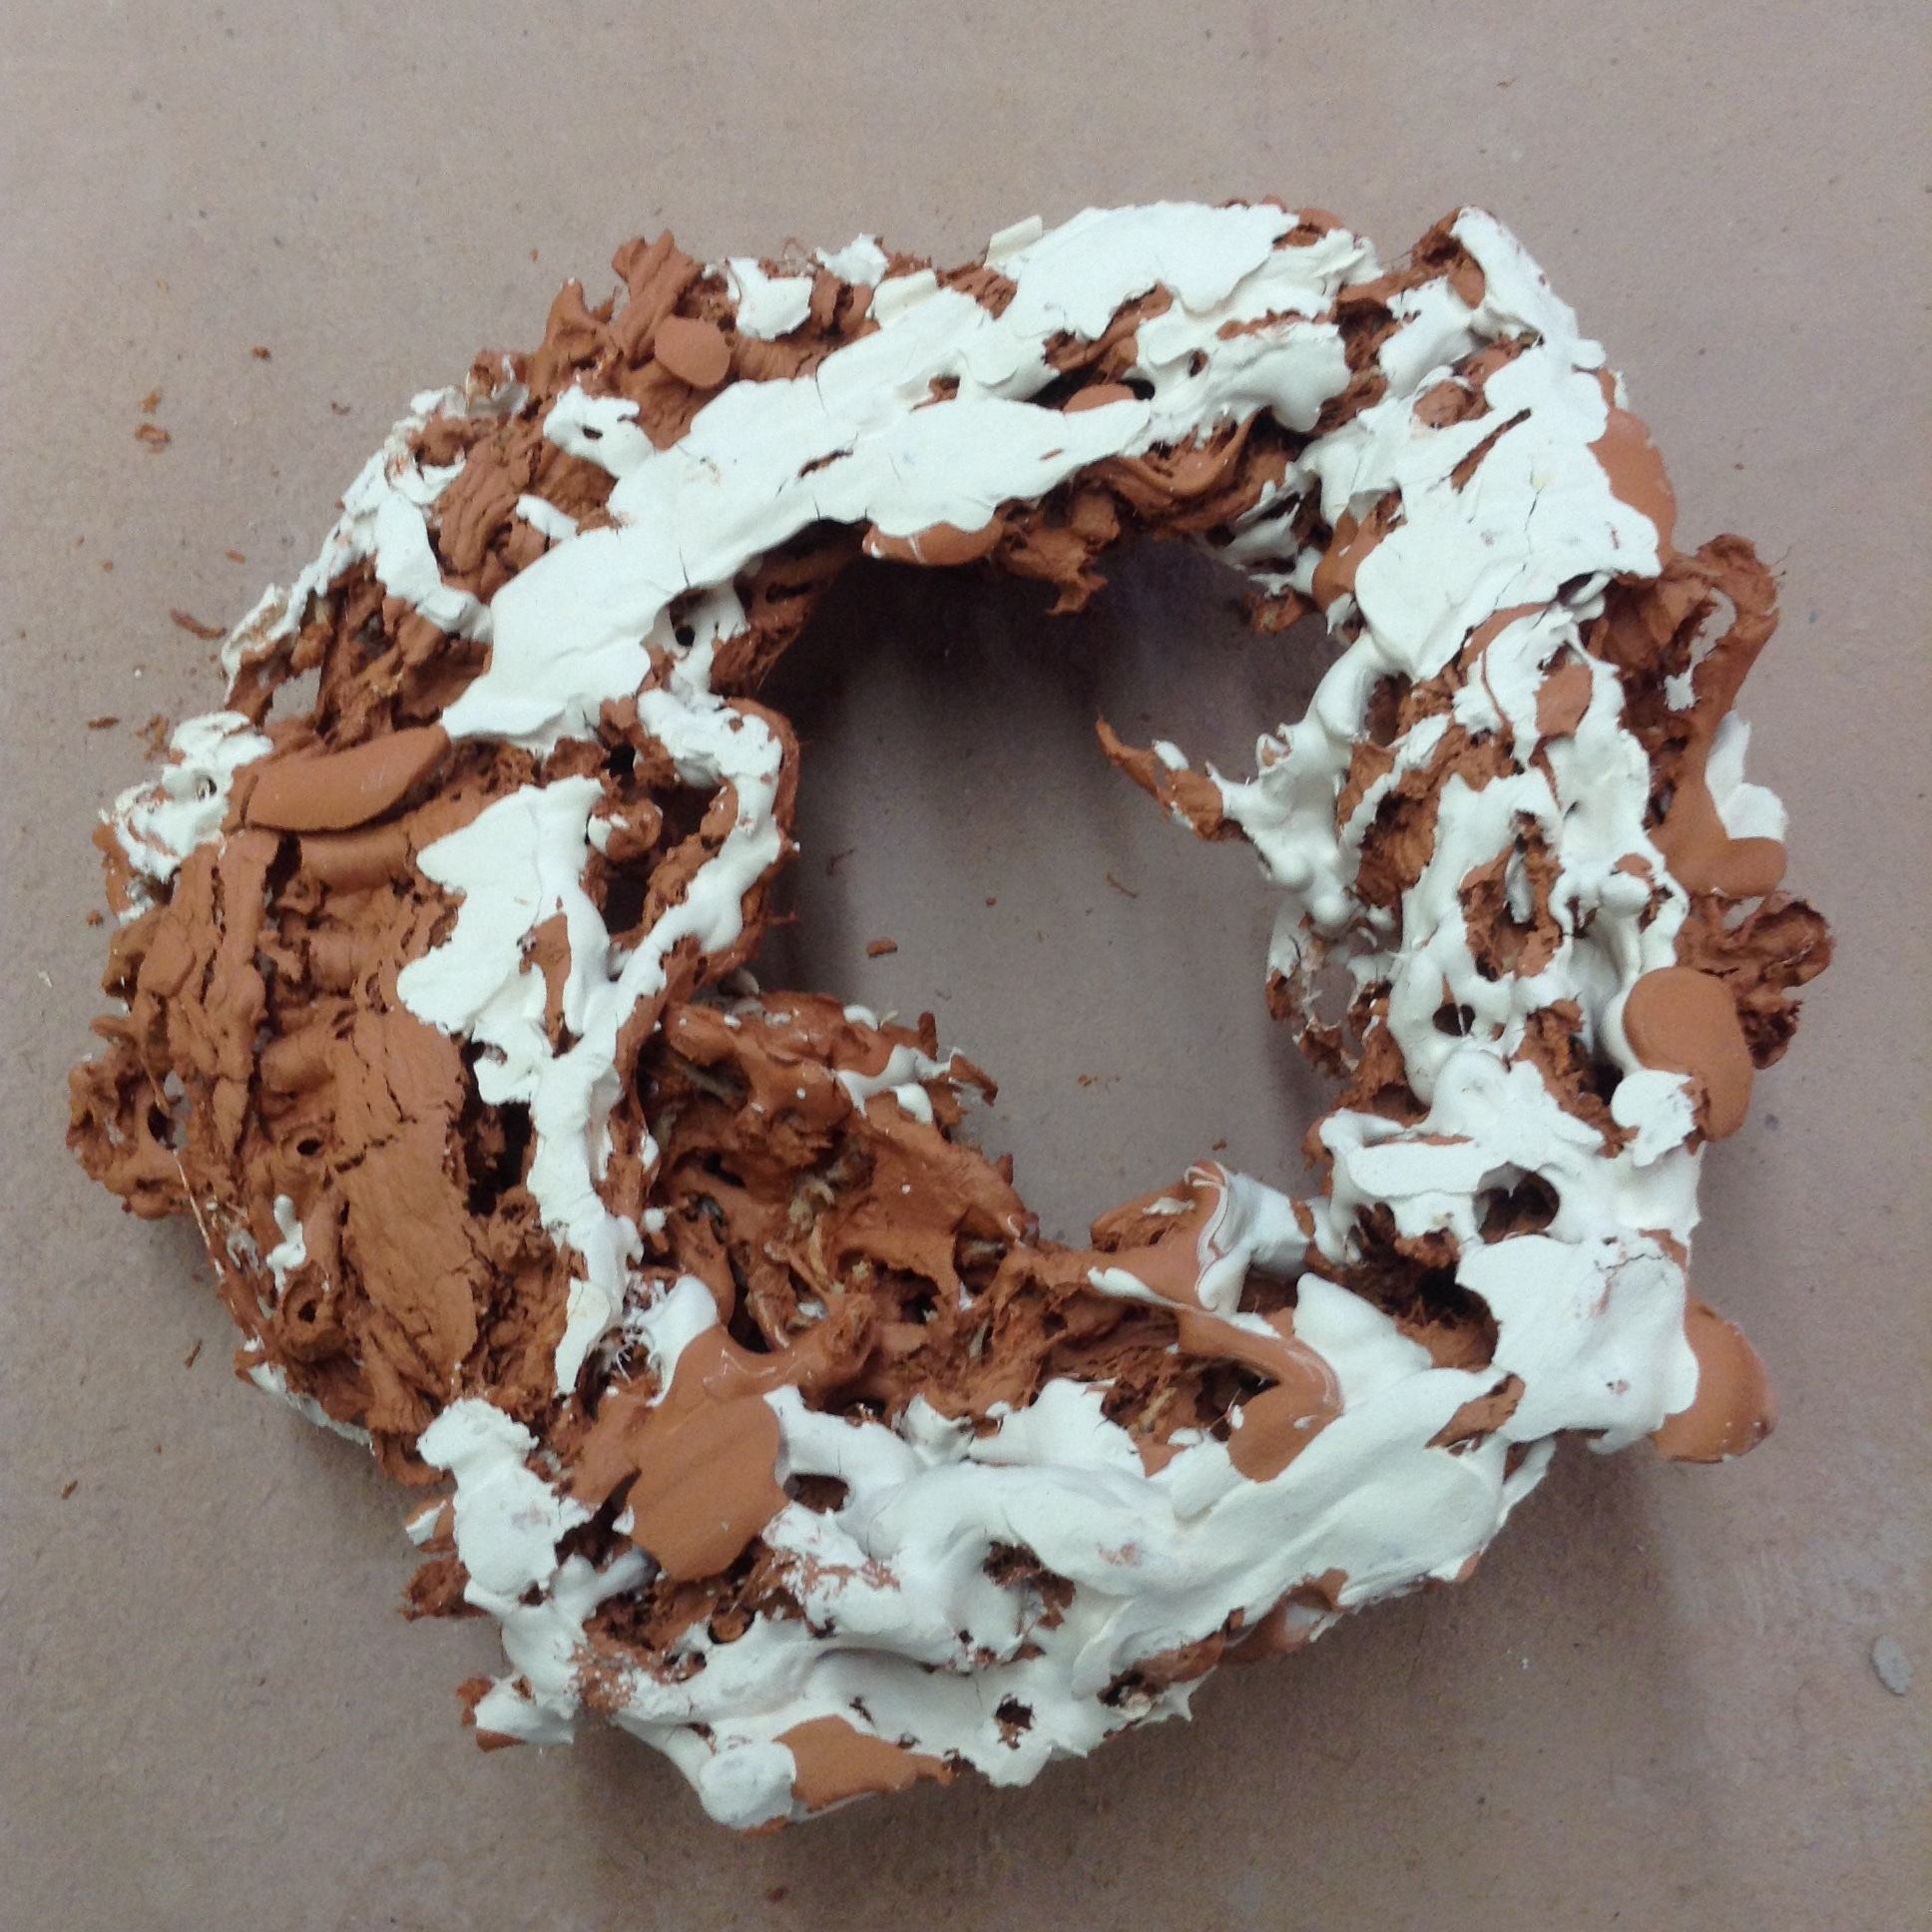
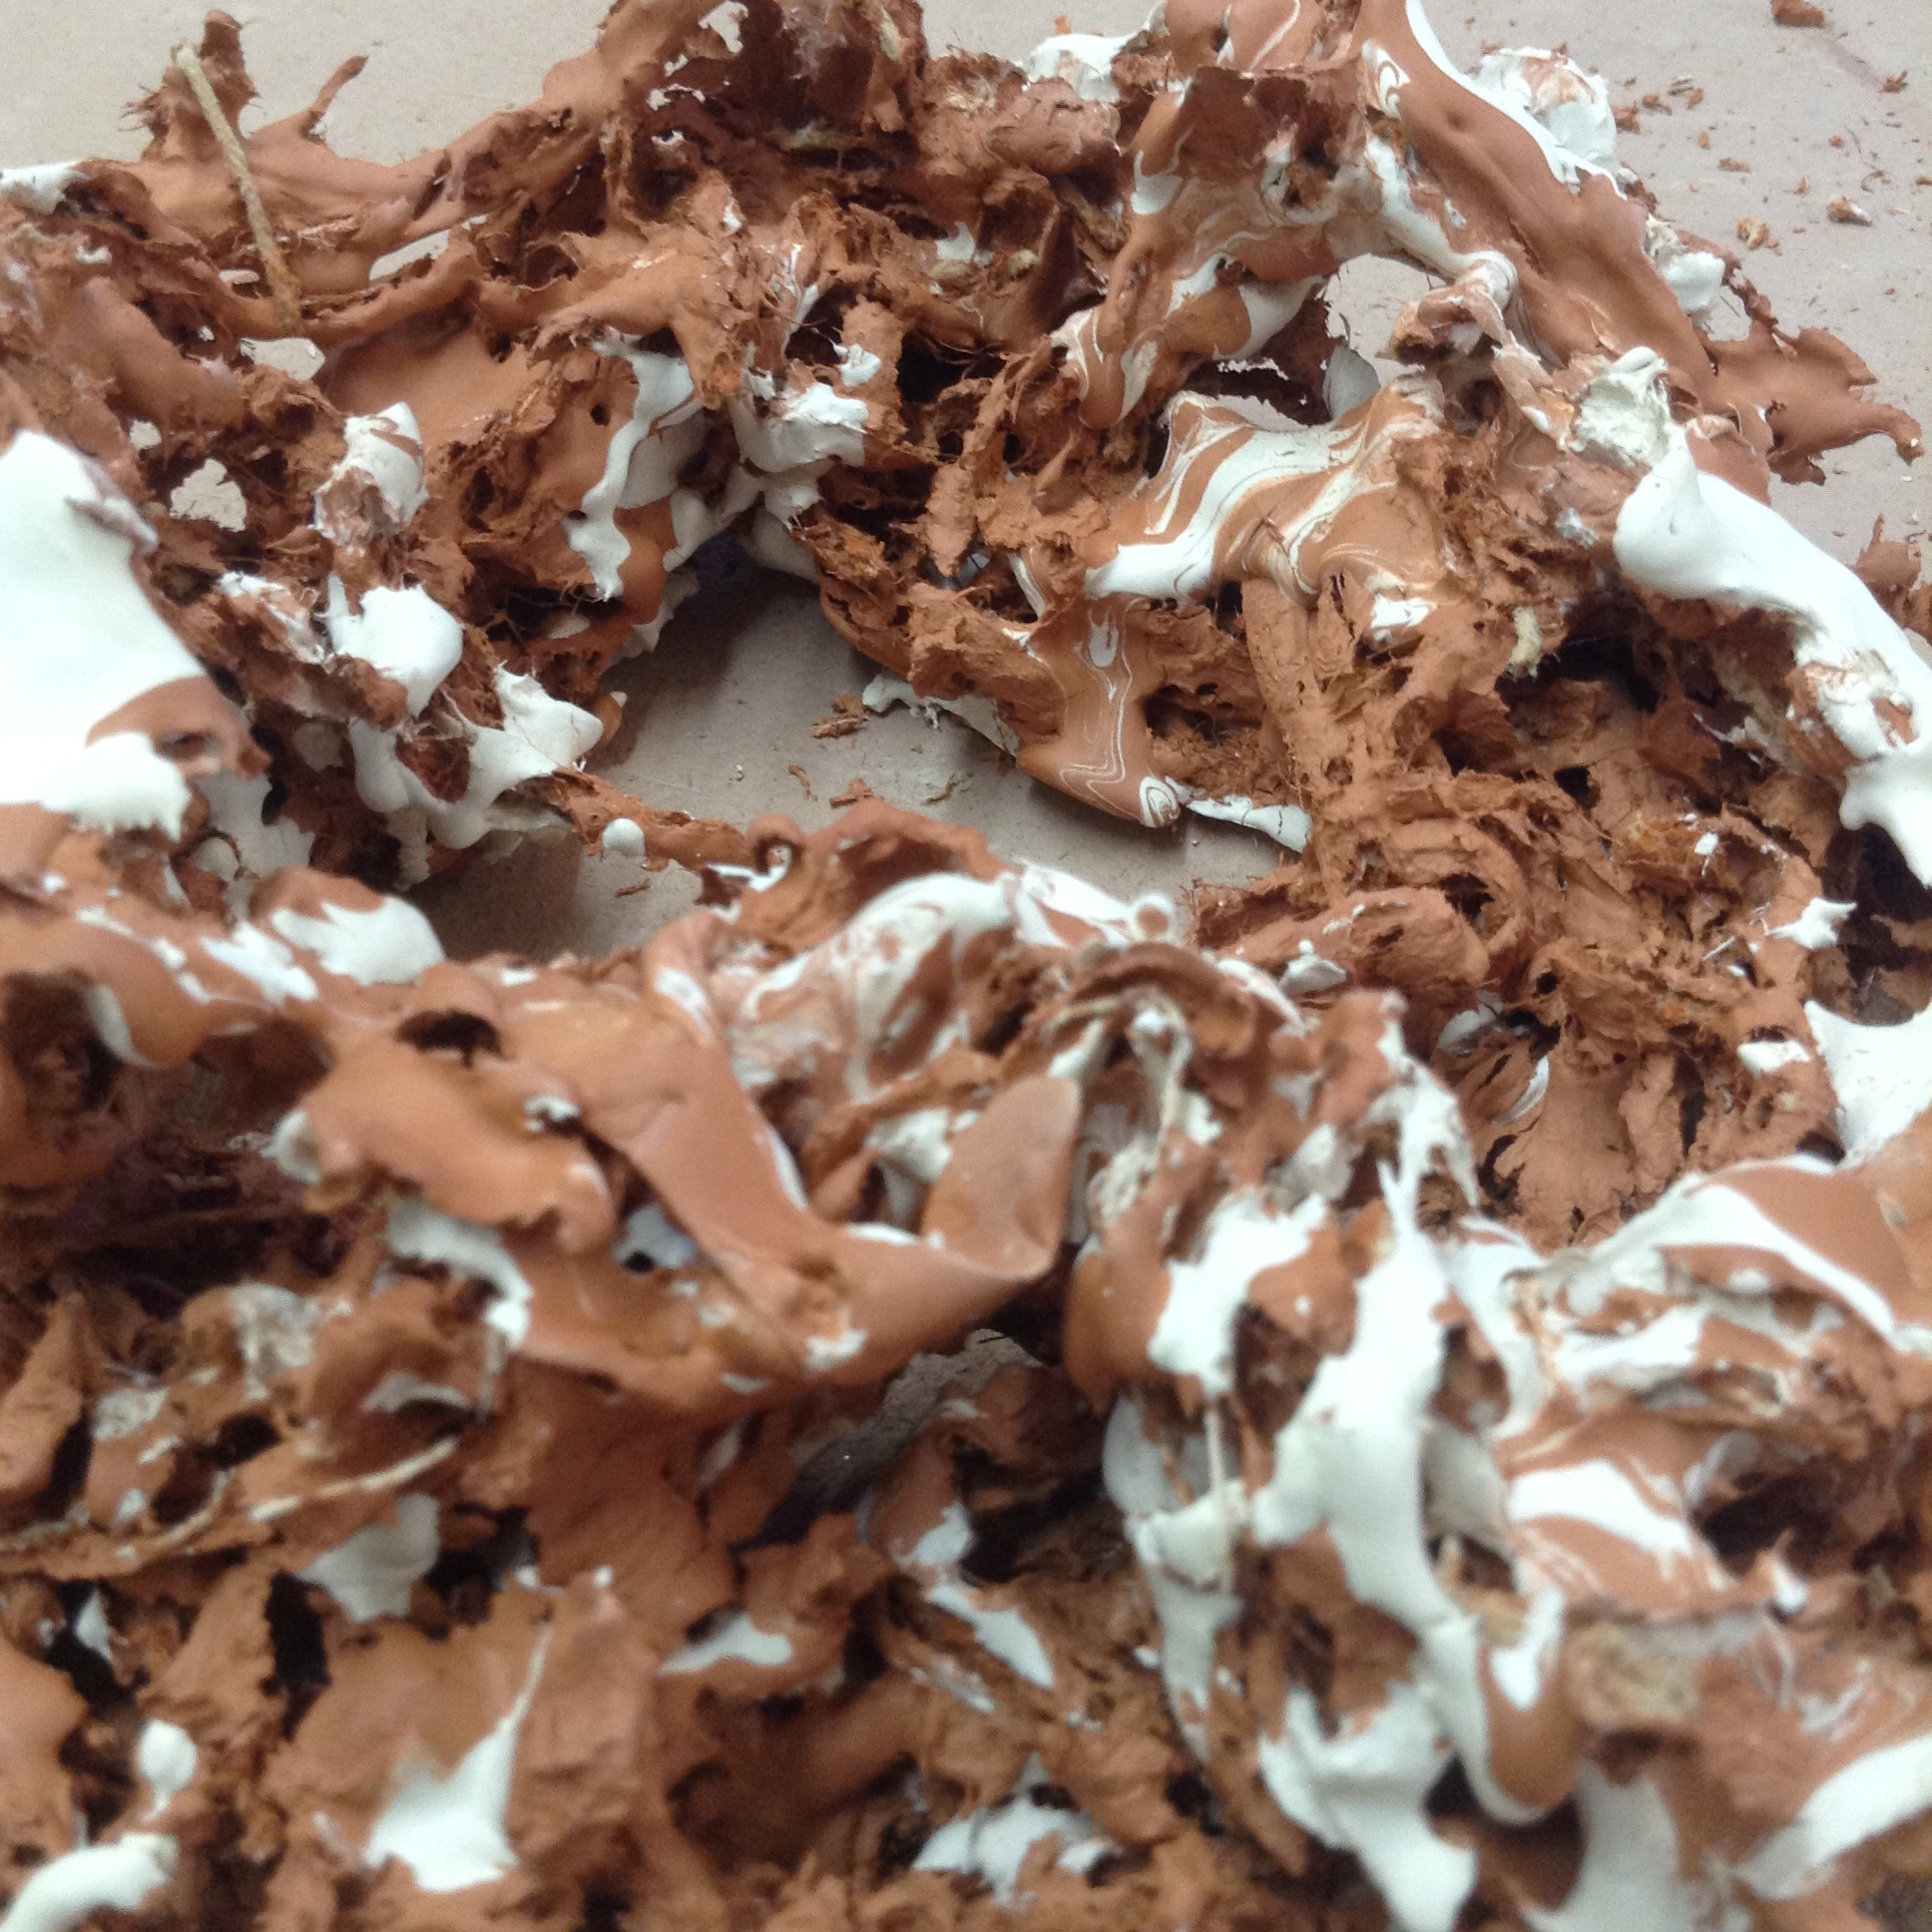
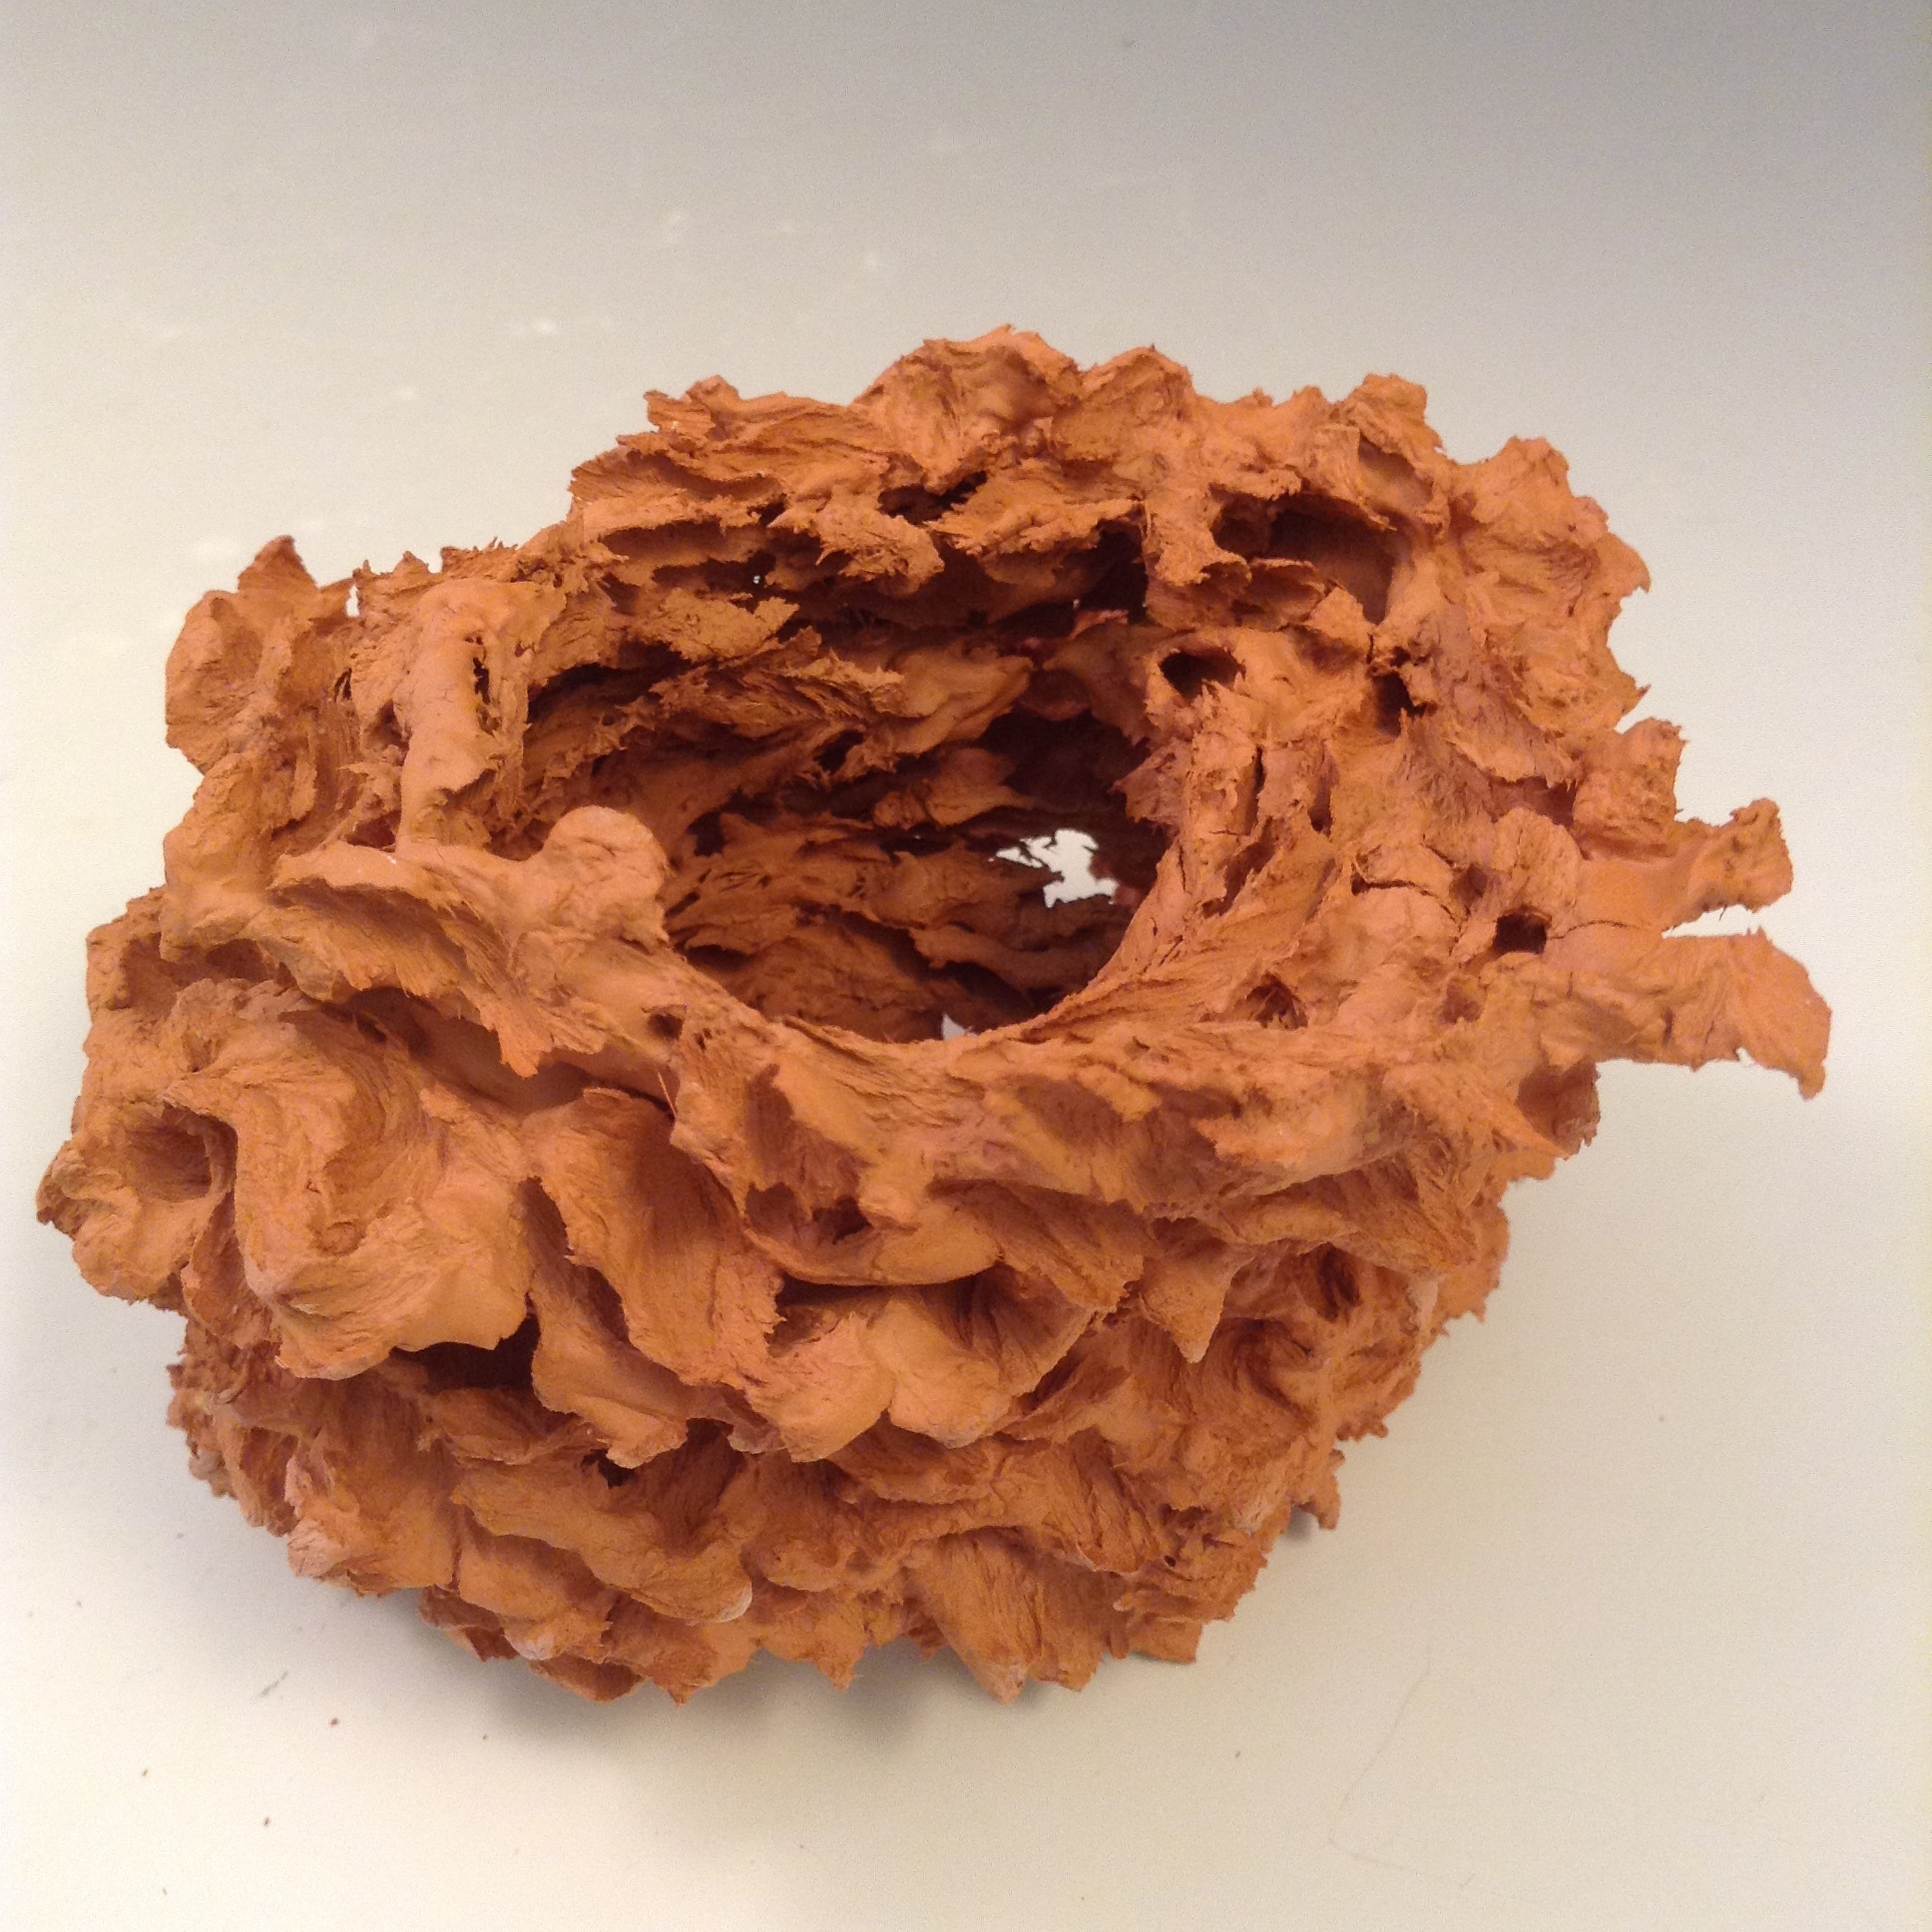
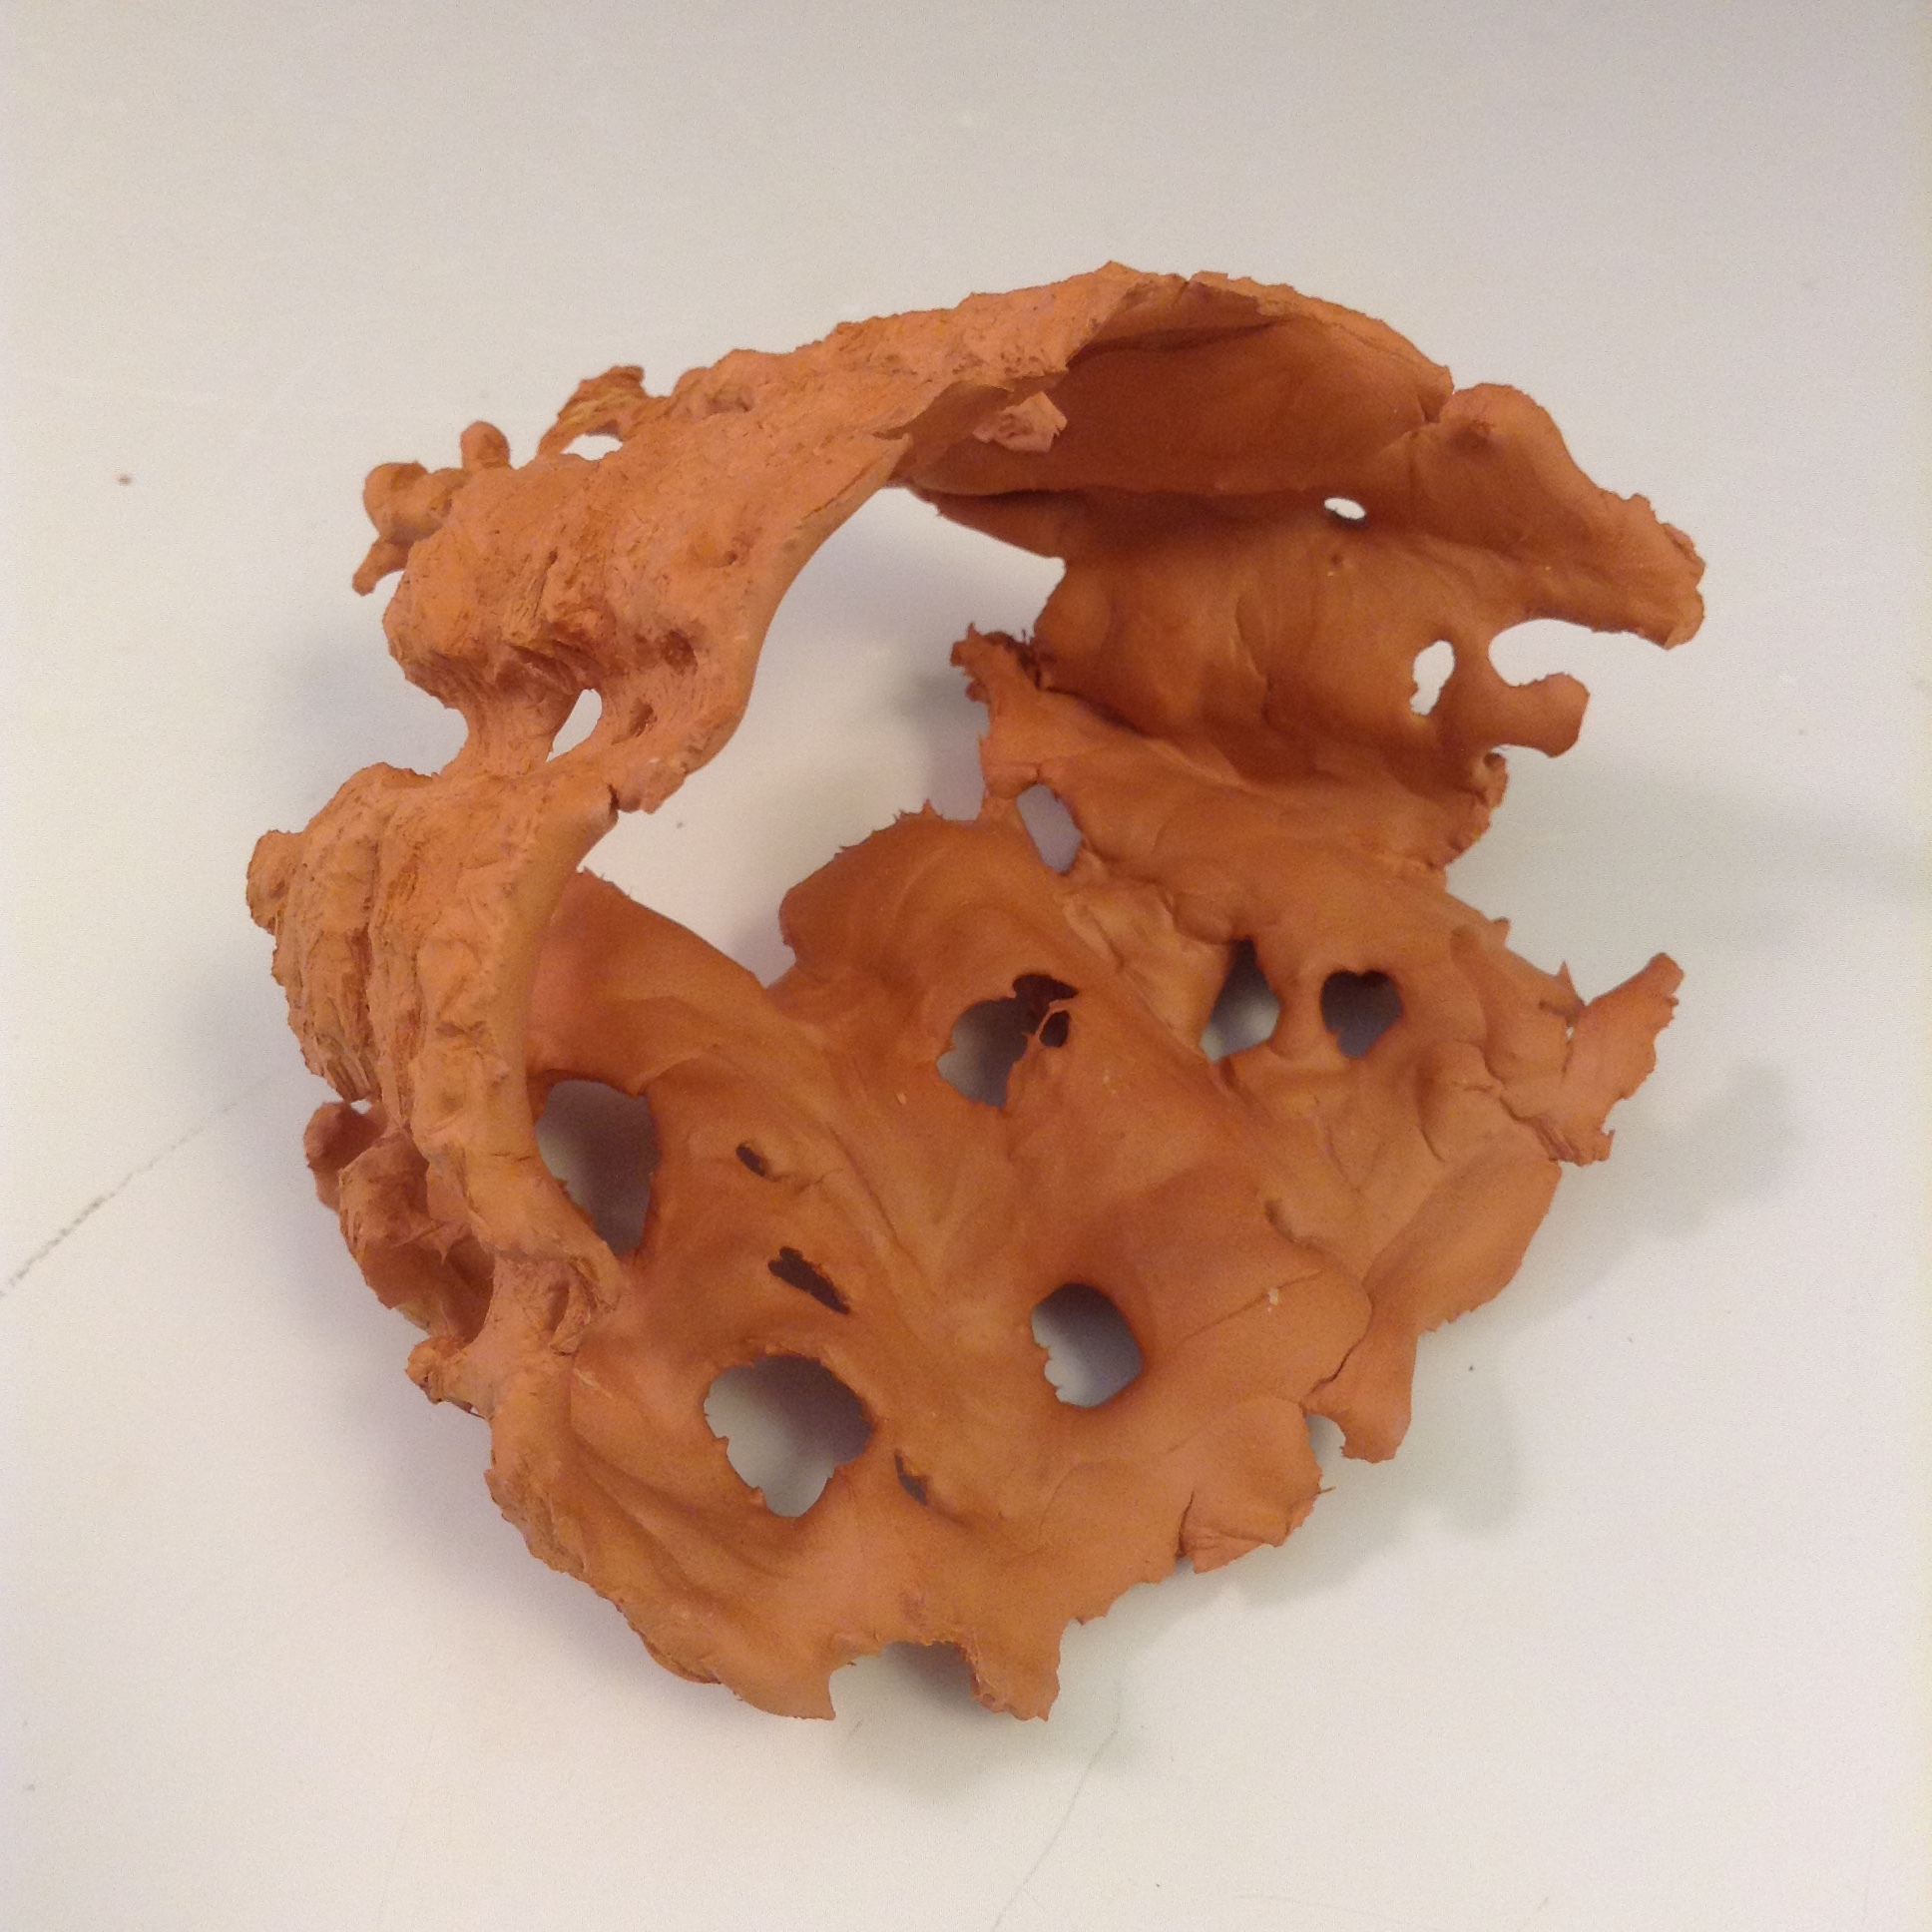
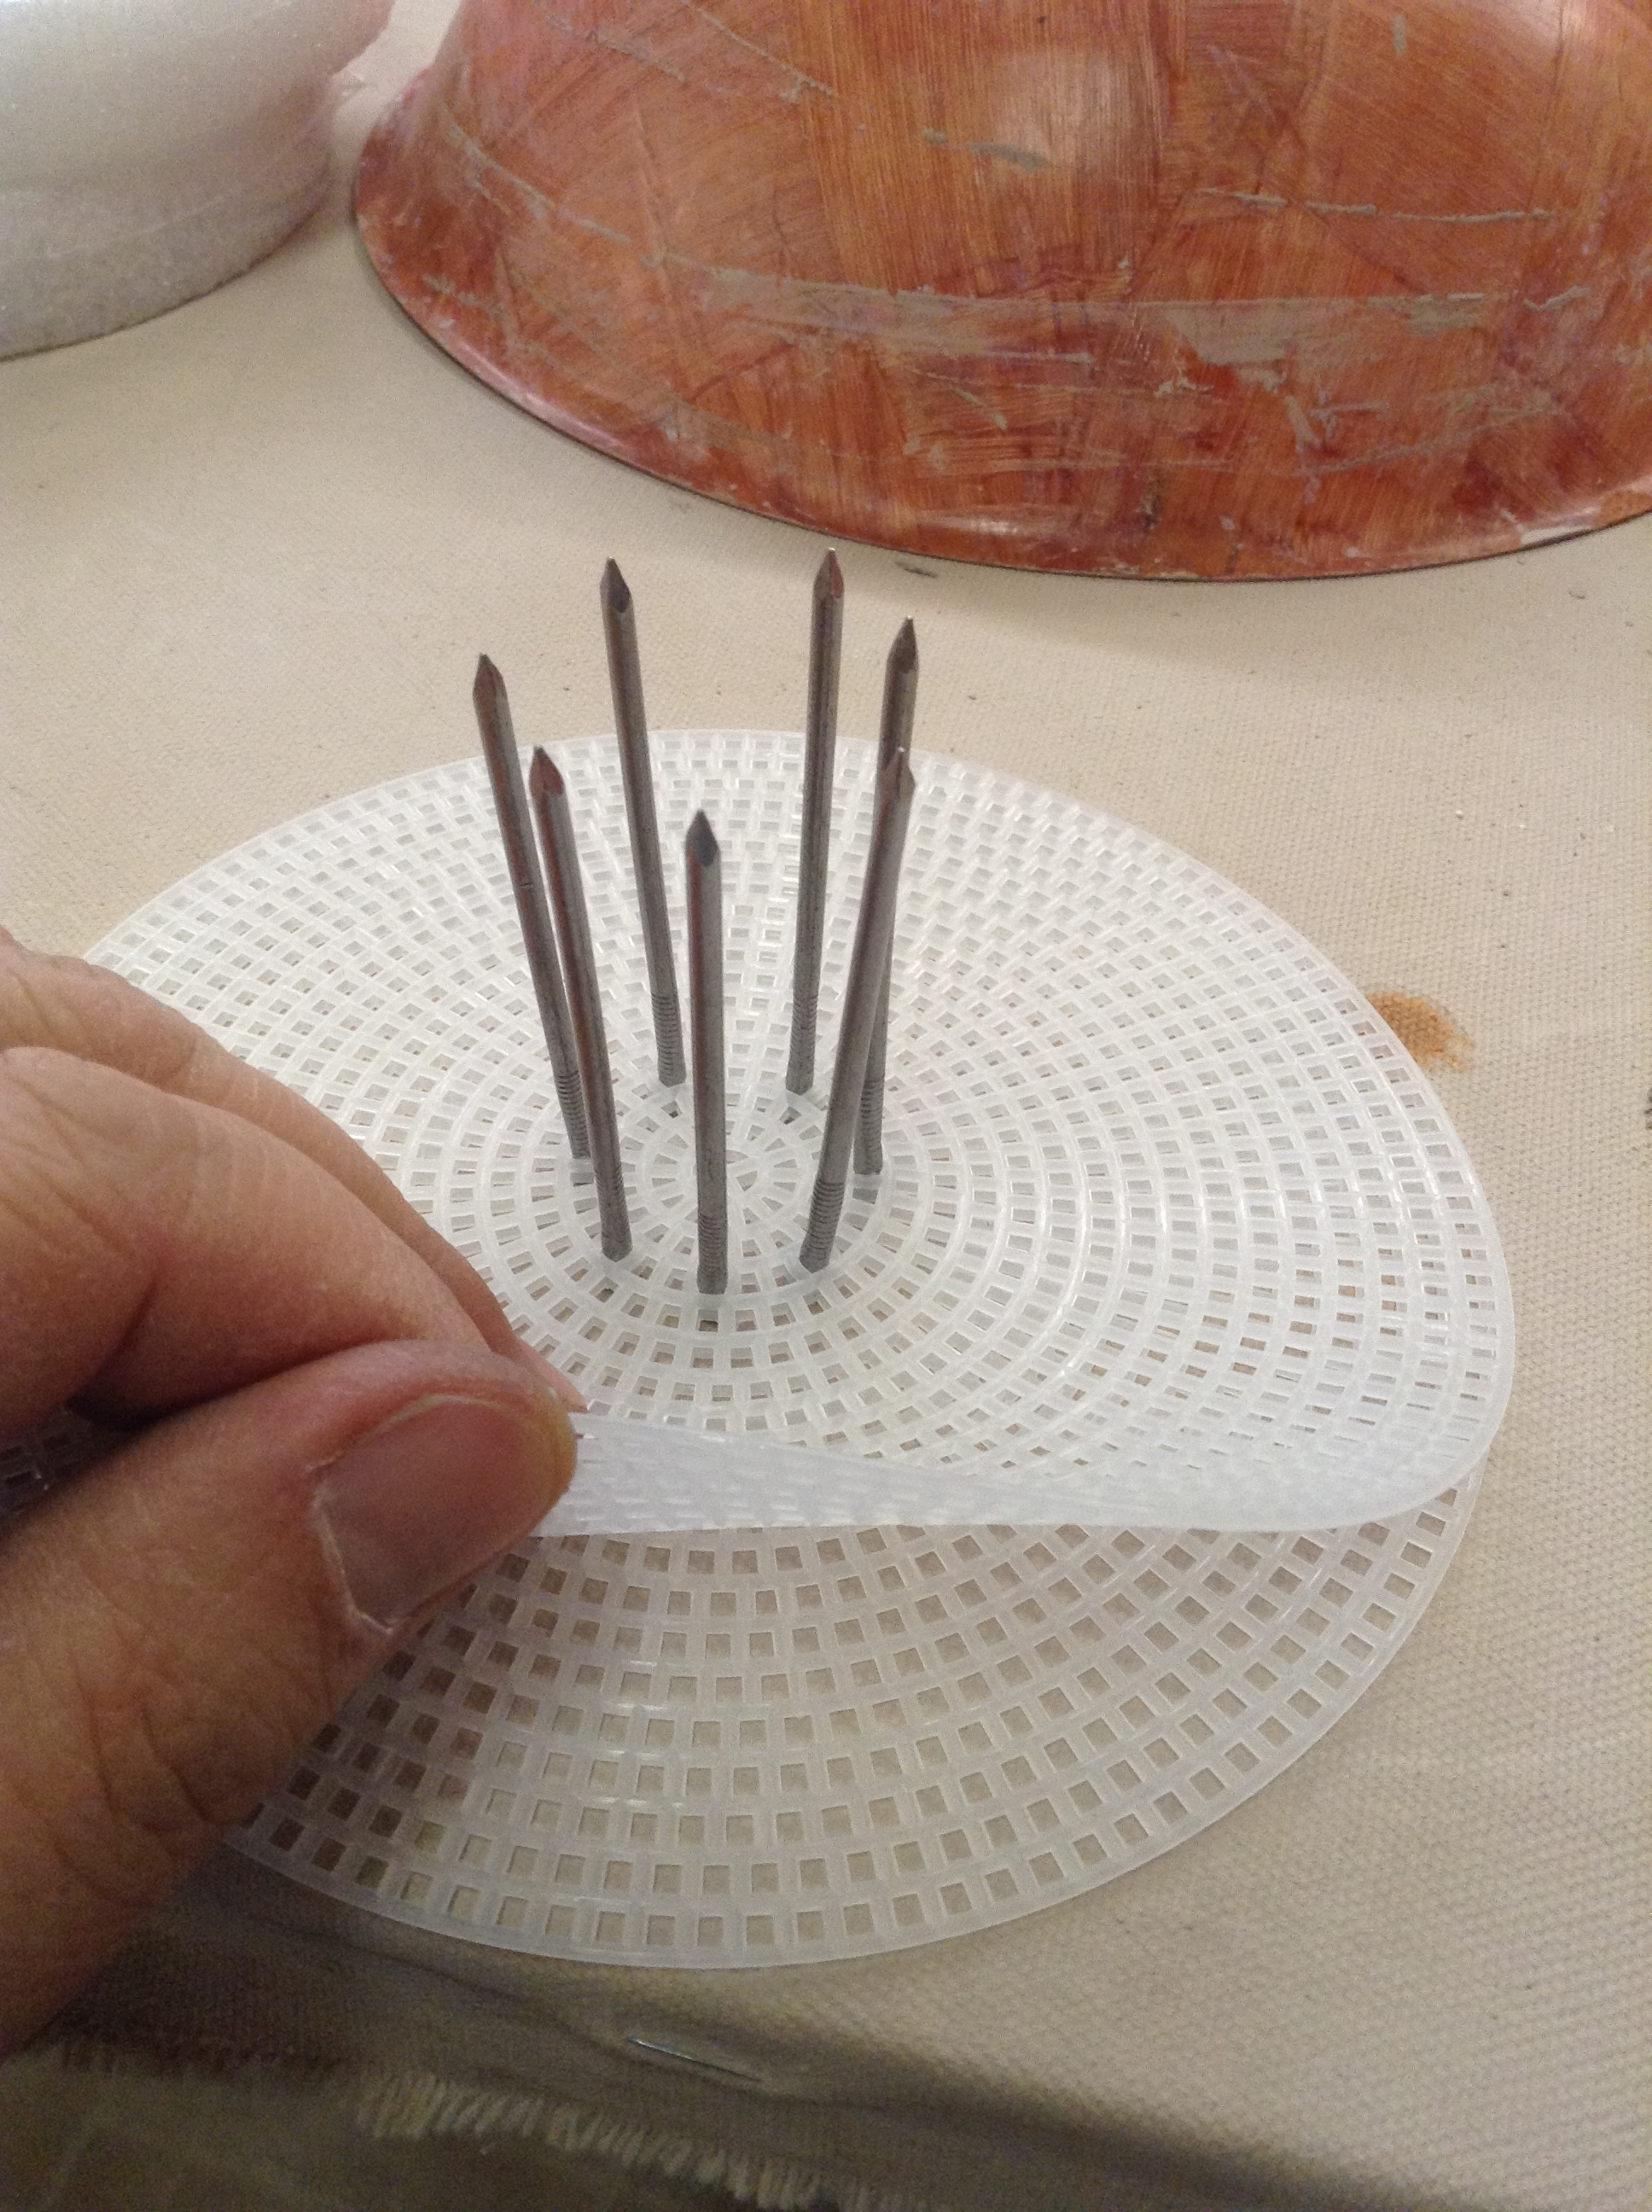
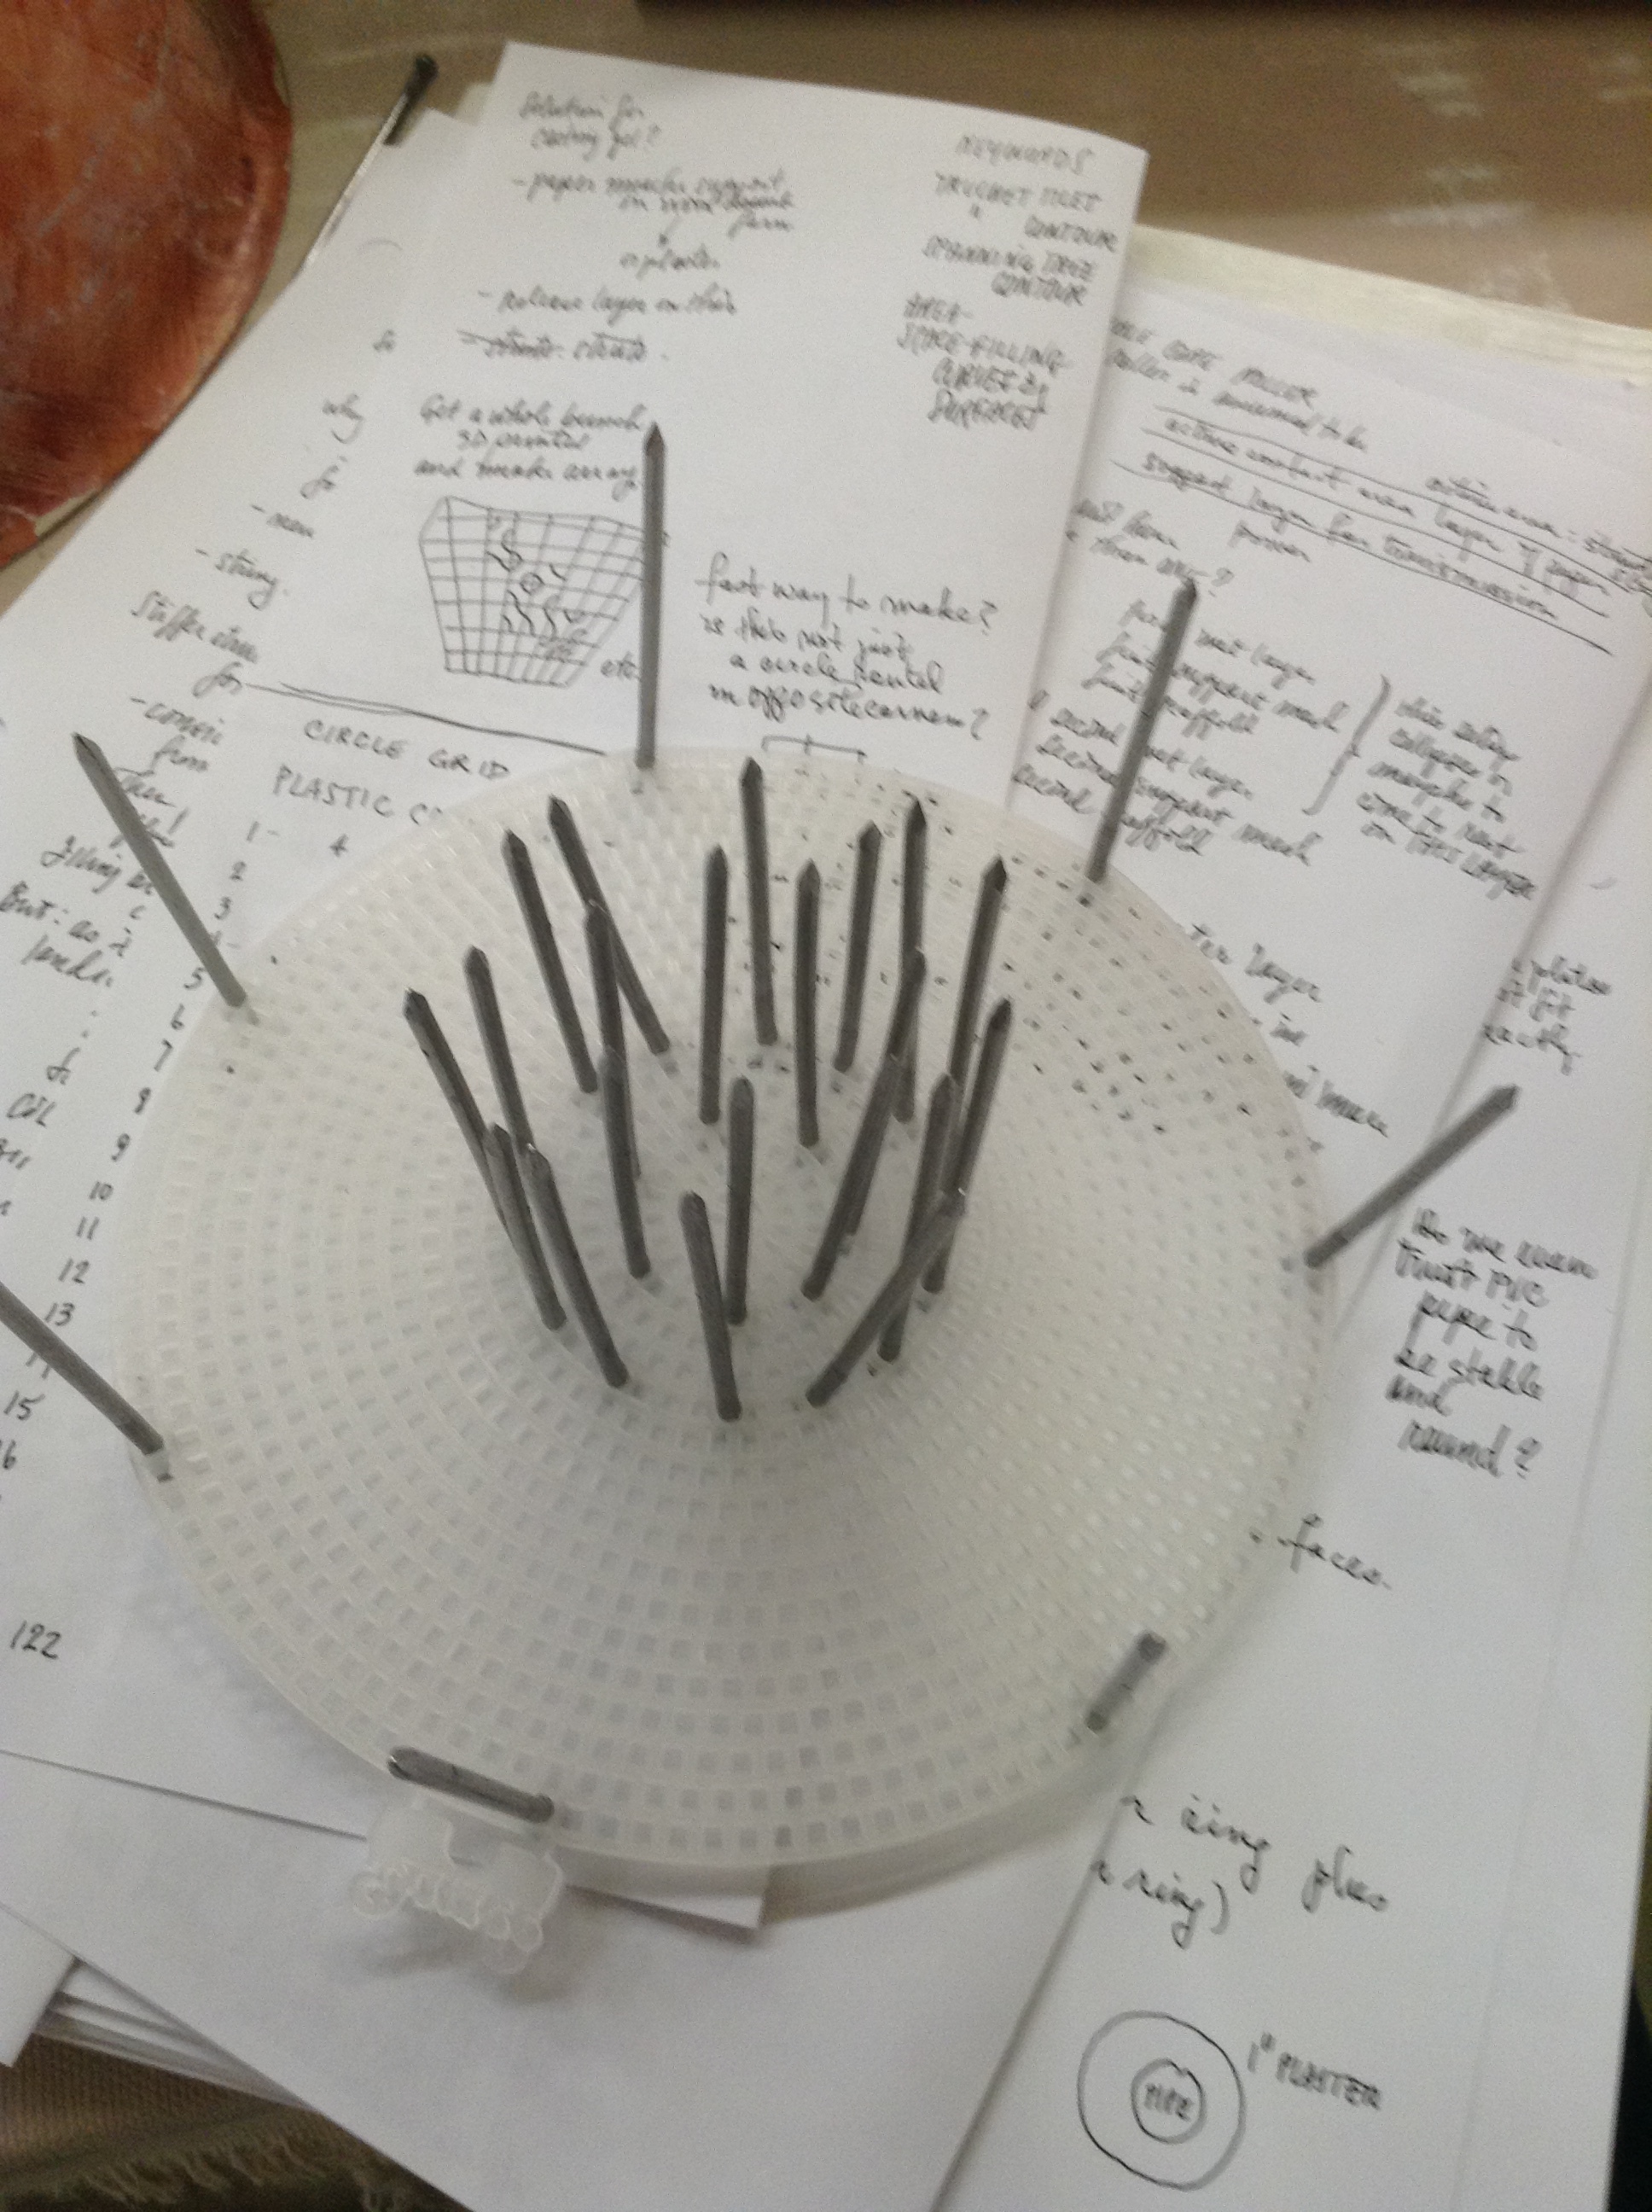
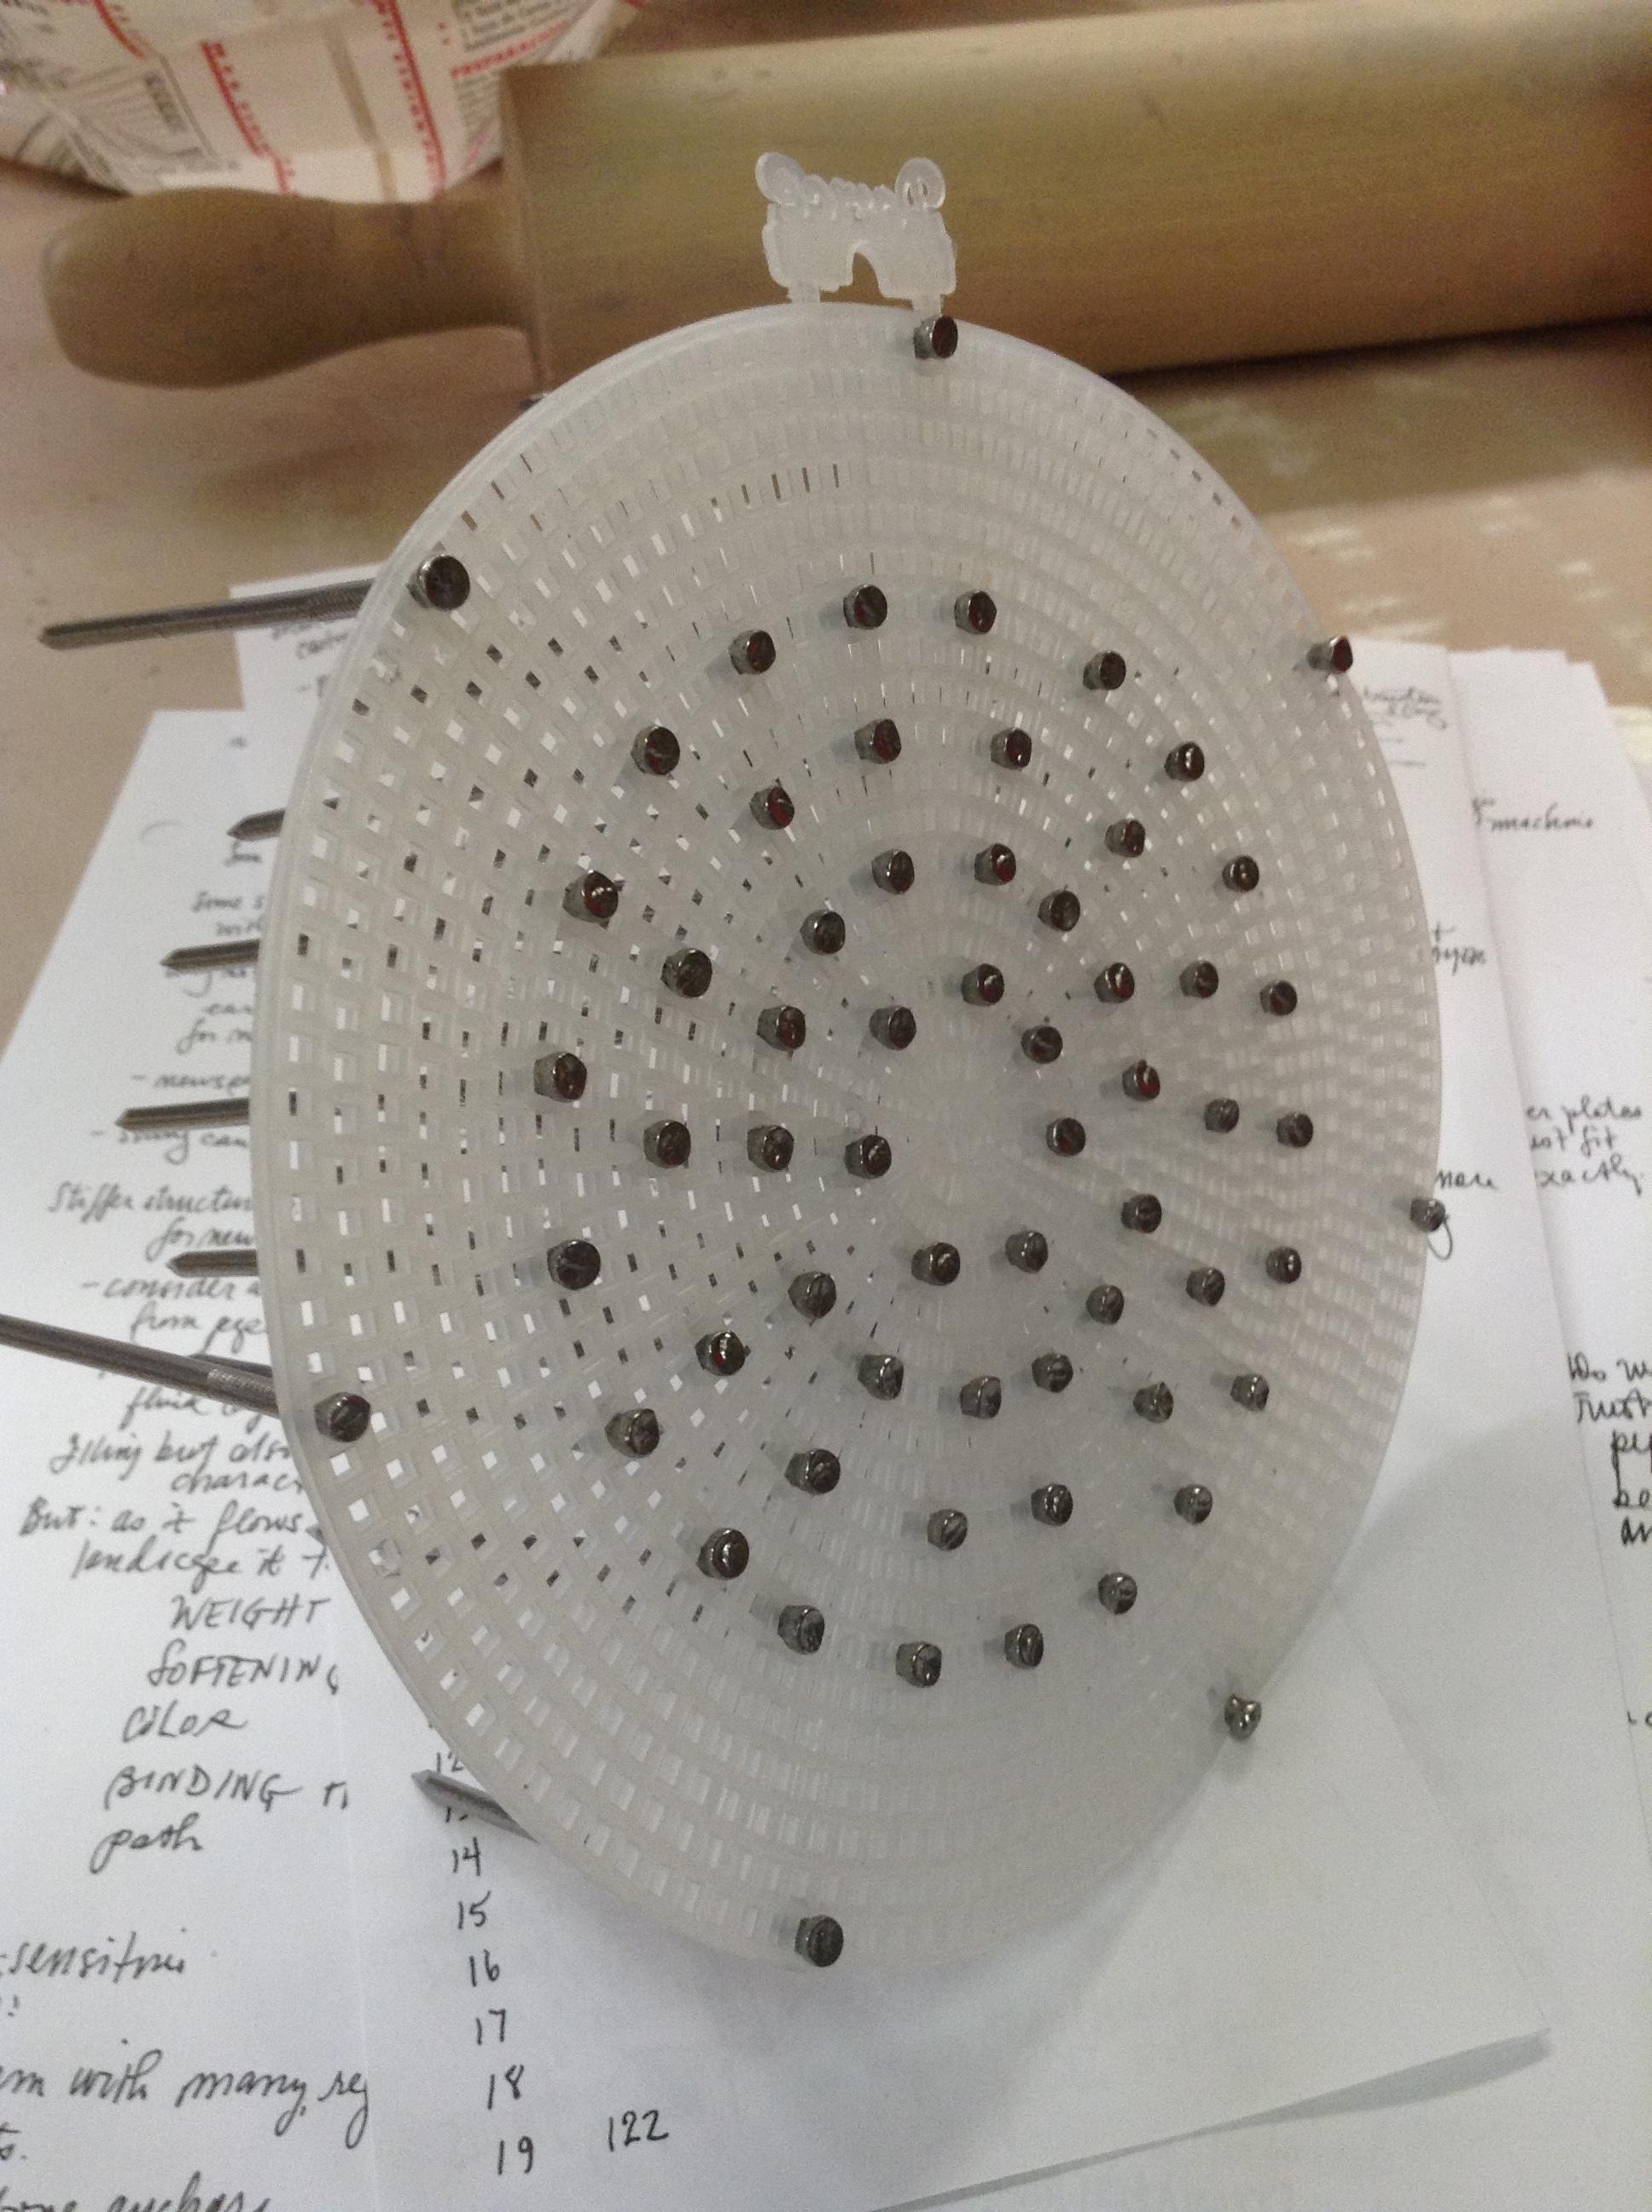
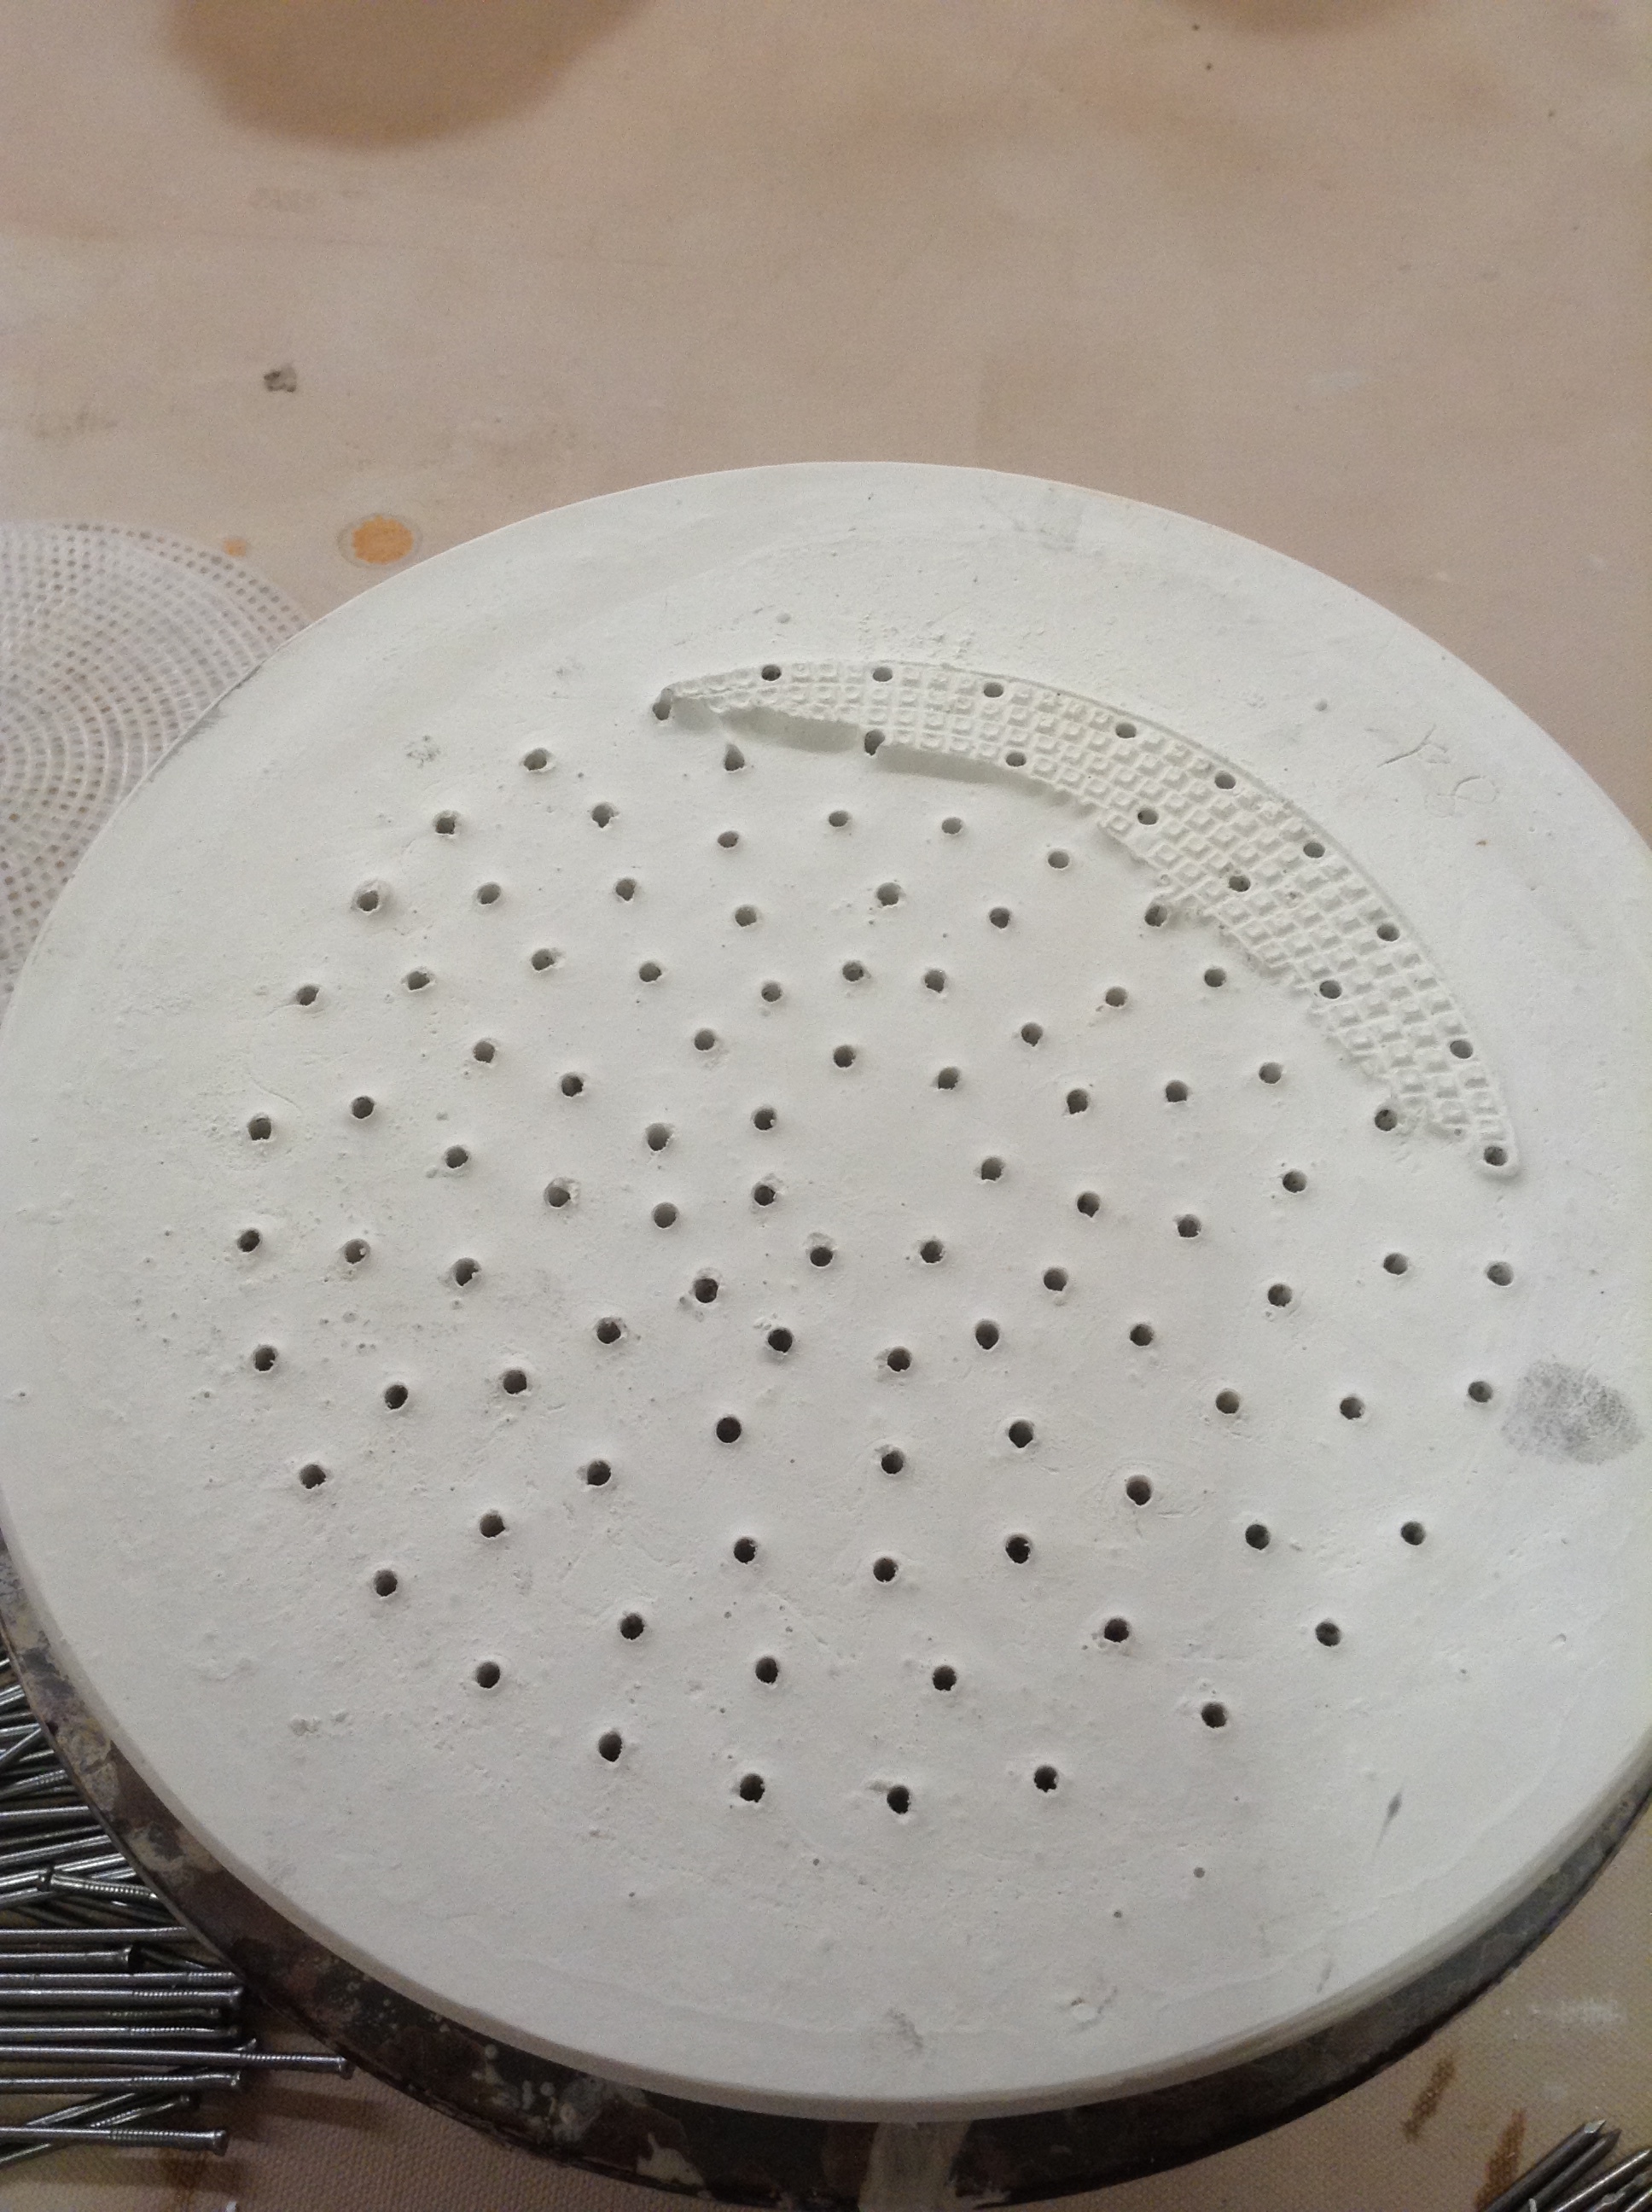
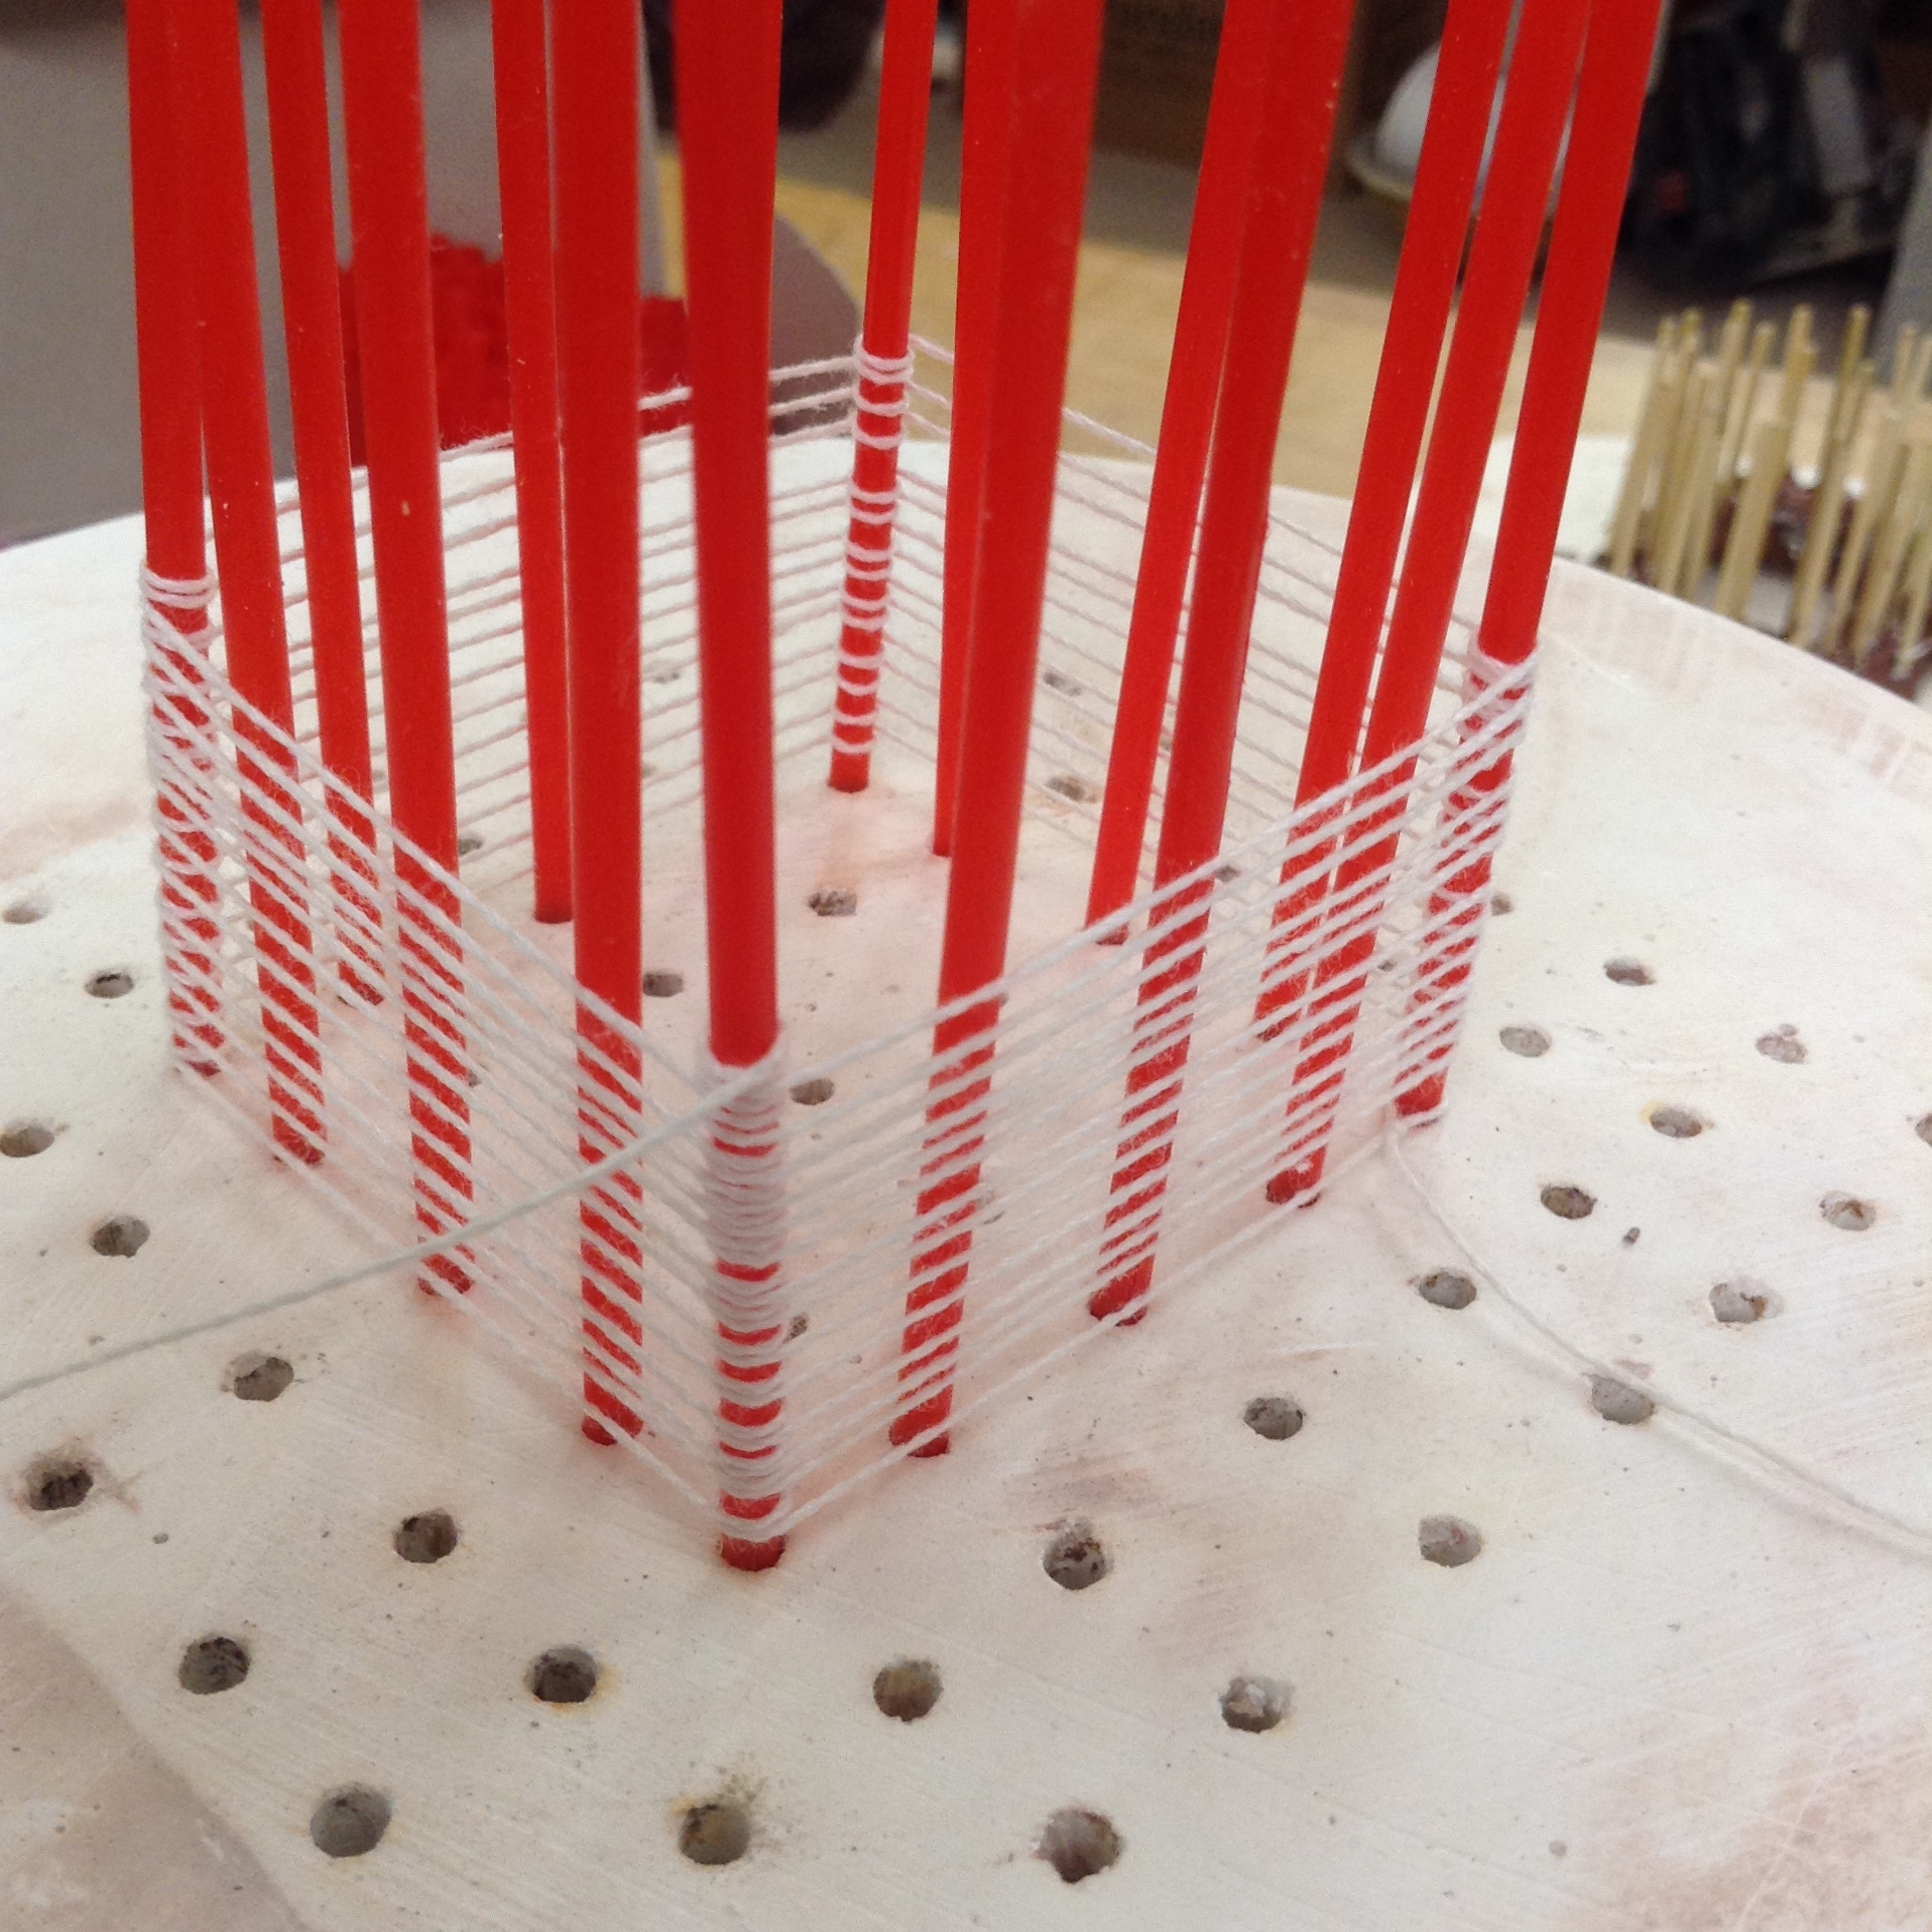
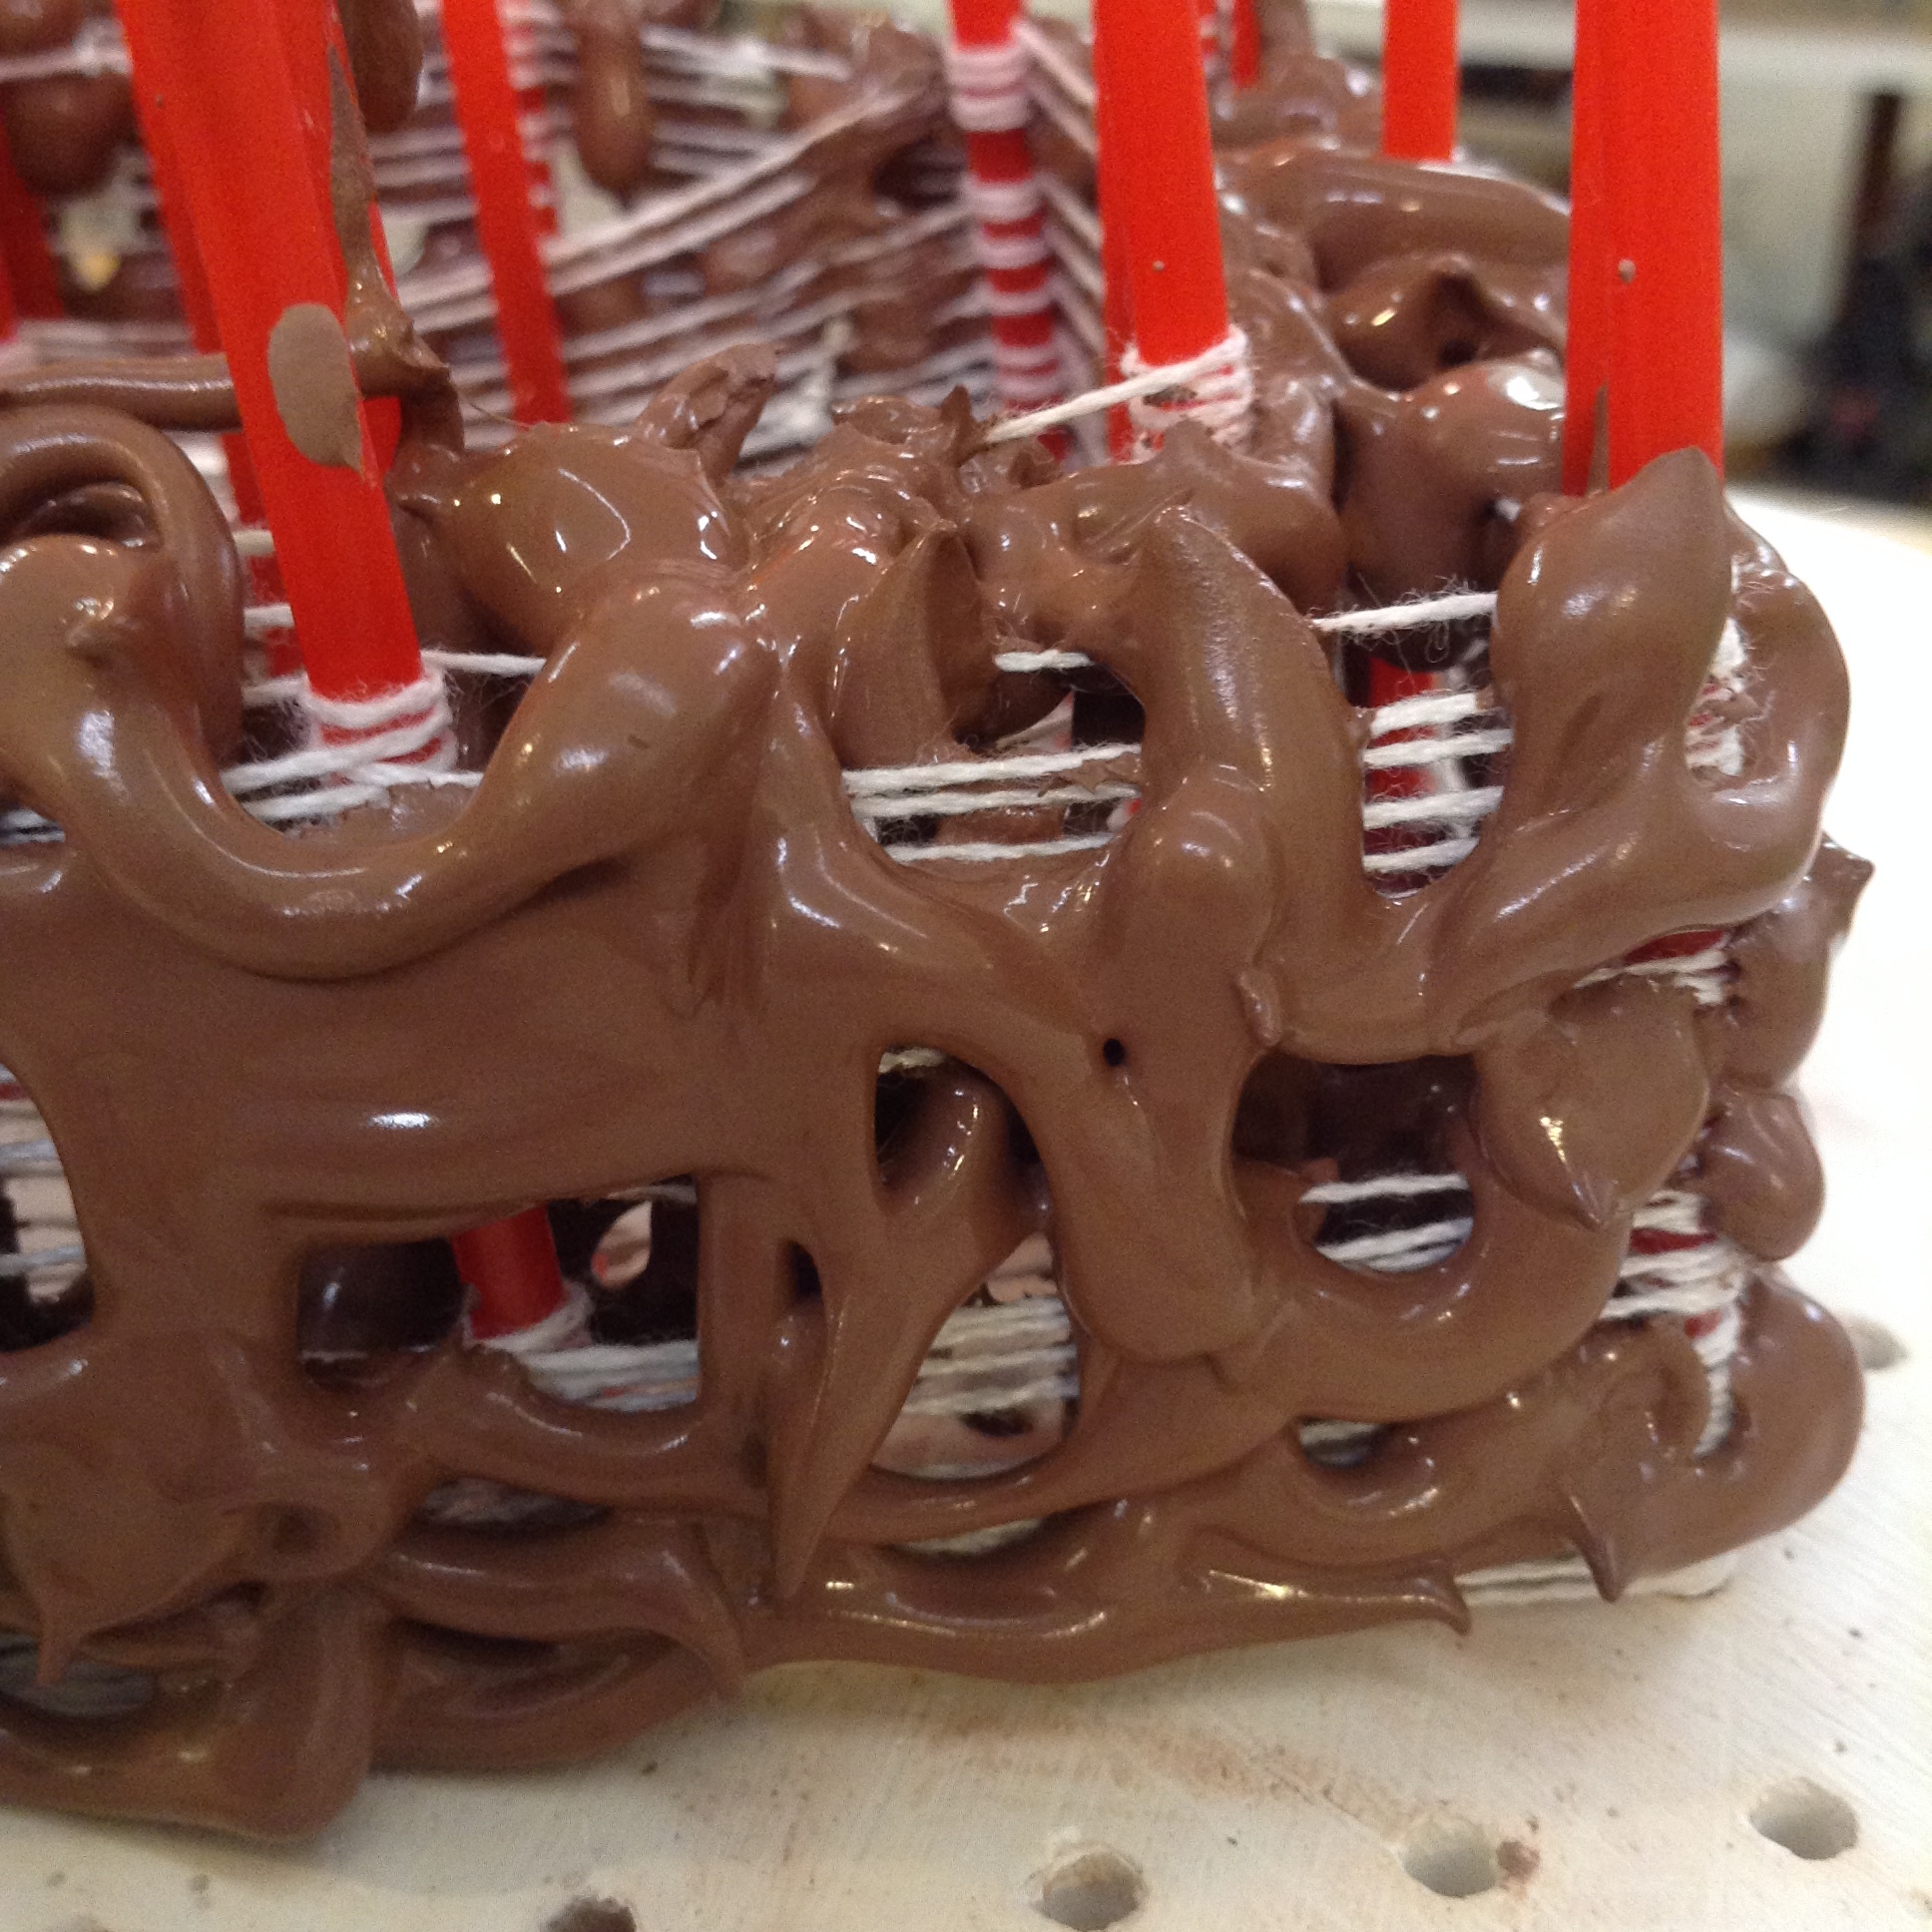
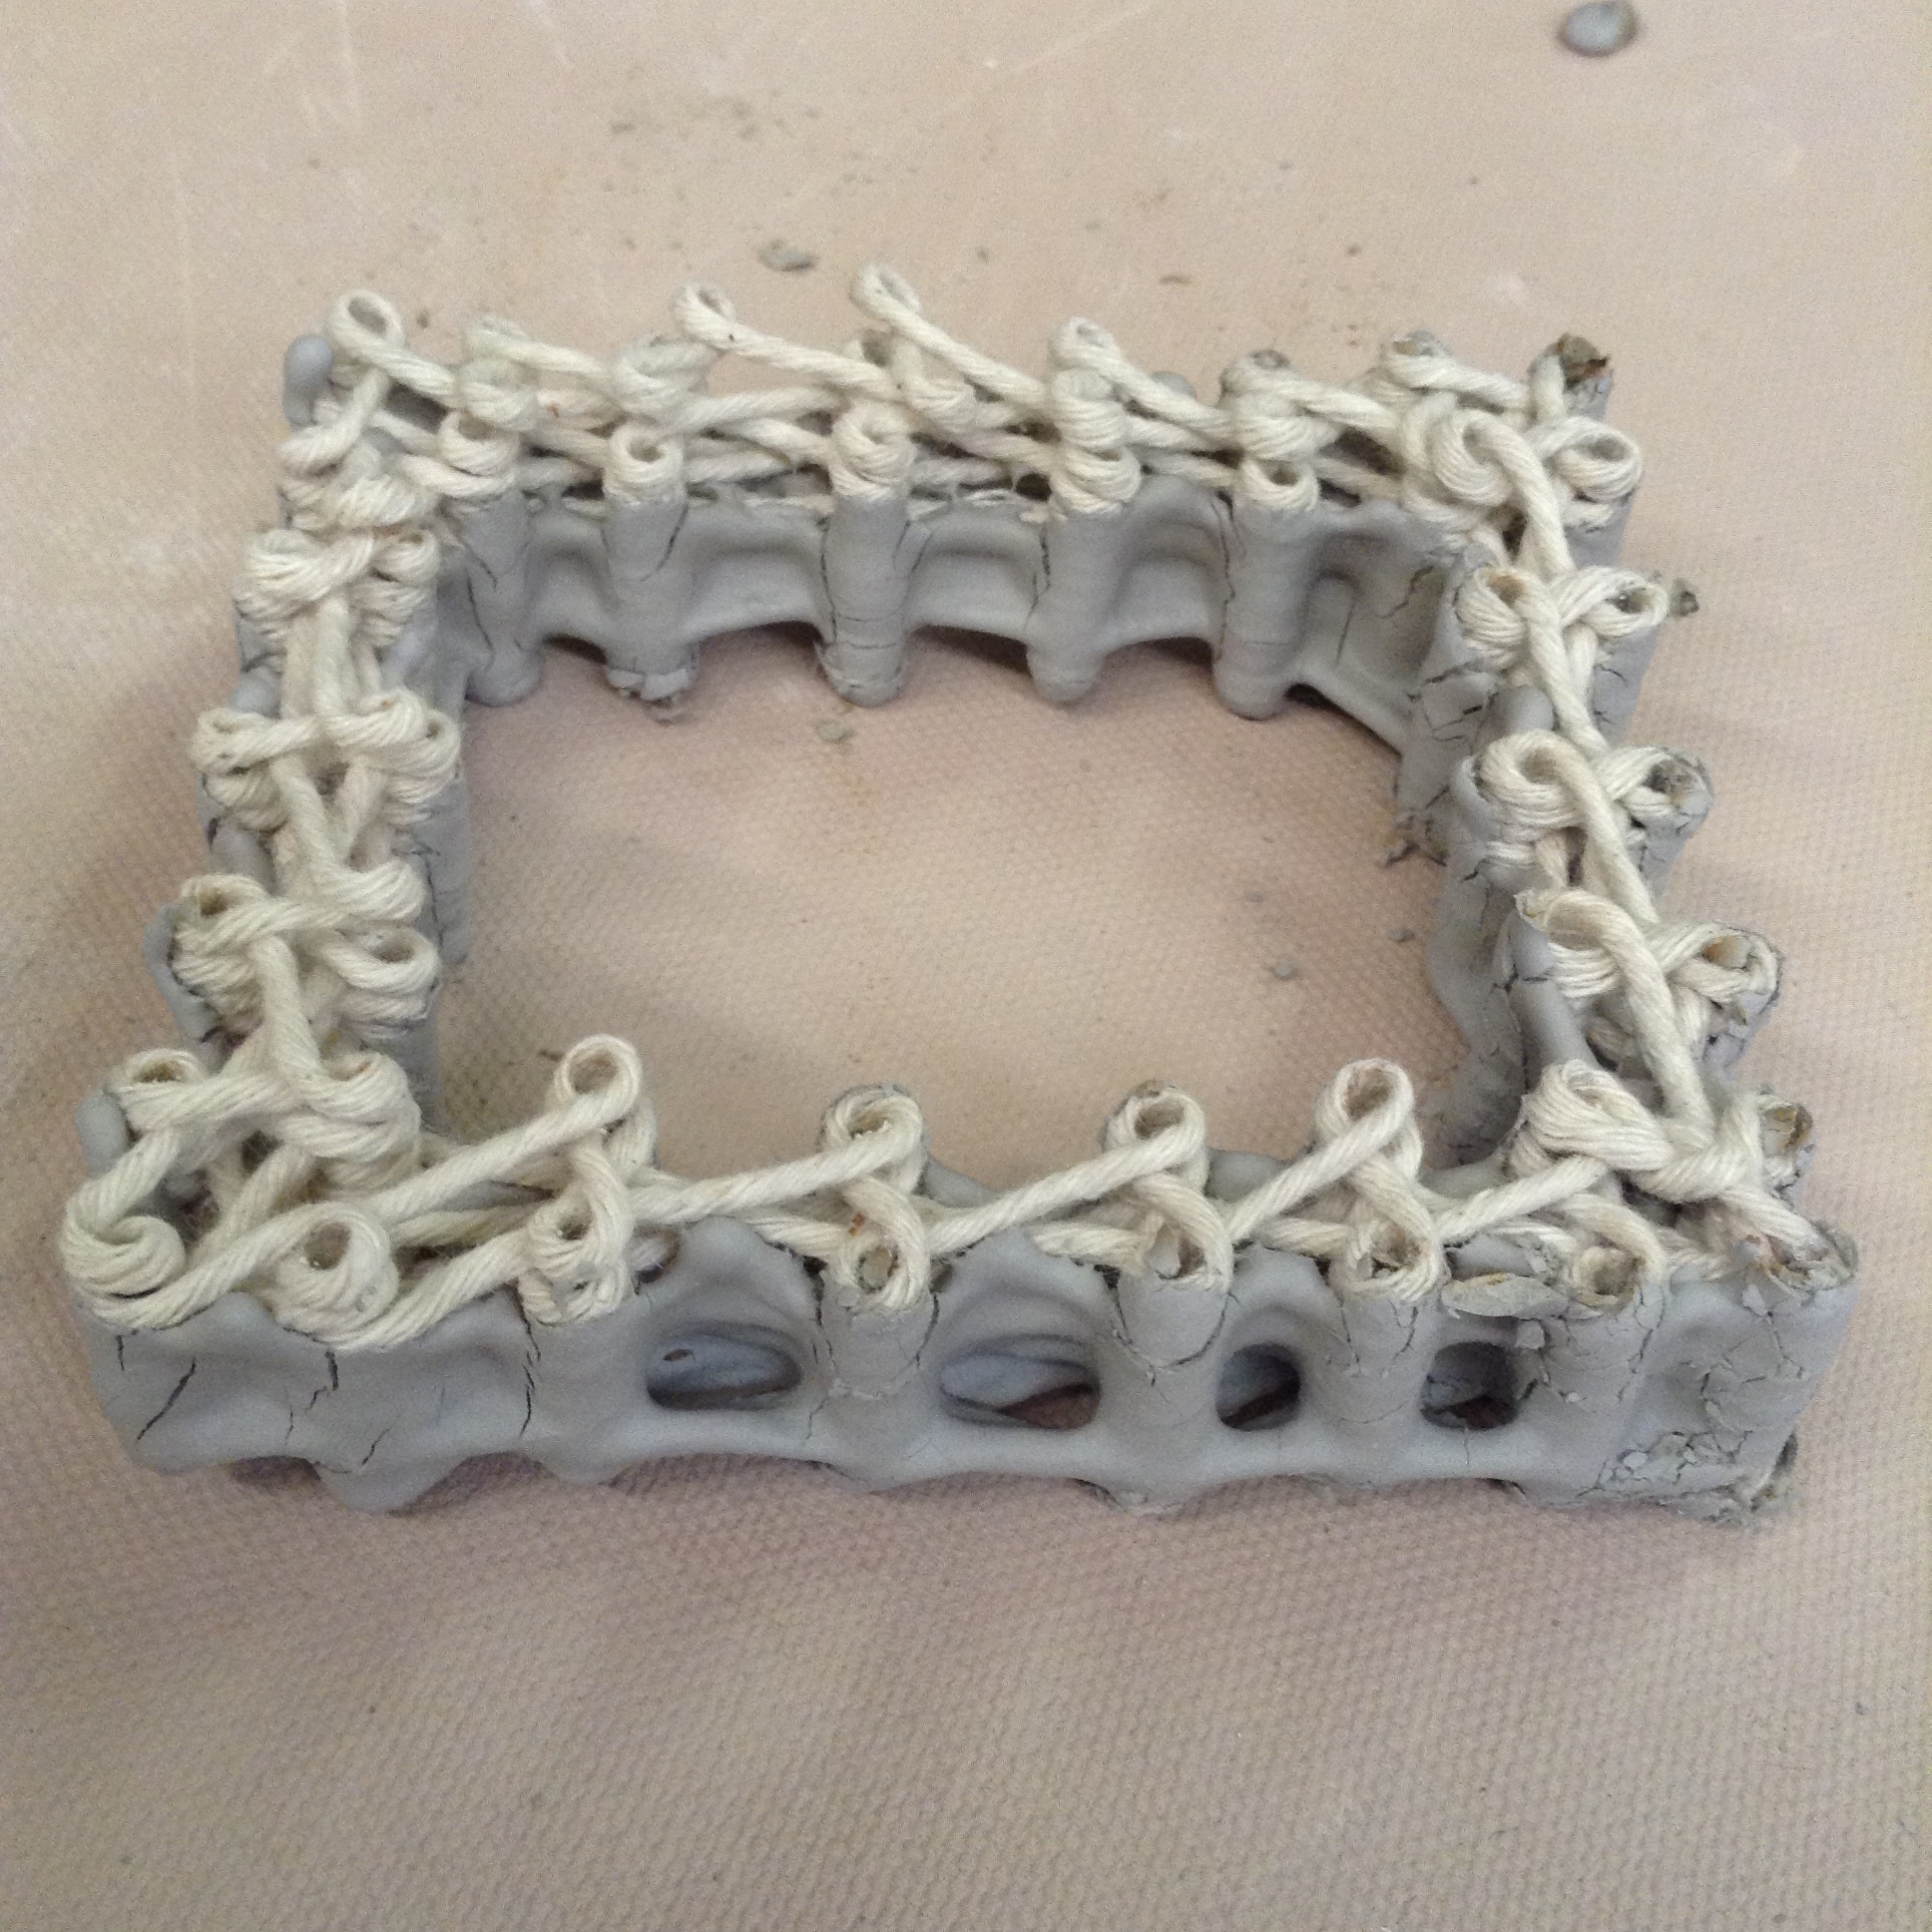
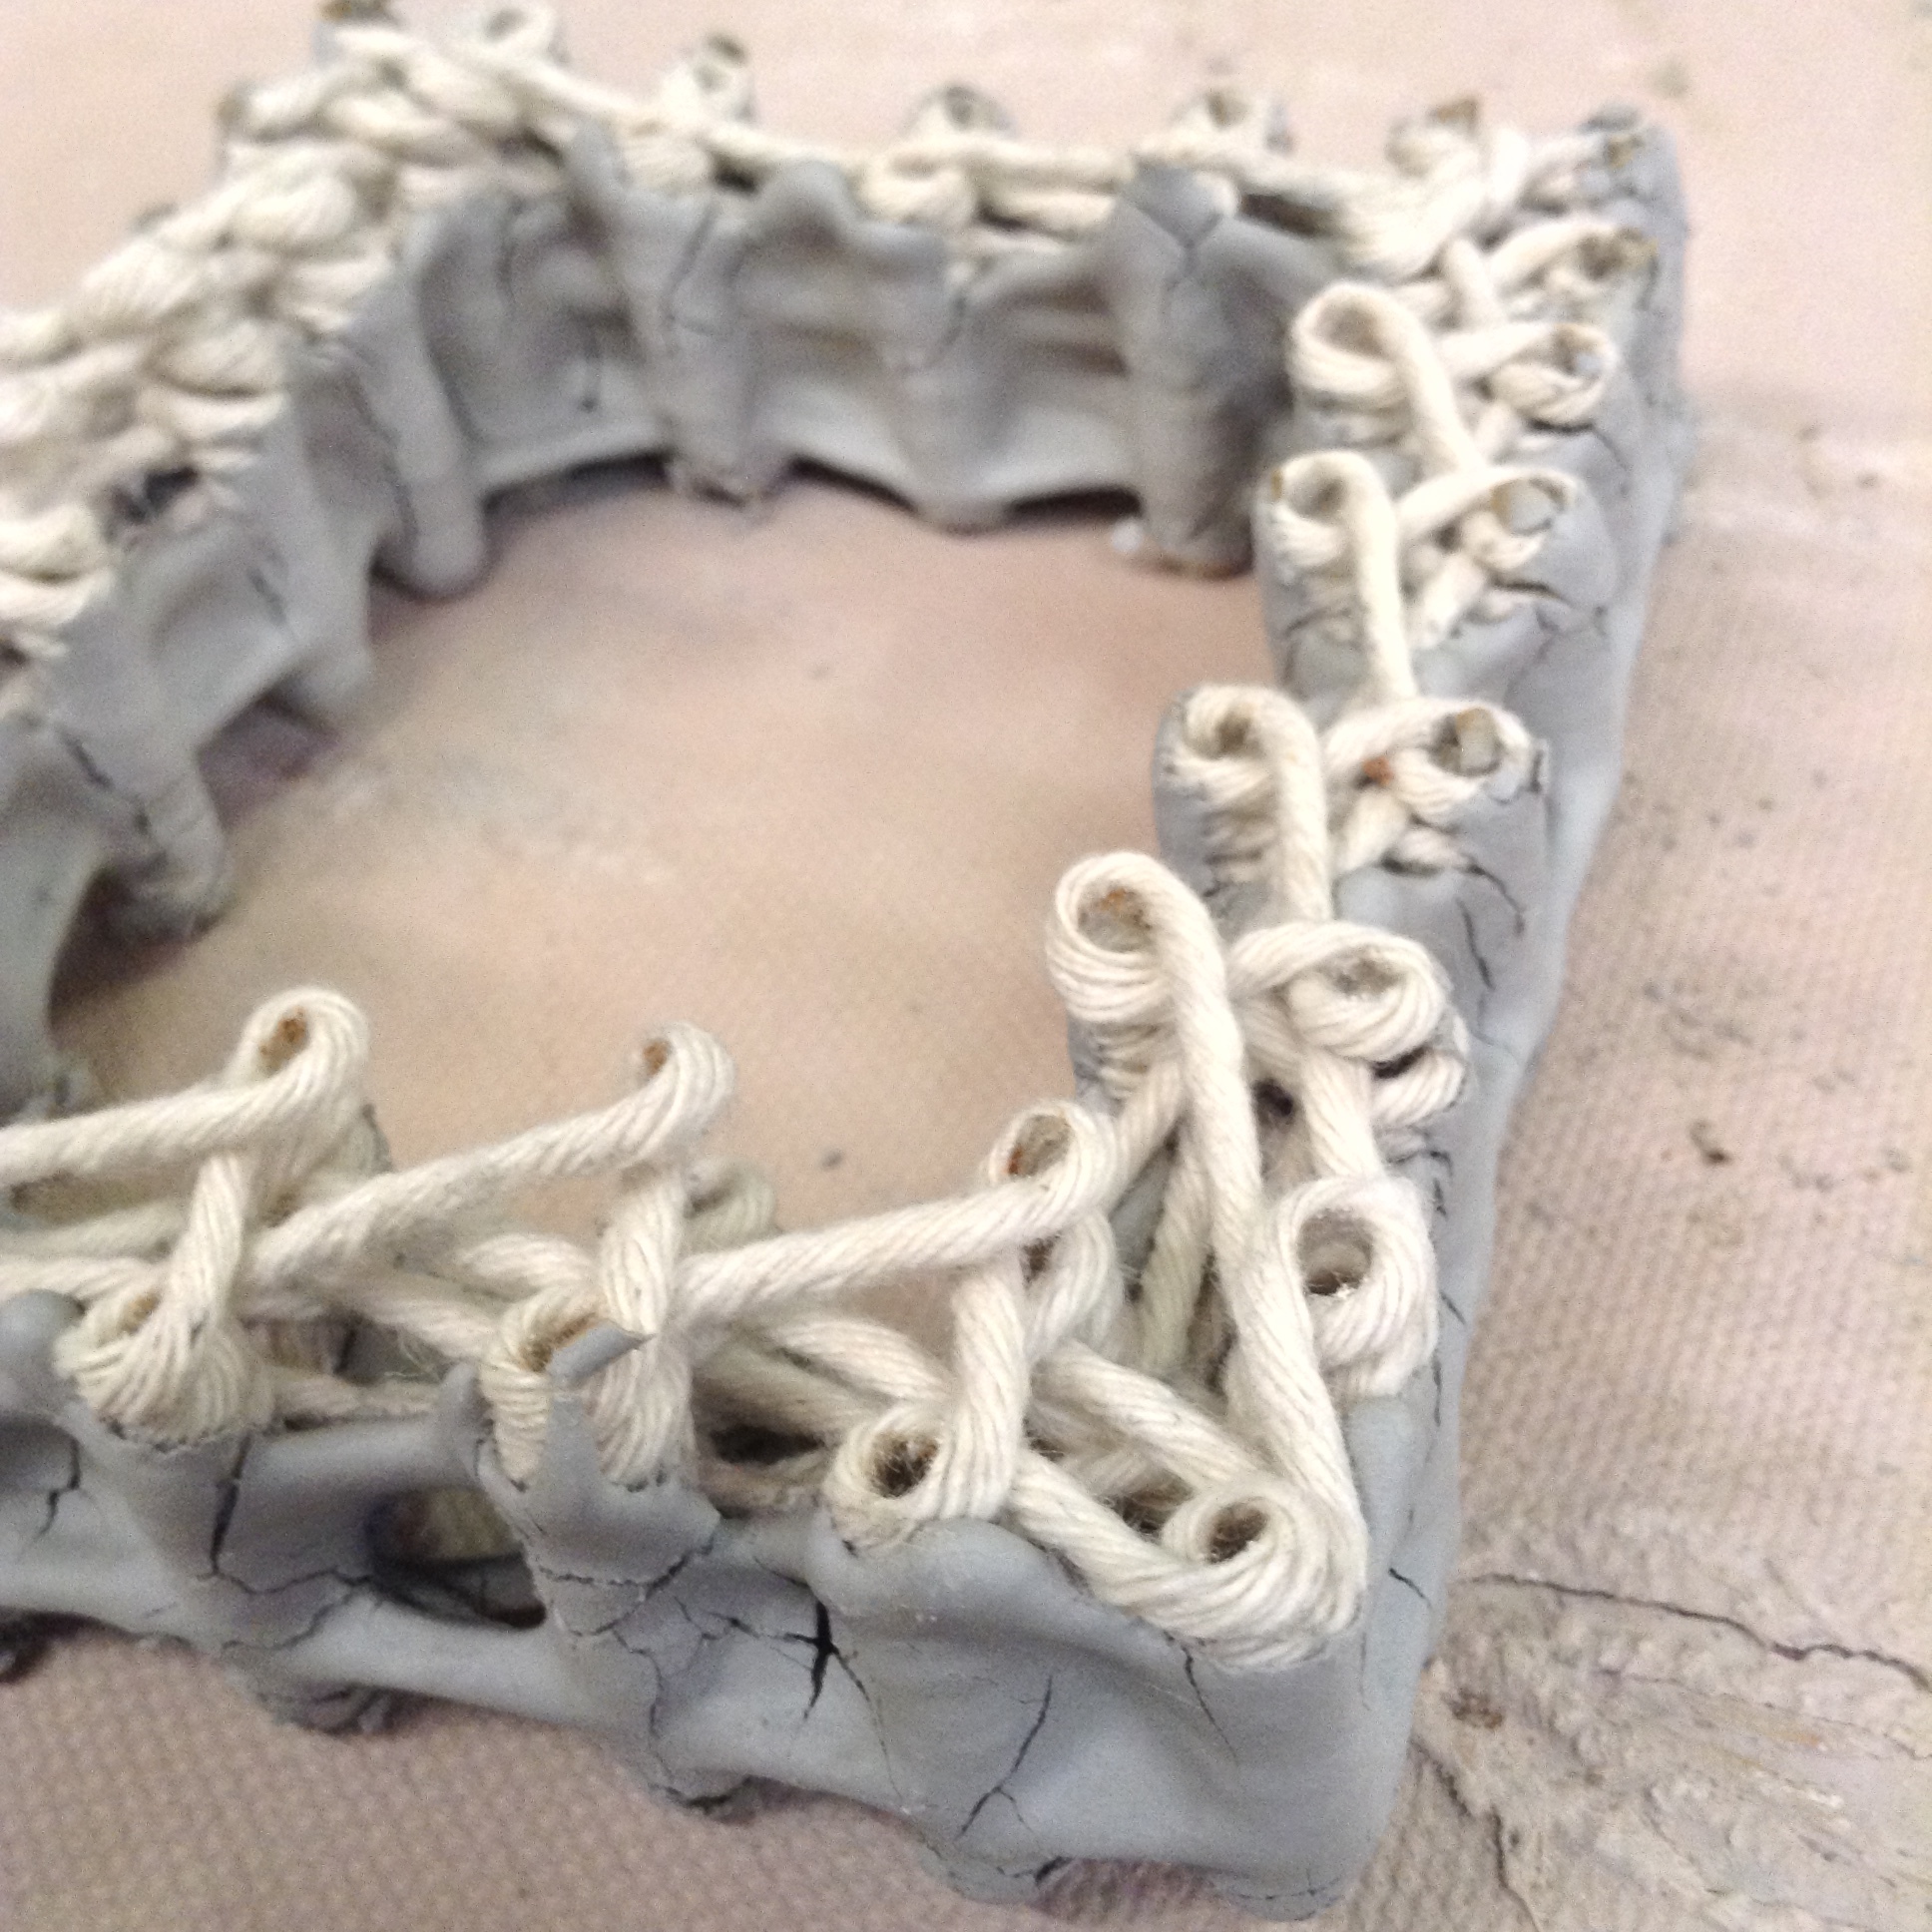
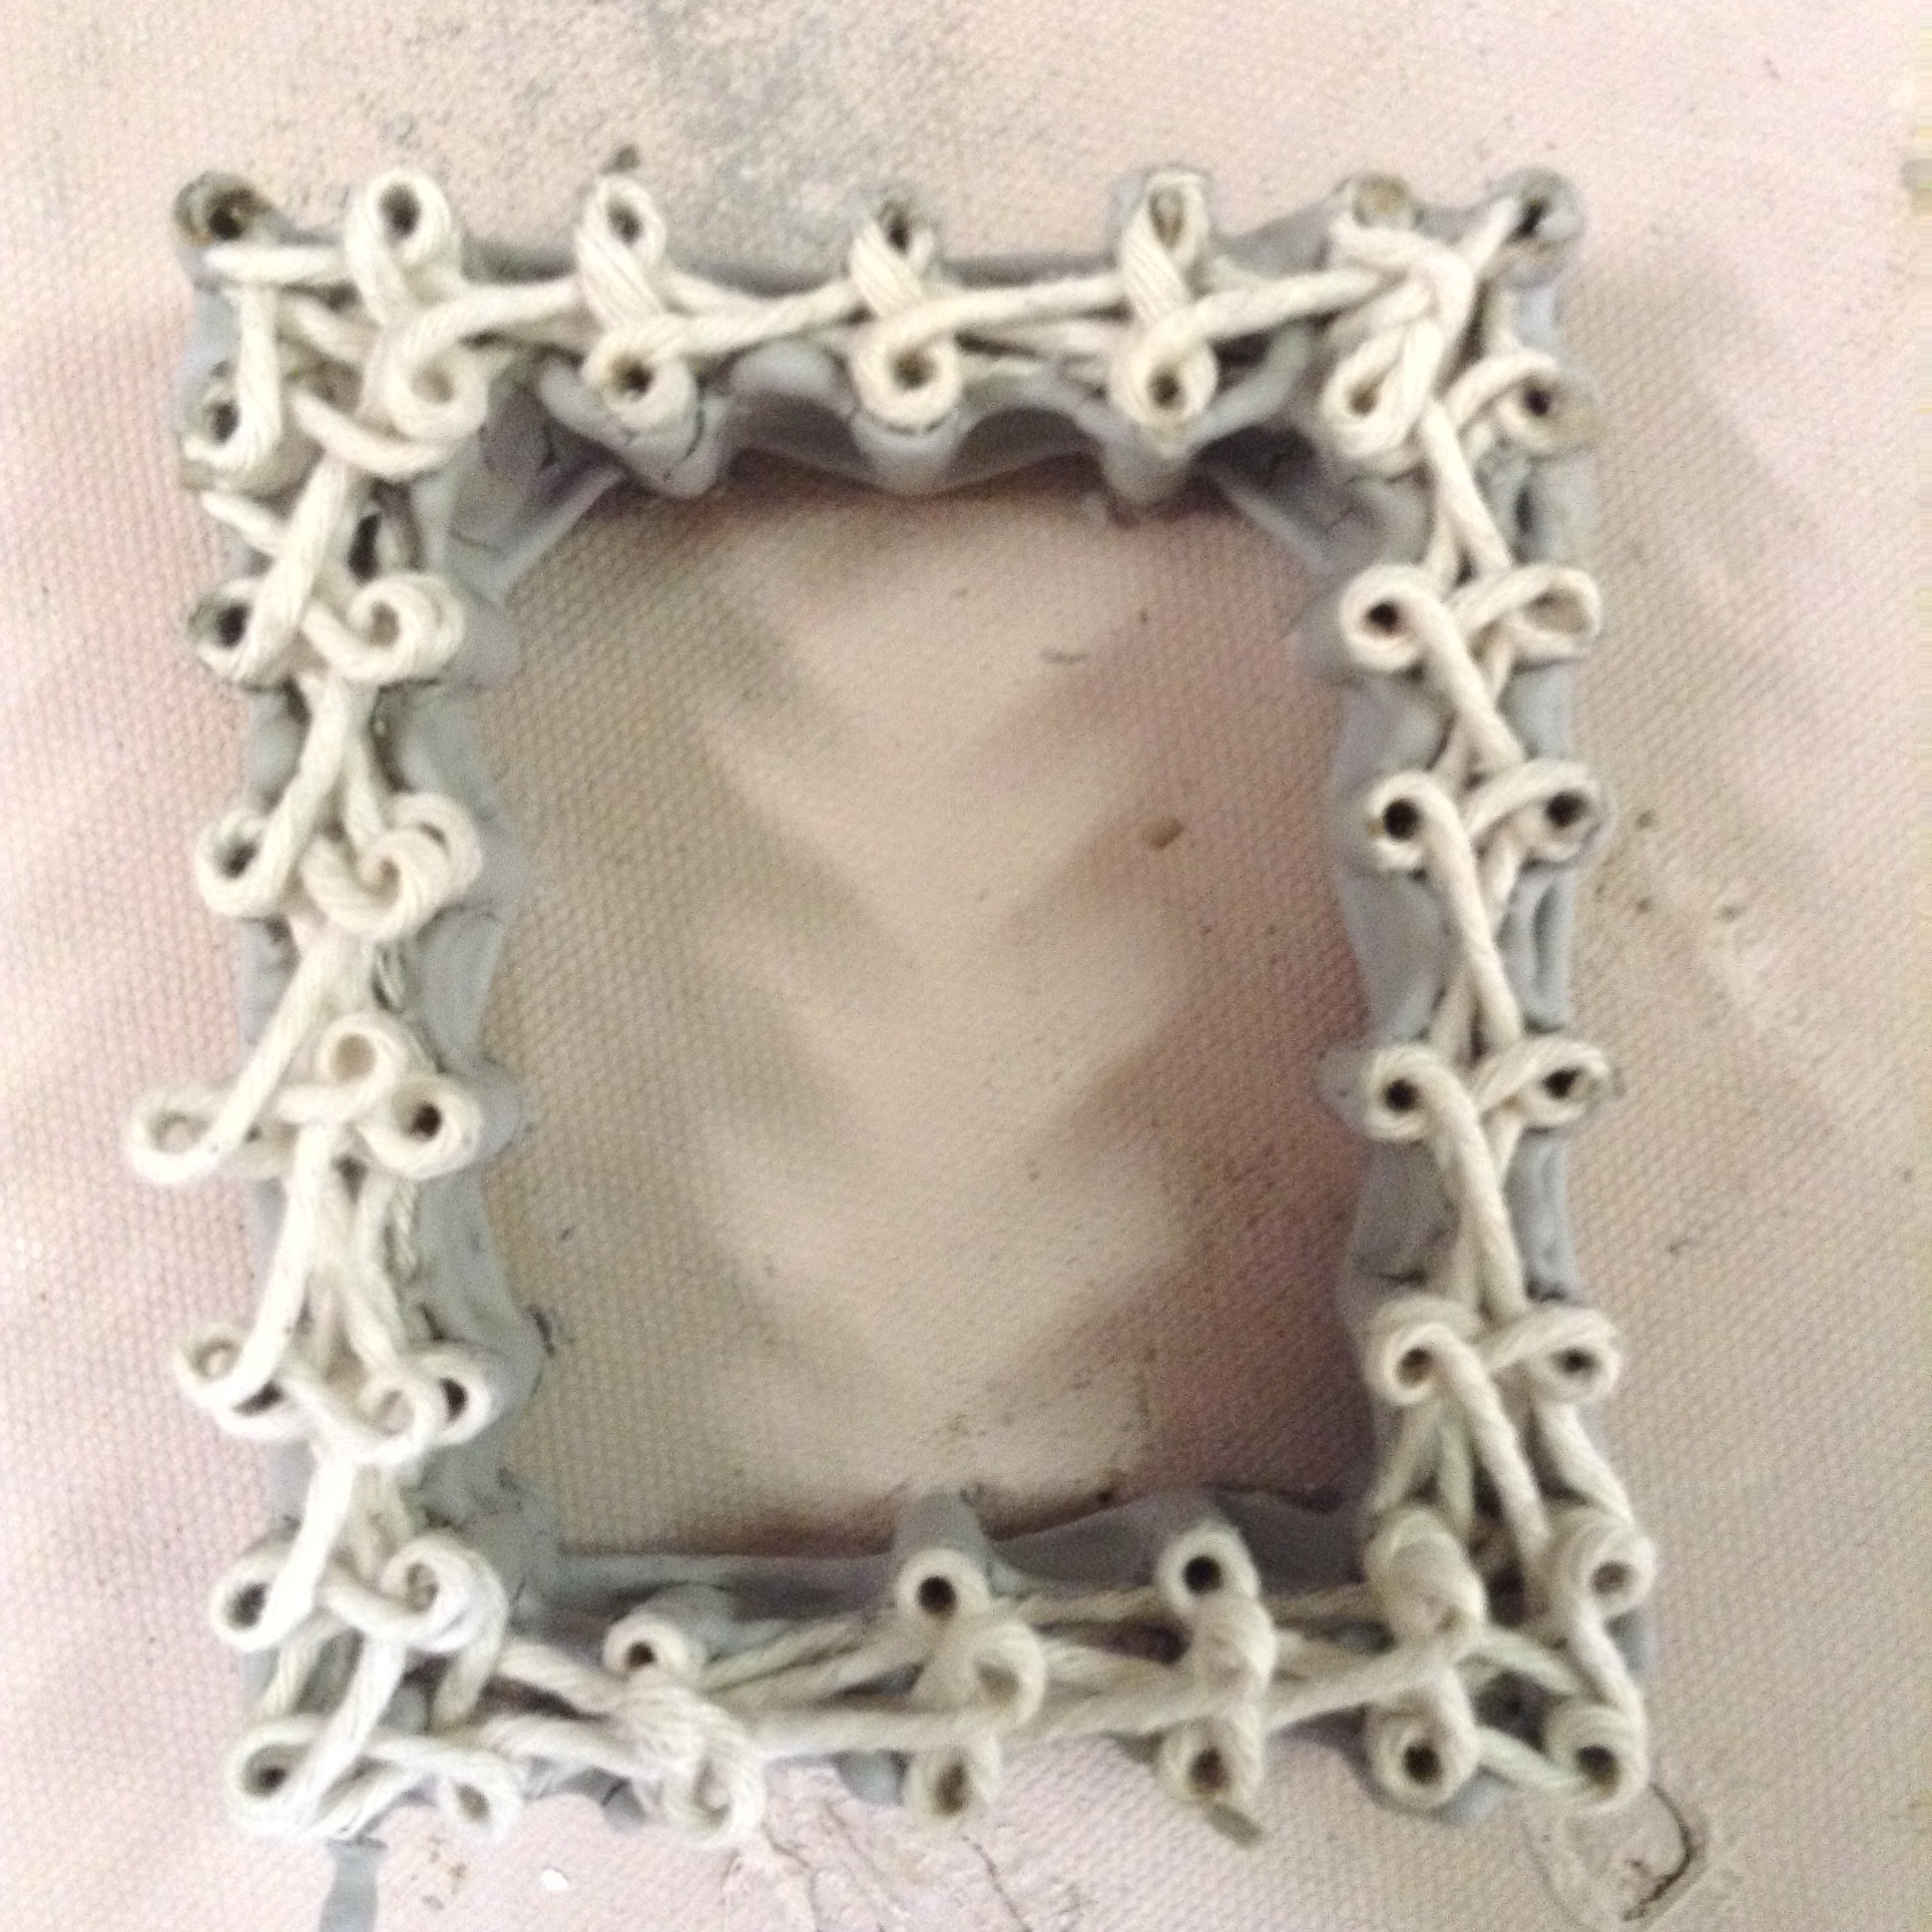
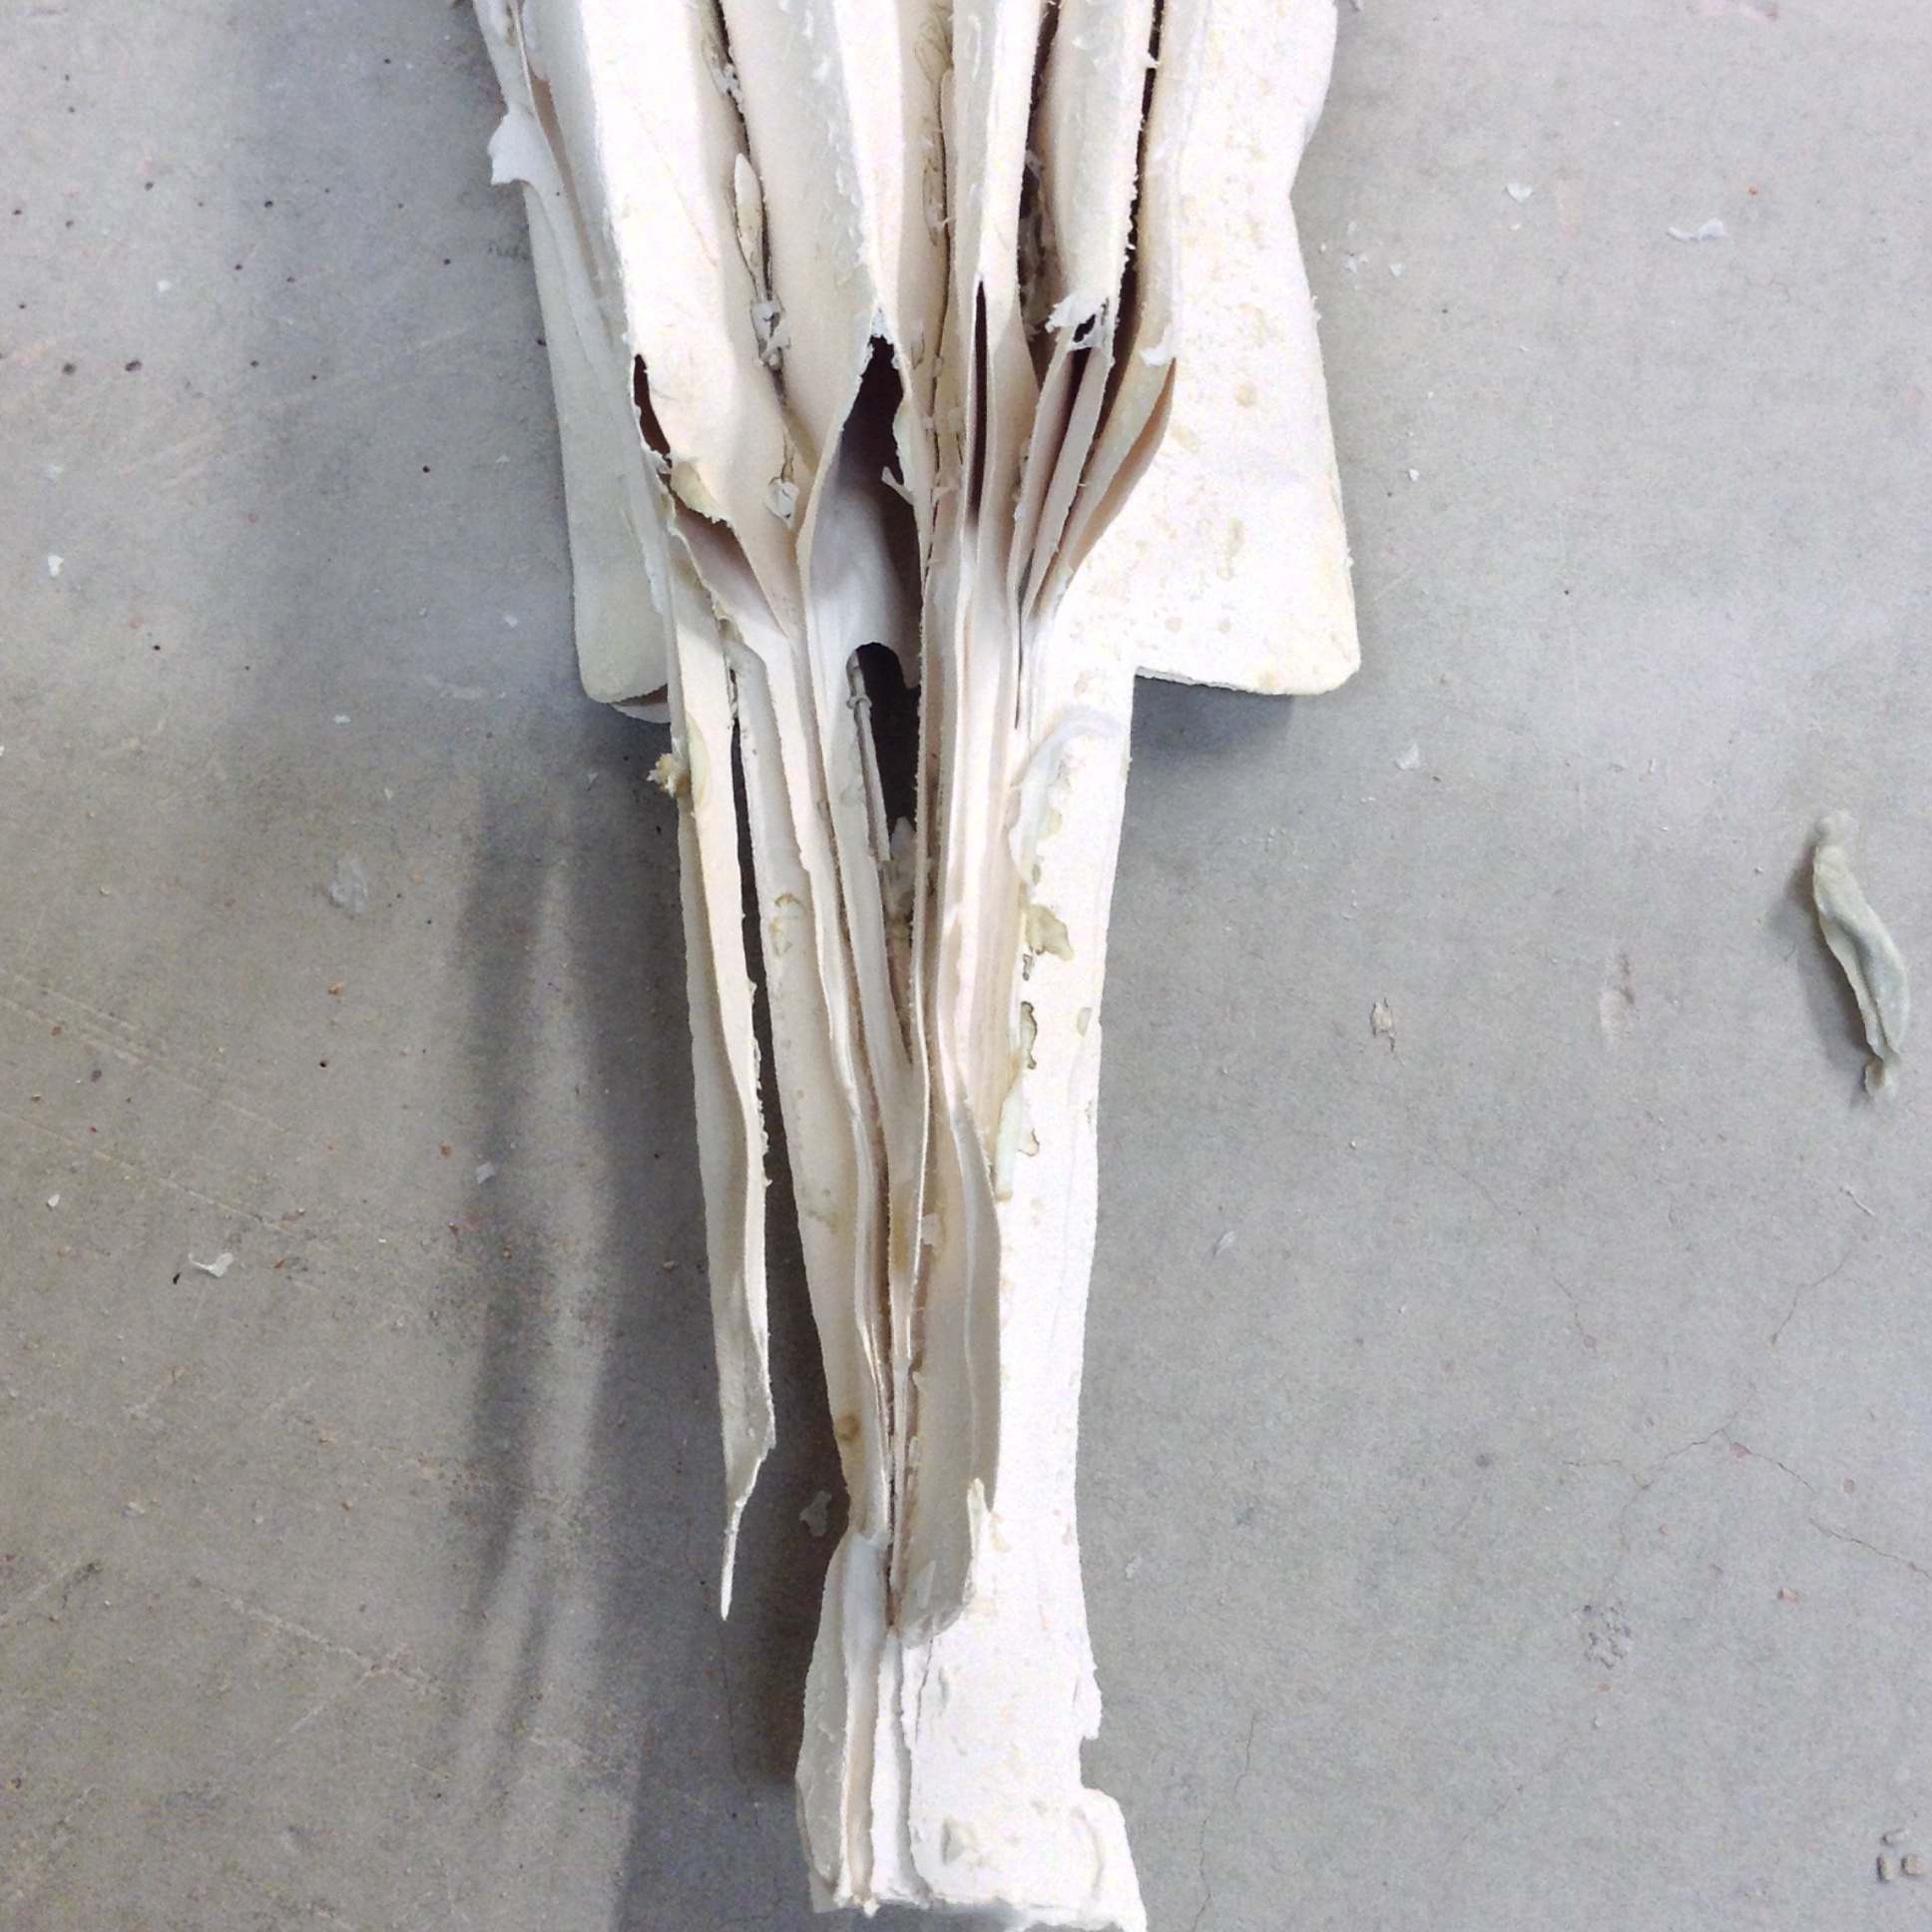
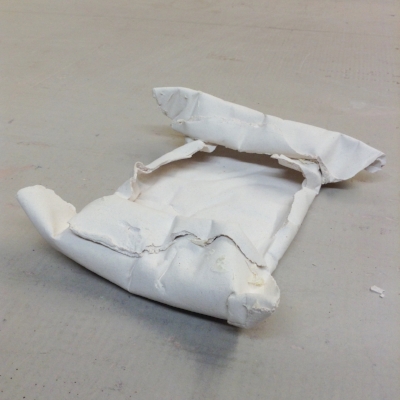
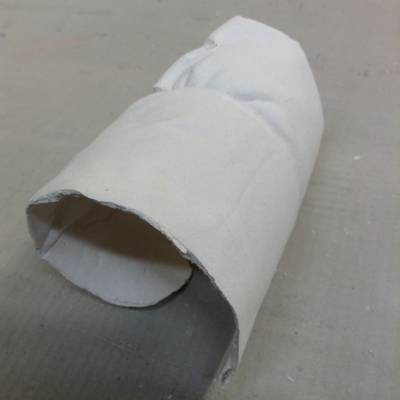
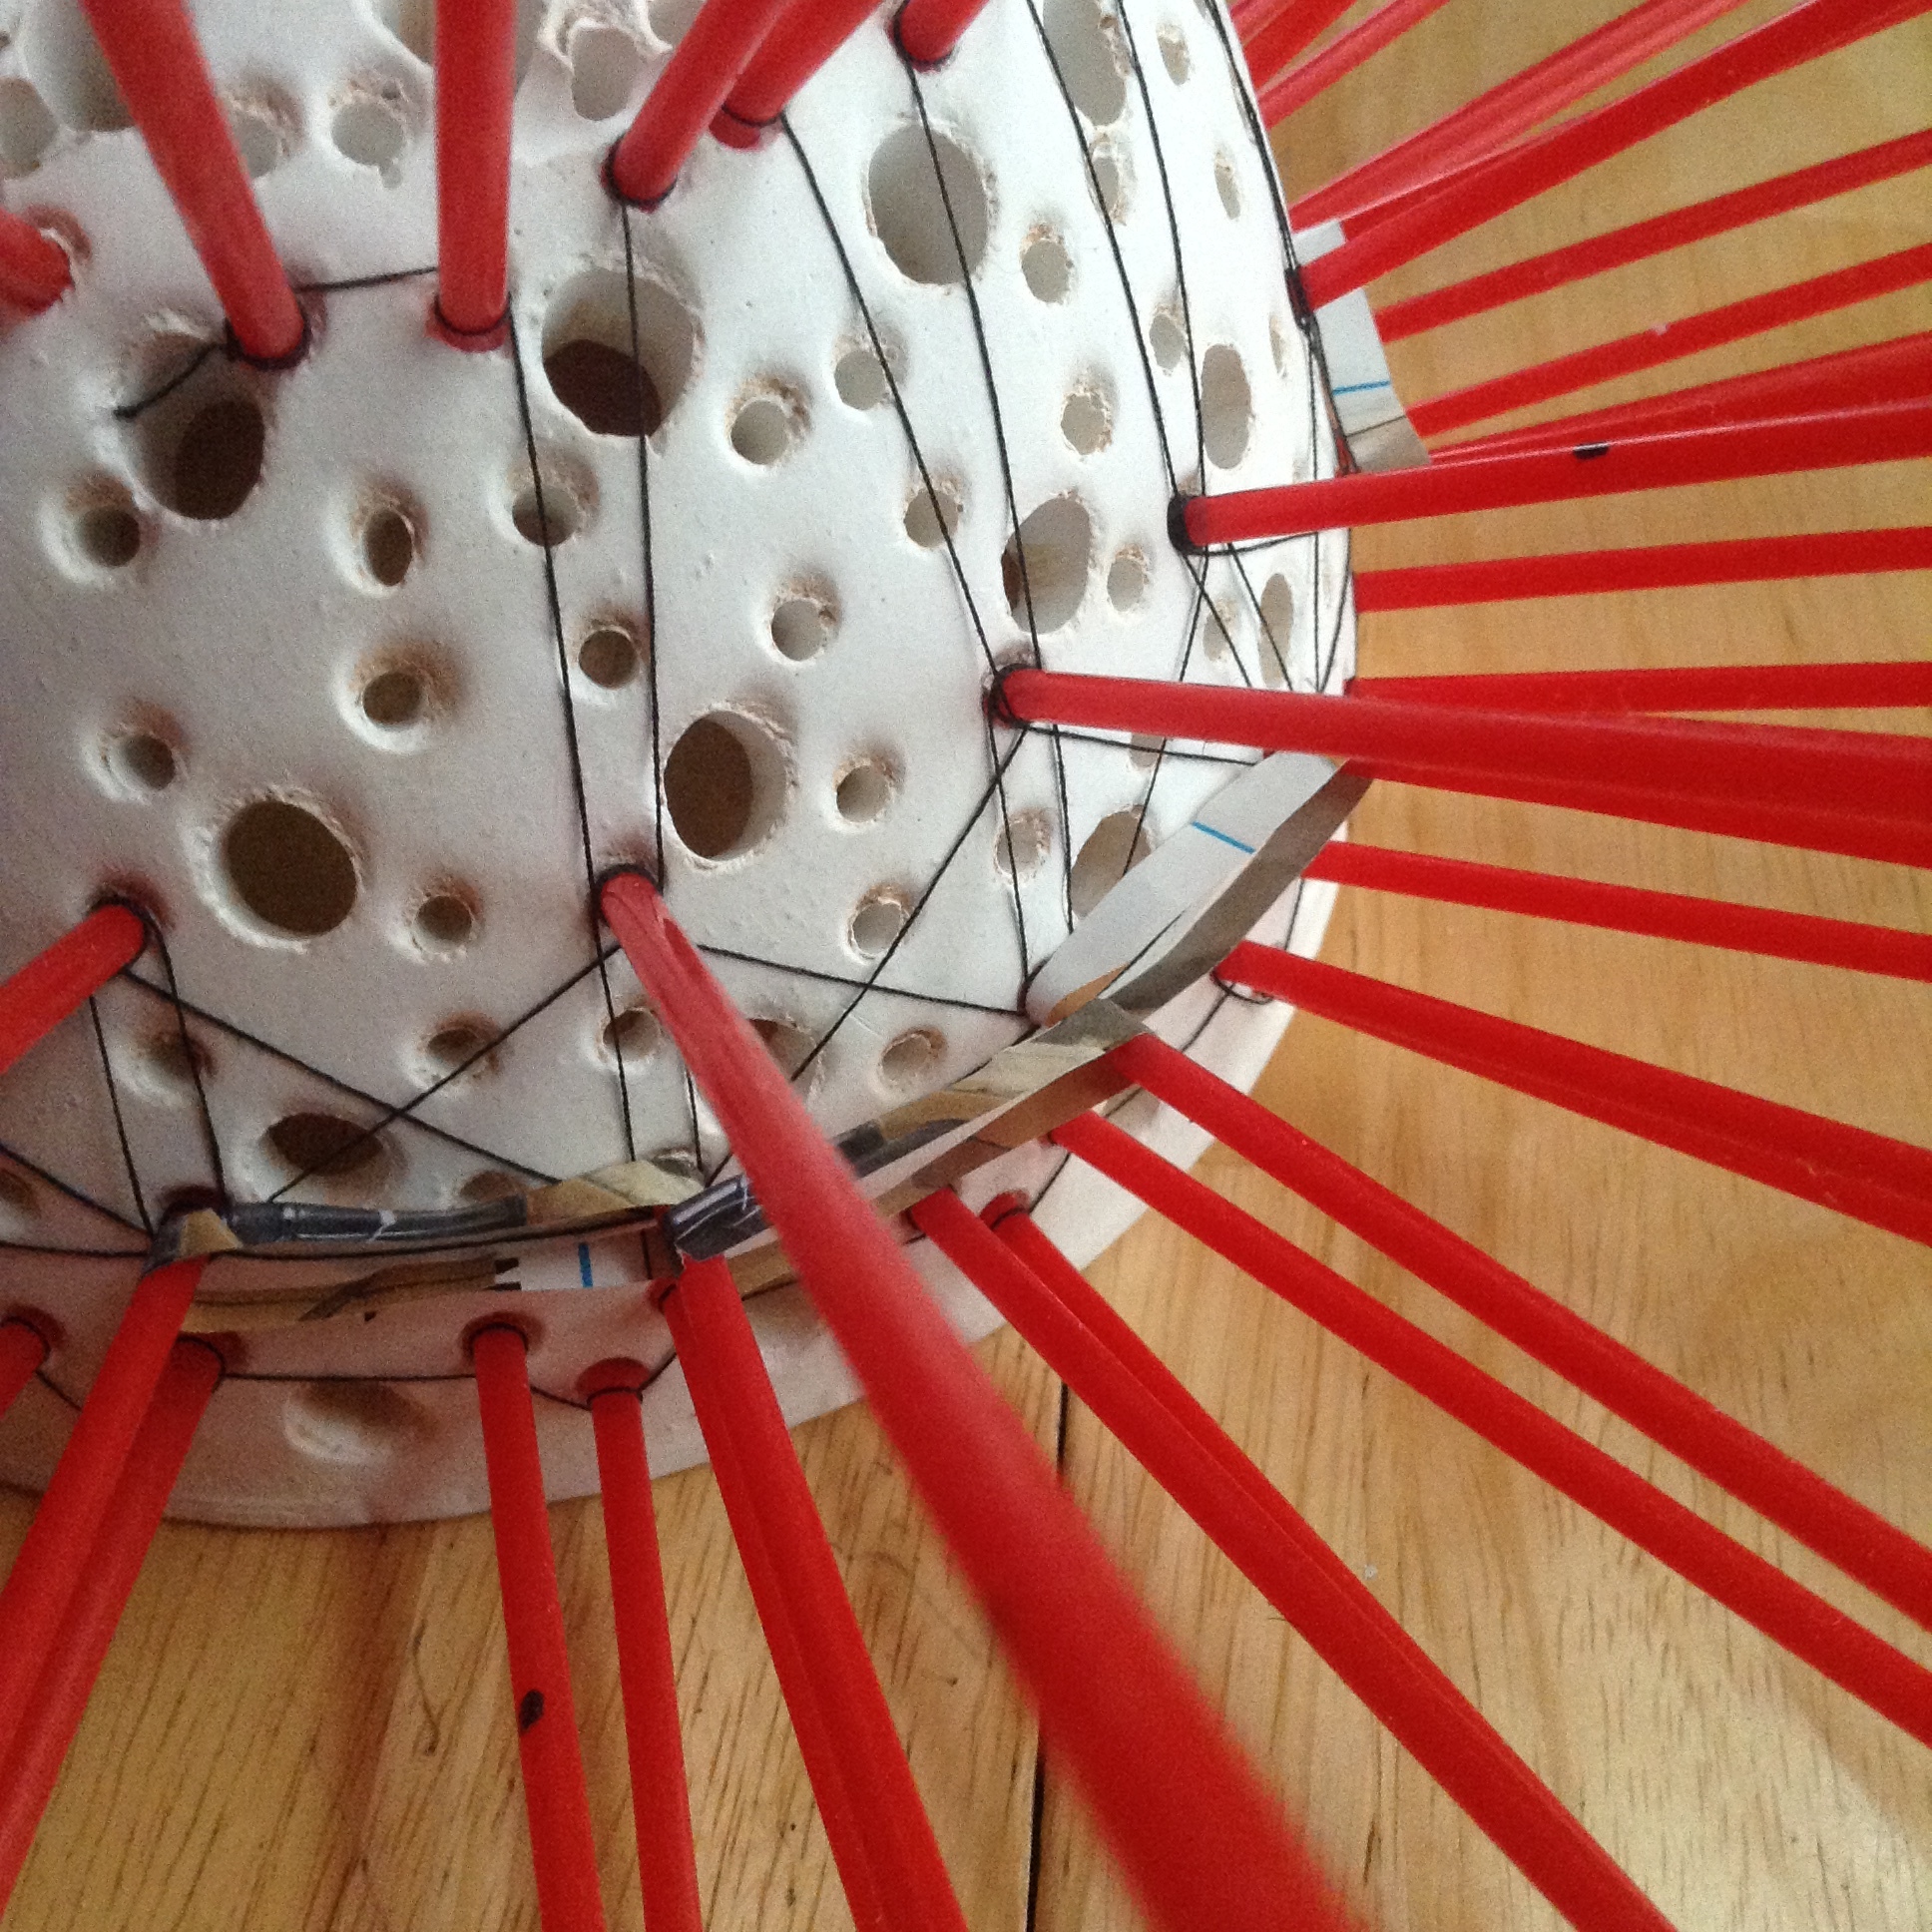
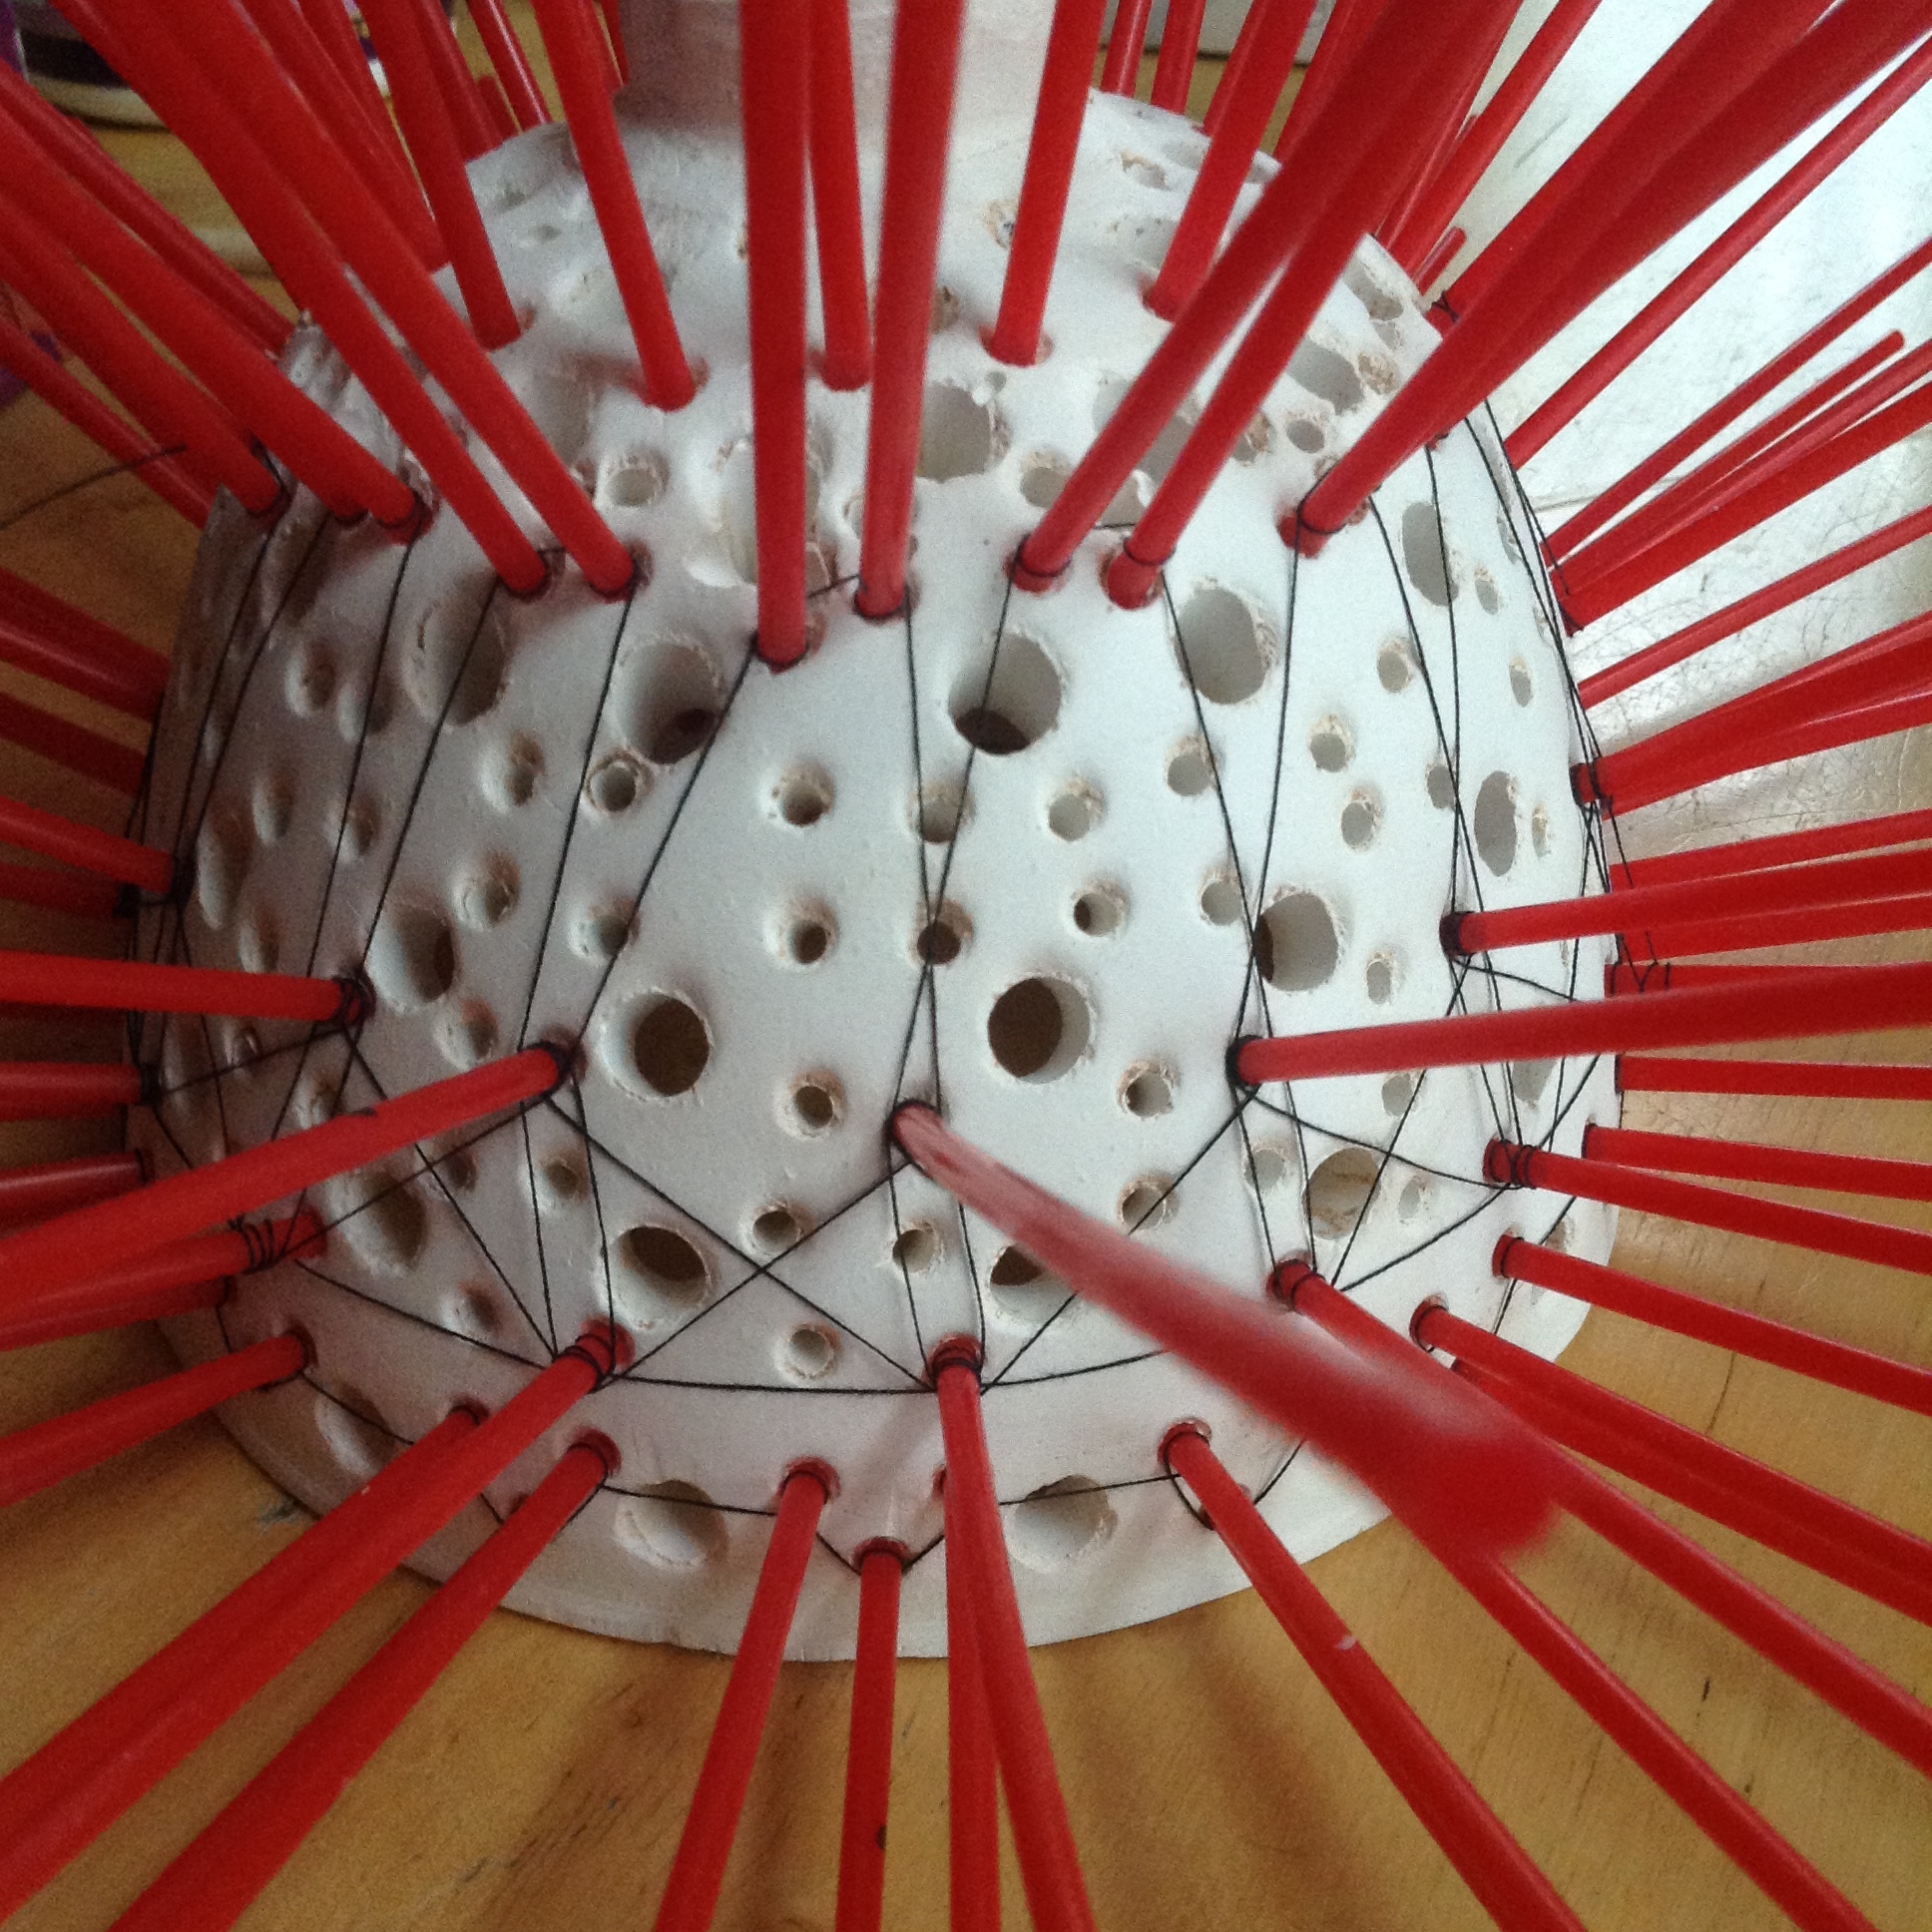
These bowl forms are intended to be a rigid shape that holds flexible straws, which in turn get wrapped with strings. I've already done it with flat plaster slabs. But it's a bit complicated now. I haven't figured out yet how to best wrap the straws with string or paper. Here are some shots of my attempts.
The paper loops can hold slip inside them and outside them. The photos show only a few loops created. They would alternate all around the form. I picked a certain pattern of holes that seemed interesting, which is why many of them are unused. The winding of combustible things around the straws will take some more planning. But I like the progress so far.
GOING FORWARD
The next round of plaster forms will have to wait: I'm definitely going to start USING the forms for their intended purpose. I'm having a weird time cheaply sourcing string that I want that I don't mind burning out in the kilns I have access to. But I have enough to use in the short-term.
Thanks for reading!